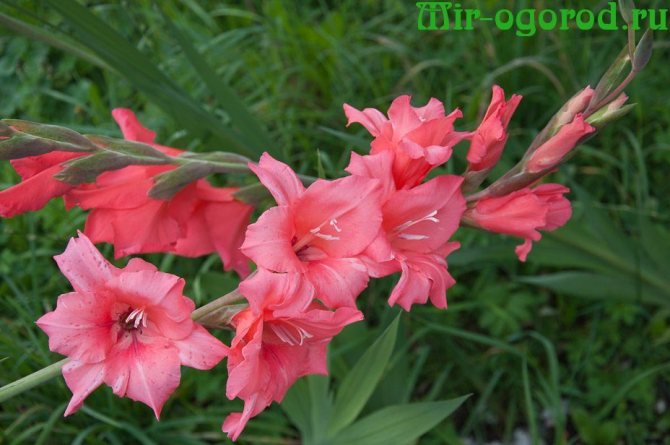
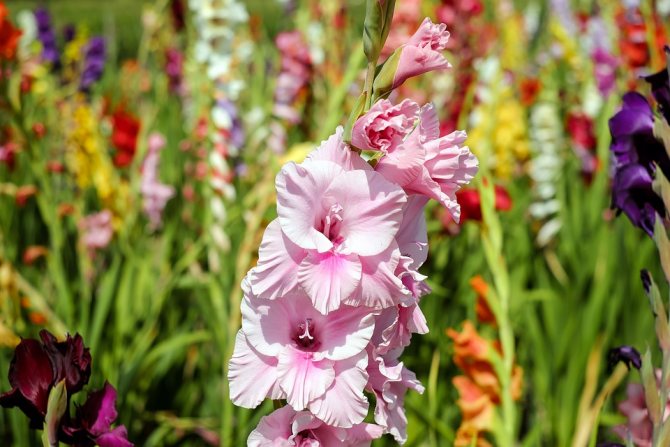
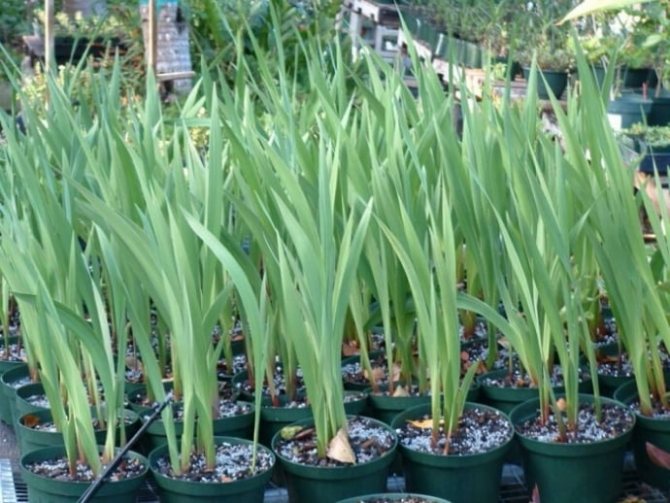
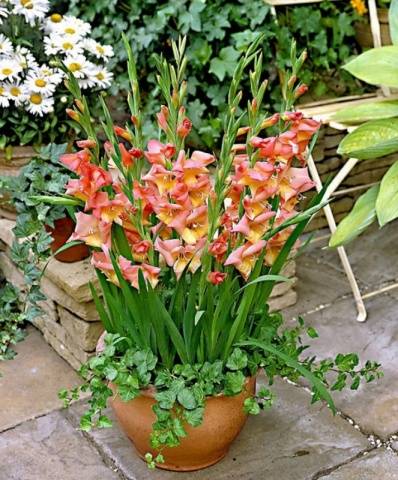
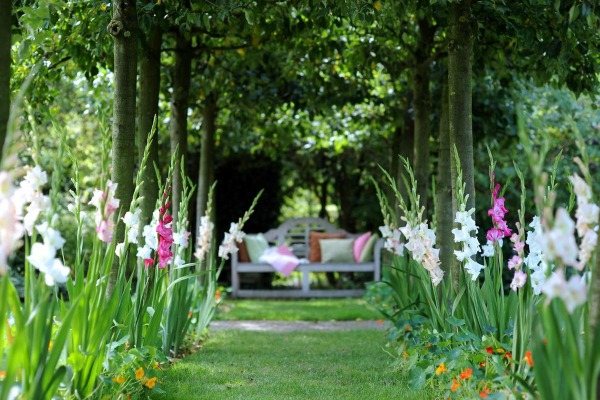
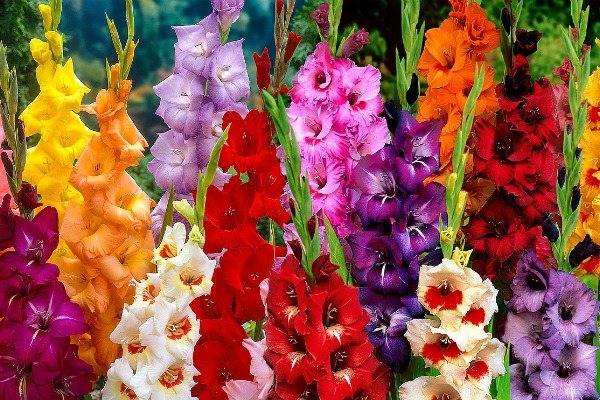
It is difficult to find a person who does not admire gladioli. They bloom at the end of summer and for a long time delight the eye with their multicolor. Gladioli are grown in the open field and by the potting method. In the fall, before the onset of frost, the bulbs are dug up, dried without removing the scales, and harvested for the winter for storage.
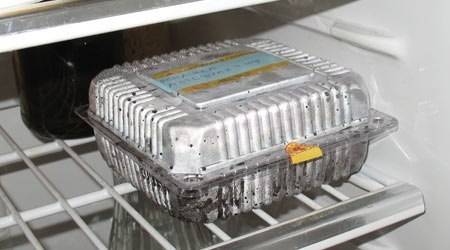
In a city apartment, bulbs are placed in a vegetable storage box on the bottom shelf of the refrigerator. In a private house - in the basement, wrapping the planting material in newspapers. With the arrival of spring, flower growers have the question of how to prepare gladioli for planting in spring. This is an important step in growing a bulbous plant. If you remove the stored bulbs at the wrong time, the abundant flowering of gladioli will not occur later.
How to store and prepare the bulbs?
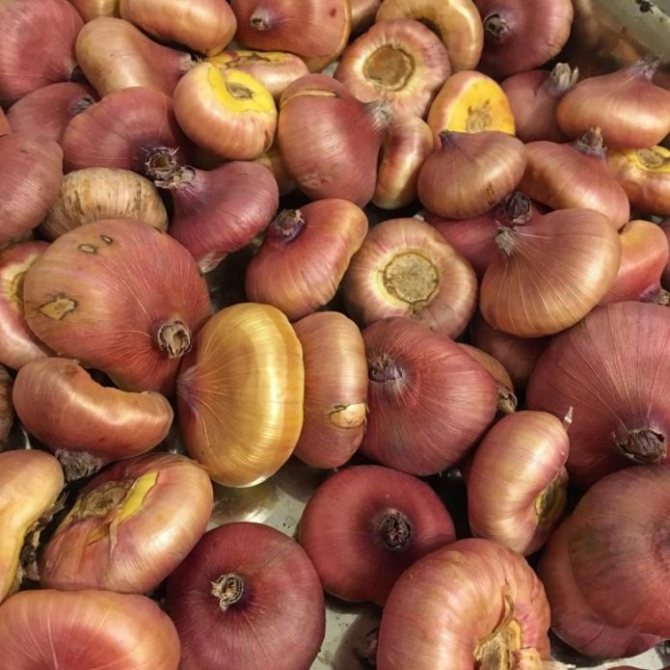
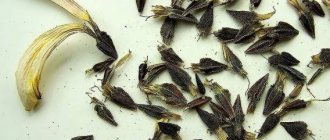
It is important to properly store the corms of gladioli, so that they can later be planted and they quickly began. The best place is a basement, where moderate humidity and temperatures from +5 to +9 degrees are maintained. The bulbs should be placed in an ordinary box with a lattice bottom, which provides ventilation of the planting material. The tubers should be inspected at least once a month. Throw away any spoiled, rotting, blackened or soft items. Gladioli cannot be grown from them.
When storing in an apartment, the bottom drawer of the refrigerator is the best place. The bulbs should be wrapped in paper and then placed in an airtight plastic bag. Approximately at the end of February, the paper will get wet due to the moisture released by the tubers, and then the paper is removed, the bulbs are dried for several days, and then wrapped in paper, a bag and sent to the refrigerator again.
Note! If the bulbs are stored at room temperature, they will germinate within 35-40 days. This will ruin all storage efforts.
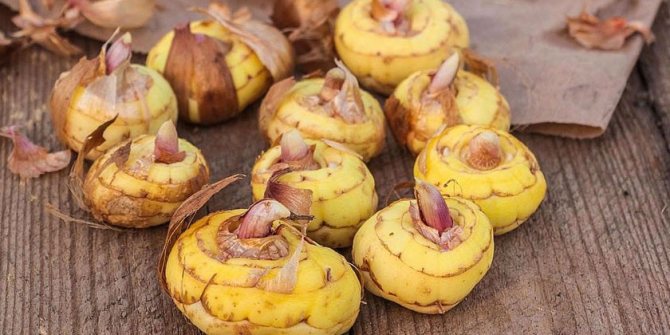
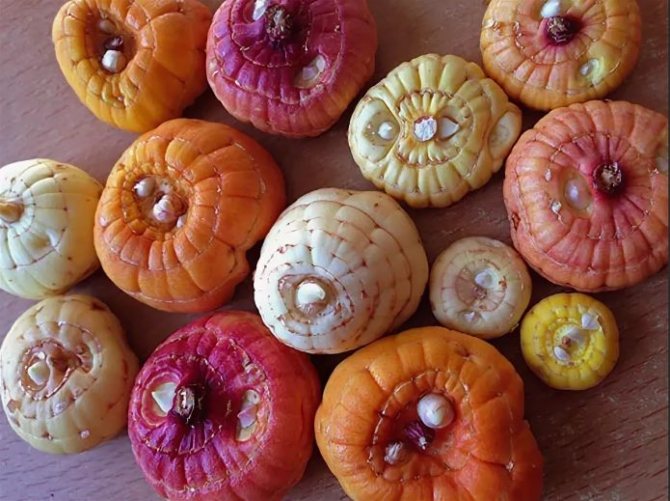
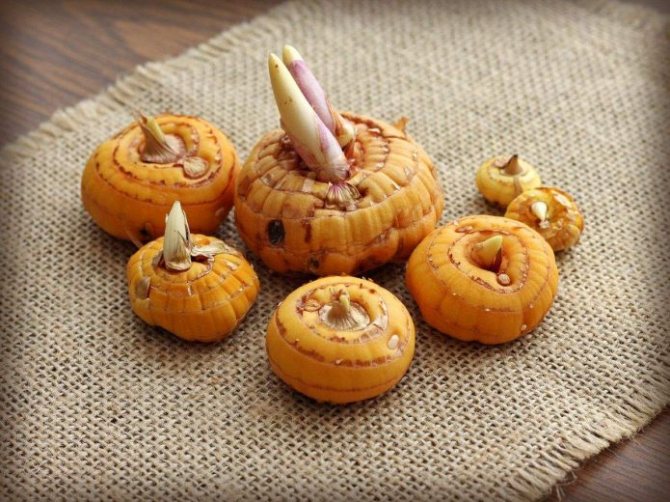
It is necessary to remove the tubers from the storage place approximately 20 days before planting. Tubers need to be taken out to a clarified place, but location in direct sunlight is taboo. The light must be diffused. The tubers should also be husked. Pay attention to the rind. Shiny and dense is considered normal. But soft, moldy or spoiled tubers should be thrown away without regret, since gladioli cannot be grown from them.
If the tubers have minor pinpoint lesions, you can try to heal the tuber. To do this, you need to carefully remove the damage with a sharp knife. Then the cut is processed using ordinary brilliant green. By the time of planting, a dense crust forms at the place where the damage was cut. As a result, the plant will sprout roots, germinate and delight with flowering.
You may be interested in: When can you plant geraniums outdoors in open ground?
Planting material must be disinfected immediately before planting. For this, a solution of potassium permanganate is used on the basis that 4 liters of water need 2 grams of the product. Alternatively, you can use "Fundazol" (0.3% aqueous solution). The planting material should be soaked in the selected solution for one hour, and then you can start planting. In principle, the disinfection procedure can be carried out 2-3 days before planting.In this case, the bulbs should be soaked for 8 hours and then washed and dried.
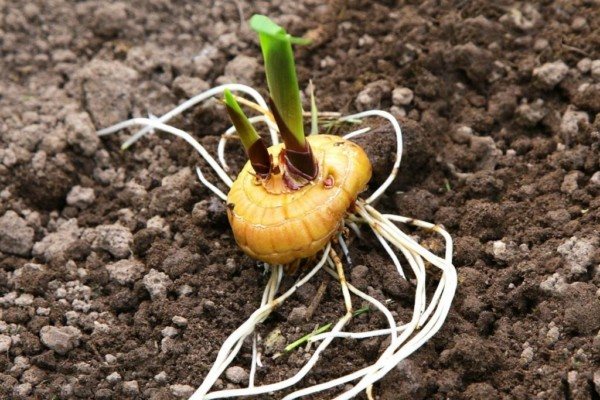
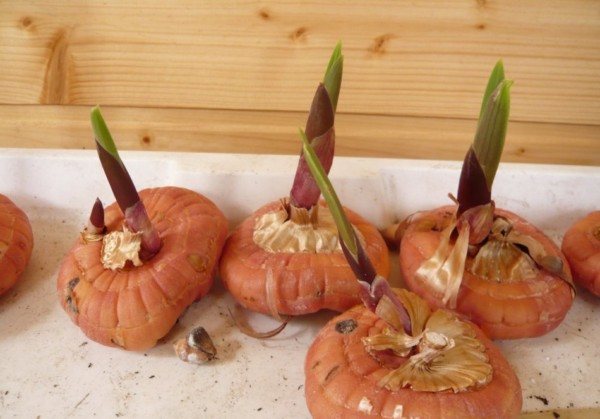
Before planting, each bulb must have either a sprout of 1 to 10 cm or a bud of at least 3 mm.

How to decide on a deadline
So, let's deal with the question of when to get gladioli out of the refrigerator or basement for germination and planting. Spring starts at a different time in each region. The bulbs should not overgrow by the time they are planted in the ground. Indeed, gladiolus is not planted in cold soil. If you get the bulbs late, then buds form on the peduncles, but the gladioli will not have time to bloom.
Attention! Many flower lovers with extensive experience in growing gladioli advise using the lunar spring planting calendar for their region.
You just need to take a regular calendar, calculate when it gets warmer on the street, take 30-40 days away - you get an approximate time when you should deal with gladioli bulbs. Germination of planting material is necessary for the formation of powerful shoots.
We figured out the question of when to germinate gladioli. Now you need to figure out how to prepare the bulbs for planting in the spring.
Disembarkation of gladioli
Dates of disembarkation of gladioli differ depending on climatic conditions. The optimal time starts from the end of April and lasts until the beginning of June (for central Russia). For the Urals and the Moscow region, mid-May is considered a suitable landing time. Gardeners of the Leningrad Region and Siberia should plant seedlings, since this is the only way to achieve the formation of a peduncle before the onset of cold weather.
It is very important to observe the following rules:
- The soil should warm up to +10 degrees to a depth of about 10-15 centimeters.
- There should be no frost in the morning so that the tubers do not freeze.
If you omit these recommendations, at best, gladioli will bloom very late, but in most cases they will not bloom at all.
If the planting dates are met, then you can enjoy the beautiful flowering already in early August and until the end of September (for late varieties).
Many gardeners want early flowering. To do this, you can specially warm up the soil using warm water, and after planting the plants, it is good to mulch the soil around them with the help of humus. If there is a possibility of repeated frost, then the soil around the planted bulbs is covered with agrofibre. Such methods are only suitable for experienced gardeners who have already planted gladioli, and beginners should not deviate from the standard scheme.
There are some tips for extending the flowering period. In particular, planting preference should be given to varieties with different (including late) flowering periods. The planting of tubers of the same variety is carried out two to three times with an interval of 10-15 days. You need to plant bulbs of different sizes, but adherence to the planting sequence is mandatory.
Before winter
One of the methods of planting gladioli is before winter. It should be used only by residents of the south of Russia, as well as by those who are able to ensure the ground temperature is not lower than +2 degrees. If the soil is cooled to at least -2 degrees, then the plants will die.
You may be interested in: What can be planted after potatoes
There is a way to get flowers ahead of schedule. A 3-5 liter pot will help with this. It is necessary to plant bulbs in it before winter, observing all planting recommendations. Put the pot on the insulated balcony (for the first time) and provide a suitable temperature (at least +10 degrees), light (diffused light) mode. After the threat of frost has passed, you can take the pot outside and decorate the flower bed with it. An alternative is to transplant gladioli outdoors in the spring.
For seedlings
Growing gladioli for seedlings is a great way to propagate a flower.Thanks to him, it is possible to reduce the amount of time required for a plant to form a peduncle. The same method is optimal for the northern regions of the country, where spring frosts last for a long time and summers are very short.
The bulbs must be planted in sawdust about 1.5 months before transplanting into the ground. Planting material can be left directly on the windowsill at room temperature. Additionally, it is worth organizing artificial diffused lighting. In this form, the tubers are kept until the skewer germinates by 10-15 centimeters.
As soon as this happens, you can transplant each flower individually into small cups (0.5 liters). In this case, you need to use a special soil for planting flowers. Before planting, both the bulbs and the cups must be disinfected with a weak solution of potassium permanganate.
It is necessary to plant gladioli on seedlings so that the roots are in the ground, but the neck of the peduncle was covered only with wet sawdust. After that, the plants return to the windowsill and germinate further.
Plants should be planted in open ground at the end of spring, when the soil warms up to +10 degrees. Disembarkation involves cutting the cups and transplanting them into prepared holes. Here, the neck of the peduncle should be covered with earth.
Bulbs storage rules
Before wintering, the gladiolus bulbs are sorted, separating the children. They are kept separately for easy planting in spring.
For the successful storage of gladioli, you need to create suitable conditions. The temperature in the storage is maintained at the level of + 4 ... +6 ° С, and the air humidity - not lower than 65-70%. You can store planting material on the bottom shelf of the refrigerator, in the basement or cellar, on a glazed loggia.
If the storage conditions are not suitable, then gladioli will germinate in the first months of storage. This is very bad, such bulbs will not have strong peduncles in the future, you can not expect lush flowering. Before planting, all sprouts that have risen above 3-5 cm are removed.
How to choose a landing site?
It is very important to choose the right landing site. It is selected depending on the region:
- Northern regions. You need to choose a well-lit garden bed, where there are no drafts.
- Middle zone of Russia. It is necessary to plant gladioli in slightly shaded areas. If the shade is from the south, then the flowers will bloom 10-15 days later, and with shading from the east - 7-10 days.
- Hot areas. Be sure to plant the plants in light shade. This will protect the flowers from heat and drought at noon.
It is necessary to take into account the acidity of the soil. The optimal indicator is in the range of 6.5-6.8. According to the composition of the soil, it is advisable to give preference to black soil; sandy loam and well-fertilized loamy soil will be a worthy alternative. Excess moisture is detrimental to gladioli, so you will need to make sure that the soil is not wet.
You may be interested in: Trench planting of raspberries
Features of seasonal planting in spring and autumn
When to plant tomatoes in a greenhouse in the suburbs
Planting gladioli in spring is preferable because it is more in line with the biological rhythms of the culture. This method is ubiquitous throughout Russia.
Autumn planting of culture is practiced only in the southern regions of Russia. This is due to the fact that even large bulbs die at a temperature of −2 ° C. Nevertheless, there are varieties that can withstand low temperatures above zero and even short temperatures below zero. Bulbs in a dense shell tolerate frost better down to -4 ° C. If you provide sufficient cover for the plantings and soil, you can try planting before winter.
How to prepare the ground?
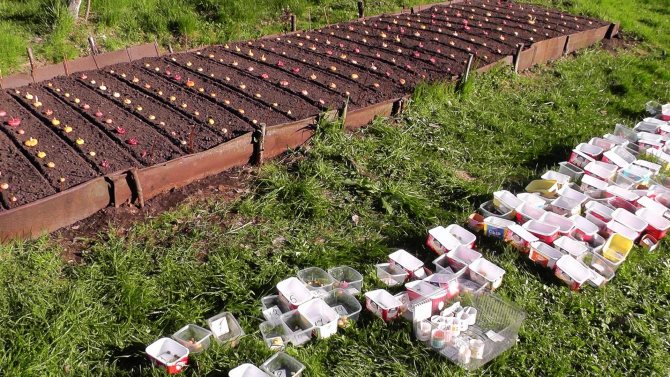
An equally important procedure before planting is soil preparation. It is advisable to hold it in the fall, when it has already been decided where the bed with gladioli will be.Preparation can also be carried out in the spring before planting the bulbs. When digging the land in the fall, you need to add potash and phosphorus fertilizers. The backfill must be deeper to retain moisture. If the earth is dug up in the spring, a depth of 18-20 centimeters is sufficient, the soil is subsequently leveled with a rake, holes and furrows are made. Fertilizers in this case are applied after the seedlings are obtained.
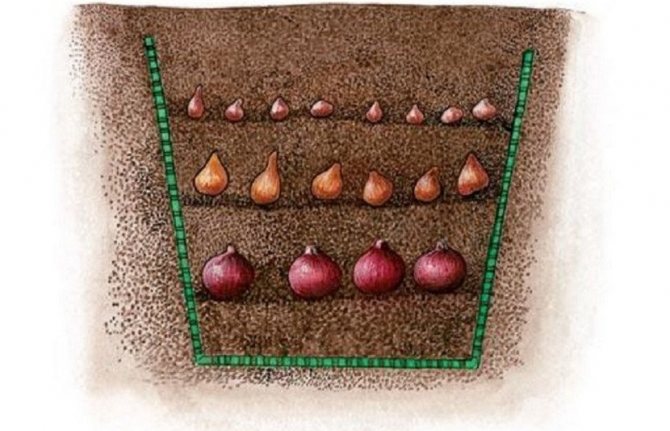
When creating grooves and holes, you need to determine the appropriate depth. It is calculated depending on the diameter of the bulbs. Experienced gardeners usually plant tubers to a depth of 4 centimeters. If you plan to plant bulbs that are larger in size, then you need to deepen the grooves by 10-15 centimeters. Medium bulbs need to be planted to a depth of 8-10 centimeters, and children up to 8 centimeters.
Between large bulbs, you need to make a distance of about 20 centimeters, and between rows - 25 or more centimeters. If smaller planting material is planted, then the distance can be reduced. In general, keep in mind that the more the aisle is done, the more the tubers will receive nutrients. If you plant the bulbs too deep and close to each other, then the skewer will be weak, the peduncles will have to be tied up so that they do not fall, and you can not wait for abundant flowering.
You can plant large, medium-sized bulbs and babies. But keep in mind that large tubers will take away nutrients from smaller ones, so the latter may not bloom at all.
What to do if the bulbs wake up in the middle of winter
Sometimes, looking at the planting material, flower growers find that already in February, some of the bulbs began to wake up. How to proceed in this case? There remains the option of potting gladioli.
All preparation activities will be identical to those described in the article. It is not necessary to additionally germinate the planting material. The bottom of the pots is covered with drainage, fertile soil is added and the planting material that has awakened ahead of time is laid out. All that remains is to take care of the landings. With the onset of warmth, the pot is taken out into the street. By this time, gladioli have time to bloom.
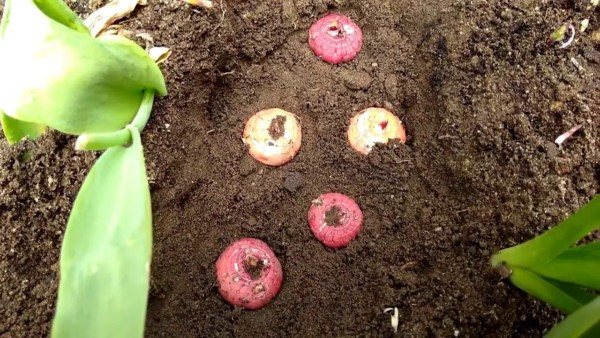
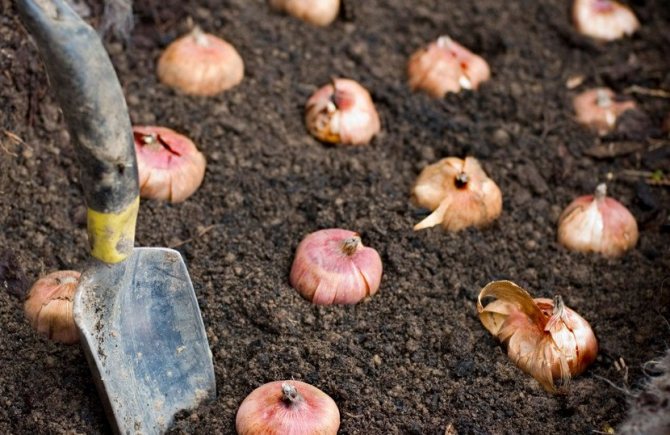
Algorithm for planting gladioli in open ground in spring
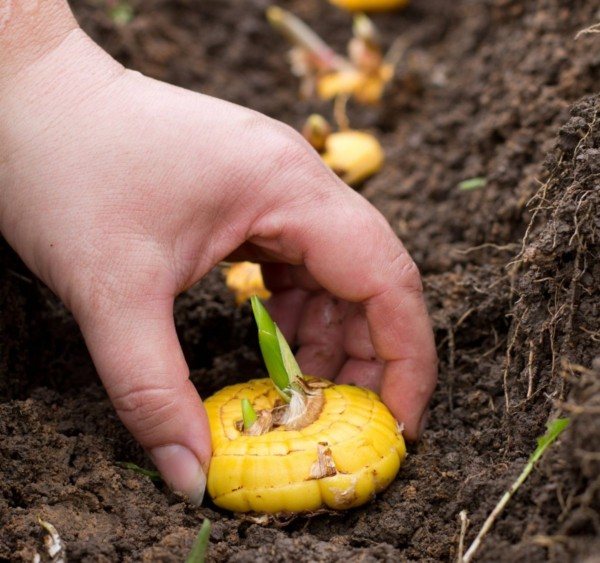
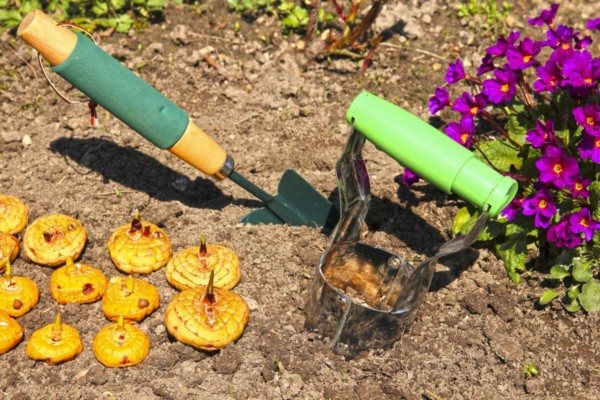
To properly plant gladioli in open ground in spring, you should adhere to the following algorithm:
- Make holes according to the diameter of the bulbs.
- Place river sand or sphagnum moss on the bottom. The layer should be about 2 centimeters.
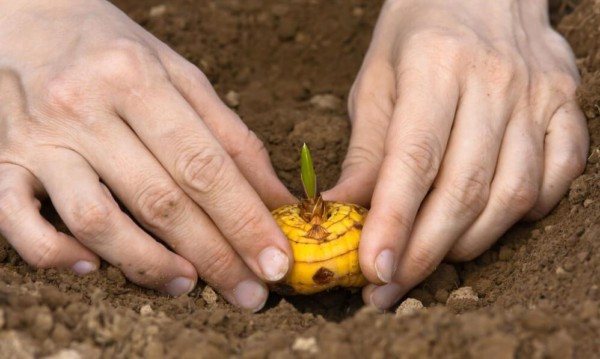
- Prepared and disinfected bulbs should be placed on the resulting pillow.
- Sprinkle the tubers on top with loose earth, and then water abundantly. The water must be warm.
- It remains to dig between the rows of furrows up to 5 centimeters for irrigation.
- After the emergence of shoots, you need to mulch the soil with humus (but fresh can not be used).
Gladioli need to be watered once a week on the basis that about 10 liters of water is needed for each square meter of soil.
Now you know how to properly plant gladioli outdoors in spring. Follow the recommendations in this article, and the plant will definitely delight you with health and lush flowering.
How to plant gladioli so that they grow straight
So that the flowers do not bend over during growth, have straight peduncles, some gardeners use a special technique when planting. First, the bulb is planted to a depth of 10–15 cm, but in the process of growth, soil is poured around the peduncle, forming a kind of hill that prevents the stem from tilting.
Did you know? 300 years ago, gladiolus bulbs were used exclusively for the preparation of medicinal products and cakes. As an ornamental plant, they began to grow it only in the 19th century.
They also resort to immediately planting the bulbs to a depth of 20-25 cm, but, as mentioned earlier, this method will significantly delay the process of emergence of the first shoots, and it is also dangerous because in the spring the ground at such a depth is not sufficiently warmed up and the planted material might just freeze. This method is applicable only in conditions of southern latitudes.
For individually planted gladioli, tension nets are used to ensure the stability of the stems. If the flowers are planted in rows, you can build props for them in the form of low wooden fences on both sides of the garden bed.A simpler option is to drive in stakes at the beginning and end of the planting from both sides and pull on a strong rope or wire.
It is important to pay attention to the application of fertilizers, which will strengthen the plants with their nutritional composition. After the first two sheets appear, the soil can be fed with a solution of 1 tbsp. l. urea and 1.5 tbsp. tablespoons of potassium sulfate, diluted in 10 liters of water.
Also find out if you need to tie gladioli and how to do it.
This dose is enough for 1 m² of planting. After the formation of the 5-6th leaf, gladioli are fed with a composition of 15 g of superphosphate and 30 g of potassium sulfate, diluted in a bucket of water (per 1 m²). Complex mineral compositions such as Nitroammofoska and Kalimagnesia are also perfect for gladioli.

Diseases and pests
Diseases in gladioli can occur both on their own due to the carelessness of the owner, and due to the spread of infection from other crops. Common diseases: botrytis, rust, septoria and fusarium. All of them are of a fungal nature, which they begin to fight back during the treatment of the bulbs with foundation.
- The preparation "Horus" and "Falcon" is used at the stage before the flowering of the plant in the presence of 3 formed leaves.
- Against insect pests, such as bulb mites, thrips are used "Balazo", "Agrovertin", "Aktara", "Confidor-maxim". Only regular check-ups will help prevent serious illness. An attentive attitude to gladioli will surely be rewarded with its unique lush flowering.
When to expect blooming gladioli
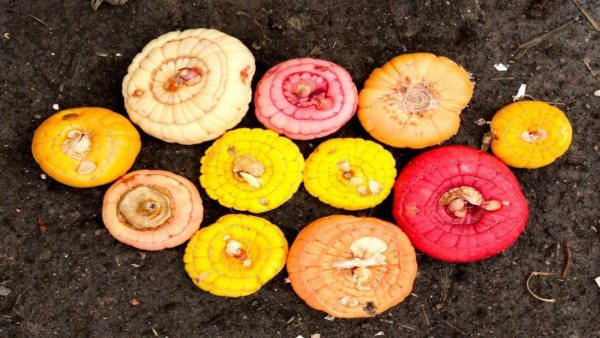
The likelihood of peduncle formation depends on the size of the corms:
- Large healthy corms with a diameter of more than 2.5-3 centimeters necessarily bloom in the first year of planting.
- With a diameter of 1–2.5 centimeters, flower stalks are formed in about half of the corms, but it is better to remove them immediately so as not to deplete the plants with flowering.
- Small corms up to 1 centimeter in diameter do not bloom, they need to grow for 1-2 seasons in a separate area.
The exact timing of blooming of gladioli depends on the variety, weather and planting time:
- Early varieties bloom 70–80 days after planting, medium ones - after 80–90 days, late ones - after 90–100 days.
- In the heat, flowering occurs earlier, in cool weather it is delayed.
- You can shift flowering to a later date by transferring planting to mid or late May, but in any case, gladioli should be planted before the onset of intense heat above 25 ° C, which prevents the formation of roots.
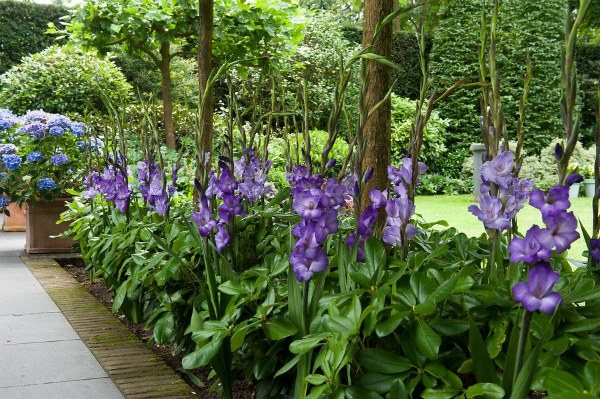
What flowers are gladioli combined in a flower bed
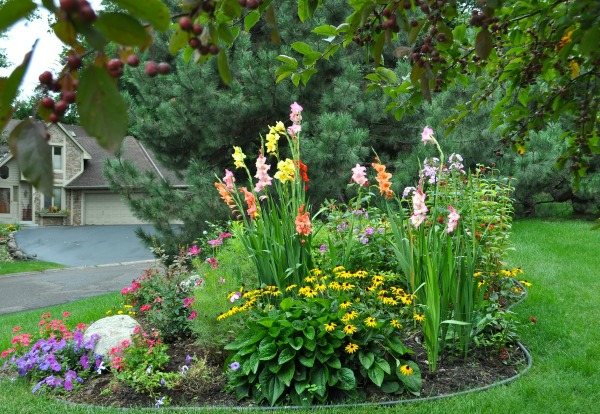
A competent combination of proportions between a tall skewer and other representatives of garden flora will help to create a harmonious composition on a flowerbed with gladioli.
To create a bright accent, gladioli are planted in groups of 10-15 pieces, placing them in the second or third row of the flower arrangement. Flowers neighbors should be just above one third of the height of the gladiolus stem. From annuals it can be kosmeya, thin-leaved marigolds, undersized annual dahlias "Merry Boys", zinnia, asters, snapdragons, etc.
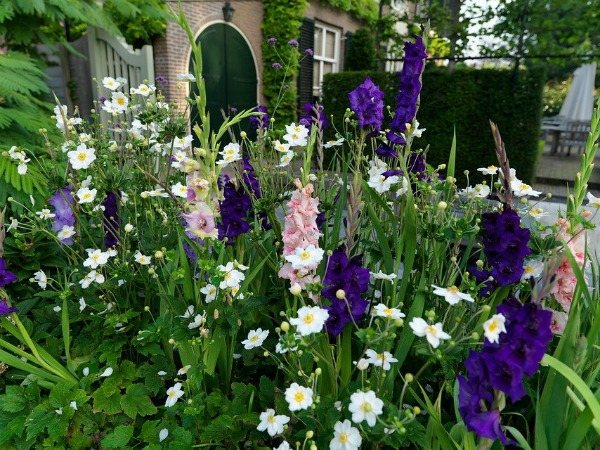
Among perennials, there are also many plants that emphasize and enhance the grace and grandeur of gladioli. These are oregano, undersized astilba, coreopsis, hosts, undersized daisies and cereal greens.
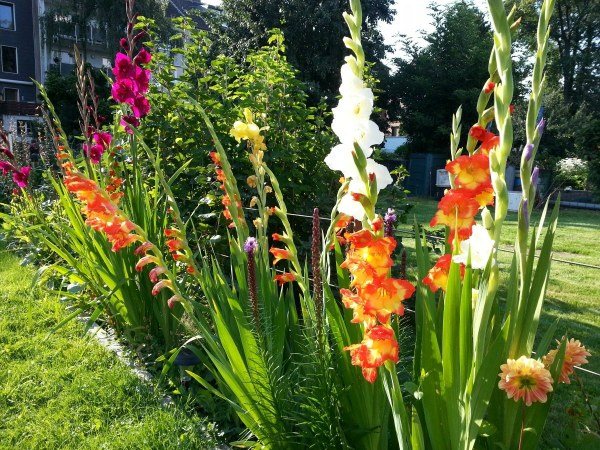
On the lower edge of the flower bed, you can plant pelargonium, nasturtium, begonia, rejected marigolds. It is important to choose plants according to the color palette so that the flowerbed does not turn out to be clumsy.
Do not plant dahlias next to gladioli, they bloom at about the same time and will compete for space and violate the integrity of the composition.
Multi-tiered planting of corms
The gladiolus multi-tiered planting will become a real decoration of the landscape of private households. Its advantage is also that this method helps to save space on small plots of land. By choosing the right varieties, you can achieve synchronous or alternate flowering.
It is quite possible to carry out work on the design of a multi-tiered flower bed on your own, if you use your imagination. First, you need to decide on the shape: often landscape designers design such objects in the form of a pyramid, but you can choose any other shape - rectangular, square, etc.
Wooden planks can be used as material for home assembly. Of them, you need to knock down boxes without a bottom of different sizes and install it with a pyramid: the first row is the largest box in terms of area, the second is a little smaller, etc. In parallel with the installation, the soil mixture is poured. When the flowerbed is built, you can start planting.
Did you know? The name of gladiolus was given by the Latin word gladius, which means "sword". The flower received this name because of the shape of the leaves, which look like swords.
It is important to choose the right varieties. If you want a multi-tiered flower bed to shimmer with color for a long period of time, pick up gladioli of different flowering periods.
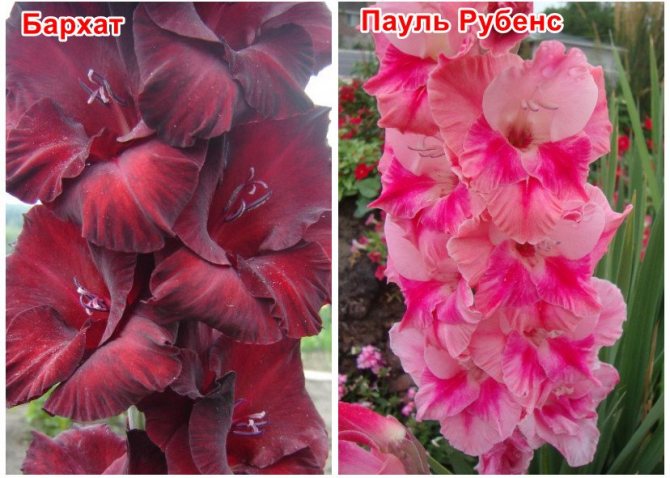
It is worth paying attention to such as:
- Velvet - has large maroon flowers with cream touches. Begins to bloom 72–74 days after planting;
- Paul Rubens - flaunts with purple-violet buds during the flowering period, which occurs on average 90–95 days after planting the bulbs;
- Focus - an early variety, the bright yellow color of which can be seen already on the 52–55th day;
- America - flowers of gladioli of this variety have a delicate light pink color, complemented by lilac blotches. Flowering is quite late - it falls on the 95-100th day after planting.
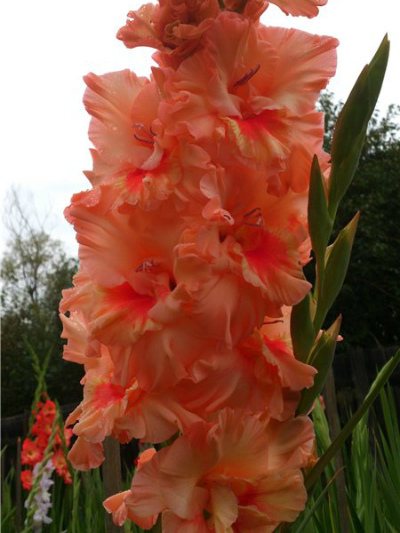
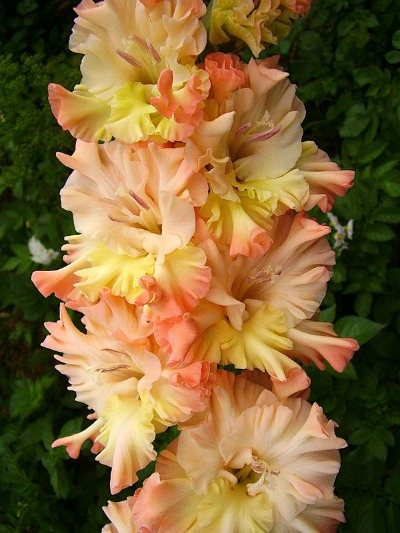
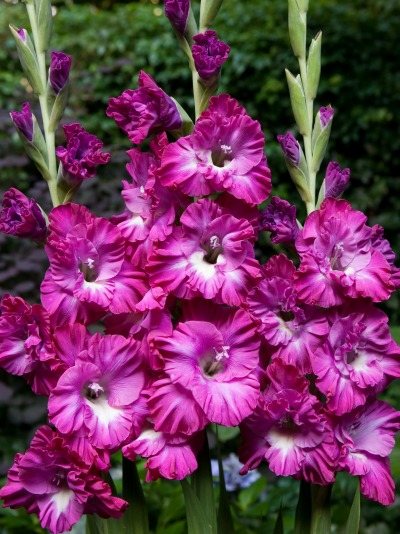
Types and popular varieties of gladioli
Gladiolus became known to Europeans in the 16th century, from where it successfully migrated to Russian gardens. Over the years of breeding, flowers have expanded their decorative qualities. The stem became taller and stronger, the flowers acquired a huge number of shades and became much larger than their wild ancestors.
Gladiolus belongs to the iris family and has more than 250 species. The current varieties are bred by crossing European and African species and belong to the hybrid garden species Gladiolus x hybridus hort.
Thanks to the labors of breeders, a huge number of varieties of gladioli have been bred. They are classified according to various criteria:
- flower size;
- plant height;
- flowering period;
- coloring;
- the number of flowers in the inflorescence.
According to the shape of the petals, gladioli are divided into simple and corrugated. By flower size - into miniature and giant. And the variety of color palette can surprise even the most demanding taste.
Popular varieties
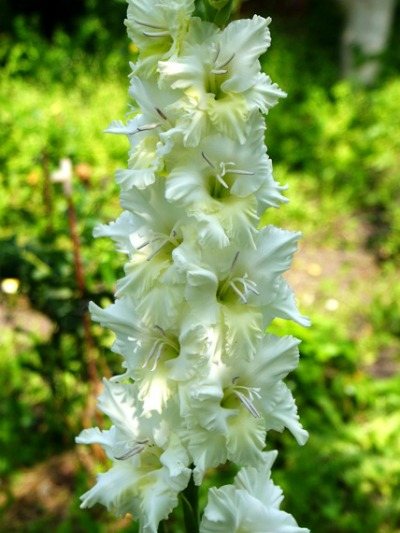
The parade of the most beautiful varieties of gladioli opens Moscow Belokamennaya... Tall plant (up to 150 cm) with pure white petals. The flowers are large, up to 14 cm in diameter, strongly corrugated. The total number of buds on the stem reaches 21, and 8 of them open at the same time.
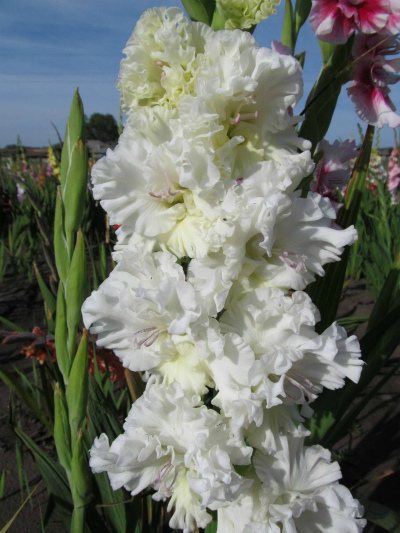
Moscow Belokamennaya
The variety is medium early, flowering begins somewhere in July. The buds begin to open from the bottom, slowly climbing up the flower arrow. A garter to the support is required in case of strong winds and heavy rains.
Krasava Is a very early variety with yellow flowers, which in good conditions can bloom at the end of June. The ear is very large. It contains up to 24 flowers and 10 of them are kept open.
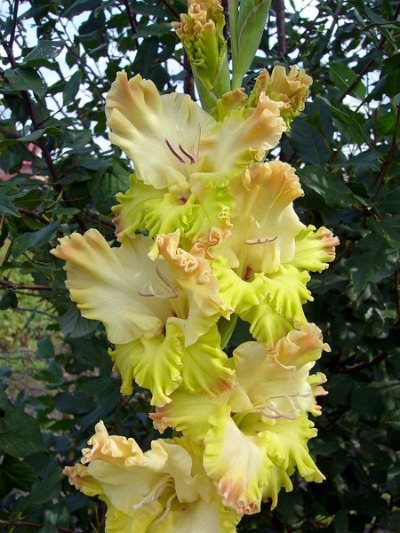
Krasava
Priscilla - gladiolus has a beautiful white-pink hue, with crimson edges. It is distinguished by strongly corrugated petals, flowers with a velvety texture, very lush. A variety with a stem height up to 100 cm.
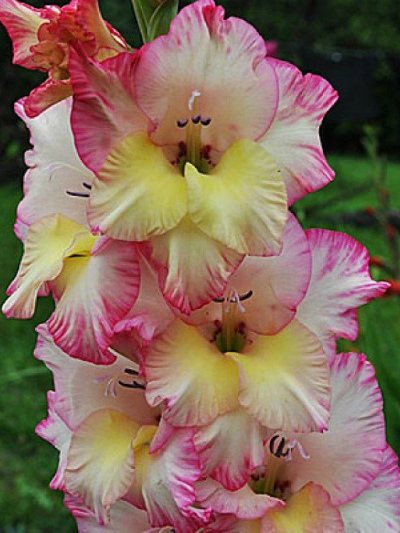
Priscilla
Brown Sugar strikes with bright brick-red flowers. The plant reaches a height of 150 cm. This variety is popular with florists and landscape designers, as it blooms for a long time and is an excellent option for cutting.

Brown Sugar
Amber Baltic. Tall, up to 160 cm, gladiolus with a bright apricot shade of flowers will become an undoubted soloist in a flower bed. On a strong peduncle there are up to 23 buds, which open up to form large, over 15 cm, orange flowers. The color palette enhances the impression with the presence of a bright red spot.
Amber Baltic
Grand Duchess Elizabeth - a tall gladiolus with salmon-colored petals that shimmer with pink and orange hues. Up to 22 buds are laid on an ear of 70 cm long.
Grand Duchess Elizabeth
White birch Is a medium flowering variety with a strong ear and super corrugated white flowers. Of the 24 buds laid on the plant, 10 blooms at the same time.
White birch
Green is old. Gladiolus with an extraordinary pale green color of flowers, strongly corrugated petals. The stem is high - about 150 cm. The flower belongs to varieties with an average flowering period and is valued for its high resistance to adverse conditions.

Green Star
Nairobi Frizzles. Gladiolus with subtle delicate lilac flowers with light spots and heavily corrugated edges. Plant height from 90 to 110 cm. Used in flower beds and for cutting.
Nairobi Frizzles
Preparation of planting material for gladioli
Two to three weeks before planting, the corms are cleaned of scales. They do this carefully, as under them there may be young seedlings that are easy to break off. If the baby's shell is cleaned, then lightly press on it with two fingers, and then remove the scales with a fingernail. It is imperative to clean it, since parasitic microorganisms and thrips nest in the scales. In addition, it is easier to detect signs of disease on peeled corms and disinfect planting material in time.
The baby is cleaned on the eve of planting so that it does not dry out. If the baby under the shell is sick, dry, with black dots, it is thrown away. To prevent the spread of diseases, all planting waste is burned.
Peeled corms are laid out sprouts upwards on vernalization, like potatoes. This activity promotes better flowering and less susceptibility to diseases at the beginning of growth.
Planting material purchased in a store or on the market is treated against diseases and pests. It is better not to use chemicals for this in the garden. Soak the corms and the baby well in an infusion of garlic (250-300 g per 10 liters of water) for 2 hours.
Garlic acts on both pathogens and plant pests. It is passed through a meat grinder, pour 10 liters of water. The planting material is immersed in the resulting infusion not only before planting, but also after digging. In the spring, a solution of a lower concentration is prepared (300 g per 10 l), in the fall - a larger one (500 g per 10 l). For digging processing, the concentration can be further increased by taking up to 1 kg of garlic per 10 liters of water.
If there is no garlic, the planting material is treated with a solution of potassium permanganate - from pathogens, karbofos - from pests. In the spring, in a solution of potassium permanganate (1 g of potassium permanganate per 10 l of water), then in a solution of karbofos (30 g per 10 l of water) the corms and the baby are kept for 30 minutes. In the fall, take a stronger solution of potassium permanganate (5-10 g of potassium permanganate per 10 liters of water) and incubate for 30-60 minutes.
A solution of karbofos is the same concentration as in spring, and the material is kept in it for the same time. After disinfection, before planting, the material can be treated with growth stimulants and trace elements for faster root development. Usually one of the following drugs is used, based on 10 liters of water:
- heteroauxin - one tablet;
- sodium gummate - 1 g;
- succinic acid - 2 g.
The planting material is kept in a growth stimulator solution for 10-12 hours.
Solutions of microelements for processing planting material can be of various compositions. For soaking corms before planting, it is better to use the recommendations of A. N. Gromov (Table 1). The processing time of the material in the recommended composition is 12-14 hours.
Table 1. Doses of micronutrient fertilizers for the treatment of corms
| Microfertilizer | Dose per 10 l of water, g |
| Boric acid | 3 |
| Potassium permanganate (potassium permanganate) | 2 |
| Copper sulfate (copper sulfate) | 3 |
| Cobalt Nitrate (Cobalt Nitrate) | 0,8-1,0 |
| Ammonium molybdate | 1,0-1,5 |
| Zinc sulfate (zinc sulfate) | 0,5-0,7 |
Tab. 2. Doses of micronutrient fertilizers for the treatment of tubers
| Microfertilizers | Dose per 10 liters of water |
| Potassium permanganate | 5 g |
| Copper sulphate | 4 g |
| Cobalt nitrate | 1 g |
Table 2 shows the doses of micronutrients recommended by T.G. Tamberg for preparing a solution for soaking tubers before planting. Processing time is 4 hours.
The author prefers to soak the corms and the baby before planting in a combined solution of ammonium molybdate (2 g) and copper sulfate (5 g) per 10 liters of water for 2 hours, then immediately plants.