Tulips are usually planted in the ground in late autumn, but it happens that for some reason this could not be done. In this case, it is necessary to decide where and how to keep the tulip bulbs until spring, so as not to leave the garden without these beautiful flowers. Saving planting material, and so that the flower arrows are thrown out of the bulbs, is not an easy task, which has a number of subtleties. But if these features are observed, it is not very troublesome.
Briefly about the origin of tulips
Some growers believe that tulips were first bred in Holland, but the birthplace of these flowers is Persia. The ancestors of today's tulips are wild tulips that grew in the countries of Central Asia. Over time, this amazingly beautiful flower began to wander around the world, winning the hearts of flower growers. In the east, the tulip was considered a symbol of love and was actively cultivated in the flower beds of nobles and sultans. The image of tulips can often be found on fabrics, carpets, and wall paintings. However, in Europe, the flower settled a little later. The famous Austrian politician Büsbeck brought tulip bulbs. In the second half of the 16th century, the tulip gained its position and became the most common flower that was actively bred. The first tulip bulbs were brought to Russia during the reign of Peter the Great, as a gift, and at the end of the 19th century, they became available to nobles.


Description
The tulip is a beautiful flower that belongs to the genus of herbaceous bulbous plants. Tulip bulbs can be stored in the ground for 4 seasons if the winters are warm, otherwise they need to be dug up, sorted out and processed annually or every 2 years. If not treated, then tulips can weaken and die due to the appearance of pests or diseases. Properly store bulbs from cut flower to planting in a dark or cool place such as a refrigerator or pantry. The shelf life of the bulbs after digging is 6-12 weeks, but no more.
The soil needed to grow tulips
The tulip is not a capricious plant, however, it makes some demands on the soil. The soil must be nutritious and oily for the flower to bloom in full force in your area. It will also not be superfluous to make samples for the pH level, tulips do not like acidic soils. The soil, as well as for any cultivated plants, must have good aeration, moisture capacity and drainage.
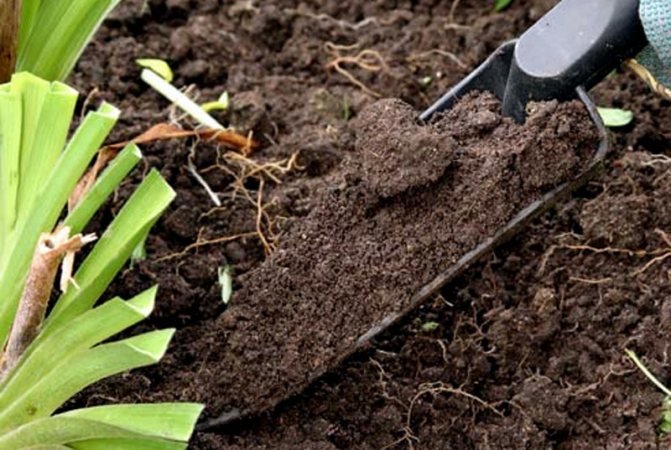
The most suitable soil for growing tulips is, of course, black soil and sandy loam soil. The soil must be prepared if it does not meet the needs of the flowers. For better aeration, river sand should be added to black soil, half a bucket per square meter. In acidic soils, it is necessary to add lime, and add peat or chopped straw to heavy loams, and also add sand. If your site has poor soil drainage and groundwater deposits, then the likelihood of putrefactive diseases will increase significantly. This problem can be easily solved with a drainage pad made of sand and expanded clay. For your tulips to delight you, you should not grow them for more than five years in one place, the bud is crushed, and the plant will become susceptible to fungal diseases. Also, do not interfere with tulip varieties, the result will be ambiguous.
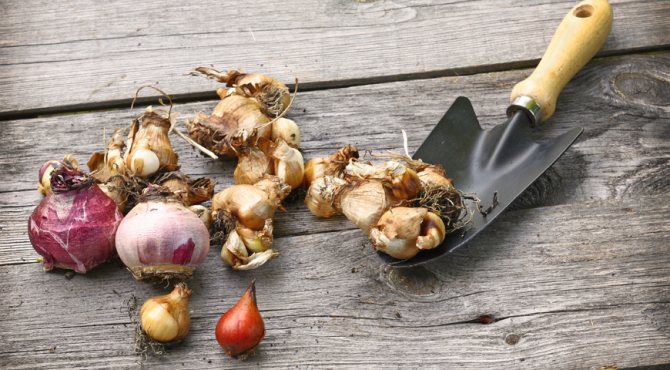
How to properly prepare planting material for storage
To preserve the bulbs until spring, they must be properly prepared and stored for the winter.
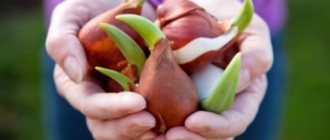
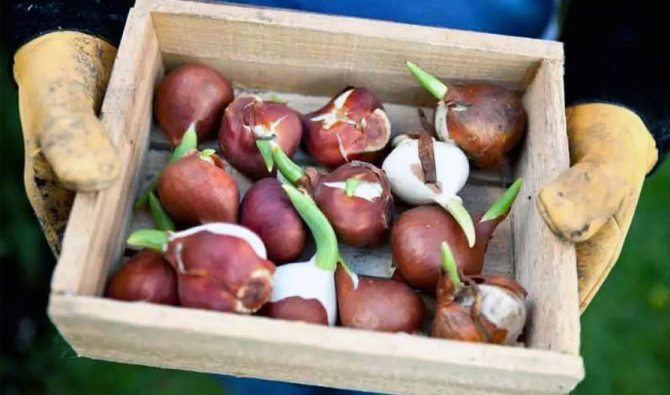
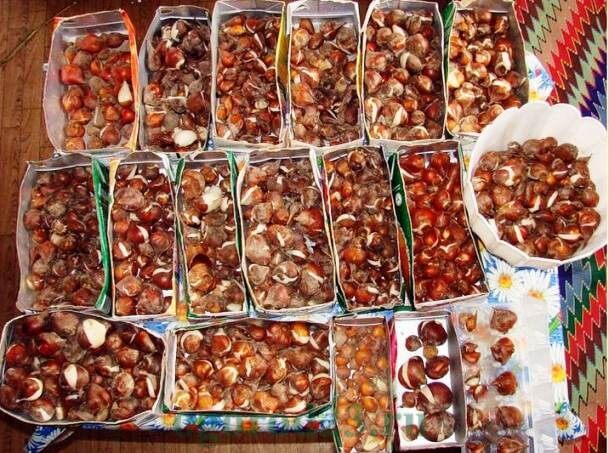
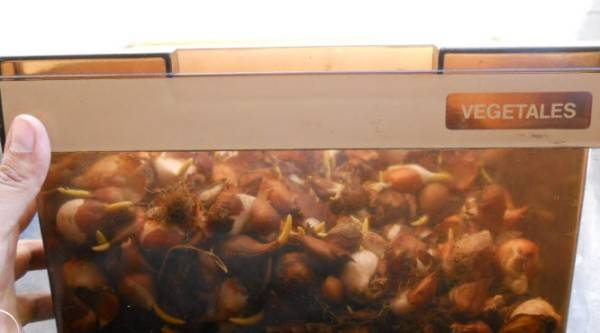
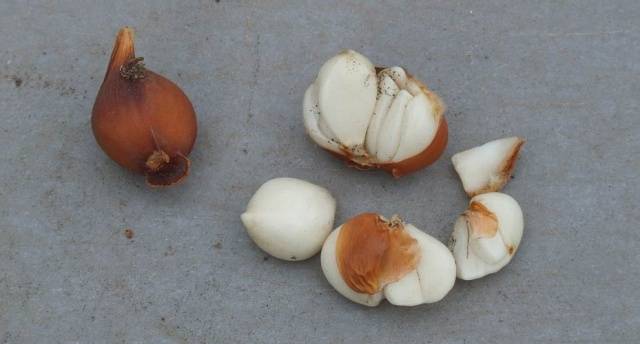
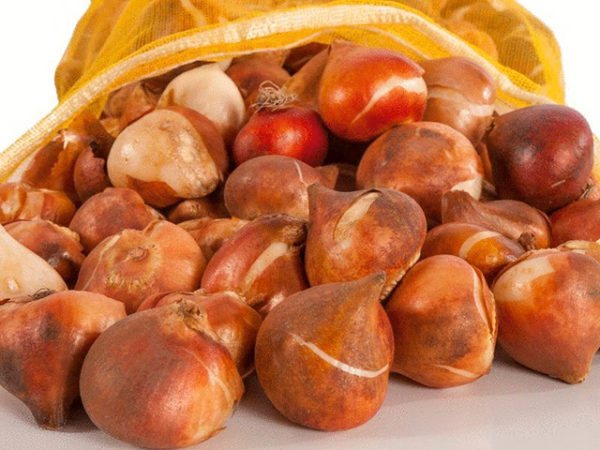
- After the bulbs have been dug up, they must be sorted by variety and size (sorted) and placed in a separate container. Particular attention should be paid to large bulbs (1 and 2 parsing), it is from them that you should expect full-fledged flowers in the spring.
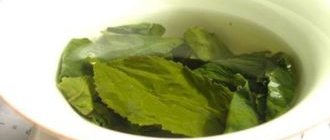
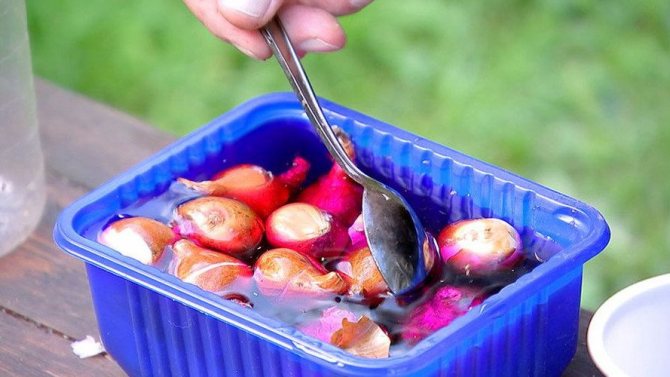
- The planting material should be cleared of the ground. If the bulbs are not intended for distillation, then it is useful to wash and disinfect them, for which they stand for 30-40 minutes in a pink solution of potassium permanganate. This significantly improves the preservation of tulips. If damaged or diseased bulbs are found, they must be thrown away immediately.
- Peeled, washed and disinfected bulbs should be scattered to dry in a shaded place. Drying in a well-ventilated area is preferable, compared to the street, as this will save you from unforeseen precipitation. In addition, tulips "do not like" drafts.
- After a week, the well-dried planting material must be sorted out again, the remnants of the stems, covering scales and embryonic small bulbs must be removed. If irregular, damaged and diseased bulbs are found, they should be discarded.
- Leave the tulips to dry for a few more days.
This completes the preparation, you can place the bulbs for storage until spring.
Tulip varieties
At the moment, more than fifteen classes of tulips have been studied and formed. They can be divided into the following groups, early ripening, medium, late flowering, some types of tulips and their hybrids. The latter group includes wild tulip varieties and those varieties that breeders have taken as the basis for hybridization. Further, the first group of tulips, in turn, is divided into simple and double varieties. The second includes triumph tulips and hybrids. The third group included lily-colored varieties, fringed and green flowers, as well as parrot and Rembrandt tulips. The fourth group includes flowers of the Kaufman, Greig, Foster and hybrid varieties.
Rostov Reserve - the habitat of beautiful steppe flowers
Where else do tulips grow? The reserve is one of the most beautiful sights of the Rostov region. It is located in the Oryol region.
The reserve was founded in 1995 to preserve and study endangered species of animals and plants of the Don. Its total area is 9532 hectares.
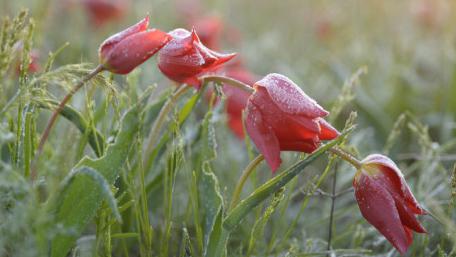
The zones of the reserve where tulips grow are amazingly beautiful. This is one of the most beautiful places in the Rostov region. For three weeks in April, you can observe amazing, stunning, nature-created beauty.
The best of all are wild Schrenk tulips that have taken root here, which have another name - "azure flower". There are also Bieberstein tulips, which look like yellow stars.
How to plant tulips correctly
Tulips love sun and warmth. The planting must be adjusted in such a way that the bulb can take root before the onset of frost. In order for the bulb to take root, a month must pass, sometimes more. Therefore, it is better to plant the bulbs in September. If you planted tulips later than the due date, then you need to resort to mulching. Before planting tulips, the soil must be dug up for better aeration and further good absorption of nutrients from the soil. To make it easier to navigate in choosing the distance of the beds, when planting, pay attention to the size of the bulbs. Larger ones are best planted from each other at a distance of 10 centimeters, and small ones at a distance of 8 centimeters. The planting depth of the bulb will depend on the weather conditions in your area, the size of the bulb and the type of soil. So on heavy soils, the planting depth can vary from 12 centimeters, and on average from 14 centimeters.
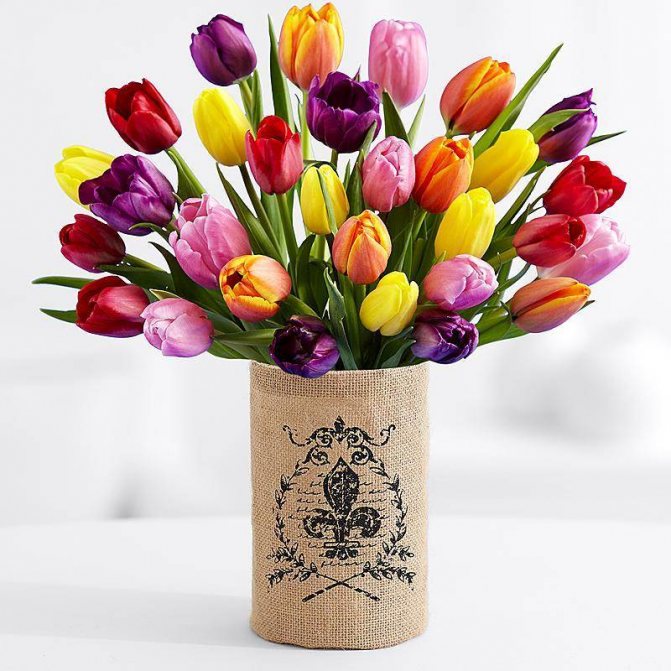
What flowers are tulips combined with?
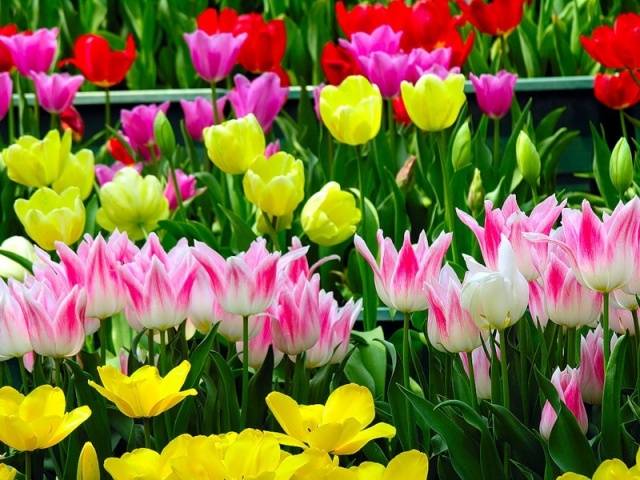
Spring mood is best conveyed by mono-bouquets of tulips or a mix with other primroses. It can be a variety of compositions:
- monochrome, for example in white and pink colors;
- contrasting (red-white, violet-white);
- rainbow mix.
Of the primroses, tulips are best combined with irises. They do not like the company of daffodils, hyacinths (plants release harmful mucus into the water).
Peony tulips in bouquets are often combined with lush greenhouse flowers - roses, carnations, lisianthus.
Greens suit them bright green - salal, ruskus, aspidistra leaves.
- 30 cm
Sicily 3990 q Order - 30 cm
Juliet 4590 q Order
- Lemon fresh 4690 q Order
Spring bouquets are characterized by natural simplicity, excessive decor is contraindicated
Proper care of tulips stimulates its growth and bud size
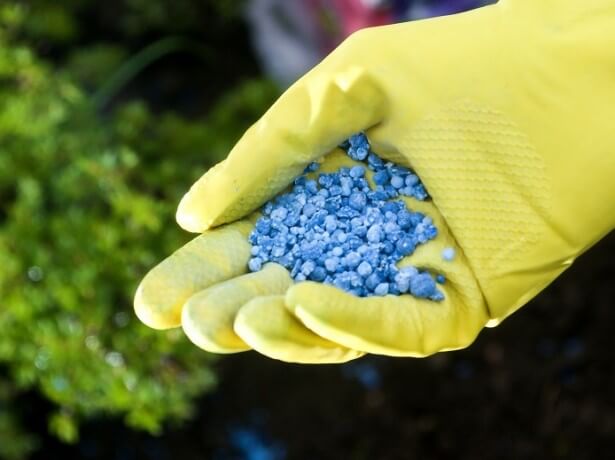
Caring for tulips, first of all, consists in feeding, which will undoubtedly increase the resistance of flowers to diseases and the quality of the buds. Therefore, the first feeding is best done as soon as the tulip sprouts appear from the soil. It is better to purchase fertilizers in a specialized store, and dilute it yourself, given the fact that a high concentration of salts in the soil will adversely affect the condition of the flower. Therefore, it is better to divide the specified fertilizer rate in half. Feel free to purchase fertilizers for bulbous flowers and feed them during the main growing season of the tulip. There will be three periods, germination, bud picking and final, after the flower has bloomed.
The state of the flower's appearance can tell a lot, for example, indicate an excess or lack of nutrients in the soil. Lack of nitrogen reflects on the leaves of the plant, they lose their elasticity, lie on the ground, and the stems do not take an upright position, over time, the lower part of the tulip becomes pinkish. The bluish color of the leaf edges of the plant will indicate the lack of potassium-phosphorus fertilizers.
The main aspect in caring for flowers is the elimination of diseased plants and the timely prevention of tulip diseases. It is necessary to remove the diseased plant together with the bulb, and in case of viral diseases, also with the ground. The dug out plant is destroyed, and the pit is disinfected with an average solution of manganese, by irrigating the affected area of the soil.
Whatever actions you take to improve the condition of flowers, be it loosening the soil, killing weeds, fertilizing or watering, try not to harm the plant. After all, if you damage the leaves, the plant will not be able to receive enough moisture, and if the bulb is damaged, the tulip will die in some cases. Keep track of the health of the flowers, during the prophylaxis and treatment.

The legend of the flower of happiness
Tulip is a flower of happiness, love and pride. There are many legends and stories about him.
One says that somehow a golden tulip grew up with happiness contained in it. However, the flower bud did not open for a long time.
And then one day a woman walked with a small child in the meadow where this proud stubborn tulip grew. Opening his little hands, laughing merrily, the child ran to the flower. From his carefree childish laughter, the tulip opened and gave everyone happiness.
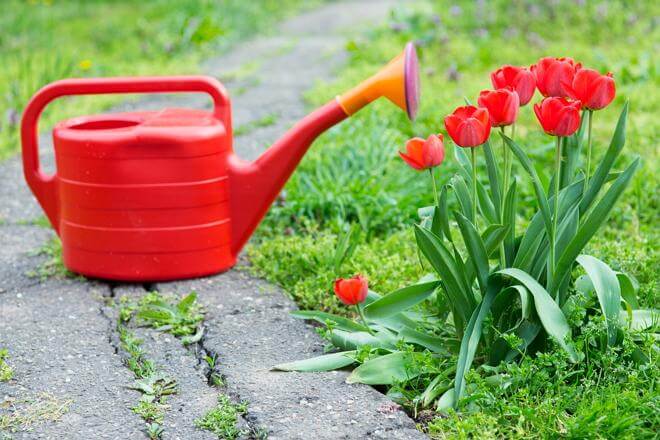
Watering tulips
Like all representatives of the flower world, tulips require an abundance of moisture and nutrients in the soil. After all, tulips quickly develop stems and flowers, and in the ground the bulb grows rapidly and gives new life to children - new bulbs. Therefore, the entire vegetation process requires a large amount of micronutrients, as well as regular and abundant watering of the plants. It is very important to organize watering of flowers exactly when the flower begins to pick up a bud, and in the subsequent flowering.And when the tulip fades, watering must be continued for a week, and in order for the bulb to gain strength and give children, additional feeding.
What are tulips?
These are garden flowers that need no additional introduction. Usually, the structure of a tulip consists of the bulb itself and the roots that extend from it (the latter die off annually in the cold).
A tulip is a flower that reacts well to the sun - it spreads its petals under its rays and neatly closes the “bell” in the late afternoon or if the sky is overcast.
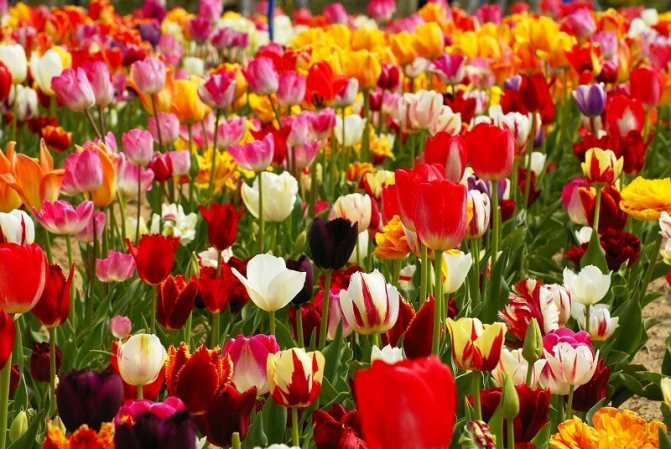
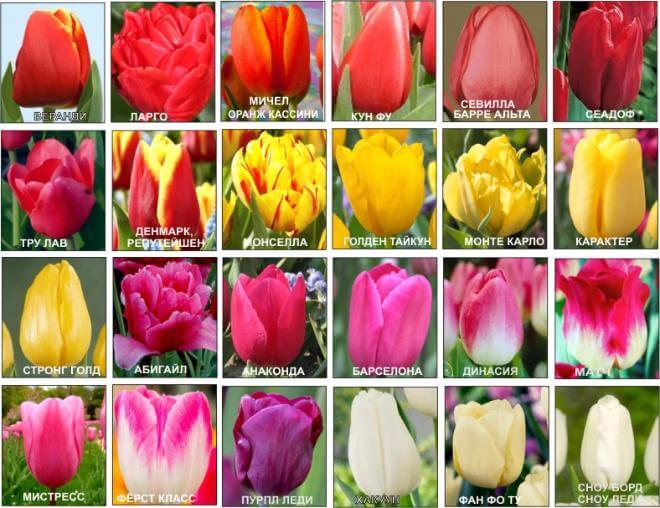
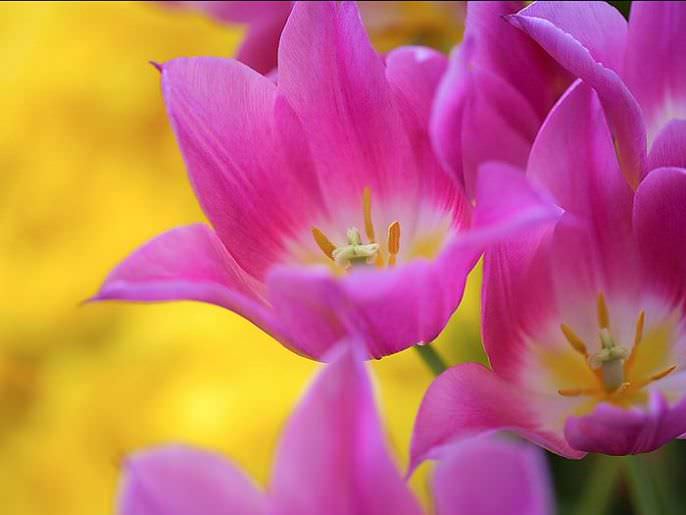
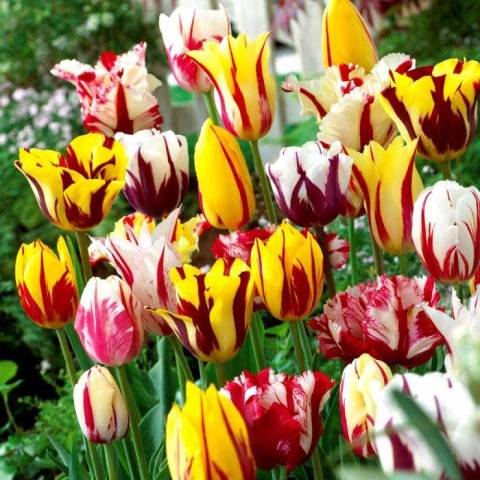
It is difficult to find a flower as rich in colors as a tulip - you can find specimens of almost any shade.

The well-known flower can be found in various shades.
Important! The shape and size also differ according to varieties and species. Flowers can be very large (up to 20 cm in diameter) or, on the contrary, small in size.
Digging the bulbs for storage and replanting tulips
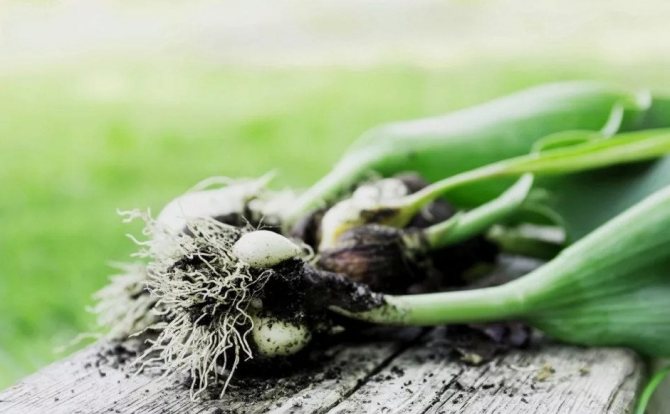
In order for the bulb to continue to delight you with large buds and flowers, it is very important to prevent seed from the tulip. If the tulip still has a seed box, remove it as soon as possible. Do not touch the leaves of the plant, because the bulb receives nutrition from them.
So that the tulips do not become smaller, and the soil can gain strength for the subsequent planting and get rid of pests, the flowers are dug up every year and stored in a cool room. However, if the tulip is planted in a well-drained and nutritious soil, at the same time, deep enough, then with annual feeding it can be left for 3-5 years in the same place. However, after three years, the tulips should still be transplanted to a new place, this is done in order to separate the babies from the mother's bulb, conduct an examination for the presence of diseases, and also give the site time to rest. Therefore, in July, when the leaves begin to wilt and turn yellow, the bulbs are dug up, cleaned of the ground, dried in a well-ventilated room, without getting sunlight on them, sorted into paper boxes or boxes and thus stored until the next planting in a cool and well-ventilated room. ...
Many gardeners plant tulips as early as September so that the bulb can take root before frost. Because otherwise, it will simply freeze out. Choose a suitable location that is well warmed by the sun and not exposed to stagnant water. Form beds, the recommended depth of which is about 20 centimeters, then add superphosphate, drain the trench with a thin layer of sand, this will protect the bulb from decay during heavy rains. It is better not to bring manure, tulips do not like it, it can lead to rotting of the bulb.
Planting is carried out in approximately this order, large bulbs are planted with the bottom down, at a distance of 20 cm from each other, then, small bulbs are planted between them and covered with soil. With this planting scheme, there is no need to replant the bulbs annually. If the winter in your region is not very snowy and frosty, then tulips should be planted on a deeper planting and be sure to mulch, and when the low temperature recedes, collect the mulch so that the soil warms up evenly. Also, by mulching and controlling the snowiness of the site, you can shift the flowering time of flowers. In general, tulips survive not too low temperatures without consequences. Therefore, in the southern regions, there is no reason to worry about your flower bed. However, if the temperature drops below -25 degrees, there is a threat to lose their flower plantations, for this, the beds must be closed and insulated.Chopped straw, peat, sawdust will serve as the best insulation in the beds, and on top the mulch is covered with a layer of snow and frosts are not terrible for tulips.
Storage methods until spring
Gardeners use several methods of storing bulbs, depending on living conditions and personal preference. Of course, it is best to plant flowers before winter and cover them with spruce branches, straw, tops or snow, where and leave them until spring.
When winter landing flowers take root better and bloom earlier. But if it is not possible to plant the bulbs in the garden in late autumn, you need to create special conditions so that they remain viable until spring.
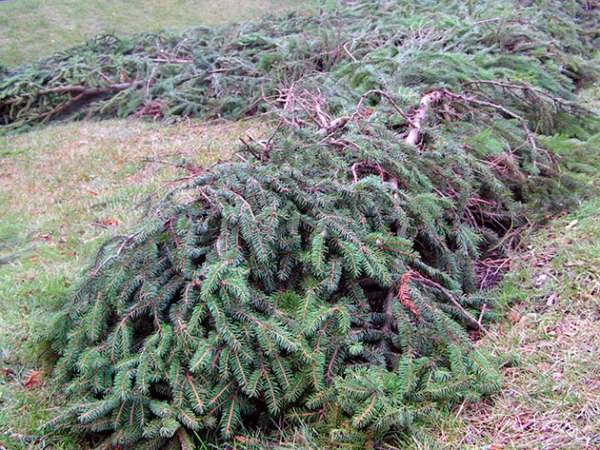
Shelter of tulips with spruce branches for the winter
No matter the way a certain temperature regime is required.
In July, the temperature should be + 23 + 25 ° С - this is necessary for laying a flower bud for next year. In the following months, the temperature should drop: in August to + 20 ° С, in September-October to + 15 ° С, in winter, a decrease to + 10 ° С is permissible.
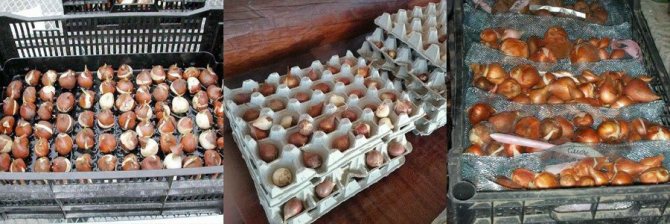
In boxes
Most often used for storing bulbous plants wooden or plastic boxes... Containers with a lattice bottom or walls are especially good - they will provide good ventilation and will prevent the decay process.
Experienced gardeners do not recommend using: The cardboard quickly absorbs moisture from the air and becomes covered with mold, which is dangerous for the bulbs.
The planting material is laid in boxes in two ways:
- Pour into prepared boxes sawdust layer, a layer of onions is placed on top. With a large amount of planting material, a layer of sawdust and tulips alternate. The sawdust will act as a hygroscopic material and will pick up excess moisture from the surrounding air.
- Every wrapped in newsprint or tissue paper and put in a box.
The boxes are installed in a dry, cool, well-ventilated place. Instead of wooden or plastic containers, some summer residents use fabric bags or nylon tights: tulips are folded into rag containers in small batches and hung from the crossbar.
In a cellar or basement
You can save it until spring planting in another way. Owners of a dry basement or cellar store tulips in the ground:
- Light neutralized soil is poured into a wooden or plastic box, obtained by mixing garden soil with peat and vermiculite and steamed for an hour in a water bath.
- Bulbs are planted in the prepared soil, which take root, but do not start growing until spring due to the cool temperature.
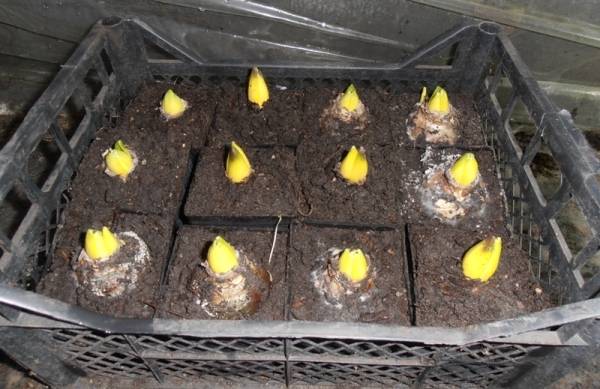
Storage in boxes with earth
In an apartment
In an apartment, the most difficult thing is to find a suitable storage space. Some varieties of tulips can be stored in the refrigerator at a temperature of + 5 ° С... However, it is more advisable to find a warmer and drier place of detention - it can be an unheated storage room or a glazed loggia.
In any case, the storage location should be away from heaters and protected from drafts.
Storing tulip bulbs in the refrigerator
Proper preparation of planting material for storage and compliance with the basic requirements will allow you to preserve the bulbs before planting with practically no loss. All efforts will be rewarded in spring, when bright, cheerful tulips bloom on the flowerbed or garden bed.
How to store tulip bulbs in winter at home
Preparing for landing
Since I have Dutch varieties in addition to ordinary tulips, in our climate they will give a larger flower and a higher peduncle, if you cover them with peat in the fall, you can use straw so that in cold snowless winters the bulbs do not suffer from frost, and in warm winters with thaws - from temperature fluctuations.I am in no hurry with the shelter, I wait until the subzero temperature is established and the soil freezes by 5 cm.
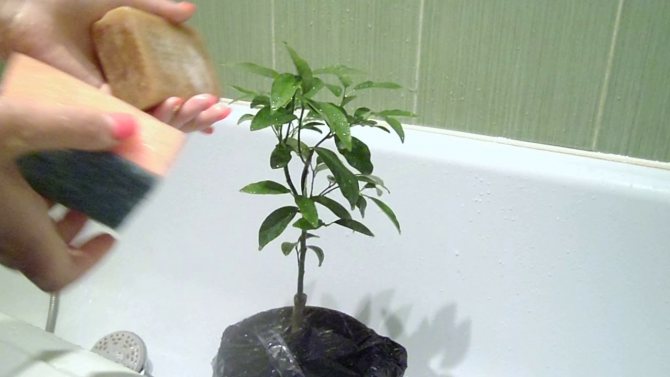
Many people probably thought about how to grow tulips at home. This is the real highlight of the apartment flower garden: bright buds that adorn the home when frosts are still raging outside the window. But in order to achieve the desired result, you need to take care of all the preparations, from the selection of planting material to the composition of the soil. Let's take a closer look at all these requirements.
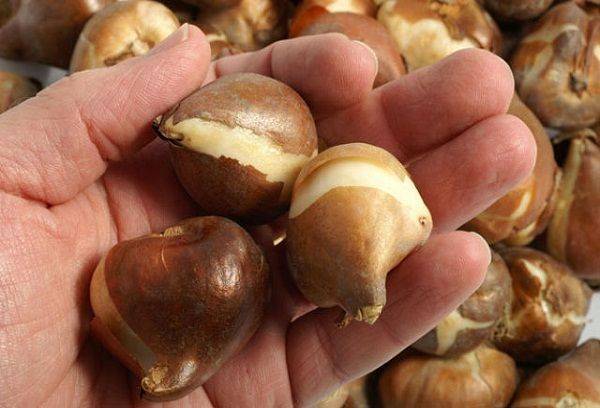
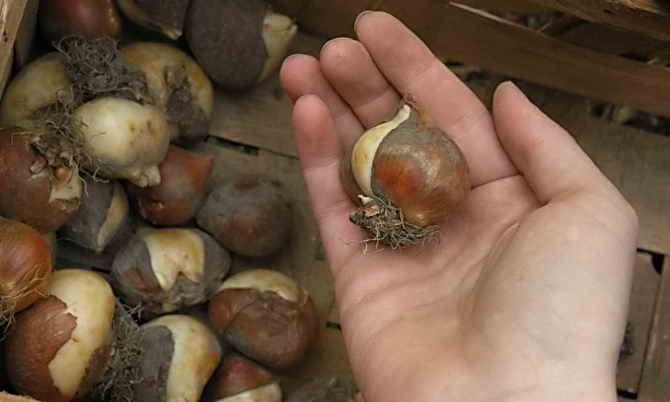
It is recommended to choose the largest bulbs. Make sure they are all large and have the same shade. It is advisable to inspect each specimen and make sure that there is no rot, suspicious spots and dots on it. Another key point when choosing a planting material is the weight of the bulb.
It is necessary to grow indoor tulips in a fairly spacious and practical container, so it is recommended to pay special attention to its choice. Prefer wide specimens, especially if you plan on planting several bulbs at a time. However, it is better not to buy deep vases, since tulips have a small root system.
As for the soil mixture, pure peat or a composition with the addition of a sand layer is considered the best option for rooting tulips. Some growers prefer to fill the pot with perlite or ordinary garden soil. In this case, you cannot do without fertilization: the substrate will need to be saturated with compost, manure or a small amount of wood ash. All key components are recommended to be thoroughly mixed and moistened.
Boarding time
How to grow tulips in your own apartment on the balcony - many flower growers are thinking about this. The main thing is to follow the key recommendations of specialists, purchase high-quality planting material, and carefully prepare the soil mixture. However, rooting time is considered an equally important factor affecting the effectiveness of planting tulip bulbs.
Before planting the seeds, you need to prepare the garden bed. To do this, it is worth acquiring such materials:
- A watering can. It is recommended to add a little salt to the water
- Priming. Sandy loam is best for this.
- Boards, with the help of which the fence is made
- Small scapula
A planting fence is necessary so that the soil layer does not rise. The boards will hinder this process. Experienced gardeners add humus to the soil. But don't take too much of it. It is poured into a place that is fenced with boards, and sand is added on top.
Read more: Fashionable Rex rabbit fur coats for a chinchilla 2019-2020: photos of female models with a hood and a collar
Plant diseases
Gray rot
Often this disease affects tulips, like spireas, a video of planting and caring for which can be seen in the material, late flowering in cold and wet weather. Rot spreads to nearby plants at the rate of fire. You need to take action at the first sign of infection.
Outwardly, the onset of the disease manifests itself in the form of brown spots on the leaves, then the spots twitch with a gray bloom of fungal spores. Plant growth slows down or stops completely. Rot affects not only the aerial part of the plant, but also the bulb.
For the treatment of gray rot, a 0.2% solution of foundationol or a strong solution of potassium permanganate is used. Re-processing is carried out after 10 days.
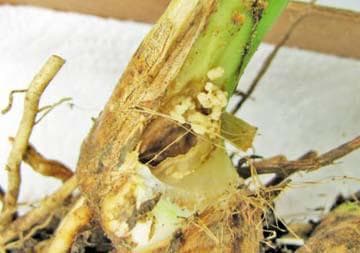
Fusarium
This disease does not manifest itself so clearly, affecting primarily the underground part of the plant. Roots perish, tulip bulb is damaged. The plant is weakened, the leaves die off, the flowers do not develop.
Diseased plants must be destroyed. Tulip bulbs are carefully examined after being dug. Bulbs affected by fusarium often give off an unpleasant odor. If there are light brown or brown spots on the bottom of the bulb, they are also destroyed.
Externally healthy bulbs are prophylactically treated with 0.2% benlate solution.
Sclerocial rot
In this disease, the bulb is covered with a white or gray bloom, which looks like felt. A diseased plant lags behind in growth, then rots. Such plants must be dug up and destroyed.
The soil within a radius of 15 cm from the focus of infection is treated with tiazone. Digging the earth to a depth of 30 cm is imperative.
Variegated
A viral disease that weakens the plant. Bulbs and aerial parts of plants become smaller and degraded. If your tulip variety does not genetically provide for variegated petals, such plants should be discarded. On yellow and white varieties, the manifestations of the virus are quite difficult to notice. The disease is given by young green leaves, on which lighter veins and yellow stripes appear along the leaf plate.
The variegated mosaic virus quickly infects closely growing tulip specimens. The main vectors of the virus are aphids and untreated garden tools.
The infected plants are dug up and burned. Used garden tools are treated with a dark pink solution of potassium permanganate.
About forcing bulbs
If you want to distill bulbs from overwintering bulbs at home, then you should take into account the fact that only properly prepared and complete (large, healthy bulbs of two to three years of age) are suitable for forcing. Small and young bulbs, when distilled, do not produce good flowers or bloom at all. You also need to keep in mind that for the successful distillation of a variety of bulbs, you need to adhere to the timing and technology of planting bulbs of this type, observe the storage conditions for the planted bulbs and their optimal content during the period of budding and flowering. This is a big topic for separate articles (for example, forcing daffodils and tulips, forcing lilies)
Why dig up tulip bulbs every year
Do you really need to dig up tulip bulbs every year? Many will tell you: "No." In fact, there is no single answer. And this circumstance depends only on the type of tulips.
Simple, garden flowers are transplanted every five or even seven years, believing that there is no need to waste time and effort, they bloom beautifully every autumn. Some varieties require more careful care and are very picky about the timing of digging and planting. And there are those that cannot be dug up and transplanted within two to three years. In any case, information about the terms and rules of storage will not be superfluous.
Important! On the 3-4th day after the beginning of flowering of tulips or immediately after the end, professionals advise to cut the peduncles for better ripening of the bulbs and the formation of a flower arrow.
Here are just a few reasons to dig up tulip bulbs after flowering and put them in short storage:
- For a lush bloom in the spring, a certain storage regime must be created for tulip bulbs. At this moment, the foundation for the future flower is laid in them - a flower arrow is formed. Ripe bulbs should be stored strictly at a temperature of + 25˚C, no more, no less. Deep underground, the bulb does not receive the heat it needs.
- All flowers of the bulbous family have one feature - every year they go into the ground to an ever greater depth. The deeper they go into the ground, the more difficult it is in the spring for weak and delicate shoots to break through the thickness of the earth. Indeed, over time, this layer of land only increases. As a result, tulip bulbs will simply rot in the ground, not even leaving children for further reproduction. An empty flower bed is a rather sad sight. Especially in spring, when you really want to see the first colorful flowers.
- Land. Even the most picky flowers take from the ground everything they need to grow and bloom.Therefore, over time, the soil becomes scarce, compacted and becomes unsuitable for plants. This circumstance affects the appearance of flowers, their resistance to diseases and the safety of varietal characteristics. In the process of digging and planting tubers, you can not only loosen the compacted soil, but also fertilize it with organic and inorganic additives, adding the necessary vitamins to the flower diet.
- If you want to preserve the varietal characteristics of tulips, as well as get a large number of children from them, then digging tulips after flowering and planting them in the fall is simply necessary. Already a couple of months after the end of flowering, it will be difficult to select high-quality seed for subsequent plantings. And if the process of digging tulip bulbs is excluded, the children will become smaller. And collecting small bulbs will be very difficult.
- Humidity during storage is an important factor. For example, if tulips grow in a flower bed next to other flowers, you will inevitably water them. This can kill the tulip bulbs. Indeed, during a dormant period, moisture for them is tantamount to a death sentence. Not only do the bulbs begin to rot, they are affected by various diseases, transmitting them in the ground to each other. By timely digging and sorting the seed, you can avoid such consequences and rejoice in the spring looking at tulips that are ideal in shape and color.
- By not separating the extra small bulbs from the mature ones in the process of digging and sorting, you create an acute shortage of minerals and nutrients necessary for the normal growth and flowering of plants.
As you can see, there are many reasons for digging and properly storing tulip bulbs at the right time.
Why dig up tulips and how to do it right is described in the following video:
Bulb formation and further cultivation
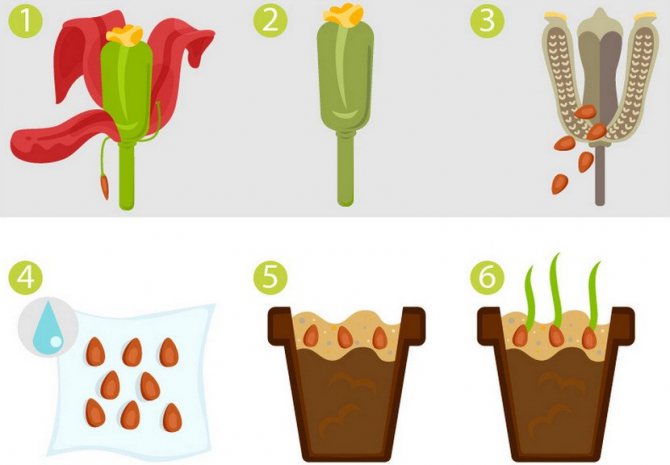
As a small tulip grows, you will be able to observe the whole process of its development:
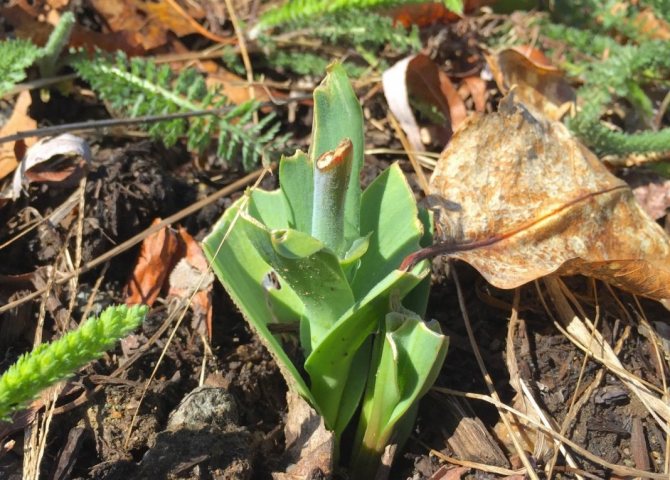
- the appearance of the first sprout in the spring;
- a tulip leaf grows in the second year;
- the bud of the bulb is formed - but it should not be touched until the third year;
- then you can remove, dry and prepare the bulb for planting;
- at the end of the fifth year, it is time for planting in open ground.
Important! Be sure to make a drainage system at the bottom of the pot or drawer.
After 2-3 years, the bulbs have formed and now you need to transplant them to safe places, excluding frosts. Then babies are formed. They need to be separated from the mother's bulb and transplanted already, as is customary when propagating tulips in the usual way.
You can dig up the first onion that appears in the spring and postpone it until the autumn transplant.... When it's time to plant the bulb, you will need to water and lightly fertilize the soil - at this time rooting takes place. Further development already refers to the rules for caring for the bulbous method of growing tulips.
Not only can you get a unique color of tulip petals and its sizes by growing from seeds. This method makes the flower stronger, more resistant to weather changes. And if your experiment is successful, you can consider yourself a breeder and discoverer - your flower has individual characteristics. You will be able to achieve the emergence of a new strain, so all your diligence will be justified. Good luck in your endeavors!
Monitoring the development of tulips
Tulips need attention, and it doesn't always have to show up in standard procedures. These bulbs need to be monitored for the first signs of a developmental disorder, health problems, or uncomfortable conditions. Regular inspection of leaves, flowers, peduncles will prevent any troubles at the earliest stage.
The most important procedure in monitoring tulip plantings is the spring one.After the plants begin to actively develop, they need to be monitored. Usually, the first assessment is done as soon as the soil warms up and the first shoots appear, noting signs of growth retardation and removing plants that do not germinate. At the slightest signs of damage to plants by diseases, such specimens are immediately destroyed and removed not only along with the roots, but also together with a fairly large earthen clod. After removing diseased tulips, the soil is treated with a fungicide, at least a solution of simple potassium permanganate to prevent the spread of diseases.
Inspections continue throughout the active growing season and flowering. The specimens affected by viruses and diseases are carefully removed, trying not to damage neighboring plants. A particularly careful assessment is always done after flowering. But if you collect tulips and carefully control their varietal affiliation, then varietal cleaning should be carried out in the midst of flowering, noting dubious specimens and impurities, in order to separate the plants and restore varietal purity later.
Any parts of tulips dug out due to suspicion of infection, as well as dry parts of plants, are not sent to compost, but destroyed.
Pruning flower stalks and tulip leaves. <>
Storage features
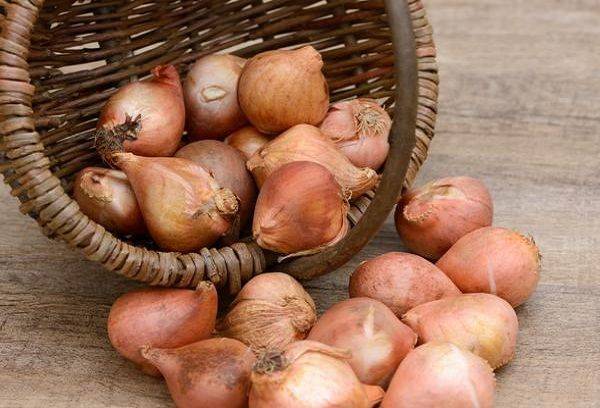
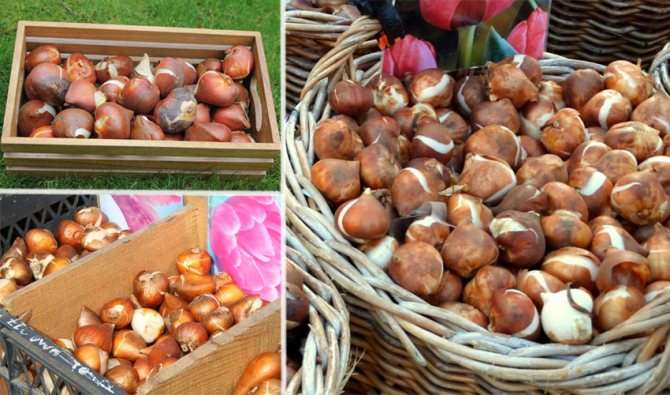
Store the bulbs you plan to plant in the fall at room temperature in a shaded area in cardboard boxes or baskets. The optimal layer height is 3-5 cm, that is, it is not particularly worth piling the bulbs on top of each other.
If you plan to plant the bulbs in advance in the spring, then it is advisable to lower the storage temperature to +15 C from August.
I read on forums on the Internet that many people store bulbs until spring on the lower shelves of the refrigerator. Indeed, such tulips will start growing well in the spring, but not all of them will bloom.
The ideal place for storing planting material is a dry subfloor. With the arrival of cold weather, the temperature in it will gradually decrease, reaching + 8 ... + 11 C in winter.
If you live in an apartment in winter, it is more convenient to store bulbs during this period in a cool closet or on a well-insulated balcony.
Tulips in Holland (video)
Tulip is one of the brightest and most attractive flowers. Many countries are engaged in breeding it, and the beginning was laid in Persia. Legends are associated with the tulip; household items and decor are decorated with its image. Breeders in Turkey, Holland and other countries are developing new varieties of plants, the beauty of which is admired by the whole world.
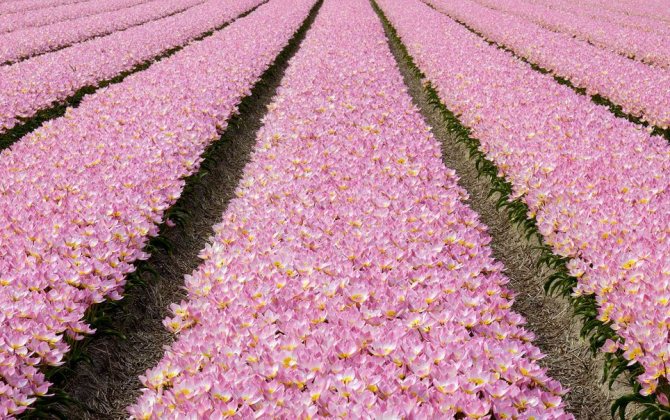
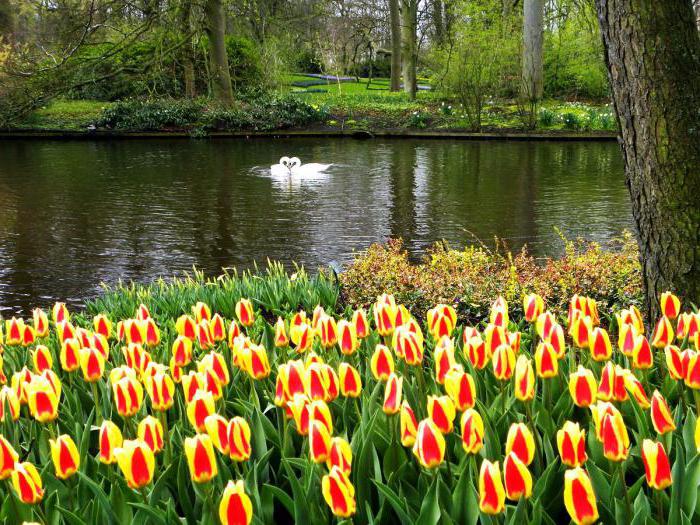
Every avid travel lover knows the colorful fields of the correct geometric shape, which can be seen flying over Holland. Many people associate the name of this area, first of all, with tulips - beautiful flowers that can be found here in huge numbers. Where is Holland located and why is this country considered the birthplace of tulips? What is the history of this area, and what interesting things awaits each guest here?
Storage periods
It is difficult to store tulip bulbs at home in winter. The planting material of these flowers is not suitable for long-term storage. It is best to dig up the plants after flowering and store them until digging in the fall. The option with winter storage is suitable only in exceptional cases (for example, in late autumn they bought plants and did not have time to plant them before the cold weather). Subject to the conditions until the fall, the onions are well preserved.
The necessary conditions
So, in order to plant and grow tulips at home you will need:
- tulip bulbs,
- container for planting a plant,
- pebbles / soil for filling containers.
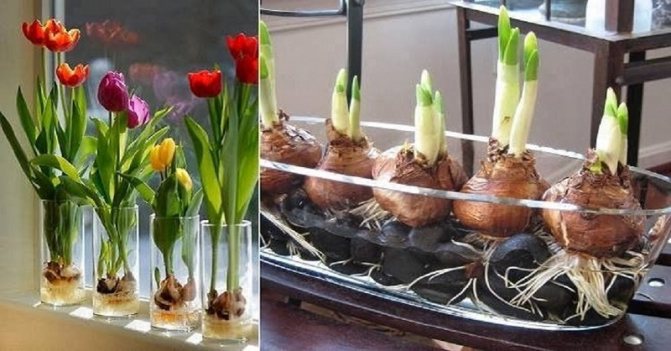
There are two options for growing tulips: in soil and without. To grow tulips without soil, you will need pebbles, decorative stones or other similar container filling.
As for the container, there are also options here: you can plant tulips in a pot or container; Recently, the growing of tulips in a vase or glass containers has been gaining popularity - it turns out very beautifully.
In early spring days, after the snow cover has melted, a loop with a particle of seed appears above the surface. In the first summer season, a tulip that has grown from a seed looks like a lonely, narrow leaf with one tiny root. Already in the second half of June, the leaf dries up, making it possible for a small scale to function, not more than three millimeters in size.
Foster's tulips
How to plant tulip bulbs? By the next spring, the seedling grows into a flat leaf with a pair of roots. A small onion, dying off, leaves a replacement bulb, which has a diameter of one centimeter. Until that time, they do not need to be dug out, but on winter days it is recommended to sprinkle the ridge with a layer of humus of six centimeters.
As usual, they are dug out of the ground in the middle of the summer season and stored until autumn days. Dry conditions are required for preservation. In October, both the replacement onion and the children are planted fifteen centimeters in the soil. Ahead of planting, fill the grooves with a sandy composition, irrigate with water and salt, and spread the bulbs at intervals of four centimeters.
Country history
The territory of the Netherlands was settled early enough - back in the Neolithic era. Celtic tribes living in the 1st millennium BC. e., were eventually supplanted by the Germanic. In the 5th century, the Frankish kingdom was formed here. In the X-XI centuries, there were several feudal possessions that were part of the Roman Empire. In the 12th century, cities began to emerge on the territory of the modern Netherlands, in which trade and crafts were rapidly developing. In 1566, a bourgeois revolution began here, aimed at overthrowing the rule of Spain. In the 17th and 18th centuries, the Dutch economy became one of the most powerful in all of Europe.
During World War II, the Netherlands declared a policy of neutrality, but already in 1940 it was occupied. After the end of the war, the country abandoned its traditional policy of neutrality and began to join various political organizations.
What are the varieties and types?
Around 1981, a current classification of tulip varieties was developed in Holland, which included more than 10 thousand different varieties bred. They are all divided into four main groups, which include 15 different classes. This classification is in use internationally.
Group 1. Early flowering tulips
The first class in this group is tulips. simple... They usually are not very tall, no higher than 40 cm. Peduncles are strong, the flower is neat, cupped. Usually they have shades of yellow or red.
Second class - double tulips (early). Their height is slightly less, up to 35 cm, the shade of the flowers is warm (also either red or yellowish), bloom longer than others in time. They have, as the name implies, a terry flower.

Terry tulips
Group 2. Mid-flowering tulips
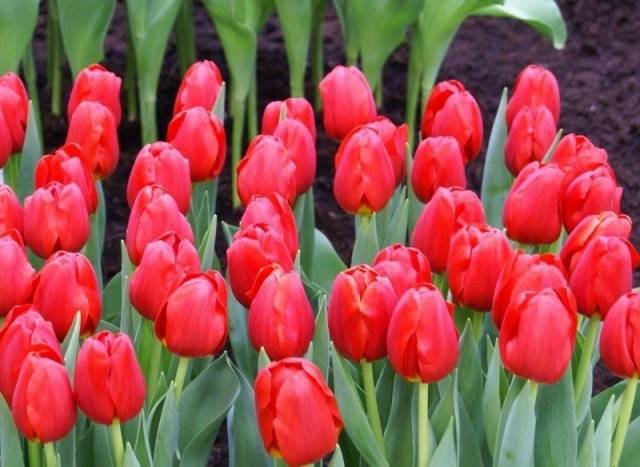
This includes the Triumph tulip classes (it has a high peduncle, up to 70 cm and large flowers with different colors - there are even such interesting extremes as dark purple, almost black and snow-white flowers) and Darwin hybrids (they are even taller, up to 80 cm, mainly bright scarlet or reddish, have increased immunity and tolerate frost well in spring).

Tulips Triumph
Group 3. Late flowering tulips
This includes more different classes.
Simple late tulips are distinguished by their high, up to 75 cm, "growth", large size flowers in the form of a glass, can be of almost any color - there are black and burgundy shades, as well as two-color variations, well adapted for reproduction.
The lily-colored class has a graceful flower shape with neat pointed petals, the arrow is not very high, about half a meter, the color can be very diverse.
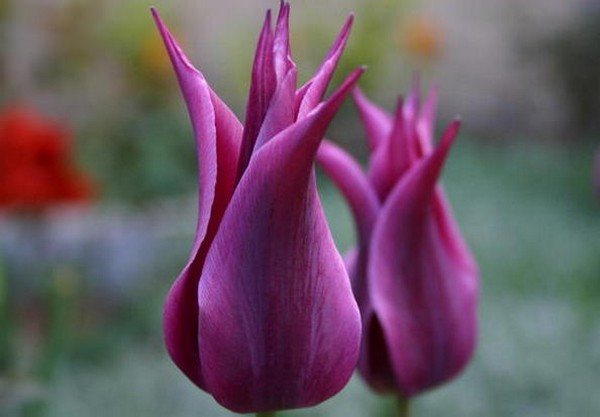
Lily tulips
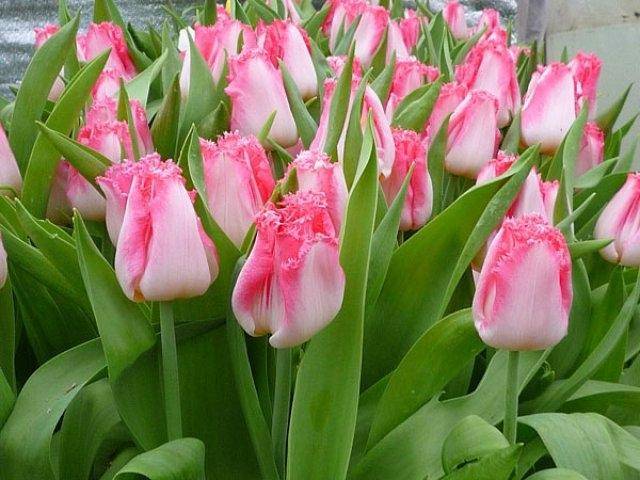
Fringed tulips are distinguished by one unifying feature - a needle-like "fringe" along the edges of the flower. Reach a height of 80 cm, the color is very different, the spectrum is very wide.
Important! The shape and size of the flower depends primarily on the species that was used in the breeding of a particular variety.
Green tulips are distinguished by a green petal back throughout the entire flowering period. Very fashionable varieties today. Height about half a meter, flowers up to 10 cm, narrow leaves.

Green tulips
The class of Rembrandt tulips is the smallest, it contains variegated subspecies. Neat large, up to 9 cm, flowers, have spots that look like strokes from a brush. Height up to 70 cm.
Parrot tulips are a real exotic. The rippled fishnet edge of the color really resembles bird feathers. The flowers are very large, in some specimens the size of the flower reaches 20 cm in diameter. The color is different, the height is a little more than half a meter.
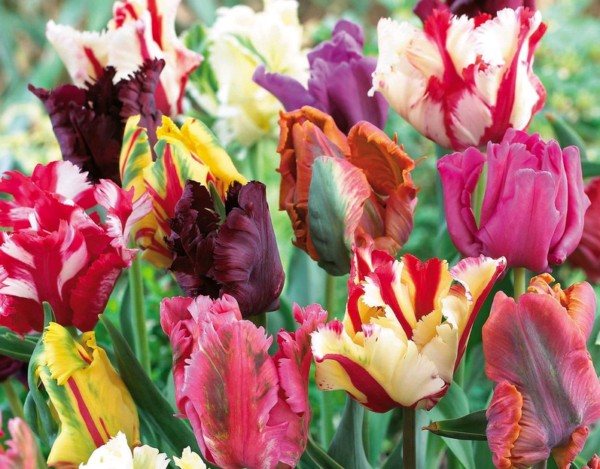
Parrot tulips
Important! Late double tulips are somewhat reminiscent of peonies. The length of the peduncle is about 60 cm, they are larger than ordinary double tulips. There are two-tone variations.
Group 4. Species and botanical tulips
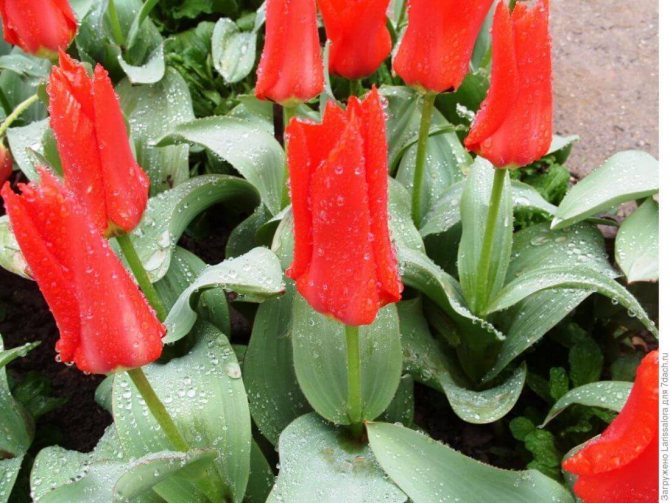
The Kaufman tulip class is distinguished by its small stature and surprisingly early flowering. The size of the flowers is large, with an interesting star-shaped shape. They are often two-colored, covered with interesting patterns of purple hue on the leaves.
Foster's tulips are very large, goblet-shaped, the flower length is about 15 cm, the height of the peduncle can reach half a meter. The color is usually bright, warm, orange or red. It can be pinkish, lemon. Leaves are dense, saturated, slightly marked with purple.
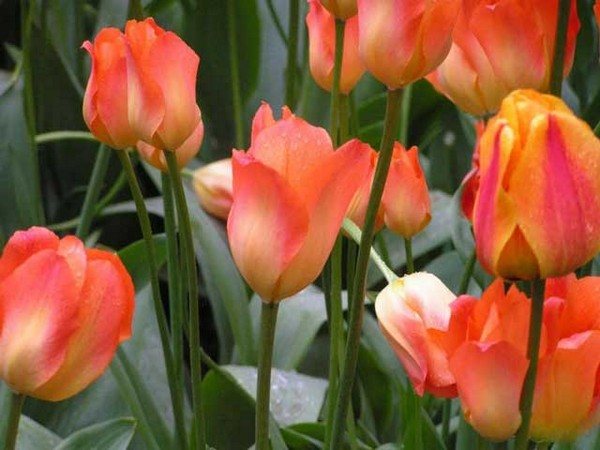
Foster's tulips
Greig's tulips reach a small (up to 30 cm) growth, the flowers are large, the base is wide, the foliage is folded back. Colored in shades of red, can be two-colored with speckled leaves.
And finally, the last class is botanical tulips. These include all tulips that grow in the wild. They usually bloom early, and the color can be very different.
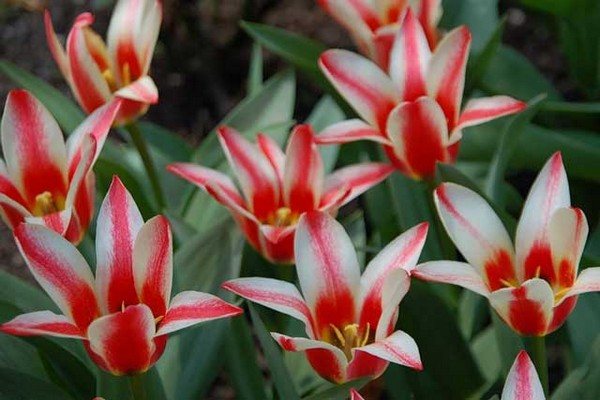
Greig's tulips
Important! Outside the classification are terry-fringed tulips - they are densely double, with an interesting edge, and can be of various colors.
Pests
In addition to bacterial, viral or fungal diseases, tulips can suffer from pests:
- In wet weather, young shoots and bulbs are threatened by slugs and snails. Tobacco dust is effective against them.
- Medvedka, beetle larvae gnaw roots and bulbs. For destruction, digging and loosening of the soil is effective. Traps are placed on the bear.
- Wireworms (click beetle larvae) damage tulip bulbs by gnawing through the tunnels. This beetle prefers areas with high soil acidity overgrown with weeds. Therefore, it is quite easy to get rid of it - remove weeds, add ash, lime and ammonium nitrate to the soil, loosen and dig the area more often.
- Greenhouse aphids. Drinks juice from young leaves and peduncles, which greatly weakens the plant. But the most unpleasant thing is that aphids are a carrier of many viral diseases. Aphids are destroyed with pesticides.
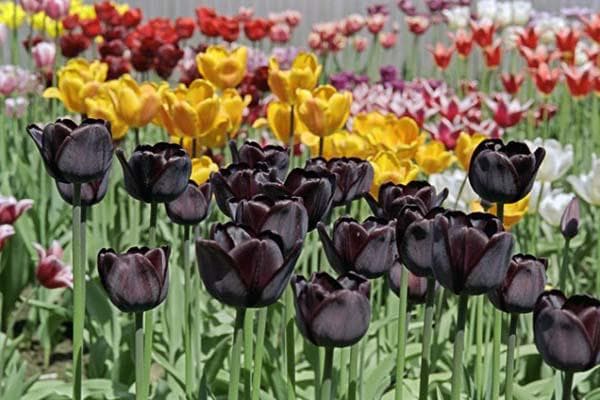
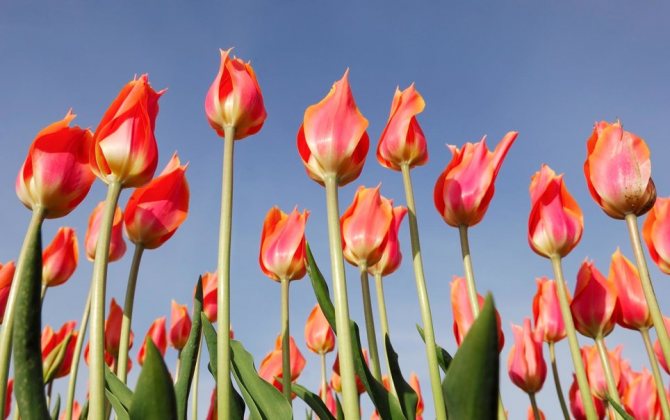
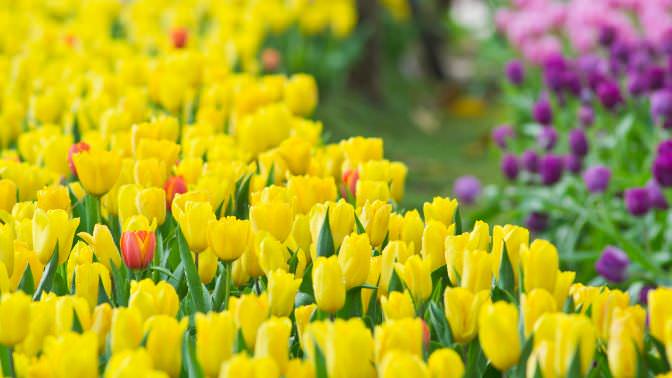
Various varieties of spring flowers
But if you follow all the tips and recommendations correctly, then it will not be difficult to grow tulips in your summer cottage, whenever you decide to plant them.