
But tulips reproduce not only by bulbs. You can collect tulip seeds after they are ripe and grow new flowers from them. Amazing? Meanwhile, there is nothing mysterious or super complicated in this, only the growing process takes many times more time. Yes, and this is a troublesome business.
The only incentive to seed tulips is the fact that new flowers can be of a completely new shade and even variety. This is how breeders develop completely new bulbous varieties. And they need not one or two seasons for this, but from 5 to 12 years. After all, tulips grown from seeds bloom only for 4-5 years, and their color, as a rule, is faded, dim.
With each new season, young plants are gaining more and more colors, their color becomes richer, and the bud is larger. 12 years after sowing the seeds, these wonderful flowers acquire their brightest hue, as well as a permanent bud and petal shape.
How tulips breed
The most common way is reproduction with detok - small bulbs that start up an adult plant. You can also propagate these flowers using seeds, but this is how they are mainly bred by breeders. When propagating flowers in a vegetative way, you do not need to think about various factors, such as:
- weather,
- activity of insects and pests, etc.
Young bulbs can be planted in autumn and spring. However, many people choose to plant tulips in the fall. It is believed that after overwintering in natural nature, bulbs germinate better in spring and bloom well.
But if you plant the bulbs in the spring, then flowering can not wait. Not all young tulips have time to form inflorescences before summer. Of course, you can plant flowers in spring, but it is worth remembering that in this case they will most likely bloom only after a year.
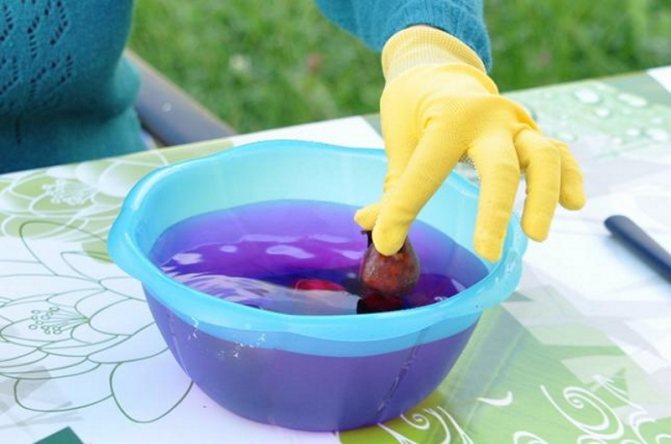
When planting in the spring, it is advised to use a special technology. To do this, first, the bulbs, ready for planting, are placed in the refrigerator for a day, then washed with a weak solution of manganese and after that they are planted to a depth of about five centimeters.

Can tulips be planted in spring?
Many people wondered if it was possible to plant their favorite flowers in the spring. It is known that the best time to disembark is autumn. However, experienced gardeners claim that these flowers can be planted in spring as well. But do not forget that the flowering period of tulips planted in spring will be much shorter, and the buds will be smaller than usual, and some of them will not bloom at all.


What soil is needed for tulips
Plants are quite unpretentious, however, they like comfortable conditions. In order for the spring development to take place faster, it is worth taking care of the soil in which the flowers grow.
It must contain enough nutrients and be fertile. In addition, it is necessary that it has good enough physical properties, such as air and moisture capacity.
More suitable for successful cultivation is a sandy loam soil type or slightly loamy. In addition, it must be cultivated. If the acidity of the soil is increased, then lime should be added to it. Groundwater should be not higher than 60-80 cm.
Sometimes tulips are susceptible to various diseases and so that this does not happen, they are returned to their original place when planting only after five or six years. Also, some varieties will not mix with others if several bulbs are lost somewhere during digging.
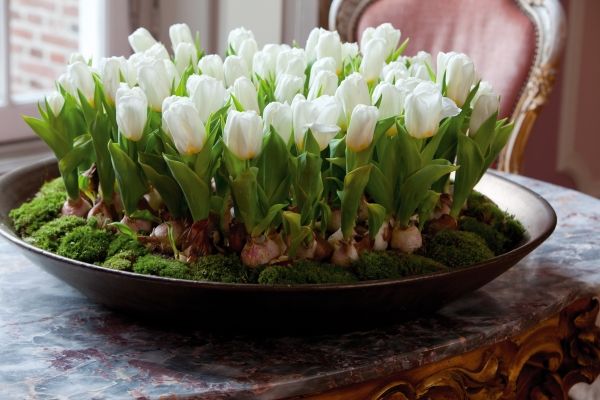
About growing tulips in a box, pot, basket
There is one more way to grow tulips. It is associated with open ground, but involves the use of a latent container.
Growing tulips
Suvorov's bow - growing and care
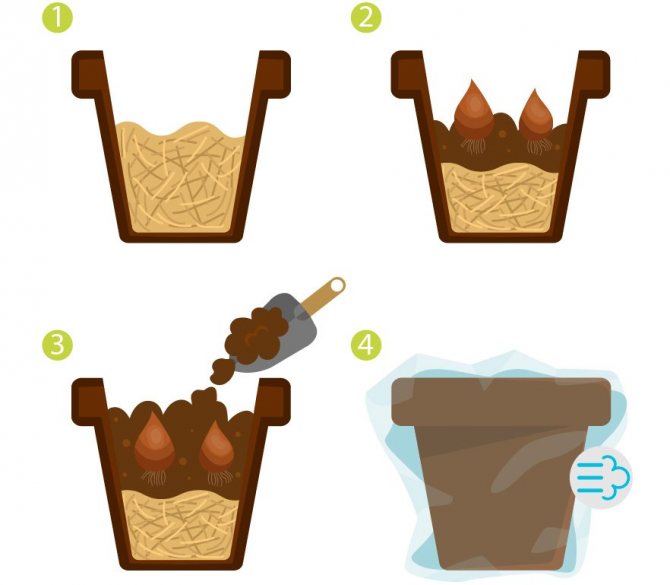
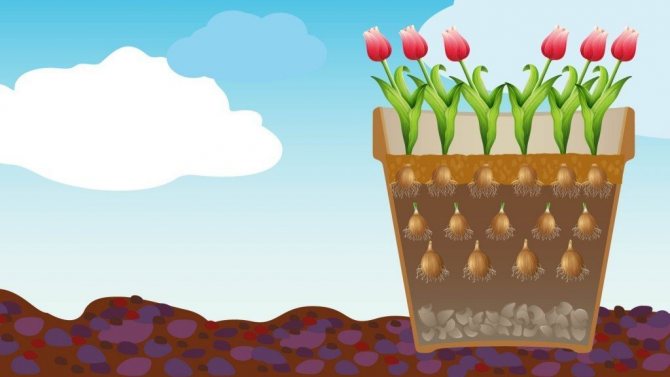
The bulbs are laid in a specialized device - a basket, which you can purchase or make yourself. This could be:
- homemade device from plastic bottles, containers;
- plastic or wooden boxes;
- non-metallic basins.
Important! Tulips in a box can even be grown, the main thing is that the container has perforations and sides for ease of use
The undoubted advantages of using such equipment are as follows:
- it is possible to grow tulips in the poorest soil, it is enough to fill the container with the necessary amount of a suitable substrate;
- the likelihood of damage by rodents or pests will be significantly reduced;
- this facilitates the summer harvesting of faded plants, since it is enough to remove the container from the soil and leave it in another place for further ripening of the bulbs, thereby saving the flower bed from the unattractive wilted remains of the shoot.
Growing in a basket or container is no different than growing outdoors.
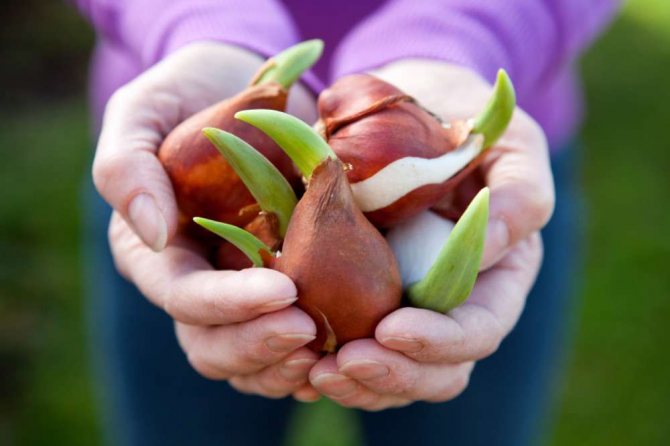
How to prepare bulbs for planting
The quality of their germination in the future depends on how well and correctly stored the bulbs.
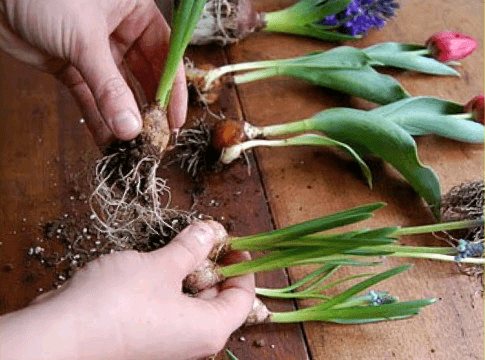
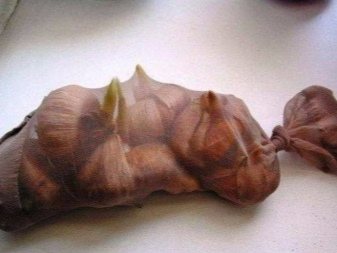
If you start planting tulips in the autumn, then around the end of July you should start digging out their bulbs and separate the mothers from the babies.
Then the bulbs must be peeled and dried, and then sent to storage. They are stored for about a month at temperature 20 degrees.
Then they are moved to a colder room, where the temperature will be kept at about twelve degrees, and there they will be there until landing.
Correct planting of tulips
For beginner florists and those who are interested in how to propagate tulips, it is important the question of the correct fit.
It is very important to choose not only the right time for planting, but also the right place. It should be noted that tulips are light-loving plants and areas with good lighting are excellent for them. But at the same time, they do not like drafts, so wind protection should be provided.
Best for these bulbous flowers sandy loam soil suitable... Their development, growth and flowering are very well influenced by the preliminary application of wood ash and rotted compost as fertilizer. However, it should be noted that manure fertilizer for these flowers is not very suitable due to the presence of a large number of fungi in it, which can negatively affect it, causing fungal diseases.
Plant the plants quite deep... Large ones can be planted to a depth of fifteen centimeters, small ones up to ten. After planting, they are watered with hot water, with diluted in it potassium permanganate... This is necessary for the prevention of various kinds of diseases.
Outdoor flower care
Tulip care is simple and it can already be carried out from the moment the first shoots appear from the ground. If some bulbs have not sprouted, then this may mean that they are sick, so the first thing to do is to remove the bulbs that have not sprouted. This will help prevent the spread of the disease to healthy and emerging sprouts.
The tulip loves moisture, but the structure of its root system does not allow it to get moisture from groundwater, so you should take care of regular and timely watering.It is especially necessary to observe a regular watering regime during the period of bud ovary and flowering. Water the tulips abundantly for about two weeks after the flowers have faded.
Water must penetrate to the full depth of the roots. It follows from this that on average it is necessary to pour from 10 to 40 liters of water per 1 m². Only in such a way that water does not fall on the leaves, otherwise burns may form on them.
The tulip needs weeding and loosening on a regular basis, so do not forget about loosening this area even when the flowers fade. This is best done after a heavy watering, when the soil is moist and soft. This makes the weeds easier to remove.
Weeds negatively affect the plant. They take nutrients from the soil, thereby depleting it and tulips begin to grow worse. But loosening helps to get rid of them.
So that weeds do not appear and they do not have to be weeded out, you can mulch the soil. In addition, you should remove those flowers that have already wilted so that the plant does not waste energy on their growth.
What to do when tulips are blooming
After these wonderful flowers have bloomed, it is necessary to remove the wilted flowers. Abundant watering should be continued for about two more weeks. Also during this period they can be fed, because at this time their bulbs begin to accumulate nutrients. Top dressing can be done with:
- phosphorus-potassium fertilizers with the calculation of 30-40g per 1 m2, for example, aquarine, solution, crystallin;
- fertilizers with chlorine and nitrogen should not be used.
When the tulip foliage turns yellow, you can cut it off. you shouldn't do this before. If the foliage is cut before it turns yellow, the bulbs may stop developing and tulips will not be able to propagate later.
When the foliage of the tulips turns yellow completely, they can be dug up. Usually, by this time, the bulbs are already mature enough and ready for the subsequent propagation of tulips. In addition, the children have not yet disappeared, which means it will be easy to separate them on their own.
Of course, it is difficult to name the exact time of digging out the bulbs of these flowers. This time may differ for different varieties. But the main and main landmark in this is the yellowed color of the foliage. This is what you should pay special attention to when preparing bulbs for propagation.
Thus, propagation of tulips is not difficult at all. The main thing is to dig them up and plant on time, as well as follow some simple rules for caring for them, and then they will certainly delight the grower with their splendor.

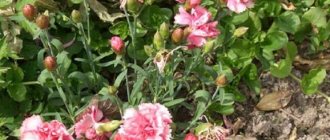
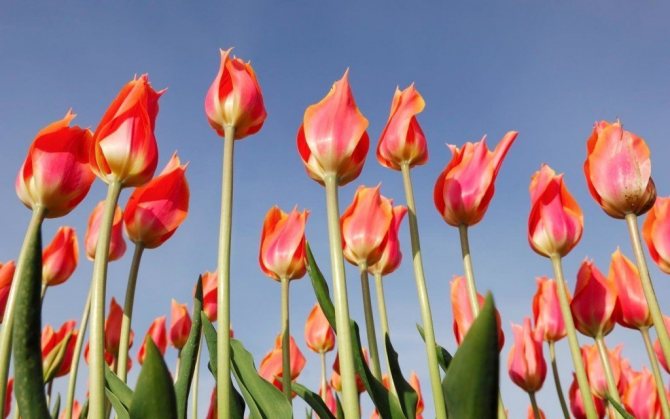
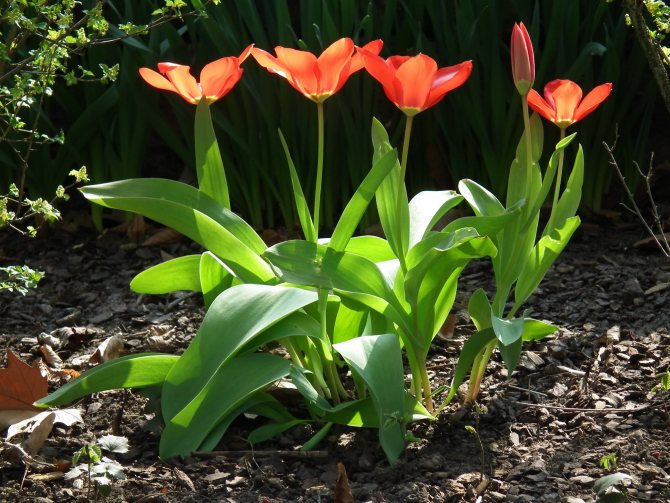
One of the earliest flowers in the flower beds of personal plots and in the front gardens are tulips - bulbous herbaceous lily plants. Thanks to the efforts of breeders, tulip fans can choose tulips of early-flowering, mid-flowering, late-flowering species and flowers from a mixed group of hybrids for their design.

Classification of certain types of tulips
Rembrandt tulips
- The initial class includes early common varietal species. Their flowering begins one of the first. As usual, by the end of April. They are not very high, reaching forty centimeters. The ovary is presented in the form of a glass, it is no more than eight centimeters. This group is distinguished for the most part by warm shades in colors. On warm summer days, the flowers open completely.
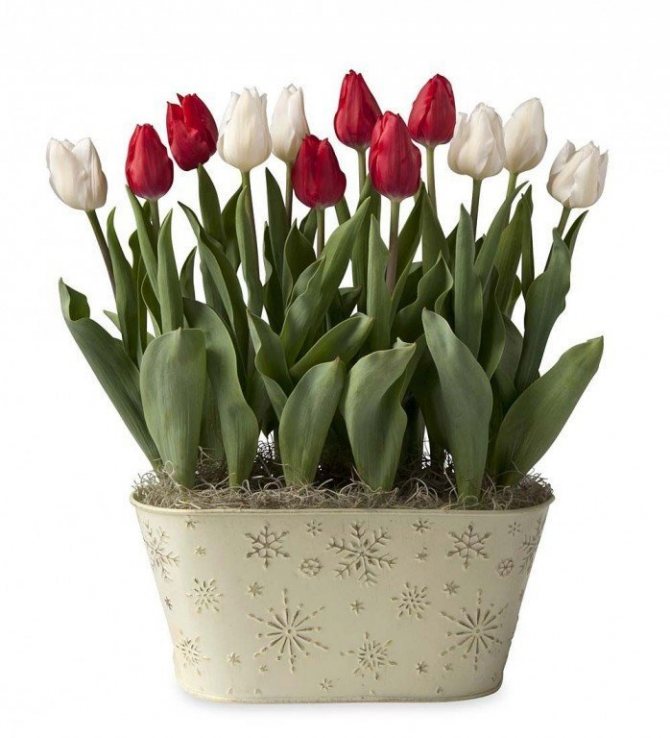
- The second class includes early terry species. This flower has a dwarf type, in height it often reaches a maximum of thirty-five centimeters. They have a large double bud. They bloom a week later than early varieties, but their flowering period is long. This group is especially preferred by landscape specialists due to the short stem of the plants. They grow straight, do not lean to the ground. They look compact. And large-sized flowers create a colored blanket from a flower bed.These tulips are not suitable for cutting and forming bouquets. They are advised to be planted in separate flower pots and to create flower beds with low-growing plants, for example, with crocuses. In such a company, they look perfect. They breed well.
- The third class includes the Triumph tulip. Its color range varies and comes in both milky and rich bluish colors. The flowering period is in April and May and takes place for a long time. The pouring in the shape of a glass does not fully dissolve and therefore looks especially elegant. The bud is perfectly preserved in bad weather, in windy weather conditions. It grows up to sixty centimeters in height. Such versatile flowers look great in landscape decoration. Perfect for making bouquets.
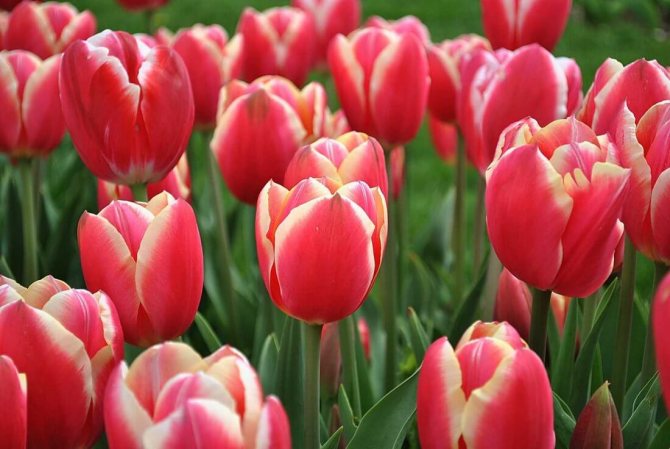
- The fourth class includes hybrid varieties. These plants grow up to eighty centimeters. Goblet ovary, as usual, crimson or pinkish tone. There are also varietal species that combine both shades. They bloom by the beginning of May. These are cold-hardy representatives of the flower world and perfectly survive cold snaps on spring days. After cutting, flowers retain their exterior for a relatively long time and are excellently transported. Their foliage is wide. Given this feature, the gardener is advised to control the intervals between plantings when planting. Flower reproduction is excellent. They are late blooming.
- Late simple tulips belong to the fifth class. They are distinguished by strong and elongated flowers, reaching a height of seventy-five centimeters. Large size pouring in the form of a glass. The color can vary from milky to gray. Blooms in the second decade of May. In this class, there are varietal species in which from three to five flowers are concentrated on the peduncle. Reproduction is of high quality.
- The sixth class includes lily-colored species. They have a rather unusual exterior, they are similar to lilies. They reach seventy-five centimeters in height. This specimen is of a goblet, elongated upward format. Sharp petals bend outward. We can say that such a flower has a "waist". The color of the buds has a huge variety of different tones. The flowering period is often in May. Lily-colored representatives are incredibly relevant for gardeners. They look amazing in bouquets. But their reproduction is at a low level. One onion produces a maximum of three.
- Seventh grade. Such plants are distinguished by the presence of fringes along the edges of the petals. Fringe looks like needles. They come in different sizes. The height of the presented flower reaches eighty centimeters. Such plants bloom in May. Varietal species have been bred, in which needles even cover the wrong side of the bud. For the most part, tulips of this species are light in color. They look great for the whole flowering period.
- Eighth grade - green flowered. Their peculiarity is the presence of green stripes or blotches on the bud. They bloom in May. Reach half a meter. The stem is especially strong, the leaf of the plant is narrow. There are varietal species with a whitish strip on the foliage, it gives the flowers even more charm. The presented class is distinguished by special resistance. The bud is goblet-shaped, up to seven centimeters high. The blossoming bud is fully revealed. Its tone is gaining even greater saturation. Flowers become more spectacular and are excellent for cutting, for planting in decorative flower beds.
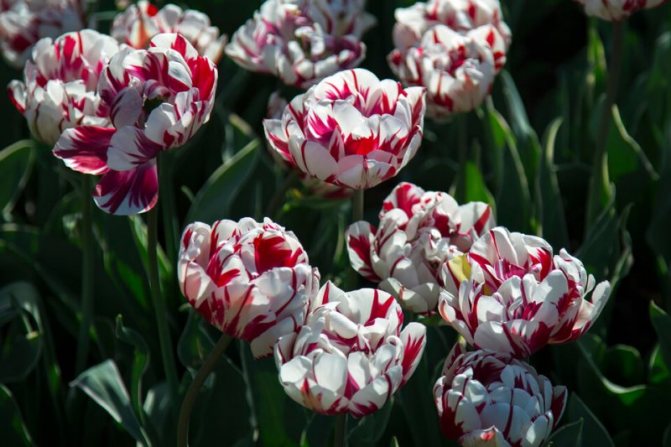
- Rembrandt belongs to the ninth grade. The plant is constantly bright colors, with a pattern on the petals. Stripes on light petals range from chestnut to charcoal. These are spectacular and beautiful flowers. Only one of their ovaries is capable of reaching seventy centimeters in length. They are cultivated without fail in unprotected soil. Today, this varietal species of tulips is considered rare, since it runs the risk of being plagued by diseases.All plants are carefully checked for disease. Original plants can be purchased only in special nurseries.
- The tenth class includes parrot flowers. In the shape of the bud, these flowers are especially exotic, and the shade can even be black. A bud with waves, ragged edges and petals. In some varietal species, the ovaries are huge. Tones range from milky to charcoal. Reach heights up to sixty centimeters. Their flowering period is at the end of May, but there are flowers that bloom earlier. These flowers are perfect for making a bouquet.
- The eleventh class includes late terry plants. Flowers with buds up to ten centimeters. They are terry and rounded. Their exterior resembles a peony, they are called peony tulips. They bloom two weeks earlier and bloom for a longer period of time, approximately three weeks. Strong and tall plants, about sixty centimeters tall. The color palette is very diverse. They do not tolerate heavy rains or strong gusts of wind. Good for cutting and forcing.
- Kaufman belongs to the twelfth grade. The earliest specimens bloom in April. Their height reaches twenty-five centimeters. The ovary is especially large, in the form of a star, with bending petals. The color palette is different. The foliage of plants may have gray stripes.
- The thirteenth class includes Foster varieties. They are larger than the Kaufman species. Able to grow up to thirty centimeters, stems in the form of a glass. When a flower opens up to its fullest, it becomes like a star. The colors are varied, but often scarlet. The foliage of the plants is wavy and large. Bloom by the end of April.
- Fourteenth grade is a subspecies of Greig. Plants are small up to half a meter. The color is motley, the large buds are goblet, the petals are bent. Flowers are scarlet or orange. Such tulips bloom by the last decade of April. Flowers are able to maintain their shape for a long time. The foliage of tulips is especially interesting, there are dark stripes on it in the form of a peculiar pattern. These flowers delightfully adorn any landscape project, ideal for an alpine slide.
- The fifteenth class includes a wild species. The presented class contains such flowers that can be found in the wild. Such peduncles are low and bloom early. The buds are small, but the shades are very diverse. The disadvantage of such plants is that they reproduce poorly. The height of this species reaches fifty-five centimeters. The oval-shaped bud reaches ten centimeters in size. The coloration is magnificent: the main shade is lemon with the presence of a pattern of motley scarlet stripes. Blooms in the last decade of April. Reproduces excellently and shows itself in the garden and forcing.
Seeds for propagation of tulips
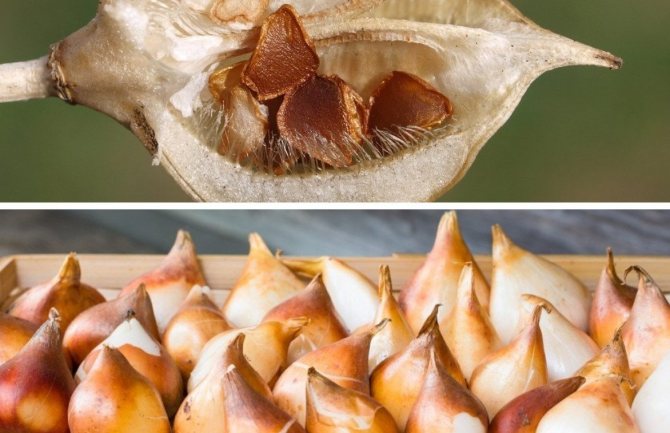
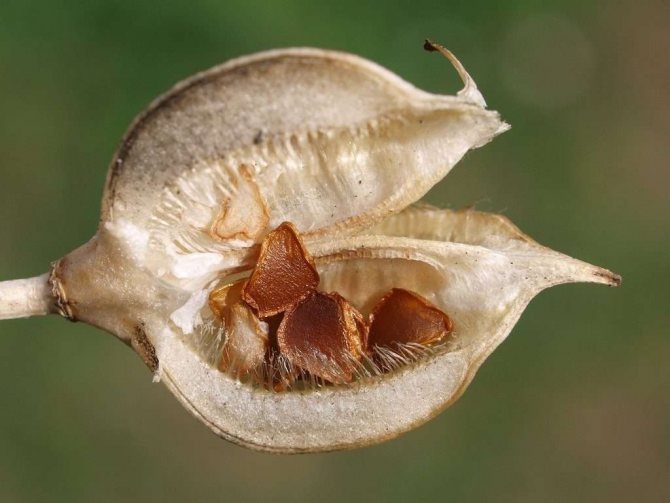
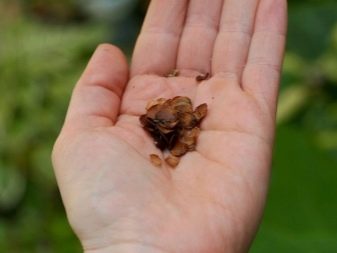
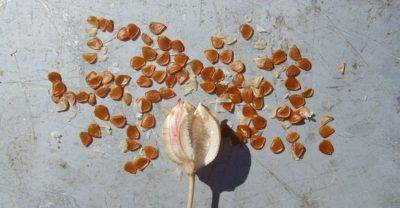
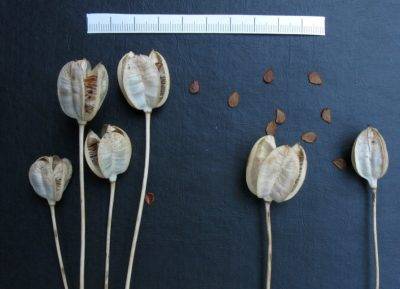
Tulip seeds are contained in the fruit - the capsule, which is formed after flowering in many varieties of the crop.
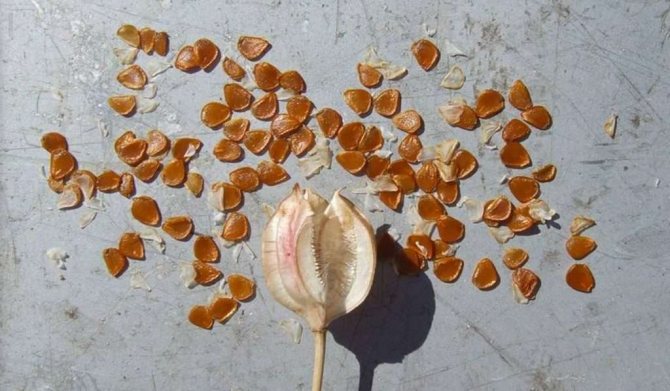
The box is round or elongated in shape, and from 2 centimeters to ten in size. Plates of rather large seeds are stacked in three compartments of the fruit and are ovoid or triangular in shape.
Seed propagation is used by breeders to create new hybrids of liliaceae. In order to carry out artificial pollination, the selected harvesting plants must bloom at the same time. First, the anthers are removed from the flowers, and after two days the pistil is pollinated. After another 2 days, pollinate again and put insect protection so that they do not pollinate the plant again.
When ripe, the capsules begin to darken and become covered with cracks. In order for the seeds to be suitable for reproduction, in early August, the boxes should be cut off and placed for ripening in cardboard or wooden boxes and placed in a warm and dry room. The seeds are stored until autumn in a dark, dry place with an air temperature of about + 5 ° C. To get a good bulb from seed, you need to be patient, since the growing period from seed to blooming tulip is 5-6 years. The seeds should not be damp, frozen and damaged by pests.
How to grow tulips from seeds at home:
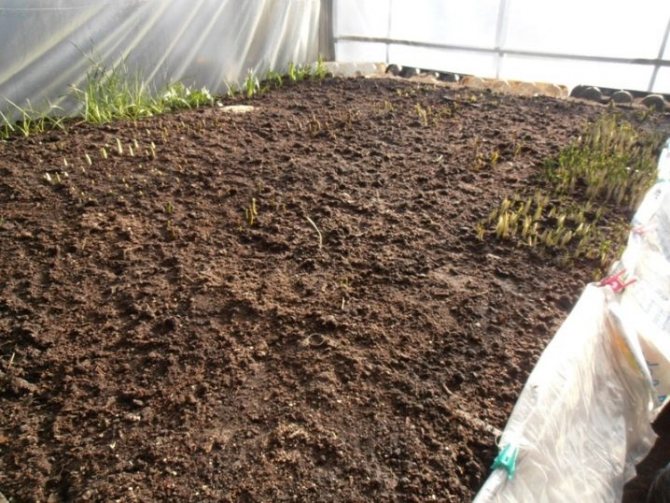
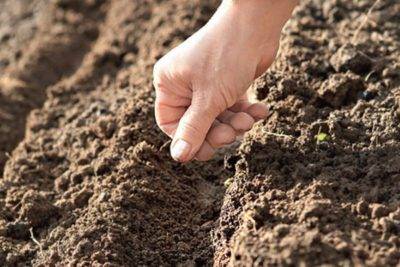
- In the garden, they choose a certain place for sowing and at the end of September they dig up the soil there along with humus. According to its structure, loam is considered the best soil for seeds. It is recommended to sheathe the garden bed with boards. Sand is sprinkled on top of such a box with a layer of 2-3 cm. By mid-October, seeds are sown densely on the garden bed in straight lines. Sprinkle them on top with soil and sand and leave the bulb to form until spring.
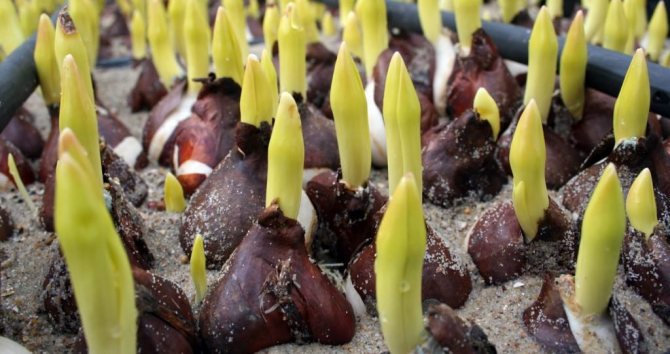
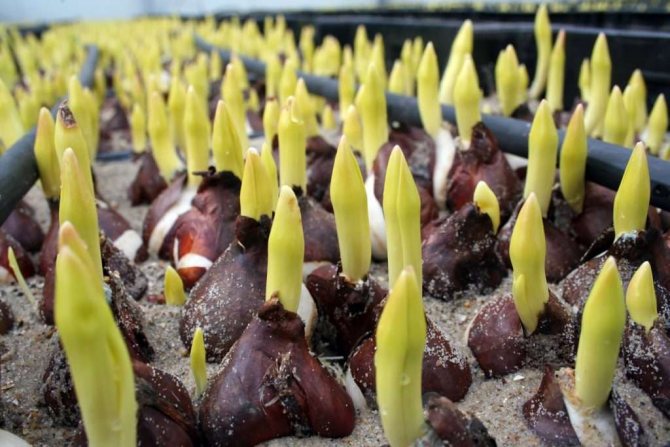
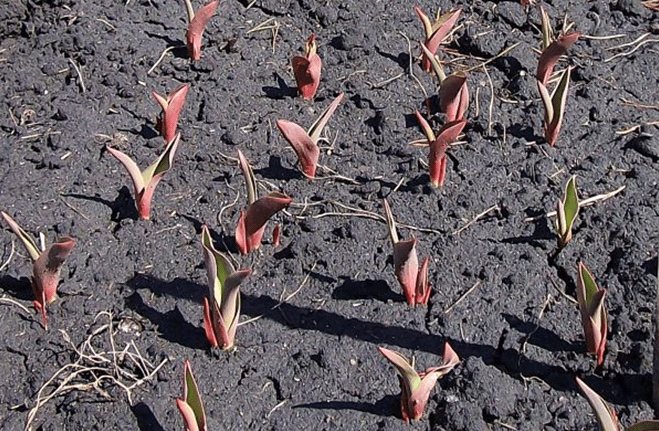
- As soon as the snow melts and the ground warms up a little, it will be possible to notice green sprouts in the form of a loop with the rest of the seed above the soil surface. In summer, a young tulip will look like a lonely, narrow leaf, rolled up in a tube, at the end of which there will be only one root in the ground. After the second half of June, the leaf will dry out, and a small onion-scale up to 2-3 mm in diameter will remain in the ground. These bulbs are not dug up, but they are also sprinkled with earth with sand and humus by 5-6 cm for winter.
- Next spring, flat leaves with 2 roots will grow. Instead of small ones, the following bulbs with a diameter of up to 1 cm will appear.They are not dug out, and they are also sprinkled with earth with a layer of 5-6 cm. In the spring of the 3rd year, seedlings germinate in large and flat leaves, and new bulbs reach a size of up to 2-2.5 cm in diameter and they will have 2-3 babies.
- In July, replacement bulbs with children are dug up and kept in a dry place until autumn. In early October, they are placed in the ground to a depth of 12-15 cm, at a distance of up to 3-4 cm from each other. The grooves are sprinkled with sand and moistened with salted water. On top of the beds, mulch from humus or rotted manure is scattered.
- The next season, the procedure for digging out and planting replacement bulbs and children is repeated again. Replacement bulbs obtained from seeds will bloom in 5-6 years. And their daughter offspring will gain strength for one more season, and develop until the period of budding and flowering.
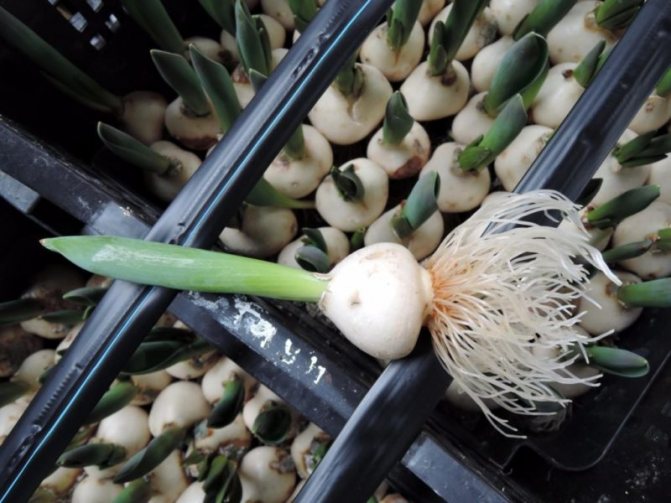
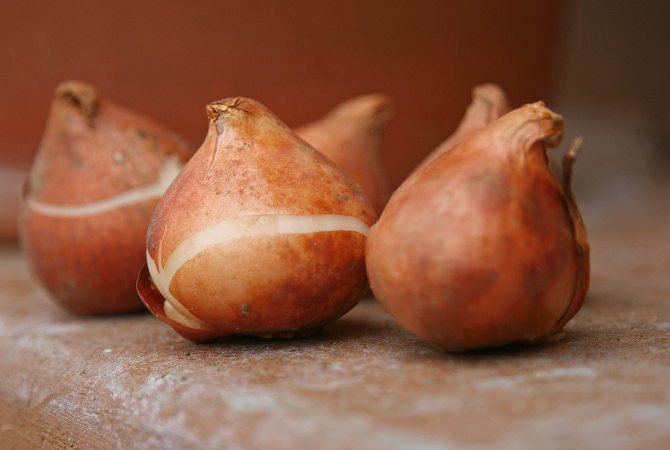
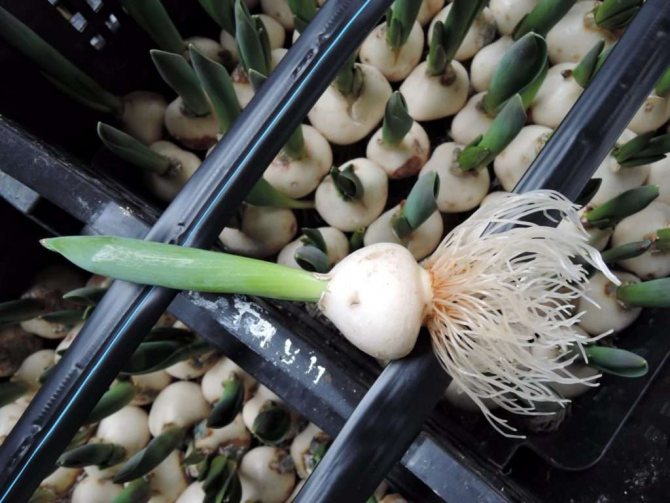
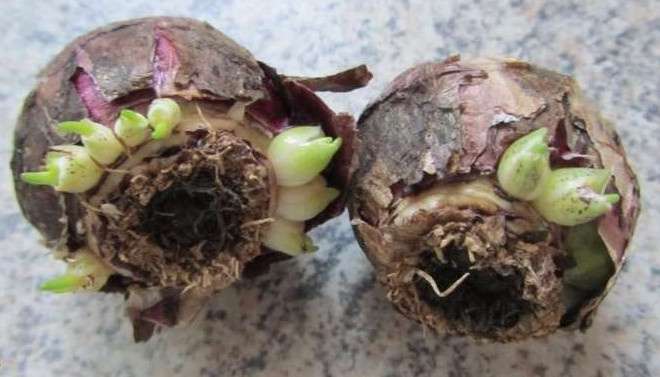
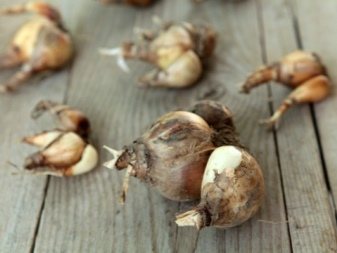
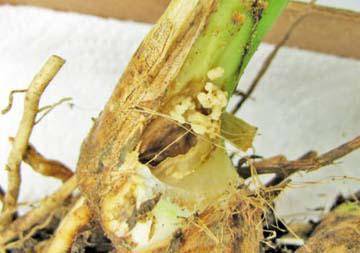
Bulb structure
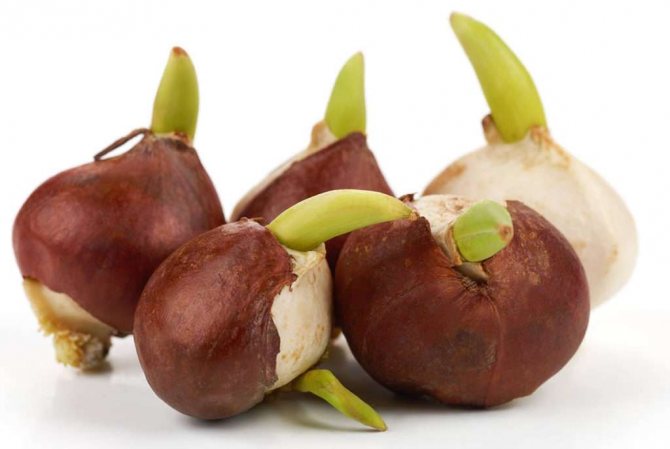
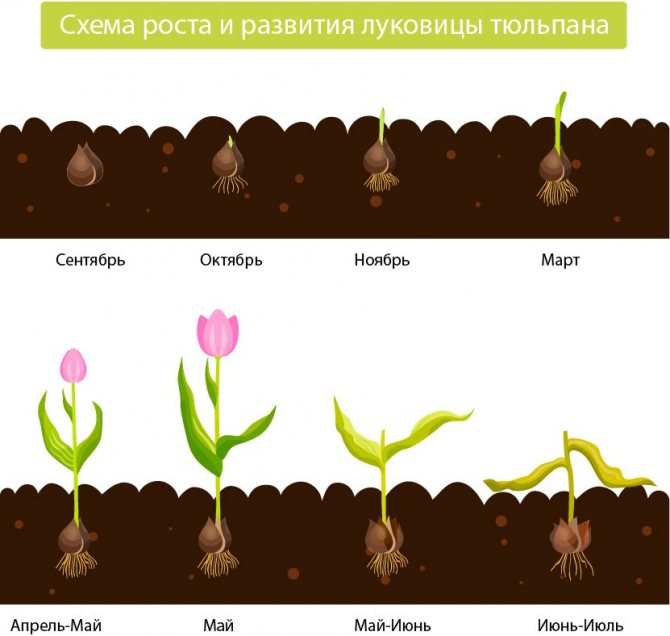
Tulips bloom in May, a short growing season is replaced by a dormant period, during which the formation of young bulbs takes place. In the fall, roots appear on them. The generation of bulbs changes annually. The bulb is a reproductive organ and a source of nutritional ingredients for a young and developing plant. The body of an organ is a bottom or a modified disc-shaped stem + storage scales (leaves) + integumentary scales.
It is the storing scales that concentrate the supply of food. And the leathery integumentary scales protect the bulb from external influences, damage by pests, diseases, and prevent excessive moisture from evaporating. The new bulb is protected by last year's shoots, the remnants of which have not been removed, and the scales of the mother's bulb, which gave birth to a new bud. In the first year, it will form inside the mother's body, and in the second year, it will turn into a bulb: between the layers of storing scales of the mother plant, the kidneys of the daughter bodies are formed.
Of these future bulbs, the central one will be replacing, which develops at the base of the tulip shoot. The laying of peripheral baby bulbs will occur in the sinuses of the integumentary scales. Their number will depend on the number of integumentary scales that feed the buds, on the size of the uterine bulb and on the variety. It lays the central replacement daughter kidney later than the peripheral buds, but it forms quickly and becomes the largest, hibernates inside the uterine bulb, and the next year it separates, lays leaves and a flower bud inside itself.
- in the summer-autumn period, the rudiment of the stem and flower, new buds are formed inside the young body of the bulb;
- after the winter season, a sprout and new bulbs appear from it, and it (maternal) dies off in the spring;
- tulips do not degenerate due to annual bulb renewal and the cultivar is preserved.
reference... Not all daughter bulbs develop, a few remain in the primordial state. This is easy to find when you dig at the base of the mother bulb, where there are dead scales. Next year, in the fall, a nest of daughter bulbs will be formed in place of the dead scales.
Tulip care
You need to start leaving in early spring. If you have not forgotten and mulched the beds with bulbs, the mulch should be removed. The garden bed will warm up faster, and tulips will bloom earlier. At the time of the emergence of shoots, see if there are bulbs that have not hatched, and which of the shoots have signs of disease. All infected bulbs should be destroyed immediately so that the disease does not spread to healthy tulips.
The soil around the sprouts should be loosened throughout the growing season, it is better to do this after rains and watering. Watering should be moderate before buds appear. Do not allow the soil to dry out.
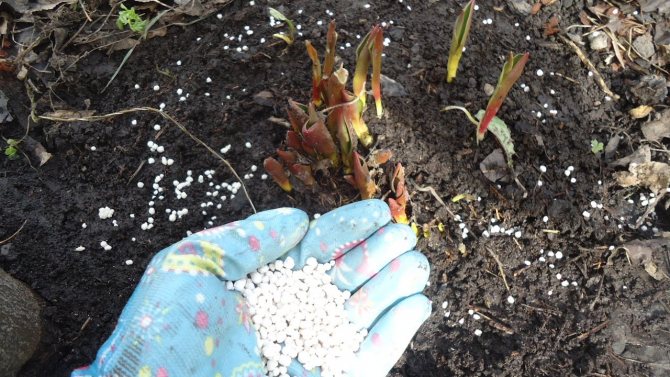
Even if you have good fertile soil, additional fertilizing will not be superfluous. It is better to feed with fertilizer diluted in water. If dry feeding is more convenient for you, remember, when sprinkling tulips with dry fertilizers, you need to make sure that the leaves of the plant are dry, otherwise burns will appear on them. In addition, tulips need to be watered after using dry fertilizer.
The most essential fertilizers for tulips are nitrogen, potassium and phosphorus. Nitrogen helps the leaves grow and develop. With its lack, the stems of tulips will be thin, and the buds will be small. Potassium increases winter hardiness, helps to increase the number of bulbs. Phosphorus makes the root system stronger and stimulates flowering.
The first time to fertilize should be when sprouts appear above the ground. The second is during the budding period. The third is at the time of flowering. Remember that the composition of fertilizers must be balanced so that there is no excess of nutrients.
Bulbs for propagation of culture
Tulips are propagated by bulbs of the following 4 groups:
- I - early flowering: simple and double early;
- II - mid-flowering: Triumph, Mendelevs (early ripening hybrids), Darwin hybrids;
- III - late blooming: Liliaceae, Darwin, double and simple late Cottage, parrots and Rembrandt;
- IV - a modular class that unites tulips of introduced species, for example, varieties and hybrids of the tulip Kaufman, Foster, Greig.
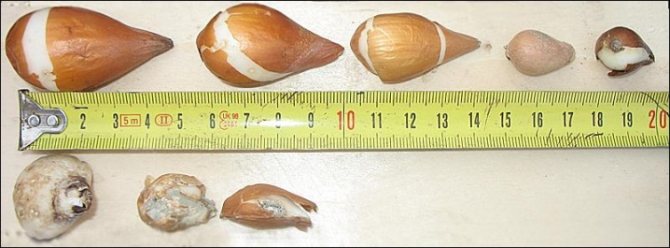
Bulb size, weight and quality are always different. After planting, the largest will bloom in the spring: replacing and developed at the base of the second and third storage scales. Small ones need to be grown so that they bloom in 1-2 years. The bulbs are sorted into groups with the appropriate diameter:
- I - 4 cm and more (large, extra - 12+);
- II - 3-4 cm (large, 1st analysis - 11/12);
- III - 2-3 cm (medium, 2nd analysis - 10/11);
- IV - 1-2 cm (small, 3rd analysis - 9/10);
- V - less than 1 cm (small, not sold in stores).
Large bulbs are planted in the ground for forcing and cutting, medium and small ones are grown.
reference... In small non-flowering groups, the replacement bulb at the end of the growing season sinks into the soil below the bottom with the presence of roots and baby bulbs, which will remain at the planting level. Flowering bulbs do not have such a feature: turning from non-flowering to flowering, the replacement does not go deep into the ground.
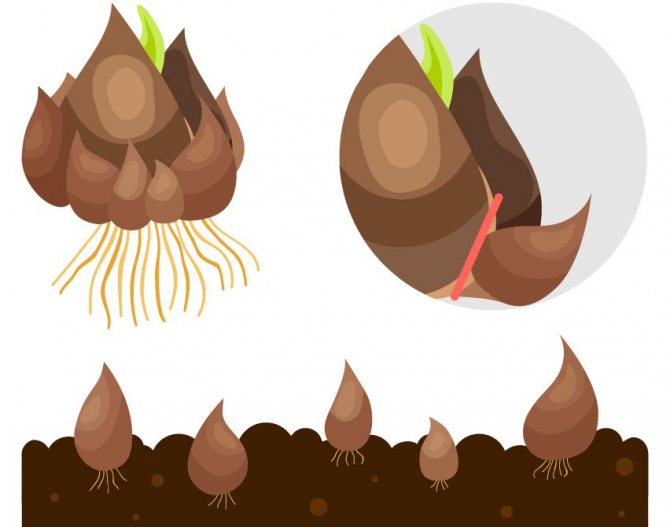
The process of planting bulbs for culture propagation
For the bulbs to take root, the soil temperature must be - 5-7 ° C warm. In the steppe zone, they are planted after October 15, so that the root system is powerful until the soil freezes. It will help the plant to winter successfully. Root development occurs within 30-45 days at a soil temperature of 6-10 ° C heat. If it is higher, it will have a harmful effect on the plant, and if it is lower, up to 3 ° C of heat, then rooting will not occur. Therefore, it is inappropriate to plant tulips later on November 15: the plant will get sick and will not bloom in the spring at the right time. Finish planting 3-4 weeks before the onset of frost.
If the bulbs are planted in the last days of September, then in the event of a prolonged warm autumn, they can germinate, which can destroy the plant during frosts. Bulbs with a well-rooted system will more easily survive a frosty winter without additional shelter. If they did not have time to take root well, then it is imperative to cover them for the winter.
Before planting, the planting material is examined, the sick and damaged are removed. The larger the specimen, the deeper it is planted. Large and medium-sized ones deepen into the ground by 12-14 cm, no deeper - 15 cm, as the number of children will decrease, and small ones - by 6-8 cm. When deepening below 15 cm, the development of stolons will occur - deepening roots, which are pulled deep into the bulb. If humus is introduced into the soil, then these works are carried out 6-8 days before the planting material is buried in the ground, since the roots of the bulb can burst when the prepared soil subsides.
Seed collection and soil preparation
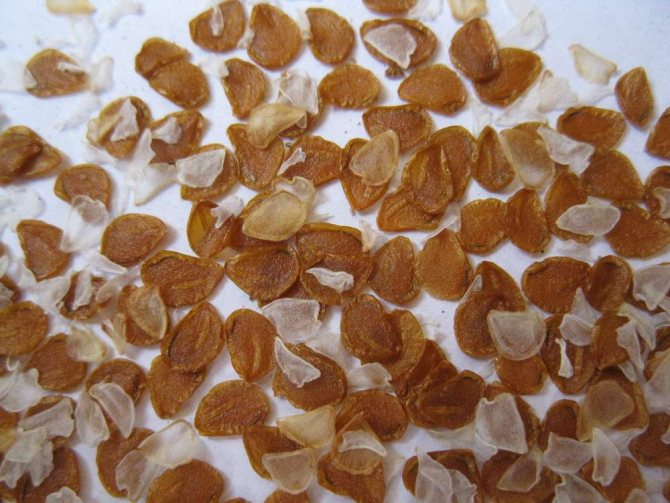
To collect seeds, a faded flower must be supported with a stick so that the stem does not bend and rot: the seeds can ripen in their natural environment. When the pods dry out and burst, the dry flower is cut and stored in a warm, dry place. The seeds should turn brown after complete drying. It will be better if you leave them in the boxes until the very planting.
The seed pod is divided into 3 parts, in which the seeds are stored in piles. They are flat rather large plates of a triangular or elongated shape. In one flower, from several dozen seeds to several hundred can ripen. For example, one Greig tulip gives up to 1 thousand pieces.
If these are wild flowers, then after drying, the box bursts, and the seeds spill out of it and are carried by the wind. For domestic tulips, the ground should be prepared. Loam is best. For central Russia, the optimal time for soil preparation is late September - early October.
The procedure is performed step by step:
- first, you should fence the garden bed with boards around the perimeter to make a box: the earth will not spill out and shift;
- the soil must be dug up, and then fertilized well, add rotted humus to it;
- pour a layer of sand 2-3 cm thick on top.
You can pre-germinate flower seeds in the refrigerator to facilitate and speed up their growth.
For this, the seeds are spread on filter paper moistened with water. Make sure that the paper is always damp and the temperature in the refrigerator does not exceed + 5 °.
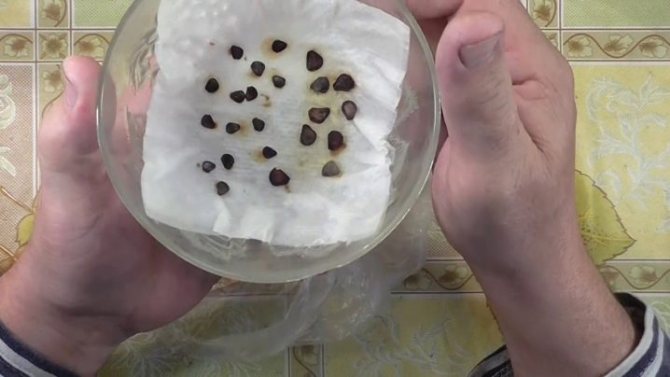
After about 2-3 months, the seeds will have their first small roots. The prepared material is planted in the fall in the ground or in a greenhouse. This must be done very carefully so as not to damage the fragile young roots.
However, seeds can be bought today. There are many Russian manufacturers on the market. If you buy seeds from well-known companies, then you will get the expected result. You can buy Polish seeds. Poland is known for its developed agricultural culture, compliance with quality standards.
It is not worth buying seeds from China from cheap shopping sites. There are many reviews on the Internet that such seeds do not take root, they rot even during soaking. Although in fairness it should be noted that there are positive reviews, but there are very few of them.
Children for breeding culture
With an active increase in the weight of the replacing bud-bulb due to the selection of a site, soil preparation, fertilization, watering regime, regular weeding, loosening and exclusion of tulip flowering, you can get a full-fledged sexually mature plant for vegetative propagation with small daughter baby bulbs.
If there are tulip babies, what to do with them? They need to be grown to the size of bulbs of I and II fractions within 1-4 years.To enter the flowering time, children of tulips of simple and double early varieties will need 1-2 years less time than children of late varieties of the same size, for medium-flowering varieties - an intermediate (average) time. The period of time depends on climatic zones, soil acidity, and the amount of humus.
In the regions of the middle lane, the babies reach the flowering pore and the size of the bulbs:
- I fraction: early and middle grades - for 12 months, late - 24 months;
- II fraction: early and middle grades - in 24 months, late - in 2-3 years;
- Fraction III: early varieties - 2-3 years, middle - 3 years, late - 3-4 years;
- IV fraction: early varieties - 3-4 years, middle - 4 years, late - 4-5 years.
In the southern regions, the children will bloom and reach the size of the bulbs (by fractions):
- I - early, middle and late varieties - for 12 months;
- II - early and middle grades - for 12 months, late - for 24;
- III - early varieties - in 12-24 months; middle and late - over 24;
- IV - early and middle varieties - in 2-3 years, late - in 3 years.
Reproduction of tulips by children of different fractions is carried out on the same area, but separate fields. The first field will be intended for bulbs of I - II fractions, the largest. They dig up the entire fertile soil layer to a depth of 45 cm, and the bulbs are buried to a depth of 10-12 cm. Mulch from humus or peat, rice husks is distributed from above to protect the soil from excessive drying out. During the growing season, fertilizing is applied and the fields with seedlings are watered. During the staining of the buds, they should be removed, and the plant should be dug out when the leaves turn yellow and dry. Next, the plant is dried and stored, as indicated above in the article.
The second field will be designed for raising children. It is divided into sections: the first is for children of the I fraction, the second is for the children of the II fraction, the third is for the children of fractions III and IV. The soil in the second field should be planted (deeply) cultivated to reduce compaction, i.e. remove the "plow sole". The bulbs are deepened into the soil by 7-10-18 cm in accordance with the fractions.
The weight of children increases when the buds are removed, the annual digging and with careful care of the plants. The dug up and dried babies are divided into fractions, the uterine bulbs of the first two fractions and babies of all 4 fractions are left for the first field. Bulbs of the first three fractions are sold or planted for flowering.
Important... The location of the fields (areas) must be changed so that the planting material does not become infected with gray rot (fungus). It will be possible to return to its original place only 3-4 years after the change of cultures. Tulips grow well after vegetable plants.
It is important to remember and adhere to the fact that tulips need sandy loam, humus-rich neutral or slightly alkaline soil, and not acidic. If there are too light sandy soils on the plots, manure, humus, compost, sod land are introduced into them. If the earth is clay, it is dug up with river sand, a sprinkle of humus, and a layer of sand is poured onto the bottom of the grooves - up to 2 cm.
Fresh manure is applied only 3 years before planting tulips - 20-30 kg / m², but not before planting, since the roots of tulips will immediately rot. If the previous cultures grew on the site and humus was not introduced, then they dig up the soil with humus (40-60 kg per 10 m²) and phosphate rock or bone meal (8 kg / m²). Can be fertilized for the main digging with prepared compost - 90-120 kg per 10 m².
Prior to use, the compost is treated with bleach, Formalin, Graposan, NIUIF-1, or by steaming. In autumn, after applying the main fertilizer, the plots are watered. This treatment promotes the development of a strong root system for better propagation and increased flower and bulb size.

1.5-2 months before planting tulips, the soil in the flower beds is dug to a depth of 25-30 cm and applied to 10 m²:
- humus - 6-8 kg;
- superphosphate - 60 g;
- potassium salt and ammonium nitrate - 30 g each
Re-digging is carried out in 15-20 days to a depth of 18-20 cm and loosened well with a rake. In places where melt or rainwater has stagnated, dry earth should be poured. All preparatory work is completed 6-8 days before planting planting material, so that the root system does not burst when the soil subsides.
Landscaping of plots
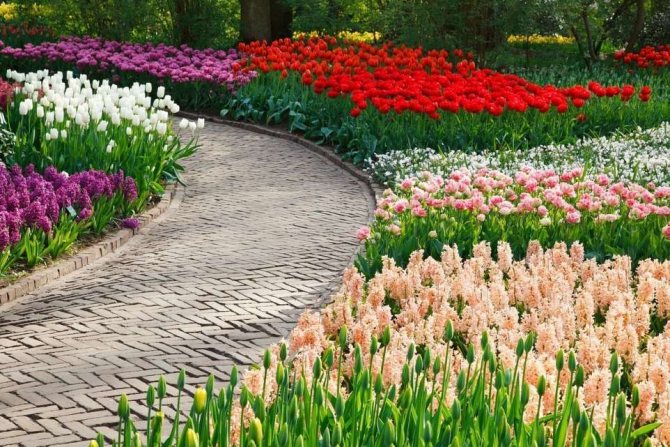
For gardening personal plots: flower beds, curbs and curtains, tulips are planted next to other flowers to create harmony: violet and forget-me-not. They are placed in the center of the rabatok, and along the edges - scilla, muscari, Pushkin or perennial arabis, creeping phlox and other flowers. Late flowering tulips and other flowers are planted between the rows of early varieties.
Important... A tulip group should consist of single-cultivated plants of different colors, but flowering at the same time. Blooming at different times will reduce the appearance of the composition.

Tulips with bulbs of the same size will bloom together. They are planted at 50-60 pcs / m². When planting in single-row rows, the row spacing should be 50-70 cm, when planting with ribbons 50 cm wide, the distance between each ribbon will be 20 cm, and the path between the group of ribbons will be 50 cm wide.
Growing tulips in Siberia in the open field
In general, the technology of growing tulips for regions with a temperate and sharply continental climate is similar. However, given the harsh weather conditions in Siberia, there are a number of distinctive nuances:
- the bulbs are planted in the last week of September so that they have time to take root before frost;
- in order to avoid freezing of the bulbs in autumn and winter, they are laid to a depth of 15-20 cm and covered with a dense layer of mulch, spruce branches, and hay. If there is snow, they cover it with a high hat over the rest of the shelter;
- tulips begin to bloom in early to mid-May, taking this into account, you need to feed them in a timely manner.
In the process of adapting to various weather conditions, tulips have become indispensable companions of spring in many regions of Europe and Asia. At the dacha, in the garden, greenhouses and pots, they feel great and respond to care with colorful flowering, which can be shared with loved ones by presenting a charming bouquet or arrangement of tulips in a hat box.
Short description
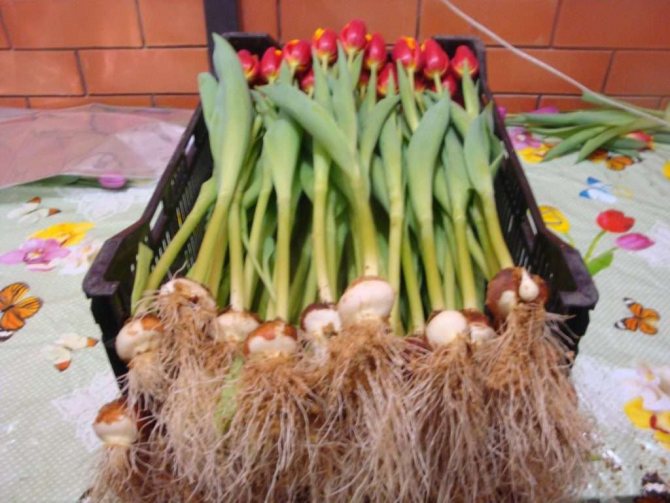
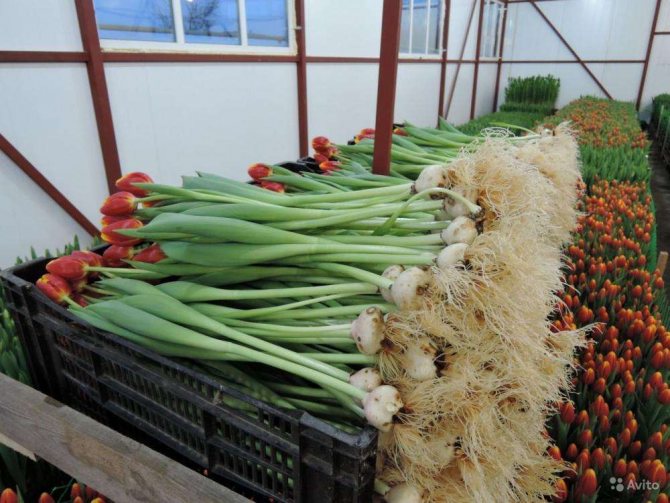
Tulips are perennial bulbous plants of the lily family. For decorative purposes, they are grown in garden plots by almost all growers.
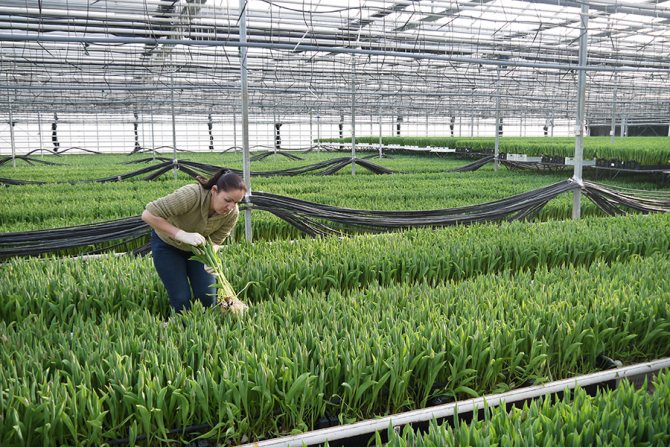
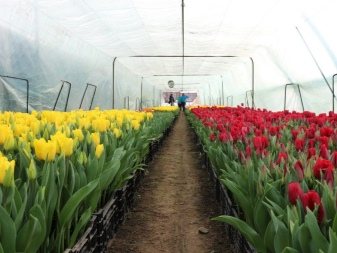
Specialized floriculture farms are engaged in the cultivation of large quantities of cut for subsequent sale.
The buds have a varied shape and color, among the hybrids there are varieties with variegated petals. During the short growing season, tulips have time to bloom, form seeds and plant new bulbs in the ground, while old bulbs die off.
During the summer dormancy, the rudiments of shoots and buds of the new season are formed in new bulbs. In the fall, the bulbs will form roots and the shoots will be completed.
Landing
The most favorable time to sow seeds for seedlings is mid-October. Seeds should be carefully inspected before planting. They should be solid and with a transparent layer around the edges. Kernels with holes, suspicions of rotting, are best placed aside to avoid contamination of the rest of the seeds.

Seeds need to be poured in a fairly dense layer on the sand and covered 1–2 cm with earth and again with sand on top.
The germination capacity of the seeds of this flower is not very high, so it is better to plant them in larger quantities. Leave in this form until spring. It should be noted that if it is very cold outside, then the garden must be insulated. This can be done by putting the film on it and covering it with branches on top. Pre-clean the branches of leaves. You can also cover it with rotted humus with a layer 5–7 cm thick. If you grow tulips in a greenhouse, then you don't have to dig them out for the first 2–3 years.
Reproduction in nature
Tulips are easy to care for and easy to cultivate. For successful cultivation, it is important to understand how tulips reproduce in nature.Under natural conditions, steppe tulips undergo self-renewal: every year the out-of-date bulb is replaced by a new one, in the next season the natural cycle is repeated. This can go on for a long time (up to 60 years), but not indefinitely.

Physiological signs of aging accumulate in replacement bulbs year after year. The moment will come when the plant will grow old and will not be able to recover in the next season. But other younger tulips will bloom violently around, and the steppe will be covered with a luxurious spring carpet.
In addition to self-renewal, wild tulips sprout from seeds that fall from ripe seed bolls.
Vegetative way
Bulb propagation of tulips is not particularly difficult even for novice florists. The vegetative method is also beneficial in that it allows you to completely preserve the characteristics of the mother plant.
How do daughter bulbs appear
Self-renewal and reproduction of tulips occurs with the help of daughter bulbs, which are formed next to the mother. One of them is a substitute. It develops especially rapidly, and two years later - after the main bulb dies off - it takes its place. In fact, it is a clone of the previous plant.
This process can be repeated up to 60 years, but not indefinitely: replacement bulbs inherit from the maternal not only varietal traits, but also gradually accumulating signs of aging. Over time, the plant begins to weaken, lose its decorative effect, and after a certain number of cycles it dies completely.
That is why new tulips need to be grown from lateral young bulbs. Their number depends on the type of plant and the conditions of its cultivation. The annual digging up and separation of children contributes to an increase in their number.
Reproduction of cultivated species
There are 2 ways: vegetative (asexual) and seed. The choice of method depends on the goal. If it is planned to select a new variety with a change in decorative properties, then the seed method is chosen. When growing flowers while maintaining varietal characteristics, a vegetative method is used.
Vegetative propagation
In this most convenient way, tulips reproduce most often. Flowering occurs quickly, the decorative properties of the mother plants are steadily preserved. During active vegetation, small nodules (babies) of different sizes grow around the mother bulb, and a replacement bulb is formed - the largest of the daughter ones. Leaves and flower buds are laid in it for the next season.
To obtain high-quality planting material it is necessary to timely and correctly dig up the bulbs after flowering, process, sort and store them until autumn planting.
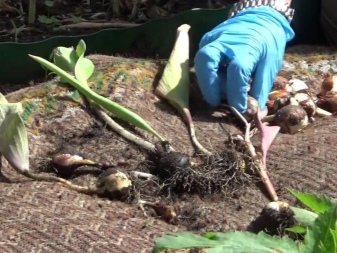
Digging
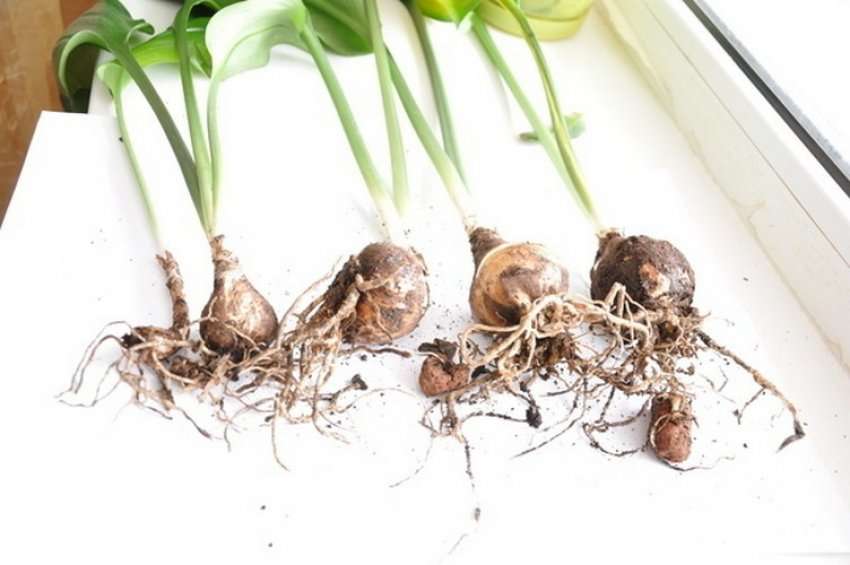
The timing depends on the variety of tulips, usually the end of June - the first half of July. Tulips are ready for digging if the leaves have become lethargic, turned yellow, have lost their turgor, but have not yet dried up. If the leaves rustle and collapse, then they were a little late with the digging.
Bulbs should not be dug out too early - they still have white covering scales, the accumulation of nutrient resources has not ended. If the digging is delayed, the nest of bulbs will collapse in the soil, some of the children will not be able to collect.
An important point: the shovel should be inserted into the soil not at an angle to the stem, but vertically, as deeply as possible, swinging it with your foot in order to eliminate the risk of damage to the bulbs as much as possible.
Treatment
The dug out bulbs are cleared of the ground, examined and discarded suspicious specimens: damaged, with signs of diseases, of irregular shape. All planting material is soaked for half an hour in a weak solution of potassium permanganate, then dried in the shade for two days, and carefully examined again.
Sorting
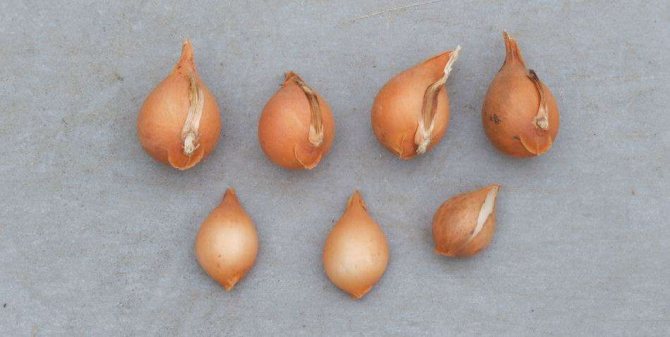
Planting material must be sorted to create a harmonious flower garden design from plants of approximately the same height and large flowers, for separate growing of children of different sizes, to maintain the planting depth of the bulbs during planting. Extra-class bulbs should be more than 40 mm in diameter, first class - 35-40 mm, second - 30-35 mm, third - 25-30 mm. Children are disassembled into two categories: the first is 15-20 mm, the second is all the others that are less than 15 mm. Sorting allows you to clearly plan the planting of compositions in the garden.
Storage
It is important to create optimal conditions during the summer dormant period, since during this time the bulbs begin to lay flower buds for the tulips to bloom in the next season.
Shallow drawers with ventilation holes are suitable for storage.
In order not to confuse the varieties, the boxes must be signed. The room should have a humidity of about 80% so that the bulbs do not dry out. The temperature at the beginning of storage should be maintained within +20 + 25 degrees (2-3 weeks), then gradually reduced to 12-15 degrees Celsius. It is necessary to store the planting material in the dark, as light can affect the physiology of the bulbs, due to which the quality of flowering may deteriorate.
Comments (4)
Valeria
04.01.2019 at 05:19 |
Tulips are very beautiful flowers, I have never had to pollinate them on my own, I mainly germinated bulbs with children, these plants require special attention and care.Reply
Julia Expert Plodogorod
04.01.2019 at 21:15 |
Hello Valeria! From what has been described, it becomes clear that you are using a vegetative way for reproduction. It is good because it is possible to completely preserve all varietal characteristics, that is, the shape and color will be exactly the same as that of the mother plant. With this method of cultivation, it is imperative to cut the flowers when they have faded so that the plant does not spend energy on ripening the seeds. But, it is necessary to leave the leaves in order to receive nutrients through them.
If you want to experiment with the appearance of your tulips, then you should try seed propagation. Then they just carry out pollination with pollen of another species of this flower. No special effort is required for this, but tulips will delight you with flowering in about five years. To get the effect, it is worth planting next to the bulbs of those varieties that it was decided to cross. If they do not bloom at the same time, then the pollen can be collected and put in a cool and dark place.
It is better to pollinate several times within three days, and then cover the bud with loose paper so that insects do not pollinate it and interfere with your breeding experiments.
Reply
Alexander
20.04.2019 at 21:02 |
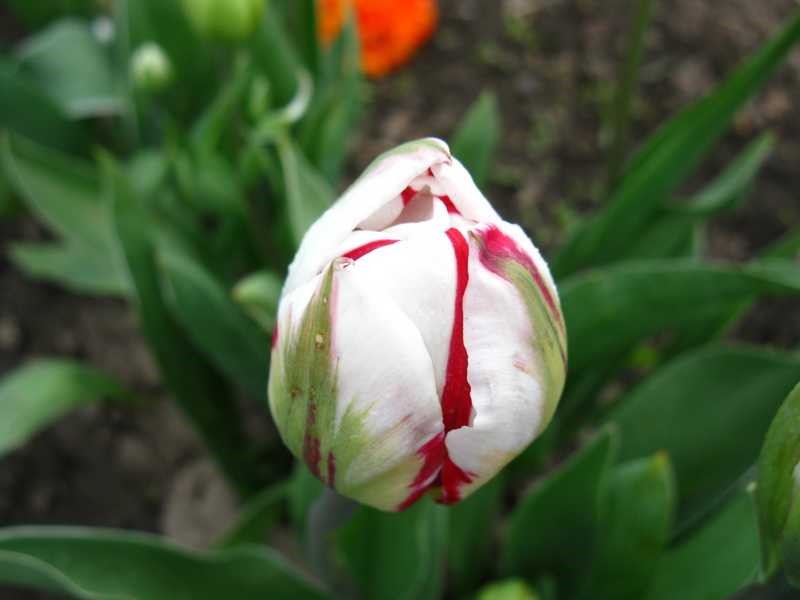
Hello Julia! I would like to ask you for advice on the cultivation of tulips, namely wild ones! In short: I accidentally met in the forest a clearing (literally several dozen) white tulips with a purple streak !!! I never did this, but there was a terrible desire to multiply them until they were picked and presented to someone !!!
Reply
Julia Expert Plodogorod
20.04.2019 at 22:33 |
Hello, Alexander! As a rule, flowering tulips, like any other plants in this phase, are not recommended to be repotted. But, if there is an urgent need, then we will consider two options.
If the plant, together with the bulb, has already been removed from the soil, then it is not worth removing the peduncle. Rinse the onion carefully and place it in a container with water together with the bud. Next, you should wait until the flowering ends. After that, the onion should be dried and put in storage in order to plant it next season on its own site.
If you have not yet taken any action, then the algorithm is as follows. Cut off the peduncle, leaving only part of the stem and the two lower leaves. Next, it is worth digging up the plant using a shovel.If possible, grab as large an earthen ball as possible to avoid injury to the rhizome.
Then you need to dig a hole of the appropriate size on the site and immerse the earthen lump brought from the forest there. After that, watering is required, preferably with settled and not too cold water. You should not feed such a plant after transplanting, this will only be an additional load on it.
If tulips take root successfully, further care is no different from caring for domestic ones. It is important to carefully examine the selected plant so that there are no spots, damage or incomprehensible growths on it. If something like this exists, then there is a high probability of contamination of other plants in the garden.
Alternatively, you can mark the spot where you found the flowers and dig up the bulbs in June or July. This is of course a more complicated and time-consuming method, since you will have to monitor the natural cycle of wild flowers, but the likelihood that the bulbs will successfully take root in the future will be higher. You can try both.
Reply
Seed tulips from China
The seeds of many varieties of tulips are offered on Chinese trading platforms. The specimen pictures are impressive in the assortment of flower sizes and colors. However, after studying user reviews, it turns out that the seed quality of many sellers leaves much to be desired. Although there are successful examples of growing flowers from seeds, unfortunately there are few of them.
If you want to show your talents in tulip breeding, you need to pay attention to well-known producers. Among them are Polish agricultural firms that adhere to high quality standards.
Gardening Tips
In order for the appearance of the garden to please, you need to make a little effort and follow a number of rules:
- when tulips are propagated by the vegetative method, it is required to properly dig, sort and store the bulbs;
- after digging, the bulbs must be cleaned of soil and roots, dried well and determined for storage;
- correctly carried out sorting will create a beautiful garden;
- the seed method takes time, but the result exceeds all expectations;
- do not leave the bulbs until spring - the quality characteristics may decrease, which will affect flowering;
- you need to correctly calculate the planting depth - this guarantees germination and flowering in due time.
Proper flower care and propagation will help preserve tulip varieties or add new luxurious species that will delight you for a long period of time.
When to dig up the bulbs?
In Central Russia, it is roughly mid-summer, but still it is better to navigate by the state of tulips. It is advisable to start digging when the two upper leaves are completely yellow, and the lower one remains half green. Bulbs dug up in the morning should be left in the air in the shade. By the evening, daughter bulbs are easily separated from the cover of the "mother". When removing old scales, you need to be careful with the bottom. Tulip bulbs requiring drying are placed for 2 months in a ventilated room at a temperature of 20 degrees and a humidity of 70. When growing tulip bulbs, it is important to create storage conditions that prevent the setting of a flower or a blind bud. For bulbs that were purchased just prior to planting, it will be helpful to remove the flower bud. This measure will help increase the breeding rate.
Every year, you should dig up varieties of parrot, lily, fringed and terry. Triumph and Darwin's hybrids can "wait" for digging for 2 years, and tulips of Foster, Greig and Kaufman can exist without digging for more than five years. Renewal buds are laid during dormancy, which requires a certain temperature: mid-summer - 23 degrees; August — 16 degrees; before planting in September - up to 10 degrees.
Can tulips be pruned after flowering
The leaves are removed after they have completely turned yellow (2-3 leaves can be left): if you do this earlier, the bulb may stop growing. And the basket of seeds and the faded bud are removed immediately so that it does not take away the vital juices.
A dried flower bed will not look too neat: dry leaves can be masked, the solution may be to grow other flowers along with tulips (daffodils, irises, chrysanthemums, calendula, dahlias).
Decor elements can be grown in pots or boxes and brought to the garden beds. If tulips are planted in the ground in boxes - if the leaves turn yellow, the boxes can be dug out and taken to ripen tulips to an inconspicuous place.
Selection for disembarkation
It is hardly possible to buy such seeds. In specialized stores, maybe they are sold, only very rarely, and amateur gardeners leave the buds for seeds for personal purposes. So you need to collect material for sowing with your own hands, from your bulbous.
Well, if you need to start growing tulips from scratch, for the first season they still buy bulbs, which are planted in the ground in the fall. Such flowers will have time to adapt to the new soil, take root properly and in spring they will delight you with friendly flowering. Here you can collect high-quality seed material from them.
It is worth noting that the color or shape of the mother plant is completely unimportant. After all, tulips are cross-pollinated plants, and young flowers grown from seeds can acquire the colors and shapes of other tulips growing nearby. So, a white goblet tulip can become the "parent" of orange with red streaks of parrot or double beauties, or even several varieties at the same time.
So, during flowering, you need to select specimens for ripening and mark them by tying, for example, a satin ribbon on the stem (the knot should not be tight). The stalk itself should not bend, bend or lie on the ground; it must be propped up or tied to a support. In the summer, when the seed pod becomes completely dry and begins to crack, it must be put together with the stem for several weeks in the back room to "ripen". This period is called the dormant period.
General information
The homeland of the flower is the more arid areas of Central Asia, it is found in rocky deserts and steppes, but at the same time it is very popular for planting and leaving in the open ground of central Russia.
Wild plant species grow in Kazakhstan and Eastern Europe, as well as in Turkey. The height of the plant can reach 20 cm in low-growing species, and up to 100 cm in high ones. The height of the plant directly depends on the varietal and species affiliation.
The rhizome of the flower represents every year the dying appendages of the root system, which are located in the lower part. Newly planted bulbs develop stolons at the very bottom, which have additional daughter bulbs.
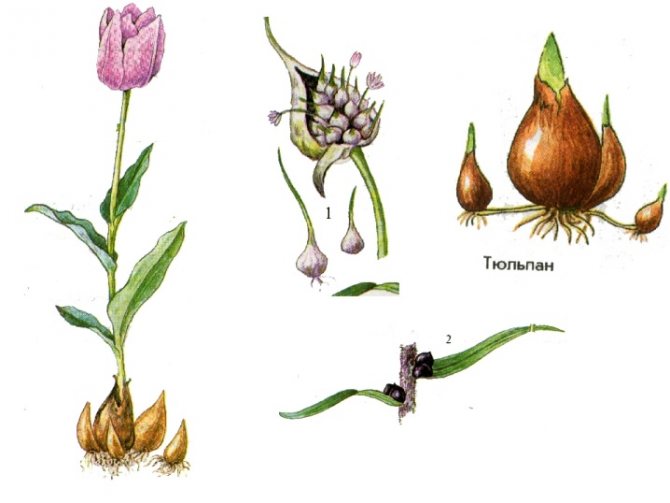
Shoots of tulips come in three forms: donets, stolon, generative stem from which inflorescences and foliage emanate. Escape is straight, standing in the form of a cylinder.
The foliage of the tulip is oblong - lanceolate with a rich green hue or slightly grayish with smooth or wavy edges. The surface of the sheet is covered with a waxy coating. The leaves growing from below are always the largest in size, and those growing from above are much smaller.
to the table of contents
Plant diseases
Gray rot
Often this disease affects tulips, like spireas, a video of planting and caring for which can be viewed in the material, late flowering in cold and wet weather. Rot spreads to nearby plants at the rate of fire. You need to take action at the first sign of infection.
Outwardly, the onset of the disease manifests itself in the form of brown spots on the leaves, then the spots twitch with a gray bloom of fungal spores. Plant growth slows down or stops completely. Rot affects not only the aerial part of the plant, but also the bulb.
For the treatment of gray rot, a 0.2% solution of foundationol or a strong solution of potassium permanganate is used... Re-processing is carried out after 10 days.
Fusarium
This disease does not manifest itself so clearly, affecting primarily the underground part of the plant. Roots perish, tulip bulb is damaged. The plant is weakened, the leaves die off, the flowers do not develop.
Diseased plants must be destroyed. Tulip bulbs are carefully examined after being dug. Bulbs affected by fusarium often give off an unpleasant odor. If there are light brown or brown spots on the bottom of the bulb, they are also destroyed.
Externally healthy bulbs are prophylactically treated with 0.2% benlate solution.
Sclerocial rot
In this disease, the bulb is covered with a white or gray bloom, which looks like felt. A diseased plant lags behind in growth, then rots. Such plants must be dug up and destroyed.
The soil within a radius of 15 cm from the focus of infection is treated with tiazone... Digging the earth to a depth of 30 cm is imperative.
Variegated
A viral disease that weakens the plant. Bulbs and aerial parts of plants become smaller and degraded. If your tulip variety does not genetically provide for variegated petals, such plants should be discarded. On yellow and white varieties, the manifestations of the virus are quite difficult to notice. The disease is given by young green leaves, on which lighter veins and yellow stripes appear along the leaf plate.
The variegated mosaic virus quickly infects closely growing tulip specimens. The main vectors of the virus are aphids and untreated garden tools.
The infected plants are dug up and burned. Used garden tools are treated with a dark pink solution of potassium permanganate.
Sowing seeds
A dormant period is needed for the seed for better germination. The seeds are ready for further action if they spill out freely when the box is turned over. The color of ripe specimens is dark red - almost like a rotten cherry, and there is a thin transparent film on the surface.
Unsuitable seeds should be discarded immediately. All dull, rotted or mildewed, deformed and underdeveloped specimens are unlikely to germinate. From mid-September, throughout October and even in November (until stable frosts), you can plant not only tulip bulbs, but also their seeds. But it is better to germinate the seed in September, so that by the end of October you have time to plant the sprouts in open ground.
Care and disease control
Despite the fact that tulips are characterized as unpretentious and sturdy plants, they still require care. Like many flowers, tulips can be susceptible to disease and pest attacks that need to be dealt with. The main thing is to notice in a timely manner that the flower is sick, and immediately start taking action. Then the plants can be saved.
Caring for tulips outdoors or at home is as follows:
- make sure that the place where the plants are planted is sufficiently lit and protected from strong drafts;
- after wintering, when the snow melts, the layer of mulch must be removed to allow the ground to warm up faster;
- twice a year, the land around the tulips needs to be loosened;
- the soil should not be allowed to dry out, it should be moistened regularly;
- the first feeding should be carried out immediately after the tulips begin to show up from the ground, using nitrogen fertilizers;
- when buds begin to tie, tulips need to be fed with potassium fertilizers;
- after the blossoming buds appear, it is necessary to apply mineral fertilizers to the soil, and after that there will be no need for further fertilizing until next year.
But even if quality care is provided to the tulips, there is a chance that the flowers will pick up this or that disease.It is not difficult to fight plant diseases if they are noticed and recognized in time. To make it easier to do this, we recommend taking note of the informative table.
| Name | Description | How to fight? |
| August disease | The disease affects only early tulip varieties. The virus enters the bulb through the roots, spreading the spores of the fungus. In this case, brown stripes may appear on the leaves, which subsequently crack, and the stems of the tulips become lethargic and lose their elasticity. The bulbs start to rot. | You need to dig up the affected plant and burn the bulb, and pour the potassium permanganate solution around the place where the tulip grew. Re-planting tulip bulbs in this location during the year can lead to new infestations. |
| Sclerocial rot | This disease occurs due to too high soil moisture and is characterized by very weak seedlings, as well as yellowing of the stems and leaves. Less commonly, you may notice blue or gray spots on the sprouts. A rusty coating appears on the bulb. | Infected bulbs must be removed and destroyed, and the soil in the hole must be poured with a solution of potassium permanganate and sprinkled with ash. The fungus can live in the soil for up to five years, so it is not recommended to plant bulbous crops in the infected area during this time. |
| Botrythia rot | Tulips quickly weaken, wither and fall off. This causes the bulbs to soften and begin to rot. | If the disease has just begun to spread, the soil and bulbs should be treated with a fungicide solution, and then sprinkled with sand. If the disease has swallowed the bulb entirely, it must be destroyed along with the flower. |
| Mild bacteriosis | Disease-infected bulbs turn pink and soft to the touch and give off an unpleasant odor. The roots may seem healthy at first, but after a while they begin to rot. Leaves and stem turn yellow and lose their firmness. | Affected plants should be dug up and transplanted into open mesh boxes in a well-ventilated area. The bulbs and the ground must be treated with soapy water or potassium permanganate solution. If the bulbs are heavily infected, then they must be burned. |
| Variegated | Short white streaks appear on the leaves and petals, giving the flower an unusual appearance. It may seem beautiful, but at the same time tulips begin to wither and lose elasticity, and eventually dry up. | It is necessary to treat tulips with chemical agents against aphids, feed the plants with nitrogen fertilizers. |
| Gray rot | Tulips look like they've been exposed to fire. Gray and rusty yellow spots are visible on the bulb, and its texture becomes very soft. Torn cuts may appear on the leaves. | The bulbs must be treated with a mixture of sulfur and sulfonal in equal proportions. If the infestation is too strong, the bulbs, along with the soil and flower, must be removed and destroyed. |
Observing the rules of planting and watering tulips, you will not have to look for ways to fight diseases. The main thing is to carefully check the bulbs before planting, as most infections can be noticed already at this stage.
Pests
In addition to bacterial, viral or fungal diseases, tulips can suffer from pests:
- In wet weather, young shoots and bulbs are threatened slugs and snails... Tobacco dust is effective against them.
- Medvedka, Khrushchi (beetle larvae) gnaw at roots and bulbs. For destruction, digging and loosening of the soil is effective. Traps are placed on the bear.
- Wireworms (the larvae of the click beetle) damage the tulip bulbs by gnawing through the tunnels. This beetle prefers areas with high soil acidity overgrown with weeds. Therefore, it is quite easy to get rid of it - remove weeds, add ash, lime and ammonium nitrate to the soil, loosen and dig the area more often.
- Greenhouse aphid... Drinks juice from young leaves and peduncles, which greatly weakens the plant.But the most unpleasant thing is that aphids are a carrier of many viral diseases. Aphids are destroyed with pesticides.
But if you follow all the tips and recommendations correctly, then it will not be difficult to grow tulips in your summer cottage, whenever you decide to plant them.
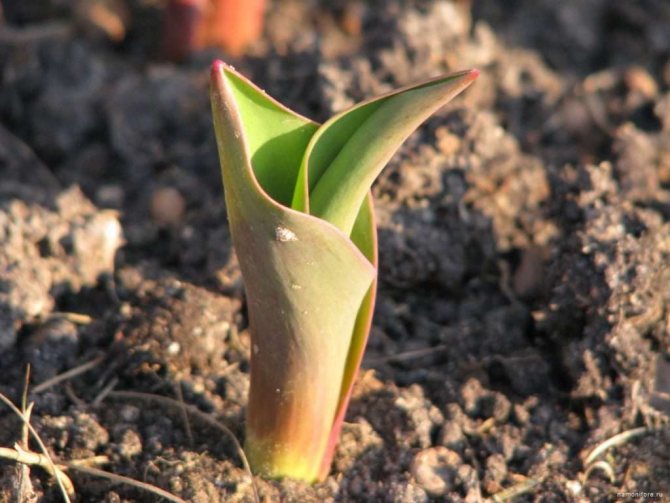
Growing conditions in spring
As soon as the snow begins to melt, and the sharp tips of tulip leaves begin to hatch, to strengthen their "health" they make the first fertilizing with mineral fertilizers right on the snow.
Loosening the soil around the tulips is carried out very carefully so as not to damage either the bulb or the roots.
Active work is also underway underground: the mother bulb grows, daughter bulbs are formed, grandchild bulbs are laid. For all these changes, the plant needs a lot of energy, which can be provided by nutrients and moisture.
In order to obtain well-formed bulbs for further flower cultivation, the plants continue to be watered for two weeks after flowering.
Withered flowers must be removed, since the forming seed pod can provoke the disintegration of the mother bulb into small daughter ones.
In June, as soon as the leaves turn yellow, the tulip bulbs are removed from the ground and laid out in the shade. Particles of soil are removed from dried bulbs and placed in cardboard boxes or paper bags. They must be signed, indicating the grade and date. At the end of September, tulip bulbs are planted in a flower garden.
Preparatory stage
One of the important and crucial stages of planting tulip seeds is the preparation of the soil, planting material and containers.
Seed preparation
Sowing is usually done in September-October. Seeds need to be carefully examined, select only whole plates with a transparent layer around the edges. If deformations, holes or spots characteristic of rot are noticed, they are rejected.
Preparation of containers, soil
Seeds are planted in soil or containers. As a container you can use:
- flower pots;
- garden boxes;
- plastic bowls or bowls;
- pallet with stable legs.
The garden also needs to be prepared:
- knock down the sides from the boards;
- dilute loamy soil with sand, enrich with humus;
- fill the frame of the bed with soil mixture.
The finished bed should be watered with salted water. The soil is then loosened to prevent the formation of lumps.
Reference! In a high bed, the seeds are more likely to survive in the winter. In addition, it is easier to construct insulation on it.
Breeding by cuttings
Another method of how tulips reproduce is with cuttings. The option is easy, but not the most common among gardeners. Of the advantages - a plant that will be grown by this method retains all the properties of the mother. The method of propagation using cuttings helps to get even and almost identical tulips. The method can work even with purchased tulips.
A significant disadvantage is that not all cuttings are capable of giving a new bulb. For a successful experiment, it is better to take several cuttings of different varieties.
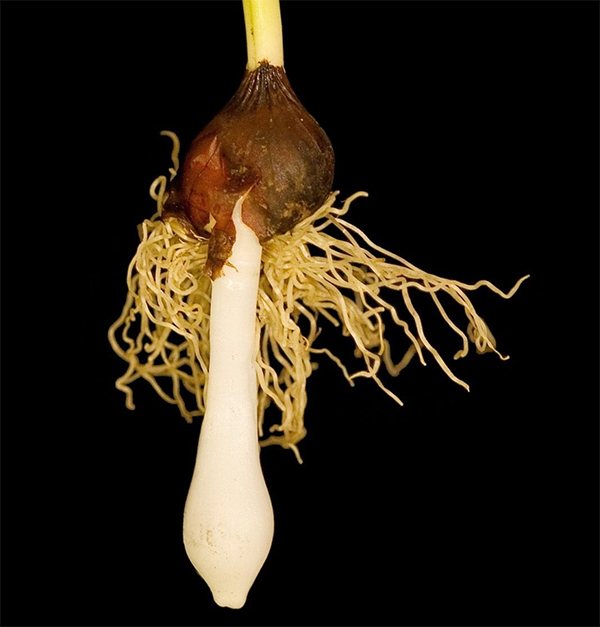
How to propagate tulips by cuttings: Cut healthy mother plants with strong flowering, large leaves. It is important that their color is clean and the shape is correct. In order to get a good harvest of tulips in the future, only the best mother plants are left. At the bottom of each stem, a longitudinal cut of about 3 cm is made. The flowers are placed in water, it is possible with a growth stimulator, for a period of at least 10 days.
A small white baby bulb should appear at the end of the stem. Separate it after a week, but carefully - it is very tender. And let it sit for at least 2-3 weeks. During this time, its surface will darken, coarsen and begin to become covered with scales, then it can be planted.
You need to plant in boxes or pots, where good drainage will be placed: it is important that the water does not stagnate, tulips do not like this.For planting, they take coarse-grained river sand, it is better to mix it with fibrous peat or heather soil. Humus soil will be harmful, because it can lead to rotting of the cuttings. Cut the petioles with a straight cut under the eyelet. If they are weak, they are planted in the garden without pruning.
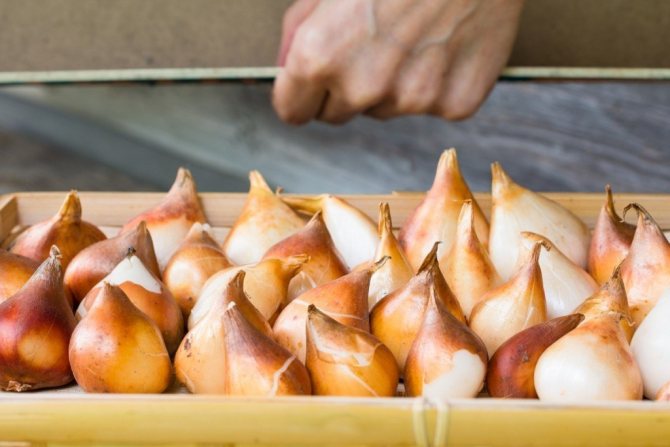
Bulb tulips
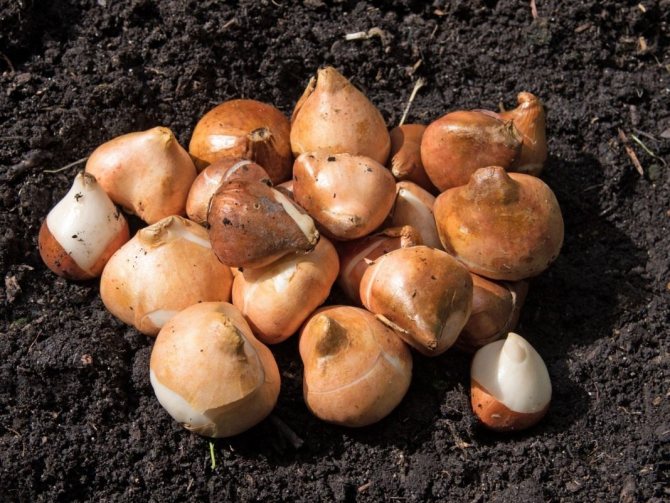
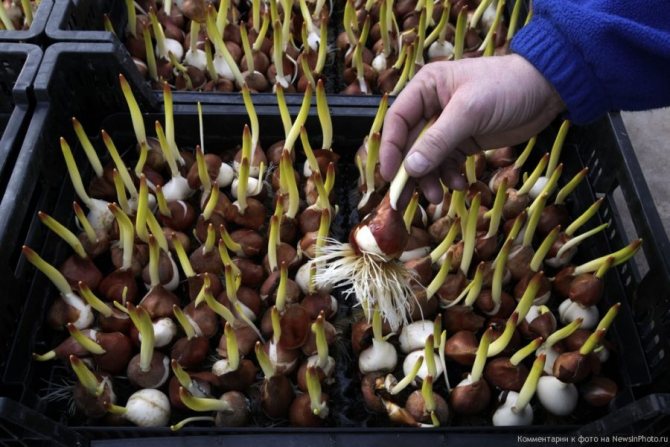
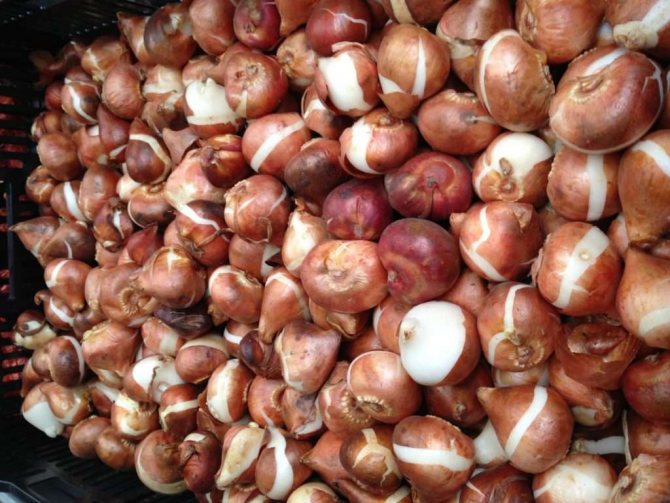
Harvesting of planting material starts in the summer season. The time is determined when the tulip bed completely fades. You can find out if the bulbs are ready for digging by looking at the state of the leaves. If they're dry, it's time to get down to business. This period usually falls in mid - late July.
The appearance of the onion also speaks volumes. If its scales have acquired a brownish tint, the material is ready for storage. Calibrate the dug bulbs by grade and size... Rotten or dried specimens, as well as specimens with traces of disease and damage from pests, are discarded.
How to store the material selected for planting?
- Arrange the bulbs in layers in wire mesh boxes and place outdoors under a canopy. Here they are aged for several days;
- Bulb nests are separated in parts and, after washing in water, are soaked in a manganese solution;
- After drying, the bulbs are again placed in boxes in 1 layer and left to dry for a month at a temperature not lower than +25 degrees Celsius. Later they are placed in a cool room, where they are kept at a temperature of +5 ° C.
If you want a beautiful full flower in a pot, schedule a planting time in the fall, but no later than the end of November. We will talk about how to grow tulips from seeds at home a little later.
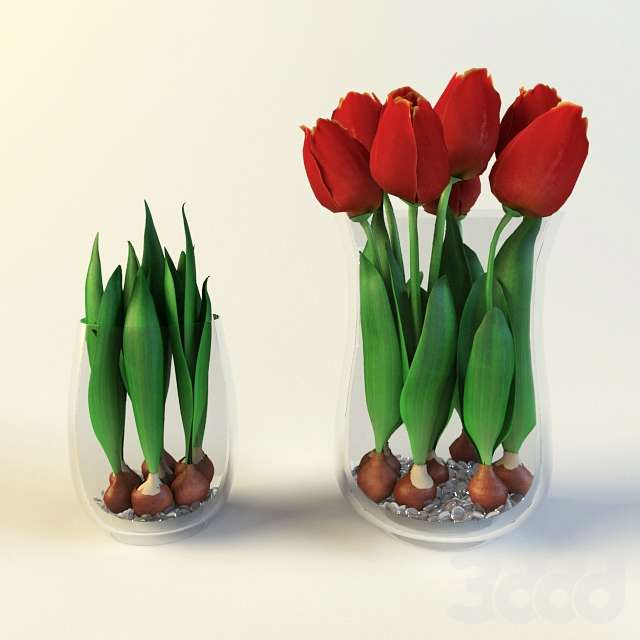
In a pot
You can grow tulips in a pot from a bulb, for example, for the 8th of March. Such a gift is much more original than a purchased bouquet. Are you ready to experiment? Then the algorithm of actions is chosen as follows:
- The bottom of a small ceramic pot is filled with drainage from expanded clay, crushed stone, shards, charcoal or gravel. From the edge of the pot, mark the distance for the planting depth and fill it with soil at this level;
- The bulbs are planted tightly. As necessary, light soil is poured from the sides and from above;
- The planting is watered and wait a certain time until the top layer shrinks. If necessary, a little more earth is reported.
- The planted containers are placed in a low temperature room for several months. This is an imitation of wintering in artificial conditions.... It is not necessary to water the tulips, but the earthen coma must also not be allowed to dry completely. Watering in normal mode and full lighting for planting will begin in 90 - 120 days.
The bulbs transferred to a warm, bright place will wake up and grow after "wintering".
Then the containers with bulbs are moved to a cool room, simulating wintering. If it's September and it's very warm outside, the vegetable compartment in the fridge will do. The containers are checked about once a week to ensure that the soil does not dry out or mold grows. You can already place the pots with tulips in a bright place and start full watering in 3-4 months.
Tulips are moistened only with warm, settled water. Top dressing is carried out on the basis of complex nitrogen-phosphorus preparations. The pots are kept in a warm, but not hot area of the house. After flowering, the bulbs remain in the ground for about 30 days with a gradual cessation of watering as the foliage wilts. Later they are taken out, freed from old scales, calibrated to size and stored.
In the open field
A multi-colored flower bed with tulips can become the main decorative element of the landscape. What is doubly valuable, it does not need to be renewed every year: perennials can bloom for a dozen years or more. Variety is key and of course proper care. But it all starts with planting bulbs in the ground. We will now tell you how to do this correctly.
Bulbules for planting are purchased at any flower market, in a store, or are taken as seedlings from an already growing tulip. It is believed that you need to dig up the bulbs in the garden every year. But practice shows that tulips grow successfully in abandoned areas without any care. Naturally, the yield and germination increase if this procedure is carried out, and this cannot be ignored.
Things to remember
- Choose strong planting material. How strong the planting material will be depends on the coefficient of germination and vegetative reproduction.
- Propagate with bulbs. Vegetative propagation occurs by daughter bulbs that retain the genetic characteristics of the mother tuber.
- Get new types of seeds. To get a new kind of tulip, then propagation should be done by seed.