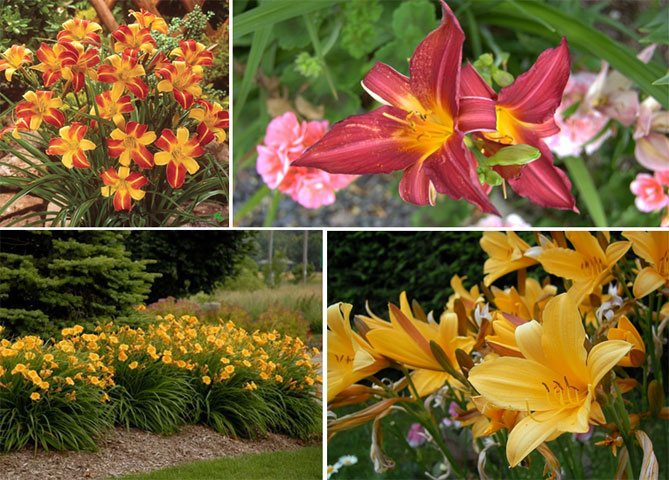
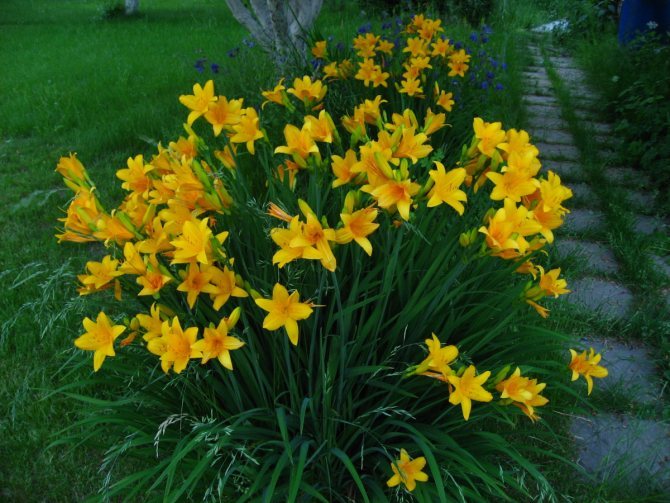
Daylilies are popular flowers among professionals and amateurs. Many summer residents grow them because of their beautiful flowering and massive tops. Daylily flowers (pictured), planting and caring for which are carried out according to the rules of agricultural technology, will delight for a long time with the richness of color and abundant flowering (if the daylily does not bloom, read our article), you just have to adhere to some recommendations.
Brief description of the species
Gardens with garden daylilies (hemerocallis hybrida) look amazing. Naturally, these unique flowers grow in Asia. They were brought to Europe in the 16th century and quickly gained popularity. The plant owes its name to lilies - they have very similar flowers in shape. It is one of the most beautiful and easy to maintain plants in gardens.
Perennials produce a single stem, around which there are long, equidistant leaves, somewhat saber-shaped. At the top of the daylily shoots are exceptionally beautiful flowers that attract attention.
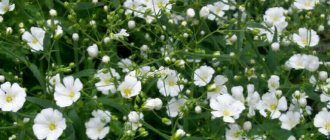
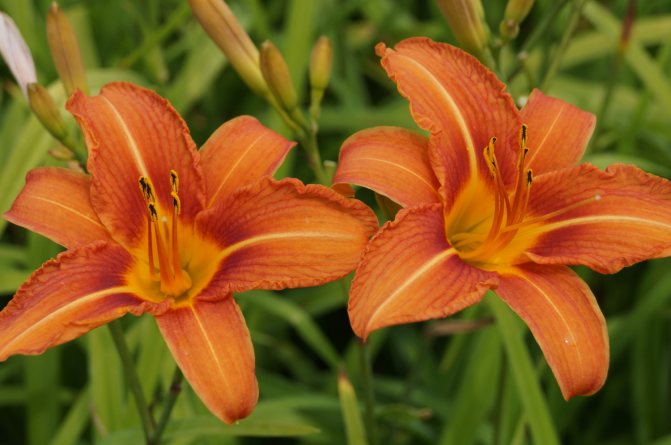
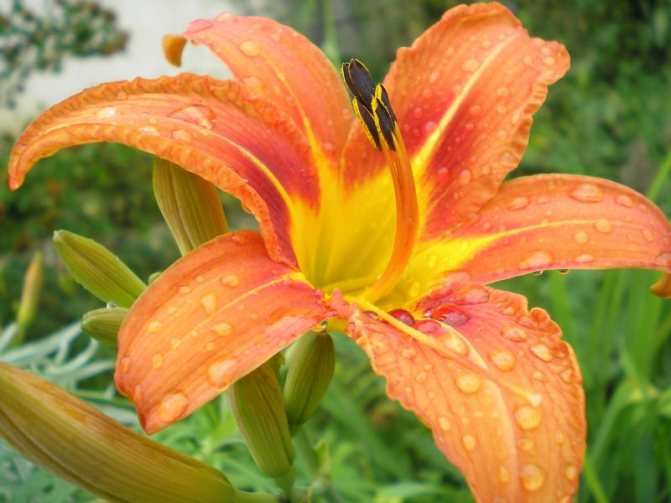
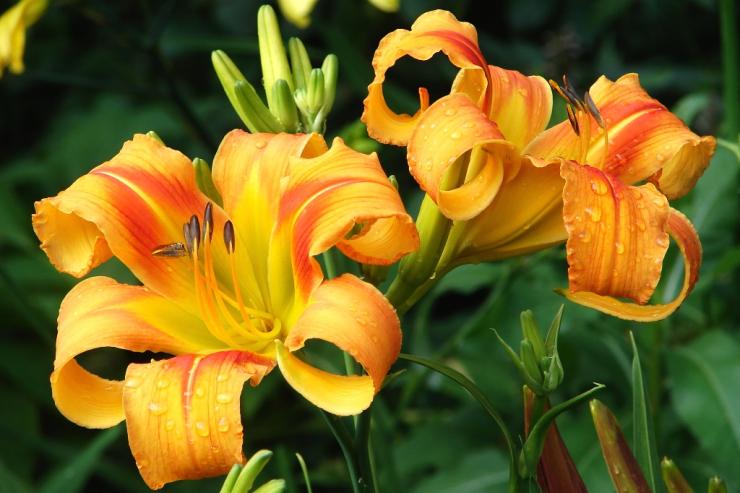
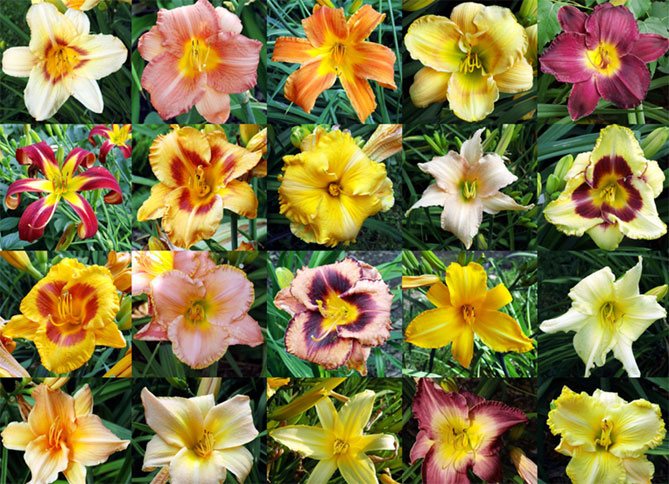
Large funnel-shaped flowers consist of several longitudinal petals, curved outside, surrounding the anther. Flowers in several pieces are collected in inflorescences of orange, reddish or yellowish color. Older varieties have tapering flowers, like a lily. Newer hybrid varieties usually have semicircular, round flowers with curled petals or single ones.
Flowers of some species are open early in the morning, others at the end of the day, remain open all night, and fall off the next day. However, this is not a problem because the proper care and cultivation of daylilies produces many new flowers every day.
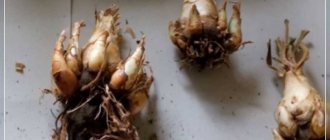
Daylily roots are fleshy, often forming stolons, which are sometimes called bulbs.
Useful Tips
The roots of daylilies are deep and branched, and their processes are capable of accumulating moisture in the pulp. Due to these features, the bush is not very picky about moisture.
If the autumn is dry, then the daylilies must be watered 1-2 times a week. Watering is carried out in cloudy weather, in the morning or in the evening with slightly warm water under the root. They stop when the first frost approaches.
You need to cut the daylilies so that small hemp remains on the surface. It is impossible to cut the leaves, stems and peduncles of daylilies too low (flush with the soil level), as this provokes the growth of new green mass.
Varieties and types of daylilies
There are many varieties of daylilies. Our gardens most often abound in one species - the most popular representative is the hybrid daylily. In fact, it is a multi-species hybrid specially selected for cultivation in our atmospheric conditions, more resistant to diseases.
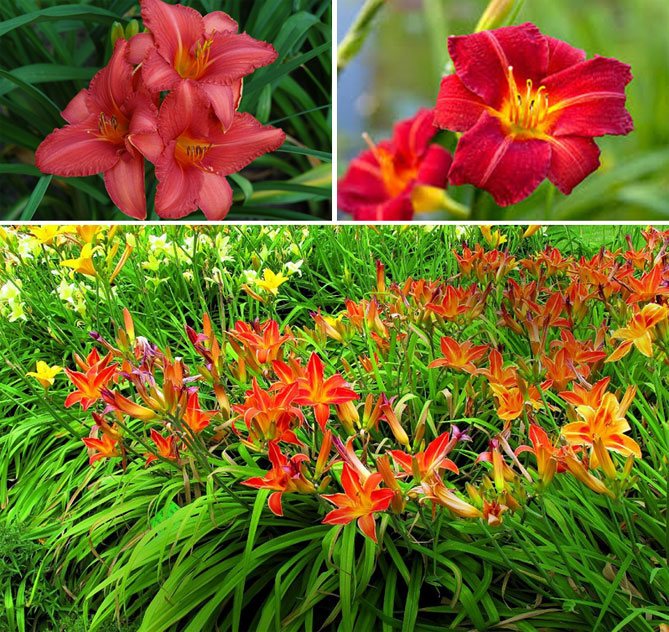
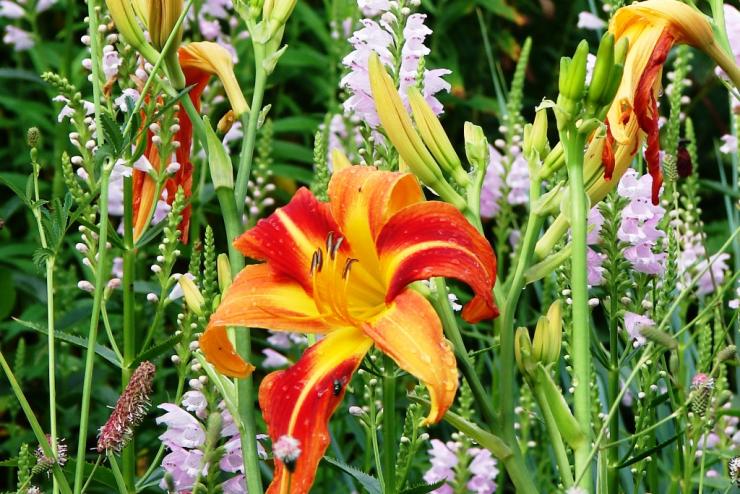
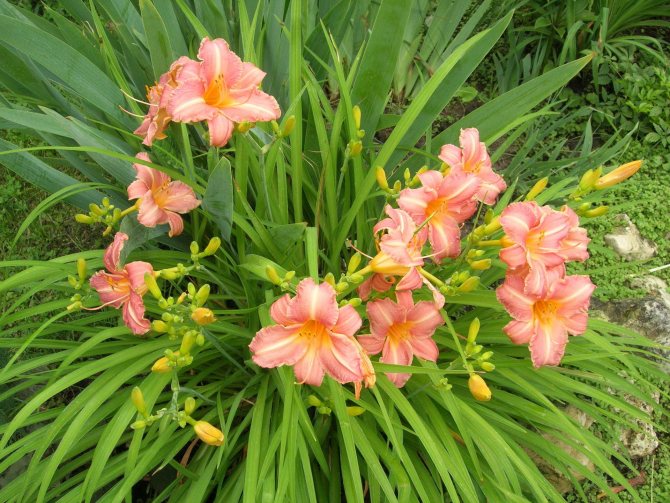
Its bloom lasts a very long time - from May to September, and the gardens have been decorated for the longest time. On one shoot, daylilies produce from one to ten flowers of different colors - yellow, red, orange and pink. There are many ways to organize a daylily garden.
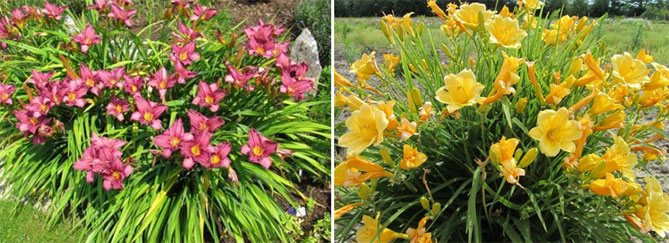
Daylilies of other species are more monochromatic. The following types are distinguished:
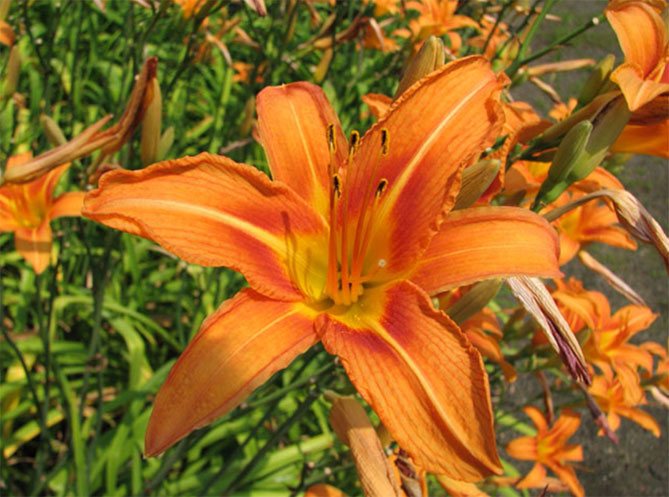
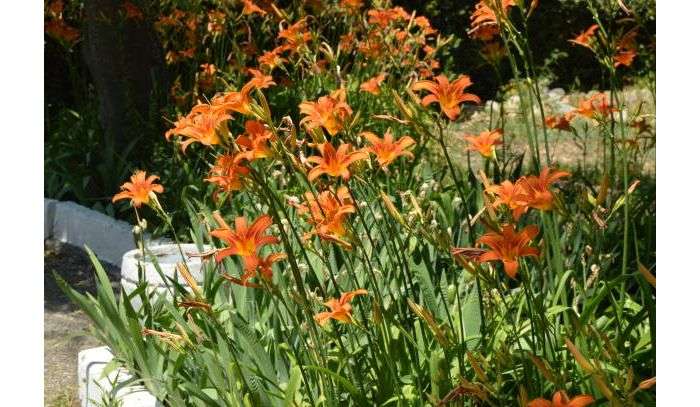
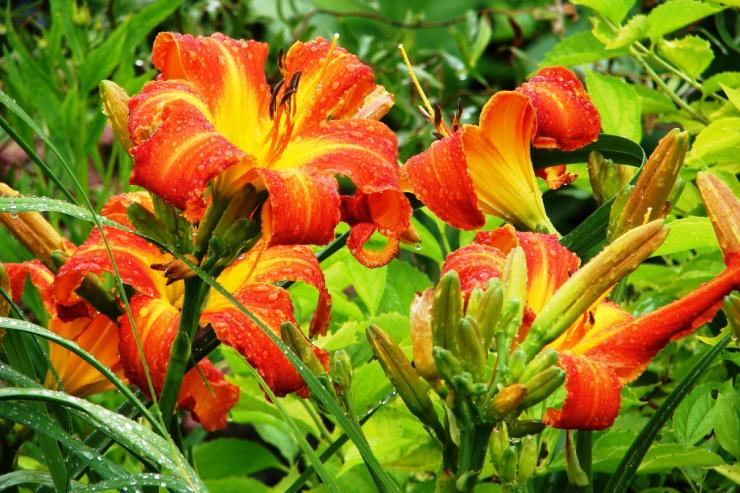
- Daylily brown-yellow in Latin Hemerocallis fulva produces orange-red flowers. Produces many flowers, up to 12 per shoot. They have a more lumpy shape, large flowers. The plant produces many leaves that can look quite herbaceous, so it is worth planting ornamental grasses next to this plant.
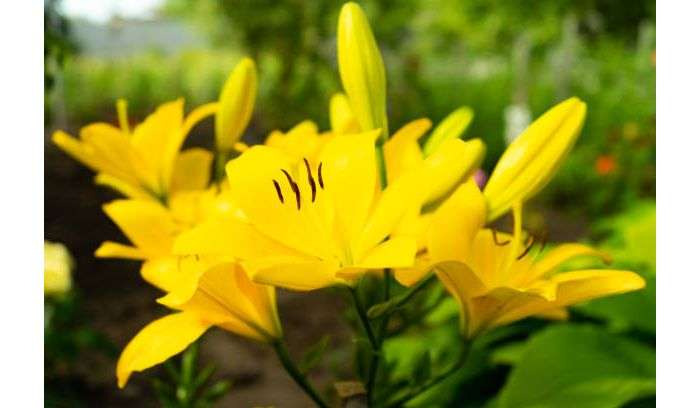
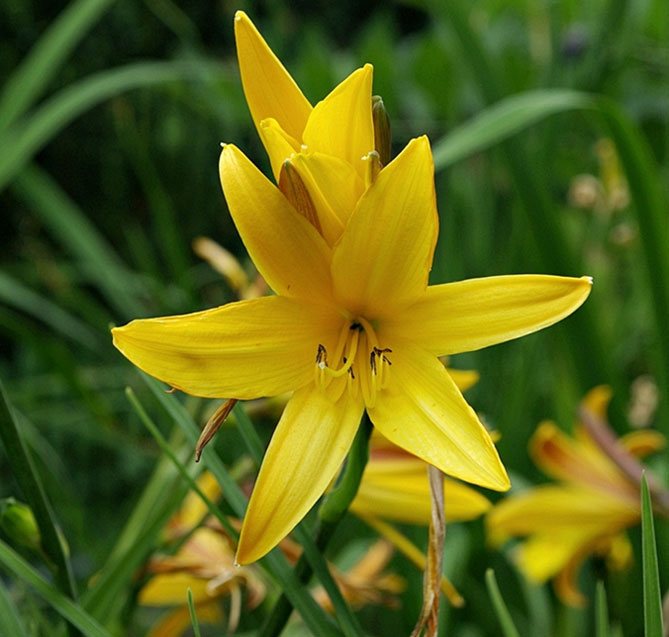
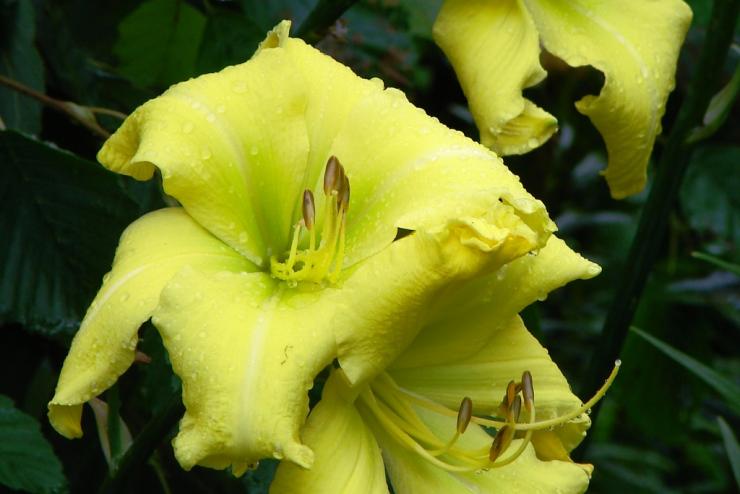
- Daylily yellow in Latin Hemerocallis flava has a slightly smaller form. A plant that produces yellow flowers that are slightly thinner but have a standard lily-like appearance. The yellow lily produces a lot of shoots and has a grassy crown. Separate flowers at the ends of the shoots appear among the herbaceous, rather dense leaves. It is an easy-to-grow species with an intense, pleasant scent of flowers.
Both species are often used in our gardens and are popular for their pleasing flowers and dense bush shape. Other species have very similar cultivation requirements.
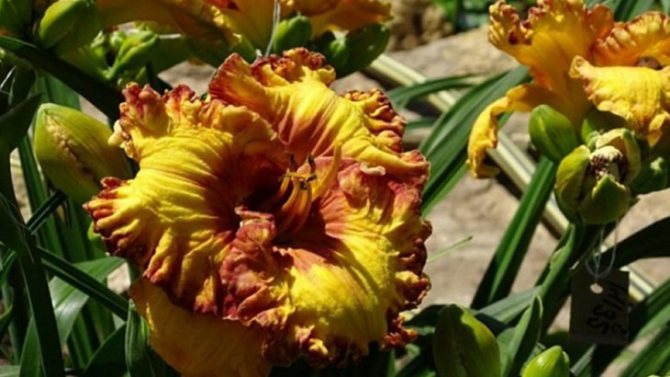
Daylily varieties are available in many varieties with different color patterns. On the market you can find bulbs and seedlings of many varieties with different shapes and sizes of the bush, so they are also divided by height.
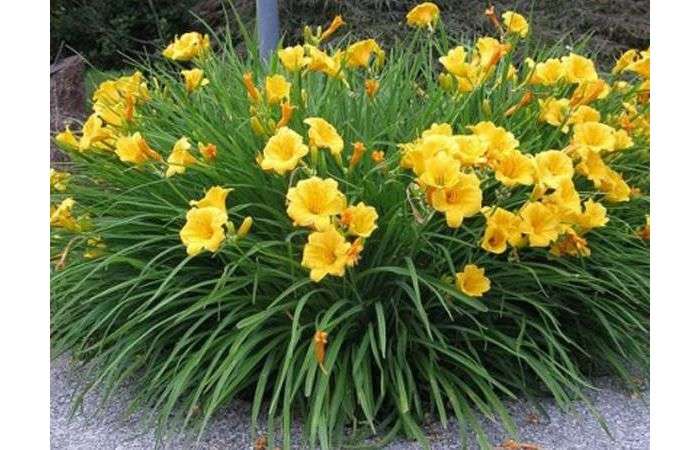
Low grades are the most. This group also includes the famous Stella de Oro daylily, which blooms in June-July. The variety produces intense yellow flowers. The stem reaches a maximum height of 30-40 cm.
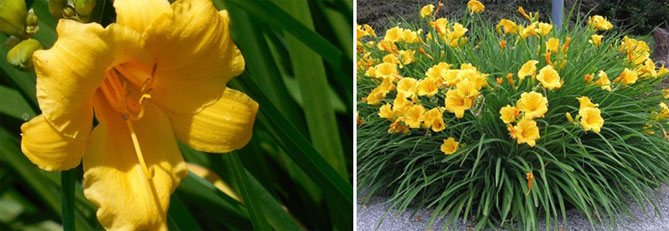
Photo. Daylily of the Stella de Oro variety
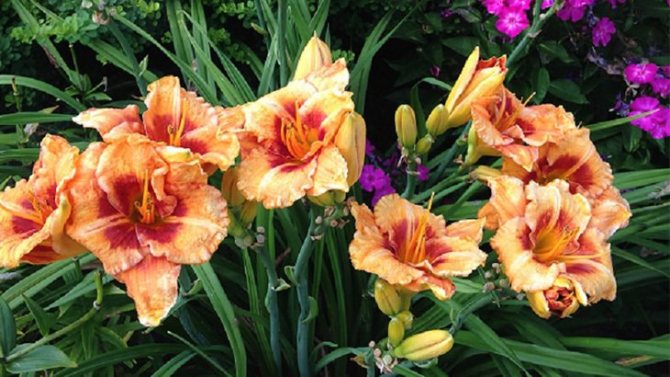
Exactly the same dark yellow flowers are produced by the cultivar Little Paul, the flower is distinguished by a darker color in the middle.
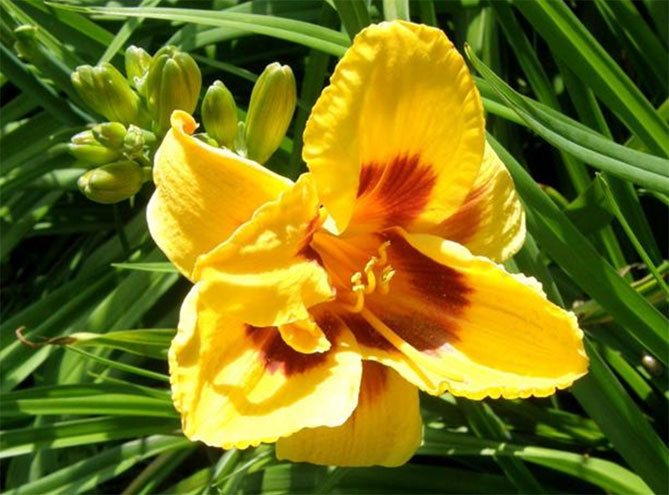
Photo. Daylily of the Little Paul variety
Pixie Parasol has an interesting color, with apricot-colored petals, very delicate, extremely decorative.

Photo. Daylily of the Pixie Parasol variety
Also noteworthy are the varieties of daylily with a higher growth, the height of which reaches 90 cm. The tall varieties look beautiful against the background of the rabatka, their leaves create a background for small plants, and their bright flowers are a unique decoration. For example, Boney Maroney with delicate yellow flowers.
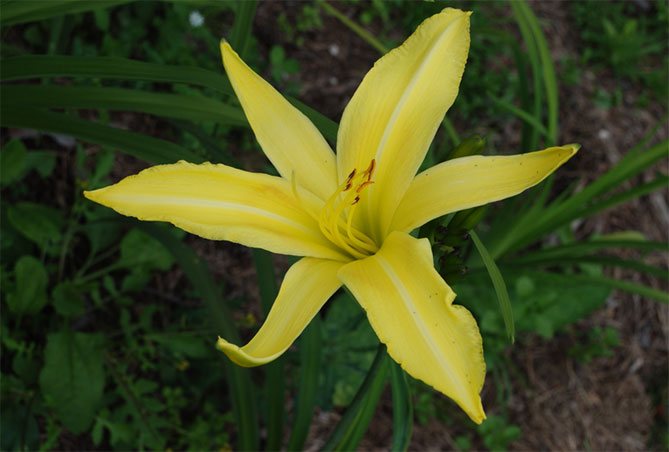
Photo. Daylily Boney Maroney

The main mistakes when caring for daylilies in the autumn
Despite the unpretentiousness of a beautiful perennial flower, it is important to follow the rules of agricultural technology. But even experienced flower growers do not always know how to care for and how to prepare daylilies for winter. Here are some errors:
- Introduction of fertilizing in the fall with nitrogen supplements. The aerial part begins to grow, which leads to a weakening of the plant before wintering.
- Incorrect pruning of lush bushes. Leaves are cut at a height of no more than 15 cm, leaving a medium-length hemp. Low pruning leads to rotting plants, untimely bud growth.
- Early cover with mulch. The root system grows out, which leads to the death of flowers.
- Pruning perennials too early. In this case, in warm autumn, the plant releases leaves, actively grows, taking away the nutrients they need for wintering from the roots. You will have to prune the bush again, weakening the plant before winter.
- Dense cover of the base of the bush, using heavy and damp mulch. Sawdust, spruce branches, straw must be dry, clean, free of debris and foreign objects.
Improper preparation leads to problematic wintering of plants, and in some cases - to freezing and death of flowers.
Planting daylilies in autumn and spring
There are 3 ways to breed daylilies:
- dividing the bush;
- reproduction by seeds;
- reproduction by children (offspring).
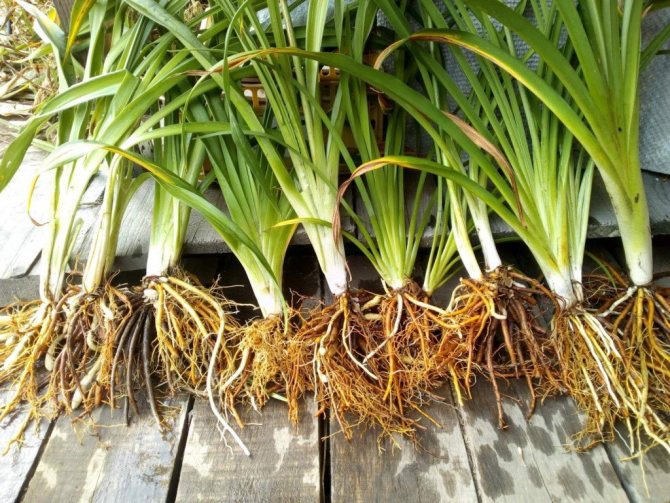
There are no strict guidelines for when to replant daylilies. You can transplant any time from spring to autumn. Frost-sensitive daylily varieties are best planted in spring so they can take root well by fall. Saplings are planted at a distance of 50-100 cm. If the seedlings are bought in a store, you need to dry them slightly, cut off the tips of the leaves (this procedure allows you to strengthen the roots).
Some daylily leaves are slightly yellow. Don't worry about it - this is normal, not harmful to the plant.
If it is not possible to immediately plant the purchased daylily sapling, you can store it for several days in a cool place before planting.Before planting, the roots of the plant are soaked in water for 1-2 hours.
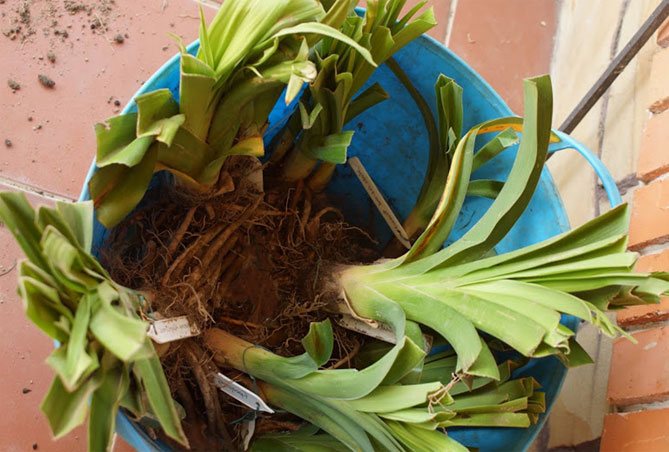
Reproduction by dividing the bush
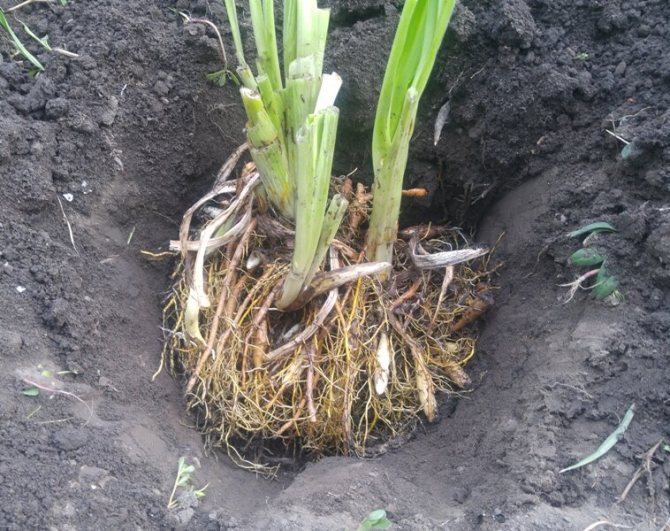
The daylily propagates by dividing the bush. To do this, you need to carefully divide the adult rhizome lump.
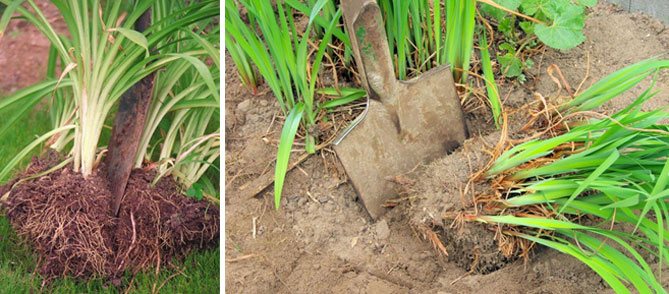
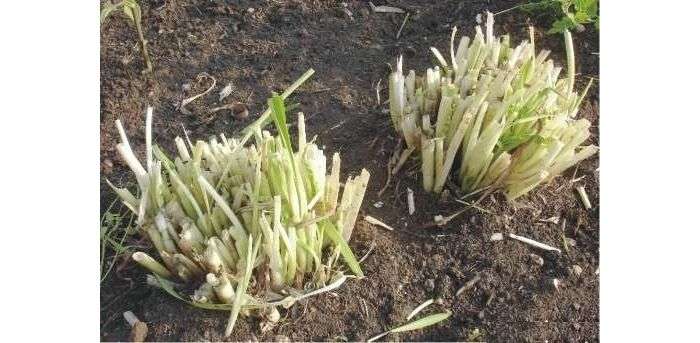
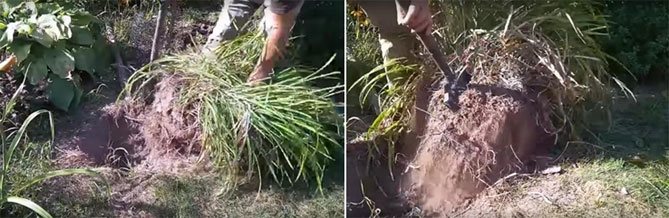
The daylily bush is dug around neatly. Then, with a sharp knife, the rhizome is cut into pieces with separate stems. If the bush is very old, overgrown, the rhizome becomes huge. Then you have to chop the lump with the rhizome with a shovel into pieces.
Then each part is more delicately disassembled into seedlings. Each daylily seedling should have a good rhizome with roots and stolons. Cut the leaves and stems of the seedling with a secateurs.

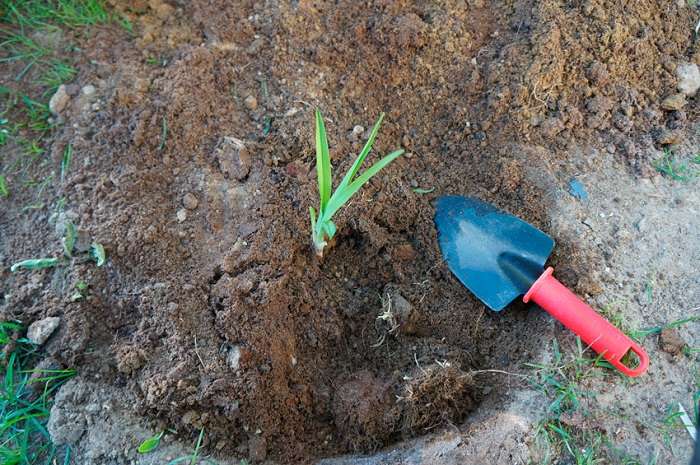
The seedling is ready for planting. We dig a hole slightly wider than the size of the rhizome. Pour peat or compost soil into the hole. We plant a seedling, the root collar is sprinkled with earth, we make a mound with a cone of 2 cm.After planting, we tamp and water. The distance between seedlings should be at least 70 cm.
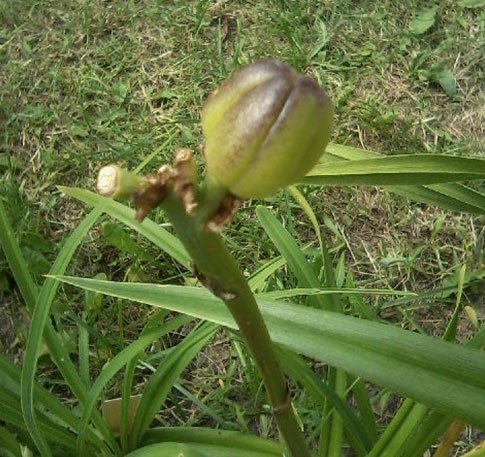
Daylily propagation by air babies (proliferators)
If the plantings of the daylily are old, it becomes difficult to separate the rhizomes, you can prepare seedlings of seedlings by the proliferation method. This should be done at the beginning of the growing season, when young shoots are 5-7 cm high. On the shoots during this period, you can see leaf rosettes with primordial roots. When the peduncle dries up, a part with an airy baby is cut off and placed in water for rooting.

Sprouted daylily seedlings are planted in containers. In September, the plants are planted in a permanent place.
Reproduction of daylily from seeds
Seed propagation is much more difficult at home. The procedure begins with artificial pollination of daylily flowers - we take a brush, dip it in pollen on the anthers of the stamens, carefully apply the pollen to the pistil with a brush. Unfortunately, only a few pollinations will result in a seed sac. Not all of the resulting seeds germinate and ripen. This is the difficulty of growing a daylily from seeds on your own.
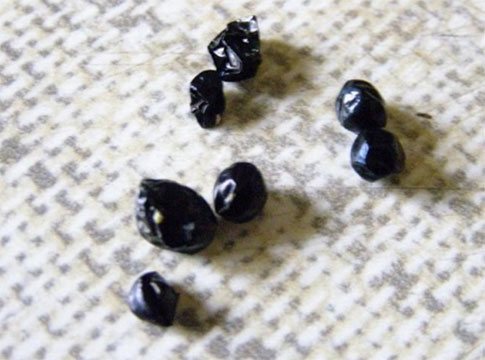
- The seeds can be purchased or harvested by yourself after flowering.
- The seeds are not stratified. You just need to dry them on the table.
- Before planting, soak the seeds for 24 hours in warm, non-chlorinated water.
- Then disinfection is carried out - a bath is made with water and the addition of a surface disinfectant (hydrogen peroxide, potassium permanganate) for 10-15 minutes.
- Then the daylily seeds are washed with cold boiled water.
- Germinating seeds are transferred to pots with peat substrate and sand (add 15% perlite / styrene).
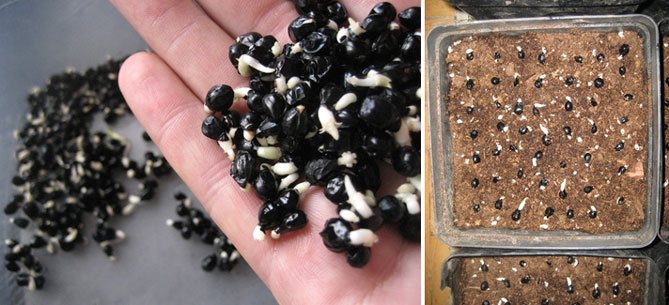
- When the seedlings grow 12 cm, a pick is made and planted in pots. The pots are placed on a windowsill well-lit by the sun's rays.
- Seedling care consists in watering, fertilizing, pest control, fungi.
Seedlings sown in early February, well fed, can bloom in August - September.
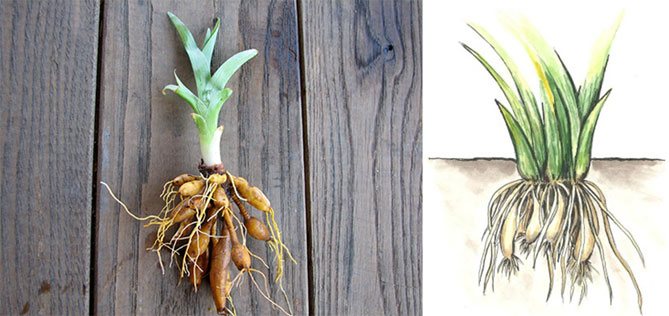
Planting bulbs, stolons
Saplings are not the best way to breed daylilies. These plants do not need a lot of heat during growth and germination, so you can simply plant the bulb itself in the ground. In fact, daylilies do not have typical bulbs, but stolons that form on the roots and are used for vegetative propagation of the plant. Summer residents often call them bulbs. It may happen that the bulb will release a shoot, the plant will look like a seedling, sometimes all leaves and rhizomes are removed before planting, especially if they are already old. Thanks to this, the stolon will sprout faster.
The stolons (bulbs) of daylilies are planted simultaneously with the seedlings of other ornamental plants - in the spring, before the start of the growing season. They are completely frost-resistant, therefore, even in the early stages of growth, they tolerate cold well and germinate quickly. The next moment of planting, when these perennials are taken, is the end of August - September.
Choosing a landing site
- Soils.Daylilies are grown on soils with high fertility. Here they develop faster, subject to receiving a large amount of moisture.
- Daylilies can be planted in full sun and partial shade. The more sunlight the plant catches, the larger the flowers. In the shade, the daylily will produce more lush foliage that resembles ornamental grasses.
Attention! The only thing that unpretentious daylilies do not like are shady positions, in the shade the plant stops blooming.
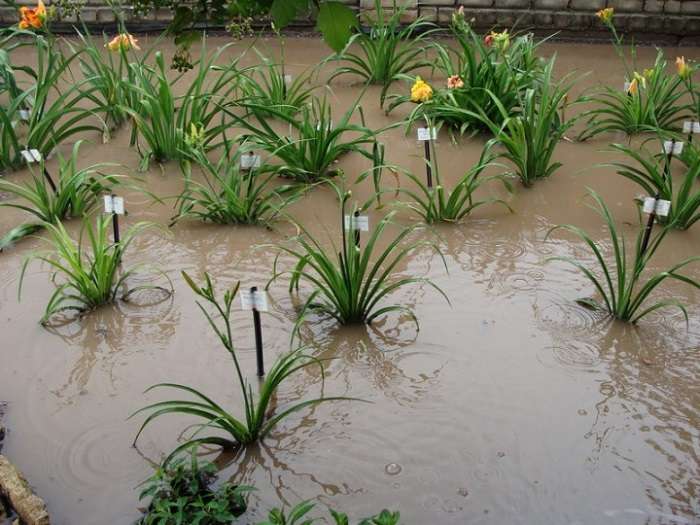
The daylily does not need a special position. All gardens, with the exception of the waterlogged ones, are suitable for growing. First, you need to supply the substrate with humus or compost so that the soil for the daylily has a supply of mineral components to begin with.
Daylily transplant
There is no need to repot the plant regularly. Sometimes you can replant the bulbs, because the plants grow quite quickly and can become tangible competitors for each other.

Common mistakes gardeners make
It is necessary to comply with the requirements for planting a daylily: good illumination, but at the same time the absence of a scorching sun on the site
If the bush grows more and more every year, and there is no flowering, there were probably some omissions during planting. Perhaps it is being looked after incorrectly, or the wrong variety has been chosen.
Typical mistakes:
- Too fast growth of green mass occurs in the case of an increased amount of nitrogen in the soil. In order for the daylily to bloom, you need to feed it with potash or phosphorus fertilizer, and exclude organics completely.
- There will be no inflorescences in the shade of a violent formation; the bush should be transplanted to an area well-lit by the sun.
- If the root collar is buried, there will be no flowers either.
- Some varieties are thermophilic and are not suitable for growing in cold climates.
- When the weather is dry and hot, flowering stops completely, as the plant suffers stress. During this period, it is necessary to water the daylilies more often.
- The defeat of spider mites or other harmful insects also does not contribute to the abundant formation of peduncles. It is necessary to periodically treat the seedlings with insecticides for prevention purposes.
Cardinal foliage pruning will help flowering. If the bush is overgrown, it is recommended to remove half of the leaves.
Growing and care
Watering
Watering is the main care activity. Daylilies grow best in soils with relatively high levels of moisture that do not dry out too quickly. If there is enough moisture, the plant grows well and produces beautiful flowers. Although they are very durable, they suffer greatly during drought, during this period they should be irrigated especially often.
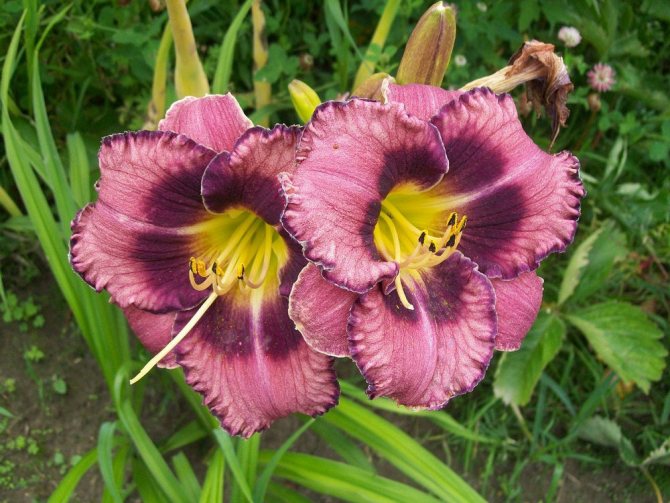
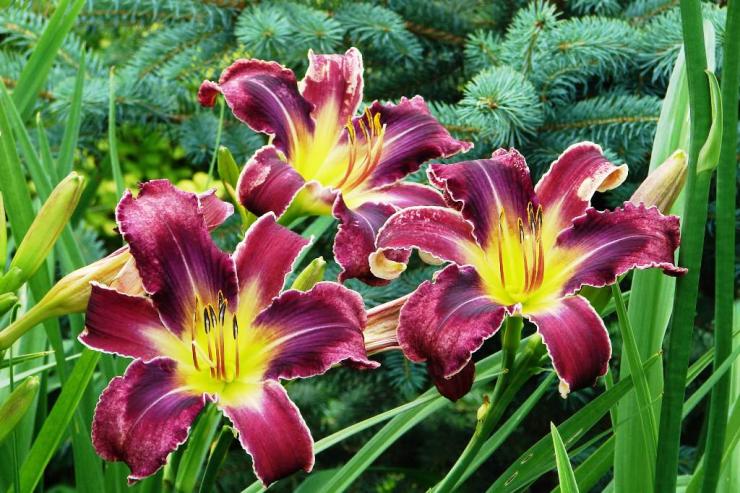
Attention! Variations of daylilies with red or purple flowers may not tolerate heavy rainfall and too much sunlight. Therefore, in their case, moderation is recommended.
For a long time, old roots can be left without water, which have a very extensive rhizome system and can easily penetrate into deeper underground layers.
Important! Watering daylilies must be done carefully so that the leaves do not get wet - this can cause fungal diseases. Water is poured in a not too strong flow around the entire cluster of roots, gently on the ground.
Daylily care in autumn and winter
Caring for daylilies does not require preparation for wintering, the gardener does not need to do anything. Perennial rhizomes winter well, do not freeze even in very cold months. Therefore, you can leave them in the ground - you do not need to dig them up or clean them if you do not want to grow plants in another flower bed. Daylilies quickly produce new shoots, so numerous gardens can be planted from one bush. Autumn care includes only planting overgrown bushes.
Fertilizer
Daylily care includes soil fertilization.The plant has an extensive root system, so it easily gets nutrients from the soil. Flowers without much care can grow up to 30 years in one place, so the land around them is greatly depleted. They do not have too many requirements for care, fertility, so it is enough to fertilize twice a year. A multicomponent mineral fertilizer is used for flowering plants.
Attention! Daylilies are sensitive to excess nitrogen. Therefore, you need to be careful with fertilizing, apply fertilizers in small doses, use multicomponent fertilizers with a balanced composition or compost. Fresh manure cannot be used, daylilies can rot in summer and freeze in winter.
When to plan a transplant in the Moscow region and other regions
Daylilies need at least 30–40 days to acclimatize and root. When determining the timing of the work, this time is counted back from the expected date of the first severe frosts. If you are late with planting, then the root system will not have time to take root in a new place, as a result of which the weakened plant will die in winter. On the territory of our vast homeland, climatic conditions vary significantly, so the timing of landing events is also different:
- the early and short autumn of the northern regions (Siberia, the Urals) dictates a strict time frame - the transplant must be done no later than mid-August (and it is better to postpone it until spring);
- in the middle lane, where the climate is milder, Krasnoday is transplanted from the last August decade to the second half of September;
- The warm and mild autumn of the southern regions allows you to extend the transplant until the end of October.
Daylilies need to be periodically divided and planted.
The lunar calendar recommends the following favorable days of the autumn months for the autumn planting of daylilies:
- 17-27 August;
- September 16-26;
- October 14-24.
I try to plant daylilies in May or at the end of April. But if suddenly the spring turned out to be very cold, then the soil does not thaw for a long time and you have to postpone this procedure until August. Flowers also take root well, but it is necessary to cover them with spruce branches before the very frosts, and then pour a snowdrift on top.
Diseases and pests of daylilies
Plant care includes constant monitoring of the condition of leaves, flowers, preventive measures and control of pests and diseases. During the growing season, various symptoms may appear on the plant:
- bleaching;
- spots;
- strips;
- holes.
Damaged daylily leaves should be systematically removed and destroyed. They may indicate the occurrence of one of the many diseases or the appearance of pests.
In caring for daylilies, the most important thing is to prevent all infections by skillful watering, disinfecting tools, maintaining proper planting distances, taking care of the good condition of the plants and, above all, purchasing planting material from reliable sources.
Bacterial wet rot
This is the most dangerous disease of daylilies. Rot caused by bacteria of the genus Erwinia leads to the loss of infected plants. The disease quickly causes plant rot at the base of the leaves. Infected tissues become soft, and an unpleasant smell of decomposing onions appears. High soil moisture and a sufficiently high ambient temperature can accelerate plant death. During the growing season, the disease spreads very quickly, with the help of tools or various insects.
The reasons for the development of the disease:
- poor care conditions;
- too intensive application of nitrogen fertilizers;
- heavy, moist substrate.
It is best to prevent infestation, as most often it comes with newly acquired plants.All suspicious specimens of planting material should be soaked for about half an hour in a bleach solution, and then planted in a separate place and observed. Fighting the disease is burdensome and not always effective. Severely infected specimens should be removed and disposed of immediately.
Rusty leaf spot
This dangerous disease can gradually kill the plant. The disease quickly spreads to neighboring bushes and negatively affects its health and aesthetic values. The fight is carried out using chemical antifungal drugs with a broad spectrum of action or environmental - Biosept, Biochicol. Infected leaves should be quickly removed and burned.
The disease occurs in the spring and manifests itself as brown spots and pits on the leaves. This is typical for areas with variable frost periods and positive temperatures. When fighting infections and prophylactically on healthy leaves, you can use approved fungicides from the triazole group.
Pests
The most undesirable are "guests":
- aphids;
- spider mites;
- thrips;
- snails, beetles and ants are also pests, although they will not cause plant loss.
Pests usually attack the aerial parts of the plant: leaves, shoots and flowers. Some species also feed underground by damaging small roots. They do not kill the plant, but they can cause stunted growth, disturbed flowering, plant deformation, tissue damage and indirectly contribute to pathogenic infection.
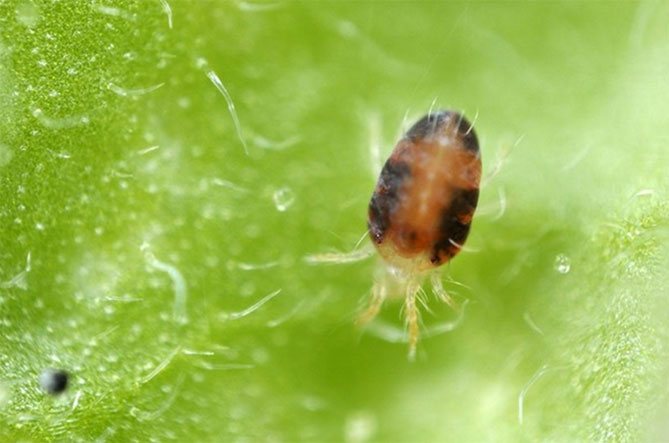
Spider mites
The most dangerous and difficult to fight are spider mites. Ticks multiply very intensively, every 3-7 days, they move to other plants and create new colonies, so the fight should be started as soon as possible.
The tick does not like water. Misting or abundant irrigation of the underside of the leaves is beneficial in reducing invasion. These are mites, not insects, so insecticides are not effective; broad-spectrum acaricides or insectoacaricides are used. Pests very quickly become resistant to many chemicals, so the fight must be carefully thought out. The biological method for controlling ticks is the use of insects.
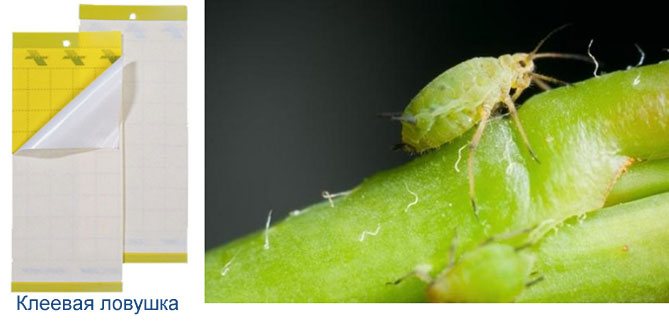
Aphid
It is the most numerous, widespread, varied pest of daylilies. The appearance of aphids varies depending on the phase of growth. The aphids that feed on daylilies are green. Under favorable conditions, aphids produce up to 50 generations, quickly form colonies, and move to neighboring plants. Knowing the insect's dependence on the host plant is useful in reducing and eliminating the pest. Aphids directly mechanically damage the plant and cause indirect damage, carrying various pathogenic infections, including dangerous viruses. Vapors released by aphids hinder photosynthesis and attract flies and ants. Pest control can be carried out using:
- natural methods (ladybugs or yellow glue flower traps);
- chemicals - actellic, decis, zolon.
Thrips
Thrips feed on plant juices, daylily tissues. In addition to mechanical damage to tissues, they carry various viruses, bacterial, fungal diseases. They feed on leaves and flower petals, eat away the content of anthers, which negatively affects the pollination of plants. There are many drugs available to combat thrips. Summer residents use potash soap solutions.
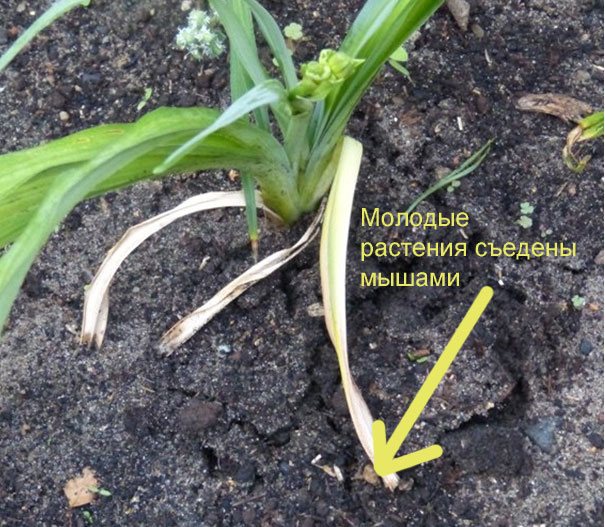
Mice, voles, moles
Vole mice can eat young shoots. Therefore, an important measure for plant care is the systematic control of rodents.
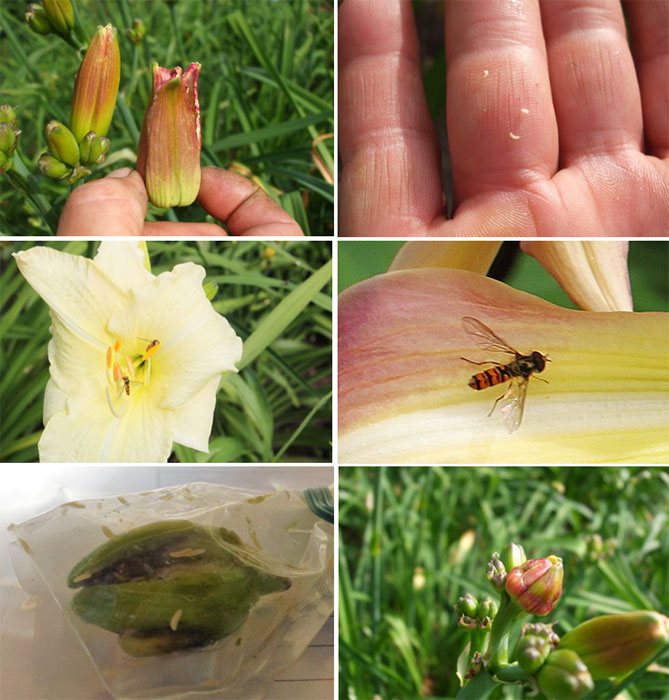
Two-winged (Contarina quinaquenotata)
The appearance of dipterans is observed on daylilies, the larvae of which develop inside flower buds, causing the absence of flowering.In early spring, the insect lays eggs on the buds of daylilies; in the depths of the embryo, a large number of small larvae, 1-2 mm in size, grow. Then, in June, the larvae emerge from the daylily flower, fall to the ground, where they hibernate in cocoons. They appear on the surface in spring to lay eggs on the buds.
In the spring, systemic insecticides should be used. Larvae are difficult to see, especially if vision is poor, but it is easy to notice the characteristic lesion of the daylily buds. Affected buds wither, they need to be removed and burned.
Ants
Ants do not directly damage the leaves and flowers of the daylily, but they act adversely when they build a nest in the ground, inside the root system. Insects contribute to the reproduction of aphids. Ants don't like:
- vinegar;
- baking powder;
- cinnamon;
- fresh tomato leaves located near protected plants.
Ants can be lured into objects of yellow color and taken out of the territory.
Snails, beetles, grasshoppers
Snails are harmful to young daylily seedlings. Pests feed at night, so they are difficult to spot. They do not like rough, cold surfaces, so it is worth sprinkling the ground around with coarse gravel aggregate. In severe cases, you will have to resort to the help of special plant protection products.
Beetles, grasshoppers, moth caterpillars, and wireworm larvae can feed on various daylilies. They do not directly cause plant loss, but the damage can cause serious pathogenic infections, so their numbers need to be controlled.
Preventive chemical treatment
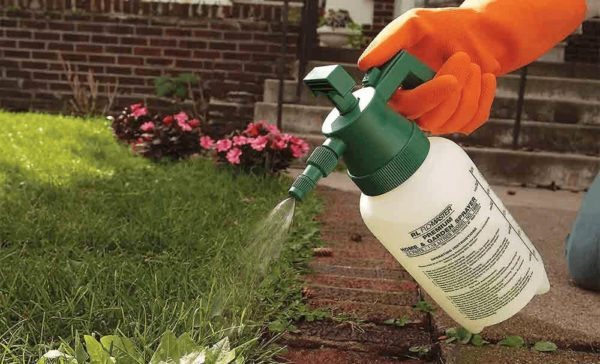
In the fall, plantings are treated with pest drugs, preventing them from wintering. Threatening plants:
- thrips;
- gall midge;
- nematodes;
- bear;
- slugs and snails.
Cleaning and pruning helps protect the daylily, but spraying is essential. Insects usually go down to the rhizomes for wintering, and only chemical means will help here.
For treatments use:
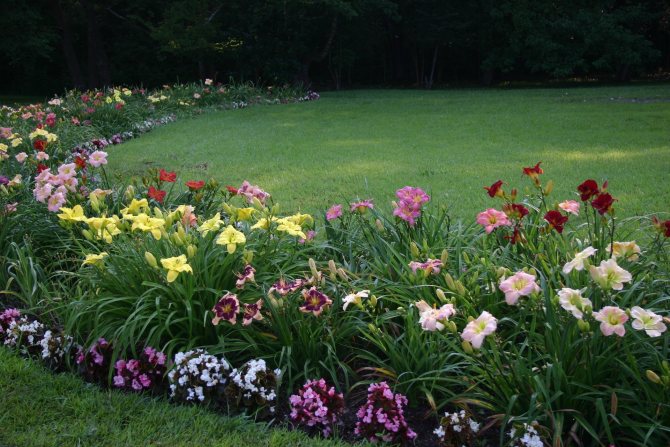
Use in landscape design
Daylilies come in many varieties and colors, and are self-sufficient in flower beds. However, they are rarely planted alone. Ornamental grasses are frequent companions of daylilies - large, very expressive flowers look very beautiful among green leaves.
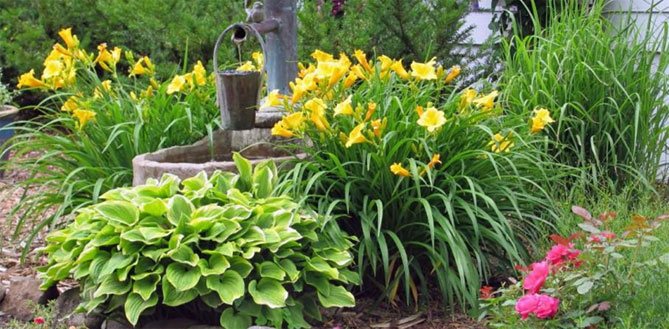
Daylilies are often planted in flower beds with bulbous plants. This is not only due to their beauty and low maintenance requirements, but also because it is one of the few bulbous plants to bloom in summer. Their flowers appear when crocuses and tulips have long faded, and lilies begin to disappear. During this period, rather similar irises compete with daylilies, so you should not combine these plants next to each other in a flower bed. Tall varieties will become the backdrop for other, smaller plants.
Daylilies look beautiful when planted in a row in front of a building or in a group of single-colored tall plants. They produce gorgeous clusters of dark green, glossy, lanceolate leaves that adorn the garden until late fall.
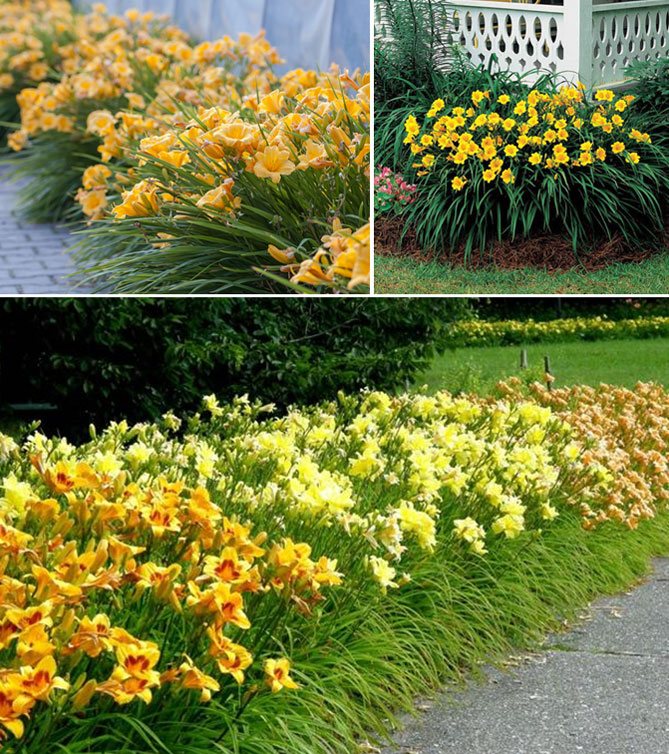
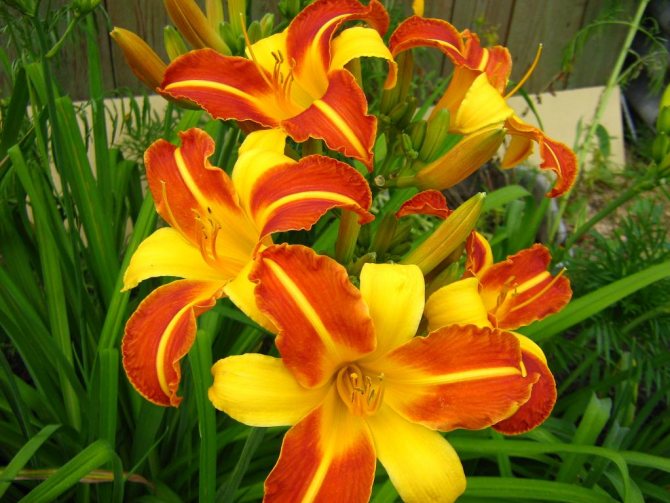
Daylilies bloom profusely from June (sometimes May) to August, the flowers resemble lilies. The most common varieties with yellow and dark orange flowers, there are different shades of red, purple, pink, bicolor petals, with a discolored middle, frills, flounces.
Daylilies are perennials, very easy to care for, have minimal requirements. Their flowers open during the day and close at night. Hence the botanical name of the species is Hemerocallis, or beauty of the day. There are many different colored varieties of these perennials. Beautiful flowers delight the eye from late spring to late autumn, withstand almost any soil and are extremely resistant to our capricious climate, pests, diseases and inexperienced gardeners.
Preparing for the winter
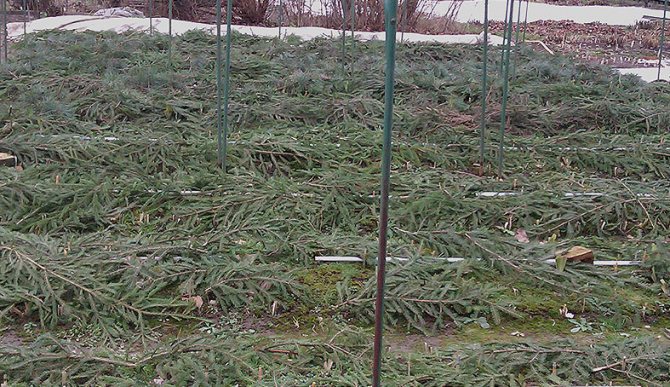
Flowers feel comfortable at temperatures in central Russia. They easily endure winter and do not freeze out if enough snow falls in frosts. But it is best to additionally cover the bed with mulch in the fall. To do this, a layer of two to three centimeters is poured onto the flowerbed, you can cover the plants with spruce paws.
Additionally, the flower should be spud, creating a comb, up to 20 centimeters high. The aboveground part of the daylily should be cut to the ground. It is especially important to cover young plantings, since the perennial roots have not yet had time to properly take root in the substrate. After the snow melts, the mulch layer is removed from the plants so that they do not melt and can freely break through the ground.