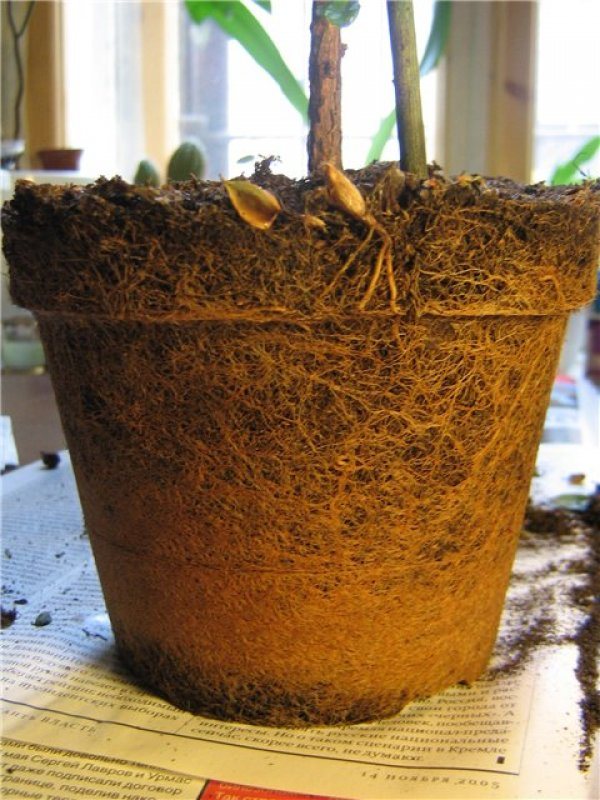
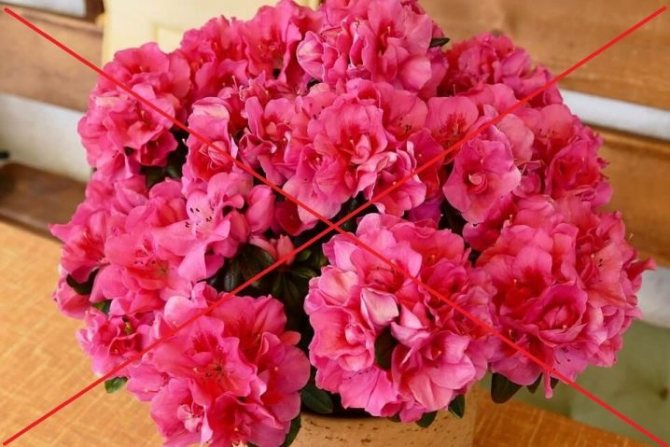
Azalea transplant and home breeding requires special attention. The flower grows quickly, branches densely, so young plants need to be replanted every year. Adults need this when a layer of moss forms on the surface of the soil or the ground is completely entwined with roots.
For azaleas, do not choose a deep and large pot, because the roots are close to the surface. The best option would be a pot that looks like a soup bowl or salad bowl. The flowering period of the plant lasts long enough. How to propagate an azalea without harming the mother flower? For this, there are certain ways to breed it.
How to propagate azaleas correctly?
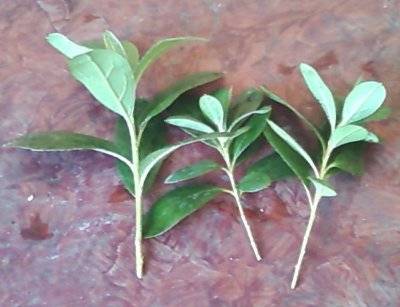
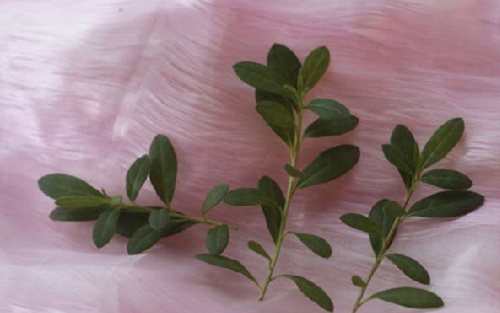
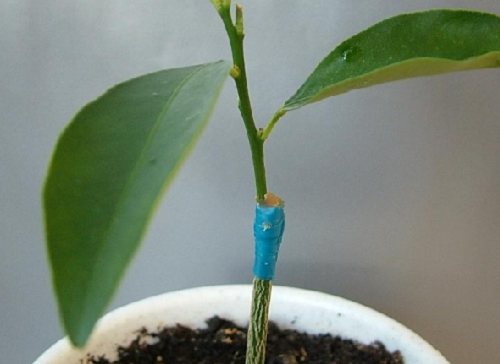
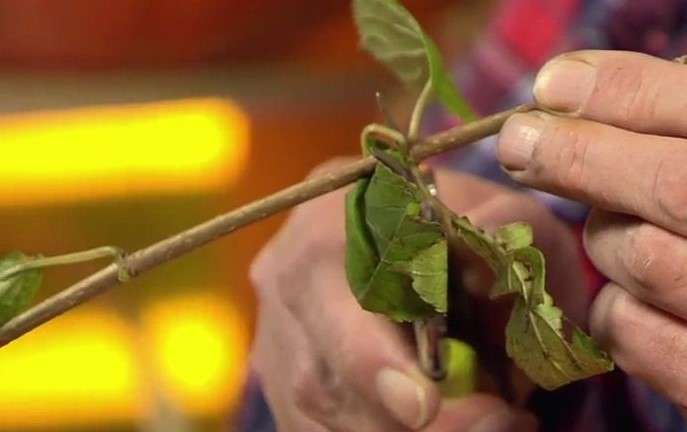
Reproduction of home azaleas is carried out from spring to August, as a rule, by stem cuttings in a substrate with an acid reaction, at a temperature of 25 degrees. Cover the cuttings with a glass jar or plastic wrap and water and spray regularly. Cuttings of this plant are cut only after flowering, 10 to 15 cm long. But remember that fattening shoots are not suitable for this. It is necessary to choose young, semi-lignified shoots; it is better to take the top of the shoot of the current year.
The three lower leaves on the handle are cut off, leaving 0.5 cm of the petiole. The remaining leaves are cut in half. The lower oblique cut is made under the bud itself, preferably under a group of crowded 3-4 leaves. Cuttings should only be harvested from healthy and well-developed plants.
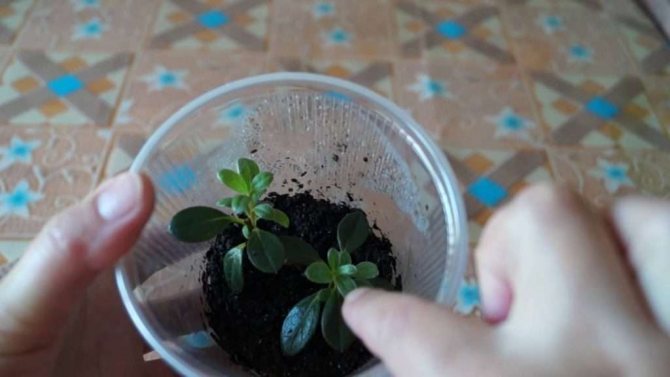
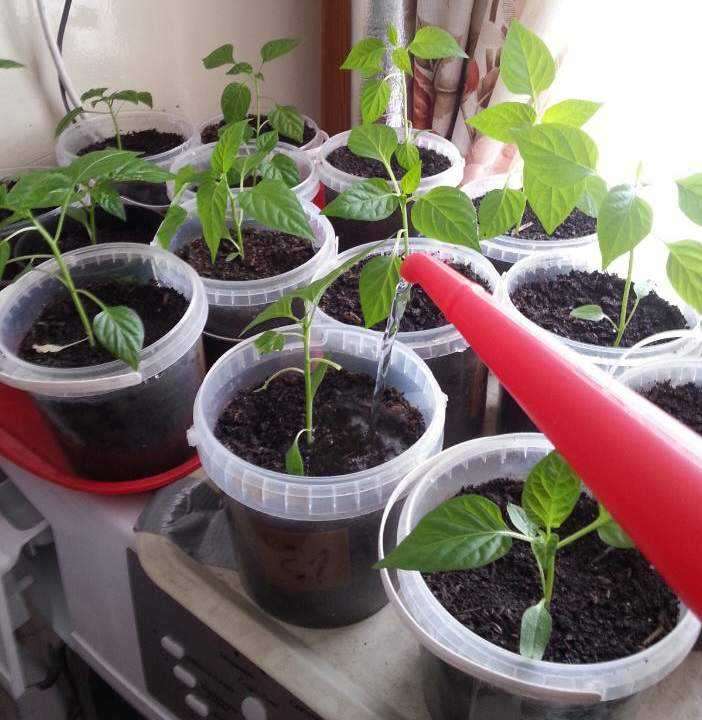
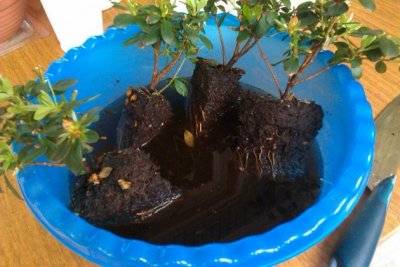
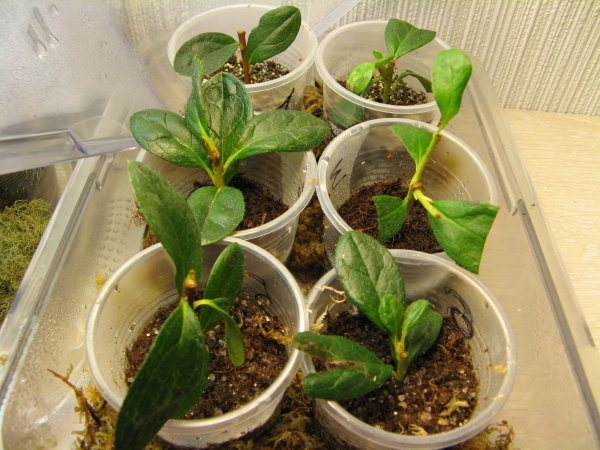
Before planting, the cuttings are tied in several pieces and immersed in a lower cut in a heteroauxin solution (2 tablets per 1 liter of water) for 6 hours. Can be soaked in root or zircon. After that, they are planted in bowls, boxes or greenhouses in a nutritious substrate to a depth of 2-3 cm according to a 4 × 4 cm scheme.
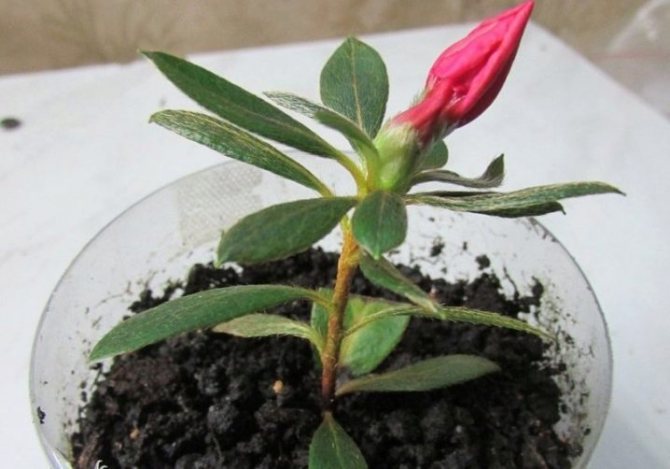
Rooting of cuttings will be faster if the soil substrate is acidic. The azalea pot is filled with substrate (special mixture for azaleas or slightly decomposed peat). Then, without moistening the earthen mixture in advance, it is watered “from the heart” with water. The pots of cuttings should be ventilated several times a week. To do this, it is enough to remove the plastic bag from the flower pot for a short time.
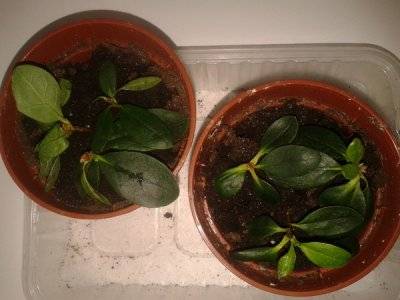
If everything is done correctly, then you should expect rooting of cuttings within 1-1.5 months at a temperature of 20-25 degrees. Rooted cuttings a week before transplanting to a permanent place "accustom" to the dry air of our apartments. First, the greenhouse is opened for 2-3 hours, and after several hardening sessions they are completely removed. Already hardened and rooted cuttings are transplanted to a permanent place and again covered with foil for 1-2 weeks so that they take root better.
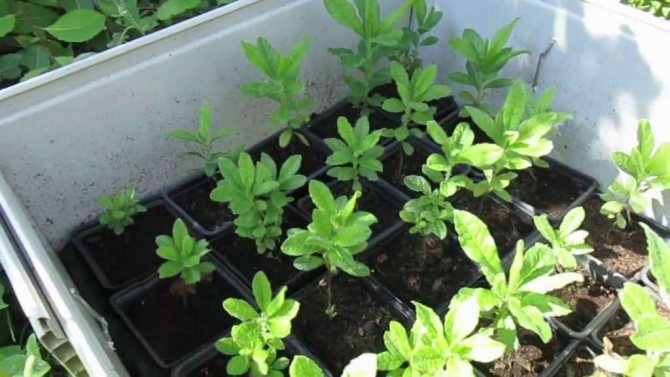
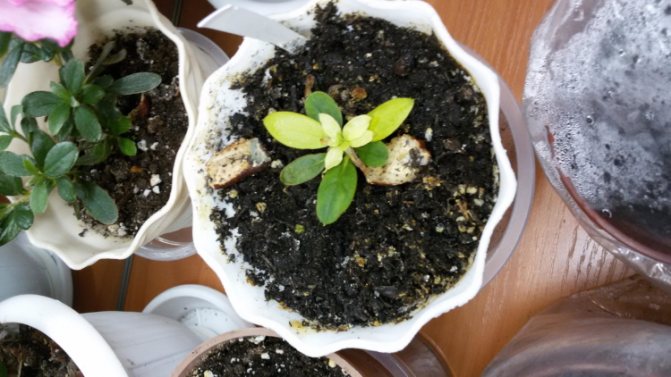
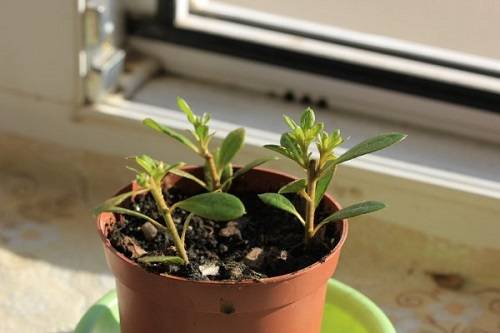
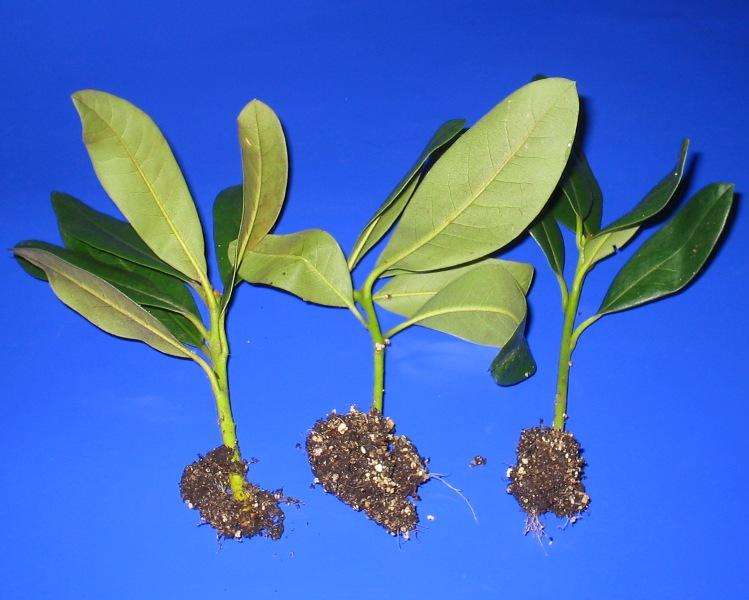
2-3 months after transplanting into another container, pinch the tops of young plants to form young shoots and form a bush. The first flower buds are removed. This promotes better shoot growth. In March, pinch a second time and cut off 4-6 new shoots. After that, young azaleas are transplanted into 9-11 cm pots with good drainage. The substrate is prepared from different parts of coniferous soil and peat. Plants are watered moderately with warm water. It is possible to grow young plants from cuttings in 2-3 years.
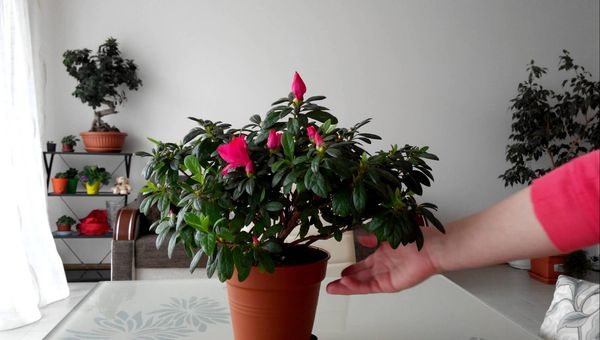
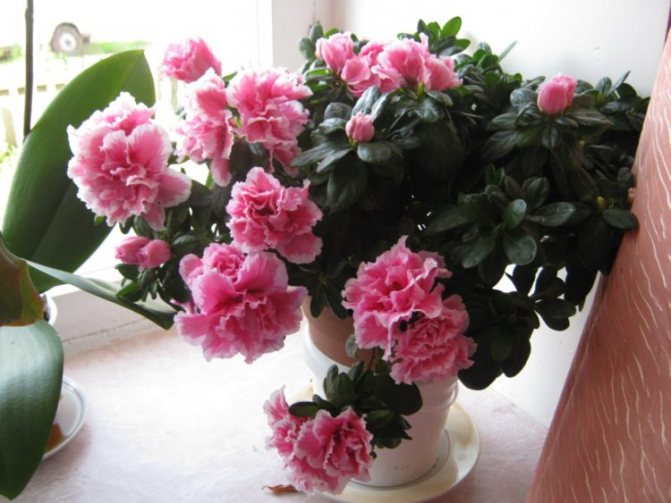
Photo: breeding a charming azalea at home will help not only increase the number of these beautiful flowers, but also get plants that are completely adapted to your conditions.
- Photo-lesson on growing azaleas (from the cuttings)
- Azalea Tips for Beginners
When is it allowed and when it is not allowed?
Reproduction for azaleas, when it comes to the vegetative method, as well as for other flowers, is stressful, so you need to take this issue as seriously as possible and carefully study the features so as not only to grow a new one, but also not to ruin the old plant.
The beginning of flowering of azaleas occurs in late autumn and continues throughout the winter. Any manipulation of the plant during this period can lead to the fall of the buds. Be sure to wait until the end of flowering, after which you can already start dividing the bushes and cutting off the cuttings.
The optimal breeding time for azaleas is from April to August.
If you decide to propagate the azalea by cuttings, remember that shoots can be cut only once a year, in the spring.
Growing from cuttings
Azalea propagation by cuttings is carried out in spring and summerwhen the flowers wither. If the flowering regime is violated, and in winter the buds are not formed, then cuttings can be carried out in the winter.
Preparation of planting material
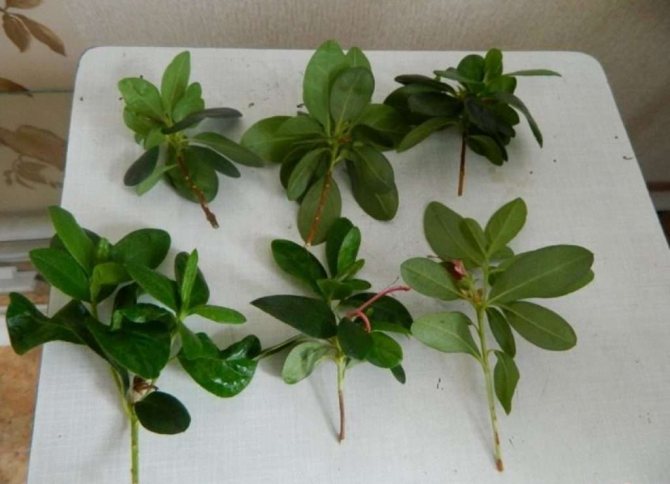
Cuttings are best taken from a strong, healthy plant. Cut off shoots from 4 to 7 cm long, the number of leaves on them should be at least 5... Use a pruner or a sharp knife.
The cut is made obliquely under the lower bud, stepping back 1 cm from it. The lower leaves are removed, leaving only a few leaves at the top. They are shortened in half, which is necessary to reduce the evaporation of moisture from the surface of the plant.
Green shoots of the current year are rooting well. Lignified cuttings do not give roots, they rot.
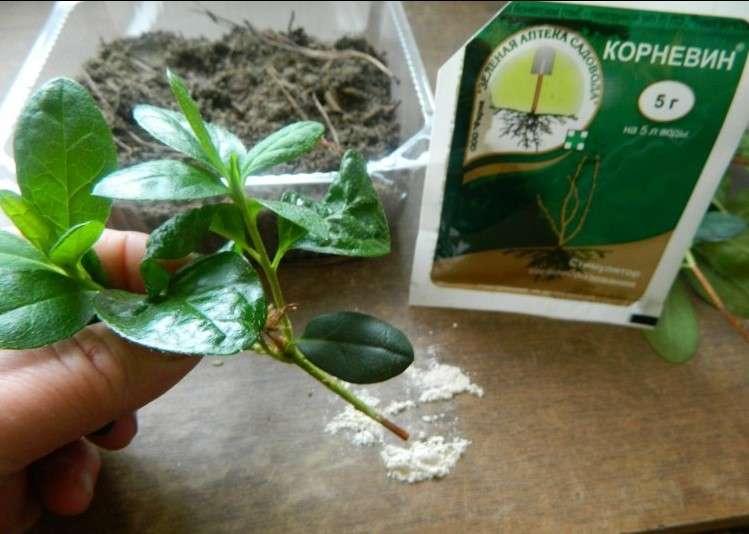
Before rooting the cutting, it must be treated with a root stimulant. Suitable for this Heteroauxin, Kornevin or Zircon:
- Heteroauxin - 1/5 tablet is diluted in 0.5 l of water... The tips of the cuttings are placed in the solution for 6 hours;
- Kornevin - some powder is mixed with the same amount of activated carbon, which is pre-ground... The cut of the shoot is moistened and sprinkled with the resulting mixture;
- Zircon - 10 drops are dissolved in 0.5 l of water... Cuttings should stand in this stimulator for 24 hours.
Planting cuttings
For planting azaleas, use a special land. It is purchased in a store or prepared by yourself, at the rate of 1 part of high-moor peat, 2 parts of coniferous land and 1 part of sand. A homemade mixture is recommended steam for disinfection... The required amount of soil is placed in a colander, and set over a saucepan of boiling water for half an hour. The earth is stirred periodically. You can disinfect the soil in the oven at a temperature of 100 °.
Before planting, the soil is abundantly irrigated with water. The ground should be very moist, but not wet.
The cuttings are buried in the ground by 2 cm, the distance between them is left at least 5 cm. The seating box or bowl is covered on top with glass or cellophane.
Seedling care before rooting
The greenhouse is placed in a warm, shaded place:
- the air temperature should be from 22 ° to 25 ° С;
- humidity inside the greenhouse is at least 80%;
- the best place is partial shade;
- in winter, soil heating will be required using a heating battery or an electric lamp.
Further care of the seedlings consists in daily airing and spraying. Air in the morning, 30 - 40 minutes.
Complete drying of the soil must not be allowed. The land is not watered but abundantly sprayed. Once a week, you can add citric or oxalic acid to the water, 2 grams per 1 liter.
Despite the fact that an adult azalea flower loves watering with cool water, water at room temperature is used for seedlings.From the contrast of warm air and cold water
Care after rooting
Azalea grows roots for a long time, about two months... During this period, the greenhouse must be turned over so that the seedlings do not twist.
The beginning of the growth of new leaves indicates that the roots have appeared on the cuttings. It's time to transplant small plants into separate bowls. Before this, it is necessary to carry out a hardening procedure, otherwise the plant will receive a shock from the change in temperature and will shed its leaves.
For the first time, the film or glass is removed for 2 hours, within 5 days this time is increased by 1.5 hours. On the sixth day, you can start a transplant.
The first bowls should be small, about 10 cm in diameter. A drainage layer of expanded clay or pebbles must be laid on the bottom. The land is used the same that was used for breeding.
The stalk is transplanted with a clod of earth. The depth of planting in a new place is the same as in the greenhouse.

Features of different types
Deciduous
For rooting deciduous varieties, green cuttings are used. They are characterized by:
- The presence of an immature bud at the apex.
- Young developing leaves are light green.
- Active continuation of growth.
If the shoot is quite adult, it is characterized by lignification, it has formed leaves of a dark green color. This suggests that the cutting is overripe and not suitable for reproduction.
Evergreen

For propagation of an evergreen variety, lignified cuttings are used. Moreover, they must be well ripened. A shoot that bends but does not break is not suitable for rooting. A suitable cutting should be:
- Healthy.
- Have a well-formed, healthy kidney.
- Have several mature leaves (at least 5).
- Be at least 10-15 cm long.
The selection of cuttings for different species of azalea will be different. How to determine if the cutting is ready to cut:
- It should be ripe, but not lignified.
- It should have a mature vegetative bud.
- Leaves should also be ripe, healthy (no signs of disease or pest infestation), and normal size.
- The stalk may have a flower bud.
- The size of the shoot should be at least 10-15 cm in size or slightly larger.
- The stalk should break with a characteristic woody sound.
The young stalk bends, but does not break. Such a shoot is not suitable for rooting.
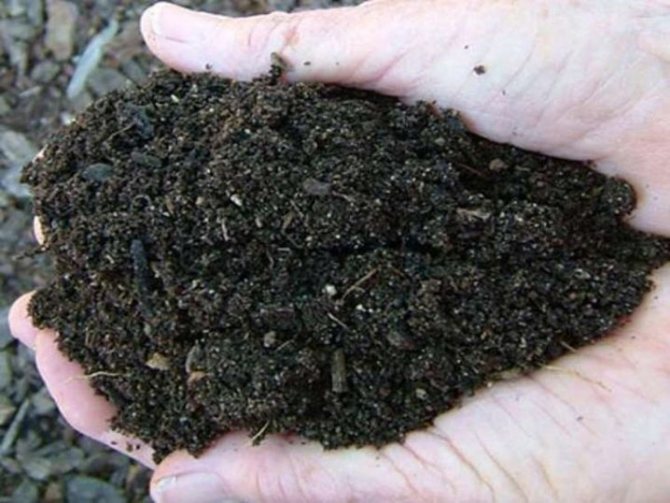
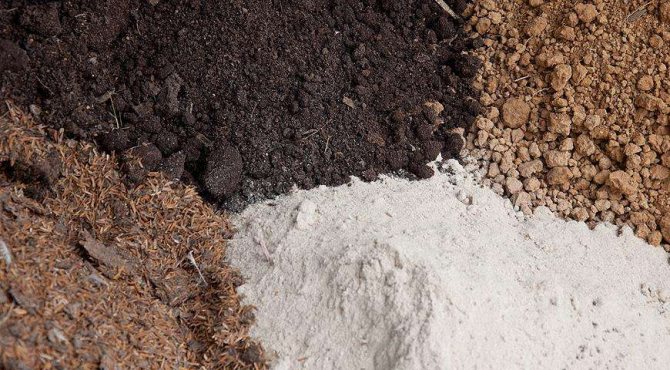
The soil
You can buy breeding soil for rhododendron at the store. And this is the simplest option. Or you can cook it yourself. This will require:
- 2 coniferous lands;
- 1 part high moor peat;
- 1 part sand.
It is advisable to add vermiculite to the soil for loosening. It should be light and loose. It is highly desirable to disinfect this mixture. This can be done over steam in a colander or in an oven at 100 degrees. Before planting, the soil must be irrigated with water. It should be damp, but not wet.
In no case should you use the soil from under the oak. Azalea does not tolerate this soil due to the large amount of tannins and low acidity.
Pot

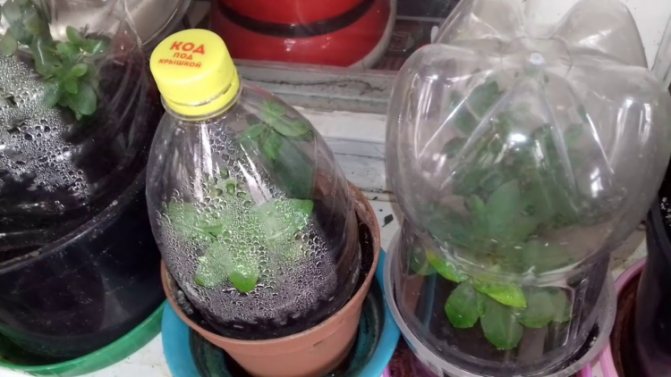
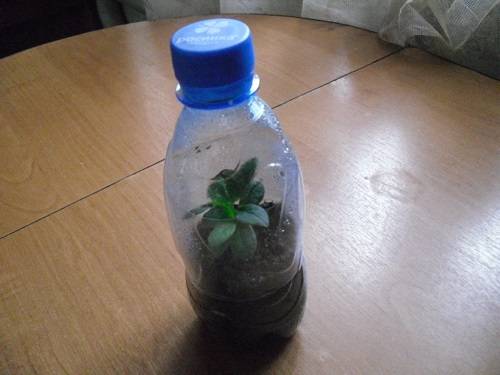
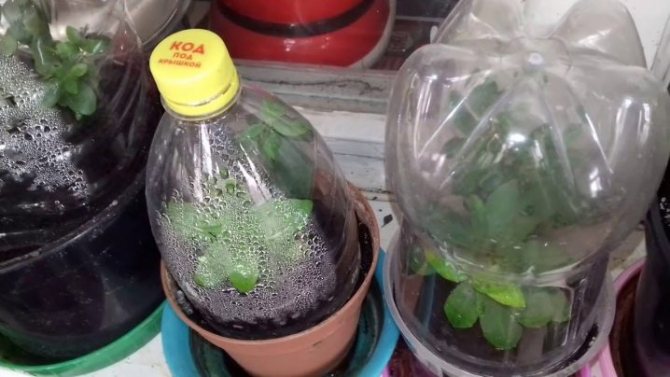
A glass jar or a cut-off plastic bottle can be used as a container. You can use an ordinary flower pot with a diameter of no more than 5 cm. Around the container you need to build a wire frame, on which a plastic bag will then be put on. The frame is made in such a way that the bag does not touch the leaves. This is how a mini-greenhouse is built. Also, a mini greenhouse can be purchased at the store.
After planting the cutting, it should be covered with a plastic bag so that the bag does not touch the plant. From above, this whole structure is covered with a dark cloth, since the azalea takes root in absolute darkness.
Some growers recommend this. Others advise, on the contrary, to put the plant in the brightest possible place and even add additional lighting.This leaves room for experimentation.
How to grow an azalea from seeds
Azalea propagates both by cuttings and grown from seeds. This method is less efficient and has some complications:
- seeds must be fresh, their germination is maintained for three months;
- sprout poorly even under favorable conditions. Sometimes not a single seed hatches;
- the characteristics of the mother plant are not transmitted during seed reproduction. But the new flower will not be worse, it will simply be different. In some cases, the azalea grown from the seed is superior to the plant from which the seed was collected.
But, despite the difficulties, if your flower has a box of seeds, it is worth trying to germinate them.
The soil is the same as for an adult plant. Seeds are sown on wet soil without deepening. Cover with glass from above and put on a place lit by the sun.
Seeds need to be sprayed periodically, the soil should not be allowed to dry out. They can hatch in 15 - 20 days.
When sprouts appear, daily ventilation is necessary. Further care and transplantation are carried out in the same way as for grafting.
Seed-grown azaleas will begin blooming not earlier than in 4 years.
Azalea after flowering
After flowering, the rhododendron needs rest. This is the best time for pruning and transplanting: they remove all excess shoots, cut off the flower tips of the branches and carefully transplant the beauty using the transshipment method, only partially replacing the soil. This procedure will allow the plant to gain strength for the next season. Remember that you can only trim the azalea before the end of summer, so that the plant has time to lay flower buds.
When the plant is accepted, watering begins to be reduced, putting the azalea into dormant mode until about February.
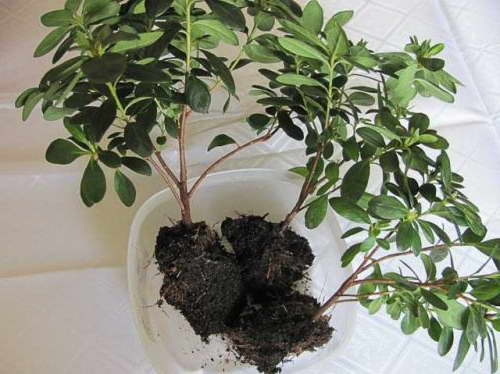
Reproduction by dividing the bush
This method is suitable for reproduction of purchased azaleas. For sale, several seedlings are usually planted in one pot. If the bush is young, it is easy to divide it without damaging the roots.
This procedure should be carried out after flowering ends.
The bowl is preliminarily lowered in a basin of water for 10-15 minutes, so that the clod of earth gets thoroughly wet... Then it is taken out and left for three hours. This is necessary in order to drain excess water.
Divide the bush by cutting it with a sharp knife. Those places in which the roots are intertwined must be carefully separated with your hands. The less damage to the roots, the easier the division will adapt to a new place.
The earth is not shaken off the roots, but immediately placed in a new bowl. Its size should be small. The soil that is not filled with roots turns sour. It is best to start with a small pot, and transplant into a larger one every year without breaking the earthy coma.
If part of the roots has been damaged, then the transplanted shoot must be covered with a transparent bag on top, or an inverted jar must be placed on it. It should be opened gradually, two weeks after planting.
Pruning and shaping the crown of an azalea
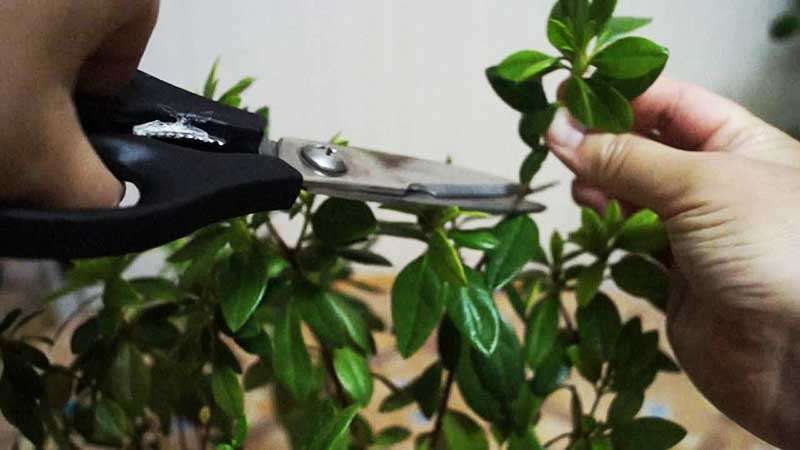
Azalea pruning can be described as shortening last year's shoots, removing weak, close-growing branches in order to create a neat crown with an even distribution of flowers. For a beautiful crown, constant cutting and pinching is necessary. Remember, excessive branching of the bush can interfere with flowering.
To late varieties of azalea, the removal of excess shoots is carried out from the beginning of May, to early varieties in March. Pinching the tops, leave 4-5 leaves on them, cut off the shoots next to the flower buds too. At the end of summer, when the plant begins to lay flower buds, it must be properly pruned; if pruning is delayed, the buds will not form. At your discretion, the azalea can be decorated as a tree, bush or bonsai.
If you want the azalea to form a uniform crown without distortions, constantly rotate it around its axis.
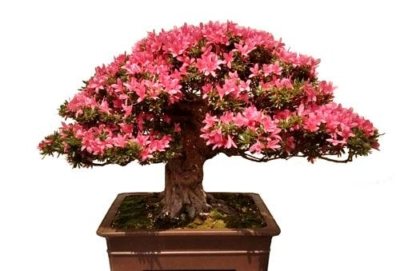
How to form an azalea bonsai?
Azalea bonsai how to form a photo
- To form a bush, pinch the azalea at the cutting stage, leaving 10-12 cm in length, arrange the side shoots in the same way.
- To form a tree, first remove absolutely all shoots, with the exception of the central branch, growing it strong, even, use a support, regularly rotate the flower around its axis. When the desired size is reached, pinch the top, which will give rise to branching, constant turning of the flower, trimming the side shoots will help create a tree with a rounded crown shape.
- To form a bonsai, form a central shoot, then, pinching - the side ones. To give the plant a curved shape with horizontal branches, tie small weights to the branches or tilt them with thick wire, wrap the shoots with it and bend it down as you wish.
Question answer
No, don’t. It is enough to put it in a place where the sun's rays do not fall. If you have to place the greenhouse on the windowsill, then it is best to stick dark paper on the bottom of the window glass.
The earth is moistened regularly, keeping it moist, preventing it from drying out. If you are going to spray, and the ground is still wet, then postpone the procedure for a while. Check the condition of the soil every 3 to 4 hours, moisture from it can evaporate very quickly. If the moment of spraying is missed, it can be disastrous for the cuttings.
This can happen for several reasons:
- lignified cuttings were taken for rooting, but they are not suitable for propagation;
- the soil is contaminated with spores of fungi or bacteria, or the tools used to cut the shoots are not disinfected;
- the soil in the greenhouse is not sufficiently heated. This is especially important when breeding azaleas in winter. For heating, a 60 W incandescent light bulb is suitable, the lamp with which must be placed under a box with cuttings. For example, a box with seedlings can be placed on a stool and a lamp on the floor under it;
- cold water was used to irrigate the cuttings.
In addition to stimulating root growth and heating the soil, root formation can be accelerated by spraying cuttings with Zircon once a week. To do this, add 2 drops of Zircon to a glass of water.
Rooting takes place in 1.5 - 3 months.
The easiest way is propagation by cuttings. Since the azalea bush must be formed annually, removing shoots, there is always a lot of planting material. There are times when the cuttings do not take root, but this rarely happens. Flowering when propagated by cuttings can begin in a year. The buds are tied earlier, but it is recommended to remove them so that the azalea grows shoots.
Difficulties and problems
Decay
The reasons:
- If the shoots are of unsuitable quality, for example, lignified or diseased.
- If the soil is not suitable or it is infected with fungi and bacteria.
- If the instruments are not sterile and an infection has been introduced during cutting.
- Cold soil in the greenhouse, especially if you propagate the azalea in the winter.
- If you irrigate the cuttings with cold water.
Knowing all these nuances, you can prevent many problems with the reproduction of azaleas.
Lack of rooting and growth
If the stalk was planted in a greenhouse three or four months ago, but young leaves do not appear, the shoot does not grow, this indicates that rooting has not occurred. In most cases, these plants are doomed.
Doom
There are situations when a plant has taken root and started to grow. And then it just withered and died. For azaleas, such situations are not uncommon, since azaleas are quite capricious and reacts painfully to any changes in the environment (temperature, humidity, drafts, direct sunlight). So that your work is not in vain, experienced root more cuttings at a time. This increases the chances of a positive result.
How does azalea breed?
Reproduction of azaleas at home, as a rule, occurs in several ways: using seeds, grafting, grafting and dividing the bushes (usually an old plant with a lot of shoots is used). Let's dwell on the first two.
Growing azalea seeds at home
Seed breeding of rhododendron is a method that experienced flower growers rarely use, since it is enough labour intensive and not very effective.
Plant seeds germinate only if there are created for them conditions, such as:
- having a permanent sunshinea (therefore, it is better to grow azalea from seeds in the period from May to August, unless the cultivation takes place in greenhouse conditions with artificial light);
- creating a "greenhouse effect";
- the presence of specialized soil;
- constant humidity.
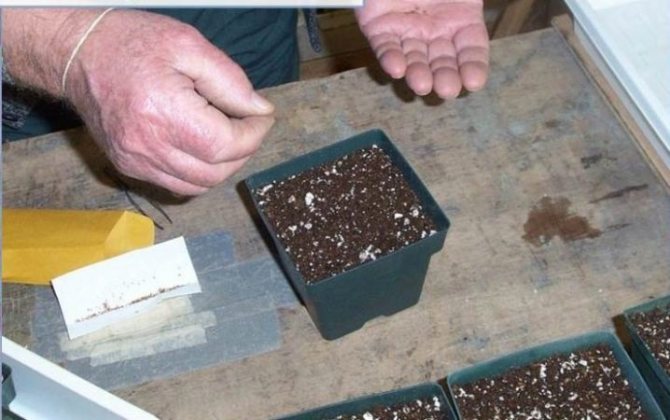
The process of breeding azaleas using seeds can be considered step by step:
Step 1. Sterilization of expanded clay or river pebbles. You can sterilize them either in the oven. 15-20 minutes at a temperature slightly above 100 degrees, or soaking in boiling water for the same time.
Step 2. Preparing the pot. Expanded clay or small-diameter pebbles are laid out on the bottom of the pot, in which the seeds will be planted, in a layer 2-3 cm... After the pebbles are laid out on the bottom, clean sand is poured on top, then the soil.
Step 3. Planting seeds. Seeds must be scattered over a damp surface of moistened soil and covered with cling film. The soil should be moistened daily, but not by coarse watering, but spraying from a spray bottle, removing the film and covering the seeds again. The polyethylene can be removed after the seeds begin to germinate.
Even if the conditions in the room where you plan to breed this beautiful flower are close to ideal, this does not guarantee that the seeds will take root.
Even if they were not purchased in a store, but were taken from "trusted" hands, from a beautiful healthy plant, it does not mean that the flower will grow exactly the same as the "donor" of its seeds.
Growing azaleas by cuttings at home
Propagation of azaleas using cuttings is the method when the end most justifies the means. The cuttings of the plant should already be sufficiently matured for transplantation, but not lignified. The best age for planting cuttings is when they from 5 to 7 months.
The most optimal conditions for cutting azaleas:
- constant air temperature 24-27 degrees;
- air humidity 80-85%;
- acidic soil (specialized soil is suitable, from under conifers or peat).
The process of propagation of azaleas by cuttings goes through several stages:
Step 1. Choosing a cutting. It is necessary to choose a sufficiently mature stalk of the azalea, separate it from the main plant with an oblique cut under the lower bud, remove the buds from the cutting and leave 3-4 leaves at the top.
Step 2. Cutting preparation. Before planting, you can treat the azalea stalk with a non-concentrated solution of potassium permanganate or a growth activator. If the cuttings are planned to be planted not immediately after cutting, then they must be formed into bundles and lowered with a lower cut into a solution of heteroauxin for 7-8 hours.
Step 3. Preparing the landing site. Whether it's a pot, a box or a small greenhouse, the principle of preparation is the same: sterilized pebbles are laid out on the bottom, and soil is on top of it. Before planting, the soil should water well.
Step 4. "Setting" the cutting in the ground. In order for guaranteed one or two cuttings to take root, they can be planted 3-4 pieces in one pot, or a large amount if the cuttings germinate in a box. Cuttings should be planted in abundantly watered soil at a distance. 4-5 cm apart, to the depth 2-2.5 cm.
Step 5. Creation of conditions for growth. The cuttings are covered with foil or placed under a glass dome.Initially, the azalea should be covered with a dark cloth and accustomed to sunlight in doses, avoiding direct contact. The time spent under the rays gradually increases until the stalk is take root... Then the plant can be constantly kept in a lighted room. From time to time, the soil should be moistened with a sprayer and ventilate daily cuttings.
Of course, if you are just a novice florist, growing an azalea will bring some difficulties, but you should not ignore such a beauty as an azalea. With a little effort, you will see how your home will transform with the first azalea bushes blooming!
Topping
Pinching for azaleas is performed with the aim of improving tillering of the plant, getting more ovaries and buds. The operation is performed from late spring to mid-summer. After flowering is complete, single flowers should be removed and the emerging shoots should be pruned and pinched.
Pinching is a sure way to form a crown of plants.
Florists recommend pinching to eject side shoots instead of growing tall. You can perform this procedure when new shoots grow to a height of about 50 mm with nails, biting off several upper leaves with them.
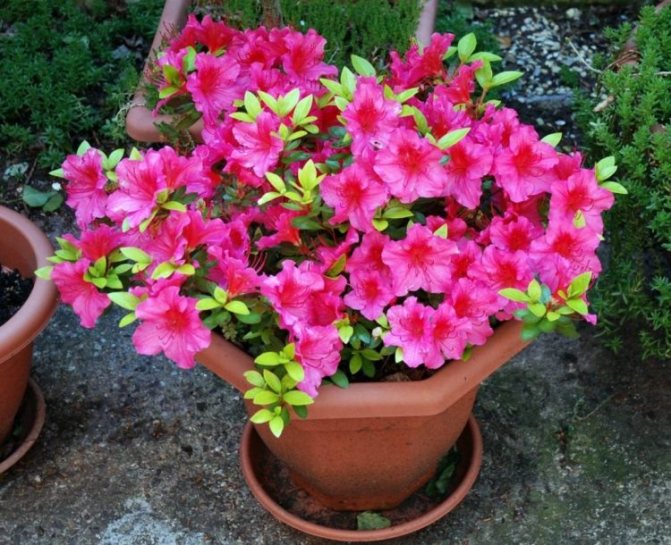
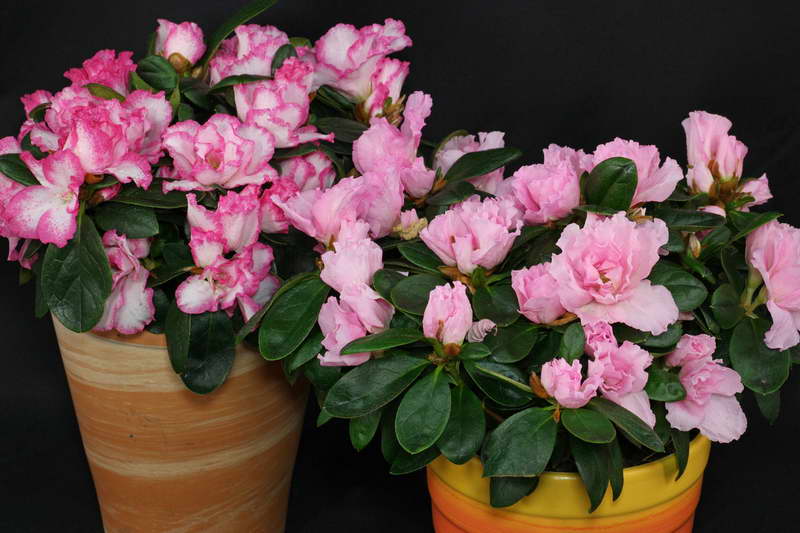
Photo
Photos of the growth of an azalea flower are presented below:
selo.

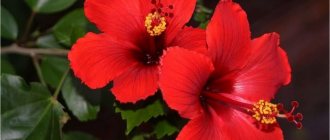
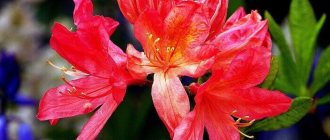
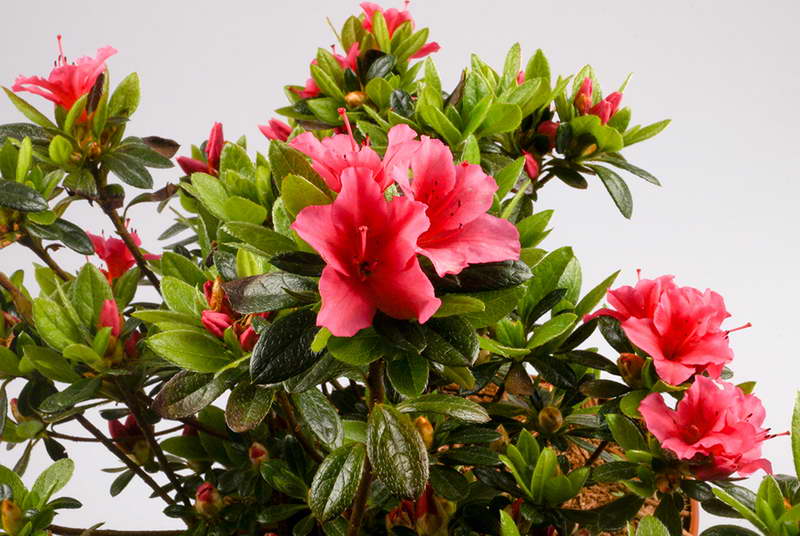
Types of home azaleas with photos and descriptions
The enchanting azalea, called Azalea in Latin, is a representative of the rhododendron genus, the heather family, and constitutes a group of species that was previously only a separate genus of plants.
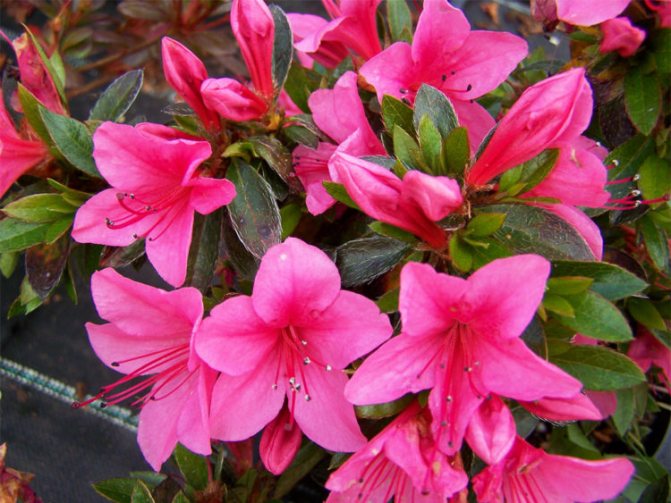
Giving flowering in cold winter, filling the house with spring mood, azalea, also called rhododendron - "rose tree", enjoys overwhelming success among flower growers.
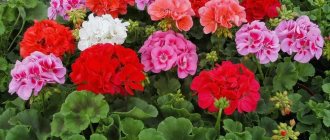
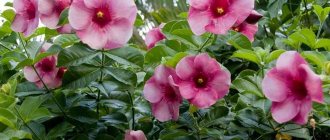
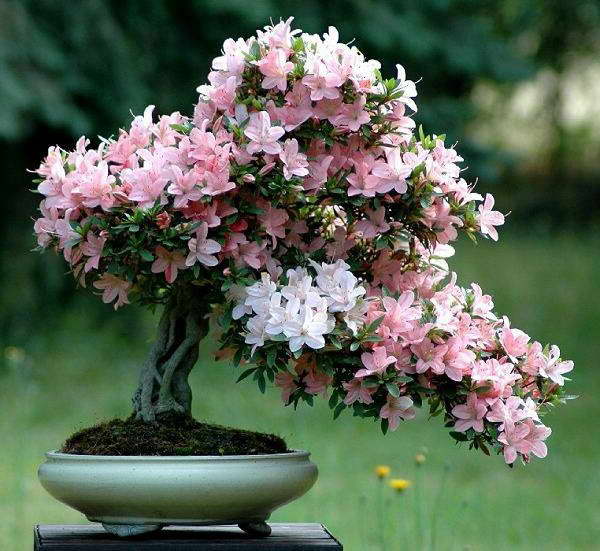
In its natural environment, azalea rises in Japan, China, southern Europe and North America, including Southeast Asia. Revered in the East as a symbol of joy and peace, popular for composing bonsai. Flowering is striking in its beauty and variety: simple or double flowers, corrugated or fringed, white, red, all kinds of shades of pink, purple or variegated. This miniature, compact, well-branched bush is distinguished by a flowering period that occurs earlier or later.
The ancestors of home breeding of azaleas were two original species:
Indian azalea or azalea rhododendron sims Rhododendron simsii
Indian azalea or azalea rhododendron sims Rhododendron simsii photo
Shoots are covered with bristles, charming flowers 3.5 cm in diameter, funnel-shaped, two-colored, may be speckled.
Japanese azalea or rhododendron blunt Rhododendron obtusum
Japanese azalea or rhododendron blunt Rhododendron obtusum photo of flowers
It has glossy casting, funnel-shaped large flowers with a diameter of 3-5 cm. Along with sakura, it is a national plant of Japan, constantly used by Japanese gardeners.
The two described species - dwarf bushes reaching 30-50 cm, are often used not just as a houseplant, they form popular bonsai-style compositions of them.
Propagation of azaleas by cuttings
In summer, cut off a 6-7 cm long stalk from an adult azalea bush. Make an oblique cut under the bud, and remove the lower leaves. Put the cutting in the root solution for 5 hours.
For propagation of azaleas, it is better to use non-lignified young cuttings.
Next, plant the stalk in a pot or plastic bottle (you can have several pieces in one container at once). To create greenhouse conditions, cover the top with a jar or cling film stretched over the frame.
Azalea takes root in absolute darkness, therefore it is necessary to put on a dark fabric on the created "greenhouse".
Put the pot with cuttings in a warm room (20-25 degrees Celsius).Further care consists in frequent watering and spraying, since the azalea is very moisture-loving and will not take root in dry soil.
After the first shoots appear (after 2 months), the shelter is removed, but not immediately. It is necessary to gradually open the jar or raise the film, each time increasing the time. After the rooted cuttings grow up to 2 cm in height, they should be pinched to stimulate the growth of lateral shoots and the formation of a young lush bush. The first buds are also removed so that the bush actively grows green mass. With the help of cuttings, you can get an adult young azalea in two years.
History of origin
China and Japan are considered the birthplace of azaleas. But it can also be found in North America and southern Europe. In Russia, the plant began to appear at the beginning of the 20th century. It is still unknown where exactly bonsai were first formed.
What is the difference from other types of rhododendron?
Unlike other plant species, bonsai grows small in stature. At the same time, it easily lends itself to crown formation and tolerates pruning well.
Subsort of this species
There are many types of plants. But not all of them are suitable for growing like bonsai. The most popular variety is Mikrantum, which is translated from Latin as "small-flowered". It has green shiny small leaves. The flowers are small but bright. The crown is spacious and dense. The species of azalea kurume and azalea satsuki are also widely known.
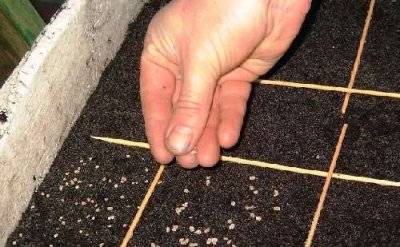
Seed propagation

Azalea seeds are sown in the month of March on moistened peat. Do not sprinkle with earth on top, just spray the seeds. Cover with foil or glass and place on a well-lit windowsill. Instead of watering, spray the seeds every day and ventilate them regularly.
Fresh seeds, which are no more than three months old, have the best germination.
After the seeds germinate, the film is removed, and when a couple of real leaves appear, the azalea seedlings dive into a common container with a distance of about 5 cm. You can transplant the bushes into separate pots already at the end of summer.
Azalea rhododendron care at home
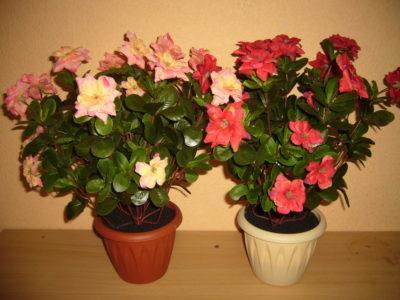
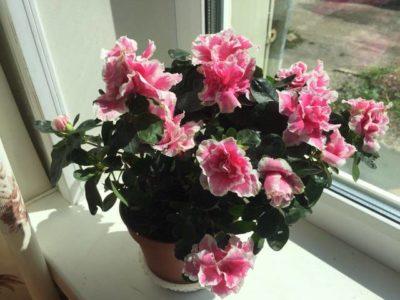
Often, received as a gift or purchased in a store, a magnificent azalea blooms magnificently for a long time, pleasing the eye, and then, unfortunately, dies - they decide to throw out the plant. In vain! Azalea is just going through a period of adaptation to living conditions. Show patience and attention: the bush will gradually regain strength and release new leaves. Having mastered the basic rules of care, you will make friends with a magnificent beauty for many years, who blooms throughout the warm season.
Site selection, temperature and lighting
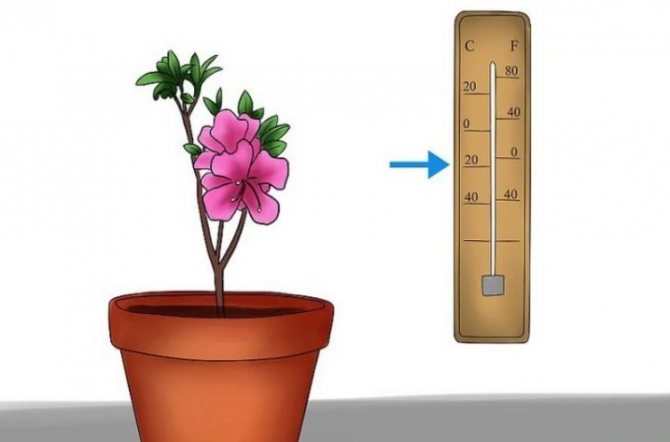
Azaleas need diffused lighting or weak partial shade along with cool air, the scorching rays of the sun will kill it. It is difficult to keep cool in summer: put the plant in the shade, preferably on the west or north window, ventilate the room more often.
It will be good for the summer to dig in a pot of azalea in a shady part of the garden, protecting the beauty from direct sunlight. Even if you just put the azalea on the balcony, summer rain will be very useful. It is necessary to return the plant to the room before the start of the heating season. The ideal climate for azaleas can be compared to a warm, foggy autumn - 10-14 ° C during the day, 6-8 ° C at night, combined with high humidity. The plant feels comfortable enough even at 18-20 ° C, if you do not forget to constantly moisturize the leaves.
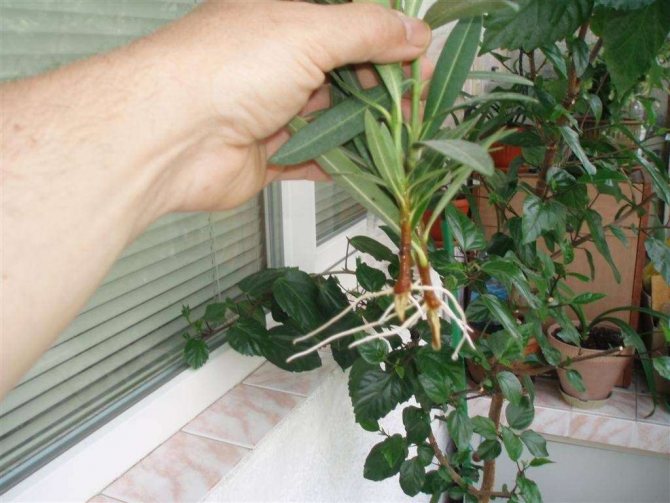
Grafting a cutting
For the rootstock to be inoculated, choose an adult plant (at least three years old) that takes root well. Take from him a stalk 15 cm long with roots. Separately cut the stalk from the young shoot of the azalea.
The cuts on both cuttings should be made the same (oblique).
Place both cuttings on top of each other with a cut point and wrap it with foil. Plant the grafted stalk in a pot and cover with foil. Water and spray the plant.
www.glav-
Reproduction method by grafting
Such breeding is used if the root system is difficult to form during cuttings. Vaccination is best done in the second half of May and June. First of all, you need to choose a stock - a cutting with a good root system, to which the flower variety you like will be grafted into in the future. Its length should be at least 15 cm. The age of this process is approximately 3-5 years.
Then it is necessary for the scion, it is the grafted variety of rhododendron, take a young stalk so that it has eyes on it. On the scion and rootstock, equal oblique cuts are made, which are connected. This place needs to be wrapped with plastic wrap. All this is planted in a greenhouse or covered with a glass jar. We must not forget to ventilate, spray and water the plant, because it loves water.
Reproduction of azaleas at home by cuttings
In indoor conditions, it is quite easy to spread the azalea by cuttings. It is advisable to carry out the procedure in the spring and summer. For fast rooting, you need:
- Prepare an acidic, nutritious substrate.
- The cuttings must be at least nine centimeters in size. The lower part of the shoots must be cleaned of leaves. Several vegetative organs can be left on top of the stem.
- It is recommended to cut a side cut just below the leaf group or bud.
- A beautiful flowering azalea should be used to breed a lush plant. It is not recommended to take shoots from a damaged or infected crop.
- Cuttings for propagation can be cut no more than once a year.
- To stimulate the formation of their own roots, cuttings must be placed in a stimulant solution. It is enough to dilute two Heteroauxin tablets in one liter of water at room temperature. A bound bundle of fifteen cuttings must be lowered into a container with a preparation. After six hours, the shoots are ready for planting. You can also use effective preparations for azaleas - "Zircon" and "Kornevin".
- The treated stems are transferred to a nutrient medium. Planting depth should be no more than four centimeters. It is necessary to observe the distance between the shoots - about three centimeters.
- For planting, it is recommended to use shallow containers, bowls or small greenhouses.
- At the bottom of the container, be sure to lay out a drainage layer of no more than three centimeters. It is advisable to use expanded clay, pebbles, gravel or pieces of broken dishes.
- Pour two handfuls of clean medium-grain sand on top.
- The pots should be filled with a prepared mixture of coniferous soil and softened peat.
- The planted cuttings must be covered with plastic wrap.
- The azalea should be sprayed daily.
Vermiculite can also be used for spreading. The soil mixture promotes the rapid rooting of cuttings.
It is important to provide the azaleas with the proper conditions. The temperature should be maintained at about + 25 degrees. The relative humidity should be at least 80 percent.
In a favorable environment, shoots can take root in 45-60 days. By this time, the cuttings will have their own massive root system.
Indoor temperatures below + 22 degrees will destroy the planting material. Experienced gardeners recommend heating the substrate with warm heating pads.
How to transplant an azalea and divide a bush
How to propagate an azalea by dividing a bush photo
Azalea bushes grow over time, they become cramped in the allotted pot. So it's time to start transplanting and dividing. Water the plant well and let sit for a few hours. After that, carefully remove the pot from the earthen clod and try, without damaging the roots, to divide the bush into separate parts. Azalea roots are superficial, rather fragile. We try to choose a wide, stable pot, in which the plant will have room to grow wider.
Care of cuttings
Planted azaleas require constant care.Keep the container in a well-lit place. You will need to rotate the container regularly to get even sunlight.
It is recommended to carry out the procedure from mid-July to the end of October.
Planted cuttings must be ventilated every morning. Half an hour is enough for cuttings for a daily supply of air.
When the first shoots appear on the azalea, you can remove the shelter. At this stage, the plant has developed its first roots. It is important to provide a high humidity environment. The azalea should be sprayed constantly. It is not advisable to allow the substrate to dry out. You can also place an open container of water near the container.
Compliance with all conditions guarantees the survival rate of cuttings of more than ninety percent.
For more information on azalea cuttings, see the video:
Diseases and pests
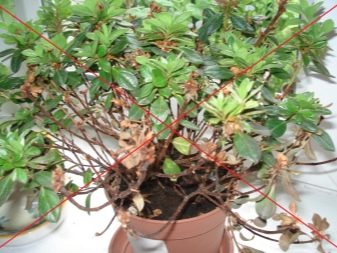
The plant is often exposed to various diseases. The following diseases are most common:
- Decay of roots. Occurs due to excessive watering and moisture. The irrigation regime is reviewed and the azalea is sprayed with a phytoverm solution.
- Hypothermia necrosis. Leaves turn brown due to long exposure to a cold room. The pot is moved to a warmer, bright place.
- Chlorosis of the leaves. Occurs due to watering with hard cold water. To prevent this from happening, the water is either acidified or defended.
Azalea bonsai is often attacked by pests such as bedbugs, spider mites or mealybugs. With a weak lesion, the leaves are wiped with soapy water, and with a strong infection they are treated with insecticidal preparations.
Indoor azalea is an evergreen bush from 30 to 50 centimeters. The most common varieties are Indian Azalea or Indica and Mix.
Pinching a young plant
The grown cuttings (more than three centimeters) must be dived into separate containers. A coniferous substrate is ideal for planting. Transferring to another container takes place at the beginning of December. The apical part of the young culture must be pinched to produce new shoots. Pinching can also create a branching bush shape.
The first formed buds must be removed. The plant will spend all its energy to grow the green aboveground part of the azalea.
The subsequent pinching should be done in March. You will need to cut about six branches.
In the spring, you can move the azalea to a larger container (about ten centimeters in diameter). A drainage layer should be laid out at the bottom of the container. The container should be filled with a mixture of coniferous soil and peat.
After transplanting, the azalea must be regularly watered with settled warm water. Indoor azalea can be grown by cuttings in three years.
Reproduction will not only help you breed the flower yourself. The grown azalea is more adaptable to the surrounding conditions of the home environment.
How to make a stylish plant out of an ordinary plant?
It takes a lot of effort and time to turn an azalea into a bonsai with your own hands. The crown is formed from the first year of life of the rhododendron:
- Choose a young azalea. One shoot is left in the middle, and all side branches must be cut off.
- The top of the trunk is not touched in the first year. In order for the main shoot to grow directly, it is tied to a support. In this case, the plant is regularly turned towards the light.
- After the bonsai reaches the desired height, pinch the top of it.
- And then they are engaged in the formation of the crown. It can be made round, elongated in different directions, square, oval. It all depends on the desire of the grower.
How to propagate an azalea at home - recommendations
There are a few simple rules to simplify the propagation of a culture:
- It is advisable to cut with a sharp knife or blade.
- It is recommended to use the area directly under the kidney to collect the cutting.
- Wet peat can be used for rooting.
- After planting, the soil should be carefully tamped down at the base of the cutting.
- For accelerated rooting, you need to carry out the spraying, airing and watering procedure three times a day.
- The rapid development of cuttings can be promoted with the help of rooting stimulants and substrate heating.
- Azalea is difficult to tolerate hot conditions. It is recommended to keep the grown plant indoors at temperatures below + 18 degrees.
Watering the plant should be carried out as the substrate dries. In winter, the amount of watering should be reduced.
For azaleas, it is recommended to use melted, distilled or rainwater. A brightly lit place should be prepared in the room.
Direct sunlight can damage the plant. Azalea leaves curl and buds fall off.
Bloom
Rhododendron can bloom both in summer and winter. Flowering lasts from two weeks to 2.5 months.
Features of the
Before flowering, the plant is kept in a cool room. With the appearance of buds, the pot is rearranged to a lighter, warmer place and fenced off from direct sunlight.
What if it doesn't bloom?
Most often, the plant does not bloom due to a violation of the maintenance regime. There was no winter dormant period, untimely watering, it stands under the sun, the necessary fertilizers are not applied. In order for the azalea to bloom, you need to change the conditions in which it grows.
Seed azalea
Seed propagation is highly complex. The distribution method is used only in the selection of new varieties.
It is quite difficult to collect seeds on your own. Flowers at home rarely set fruit. Seeds ripen only after special pollination. You can buy seed from garden nurseries. Freshly harvested rudiments are suitable for the distribution of azaleas.
It is important to take into account that propagation by seeds does not guarantee the preservation of the varietal advantages of the mother plant.
A grown azalea may acquire specific or hybrid characteristics. The crossed plant is often much prettier than the parent crop.
To breed azaleas you will need:
- Sow seeds in early spring onto a damp substrate. You can evenly water the soil mixture from peat using a spray bottle. It is not recommended to cover with soil from above. Fragile seeds may not germinate.
- After scattering, you need to cover the container with glass.
- It is important to move the container to a lighted place.
- Ventilate the mini greenhouse daily. You can water the seedlings with exceptionally warm water at room temperature. Ten liters of hard water can be softened with three grams of sulfuric or oxalic acid.
- Seeds up to three months are able to maintain no more than 70% of germination.
- Under favorable conditions, the first shoots will appear in ten days. Seedlings are often uneven. Germination can take over three weeks.
- At the moment the cotyledon leaves unfold, it is necessary to dive the seedlings.
- The sprouts will be kept in separate containers throughout the summer season. At the end of August, it is necessary to move the crop to a separate pot.
Propagation by cuttings
How to grow an azalea from a cutting? When rooting cuttings, take into account every little thing, otherwise you will not succeed. Breeding stock is cut at the end of winter - the beginning spring, or June. For these purposes, adult specimens with non-lignified shoots are suitable.
The cuttings must be ripe. To test the quality, break it, it should make the characteristic sound of breaking wood. A ripe bud, leaves of normal size, must be present on the cuttings.
How to plant azalea cuttings? A workpiece 15-20 centimeters in size is treated with a growth stimulator for 15-16 hours and rooted in a special substrate. There is a special soil for sale with an acidity of 3.5-4.5. You can use coniferous forest soil.
A drainage layer of about 3 centimeters is placed in the dishes. The next layer is sand (3 cm.) Then a mixture of peat and coniferous soil.
Cuttings placed in the ground are covered with glass. The rooting temperature should be around 24 degrees.
If the temperature in the room is not high enough, heat the bottom of the container.
In addition to heat, light is needed for rooting. The plantings are regularly sprayed, the dishes are turned periodically. The roots appear in three to four weeks, but will start to grow in 4-5 months. The film is removed only after that.
Cuttings grown by 3 centimeters dive into pots in the coniferous soil. The process is combined with pinching to form a lush bush. To build up the leaf mass, the buds that are tied are removed. At the beginning of spring, a second pinching is carried out.
IMPORTANT. After germination of the cuttings, the temperature for growing azaleas is reduced to 18-19 degrees.
Step-by-step instructions on how to propagate a flower
Separation from the mother flower
- The tool for separating shoots must be sterile.
- The cut should be done under the lower kidney, about 1 cm below it.
- The cut is made obliquely, the lower leaves are removed.
- The stalk is processed with a root growth stimulant. It can be Kornevin, Zircon or Heteroauxin.
- The cuttings must be healthy, strong and have at least 5 leaves.
Proportions for the preparation of solutions to stimulate root growth:
- Heteroauxin - 1/5 of the tablet should be dissolved in 0.5 l of water. Cuttings are kept in this solution for no more than 6 hours.
- Zircon - 10 drops should be dissolved in 0.5 l of water, put the cuttings there and stand for 24 hours.
- Kornevin is prepared as follows: 1 part of Kornevin powder and one part of activated carbon (crushed) should be mixed. And sprinkle the slices with the resulting mixture.
How to plant correctly?
Before planting, it should be immersed in a solution with a root growth stimulator.- Immediately before planting the slices, they should be treated with a solution of potassium permanganate.
- The shoot is planted in prepared soil, deepening by about 2-3 cm.
- Cover with a plastic bag so that the bag does not touch the plant.
- Cover the top with a dark cloth (if you prefer to root the azalea in the dark).
Is it possible to root a rhododendron in water? If the cuttings have already been cut, and the soil is not yet ready, then it is quite acceptable to keep them in a glass of water for some time. You can add rooting solution to the water.
Placing cuttings in water is a last resort and should only be used when needed. Since in this case, the chances of survival of the shoots are significantly reduced.
How to root and grow?
After planting the cuttings, be patient. Since rooting will take about 4 months. Another couple of months will have to wait until the plant grows. And only then it will be possible to shoot the film. The container in which the cuttings are planted should be in the warmest place of the apartment or house (it is advisable to heat it from below). Cuttings can be carried out from mid-July to mid-October.
Cutting and application features
A cut is a part of a mother plant that can grow into a full-fledged flower. This method assumes vegetative propagation while maintaining the properties of the azalea from which the shoot was separated. It is used by the vast majority of gardeners because it is effective and simple.
To carry out propagation by cuttings correctly, it is necessary to take into account the characteristics of different types of azaleas. Let's consider this issue in a little more detail.
Deciduous species
To root this type of azalea, you must use a green stalk, which is characterized by the following features:
- The presence of an immature bud on the top of the branch.
- The leaf plates are small in size, differ in color from the rest - light green, not dark green.
- The growth is taking place at an active pace.
In order not to make a mistake in the choice, you should look at the branch, if it is stiff, it means that it is too mature and not suitable for reproduction.
Evergreen species
Azalea, which belongs to these species, reproduces by adult shoots. They must be ripe, woody; when bending, break with a characteristic crunch.
When picking up a stalk, you should pay attention that it is healthy, without traces of the disease, with ripe leaves (at least 5), 10-15 cm long.
What conditions are required?
When planning to propagate this beautiful ornamental plant, it is important to pay attention to the quality of the planting material. It must be sourced from a healthy, mature and well-developed plant that is adapted to housekeeping. Too young and weak plants are not suitable for obtaining planting material, since they have a low donor potential. Very mature and old azaleas are also almost not used for the procedure, since at this age stage their metabolic processes slow down, nutrients, micro- and macroelements are less absorbed. Taken together, these factors make older plants unsuitable for reproduction.
Another equally important condition on which the results of the upcoming event depend is the quality of the soil mixture. Its composition and properties are of equal importance both when breeding an azalea with seeds, and when propagating it by cuttings or dividing a bush.
Before use, the soil must be carefully processed: steam or disinfect with a solution of potassium permanganate.
If sand is used as part of the soil mixture, it must first be sieved, washed and calcined.
Other conditions that provide effective breeding of indoor azaleas are:
- creating a greenhouse effect;
- maintaining sufficient air humidity;
- ensuring a stable temperature regime.
The greenhouse effect is essential for seed germination and rooting of cuttings. It can be provided with the help of an impromptu greenhouse made of a plastic bottle cut in half, a container with a lid or plastic wrap, which is tightened with a container with planting material.
Given that this ornamental culture is moisture-loving, it is important to ensure sufficient air humidity when breeding it. This can be done by periodic spraying and irrigation. You can also maintain the required level of moisture in the air using a special room humidifier or a wide container filled with water and placed next to the plants.
When calculating to propagate an azalea in one of the ways, it is also necessary to take into account that many of its varieties have increased requirements for the air temperature.
Despite the fact that to date, breeders have managed to obtain cold-tolerant hybrids, when breeding azaleas, it is still desirable to maintain the temperature at 22-25 °.
Transfer
How and when to transplant an azalea at home?
It is recommended to replant young plants annually, and adults every two or three years.
Azalea transplant is carried out in the spring, after flowering.
It is not recommended to transplant azaleas during budding and during flowering.
Otherwise, the plant may discard buds, flowers, and leaves. It will be difficult to save him.
How to transplant an azalea? When transplanting an azalea, it is important to know that it has a very sensitive root system, which has its own microflora. Mushrooms live on its roots, providing the azalea with good nutrition. Therefore, it is very important not to break this symbiosis during transplantation.
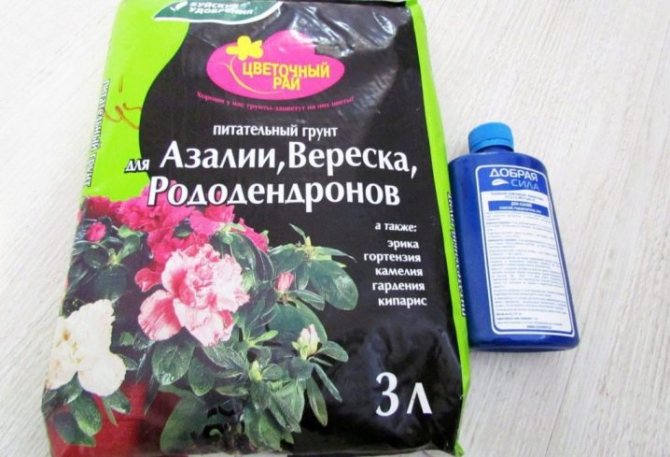
The correct substrate is very important for the healthy development of the plant. It is desirable that it is acidic, with a pH of 4.5 to 5.5, light and nutritious.
You can take a ready-made mixture called "Azalea" or prepare the soil yourself, taking 1 part of peat and 2 parts of rotted needles.Or you can mix in equal parts peat, humus, sand, turf and leafy soil and add 5 parts of coniferous soil to them. Another option:
- part of the sand
- part of dried and crushed sphagnum moss
- 2 parts of rotted needles.
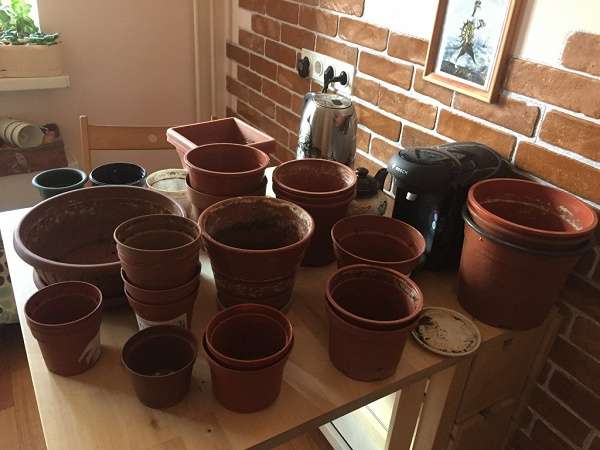
For an azalea with a superficial root system, a new container should be selected wide enough and not very deep, but 5 cm higher than the previous one.
At the bottom of the pot, a drainage layer of at least 3 cm thick is placed in the form of large expanded clay or broken shards. A layer of pine bark is placed on the drainage (it helps to increase the acidity of the soil), and then the container is filled with prepared soil. It is useful to add Trichodermin to the substrate to prevent fungal infections and rot.
Before transplanting azaleas, cut off dry twigs, faded buds and clean the stems of dried leaves. Next, the bush together with a lump of earth is taken out of the pot and placed by roots in a basin with filtered or boiled water and "Kornevin" or "Zircon" dissolved in it.
The procedure is repeated by changing the water twice. The roots of the azalea are very tightly entwined with a clod of earth, so it is impossible to completely remove it, and it is not necessary. However, such bathing helps to wash out most of the salts that have accumulated in the soil during the year.
Before immersing the plant in water, it is recommended to make cuts in the earthen coma with a knife - these should be grooves about 0.5 cm wide on the sides, bottom and top. This will help the roots to absorb moisture, easier to settle down and germinate in new soil. Otherwise, they will not be able to receive enough nutrients and dry out, which can lead to the death of the plant.
After part of the earth (usually no more than a third) is washed out of the roots, you can start transplanting, or rather, transferring the flower to a new pot. It is taken out of the basin and, when the water drains, is placed in the center of the container, and then evenly sprinkle the roots with earth, lightly tamping. In this case, it is very important not to deepen the root collar of the plant.
If the azalea has grown too much, it is divided into bushes, cutting the root ball into several parts according to the number of divisions. Each bush with a lump of earth is placed in a separate pot.
What to do after an azalea transplant?
After transplanting, the azalea is abundantly watered with water in which it has soaked, and placed in a warm and bright place with shade from the sun's rays. Watering is repeated after four days. In partial shade, the plant is kept for about 12 days. It is useful to spray a flower that has not yet matured after transplantation with "Zircon" or "Epin".
You should also protect the weakened plant from drafts. You should not immediately fertilize the transplanted flower, you must definitely give it the opportunity to adapt and get stronger well.
What kind of rooting soil to choose?
Here are several options for the selection of soil, the main thing to remember is that only soil with a light, loose structure is suitable for rhododendrons:
- Peat is often used. If we take it from the swamps, then only the uppermost layer, since its acidity is less.
- You can prepare a mixture of coniferous peat and sand (proportion 2: 1: 1). For better moisture retention and soil loosening, Vermiculite is added.
- It is easier for beginners to buy ready-made soil for growing azaleas. It has already thought out the necessary composition and added the necessary nutrients.
- Rooted shoots are transplanted into soil similar in composition to that which was in the early stages of germination.
Few differences with other plants
Rhododendrons love mountainous areas in their natural environment, coolness and freshness of the air. Azalea is the same. Therefore, cool gardens and greenhouses suit her. No flower chooses like azalea season for flowering winter. And this means that it will be more fun at home with him even in a cold season. Indeed, bright and rich colors will be added to gray everyday life.
This plant has only two species. Azalea can be Chinese or Japanese. According to esoteric knowledge, this plant has a positive energy.Having planted an azalea at home, the owners give themselves consent, understanding and comfort. They say that this plant does not tolerate quarrels and disagreements, therefore it will delight with flowering, expecting positive emotions in return.
Separate Tips

In any procedure, there are small details that must be adhered to. Experienced gardeners suggest them. And the experience of professionals is invaluable.
So, while the azalea is grafting, you must not forget:
- that the cuts under the kidneys are made with sharp, well-sharpened objects (blades and knives);
- that the deepening of the shoot freed from the leaves below should be carried out no further than 3 - 4 cm;
- compact the soil mixture after the planting process is completed (an elementary option is trampling with your fingers);
- check the temperature under cover in a pot with rooting cuttings so that it does not drop beyond the plus 25 degrees Celsius line;
- monitor, and, if necessary, increase moisture indicators (conduct constant watering, spraying and sheltering future plants, excluding the morning hours, when the container with cuttings should be ventilated);
- do not confuse the requirements: when an azalea undergoes the reproduction process or the growth of an adult plant at home (for a rooting cuttings, you need plus 25 degrees Celsius, and for a shrub after 3 years of growth - plus 18 degrees Celsius and below);
- provide good lighting, but avoid direct sunlight for shrubs and young shoots;
- if possible, stock up on rain, melt or distilled water for irrigation;
- that low soil moisture is an invariable requirement for creating better conditions for young and adult plants of a given species.
Now it is clear how the azalea reproduces. Of course, there is another type of its cultivation - from seeds. But it is very difficult. And only breeders can do it. You can get fresh azalea seeds if you can buy them. Which is also rare. And to get an ovary of fruits on an azalea is possible only with special pollination of flowers. Self-pollination is more of a luxury and an exception than a rule. At the same time, plants grown from seeds differ in many respects from mother plants.
To grow a hybrid from azalea seeds or a new young healthy plant by cuttings, you will have to spend a little time and effort. But the beautiful flowering and the positive energy that the bush exudes will be a real reward for the grower.
Preparing the pot
Several options can be used as a container for the first planting: a glass jar, a long bowl, a plastic bottle cut to the desired height, or a pot with a diameter of no more than 5 cm. A frame is being built over the container, which in the future will allow the plant to be covered with polyethylene without crushing the leaves. When creating an arbitrary support from the wire, it should be calculated in such a way that the sheets do not go beyond, but are freely located inside.
After planting, the structure is covered with a plastic bag and a dark cloth so that the azalea takes root in complete darkness. Some gardeners consider this procedure unnecessary and incorrect: in their opinion, the plant should be placed in the most illuminated place and even use artificial lighting to increase daylight hours. Which option to choose - everyone decides for himself.
How to propagate garden azalea by cuttings?
Garden azalea is considered a more hardy and less capricious plant in comparison with one grown in an apartment. Despite this, rooting is not easy. However, some gardeners still succeed. If you rely on their experience, then soon the bush will delight you with beautiful flowering.
It is best to root the plant in peat. Moreover, the lower the acidity of the product, the more chances of success. Cuttings can be started from the second half of July to mid-October.
Cutting preparation
A stalk for breeding an evergreen azalea is taken ripe, after flowering.Fatty specimens are not suitable for this.
A material is considered suitable if it meets the following requirements:
- A ripe branch breaks with a sound characteristic of wood.
- The vegetative bud should be well developed, with normal-sized leaves and a well-formed bud.
- The optimal cutting length is 10-20 cm.
An oblique incision is made on it, removing part of the bark and trying not to damage the bast, about ¼ of the length of the cutting. It is imperative to cut off the bark. Without this manipulation, it will not be possible to root the flower.
To root deciduous azaleas, cuttings that have appeared this year are taken. In such processes, the vegetative bud is still developing, the leaves are small, light green in color. Older material is unusable. Rooting begins in late June - early July.
Landing
The stalk is treated with a stimulant for hard-to-root plants according to the instructions. The twig is immersed in the ground by 2.5–3 cm. The soil is tamped around. Cover the dishes with plastic wrap. Rooting takes place over a period of months. The shelter is removed only after the seedlings have begun to grow.
The box with the handle is placed on the most brightly lit windowsill. A temperature of about 25 ° C is considered normal. Therefore, the boxes can be heated. Once a week, the containers are turned with the other side to the window.
How to root?
Rooting lasts about 4 months, the plant develops for the next two months. Only then can the film be removed completely. The first year, a young rhododendron should actively grow. If necessary, it is artificially illuminated.
If even after 3-4 months the plant does not develop, then rooting has not occurred. And in order to insure yourself and get young bushes, it is recommended to plant as many cuttings as possible at a time.
Features of seed
What does it look like?
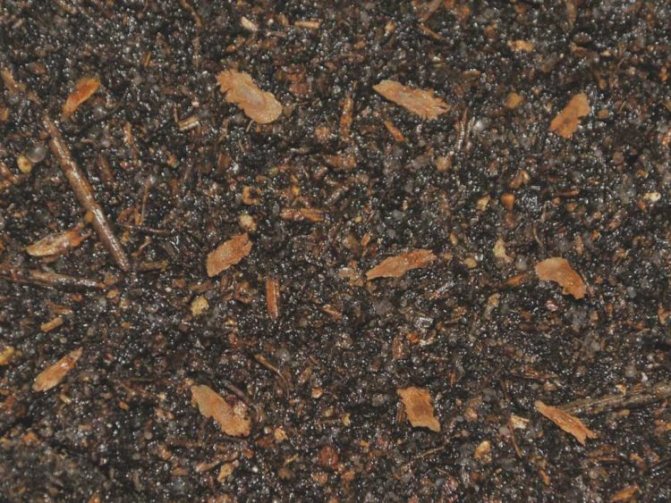
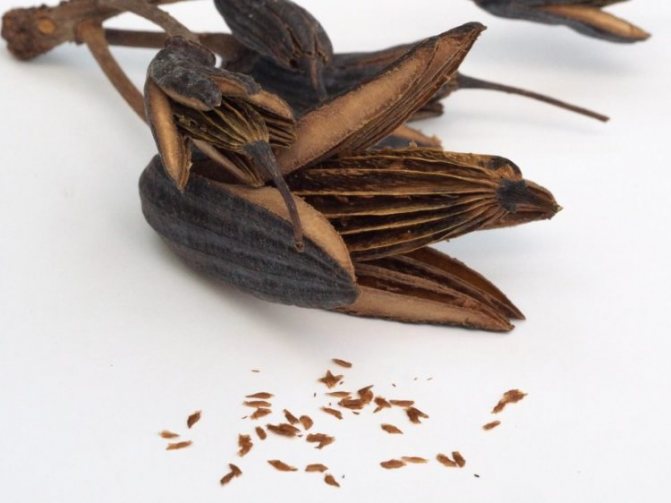
Like other representatives of the flora, the fruit with seeds in rhododendrons appears at the end of flowering. It is a five-leafed capsule with numerous seeds. Which, quite unusually, opens from the bottom to the top. The shape of the seed resembles a stick, long and oblong. The size is very small, from 0.5 to 2 mm in length. The color of the seeds is usually dark brown, closer to black.
Photo
Below you can see a photo of the seeds:
How to choose the right one?
Certainly, for the seed growing method to be successful, it is important to take a responsible approach to the purchase of seeds. There are a lot of companies involved in the production and packaging of seeds. However, not everyone sells quality material.
Often, beginners buy seeds, paying attention only to the cost and a beautiful picture. Subsequently, after landing in the ground, they get a sad experience.
Therefore it follows:
- Purchase seeds in proven, specialized stores. In them you can get qualified advice, there are certificates for products.
- Pay attention to the packaging, it must be strong, without defects, made of good paper. The inscriptions should be well read.
- Find out the number of seeds in a pack so you know how much to buy.
- Shelf life.
If you stock up on seeds for future use, then it is important to store them correctly, in a dry and cool place. The shelf life of seed in such conditions is 2-3 years.
Where to buy and can you order from China?
To date, there is no shortage at the points of sale of seeds. There are even specialty stores that sell rare, exotic seed. I would like to add once again that it is better to purchase goods in branded seed stores.
There are also many large garden cents where you can buy seeds or seedlings. And also additional accessories for planting seedlings, soil, containers and more. This will definitely save time. For example, in Moscow it is the Yasenevo garden center, OBI. The price of seed varies from 50-200 rubles.
Online stores are no less popular.When there is no time for shopping trips. Just without leaving your home to order seeds and materials at hand. Managers can also advise over the phone. The price of goods in these stores is 100 rubles for 10 pieces, 200 rubles for 30 pieces. Also the cost of rhododendron seeds depends on the variety.
A large assortment and low prices are presented in online stores in China. You can buy rhododendron seeds from 26 rubles for 50 pieces, so this is also with an additional bonus, in the form of free delivery.
Can I get it myself?
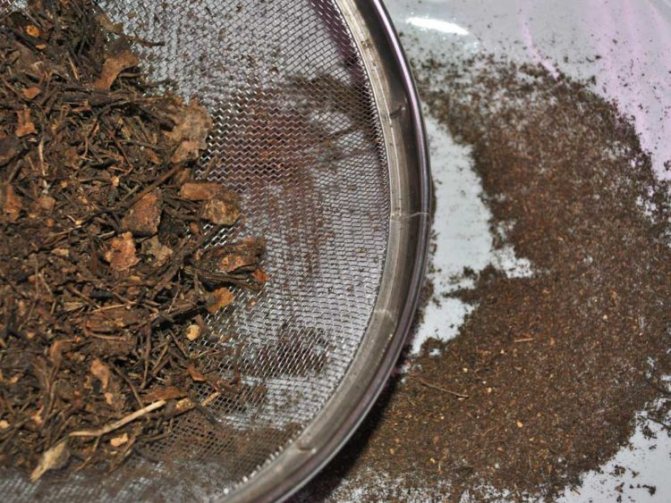
The ideal option, of course, is self-harvested seeds. In Central Russia, the seed material of rhododendrons ripens successfully. They are harvested in late autumn, certainly in dry weather. It is worth waiting for the seeds to turn completely brown, but the pods may remain green.
In a dry and warm room, they should be dried by putting them in paper boxes. A few days later, the boxes are opened, pouring out the seeds.
The seeds must be clean without impurities, otherwise rotting and the appearance of mold are possible.
It is best to sow fresh seeds, as the germination percentage is higher. On an adult plant, a large number of seeds are formed. For cultivation on a non-production scale, this amount is not needed. Therefore, the ovaries of the seeds should be cut off when they are still green, so that the shrub does not waste energy on them.
Possible mistakes
Novice growers who have never had to plant an azalea before often make serious mistakes. Such oversights at best can turn into disappointment, at worst - the death of the donor plant.
- So, experienced florists do not recommend using a flowering plant. to obtain planting material. This can cause severe stress to the plant, as a result of which the bush can become seriously ill.
- For planting cuttings, you should choose a loose and acidic soil. In neutral and dense soil mixtures, it is almost impossible to root the shoots.
- When sowing seeds, do not cover them with substrate. Considering that this planting material is characterized by an already weak germination rate, the hatched seedlings may not have enough strength to overcome the obstacle in the form of a layer of earth.
You can get acquainted with the technology of propagation of azaleas by cuttings in the next video.
How to properly care for a young flower?
Young azaleas propagated by cuttings or seeds, after rooting in the greenhouse, cannot be immediately transplanted into separate pots. A change in the microclimate will negatively affect their condition.
During the week, the seedlings adapt to new conditions, leaving them open for 2-3 hours.- The first pots should be 7 cm in diameter. Expanded clay is poured at the bottom for drainage. The substrate remains the same as when rooting.
- After 2-3 months, young azaleas pinch the tops of the shoots. This procedure promotes the appearance of lateral shoots that form a branchy bush.
- After 6 months, the flower throws out the first buds. They are cut off, the azalea still does not have enough strength for simultaneous growth and flowering.
The propagated plant is kept at a moderate temperature - in winter - 15-16 °, in summer - 20-22 °... The soil in the pot should not dry out until the next watering. Moisten it with soft water. The bush needs a humid climate, it will be provided by frequent spraying and placing a container of water nearby.
The choice of breeding method depends on the azalea variety. It is better for novice growers to stop at grafting or dividing the bush. The main plus of independent reproduction is that azaleas fully adapt to the climatic conditions of the room. The new plant blooms in 2-3 years.
Growing problems
In principle, rhododendron transplant is well tolerated. But if troubles arise, this may be due to poor fit and content parameters.
- Leaves turn yellow, a depressed look indicates a lack of oxygen, minerals or improperly selected soil composition to the roots.
- Leaves wrinkle, signaling the owner about gaps in the content: low light level, inappropriate temperature and humidity conditions, insufficient watering.
- Short-term flowering also depends on the parameters in the room. This happens at low humidity, lack of nutrition, lack of life-giving moisture.
Breeding soil
Reproduction of azaleas at home requires the use of the correct soil composition. It can be purchased at a specialty store or prepared by yourself: two parts of coniferous soil are mixed with one part of sand and high moor peat.
It will not be superfluous to add vermiculite, which will provide sufficient loosening. It is also recommended to disinfect the resulting composition. The soil should be held in a colander over steam or for a few minutes in an oven preheated to a temperature of 100 degrees. Before planting the cuttings, the soil is sprayed with water. It should come out damp, but not wet.
It is important that the land is not taken from the area under the oak crown. For azaleas, it will be destructive, since it contains tannins and is slightly acidic.
Problems with the reproduction of azaleas
During the rooting of cuttings, such unpleasant moments can occur:
- Decay of the lower ends of the cuttings, lack of root formation. This usually occurs at temperatures below 22˚C, or with temperature fluctuations.
- Decay or mold on the upper ends of the cuttings. This can happen if the film touches the plants due to insufficient ventilation.
- Failure to reproduce is possible when using contaminated soil or non-disinfected tools.
- Absence of roots in cuttings, provided all conditions are met. It is possible that the cuttings were poorly chosen (not ripe, lignified) or the cuttings were not carried out correctly.
- Special requirements apply to irrigation water: it must be warm and soft. You can soften the water with a few drops of lemon juice.
Having received many young azalea bushes after breeding, you can try to grow 1-2 in the form of a trunk. The standard form is a tree with a bare trunk and a lush crown. This flower looks very impressive during flowering. It is very convenient to form such plants from young bushes propagated by cuttings.
Reproduction methods
For the reproduction of this flowering plant, almost all known ways:
- cuttings;
- reproduction by seeds;
- division of the bush.
Each of them has its own disadvantages and advantages.
However, no matter which method will be used to breed azaleas, the florist should tune in to laborious, painstaking and complex work.
Cuttings
According to experienced flower growers, the easiest way is to propagate this indoor flower by cuttings. Compared to other methods, cuttings are more effective. However, this method does not give a 100% guarantee of success. Thus, observations show that out of 10 cuttings of such a capricious plant as an azalea, usually only 1–2 specimens take root.
The procedure is carried out from May to August, when the plant will bloom. To obtain planting material, ripe stem shoots are cut from the donor bush. You can take a shoot from the top of the plant. The following requirements are imposed on cuttings for breeding azaleas:
- length from 10 to 15 cm;
- the presence of several full-fledged leaves (of the appropriate size and color);
- the presence of a fully formed kidney (at least one).

The degree of maturity of cuttings is determined by the sound that is heard at the moment the shoot breaks. The dry crackling sound typical of breaking wood is indicative of the maturity of the cuttings.If it does not break, but bends, then it cannot be used as a planting material due to its immaturity.
The grafting process is carried out step by step.
- The lower part is cut along an oblique line, after which excess leaves are removed from the cutting.
- Then the cutting is placed in a container with a solution of a rooting stimulator for several hours.
- Next, prepare the substrate for the rooting of the planting material. For this purpose, some growers use pure peat without any impurities. It is also allowed to use a loose nutritious soil mixture with an acid reaction.
- The prepared soil mixture or peat is placed in a container, carefully spilled and left for some time to drain excess water through the drainage holes. The water collected in the pallet is drained and the soil in the container is checked. It should be moderately damp, but not too wet.
- The cuttings are buried by 2.5–3 cm, depending on their length. If the stalk is too long, it is allowed to deepen it deeper.
- After planting the cuttings, the container is covered with a film cap, glass jar or cut plastic bottle. This will provide the rooting plant with an optimal microclimate and prevent rapid evaporation of moisture from the soil. During the rooting period, the protective cap is regularly removed and wiped from the inside from condensation.
Which cuttings to choose?
An advanced amateur florist Nina Velichko, who has filmed a lot of useful and visual material about the cultivation of azaleas, tells about how to choose material for further reproduction.
Azalea flower and rhododendron: what is the difference, types, cultivation, care, pruning, photo
Outdoor peonies: when to plant, in spring or autumn? The nuances of planting and care

[collapse]
Rooting a plant
Certain conditions are created for rooting the cutting.:
- temperature - 25 ° C;
- humidity - 80%.
A stable microclimate ensures that the azalea is covered with a film or glass jar. Rooting time depends on several factors.:
- the age of the cutting;
- indoor temperature and humidity;
- the composition of the substrate.
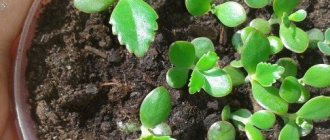
On average, the process takes 1.5-2 months. Care during this period consists in moisturizing and ventilating the greenhouse. A sign of rooting is the appearance of new leaves.
Important! When working with azalea, remember that all parts of the plant contain a poison - the glycoside andromedotoxin. Use gloves to protect your skin from the juice.
Growing from seeds: what is good about this method
Growing an azalea from seeds is no less laborious process. The method has the advantage over all the others in that any desired number of copies can be obtained from scratch at the same time, which is good for production scales. If the seed has sprouted, then the seedlings will appear in two weeks. The main condition is fresh quality seeds and suitable growing conditions.
How to propagate a Money Tree at home
This method has its own nuances. For example, three seasons must pass before the plant is planted in open ground.
How to choose the best seeds
You need to buy azalea seeds in trusted stores that have quality certificates for all products on sale. The packaging should not have defects, tears, wrinkles.
The following parameters should be indicated on the package:
- the number of seeds;
- shelf life;
- manufacturer.
Important! If the seeds are stored in a cool dry place, then they are suitable for use for up to three years. The easiest way to propagate azaleas is from fresh seeds that have a lifespan of up to 90 days.
The seeds can be harvested by yourself. To do this, you must wait until the end of the flowering period and open the five-leafed box. The seeds are small and elongated, each from 0.5 to 2 mm long.
The time for collecting the material is the end of autumn. The seeds should ripen well, turn dark brown, while the capsule remains green.After collecting, they are wrapped in paper or cardboard for several days until they are completely dry.
What should be the soil for planting seeds
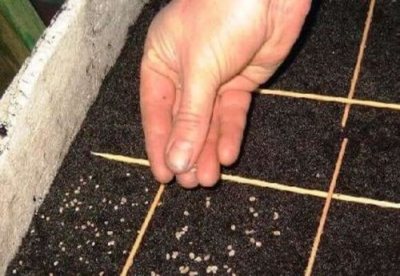
Seeds are sown in the soil with a top nutrient layer or laid out on peat tablets. Sowing period March-April. You can start reproduction of azaleas in February, then additional lighting will be required to create a daylight hours lasting 12 hours.
How to Grow Lush Azalea from Seeds? Sun and moisture are prerequisites for seed germination. If a greenhouse effect has been created over the growing vessel, then the glass or film is periodically removed for ventilation. In order not to overmoisten the seeds, it is better to irrigate the soil from a sprayer, using a special composition: dilute 4 g of oxalic acid in 10 liters of settled water.
For sowing, use any available container. The bottom of the flowerpot is equipped with drainage holes.
The stores sell ready-made soil mixture for rhododendrons. You can make it yourself from the following components:
- deciduous land;
- sod land;
- peat;
- sand;
- humus.
All components are taken in the same proportions and pre-disinfected in a solution of potassium permanganate, you can add a baking powder.
The most important parameters for the soil:
- water permeability;
- air permeability;
- saturation with minerals;
- ease;
- looseness;
- acidity pH 4-4.5.
Important! The soil must be warm before sowing.
Temperature
Standard home conditions are suitable for growing seeds: an air temperature of 20 ° C and bright light. In this situation, the seeds will sprout in 2-4 weeks, the sprouts will appear unevenly. To stimulate growth, it is recommended to spray them with a solution of zircon or epin.
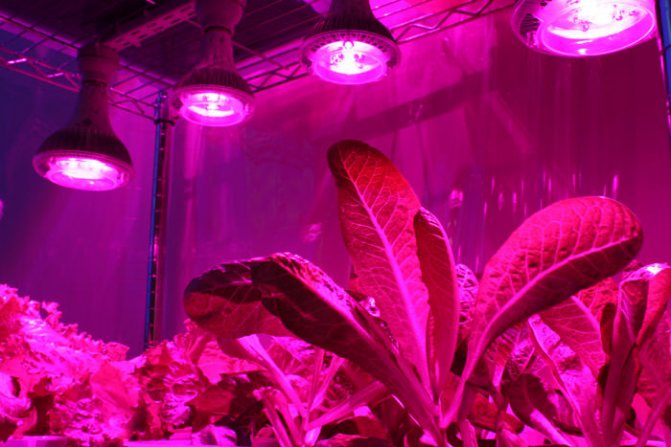
Supplementing plants with phytolamp
Humidity
The sprouts must be in high humidity conditions, so they are covered with transparent material to create a greenhouse effect.
For your information! The hardest thing is to adapt the sprouts to new conditions, dry cool air. To harden the azaleas, they are taken out into a room with a temperature of 10 ° C. This will raise the flower's immunity and further protect against many diseases.
To avoid flooding the seeds, the bottom watering method can be used. Thus, the sprouts receive the necessary nutrition, and the root system is stimulated.
Common problems
- Wrong choice of material - old cuttings take a long time to take root.
- Shoots may not take root, but rot. The problem arises when using a substrate that is contaminated with fungi and bacteria. Before use, the soil is disinfected with steam.
- The accumulation of condensation under the film provokes the appearance of mold. Airing the greenhouse daily will help prevent waterlogging.
- At temperatures below 25 ° C, the cuttings do not root, in order to provide the seedlings with the necessary heat, the container is heated. For this, a 60 W lamp is placed under the container.
- If the roots do not form for a long time, the plant is sprayed once a week with water with the addition of "Zircon" (2 drops per 200 ml of water).