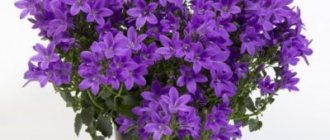
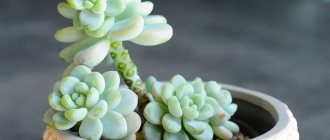
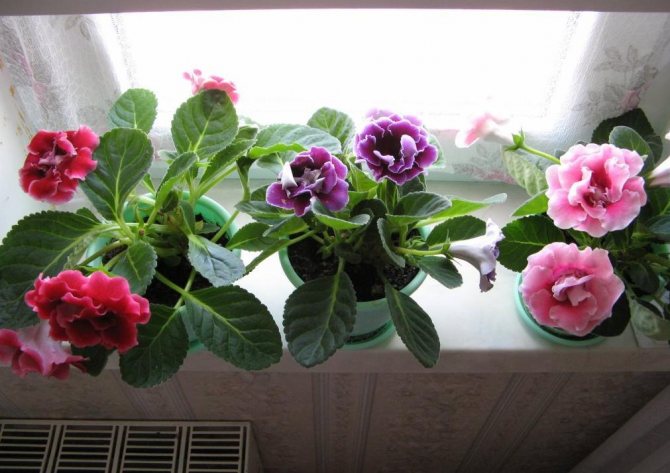
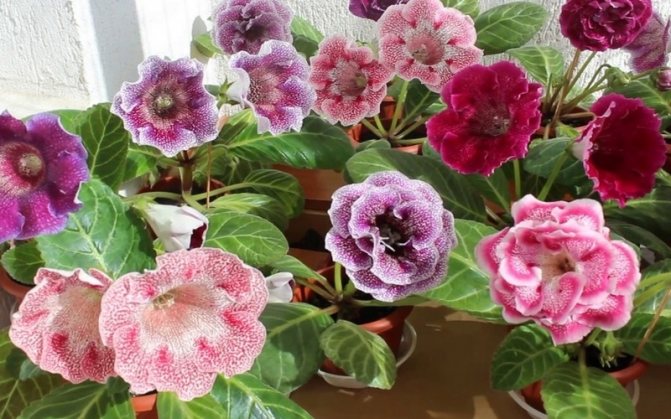
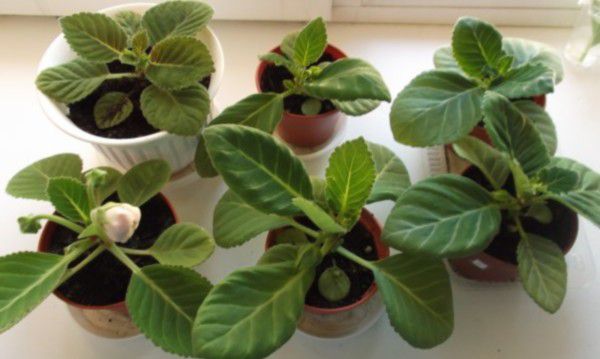
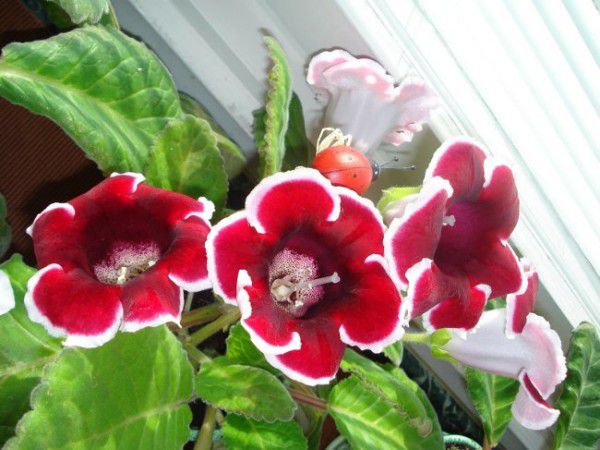
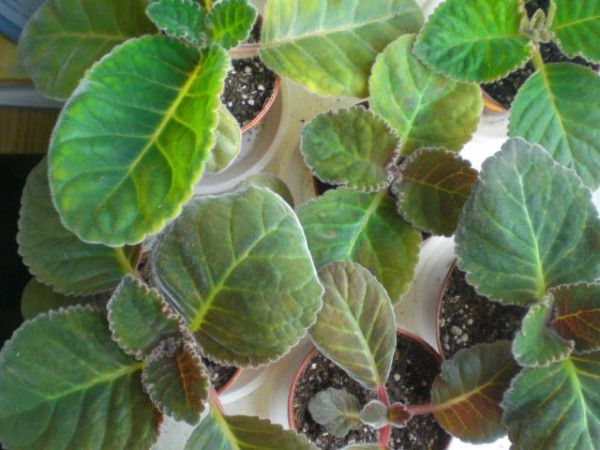
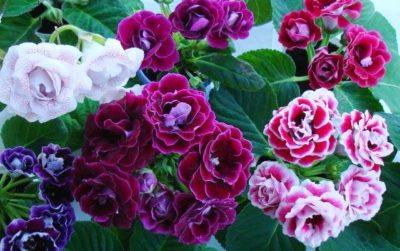
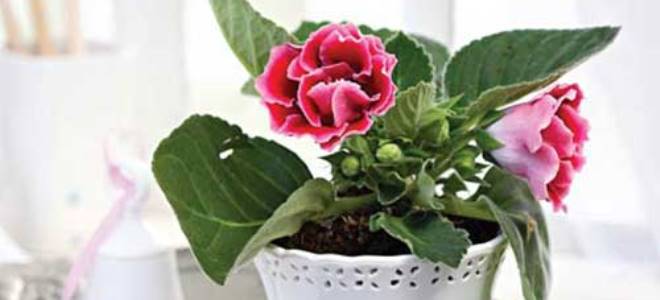
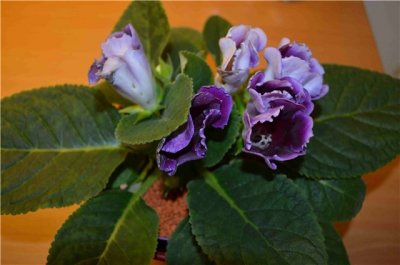
Gloxinia can often be found in flower beds. Its flowers, shaped like bells, are distinguished by a variety of shades. The short stem and the fleshy leaves bordering it, which have a velvet texture due to the villi, are almost invisible under the rich bouquet of large flowers.
Growing gloxinia from seeds at home
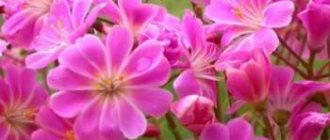
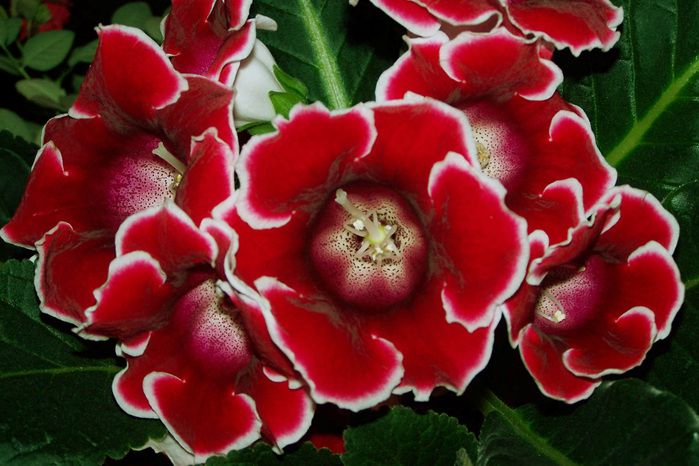
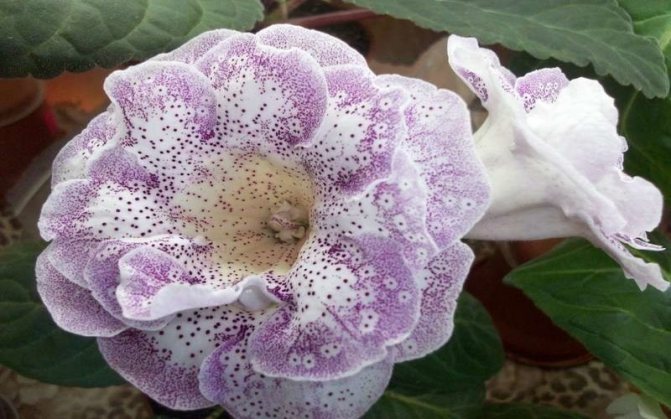
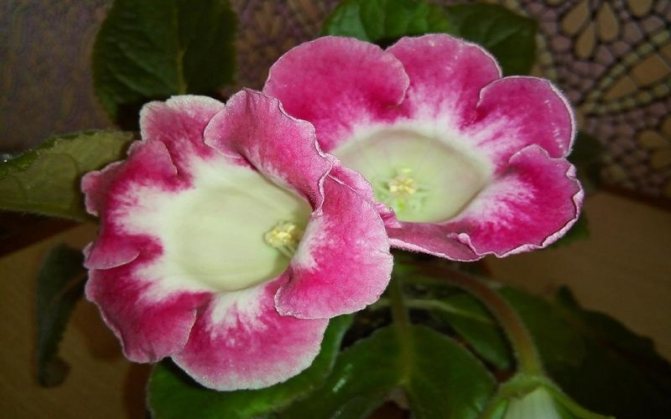
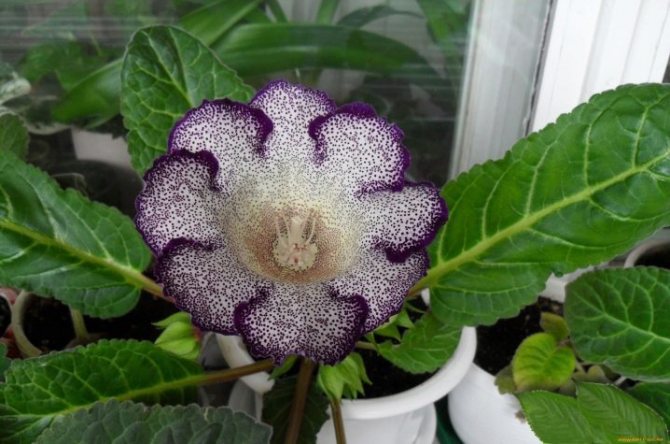
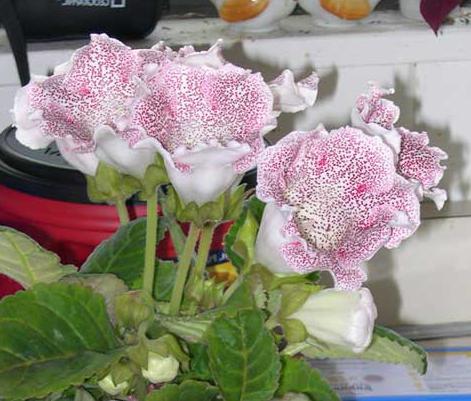
Gloxinia Blanche De Meru
Professional cultivation of gloxinia from seeds at home. Photo instruction
How is gloxinia obtained from seeds? How is a flower grown from seeds at home? How is the planting carried out, the choice of the soil mixture, the subsequent care of the crops? Professionals share their experience with photography.
In addition, experts recommend propagating gloxinia with a leaf, if you have never had to work with seeds.
How to choose gloxinia seeds? Photos of popular brands... The best varieties are imported from Germany, Holland and Great Britain. A domestic manufacturer has a good seed.
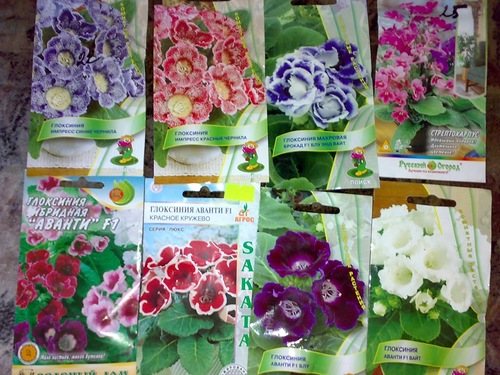
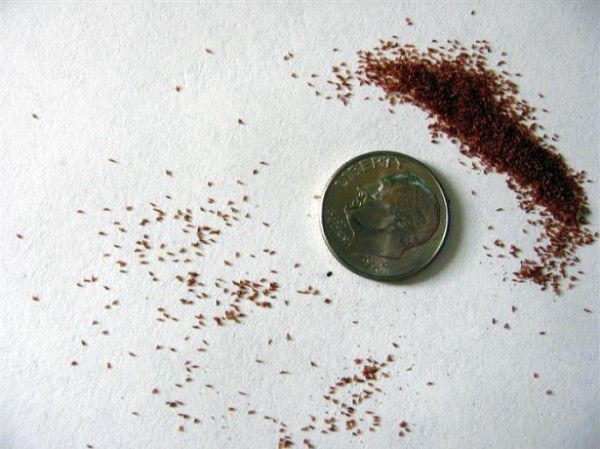
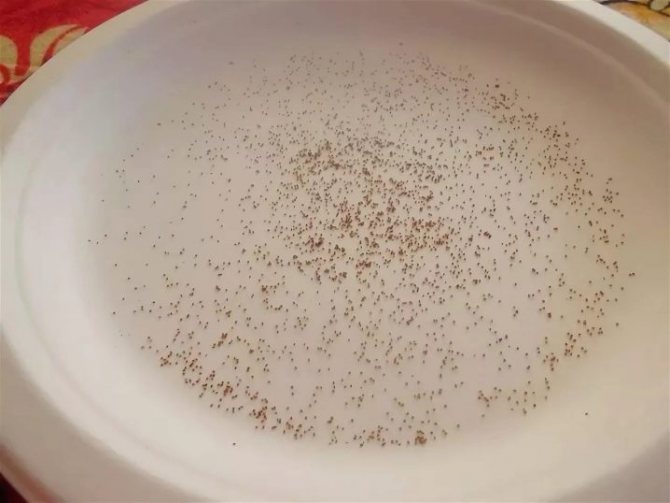
Beautiful and healthy seedlings are produced by a hybrid seed of the first (F1) and second (F2) reproduction. If flowers are pollinated from these seeds, then the next generation may not have the quality characteristics of the parents. Gloxinia seeds in the photo are very small, dusty.
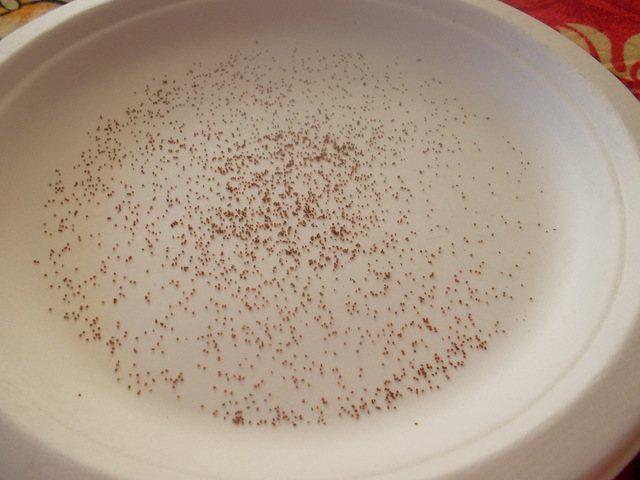
To improve germination and convenience during sowing, they are treated with special nutrients (pelleted). As a result, the seed is covered with a film.

The germination capacity of gloxinia seeds, if stored correctly, do not change for 5 years. However, experts recommend planting in the first year after harvesting or packaging grain.
When to sow gloxinia from seeds? Planting time is not critical. Sowing gloxinia seeds for seedlings can be carried out both in autumn and in winter. However, in this case, the plants are provided with the desired temperature regime and the length of daylight hours. Seedlings are highlighted. Otherwise, it stretches and falls.
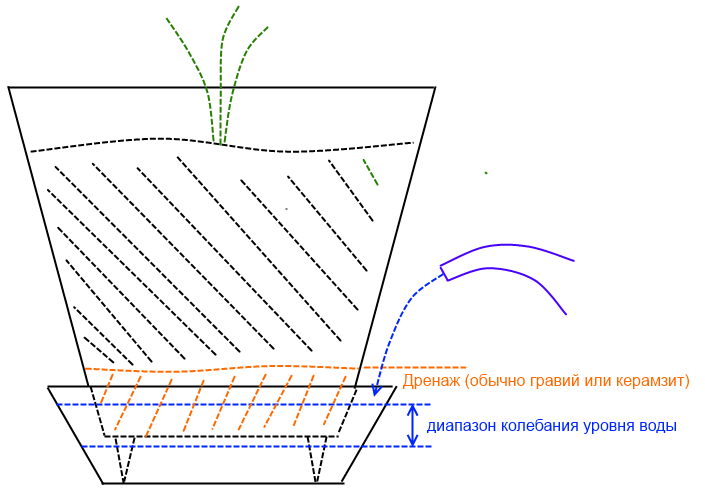
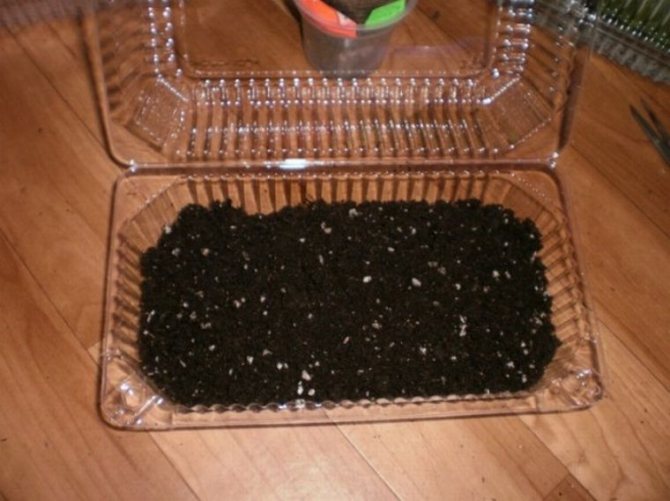
Grow pots... Sowing gloxinia with seeds is carried out in shallow and wide containers, which must be equipped with drainage holes. The containers should be convenient for organizing a greenhouse. You can use food grade, plastic containers with a lid.
Soil selection. Planting gloxinia seeds is carried out in the following soil mixture: take one part of coniferous soil and deciduous soil. There should be no humus in the mixture.
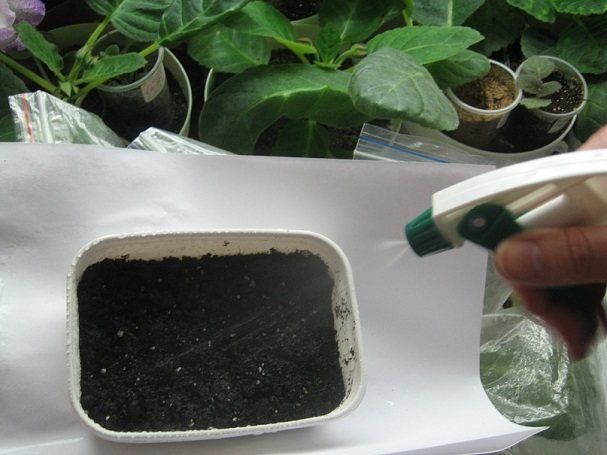
Planting directly... How to plant gloxinia seeds? Small expanded clay is poured onto the bottom of a pre-prepared container with drainage holes. Then a soil mixture is laid on top of the expanded clay. It is preliminarily placed in the microwave for 2 minutes. The soil should be moist, but there should not be an excess of moisture in it. For this, the earth is sprayed from a spray bottle. If properly prepared soil is squeezed in your hand, it forms a lump, which disintegrates when lightly pressed.
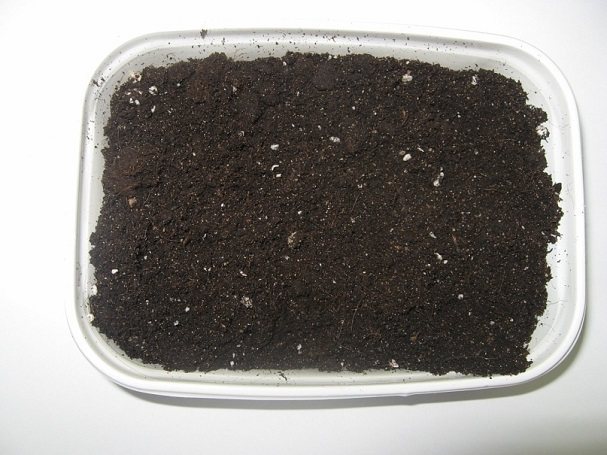
The soil should not reach the edges of the container by 4-5 cm, if the container will simply be covered with film. The earth also does not need to be compacted. Gloxinia soil should be light, nutritious and loose. It is advisable to sprinkle sifted peat on top of the soil.
How to sow gloxinia with seeds? You do not need to make grooves for this.Gloxinia seeds germinate in the light, and therefore they are not sprinkled with soil. They are simply laid on top of the ground and lightly sprayed with warm, settled water. If the seed was yeast, the nutrient film must not be allowed to dry out.
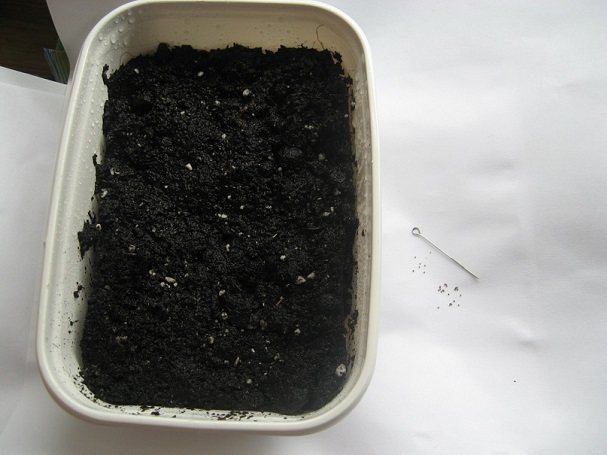
How convenient is it to do everything? To do this, the grains are laid out on an A4 sheet folded in half, and then gently moved to the ground with a needle. It is necessary to spray seeds from a spray bottle at a distance of 40 cm. Otherwise, the seed will go deep into the soil and its germination will deteriorate.
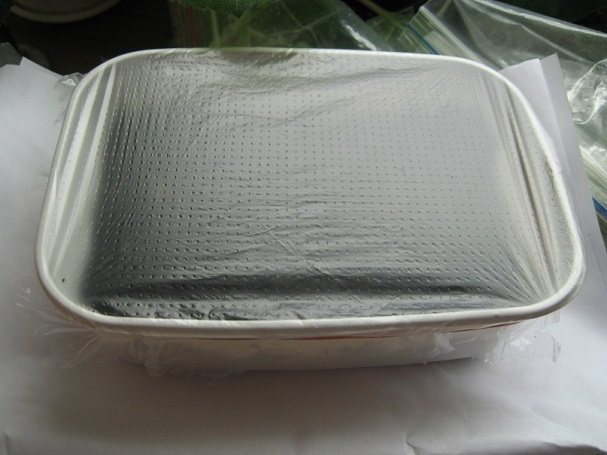
After the seeds have been evenly distributed over the soil, the container is covered with a film with small ventilation holes.
How to grow gloxinia from seeds? Basic rules for caring for crops:
- Lighting... The container should be placed in a bright place, but not in direct sunlight. It should be diffused light. If the reproduction of gloxinia by seeds is carried out in the autumn-winter period, then the container is placed under a fluorescent lamp at a distance of up to 40 cm.The distance will depend on the power of the lamp. The more powerful it is, the further the container is placed. Seedlings need to be illuminated for 12-14 hours. Otherwise, the seeds will not germinate.
- Temperature... The container must be kept at a temperature of +22. +26 degrees. This has a positive effect on the germination rate of the seed. As soon as the first shoots appear, the temperature is reduced to +18. +20 degrees.
- Watering... Do not allow the soil to dry out. Watering is carried out as needed from a spray bottle or through a pallet. Although watering is often not needed. After all, the container with the seeds is covered with foil. It prevents excessive evaporation of moisture.
- Airing... You need to air the container with seeds 2 times a day for 10-15 minutes. This will prevent condensation from forming on the film.
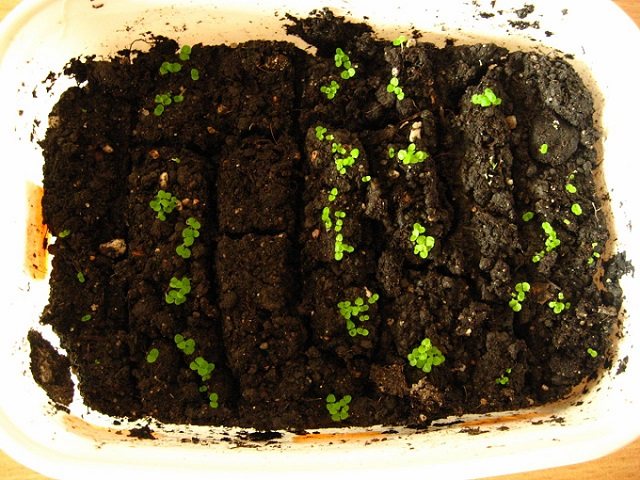
The timing of germination of gloxinia from seeds... If the correct conditions for growing gloxinia from seeds were observed, the first shoots of conventional, non-hybrid plant varieties appear on days 10-14. At low temperatures and insufficient lighting, germination takes up to 1 month. Germination of seeds of calico, tiger, double varieties occurs 14-20 days after sowing.
Seedling care... On days 2-3 after the emergence of shoots, the film is gradually removed from the container. At the same time, the temperature in the room where the gloxinia shoots are located is lowered to +18. +20 degrees. Otherwise, the seedlings are pulled out.
The 1st pick is carried out 1 month after the emergence of shoots. At this time, one rosette of full-fledged leaves should appear on the plants. The first pick is carried out if the gloxinia seedlings are thickened. If the seeds were planted at a sufficient distance from each other, the first pick is skipped. Gloxinia dive into the soil of the same composition as the soil for sowing seeds. The distance between the seedlings is 2 cm.
2nd pick. It is carried out 2 months after germination. By that time, young gloxinia should have two pairs of leaves. The pick is carried out into the ground of the same composition as before at a distance of 4-5 cm. This stimulates the growth of seedlings.
3rd pick. It is performed when the plant has three pairs of leaves. The pick is carried out at a distance of 10 cm or in separate containers for each gloxinia.
For the successful cultivation of young gloxinia, the correct conditions must be observed:
- temperature + 20 degrees;
- a large amount of diffused, sunlight;
- in the hot season, spraying at night;
- watering as the top layer of the soil dries up.
If young gloxinia has received the right home care, it will bloom 5-6 months after germination. Young gloxinia in winter at home does not need rest, and therefore it continues to grow throughout the winter.
Dormant period
In autumn, (September - October), when it will be seen that the soil does not dry out for a long time after watering, watering is reduced, and after the leaves begin to turn yellow or dry out, they stop watering altogether. After the aerial part of the plant has completely died out, the tuber goes into a dormant state, which lasts 3-4 months, depending on the storage temperature.
Tubers are stored in several ways.
- The pot with the tuber is placed in a cool place with a temperature of +10 to +15 degrees. During the winter, the soil is slightly moistened several times so that the tubers do not dry out and do not shrink too much, especially if the tubers are small, they are stored worse, since they dry out quickly. If the storage temperature is higher, then you need to moisten more often.
- 2 weeks after the aboveground mass has completely died out, the tubers are dug up, cleaned of root residues and placed in wet sand and stored in a cool place. This method is convenient in that at any time you can easily get the tubers out of the sand and inspect their condition.
I store it like this: I dig up the tubers, put them in wet sawdust or sand and store them on the lower or middle shelf of the refrigerator door. Once a month I take out and examine the tubers, if the sawdust dry out, I slightly moisten them and put the tubers there again.
According to literature data, as well as on the basis of data from Internet resources, storage temperatures below +8 degrees are fatal for gloxinia. In my many years of experience, I cannot agree with this, in the refrigerator it is only +5, but I did not have any losses. The main condition is not to overmoisten the substrate in which the tubers are stored, it should be only slightly damp, and the sand may even be dry.
Features of culture
The plant owes its unusual name to the German scientist Benjamin Peter Gloxin, who devoted his life to biology. Another name for the flower is sinningia.
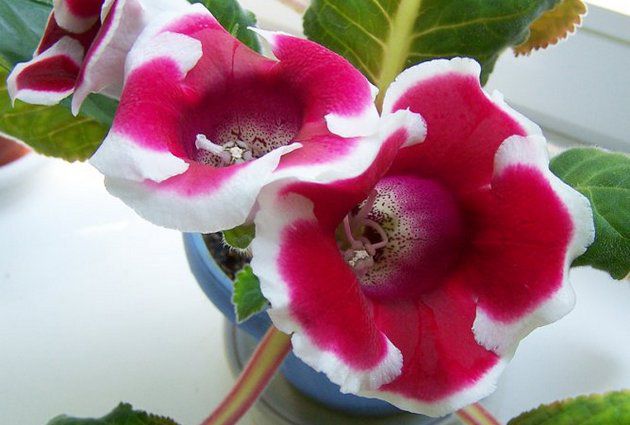
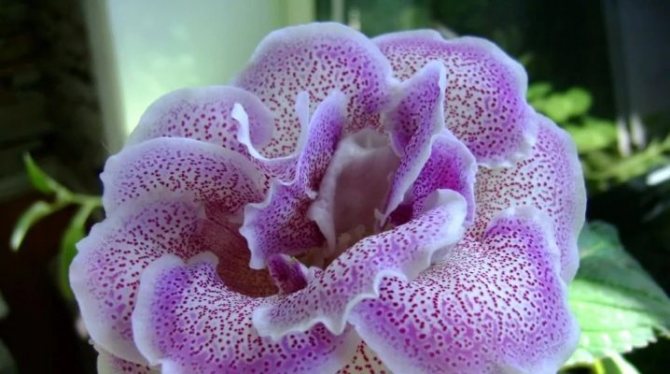
In some varieties of gloxinia, the flowers are covered with bright specks inside, while in others they can be decorated with frills in contrasting colors along the edge. Flowers can be smooth or velvety, depending on the variety.

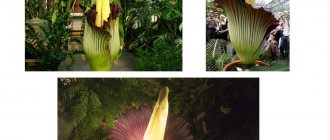
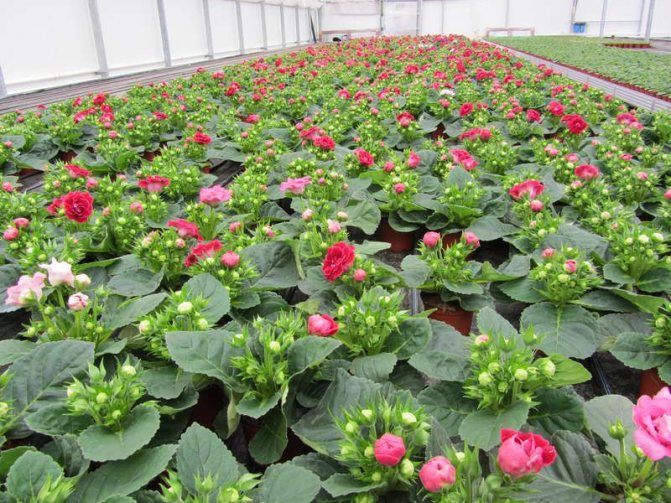
Growing gloxinia in a greenhouse
Gloxinia can be grown from seed at home, which will take effort and time. Despite the fact that this ornamental plant is very whimsical to the conditions of detention, it is very popular. The flower will retain its attractive appearance for many years, delight with abundant flowering and fresh velvety leaves, provided that it is properly cared for.

Conditions and time for growing
You should not delay planting work... Do this immediately after the "sleep" period, at the stage of awakening. If this moment is missed, the shoots will begin to stretch and turn pale due to the lack of chlorophyll.
The time for bud formation depends on the conditions of the plant in winter. Gloxinia awakens in February-March. If the tubers have not woken up, then to wake them up, place a flower pot in a warm and well-lit place.
Gloxinia breeding methods
Gloxinia can be grown at home using one of several propagation methods for this plant; the most common are the following:
- breeding with a leaf separated from an adult plant;
- division of tubers;
- sowing seeds.
Important! Indoor plant lovers rarely use tubers for breeding gloxinia, considering this method ineffective. Parts of the tubers must be planted in the ground, where they may not take root for a long time.

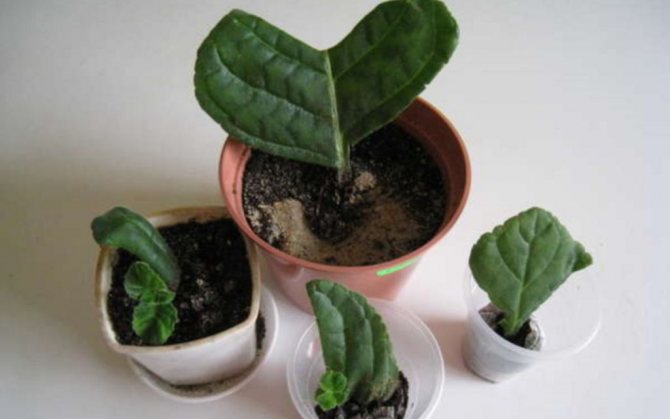
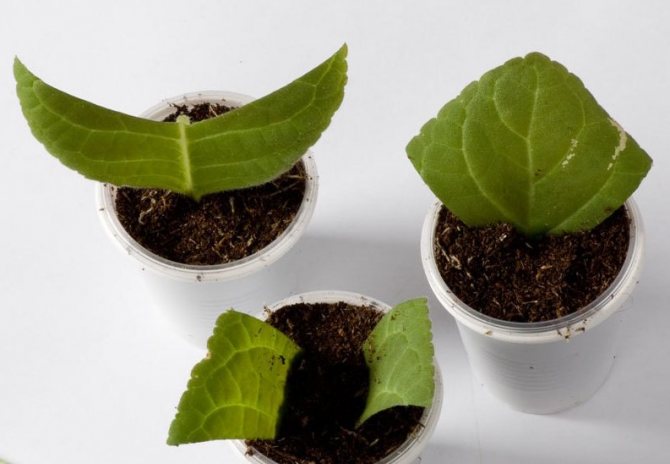
The easiest way to quickly grow a new gloxinia bush is to root a leaf cut from an already growing bush. You need to take a healthy leaf with a petiole, the length of which is more than 2 cm, and place it in a container with water. When the roots begin to grow, it is necessary to transplant the leaf into the ground. Large leaves can be divided into parts.Parts of the leaf should also be placed in water until the roots form.
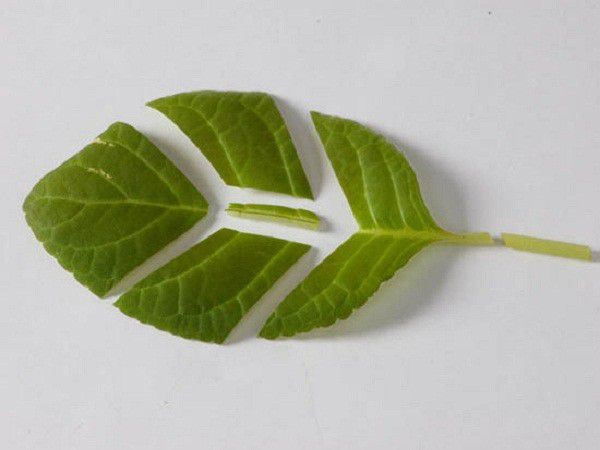
Reproduction of gloxinia by leaf fragments

Reproduction of gloxinia leaves
Breeding gloxinia with seeds is not an easy way. The seed of the plant is small and difficult to germinate. The sprouts that appear are very difficult to care for, they grow slowly. Seed propagation is used mainly to obtain new varieties of gloxinia. In this article, we will provide step-by-step instructions for growing a plant at home in this way.
Gloxinia - seed propagation
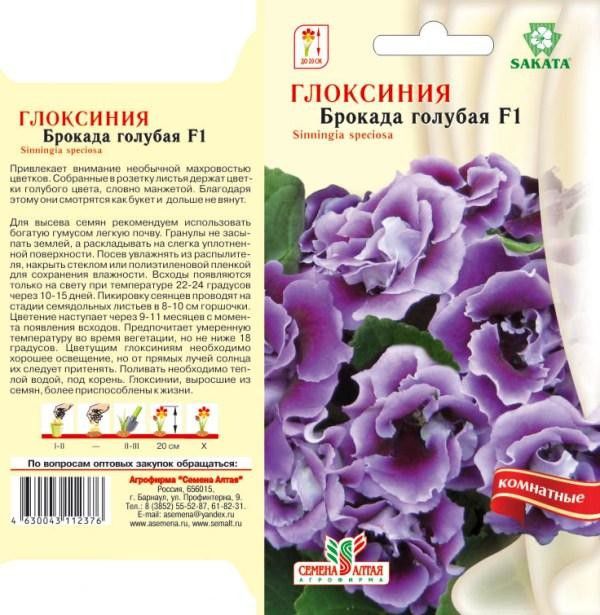
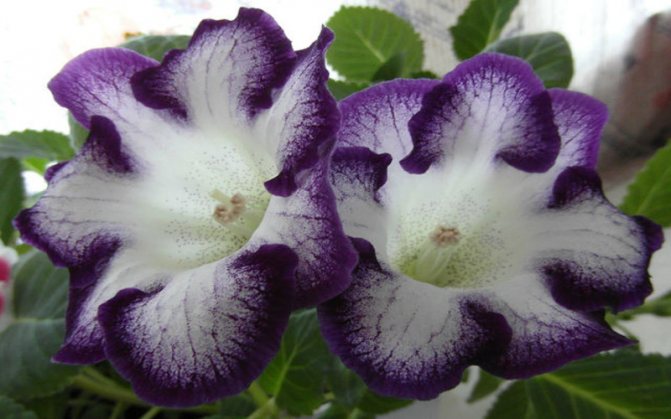
Gloxinia Brocada blue F1


Bloom
In a properly grown plant, after the third or fourth pair of leaves, buds are laid. Their number depends primarily on the mass of the tuber and growing conditions (light, temperature, humidity).
Gloxinia can bloom again (eg Avanti and Brocade hybrids) if the first bloom was early. In this case, the aerial part (stem and leaves) is cut off, leaving a shoot about 2 cm high. Soon, lateral shoots of the second generation (second growth) develop in gloxinia, on which buds are laid, the plants bloom, but not as abundantly as during the primary flowering. Flowers are smaller.
Repeated flowering is not typical for all species and varieties of gloxinia, for example, lateral shoots of the summer generation of the Kaiser Friedrich variety develop slowly, by the end of summer they have time to overgrow with leaves, but do not go into the budding and flowering phase.
To the content
Collection and timing of sowing gloxinia seeds
In order for the reproduction of gloxinia by seeds to become possible, it is required to make their competent collection. First, the plants are pollinated with a piece of cotton wool, which needs to touch each pistil of all gloxinia flowers that are in the house. After some time after the petals fly around, you can see the formed seed boxes in the center of the flowers. After about a week, these boxes will begin to open.
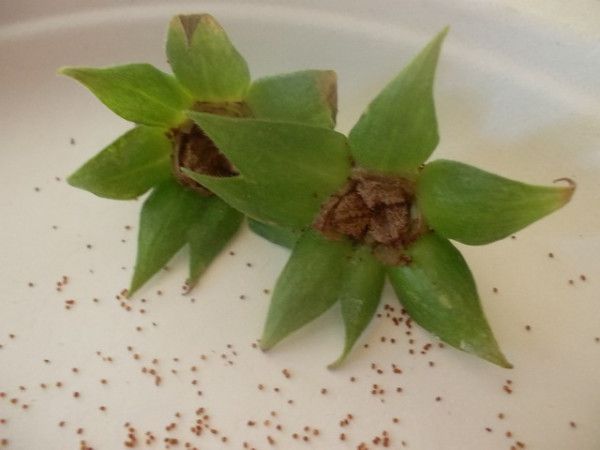
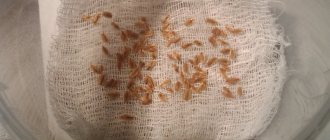
Collecting Gloxinia Seeds
Broken seed pods must be cut off. To collect the seeds, the opened box is lowered into a glass, into which sufficiently mature brown seeds will be poured. These seeds do not require any treatment before sowing. For growing gloxinia at home, you can also use purchased seeds.
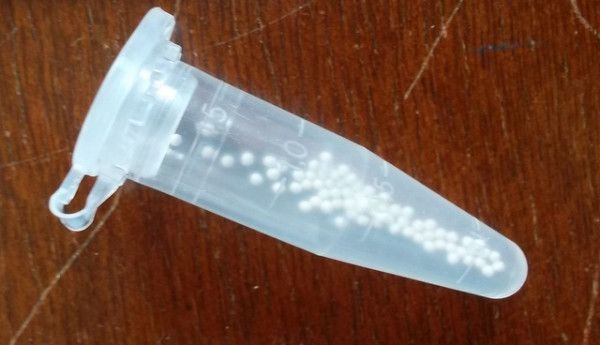
Gloxinia seeds in granules (pelleted)
Important! It is best to plant gloxinia seeds at the end of winter. If sowing is carried out in the fall, then for the seedlings it will be necessary to organize backlighting and maintain the required temperature in the room where it will grow. If this is not done, the plants will stretch out.


How to plant gloxinia tuber: step by step process
The correct placement of the flower in the pot plays an important role. The whole process of planting gloxinia with a tuber after winter dormancy is step by step:
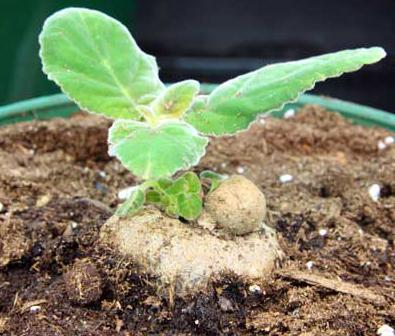
- First you need to understand at what depth to plant gloxinia with a tuber. The convex nodule part goes down (in contact with the substrate), the upper part is sprinkled with soil 2/3 of the height so that the growth points are not clogged with soil.
- Nearby, it is necessary to make several depressions and fill sand there. This will make the soil looser and lighter.
- After pouring the soil into the pot, it is necessary to water the substrate in such a way that water does not get onto future sprouts.
- You can set up a mini greenhouse by covering the pot with a bag. With sufficient lighting, watering and a temperature regime within 22 °, young shoots should be expected in a month.
- Pour the soil into the pot to the desired volume after the sprouts reach 4-5 cm.
Video on how to properly plant gloxinia with a tuber:
Top dressing
The fact that gloxinia is properly cared for is indicated by a large number of buds during the flowering period. Their number can reach 20 per bush.Timely fertilization will contribute a lot to this.
During the growing season, it is recommended to feed the plant 3 times a month. For this, fertilizers are purchased for indoor plants. After approximately August 15, gloxinia begin to plunge into a resting stage. At this time, the plant needs fertilizing that contains potassium and phosphorus, but does not include nitrogen. After the completion of the rapid growth, it is not required to fertilize with gloxinia.
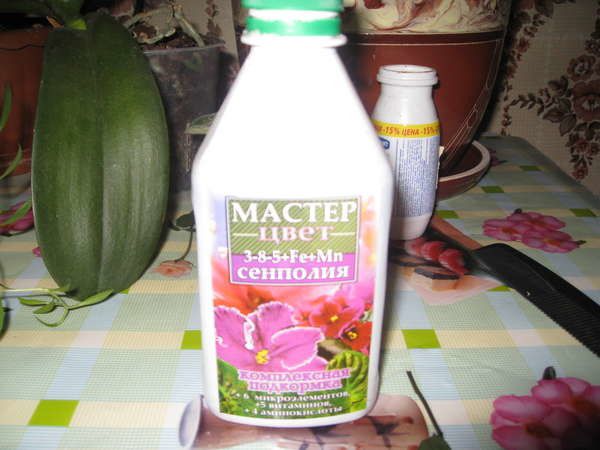
Complex food for flowers
Important! It is possible to determine that the plant's need for nutrients is not satisfied by its external state. The growth of gloxinia slows down, the foliage turns pale, the flowers become smaller, the duration of flowering decreases.
But an overdose of fertilizers can be harmful. Therefore, you should carefully consider the recommendations indicated on the packaging of the drug, on the amount and frequency of feeding.
Preparing the soil and pot
Before planting a plant, you need to prepare the substrate, drainage, and prepare a container. Gloxinia does not have special requirements for the composition of the soil mixture... But for planting it, it is better to choose a light, well-air- and moisture-permeable soil. It should contain a sufficient amount of nutrients. Ready-made peat-based substrates are excellent for this.
If the soil is too dense, then moisture will be retained in it, and oxygen will not be able to penetrate to the roots. This will lead to decay and death of the plant. The size of the container for gloxinia should be 4-6 cm wider in diameter than the planting material. This will allow the flower:
- develop a good root system;
- lay a large number of buds;
- to form beautiful foliage without sacrificing culture.
To buy too large a pot for gloxinia is not worth it... In it, the culture will only produce leaves and will not form buds. In addition, with a large capacity, it is easy to make a mistake with the amount of water for irrigation, and this is fraught with rotting of the tuber.
Lighting
The plant needs to provide access to a light source of sufficient intensity. In this case, it is undesirable to get on the leaves and flowers of direct sunlight. This can lead to burns on the sheets and, in the future, to the death of gloxinia. Plants feel best on the windowsills of windows facing west or east. If the plant lives on the windowsill of a south-facing window, then it needs shading. Gloxinia needs a long day of light, at least 12 hours. With a lack of natural light, she needs to provide additional lighting with a phytolamp.
Deviation from at least one of these principles of caring for gloxinia can lead to inhibition of its growth and loss of its attractive appearance. A healthy plant has a small stem and dark green leaves.
Important! The lack of lighting is determined by the pale color of plant parts and their elongation, and the excess is determined by the yellowed leaves curved at the edges and shortened flower stems.
The plant does not tolerate changes in temperature and drafts. There is no need to ventilate it. The air around the gloxinia must be sufficiently humid. To maintain the required humidity, you can place a container of water around. The ingress of moisture on the leaves and flowers must not be allowed, therefore irrigation from a spray bottle is excluded.
Gloxinia does not tolerate drafts and temperature extremes
During the growing season, it is recommended to keep the temperature in the room where gloxinia is kept at + 18 ° C. Overheating of a plant can be determined by rising leaves, and freezing, on the contrary, by dropping leaves. This also indicates insufficient watering. In the resting phase, gloxinia feels good at a temperature of about + 10 ° C.
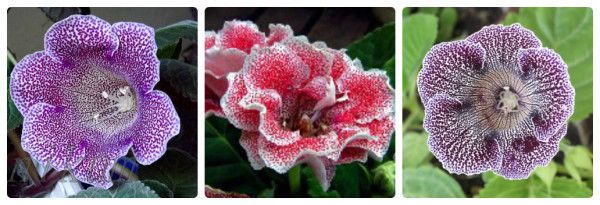
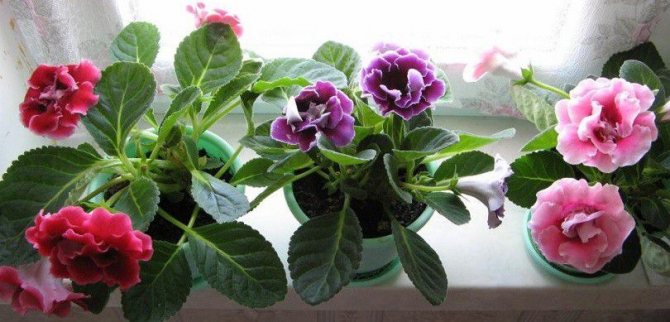
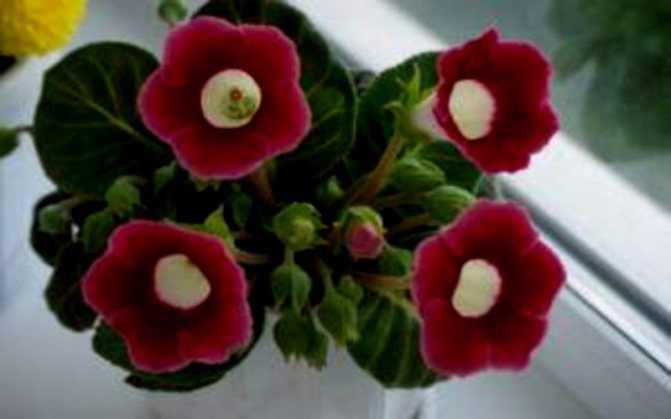
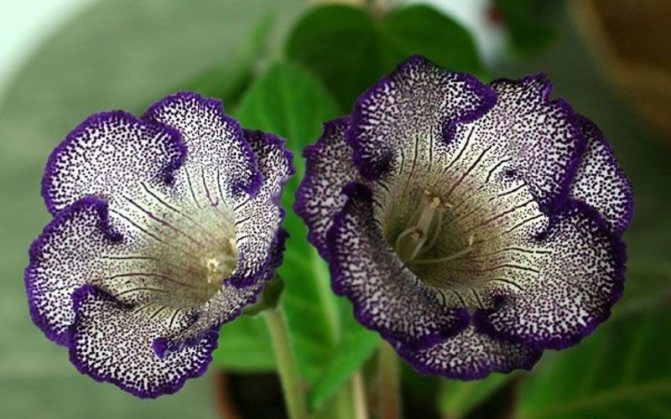
Several varieties of gloxinia
Watering rules
Proper care for gloxinia growing at home includes regular watering and fertilization.When plants grow vigorously, the soil needs to be watered quite often to prevent it from drying out. In this case, the formation of excess moisture on the roots should not be allowed to avoid rotting.
Gloxinia care
Important! You can determine the moment when it is necessary to water the plant again by the dried surface layer of the soil.
Water used for irrigation should be filtered in advance. Its temperature should exceed room temperature by about 2 degrees in order to reduce the likelihood of rotting tubers. The latter absorb warm water more easily.
When watering, it is highly discouraged to let water get on the flowers and leaves of the plant. To avoid this, you can pour moisture into the pallet. When the soil has absorbed enough water, the excess should be removed from the pan. During the period of rapid flowering, gloxinia needs more active irrigation.
Pallet irrigation scheme
Important points of care for gloxinia
Summing up, here are the basic rules that must be followed in order to get beautiful gloxinia from seeds at home.
- Gloxinia prefer spacious windowsills with bright enough light. But direct sunlight should be excluded.
- Watering the plant is required in a timely manner, avoiding stagnation of moisture at the roots.
- To maintain the attractive appearance of gloxinia, it is recommended to remove yellow leaves and wilted flowers from it.
Yellow leaves need to be removed
Video - Growing gloxinia from seeds at home
Nikolay Zhuravlev editor-in-chief
Publication author 28.03.2017
Did you like the article? Save so as not to lose!
The variety of indoor flowers today is simply amazing. Among them there are varieties that have been loved by flower growers for many years, and there are those that have appeared relatively recently. In this article, we will consider the correct sowing of a flower such as gloxinia, and further care for it at home. After all, for many decades it has been Gloxinia is one of the most popular potted plants.
Possible failures
Tuber has not formed - this can happen when planting a very long stem cutting or if the cutting was very deeply planted and watered abundantly.
The buds turn black and die off - the reason is the lack of micronutrients and the shortened daylight hours.
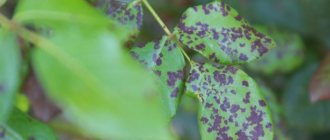
Reddening of the leaves is a lack of phosphorus.
Yellowing of leaves - lack of nitrogen or excessive watering.
Leaf discoloration - lack of magnesium.
Leaf curl - insufficient air humidity.
Spotting (non-infectious). On the leaves there are yellow or brown spots of an indefinite shape - too bright lighting, drafts or watering with cold water.
Twisting flowers, slowing down the growth of plants - the temperature is below +15 degrees.
The curling of the edges of the leaves and their bending, the formation of deformed flowers and shortened pedicels - excess moisture in the soil.
Decay of petioles and buds - excess soil acidity, excess nitrogen fertilizers, waterlogging of the soil.
The plant does not bloom - insufficient lighting, lack of nutrition, dry or cold air, improper maintenance during the dormant period, excess nitrogen fertilizers.
Features of the
Gloxinia belongs to the Gesneriaceae family, America is considered its homeland, and for its name the flower was named in honor of the botanist Benjamin Peter Gloxin. Its second name is sinningia.
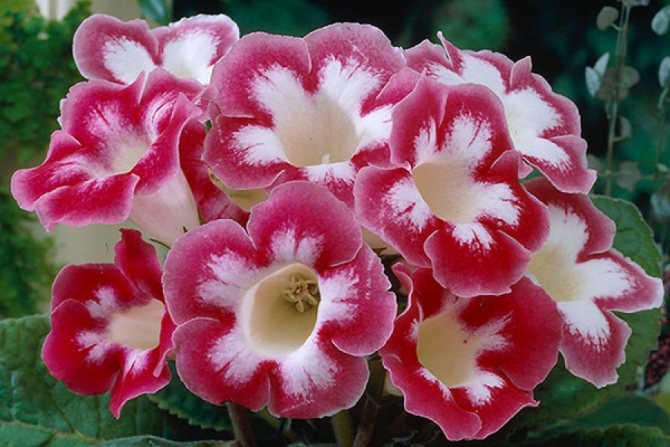
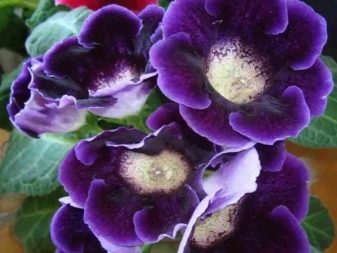
It is a small houseplant that has bell-shaped flowers of a large size and a wide variety of colors. Their border can be smooth and terry, monochrome or multi-colored. For example, the Avanti F1 hybrid gloxinia has white flower petals, while the Hollywood sinningia is dark purple.
Such indoor bushes look very stylish and bright, their leaves also have a different ornament on their surface, depending on the cultivated variety.
The key features of this chic indoor bush are:
- the possibility of growing indoors or in special greenhouses;
- the presence of a tuberous root, which, if necessary, can be stored in a subfield just like ordinary potatoes;
- regardless of the variety, the leaves always grow in the form of a rosette, and their surface is covered with small villi;
- the stem of gloxinia is short, but very thick;
- the tone of the flowers themselves depends only on the type of gloxinia.
Against the background of other indoor plants, sinningia always stands out favorably for its lush and unimaginably bright flowering.
What is this flower?
The height of an ornamental plant can be different - up to 5 cm or up to 70 cm. Some subspecies of gloxinia in their homeland grow as dwarf shrubs... Basically it is a herbaceous plant, the growing season in which begins in spring and ends in autumn.
ATTENTION: In winter, the flower is at rest. Its aerial parts die off, and the rhizome "sleeps". With the arrival of spring, the buds wake up, leaves that have an opposite arrangement begin to grow. They can be fluffy, smooth, glossy.
The peduncle can carry one of several buds, and sometimes a whole brush. The appearance of the flowers resembles bells... Their color may be different:
bright;- blue;
- white;
- pink;
- red;
- brown;
- purple.
The plant blooms from May to September. The seeds ripen in a small box. They are small, dark and slightly elongated.
How do I get seeds?
In order to get seed, you can choose one of two ways.
- Contact a specialist store... There, gloxinia seeds are presented in an unusually wide range, with both classic and hybrid varieties. The big advantage is that reproduction in this case will be quick and simple, because the seeds are already completely ready for further use.
- Hand picking seeds... The main difficulty here is that you first need to manually pollinate the flowers themselves. For these purposes, during direct flowering, pollen is planted in the pistil of a flower from another plant. It is advisable to use flowers with different colors for this procedure. A few days after the procedure, the corolla dries up, and a seed capsule appears in its place. Its formation and maturation can take up to 56 days.
As soon as the first signs of opening of the box appear, it is carefully cut off with sharp scissors and placed in a dry container. After full disclosure, the seeds are carefully poured into a clean container for further use.
The best time to sow seeds is February. Therefore, pollination of plants should be started in late November - early December.
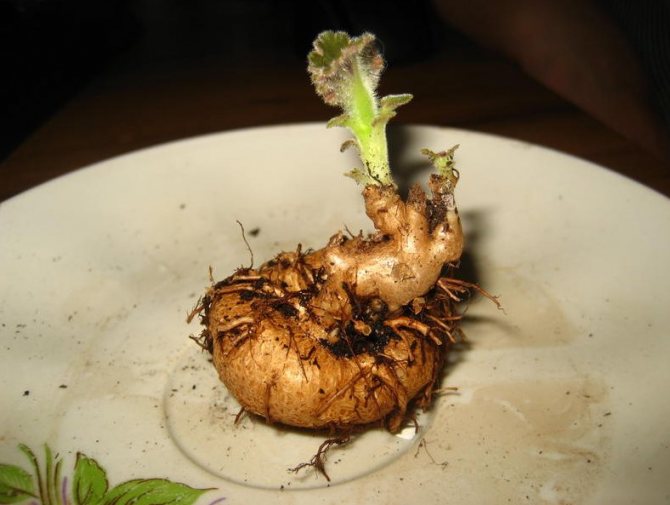
Cooking the tuber
How to process, wake up
Before planting a tuber in a new pot, rinse the remnants of the past soil with warm water, let it dry in natural conditions for a day, remove all dry roots, trim off dead parts. Slices can be left untreated, or they can be sprinkled with charcoal to prevent decay. A weak solution of potassium permanganate is suitable for processing. 15-20 minutes in solution will help protect the plant from various diseases in the future.
Sometimes, after storage, the nodules become soft. Such specimens are not suitable for transplantation; they should be brought to a viable state. To do this, wrap the wrinkled samples in a damp cloth for several days. The procedure should restore elasticity and strength.
How to split
When the nodule is already old and is not suitable for planting after winter dormancy, but it is a pity to throw it away, you can use division.In other cases, the division process should be avoided, because the stronger and larger the tuber, the more magnificent and beautiful the flowering.
Having divided the planting material into parts, the cut site should be treated with charcoal to dry the surface. There must be a sprout on each “plot”, otherwise there is no point in transplanting. Some enterprising growers are trying to "splicing" cuttings from different types of gloxinia in order to get several individuals of different colors in one pot.
When and how to plant?
So, it is better to plant the collected or acquired material in the first half of February. But in addition to the seeds themselves, you also need to take care of the following.
- Correct dishes. The container should be shallow, rather wide, and must have a tight-fitting lid, which, if necessary, can be replaced with cling film or a piece of clean transparent glass. You can also use special peat tablets. In that case, a container with a pallet is prepared for them, in which they are installed, and the germination of seeds itself is carried out in this case without land.
- Now about the ground. You can sow seeds either in ready-made mixtures of the substrate, or you can make it yourself. Land harvested under a pine or birch tree and, of course, as far from the road as possible is best suited. But only such a substrate should be disinfected in an oven at a temperature of 150 degrees for 1 hour, and only after it has completely cooled down can it be used in the future.
- Drainage. For sowing gloxinia at home, its presence is not necessary. But if you wish, you can use clean and fine pebbles.
Where to sow?
For seedlings, you should take wide bowls, in which there must be holes for the drain of excess water. It is better not to use deep dishes - seedlings in it can rot, besides, they still need to be transplanted several times.
Since it will be necessary to create a greenhouse environment, small plastic vessels with a lid will do.
The soil for growing seedlings is selected very light and nutritious. You can use a commercially available peat soil by adding a little fine charcoal and vermiculite to it. Also, seedlings grow well in a mixture of deciduous and coniferous soil (in equal parts), but in this case the soil must be disinfected with potassium permanganate.
Seedling care
A week after planting the seeds, the container must be ventilated. For this the container is opened daily for 10-15 minutes. This procedure is necessary both for the access of fresh air and to prevent the appearance of mold on the surface of the substrate.
Watering is carried out regularly, but only when the soil begins to dry out. The room temperature should be about 22 degrees. And it is very important to exclude direct sunlight on crops.
After the shoots appear en masse, the shelter is removed from the container. Now it's time to pick plants. Experienced growers are sure that for the normal growth and development of gloxinia, it is necessary to carry out at least 3 picks, ideally, this procedure is performed 4 times.
- First time - 1 month after sowing. To do this, using a spoon, carefully remove the seedling from the container with the earth and transplant it into a separate container with the same soil. Lightly irrigate on top. At this stage, plants can be planted in 2-3 pieces in one box.
- Second transfer carried out at the moment when the height of the flower becomes more than 2 cm. Here, each plant is already planted in a separate container, the capacity of which is at least 100 ml of soil.
- Third time the pick should be carried out after about another 15–20 days. The container capacity is no less than 200 ml.
- Fourth transfer - this is the planting of a plant in its permanent place.
If everything was done correctly, then gloxinia will bloom in the first year. But such a picking of sprouts is necessary only in the case of sowing seeds in the ground.
Reviews of the owners of this plant indicate that it is better to sow seeds in peat tablets - so picking is easier and faster, and the plants do not get sick. To do this, choose a container immediately with a volume of about 250-300 ml, pour drainage on its bottom, then a little substrate, and set tablets with sprouts. The container is again filled with soil from above and the surface is sprayed with warm water.
Gloxinia is not just a beautiful indoor flower, but also a plant that is extremely demanding on lighting and regular feeding.
- It is best to place pots on windows facing east or north. In the presence of a large amount of direct sunlight, the flower needs darkening. If during the active growing season the daylight hours are shorter than 16 hours, it is necessary to install special phytolamps.
- During the budding period and in the most active flowering, gloxinia must be fed with special mineral fertilizers. It is necessary to choose those that are designed specifically for flowering indoor plants, and it is imperative to observe the dosage indicated by the manufacturer.
Some people think that it is impossible to plant gloxinia seeds in peat tablets. Allegedly, due to a weak root system, the plant will not be able to fully develop. This is not entirely true. In small tablets, the seed material feels great, but it is better to refuse to use even the smallest peat pots.
Air humidity
The air humidity should be in the range of 70-80%, but gloxinia feels good even at a lower humidity of 50%, but even lower humidity is undesirable, the plant does not develop well, growth slows down and leaves deform. The edges of the leaf blade are bent downward.
To increase air humidity, you can place the plant on pallets with wet expanded clay, moss, water, but you cannot spray gloxinia itself, because brown, dry spots are formed. However, far from light and draft, gloxinia tolerates water procedures very well. At night, you can bring it into the bathroom, sprinkle it or wash it with warm water and leave it there with the doors closed and the lights off until the water on the leaves is completely dry.
To the content
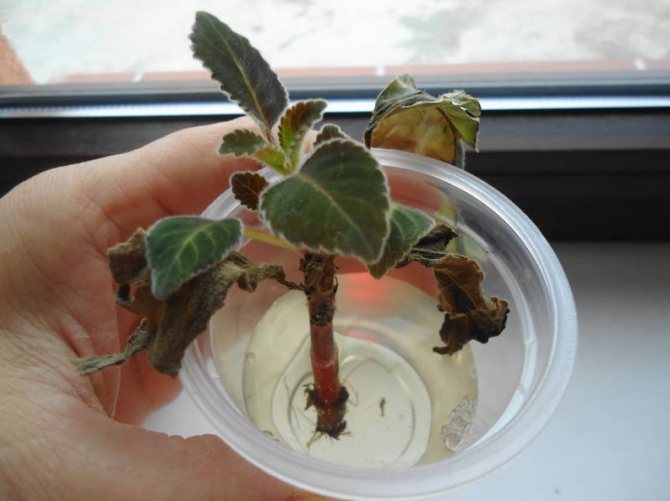
Stem cuttings
A stalk is harvested from large, well-developed leaves of the lower tier: a leaf with a petiole 1 cm long is cut off. The thicker the petiole, the larger the nodule is formed from it.
The cut leaf can be pre-rooted by immersing only the petiole in water. Water should be topped up as it evaporates. Roots are formed within two weeks, after which the leafy cutting is planted in light, loose soil.
You can immediately, bypassing water rooting, plant a leaf cutting in the soil mixture, dipping its cut into charcoal powder. In this case, the cutting is covered with a transparent plastic wrap, ventilated, moistened and kept at a temperature not lower than 22 ° C. As a rule, the roots are formed within 2-3 weeks, and the resulting gloxinia can bloom in the same year.
In the event that the plant forms many lateral shoots, they are cut and rooted in the same way as leaf cuttings - first in water, or immediately in a light soil mixture. Gloxinia from stem cuttings blooms in the same year.
Start with a seed
You can propagate a flower with velvet flowers in different ways, including seeds. This method is not only economical, but also gives a lot of pleasure from observing the development of gloxinia. When choosing seeds, you should pay attention to the expiration date. Good seedlings cannot be obtained from old seeds.
Growers owe a modern variety of varieties of amazing Gloxinia to breeders. Today you can pick up all sorts of options that differ in color, leaf shape, bell size. There are flowers with great doubleness and single-row.
You can buy ready-made seeds in flower shops.Most often, flower lovers purchase the following varieties:
- Cleopatra;
- Eliza;
- Brocadu;
- Kaiser Wilhelm;
- Winter cherry and others.
When growing gloxinia from seeds, you should know that those that are purchased in the store are completely ready for sowing, most often they are pelleted, with a nutritious shell. You can collect seeds with your own hands. Those who like to experiment will like this activity. Grown with your own hands, gloxinia from seeds can be your pride.
Family landing conditions
If you need to grow several varieties, then each variety must be sown separately.
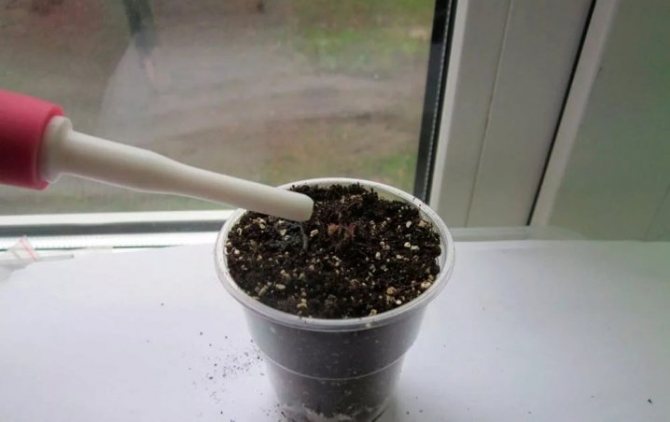
- Seeds must be poured into a pre-prepared lid or matchbox in order to make them convenient to take.
- A toothpick or a thin stick needs to be moistened with water. Thus, it is very easy to pick up each gloxinia granule.
- Next, you need to lower the seed to the surface of the soil without embedding. Do the same with the remaining seeds. So plant all the granules in a row.
- After sowing the seeds, the patch must be covered with either a foil or a lid.
- It is necessary to water the soil before planting so that the seeds do not fall into the ground.
After all, deepening even by at least 0.5 cm can drastically reduce the possibility of emergence of seedlings. If tablets were used, it is no longer worth watering, the moisture absorbed by peat-distilled tablets should be enough for growing. - Put the patch on the window to create greenhouse conditions for the plant. Additionally, you can use table lamps.
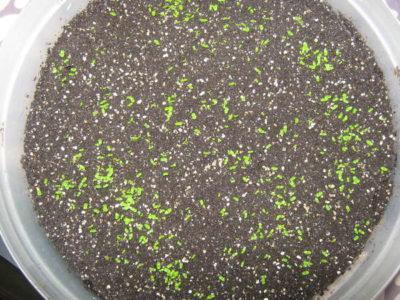
Seedlings should germinate in 2-3 weeks. Do not open the lid before the first shoots appear, so as not to disrupt the normal conditions for growing seeds.
It is necessary to control:
- Humidity of soil and air in the container. If necessary, it is worth sprinkling lightly with clean boiled water. The water temperature should be slightly above room temperature.
- Lighting. The degree of illumination cannot be changed. If necessary, to reduce the temperature from the lamps, you can raise the lamps higher. This will not dim the lighting.
As soon as the second leaf appears, it is necessary to gradually accustom the seedlings to room conditions: humidity, temperature. Namely, to begin to ventilate the greenhouse, thereby tempering gloxinia.
After choosing favorable days for sowing prepared gloxinia seeds according to the lunar calendar at any time of the year, it is recommended to start laying out the soil in a container at a height of 2-3 cm.
After that, professional florists recommend tamping, leveling the surface of the soil in the container and moistening it with a spray bottle, which is distinguished by a fine spray of a water jet.
Seeds of beautiful flowers are sown without deepening on the surface of the soil, followed by moistening. Accurate watering of the soil prevents the seeds from being washed over the surface.
We offer you to familiarize yourself with: Growing tomato De Barao black
The soil
Adult gloxinia needs light soil. A primer for violets, or another versatile primer for flowering plants, is suitable. If you are preparing the soil for planting yourself, you can use the following composition:
- land from the trunk circle of deciduous tree - 2 parts;
- peat - 1 part;
- sand - 1 part;
- rotted manure, or compost in the amount of 1 glass per 5 liters of soil mixture.
You can read about what kind of soil is needed for growing gloxinia here.
Seeds
To grow Gloxinia from seeds at home, a flowering period is required to pollinate the plant artificially, using a soft brush. If pollination is successful, after the withering of the petals, a green fruit is formed, which turns into a dry capsule in about three months.
Small dust-like seeds in it ripen unevenly, they are extracted in several steps. Germination is maintained for two to three years.
Gloxinia grown from self-obtained seeds may have new varietal traits that are different from those of the mother plant.
Seeds of various varieties of gloxinia are on sale, enclosed, for the convenience of sowing and early germination, in pellet shells. Sowing of Gloxinia with seeds is carried out in January, February, March on the surface of a moistened light soil mixture (leaf earth and sand) and covered with plastic wrap.
They are ventilated, moistened and kept in a bright, warm place (the optimum temperature is 24-26 ° C). Seedlings appear in about two weeks.
If the sowing is thickened, the seedlings are planted already at the stage of cotyledon leaves, at a distance of 2 cm from each other.
When one or two pairs of true leaves are formed, young gloxinia can be gradually removed from the "greenhouse" regime and planted in small "cactus" pots for further growing.
New plants obtained from seeds bloom in about seven months.
Gloxinia can be grown perfectly from seed. you can buy seeds in the store, or you can subscribe from some collector. Seeds collected by collectors from their gloxinia tend to have very good germination. Attention, gloxinia grown from seeds may not repeat parental traits. A wide variety of gloxinia colors can be obtained from such seeds. So when growing gloxinia from seed, be prepared for unexpected surprises. So we have seeds. Gloxinia seeds are very small, but do not be confused, you will get flowering plants from them in 5-7 months. That is, if sown in January, then flowering plants can already be obtained in late May, early June. We take a container for sowing seeds, it can be any plastic container. It should be shallow, about 5-7cm. depth. I do not make drainage holes. We put drainage on the bottom, it can be finely crushed foam. We fill in the soil. I use soils, "Flower", or a series of Terra-Vita "Living Earth", you can also use a primer "Nesterovsky". We water the soil. Then we sow seeds evenly over the surface of the soil. Attention! We do not cover the sown seeds with earth. We create greenhouse conditions (cover with a transparent lid) and put in a well-lit warm place. I put it on the top shelf of the rack. Shoots appear on the 5-14th day. We are waiting for them to grow up. As soon as the seedlings have real leaves, they will need to be planted (cut open). Don't be afraid that they are small. After the pick, the seedlings grow very actively. Previously, I did not dive seedlings and they grew very slowly. After I began to dive the seedlings, they began to grow much faster. You need to dive at least 3 times. The time for the next pick comes when the seedlings begin to close in leaves. After the 3rd pick, we plant the seedlings separately. For this I use disposable plastic 100g. cups. When the seedlings tie the buds and grow enough they need to be planted in small pots with a diameter of 7-9 cm. Water carefully, after the top layer of the earth has dried. Good luck to everyone! Photo lesson Prepare a container, take seeds, sow on the surface of the soil. Do not cover the seeds with soil !!!! 1. Sow, cover and place in a warm, well-lit place. I have it on the top shelf of the rack. 2. After 5-15 days, the seeds germinate. We have already grown a little. 3. It's time to dive, (plant), the seedlings have already closed with leaves. 4. Dismantled (planted), you need to moisten the soil, be sure to cover and put in a well-lit warm place. 5. Here the seedlings have grown up again, it's time to dive again. 6. Dismantled. I use the smallest disposable cups for this. 7. Now we place it in a greenhouse and place it in a warm, well-lit place. As soon as the seedlings begin to actively grow, we open the greenhouse. When we see the buds, it's time to plant them in separate pots.Water carefully, do not overflow, a bay is possible.
A series of messages "Garden, vegetable garden, windowsill": Part 1 - Home orchids - secrets of growing and care Part 2 - Strawberries in a barrel - beautiful and tasty ... Part 13 - Rules for watering an orchid Part 14 - Reproduction of gloxinia with a peduncle Part 15 - Growing gloxinia from seeds ... Photo tutorial. Part 16 - Nursing the roots Part 17 - Greenhouse made of plastic bottles ... Part 20 - WAY TO THE HEART OF BEAUTY - BEGONIA Part 21 - Germinating seeds in tea bags Part 22 - CARE OF CUCUMBER
Which pot is right for you?
The roots of this tuberous plant develop horizontally, so for gloxinia they choose pots that are wider than they are high.
The size container shouldn't be too bigso that excess moist soil does not become a source of fungal infections. It is best if the diameter of the pot is only 4-6 cm larger than the diameter of the tuber.
To ensure breathability, you should choose a landing capacity made of ceramic without a continuous layer of glaze.
Useful video
Below is a list of articles that may be useful to you:
- Planting Gloxinia
- Gloxinia bloom
- Diseases and pests of Gloxinia
- How to care for Gloxinia in winter
- Types of Gloxinia
If you find an error, please select a piece of text and press Ctrl Enter.
Tags: growing, gloxinia, seed, care
About
«Previous post
Other types of reproduction
In addition to dividing the tubers, there are also ways to reproduce the beautiful shiningia: by seeds or cuttings. Rooting by leaves can be done during spring and until autumn. This can be done before, during and after flowering. Moreover, young leaves cut in spring take root faster and easier than those that were separated in autumn.
A special device is made before the procedure. A hole is cut in the lid or piece of cardboard. There, carefully, so as not to damage the delicate shoot, a leaf is inserted, and the cardboard / lid is placed on a glass of water. The liquid level should be up to the tip of the cutting. As it evaporates, the water is topped up. During the rooting period, 1 tablet of activated carbon is added to the liquid so that the process of rotting of the sprout does not begin. Within a month, small roots appear at the end of the cutting, and a tuber is tied.
Often, growers divide the edge of the cutting lengthwise so that the greatest division of the gloxinia tuber occurs. It is better to plant the stalk immediately in the ground, at the first signs of the appearance of roots. Before winter, the first embryos the size of a hazelnut are formed on it. Peduncle rooting is made from an already blossoming plant. The buds should be carefully removed, and the flower stalks should be placed in the same structure as in the case of the leaf cuttings. The water level must reach the tip of the plant so that 1 cm of it is submerged in the liquid. A month later, when the roots appear, the peduncle must be planted in the soil. After another 30 days, the leaves that appear will signal that nodules have already tied. Young plants for the winter must be placed in a cool, but bright place to give rest to the flower. Watering during the rest period must be reduced, otherwise the gloxinia flooded with water will die.
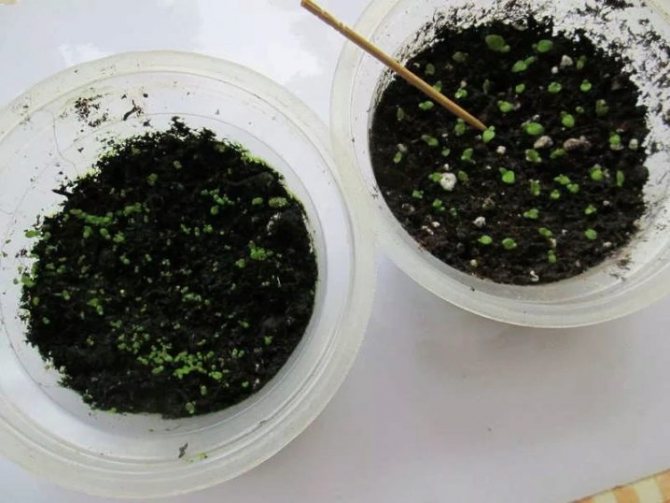
We are waiting for sprouts
Now our container with crops needs to be placed in a warm, bright place. The windowsill won't fit, it's too cool there. Alternatively, place the container in a special warm foam or foam pad. Plus add extra lighting. Happy owners of phytolamps, it's easier for you. Fluorescent lights will work, though.
It is very important not to open the container lid until the first shoots appear. High humidity and warmth promote seed germination. But, depending on the expiration date and conditions, this process can last from 2 weeks to 3 months.
High-quality seeds sprout quickly. The bad ones ... don't come up at all.The only clarification: as soon as the first green shoots appear, do not rush to remove the shelter. The plants are still too weak, so let the mini-greenhouse be there for now.
New place of residence
The preparation of containers for sowing prepared gloxinia seeds involves the purchase of plastic boxes for seedlings or transparent plastic containers with lids, which are a cheaper option for packaging confectionery.
It is not necessary to make holes to remove excess water as the period between subsequent picks of seedlings takes a little time.
Preparing for landing
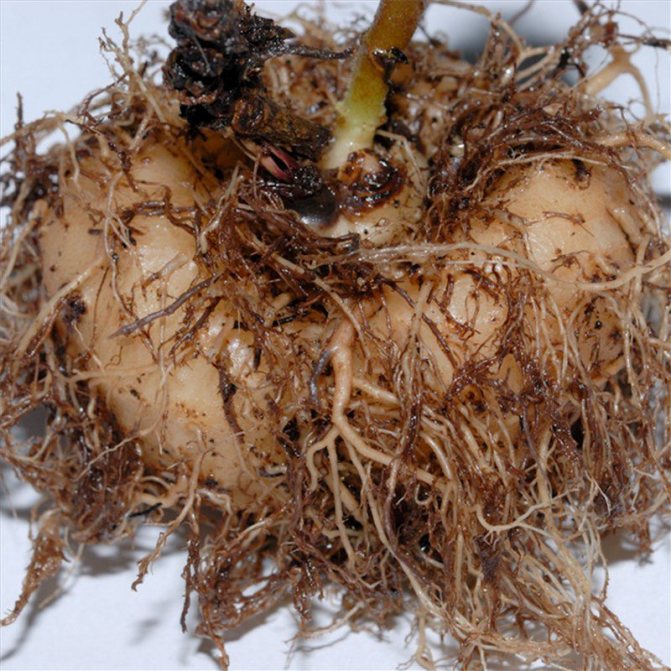
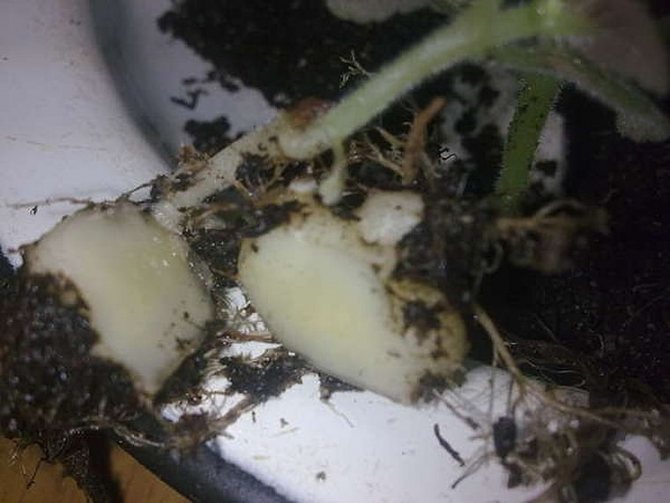
Gloxinia babies are stored in shavings and sawdust in winter. Often the tubers are covered with old, dried roots. Therefore, before planting, they need to be cleaned as much as possible - cut off carefully or cut off all the threads of the roots with nail scissors, leaving the largest ones. The tuber should be as bare as possible. And from the largest roots new ones will grow.
It is necessary to determine where the bottom of the tuber is, and where the top is, so as not to plant it upside down. There is a small depression in the place of future sprouts. On the opposite side of the tuber there is a bulge, and it must be buried in the soil. Make sure that there are no rotten spots, rot, and various damages on the seedling. If there are any, you need to carefully cut them out, and sprinkle these places with charcoal. Alternatively, it is appropriate to treat the cut with a fungicide and Kornevin powder, after mixing them. After such treatment, it is advisable to dry the tubers for about a day. These operations will allow the damaged seedlings to be reanimated.
A Few Tips
- Gloxinia is very fond of feeding. It must be produced when the young foliage is fully developed. 60 minutes after watering, a solution of mineral fertilizer should be introduced into the soil. The procedure must be performed every 10 days.
- It is easy to care for the leaves of the plant - you should wipe off the dust with a soft brush or wash them with warm water, avoiding getting moisture into the outlet.
- If you do not intend to collect seeds, wilted peduncles must be removed. This will significantly prolong the flowering period.
- After full flowering, before a dormant period, watering is reduced, and fertilization is stopped altogether.
These simple tips and tricks will help you understand how gloxinia reproduces, planting a tuber will not seem so difficult. A beautiful ornamental plant will bloom with lush bells as a token of gratitude.