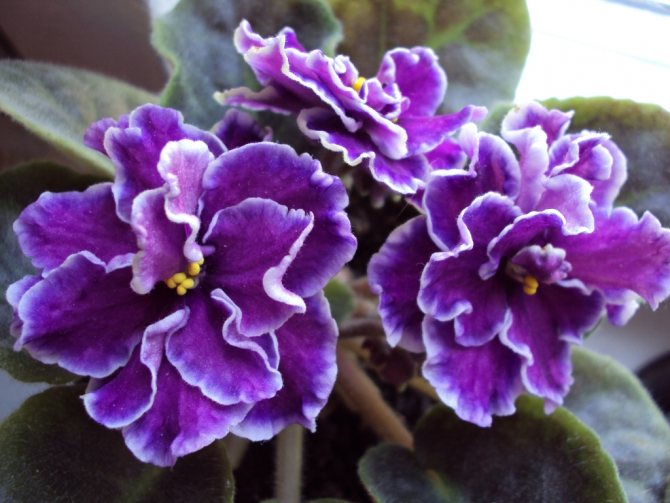
Despite the fact that the content of violets is quite capricious, the reproduction of this charming plant not difficult... You just need to observe some subtleties.
Which breeding is the most popular? Breeding Saintpaulia
possible in different ways:
- Seeds;
- Stepsons;
- Peduncles;
- Cuttings;
- Leaves.
Most often, the violet is propagated by a leaf.
Here it will be described in detail about the propagation of violets with a leaf at home.
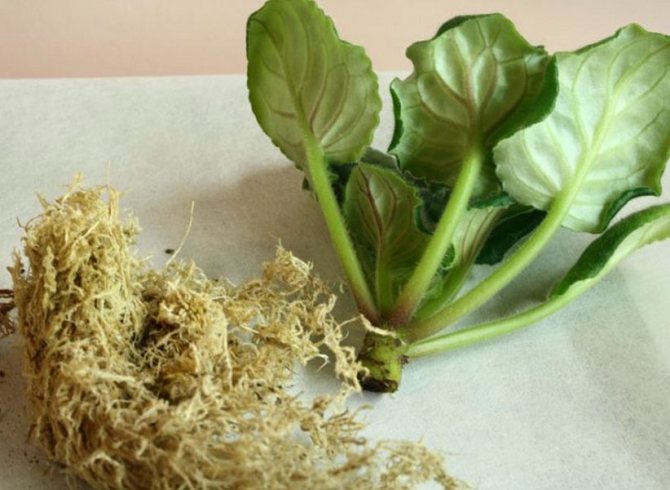
Selecting a sheet
To understand how to properly root a violet leaf, you first need to decide what the planting material should be. In other words, we will tell you how to choose a leaf for propagation. If he is sick or weak, you will not be able to raise strong, abundantly flowering offspring. That is why, before rooting a violet leaf in the ground or in water, you must be very careful about its choice.
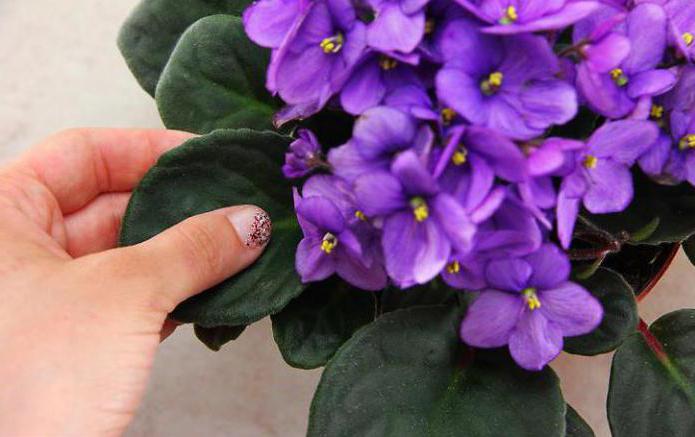
Experienced flower growers do not advise using leaves from the lower tier closest to the ground for propagation. Firstly, they are the oldest, most likely already weakened, and secondly, such leaf plates can be inhabited by spores and fungal bacteria. You should choose a stalk from the second, or better - from the third tier, where the leaves are already well formed, they have reached the size of an adult plant, and have a pronounced turgor.
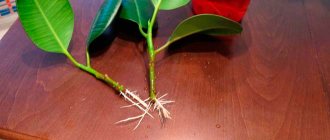
Rooting the cutting
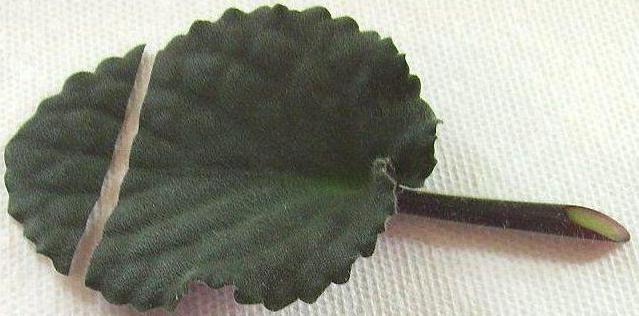
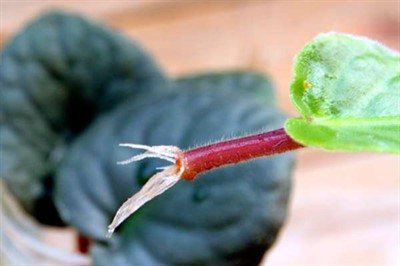
If the leaf was severely damaged during transportation, you can rooting the cuttings of violets without a leaf blade or with a small fragment of it. There are no difficulties with this method: often growers deliberately cut off excess leaves if it is large or has a wavy edge.
When planting a cutting without a leaf blade, it is important to correctly determine which side of the leg should be in the ground. The base of the petiole is always thicker and smoother, more rounded. Where there was a leaf blade, there may be lateral growths that give the petiole a concave shape. This part should be at the top, above the ground.
Planting and leaving is carried out according to the general rules, using any of the described methods. Moisten the substrate constantly so that its surface does not dry out.
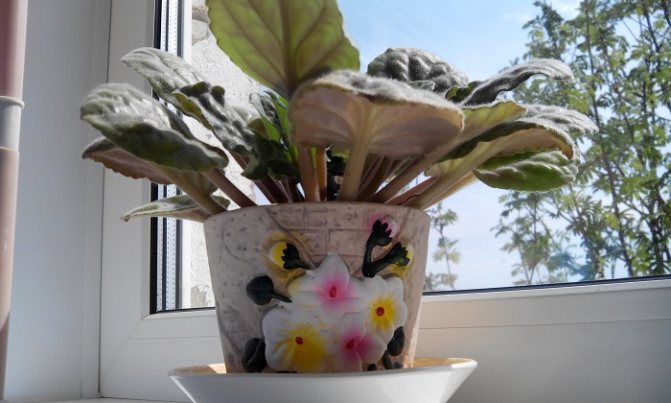
Why does the leaf seem lethargic?
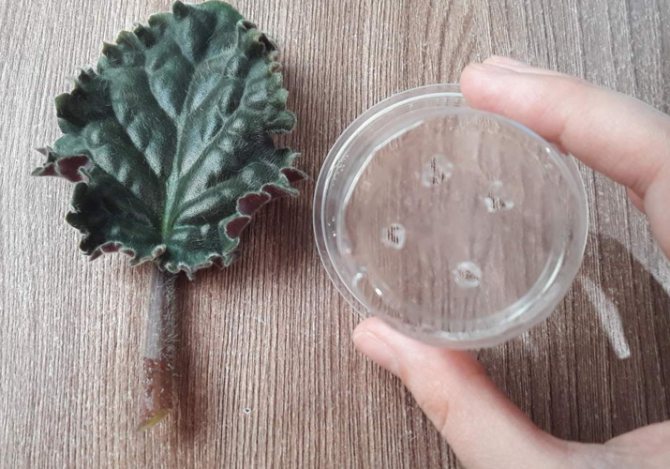
Sometimes the planting material seems to be drooping, having lost its elasticity and visual appeal. This can happen when they try to grow a new outlet from a leaf that was purchased in a store, arrived from the nursery by mail, or was received from friends. A long road, and sometimes irregular watering, instantly affects the condition of the cutting and leaf plate. Therefore, lovers of indoor plants, who know how a violet develops, rooted from a leaf, beginners are recommended to put the whole leaf intended for reproduction in warm boiled water for a couple of hours, into which several crystals of potassium permanganate must first be added.
This simple method will help return the leaf to its normal state and disinfect it. After that, the cutting is dried on a napkin, cut with a sharp knife at a distance of about four centimeters from the base of the plate. The cut can be made straight or at a 45 ° angle.
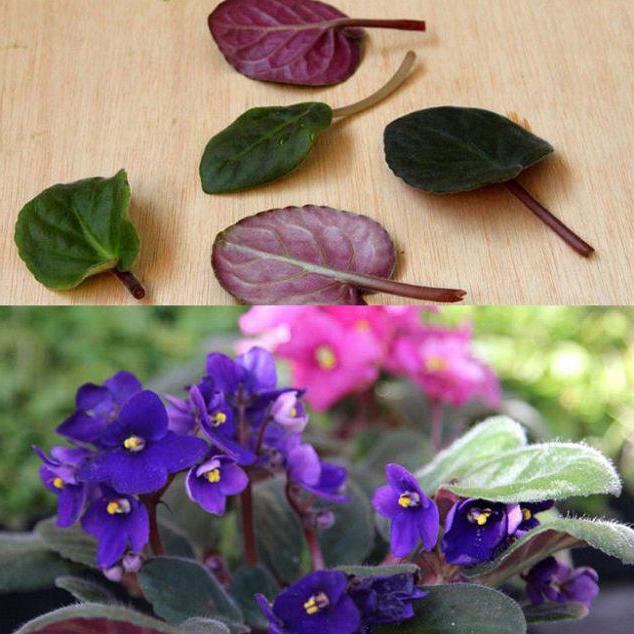

Sheet selection
The simplest and most acceptable way for amateurs to increase the number of Saintpaulias on your windowsill is to propagate violets using leaf cuttings. And, of course, this procedure requires a leaf from which a young plant will develop.
We offer you to familiarize yourself with How to make a slime with your own hands?
It is much preferable to take for reproduction leaf petioles that grow higher, in the third or in the second row, here they are moderately formed, have grown enough and have a pronounced turgor. If you prefer to receive leaf petioles for seedlings by mail, then there is a high probability that they will send you sluggish sockets devoid of appearance, having lost their vitality during shipment.
Florists who have experience in reproduction of Saintpaulias do not recommend using them for breeding indoor flowers using shoots obtained from the leaves of the parent plant and foliage from the lower tier. As a rule, this part of violets is the oldest, probably already having lost its vitality, besides, there is a high probability of infecting "children" with parasites living on the stem, near which the leaves of the first circle are located.
Rooting violet leaves begins by choosing the right seedling material. They don't have to be weak or sick. Otherwise, the offspring of such leaves will be just as sluggish.
It is not recommended to cut leaves from the lower tier of the bush for breeding violets. Here they are often weakened and old. It is these leaves that are most susceptible to attacks by pests, fungi and harmful microorganisms.
If the leaf was transported along the street before planting (from a store or from friends), it may become lethargic. To restore his vitality, a weak solution of potassium permanganate with water should be prepared. The liquid should be slightly warmer than room temperature. After two hours in the solution, the leaf is disinfected and recovers its strength.
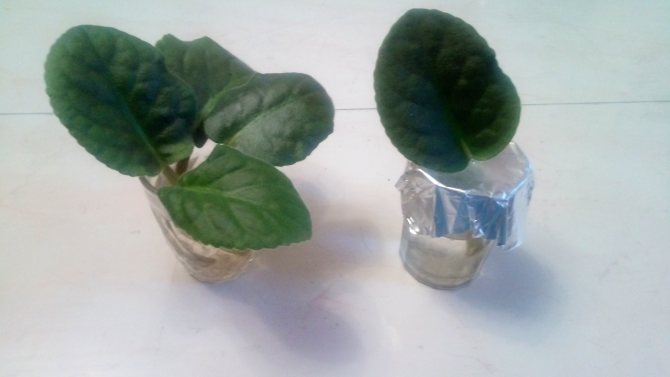
How to root a violet leaf in water?
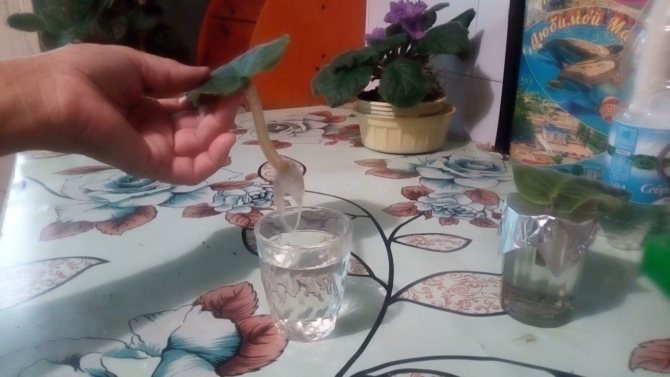
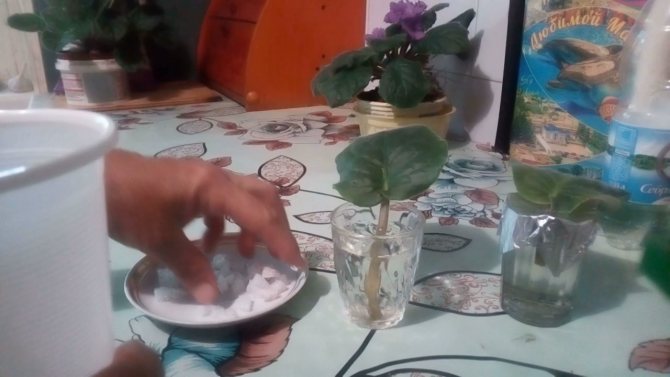
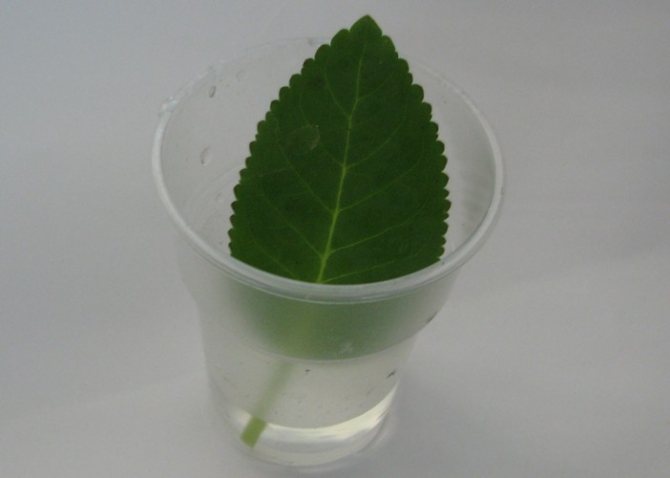
The sooner a leaf cut from a plant gets into the water, the faster and easier the root formation process will take place. For beginners, we recommend this particular method of breeding violets from a leaf. How to root a plant quickly? It's not difficult at all. The easiest way to do this is in standing or boiled water. This will allow you to: track the state of the selected sheet; prevent rotting of the cutting; track the formation of roots and rudiments of new rosettes.
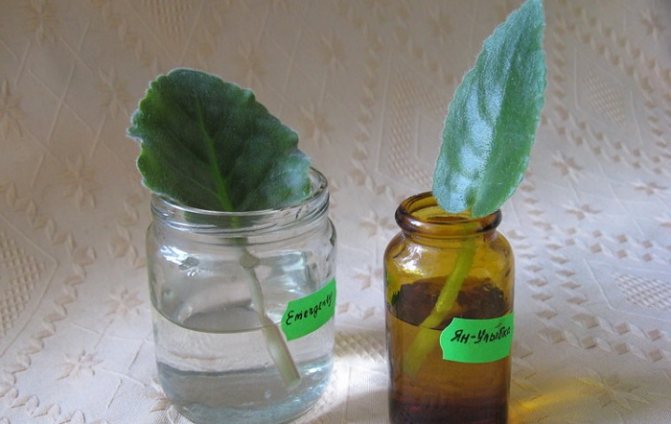
Before rooting a violet leaf in water, the container into which it will be lowered must be thoroughly rinsed, and if it is a reusable dish, it is better to sterilize it. For this purpose, small cups or bottles made of dark glass are more suitable, which prevents the formation of green algae on the walls of the vessels, as a result of which the water stays fresh longer.

Watering violets
Violet does not like excess moisture. So that it does not die due to waterlogging, it must be properly watered. Water the violet with settled water. Better to water them through the pallet. Water flows through the holes to the roots, and when the violet is drunk, excess water can be poured out. But you can also water through the ground. Here it is important to ensure that water does not get on the outlet and the leaves of the plant.
Settled water is considered to be open for 24 hours. During this time, chlorine will evaporate from the water, and impurities will sink to the bottom. And the temperature of the water will become room temperature, since cold water adversely affects the roots of plants, they experience a shock from this. You can water it with melt water or rainwater, bringing it to room temperature as well.
How is rooting done?
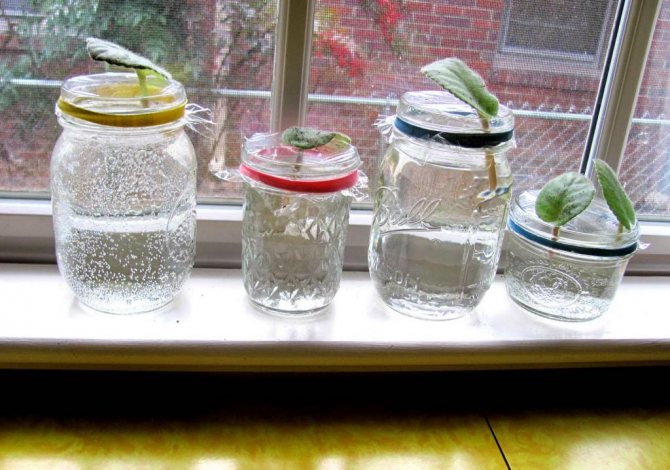
Dip the leaf two centimeters into the water, while the cut of the cutting should not touch the walls of the vessel, for this it can be fixed with a lid on a jar or a sheet of paper.To exclude the development of microscopic algae and pathogenic bacteria, dissolve an activated carbon tablet in water.
As it evaporates, water is added, but only clean and settled water is used. Try to stick to the original liquid level and do not wet the sheet plate. You will see the first roots in two to four weeks. The timing largely depends on the variety of violets and the state of the planting material.
How to root a violet leaf if, instead of roots, traces of rot appear on the cut? The sheet must be removed from the water, dried and cut in such a way as to completely remove the damaged tissue. Further rotting will help prevent the same coal, but already crushed into powder. The cut is carefully processed with it, after which the sheet is again immersed in water. If traces of decay are found, the water is changed and the container is thoroughly disinfected.
Peduncle rooting
Varietal violets (chimeras) are difficult to propagate by leaf cuttings, since they do not retain the characteristics of the variety during traditional breeding. It is possible to increase the number of plants with the desired properties by using flower arrows for cutting cuttings.
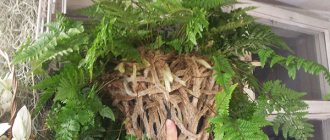
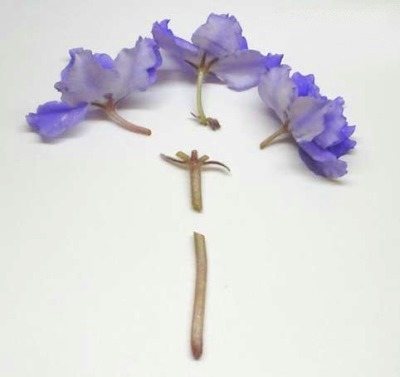
You need to choose recently blooming arrows with 1-2 open cups (to make sure that the variety is the one you need). This stem has miniature leaflets at the base of each branch. The flower arrow is divided into several parts, each of which will have 2 such leaves.
The stalk above the stipules must be cut off so that the stump remains no more than 2-3 mm. A leg 1.5 cm long is left below. An oblique cut is optional.
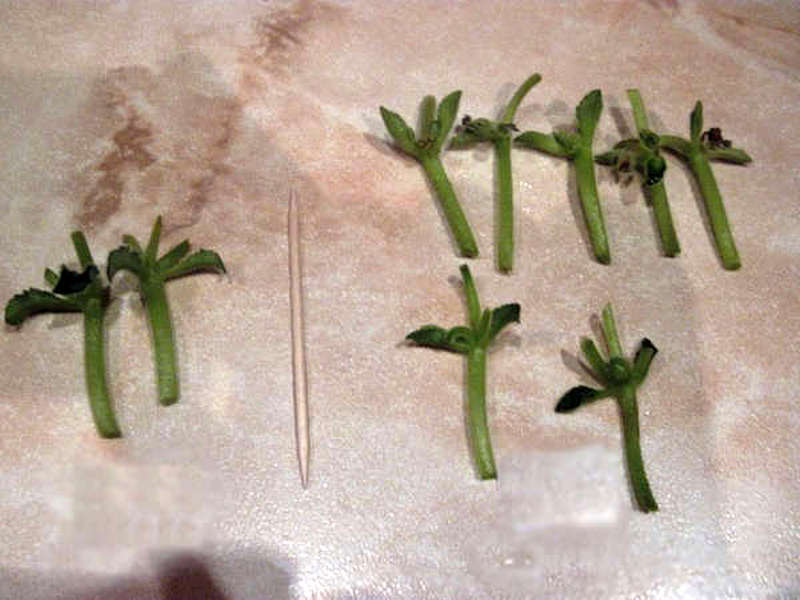
Dust the prepared cuttings from the peduncles with activated carbon powder and plant in moist light soil, burying almost to the stipules. Place the containers in the greenhouse and monitor the soil moisture. Babies will appear in about 1 month.
The necessary traits are inherited only by young rosettes, which will begin to grow in the axils of the stipules. Those that emerge from the lower cut can retain their properties only in 50% of cases, therefore they are most often broken out as they grow back, allowing the upper plants to develop.
A little soil needs to be added to the base of these sprouts so that they take down their own roots. After that, the larger outlet is carefully separated and deposited, and the remaining one can continue to grow in the same container.
Transfer to a nutrient substrate
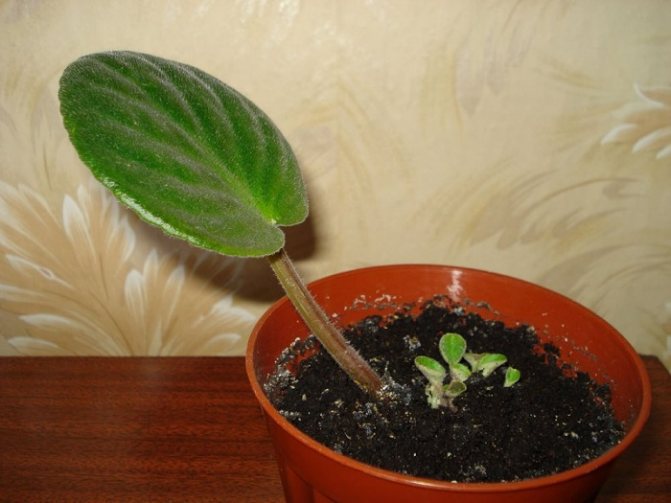
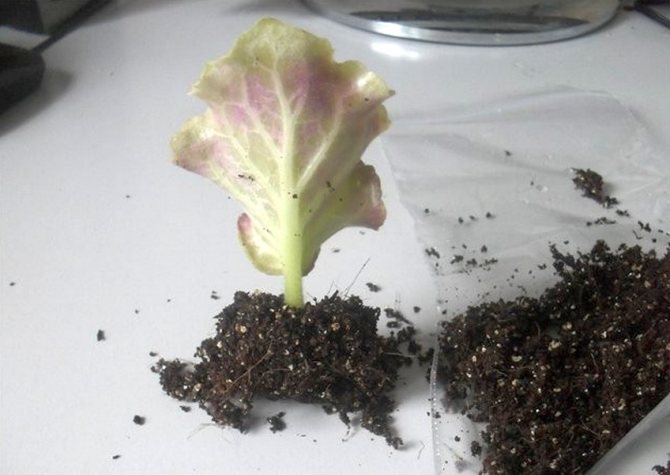
After numerous strong roots about two centimeters long appear on the cutting of the leaf, it is time to transplant it into the soil mixture. In some cases, flower growers do not get the planting material out of the water until tiny rosettes appear on the handle. They are not added to the substrate. But in this case, there is a danger of slowing down their development and growth. What is the best way to root a violet leaf that has already given roots?
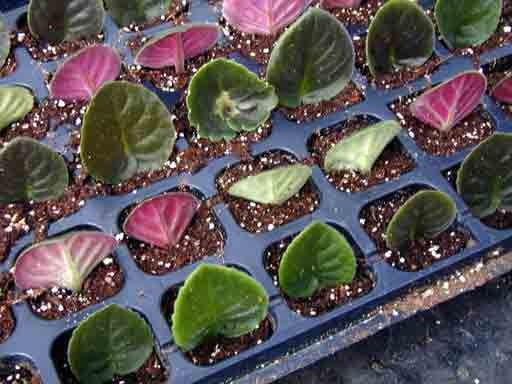
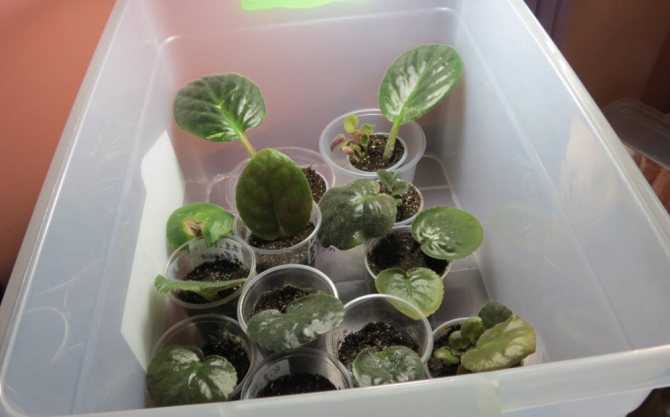
Prepare small plastic glasses, make holes in them to drain the water. Fill them by a third with shallow drainage, and then fill them up to the top with soil. The stalk and leaf should not be deeply deepened, since the emerging rosettes will make their way to the surface for too long. As a result, they will weaken and may not hatch at all. Around the cuttings, the soil is slightly compacted, moistened with a sprayer and in this form, the cups are placed in a greenhouse or simply covered with a bag to create a microclimate and retain moisture.
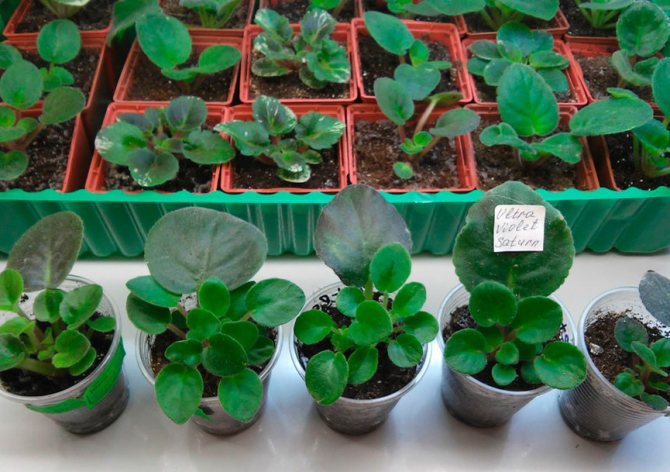
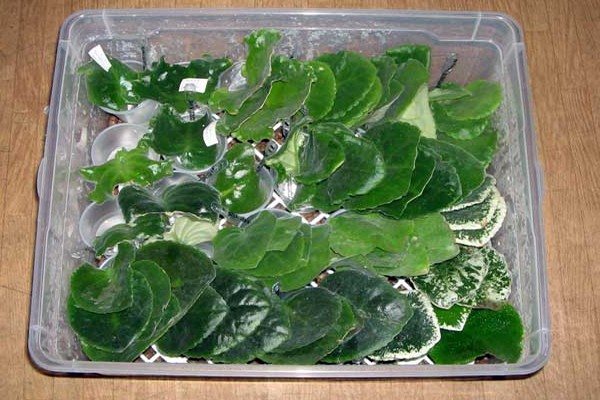
If you are growing violets from the leaves of several varieties at the same time, the cups must be signed, indicating the name of the plant and the planting date. The plants are taken out from under the film after the young foliage appears above the soil level. This usually takes at least half a month.


When and how are young outlets seated?
Violet rooting continues 1.5-2 months depending on the variety and which leaves were used for this.For a faster process, you can use root stimulants, this will speed up the formation of roots and germination of shoots for a couple of weeks.
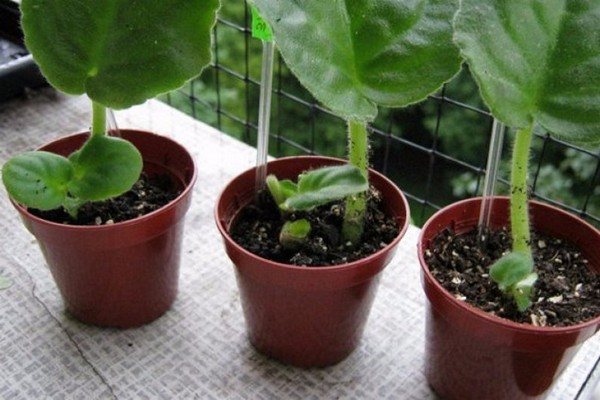
When the height of young violets reaches 3-4 cm and they have at least two pairs of leaves, it is time to separate them from the mother leaf. Stages of separation of children:
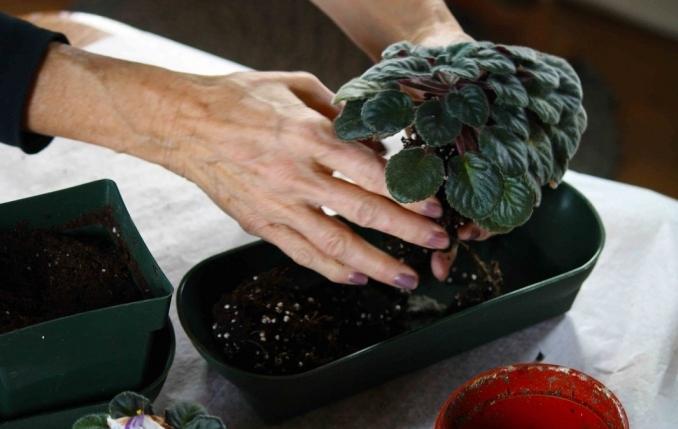
- A moistened earthen lump is taken out of the glass, the soil is gently shaken off;
- All new sockets have their own root system. The roots are intertwined with each other and with the root system of the uterine leaf. For separation, all new sockets are held with the fingers of the left hand, and the uterine leaf plate is carefully disconnected with the right;
- Small sockets then easily lag behind each other;
- They are planted in cups with a diameter of 5-6 cm, without deepening the growth point, that is, the lower leaves should not reach the ground 1-2 mm.
Immediately after planting, the saintpaulias are again placed in a greenhouse or a plastic bag for some time. Keep them at a temperature +20 - + 26C, with good lighting and the duration of daylight hours at least 10-12 hours.
Do not allow sunlight to enter the leaves of young violetsas this can cause overheating, burns and plant death.
How to root a violet leaf in the ground?
Leaves planted immediately in the ground take root well, and this process is much faster. This method is irreplaceable when a leaf from a very young, still immature plant is used for reproduction of violets, or, on the contrary, the planting material has already been obtained somewhat wilting. The same method is suitable for those who do not know how to root a violet leaf without a cutting. The leaf is selected and prepared in the same way as when rooting in water, but the cutting from miniature varieties is further shortened, leaving only from a centimeter to one and a half.
Reproduction methods
Violets propagate easily with the help of a leaf in soil and water. Rare specimens can be multiplied using a leaf fragment. In this way, you can not only expand the collection, but also save the plant that cannot be helped.
There are ways of reproduction using seeds, peduncles and stepchildren. Let's consider each of the breeding methods separately.
Leaf propagation
This method of rooting in water or directly in the ground is chosen by flower growers most often. This method is explained by simplicity and relative ease. The main thing is to be careful and patient. The main stages of breeding:
- selection of planting material (leaf);
- rooting of a leaf in a special soil or in water;
- separation of children;
- transshipment of young outlets.
If everything is done correctly, then the indoor violet will certainly delight you with new healthy offspring.
If the stalk is missing
If the stalk is absent, the leaf is cut into segments and then deepened into the ground. Experienced flower growers resort to this method when they receive a sample of a very rare species and are afraid that it may not take root. If you divide it into segments, the likelihood of successful rooting increases.
If you first learn how to root a violet leaf in water, then this method will not cause you problems. Prepare all the same plastic cups that so often help us out with plant propagation. Fill them a third with drainage. Then fill the glass to the top with soil mixture, and this should be soil mixed with perlite, for looseness. This will facilitate the development of small outlets by providing free air access.
Not only perlite, but also sphagnum moss, which retains water and has an antibacterial effect, is included in the soil for violets from a leaf. How to quickly root the leaf in this case? The potting mix should be slightly damp. A leaf or its segment is buried in the ground: by five millimeters for miniature varieties and by a centimeter for traditional varieties of violets.
You can plant two or three leaves in one glass, but it is necessary that they be of the same type.As in the case when cuttings with emerging roots were planted in the soil, the soil is moistened and the glass is placed in a greenhouse. To prevent mold from appearing on the soil, the plants are periodically ventilated, but at the same time they are protected from drafts and too cold air.
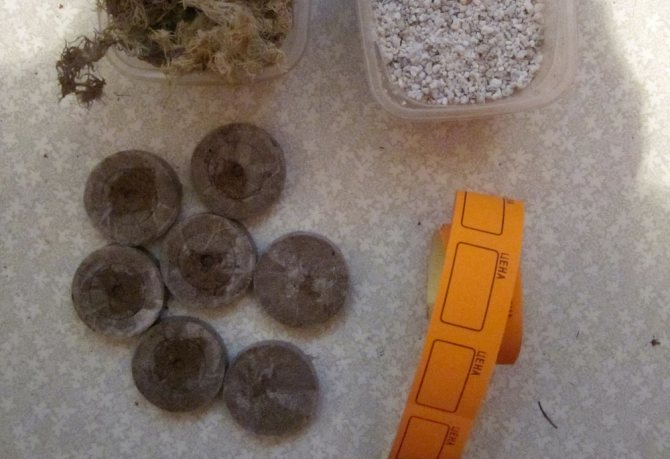
Many beginners are interested in how to root a violet leaf in peat tablets, and whether this method gives a good result. Yes, due to the nutritious and loose substrate, the plants in this case quickly give roots and young rosettes. And the principle of planting remains the same as when planting in the ground.

How to grow from a leaf
The entire growing process begins with a leaf that is separated from the mother plant. How to choose it correctly?
It should be of medium size, not lethargic, without traces of damage from diseases or pests, even and beautiful.
The appearance and endurance of the future plant will largely depend on its quality.
If you want to grow beautiful, lushly blooming violets from the leaves, you need to create favorable conditions for them. Because Saintpaulia, although not very picky about the surrounding conditions, will grow, even if she is not comfortable, but in this case there will be no flowering. Read about all the reasons for the lack of flowering in the material at the link.
And I really want a beautiful hat of flowers, right? Then we recommend that you familiarize yourself with the basic rules for caring for these plants.
Note! This method is not suitable for some varieties of Saintpaulias, for example "Chimera" and "Raisins". But the "Ice Rose" Saintpaulia can be propagated in this way
When propagated by a leaf, their varietal characteristics are not preserved.
Which pot to plant
An important stage in the process of growing Saintpaulia is the correct selection of a flower pot. It is worth taking into account both the size and the material from which it is made.
Expert opinion
Nesterenko Ilona Mikhailovna
Florist, houseplant specialist. Mistress of a country house with a garden and a vegetable garden
There is a common misconception among novice flower growers that the larger and more spacious the pot, the better. In fact, you need to choose the optimal size at which the rhizome will fill the container. In a container that is too spacious, the violet will not bloom and may die over time.
The choice of material is equally important. For this purpose, plastic, clay and their derivatives are used.
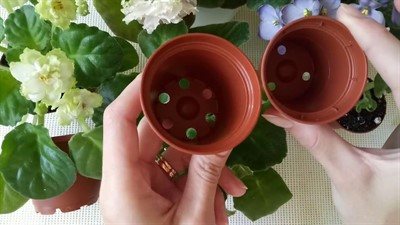
The best option is a clay pot. Air will flow well into it, which is vital for violets.
One more a wonderful feature of clay: it protects the plant from insect pests and various diseases.
Ceramic pots are also made from clay, but mixed with other materials. In addition, they are covered with glaze, which prevents air from reaching the roots.
Plastic pots are durable, lightweight. The only negative is that they do not allow air to pass through. You can solve the problem by using holes in the bottom of the vessel.
For more information on how to choose the best violet pot, read the material at the link.
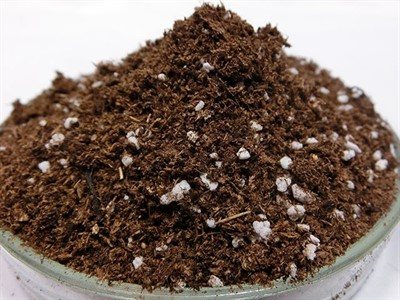
What soil is needed
In nature, violets exist in rather harsh conditions.
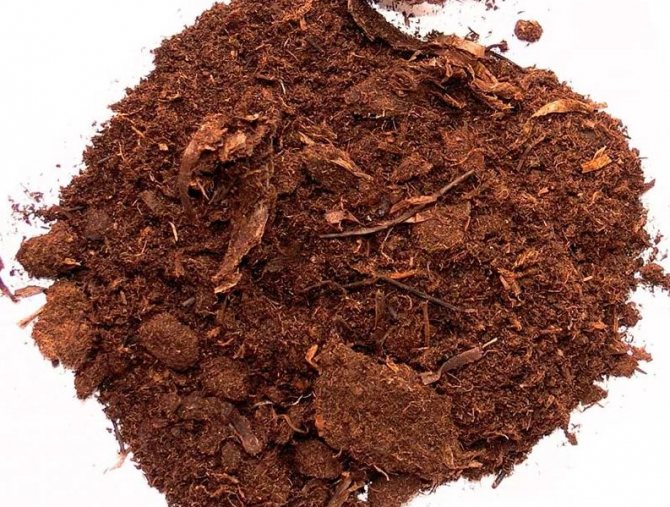
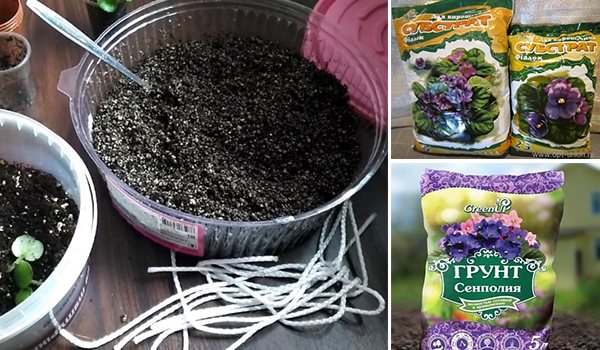
The land on which they grow cannot be called particularly fertile, but all the necessary nutrients are there. Plants choose soil formed from peat, charcoal, organic matter, moss, turf.
For growing a flower at home, land from a summer cottage or garden is not suitable. Specialty soils are sold in specialized stores.
You can prepare an earthen mixture yourself. Land from mixed forests is taken as a basis. At the same time, you should not dig it in those places where the oak grows. When the soil is collected, it is steamed a little.
To do this, take a container with a small amount of water, pour the earth into it and put it on fire. You need to warm up the soil for 15 minutes, stirring occasionally.
After cooling down, add the necessary additives:
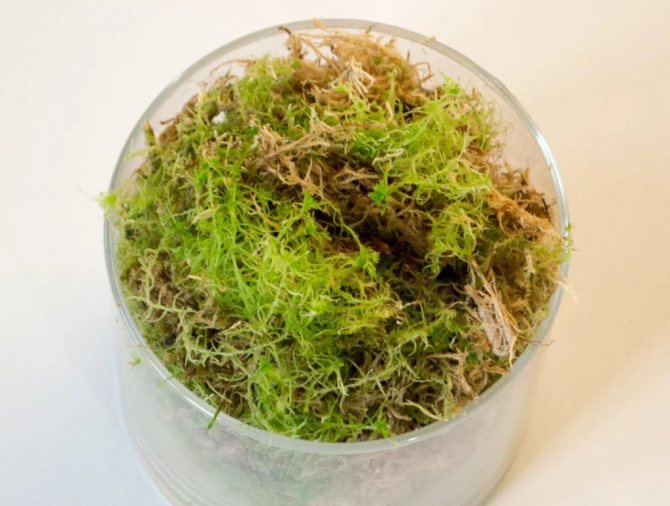
Moss - grows in swamps and damp places. It has good breathability and moisture retention.
Sold in specialized flower shops, used for planting many indoor plants.- Peat - very light and fertile soil. It is not used on its own, since it does not hold moisture at all.
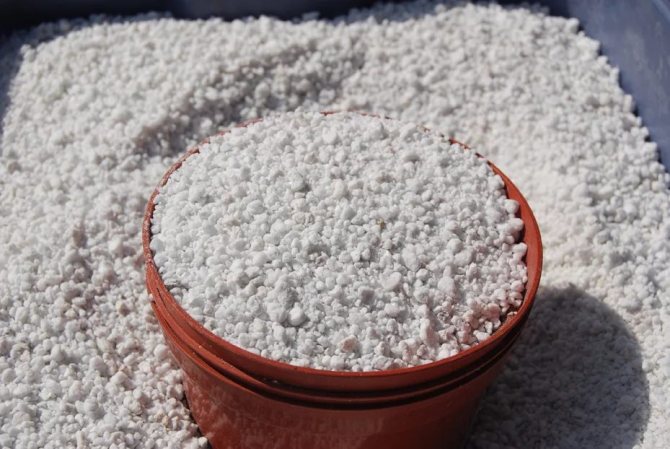
- Perlite and vermiculite - artificial loosening agents, sold in flower shops. The first has bactericidal properties, and the second enriches the soil with minerals.
You will find more information about good soil for Saintpaulias in an article devoted entirely to this topic.
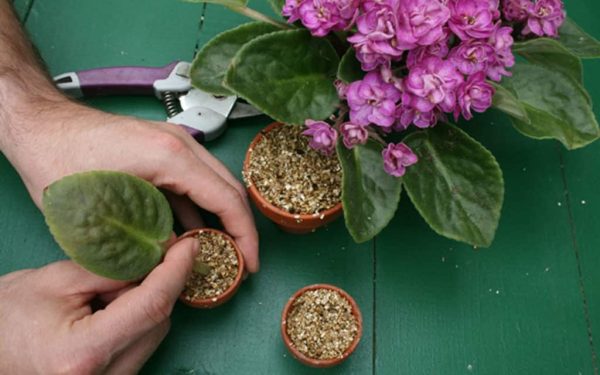
Planting a leaf
The pot is selected, the soil is purchased or prepared independently - it's time to start planting violets. There are two ways: from a seed and from a leaf.
The first option is available only to professional growers. But everyone can grow Saintpaulia from a leaf.
Method one:
- Using a sharp knife, carefully cut the leaf off the mother plant. In this case, the length of the cutting should be at least 4 cm.
- Place the leaf in a container of water. The optimum temperature is about 25 °. While waiting for the roots, you need to check the stalk for decay. The rotten tip is carefully cut off.
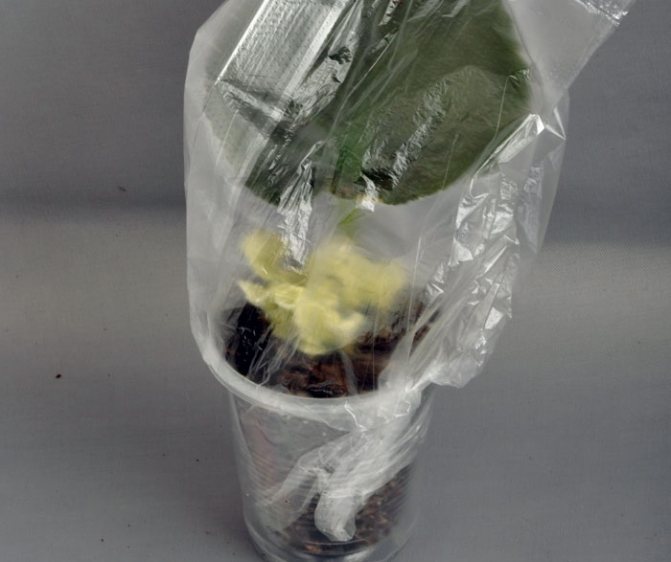
- When roots appear on the handle, it is transplanted into the ground. The top of the pot is covered with polyethylene, imitating a greenhouse.
Method two.
This option differs from the first in that violets are planted directly into the ground, bypassing germination.
Watering rules
Violets are extremely demanding to water. They die both from a lack of moisture and from its excess. For flowers, both cold tap water and hot water are equally harmful. It is best to water the saintpaulias with water at room temperature, which has been left to stand for 12 hours.
You cannot water violets from above. The ingress of moisture on the leaves of plants causes their death.
Florists water Saintpaulia in one of the following three ways:
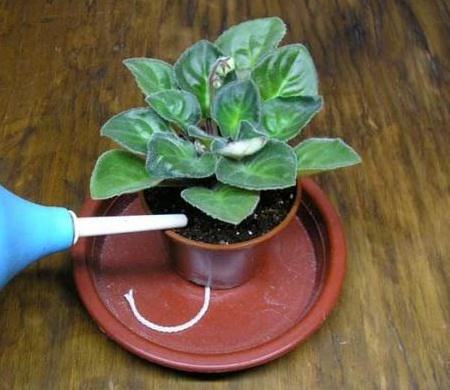
- Drip irrigation consists in the fact that the liquid flows in a thin stream from a thin spout of a watering can or from a syringe, without damaging the leaves of the plant.
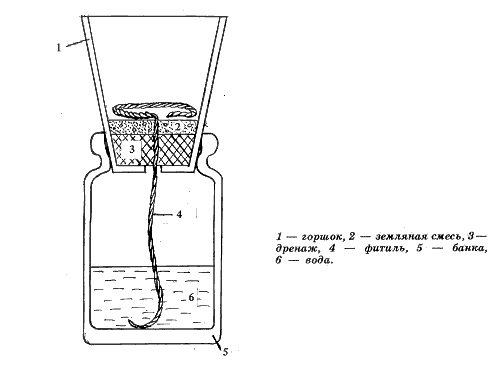
Wick irrigation consists in passing a strip of fabric through a hole in the bottom of the pot. Its opposite end is dipped into a vessel with water.
A flower pot is placed on top and the violet absorbs moisture by itself.The convenience of this method is that you do not need to worry that the flower does not have enough moisture or it is watered too abundantly. But it also has significant drawbacks.
In winter, the water in the container cools down quickly, especially on the windowsill. This will cause hypothermia of the root system. In addition, some varieties of violets categorically do not tolerate wick irrigation.
- Watering from below... For this method of irrigation, a tray filled with water is used. A small plate can play its role. Through the drainage holes, water will flow to the roots.
Would you like to use wick irrigation?
No Yes!
Important! The pallet should be individual for each pot. Otherwise, there is a risk of rapid spread of diseases between plants.
Of great importance for the successful development and flowering of home violets is how high-quality water for irrigation is. The water from the tap is chlorinated, therefore it is not suitable for irrigation.
If there are no other options, be sure to let it stand in a container with an open lid, most of the chlorine will come out in a day.
One option is to boil it and then add a teaspoon of acetic acid or five crystals of citric acid per liter. You can use this solution once every 30 days.
For watering in the spring-summer period, it is better to choose the morning hours, and in the autumn-winter season - daytime. If the flowers are lit artificially, the time of day does not matter. The main thing is to water at about the same hours.
Still have questions about watering Saintpaulias? Use our link and read the detailed material on this topic.
Fertilizers at home
The flower needs feeding in the spring-summer period, when it is actively developing and blooming. Improper or untimely fertilization will cause great harm to the plant.
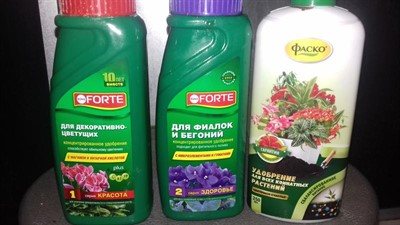
The interval between the next fertilization should be 14 days.
Store drugs are based on phosphorus, potassium and nitrogen. It is important to remember that due to the excess of the latter, the violets stop blooming.
Folk remedies can also be used to fertilize Saintpaulia. They are in every home and give good results. If you pour black tea on the soil in a pot, the moisture will last longer. To loosen and increase the acidity of the soil, coffee grounds are used.
Citrus peel infusion will help to strengthen the health of the plant. It is poured with boiling water and insisted for a day.
Watering with sweet water stimulates growth well. Spraying with onion peel infusion will not only provide abundant flowering, but also protect against pests.
As a general rule, all fertilizers should be diluted in water in a ratio of 1:10.
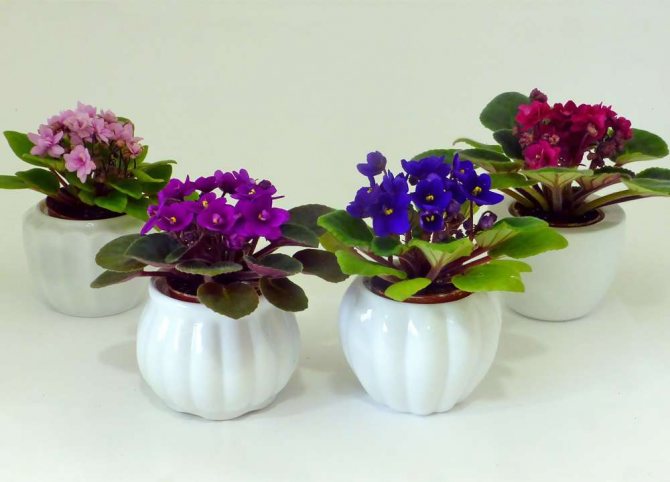
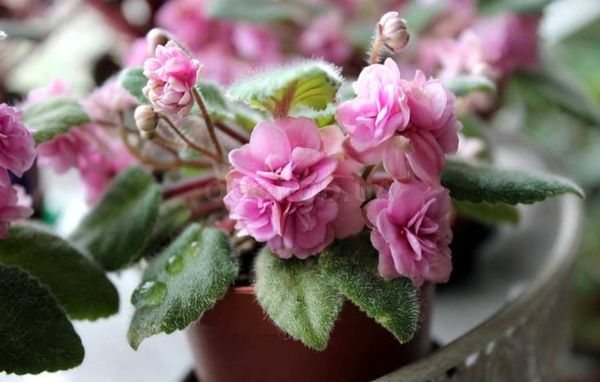
Luxurious varieties of Saintpaulias that will decorate any collection: Dance of the Galaxies, Wind Rose, Wedding Bouquet, Royal Lace and Duchess.
Conditions for growing violets from a leaf
How to root a violet leaf? What does a young plant need? The most important condition for the success of this process is constant attention to this tiny plant, which must be ensured:
- light nutritious soil;
- stable temperature;
- daylight hours at least 12 hours;
- uniform and regular watering;
- moisture and draft protection.
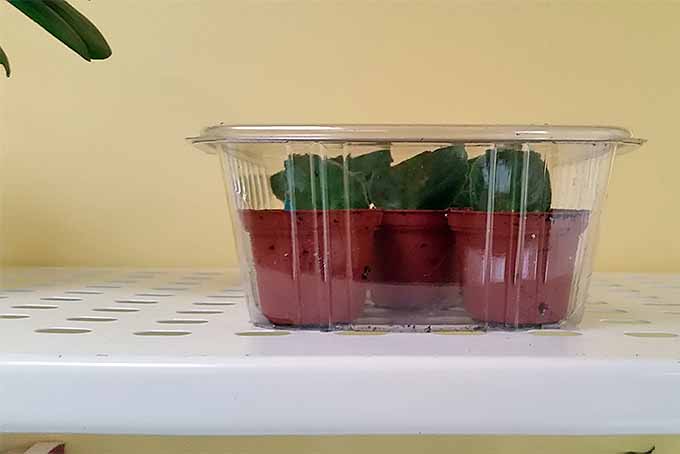
Violets feel very comfortable on shelves equipped with additional lighting, which provides plants with conditions for growth even in the autumn-winter period.
Natural conditions
For successful cultivation, it is important to provide conditions close to natural habitat.
The homeland of the flower is hot Africa, but various varieties feel great on almost all continents. In nature, violets prefer open meadows or slightly shaded areas with moderate humidity.
The habitats of Saintpaulia are characterized by twelve hour daylight hours. The brightness of the southern sun is softened by high clouds. These flowers do not like direct sunlight, which disrupts the color of the leaves.
At home, flowers are placed on windows facing east. In areas with a warm climate, violets grow on the north or northeast side. Diffused light is used for lighting.
In winter and autumn, daylight hours in countries with temperate climates are significantly reduced. For normal flowering, Saintpaulias need artificial lighting.
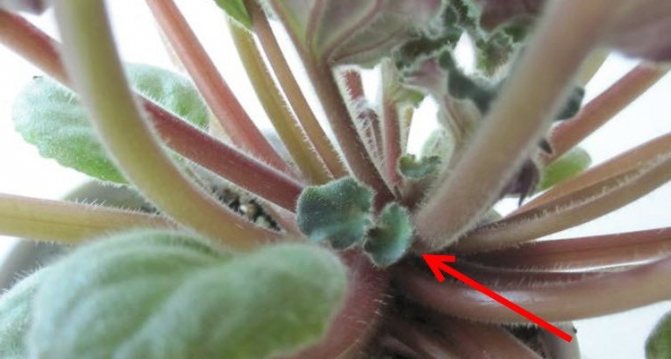


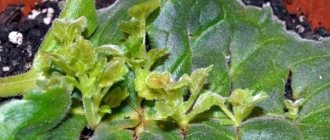
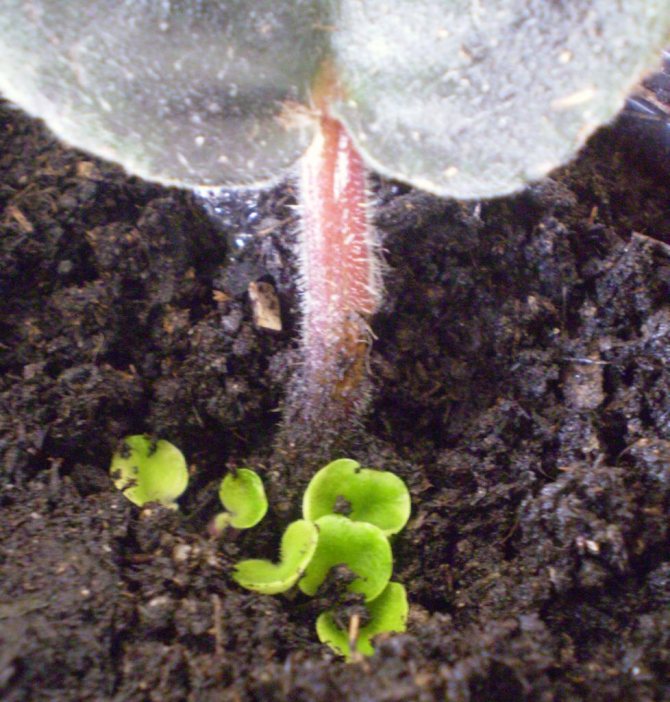
Separating outlets
When a violet leaf is rooted, several tiny rosettes with a diameter of three to five centimeters are formed at its base. This suggests that it is time to plant the plants. The children are separated so that each outlet has at least a couple of leaves with a well-developed growth point and several roots.
In order for the separation to pass in the most gentle way, it is necessary:
- moisten the earth well;
- take out the plant along with the soil clod;
- carefully clean the roots from the soil.
Children who do not have enough roots should be planted not in the ground, but in a mixture of soil and perlite, like a leaf cutting. Such a plant must be placed in a greenhouse for two weeks.
The grown rosettes are planted in a permanent place when their diameter is approximately twice the size of the previous pot. Plants will need containers up to six centimeters in diameter. The transplant is carried out by the transshipment method, keeping the earthen lump. New soil is added around the circumference and at the bottom.
Transplant features
The need for a transplant arises if:
- The plant grows poorly, weak.
- The roots are tightly intertwined.
- A new branch has appeared.
There are two transplanting methods: with a complete replacement of the soil and simply transferring the flower along with the soil to another pot.
In any case, you need to try not to damage the roots.
You will learn about the rest of the rules for transplanting violets if you use this link.
Preparing a violet leaf for reproduction at home
How to crop the selected sheet correctly? There are several options here. You can use whichever you like best. The first is to take it and break it off with your hands. The second way to do this is more civilized, that is, use a sharp knife, pruner, blade. We prefer the second method, as it is less harmless to the plant.
How to cut correctly without harming the plant? We advise you to make a bevel cut at a 45 degree angle. Having previously disinfected the cutting tool, cut off the leaf, leaving a small stump. The size of the hemp should not be less than 5 millimeters. Sprinkle the cut area on the parent plant with crushed activated charcoal.
Sheet cut
Rooting violet leaves requires proper preparation of the material. It is not enough just to rip off a piece of paper. This can lead to adverse consequences. The stalk must be cut correctly.
A sharp blade or a well-sharpened knife is suitable for this. The cutting surfaces must be treated with an alcohol solution. The selected sheet must be placed on a hard surface. Then, with one firm movement, the cutting is separated from the plant.
The leaf must be left to dry. It is recommended to sprinkle the cut with activated carbon. Experienced flower growers argue that in the absence of an antiseptic for processing a knife at hand, it is better to simply break off the sheet. If an infection gets into it, the consequences will be irreversible.
Landing in the ground
When the rooting leaf has been selected, it is time to cut it off. Some owners of violets ignore this operation and simply break off the petiole they like. Although experienced florists recommend using a cutting attachment with a sharp enough blade (a utility knife or a safety razor blade).
The cut area needs to be treated with activated carbon powder abundantly, but without fanaticism, sprinkling the area where the "operation" was carried out, and the Saintpaulia leaf itself should be placed in a weakly concentrated solution of potassium permanganate.
It happens that the planting material is received on the side. The first thing to do is place the violet leaf, which is to be rooted for several hours, in warm water at room temperature.
There are two ways to breed violets. The leaf can be planted in water or soil. To understand which method is preferable, you should consider them in detail.
Rooting a violet leaf in water is easy. It is necessary to prepare boiled or settled water. The sooner you place the stalk in water, the faster the leaf will begin to release roots. It is best to use transparent plastic cups in the form of a container for planting. They are thoroughly washed and sterilized.
We offer you to familiarize yourself with How to make a home fragrance with your own hands?
The stalk is immersed in water to a depth of 1.5-2 cm. The tip should not rest against the bottom of the glass. Fixation is performed with a cover. Holes are made in the paper by threading cuttings through them. Activated carbon (one tablet) should be placed in the water. As the liquid evaporates, it should be poured into a glass.
Rooting of a violet leaf in the ground occurs at a shallow depth. If you plant the cutting too deep, it will be difficult for the shoots to break through the soil. At the same time, the plant weakens. In some cases, the sockets may not appear at all. Therefore, the new roots that the violet put in should be close to the surface.
The soil around the leaf needs to be compacted. Then the plant is watered abundantly. The container with the violet is covered with polyethylene. This will help maintain the correct humidity level inside.The plant is placed in a warm, bright place (but not in direct sunlight).
The bag should remain on the pot until new shoots appear on the leaf. This indicates that the process was successful. The shoots can be transplanted into the pots intended for them.
Experienced growers claim that when planting a plant directly into the ground, the rooting time of a violet leaf is significantly reduced. In this case, more new processes appear, the likelihood of rotting on the cutting is significantly reduced.
To transplant into soil, you need to purchase a special mixture. Such soil includes polystyrene, sphagnum, vermiculite and perlite. You can also prepare the soil for replanting yourself. Vermiculite and perlite are mixed in equal proportions.
Next, the resulting mixture and sphagnum are added to the soil. This component has an antibacterial effect. You can add peat. Such components make it possible to provide the plant roots with the right conditions for full-fledged growth.
Rooting of a violet leaf in the ground is faster. However, correct pruning and transplanting of the material is required. The selected leaf is broken off from the plant. It is cut obliquely with a sharp blade. If miniature varieties are transplanted, the cutting is shortened more. You can leave it only 1-1.5 cm long.
The cut is treated with a weak solution of potassium permanganate. Half an hour the cutting dries up. At this time, drainage holes need to be made in the plastic cup. It is filled with warm, moist soil. A cutting is planted in it.
The glass must be closed with polyethylene. Periodically, the seedling is ventilated. This avoids the appearance of mold on the soil. After transplanting, the leaf withers a little. This is considered the norm. When the plant has roots, it will be full of energy again.
Watering is performed once a week. It is impossible to fill the plant or feed it with fertilizers. In this case, the violet will develop the root system faster. The plant is grown in a warm, well-lit place. It is protected from direct sunlight and drafts.
The cut area needs to be treated with activated carbon powder abundantly, but without fanaticism, sprinkling the area where the "operation" was carried out, and the Saintpaulia leaf itself should be placed in a weakly concentrated solution of potassium permanganate.
It happens that the planting material is received on the side. The first thing to do is to place the violet leaf, which is meant to be rooted for several hours, in warm water at room temperature.
Reproduction of violets using peduncles
Experienced flower growers and breeders propagate violets in this way. But for the reproduction of violets - chimeras - this is almost the only possible option, since with other methods their decorative features are lost.
Choose a blooming or already faded flower with large stipules on the mother bush. Do not take the buds, they will not fit. Cut out the stem with a clean, sharp blade or knife. Air dry for 10-15 minutes, treat the cut with crushed activated carbon. It is better to root in a greenhouse with high humidity. Use a mixture of chopped sphagnum moss and perlite as a substrate. You will see that the peduncle has taken root when a young rosette appears near the stipule. Wait a little until it develops well, only then it can be transplanted into a pot of soil for Saintpaulias.
Leaf rooting methods
The faster the workpiece gets into an environment suitable for rooting, the easier and faster the roots appear from the leaf, and then the children grow. There are several ways to root the leaves.
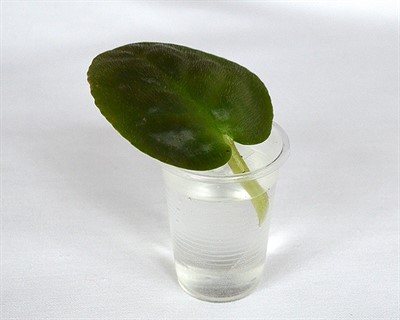
Rooting in water
Rooting in water is the easiest way to control the condition of the cuttings and prevent rotting in time. It is recommended to use dark glass dishes as a rooting container.This will help prevent algae from growing on the inner walls and contaminating the water. Before filling the container with water, it is thoroughly washed, and then sterilized or ignited in the microwave. After processing, the container is filled with water and an activated carbon tablet is added to it for disinfection.
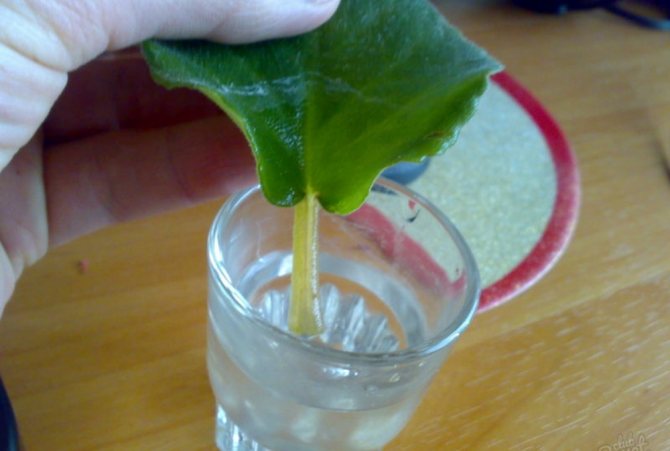
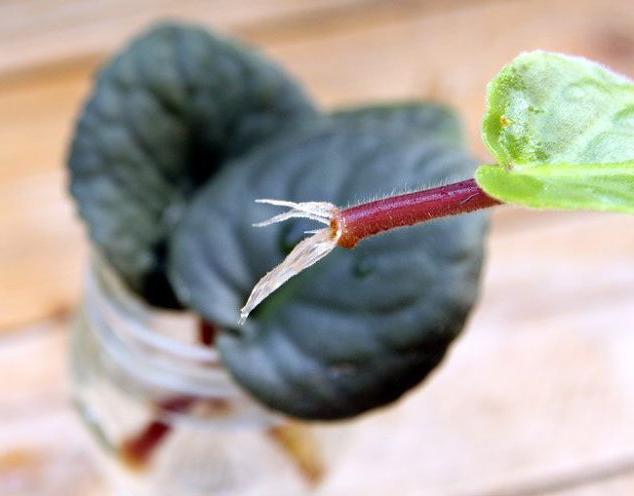
A stalk of a violet leaf is immersed in water for a couple of centimeters.
The violet leaf must be placed in the water in such a way that it does not touch the walls or the bottom of the container. For fixing, a piece of cardboard or thick paper is used, installed on a container with water. The stalk of the leaf should be immersed in water to a height of 1.5-2 centimeters.
The root formation process must be monitored regularly. Under favorable conditions, the first roots appear in 3-4 weeks. If rot appears at the cut site instead of roots, the cutting is removed from the water, the decayed part is cut off, and again immersed in clean water.
The leaf is ready for transplantation into the ground after the roots reach a size of 1-1.5 centimeters.
Rooting in a peat tablet
Rooting a violet leaf in a peat tablet gives almost one hundred percent result. Loose and at the same time nutritious substrate promotes active root formation. The advantage of this rooting method is also the disinfecting properties of peat. Rooting in a peat tablet is convenient because the resulting rosette of violets can be subsequently transplanted into a pot without disturbing the delicate roots.
Rooting violet leaves in peat tablets is an excellent solution.
Before planting the cutting, the tablet is soaked for 20 minutes in warm water. The tablet increases in height by about 5-6 times. A violet leaf is planted in the swollen peat, deepening the stalk by 1 centimeter. On top of the planted sheet, cover with a transparent cap (glass or plastic cup). After the appearance of the baby leaves, the plant, along with the pill, is transplanted into a pot filled with nutritious soil.
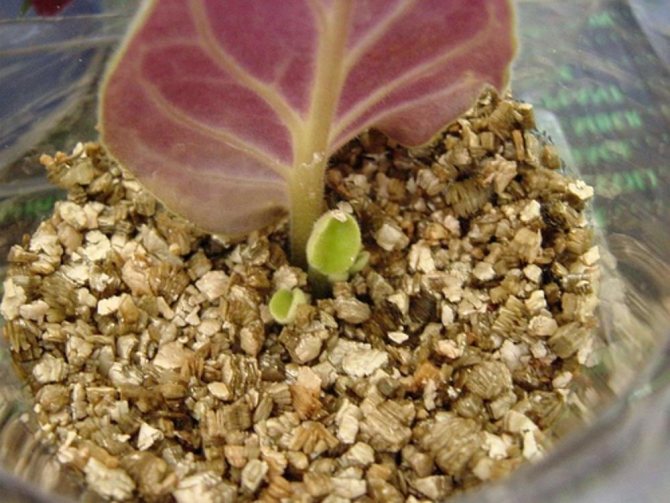
Benefits of rooting in vermiculite
Violet leaves take root quickly in vermiculite, as well as in a mixture of vermiculite and peat. Vermiculite has maximum air permeability due to its looseness, and at the same time retains moisture well. Maximum air and moisture exchange prevents rotting of the cuttings, which often happens when planting in the ground.
A mixture of vermiculite and peat in equal proportions allows moisture to pass through, preventing its stagnation, does not form a dense layer. At the same time, the required amount of moisture is retained in the mixture. The cut of the violet leaf is optimally moistened.
For rooting in vermiculite, take a disposable cup, make holes in the bottom, lay a drainage 2-3 centimeters high on the bottom. Then the glass is filled with a mixture of vermiculite and peat. For disinfection, it is recommended to add Fitosporin powder to the mixture. It will protect the stalk from the processes of rotting and reproduction of the fungus.
Vermiculite is poured into a plastic cup, and then a violet stalk is carefully planted in it.
The mixture is evenly but moderately moisturized. Then, in the center, a recess is made 1 centimeter high and a stalk of a leaf is placed in it. You can plant a leaf vertically or at a slight slope.
After planting, a greenhouse is built from a plastic bag. It is convenient to use zip bags of the desired size. The bag is selected in such a way that the cup with the leaf fits in it entirely, and there is a free space of 2 centimeters above the leaf. In the process of germination, the bag is slightly opened daily for several minutes for airing.
The glass is placed in a bright, warm place, without direct sunlight. The germination temperature should not fall below plus 20 degrees.
In autumn and early spring, it is not recommended to place the cups on the windowsill, as the cold from the glass will prevent the formation of children. When rooting at this time of the year, it is advisable to place the cups at some distance from the window and illuminate them with a phyto or fluorescent lamp.
Rooting a leaf in a transparent bag
You can root a violet leaf not only in a pot, but also in a small amount of substrate, poured into a transparent bag. Zip-lock bags are ideal. A small amount of soil for violets mixed with vermiculite is poured into the bag. The substrate is placed in a bag dry so as not to stain the walls, and only after that it is moistened.
The cut of the cut of the leaf is placed at an angle into the substrate, tightly closed. The bags can be hung or placed on a flat surface. For airing, the bag can be opened from time to time for a few minutes, and then tied again.
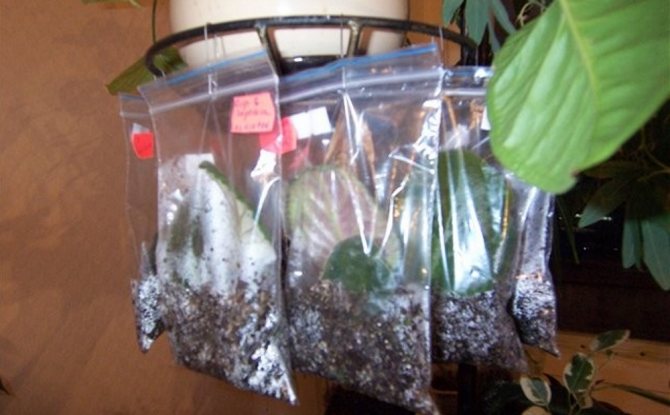
Some gardeners root violet leaves in sachets.
Rooting a violet leaf in the potting mix
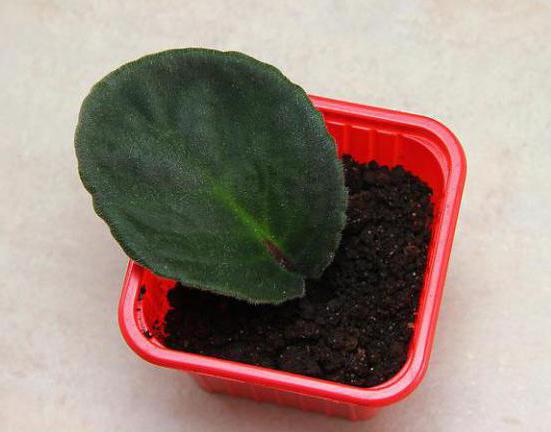
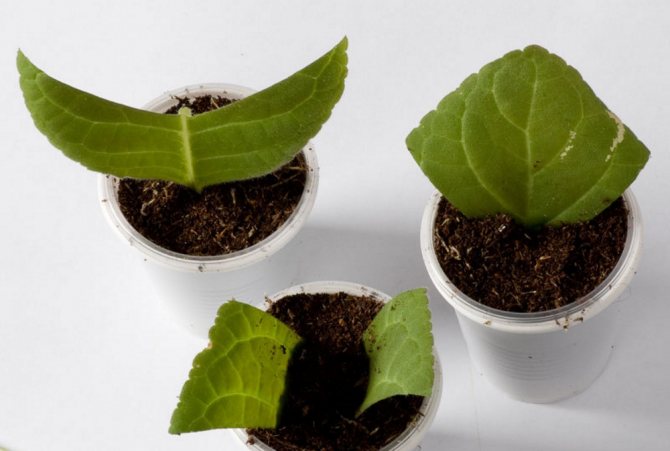
Disposable cups are used to root the violet leaf in the ground. At the bottom of each, a hole must be made to drain the excess liquid. Then a layer of drainage is poured onto the bottom (small gobs or pieces of foam). The cups are filled with loose soil 2 centimeters below the edges.
The leaf is placed in the soil at an angle of 45 degrees to a depth of no more than 2 centimeters. To prevent the leaf plate from touching the soil, a support is placed under it (a match or a toothpick). To create greenhouse conditions for the shank, it is covered with a transparent cap on top.
Important. Cups should not be placed in direct sunlight. Due to the created greenhouse effect, the leaf will die.
Transplanting a cuttings rooted in cups with soil is carried out after the diameter of the newly formed leaves reaches 3-4 centimeters.
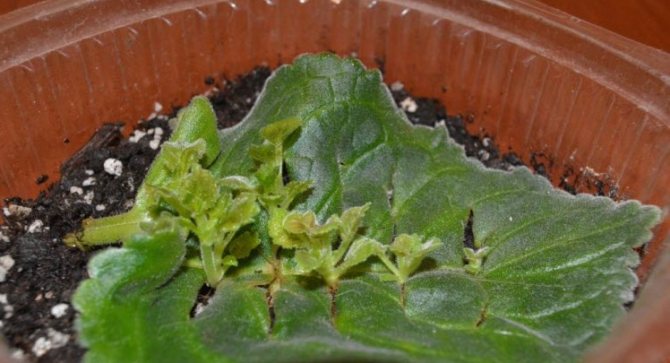
Rooting leaf fragments
Reproduction of violets by dividing the leaf is used if the plant begins to rot. Most often, this method is used to preserve especially valuable, rare varieties. Even leaves starting to rot are suitable for division. It is important that at least one living vein remains on the separated fragment.
A plant that has begun to rot can be propagated by dividing the leaf into parts.
The leaf is broken off from the mother plant, the upper third is cut off from it and the fragment is dried for 2-3 minutes so that the cut is covered with a film. Then the cut is treated with activated or charcoal.
The fragment is placed in a container with soil, tightly pressing the cut to the surface. From above, the container is covered with a transparent cap. Reproduction from a part of a leaf gives several leaf rosettes at once, since they are formed from each vein.
Reproduction of violets by a leaf in a peat tablet
This is our last, but not least, method. The fact is that, despite the fact that it is relatively unpopular, it still remains very effective and efficient, and therefore, if you have already tried other methods, you can experiment and use a peat tablet.
The conditions created with this wonderful potting mix will not only allow the violet rosette to break through the soil with ease, but will also provide it with ample nutrients and will also perfectly retain moisture and prevent rot formation.
Let's sum up
In order for the procedure for propagating violets by the leaf method to be successful, you will need to provide the plant with some of the conditions listed below so that you can repeat all the most important aspects mentioned in this article.
First of all, of course, you need a fairly loose, but at the same time, well-retaining soil, which will allow your leaf to grow without any difficulties. Mixed soil can also be used.
It is equally important to maintain an optimal room temperature between twenty-two and twenty-six degrees Celsius. A greenhouse or an ordinary plastic bag can help you with this.
It is necessary to provide the sprout with a sufficiently long daylight hours, thanks to which it can receive enough energy to grow and develop effectively.
Watering should be not only regular, but also with correctly calculated portions, since only in this way can you help the plant get used to new conditions and maintain an optimal growth rate.
The place where you grow the leaf should be humid enough. Otherwise, there is a high probability that the plant will dry out and, most likely, die, not having time to turn into a wonderful adult.
It's just as important to find a good place to grow your seedlings, so if you have plant racks that can accommodate multiple pots at once, there is nothing better you can do than place your violets there.
Ideal potting mix
After reading all of the above points, you probably noticed that one of the most important, if not the most important part of the propagation of a violet leaf is good soil. Therefore, we strongly recommend that you make it yourself, as what you buy in the store may not be good enough and will not meet your expectations.
The preparation of the soil should be started a few days before the direct planting of the boring in the pot, since all the ingredients need to be thoroughly mixed with each other. As a basis, we advise you to use not ordinary soil, but ready-made soil for violets, which can be freely purchased in any store or market.
Nevertheless, since experienced gardeners do not like to use at least something purchased, we can recommend the following recipe with which you can prepare not only healthy, but also natural potting mix:
You will need one part of deciduous humus, three parts of high-moor peat, one part of clean river sand, two parts of sphagnum moss and one part of ordinary garden land, which will not be difficult to find at all.
Also, to provide soil looseness, you can use substances such as, for example, perlite, which have become especially popular and widespread in recent years.
Also, it will not be superfluous to introduce crushed charcoal into the soil, which will provide your sprout with protection from viruses, bacteria and fungi, and, of course, a little sphagnum moss on top to maintain a sufficient moisture content in the soil after watering.
In the event that you have already used sphagnum to make the base of the potting mix, you will have to grind it. But as a whole, it can be used even as a drain.
Separation of outlets during leaf propagation
The fact is that in all the previous paragraphs, considering pots and cups for growing seedlings, we, of course, talked exclusively about a temporary dwelling, since these plants grow quite quickly.
Soon enough, several young outlets will form underground, and then the question of where and how to put them will become quite acute.
To resolve this issue, an ordinary transplant procedure is used, however, you should take into account that if the leaves are a little unhealthy in color, in no case should they be transplanted. It also means that they need to be taken care of a little more diligently, and then in a few weeks everything will return to normal.
If you are going to cut the rosettes, then you need to take into account that each of them must have at least a couple of leaves, and preferably three, so that each plot can easily support its own existence through photosynthesis.
It is also worth remembering that separation is a rather exhausting procedure for a plant, and therefore it must be carried out not only carefully, but also observing the following rules:
The soil must be very well moistened so that a "warm welcome" is given to the new pot.
The plant must be transplanted together with a lump of earth, since otherwise you run a very high risk of damaging its root system.
Pots, by the way, of course, should be tiny. In diameter, they may not even reach five centimeters, however, while the plots are just growing and gaining strength, these sizes should be more than enough for them.
However, a very unpleasant situation can happen during the plot: some children will simply not have enough roots to maintain normal life. In this case, you will need to make the soil for them as loose as possible. Also, after planting, it is advisable to plant such a painful sprout in a greenhouse.
After some time, when the diameter of the plant is twice the diameter of the pot itself, you can think about transplanting the flower to a permanent place of residence, where you can take care of it like a full-fledged adult plant. The pot, accordingly, should also be enlarged, but the violet leaves should still be slightly larger than it.
Otherwise, the final transplant before entering adult violet life is no different from what you have already done.
Information for beginner florists
When violets are propagated by leaves, novice florists most often have the following questions:
- Kornevin's use: to root the cutting, you can use a solution of the drug - a pinch of ½ liter of water. The same solution can be used to water a plant planted in the ground. Also, you can powder the cut of the cutting with Kornevin powder, but some delicate varieties of violets can get a chemical burn at the same time;
- the leaf is rooted, but there are no children: perhaps the children cannot overcome the thickness of the soil and they need help. Another option is to arrange stress for the cutting: remove from the greenhouse and cut off 1/3 of the leaf, most often this helps;
- rooting a cuttings of Saintpaulia in winter: Experienced growers root violets all year round. If the window sill is cold in winter, you can simply put foam on it. Cuttings planted using the technology will give new plants in autumn and winter.
How can you propagate a violet
There are different ways of breeding violets. In this case, the choice of any of them may depend not only on personal preferences, but also on the type of plant. The agricultural technology of this flower provides for the following types of reproduction:
- rooting by a leaf;
- breeding with peduncles;
- jigging stepsons.
Each of these types has advantages and disadvantages. But, whichever method you choose, it is necessary to select offspring only from a healthy and strong mother bush. Better to start with the easiest and most common way.
We grow new bushes from a leaf
Vegetative reproduction of violets is one of the most common. This is due, first of all, to the availability and prostate performance. Having mastered this method, it will be much easier to cope with more complex breeding methods. Therefore, we will dwell on its consideration in more detail.
Last but not least, the quality of the new bush and the success of reproduction depends on the correctly selected planting material. When choosing a sheet, you need to ensure that it is:
- elastic and juicy;
- had a rich color;
- Free from pests, rot or stains.
Possible problems and solutions
When rooting a cuttings of Saintpaulia you may encounter the following problems:
- violet leaf rotting - remove the handle, cut it to living tissue and dip the cut into Kornevin. Pour warm water into a clean dish, dissolve 1/3 tablets of activated carbon in it and lower the handle so that it does not touch the cut of the dish;
- the rooted violet leaf has lost its turgor - you should cover it and keep it in the greenhouse for some time until the turgor is restored;
- rooted leaf broke - continue to look after the "hemp" as before. A large percentage of the fact that children will still appear.And although they will be weaker, time and leaving will fix the situation. And a piece of a leaf can be left for rooting;
- rooted leaf turned black - this can happen for two reasons: excess moisture and sunburn. If the leaf can still be saved, remove it from the window and open the greenhouse. If possible, trim away rot to healthy tissue. If it was not possible to save the sheet, analyze your mistakes for the future.
IMPORTANT! The diameter of the cutlery should not exceed 50 mm!
Microclimate for breeding Saintpaulia
Indoor violet is a pampered, delicate plant. The appearance of one flower in an apartment entails the cultivation of other Saintpaulias. You don't have to buy an adult Saintpaulia in a pot, it's better to figure out how to grow stepchildren from a leaf or its pieces.
If you achieve a certain microclimate, then breed violets are available all year round. Saintpaulia can be capricious, so you need to choose the right soil, pot, know everything about watering, temperature conditions.
Best time
It is best to use vegetative propagation in spring or summer. From December to March, the flower is dormant. With the onset of warm days, it wakes up and begins active growth.
For reproduction to be successful, light must fall on the planted leaves for most of the day. In the winter months, special lamps or phyto-devices are used for highlighting.
Suitable humidity level
Saintpaulias love rather humid air. Humidity is especially important during the breeding season. To maintain the required level, cups with rooting leaves, flower stems or seeds are covered, and a greenhouse is created. The most suitable moisture value for rooting is 50-60%.
Suitable temperature conditions
Violets are afraid of sudden temperature jumps. Only formed bushes are able to survive cold at +10 ° С and heat up to +35 ° С. For good development of Saintpaulia, the optimum temperature is + 22 ... 24 ° С. This temperature must be maintained constantly.
Potting requirements
The active growth and reproduction of violets requires a soil of a certain composition. It should be easy to breathe, be slightly sour, rather loose. The increased density of the soil from the summer cottage does not allow the use of such land for the reproduction of Saintpaulia.
Novice amateur flower growers choose a substrate from specialized stores. A competent salesperson will always suggest the right option. Experienced flower growers noticed that sometimes the composition on the package differs from the actual one. They make their own potting mix of the following ingredients, taken equally:
- washed sand;
- slightly sour peat;
- humus from leaves;
- green moss;
- peat moss;
- charcoal;
- black soil from the garden.
You can add a little more peat. Charcoal maintains moisture in this composition, adds antibacterial properties to it, loosens the earth, and prevents it from drying out.
Peat moss regulates moisture, the substrate with it does not provoke putrefactive processes. The best land is taken in a mixed forest, where spruce, pine, oak and aspen grow.
Pot selection
Leaves, flower stems, seeds taken for propagation are placed in small containers - no more than 5 cm. Holes are made at the bottom of the cups and expanded clay is poured. When young shoots of violets outgrow the flowerpots by half, it is time to transplant them into larger pots. The bushes are removed from the cups along with the substrate, transferred to a new pot, and the soil is poured down and on the sides.
Violet roots do not grow in depth, but on the surface of the soil... This way they get more heat, air and light. A flowerpot for a mature plant should not be more than 9 cm in height. Transplanting into pots that are too large may result in the death of Saintpaulia.
Advice! Violet blooms better in a compact container, and leaves are actively developing in a spacious container. An ideal pot is selected three times less than a Saintpaulia rosette.The most suitable for violets are plastic and clay containers.
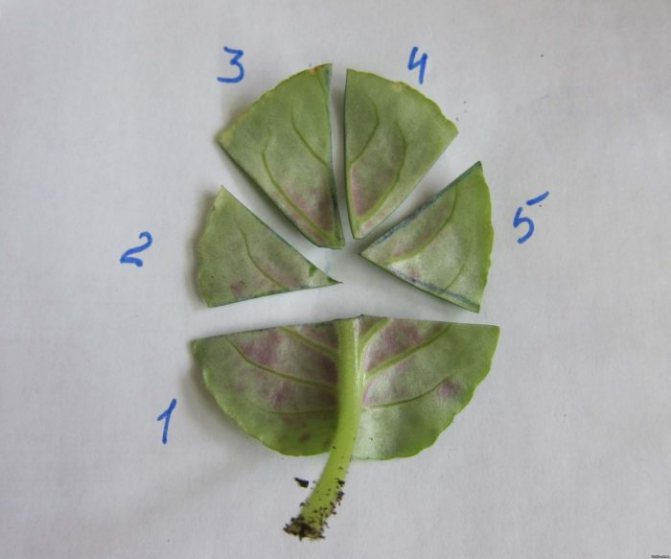
Reproduction by a fragment of a leaf
Rooting a violet with a leaf fragment is rarely used. This approach can be a solution if the planting material begins to rot. The stem is broken off near the very base. With a sharp knife, the sheet is cut into several fragments. The blade must be very sharp. Each piece must have at least one vein.
This method is suitable for rare varieties of violets. In some cases, only a third of the top of the sheet is taken for such purposes. The cut is performed horizontally. The fragment is left for a few minutes. During this time, the edge will be covered with a film. Next, the cut site is treated with activated carbon.
The plate is placed in the ground. The cut should fit snugly against the ground. The pot is also covered with plastic. When the plant takes root, many shoots are produced. They emerge from every vein of the leaf.
Having considered how the violet leaf is rooting, as well as the basic methods of this process, each grower will be able to independently grow this wonderful plant at home.
How to propagate a violet leaf
Consider today such a method of breeding violets as leaf rooting. This is a very popular, fast and reliable method.
Violets reproduce at any time of the year. In winter, it’s only difficult to create conditions for them, so it’s better to choose the warm months.
How to choose a leaf for propagation
Usually, the lower or middle leaves are taken for this. It is believed that the larger the leaf, the more chances it has for successful rooting.
But at the same time, the leaf should not be old, damaged or sick, with obvious defects. We choose only good and healthy ones.
I must say right away that the mother's sheet, if it is of high quality, can be used more than once after the appearance of the children. Let's take a step-by-step look at the whole process of rooting a violet with a handle.
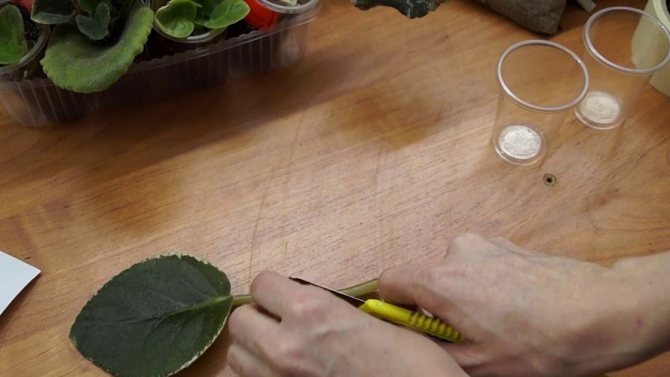
Step 1. Cut off the sheet you like
With a sharp, clean knife or razor blade, cut the sheet closer to the base. The stalk should be about 4-5 cm (especially if we want to reuse the same sheet later).
There is no golden rule for the length of a violet stalk for rooting. Both long and short 2-3 cm root equally well, here each grower decides over time as it is more convenient for him. Yes, and a leaf does not have a leg at all, and even a piece of a leaf can be planted and it will give roots.
Violet is a strong, life-loving plant that can germinate even from a fragment. Our task is to help him by creating the right conditions.
I have never had a leaf that does not sprout or disappear. Sometimes abnormal situations happen, but I will tell you how to proceed in this case.
By the way, do not be afraid to cut variegated leaves. They are no more capricious than their monochromatic counterparts, and also reproduce well.
Among violet growers, there is an opinion that among variegated violets it is worth choosing leaves with a lot of green.
I try to stick to it, but it happened that I had to root very white leaves, and everything went well.
Step 2. Dry the slices of the leaves
This is also one of the postulates of violet-growers, which, in general, not everyone observes. But if you want to do everything according to the rules, then dry the cut for 20 minutes before planting it in the ground.
It is believed that the "open wound" inflicted on the plant during this time will stop sap flow, dry out and be less prone to decay.
Drying is not required if you plan to root the leaves in water.
Step 3. Preparing the soil
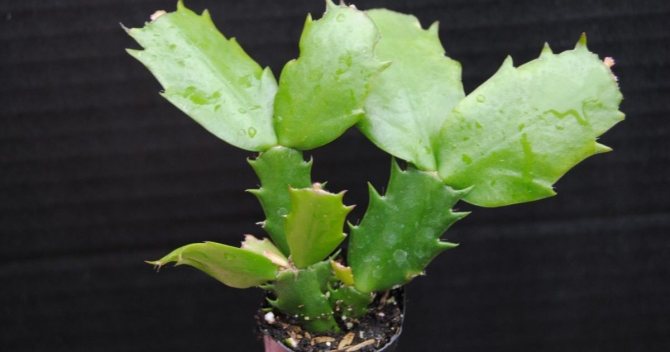
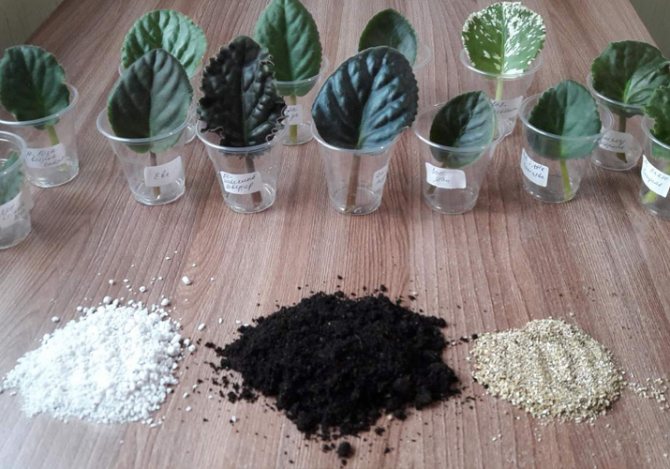
Here is a complete expanse, each grower, again, according to his own feeling, selects his own formula. I have this: I take 2 parts of soil for violets (good and loose ... just not the Garden of Miracles) + 1 part of perlite + 1/2 part of vermiculite.
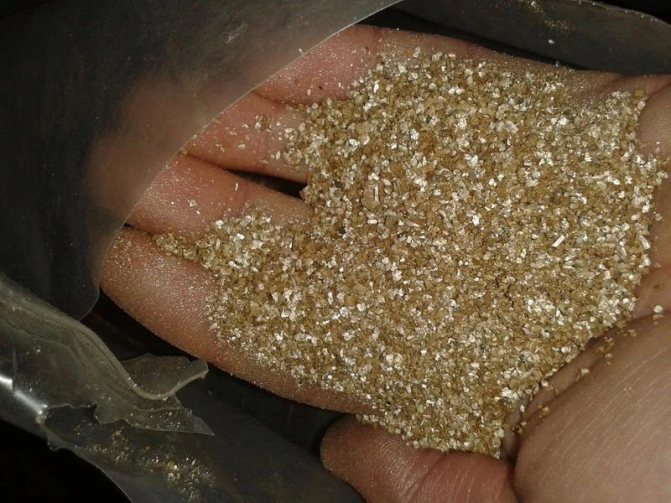
Violets root quite well in pure vermiculite (in the photo on the far right, yellowish) and in pure peat, in various mixtures. I like to shaman and make my own mixture.
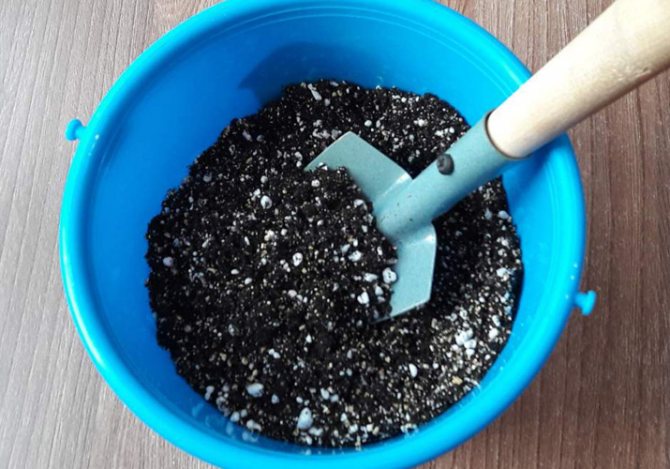
It turns out to be very loose, air-intensive and at the same time quite moisture-absorbing. Good moisture and air exchange in the soil is a guarantee that decay processes will not begin, which often occur if the cutting is planted in clean soil.
Such a mixture, like mine, very quickly passes moisture through itself, evenly moistening, and at the same time does not become heavier, does not lump into a dense deaf layer. Excess water is easily removed, and optimal hydration is maintained.
Step 4. Prepare the container
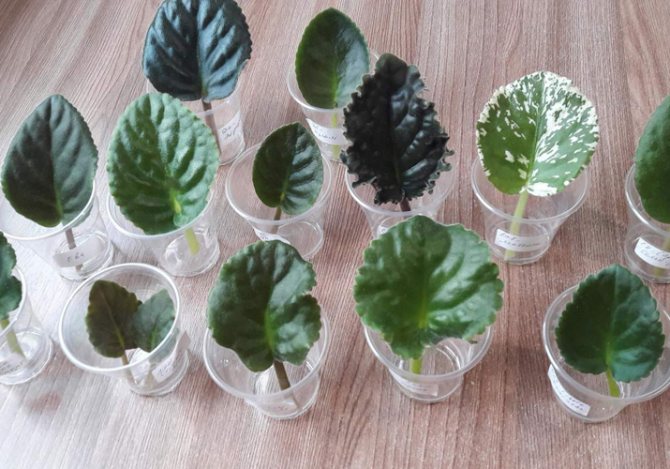
I prepare 100g cups in advance, these are disposable cups that are full in any supermarket. The container should not be large.
Violets, in principle, do not like spacious pots, they like more cramped, more comfortable ones.
I stick the name of the variety on each glass and put the corresponding sheet there.
For this photo session, I took such an interesting, "curly" sheet with a red underside. This is the RM-Heavenly Jeweler variety, very unusual, with elegant leaves. It blooms with delicate white flowers with a pale blue venous pattern, along the edges of a green curly ruffle.
Further, in each glass at the bottom, I make drainage holes with nail scissors.
Place drainage at the bottom. It can be expanded clay, like mine. Some also use pieces of styrofoam (this is also a good, completely inert material).
We fill the glass with earth mixture.

Step 5. Landing
Here I have a small nuance. I dilute Fitosporin powder in lukewarm soft boiled water. It will also protect our cutting from rotting and all kinds of unfriendly fungal diseases.
How to choose the right violet leaf for propagation
Now in the world there are at least 500 of the most different varieties of violets. But breeders still don't miss the opportunity to experiment. They bring new varieties to the delight of lovers and collectors of these flowers. If you are delighted with any of the many varieties (or maybe even more than one) and want to decorate your house with this delicate plant or give it to your friends, master the technique of leaf propagation.
Fresh articles about garden and vegetable garden
Homeland of the houseplant tradescantia
Salvia perennial: tips for growing and care, photos
Climbing rose: planting and care in the open field, photo
According to gardeners, this method is more convenient than cultivating a culture with cuttings, peduncles or stepchildren. In addition, it is suitable for almost all varieties of violets, with a few exceptions. The optimal time to breed a plant in this way is spring and autumn. To a large extent, the successful result depends on the correctly chosen leaf. To do this, carefully examine the violet rosette. You will see that the leaves grow from it in rows. Next, there is a choice:
Leave the first row from the bottom alone: the offspring from these leaves will have to wait a long time.
Do not take propagation material from the middle of the outlet. This can damage the growth point.
Pay attention to the second and third rows from the bottom. Young, strong leaves grow there, which are very good for reproduction. But not just any sheet will do. Before cutting it off, make sure the plate:
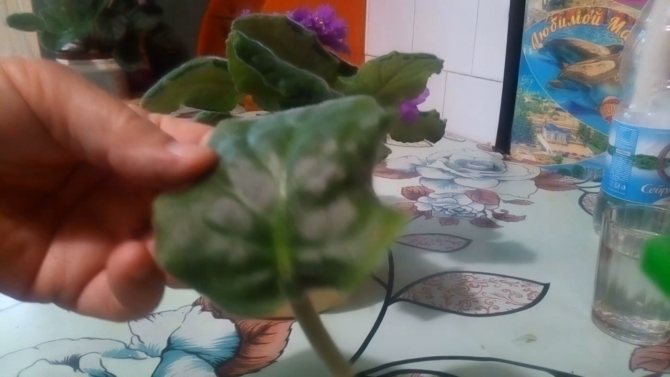
- healthy, without signs of disease and pest infestation;
- brightly colored;
- elastic (keeps its shape well);
- has no damage: stains, scratches, dots, creases, etc.
Rules for choosing a leaf for rooting
The correct choice of planting material is the key to success in breeding violets. A weak and sick leaflet will not give strong offspring and will most likely die before the roots appear.
For rooting, take healthy and strong violet leaves.
When selecting planting material, you must adhere to the following recommendations:
- It is not recommended to take leaves from the bottom row of the outlet for reproduction. Such leaves are the oldest on the plant, therefore, they are already weakened. Old leaves practically do not form children, so a full-fledged plant from them will not develop. Often, such leaves are affected by fungal spores or bacteria.
- Do not take leaves from the center of the violet for rooting, since during cutting you can damage the center of growth of the mother plant. In addition, the central leaves are still too young and cannot produce full-fledged offspring.
- For rooting, it is recommended to cut the stalk from the second or third row. He should be well developed and have a good turgor.
- The leaf should be free of damage, burns and signs of decay.
- The color of the planting material must be characteristic of a certain variety and uniform. Pale, unevenly colored leaves also cannot produce full-fledged offspring.
- For reproduction of variegated varieties, you should take leaves with the least contrasting spots. The chlorophyll-free part of the variegated leaf contains a minimum of veins. Therefore, the probability of obtaining offspring from such leaves is minimal.
Advice. The most suitable for reproduction is a leaf located directly under the peduncle. The supply of nutrients in such material is maximum.
Requirements for the composition of the soil and recommendations for its preparation
Soil for violets should be as loose and slightly acidic as possible. Ready-made mixtures for Saintpaulias from a store are suitable, in which it is recommended to add river sand, crushed sphagnum moss, perlite or vermiculite.
You can independently make soil for violets by mixing the following components:
- ready-made soil for violets - 2 parts;
- perlite - 1 part;
- vermiculite - 0.5 parts.
The famous breeder B.Macuni suggests using the following recipe for preparing soil for violets:
- leaf humus - 1 part;
- high-moor peat - 3 parts;
- sand - 1 part;
- green moss - 2 parts;
- sphagnum - 1 part;
- garden soil - 1 part.
Charcoal is added to this mixture for disinfection.
Watering
Water the flower should be warm water and quite generously. The soil under the plant must always be kept moist. Water should be watered once a week, and in the summer they watered after two days. Excessive moisture should be avoided, as it can provoke root rot. It will be great if you can water your pet with rainwater. But still, remember that it must be warm. The violet responds very well to spraying with water, but the water should not contain lime, otherwise stains will appear on the leaves.
Top watering
This method of watering is most suitable for violets, but it is actually the most difficult. With this method of watering, water is poured in a thin stream into the ground near the edge of the flower pot. In this case, the water should not erode the soil. It is imperative for violets that the young leaves and the growing point remain dry. For this method, both a syringe and a small bottle or watering can with a small hole are suitable.
Pallet watering
This option takes an order of magnitude less time, but it also has its own nuances. You need to pour water into the pan as much as the soil is able to absorb. You will understand that there is enough water when you see the topsoil become wet. After 30-40 minutes, the water remaining in the pan must be drained off.
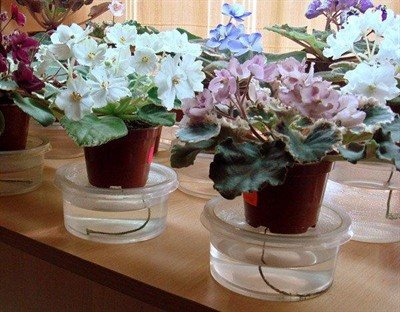
Wick
This method is essentially a modification of the previous one. A piece of fabric or a rope (not synthetics) is brought out through the hole in the bottom of the pot, and lowered into a container of water located under the pot, which should not touch the bottom of the water. The other end, accordingly, remains in the ground.
Separation technology of the formed outlets
The grown rosettes of violets must be separated and transplanted into separate pots.
It is possible to divide the sockets of the formed children only after they reach a diameter of at least 3 centimeters. An outlet is ready for an independent life, which has formed at least three pairs of leaves. The first outlet is left in the old container, the rest are separated and deposited in separate containers.
The division process must be carried out without fail, since several outlets with. children, planted in the same container, over time begin to crowd each other. Such a violet quickly loses its decorative effect and never blooms.
Variegated varieties often form babies with completely white or pink leaves. Such outlets cannot be detached as they are not viable. You can plant the outlet only after 2-3 green leaves have formed on it.
After the separation of the babies, the mother's leaf can be left in the soil, and it can give a new wave of babies. Separated sockets of children should not be planted immediately in large pots, since the uncultivated soil will begin to acidify. The development of violets in a pot that is too spacious is inhibited, the leaves begin to stretch out.
Difficulties in breeding violets
Often, flower growers incorrectly perform the actions of planting cuttings, as a result of which they die. The most common errors are highlighted:
- too acidic soil;
- exposure to direct rays of the sun on violets;
- excessive or poor watering;
- lack of treatment with disinfectants.
- low air temperature and humidity.
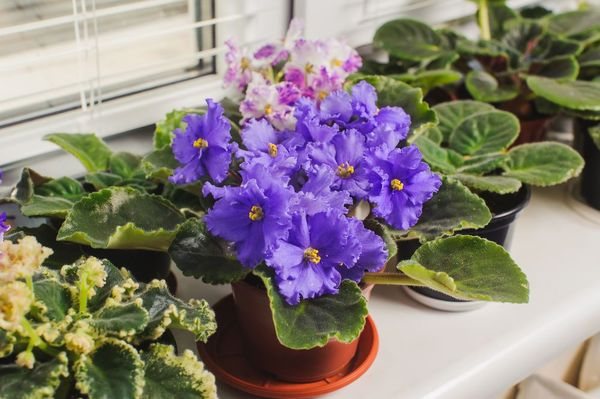
Violets are a real decoration of the windowsill
Basically, beginner growers face such problems due to ignorance of some important rules for breeding violets. Therefore, in order not to waste time and planting material, you should study these subtleties in advance - we have described all of them in our article. Breeding violets on your own is very interesting, and if you follow the step-by-step instructions exactly, it is impossible to make a mistake. Good luck!
Under what conditions do violets reproduce?
Violet is enough fastidious plant... She will not tolerate rough handling. You can safely reproduce these flowers all year round, if there are opportunities to create comfortable conditions.
Time
In the warm season, the daylight hours are the longest, so spring and summer are considered favorable for the start of reproduction of violets... If it is winter, then it is important to create additional lighting with a fluorescent lamp or other special devices.
Important! To achieve effective breeding, the day length should not be less than 12 hours.
Humidity
During the breeding season, it is important to maintain a high humidity level, from 50 to 60%... Dry air has a detrimental effect on these plants.
Temperature
Also an important factor. Maintaining the same temperature regime without sudden jumps - guarantee of good development of violets... The optimum temperature in the room where the flowers are located should be within 24-27%.
The soil
Soil for violets should be taken breathable, loose and slightly acidic... You can select a suitable soil in the store with the help of a qualified seller. But experienced gardeners prefer get the substrate yourself, because it is not always possible to buy really high quality land.
Charcoal used to create and maintain the desired humidity level, turf land - as a loosening agent of the soil. Thanks to her, the soil will not dry out or become too wet.
Sphagnum must be handled carefully using in small quantities, because it can cause the onset of the decay process.

Pot
For a leaf, peduncle or violet seed, a small a pot with a diameter of 4 cm, with special holes. As soon as the violet becomes large enough, it should be transplanted.
If the diameter of the pot does not exceed 6 cm, then the violet is simply removed and transferred into a larger container, while fresh soil is added. Also do not forget about expanded clay... It is necessary so that water does not stagnate in the ground.
Irrigation
Water the flower as needed. Water should be used only well-defended and room temperature.
Important! Violet does not tolerate too wet soil.
Temperature
The temperature of +20 degrees C is very favorable for Saintpaulias, in such conditions adult plants bloom for a very long time, the flowers are usually large and can stay on the plant for a long time. For young plants that have just begun their development and have recently separated from the mother leaf, temperatures up to +23 - + 24 degrees C will be more favorable - no more, otherwise you will not have a chance to grow full-fledged plants, despite full care.
But from time to time, winter wins, so, sadly, plants have to experience a seasonal drop in temperature, especially if their habitat is a windowsill. But if the temperature there is +16 - +18 degrees, then this will not affect the state of the violets. You just need to make sure that cold air does not get on them during the ventilation of the room. And yet, so that the roots of the plant do not get overcooled, do not keep them on a stone windowsill. It is very cold, it is better to use a wooden stand.
In order for the violets to develop normally, it is necessary to ensure that the temperature in the room where they are located is different day and night.... However, this is very difficult to achieve at home.
The fact is that at night, at high temperatures, the respiration of violets becomes more intense. This, in turn, leads to a greater consumption of organic matter and inhibits the development and growth of the entire plant. Therefore, it is advisable to regulate the day and night temperature. The difference between them should be within 2-3 degrees.
Another important point: do not forget that sudden changes in temperature are very harmful to violets. For example, if a plant was grown in a greenhouse at a temperature of +25 degrees, and then it fell on a window where the temperature was +17 degrees, then its flowers would immediately droop, and the lower leaves could rot. Almost all plants, which, after the greenhouse, begin to grow at home, suffer from this.
I would like to remind you that when growing violets at home, you should not blindly follow all the recommendations, since they are grown in different conditions. You just need to make an allowance for your place of residence: hence the different temperature conditions and different lighting conditions.
So, for example, in the southern regions of Russia, violets in the hot season, despite proper care, can slow down their growth, and in the countries of Central Asia in hot weather they will not bloom at all. Violets are able to withstand lower temperatures from +10 to +5 degrees, but only in conditions of a gradual decrease, as well as a reduction in watering.
How to avoid mistakes when breeding violets
It is better for inexperienced flower growers not to start with a capricious Saintpaulia: cultivation and care take a lot of energy and attention. It is important to choose the right substrate - moderately acidified and necessarily loose. Do not allow overdrying of the soil, cold temperature, hitting the rays of the burning midday sun.
Sometimes babies do not germinate well due to irregular and weak watering. It is not necessary to bury the root collar too deep in the ground. When rooting planting material, it is important to thoroughly disinfect the cut points.... If such nuances are not taken into account, then rooting will slow down, the stem will rot, flowering will slow down, and the plant will not release new leaves for a long time.
Correct planting of violets step by step
In order not to damage the plant, not to worsen its condition, the plant must be transplanted correctly. We will analyze in detail all the nuances, we will tell you step by step how to plant a violet correctly:
- The frequency of transplanting violets is from six months to 9 months.
- For a sufficiently strong plant (no longer a child, but also not an adult plant), a pot is needed with a diameter of 8-9 cm, the maximum size for an adult violet is 11 cm. A miniature violet develops well in a 5 cm pot. The ratio of the diameter of the new pot to the diameter of the plant itself should be 3: 1.The size of the holes on the bottom should be about 3 mm. You need several of them. The pot, if reused, must be disinfected, do not use from under diseased plants!
- Fill the drainage to a quarter of the height of the pot, then sand (to cover the drainage layer with a thin layer), then the prepared soil mixture for the violets.
- When replacing it with a more spacious pot, the violet is simply rolled over, adding new soil around the edges. If the old pot is used, the depleted soil should be shaken off a little from the roots. Remove damaged roots and sprinkle with crushed charcoal. Place the flower in a pot and, holding the root collar, carefully apply the soil in parts, carefully distributing it between the roots. Tamp lightly on top.
- It is good to shed the transplanted violet. The plant will adapt for the first 2 weeks. During this period, you need to carefully monitor it: keep the temperature slightly above 24 ℃, if necessary, create a greenhouse around the flower.