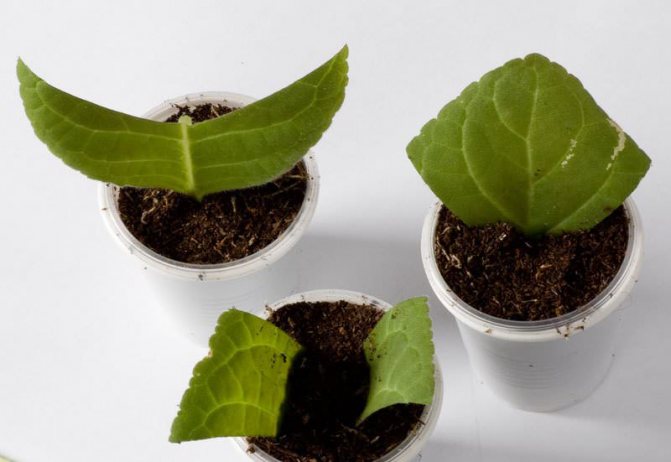
Gloxinia can be propagated by a leaf in two ways:
- by rooting a whole leaf in the soil;
- horizontally rooting a leaf, incised in the center (as in the propagation of violets).
Rooting a whole leaf in the ground
A universal substrate for flowers or seedlings is suitable for rooting. It is light, airy and contains essential nutrients.
In order to prevent, spill the soil with a solution of potassium permanganate.
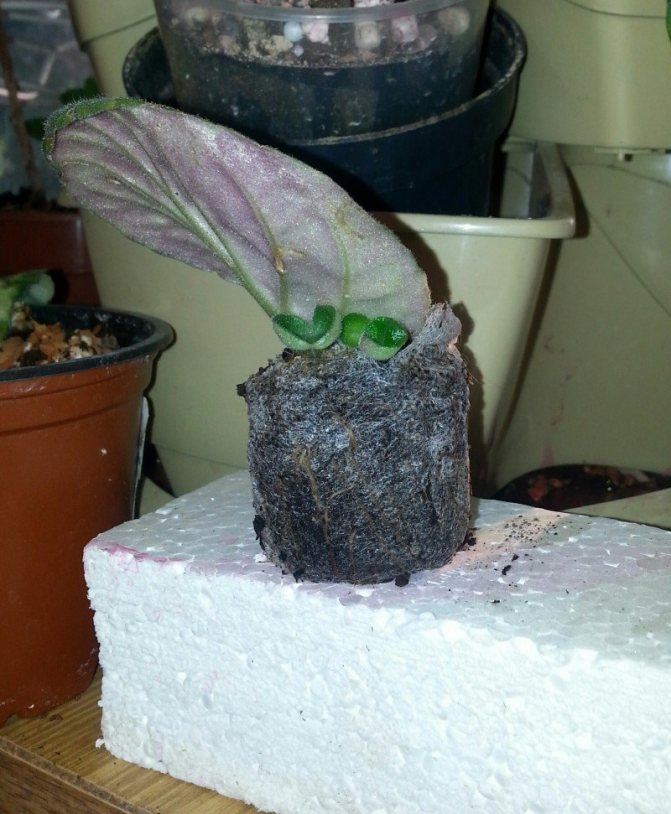
Dip the prepared leaf with a petiole in potassium permanganate and plant it in the ground, slightly wrinkling it with your fingers around the petiole. In this case, it must be placed not in a vertical position, but at an angle.
It is only necessary to deepen into the ground the petiole itself, before the beginning of the leaf plate.
Preparation
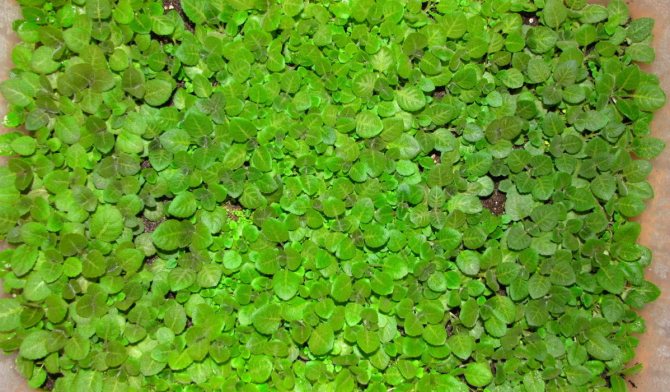
Reproduction of synnengia with a leaf is best done in early summer, because fresh leaves, in a given period of time, have more strength. Moreover, a young plant has more ability to form a tuber.
Preparing for breeding and growing at home:
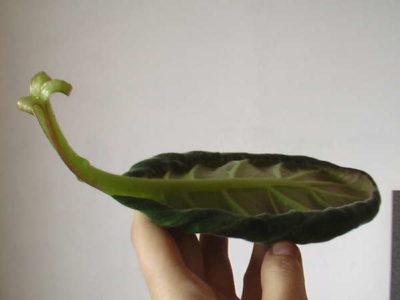
- From a healthy adult plant, cut off a leaf taken at the base. (The length of the petiole is up to 5 centimeters.)
- Cut the petiole exactly across with a sterile blade or a sharp knife, so as not to introduce microbes and damage the plant itself, dip the tip into a phytohormone solution.
- Before planting, disinfect the soil with a solution of potassium permanganate or spill it with boiling water.
Pot selection
The pot in which the plant will be placed should be 4-5 centimeters wider than the tuber itself. Both clay and plastic pots are suitable for growing. The form can be absolutely any. It is best not to plant tubers in a pot that is too wide or too narrow.... If the container is too narrow, the plant will often dry out, since there is little soil in it. If on the contrary - too wide - the plant will increase the leaf and root mass, postponing flowering for a long time.
You can read more about the rules for choosing a pot for gloxinia here.
Soil selection
The soil must be loose and have a liquid carrying capacity. Many growers prefer soil for violets. You should not use ordinary peat with a high degree of acidity, because gloxinia will grow poorly and will not give flowers. Optimally:
- 1 piece of leafy land;
- 0.5 parts of river sand;
- 1 part deoxidized peat.
Read about the correct preparation of the soil for gloxinia in a separate article.
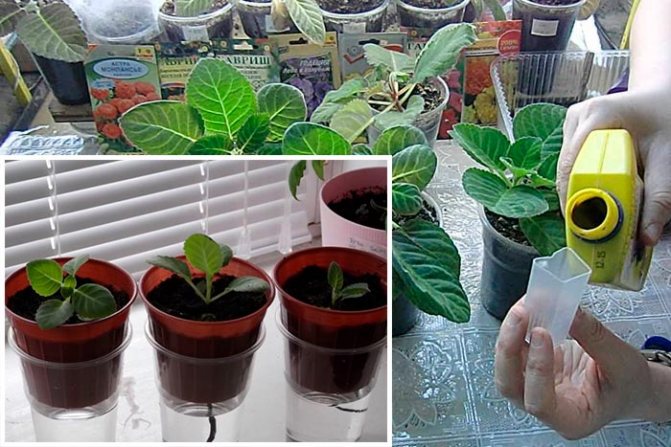
How to care for leaves during the rooting period?
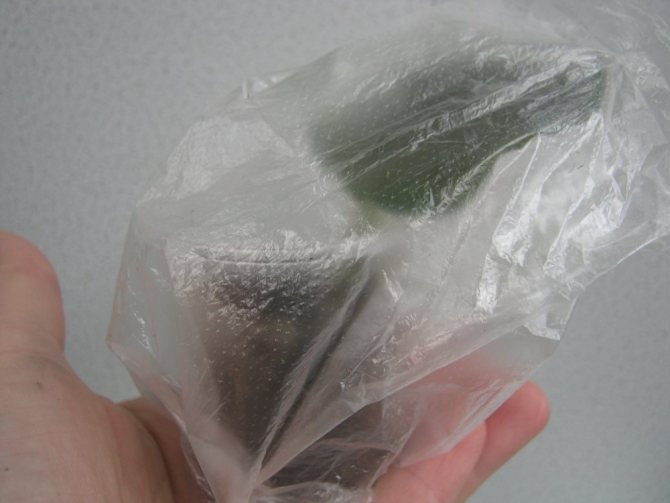
After the leaves are planted in the soil, you should cover the container with a lid (if it is a plastic container) or put a plastic bag on top. This will create a constant, warm and humid microclimate inside. Put the greenhouse on a light windowsill. Periodically, the soil will need to be moistened, as well as ventilated the greenhouse.
To prevent excess water from stagnating in the container during watering, it is advisable to make drain holes in it, and the watering itself can be carried out through the pallet.
Leaf reproduction of gloxinia - video
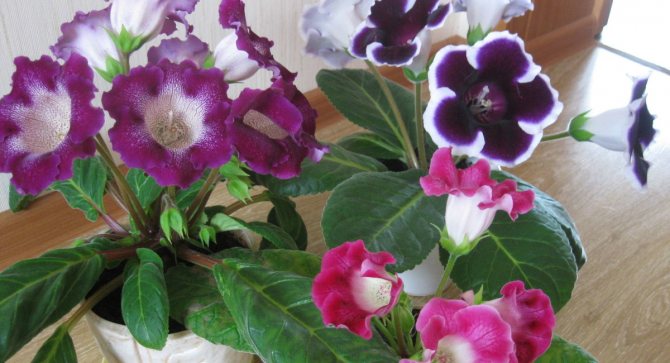
Hello, friends! This year I have a flower paradise on my windowsill. My gloxinia delight with their flowering. This flower is very beautiful, and many people probably want to have it: both inveterate flower growers and ordinary lovers of indoor plants.
One is good, but when there are several of them, and all of different shades, this is an indescribably beautiful sight: an apartment or a house will immediately transform.
Content
It is not necessary to buy a plant in a flower shop, it is enough to pick a leaf from friends and plant it. If everything is done correctly, very soon this beauty will begin to delight the eyes of the hostess with her flowering. And my article on how to grow gloxinia from a leaf.
Conditions for rooting cuttings
Cuttings of leaves and cut leaves of gloxinia are not recommended to be placed in water. The effect will be much better if you plant them in pots or cups with well-moistened soil.
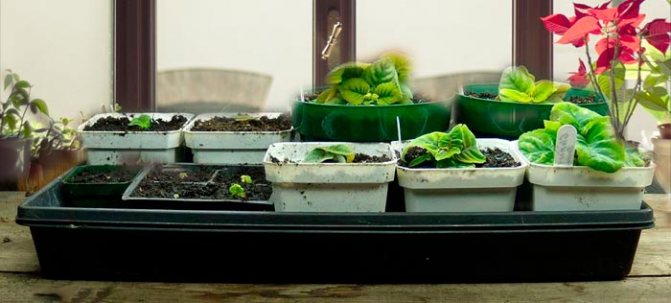
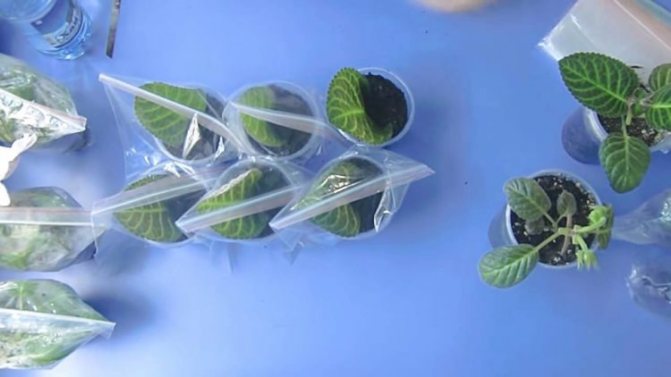
Containers with planted flower leaves can be placed in a greenhouse. Thus, almost all cuttings and leaves have a chance for successful germination. There will be practically no losses.
Many growers do not consider it necessary to air the greenhouse with seedlings. Thanks to the moistened soil, it feels great and does not need watering for about 25-30 days.
Based on the above data, the use of a greenhouse makes it possible to get flowers in full, practically without loss, the growth of gloxinia will be much faster. In addition, the gardener saves personal time by being able to tackle other flowers.
After 25-30 days, all planted leaf cuttings and leaf fragments take root. During this period, you can remove the greenhouse. This should be done gradually so that the plants adapt to room temperature. Further actions for the care and watering of gloxinia are carried out in the usual way, as with adult plants.
During all periods of synningia growth, rooting is no exception, the flower needs a sufficient amount of light. Otherwise, rooting will slow down very much, in young shoots it may lengthen.
Reproduction
There are only 5 opportunities for reproduction of a beautiful flower at home:
- Part of the sheet.
- By rooting the peduncle.
- By dividing the tuber.
- Seed reproduction.
- Leafy cuttings.
The last option is exactly the one that will be discussed. It is impossible to say whether it is the simplest, but difficulties in this case will not arise.
Ways to propagate a plant
The most recognized ways:
- Reproduction by leaf petioles.
- Reproduction by seeds.
- Reproduction by dividing the tuber.
- Reproduction by peduncles.
Attention: An ordinary way of reproduction is the rooting of the leaf petiole.
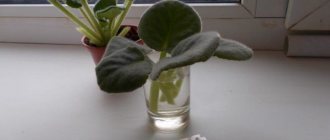
Things to do before boarding

Previously, you can achieve the appearance of roots. To do this, a little boiled water is poured into a small glass, where the leaf is placed.
However, there is a second option, when landing occurs immediately. Most often it is recommended to choose this method. Previously, the sheet (if it is very large) is divided into three parts, or at least in half. The substrate should be slightly damp.
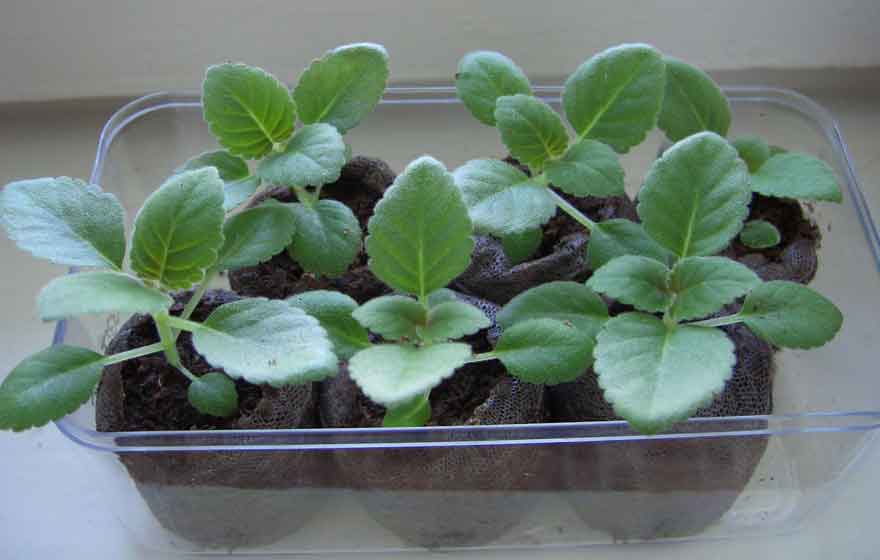
When the leaf fragments are planted in a cup, it is best to organize greenhouse conditions for them by covering them with a plastic cup. Due to the moist soil, watering and airing are not necessary - cuttings can live like this for about a month.
Thus, you can be sure that gloxinia will definitely be accepted, and meanwhile not think about caring for it.
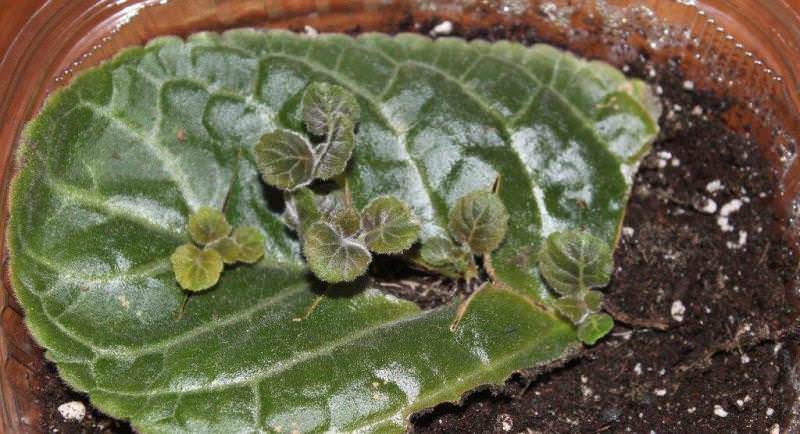
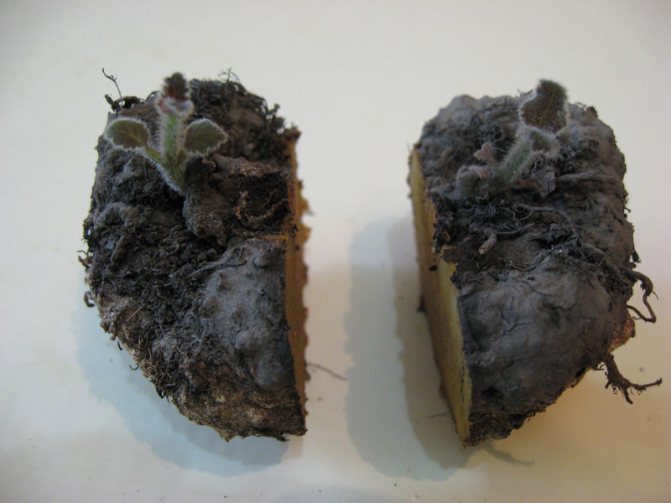
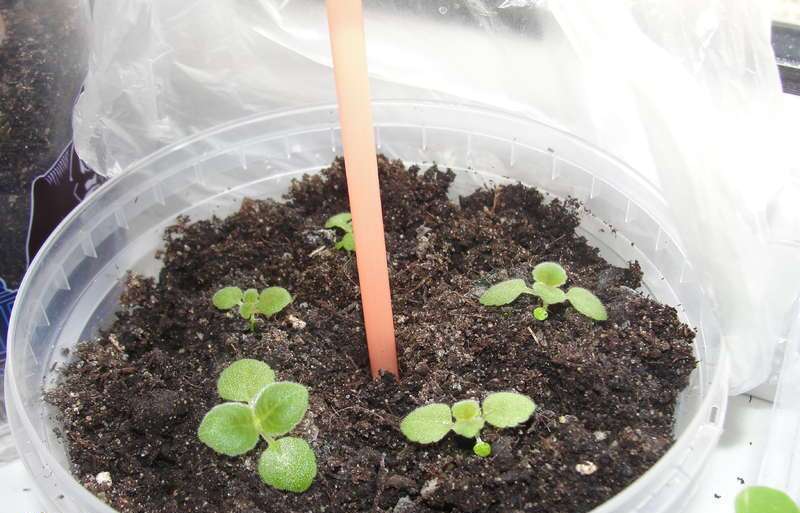
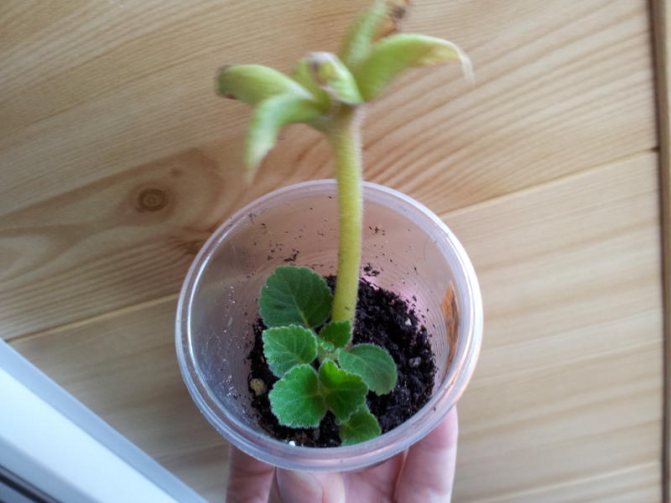
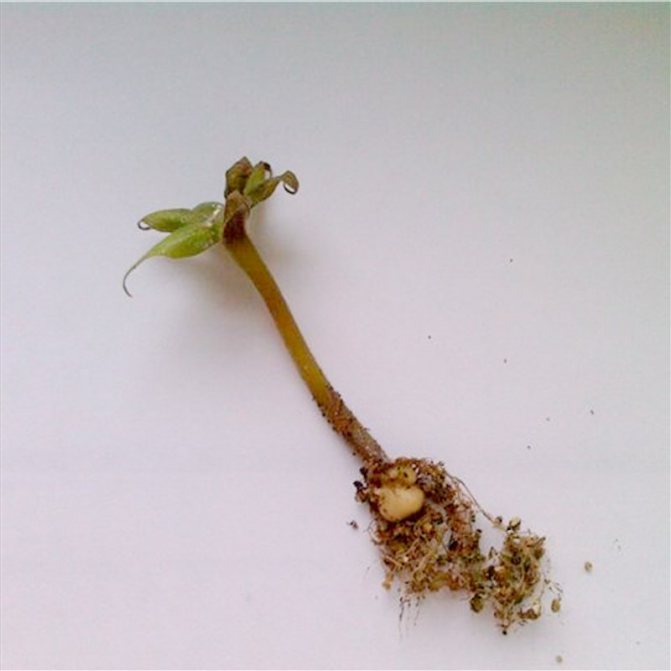
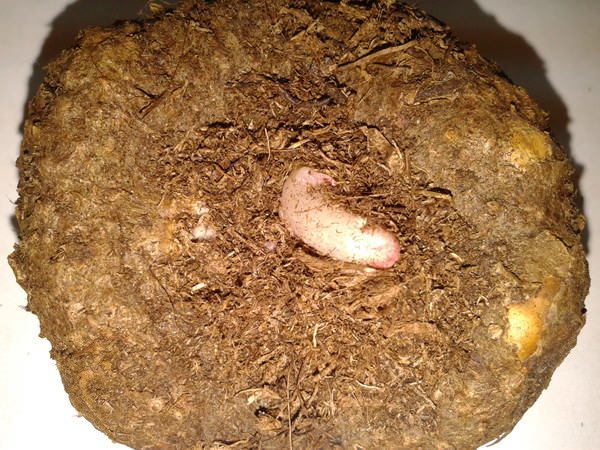
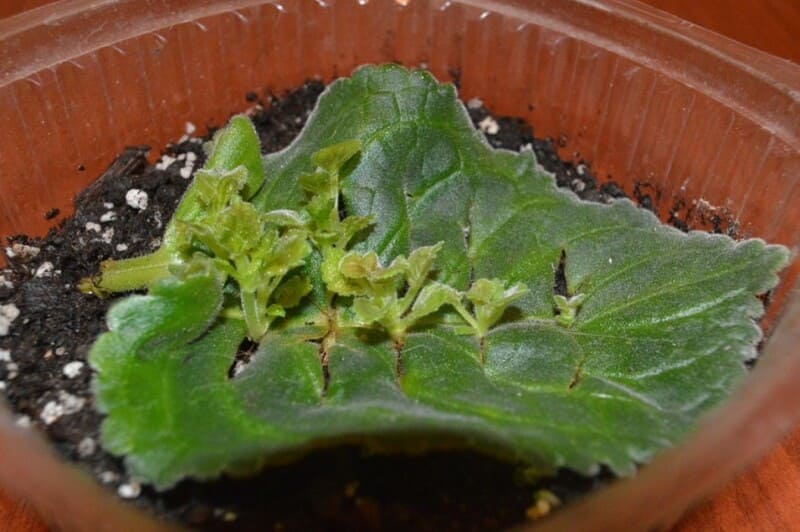
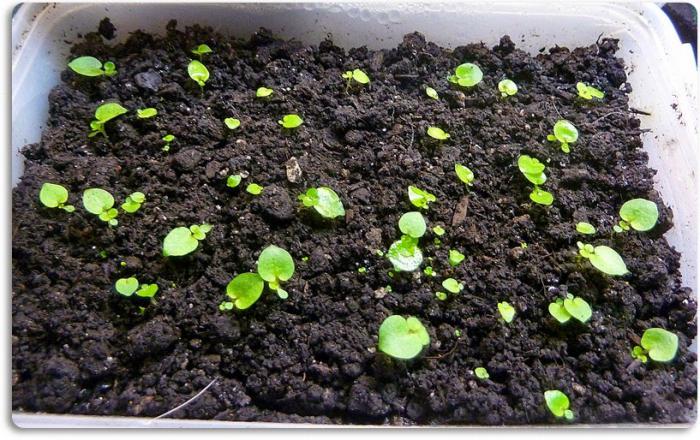
Young shoots in the fragments may appear as early as 1.5 months after planting.When there are no children for a long time, it is very simple to speed up this process as follows (only perhaps not earlier than a few months after rooting): the leaf breaks off so that about one centimeter remains in the tuber.
Then the glass is completely "hidden" in a plastic bag and placed in the place in the house where there is most of the light. After germination of the sprout, the bag is removed.


Is it possible to grow gloxinia from a leaf
It is more difficult to propagate gloxinia with a leaf than with a part or a whole bulb, but this method is widely used by flower growers. This flower reproduces not only by tubers or seeds, but also by cut cuttings, a whole leaf blade and its parts.
To root a gloxinia leaf, you need to take a plate at least 3 cm in diameter or a piece of the same size. The same applies to the length of the petiole, if this site is used for rooting.
Leaf propagation is convenient in that such planting material can be taken from any sufficiently young and strong plant - it is not necessary to buy tubers in a specialized store.
How to separate the kids?
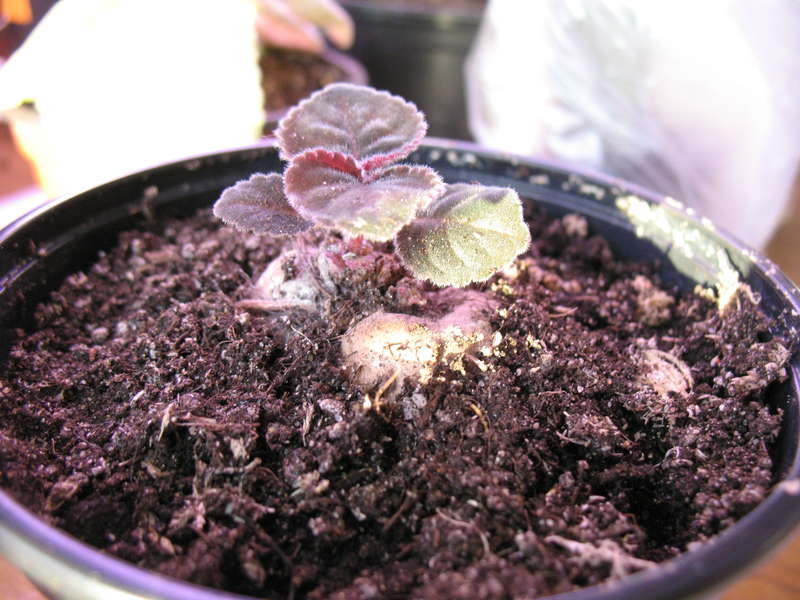
When there is confidence that the "kids" will be able to grow further on their own, it is necessary to separate them from the so-called "mother". If the child is alone, the sheet is simply broken off. If there are several, then you need to take them out and carefully separate them so that the main tuber remains at the leaf.
Next, future gloxinia are planted in separate small pots.
It is not worth worrying about the fact that they will not accept without a root - very soon they will have their own tuber. Here is a simple answer to the question "how to breed gloxinia."
Preparing to land
To plant a tuber successfully, you need to take care of the composition of the nutritional mixture. Gardeners usually have a special soil compositional secret so that the tuberous planting will provide a long and lush flowering. For example, it can be carried out in the presence of equal shares:
- coniferous land;
- fibrous (high moor) peat;
- sand.
Some growers suggest preparing the soil from other components, but also in the same parts:
- half-ripe deciduous land;
- fibrous peat;
- sand (it can be used together with perlite mixed with peat).
In two versions, 1.5 kg of ammonium nitrate, 2 g of superphosphate, 1 g of potassium sulfate must be added to 1 kg of the mixture. Planting the tuber is preferable in loose soil with a neutral pH. The flower grows unimportantly in excessively fertile soil and does not tolerate high acidity. When watching the video, you can learn about other mixtures consisting of peat and sphagnum. It is also possible to buy ready-made soil for gloxinia.
In addition to the earth, you need to prepare:
- fungicide (some growers dip a tuber into it for a couple of minutes);
- wood ash or activated carbon;
- small pots to plant a small tuber;
- other larger containers for planting.
It is better to cut large gloxinia tubers in half and remove damage to healthy tissue. Slices are sprinkled with wood ash or activated carbon. Each part should have a bud or sprout ready to grow. Before planting gloxinia, the planting material with a cut must be dried for 3-5 days.
Conditions for the favorable development of a flower
A place
Gloxinia is photophilous, and even during the rooting period, it should stand in a bright place. After it is accepted, you can rearrange, for example, on the windowsill. Natural light should be supplied constantly. However, direct sunlight is undesirable. It is especially important to observe this rule when our beauty is blooming.
Watering
Watering is carried out only when the flower needs it. Water is usually taken filtered, rain, thawed, or it can even be diluted with a little boiled. The water collected under the tap must be defended for at least a day.When watering, make sure that drops do not fall on the leaves.
It is best to give her a drink using a tray, and after the gloxinia takes the required amount of moisture (20-30 minutes), drain what is left. If this is not possible, pour over the edge of the pot.
The water temperature should be a couple of degrees higher than the environment. Only when the ground is dry can you water again. Important! Excessive moisture contributes to root rot.
How to give fertilizers correctly, and which ones are better to buy
Feeding can be started two months after planting. This happens about 1 hour after the water is given, in a similar way to watering (around the edges). fertilizing is not worth it when light hits the gloxinia. It is better to do this in the evening or in cloudy weather.
Mineral fertilizers alternate with organic fertilizers. The second is changed to the first as follows:
- Before the buds appear: for nitrogen.
- After their appearance: phosphoric.
Depending on what gloxinia needs, you can choose a top dressing:
- Enhanced vegetative growth - nitrogen.
- Intense flowering - phosphorus.
- Improvement of peduncles - potassium.
- An increase in the number of buds, a rich color, the size of flowers - microelements.

Step-by-step instructions on how to reproduce correctly?
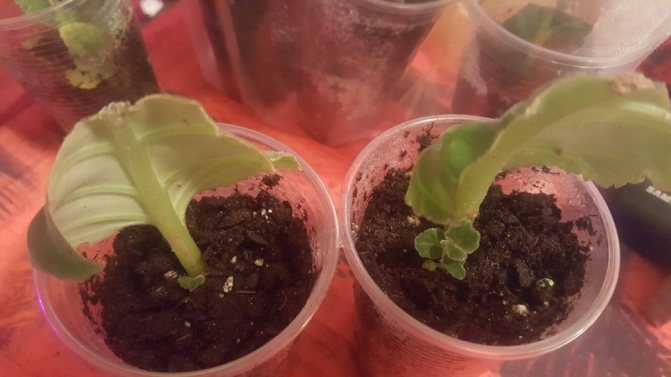
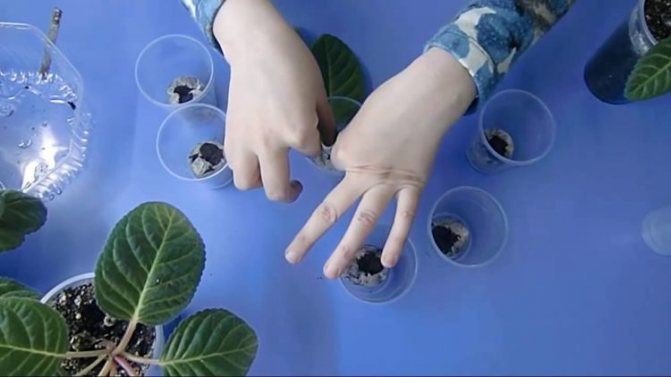
- We make drainage holes in a plastic cup, fill up the soil.
- We moisten the substrate and make depressions there at an angle of 45 º using a pencil or ice cream stick. (You can simply place the leaf in the soil at a 45º angle).
- We press down the earth around. Place the sheet so that the bottom surface is facing the wall of the pot, and the base of the plate does not touch the soil.
- Cover the top of the glass with a bag without damaging the sheet.
- We place the mini-greenhouse in a bright, warm place without the risk of direct sunlight. Soil temperature should not drop below 16 ° C.
- We ventilate the greenhouse once a day and water it when the soil dries up.
We recommend watching a video about the reproduction of gloxinia using leaves:
Problems to face
- If the leaves of a flower turn yellow, you need to pay attention to watering, perhaps it is excessive. It can also be affected by a lack of nitrogen and too hard water.
- When the leaves are discolored, it indicates a lack of magnesium.
- When spots appear on the leaves, you need to remove the gloxinia further from the light, as this indicates excessive lighting. It may also be due to the fact that it is watered with too cold water.
- If it is not blooming, it may be oversaturated with nitrogen. In addition, this problem may arise due to lack of lighting or cold.
Gloxinia in a "dream"
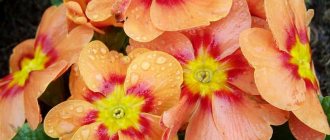
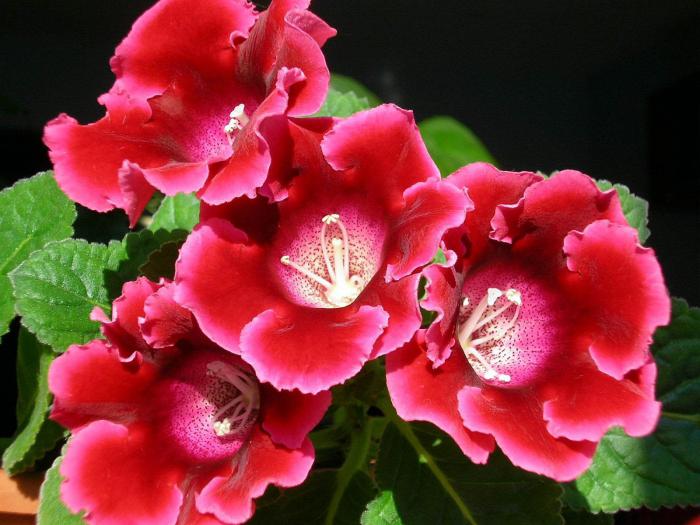
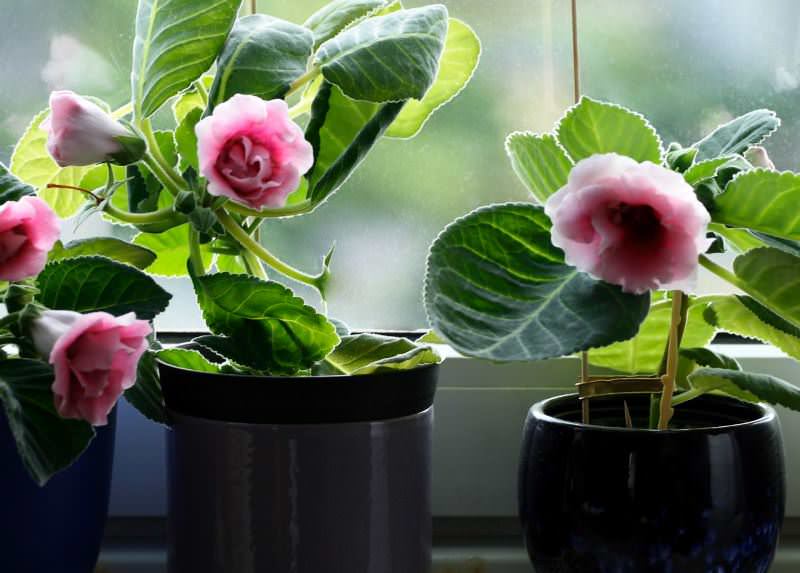
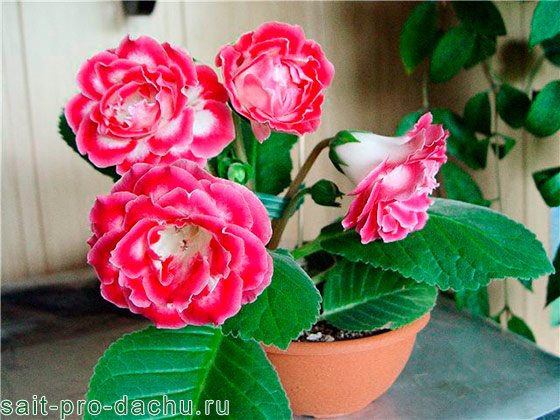
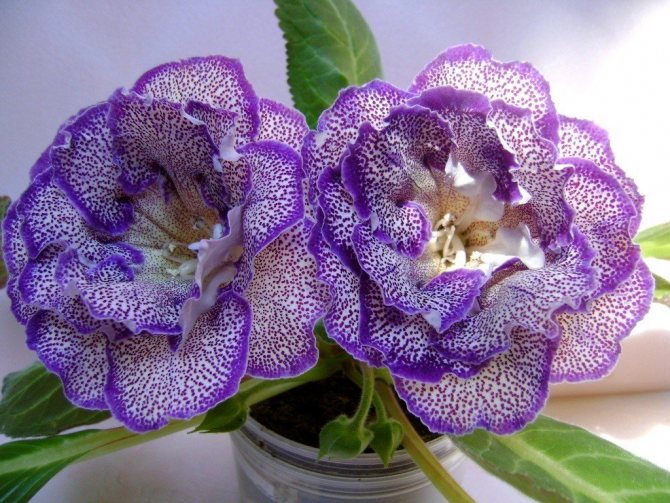
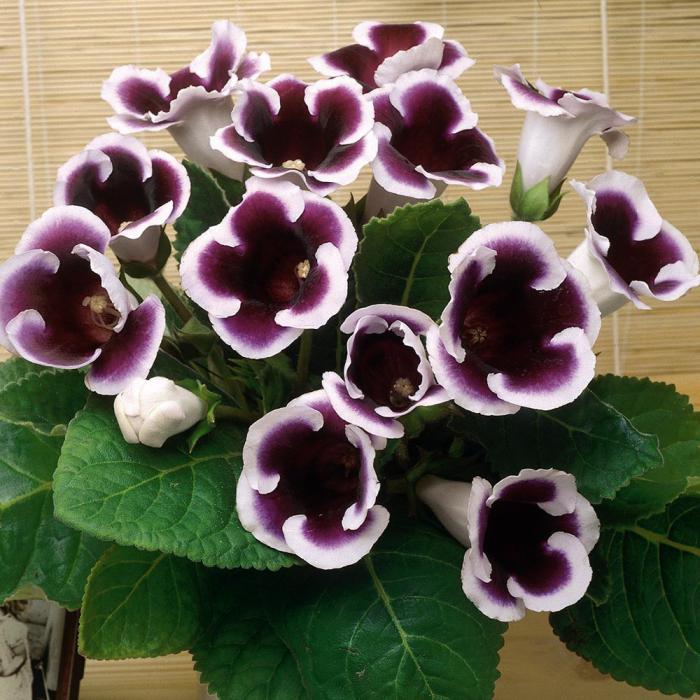
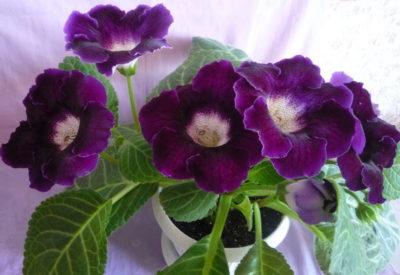
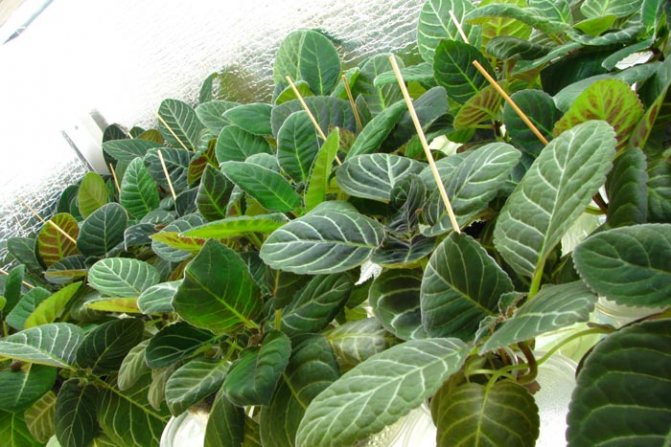
The fluffy emerald leaves of a relative of the uzambar violet are an excellent background for double and non-double flowers, mainly of amethyst color, sometimes with a white border around the circumference or a contrasting bell neck with pronounced veins and corrugated edges. It is a pity that the flowering of this beauty, which lasts from July to September, is replaced by an almost five-month "sleep".
Originally, these showy flowers were grown only from tubers that dormant in winter. Now the problem of how to plant gloxinia does not exist due to the widespread practice of obtaining planting material by cutting leaves and seeds.
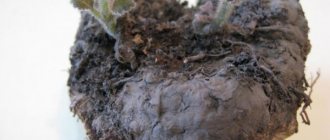
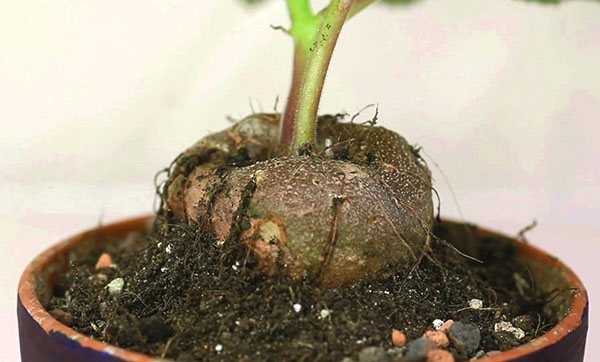
After flowering, when the leaves dry up and die off, you need to let the soil dry. You can store gloxinia tubers (an adult plant) directly in the container where it grew. They find a dry place for it and, putting the container on one side, leave it until February-March.
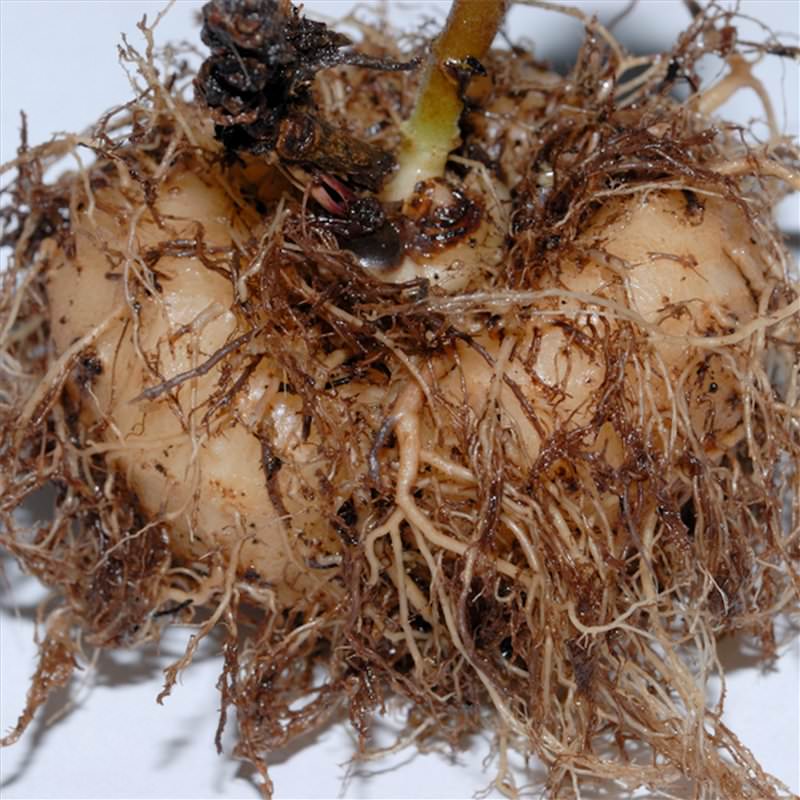
Small annual nodules grown from seeds and cuttings, covered with slightly moistened sand, are placed in boxes. At temperatures from 10 to 15 ° C, they plunge into "sleep". If their number is small, then there is another way to store the tubers offered by flower growers.Tubers winter well in small bags with a lock, they can be stored in a substrate, in moss, or without fillers at all. You just need to make sure that the tubers do not dry out, do not germinate and do not rot.
What is this flower?
The second name of the plant is Sinningia, it belongs to the Gesneriaceae. Sinningia is a perennial, with a tuberous root and plump dense leaves... It can bloom with regular and double flowers. They flaunt over the rosette, in the form of velvet bells.
Gloxinia was originally an inhabitant of the deciduous tropical forests of Central America, and more precisely, it is most likely to be found in Brazil. She hides in the lower tiers of the forest, in the shady part.
The climate there is very humid, combined with periods of drought and heat, when the ground part of the plants dries up, ceasing to function, and the center of life shifts, dying in the root system, which "falls asleep" in anticipation of beneficial moisture for several months. So gloxinia learned to preserve its life, adjusting to the climatic rhythms of the region.
The rooted leaf begins to wither
Another unpleasant situation that can occur during the reproduction of gloxinia is when the leaves wither. But everything is not so scary, and it can be easily corrected.
Reasons for wilting foliage:
- The plant is exposed to direct rays of the sun. The plant is moved to a place where the light is diffused.
- No greenhouse was used for transplanting. Gloxinia really needs it, especially in the early stages of development. With its help, the heat and humidity necessary for full development are created.
- Excessive watering of the plant.
- During transplantation, the root system was damaged in plants with an already appeared leaf. Such work should be treated with care.
- Too large pieces of paper were taken. In this case, it is better to cut (cut) it.
Reproduction of gloxinia requires a sufficient amount of knowledge to get a good result.
How does rooting take place?
There are a couple of ways to root gloxinia leaves. The first consists in rooting the leaf in water, when the small roots are waiting for the growth and then the cutting is transplanted into the ground. This is the most efficient option. The second method consists in direct planting of the separated leaf cuttings into the ground or into a peat tablet. Experience shows that most successfully the cutting can be rooted directly in the ground.
When is the best time to do it?
There is no specific framework for this process, but the best time to breed gloxinia with a leaf will be the spring season or the very beginning of the summer season.
Which leaf to take as a cutting?
- Young, with a strong leaf blade and elastic petiole.
- No spots, rot, puffiness.
- From a plant about to bloom or during flowering.
- The mother plant must be healthy.
What will it take to root?
You will need the following materials and tools:
- Plastic beer cups, half a liter or two hundred grams - the volume here depends on the size of the leaf, you need the leaf to sit freely in the glass and lean on its wall, but does not slide down to the bottom, does not fall.
- Transparent plastic wrap such as bags or rolls.
- A piece of styrofoam.
- Sharp thin knife or razor blade. Necessarily cleaned and disinfected.
- Freshly cut leafy cutting of Gloxinia. The stem of the cutting is cut neatly, at a slight angle.
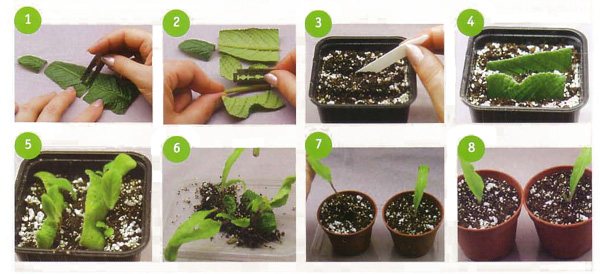
Pre-processing instructions
To create multiple breeding units from a single cutting, the following method can be applied.
- We trim the sheet plate so that a two-centimeter fragment remains from the base.
- From half of the large leaf, in fact, we cut out another small one, following the direction of the vein pattern, we clean the part of the cut fragment from the leaf blade, exposing the central vein, which passes into the petiole leg.
- Thus, we get two planting leaves.
Further, to root both parts, a single "scenario":
- Place the cutting in pre-boiled water cooled to room temperature. The water level should be up to half of the taken glass.
- As an additional retainer that protects the leaf from falling and sliding, you can use a piece of polystyrene by placing it in a glass between the wall and the handle on the front side of the sheet plate.
- Cover the sheet with a greenhouse bag, securing it at the base of the glass with an elastic band or a piece of tape. In this case, do not wrap tightly, but leave a small gap for ventilation. If scotch tape is used, then it is necessary to fix it on one side, and on the other, tie polyethylene so that it is possible to fold it back.
- The greenhouse is placed in an illuminated place where it is warm enough, but without direct sunlight. Once every three days, airing is done, the greenhouse is removed, opening the plant completely.
- Root and callus formation will take place within two to three weeks. When the roots gain a length of about one centimeter, then the stage of planting in the ground begins.


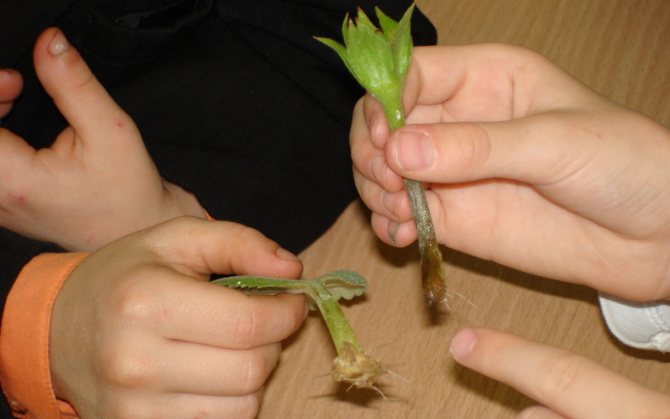
Reproduction of sinningia using leaves
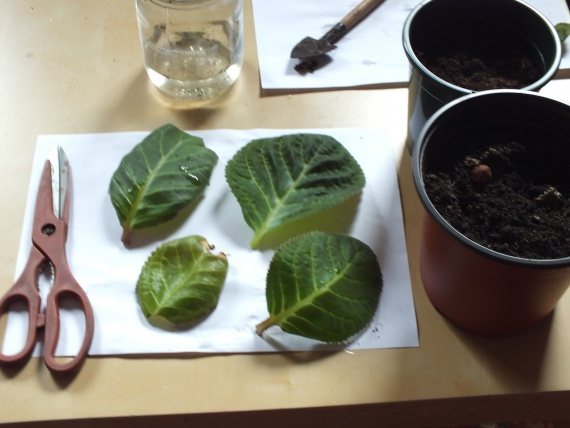
Reproduction of gloxinia leaves requires responsibility. Of all the possible, the most whole and healthy one is chosen, without any defects. Step-by-step instruction:
- The leaf is cut from the cutting by dividing it into parts. The blade must be sharp and disinfected.
- Preparing the right soil:
- Soil for violets.
- Sand.
- Coconut flakes.
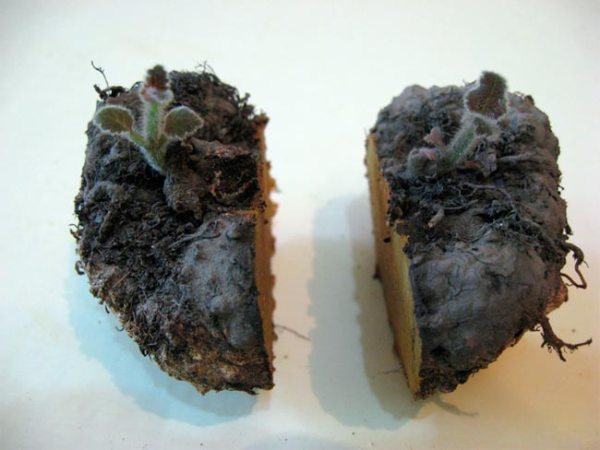
Before planting leaves in the ground, it is treated with a solution of potassium permanganate for disinfection purposes. Small pieces of foam are placed under the small leaves for stability.
- To create the effect of a greenhouse, the container with sprouts is covered with a bag and periodically ventilated.
- When roots appear, the package can be removed.
- In early spring (the last days of March), the formed tubers are planted in pots.
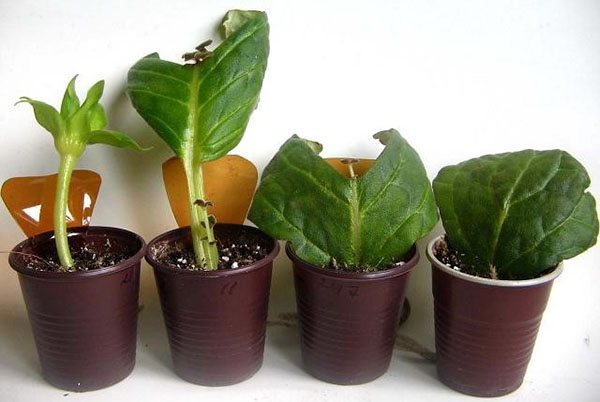
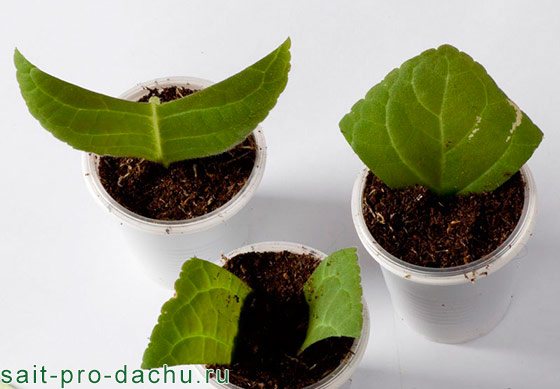
Photos of breeding stages
The photo shows the stages of plant cuttings:
Vegetative way
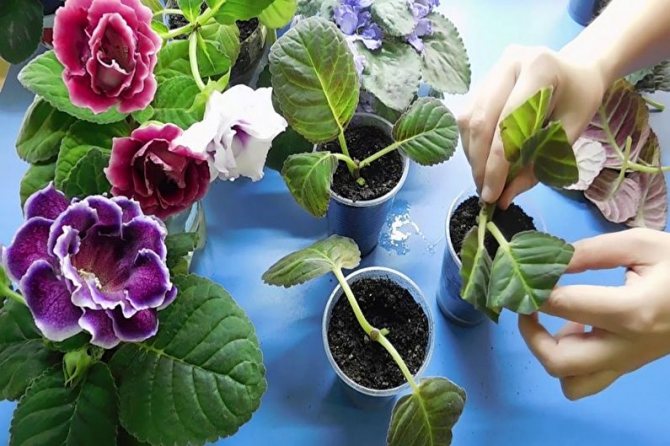
If the grower already has an adult plant, then you can resort to a more reliable and proven breeding method - propagation by leaves, cuttings or tubers.
When propagated by a leaf:
- The smallest leaf is selected, or a large one is taken and divided with a sharp knife along the veins into segments, while the petiole is shortened to 2 cm.
- Delenki are seated in separate pots filled with light moist soil mixture.
- The containers are placed in plastic bags to create greenhouse conditions.
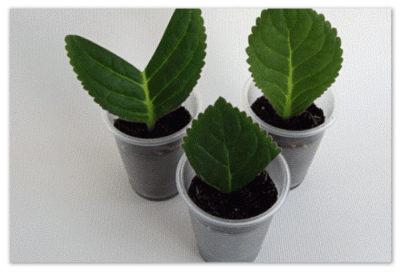
- After a month, when the exotic plant takes root, the protection begins to gradually be removed, which allows the flower to adapt to new living conditions.
Reproduction by tubers is carried out in the same way - dividing the tuber into parts.
How to solve problems with cuttings so that the leaf does not disappear
The petioles may rot or lose turgor.
The reasons:
- The petioles are affected by rot, being planted in the ground or in peat tablets, if they are strongly pressed on them during planting.
- In direct sunlight on the seedlings.
- Lack of lighting.
- Using a cutting tool without prior disinfection.
- Breaking off the sheet instead of neatly cutting.
- Elevated ambient temperature, location near the stove or radiators, on the south windows.
- An old leaf was taken as a cutting.
- The shank was taken in not the most favorable period of the year.
- The leaf for the cutting is taken larger than the optimal size - this can lead to a loss of turgor. Therefore, it is better to divide overly large leaves.
- Excessive deepening.
Obviously, most of the problems are solved by following the simple rules for grafting gloxinia. Consider the problem of getting rid of rot at the preventive stage, since if the stalk has rotted, then it is unlikely that it will be possible to save the still fragile plant, it's much more efficient to do it all over again.
Features of culture
Decorative gloxinia has a number of features that should be considered when growing in an apartment:
- dying off of the aerial part after the end of flowering;
- the introduction of dressings in preparation for winter, from which nitrogen must be excluded;
- choice of a pot for an adult specimen with impressive dimensions;
- the need for additional supplementary lighting, which will extend the daylight hours and ensure abundant flowering.
Watering correctly
For irrigation, soft, melt water is used. Watering is recommended from a pallet along the edge of the pot - moisture must not be allowed to enter the center. If this procedure is carried out incorrectly, the flower will begin to rot.
Water to moisten the soil must be warm, regardless of the season. Half an hour after watering, be sure to drain the water from the sump. Between watering, you need to dry a clod of earth.
Important! If the weather is rainy and cold, the moisture of the plant is reduced. This is due to the fact that the soil dries out for a long time, and the roots can rot from a large amount of moisture.
Basic breeding methods
Gloxinia now reproduces in five main ways:
- Planting leafy cuttings.
- Rooting parts of the leaves.
- Planting seeds.
- Separation of tubers.
- Reproduction by peduncles.
Each of these methods will be described in more detail below.

Inexperienced growers may have some problems during the reproduction of gloxinia at home. The most common problem is decay of the planted leaves. If two or three leaves have rotted, then this is normal. However, if all or almost all of the leaves rot, it means that some mistakes were made, for example:
- during planting, the fingers squeezed the stalk strongly. It is not allowed to press strongly on the sheet or the cut off top. It is advisable to make a small hole in the ground before planting, insert a handle into this hole and very carefully fill in the soil.
- too much sun gets on the mini-greenhouse in which gloxinia take root; immediately you need to remove the container in the shade;
- leaves and cuttings can rot in low light. It is necessary either to put a container with cuttings on the windowsill, or turn on the phytolamp;
- the blade or knife has not been properly disinfected;
- the room temperature is too high or too low;
- too old leaves were used for rooting, it is advisable to root the leaves during the period of the appearance of flowers or the flowering of gloxinia;
- the soil is constantly waterlogged, this flower does not like too frequent watering.
In addition, in the autumn and winter periods, adult gloxinia pass into a state of dormancy and shed their foliage, therefore, young, not yet rooted plants can dry out or simply fall asleep. If the reproduction of a flower is carried out in autumn or winter, then you need to create the same conditions for the plants as in the summer:
- to supplement the illumination with a phytolamp so that the daylight hours are about 12 hours, more is possible
- create greenhouse conditions and raise the temperature in the room to 20-23 degrees;
- protect gloxinia from drafts, prevent temperature extremes.
So, gloxinia is a very attractive, original and colorful flower. Thanks to this, plants can decorate the room, make the room beautiful and spectacular. Different growers use different methods of gloxinia propagation at home. Adhering to all of the above recommendations for growing this magnificent flower, you will definitely be able to propagate gloxinia, and it will delight the owners of the house and their guests for a long time.
Usually, leafy cuttings of gloxinia root well, but it is important to remember that direct sunlight is destructive for them - they can cause rotting or wilting of the leaf. Waterlogging and drying out of the soil leads to the same consequences.Low air humidity slows down the formation of roots on the sections of the vascular bundle, and low temperatures sometimes lead to the death of cuttings as a result of infection with microorganisms.
Carrying out cuttings with a clean and sharp instrument, rooting cuttings at high humidity and temperature and bright light are the main conditions for successful vegetative propagation of gloxinia. This plant is undemanding to care for and pleases with long flowering from spring to late summer.
We select the pot
The pot for planting the tuber should have a diameter of 4-6 cm. It is better to grow the plant in a shallow vessel. The height should be such that a 3 cm drainage layer can be placed at the bottom. A soil layer should be placed on top - the tuber should be covered with soil for good root growth.
Advice! Gloxinia can be grown in a pot of any shape. If it is high, a considerable drainage layer can be placed at the bottom. Clay or plastic dishes work best.
Difficulties arising from growing gloxinia
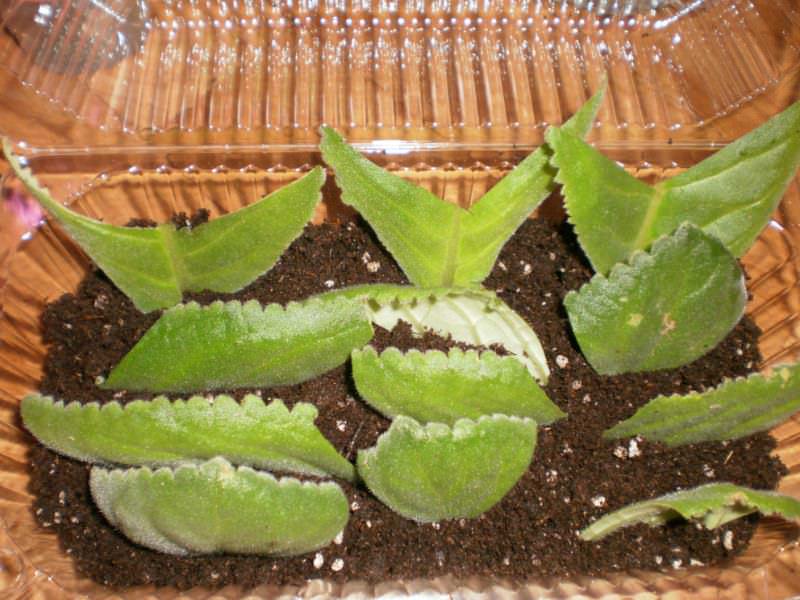
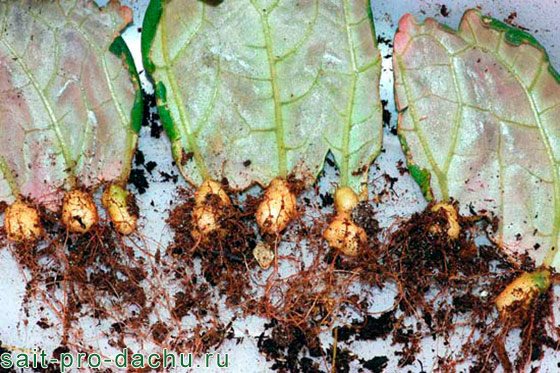
To grow gloxinia from a leaf, you need to take one large leaf of the plant and cut it into several pieces. It is worth cutting so that a vein from the leaf remains on each piece, new roots will form from this part. There is no need to cut small leaves.
Properly prepared soil will allow the leaves prepared for planting to take root quickly and reliably. The optimal composition of the soil mixture for gloxinia is as follows: in equal proportions, sand, peat and a deciduous mixture must be taken, the main condition is necessarily loose earth. Before planting, disinfect the soil and spill it with fertilizers, this will help the plant to grow stronger in new conditions.
Growing gloxinia from a leaf implies adherence to the correct technology when planting:
- The prepared sheets for rooting must be placed with an edge on the ground and slightly deepened with the end where the sheet vein is. Well-watered soil will hold these sheets. Cover the container with landings on top with a film and put it in a warm, bright place. Maintain the temperature at + 25 ° С. Once every few days, ventilate for a few minutes and keep the ground moist;
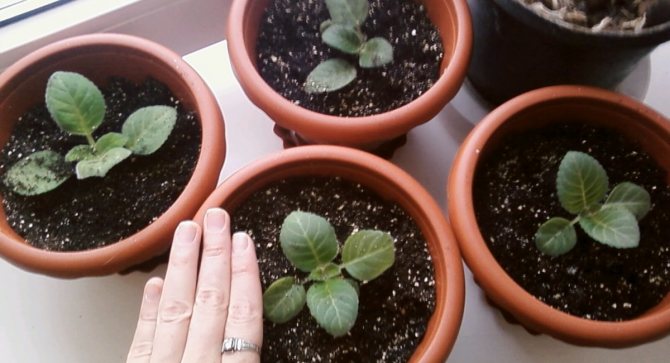
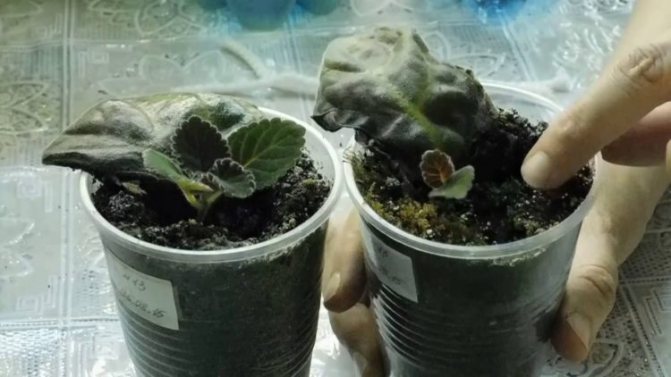
- After 15-20 days, the planted leaves will begin to form roots. After another week or two, the rooted leaves form many babies. After they grow up a little, they can be planted. For prevention, water the sprouts with a manganese solution, only weak, so as not to burn the young shoots.
There is another method, how to grow gloxinia from a leaf. Warm disinfected water is poured into a small container, such as plastic cups. The leaves are lowered into the container so that the handle is in water, the leaf itself does not need to be immersed in liquid. Cover the gloxinia cups with foil, and also leave in a warm place.
After a couple of weeks, the first roots will begin to appear. Now gloxinia leaves can be planted in the ground.In order for the plants to take root well, it is recommended at the first stages of growing, to plant them in a hydrogel. In this way, many gardeners avoid blackleg disease. Soak it in liquid with the addition of the necessary fertilizers and trace elements. The hydrogel is sterile. The grown gloxinia are freely removed, while the root system remains intact, and are transplanted.
Many are wondering how to grow gloxinia? You already know about growing gloxinia from a leaf, now let's move on to the general problems and difficulties that many growers face:
- A bloom of yellow or white indicates that the plant is being watered with hard water. Water flowers only with settled or filtered liquid;
- With a lack of potassium, the leaves of plants begin to turn yellow and dry out at the edges, this may also indicate a lack of iron;
- If gloxinia has stopped growing and faded, then there is a lack of nitrogen in the ground;
- Too much light and heat causes the plant to shrink and small flower stalks;
- A fluffy coating of a gray tint was noticed on the leaves, which means that powdery mildew affects gloxinia;
- If the flowers of gloxinia do not open for a long time, then the plant was in a draft or is still there;
- Dark spots on the leaves may indicate over-feeding and watering;
- The plant grows too slowly, the leaves acquire a reddish color, therefore, there is a lack of phosphorus.
Proper care and watering, as well as favorable growing conditions, will affect the plants immediately. Gloxinia will delight with its lush flowering for a very long time. How to grow gloxinia, you now know, dear readers. I wish you success!
Answers on questions
Why can rooted leaves wither?
When transplanted to a permanent place, the roots could be damaged. Poor quality soil, lack of moisture in the soil can lead to wilting of foliage.
What is the easiest and most effective way to reproduce Gloxinia?
The easiest way to propagate this houseplant is young foliage - it quickly takes root and immediately grows.
Observing all the rules for the reproduction of this beautiful indoor flower, you can get strong healthy seedlings in a couple of months, which grow over the summer, and in the next season they will delight the owners with abundant flowering.
Charming gloxinia have long chosen window sills and, along with violets, occupy a strong leadership in popularity among domestic flowering ornamental plants. When growing gloxinia, at some point the question arises of how to propagate this beauty in order to decorate the house even more abundantly or to make a wonderful gift to someone close and familiar.
The easiest and most effective way is to propagate gloxinia with a leaf, that is, a cuttings. Even a novice florist can do this.
Related Videos
Next, you can watch the video where you will see how to plant gloxinia with a leaf:
Here is such a simple scenario for creating gloxinia from a leaf to an independent plant to be realized. If all the precautions are followed and all the basic rules are followed, then in just a few months you can get a healthy and beautiful flower.
If you find an error, please select a piece of text and press Ctrl + Enter.
Despite the fact that gloxinia is a bulbous plant and grows from a tuber, it can be propagated by other methods. One of the most popular and suitable home use methods is to grow gloxinia from a leaf. The flower can be propagated as a whole leaf blade, or in part of it, as a result, from one leaf, several shoots ready for rooting can be obtained.
Sowing seeds
This is a fascinating process, because in front of your eyes a beautiful flowering plant can grow from a tiny seed in 5-6 months, however, you have to make an effort and spend time. The best time for sowing is February-March, when there is an extended daylight hours. For those with special lamps, the planting season lasts all year long. In this way, you can get the rarest varietal gloxinia. Leaf propagation limits this possibility.
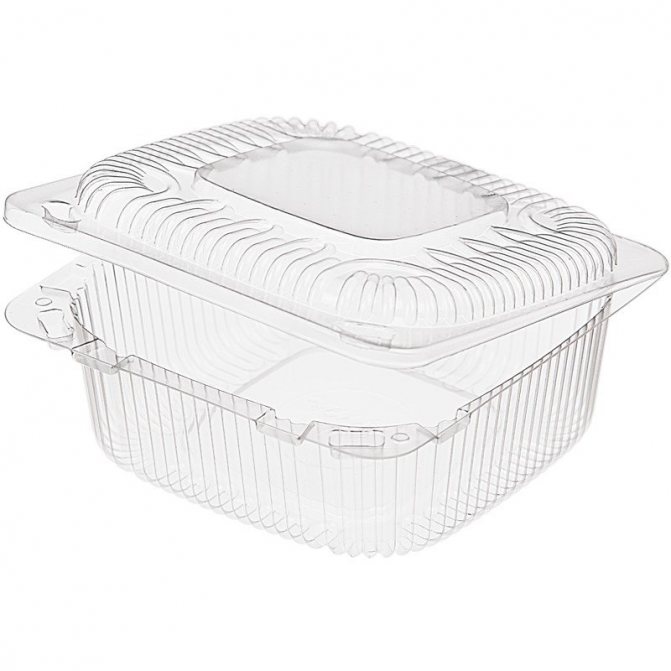
Prepare a nutritious lightweight substrate and a small plastic container for your gloxinia. Ideally, it should be closed (like a cake wrapper). In such utensils, greenhouse conditions for seedlings will be created. Several drainage holes should be made at the bottom.
Procedure
- Pour soil into the container with an even layer of 3-4 cm and moisten it with a light solution of potassium permanganate from a spray bottle.
- Spread the seeds evenly over the surface with tweezers.Then lightly spray the surface again and close the container with the lid. The temperature must be maintained at a level of 18 ° C. Ventilate the seedlings periodically (every two days) to prevent mold on the surface.
- The first shoots appear, as a rule, after two weeks. From this moment on, it is necessary to ventilate the greenhouse daily, removing condensate.
- As soon as the first pair of true leaves appears, dive gloxinia. Reproduction by a leaf proceeds quickly enough, subject to all conditions and rules.
Sprout care
Sprout care includes:
- watering as the soil dries up;
- the cups should have drainage holes through which excess moisture will leave;
- you also need to ensure that the humidity is not too high;
- if black flies began to fly over the pots, you can turn on the fumingator next to the plants for a while;
- feeding sprouts in the first 45-55 days is not carried out, let the plant grow up first;
- the first time the fertilizer should be lightly concentrated. It is better to bring it in in the evening or on a cloudy day.
It should be remembered that an excess of nitrogen in the soil leads to a decrease in flowering and to the appearance of root rot.
Reproduction methods at home
Like many plants, gloxinia has several methods of reproduction. Let's consider its main methods:
- part of the sheet
- seed
- dividing the tuber
- peduncles
- leaf cut
Part of the sheet
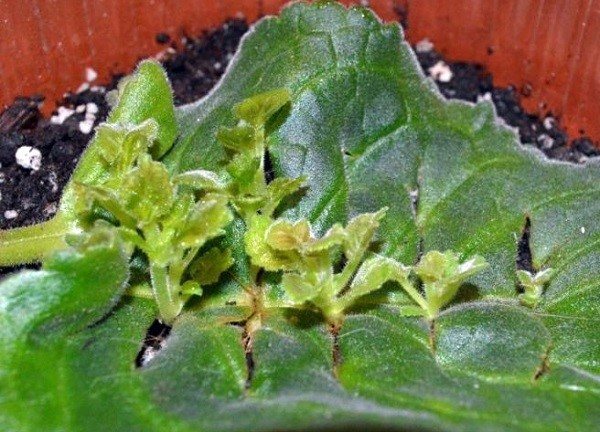
With the onset of autumn, when the gloxinia has faded, you can get a young plant using a simple method of leaf propagation. The leaf of the flower is powerful, fleshy, from it one, two or several plants may come out... The most common and easiest way is to reproduce at home using a leaf.
You need to take a sharp knife and cut off the leaf along with the medium-sized stalk. Place it in standing water and wait until the leaf sprouts. You can plant it directly in a pot with a fertile mixture. The stalk must be released completely into the ground, and the leaf must be left on the surface.
Next, you need to pour water at room temperature and cover with a bag or glass bottle. After 1.5-2 months, young shoots should appear on the leaf, it is necessary to remove the bag from the leaf.
To multiply in two parts of the sheet, you should cut it into 2 parts along the vein line. At the bottom of the sheet, leave a 2 cm stalk and plant in pots prepared with the ground. In order for the parts of the leaf to take root better, you should cover them with a glass.
Reproduction of gloxinia by dividing the leaf into 2 parts
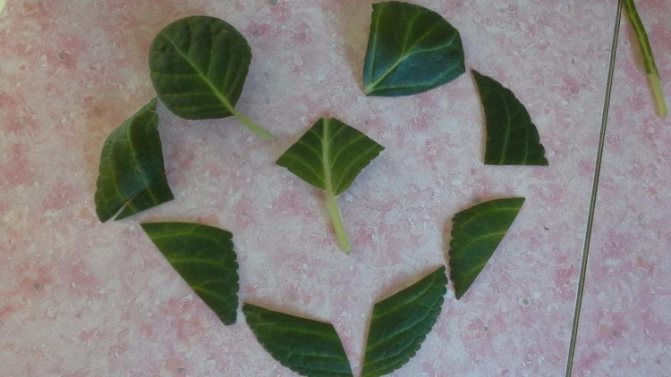
You can also propagate gloxinia dividing the sheet into 15 parts... To do this, choose the strongest and healthiest leaf, cut it into pieces along the lines of the veins with a sharp knife. The central vein is removed. The parts are planted in the prepared soil mixture:
Seeds
Seed propagation is much more difficult and troublesome, but stronger seedlings can be grown in this way. The seeds can be bought at the store, or you can collect them yourself from the plant. Sowing consists of the following stages:
- Prepare boxes with fertile soil.
- It's better to start sowing in winter late February, early January.
- Small seeds scatter over the surface, can be mixed with sand without covering with earth.
- Watering is carried out with a spray bottle.
- Cover boxes with a film.
- Place boxes in warm and well-lit place with a temperature of 25 degrees.
- Spray as the soil dries.
- After a month, the first shoots appear.
- After the appearance of 2 leaves, seedlings should be seated in separate pots.
- Seedlings are gaining color after 9 months, their flowers need to be torn offso that the flower gains strength and gets stronger.
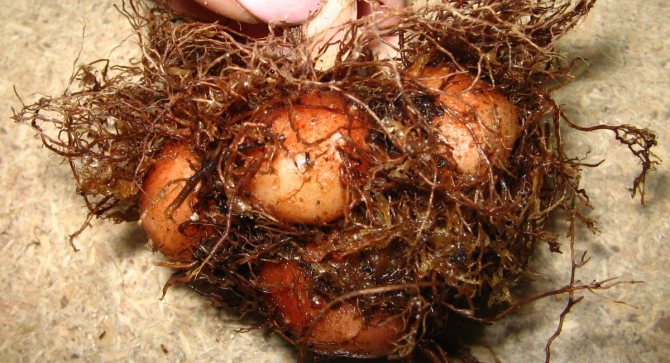
Propagate gloxinia by dividing the tuber
There is a method of reproduction by dividing the tuber.
How to properly propagate by dividing the tuber:
- Inspect the tuber so that there are no rotten areas on it, if any, you need remove them with a knife.
- Shared should be largest tuberto be 7-8 cm in diameter.
- Using a sharp knife, divide into parts so that each has a sprout.
- Dry the strips in the fresh air, and the edges of the slices grease with brilliant green, then cover with garden pitch to avoid decay.
- Plant the cuttings in prepared pots filled with soil.
- Water moderately, otherwise the tuber may rot.
- Watering is best done through the pallet.
- Transplant after the root system has grown and will fill the entire pot.
- Instead of pots, disposable cups are suitable, through them you can see when the roots appear.
Division of gloxinia tuber
Peduncle
Gloxinia reproduces well with peduncles, but you should know that not all varieties can be propagated in this way... Common gloxinia reproduce with peduncles without difficulty. And terry very often rot. Therefore, the reproduction of certain varieties needs to be taken care of.
The peduncle can give roots if placed in a glass of water. It should not be immediately planted in the ground, you need to wait until the roots are about 2 cm.Otherwise, it may die. You should pick up loose and fertile soil, deepen the seedling into it by 0.5 cm.
From above, the peduncle must be covered with a film or a plastic bottle. As the plant grows, the dry peduncle should not be removed, it will dry up and fall off by itself. In this case, there is a high probability of a positive result.
By the handle of a leaf
Gloxinia can be propagated by leaf cuttings:
- root the leaf in water
- planted directly into the soil
Consider the first method, when the gloxinia leaf is rooted in water. To do this, we take a sharp knife, cut off a leaf with a 2 cm spine.If a large leaf can be divided into 2 pieces, cutting along the vein line. Put it in a glass of clean boiled water. Pour water about 1.5-2 cm in height.
To prevent the sheet from wobbling in the cup, you can prop it up with pieces of styrofoam without damaging it.
Next, the glass is covered with foil. The place needs to be chosen warm and well-lit. After two days, the film should be removed to air the sheet. After 2-3 weeks, roots should form on the spine.
After reaching the roots of 1 cm, they are transplanted into a separate pot with soil. Drainage must be done at the bottom of the pot, and the soil must be loose and soft so that air and excess moisture can pass through it.
Next, we also cover it with a film or plastic bag. We air it 2 times a week. Watering is carried out through the pallet, as the soil dries. Babies begin to appear after 3 months, and the leaf itself dries up.
Gloxinia in our house
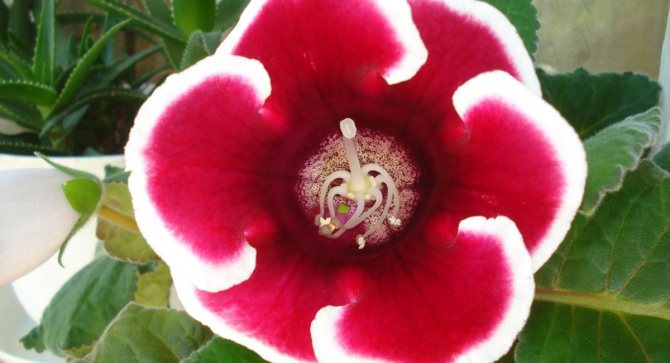
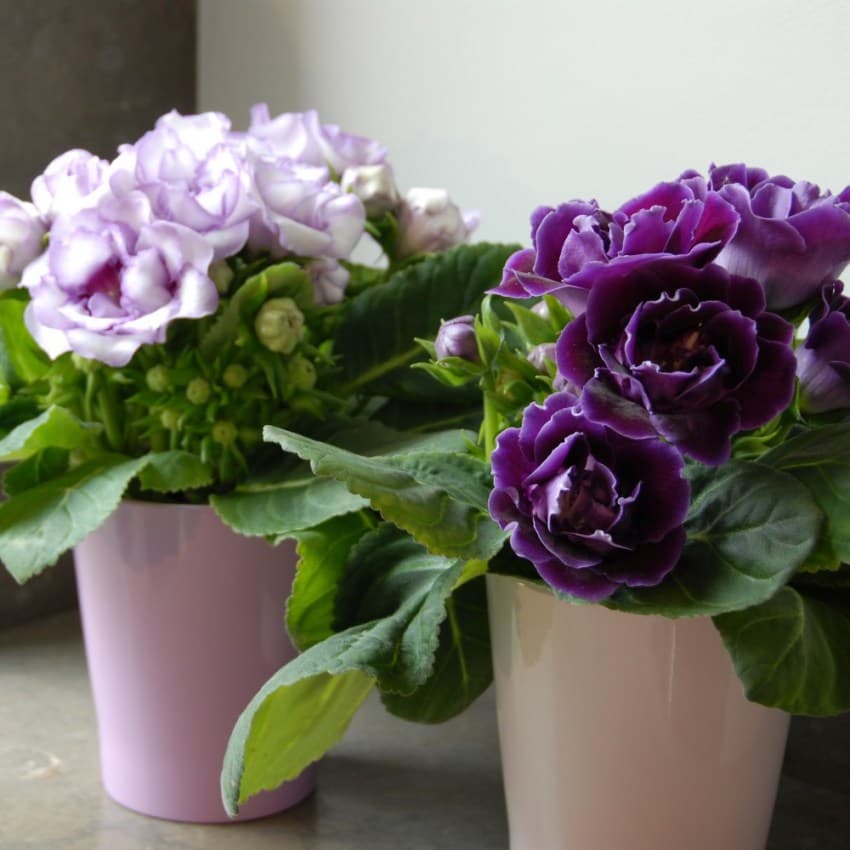
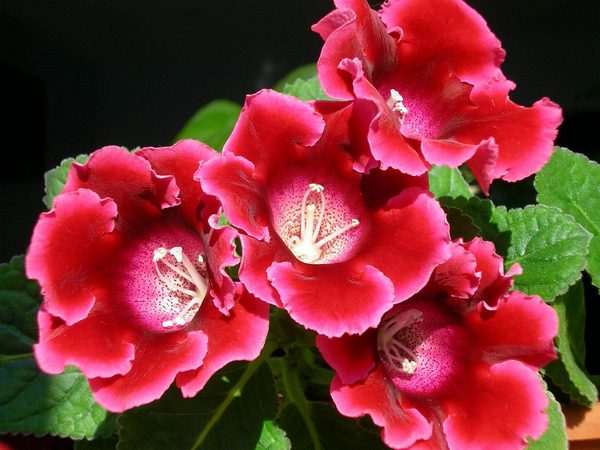
Gloxinia can be considered an unpretentious plant. It is a tuberous plant of the Gesneriaceae family. She has soft pubescent leaves, a shortened stem and velvety funnel-shaped flowers, color of flowers from white to almost black, with or without border, speckled or monochromatic.
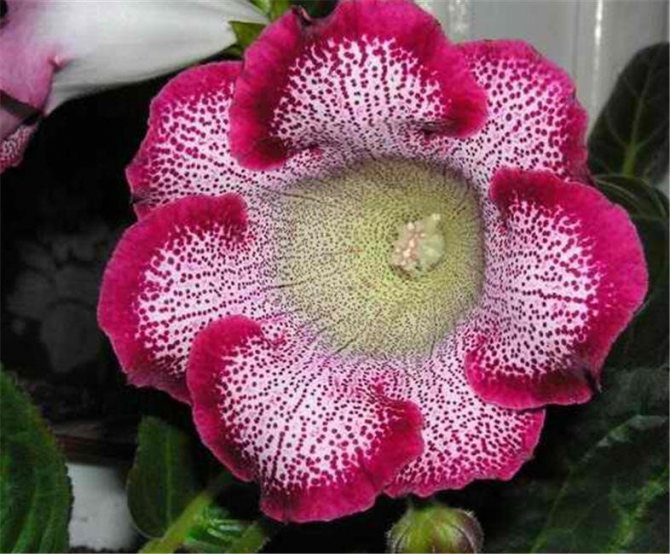
Gloxinia flowers can be solid or speckled
Gloxinia loves bright diffused light, but in direct sunlight it can burn the leaves, so we put it on the table near the window or on the east or west windowsill. Another good option for gloxinia is backlighting with artificial light - in this case, the plant develops well and will definitely not get burned. With a sufficient amount of light, the leaves of gloxinia are dark green in color, arranged horizontally.
But in summer, with a daylight length of 14 hours or more, an excess of light is also possible, then the leaves of the flower turn yellow and sink down, bending towards the ground, and the peduncles are shortened.
For growing gloxinia, the optimal temperature is considered to be 20 degrees Celsius, and the flower itself shows whether it is hot or cold. When overheated, it raises the leaves up to reduce the evaporation of moisture from the leaves, and when it gets cold or lack of watering, the leaves go down.
It is necessary to water gloxinia with warm water, after the top layer of the soil has dried, from above or from a pallet, but without getting on the leaves and flowers. For the same reason, gloxinia is not sprayed, it feels good in the dry air of the apartment.
Gloxinia blooms from March to October, sheds its leaves in autumn, watering is stopped and the tuber is placed on "rest" until February in a dry room with a temperature of about 10 degrees.