Autumn care: how to keep gloxinia until spring
In November or December, when the plant stops blooming, you need to stop watering and move it to a dry and dark place.
In the place where the flower will be stored, there must be good ventilation and the temperature regime of the air should be from 12 to 14 degrees.
After the death of the aboveground part, it must be removed, leaving a small barrel one centimeter in size. The flower has a dormant period.
Before sending a flower for a dormant period, its tubers must be cleaned of the ground, rinsed thoroughly in cold running water and dried. If it is poorly dried, the decay process will be inevitable..
The prepared composition must be placed in a regular plastic bag and the tuber should be placed in it. It is necessary to store the container with the tuber in a cool and dark place.
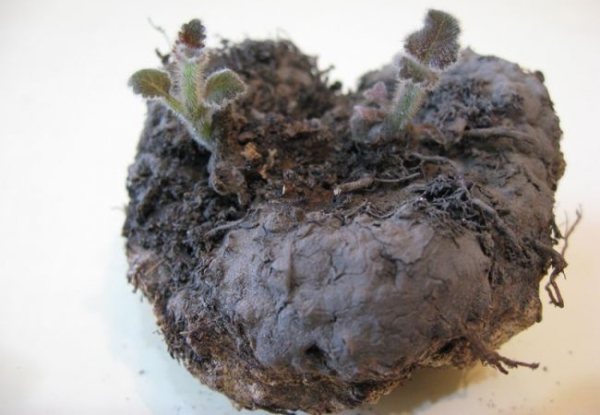
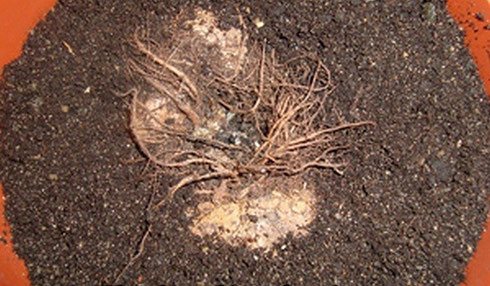
At the end of autumn, the tuber is dug up, washed and dried.
Description
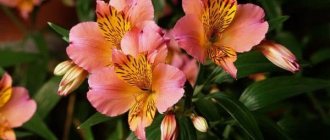
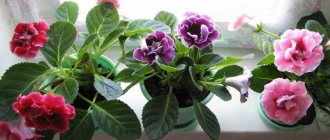
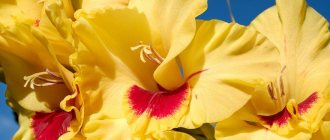
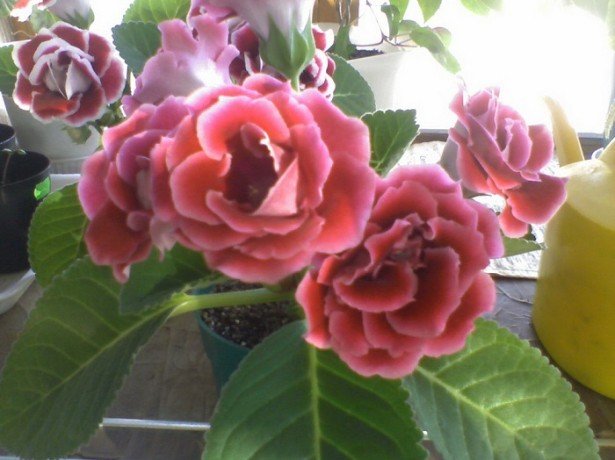
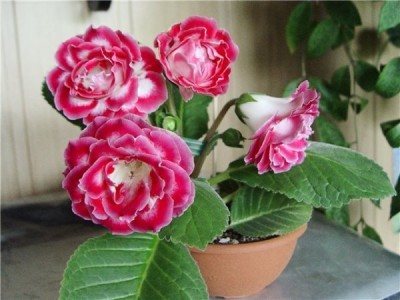
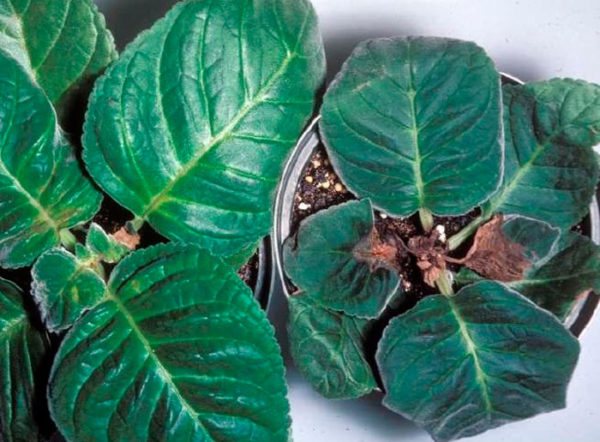
Gloxinia is a perennial herbaceous stemless or short-stemmed plant with fleshy shoots up to 25 centimeters in height. The leaves are large, dark green in color, velvety to the touch, externally visible on them slight pubescence, because of this they seem dull and dull.
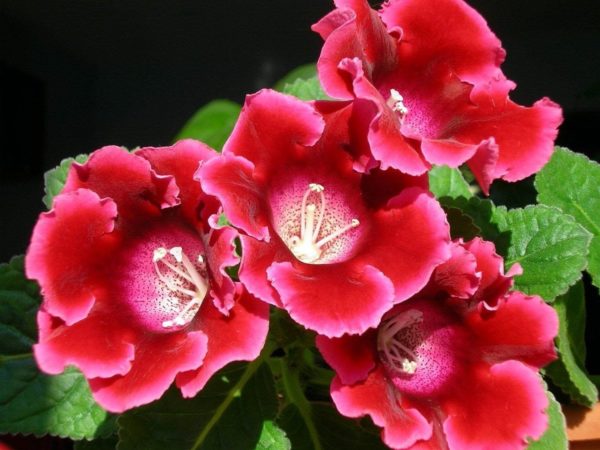
Leaves are regular ovoid and can be up to 20 centimeters long. The flowers are large, the buds are like bells. The flower, like the leaves, is velvety. The edge of the petals is corrugated. Flowers can be up to 8-12 centimeters in diameter. The colors of such bells can be varied, and the flowers are also with a border along the edge of the petals or speckled. Stems are short, diverge into an inflorescence umbrella, each flower on a separate peduncle.
On a note. The flowering period is from March to June, up to 40 flowers can bloom simultaneously on one plant.
Winter preparation and pruning
If the plant is young, then in the first year, gloxinia does not need to be cut off in order for the flower to gain strength.
If the plant has dropped all of its leaves, you need to cut off its stem. so that the height of the remaining small stem above the ground is no more than one centimeter.
Then, for a month, the plant is supplied with a minimum amount of moisture and is not fed. And only after that, the tubers are carefully dug out of the ground and harvested to rest.
Proper care of gloxinia bulbs during hibernation, then they can be saved until the next season. After proper rest, the plant will begin to give new shoots and roots.
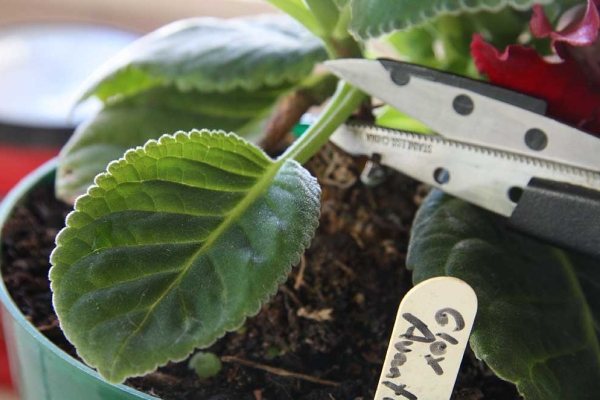
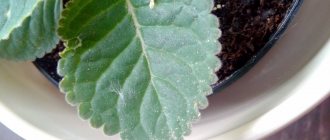
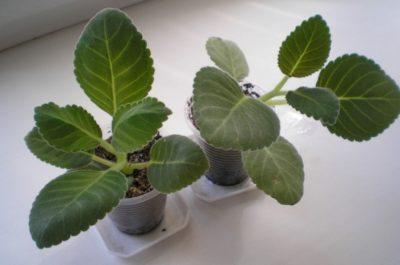
Before wintering, cut the leaves and stem up to 1 cm tall
Useful materials
Below is a list of articles that may be useful to you:
If you find an error, please select a piece of text and press Ctrl + Enter.
This beauty from the world of flowers requires a special attitude towards herself. Previously, not all growers knew that the inhabitant of the tropics, gloxinia, sheds leaves for the winter and waits out a period of dormancy in the form of a tuber, which is why this flower sometimes turned out to be thrown away. Now everything is different. We know that winter peace is needed, but what is the right way to provide it?
How to wake up a plant
If the tubers of the flower are healthy, then they will wake up on their own.... But if for some reason this does not happen and the flower continues to rest, then you can wake up the sleeping plant as follows:
- Prepare a plastic bag.
- At the bottom of the bag, place two tablespoons of soil, which is based on peat.
- Moisten the soil a little with cold water.
- Remove the tuber, rinse it well with running cold water and carefully check it for rot. If everything is fine, then it needs to be dried and placed in a plastic bag.
- Tie the bag well and place it in a place where it is light and warm, under the lamp.
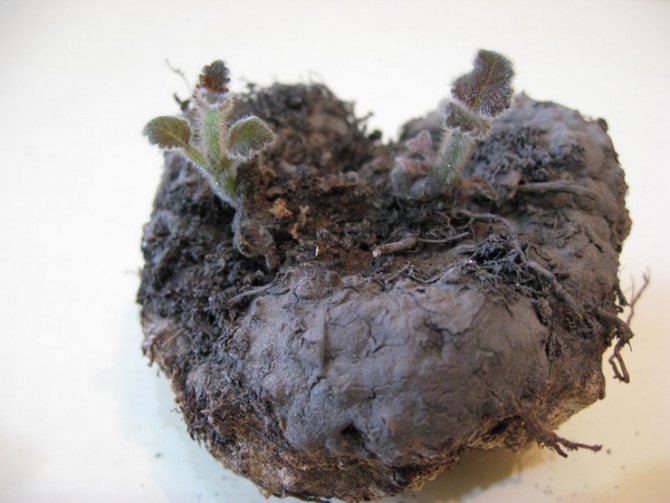
The brighter the light that hits the gloxinia bulb, the more new and young shoots will form on it.
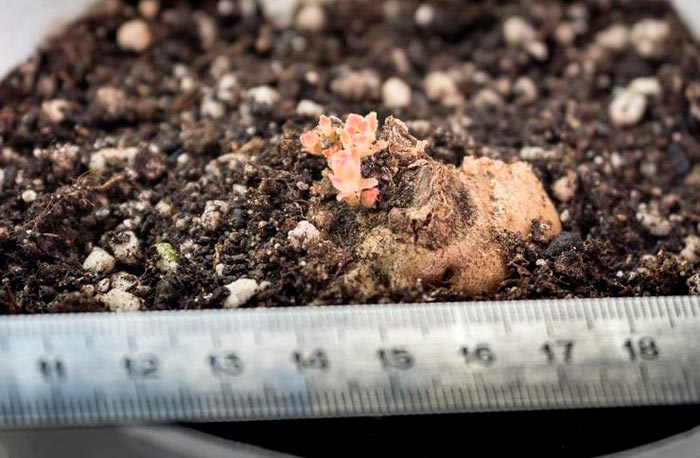
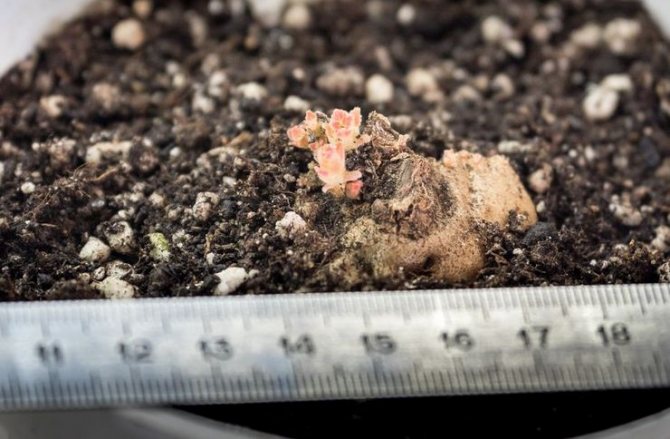
To wake up the flower, moisten the tuber with water, place in a bag and place under the lamp
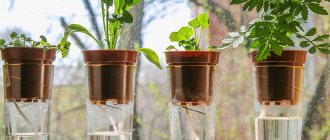
How to store gloxinia without soil
In the photo gloxinia
Sinningia is native to the mountain forests of South America. Only not from the evergreen selva, but from the upper reaches of the Amazon, where the rainy summer months are replaced by arid winter relative coolness. Why the physiology of the Gesneriaceae requires a rest period. Otherwise, you can not only weaken the plant, not allowing it to bloom next spring, but also completely destroy it.
Wintering conditions and methods
There are two methods for storing tubers during the dormant period:
- Storage without soil, by removing it from the pot.
- Storage and wintering with soil.
Important conditions for storing tuber in winter are:
- Lack of bright and sunlight.
- Temperature range - from 3 to 15 degrees.
- Air humidity not drier 60% and not more than 90%.
How to store a tuber without digging out
In the fall, you need to stop watering... After all the foliage has fallen off, you need to place the pot in a cool place away from the radiator or heating appliances.
Sometimes it is necessary to moisten the topsoil with water. The main thing, do not overmoisten or overdry the soil.
The tuber that remains in the soil during the dormant period is less susceptible to rotting.
Store the tuber without digging out in a cool, dark place.
How to store the dug tuber
If foliage begins to fade, you need to stop watering and fertilizing. When the leaves are completely shedding, carefully remove the tuber from the soil. Clean it from the ground and rinse it in running water, and then dry it well.
It must be stored in a plastic bag with the addition of river sand and sawdust. Sand and sawdust should be slightly damp.
Sometimes you need to check the onions for rot... If rot is present, cut it off with a knife or razor. No dark spots should remain in the tuber, otherwise it can lead to a relapse.
The cut must be lubricated with ash or charcoal.... The tuber of the plant must lie down for a day in the fresh air for the cut to dry out.
Storage of gloxinia tubers in winter:
Features of the
The plant is thermophilic and grows well when the air humidity is at least 50%. This is a tuberous type belonging to the Gesneriaceae. The second name is synningia. It came to us from the tropics. Gloxinia lived in the mountainous regions of the Amazon River, in its upper part. There, periods of heavy rains turn into winter drought with a decrease in temperature, and the flower is used to hiding and waiting until the showers feeding the soil come again. Therefore, gloxinia refers to flowers that require a dormant period.
Interestingly, in the past, amateur flower growers often believed that by dropping leaves and withering, gloxinia so passed away and was simply thrown away. It is necessary to take care of it in resonance with its biorhythms, otherwise the plant will be depleted, it will waste its life potential in an irregular manner, it will not have time to gain enough strength for the upcoming flowering and may even die.
At home, it grows well in the kitchen and on the insulated loggia.because the humidity is higher there. Reproduction of the plant is carried out by cuttings, leafy and from the tops, as well as seeds and tubers (read about how to grow gloxinia from a leaf here).
On a note. Gloxinia itself "knows" when it needs to rest, at this time the foliage begins to turn yellow.
Usually the plant is prepared for bed from September to October. Little by little, watering is reduced to nothing, and the dried leaves are carefully cut off, and the pots are moved to more shaded places. The flower's dream is quite long, it takes more than one month.
Proper autumn care to preserve gloxinia until spring
Adult indoor gloxinia in winter needs a long rest. If the plant has bloomed at least once and formed tubers, it falls into dormancy. Moreover, the larger the tuber in size, the more successfully it is preserved. Young gloxinia, living only the first year, may not fall asleep for the winter. The tuber of such plants is less than 2 cm in diameter, therefore, without creating the necessary conditions, they dry out and die.
The time of the onset of the rest period
Gloxinia is native to South America. Therefore, in its development, the plant adheres to the seasonality of this region. The rest time, when to remove gloxinia for storage for the winter, usually comes in September or October. Then a drought begins in her homeland.
If this does not happen on time, the flowering periods are shifted. According to the rules, they should be in the spring and summer. To avoid this, care is taken at the beginning of autumn to prepare for winter. With late flowering, they are waiting for its completion, and after that special preparatory measures are carried out.
Preparing for winter
Caring for gloxinia in winter at home is to create a special microclimate to preserve the vitality of the tubers. The plant needs preliminary preparation for winter. In September or October, after the flowering of the plant, the light intensity is lowered. For this, the flower pot is moved to a window facing the north side. At the same time, the temperature is maintained no more than +15 degrees. Potash is added once. Watering is gradually reduced, once every 7 days, moistening the soil with a small portion of water.
When the leaves begin to die off, watering is stopped altogether. During this period, the upper part of the gloxinia still does not need to be cut off so that the nutrients descend from the green mass into the tuber. If this rule is not followed, the vegetation processes will resume. When the green part of the gloxinia completely dies off on its own, it is cut off, leaving a stump 1 cm high.
Priming
For planting gloxinia, the soil is suitable, which is used to grow violets. It is advisable to add a baking powder to the soil - vermiculite, perlite, sphagnum moss. At home, you can prepare your own planting mixture.
For this you need to mix:
- 3 pieces of land from any deciduous tree, except oak;
- 3 parts of peat;
- 2 pieces of sand.
To make the soil as useful as possible, it is worth adding 200 grams of humus for every 5 liters of soil. This maneuver will enable the grower to do without additional gloxinia subcortex for a long time. And also an important stage is the disinfection of the soil, this can be done with the purchased Maxim (1 ampoule for 2 liters of water).
Good drainage plays an important role in the planting of gloxinia. Suitable for this - polystyrene, expanded clay, crushed stone. The higher the pot, the higher the level of drainage, up to 1/3 of the total soil volume.
Storage of tubers
After the completion of the preparatory measures, the tubers of adult gloxinia are removed from the soil for subsequent storage. It is convenient to do this by the transshipment method:
- Transfer the earthen lump from the pot into a large, wide container.
- Use your fingers to gently knead the soil and divide it into several parts.
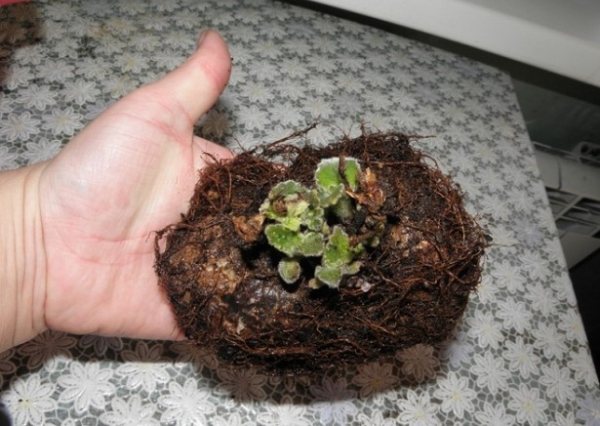
- The tuber is removed and the remaining soil is removed from it.
Methods and conditions for storing tubers
For wintering gloxinia at home, different methods are used.A plastic bag with a mixture of wet sawdust and washed and oven-heated river sand is suitable for storing a developed spine. The mixture is slightly moisturized. Otherwise, the tubers will turn sour from lack of air and a large amount of water.
The prepared mass is poured into the lower part of a dense bag. Then they put the prepared tuber into it and cover it with the remains so that it is completely hidden from view. After that, the package is removed to a place suitable for wintering.
A room for the successful conservation of tubers in winter must meet the following requirements:
- lack of intense lighting;
- the air temperature is not lower than +3 degrees and not higher than +15 degrees;
- moisture content from 60 to 90%.
These conditions are closest to natural conditions under which gloxinia winters in its homeland. The easiest way to create the necessary microclimate is to put the bags of bulbs in the lower drawer of the refrigerator for vegetables. This option to store gloxinia is suitable if there are few plants.
Another suitable option is to place bags of tubers on a glazed, but not heated loggia or balcony. In this case, the air should not warm up above +20 degrees. Otherwise, the tubers will come out of the resting stage ahead of time.
If the house has a cellar with a significant depth, where the temperature is maintained at +5 degrees in winter, the gloxinia roots are placed in it. Ideally, in such a room there is no fungus or mold on the walls and constant humidity is maintained. In such conditions, there is no need to additionally moisten the soil in the package. He will always be in optimal condition.
If there is no place for a refrigerator, a suitable balcony or cellar, bags with tubers are placed under the bath. In this case, the conditions for humidity and illumination are met, only the temperature remains high.
Periodically, the tubers are inspected during storage so as not to miss the formation of rot. If traces of damage by putrefactive processes appear, the damaged areas are cut to a normal tuber and the cuts are sprinkled with ash or crushed activated carbon.
Storage in soil
Another option is to take the pots out to an unheated glazed loggia or move them to the cellar. Any room is suitable where the temperature will be significantly lower than that created during the growing season.
The topsoil is sometimes moistened with water. The soil should not be watered too much, but the soil should not be allowed to dry completely. In this way, it is good to store tubers in the bathroom. For additional cooling, it is occasionally recommended to spread pieces of ice over the soil surface.
Advantages and disadvantages of storage methods
The proposed methods for maintaining the viability of tubers are used in accordance with the age and condition of the plant. They have their pros and cons:
- young gloxinia is left in the ground for the winter, so it is more likely to prevent the tuber from drying out;
- if there is no suitable place for placing pots or there are a lot of flowers, then the outside of the soil method is more suitable;
- when placing tubers in bags, the risk of rot formation increases, so they are often checked;
- It is most convenient to keep bags with gloxinia in the refrigerator in winter;
- if there is no suitable room or a large refrigerator, it is optimal to store the roots in the bathroom;
- Gloxinia bought in the fall can be stored in a soilless way with mandatory preliminary disinfection.
Storage in the ground
Gloxinia care in winter is greatly simplified if we leave the plant intact. We also stop watering in the fall. We are waiting for the complete fall of the foliage. Then we put the pot with the wintering nodule closer to the coolness. For example, if you have a cold balcony, then keep the pot close to its door, away from the battery - this will provide the required wintering temperature.
You can also take the wintering pots to the cellar, put them on the balcony, if you have it insulated. It is important that gloxinia in pots in winter experience temperatures significantly lower than those + 30 ° C that are sometimes observed in apartments.
It is also sometimes required to wet the top layer with water. Do not overmoisten, but also do not overdry the soil. By the way, potted storage is more advisable in the bathroom. Place ice cubes on top of the soil to create a cooler temperature for the tuber. This will lower the temperature of the substrate surrounding the tuber to the most acceptable level.
A tuber that remains to winter in the ground is much less exposed to putrefactive processes.
Winter care for young gloxinia
For young plants, the period of winter dormancy is different. In flowers of the first year of life, the tuber is formed very small. Therefore, without additional moisture in winter, it will die. Such specimens are not immersed in hibernation. Since the daylight hours at this time of the year are short, additional lighting is arranged for the plants, extending it to 12 hours.
It is important to keep the air temperature at an optimal level. If the room is hot, then the plant will develop the aerial part and stretch the stem instead of increasing the mass of the roots. Therefore, the temperature should be maintained at +20 degrees. The flower is rarely watered, so as not to provoke rotting of the tubers.
For gloxinias, which have already managed to bloom once, a special approach is required. They have already managed to form a medium-sized tuber. Therefore, conditions are created for finding the flower in a half-asleep state. To do this, the pots are placed on the north side and sometimes watered with a little water. When the daylight hours lengthen, the rested gloxinia will begin to grow again.

Gloxinia for the winter
For this, several methods are used. At the first, the tubers are left in the pot in which the plant was grown. It is recommended to cover the top of the pot with a pallet, put the pot in a plastic bag, wrap the edges and put it in a cool place.
When using the following storage method, the tubers are dug up in the fall and placed in a plastic bag with a fastener. According to individual growers, it is necessary to pre-treat with Fitosporin or Fundazol.
Vermiculite is poured inside the package in half with a substrate or sawdust. It is recommended to put a closed bag in a box and place it in the refrigerator during the winter. It is advisable to put a thermometer there to control the temperature (it should not fall below 10 degrees).
For preservation, you can take them out of the pot and place them in peat, sand or sphagnum moss. Monthly, you should slightly moisten the substrate with warm water and maintain the temperature up to 12 degrees.
Autumn garden treatment with urea
Platicodon: planting and care at home
Poinsettia: home care, how to trim?
When the gloxinia is completely dry (its green part), it's time to start sending the tuber for storage.
There are two ways to store nodules in winter:
- Directly in the pot without removing them from the soil. Trim dry leaves and stems with scissors, leaving a small stump. Moisten the ground slightly and cover the flowerpot with a bag, tying it tightly. Once a month, you need to remove the bag to check the soil and, if necessary, moisten the soil again, watering only along the edge of the pot.
- In a bag of peat. Gently remove the tuber, wash it, getting rid of the remnants of the earth. Be sure to let it dry. Pour some peat into the bag and put the tuber on top. Spray a little water and close the bag tightly.
For young plants, the period of winter dormancy is different. In flowers of the first year of life, the tuber is formed very small. Therefore, without additional moisture in winter, it will die. Such specimens are not immersed in hibernation.
It is important to keep the air temperature at an optimal level.If the room is hot, then the plant will develop the aerial part and stretch the stem instead of building up the mass of roots. Therefore, the temperature should be maintained at 20 degrees. The flower is rarely watered, so as not to provoke rotting of the tubers.
For gloxinias, which have already managed to bloom once, a special approach is required. They have already managed to form a medium-sized tuber. Therefore, conditions are created for finding the flower in a half-asleep state.
Gloxinia is a visitor from South America who has already managed to acclimatize well in our latitudes. In fact, those gloxinias that you can see in flower growers are the result of the work of breeders. All varieties of this flower come from sinningia speciosa (found in the wild).
This flower is thermophilic, because the average annual temperature in its native latitudes is approximately 21 degrees Celsius. Gloxinia loves nutrient-rich soil and it tolerates drought well.
Are you wondering how to prepare gloxinia for winter? Then you can relax, because nature has taken care of almost everything on its own. In this plant, its entire ground part dies off before wintering.
- Some experienced growers prefer to dig up tubers for the winter. The optimum temperature for the best preservation of tubers is 10 degrees. For these purposes, many put tubers in the vegetable compartment of the refrigerator. But this storage method will be relevant if your refrigerator is maintained at a temperature not lower than the recommended level.
- When using the following method, the tubers do not need to be dug out at all, they are simply stored in pots. The soil is used the same in which the flower grew in the warm season. But, again, one should not forget about the recommended temperature regime. Gloxinia transplanted into pots for the winter will be best kept at a temperature of 10 degrees.
To store the tubers of this plant, use a cool place with sufficient moisture in the air. As you can see, taking care of gloxinia in winter is not at all difficult, the main thing is to know some subtleties. In the next section, experienced florists will share with you tips.
Useful Tips
- After the onset of cold weather, the number of watering the plant should be reduced to one or two per week, and no more.
- The plant should be removed from the windowsill after the leaves begin to dry out and darken.
- After the top of the gloxinia dies, it should be cut off, leaving a small process on top, no more than two centimeters long.
- Be sure to make sure the leaves are not green before pruning, otherwise the plant may resume its vegetative phase.
- The bulbs are dug out no earlier than December, guided by the drying out of the upper shoot (it must be completely dry).
- Gloxinia in the form of bulbs tolerates storage better in winter, with the exception of young plants, in which they winter for the first time. They are left for the winter in a warm place, without removing the dead leaves. The thing is that young bulbs are not able to endure wintering without soil, and, most likely, they will dry out and die.
The main thing to remember when cultivating gloxinia is that she is a guest from warm countries. Therefore, the main thing is the air temperature, it should vary within 25 degrees. The air in the room must be always humid.
Do not neglect mineral fertilizers, which should be applied to wet soil twice a month. Use these recommendations, and an unusual plant will decorate your site for many years!
Also, recommendations for the reproduction of gloxinia will be useful to you.
At this time of the year, it is usually cold in the apartment, because gloxinia fall asleep perfectly.
Forcibly putting gloxinia to bed is when a person cuts off the stem and leaves, and not the plant itself dries them.
Before sending the tubers to sleep, it is advisable to reduce watering and fertilizing with fertilizer. By the middle of September, some gloxinia themselves drink less water.
I cut off the stems of gloxinia and put the pots with tubers in a dark place.
STORAGE METHODS FOR GLOXINIUM CLUBS DURING REST PERIOD
Photo lesson "Storage of gloxinia tubers during the dormant period" can be found on the page.
If the plant is young, then in the first year, gloxinia does not need to be cut off in order for the flower to gain strength.
If the plant has dropped all of its leaves, you need to cut its stem so that the height of the remaining small stem above the ground is no more than one centimeter.
Then, for a month, the plant is supplied with a minimum amount of moisture and is not fed. And only after that, the tubers are carefully dug out of the ground and harvested to rest.
If the gloxinia bulbs are properly cared for during the hibernation period, they can survive until the next season. After proper rest, the plant will begin to give new shoots and roots.
Before wintering, cut the leaves and stem up to 1 cm tall
Gloxinia is a house plant that needs a dormant period after flowering in order to regain strength for subsequent flowering.
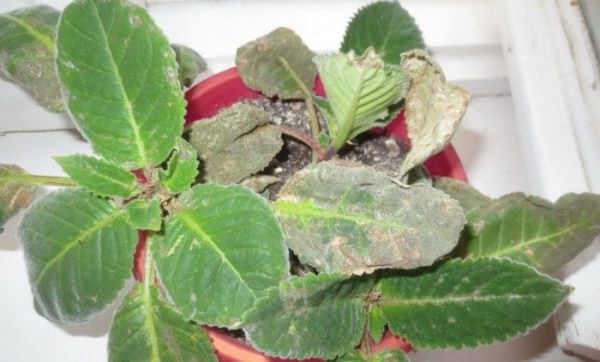
If gloxinia begins to turn yellow, don't worry, as this simply indicates that a state of rest is coming. In this case, the flower sheds foliage, and the stems and even roots dry out.
If you properly care for the plant before the dormant period and during dormancy, then after wintering, gloxinia will again please with good flowering and its beauty.
Before wintering, the leaves of the flower turn yellow, dry, fall off
When the flower sheds all the foliage, you need to cut the trunk so that its height remains within one to two centimeters.
Then, within a month, you need to continue caring for the flower, but gradually reduce watering and not feed with fertilizers. Only after that you need to carefully dig the roots out of the ground.
If you do not remove the gloxinia tuber from the pot, then during the rest period, watering should be done once or twice a month. If watering is plentiful, the roots will rot and the plant may die.
Sometimes it happens that during the dormant period a small sprout appears on the onion due to the insufficiently cool air temperature. Such a sprout should be removed, as it will begin to grow and stretch.
If you properly prepare your plant for wintering, follow all the recommendations and tips, carefully look after the flower during dormancy, then in the spring gloxinia will thank you for your care with magnificent flowering.
We suggest that you familiarize yourself with: How and why to water beets with salt
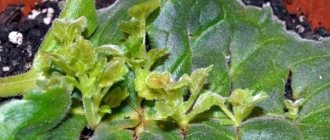
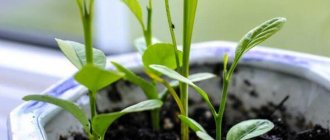
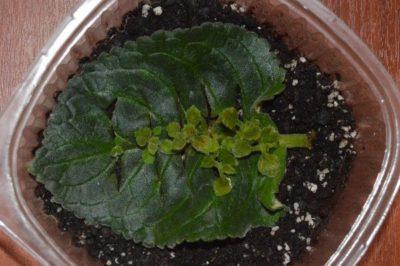
Gloxinia awakening
With the end of winter, young shoots hatch on the tubers. This indicates that the plant is waking up from sleep. Then fresh soil is prepared, watered a little and tubers are planted in it. They do not need to be deeply buried; it is better to leave the top on the surface. Watering begins 7 days after planting. The plant is not heavily flooded so as not to provoke fungal diseases.
In the initial growing season, weak shoots are removed, leaving only a few of the strongest ones. This is necessary for a better formation of the tuber. How beautifully and luxuriantly the gloxinia blooms depends on its strength.
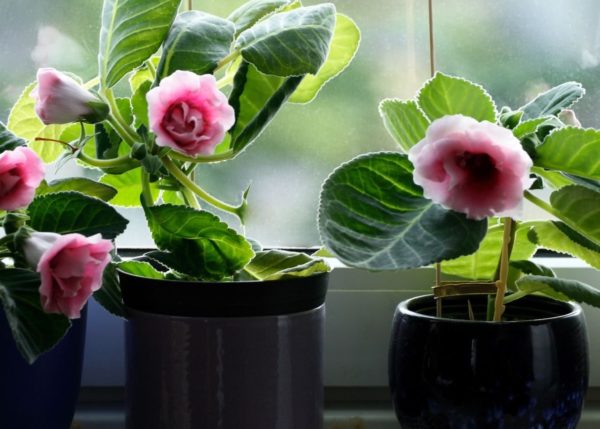
Awakening

The rest period lasts four to five months. By the end of January, you can expect awakening in the form of the first shoots. When this happens, you should return the plant to the pot with fresh soil and put it in the brightest place (we wrote about the size of the pot for the healthy development of gloxinia). They deepen quite a bit. The sprout should rise slightly above the layer of earth, or be on a par with it. In the first seven days, watering is not done, then they start with moderate doses of moisture, gradually bringing them to normal.
Growth stimulation is not done until February, so that the tuber does not waste strength, because the more it is, the more abundant the flowering will be. Excess shoots are removed, leaving three to four pieces when they reach five centimeters in length.
You can use them for breeding, rooting in a jar, like a small greenhouse, periodically hardening and airing.
Attention! If it turned out that the tuber at the end of hibernation was struck by rot, then you need to disinfect it using the above method.
Can also be placed in root for nourishment.
Possible problems
If the tubers were stored in unsuitable conditions, they wake up early. There are several solutions to solve this problem:
- If very small sprouts appear on the tuber, then they are left and the amount and amount of moisture is reduced.
- Large shoots are cut, and the root is returned to the storage location. In the spring, it is transplanted into the prepared soil.
- The tuber is immediately planted in a container and illuminated with fluorescent lamps. Then the plant grows weak and very thinned. At the end of winter, the top of such a flower is cut off and rooted in another pot. After a short time, gloxinia gives young shoots.
- Keep awake tubers in cooler conditions to slow down development. At the same time, they create high-quality natural lighting.
When a flower does not awaken at the right time, its vitality is restored as follows:
- 2-3 tbsp are placed at the bottom of the plastic bag. l. light soil, moistened with water.
- Place the onion on the ground and seal the bag.
- The bag is placed in a well-lit place so that it has a temperature from +24 to +28 degrees.
- The bulb is ventilated every 3 days.
After 15 days, the tuber sprouts. Their number depends on the quality of the lighting. The better it is, the more sprouts are formed. The awakened plant is transplanted into a pot, leaving 2 shoots on the tuber. Unnecessary ones are cut off and used as a means for propagation.
While in the greenhouse, the tuber can turn green. This is normal, after planting in the ground, it will become a normal shade. Sometimes, when you wake up, the roots appear first, and not the green mass. Then it is also transplanted into a pot, sprouts appear after a few days.
When is it needed?
Gloxinia transplant is required in several cases:
after dormancy, the plant woke up and a small sprout appeared, but leaves did not form;- when buying small sprouts in an unsuitable container for the life of the plant;
- when buying tubers that have not yet been planted in the soil;
- in emergency situations, when the plant is susceptible to pests (spider mites, mealybugs) living in the soil - in this case, you need to remove the tubers from the contaminated soil and completely clean it from its residues, disinfect the tubers by soaking it in a solution of potassium permanganate or means - Epin and Zircon , remove the damaged parts of the tuber with a knife and dry with wood ash;
- in cases of the development of fungal diseases of the plant.
Wintering without rest
When gloxinia does not fall into a state of rest, it loses its attractiveness, stretches strongly. Lack of rest leads to the fact that few flowers appear. To avoid this, the plant is sent to rest forcibly.
To do this, in October, cut off the upper part of the flower, without waiting for it to fade on its own. The containers are rearranged in a darkened, cold room.
When the flowering of such a plant ends, the upper part is cut off, leaving a couple of lower leaves. Soon, new leaves grow from the sinuses. Caring for such gloxinia continues in the usual way.
How to care for in winter?
In winter, plants that have not gone to rest require care. They are watered and, if possible, the daylight hours are lengthened using fluorescent lamps.
Learn more about the features of gloxinia care here.
What to do to make her wake up?
Tubers stored during the dormant period should be cleaned of soil residues, rinsed in warm water, and checked for integrity. Existing damaged areas should be powdered with charcoal. Tubers need to be dried. To restore over-dried tubers:
- soak for a day in a solution of Epin or Zircon;
- it is recommended to leave soft tubers wrapped in a wet cloth for 3 days;
- put the tubers in moistened vermiculite.
When examining the stored tubers, you will notice that some have sprouted. Then it must be removed from the bag and planted in a fresh substrate.
What if I woke up early in November?
A pot with gloxinia that wakes up ahead of time can be rearranged on the window, watered and create conditions for further growth (it is advisable to organize additional lighting). You can make it easier: remove the emerging sprouts.
Doesn't retire
In gloxinia, which does not go to rest, the part located above the ground stretches, the plant loses its attractiveness. In the future, it will not be possible to get good flowering, since for the proper development of the tuber, it needs a dormant period of 2 to 4 months.
It is recommended to forcefully send such gloxinia to rest. To do this, in early October, you should cut off the leaves and stem of the plant, without waiting for them to dry out on their own. Place the pots in a cool, dark place.
Having sent such a plant to rest, due to the death of the tuber, you can not wait for it to wake up. After that, how the bloom of such gloxinia will end, it is necessary to trim the stem above the first pair of leaves. Shoots will appear from the sinuses and the plant can be continued with normal care.
Proper care for gloxinia in winter at home
Gloxinia in winter requires minimal care. The main thing is to properly prepare it for wintering. To do this, in the fall, when flowering ends, watering is reduced, gradually reducing it to nothing. It is better to put the pot with the plant in a less illuminated place for this time. This usually happens between September and October. If the plant is late flowering, then it needs to be allowed to bloom, and then watering should be reduced.
In preparation for winter, you can feed the plant with potassium-containing fertilizer once. The stem and wilted leaves are cut off, leaving a small stump. The upper part is removed only after it is completely dry. Otherwise, the nutrients will not have time to transfer from the foliage to the tubers.
How to store gloxinia in winter? You can store tubers in the following ways:
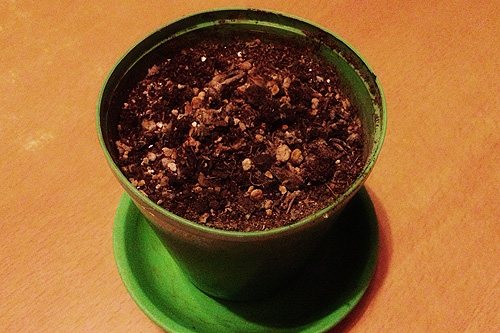
- tubers are not dug out of the flower pot... Cover the pot with a saucer and put it in a cool, dark place. From time to time you need to check the condition of the plant so that it does not dry out. Otherwise, the tubers will completely dry out and nothing will bring them back to life. In the case of gloxinia care at home in winter, it involves careful spraying of the ground. But it is impossible to allow it to become waterlogged, which is fraught with the appearance of premature shoots;
- the tubers are dug out of their native substrate and stored in a plastic bagfilled with sawdust or crushed peat. You can also use the substrate mixed with vermiculite to store gloxinia in winter. If the grower has several gloxinias blooming at different times, then it makes sense to label the packages with labels indicating the date of packaging and the variety.
How to store gloxinia tubers in winter? Packages of tubers are placed in a box or box. It is placed in a dark place where the storage temperature should be between 12 and 15 degrees.
Can this be done during flowering?
During the flowering period of gloxinia, its bush seems to be very voluminous and spreading. It may seem to some inexperienced growers that the plant is cramped in a pot, but this is an erroneous assumption.
Important! In no case should flowering gloxinia be transplanted, manipulation can be carried out after the flowering period.
She will lose all her flowers and buds, and untimely interference in the process of feeding the plant can lead to the complete death of the tubers.
Young gloxinia - winter care
If gloxinia is young, then its storage in winter is special:
- since young gloxinia have a very small tuber, then during wintering without watering it can die from drying out. Therefore, young plants are not hibernated. However, due to the short daylight hours, they need backlighting. It is necessary to arrange so that the flower is illuminated for at least 12 hours per day;
- for young gloxinia in winter, the temperature regime is important. If the room is too hot, then the strength of the plant will be spent on stretching the stem, and not on increasing the mass of the tuber. Therefore, the temperature in the room should not be higher than 20 ° C. You need to water the pot less often than in the summer, avoiding waterlogging, which can lead to rotting of the tuber-roots.
If the plant has already bloomed once and has formed medium-sized tubers. In this case, gloxinia requires special care for itself. For her, conditions are created for her to be half asleep: the pot is rearranged to the north window and occasionally watered. At the end of winter, with lengthening daylight hours, the rested plant is exposed to a sunny place.
How and when does it happen?
Wintering of adult plants
In autumn, the flowering of adult sinningia is no longer so active and gradually stops altogether. In order not to disrupt the natural process, gloxinia cease to feed, and watering is minimized. Enough time should pass before gloxinia can be put into hibernation. You can cut off the drying leaves at the very root, or you can leave arrows 2-3 cm each.Ideal for the winter is a semi-dark zone with temperatures from + 10 ° C to + 13 ° C.
During sleep, gloxinia are very sparsely watered, once or twice a month. Pour water strictly along the edge of the pots so as not to wet the surface of the tuber. When watering, take a little lukewarm water.
The second hibernation option is storing tubers in a sandy-type substrate, or in peat, or in sphagnum moss. The tubers are removed from the pot and dropped into the selected substrate, keeping there until the end of the winter period. Every month, spraying with warm water once is done on the coma in which the tuber is stored.
The temperature is needed the same as in the first option, 10-13 degrees. More experienced flower growers-artisans, knowing the nature and habits of the plant, having studied them subtly, are guided by other indicators using a labile rest time schedule, where in each case the period is calculated individually.
Young plants
Gloxinia in the first year of life, which has not yet entered the flowering period and has not grown a tuber about a couple of centimeters, spends the winter without sleep. But it is necessary to take into account the peculiarities of the normal conditions of her life for this specific period. For twelve to fourteen hours every day, the plant should be provided with full lighting. The temperature in the room where gloxinia is located is required somewhere between + 18-19 degrees. Such conditions in winter will provide gloxinia with healthy development, it will not drag on and will put all its strength into the development and growth of the tuber.
- If the young gloxinia has already tried to bloom and has grown a small tuber, then wintering takes place in a different way. From the autumn time, active watering is transferred to the moderate mode and the pot is removed to a less illuminated place. The plant is half asleep during the winter period (you can find out how to properly water and feed gloxinia at home here).
Reference. When the day becomes longer, sunlight appears in greater quantities, then the rested babies are returned to their original place.Usually the brightest position is chosen, in time this stage falls on the beginning of February.
- Young gloxinia, grown from seeds, are not sent for winter sleep at first until they have grown the required tuber size.
Exit from the resting state of gloxinia
The emergence of young shoots on tubers at the end of February indicates the beginning awakening of gloxinia. Then the tubers are transplanted into a fresh, slightly moistened soil substrate, without deepening. It is better that the tops of the tubers are not covered with earth. Watering begins a week after transplanting. Watering should be moderate, waterlogging threatens fungal root diseases. At the beginning of the growing season, it is advisable to remove a few shoots, leaving a few strong shoots. This is done with the aim of directing the vitality of the plant to the development of tubers, the quality of which will determine the beauty and splendor of flowering. Broken shoots that have reached a length of 5 cm can be used for plant propagation. They are planted in other pots for rooting and covered with transparent plastic caps with ventilation holes. It is convenient to use plastic bottles for making shelters.
Possible growing problems and diseases of gloxinia leaves.
What is a dormant period
In autumn, the flowering of adult gloxinia becomes weaker, after which it stops. This indicates the correct order in which gloxinia enter a state of temporary rest. In order not to interfere with them, the plants are not fed and gradually reduce watering.
It is very important that gloxinia has enough time to prepare for sleep. The gloxinia pot is transferred to a less lit windowsill. These measures lead to the fact that the plant easily passes into a dormant state.
The best wintering option for gloxinia is a cool place with an air temperature of about plus 10 - 13 ° C. It is desirable that it was half dark. Watering is rare (1 - 2 times a month), gentle. It is only needed so that dehydrated tubers do not shrivel in dry soil.
The worst option is complete drying of tubers that cannot be reanimated. When watering (preferably in the edge of the pot), try not to soak the tuber itself. Use water at room temperature or lukewarm temperature.
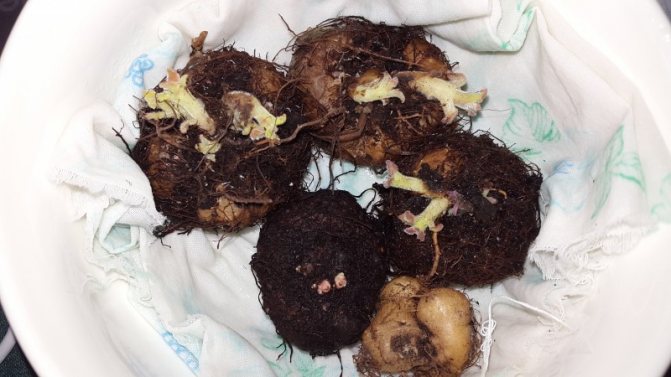
There is another way to preserve gloxinia tubers in the winter. To do this, the "shaggy" tubers are taken out of the pot and placed in sand, peat or sphagnum moss until the end of winter. Once a month, the substrate is sprayed with warm water. Air temperature - plus 10 - 13 ° С.
It is worth saying that some experienced amateur growers use a "rolling" dormant schedule. But these are already author's methods, thanks to which certain goals are solved.
Young plants that have already tried to bloom and have managed to grow small tubers winter differently. In order to prepare them for the necessary rest, in the fall they are watered moderately and the pot with them is rearranged to a less bright place.
For example, on the sill of the north or north-east window. During wintering, gloxinia fall into a half-asleep state. As soon as there is more sunlight and the daylight hours lengthens, the pots with rested young plants are moved to the lightest window sill (for example, the south or southwest window). The time of "moving" is chosen according to the weather. More often it is the end of January - February.
Pot with wintering gloxinia
In winter (in February), shoot growth should not be stimulated so as not to deplete gloxinia. From the moment of growth, extra shoots are boldly removed. During this period, only three to four shoots are enough for gloxinia to gain strength without depleting the tuber. The larger and more complete the tuber, the more magnificent the flowering of the plant will be.
If there is a desire to propagate a specific variety, then the extra shoots are broken out when they grow up to 5 cm in height. They are rooted in any suitable container using a glass jar, plastic bag (frame), or a "glass" from a transparent plastic bottle.
They cover the cuttings from above. I find the top of a plastic bottle to be the best cap option. I make several holes in its lid with a hot nail, which protects from the inevitable condensation.
Flowering (weak) of some young cuttings gloxinia can be expected this year. Many first-year gloxinia (especially those grown from seeds) find themselves without a tuber or with a tiny nodule (up to 2 cm).
In winter, their shoots stretch out, as they do not have enough light. And too warm air promotes growth. This is a serious problem faced by those amateur growers who grow young gloxinia in the dark during the fall and winter.
We offer you to familiarize yourself with: Multi-tiered onions - varieties for growing and storage
When gloxinia does not fall into a state of rest, it loses its attractiveness, stretches strongly. Lack of rest leads to the fact that few flowers appear. To avoid this, the plant is sent to rest forcibly.
To do this, in October, cut off the upper part of the flower, without waiting for it to fade on its own. The containers are rearranged in a darkened, cold room.
Important!
Dutch gloxinia obtained from seeds cannot be forced to rest. Such a flower has not formed tubers, so it dies.
When the flowering of such a plant ends, the upper part is cut off, leaving a couple of lower leaves. Soon, new leaves grow from the sinuses. Caring for such gloxinia continues in the usual way.
author Savelyeva N., author's photo
Gloxinia is a tuberous plant that has a dormant period in winter. Of course, at the end of the growing season, if necessary, you can leave a few gloxinia leaves for propagation.
After the end of the flowering of gloxinia (usually in August, September or October), watering of the plants is reduced. Some gloxinia are reluctant to retire. If gloxinia continues to bloom in November, let it bloom, and then gradually reduce watering. In any case, the aboveground part of gloxinia will soon dry out without watering.
During this period, gloxinia is not fed. The only thing that is practiced: to prepare gloxinia for a dormant period, you can fertilize the plants with potassium fertilizer once. For example, potassium monophosphate.
When, in preparation for winter rest, the leaves of gloxinia wither and turn yellow, watering is stopped altogether.
Important: do not cut off the entire aerial part of gloxinia at once. It is necessary to allow nutrients to gradually pass from the leaves and stem to the tuber. This is necessary for the successful wintering of the tuber and for the further normal development and flowering of the plant.
The already withered aerial part of the gloxinia is cut off, leaving a trunk 1 - 2 cm long.
Further, with the gloxinia tuber, you can do different things. I have tried and appreciated two ways to store tubers in winter.
However, young gloxinia with a small tuber, grown from seeds, do not sleep - otherwise a small tuber may die during the winter.
When not dormant gloxinia are kept in winter, they need additional illumination up to 14 hours a day.
Savelyeva Natalia (Ukraine) https://fialka.biz
I store most of the gloxinia tubers during hibernation in the same pots in which they grew. I don't get the tubers out of the soil. I put pots with gloxinia tubers in cardboard boxes. Until the winter season 2008 - 2009
In winter, the apartment has a high temperature (26 degrees) and very dry air, for this reason, I watered the soil in pots with stored tubers two or three times a month. It is very important to make sure that the soil in the pots does not dry out, because the gloxinia tubers in the dry soil wrinkle and become soft, and this leads to the death of the tubers.
Since autumn-winter 2008-2009, I have been storing gloxinia tubers on an insulated balcony. By fully or incompletely opening the balcony door to the apartment, I regulate the temperature on the balcony so that it is 16 - 18 degrees. With such cool storage conditions for tubers, I water the soil in pots about twice a month.
2. STORING GLOXINIUM CLUBS IN PACKAGES WITH A CLIP OR JUST IN PACKAGES
The best and most reliable way to store gloxinia tubers during dormancy. Try it!
You can successfully store dormant gloxinia tubers in transparent plastic bags with a zipper. Such bags come in different sizes and density of cellophane. Usually sold in kiosks with disposable tableware.
If you cannot get zip bags, you can store the tubers during the dormant period in simple small plastic bags. Tie the bag instead of zip closure.
Put 1 - 2 tablespoons of slightly damp peat soil at the bottom of the bag, place the nodule on it. Close the bag with a clasp. Gloxinia tubers in bags do not need to be watered at all. NOTE!!!
It is advisable to store gloxinia tubers in plastic bags only in a cool (12 - 16 degrees) and dark place, because in a warm room tubers in bags wake up quickly !!! Be sure to put the packages with nodules in a dark place.
3. POTTED GLOXINIUM STUBERS CAN BE PLACED IN A PACKAGE
Gloxinia tubers in pots can be successfully stored in plastic bags. With this storage method, the tuber is in the same soil in which it grew. Place the pot with the tuber in a transparent bag, and tie the bag.
4. STORING GLOXINIUM STUDIES IN THE REFRIGERATOR
Some gloxinia breeders successfully store gloxinia tubers at the very bottom of the refrigerator - in the vegetable storage compartment at a temperature of 11-12 degrees.
Gloxinia tubers are placed in a bag with a fastener. Also in the bag there is peat (sometimes vermiculite is added to peat) or - only vermiculite.
This method of storing gloxinia tubers is good because the tubers themselves do not wake up quickly. You can keep the tubers in the refrigerator for 2 to 3 months. After that, remove from the refrigerator and place the bags with tubers in a warm (room temperature) and bright place so that the tubers wake up.
5. OPTIMUM TEMPERATURE FOR STORING GLOXINIA STUDIES
The optimum temperature for storing gloxinia tubers during the dormant period is 12 - 17 degrees.
Of course, at a temperature of 22 - 26, and higher, the nodules will have a dormant period. It's just that under cooler conditions the nodules do not wake up so quickly, that is, they sleep longer and better. But there are exceptions.
ALL ABOUT CARE OF GLOXINIA DURING REST
If you first have gloxinia at home, then, probably, the question arose: how to care for gloxinia during rest and during active growth. In this article I will write how to prepare a plant for a dormant period. You can read articles on nursing during growth here.
GLOXINIA CARE - FIRST YEARS DURING REST
In the autumn-winter months, the gloxinia tuber begins a dormant period, which usually lasts from three weeks to four months or more. But if you have gloxinia - a first year that has not yet managed to grow a tuber, then we will consider caring for such a plant during the dormant period.
1. Cultivation of first-year gloxinia without a dormant period. If there is no rest period for gloxinia - a first year, then this is normal. Moreover, if such gloxinia has never bloomed yet. It is not worth worrying about the lack of a rest period in first-year gloxinia.
If gloxinia is not provided with a state of hibernation, then it may even die. During this period, flower buds are formed in the flower.
What if the gloxinia tuber does not wake up?
Gloxinia usually sleeps for about 3 months. In some cases, gloxinia sleeps longer (4-5 months) and does not want to wake up, despite artificial lighting, watering and an increase in the temperature of the content. If gloxinia does not wake up, but the tuber is healthy, firm, without visible signs of rot, you can stimulate the awakening of the plant. However, before awakening, it is still necessary to carefully examine the gloxinia tuber. To do this, it is washed with warm water and examined.If there is rot, it is removed (cut out) to healthy tissue, the place of the cut is sprinkled with a fungicide and the cut is allowed to dry out. Drying is arranged within 2 days. During this period, the cut is monitored. If it is dry and the spots of rot no longer appear, then the tuber will surely give healthy shoots in the future.
There are several ways to awaken the gloxinia tuber. All of them have been tested by experts and participants in popular forums. Each of the above methods gave a positive result.
1 way. You need to take a regular, transparent, plastic bag, preferably with a zip-lock fastener, but you can also use the most ordinary one. A little (2-3 tablespoons) of light, peat soil, slightly moistened with water, is placed on its bottom. Next, a gloxinia bulb is placed in a bag, which does not want to wake up. The bag is fastened or tied. It is placed in a well-lit place. If there is a lamp of artificial lighting, then under it. the temperature of the content of the tuber should be within +24. +28 degrees. The package is not opened. It can be ventilated once every 3 days to avoid air stagnation.
The result comes in 2 weeks. In a greenhouse, with good lighting and high temperature, one gloxinia tuber is able to give from 2 to 5 shoots. The brighter the light, the more sprouts. However, there is more than 2 sprout left on one tuber, the flowering of the plant in the current year can not be expected, and therefore "extra" sprouts can be cut and rooted. The tuber itself from the greenhouse is transferred into an ordinary pot with soil. But we must not forget that the gloxinia tuber cannot be completely buried in the ground, otherwise it will rot.
Method 2. A greenhouse is also used here, but this time it is made from a plastic, transparent bottle or glassware. So, the gloxinia tuber is examined for rot. If there is none, then proceed as follows: wet moss or vermiculite is placed on the bottom of an impromptu greenhouse. Tubers are placed on top of the wet material. The greenhouse is covered with glass or a bag and placed in a bright, warm place. The temperature of the content is within +24. +28 degrees.
In the greenhouse, the gloxinia tuber can turn green. Nothing wrong. In the ground, it will acquire its usual color. In such a greenhouse, several sprouts can also wake up at a flower at once. Some of them must be cut and rooted. If the tuber first began to expel the roots, and not the green part, do not worry. He woke up and soon green sprouts will appear. Such a tuber can also be transferred to a pot of soil.
How to seat?
Gloxinia can be propagated and planted in five ways:
Petiolate
- To grow a flower from a leaf, you need to take one leaf from the bottom of the plant in June-July.
- Place the leaf stalk in a container of water so that it is submerged in water by 1.5-2 centimeters.
- Do not change the water, but periodically top up.
- Keep the leaf in water until young roots form on the handle.
- After this formation, plant a young shoot in the ground to a depth of 2-3 centimeters. For better rooting, cover the cutting with a glass jar or plastic bag.
Watch a video about the reproduction of gloxinia by leaf cuttings:
Stem cuttings
Cut off the lateral lower shoot with several leaves in an adult gloxinia. Place it in a container of water until roots form, as is the case with a leaf. After the roots appear, plant the plant and root, by creating a greenhouse effect using glass or a bag.
Sheet
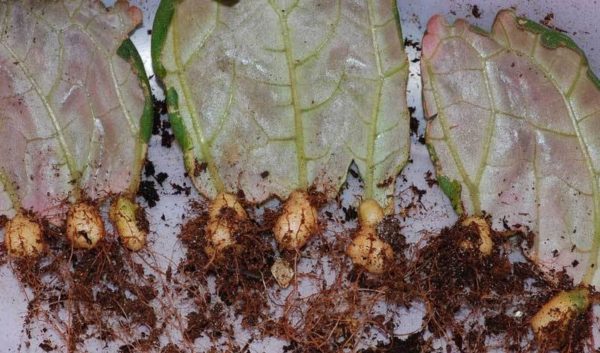
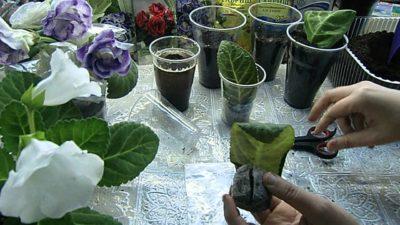
Cut off the sheet at the very base of the outlet.- Cut the leaf plate from the back side across the protruding veins in thickened places.
- Put the sheet on a moistened ground and press the cuts to the soil.
- Create a greenhouse effect with film.
- In the places of the cuts, roots will soon appear, and then small nodules, which then need to be planted according to the standard scheme.
Read more about gloxinia leaf propagation here.
Dividing tubers
- Only large tubers that have two or more processes are subject to division. It is cut with a knife so that there is a sprout on each part.
- Slices should be sprinkled with charcoal and dried for 3-5 days.
- Plant in moist soil, like whole tubers.
Seeds
The seeds of a plant are formed by artificial pollination. On the second day after the blooming of the bud, you need to transfer the pollen to the flower with a small brush. Seeds ripen in boxes within 2 months. Gloxinia seeds are moistened and covered with glass until young shoots form. 2 weeks after germination, the glass is removed and the seedlings are placed in the light.
On a note. Gloxinia can dive after the appearance of a full-fledged leaf on the sprout.
We talked in more detail about how to grow a flower from seeds in this article.
If gloxinia woke up in December-January.
What to do if gloxinia wakes up in December or January? The early awakening of gloxinia indicates the wrong conditions for keeping tubers during the dormant period. It can be high temperature (above +15 degrees) or bright light. But the tuber is already awake and what to do with it in winter.
A number of expert recommendations:
1. If there is no artificial light, and the size of the tuber is more than 3 cm in diameter, you can put it to sleep again. For this, the illumination of the plant and the temperature of the content are reduced.
2. If there is an artificial light, then the tuber is not sent to rest again, but the pot with the plant is placed under the lamp. The required duration of daylight hours for the successful development of a plant is 12-14 hours. The temperature of the content should be within +18. +20 degrees. If the temperature in the room where gloxinia grows in winter is raised to +20 degrees, then its sprouts will begin to stretch.
Even without artificial lighting, gloxinia, which woke up early, can be grown in winter. But the air temperature in the room should not rise above +18 degrees and the plant should be placed on the windowsill. If during the winter months the gloxinia stretches out, then in the spring the stalk can be cut off, leaving a stalk with 2-3 buds on the tuber. The cut stem is rooted. And from the remaining cutting, new shoots will soon appear.
25
Vessel selection
The pot for the successful growth and development of gloxinia should be 4-6 centimeters wider than the planted tuber.
Reference. The height of the pot should maximally accommodate 2-3 centimeters of drainage and a layer of soil in which the tuber will be completely placed and it should not look out.
When you transplant from one pot to another, remember that there must be enough soil between the drainage and the tuber for the growth and development of the plant's root system. The shape of the pot for growing gloxinia does not really matter. It is important to comply with the requirements for its height so that the leaves of the plant do not fall down and do not touch the surface on which the pot is placed. It is better to make the drainage higher than the tender plant will begin to die from unwanted contact with surrounding objects.
How to solve problems with cuttings so that the leaf does not disappear
The petioles may rot or lose turgor.
The reasons:
- The petioles are affected by rot, being planted in the ground or in peat tablets, if they are strongly pressed on them during planting.
- In direct sunlight on the seedlings.
- Lack of lighting.
- Using a cutting tool without prior disinfection.
- Breaking off the sheet instead of neatly cutting.
- Elevated ambient temperature, location near the stove or radiators, on the south windows.
- An old leaf was taken as a cutting.
- The shank was taken in not the most favorable period of the year.
- The leaf for the cutting is taken larger than the optimal size - this can lead to a loss of turgor. Therefore, it is better to divide overly large leaves.
- Excessive deepening.
Obviously, most of the problems are solved by following the simple rules for grafting gloxinia. Consider the problem of getting rid of rot at the preventive stage, since if the cutting is already rotten, then it is unlikely that it will be possible to save the still fragile plant, it is much more effective to do everything anew.
Advice! Before planting, you can treat the cuttings with a solution of "Whiteness" - one part of whiteness with 11 parts of water at room temperature. The leaf is placed in the solution for no more than a minute, and then carefully and thoroughly washed in running water and dried.
Reproduction of gloxinia
In flower shops, you can, if you wish, purchase seeds of various varieties of gloxinia and try to grow a flower from them with your own hands. But you should be prepared for the fact that this event may not give the expected results.
The first step is to buy the seeds of this flower, and experienced growers recommend opting for granular seeds. As a rule, the germination period is written on a pack of seeds from 4 to 6 months, and sometimes 9 or 10 months, but this is only if the sowing is done in autumn or winter.
For seedlings to appear as soon as possible, sowing should be done in March. For crops, you will need a mini-greenhouse, which you can buy in a store or do it yourself: for this, in a deep plastic container with a lid, you need to place peat tablets that need to be soaked.
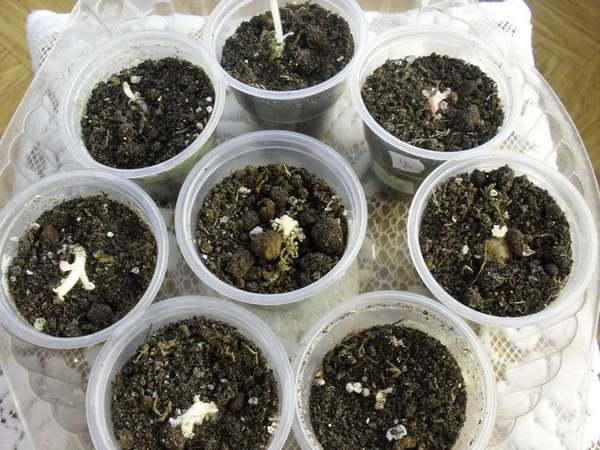
Then granules with seeds are laid out on these tablets; they do not need to be buried in the substrate. To prevent air from stagnating in the greenhouse you built, you need to make several holes in the lid for ventilation.
The mini-greenhouse should be removed in a well-lit and warm (22 to 23 degrees) place. For 10-15 days, the substrate should be very carefully moistened if necessary. After that, all that remains is to wait until the seedlings appear.
After the seedlings appear and grow, they should be planted in individual disposable cups along with peat tablets. And after a while they are planted in permanent pots.
Propagation of gloxinia by leaf cuttings is much more reliable than generative propagation. Therefore, if there is such an opportunity, then it is better to opt for this particular method of reproduction.
Since the leaf plates of this plant are rather large, either the smallest leaf should be found, or the large plate must be divided into parts. The sheet must be cut across, parallel to the transverse veins.
Parts of the leaf plate must be planted in individual pots filled with slightly moistened light soil mixture. They are placed in a small greenhouse or covered with a plastic bag on top. For four weeks, you do not need to air or water the leaf cutting.
After the indicated time, parts of the leaf plate should take root, and they must be gradually taught to live in indoor conditions, for this you need to open the shelter for a while. A greenhouse with rooting leafy cuttings should be placed in a warm and bright place.
There are several ways to propagate this plant. But the most popular at all times among amateur flower growers is the rooting of leaf cuttings.
We suggest that you familiarize yourself: Is it possible to treat ears with boric acid
Reproduction methods
- Seed: has proven itself well in breeding work when breeding new species. Seed propagation of hybrids older than the first generation does not guarantee the preservation of the purity of the variety - the parental traits are split. Small seeds are scattered over the surface of the moistened soil, create greenhouse conditions and germinate in the light. After the appearance of the first pair of true leaves, they are seated in separate containers.
- Leaf cuttings: planting material is taken from the bottom row of leaves.The cut of the cutting is treated with charcoal and placed in water or directly into the ground. Maintain air humidity around the rooted plant. Roots are formed in 2 to 4 weeks.
- Part of the leaf, peduncle, part of the stem: almost all fragments and segments of this plant are able to take root in moist soil. Small nodules are easily formed at the sites of cuts and damage to the leaf plate.
The soil
The soil for growing gloxinia should be loose, light, moisture and breathable, containing organic matter and mineral fertilizers in the right proportions. If you will harvest the soil mixture yourself, take two parts of leafy soil, add one part of river sand and the same amount of peat. But it is better to purchase ready-made land for flowering plants. Soil works well for Violets, Saintpaulias or Begonia. Good drainage is required at the bottom of the pot. This is expanded clay, small pebbles, polystyrene or clean eggshell with a layer of at least 2-3 cm. The roots of gloxinia grow in breadth, pick up shallow but wide containers for planting.
Top dressing
Gloxinia is a flower very demanding on nutrient soil. The rapid growth of its leaves and lush flowering is achieved by additional feeding. For this, special fertilizers are used for decorative flowering plants. It is advisable to feed gloxinia with organic and mineral fertilizers once every two weeks, alternately. It is better to choose the time for fertilizing after the main watering in the morning or evening hours, and it is also possible during the day, if the weather is cloudy, so that the sun does not burn the delicate leaves and flowers of the plant. During the period of active leaf growth, before the buds appear, gloxinia needs more nitrogen fertilizers (but do not overfeed the plant with nitrogen, an excess of nitrogen is even worse than a lack of it). After bud formation and during flowering, only potassium-phosphorus supplements should be used for feeding. Then the flowering will be more abundant and decorative. At the beginning of autumn, you need to feed the plant for the last time this season with superphosphate or potassium monophosphate for the successful wintering of the gloxinia tuber, and at this all feeding is stopped - the plant needs to prepare for the dormant period.
Diseases and pests
Late blight - a fungal disease that appears when water stagnates in the sump, too dense soil, excessive air humidity, as well as at low temperatures during the growing season.
Fusarium - also a fungal disease that appears with excess moisture, lack of water and fertilizers. The leaves wither, curl, acquiring a brown color. It is worth treating the plant with fungicides and transplanting it into fresh soil.
You may be interested in:
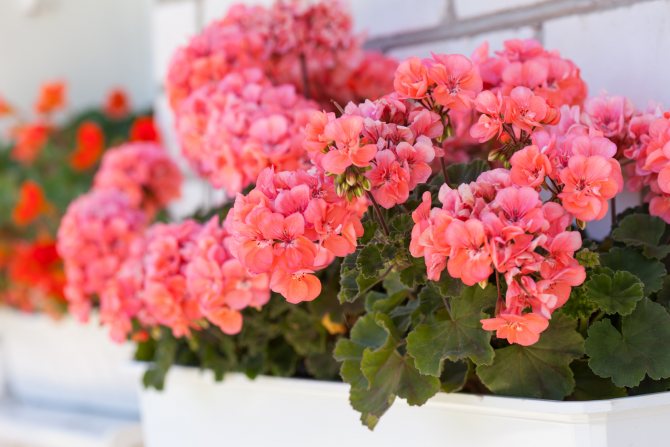
How to care for geraniums in winter? Many women love to grow flowers at home, because it is not only beautiful, but there is something to do in their free time ... Read more ...
Gray rot... Its development can provoke waterlogging of the earth. The stem begins to turn black, and a gray bloom and brown spots appear on the flowers and leaves. It is advisable to remove the affected areas of the tuber, and treat the rest with fungicides and transplant into new soil.
Quite rarely, but it happens that gloxinia is attacked by such pests as:
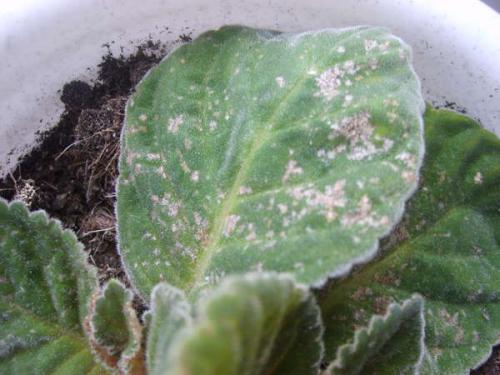
- a spider mite appears on synningia if the room has enough dry air and a lack of moisture. For prevention, increase the humidity in the room, and isolate the infected plant from the rest. Treatment is carried out with acaricides, and the soil is treated with drugs such as Temik or Aldicarb.
- cyclamen tick. If you notice deformed thickened leaves covered with a layer of dust, then this particular pest has visited your plant. For treatment, it is recommended to use acaricides from ticks.
Storing an excavated gloxinia tuber
I still use the second, more reliable way of storing gloxinia tubers.
In autumn I take out the gloxinia tuber from the pot and place it in a plastic bag with a convenient fixing "fastener". Either sawdust or a mixture of vermiculite and substrate in equal proportions can be placed inside the bag as a filler.
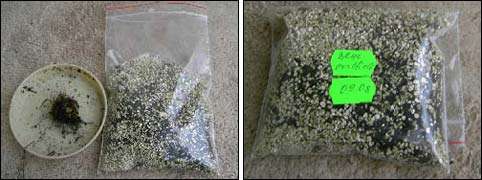
Then the bag is closed, labels with the necessary information are pasted on it. I write on the tags the variety of gloxinia and the date of laying the tuber for wintering. This information will be needed later.
Gloxinia usually "sleeps" for 4-5 months. Gloxinia tubers often have to be resting at different times.
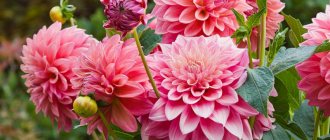
Features of gloxinia
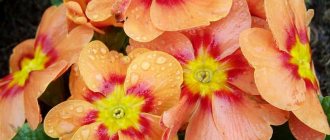
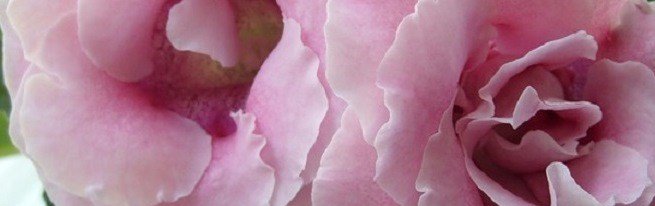
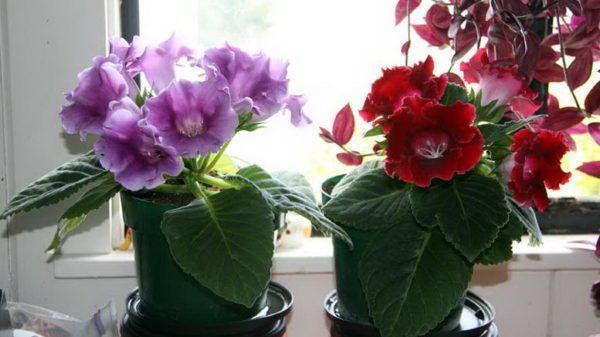
Indoor gloxinia is a tuberous perennial plant. Its shoots are short, and the juicy leaf plates are velvety and have a bright green color. The velvety bell-shaped flowers can be double or simple, they are painted in red, purple, pink and white, and there are also frill, speckled and bicolored.
In diameter, such flowers reach 70 mm, and in length - 50 mm. Gloxinia has a large number of seeds that are very small in size. In natural conditions, there are 25 species of this plant, but breeders mainly work only with beautiful gloxinia and royal gloxinia.
This flowering plant has thickened shoots, the height of which does not exceed 100 mm. On the surface of the dark green plates there is pubescence, on the upper side there are streaks of a silvery color, and on the lower side - pale red.
Broadly oval leaves are arranged oppositely, 4–6 leaves, in length they reach 15–20 centimeters. On long peduncles there are drooping dark purple bell-shaped flowers reaching 70 mm in diameter and 50 mm in length.
This herbaceous plant has wide-oval long-petiolate leaf plates that taper towards the base. Such leaves are colored uniformly green. Flowers, depending on the variety, can have different shapes, they are colored red, blue, purple, white, purple or pink, there are forms with a white border around the edge.
This flower has some features that a florist needs to know about:
- When the flowering is over, the part of the plant located above the ground will die off. It is very important to wait until this process is over by itself.
- Before the plant begins a dormant period, it must be fed and fertilizers are used for this, in which there is no nitrogen, for example, potassium monophosphate.
- A pot for such a flower needs a large enough. So, an adult gloxinia needs to be planted in a pot that reaches at least 15 centimeters in diameter.
- In order for flowering to last throughout the year, for such plants it is necessary to equip a warm shelf or rack, where the bushes will be illuminated for 14 hours a day.
When planting, it is very important not to confuse or plant the tubers "upside down", that is, the part where the roots should be. Especially if you have to transplant gloxinia that has not yet woken up. Usually the upper side, where the sprouts should appear, has a slight depression, and the lower one is always smooth and more rounded.
The tuber is immersed in the ground for about two-thirds, so that the very top remains open. Water carefully so that water does not get on the tuber, and put a transparent plastic bag over the pot. The resulting microsteam is placed in a warm and well-lit place. Once a day, the bag is removed for airing for twenty minutes.
When the first pair of leaves appears, the polyethylene is removed for the day, leaving the gloxinia closed only at night. And after another five days, it can be removed completely. Then they begin to fill up the earth, so that the tubers are covered by at least a centimeter.
Tuberous flower with a pronounced dormant period. In culture, it is simple, but with errors in care, it does not bloom or ages quickly.
When is the best time to carry out the procedure?
When exactly can a house plant be transplanted after flowering? It is best to replant gloxinia in February or March, when the tubers begin to wake up. The kidneys are a signal that they have begun to wake up. If the plant was dormant in its own pot, then the first signal that it needs to be transplanted is the appearance of the top. If the gloxinia has just faded, and it needs to be transplanted, then you need to either wait for the leaves to wither, or carefully cut them off with a sterile blade.
Rest period
When to clean gloxinia for the winter, at rest? Usually in September-October, the plant goes into a midnight state when it begins with the dry season in their homeland - South America.
In the case when the plant has faded and does not want to fall asleep, it needs help. If gloxinia does not go to rest on time, the flowering time, which should fall on the spring and summer months, will shift.
To prevent this from happening, at the beginning of autumn, the faded gloxinia begins to be prepared for wintering. With late flowering, wait for its end. After complete self-extinction of the aerial part, the tuber is ready for storage. If everything is done correctly, gloxinia will begin to wake up not earlier than January - February.
.
Main life cycles of gloxinia
Since gloxinia is a tuberous plant, it has a special life cycle. There are three main periods of the life of this flower during the year:
- Dormant period
- A period of active growth
- Flowering period
Rest period (gloxinia hibernation)
In room gloxinia, the rest period is pronounced. She, unfortunately, is not able to bloom all year round and delight us with her magnificent flowers and even leaves. As we wrote above, by the middle of autumn, after another flowering, gloxinia stops drinking water, the stems and leaves turn yellow and dry, the roots die off. The plant begins a dormant period. The stem is cut to a height of one to two cm above the soil. It is worth watering the stump for another two to three weeks in moderation, do not feed it. Let the gloxinia sleep. Only the tubers of this flower remain alive, which, if properly stored, are preserved until the next season.
Ways to preserve gloxinia in winter:
- The tuber is carefully dug out, cleaned from the ground, treated with an antiseptic, placed in a plastic container with slightly damp sand and put away for the winter in a cool dark place, for example, in a garage or basement with a temperature of 10-12 ° C.
- The tubers are stored in a plastic bag with a seal along with vermiculite mixed with the substrate 1: 1. The bag is zipped and placed in the refrigerator in the vegetable compartment. So you will be sure that the tubers do not dry out.
- The tubers are not dug out of the soil and left to winter in a pot, which is covered to the top with dry sand and taken to a dark, cool room - a garage or basement. As a last resort - to the bathroom, where it is stored under the bathtub, covered with a dark film. It is very rare to water gloxinia during the dormant period - 1 - 2 times a month, if only the tuber does not dry out. Pouring it in is even worse than drying it out - it will start to rot and may die. In this state of rest, gloxinia will be from one to three months. It is not advisable to allow premature germination of the plant, as it will grow weak and incapable of flowering.
If gloxinia has not formed a tuber sufficient for storage - what to do?
If gloxinia is still small, only grown from seeds, then its tuber is still very small, and such a plant simply will not survive the dormant period. To understand if your flower can overwinter, count its leaves. If there are less than six pairs, such a flower cannot be sent to rest, it may die. May gloxinia continue to grow in winter. If you provide it with moderate watering and nutrition, humidity and large daylight hours with the help of backlighting - next year, when your flower grows at least six pairs of leaves and begins to pick up buds - it will enter its normal life cycle, like all gloxinias, it will fade and will retire in the fall.
Also, the tuber may not form when growing gloxinia from a leaf or cutting, especially when the cutting is deeply buried in the soil.
The period of the active cycle in gloxinia
By the beginning of a new active cycle, with proper care of the dormant tubers of the plant, new roots and sprouts will begin to appear on them. Gloxinia usually starts growing in February or early March. Tubers are taken out of an old pot or from a container with sand - depending on where they were stored, they are cleaned of soil, old roots are removed.
Every spring, gloxinia is transplanted into a new soil that is healthy in all respects!
Each tuber is examined, rotten or dried out areas are cut off with a clean sharp knife or scalpel. For 30 minutes immersed in a dark pink solution of potassium permanganate. Places of cuts are sprinkled with crushed activated carbon. Sometimes growers treat tubers with growth stimulants. Then try not to immerse the plant deep in the solution so that the growth point is not exposed to the drug. After all treatments, the tubers are given time to dry well - enough for a day. Sick and wrinkled - thrown away. This is a guarantee that the remaining tubers will give us healthy and strong plants that can bloom with lush beautiful flowers for a long time and repeatedly.
The gloxinia pot is selected depending on the size of the nodule.
It can be ceramic or plastic. For a small young plant, a pot up to 10 cm in diameter is suitable, for a long-flowering plant with a large tuber, a pot is chosen up to 15 cm in diameter. The height is usually taken the same as the width. You should not buy a pot for growth for gloxinia - in it the plant will fatten, only dense foliage and tuber will grow, and our beauty can forget about the need to form buds. In addition, too much moisture can build up in a large pot, which can lead to rotting of the tuber.
So, the tuber is planted in the ground at two-thirds of its height. We already wrote above that a special soil mixture for flowering plants - "Saintpaulia", "Begonia", is suitable for the soil. At the stage of transplantation and subsequent rooting of gloxinia, there is a risk of losing tubers due to rotting.
Therefore, do not forget about drainage, 2-3 cm of expanded clay or other material at the bottom of the pot is a prerequisite for healthy roots!
The soil is slightly moisturized. The pot with the tuber is placed in a bright, warm place under the film until the first pair of leaves appears. Remember to air it out in the morning and evening. When the leaves grow up, the film is removed completely. The nodules are covered with soil no more than one cm, just to cover it. It is better to water through the pallet or carefully along the edge of the pot so as not to flood the middle of the flower with the growing point.
Sometimes, seemingly healthy, strong tubers do not show signs of life on an equal basis with others. Wait a little, perhaps these tubers need a little longer to start an active life. If you put them in the ground, start watering - they will most likely rot, because they will have nothing to absorb food and watering. Wait for the natural awakening of gloxinia.
If, however, you need to wake up the sleeping beauty, try to artificially activate the growth of the aerial part of the plant. To do this, well-processed, prepared for planting, dormant tubers are folded into a bag with a slightly moistened peat substrate. The bag is tightly closed and placed in bright, but diffused sunlight. If this is a problem - under the phyto lamp for 12-14 hours. Germination temperature should be high - 24-26 ° C. Tubers are kept in such a bag without airing until they begin to sprout. After a week or two, you will see drops of moisture on the inner surface of the package - these are the tubers breathing, a growing point has hatched on them. This means the tuber is ready for planting. It is possible that this flower will still catch up with the rest in growth and will bloom beautifully no worse than them.
Gloxinia did not wake up after winter rest, what should I do?
Sometimes it happens that gloxinia did not wake up after wintering
... The first aid for awakening is to wrap the flower pot in a large plastic bag and moisten the soil. It is possible that the wintering was too dry and the tuber was dry. Then, in a bag from the artificially created greenhouse effect, the flower can wake up and grow.
Sometimes too young gloxinia is sent for wintering, which in the first year did not have time to form a sufficient tuber. Such gloxinia will never wake up.
If the gloxinia tuber was purchased last year in a store, but after last year's flowering it did not survive hibernation, it may be due to the poor quality of the planting material. The tubers looked decent, healthy, but in reality it could turn out that the tuber is already old, or infected with an infection, or infested with pests. Or perhaps he was simply overfed with growth stimulants. Such tubers had the strength to bloom once, and during the winter dormancy, most likely, he died.
Dig the tuber out of the soil and inspect. The shriveled tuber can most likely be thrown away. If there is hope that the tuber is still alive, cut it in half. If it is all brown inside, it must be thrown away. If only part of the tuber is brown, all the rot must be cut off, the remaining parts of the tuber must be treated with brilliant green. Can be soaked briefly in Epin or Zircon to increase the vitality of the tuber.
Gloxinias usually live no longer than four to five years. If you value your gloxinia variety, think in advance about its reproduction - after all, the plant may not come out of hibernation simply because the tuber is already old and simply died.
Bloom
Gloxinia usually begins flowering in late spring. Sometimes, the plant wakes up a little earlier, at the beginning of February, then at the end of March it can bloom. Although, for this, you will need to create the most comfortable conditions for the plant - sufficient lighting with the help of lights, moderate watering, temperature within 22-24 ° C, high air humidity. Then she will delight you with her rapid flowering, perhaps more than once a season.
Usually, the period of the first rapid flowering occurs at the end of May - beginning of June. Gloxinia will delight you with its amazing flowers until the end of summer.
For more information on the flowering of gloxinia and what to do after, read in.
What does gloxinia look like?
The leaves of this houseplant are quite large, often have a rounded shape or jagged edges. The surface of the leaf resembles a violet leaf: velvety and soft. Flowers of various colors are bell-shaped, only much larger. The second name is sinningia.
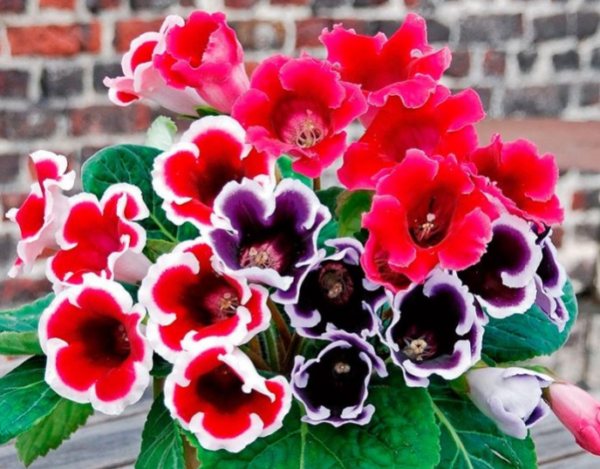
This Brazilian beauty received her first name from the ship's doctor, who was the first to meet this miracle and describe it. And the second is in honor of the breeder who bred a large number of beautiful gloxinia hybrids.
Choosing a flowerpot
When transplanting gloxinia, it is very important to choose the right flowerpot. Since its root system is located horizontally, it is imperative to transplant it into a wide container. But the height must be less than the width. It should be borne in mind that the volume of the pot itself should not be too large.
This can lead to the following:
- The roots and leaves will grow very slowly.
- A large amount of moist soil will provoke fungal diseases.
- The flower will begin to master the empty space, will actively grow roots and foliage, and only then will it bloom.
Therefore, you need to be serious about choosing a pot. The ideal option is short and wide. It is desirable that the distance from the tuber to the edge of the flowerpot is no more than four centimeters. Ceramics is the best material for a pot.
Plant care
Lighting and location

Gloxinia is a light-loving plant
Indoor gloxinia refers to light-loving plants. She loves an abundance of light, but does not tolerate direct sunlight.Therefore, the place for the flower pot must be chosen depending on the season and climatic zone of your residence. For example, in the spring, gloxinia feels great on the southern windows of the apartment, it is actively growing and gaining buds, and on hot summer days it is better to rearrange it to the eastern or western windows, if possible. If not, then you will have to rearrange the pot on a shelf in the depths of the south window or somehow shade it. If you have all windows facing north, chances are your plants won't have enough sunlight. Their shoots will stretch out, the leaves will become faded, the plant will slow down its growth, stop picking up buds and may not bloom at all. To prevent this from happening, it is necessary to create additional lighting for gloxinia, increasing daylight hours at least up to 12 hours. For this, special lamps are used for illumination.
Temperature regime
When growing gloxinia from a tuber, it is important to observe a special temperature regime. The root of the nodule takes place best at a temperature of 24–25 ° C. When the first leaves appear, it is advisable to reduce the temperature to 22 ° C during the daytime and to 18 ° C at night. If the temperature in the room is much higher, and there is not enough lighting, as is the case in the winter months, gloxinia will begin to stretch, flowers and leaves on long petioles will become smaller and lose their beauty and decorative effect. During the period of active growth and flowering, the temperature should not drop below 18 ° C, since in cooler conditions the vegetation of the plant will slow down, and it will stop blooming, and may get sick and die. A prolonged increase in the air temperature in the room during the growing season of gloxinia to 25-30 ° C is just as destructive. The root system will overheat, the turgor of the leaves will weaken, the plant will no longer develop normally. During the rest period (autumn - winter), gloxinia feels normal at a temperature of 10-14 ° C.
But, we must remember that gloxinia does not tolerate drafts and temperature drops well at any time of the year!
Ambient humidity
For the successful cultivation of indoor gloxinia, high indoor humidity is important - within 70-80%. The lack of moisture will be shown to you by drooping leaves of a flower. Air humidity can be raised by placing flower pots in a tray with wet expanded clay or pebbles. It should be borne in mind that velvet leaves and gloxinia flowers do not tolerate spraying with water, therefore, if you nevertheless decide to humidify the air in the room with a sprayer, try to do this with a fine spray around the plant, without getting on it. You can place wide containers of water in the room next to our sissies - evaporating, the water will increase the air humidity in the room, and gloxinia will delight you with a healthy and blooming look.
Watering
It is necessary to water gloxinia carefully, preferably through a pallet or along the very edge of the pot, with a small amount of warm, slightly warmer than room temperature, settled water. Excess moisture often leads to decay of the plant roots, and the ingress of excess moisture on the leaves and in the center of the tuber can lead to decay of the root collar, and then the entire bush.
The next watering is needed no earlier than when the upper layers of the soil are well dried. At the end of August, gloxinia should be watered even less often so that it gradually prepares for the dormant period, which usually occurs in mid-October. Excess water from the pan under the pot must be removed so that it does not stagnate and damage the roots.
Average universal parameters
- A place with no bright light.
- Temperature range from +3 to +15 degrees.
- Humidity not more than 90% and not less than 60%.
As a result
We simulate the weather factors that are common for a plant in its natural habitat.
Suggested storage locations for tubers
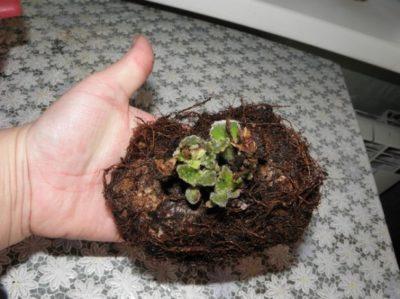
Refrigerator, the section with the least cold temperature, where vegetables and herbs are usually stored.There is a danger of overdrying the tubers, so you need to regularly check the suspension for moisture.- Insulated balcony or loggia, where the temperature does not rise more than twenty degrees, since the plant can wake up from the heat.
- The cellar is deep and warm, where the temperature drop does not go beyond + 3-5 degrees. Storage in the cellar is possible only at moderate humidity, when the walls and shelves are not affected by mold. Here you can safely leave the tubers and not worry that they can dry out.
- Under the bathroom. The humidity and light parameters are ideal, but the temperature may not correspond, be higher than expected.
- On the mezzanine in the hallway. The main thing here is not to forget about hydration.
February, what to do ...
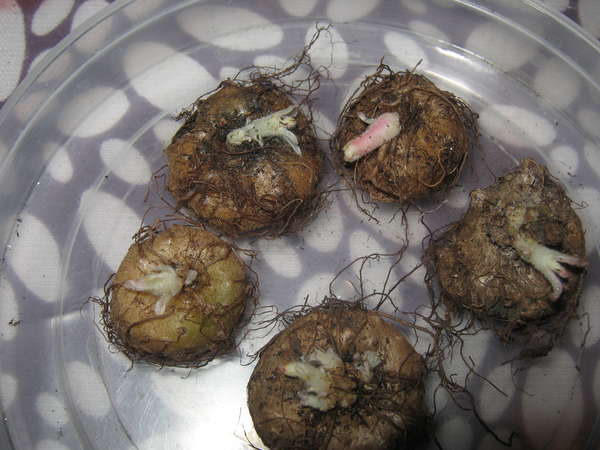
The tubers take time to wake up. Novice growers are always worried when they need to get gloxinia nodules that have wintered in a dark place. The box of sleeping gloxinia should be removed in the middle of winter. After a thorough examination, live planting material is selected.
- If ripe, healthy tubers were laid for rest, then the awakening of gloxinia occurs rapidly. Sleeping nodules are exposed to a well-lit window in a warm room, watered. After some time, the first shoots appear.
- If there is some kind of failure in caring for gloxinia, which is at rest, then the nodule may wake up on its own. Even the coolness and darkness do not interfere. Such planting material needs to be pulled out into the light as soon as possible, otherwise the shoots will stretch out and problems with planting will arise. Some appendages will have to be removed.
Pros and cons of off-ground and underground storage of gloxinia in winter
- It is better to store young synningia without removing it from the ground. So there is less risk of drying out;
- Ground pots are cumbersome, if there is little space and a lot of flowers - choose off-ground storage;
- The tubers should be checked frequently for rot;
- The bags are conveniently stored in the refrigerator - the most suitable method for wintering a flower, called gloxinia;
- Wintering in the bathroom - an option in the absence of a cellar, balcony, large refrigerator;
- Moistening the top layer of the earth with ice is the best way to store gloxinia in a warm room in winter.
- We store purchased tubers without soil with mandatory disinfection.
Talismans and charms
All stones

Talismans and charms
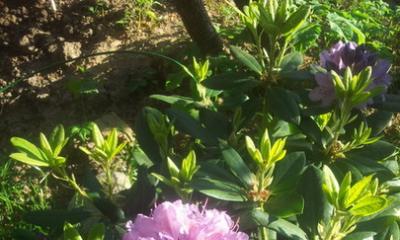
Detailed description
- In September-October, after flowering, place the gloxinia in a less illuminated place, for example, on the northern windowsill. Provide a temperature of + 15 ° C. Feed once with potash fertilizer. Reduce watering gradually. Moisten the soil with small portions of water no more than once a week.
- When the leaves begin to dry, stop moisturizing the substrate. You cannot immediately cut off the aerial part of the plant. It is necessary to allow the nutrients to gradually transfer into the tuber from the stem and leaves. If green foliage is cut off, vegetation processes may resume.
- After complete self-withering away of the upper part, cut it off, leaving a small stump with a height of one to one and a half centimeters.
Features of care after planting
Immediately after transplanting, the plant requires moderate watering: waterlogging of the soil is not allowed. The safest way is to water along the edge of the container. Water should not get on the tuber. Otherwise, problems will begin: the root can rot.
The pot with the transplanted gloxinia should be placed on a bright window. Direct sunlight is dangerous for the plant. It is required to maintain the temperature up to +22 degrees, air humidity up to 70%.
What to do with the kids
If, when transplanting planting material, small daughter nodules are found, they can be used to propagate gloxinia. Separate carefully. Then disembark. We use small containers.
The next pick is carried out into a larger pot using the transfer method. The new plant will delight you with velvet flowers as soon as it takes root.
How to transplant gloxinia after sleep
You need to transplant gloxinia after it fully wakes up. The nodule is taken out of the box, shaken off from the substrate in which it hibernated. Then washed under running water. Clean planting material is easier to inspect. If even a small speck of rot is noticed on the nodule, it must be removed. You need to cut it off with a sharp knife, which is pre-disinfected in order to avoid infection of the nodule with diseases.
The prepared planting material is disinfected for a third of an hour with a foundationol solution. Then you need to get the tuber, put it on a clean cloth to dry. Cutting points are treated with fine charcoal. Only after that do they start landing.
The soil
Each time you transplant, you need to use a new soil, even if the flower has wintered in a pot. It is best to transplant gloxinia into ready-made soil formulations specifically designed for indoor plants. They contain essential nutrients and trace elements.
You can prepare the soil with your own hands. It is necessary to ensure that the substrate is loose, it is easy to let air through. This will require:
| 1 part | leaf land |
| 1 part | deoxidized peat |
| 0.5 part | sand |
Attention should be paid to acidity, it should not exceed pH 5.5-6.5. Acidic soils are not suitable for gloxinia: growth slows down, bud formation is weak.
For soil disinfection, you can use ready-made preparations, such as "Maxim" (the method of application is strictly according to the instructions). Some indoor flower lovers do this. Dilute potassium permanganate until pink in hot water and spill the soil.
Pot
When choosing a container for planting, you need to take into account the parameters of the tuber:
- If they are small, from 1 to 2 cm, it is best to use 100-gram plastic cups.
- Planting material ranging in size from 3 to 4 centimeters is planted in pots with a diameter of up to 9 cm.
- When planting larger specimens, it must be borne in mind that the diameter of the container must exceed the dimensions by at least four centimeters.
The tuber should not be completely covered with soil, only 1 cm. The rest of the gloxinia should rise above the surface. The sprouts that have not yet matured are not sprinkled with earth.
Transplant process
To plant gloxinia with a tuber in a pot, you will need sharp scissors or a knife, a new pot of the required diameter, warm water. Transplant stages:
- Rinse and dry the old pot, the new one does not need to be disinfected. A quarter of the height of the container is covered with a drainage layer, and soil is poured another half of the height.
- The prepared tuber is placed vertically, covered with earth so that its upper part looks out a little from the soil.
- They tamp the earth with their hands, pour it with warm water, cover the pot with a tuber with a transparent plastic wrap.
- Gloxinia leaves form earlier than the roots, therefore, until strong stems appear, water the flower carefully, trying not to get moisture on the rosette of leaves.
- When the stems appear, they pour about 1 cm more of the earth, tamp it.
Be careful not to plant the tubers upside down. In the lower part, they are round, smooth, and on top there should be a small depression, from where the leaves will then appear.
Preparing tubers for transplanting
Gloxinia does not wake up at the same time. If the nodule does not show signs of life either in February or in March, it must be forced out of hibernation. To make gloxinia wake up, you can use the following methods:
- It will be necessary to increase lighting, indoor humidity and increase watering. The tuber is placed in a pot with very moist soil. Do not pour water on the planting material. Watering is carried out along the wall of the pot.
- To wake up gloxinia, it is put in a plastic bag. At the bottom you need to put soil consisting of peat and sand. It needs to be sprinkled with warm water from a spray bottle.Before laying, the dormant tuber is washed in running water, inspected for rot or other damage. Sprinkle with wood ash if necessary. Dried in the open air, the planting material is placed in a bag. The bag is tightly tied. To bring a flower out of hibernation requires an elevated air temperature, within 26 degrees. The place should be bright, but the sun's rays should not fall on the package. If daylight hours are insufficient, backlighting will be required. The bag is opened from time to time for airing and watering.
At the end of winter, young sprouts can be seen on the tuber, this indicates the readiness of the plant for planting. The tuber must be removed from the pot, cleaned of old dry roots. Then rinse off the old soil in slightly warm running water. Then it must be carefully inspected and checked for the presence or absence of rot, damage and rottenness.
If there are affected areas, then they should be cut out very carefully until healthy tissue.
The cut must be sprinkled, you can use two options:
- crushed charcoal;
- a mixture of powders of fungicide (foundationol) and root.
Then let the tuber dry for 24 hours. If the tuber is sluggish and shriveled, then it should be saturated with moisture. To do this, it is placed in wet vermiculite for three days or simply in a wet cloth. If there are sprouts on it, then they must be left on the surface. It is important to take into account that vermiculite should be slightly moist, not wet, so as not to provoke rotting of the nodule. Vermiculite retains moisture well, thanks to which the tubers are perfectly absorbed by it and restore elasticity.
It happens that the tuber does not wake up for a long time, then you need to help and wake it up. For this, you can use ordinary plastic bags. Put 1-2 tbsp at the bottom of the bag. l. moist peat-based soil. The tubers must be cleaned, inspected for rot, and if everything is in order, then place the tuber in a bag, having previously washed and dried. Then, tightly closing the bag, put it in a well-lit and warm (24 ... 26 ° C) place.
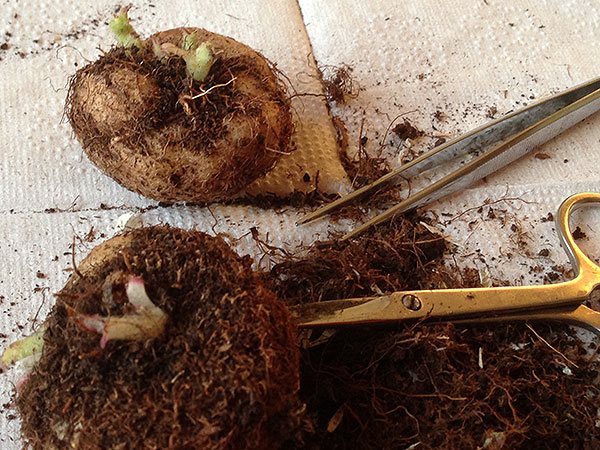
It is not necessary to additionally moisten the substrate and ventilate the bag. After two weeks, condensation will appear on the walls of the bag, and small green sprouts from the nodule. This indicates that the gloxinia tuber has woken up and can now be planted in a pot. Usually several shoots appear at once. When they grow up, they can be separated from the nodule and get several plants.
We suggest that you familiarize yourself with: The benefits and harms of champignons for humans
Before planting in the soil, gloxinia tubers must be soaked for half an hour in a fungicide solution.
This will prevent rot and fungal diseases.
To do this, use:
- Dresser for bulbs.
- Foundation solution.
- Strong solution of dark pink potassium permanganate.
- Fitosporin.
If there is a need to accelerate the formation of roots, then this can be easily done. To do this, for a day, the tubers are placed in a solution of root (5 g of powder per 5 liters of water), zircon (10-12 drops per 200 ml of water) or epin.
Beautiful flower - gloxinia
Gloxinia flowers are varied in shape and color, the texture can be regular or double. Indoor gloxinias usually have more than twenty flowers, they are quite large - from seven centimeters in diameter and bloom at the same time. After a lush flowering, a dormant period begins, then the cycle repeats again.
In order not to break the cycle, you must follow all the rules of care. The main condition is to protect the tubers of the plant from rot, and for this you should regularly transplant gloxinia.
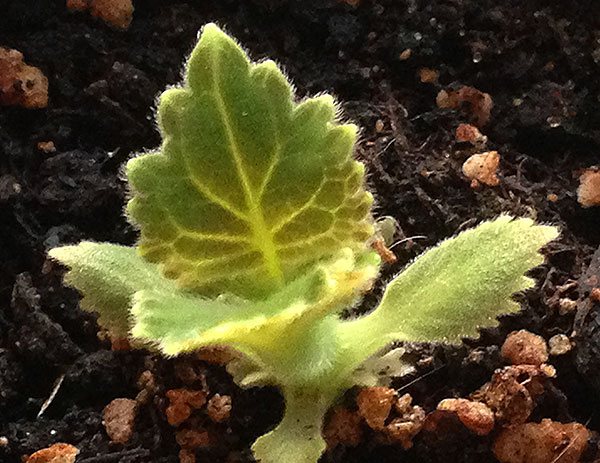
The best time to transplant is in the spring, when the rest of the plant ends.
Then the tubers wake up and small sprouts already appear on them. This happens depending on what temperature was maintained during the storage of the tubers.
They often wake up in February or March, but sometimes in January or April. It is recommended not to delay the transplant and control so that a very large sprout does not grow. The earlier the sprouted tuber is transplanted, the better the flower feels.