Buying varietal and hybrid gladioli is a costly event. But if the autumn digging is carried out correctly and the gladioli are processed before winter storage, they can not only be successfully saved until the next season, but also the amount of planting material can be increased.
The technique of digging and processing is not as complicated as it might seem at first glance. It is important to remember that corms do not tolerate frosty winters, so the entire planting will be ruined if these flowers are left in the ground in the fall.
Gladioli: a brief botanical reference
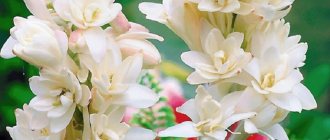
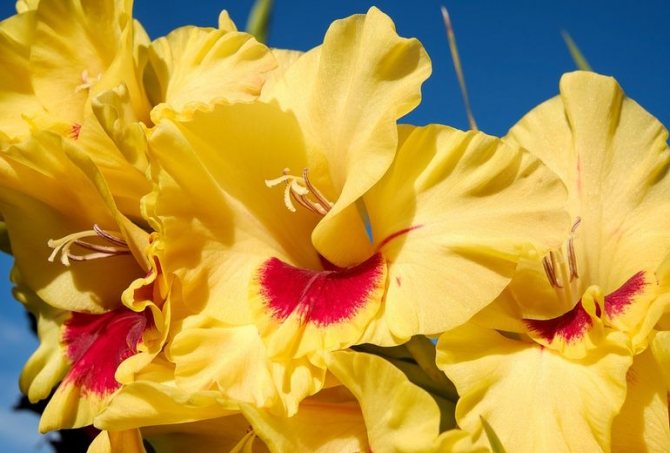
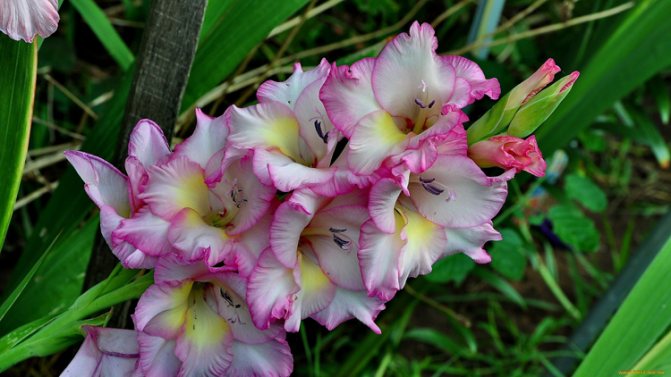
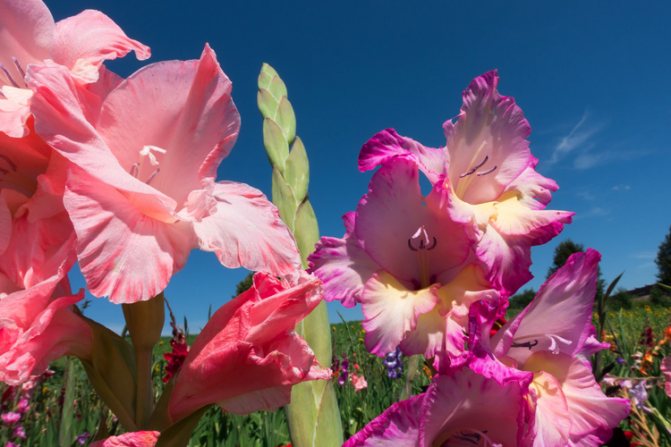
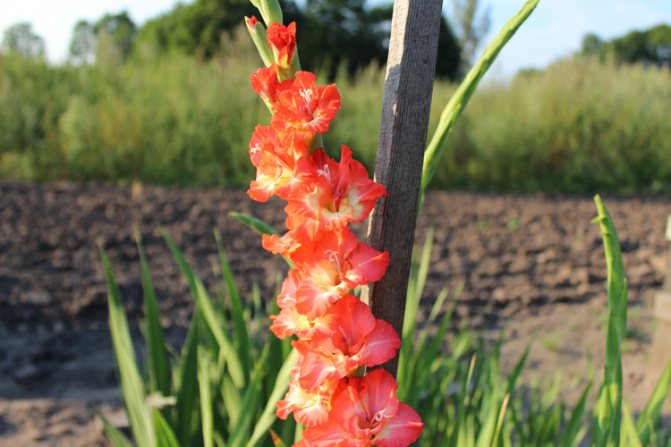
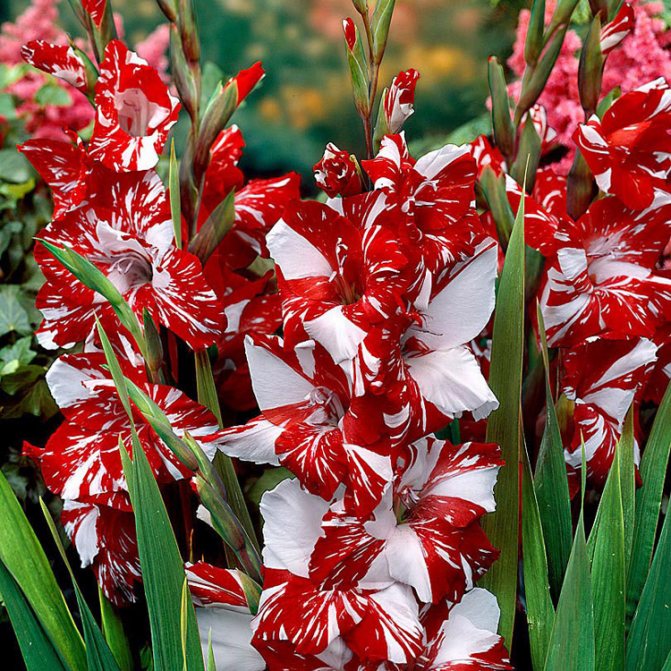
These perennial flowers belong to the Iris family. They came to us from hot Asian countries and from the Mediterranean. Gladioli owe their name to the shape of leaves resembling a sword (gladius - sword), the second name is a sword. Gladiolus inflorescences are a vertical spike, on which flowers are arranged in several rows or in a spiral. Their size can be from miniature (6 cm) to giant, reaching 15 cm.
Gladioli are propagated by bulbs that grow on the roots of plants in one year. Tubercles (babies) are formed around the main bulb, which also serve as planting material for new bushes. The height of the gladiolus bush reaches 80 centimeters, the inflorescences differ in the density of flowers, the length of the ear and the size of the flower.
Drying
First, it is recommended to keep the bulbs at a temperature of about + 28… + 30 ° C for 5–7 days, and then dry them for about a month at lower temperatures (+ 18… + 20 ° C). If it is not possible to carry out the first rapid high-temperature drying, then gladioli are dried in room conditions for 2–2.5 months.
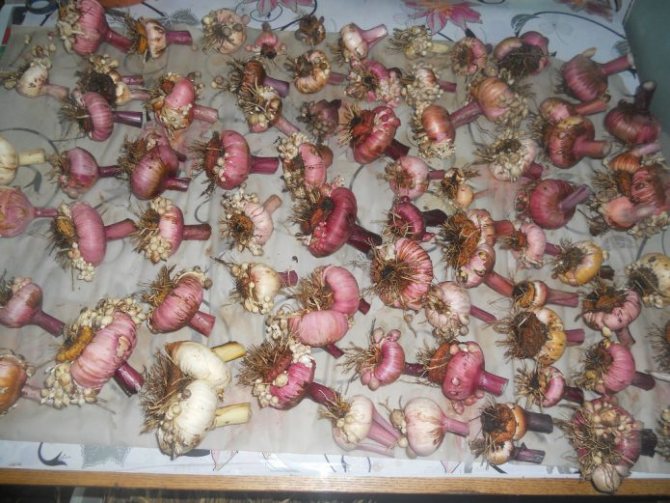
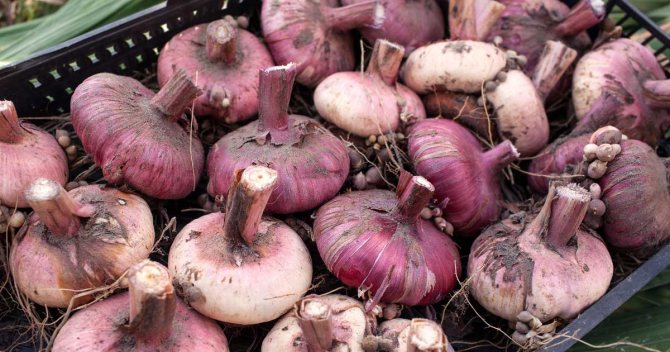
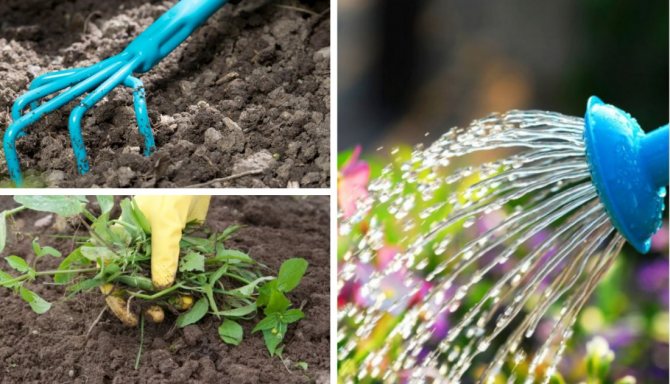
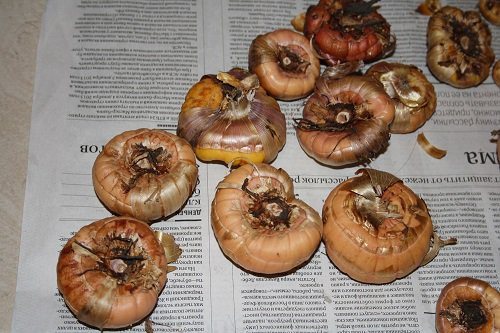
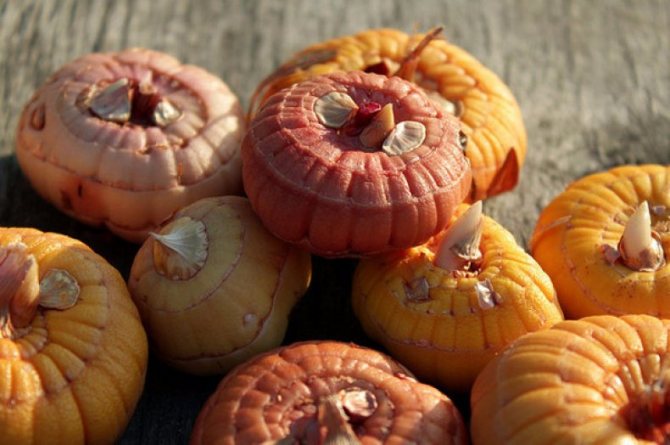
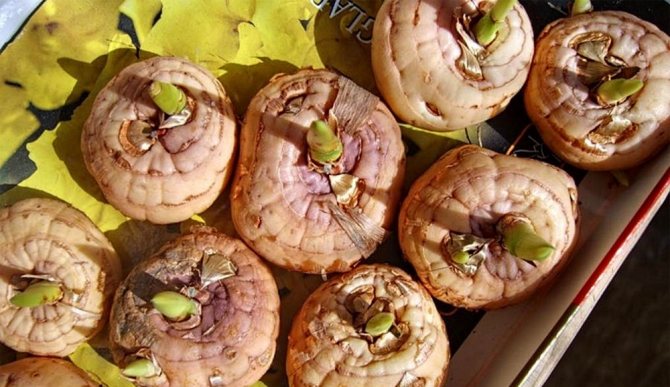
After digging up the gladioli bulbs, dry them well.
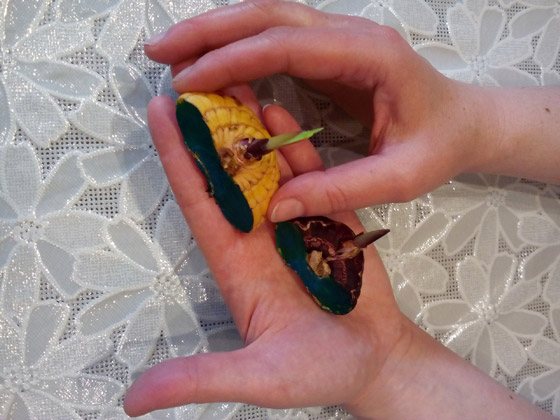
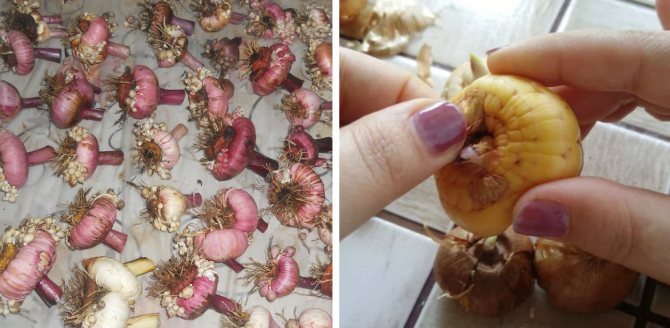
Completely dried planting material is freed from scales and dried out old bulbs with roots. On children, they try not to break the protective cover, otherwise they may dry out.
After drying, the husks are removed from the gladioli and the old onion is separated
Video: cleaning and drying gladioli
When to dig gladioli in the fall and how to store them after digging
First of all, it must be said that it is impossible to leave tubers in the ground for the winter - the probability is 100% that they will freeze out. The second reason why it is necessary to extract them from the ground is that the bulbs, when they are in the ground for a long time, are affected by diseases and pests. And the third - digging out the bulbs allows you to separate the "kids" from them for reproduction of the variety you like.
Separation of tubers
Now let's figure out exactly when to dig out gladioli in the fall. It depends on the climate, the variety of plants and when they were planted and when they bloomed. It is believed that it is necessary to dig up the bulbs one and a half months after flowering, but this is not suitable for all climatic conditions. For example, in the northern regions, where flowering occurs late, and begins to get colder early, such an interval cannot be sustained. Usually they start from mid-September and then dig up until the autumn frosts appear. The timing can be more accurately determined by the state of the leaves: if they began to fade and turn yellow, then it's time to start.
The bulbs of plants with a dark color of flowers are dug out first, because they are more susceptible to various fungal diseases than others. The last to dig up those plants that were grown from the "kids". If damage is visible on the leaves of gladioli, this indicates a fungal infection. They need to be urgently dug out in order to have time to cope with the emerging disease.
To accurately determine the timing, you should follow the weather forecast. You need to choose a sunny and dry day, but if you still had to dig it out in rainy weather, then the bulbs must be immediately washed in running water and dried.

The bulbs of plants with a dark color of flowers are dug out first.

Collection of corms
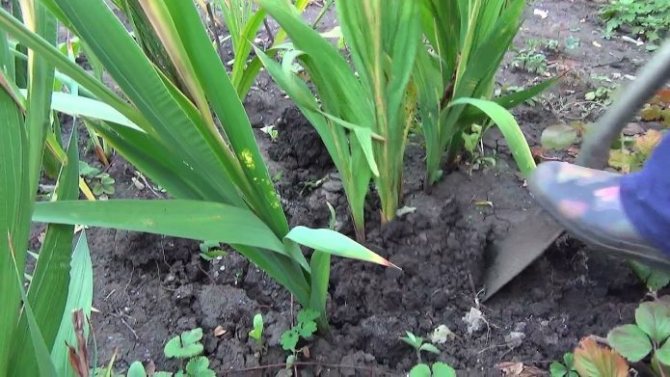
Cleaning should be started in dry weather. It is desirable that it be sunny on this day. It is necessary to choose a period when the earth is not too dry, as this will make it difficult to extract the rhizome. Too wet soil is also not desirable, the ideal option would be moisture, at which the soil crumbles normally, leaving no traces of dirt on the bulbs.
Digging technology consists of the following stages:
- A shovel or pitchfork digs into the soil 10 cm from the plant. It is better to use a pitchfork for this, since when using a shovel, the number of damaged children is much higher.
- The soil is lifted up smoothly with a shovel or pitchfork, after which most of the roots emerge from the deep layers of the soil. If they break at the same time, it's okay.
- With a hand in the surface layer, they cover the stem and gradually begin to pull up the bush, shaking it from side to side. In this case, you need to control so that the shoot does not pull out of the bulb.
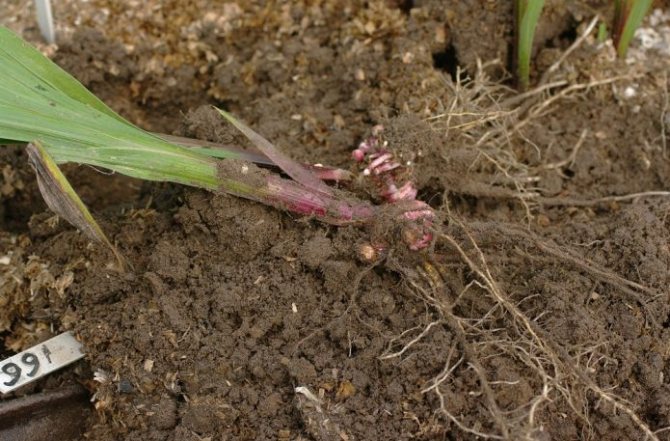
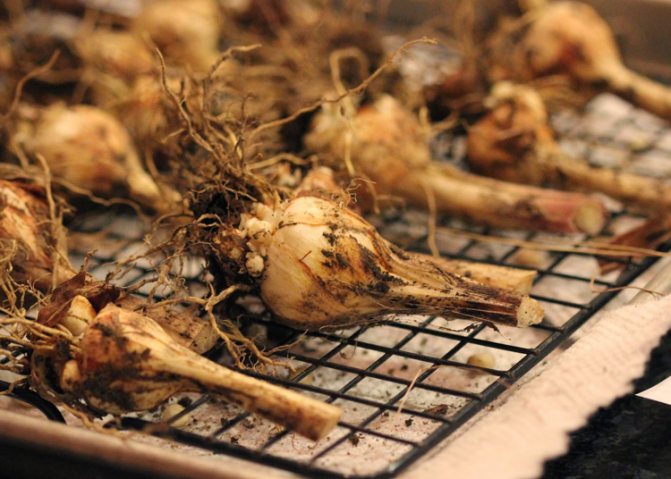
- The removed tubers are cleaned of the ground, trying not to break off the children.
If the digging had to be carried out from wet soil, then the dug out gladioli are washed under running water at room temperature until the dirt is completely removed.
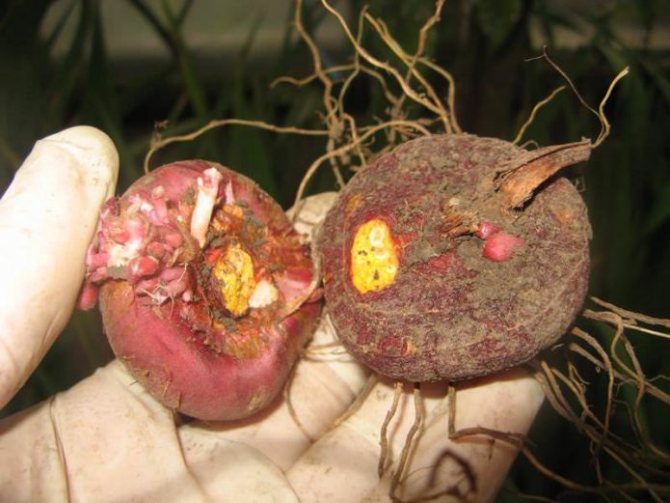
After cleansing, the material is examined for the presence of fungal infections and rot. If signs of disease are found, then the corms must be immediately selected separately from healthy ones and burned, since contact with healthy material can lead to infection of other corms.
In the event that lesions are found on rare or valuable varieties, you can try to save them:
- damaged areas are cut off with a sharp disinfected knife;
- the place of the cut and the entire rhizome are treated with a solution of potassium permanganate or greenery.
Further preparation for storage follows the general rules.
How to properly dig up gladioli after flowering
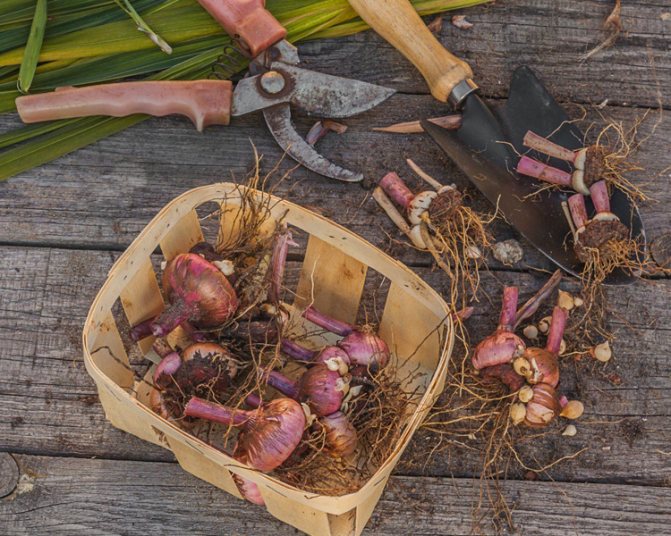
So, the time has been determined, a fine day has been chosen, you can start digging. This should be done with a shovel, but you need to stick it into the ground vertically and as deep as possible so as not to damage the bulb. Using a pitchfork instead of a shovel is less traumatic for tubers, but if the soil is too crumbly, it is likely that they will not be found.
TIP! (click to find out)
TIP! If, through negligence, the bulb was cut off, it can be saved by treating the cut side with brilliant green. Store this bulb separately.
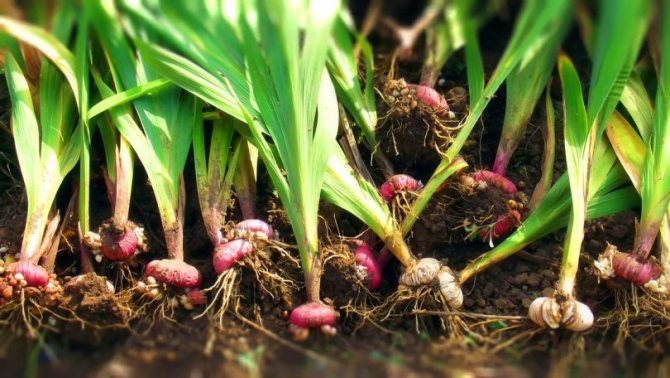
In advance, you need to spread an oilcloth or cloth next to it, over which to shake the planting material, so as not to lose the "kids". Then the bulbs are washed, the husks do not need to be removed. The old onion (bottom) should easily separate, if it did not work out right away, then after drying it should work out.
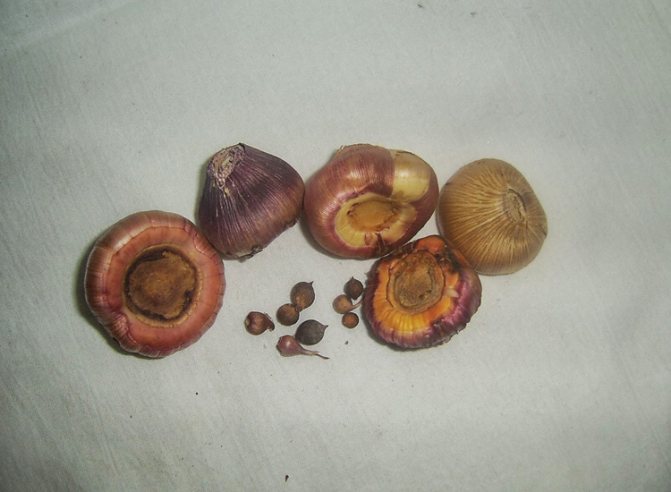
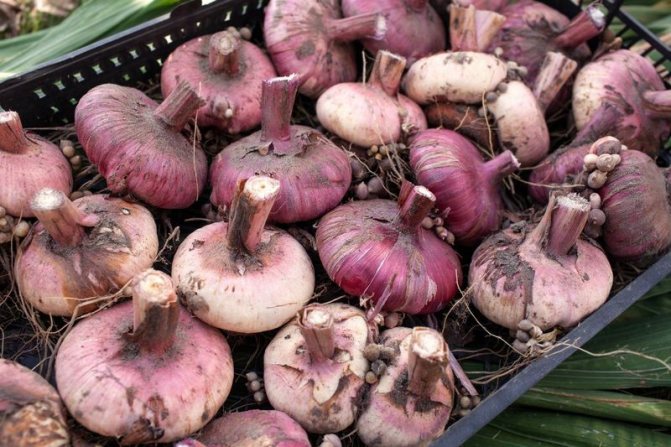
Washed tubers
Sorting
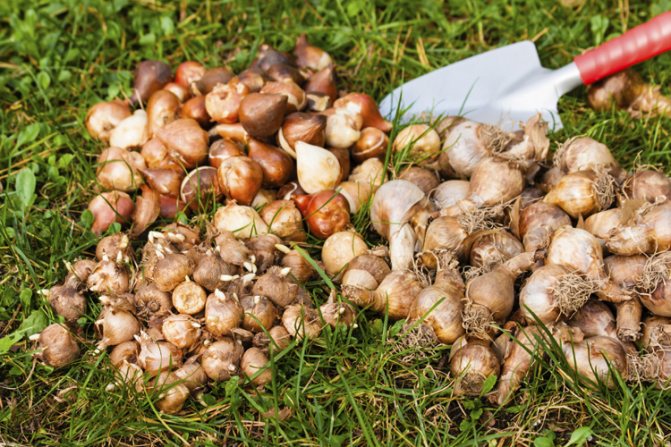
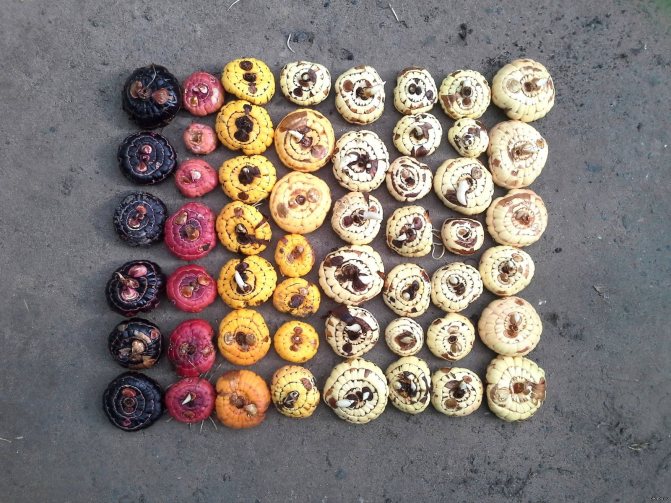
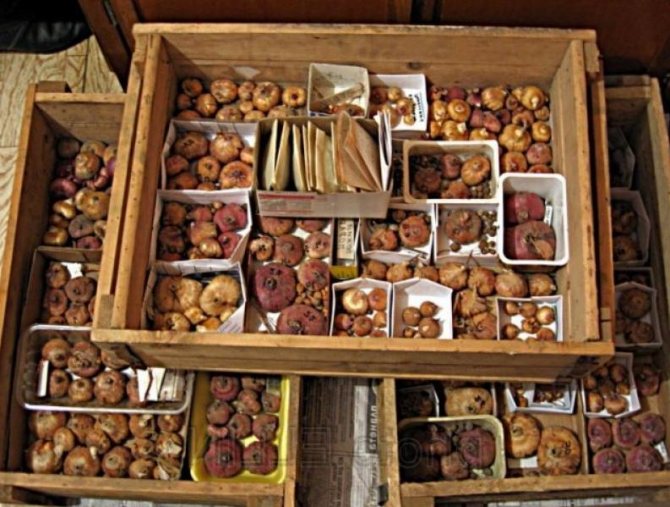
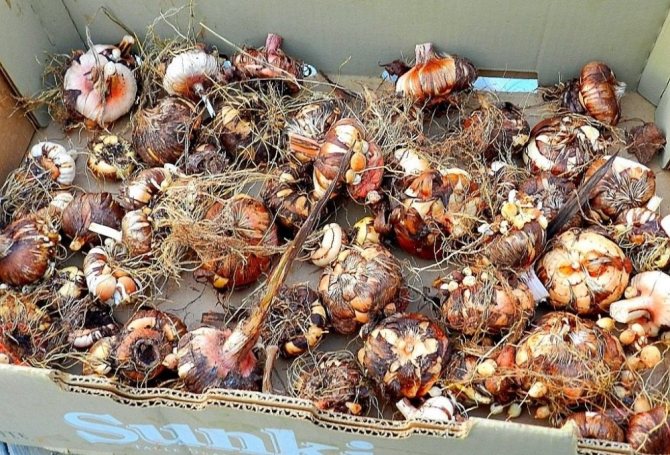
During digging, all the material must be laid out by varieties in separate containers and supplied with tags, and the children must be immediately separated from the mother's tubers..

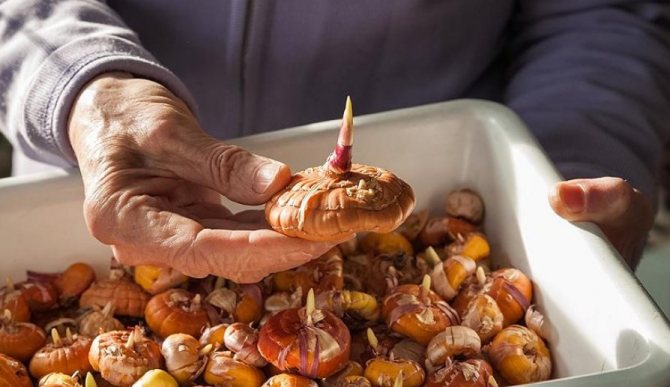
It is best to immediately place the gladiolus bulbs in separate boxes according to the varieties when digging.
Bulbs are chosen for winter storage:
- healthy, without traces of damage by diseases or insect pests;
- not older than four years;
- rounded, in which the height approximately corresponds to the diameter;
- the largest babies with intact covering scales.
Read also Chicken which company is better to buy

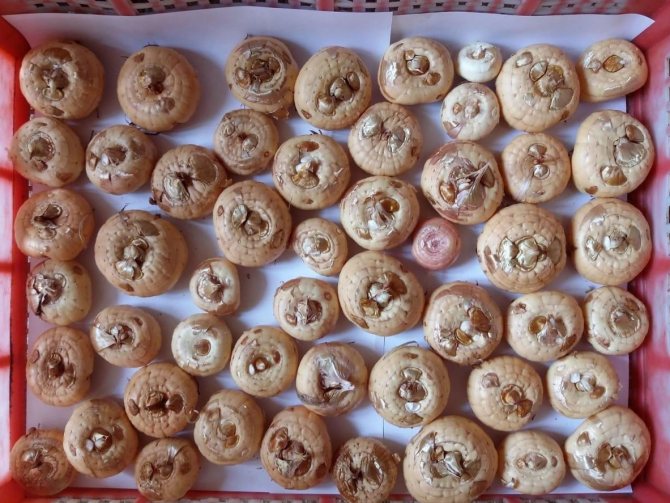
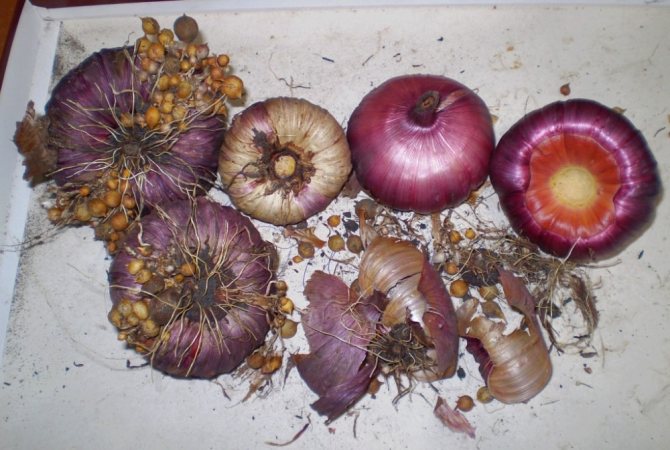
The healthiest and strongest bulbs are selected for winter storage.
At the same time, sick, old and flat with an excessively large bottom, as well as suspicious specimens, are rejected.
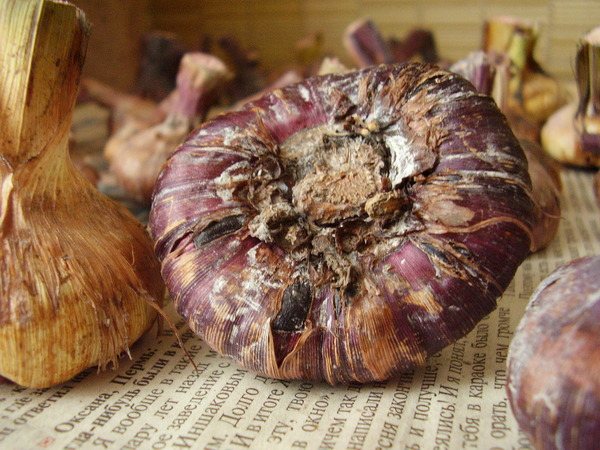
Sick, old, dry and damaged bulbs are discarded
All plant residues (excess and discarded bulbs, leaves, etc.) I prefer to burn immediately.
How to store gladioli after digging, methods of processing the bulbs
Treatment of gladiolus bulbs after digging with a fungicide
The necessary operation immediately after rinsing is the treatment of the bulbs with a fungicide against thrips. If this is not done, the thrips will destroy the onions by drinking the juice from them.
Disinfection
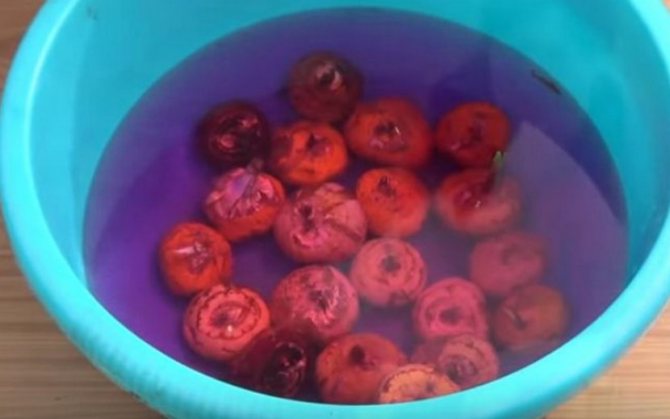
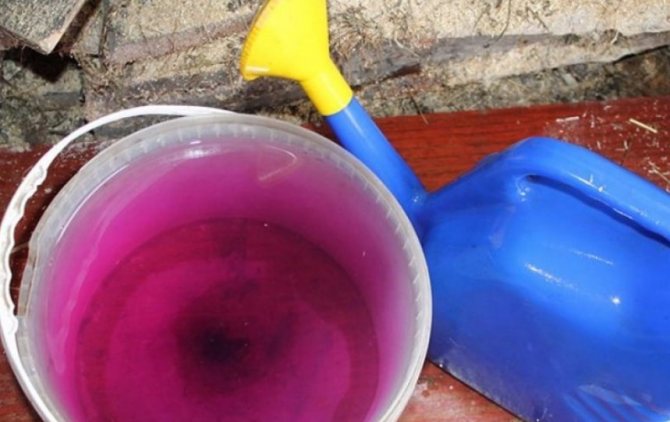
Disinfect with a 3% solution of potassium permanganate by keeping the tubers in it for at least half an hour.
Treatment with drugs
Soak in solutions of "Decis", "Iskra" or "Inta-vir" preparations for half an hour. Tubers affected by the fungus must be burned. After all treatments, the foliage is cut off, leaving a stump of 2-3 cm. The roots should be removed immediately after digging up.
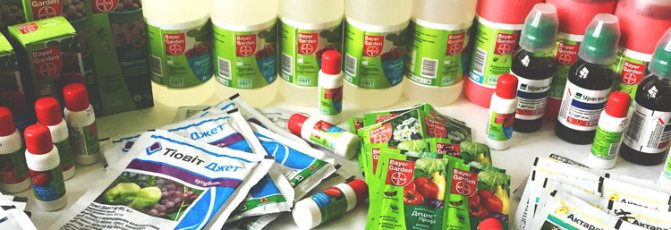
Preparations suitable for processing
Rules for drying gladiolus bulbs
It will take a month for the corms to dry normally. All this time, they must be at an ambient temperature of + 25 ° C to + 30 ° C. In an apartment, this can be at the top of the kitchen cabinets, where it is always warm. The planting material is laid out in one layer on paper or fabric. If you need to dry the bulbs faster, you can use a hair dryer. Rapid drying also helps prevent disease. Bulbs should be inspected daily to identify damaged and diseased bulbs. Not separated "babies" can be easily separated after drying. Then they are stored in separate paper or tissue bags.
REMEMBER! (click to find out)
REMEMBER! If thrips are found on the bulb, it is placed in a plastic bag with insecticide for half an hour. Then the onion is thoroughly washed in hot water and dried.


Pruning
Pruning is needed to speed up future drying. To do this, use a knife, which must first be treated with a bright pink solution of potassium permanganate in order to prevent the development of fungal infections at the cut site.
Pruning is performed using one of the methods practiced by professionals:
- to the base of the bulb;
- leaving only a small "stump" of 0.7 - 1 cm from the stem.
Pruning is necessary in order to prevent the spread of thrips, which climb into the lower part of the shoot in the fall, and can move to all other bulbs during storage.
In addition to the stem, the remaining roots must also be shortened. Experienced gardeners advise leaving about 1 cm of roots, the remnants of which will be removed in the spring before planting, but sometimes they prefer to cut them in the fall to the very bottom. The presence of small roots prevents drying out during storage, so this is very important for small tubers, and in the case of large tubers, the roots can be cut off completely.
Upon completion of pruning, the tubers should be treated with a solution of the "Maxim" preparation, keeping the rhizomes there for 20 minutes. It can be purchased at any flower shop or garden center.
If there are doubts about the quality of the excavated material, it is advised to process it more carefully in two stages:
- Antiparasitic treatment in a solution of karbofos in a proportion of 20 g per bucket of water - soak for 20 minutes. Instead of karbofos, you can take chlorophos.
- Antifungal treatment in a solution of potassium permanganate in a proportion of 10 g per bucket of water - hold for 25 minutes.
Dry husks should not be removed from corms, as they help prevent the bulbs from drying out during winter storage.There are opponents of this method, who believe that the husk can contribute to the development of mold, but with proper drying of gladioli, there is no such risk.

Necessary parameters of the storage environment for gladioli in winter at home
The ability to properly preserve bulbs is the main criterion for the success of further cultivation of skewers. Here are some helpful tips.
Temperature
For about two months, the bulbs do not germinate, all this time they can be safely stored under any conditions, and then you have to worry. The optimum temperature for long-term storage of corms is from + 2 ° C to + 8 ° C.
Humidity
For proper preservation of gladiolus bulbs, it is necessary to maintain the ambient air humidity within 60-80%. At high humidity, the bulbs will begin to rot, and in dry air, they can dry out. Slight drying of the bulbs is quite normal. Before planting, they need to be wrapped in a wet rag, and they will return to their original shape. “Babies” cannot be overdried, therefore they are kept separately from adult bulbs and constantly in a humid room.
Improvised means
To accommodate the material, boxes or boxes with a mesh bottom, which will provide air movement, are suitable. In the case of a small number of bulbs, linen bags made of natural fabrics (flax, cotton), nylon nets with small cells, paper bags are used. It is unacceptable to use polyethylene for packaging. It is impervious to evaporating moisture that accumulates inside. This can cause rotting or early germination. Laying fresh garlic cloves or dry mint leaves between the onions will provide protection against fungal attack.
Storage locations for gladiolus bulbs in winter
In the basement or cellar
A well-ventilated basement or cellar is considered the most suitable place for storing corms. They are placed in containers with a lattice bottom. Another technique is to fold the tubers into transparent women's stockings and hang them up. The basement where vegetables are stored is not suitable for keeping gladioli, because they can be damaged by moisture evaporated by the fruits during storage.
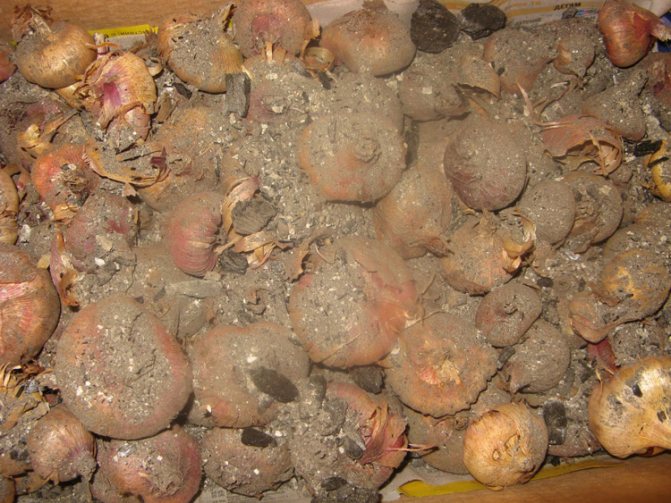
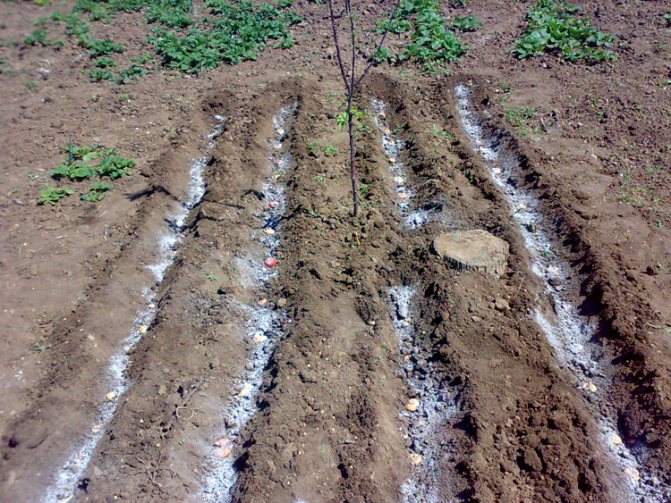
To keep moisture away, you can sprinkle the tubers with ash
In the apartment
Most gardeners are interested in, how to store gladioli in the winter at home. The most suitable section of the refrigerator may be where vegetables are kept. The packing material will be paper or cardboard.
On the balcony
If the gardener does not have a basement, you can use a balcony or loggia. Containers with tubers laid out in one layer are placed on a raised platform, and when frosts come, they are wrapped in blankets. Sometimes this is not enough, for reliability it is better to make a special container: a wooden box, sheathed with foam on all sides. He should also be wrapped in a blanket or an old fur coat.
Storing tubers in the ground
This method is not suitable for northern regions with a harsh climate; it can be applied only in the southern regions of our country. Also, it will not work where groundwater is close. To lay the gladiolus bulbs for storage, a trench is dug about 80 cm deep, the tubers are placed in a wooden or plastic container, sprinkled with sand and placed at the bottom of the trench. From above, the pit is filled with sawdust, foliage or hay, forming a mound, over which the film is stretched.
For storage, you will need a container with a lattice bottom
Where to store
A cool, dry basement with good ventilation is considered an ideal place for wintering this culture, but not everyone has an appropriate room, so most apartment residents store gladioli in the refrigerator.
In the basement
For these purposes, a basement is needed, in which the rest of the crop is not stored, since vegetables and fruits evaporate a lot of moisture during storage. Sometimes they equip a separate room with an individual ventilation mechanism.
The following conditions must be observed in the room:
- constant temperature within 4-7 ° С without significant changes;
- relative humidity from 60 to 85%;
- constant supply of fresh air.
For tubers, slightly different conditions will be ideal:
- temperature regime in the range of 2-5 ° С;
- air humidity from 85 to 90%, since they are more susceptible to drying out.
What to do if thrips are found on gladioli
Thrips are insects that are common flower pests. If at least one bulb infected with thrips is stored, it can destroy all other tubers. Thrips multiply quickly, move to neighboring bulbs and suck out all the juice from them. Let's take a look at how to store gladioli so they don't get destroyed or damaged by thrips.
First of all, you need a regular inspection of all bulbs. If the husk has become rough and small holes are found on it, this is the work of thrips. If such tubers are not removed, then round gray or brown spots may appear, the bulb dries up and shoots yellow dust from itself.
Even when all damaged bulbs have been removed, in order to prevent each tuber before planting in the ground, it should be etched with Actellic or simply held in hot water at + 50 ° C for five minutes.
ATTENTION! (click to find out)
ATTENTION! Gladioli should never be planted in their original place earlier than three years later. Sources of infection with diseases and insect larvae can remain in the ground.
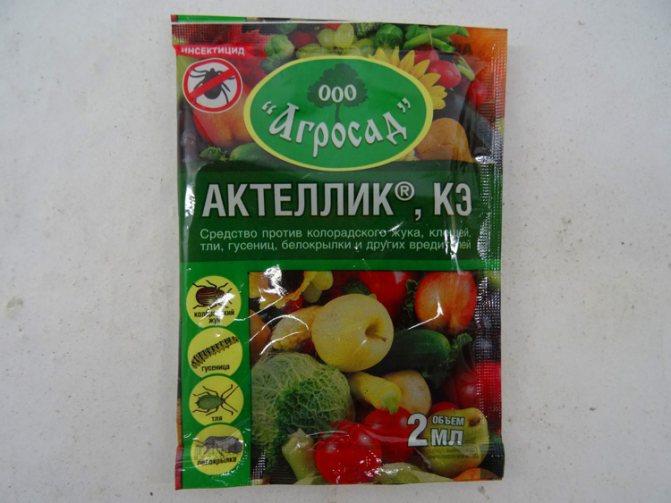
The drug "Actellic"
When buds begin to form, spraying with Decis, Karbofos and other pest control agents is recommended. The treatment should be repeated every 18-20 days.
When to carry out the procedure
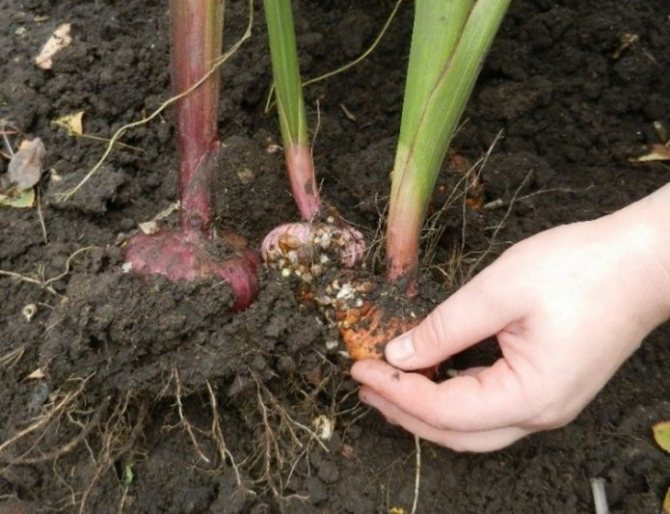
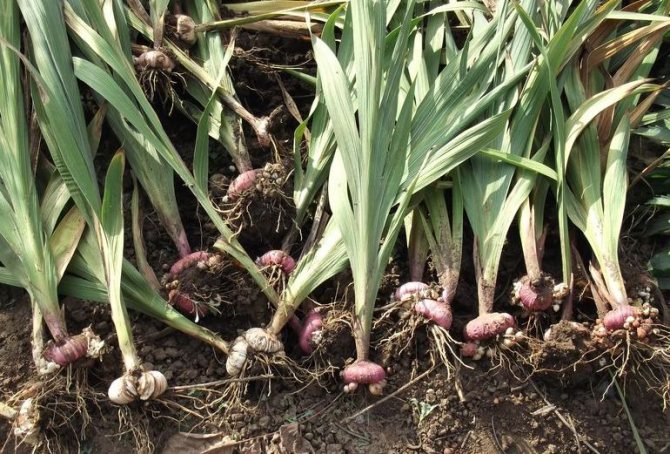
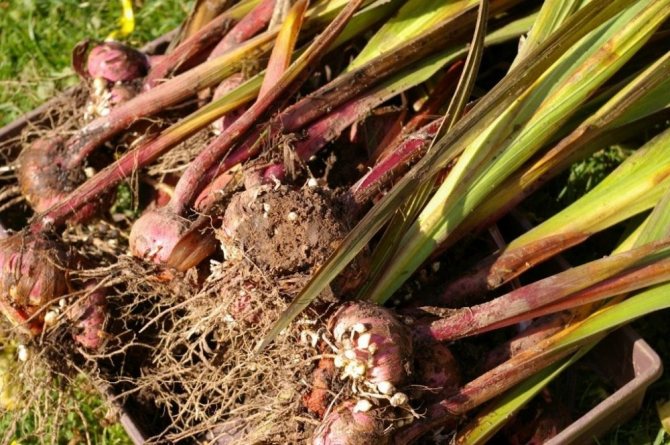
Gladioli should be dug out 35-45 days after flowering. it second half of September - early October. It is impossible to pull when digging out the bulbs, since such a plant should not stay in cold soil for too long. To make sure that the corms are ripe, they need to be carefully examined. If cover scales are visible on them, then the plant must be immediately dug out of the ground. When carrying out such work, you need to take into account some features:
- first you need to remove the large onions, after the small ones, and at the end, dig out the children. Digging is carried out using a special pitchfork or a wide garden shovel;
- it is necessary to pull out gladiolus corms from the soil at a time when the streets will be warm and there will be no rain, since it is then that the soil will be moderately moist and it can be easily shaken off the surface of the bulb;
- the potting mix should not be too dry. In this case, it will be difficult to pull out the babies, which retain the ability to emerge for several years. As a result, this can lead to mixing of varieties.
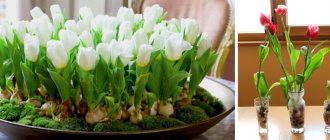
Rules for planting gladioli and caring for them in the open field
First of all, we decide on the place. The place where potatoes and carrots grew before is not suitable for planting skewers. Also, you should not choose places where manure was previously introduced - gladioli do not tolerate it. Suitable predecessors include marigolds, dahlias, tomatoes, and peas. Also, you should not choose shaded places and those where groundwater is close. Acidic soils are also unsuitable, or the soil for flowers must first be deoxidized. On heavy soils, sand is added. Gladioli do not like organics, but mineral fertilizers need to be applied for digging. To get the desired result from growing gladioli, you need to adhere to the following rules:
- the bulbs are embedded to a depth equal to four diameters of the bulb itself;
- the distance between tubers should be from 15 to 20 cm;
- the bottom of the trench should be drained with sand or sphagnum;
- the soil during planting must have a temperature of at least + 10 ° C.
Landing gladioli in trenches
During the entire period of growing flowers, you need to monitor the moisture content of the soil, preventing it from drying out, but you should not overmoisten it either. In hot weather, it is recommended to water every evening, and after watering, be sure to loosen it to break the soil crust. Watering should be so abundant that the soil is moist at a depth of 20 cm. At the same time, you cannot pour water directly onto the plants.
Top dressing is carried out after the release of the first leaves - with nitrogen fertilizer, after the release of the sixth leaf - with phosphorus-potassium, when laying the buds, you can apply a solution of bird droppings. Spraying with a solution of potassium permanganate, copper sulfate and boric acid also works well.
Drying and storage methods
Gladiolus bulbs should be disinfected before storage in order to destroy fungal spores and pathogenic bacteria. Rinse them thoroughly under running water, and immerse them for half an hour in a weak solution of potassium permanganate. Then take it out, spread it out on a thick cardboard or board in a ventilated place until it dries completely. This is an important point. If the bulb dries poorly, it will start to rot and will only have to be thrown away.
For two days, the corms are kept in the fresh air. Then they need to be folded in a wooden container in one layer and dried in a room at room temperature for a month.
There are many storage options.
- You can buy finely woven nets that are specially designed for vegetables. Some housewives use ordinary nylon stockings for gladiolus bulbs.
- Cardboard boxes work well. Line the bottom with paper, and make small holes in the walls for proper air passage. It is allowed to use wooden boxes.
- Babies are best kept in paper bags or cloth bags. For sewing, use only natural fabrics such as cotton or linen.
Do not put prepared bulbs in plastic bags if there are no holes in them. The planting material releases a small amount of moisture. Without air circulation, it does not evaporate, but accumulates. As a result, the tubers rot, deteriorate and germinate.
To keep the plants reliably protected from fungi and bacteria, put a few stalks of mint or garlic cloves in the container. They have bactericidal properties, and their smell repels pests.
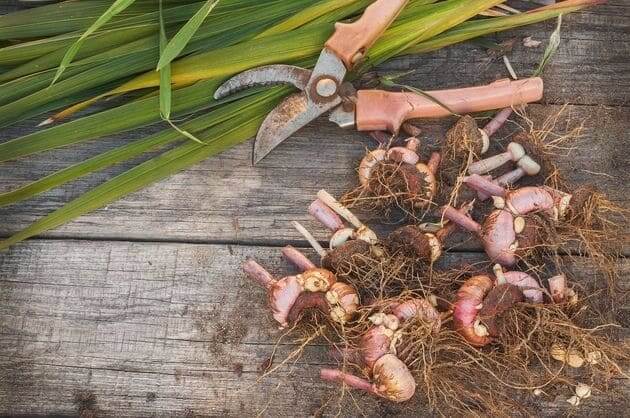
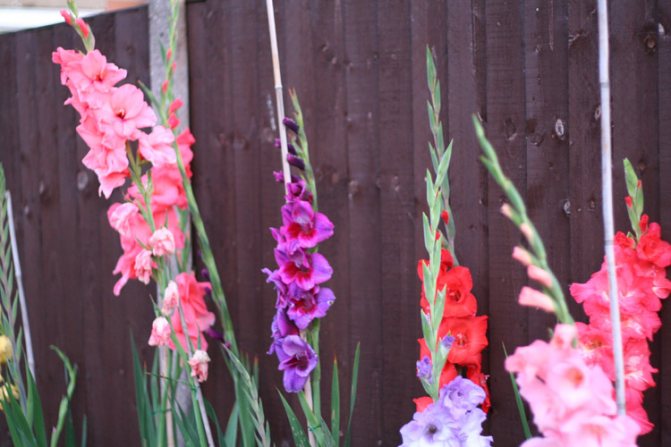
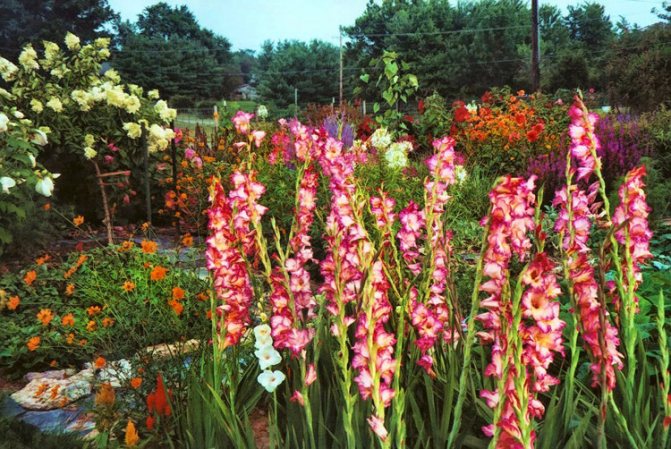
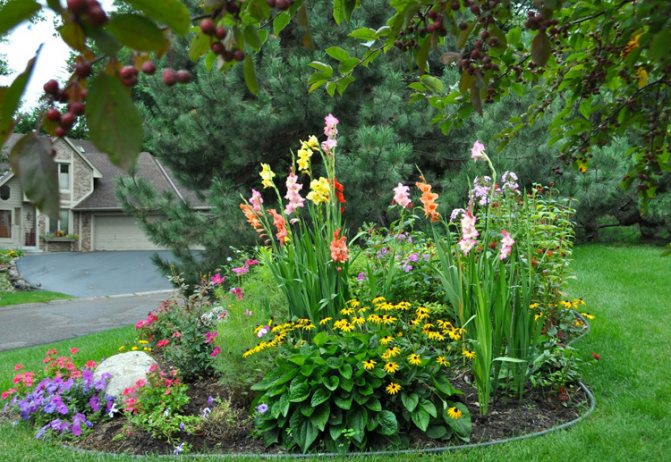
Photo gallery and varieties of gladioli
Gladiolus varieties
Gladiolus varieties are classified according to many parameters and are written in the form of a digital and alphabetic cipher containing all the information about this variety. Immediately after the name, the variety code is indicated in the form of a three-digit number.
Here are the quality standards indicated by the code:
| Cipher | Flower diameter | Flowers not less | Opened flowers | Peduncle length |
| 100 | less than 6 | 15 | 5/6 | Max. 43 |
| 200 | 6-9 | 18 | 6/5 | Max. 46 |
| 300 | 9-11,5 (12) | 19 | 7/5 | Max. 51 |
| 400 | 11,5 (12)-14 | 20 | 8/6 | Max. 51 |
| 500 | over 14 | 19 | 7/5 | Max. 56 |
The first digit of the code indicates the diameter of the flower, the second - the color group, the next one informs about the color saturation and the presence of blotches of other colors (for single-color ones, an even number is indicated). The three-digit number is followed by the designation of the flowering time:
- OP - very early;
- R - early;
- RS - early middle;
- C - medium;
- SP - medium late;
- P - late;
- OP - very late.
Further, two numbers indicate the year of selection of the variety. Besides, the author's surname or company name is added. There may also be a combination of letters indicating corrugation:
- NG - non-crimped;
- UG - moderately corrugated;
- G - corrugated;
- SG - strongly corrugated;
- SSG - super-strong crimped.
Grade designation
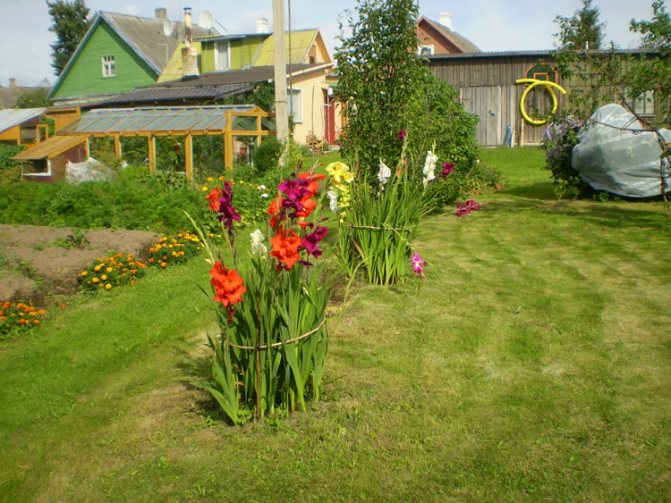
Photo of gladioli in landscape design
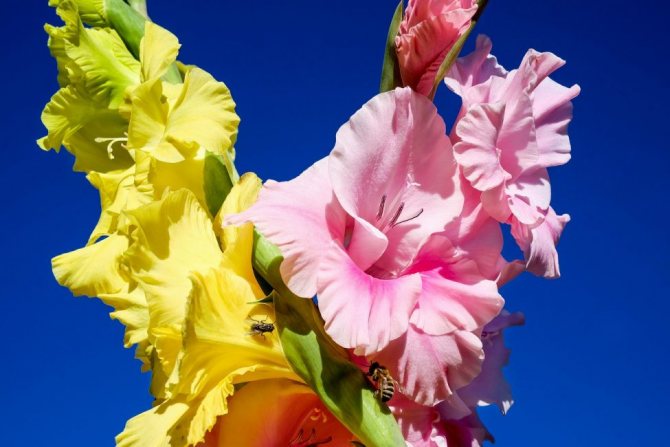
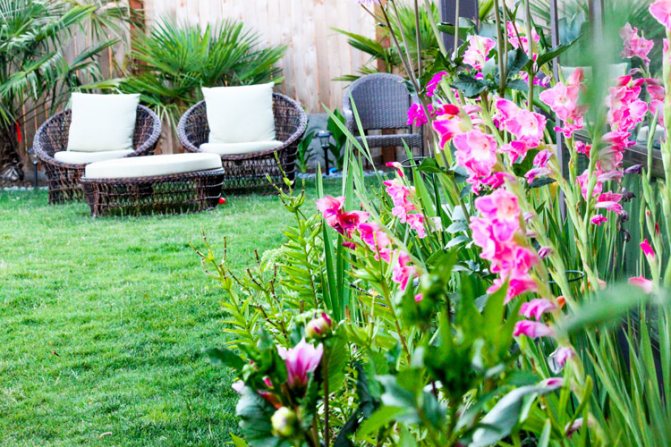
This royally luxurious flower could not fail to receive recognition from landscape designers around the world. The variety of its colors, shapes and sizes allows you to create compositions that are not similar to each other, in accordance with the individual characteristics and purpose of any site.


Why dig up for the winter
The need to dig a gladiolus in winter time can be explained by its sensitivity to cold, in winter the culture can easily freeze. A critical indicator for a flower is a temperature below minus three degrees. It is in such conditions that the corms of the plant begin to die, and it is no longer possible to fix such a process. That is why the tubers of the plant must be harvested and stored in a warm room until spring.
Digging a gladiolus is a rather responsible process for every summer resident, since the correctness will directly affect the state of the planting material.
It is necessary to clarify that the name of gladiolus came from the Latin word gladiolus, which means "sword" in translation. Its leaves strongly resemble swords, which gives the plant its name. Science knows about 2,000 varieties of gladioli.
Storage errors
Sometimes inexperienced growers make mistakes, as a result of which the flowers die. Here are the most common examples:
- the bulbs were dug out of the ground early and did not allow them to dry out properly;
- before storage, the planting material was not treated with fungicides and insecticides;
- during storage, the temperature was below zero and the bulbs were frozen;
- the bag or box was tightly closed, as a result of which the gladioli disappeared.
Some also consider it a wrong action to fill sawdust or earth in the box where the tubers are placed. If moisture accidentally gets on them, then, on the contrary, the tubers will rot very quickly.
To extend the shelf life of your bulbs until spring, you need to use some good advice:
- every 3-4 weeks, the planting material should be checked for moisture and damage to the tubers;
- if a small section of the onion still begins to rot, you do not need to throw out the tuber. It is enough to cut off the bad part and process with potassium permanganate. After potassium permanganate, sprinkle the site with ash, but store it separately from other representatives;
- sometimes gladioli dry up during the winter. In this case, before planting, the bulbs are soaked for 30-40 minutes in cool water. A growth stimulant can be added to the water to activate the plant;
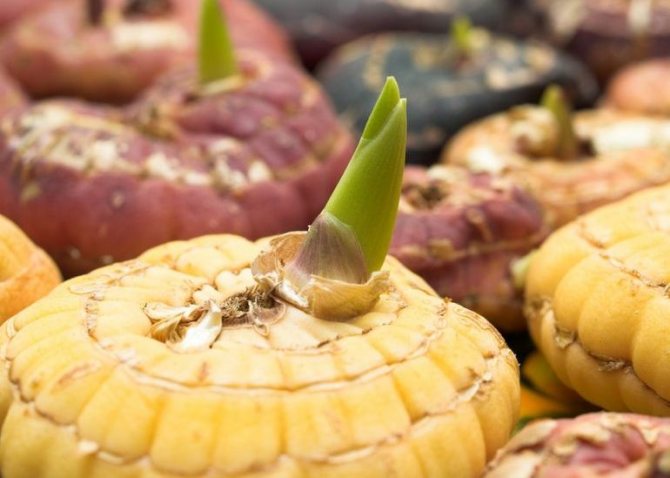
- with the arrival of spring and warming, the bulbs begin to germinate. For best germination, they are moved to a sunny, warmer room and left there for a couple of weeks.

It is quite possible to keep the bulbs healthy, with proper care they will change from year to year. The immunity of perennial gladioli is significantly strengthened every year, which allows them to multiply and refine flower beds and the surrounding area. Favorite flowers will again delight you with beauty in the summer season in garden plots and flower beds.
How to keep flowers in the country
It is not always possible to take out tubers from the summer cottage after the end of the season. Do not be upset, we will tell you where you can store flowers.
A cool, dry, ventilated cellar is an excellent storage place. However, if you decide to store tubers in this place, one caveat must be taken into account: in addition to the bulbs, there should be no fruits and vegetables in the cellar, as they are capable of releasing a large amount of moisture, which can lead to mold.
Important! The large bottom of the bulb indicates its old age. In this case, it is recommended to tackle the rejuvenation of the variety.
Maintaining a constant temperature of 4-7 ° C is one of the mandatory storage conditions. It is also necessary to monitor the humidity indicator, it should be in the range of 65-80%. Storage of children of gladioli should be carried out in cooler conditions with high humidity.
If you have a mesh, you can build special boxes. The net stretched to the bottom will provide good ventilation and the tubers will not rot.
You can use a trench to store tubers. This method is suitable if there are no harsh winters in your area. Ground water should not flow near the selected area.It is necessary to dig a trench, the depth of which should be approximately 80 cm and the width of 70 cm.
If you don't have a place to plant gladioli, you can grow them in a container.
Gladiolus bulbs are folded into boxes, covered with dry sawdust and lowered into a recess. Top boxes should be covered with dry leaves and covered with foil. Thanks to this protection, rain and melt water will not fall on the bulbs. It is very important to complete the trench laying before the onset of severe frosts.
Interesting Facts
Gladiolus has been known since ancient times. Its corms were eaten. They were baked and eaten in their pure form, and were also used to make flat cakes, grinding together with onions.
The ancient Greeks believed that gladiolus protects warriors from death and brings victory... For this, the warriors wore amulets made of gladiolus corms around their necks. In the Middle Ages of our era, flour was made from bulbs, which was used as an additive in baking bread.
In the XYII and XYIII centuries, this wonderful plant was used for medicinal purposes. It was used as a diuretic and to relieve toothache.
Description of gladioli
The name "gladiolus" comes from the Latin word gladius, which means "sword". Indeed, the leaves of the plant in their appearance resemble a sharp sword. Therefore, among the people gladiolus is often called a sword.
The homeland of gladiolus is the regions of Africa and the Mediterranean, Central and Southern Europe, Central Asia and Western Siberia with a tropical and subtropical climate.
Gladiolus is a bulbous plant. The corm is round, slightly flattened, in filmy scales, the color is varied, from milky to black cherry. The stems of the flower are erect, reaching a height of 50 to 150 cm. The leaves are xiphoid, bluish-green, 50 to 80 cm long. The flowers are collected in a spike-shaped inflorescence.
Disease protection
Thrips are almost one dangerous pest that can damage a plant. They crawl under the husk of the bulb and continue to winter together with the tuber. During wintering, such a pest can completely drink all the juice from the bulb, as a result of which it simply dies.
That is why the material must be well processed before storage. This is the only way to avoid death. Experienced flower growers advise to carry out such a procedure for the plant as sprinkling with cockroach powder. It is recommended to carry out it several times - before laying it for winter storage, as well as in early January. To make the tubers look healthy, they need to be treated with chemicals.
Buying the same plant varieties every year is not entirely profitable. At the same time, it will be quite simple to preserve the plant bulbs, you just need to choose a method that is exactly suitable and will help the tuber to survive.
If you want gladioli to continue to delight your eyes throughout the summer season, then you should carefully consider their storage in winter. To do this, it is best to follow the recommendations and advice of flower growers, as well as protect the plant from damage by possible diseases, then you will definitely succeed.
Gladioli - flowers loved by many gardeners require attention. They need to be dug up in time, cut off, and then stored in gladioli in winter. There are many different options for storing gladioli in winter, and we will tell you about all of them. We hope you find the most suitable method for yourself and save your favorite varieties of gladioli until spring.
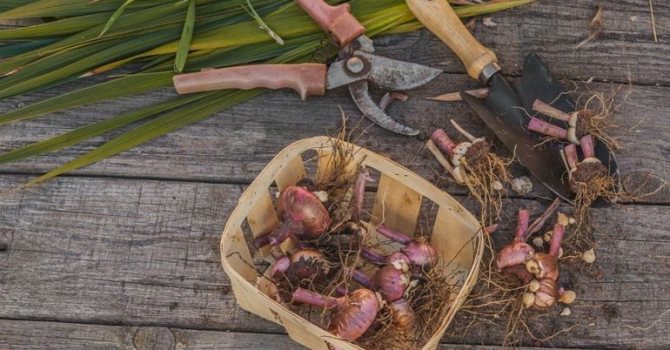
To make your gladioli delight you with abundant flowering and large corms, start cutting flowers according to the following scheme:
- You need to cut off gladioli when the flowers partially open.
- It is best to cut the gladiolus flower when the two bottom flowers are in full bloom.
- I cut the peduncles with a sharp knife early in the morning or in the evening so that the remainder of the peduncle is deeply hidden between the remaining leaves, of which there should be at least four on the plant, and which should ensure further growth and development of the corm. After all, she needs to gain strength to please us with lush flowering next year.
The time when it is best to remove gladioli from a flower bed can be easily calculated. It should take 30 - 50 days after flowering, and then gladioli can be safely dug out. The aerial part of the plant should die off during this time, and only then, the gladioli can be dug up and cut off.
After digging, gladioli are cut off. And this must be done very carefully! In no case should you cut, cut off or twist the stems and leaves of gladioli until they die off completely. Their dying off just happens 30 - 50 days after flowering.

Varietal variety
Gladiolus is an unusually beautiful plant. There are a huge number of species and varieties of plants. They are:
- miniature;
- small;
- medium;
- large;
- gigantic.
The colors of the flowers are very diverse.
In order to take into account all the varieties, scientists have developed a classification of gladioli varieties, where, using digital codes, each variety is described by color and size of flowers.
What you need to know about the characteristics of the plant in order to preserve the bulbs until spring
Gladiolus is a plant from the iris family, belongs to the genus corms. This flower was brought to Russia from Africa and the Mediterranean, where it grows in subtropical conditions. Unlike irises, the gladiolus tuber is delicate and does not tolerate wintering at subzero temperatures. The corm dies already at a temperature of minus three degrees, and it will not be possible to save it with hypothermia.
Gladiolus bulbs are very delicate and die even with a slight minus.
A feature of this flower is the formation of a new bulb on an old one planted in spring. After the formation and flowering of a new bulb, the old one dies off. For flowering in the next growing season, the new bulb must mature in the soil. The ripening time of the bulbs depends on the variety of gladiolus.
Belonging to a particular species is usually indicated on the packaging of the bulb in the store:
- OPs are very early. Bloom 85 days after planting. These species are recommended to be planted in regions with a short summer season.
- C - medium. Bloom in 100 days.
- P - late. Bloom in 130-140 days.
It is impossible to regulate the flowering time by early planting of corms, since, being in cold soil, the bulb does not develop and can die from exposure to moisture. Therefore, before buying and planting gladioli in their own area, each grower must calculate the time it takes for the plant to fully develop. In order to dig up the onion in the fall and save it until planting in the spring.
Rules for preparing for storage in the refrigerator
The excavated planting material must be dried and sorted. Weak, pest-affected and infected specimens must be removed, because during storage they can destroy all planting material.
Drying is provided according to the following algorithm:
- the bulbs are put in mesh boxes in one layer;
- the box is removed to a dry, warm place (the temperature should be at least 24 degrees);
- drying time - 1-1.5 months.
After completing the procedure, viable babies are removed from the bulbs, the dried stem is removed and the roots are cut off. The resulting material should immediately be laid out according to varieties so that in the spring there are no problems with planting them in a flower bed.
Since gladioli are often subject to fungal and bacterial infections, the processing of planting material before it is sent for storage is an important step. Experienced growers recommend immersing the bulbs in a solution of basezol and manganese for 30 minutes.At this stage, the use of any growth stimulants is strictly prohibited, because the bulb will have a rest period. After this procedure, the onions are re-dried for 1 week, and then the most convenient storage method is determined.
Advice! Garlic is a natural antibacterial component, so its cloves can be placed next to the planting material. The secreted essential oils will help prevent the development of the infectious process.
Recommended storage conditions:
- temperature is about 4 degrees;
- air humidity - 75%;
- darkness, lack of sunlight;
- sufficient air access.
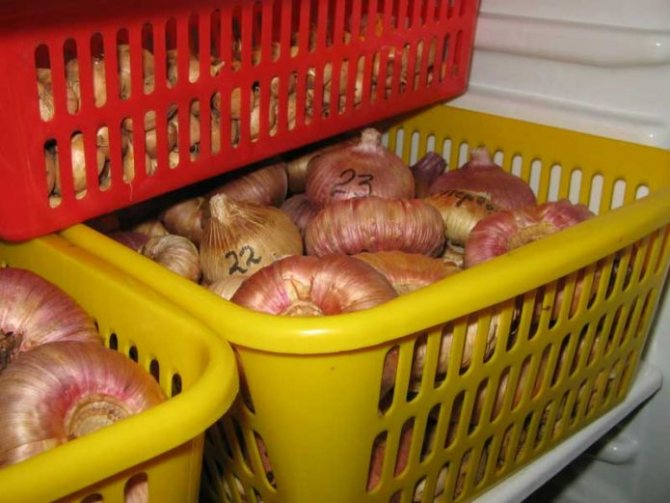
The listed conditions can be ensured by placing the planting material in the refrigerator, namely in the compartment for vegetables, but special attention should be paid to its packaging.
In winter, all stored specimens must be inspected for damage once a month. If any signs of damage are detected, the specimen should be isolated from the total mass, otherwise all the material may deteriorate.
Subject to the described requirements of the bulb, there are ways to successfully transfer wintering in the refrigerator. Such a non-standard solution will not affect the health of the plant and the splendor of its flowering in the next season. Another positive point is that when stored in the refrigerator, there is no risk of damage to the tubers by rodents.
Features of storage in the refrigerator
The method of storing planting material in the refrigerator is convenient because the gardener can control the condition of the bulbs at any convenient time. Also, the unit ensures the content of the material in stable conditions: fluctuations in temperature and humidity are excluded.
To send gladioli to the refrigerator for the winter, you must:
- pack the bulbs in isolation from each other, wrapping each with a sheet of parchment or other thin paper;
- sort the material by grade and put it in plastic bags;
- make several volumetric holes in the bags for ventilation;
- put in a container for vegetables.
If there is not enough space in the container for vegetables, you can place the material on the glass shelf located above it, the conditions there are no less suitable. In the first few months, the safety of the material is recommended to be checked once every 2 weeks. If dampness is found on the surface of the tubers, they should be removed from the storage and additionally dried.
Attention! If gladiolus tubers begin to germinate prematurely in the refrigerator, they need to be moved to the uppermost shelf. The temperature there is lower, and accordingly, development will slow down.
It is convenient to store gladioli in the refrigerator, but not every gardener can boast of a volumetric unit; accordingly, it is not always possible to place the entire stock of planting material without prejudice to your own convenience. In such cases, it is worth paying attention to two other methods that allow you to preserve plants in an apartment.
How to keep bulbs in an apartment
To store bulbs in an apartment, it is important to choose a place with the lowest possible temperatures. For example:
- on the windowsill near the wooden frame;
- in the corridor by the door;
- near a leaky balcony door;
- in a common vestibule.
The main difficulty that arises when choosing this storage method is to preserve optimal moisture, so the bulbs need to be wrapped with paper in several layers. If the moisture is insufficient, the material may dry out and become unsuitable for planting.
Preparation for storage in an apartment is provided by this method:
- the bulbs are placed in a low wooden or plastic container;
- copies are laid out in one layer so that they do not come into contact with each other;
- the bulbs are covered with river sand.
If the decision is made to keep the bulbs on the windowsill, they are simply laid out on the surface in one layer. The room should be regularly ventilated and the material should be kept away from sources of centralized heating.
Is it possible to keep planting material on the loggia
Planting material can be kept on a glazed loggia, but the owner must regularly monitor the temperature. If it drops to 0 degrees, gladioli should be brought into the apartment. Otherwise, the bulb will freeze and die. Storage is provided according to the described method used for keeping in an apartment. Gladioli are recommended to be placed in a shallow container in one layer, and then sprinkled with sand or sawdust.
Especially carefully inspect the material when storing it on the balcony in the spring. Bulbs germinate not only because of the heat, but also when exposed to sunlight. Therefore, as soon as daylight hours begin to increase, it is recommended to additionally cover the container with a dense cloth. At home, you can insulate the container used with foam, but this insulation must be removable.
Possible plant difficulties
Without fail, tubers must be inspected once a month in order to quickly identify deviations from the norm.
Some options for plant problems:
- Development of gray mold - too high humidity, it is necessary to dry and replace the paper.
- Thrips development - for this, damaged tubers are harvested, and healthy ones are treated with Hom.
If there are no suitable means to eliminate thrips, then you can put the diseased bulbs in a special container, which must be tightly closed.
On the damaged bulbs laid out in the container, special cotton wool soaked in medical alcohol with a concentration of 96 percent is placed, well closed with a lid. With this method, thrips, which cannot withstand the effects of alcohol, simply die. After that, the tubers dry well:
- such a procedure must be carried out twice with a total interval of four days;
- Be sure to put a plastic cover between the cotton wool and the bulb.