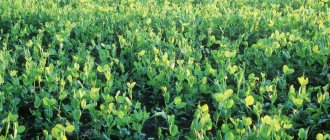
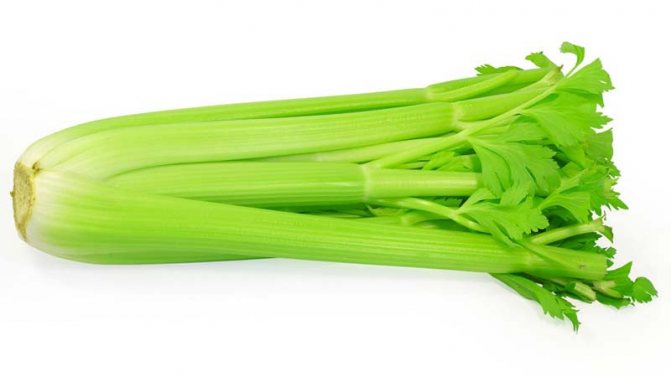
Celery is a biennial or perennial vegetable from the Umbrella family. It is appreciated for its pleasant taste and specific spicy aroma. There are about 20 wild varieties, but in the dachas, one species is mainly grown - the fragrant one. Gardeners prefer to choose two-year varieties that give green mass and roots in the first year, and seeds in the second. Few know how to grow celery from seed, despite its apparent simplicity.
What is stalked celery and what are its features
Celery is a biennial crop from the umbrella family. This is a relative dill and carrots.
There are three types of plants: petiole, leaf and root. They differ in that they give the greatest amount of nutrients to different parts of the plant.
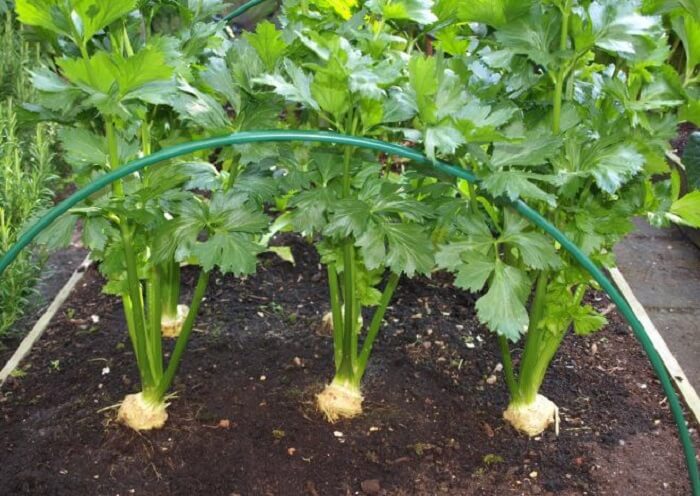
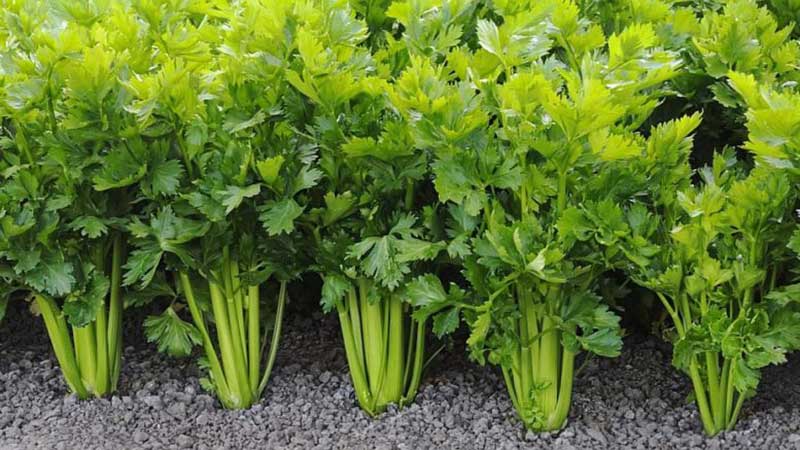
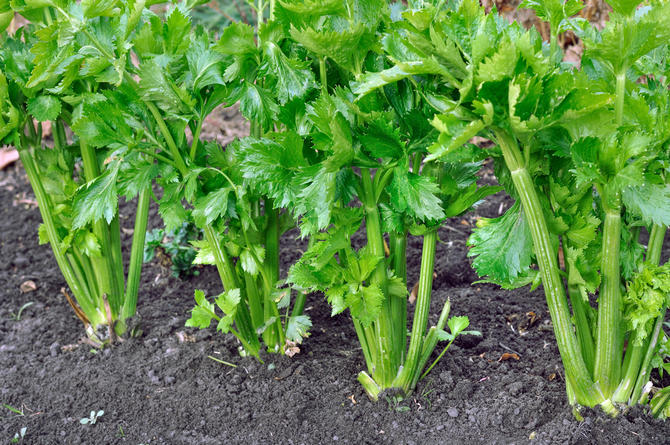
Petiole celery has thick, juicy stems. Its roots do not form root crops, and with proper care, the leaves are underdeveloped. It is characterized by cold resistance, therefore it can be grown even in such regions as the Urals, Moscow region and Siberia.
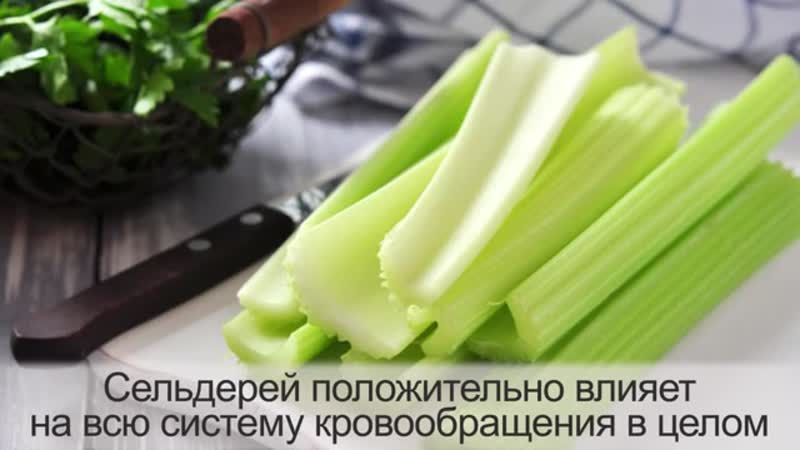
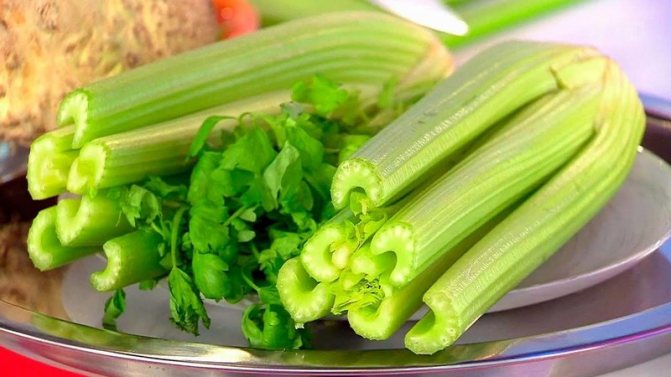
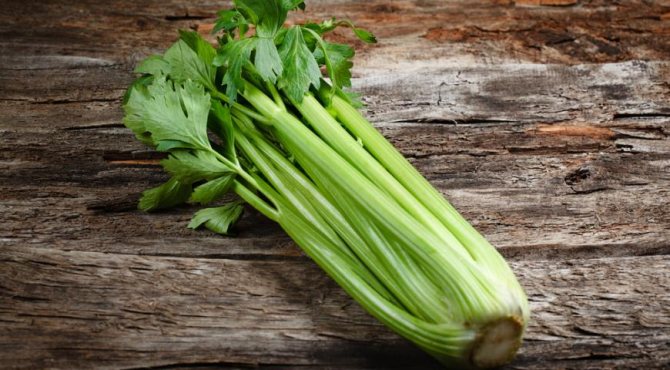
A plant with a pronounced aroma and contains a natural flavor enhancer. This product is used to improve the taste of the first and second courses. It is also consumed raw.
Celery is a healthy vegetable. 100 g of product contains only 12 kcal, 0.91 g of fat, 0.12 g of fat and 2.4 g of carbohydrates. It contains a large amount of amino acids, minerals (phosphorus, potassium, calcium, sodium, magnesium), vitamins (A, B, PP, C, K), flavonoids.
Celery activates metabolism, has a positive effect on the condition of the liver and kidneys, and normalizes blood pressure and hormonal levels. Dried and chopped petioles are useful in place of salt.
This plant only has a drawback - it is difficult to cultivate. Until the plantings get stronger, they are extremely sensitive to negative environmental factors. Violation of the care technology leads to a decrease in the taste of the petioles.
Another disadvantage is that many varieties will have to be bleached to become edible. Breeders have developed hybrids that do not need bleaching, but they are more sensitive to lower temperatures.
Bleaching is carried out so that the stems lose their bitterness, too spicy taste and bright green color. To do this, they are denied access to sunlight at the last stage of development, when the height of the stems reaches 30 cm.The procedure is as follows: celery leaves are collected in a bunch and wrapped with improvised material - cardboard, paper, scraps of plastic pipes, etc. It is important that the wrapper fits snugly against the bottom of the soil.
Planting celery - where to start?
First you need to decide what type of celery you want to grow on your site. At the moment there are three of them:
- Leafy - grown for greens rich in vitamins;
- Petiolate - for juicy petioles:
- Root - for root crops.
When deciding how to plant celery, you need to know that, of course, not so much actually depends on the species, but there are still certain nuances.
After having decided on the type, it is necessary to pay due attention to the choice of seeds, of which there are a great many on the market today.It would seem that the whole difference lies only in appearance and in some agricultural technology. In fact, celery of different varieties differs in taste, application, properties. Therefore, everything here is individual and, probably, you will have to try several options in order to choose the most suitable variety for yourself.
The varieties that have received the greatest demand and popularity:
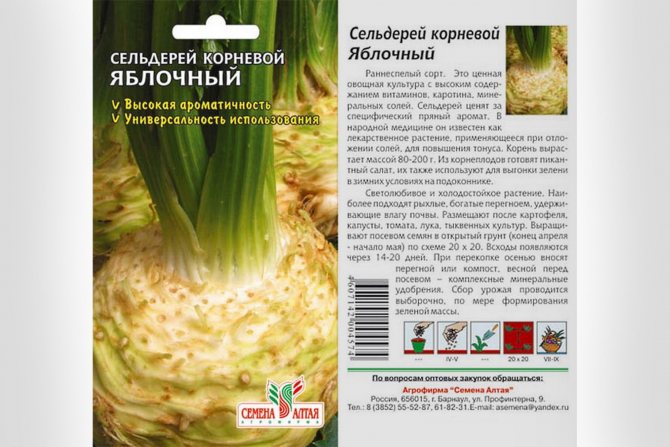
- Root: Diamond, Maxim, Apple.
- Leafy: Cheerfulness, Spartan, Kartuli.
- Pereshkovy: Atlant, Malachite, Jung.
The best varieties for outdoor cultivation
There are several varieties of celery suitable for cultivation in our country. They are divided into two groups depending on whether they need to be bleached or not.
Self-bleaching varieties and hybrids:
| Varieties and hybrids | Description |
| Malachite | Differs in light green fleshy stems. From 1 sq. m harvest up to 4 kg. Petioles are ready for harvest 90 days after sowing the seeds. |
| Tango | The stems are curved and fleshy, with a rich flavor. The weight of one outlet reaches 1 kg. From 1 sq. m receive up to 3.5 kg of the crop, which is ready for harvest 170 days after sowing the seeds. |
| Gold | Stems are slightly curved. The weight of the outlet reaches 700 g. From 1 sq. M. harvest up to 5 kg. Plants are ready for harvest 150 days after sowing seeds. |
Varieties requiring bleaching:
| Variety | Description |
| Pascal | The length of the stems reaches 35 cm. The weight of the rosette is up to 0.5 kg. From 1 sq. m collect up to 4 kg of outlets. The crop ripens 100 days after sowing the seeds. |
| Utah | The stems are thick and dense, their length reaches 25 cm. The mass of the rosette reaches 400 g. The variety is late-ripening - the harvest is harvested 160 days after the first shoots appear. |
| Male prowess | Thick, fleshy stems are slightly curved. Their length reaches 50 cm, and the weight of the rosette is 600 g. Purple color is characteristic. The crop is ready for harvest 170 days after sowing the seeds. |
| Atlant | The stems are even, their length reaches 45 cm. The mass of the outlet is 450 g. From 1 sq. M. m harvested up to 3.5 kg of the crop. The ripening period is 160 days. |
| Crunch | The stems are dark green, fleshy and juicy. The rosettes are ready to harvest 110 days after sowing the seeds. |
| The groom | The height of the stems reaches 40 cm. One rosette weighs 400 g. The crop is ready for harvesting 150 days after sowing. |
Types and varieties of plants
Before proceeding to the step-by-step instructions for cultivation agrotechnics, it is worth understanding the types of plants. There are 3 main categories:
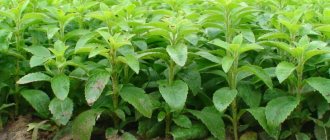
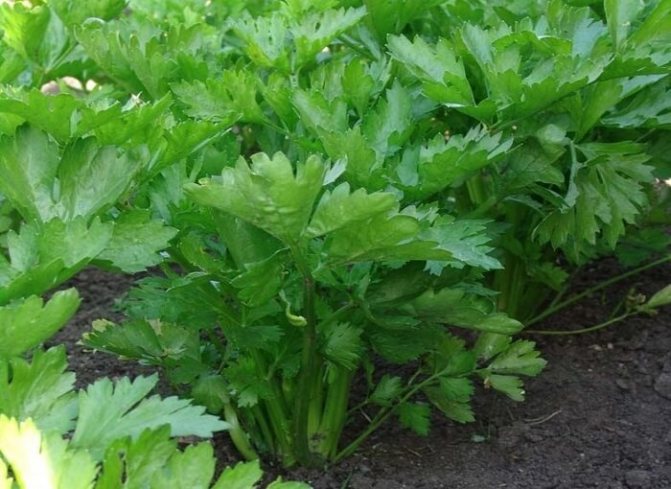
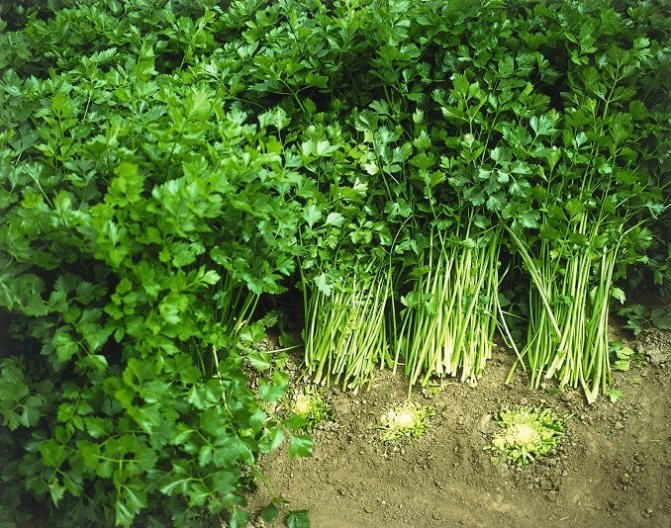
- Leafy - forms a rather dense rosette, consisting of 100 or more leaves. Grows back quickly after cutting. Its shoots are elongated and thin, from 60 cm long. Not so common in gardening, since it does not form root crops. Varieties: Cheerfulness, Samurai, Spartan, Zakhar, Kartuli, Tender.
- Petiolate - a vegetable with thick and juicy petioles, up to 4 cm in section at a height of 40 cm or more. Greens do not grow as intensively as in the previous representative. There are no more than 20 leaves in the bush. Stems are cylindrical-concave. The most popular varieties are: Pascal, Golden, Malachite, Tango, Triumph, Aelita.
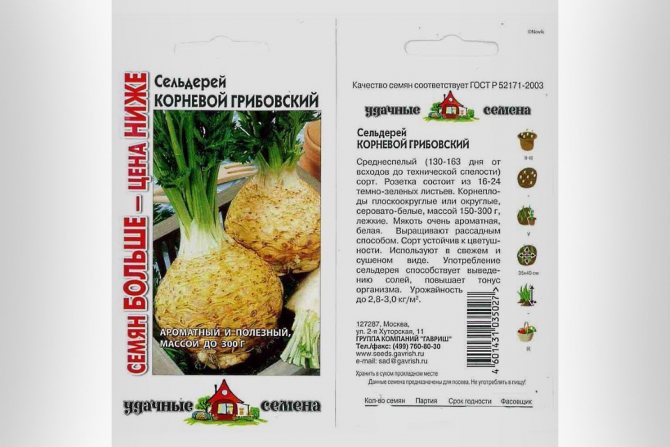
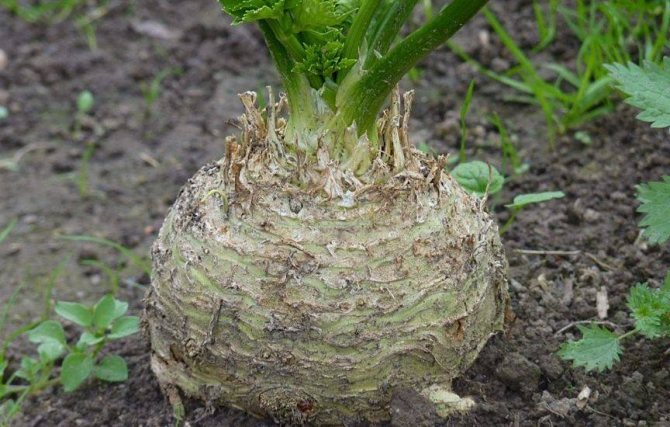
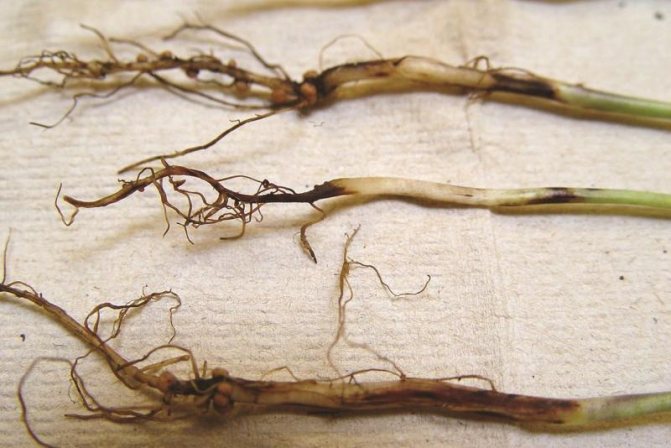
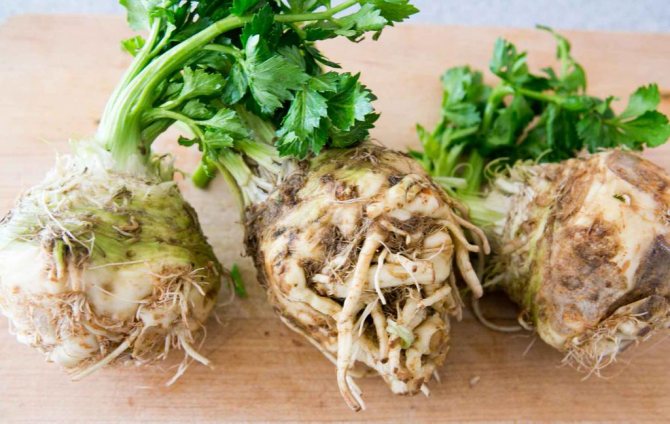
- Root - differs in rather large rounded roots. By the time they fully ripen, they gain weight about 700-800 grams. Popular hybrids: Delicacy, Globus, Gribovsky, Diamant, Egor, Esaul, Zvindra, Apple.
Along with the main species, there is an extensive range of hybrid varieties. Each is good in its own way, with individual taste and appearance. They are divided into early ripening, mid-ripening and late ripening periods.
Sowing and transplanting dates
Stalked celery develops slowly. It is important to sow the seeds in a timely manner, otherwise the stems will not have time to become sufficiently fleshy and juicy until the first frost.
It is advisable to choose the timing for sowing celery, focusing on the manufacturer's instructions. There are also general recommendations regarding the time of growing seedlings in different regions:
- cities with southern climates - the second half of February;
- regions with moderate climatic conditions - early March;
- cities with cold climates - end of March.
Seedlings are planted in open ground in early March or June, depending on the region. By this time, the soil at a depth of 15 cm should have reached 15 ° C.
Where to plant celery?
When planning a site and choosing a place where to plant celery, you should be guided by the following features of this plant:
- Photophilousness. For full development, all types of celery need bright lighting throughout the day. Without it, the greens will become pale and lethargic, and the roots will become crushed and deformed.
- Fear of stagnant water. Although the culture requires regular watering, it does not tolerate waterlogging. The soil on the site should be well water and air permeable.
- The need for rich soil with a neutral reaction. In the process of growth, celery draws a large amount of nutrients from the soil, so the site must be thoroughly fertilized. This will have to be done in advance, during the autumn digging.
How to grow seedlings
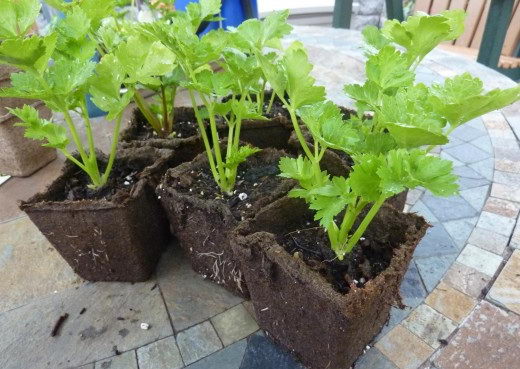
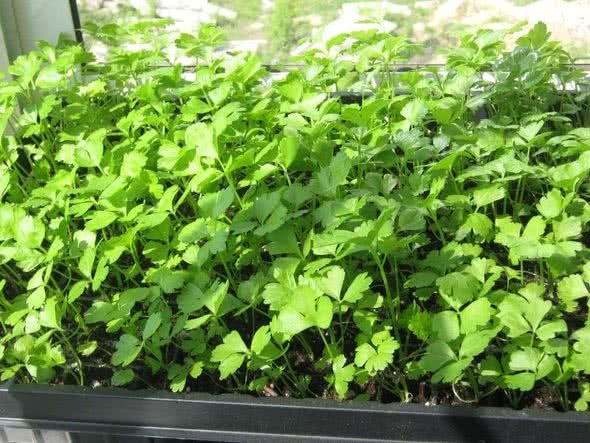
Petiole celery is grown only in seedlings. It has a long ripening period, so with the seed method, its stems simply won't be ready for harvest.
Growing celery seedlings is a long and complicated process. It is the young plants of this culture that are most capricious in their care and do not tolerate any adverse effects poorly.
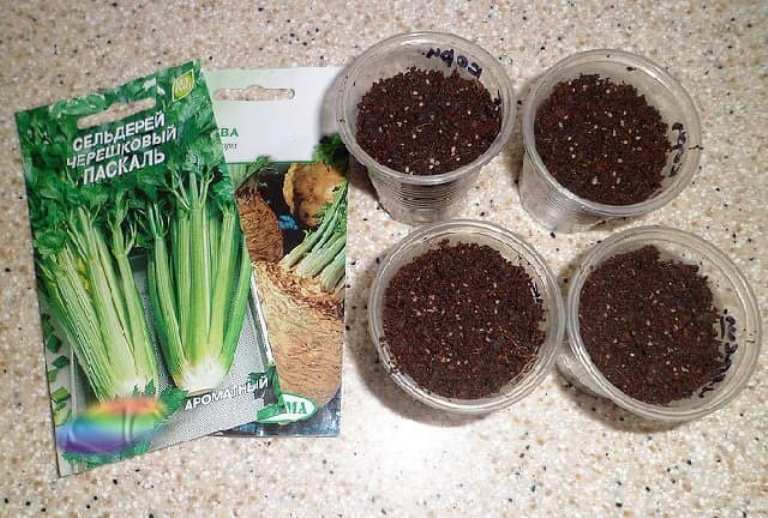
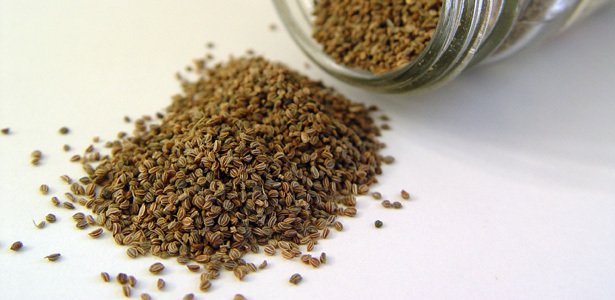
When deciding on the amount of planting material, it is important to take into account that celery seeds have a low germination rate. Seeds are taken 2-3 times more than the desired number of plants.
Preparatory work
For growing celery seedlings, light and nutritious soil with low acidity is used. A universal seedling soil is suitable. To prepare the soil mixture, take the following ingredients on their own:
- peat - 3 parts;
- ash - 1 part;
- humus - 1 part;
- sand - 1 part.
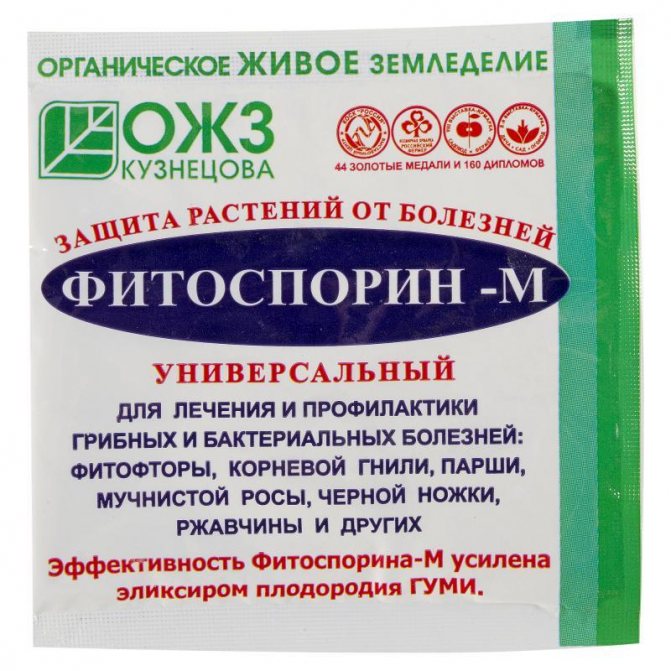
The soil is disinfected. To do this, it is calcined in the oven, poured with boiling water or sprayed with a dark pink solution of potassium permanganate. Additionally, it is recommended to treat the soil with "Fitosporin", which is considered an antifungal agent.
For celery, two types of containers are prepared:
- Wide boxes or plastic trays.
- Containers 15 cm high (cups, peat or plastic pots, cut bottles). Plants dive into such a container after two real leaves appear on them. The pots must have drainage holes.
The container is also disinfected. It is soaked in a dark pink solution of potassium permanganate or rubbed with alcohol.
To increase and accelerate the germination of seeds, they are prepared before planting. This will reduce the risk of infection of plants and increase their resistance to negative external influences:
- Disinfection. The seeds are immersed in a light pink solution of potassium permanganate for 15-20 minutes. Fitosporin solution is also suitable. After that, the seeds are washed with water at room temperature.
- Removing the oil shell. The seeds are soaked in water with a temperature of 60 ° C for 8 hours. During this time, the water is changed several times. The procedure will remove the essential oil from the shell of the planting material, which prevents it from germinating. Then the seeds are washed again under running water.
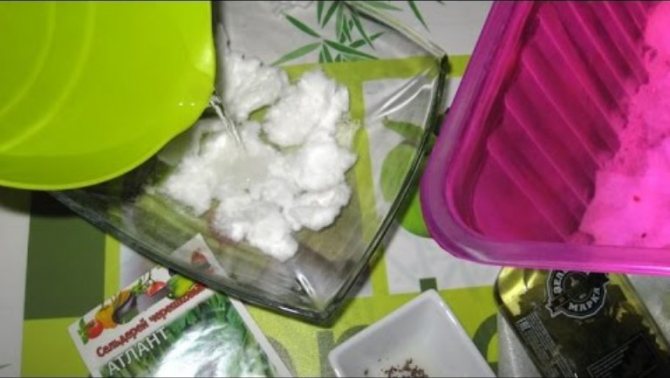
- Germination... The first method: the planting material is wrapped in wet cheesecloth, which is placed in a container and covered with a film. Until the planting material germinates, it is moistened as it dries and regularly ventilated. The second method: a layer of wet sawdust is poured on the bottom of the can, sand is distributed on top, mixed in equal proportions with seeds. The container is not covered. The substrate is moistened as it dries.In both cases, the seeds are germinated in a warm place.
Sowing seeds
The boxes are filled with soil so that 2-3 cm remain free to the edge. The soil is moistened with warm water or a solution of a growth stimulator from a spray bottle. In it, grooves up to 1 cm deep are made in rows.
Prepared, but not germinated seeds are densely poured into the grooves. If a large percentage of planting material sprouts, then the seedlings will have to be thinned out.
If the seeds were germinated in advance, then the hatched specimens are planted in grooves at a distance of 3-4 cm from each other. In order not to damage the thin sprouts, they are not taken by hand, but glued to a match head soaked in water or gently lifted with tweezers.
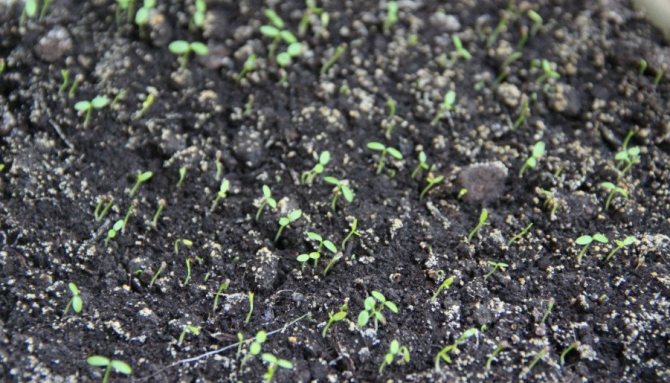
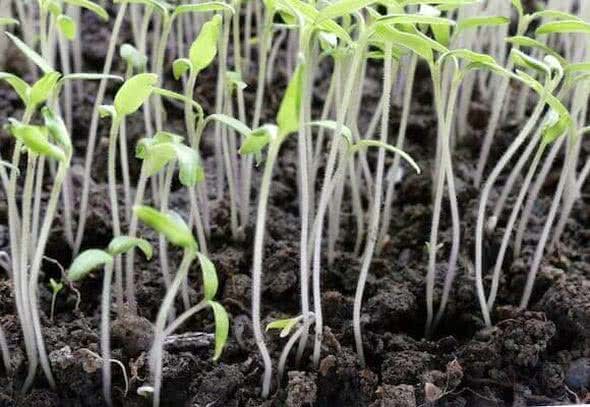
Sprinkle the seeds with a thin layer of earth. They are covered with foil and removed to a warm place before the first shoots appear.
Seedling care
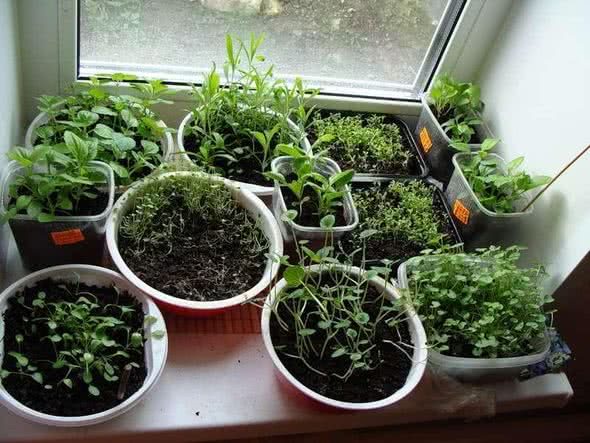
Seedlings are grown in a heated greenhouse or at home on a windowsill. In the second case, the plants are stronger and more hardy.
To grow strong and healthy plants, it is important to properly care for your seedlings.
The list contains the main nuances:
- After the first shoots appear, the film is removed from the containers. The seedlings are rearranged in a well-lit place. If there is not enough natural light (the plants begin to wither), fluorescent lamps are additionally used.
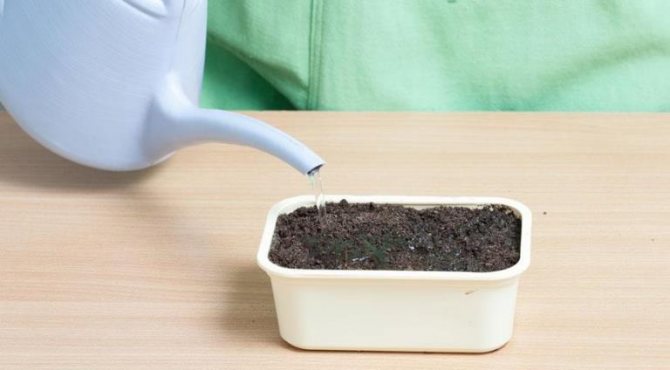
- Water the seedlings from a spray bottle as the soil dries out. Watering should not be too abundant. Otherwise, the water will stagnate and the plants will start to rot.
- After the emergence of seedlings, if the plantings are thickened, they are thinned out so that 3-4 cm remain between the plants.
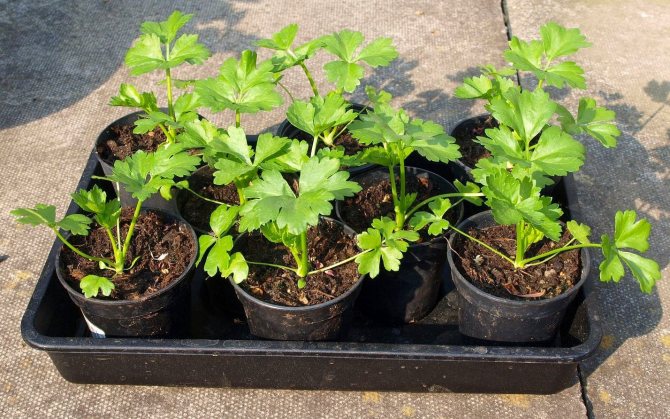
- After the appearance of three true leaves, the seedlings dive. To do this, they are removed from the common container using a fork. A layer of sand is poured onto the bottom of individual containers, and then soil. The stem is buried in half. After that, the plants are watered. The next watering is possible no earlier than a week later.
- For the entire period of growing seedlings, two dressings are applied. The first time is two weeks after the appearance of the first shoots, and the second is two weeks after the celery is picked into individual containers. Superphosphate 15 g, urea 5 g or potassium sulfide 10 g are used. These funds are added to a bucket of water.
- Before planting in open ground, the seedlings are hardened. To do this, it is taken out on the street or on the balcony for 10 days, gradually increasing the time spent in the fresh air.
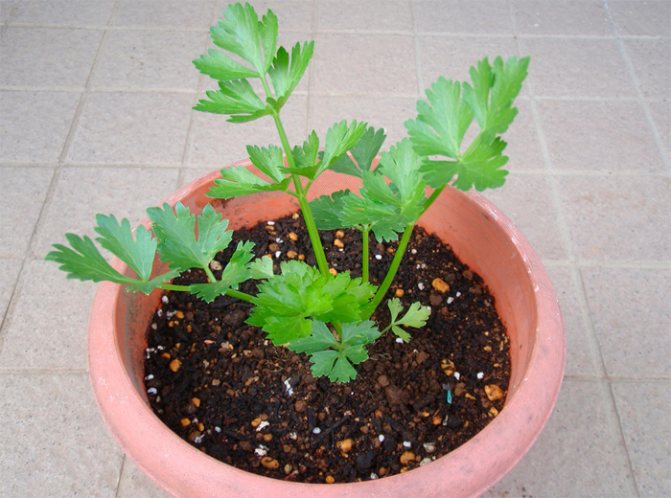
Is it possible to grow celery at home
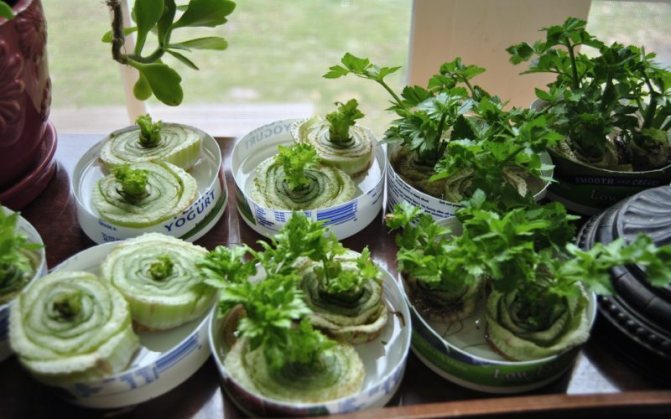
If we are talking about getting root crops at home, then this is possible only theoretically. Of course, artificial conditions can be created, but is there any point in maintaining high illumination for six months and creating long daylight hours in order to obtain several fruits? But it is quite possible to get vitamin greens in winter by planting a commercial celery root crop in a pot, which is often done. But it would be more correct to call this process not growing, but forcing greens.
Growing conditions
You can get celery leaves at home on an insulated balcony, if the temperature is at least 10 ° C, or on a lighted windowsill. For this, the root crop can either be bought in the store, or taken from your own summer harvest. It is important that it is not too small: at least 5 cm in diameter. No special conditions are required: you need a large pot, a place for it and a little effort, consisting in watering and maintaining sufficient light.
Landing
You can plant a root crop both in early spring (on the balcony, to get spring greens), and immediately after digging up the root crops in the garden (on the windowsill, for winter collection of vitamin products). However, it should be understood that the duration of the tender leaves will be short-lived: in two months the leaves will be, though fragrant, but very coarse, they can be used in cooking, but not in salads. This means that you will need to plant a new root crop.
Any flower pot or small bucket is suitable as a container. Several specimens can be planted in a large container, but not closely. It is advisable to place a small layer of drainage at the bottom, but there are no special requirements for the soil for distilling foliage: the earth of any usual composition will do. True, you can bring weed seeds from the garden with it, but this is not scary: weeding is not difficult, it is worse if it contains unpleasant insects. It is necessary to plant a root crop so that its crown is not covered with earth.
Care
Planting care is elementary. Potted celery should be watered frequently, preferably with settled water. Watering is required abundant, but without fanaticism: the soil should not sour, otherwise the root crop will simply rot. It is better to keep the pot on the southern windowsill: you need a lot of light. If we are talking about winter time, you will have to equip and additional lighting: a short day will not provide an opportunity to obtain a bountiful harvest, even of green products.
At home, we can only talk about getting green products.
The first leaves can be cut off in 2-3 weeks. To prolong the receipt of the crop, the soil in the pot must be periodically loosened. Should I give top dressing? It seems that it is better not to do this: as long as the root crop has its own strength, let it drive out the foliage as much. For your own health, it is better to get natural products, and after a couple of months, replace the soil and root crops in the pot.
Open ground transplant
The soil for celery is prepared a month before planting the plants in open ground. To do this, it is dug up and cleaned of weeds. Then rotted manure or humus is introduced at the rate of 6 kg per 1 sq. m. Add 30 g of superphosphate and 15 g of urea to the soil. The soil is thoroughly mixed with fertilizers.
A week before picking the seedlings to a permanent place, the soil is watered with copper sulfate (for 1 bucket of water, 2 tablespoons of the preparation are taken). Additionally, it is treated with "Fitosporin".
For celery, dig holes 10 cm deep. The distance between the rows should be 40-50 cm, and between the plants 25-30 cm. Celery is not deeply buried. Otherwise, it will start to rot.
After picking, the beds are watered abundantly with water at room temperature. The first two weeks at night they are covered with foil or white burlap.
Important! If celery is planted too early or too late, the stems will turn out tasteless.
How to care for celery
All questions have already been resolved: when to sow celery, how to properly process the seeds, and you have already planted the plant itself on the garden bed. Now you need to decide how to properly care for the crop so that it pleases with a good harvest. In general, the care is about the same for all three types of celery. But let's dwell on this issue in more detail.
So, common to all three types is that celery does not like it when even a light crust forms on the surface of the earth, therefore, loosening the soil when growing a plant plays a significant role. In addition, the culture does not like thickening, so experienced gardeners advise not only to plant seedlings at a sufficient distance from each other, but also to regularly weed the garden from growing weeds. Do not forget about watering - the soil where celery grows should be moderately moist, therefore watering the beds with the planted culture should be carried out as the soil dries up.
Further care
Agrotechnics of celery in the open field is simple... The main thing is to follow the basic rules of caring for him:
- Celery is poured with warm, settled water 2-3 times a week. Watering should be abundant, but infrequent.
- After each watering and precipitation, the soil is loosened and at the same time cleared of weeds.
- It is recommended to mulch celery beds with rotted straw, burlap or dry grass. This will protect plants from frost and pests, slow down the growth of weeds.
- Celery is fed every two weeks. Mineral fertilizers (20 g of nitrophoska for 1 bucket of water) and organic fertilizers are alternated (manure is diluted with water in a ratio of 1:10). Before feeding, plants must be watered with plenty of clean water.
- Self-bleaching celery must be earthed. They begin to do this when the stems reach a height of 15 cm.
- When growing varieties that need bleaching, their petioles, when they reach a height of 30 cm, are wrapped in a damp cloth.
Attention! With rare watering, the stems become bitter.
Diseases and pests
Celery is not as susceptible to disease as other crops. But sometimes it is also affected by fungal, bacterial and viral diseases.
The list contains the most common ones:
- tobacco mosaic virus;
- bacterial spotting;
- late burn;
- blackleg;
- rot (white or heart-shaped);
- scab.
If you follow the rules of prevention, the risk of developing pathologies will be minimal:
- Compliance with the principles of crop rotation. Celery is not planted after other greens and carrots.
- Removal of plant residues. Pathogens may remain on them.
- Temperature. Celery is planted only after the night frosts have passed.
- Disinfection. Disinfecting solutions are used to treat all tools and materials with which plants come into contact.
- Compliance with the rules of watering. Do not allow stagnant water or drying out of the soil.
During epidemics, it is recommended to spray the plantings with a solution of copper sulfate, potassium permanganate or "Fitosporin". Diseased plants are removed so that they do not infect healthy specimens.
Celery is often attacked by pests. They not only spoil plants, but also carry pathogens throughout the garden:
- snails and slugs;
- aphid;
- scoop;
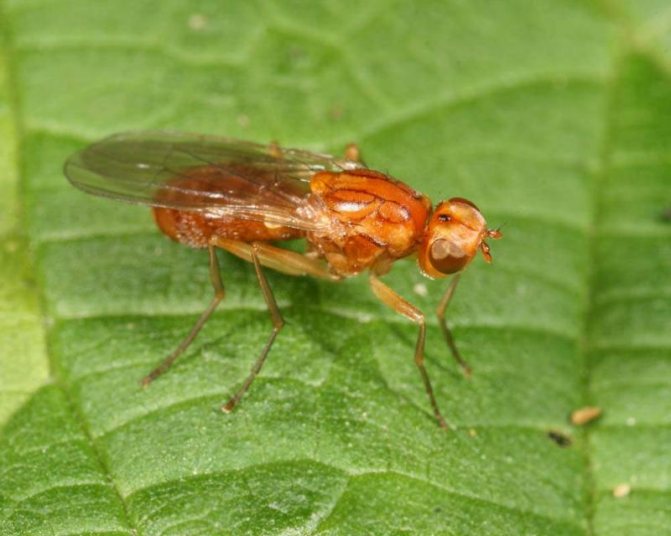
- carrot fly larva.
To protect celery from pests, it is sprayed with a decoction of bitter herbs (wormwood, dandelion). The beds and aisles are sprinkled with ash.
Important! A rotten core indicates that bacteria have entered the stems.
Diseases and pests - how to prevent?
Celery is a crop that can be attacked by pests and disease.
Common diseases of celery.
Blackleg
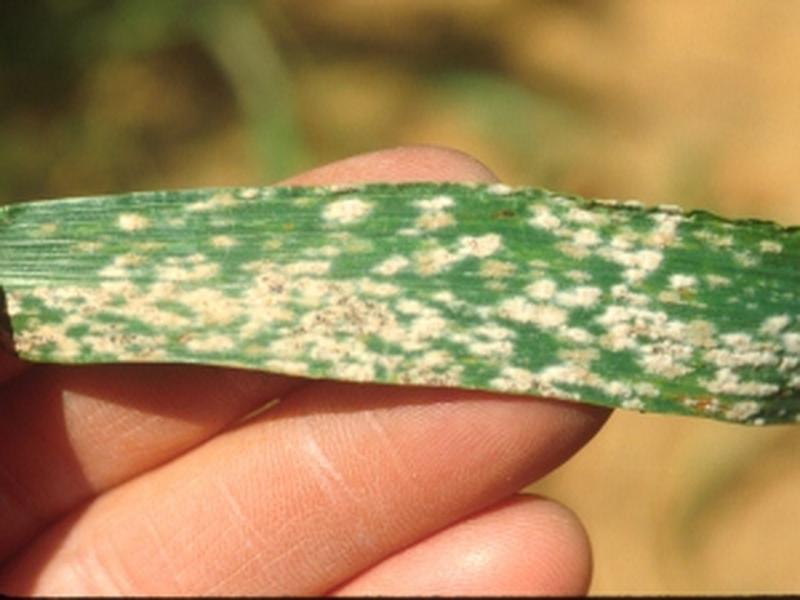
Powdery mildew

Septoriasis
Table "Symptoms and treatments for diseases of celery."
| Diseases | Symptoms | Treatment methods |
| Cercospora | Round spots on the leaves from yellow to purple. |
|
| Septoria or Bacterial spot |
|
|
| Fomoz or gray rot |
|
|
| Heart rot |
|
|
| Powdery mildew |
|
|
| Stalk white rot | A white bloom forms on the stem of the plant. |
|
| Viral mosaic | The leaves of the plants are covered with a yellow circular pattern. |
|
| Blackleg |
|
|
| Stem root rot |
|
|
The following preventative recommendations will help you grow celery while keeping disease out:
- try not to overmoisten the soil with daily watering;
- plant seedlings in the ground, observing the recommended distance between rows and plants;
- weed beds from weeds in a timely manner;
- use chlorine-free fertilizers to avoid soil salinity, which thin the roots;
- disinfect seedling containers;
- to keep organic fertilizers in the compost for 6 to 10 months before laying in the garden.
Celery pests.
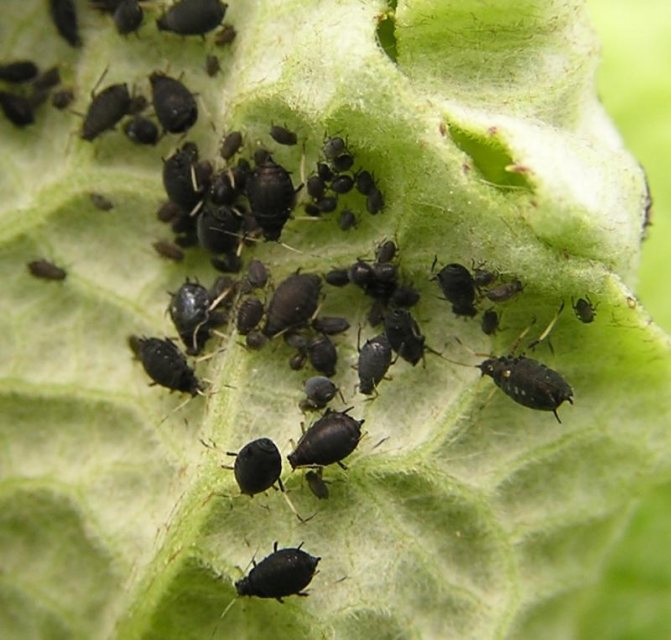
Bean aphid
Carrot fly

Celery fly
Pest Damage and Treatment Methods Table.
| Pests | Harm done | Ways to fight |
| Carrot fly |
|
|
| Carrot lily | The larvae deposited by the fly penetrate the root crop and spoil it. |
|
| Bean aphid | It spoils the leaves and stems of the plant. |
|
| Celery fly | Eats the leaves and shoots of the vegetable from the inside. |
|
Photo gallery
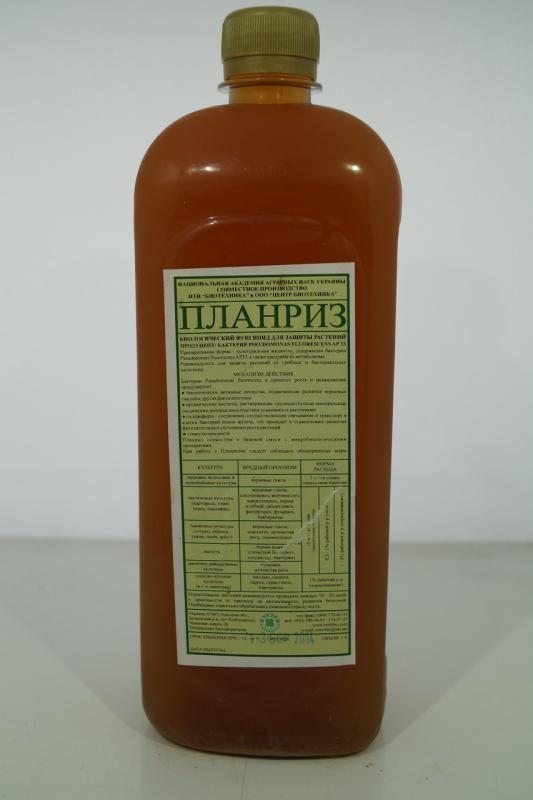
Planriz - 219 rubles 900 ml
Fitospirin - M - 30 rubles 100 g
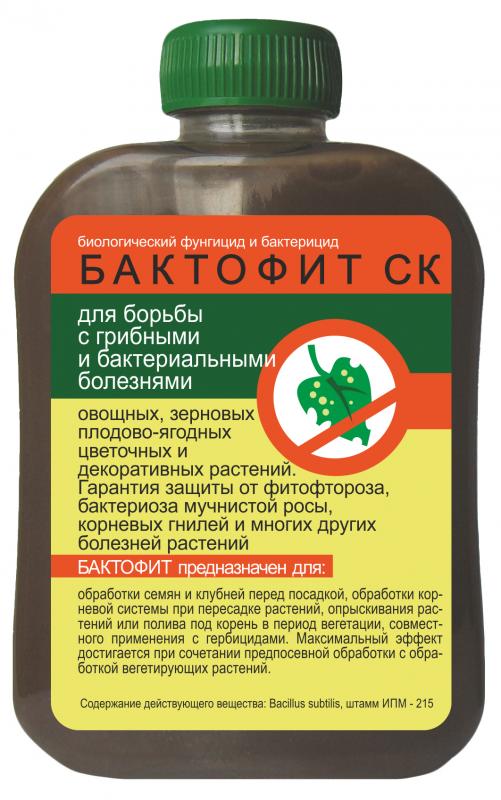
Baktofit - 130 rubles 100 ml
Gamair - 73 rubles 20 tab.
Harvesting and storage
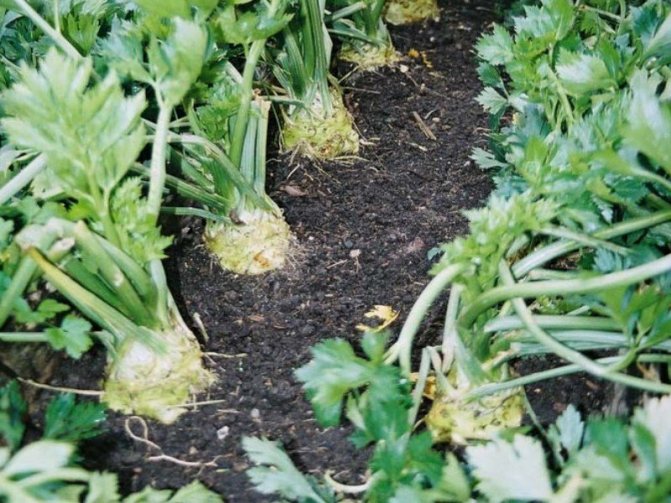
Celery is harvested when its stems are thick and at least 30-35 cm tall. Most varieties are ready for harvest in August or September.
The varieties that need bleaching are stored throughout the winter. They are removed to the basement without removing the material in which they were wrapped during bleaching and covered with sand. Celery can stay in the refrigerator for more than a month. To do this, it is wrapped in film.
How to care for leafy celery
The plant is unpretentious in care. Standard procedures should be followed: water regularly, loosen between rows, remove weeds. Mulching the soil will cut the work in half. The moisture level will last longer, it will prevent the appearance of an earthen crust, weeds are less disturbing. Spud the bushes.
Harvest celery leaf regularly. After each cut of leaf celery, it must be watered abundantly, combining watering with top dressing. Mostly organic fertilizers are used: fermented grass, fermented manure or chicken droppings.
Features of cultivation depending on the region
In regions with different climatic conditions - their own subtleties of growing celery:
- In northern regions, it is recommended to cover the beds with foil or each plant separately with a plastic bottle every night. With cold snaps, such a measure is taken during the day.
- In areas with a warm climate, the beds are watered every other day.
- After heavy rains and cold snaps, the risks of plant infection increase. In this case, it is recommended to spray them with "Fitosporin" for prevention. This is especially true for the central regions.
Growing root celery through seedlings
Root celery has the longest growing season of 150-190 days. Growing seedlings is a must.
When to sow root celery seedlings?
Sowing should be started in 1-2 ten days of February.... The principles of planting and caring for seedlings are the same as for leaf celery. The difference is that not only picking is carried out, but also the transshipment of grown seedlings into more spacious peat cups or pots.
How to sow root celery, look at the video:
When the plants grow a little, it is imperative to make a pick.
How to dive root celery, look at the video:
The grown seedlings of root celery are transferred again into larger pots, when the plants become cramped, and are grown to planting in the ground in May, when the threat of frost has passed.
Celery root seedlings ready for planting photo
Landing in the ground
Root celery is planted in the ground at a distance of 35-40 cm, without deepening the root collar. It is useful to immediately mulch the planting with mowed grass.
Reviews of summer residents
Experienced summer residents say that, observing the basic rules of agricultural technology, it is not difficult to grow celery. Some of them provide helpful advice.
Irina, Izhevsk: “I have been growing stalked celery for the third year. Very tasty and healthy greens that can improve the taste of absolutely any dish. The first year there were difficulties with germinating seeds. They germinate for a very long time. Now I got used to it and before landing I soak them in "Epin". As for the rest, I did not notice any difficulties in growing. "
Elena, Sochi: “I love celery. This year, for the first time, it grew its petiolate variety. I chose varieties that do not require bleaching. Fertilized with silage, with the addition of ash and chicken droppings. The harvest was good, the stems are juicy and fragrant. The only negative is that no more than half of all the seeds I purchased have sprouted. "
Useful properties of celery
The plant is rich in a set of substances useful for the human body. These are vitamins (A, E, C, K, B and PP vitamins), macro- and microelements (calcium, potassium, iron, phosphorus, zinc, sodium, manganese, magnesium), amino acids (arginine, lysine, histidine), fiber , essential oils.
Also, the plant is an aphrodisiac.
Contraindications to eating are pregnancy and breastfeeding (it lowers milk levels, bloating may appear). If you have a stomach ulcer, urolithiasis, or varicose veins, you should treat celery with caution.
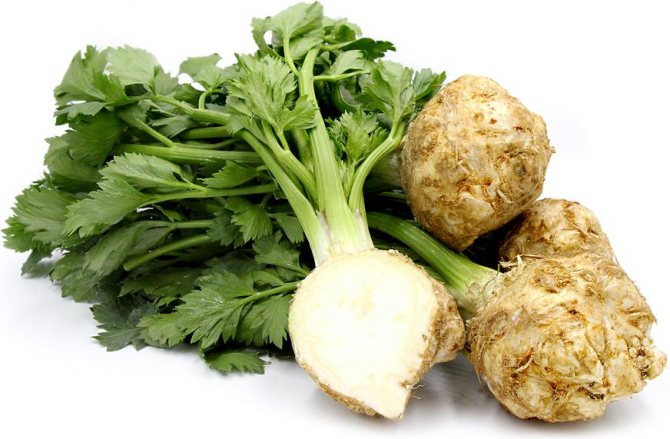
Depending on the type of plant, a certain part is used for food: leaves, petioles, root crops. They have a bittersweet taste and pleasant aroma. They are added to various dishes fresh, prepared side dishes, pates, and used in home canning. Leaves can be frozen. The dried and milled parts of the plant are a spice. Celery seeds are used to flavor table salt.
Celery will benefit your site too. Earthworms like to be in the roots of the plant - they contribute to the formation of humus (fertile layer of the earth). To attract them to the site in large numbers, sow or plant celery in a circle to create a "cozy house".
Celery is a biennial or perennial vegetable from the Umbrella family. It is appreciated for its pleasant taste and specific spicy aroma. There are about 20 wild varieties, but in the dachas, one species is mainly grown - the fragrant one. Gardeners prefer to choose two-year varieties that give green mass and roots in the first year, and seeds in the second. Few know how to grow celery from seed, despite its apparent simplicity.
General information
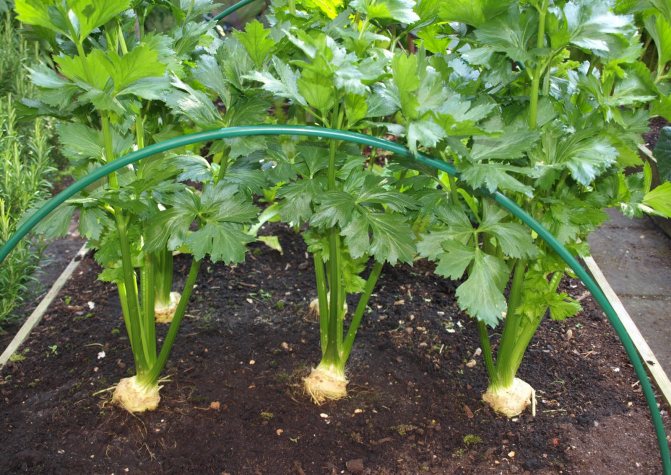
Petiole celery belongs to the family of the same name, has a two-year maturation cycle.In the first season, greens (including petiolate stems) and an edible rhizome are obtained from it, and in the second it forms a fruit body with
seeds. It is a tall herbaceous vegetable that grows up to one meter in height.
The degree of complexity of his agricultural technology is assessed as "above average", the plant is quite capricious, but quite successfully grown in mid-latitudes. Therefore, before taking on its cultivation, we recommend that you carefully familiarize yourself with the features of its planting and care and boldly get down to business.
Growing celery in the country
Regardless of the species of celery, cultivation and care in the open field is practically the same type, with the exception of some points. Everyone loves an abundance of light, as well as an enriched and breathable soil. The medium is preferable neutral or slightly acidic
A small shadow will not do much harm to the plant; rather, on the contrary, the leaves acquire a more intense aroma. The landing site is prepared in advance. Before winter, they plow with organic matter (humus), and in the spring they re-dig and make beds.
The early varieties can be planted immediately in open ground in early spring, while the later ones are transplanted. It is important to initially select the right seed of exceptionally good quality.
Root and stem celery in cold regions, in particular in the Urals and Siberia, can be grown only through preliminary harvesting of seedlings at home or in a greenhouse.
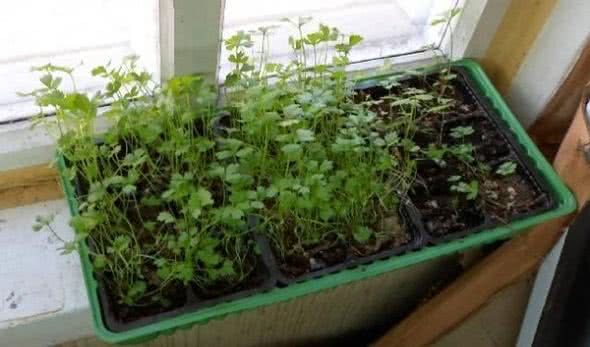
Growing seedlings
They sit in separate mobile containers and keep them until spring on window sills or heated balconies. Only thanks to this method it is possible to obtain spicy greens at the earliest possible date, and in the future - large root crops and fleshy petioles.
To sow celery seeds, they are first soaked in a manganese solution for about 2 days, then it will be easier for them to emerge from under the layers of the earth. Can germinate on damp gauze. This is due to their excessive smallness.
How to grow celery from seeds can be seen in the table:
| View | Growing process |
| Sheet | Celery leafy varieties tolerate cold weather, so many experienced gardeners immediately plant seeds in open ground. Do this as soon as stable warm spring weather is established. But the best result can be achieved through seedlings. Preparations begin in early March. Seedling soil is bought ready-made or made on its own, mixing peat, humus, sand and turf in the same ratio. Seeds are spread evenly over the substrate without severe drowning. Top covered with a thin layer of peat and watered with potassium permanganate or dissolved organic matter. Cover with foil to create greenhouse conditions. Further care includes: daily ventilation, removal of condensation accumulating inside and watering. It is optimal to maintain the temperature in the range of 19-25 ° C. A week after sowing, it is lowered to 17 ° C. To accelerate germination, an artificial backlight is installed. With the appearance of the first two strong leaves, a dive is performed with simultaneous pinching of the central root. This scheme improves its growth. Approximately 10-14 days before transplanting to the street, the seedlings begin to harden. Transplanted in April-May. |
| Stemlevoy | For stalked celery, cultivation and care is almost the same as leaf celery. There is a slight difference in the rules for transplanting into open ground. When sown on seedlings of this type of celery, the seeds are drowned deeper, by 10-12 centimeters. The base of the neck is also left on the surface, they do not fall asleep with earth. |
| Radicular | Root celery and its cultivation and care have a number of specific features. Only the seedling method is suitable here, which is associated with a long growing season - from 150 to 180 days. Seeds are sown at home in early February.Stratification is preliminarily carried out: it is wrapped in a damp cloth for 7-8 days, then transferred to the refrigerator for another 10 days. For planting, mix the earth and humus in equal proportions. Two days before the planned sowing, the soil mixture is spilled with potassium permanganate. Seeds are laid out in narrow furrows at a distance of 7-9 cm and covered. Cover with glass. All the time, while they will germinate, they remove the glass for ventilation every day and remove the accumulating drops of water. Initially, the temperature is kept at 24 ° C, then reduced to 18 ° C. Fluorescent backlight lamps are installed nearby, since in February there is still a short daylight hours. Unlike previous varieties, this one requires a double pick. Remember to pinch the main root one third of the total length. The plantings are planted carefully so as not to injure the roots. Otherwise, as a result, multiple small roots will grow, unusable. To get large fruits, it is better not to cut off the green component all summer long. |
Choosing seeds
Due to the peculiarities of the climate, buying seeds for growing in mid-latitudes is better than early varieties, since the ripening period for this crop is quite impressive, up to 8 months. Early varieties can ripen in six months. It is recommended to take the expiration date with a margin. Many Russian gardeners give preference to foreign varieties, and this is quite justified, however, among the Russian selection there are quite worthy varieties - "Atlant", "Golden", "Aelita".
It is worth paying attention to the size of the seeds. The larger they are, the more fleshy the stalks and root vegetables will be.
It is interesting! Such a long germination period of celery is due to the very high content of essential oils in the seeds of this plant.
Photo gallery
The photo shows preparations for treating celery from pests and diseases:
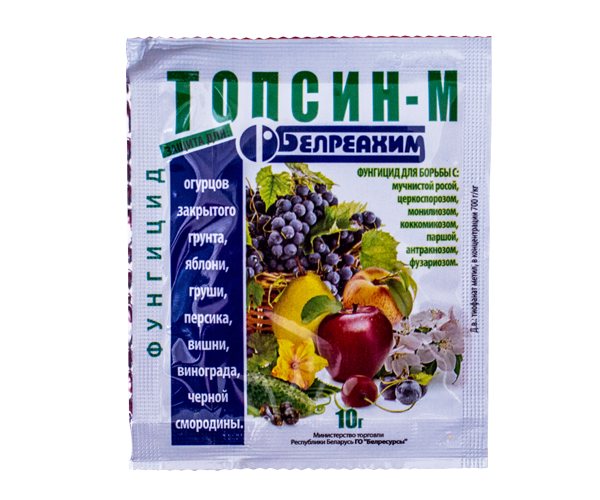
Topsin M, from 55 rubles.
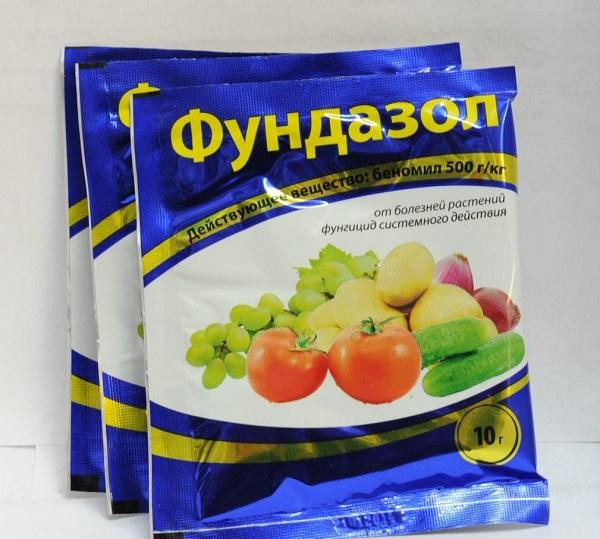
Fundazol, from 40 rubles.
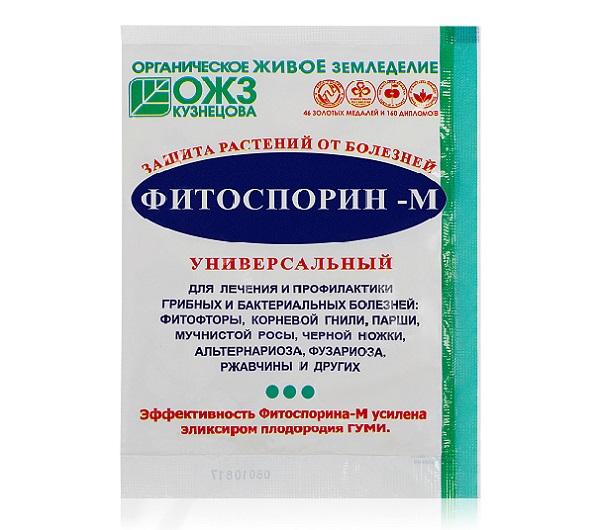
Fitosporin, from 30 rubles.
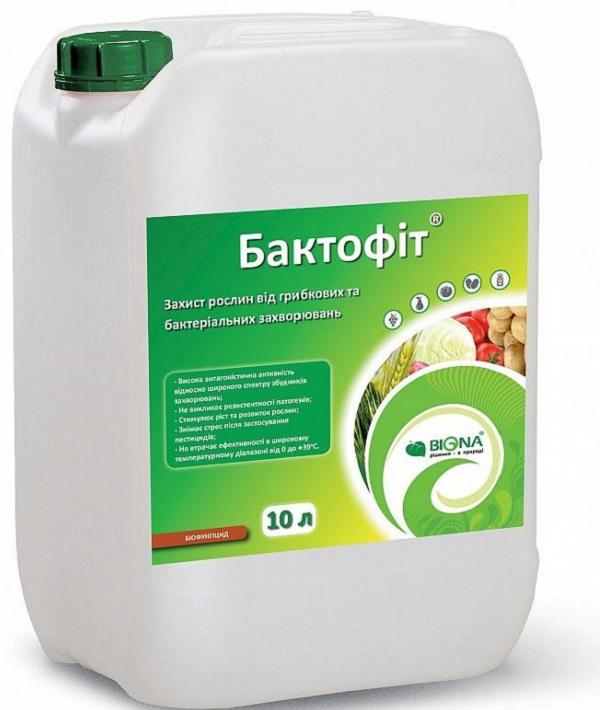
Baktofit, from 100 rubles.
Basic information about the plant
The homeland of the plant is the Mediterranean. It belongs to the herbaceous genus, the umbrella family. The best place to grow celery is in humid areas. In European countries, it spread in the eighteenth century. For a long time it was grown for decorative purposes.
The plant grows up to one meter in height, has a thickened root. It refers to biennial crops. In the first year of life, a root crop and a rosette of leaves are formed. In the second year, a stem appears, then the plant blooms.
It is not afraid of frost. Even young seedlings are able to resist when the air temperature drops to -5 ° C.
Choosing a seat for landing
The vegetable prefers windless areas, tolerates the sun and limited shading equally well. Light lace partial shade is perfect for him. The moisture requirements for all varieties of this culture are increased, prolonged drying of the soil is not allowed. Still, you should avoid lowlands in which water can stagnate for a long time.
Celery can survive the spring frost and continue to grow, but after that there will be abundant foliage growth and the formation of completely inedible tough petioles.
Ground requirements
Loamy or sandy loamy soil that warms up easily will be ideal. Slightly less fertile, but quite suitable for growing all types of celery, will be meadow land. But sandstones and heavy clay soil are not suitable for growing them. As a last resort, you will have to take care of good drainage. The acidity must be kept within neutral values (pH = 6.5-7). At high acidity, the soil should be deoxidized with lime, otherwise the development of plants will be weak and slowed down.
Whitening
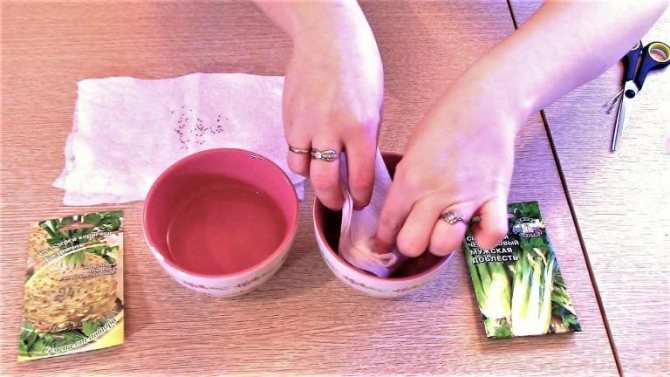
In order for the stems to acquire the necessary tenderness, whitening must be carried out in September, which consists in the complete shading of the petioles.An outward sign of readiness for bleaching will be fully formed bush rosettes, which signify the end of the vegetative development of the first year. You will need wrapping paper, cardboard, straw, or other odorless material. They need to wrap the stems so that no light falls on them. The lower edge of the wrapper should touch the ground, the upper edge should reach the very leaves, which remain free.
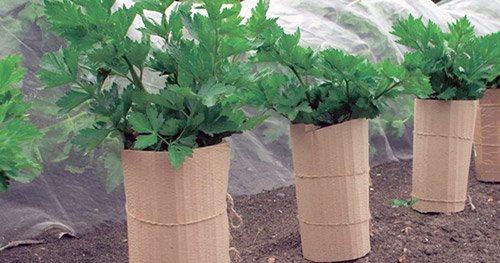
Bleaching stalked celery
It is not worth the practice of dusting with earth, although this method is also used. Firstly, the petioles absorb odors well and will have an unpleasant odor, and secondly, this is a much more troublesome way.
Not all varieties of stalked celery need bleaching! Examine the packaging.
What to do if the seedlings are stretched
It often happens that the planted celery seedlings are strongly stretched.
What are the reasons for this? There are several of them:
- Failure to meet the landing dates - too early
- Lack of light
- Incorrect temperature conditions
- Waterlogging
- Thickening of plantings
- Incorrect feeding regime
Let's talk about each of them.
Planting too early and lack of light. In fact, they have one reason, and it is the most important, when planting seedlings, for example, in January, when the daylight hours are the shortest, the seedlings simply do not have enough light. And in conditions of insufficient light, the plant reaches for the sun, which is still very small. It is possible to compensate for the lack of light only by supplementing the seedlings with special lamps. Celery needs 12-16 hour daylight hours.

Incorrect temperature conditions. Sowing celery for seedlings takes place either in winter or in early spring. At this time, the heating in the apartments is working at full capacity, and the temperature often reaches 25 degrees. And green babies need no more than 20. In an excessively warm room, the plant forms a thin long stem. There are two options, either to freeze with the seedlings or to provide her with a special room.
Waterlogging. If celery is often watered, then it ceases to form a root apparatus, it does not need it, why look for water if it is always there. And if, at the same time, the temperature is increased, then, as in the tropics, the plant will look like a liana, stop bothering itself with the formation of the root system and send all the nutrients to the ground shoots.
Thickening of plantings. In this case, a double effect can occur. The seedlings will no longer have enough nutrients and there will be a lack of lighting. This is usually a problem with seedlings growing in a cramped box. In such cases, you need to feed and thin out the seedlings.
Incorrect feeding regime. Often, gardeners, guided by good intentions, too often treat their pets with an excessive amount of fertilizer, or the wrong composition. Overfed plants often form long, slender shoots. There is only one recommendation here, refrain from excessive fertilization.
If your seedlings begin to stretch, see what you could disturb and correct mistakes.
Landing on the garden: terms, methods and scheme of planting
Sowing seeds directly into the ground is carried out from mid-April, when the earth warmed up to + 10 ° C. The distance between the rows should be 50-60 cm, the embedment depth should not be more than 3-5 mm. The soil is moistened, covered with a film, securing the edges with weights from the wind. After 2 weeks, when shoots appear, thinning is carried out. Leave plants that are stronger in appearance with an interval of about 30 cm between them. Seedlings grown from late February to early March are planted in gardens at the end of May. They adhere to the following planting scheme: 50-60 cm between rows and 30 cm between roots, groove depth 10 cm.
Planting is carried out by deepening the plant to the point of growth, which must be left on the surface.
Advantages and disadvantages
Root celery is widely known and popular.But most gardeners doubt whether to grow it on their site or not. There are pros and cons to this business.
Advantages:
- Strong seedlings. Proper care from the start of sowing will produce healthy and strong seedlings.
- Artificial lighting simulation. If there is a lack of sunlight, you can use a special lamp.
- Convenience when placing containers with seedlings. In a small room it takes up a small part of the space.
- A variety of varieties.
- Frost resistance. Seedlings planted in the ground can withstand up to -5 ° C.
- Convenient location of planting in the garden. With a small number of seedlings, you can place it on the extreme strip of the garden.
- Combination with some vegetables. To save space, you can plant it with tomatoes, cabbage, beets, cucumbers, beans.
- Long-term storage of root crops after harvest.
Disadvantages:
- Long growing season. Gardeners living in the middle lane will face difficulties in growing root celery. Harvesting takes place 6-7 months after sowing.
- Seeds have poor germination. There should be a large number of seeds in the stock - not all can sprout.
- Death or illness with too much watering.
- Quarry with parsley, potatoes and carrots.
Crop rotation
Good predecessors are tomatoes, lettuce, all kinds of cabbage and other cruciferous plants, cucumbers, beets, all types of onions (especially chives), pumpkin seeds, green spinach and bush beans.
Should not be planted in place of last year's crops of corn, potatoes, carrots, parsley, parsnips. You can resume planting celery in the same place no earlier than 4 years later!
Of the neighbors of the current season, white cabbage is most impressed by celery, which stimulates the growth of this vegetable. He pays her for this by driving away cabbage pests. The rest of the neighborhood is similar to the crop rotation requirements.
One of the worst neighbors is the parsnip. This seriously increases the risk of being attacked by a celery fly.
Plant varieties

Most often three types of celery are grown: root, leaf, petiole. Each of them has many varieties.
Cultivation of celery root in the open field is carried out in order for its root to reach its maximum size. It is he who is valued for its healing properties. It can be compared to ginseng root. It usually takes ninety to one hundred and fifty days for this species to mature. The weight of the finished root crop is 60-300 grams. Although there are also giants, the weight of which reaches 500-700 grams.
Growing leaf celery provides gardeners with fragrant leaves throughout the summer. They contain a large amount of vitamins. The plant does not form a root crop. It is famous for its beautiful leaves that peek out from the ground in bunches.
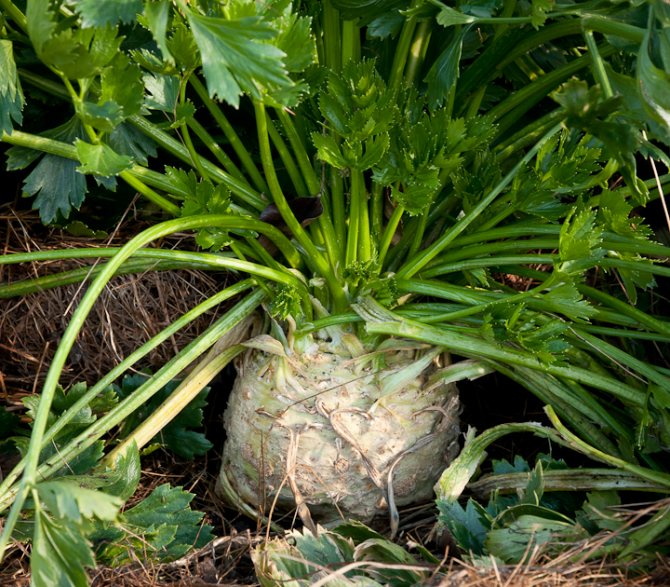
Growing stalked celery will also not provide root crops to gardeners. Its value lies in the stems, which are up to five centimeters thick. They are rich in vitamins and have a juicy and fleshy consistency.
Everyone can find for themselves the best option for filling the body with useful substances that are contained in herbaceous culture. How do you get it on your own site?