Indoor plant lovers tirelessly try different irrigation methods to make flower maintenance easier.
The most effective options are especially appreciated, because they plan to go on vacation at least once a year. In the absence of moisture, only a cactus can survive.
The rest of the crops die from heat and increased dryness. The ideal option is to equip wick watering of plants, how to do it is described in detail in the article.
general information
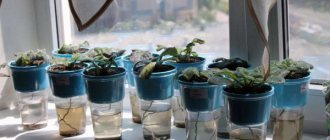
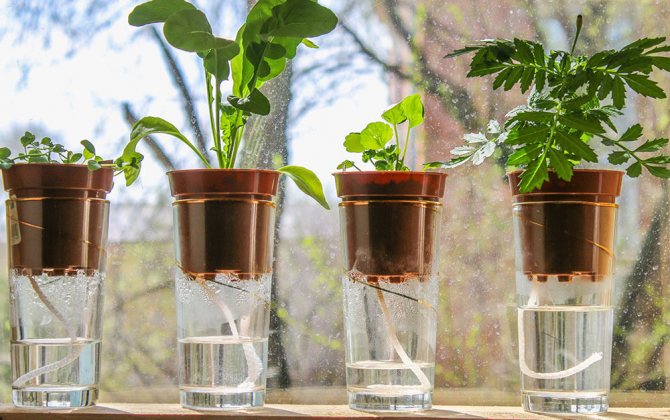
The wick irrigation of indoor rooms is convenient in that capillary forces are involved, through which the wick is soaked, transferring water to the plant. Immediately, we note that this method as a permanent watering is suitable only for small plants, which have a small root system and the soil is quickly saturated with moisture. A pot with a large sample of Benjamin's ficus, one small wick will not be able to saturate with water. But if you need to go somewhere for 1-2 weeks, you can make wicks for such large pots and containers, but then you will have to put a bucket next to each of them.
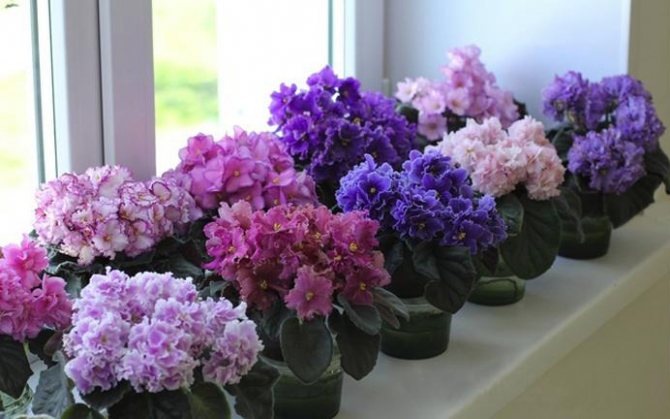
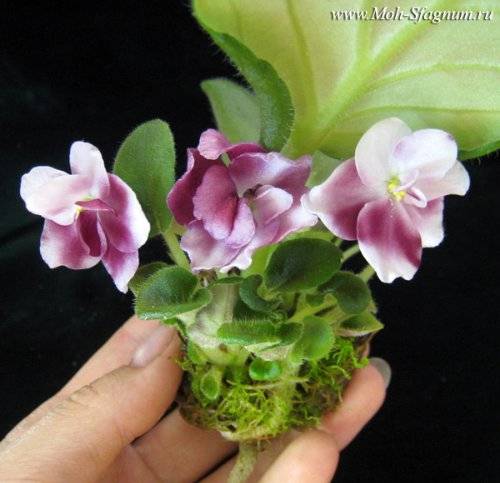
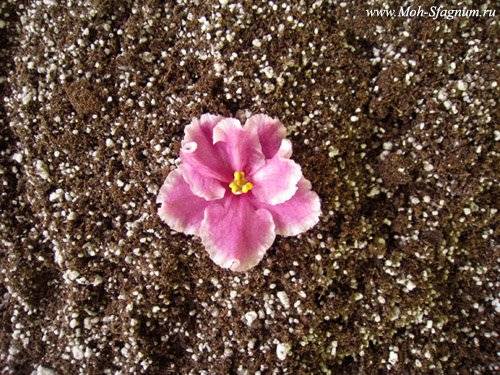
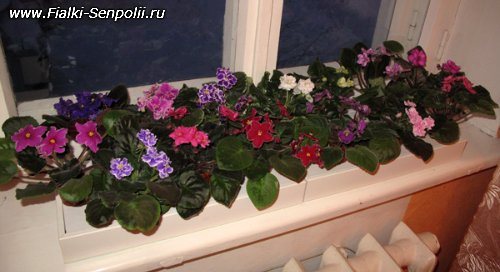
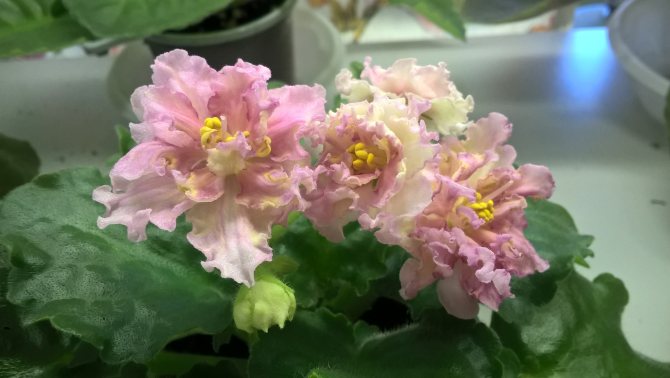
Lush bloom as a result of wick irrigation
Liquid fertilizers can be mixed into the water, and then the plants, along with watering, will receive their portion of mineral and organic components.
What is agroperlite and agrovermiculite
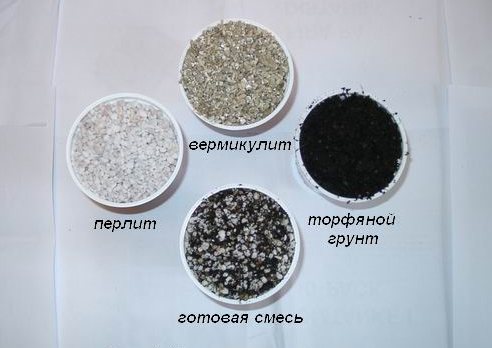
Agroperlite
Swollen rock in the form of small, hard, rough, odorless lumps, which, with strong pressure, are painted into sand. Fraction size - up to 5 mm. It has a high degree of water absorption - it absorbs a mass of water that is 4 times its own. Does not decompose, does not rot, is non-toxic, there are no heavy impurities in the composition.
Agrovermiculitis
Vermiculite is a mineral of the mica group, mined mainly on the Kola Peninsula. In the process of firing, it is structured into worm-like threads with scales and is divided into certain fractions. In the agro-industry and, in particular, in plant growing, fractions of 3-10 mm are used. For indoor flowers, a fraction of up to 5 mm is used as an additive to the substrate, which ensures sufficient aeration.
The advantage of vermiculite lies in the high concentration of trace elements useful for plants, which are gradually washed out and transferred to the root system. In general, agrovermiculite is used for soil mulching, since the percentage of its hygroscopicity among similar materials is very high - 530%. This means that vermiculite absorbs water 5 times its own weight. At the same time, he does not give it away immediately, but gradually.
What is required for wick irrigation
In order for the wick irrigation of plants to work, it is necessary to choose the right substrate. It should be loose enough to absorb and retain moisture well. Most often, purchased peat soil (it is sold in garden stores), coarse agroperlite and vermiculite are used for these purposes.
All three elements are taken in equal parts, mixed thoroughly and poured into a pot for planting a plant.
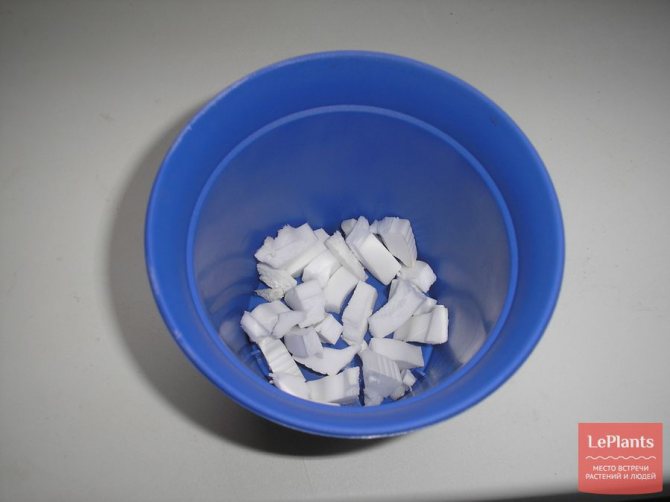
Before making up the substrate, perlite and vermiculite are soaked in water for 5 minutes so that they are completely saturated with it.
As a wick, you can use a cord made of natural or synthetic fabrics, which absorbs water well.It's very easy - pour water into a glass or a cup and put a cord on the surface. If it immediately absorbed water and went to the bottom, this material is suitable. If it absorbed a little or does not absorb it at all, then such a cord for wick irrigation of indoor plants will not work at all.
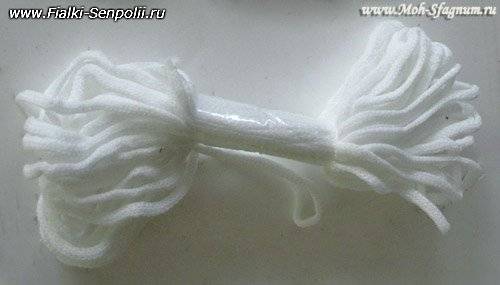
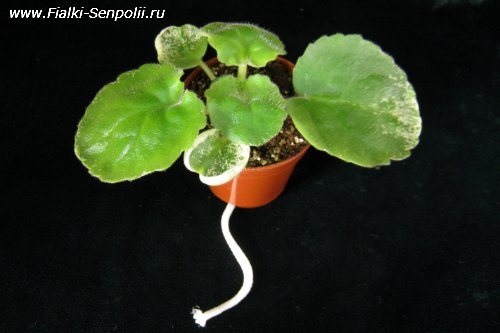
Usually, nylon is used as such. It has no equal in terms of water absorption. The thickness of the cord depends on the size of the pot. If we are talking about small ones - violets, crocuses, etc., it is enough to cut the strips across, as shown in the photo below, and cut them on one side.
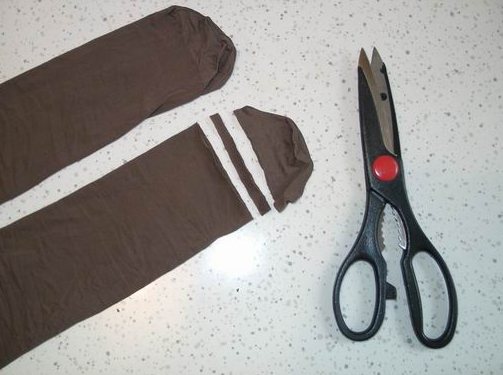
For the wick, nylon tights or stockings are cut along
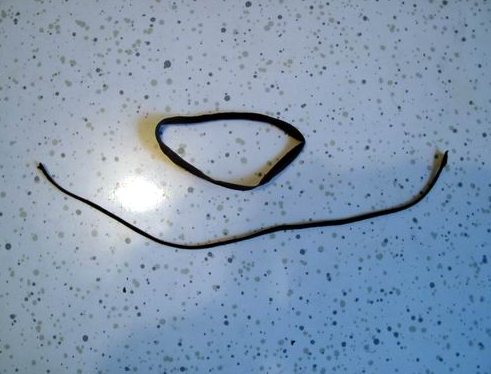
The ring is cut from one side and your wick is almost ready.
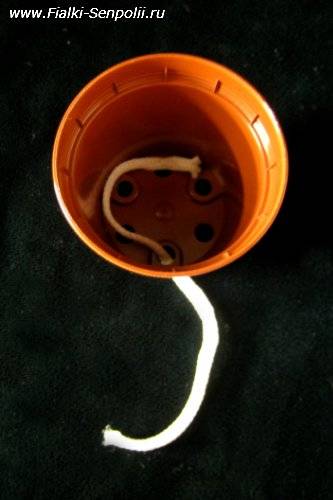
To use wick irrigation, it is better to use plastic pots, where large holes are made at the bottom. In order to prevent the substrate from spilling out of them, it is advisable to cover the bottom with a piece of rags.
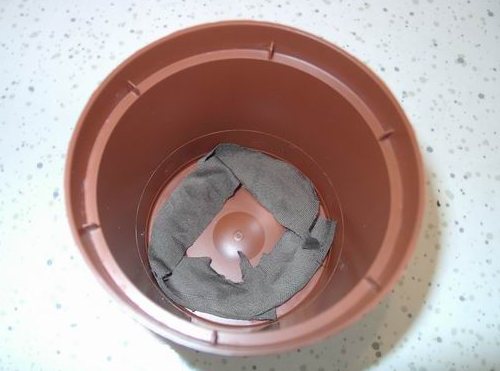
A pot where the drainage holes are covered with a cloth
For a container with water, you can use any container on which the flower pot will evenly stand. For home use, you can use jars of jam or dairy products, but it looks, he says, not very beautiful. You can install the pot on such a container, and insert the whole combination into a beautiful planter.
One hole should be made in the lid of the water tank, a wick will be inserted into it.
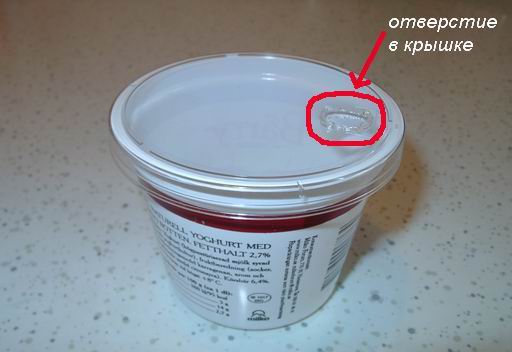
Container with lid for the wick

This is how the wick watering of plants is carried out.

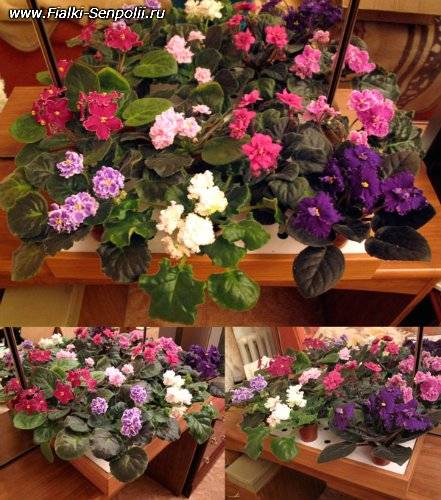
Planter for violets
How to do wick watering correctly
In order for the plant to really be saturated with moisture of high quality, it is advisable to do wick watering when transplanting indoor plants. To do this, the day before the flower is watered well, the water is allowed to drain so that the next day the clod of earth is wet, but not excessively wet.
Preparing the substrate - mix in equal parts peat soil, agrovermiculite and agroperlite.
We prepare the pot - we line cotton or synthetic fabric on the bottom so that the earth does not spill out through the holes. We thread a wick into one of them.

The length of the wick corresponds to the depth of the water tank
We pour agroperlite on 1.5-2 cm, which acts as a drainage and put a wick on top of it with a ring
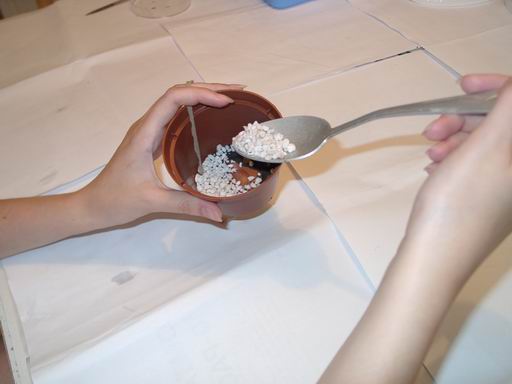
Agroperlite is used as drainage
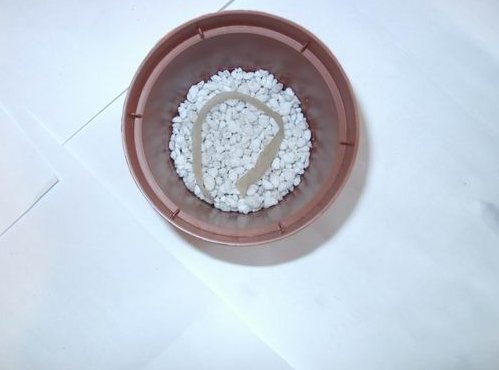
This is how the wick is laid before filling the substrate.
Further, depending on the age of the plant, the prepared substrate is poured into the pot. If this is an adult specimen, pour it into a quarter, insert the plant and sprinkle it on the sides, slightly trampling it down, but not ramming it. If it is a baby, the substrate is poured to the top and carefully inserted, taking care not to damage the still weak root system.
When transplanting an adult plant, you need to shake off the old soil, but do not wash it off, as the roots will begin to rot. Try to shake off the ground with your hands in order to qualitatively update the composition.
Bush ready for transplant
Soil for wick irrigation of violets
Everyone who has just started to get involved in violets water their plants in the usual way: in a tray or in the pot itself, right under the leaves. And most often the problems that appear over time when growing violets are associated either with the drying out of the earthen coma, or with its overflow. Because of the first, violets lose the turgor of the leaves and shed flowers, because of the second, root decay occurs and the plant may die altogether. And although each grower tries to comply with the watering regime, it is very difficult to take into account the individual characteristics of each outlet, the temperature and humidity in the room, as well as other nuances. So what should you do? Everything is very simple: switch to wick irrigation, and you will make life much easier for yourself, and provide your "wards" with the most comfortable conditions. What is "wick irrigation"? Wick irrigation - This is an irrigation method in which the capillary properties of the cord are used, thanks to which the water from the container under the pot rises up the wick and gives off moisture to the substrate. as soon as the substrate dries up, the water is "pulled up" again. As a result, the plant receives only the amount of water that it needs at a given time under given conditions. If the conditions change (it becomes hot or cold, the air humidity has increased or decreased, the plant has grown, etc.), then the amount of incoming liquid will also change to what your violet needs.

Of course there are some minuses:one. If the system is not arranged correctly and the substrate is waterlogged, then the roots can rot. However, even with ordinary watering, this phenomenon is by no means uncommon! 2. When waterlogged, small flies may appear - sciarids (mushroom mosquitoes). However, since their larvae feed on decaying organic debris (leafy soil, etc.), the chances of getting them with ordinary soil mixture (and, accordingly, ordinary watering) are much greater. Some complain that when converted to a wick, violets become much larger in size. This is the case if you leave them in ordinary 10-12 cm pots. However, wick watering requires less capacity, and in a 5.5-8 cm pot, violets feel comfortable, bloom profusely, but the size of the outlet remains normal! 4. Some people worry that when the container with violets is on the windowsill, the water in the trays cools down and the plants drink the cold water. Yes, this is a minus. But when you water each violet separately with warm water, then on the same windowsill the moistened earthy clod instantly cools down and the roots are in a cold substrate. That is, there is no difference in this case. The only way out, regardless of the method of watering, is either to insulate the windowsill, or to rearrange the violets to a warmer place for the cold period.

What are prosgives wick watering when used correctly: 1. Violets grow in the most comfortable conditions, without experiencing the stress of overflow or dryness; 2. Having found the optimal concentration of fertilizer solution, you will not overfeed or underfeed violets; 3. It becomes very easy to grow violets: you do not need to check every day if the earthen ball is dry, and run around with a watering can / pear / pipette to measure out the amount of water that the plant needs; 4. In winter, due to the high dryness of the air, the topsoil dries up, and moisture remains inside. And you can easily flood the plant. Whereas with wick irrigation, the substrate is wetted evenly: the top layer dries out and moisture immediately pulls up from below; 5. You should leave the violets for a long time (several weeks), for example, while on vacation, and do not ask your neighbor / friend / mother to water your pets; 6. It is very easy to root and grow a large number of violets, since you do not have to water each pot separately; 7. When it comes to rooting leafy cuttings, then you do not miss the moment of evaporation of water from the glass (also very important with a large number of violets); 8. Due to the comfortable conditions, violets not only bloom more luxuriantly, but also bloom much earlier;
9. Violets are very fond of high humidity, but it is quite difficult to provide it without special humidifiers. But with wick irrigation, water will constantly evaporate from the tanks with the solution, which will create additional humidity in the air next to the plant; 10. Mini-violets, which are grown in very small pots, with normal watering can dry out in just a day, so wick watering is very convenient when growing them; 11. Since food will come from a solution, and not from the soil, a small pot is needed (even less than 1/3 of the outlet diameter), and this is a certain saving both on the amount of substrate and on the pots themselves (the larger the diameter, the higher price); 12.With a small diameter of the pot, the rosette turns out to be small, but evenly developed. The forces go to flowering, and not to a set of green mass; 13. As a result, you will get healthy, well-developed, profusely blooming violets, since with wick irrigation, the plants receive all the necessary trace elements from the solution, and the violet itself regulates the moisture level of the soil. We have been using wick irrigation since 2005 and noticed that violets began to grow much better than when watering in a pan. Their leaves are clean (without traces of drops, which are almost inevitable with ordinary watering), and the cap of flowers is much larger and denser. How do you organize such a wonderful system? Consider 2 examples - rooting of leaf cuttings in sphagnum on wick irrigation and growing children and adult plants on wick irrigation. And for those and for others there is 3 general points: wick, solution and container for wick irrigation. Wickmust be synthetic (cotton will rot very quickly) and be well wetted, that is, have capillary properties. This is a very important point, since not all synthetic cords are hygroscopic, so it is advisable to check this in advance (you can ask to wet a small area right in the store). We cut the wick into pieces about 20 cm long. The thickness of the wick is usually small. We use a cord with a thickness of about 0.5 cm for pots with a diameter of 4-8 cm. My frequent misconception is that many people believe that the larger the diameter of the cord, the more the substrate is wetted. This is not true! The point is that the wick is just a "conductor", and the "pump" is the surface of the potted substrate. It is even simpler: the water does not "enter", but is "pulled up" according to the law of capillaries, when water evaporates from the upper layer of the loose substrate. But at the same time, the top layer will always stay wet... That is, the substrate will take exactly as much water as it needs. Do not forget that this only works with the correct substrate for wick irrigation (very moisture and air permeable). If you use a dense substrate containing organic matter, it will retain water.
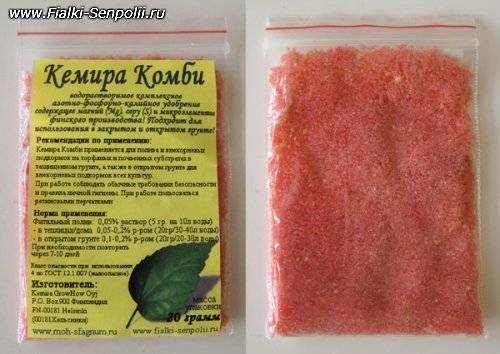
The color of the wick does not matter, the main thing is that it does not paint the water (otherwise it may affect the color of the leaves and flowers). Some make wicks out of worn-out nylon tights. On the one hand, this is convenient, since they are almost always at hand, but, according to reviews, such wicks conduct water too well and the substrate freezes. The main thing is that the end of the wick constantly touches the solution, and the bottom of the pot remains dry. The distance between the bottom and the water level is usually about 1-5 cm and depends on the length of the wick and the amount of water in the tray. It is not the length of the wick itself that is important, but the distance from the water to the pot (the wick can lie still half a meter in the solution - it's not scary). from the "air" section of the wick is a kind of "engine" of the entire system: when it dries up (which means that the soil in the pot also dries up), water, according to the law of capillaries, is pulled upward - into the pot. If you make this distance too large, then the wick will dry out due to its long length, and not due to the fact that the soil has already dried up ... We use trays 7 cm high, which are about 6 cm filled with solution, on top there is a plastic plate with holes on which there are cups or pots. At the same time, the end of the wick touches the bottom of the tray, that is, the solution can be added quite rarely (depending on the number of pots, air humidity and other conditions). For cooking solution you can use any water-soluble mineral complex micronutrient fertilizer. We have been using soluble fertilizer for many years "Kemira Kombi"Finnish production. In this case, we are preparing 0.05% solution... It is very convenient to dilute, for example, the entire pack (20 grams) in 1 liter of water and keep it closed away from children (so as not to be confused with soda).And as necessary, dilute in the proportion you need! By the way, do not forget to write on the bottle what is there and how to breed. For example, when diluting 1 package (20 grams) in 1 liter of water, a 2% solution is obtained. We take 25 ml (5 teaspoons) and dilute in 1 liter of water - a 0.05% solution is obtained. Or 50 ml in 2 liters - the same effect. It is more convenient for someone - who has how many plants. You can store Kemira's solution for a very long time. If precipitated, then shake up - and use as directed.
Solution container - container for wick irrigation- can be individual for each plant, or common for several. The first option has an undoubted plus in the fact that if some nasty thing starts in the water, then other violets will not suffer. However, we have been growing violets on trays for many years, from which 6-8 children drink, or 2-3 sockets. And we never had any problems. And it is much easier to pour the solution into several large tanks than into many small ones. Sometimes a green plaque appears on the walls of the container with the solution - these are algae. There is nothing wrong with them - they do not affect the vital activity of violets. Perhaps the only drawback is an aesthetic defect. But sometimes you can also wash your containers / trays / tanks to remove any greenery. Another point is greenhouse... Everything is simple here: if there is an opportunity, then it is worth making it - both cuttings and children will grow in much more comfortable conditions. If this is not possible, then its absence will at least to some extent be compensated for by the evaporation of water from the trays and the correct moisture content of the substrate in the pot. Now let's take a closer look at the technology. When rooting of leafy cuttings in sphagnum on wick irrigationyou will need: Basic: 1. Live sphagnum moss; 2. Plastic cups (180-200 ml); 3. Correct wick; 4. Fertilizer like Kemira Kombi; Additionally: 1. Marker or stickers (adhesive labels); 2. Burner or wire / awl; 3. Scissors; 4. Blade or utility knife; 5. Sticks for leaf spacers.

So, you need to make small holes in the cups so that the wick can be threaded into it. We usually use a burner for this, but a heated wire or thick awl will also work. You can cut holes with a sharp-tipped knife. The names of varieties can be written on the cup with a marker or with a pen on adhesive labels. You can also use a marker to write sticks for stirring coffee and put them in cups. It's as convenient as anyone. We cut the live sphagnum moss into pieces of 2-5 cm (as it happens) - so later it will be easier to separate the roots of the children from the moss itself. By the way, do not be surprised when, after a while, the chopped moss begins to grow - new green stems will appear. This is a very good sign, as living moss has bactericidal properties and thus prevents cuttings from rotting. Sometimes the growth of moss is so intense that you have to remove its excess, so that later it will be more convenient to plant the children! We prepare a 0.05% solution of Kemira Kombi, which our cuttings will drink and later the children. It can also be rooted in clean water (before the formation of children), but in our experience, when using a fertilizer solution, the children appear faster. We thread the wick through the hole so that a half-circle from the cord is obtained at the bottom of the glass, the rest remains outside. We put chopped sphagnum moss on the ring so that it takes about 3-4 cm in height, you can slightly compact it. In leafy cuttings of violets, we make a cut at an angle, leaving the length of the petiole about 2-3 cm. Some people prefer not to cut it, but to break off the cutting is also the right option. If you are a beginner violet grower and are afraid that the cuttings will rot, then you can leave the petiole longer (in order to cut it if necessary), but it is more convenient to root not long petioles.Insert a leaf stalk into the sphagnum so that the cut is covered with moss, but does not reach the plastic bottom. Many recommend that you first dip the cuttings in Kornevin. We do not do this (we already have everything rooting well ), but, according to reviews, it really speeds up the process of root formation.

So that the leaf does not fall (if it is large or, on the contrary, too small), it is advisable to prop it up with a special stick. For this, all the same coffee stirrers, broken or cut in half, are suitable. You can think of something else, the main thing is not to use wooden sticks - the leaf plates start to rot from them very quickly. It is best that each leaf has its own glass (if one of the pair rots, the second will not be "infected", and children will then feel more at ease). But in order to save space, you can put 2 leaves of the same type in one glass. In this case, spacer sticks are essential. If the sheet plate is very large and does not fit into the cup, then you can safely cut the edges at a slight angle (as if parallel to the walls of the cup). For reliability, the slices can be sprinkled with crushed charcoal (if there is no charcoal, you can crush activated carbon tablets). When all the leaves find their homes, the cups must be placed in a tray with the solution so that the wicks get wet and the moss is completely saturated with water. This is very important, otherwise the system will not work. If there is no pallet, then you can spill the moss well on top. After that, the cups can be placed on the wick irrigation container. After about 10-14 days, you will see that the leaves seem to stand up in the cups and become more elastic. And if you pull them slightly, you will feel resistance. This means that everything is going well and the first roots have appeared. At this stage, you can do without backlighting. But babies will appear much faster if you arrange additional lighting. The rate of formation of babies in different varieties and depending on different conditions is very different, on average from 1 to 3 months and even longer. If the leaves sit without children for a long time, they need to be "stimulated" - cut off the top 1/3 of the sheet, and sometimes ½ if the sheet is very large. Do not forget that violets must be protected from drafts, and the optimum temperature for them is above 22 degrees. Some leave the cuttings in the moss only until well-developed roots are formed, and then transplanted. We prefer the option when the leaves take root in the moss, give children and the children grow up in the moss on wick irrigation until the age when they can be planted separately.
This is usually determined by the size of the baby (about 1 / 3-1 / 4 from the mother leaf) and the amount of green pigment for variegated varieties. By the way, after the separation of the firstborn, the leaf can be left in the sphagnum and it will give you another generation of babies. Now let's talk about growing children and adult plants on wick irrigation. The difference between the leaves and the children is only that the sockets use a mixture for wick irrigation, in which there is no place for sphagnum. Also, according to our observations, it is not worth adding earth to the mixture, as this will lead to rotting of the roots of children and adult violets (sphagnum and earth strongly pull water towards themselves). So we use only landless mix... Usually we take 50% of high-moor (red) peat and 50% of perlite, vermiculite or their mixture.
You can also use a mixture of coco peat / substrate and perlite, as coir remains porous even after being saturated with water, which promotes active root formation and better plant growth. But do not forget to rinse the "cocoa" before use - it contains quite a lot of salts. Landless mixture for wick irrigation turns out to be very loose, moisture and air permeable, and thanks to this, the root system becomes well and evenly developed.At the bottom of the pot we put a turn / half turn of the wick. We usually make the ring slightly smaller than the circumference of the pot.
Some people thread a wick through the entire thickness of the mixture, but this is not necessary: due to the looseness and moisture permeability of the substrate, the solution will evenly wet the entire mixture in the pot.Sometimes it is recommended to put some kind of synthetic material on the bottom so that the substrate does not spill out, but with a small diameter of the holes in the pot, the wet mixture will not go anywhere. Thus, we fill the wick on top with a substrate and plant the baby. No drainage is required for wick irrigation. If, after separating from the leaf, you still have very small children, there is no need to put an end to them: be sure to put them in a pot with the same mixture, and they will surely take root. In such a substrate, roots develop very quickly! We put the pot on a tray of water so that the whole system is sure to be saturated with the solution. You can also spill the system well from above, but this is less convenient. You may have to pour the substrate a little from above, as it will settle a little from the water. The main thing is not to deepen or fill the growth point, otherwise the baby will die. After that, you can place the pot on the wick irrigation container and add the solution as needed. Landless substrates do not contain nutrients, therefore it is necessary to constantly use top dressing, which will always come to the plant with the help of a wick. We use a 0.05% Kemira solution. With wick irrigation with Kemira Kombi solution, nutrients are supplied evenly, the plant does not experience stress from overfeeding / underfeeding. But do not forget to monitor the state of the plant. If it grows well, we don't change anything. If the lower leaves turn pale, and the plant becomes "skinny" - the concentration of the solution can be slightly increased. And if a reddish-whitish coating appears in the middle of the outlet, then the concentration must be reduced. No additional feeding is required. Some violet waters sometimes “dry out” their plants (they do not immediately add the solution when it runs out). We never do this, and our violets feel great. By the way, as I have noticed, lovers of soil are advised to "dry" not a landless substrate, but a soil mixture. And for them this is justified - because of the soil, the substrate gets too wet, and so that the violets do not rot, they have to be “dried”. With the right substrate, this simply isn't necessary. Over time, as the baby grows up, roots can sprout through the hole in the bottom of the pot along the wick.

There is nothing wrong with that, on the contrary, it means that the plant feels great. We usually leave things as they are. But you can carefully transplant a violet. Most importantly, do not try to free the old wick from the roots - you can damage them. Just cut off what can obviously be cut off, especially since this will stimulate the formation of important and necessary lateral roots, and put the updated root system in the pot again. It is advisable to transplant the violets once a year (not necessarily in a larger pot): this is done to renew the substrate so that salts and other nasty things do not accumulate in the soil. If a larger pot is not needed, then simply shake off the old substrate from the roots, and add a new one to the pot! Some people worry about the size of the outlet. To prevent "elephants" from being made of violets, the diameter of the pot should be minimal (we have both children and adults primroses, and sometimes re-flowering rosettes live in pots 5.5 cm). If you plant violets in large pots, the result may be "burdocks"! If for some reason the system stopped working (for example, you forgot to pour the solution into the tray in time and the mixture with the cord dried out), you need to spill the substrate well or put it in a container with water / solution to soak, and everything will fall into place again! If you want to transfer violets that grew in the ground to wick irrigation, then you need to get them out of the pot and, if possible, remove the soil from the roots as much as possible, but carefully, but you should not rinse the roots. And only after that, transplant it into a mixture for wick irrigation.After several days of adaptation, the violets will rise and will only delight you! Some recommend that after transferring to the wick, water the plants with only clean water for a week or two. Of course, whether to immediately plant in a solution or wait is everyone's personal business. But don't forget that we are planting in a completely landless mixture, and it does not contain any nutrients. And in my opinion, it will be difficult for violets to come to their senses "on a starvation diet." Therefore, we recommend that when using a landless substrate, immediately put violets on Kemira's solution. Wick irrigation- it is very convenient and really simple. If you are worried about the result, just start small: transfer a few not very valuable violets to the wick and observe them for a month. It may be necessary to reduce / increase the concentration of the solution, remove the wick from the pot a little, or, conversely, add. And when you find your optimal version of the system, you can safely translate the rest of the violets. They will thank you for this with their good health and lush flowering!
Content
- 1. What is the essence of wick irrigation?
- 2. What plants are suitable for wick irrigation?
- 3. The composition of the soil for plants on wick irrigation
- 4. Methods for organizing automatic irrigation
- 5. Why choose wick irrigation?
- 6. Pitfalls of wick irrigation
- 7. A few final tips
If you have a large collection of moisture-loving plants or spend a long time on business trips - wick irrigation will be the best way out. Moistening the soil with this method of irrigation occurs gradually with minimal human involvement.
Advantages and disadvantages of the method
Amateur flower growers who have used wick irrigation for violets express conflicting opinions about the advisability of its use. This is due to the fact that the method has not only advantages, but also disadvantages. Its undeniable advantages:
- saves time spent on regular watering, especially when serving a large collection of plants;
- young rosettes develop faster;
- the flowering of violets becomes more magnificent, and the flowers are much larger;
- the life expectancy and flowering of plants is lengthened;
- there is enough water in containers for several weeks, so you can fearlessly go on vacation or a long business trip;
- with the help of a properly formulated nutrient solution, it is easier to feed Saintpaulias;
- the risk of overfeeding or waterlogging the plants decreases, since moisture in the earthen lump comes evenly as it dries.
When planting violets on a wick, small pots are used, so the volume of the potting mix is reduced, and dishes for flowers are cheaper.
Knowing the vulnerabilities of watering plants through the wick will help to reduce the possible negative effects. The disadvantages of wick irrigation of violets are as follows:
- an overly thick wick can cause soil locking and plant decay;
- during the cold period of the year, too low a temperature of water in containers should not be allowed, as this will lead to the death of outlets;
- due to active growth and abundant flowering, violets need more space;
- stems and leaves become fragile, making it difficult to transport the outlets.
Transferring indoor plants to wick irrigation can entail re-equipment of the flower shelves, since they must fit not only the pots, but also the containers under them.
What is the essence of wick irrigation?
The method is based on the capillary properties of a wick, which is a thin cord made of nylon, nylon or other well-wettable material. The higher the surface tension forces that occur at the interface separating the liquid and solid phases, the better the capillary absorption of the wick. As a result, it conducts water well.One end of the wick is lowered into a container with water or nutrient solution, the other is brought out into a pot with a planted plant.
It is better to use synthetic cords - they are more durable and do not rot, unlike natural fibers. Paradoxically, the best conductive properties are demonstrated by a wick twisted from a narrow strip of nylon fabric cut from women's tights. It is able to raise water even without pre-wetting.
Irrigation technology
So, what is the specificity of such a method? In this case, it is assumed to use a cord - a wick. On it, water poured into a container, above which the pot with violets is located, rises and nourishes the soil. The cord used should not be made of natural materials (as it can quickly rot), but synthetic. In addition, it must absorb moisture well.
For Saintpaulias, the wick watering method is optimal, especially if there are a lot of these miniature flowers in your collection. Unlike conventional irrigation methods, with wick irrigation, the violet will receive as much moisture as it needs. Using a simple wick technology, you will protect the violets from waterlogging and drying out (as you know, some owners sometimes forget to water the flowers).
Of course, this method has its drawbacks, which can add troubles to the owners of violets. Basically, they arise if the procedure is incorrectly performed. However, we will return to listing the disadvantages and advantages of this technology a little later.
What plants are suitable for wick irrigation?
The most popular wick method is for Saintpaulias lovers - these flowers do not need to dry the soil between waterings. Streptocarpus, Gloxinia and other plants without a pronounced dormant period can also be transferred to round-the-clock wick humidification. At the same time, the air in the room should not be cold, otherwise the roots of even these plants will not be able to absorb sufficient water and the flora will die. Also, with a reduction in daylight hours with wick irrigation, it is imperative to use additional lighting with fluorescent or special phytolamps.
For your information: for large specimens of Saintpaulias planted in a container with a diameter of more than 8 cm, wick irrigation will no longer work. Moreover, some varieties of uzambara violets generally do not accept such a method of moisturizing.
For some plants requiring a reduction in watering in the autumn-spring period, it is advisable to organize a "wick" only for the period of their active growth. Among other things, wick irrigation is a real lifesaver during the holidays, the main thing is to pour enough water into the tank.
Cons and pros of wick irrigation
Many violet collectors keep their plants on wicks, but what is the reason for the popularity of this method? I propose this topic for discussion.

There are many pros and cons of wick irrigation. For many violet lovers, the transfer to this watering option causes distrust and fear of losing their favorites. How to translate the cons of wick irrigation into pluses? A request to collectors who use wick irrigation to share their experience, as well as answer the questions, is it really that:
1.In violets, the diameter of the plant increases due to the elongation of the cuttings of the leaves and the rosette grows old quickly
2. The diameter of the flower decreases in relation to the diameter of the rosette, that is, the flowers become smaller
3. Leaves become more fragile and brittle, which complicates their transportation and transplanting
4. Some varieties of violets do not accept wick watering
5. They bloom quickly, with normal watering the flowers last longer
6. The soil becomes salted very quickly on the wick.
7. Perhaps excessive waterlogging, and as a result - rotting of the outlet
8. The height of the plant is increased due to the container with water, which leads to the need to increase the height of the shelf.When switching to wick irrigation, it is necessary to increase the inter-shelf distance on the rack, sometimes with the loss of one shelf because of this.
9. Saving time for watering
10. You can leave the plants unattended for a while and not worry that the soil will dry out
11. Because the solution for wick irrigation contains fertilizers, the plant constantly receives the necessary substances
12. Most plants adapt well to wick irrigation, you cannot overdry or "flood" the violet
13. Plant growth is accelerated. Baby turns into a starter faster and blooms faster
14. The plant blooms more often
15. The humidity of the air increases, and this is especially good when the heating is on
16. Wick watering limits each plant. With this type of watering, the nematode cannot walk on a single wet sump, which is a huge advantage of wick watering.
17. The size of the rosette can be limited by significantly reducing the pots.
18. It is recommended that sometimes the vessel with water is empty and the wick is a little dry.
19. The pot is needed small, less than 1/3 of the diameter of the outlet, since power comes from the solution, and not from the substrate, a decent economy is obtained on the ground.
20. Use different materials for the wick: synthetic linen cords of different thicknesses or cut tights. From experience: which is better?
21. When transplanting, it turned out that people put the cords in the pot in different ways: someone rings on top of the drainage, and someone just pulls along the wall of the pot almost to the very top. If there are any fundamental points in this?
22. Peduncles become somewhat collapsed, do not stand strictly "upward", because of this, there is not a "hat" but a kind of "collapse".
23. At the moment, pots for wick irrigation have not been developed, so the appearance of a plant with a container for wick irrigation leaves much to be desired.
24. Is oxalic acid used for wick irrigation? If so, how does it work with fertilizers dissolved in water?
25. Before turning off the heating in the spring, the violets must be removed from the wick, otherwise they will die from the temperature drop
26. Mini-violets, which are grown in very small pots, with normal watering can dry out literally in a day, so wick watering is very convenient when growing them
27. The mixture should be landless, then there is less risk of infection by any living creatures
28. It is not the length of the wick itself that is important, but the distance from the water to the pot. This "air" section of the wick is a kind of "engine" of the entire system: when it dries up (which means that the soil in the pot also dries up), the water, according to the law of capillaries, is pulled upward - into the pot. If you make this distance too large, then the wick will dry out due to its long length, and not due to the fact that the soil is already dry ...
29. Often a green bloom appears on the walls of the container with the solution - these are algae. There is nothing wrong with them, since they do not affect the vital activity of violets. The only negative is the aesthetic perception.
30. There is no place for sphagnum in the mixture for wick irrigation, since sphagnum strongly draws water towards itself, which leads to decay of the roots.
31. No drainage is required for wick irrigation.
32. When transplanting violets to wick irrigation, it is impossible to wash off the old soil (!), This can lead to decay of the roots
I really want to have healthy and beautiful plants and not make elementary mistakes when translating them into a wick.
Ways to organize automatic watering
Modern ready-made automatic irrigation systems
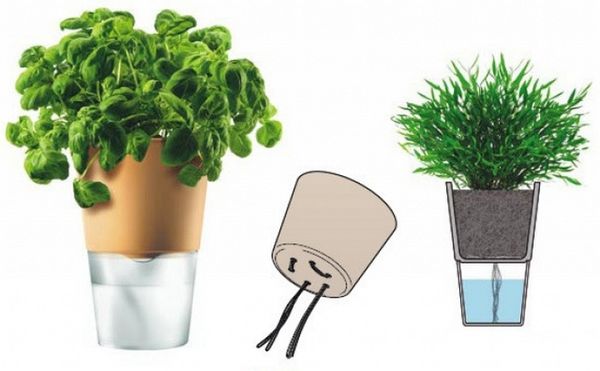
As one of the options for wick irrigation for indoor plants, “smart pots” have been increasingly used in recent years. Equipped with an auto-irrigation system, they are able to deliver moisture to the plant roots without additional water addition for three months! Among the most popular containers of this type, Lechuza pots, developed by a German company and supplemented with a soil irrigation kit, should be noted.
The principle of operation of such a system is simple and straightforward. LECHUZA-PON, a special nutritious moisture-absorbing substrate, is poured into a special pot with holes, on top of which the soil is placed and the plant is planted.After the container is inserted into the planter, equipped with a water level indicator and a watering hole. More details about the installation of the Lechuz planter and the principle of its operation can be seen in the video review on our website.
Systems of our own production
If necessary, wick irrigation can be organized independently. This will require the simplest items and a little dexterity. First of all, you need to choose a cord with good capillary properties, which will act as a wick. Perlite or Styrofoam pieces can be used as drainage. It is not recommended to take expanded clay, as it has the ability to accumulate salt and raise the pH (acidity) of the substrate.
- A drainage layer is laid out on the bottom of the container, in this case it is polystyrene - cheap and cheerful.
- On top of the drain, an incomplete turn of the wick should be laid out, the end of which is brought out through the hole for the outflow of water.
All about wick irrigation
Everyone who has just started to get involved in violets water their plants in the usual way: in a tray or in the pot itself, right under the leaves. And most often the problems that appear over time when growing violets are associated either with the drying out of the earthen coma, or with its overflow. Because of the first, violets lose the turgor of the leaves and shed flowers, because of the second, root decay occurs and the plant may die altogether. And although each grower tries to comply with the watering regime, it is very difficult to take into account the individual characteristics of each outlet, the temperature and humidity of the air in the room, as well as other nuances. So what do you do? Everything is very simple: switch to wick irrigation, and you will make life much easier for yourself, and provide your "wards" with the most comfortable conditions.
What is "wick irrigation"? Wick irrigation is an irrigation method in which the capillary properties of the cord are used, due to which the water from the container under the pot rises up the wick and releases moisture to the substrate. As soon as the substrate dries up, the water is "pulled up" again. As a result, the plant receives only the amount of water that it needs at a given time under given conditions. If the conditions change (it becomes hot or cold, the air humidity has increased or decreased, the plant has grown, etc.), then the amount of incoming liquid will also change to what your violet needs.
Of course, there are some downsides:
- If the system is not arranged correctly and the substrate is waterlogged, then the roots can rot. However, even with ordinary watering, such a phenomenon is by no means uncommon!
- When waterlogged, small flies may appear - sciarids (mushroom mosquitoes). However, since their larvae feed on decaying organic debris (leafy soil, etc.), the chances of getting them with ordinary soil mixture (and, accordingly, ordinary watering) are much greater.
- Some complain that when converted to a wick, violets become much larger in size. This is the case if you leave them in ordinary 10-12 cm pots. However, wick watering requires less capacity, and in a 5.5-8 cm pot, violets feel comfortable, bloom profusely, but the size of the outlet remains normal!
- Many people worry that when the container with violets is on the windowsill, the water in the trays cools down and the plants drink cold water. Yes, that's a minus. But when you water each violet separately with warm water, then on the same windowsill the moistened earthy clod instantly cools down and the roots are in a cold substrate. That is, there is no difference in this case. The only way out, regardless of the method of watering, is either to insulate the windowsill, or to rearrange the violets to a warmer place for the cold period.
What are the advantages of wick irrigation when used correctly:
- Violets grow in the most comfortable conditions, without experiencing the stress of overflow or dryness;
- Having found the optimal concentration of the fertilizer solution, you will not overfeed or underfeed the violets;
- It becomes very easy to grow violets: you do not need to check every day if the earthen ball is dry, and run around with a watering can / pear / pipette to measure out the amount of water that the plant needs;
- In winter, due to the high dryness of the air, the topsoil dries up, and moisture remains inside. And you can easily flood the plant. Whereas with wick irrigation, the substrate is wetted evenly: the top layer dries up and moisture immediately draws up from below;
- You can leave the violets for a long time (several weeks), for example, while on vacation, and not ask your neighbor / friend / mother to water your pets;
- It is very easy to root and grow a large number of violets, since you do not have to water each pot separately;
- If it comes to rooting leafy cuttings, then you do not miss the moment of evaporation of water from the glass (also very important with a large number of violets);
- Due to the comfortable conditions, violets not only bloom more luxuriantly, but also bloom much earlier;
- Violets are very fond of high humidity, but it is quite difficult to provide it without special humidifiers. But with wick irrigation, water will constantly evaporate from the tanks with the solution, which will create additional humidity in the air next to the plant;
- Mini-violets, which are grown in very small pots, with normal watering can dry out in just a day, so wick watering is very convenient when growing them;
- Since the food will come from the solution, and not from the soil, a small pot is needed (even less than 1/3 of the outlet diameter), and this is a certain saving both on the amount of substrate and on the pots themselves (the larger the diameter, the higher price);
- With a small diameter of the pot, the rosette turns out to be small, but evenly developed. The forces go to flowering, and not to a set of green mass;
- As a result, you will get healthy, well-developed, profusely blooming violets, since with wick irrigation, the plants receive all the necessary trace elements from the solution, and the violet itself regulates the moisture level of the soil.

We have been using wick irrigation since 2005 and noticed that violets began to grow much better than when watering in a pan. Their leaves are clean (without traces of drops, which are almost inevitable with ordinary watering), and the cap of flowers is much larger and denser.
How do you organize such a wonderful system? Consider 2 examples - rooting of leaf cuttings in sphagnum on wick irrigation and growing children and adult plants on wick irrigation. For both, there are 3 common points: wick, solution and container for wick irrigation.
The wick must be synthetic (cotton will rot very quickly) and be well wetted, that is, it must have capillary properties. This is a very important point, since not all synthetic cords are hygroscopic, so it is advisable to check this in advance (you can ask to wet a small area right in the store). We cut the wick into pieces about 20 cm long. The thickness of the wick is usually small. We use a cord with a thickness of about 0.5 cm for pots with a diameter of 4-8 cm. The most common misconception is that many believe that the larger the diameter of the cord, the more the substrate is wetted. This is not true! The point is that the wick is just a "conductor", and the "pump" is the surface of the potted substrate. It is even simpler: the water does not "enter", but is "pulled up" according to the law of capillaries, when water evaporates from the upper layer of the loose substrate. But at the same time, the top layer will always remain wet. That is, the substrate will take exactly as much water as it needs. Do not forget that this only works with the correct substrate for wick irrigation (very moisture and air permeable). If you use a dense substrate containing organic matter, it will retain water.

The color of the wick does not matter, the main thing is that it does not paint the water (otherwise it may affect the color of the leaves and flowers).Some make wicks out of worn-out nylon tights. On the one hand, this is convenient, since they are almost always at hand, but, according to reviews, such wicks conduct water too well and the substrate freezes. The main thing is that the end of the wick constantly touches the solution, and the bottom of the pot remains dry. The distance between the bottom and the water level is usually about 1-5 cm and depends on the length of the wick and the amount of water in the tray. It is not the length of the wick itself that is important, but the distance from the water to the pot (the wick can lie still half a meter in the solution - it's not scary). This "air" section of the wick is a kind of "engine" of the entire system: when it dries up (which means that the soil in the pot also dries up), the water, according to the law of capillaries, is pulled upward - into the pot. If you make this distance too large, then the wick will dry out due to its long length, and not due to the fact that the soil has already dried up ... We use trays 7 cm high, which are about 6 cm filled with solution, on top there is a plastic plate with holes on which there are cups or pots. At the same time, the end of the wick touches the bottom of the tray, that is, the solution can be added quite rarely (depending on the number of pots, air humidity and other conditions).
To prepare the solution, you can use any water-soluble mineral complex micronutrient fertilizer. For many years we have used Finnish-made Kemira Kombi soluble fertilizer, but the plant in Finland has closed, and we do not really trust the Russian analogue. Therefore, we found the optimal replacement of Italian origin - Nutrisol, which is almost identical in composition to the Finnish Kemir. In this case, we prepare a 0.05% solution. It is very convenient to dilute, for example, the entire pack (20 grams) in 1 liter of water and keep it closed away from children (so as not to be confused with soda). And as necessary, dilute in the proportion you need! By the way, do not forget to write on the bottle what is there and how to breed. For example, when diluting 1 package (20 grams) in 1 liter of water, a 2% solution is obtained. We take 25 ml (5 teaspoons) and dilute in 1 liter of water - a 0.05% solution is obtained. Or 50 ml in 2 liters - the same effect. It is more convenient for someone - who has how many plants. You can store Nutrisol solution for a very long time. If precipitated, then shake up - and use as directed.
The container for the solution - the container for wick irrigation - can be individual for each plant, or common for several. The first option has an undoubted plus in the fact that if some nasty thing starts in the water, then other violets will not suffer.
However, we have been growing violets on trays for many years, from which 6-8 children drink, or 2-3 sockets. And we never had any problems. And it is much easier to pour the solution into several large tanks than into many small ones.
Sometimes a green plaque appears on the walls of the container with the solution - these are algae. There is nothing wrong with them - they do not affect the vital activity of violets. Perhaps the only drawback is an aesthetic defect. But sometimes you can also wash your containers / trays / tanks to remove any greenery.
Another point is the greenhouse. Everything is simple here: if there is an opportunity, then it is worth making it - both cuttings and children will grow in much more comfortable conditions. If this is not possible, then its absence will at least to some extent be compensated for by the evaporation of water from the trays and the correct moisture content of the substrate in the pot.
Now let's take a closer look at the technology.
When rooting leafy cuttings in sphagnum on wick irrigation, you will need:
- Live sphagnum moss;
- Plastic cups (180-200 ml);
- Correct wick;
- Complex fertilizer like Nutrisol;
Additionally:
- Marker or stickers (adhesive labels);
- Burner or wire / awl;
- Scissors;
- Blade or utility knife;
- Sticks for leaf spacers.
So, you need to make small holes in the cups so that the wick can be threaded into it. We usually use a burner for this, but a heated wire or thick awl will also work. You can cut holes with a sharp-tipped knife.
The names of varieties can be written on the cup with a marker or with a pen on adhesive labels. You can also use a marker to write sticks for stirring coffee and put them in cups. It's as convenient as anyone.
We cut the live sphagnum moss into pieces of 2-5 cm (as it happens) - so later it will be easier to separate the roots of the children from the moss itself.
By the way, do not be surprised when, after a while, the chopped moss begins to grow - new green stems will appear. This is a very good sign, as live moss has bactericidal properties and thus prevents cuttings from rotting. Sometimes the growth of moss is so intense that you have to remove its excess, so that later it will be more convenient to plant the children!
We are preparing a 0.05% solution of Nutrisol, which our cuttings and later children will drink. It can also be rooted in clean water (before the formation of children), but in our experience, when using a fertilizer solution, children appear faster.
We pass the wick through the hole so that at the bottom of the glass we get a half-circle from the cord, the rest remains outside. We put chopped sphagnum moss on the ring so that it takes about 3-4 cm in height, you can slightly compact it.
In leafy cuttings of violets, we make a cut at an angle, leaving the length of the petiole about 2-3 cm. Some people prefer not to cut it, but to break off the cutting is also the right option. If you are a beginner violet grower and are afraid that the cuttings will rot, then you can leave the petiole longer (in order to cut it if necessary), but it is more convenient to root not long petioles. Insert a leaf stalk into the sphagnum so that the cut is covered with moss, but does not reach the plastic bottom. Many recommend that you first dip the cuttings in Kornevin. We do not do this (we already have everything well rooted  ), but, according to reviews, it really speeds up the process of root formation.
So that the leaf does not fall (if it is large or, on the contrary, too small), it is advisable to prop it up with a special stick. For this, all the same coffee stirrers, broken or cut in half, are suitable. You can think of something else, the main thing is not to use wooden sticks - from them the sheet plates begin to rot very quickly. It is best for each leaf to have its own glass (if one of the pair rots, then the second will not "get infected", and the children will then feel more at ease). But in order to save space, you can put 2 leaves of the same type in one glass. In this case, spacer sticks are essential.
If the plate is very large and does not fit into the cup, then you can safely cut the edges at a slight angle (as if parallel to the walls of the cup). For reliability, the slices can be sprinkled with crushed coal (if there is no charcoal, you can crush activated carbon tablets).
When all the leaves find their homes, the cups must be placed in a tray with the solution so that the wicks get wet and the moss is completely saturated with water. This is very important, otherwise the system will not work. If there is no pallet, then you can spill the moss well on top. After that, the cups can be placed on the wick irrigation container.
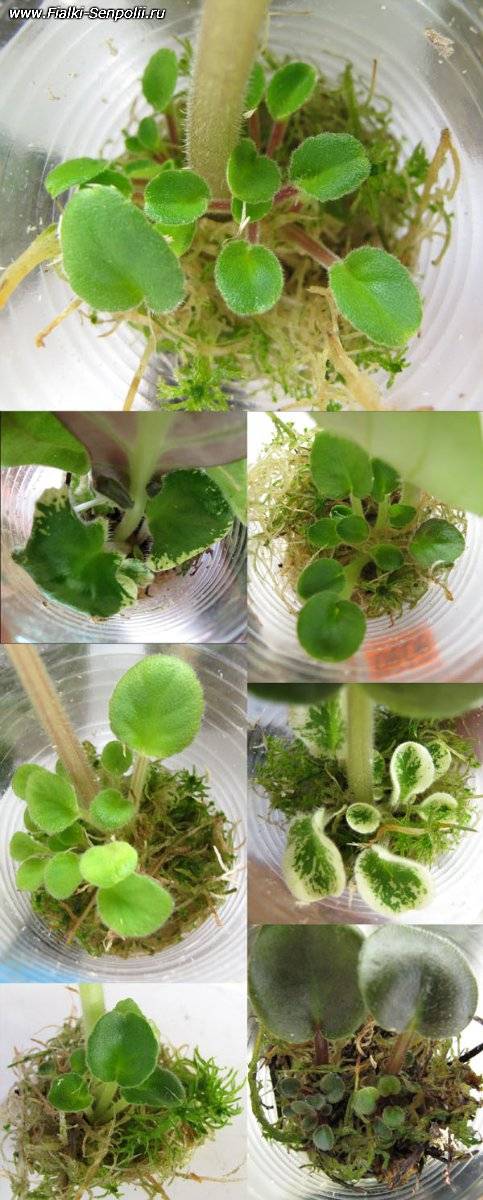
After about 10-14 days, you will see that the leaves seem to stand up in the cups and become more elastic. And if you pull them slightly, you will feel resistance. This means that everything is going well and the first roots have appeared. At this stage, you can do without backlighting. But babies will appear much faster if you arrange additional lighting. The rate of formation of babies in different varieties and depending on different conditions is very different, on average from 1 to 3 months and even longer.If the leaves sit without children for a long time, they need to be "stimulated" - cut off the top 1/3 of the sheet, and sometimes ½ if the sheet is very large. Do not forget that violets must be protected from drafts, and the optimum temperature for them is above 22 degrees.
Some leave the cuttings in the moss only until well-developed roots are formed, and then transplanted. We prefer the option when the leaves take root in the moss, give children and the children grow up in the moss on wick irrigation until the age when they can be planted separately.

This is usually determined by the size of the baby (about 1 / 3-1 / 4 from the mother leaf) and the amount of green pigment for variegated varieties. By the way, after the separation of the firstborn, the leaf can be left in the sphagnum and it will give you another generation of babies.
Now let's talk about growing children and adult plants on wick irrigation.
The difference between the leaves and the children is only that the sockets use a mixture for wick irrigation, in which there is no place for sphagnum. Also, according to our observations, it is not worth adding earth to the mixture, as this will lead to rotting of the roots of children and adult violets (sphagnum and earth strongly pull water towards themselves). So we only use landless mixture. Usually we take 50% of high-moor (red) peat and 50% of perlite, vermiculite or their mixture.

You can also use a mixture of coco peat / substrate and perlite, as coir remains porous even after being saturated with water, which promotes active root formation and better plant growth. But do not forget to rinse the "cocoa" before use - there are quite a lot of salts in it. Landless mixture for wick irrigation turns out to be very loose, moisture and air permeable, and thanks to this, the root system becomes well and evenly developed.
At the bottom of the pot we put a turn / half-turn of the wick. We usually make the ring slightly smaller than the circumference of the pot.

Some people thread a wick through the entire thickness of the mixture, but this is not necessary: due to the looseness and moisture permeability of the substrate, the solution will evenly wet the entire mixture in the pot. Sometimes it is recommended to put some kind of synthetic material on the bottom so that the substrate does not spill out, but with a small diameter of the holes in the pot, the wet mixture will not go anywhere. Thus, we fill the wick on top with a substrate and plant the baby. No drainage is required for wick irrigation.
If, after separating from the leaf, you still have very small children, there is no need to put an end to them: be sure to put them in a pot with the same mixture, and they will surely take root. In such a substrate, roots develop very quickly!
We put the pot on a tray of water so that the whole system is sure to be saturated with the solution. You can also spill the system well from above, but this is less convenient. You may have to pour the substrate a little from above, as it will settle a little from the water. The main thing is not to deepen or fill up the growth point, otherwise the baby will die. After that, you can place the pot on the wick irrigation container and add the solution as needed.
Landless substrates do not contain nutrients, therefore it is necessary to constantly use top dressing, which will always come to the plant with the help of a wick. We use 0.05% Nutrisol solution.
With wick irrigation with Nutrisol solution, nutrients are supplied evenly, the plant does not experience stress from overfeeding / underfeeding. But do not forget to monitor the state of the plant. If it grows well, we don't change anything. If the lower leaves turn pale, and the plant becomes "skinny" - the concentration of the solution can be slightly increased. And if a reddish-whitish coating appears in the middle of the outlet, then the concentration must be reduced. No additional feeding is required.
Some violets sometimes “dry out” their plants (they do not immediately add the solution when it runs out).We never do this, and our violets feel great. By the way, as I have noticed, lovers of soil are advised to "dry" not a landless substrate, but a soil mixture. And for them it is justified - because of the soil, the substrate gets too wet, and so that the violets do not rot, they have to be “dried”. With the right substrate, this simply isn't necessary.
Over time, as the baby grows up, roots can sprout through the hole in the bottom of the pot along the wick.

There is nothing wrong with that, on the contrary, it means that the plant feels great. We usually leave things as they are. But you can carefully transplant a violet. Most importantly, do not try to free the old wick from the roots - you can damage them. Just cut off what can obviously be cut off, especially since this will stimulate the formation of important and necessary lateral roots, and plant the updated root system in the pot again.
It is advisable to transplant the violets once a year (not necessarily in a larger pot): this is done to renew the substrate so that salts and other nasty things do not accumulate in the soil. If a larger pot is not needed, then simply shake off the old substrate from the roots, and add a new one to the pot!
Some people worry about the size of the outlet. To prevent "elephants" from being made of violets, the diameter of the pot should be minimal (in our country, both children and adults are primroses, and sometimes re-flowering rosettes live in 5.5 cm pots). If you plant violets in large pots, the result can be "burdocks"!
If for some reason the system stopped working (for example, they forgot to pour the solution into the tray in time and the mixture with the cord dried out), you need to spill the substrate well or put it in a container with water / solution to soak it, and everything will fall into place again!
If you want to transfer violets that grew in the ground to wick irrigation, then you need to get them out of the pot and, if possible, remove the soil from the roots as much as possible, but carefully, but you should not rinse the roots. And only after that, transplant it into a mixture for wick irrigation. After several days of adaptation, the violets will rise and will only delight you! Some recommend that after transferring to the wick, water the plants with only clean water for a week or two. Of course, whether to immediately plant in a solution or wait is everyone's personal business. But don't forget that we are planting in a completely landless mixture, and it does not contain any nutrients. And in my opinion, it will be difficult for violets to come to their senses "on a starvation diet." Therefore, we recommend that when using a landless substrate, immediately put violets on Kemira's solution.
Wick irrigation is very convenient and really simple. If you are worried about the result, just start small: transfer a few not very valuable violets to the wick and observe them for a month. It may be necessary to reduce / increase the concentration of the solution, remove the wick from the pot a little, or, conversely, add. And when you find your optimal version of the system, you can safely translate the rest of the violets. They will thank you for this with their good health and lush flowering!

The author of the article and photos: Marina Kulinich (Krutova), the article was written for the site and provided to the site with the permission of the author.
Why choose wick irrigation?
Among the advantages of wick irrigation are the following:
- Significant savings in time spent on watering plants with large collections of plants;
- Constant moistening of the soil, with proper organization - in the amount of moisture that the plant requires;
- Convenience of fertilization and their complete absorption by the room flora;
- Rich leaf color, abundant flowering, fast growth;
- The ability to leave flowers unattended for a long period.
Benefits of wick irrigation
- This method is much less laborious than the usual one.
- There is no need to constantly monitor the condition of the soil and water the plant.
- Providing the most comfortable conditions for Saintpaulias.
- The risks of excess or lack of moisture and nutritional components are minimized, since the required amount of both is supplied to the plant through the cord.
- With this watering, Saintpaulias grow quite large and healthy, besides, they grow very quickly.
- The flowering period lasts longer than usual, as new flowers are constantly appearing.
- The required air humidity will be provided due to the evaporation of water from the container on which the pots are standing.
- Savings on soil and pots.
- In addition, using this technology, you can safely go on vacation without worrying that upon arrival you will find dried flowers.

Wick irrigation pitfalls
Each watering method has its own "fly in the ointment" and the wick is no exception. Among the most likely problems when switching to this method, the main ones can be distinguished:
- With a heavy substrate, the wick is not able to bring water to the roots and the plant may dry out;
- With an incorrectly adjusted level of water intake, the plant can be flooded, which will lead to rotting of the root system and the death of the flower. And to provide the correct "dose" of moisture without experience and practice is sometimes difficult;
- In some cases, in plants kept in constantly moist soil, smaller flowers and large, but brittle leaves can be observed;
- At low temperatures, the roots are unable to absorb the incoming liquid and the plant withers;
- Not too presentable type of construction. True, if desired, the container with a wick can be decorated.
Preparing to switch to wick irrigation
When switching to wick irrigation, first of all, it is necessary to prepare a soil mixture for planting, which must have moisture and air permeable properties. Vermiculite and perlite are washed to get rid of dangerous impurities: dust fractions, salts, etc.
If coconut fiber is used, then it must be poured with boiling water and held in this state for a while. The manipulation is carried out several times in a row. Water is poured into the peat, mixed and left until the water is absorbed and the peat turns into a crumbly mass.
Before moving on to wick irrigation, you need to purchase a nutrient solution, which should always be present in the container for wick irrigation. The exception is weak and diseased flowers, as well as the period after transplantation.
It is worth preparing in advance convenient structures for filling with water. They must be stable, otherwise, after emptying under the weight of the flower pot, they will fall.
A few tips in the end
- The main difficulty of wick irrigation is to ensure the required level of water supply. Therefore, during the first days, observe the plant on the wick, check the condition of the soil and, if necessary, adjust the dose of moisture.
- Before transferring the plant to the wick, check if it needs periods of complete drying of the soil, otherwise the root system may not be able to cope with the constant supply of moisture.
- Before transferring the plant to wick irrigation, think about whether there is a need for this. If there are only a few moisture-loving plants in the collection, it may be possible to do with the usual regular moisture. Any transplant is stressful for the home flora.
Subscribe to new articles in the Floriculture section and receive updates by mail. Expert articles on gardening and gardening are understandable and accessible to everyone!
Indoor plant lovers tirelessly try different irrigation methods to make flower maintenance easier.
The most effective options are especially appreciated, because they plan to go on vacation at least once a year. In the absence of moisture, only a cactus can survive.
The rest of the crops die from heat and increased dryness. The ideal option is to equip wick watering of plants, how to do it is described in detail in the article.
How is the transfer made to wick irrigation?
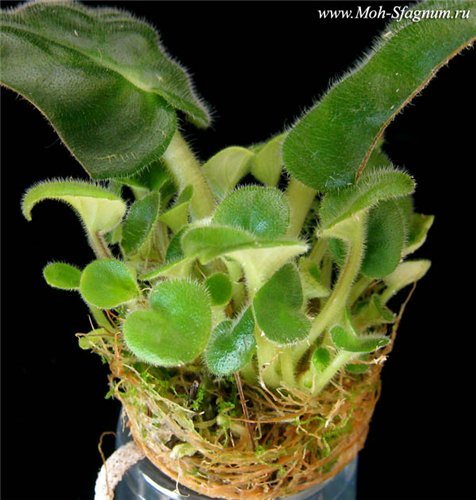
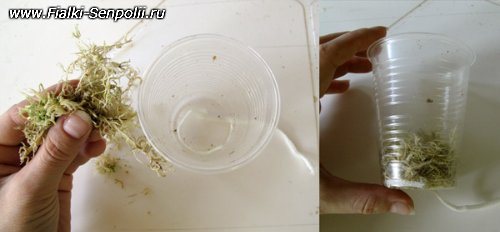
The easiest way is to transfer a collection of violets to wick irrigation at the stage of their reproduction. A hole is made in the bottom of a small plastic disposable cup through which a wick is passed. A miniature pot is filled with chopped sphagnum moss. For feeding the Saintpaulias, a Nutrisol solution with a concentration of 0.5% is used.
A master class for planting violets consists of several stages:
- The moistened cord is threaded through the hole in the bottom of the pot so that it lies in a ring. A part of the wick should remain outside the wick enough to reach the bottom of the water tank.
- The ring of the cord is sprinkled with sphagnum moss with a layer of 3 cm.
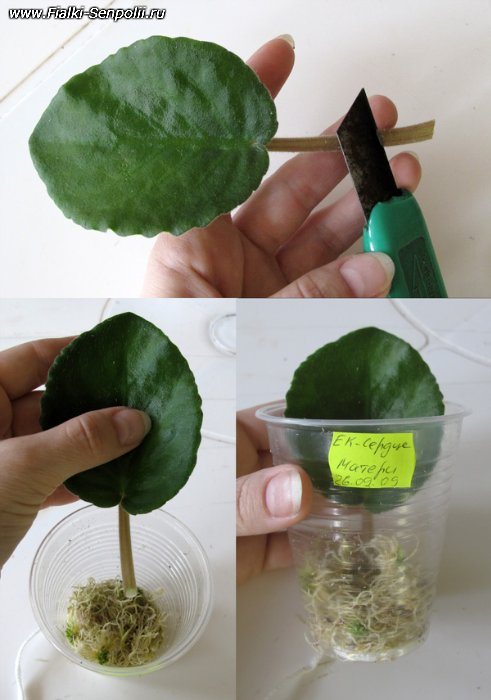
- Leaf plates with cuttings 2-3 cm long are cut from the violet rosette, they are lowered into a biostimulator to accelerate root formation.
- Cuttings are planted one by one in cups, supported with plastic sticks (you can use disposable spoon sticks to stir sugar). Wooden matches and sticks contribute to the development of putrefactive processes, so it is not recommended to use them.
- Glasses with cuttings are placed on containers with Nutrisol solution and the wick is lowered into it.
After 2 weeks, the cuttings take root. Additional lighting can be used to accelerate growth. Young outlets appear within 1-2 months. If this does not happen, to stimulate growth, the leaf plate is cut by a third, and the large leaves are shortened in half.
If a green coating has formed in the container with water, wash it off. In winter, when the Saintpaulias are kept on the windowsill, the temperature of the solution in the containers decreases, as a result of which decay of the root system can occur. In this case, Saintpaulias are transferred to traditional watering: the pots are placed in trays without removing the wick.
What is wick irrigation
Florists use different irrigation systems for their plants, sometimes it is rational to combine options, adjusting the regime for certain circumstances that force them to leave the apartment for a long period.
Wick irrigation is a type of irrigation method that involves the installation of a container with water and a thin cord (wick), through which liquid enters the plants.
Principle of operation
The mechanism of this system is based on the capillary properties of the wick. One end of the cord is lowered into a container with settled water or a nutrient mixture. The other edge is inserted into the bottom of the pot into the soil with an outlet to the root system. The tissue is constantly hydrated, thus delivering liquid in moderate but regular doses to the plant.
Reference! The functionality of wick irrigation largely depends on the correct choice of material for the wick. It must be resistant to decay processes, conduct liquid unhindered.
Wick watering. How we came to him.
Hello dear lovers of violets!
In this article I want to tell you how the wick came to our collection.
Just want to dispel the myth that large violets grow on the wick. Here are my sockets:
How big can they be? I think a clever combination of lighting and feeding does the trick.
There are large rosettes, and there are also hands up, but they are in the minority, and I regard this as a feature of the variety. By the way, I'm trying to get rid of such varieties. I will grow those that suit my conditions.
But back to my way to the wick. Initially, violets were watered with alternating watering from above with a syringe and into a pan, but as the collection grew, more than one evening took to watering. I had to try each pot with my finger. All violets drink differently. Today one wants to drink, and the other is still damp, and tomorrow the other is dry. And this cycle of watering and probing reminded me of slavery. I could not enjoy the beauty of blossoming bouquets, communicate with violets, tear off leaves, dried inflorescences. In general, there was not enough time for pleasure, and for other care besides watering.Considering that I am a person who also works "from call to call", then the evening time for my favorite hobby - oh, how little. Capillary mats came to the rescue.
Mats were put on all the shelves. The appearance of the shelving has deteriorated markedly.
First, placing mats and violets on pallets was considered irrational and expensive. They made something like troughs with sides made of dense cellophane for the entire shelf. The sides were fixed with clerical clips to the racks of the rack.
Secondly, the mats got dirty quickly. A beautiful white film for a couple of weeks of watering turned into gray from the soil, which appeared through the holes of the pots.
But even if you consider that my collection is located in a technical room, and you can give up on the exterior of the shelves, the watering itself caused a lot of inconvenience.
First, the shelves must be perfectly aligned, otherwise the water will drain to one side.
Secondly, the cellophane bumpers did not always withstand the flow of water, they took a horizontal position, getting rid of water right on the floor, walls and on violet leaves from the lower shelves.
Thirdly, watering children, rooted cuttings and teenagers in plastic cups was problematic. Due to their light weight, they did not put enough pressure on the mats and often remained dry, despite the addition of wicks inserted. Therefore, I still had to feel each glass and water it individually.
Fourth, all violets drink water differently. Some had already begun to dry up, while others were wet. I could not catch the moment when it was necessary to water the mats. I watered the entire shelf when they dried, but when the lower leaves of some violets from waterlogging began to wither, “dancing with a tambourine” began around my favorites. I lowered some of the violets from the shelf to the floor, watered the shelf. In the morning, I returned the violets from the floor to the shelf. I tried to combine shelves with violets with the same need for water, but these are long observations, during which the plant can be harmed. So I wanted to water the violet just when she needed it. So the wick came to our collection!
First, I see how much the violet drinks and when to add the solution.
Secondly, due to constant feeding in small doses, the violet is always full and happy, the flowers open all and completely, the leaves shine and look healthy
Thirdly, (the bonus came by itself :)) violets approached the lamps to the height of the container with the solution, which influenced the formation of a beautiful rosette and lush flowering.
These are pluses for violets. And for me, the main plus is the free time to admire the results of my labor, to communicate with plants, to transplant, rejuvenate, grow new products, etc.
In general, from our experience, wick irrigation showed only positive aspects.
I do not want to categorically assert that capillary mats are an empty invention, and classical watering from above or below are relics of the past, but a wick has taken root in our collection.
We treat the supporters of both classic and capillary irrigation with equal respect. All methods of watering violets bring excellent results, as evidenced by numerous photos of chic and lush rosettes on the Internet, at exhibitions, among friends. But each collector finds the most optimal way for himself, based on his needs and capabilities. Moreover, watering is only one component of complex care for violets.
For those who, after our story, would like to join the supporters of wick irrigation, we are preparing a number of articles on the intricacies of wick irrigation, in which we will talk about the composition of the soil, the fertilizers used, containers, wicks ... and a master class of planting a plant on a wick.
All information is based on personal experience gained through trial and error.
We wish you health and lush blooming for your pets!
To the list of articles
What plants are suitable for
Most often, the wick irrigation method is practiced by indoor plant lovers, for example, Saintpaulia. This crop does not need intermediate drying of the soil between irrigation measures, so capillary delivery of moisture on a regular basis is ideal.
Gloxinia, Ahimenes, Hirita, Episii and Streptocarpus can be transferred to round-the-clock humidification with the help of a wick. These plants do not have a pronounced dormant period. At the same time, it is important to observe an important condition: the air temperature in the room where the flowers are installed should not fall below 20 °. Otherwise, the risk of root decay increases.
Important! If wick irrigation is organized in the cold season, when the daylight hours are short, there is a need for additional lighting. It can be easily done using fluorescent lamps or special phytolamps.
For large varieties of Sentopolias, a pot with a capacity of more than 8 cm is required. For such containers, wick irrigation is not suitable, as well as for some varieties of violets (for example, Uzambarskaya).
For those crops that need a decrease in moisture for the autumn-spring period, the wick system can be organized only for the summer season, especially when the active phase of growth occurs. Also, cord irrigation is suitable for those who go on vacation. Indoor crops will withstand the heat with regular delivery of water from the container to the rhizome.
What is wick irrigation?
The wick method of irrigating plants ensures the wetting of the earthen coma with the help of a cord placed inside the flower pot-wick. For its manufacture, nylon, nylon and other hygroscopic materials are used. In the process of transplanting the plant, the upper part of the wick is placed in a flowerpot, and the lower part is plunged through a drainage hole into a reservoir of water.
A cord moistened with water moistens the soil ball to the required level. Plants receive as much moisture through the cord as they need. The rate of water absorption depends on the ambient temperature, air dryness, and the plant's moisture requirements. The grower is required to add water to the container under the pot from time to time.
Synthetic fabric is best for making a wick. It does not rot, it serves for a long time, it is well wetted with liquid. According to flower growers practicing the new watering method, it is best to use old nylon tights as a material for making wicks. They are cut into strips and twisted into a cord.
The wick irrigation system is not used for all indoor plants. It is used for flowers that prefer light, loose soil mixtures. These include the uzambara violet, gloxinia, and streptocarpus with a well-formed root system. For Saintpaulias, this method of irrigation is most often practiced, but for large bushes growing in large flowerpots, it is not suitable.
Preparatory stage
At the preparation stage, you need to stock up on a pot, filler and a wick.
Pot requirements
Florists recommend giving preference to a pot and water containers, which are made of plastic, the diameter of the upper rim does not exceed 8 cm. The material is well washed and disinfected. It is easy to make a hole of the required size in the bottom part.
Reference! Plastic cups, bottles and containers are suitable for organizing wick irrigation.
When installing small pots on a common pan with water, you need to put a grate on the bottom so that the containers do not touch the water.
What kind of soil to use?
If you decide to transfer your Uzumbar violets to wick watering, then a complete replacement of the soil in the pots is inevitable. There is no unambiguity in the choice of components, but there are general signs of the substrate - looseness and air permeability. The roots must breathe, and the unhindered access of air will help them avoid rotting from excess moisture, which is inevitable during wick irrigation.
one.peat, vermiculite and perlite, taken in 1 part. This substrate was proposed for the first time in America and is considered a classic recipe for watering with a wick. There are almost no nutrients in it, but the possibility of decay due to high humidity is also minimized;
- peat and perlite in a ratio of 1 to 2. The absence of vermiculite makes the mixture less water-absorbing;
2. land (leaf, turf, various purchased soils), peat, perlite, sand, vermiculite (coconut fiber) in a ratio of 2 (1) / 1 / 0.5 / 0.5 / 0.5;
- the same mixture, only without the addition of vermiculite, which greatly moisturizes the soil and in the presence of an earth component, undesirable saprophytic flora can develop in it;
3. live sphagnum moss;
- common forest mosses (ptylium, climacium, cuckoo flax) are used dry or rotted.
There are 2 diametrically opposed opinions regarding the use of moss. Some growers unequivocally and categorically reject it, as it greatly moisturizes and acidifies the substrate. For others who successfully grow Saintpaulia, moss is the main and only component in wick irrigation.
How to make wick watering for plants with your own hands
Even a teenager can make wick watering for indoor plants, if we take into account the recommendations of experts.
Required materials and tools
No special tools are required for work. You can do with the means at hand:
- spatula;
- a container for mixing filler components;
- a pot for a plant;
- capacity for water;
- synthetic cord or a piece of nylon tights.
Step-by-step instruction
The sequence of actions for transferring plants to wick irrigation is carried out in the following order:
- a wick is threaded into the hole at the bottom of the pot, starting up to 15-20 cm in length;
- holding the cord in an upright position, introduce a little of the prepared mixture into the pot;
- wrap the wick around the base of the container, making 2 turns;
- reintroduce part of the substrate;
- if there is a large fragment of the cord, you can make another turn;
- cover the filler with a layer of 2 cm;
- plant a plant by adding the required amount of substrate;
- install the pot in a selected container of water by running the lower end of the wick inward;
- check the reliability of the assembled structure;
- water the plant in the usual way, then the system will work on its own.
How to plant and transfer a violet to a wick look
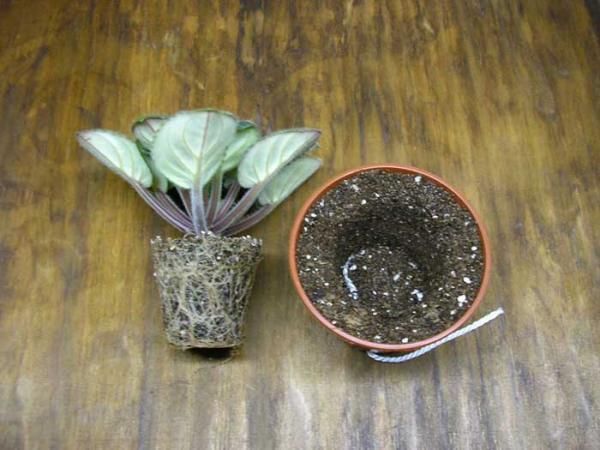
If you want to plant a violet on wick irrigation, you need to adhere to the following rules:
- Before transferring violets to wick irrigation, you need to take care of the containers where the solution will be located. You can make them yourself or use thick plastic cups.
- Make sure a hole is made in the flower pot.
- Now we are preparing the cord itself. For one pot, we need a piece 15–20 cm long. It needs to be threaded through the hole and laid in a circle on the bottom of the pot. The other end of the cord should be dipped into the solution.
- On top of the cord a few centimeters, we lay sphagnum moss, which will subsequently help separate the plant children, and pour in the nutrient mixture.
- After that, you can plant cuttings of violets in cups. Each of them must be placed in a separate container.
- Dip the cups into a container with Nutrisol solution so that the moss and the wick itself are saturated with moisture. After that, you can put the cups on a container of water. Make sure that they do not sink into the liquid, but are several centimeters above the water level.
- If you did everything correctly, the flowers will take root in a few weeks. This will be evidenced by the raised leaves, which offer resistance if you try to pull them slightly.
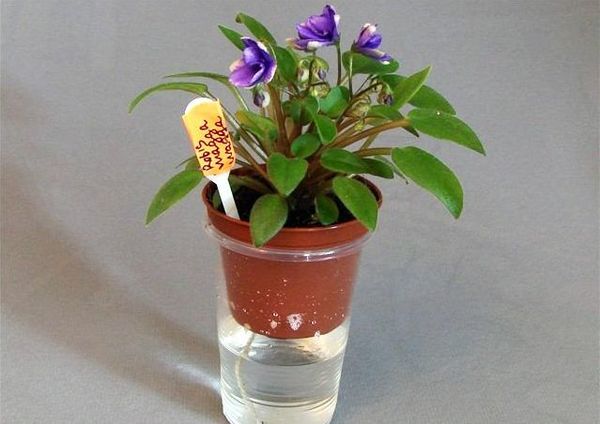
Transferring a violet to wick watering is not so difficult. Here's a step-by-step guide to transferring your plants to wick watering flowers you've been growing for a long time.
- In the same way as in the first case, we prepare the soil, the pot and lay the cord on the bottom of the pot.
- Pour the pre-prepared mixture into the pot (it is recommended not to use soil so that the roots do not rot) for the violets, transplant the flower and water it with water until the mixture gets wet (this must be done once, do not water the flower on top). Then you need to drain the excess water and place the pot on a container with some water (it must be settled and slightly warm).
- When transferring violets to wick watering, make sure that the distance from the surface of the water to the bottom of the pot is within 1-2 cm.
- So, the transfer was successfully completed. Now the water, rising up the wick, will wet the soil to the required state.
Despite the fact that it is much more convenient for your flowers to get moisture on the wick, not everything can go smoothly the first time. Therefore, it is recommended not to transfer all the Saintpaulias that you contain to such watering at once. Transfer several plants, observe the results, use trial and error to find the optimal conditions for your flowers (cord length, material, amount of water in the container, etc.).
If the "test" is successful for the violets, you can carry out this procedure with the rest of the flowers.
How to transfer a plant to wick watering correctly
The process of organizing wick irrigation of indoor plants is best timed to the planned transplant or transshipment. The principles of preparation are as follows.
- It is not recommended to use fertile soil to fill the pots. It attracts moisture, which can cause root rot. It is better to use a mixture of such components: vermiculite, perlite, coco peat.
- Pull the wick through the hole in the pot and place it in a circle on the bottom of the container. The cord must not come into contact with the roots.
- Make regular feeding. This action cannot be ignored, because there are no nutrients in the mixture used. For violets it is recommended to use Nutrisol 0.05%. A dose of fertilizer is mixed with water, and then nutrients are supplied to the plant along with moisture.
- If the wick dries out, the pot is placed on a pallet and poured abundantly with settled water from above. When the cord is wet, you can return to wick watering.
Transfer of violets to wick irrigation. Part 1. Preparatory work and transplantation.
For a long time, my attitude to wick irrigation was negative. I studied and looked closely at this irrigation method for a long time and, finally, decided to try it. When the collection was small, there were no special difficulties with watering, but when the number of outlets increased and increased, it took a lot of time to water, I mostly have miniatures, and they need to be watered every other day or after 2, depending on the weather ... And I decided to transplant the first batch of miniatures. It was early May. After that, a second batch of outlets was transplanted a little later. Now there are already 2 shelves on the shelves and it is already possible to draw some conclusions.
Today I will talk about the preparatory work and the transplant, and the next time I take care of them and a little about the standard violets and trailers converted to the wick.
Land substrate.
I chose Greenworld and perlite. Although there are many recipes for land and landless compositions of the substrate. Since my violets before that grew in an earth mixture based on Greenworld, I also took it as a basis for wick irrigation.
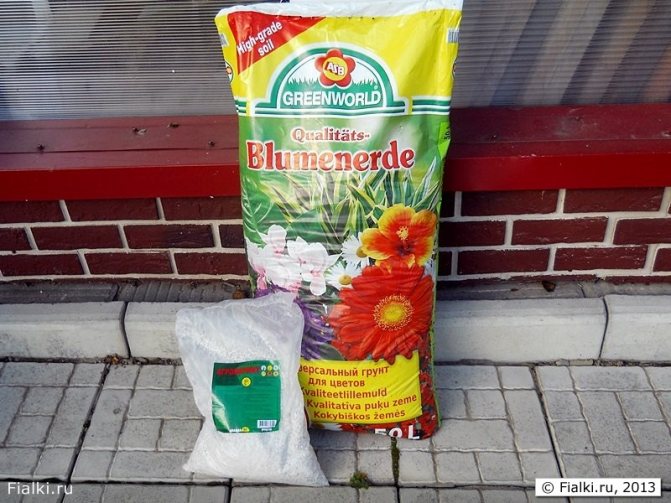
The composition of the substrate includes: ready-made ground mix Greenworld - 1 part and agroperlite - 1 part.
I pre-steam the ground mixture in the microwave for 6 minutes, then mix it with perlite. This mixture is open for 2-3 days and dries out a little. I put it in a dry mixture.
Wick.
For the wick, I take a synthetic thread:
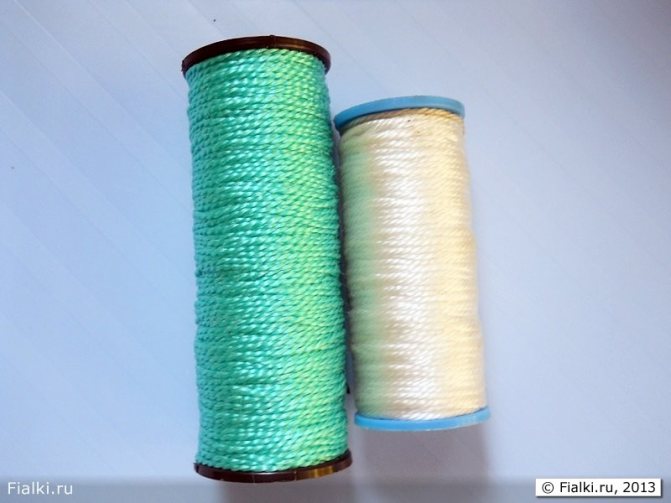
Its diameter is about 1.4 mm. It gets wet well, the color does not matter:
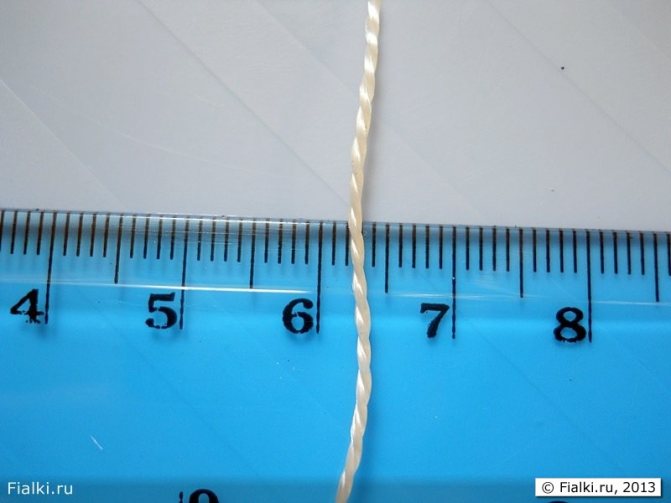
I cut it into pieces about 25 cm long in advance (it depends on how high the water tank will be). It is necessary that the wick lies in a small loop at the bottom of the water container and is 3 centimeters higher than the pot.
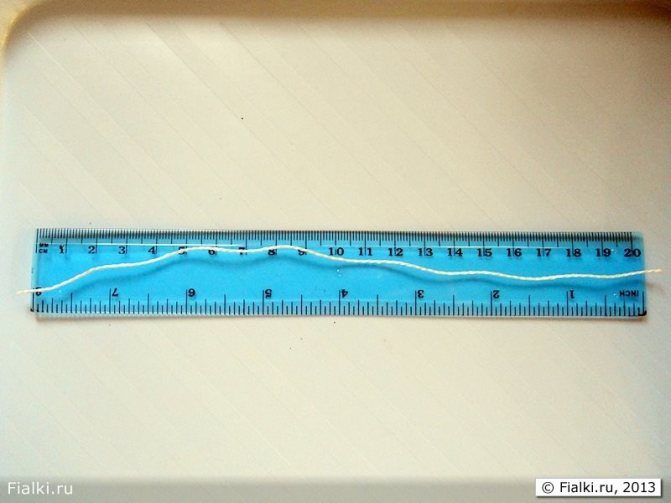
Water tanks.
Since I mostly have miniatures, the pots are 5 and 5.5 cm.
This is what pots look like in 100 g disposable cups:
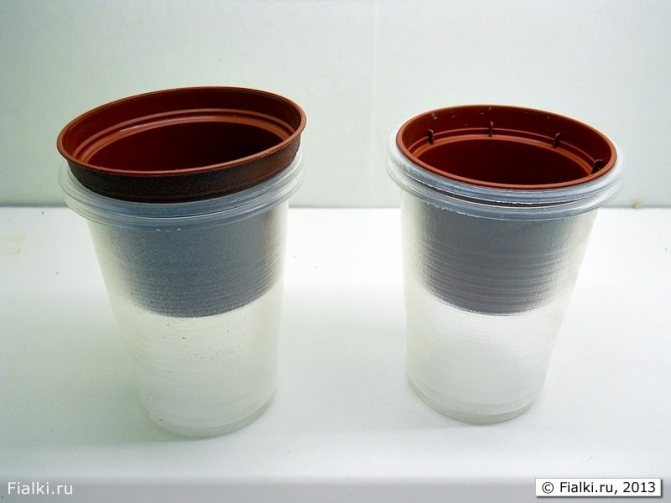
I will say right away that this is inconvenient. The 5 cm pot is very strongly lowered into the glass and it is difficult to remove it when you need to add water. E. Seliverstova in one of her articles said that on top of the pot she fixes the foam rubber tape and then the pot does not go down like that. In the comments, someone wrote (sorry, I don't remember now) that you can also glue a self-adhesive seal for windows and doors to the pot. I tried the sealant:
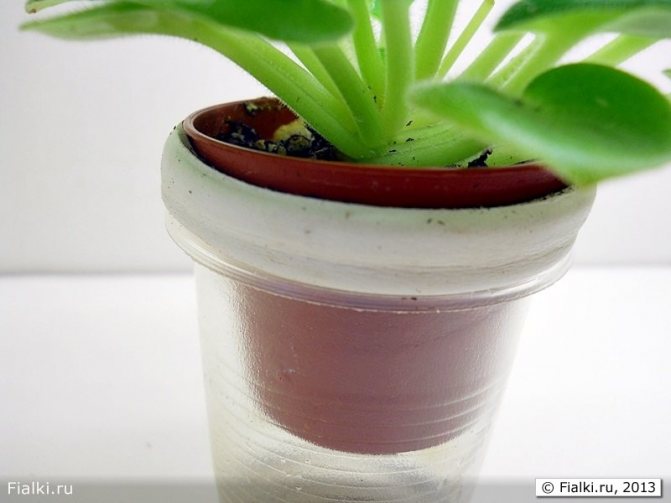
So it became much more convenient to take out the pots. But I didn't really like using 100 g disposable cups. When they run out of water, the pots with rosettes become very "somersaults", and if there is also a large socket, then the probability of turning everything upside down increases many times.
Svetlana Sazykina suggested a good idea - to use small 100 g glass jars from baby food:
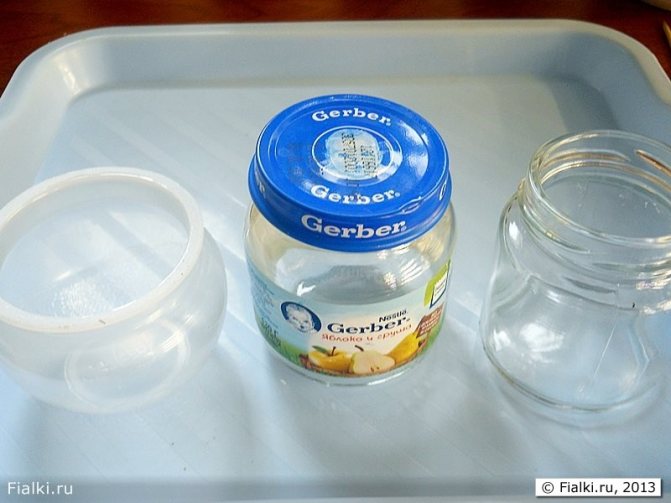
Such jars, after removing the sticker from them and rinsing thoroughly, are great for miniatures:
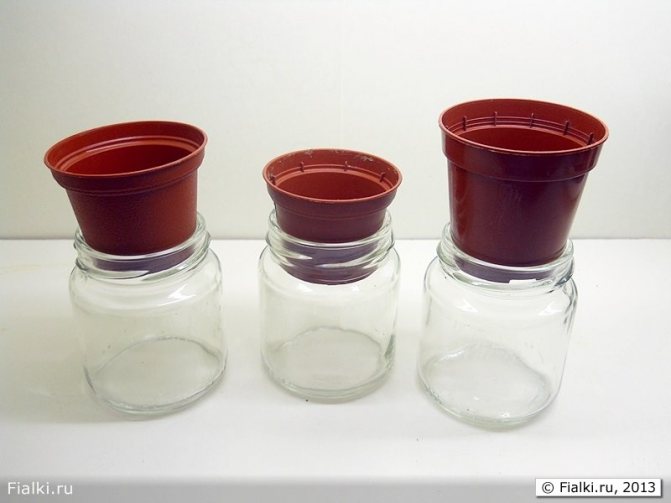
This shows how the 5 and 5.5 cm pots stand on these jars. Even when the water in the jars runs out, the rosettes do not fall due to the weight of the glass jar itself.
It is a pity that my granddaughter has grown up ... How many such jars were thrown away ... Now I collect them as a particularly valuable commodity. When I go to the store, I almost always buy several jars of baby food, I have to eat myself or treat my husband.
On the rack, the sockets put on the wick stand like this:
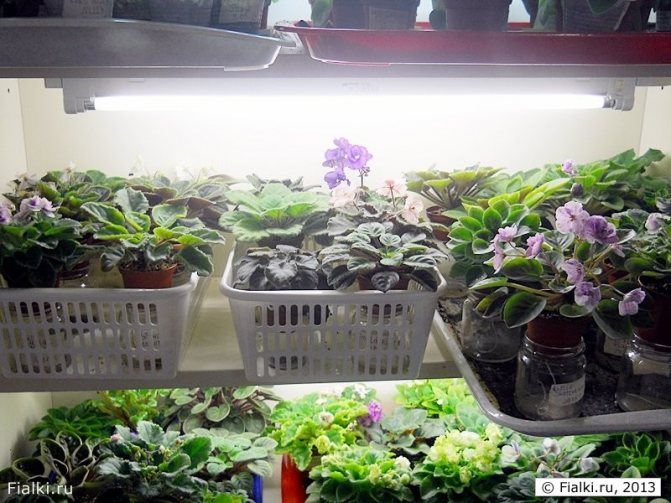
Some are in baskets (they are sold in all stores), and some are on trays with watering mats, into which I pour water to humidify the air near the outlets. I put not very large sockets on the trays. I still like it better without baskets. If these are the lower shelves, then, it seems, and nothing, but on the upper shelves the sockets themselves are almost invisible, only baskets ...
When all the preparatory work is completed, we proceed to the transplant.
We take pots 5 or 5.5 cm, pull the wick thread through the hole:
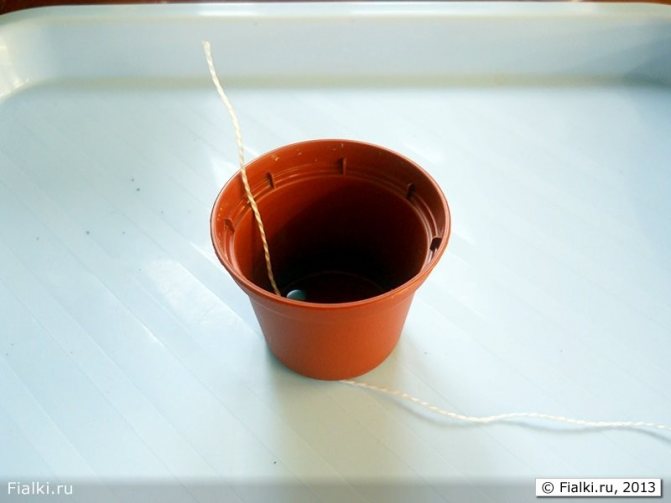
We pour in a little substrate:
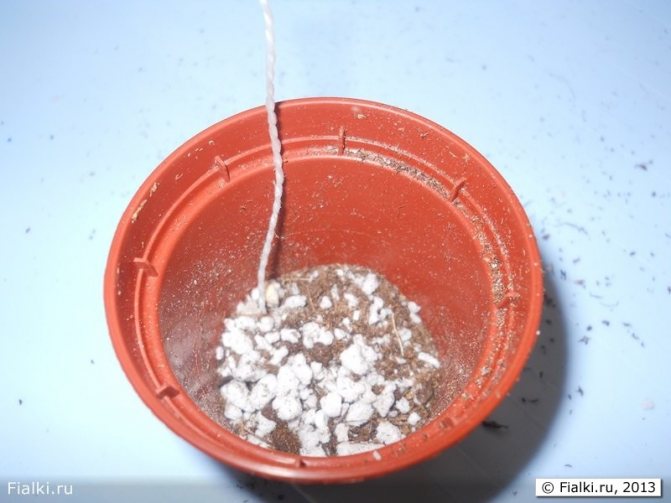
We put the wick inside the pot and add a little more substrate:
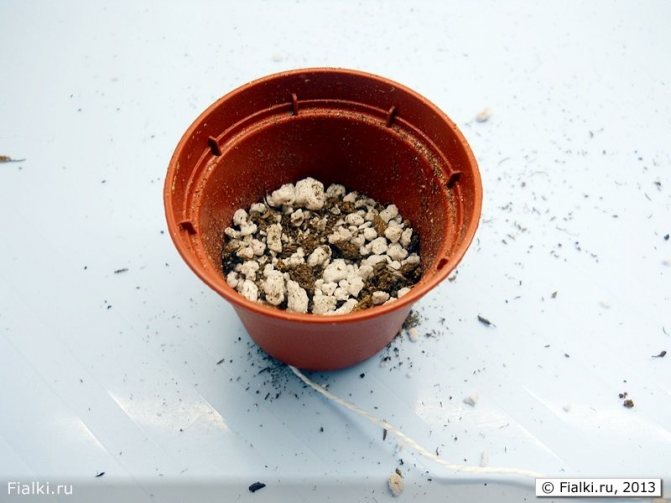
Now we take out the rosette from the old pot, before transplanting it is better to dry the ground a little, then it will be easier to sprinkle from the roots. We shake off the old earth from the roots, but without fanaticism and, even more so do not rinse the roots under water.
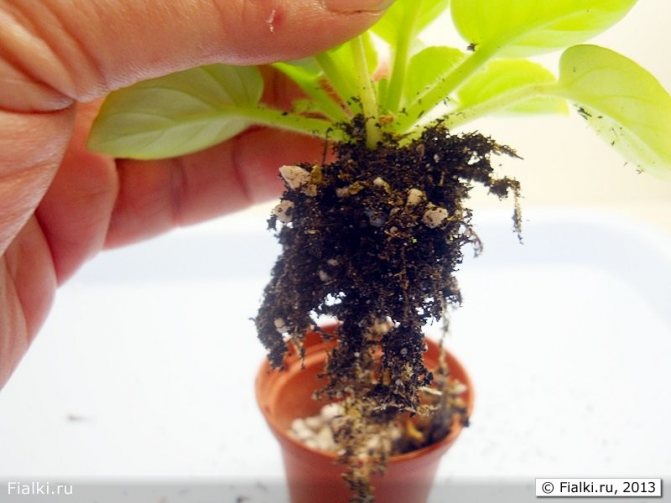
We put the socket in the prepared pot, add the substrate. Everything, the socket is transplanted:
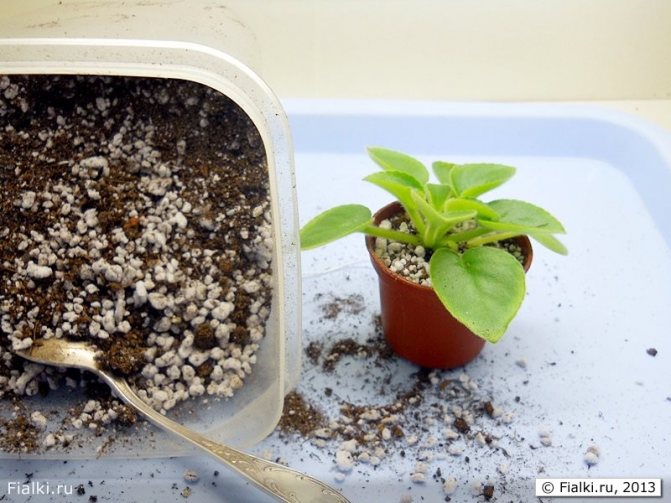
and put it on the water container:
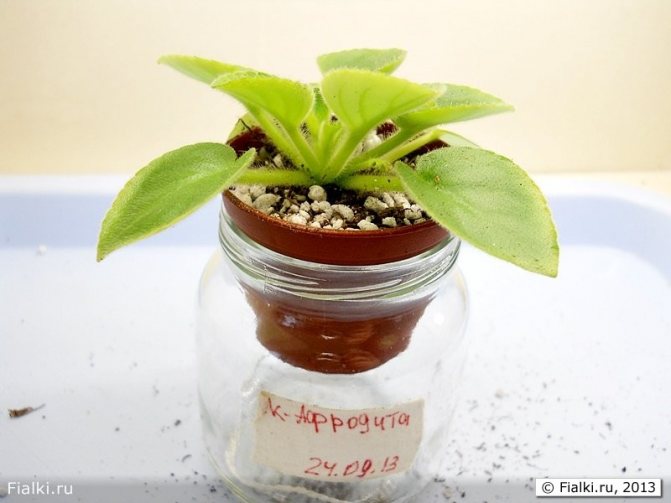
The label must be glued to the jar, not to the pot, otherwise the inscription may get wet and you get a nameless.
We prepare a solution for irrigation:
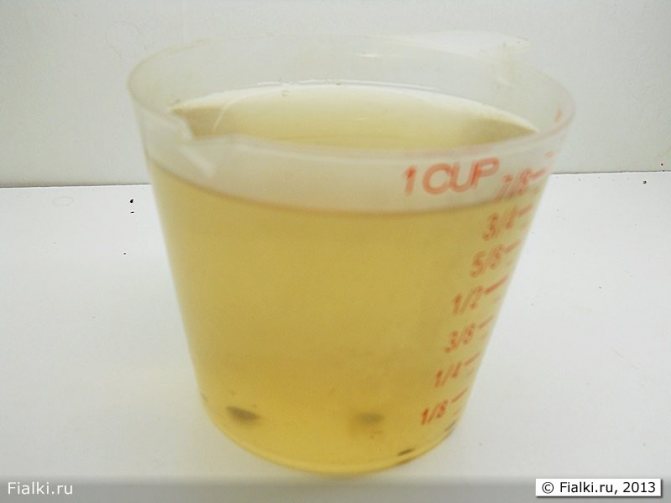
For 1 liter of water 2-3 drops of Zircon and Fitosporin in the dosage indicated on the package. We spill the substrate until a few drops fall to the bottom of the water tank. Now we put the socket on the rack under the lamps. For 3-4 days, the outlet is without water. Only after that water is poured into the container and the rosette is watered a little from above to make the wick work.
Next time I will talk about replanting trailers and standards and caring for wick violets.
If you have any questions, ask them in the comments.
Wick watering for seedlings
When growing seedlings, gardeners use wick technology to moisturize the seedlings. This irrigation method is suitable for seedlings of tomatoes, cucumbers, basil, physalis, ageratum and other crops. Watering with a cord and a container of water is suitable for the period from sowing to transplanting to the beds.
The upsetting process includes the preparation of containers. It is quite simple to make them using plastic bottles or bottles.Each of them is cut approximately in half. The upper part with the plug is immersed in the lower half so that the lid does not touch the bottom.
Next, a hole is made in the lid, where a tape is passed, cut from old nylon tights (about 2 cm wide, 20-30 cm long). It remains only to fill the upper half of the bottle with soil mixture, and the lower half with water. When backfilling the soil, the cord is laid in circles.
Reference! For seedlings, you need to use lightweight soil. For this, the finished substrate is mixed with peat and vermiculite. It is also recommended to sprinkle coco peat on the surface of the soil.
What is needed to organize wick irrigation
The unique technology of irrigation with a wick is based on the use of a special fabric cord, through which water from the container rises up the wick and saturates the soil with moisture. As a result, the plant receives the optimal amount of liquid without the possibility of flooding.
What should be the wick
Any synthetic cord is suitable for creating a wick, natural materials are not suitable, since they will quickly rot in a humid environment. To check how the selected fabric absorbs moisture, you need to wet it, let it dry and put it in a container with water. If it gets wet instantly, then it is undoubtedly suitable for a wick, but if it floats on the surface, then you should look for another option.
The wick should not be thick - 1.5-5 mm thick and 15-20 cm long. They are preliminarily well wetted in water.
Ground requirements
The main thing that is needed to create wick irrigation is to choose the right substrate. The soil should be loose, lightweight, highly breathable and able to retain moisture. The composition of the soil should include coarse-grained perlite, vermiculite (or sphagnum moss) and purchased peat soil for indoor flowers. All components are taken in equal amounts.
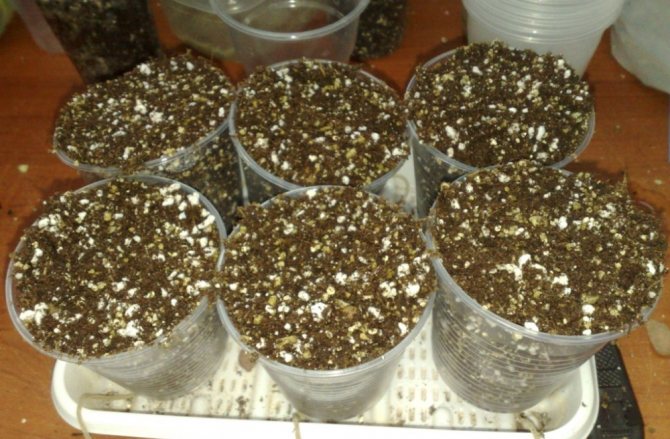
For wick irrigation, only a special substrate is used.
Such a mixture is not rich in nutrients, and for a beautiful and lush flowering violets need high-quality feeding. Perlite and vermiculite must be wetted with water before use, but so that the mixture is wet, not wet.
Suitable capacity
As a reservoir, plastic pots are best suited, selected in accordance with the size of the plants: from 7-8 to 10-11 cm. The bottom of such a container is usually dotted with holes, and so that the loose substrate does not spill out, they must be covered with a synthetic cloth.
You shouldn't choose ceramic pots as they are heavy and the wick dampening structure is not light enough anyway.
As for the water tank, on the counters you can find special utensils for wick irrigation: it is very practical, and the water does not evaporate from it. If it is not possible to buy ready-made containers, then you can use an ordinary plastic food container, and for pots with a diameter of 9 cm - disposable half-liter cups.
How to make a water container yourself? Close the food container tightly with the lid and make a hole for the wick. Put the pot with the violet on top, dip the wick into the water. In the case of a disposable half-liter cup, it is tightly closed with a pot with a diameter of 9 cm, and the moisture does not evaporate.
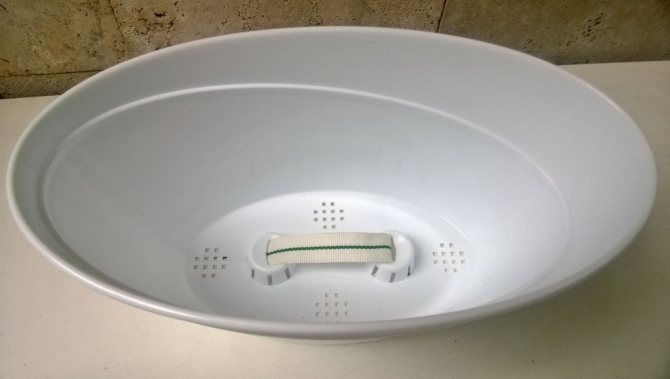
Various pots for wick irrigation are on sale.
Attention. The distance from the water level in the container to the bottom of the plant pot must be at least 5 mm.
Advantages and disadvantages
Each irrigation system has its own advantages and disadvantages, and wick irrigation is no exception. The popularity of this method is due to the following advantages:
- no threat of waterlogging or drying out of the soil;
- soil moistening occurs evenly under any conditions of plant maintenance;
- when the liquid is enriched with the optimal amount of fertilizer, the culture receives the necessary nutrients that are important for normal vegetation;
- indoor flowers can be left for a long time, which solves problems with business trips and vacations;
- reduction in labor costs and time required to care for domestic crops;
- acceleration of the developmental period of children (to the starter and then to the young shoot);
- flowering with wick irrigation is usually brighter and more expressive, the inflorescences are larger;
- saving means on pots (containers with a diameter of 8 cm are used), soil mixtures.
The wick technology is not devoid of disadvantages. Among the main ones:
- the air temperature in the room should not fall below 22 °;
- improper selection of soil turns into rotting of the root system due to waterlogging;
- a ban on placing the pot on the windowsill (the reason is an unstable temperature regime);
- in rare cases, the wick may dry out (the reason is the wrong selection of fabric).
Advantages and disadvantages of the wick irrigation method
Before organizing wick watering for your violets, you should understand the pros and cons of this method.
The indisputable advantages include the following sides:
- wick-grown plants often bloom more abundantly and boast a more luxuriant outfit;
- some varieties of violets bloom without interruption;
- it is almost impossible to flood a flower, since moisture is distributed evenly and as needed;
- a properly formulated solution with a balanced amount of fertilizers will allow you not to overfeed the plant and give it the required amount of nutrients;
- young plants develop much faster;
- saving time, because watering will be done independently, without requiring an individual approach;
- the water remains in the containers for a long time, sometimes for several weeks.
We must not forget about the negative aspects of such watering:
- It is very important to choose the correct thickness of the wick for watering.
if you make a wick too thick, then the water will flow in excess, which will lead to the flooding of the plant;
- in winter, it is necessary to control the temperature of the water in the tanks, since too cold water will adversely affect the condition of the violets and can lead to death;
- high soil moisture caused by the wrong substrate, poor-quality cord material, the wrong diameter, etc., can cause root rot;
- abundant flowering can be called both an advantage and a disadvantage, because it will take a lot of space to keep several varieties of blooming violets;
- it takes a lot of time to select the optimal containers and re-equip the place where indoor violets are kept.
Tips from experienced florists
If a decision is made to transfer flowers to wick irrigation, you should take into account the advice of professionals in order to avoid mistakes that could cost the life of your beloved plant.
- When installing the wick in the pot, it is important to take into account that the rope should not come into contact with the roots. The optimal distance is 1 cm.
- A suitably shaped plastic container or a plastic bottle can be used as a container for water. It is recommended to choose a volume of 0.5 liters. This is enough for 2-3 weeks of irrigation.
- The container with water and the pot must be in close contact so that the liquid does not evaporate.
- Plants should not be placed near heating radiators during the operation of the system. The water will use up faster and the greens will look faded.
- Before transferring the irrigation regime to wick technology, it should be clarified whether the culture needs periodic drying of the soil. If the result is positive, the roots will not withstand a constant humid environment and will rot.
Any actions with the plant must be consistent with the rules of agricultural technology of one type or another. Not every innovation is applicable to some cultures. At first glance, a simple bobble in leaving can create big problems for a potted flower.
Watch the video about wick irrigation:
Have you noticed a mistake? Select it and press Ctrl + Enter to tell us.
How to transfer violets to wick watering during reproduction
It will not be difficult to transfer violets in the breeding stage to wick watering, the main thing is to know how to do it correctly. To root stalks of leaves in peat moss, you need a small diameter plastic glass, peat moss (sphagnum), complex fertilizer and a wick. Scissors, a blade, wire, an awl, sticks, a marker or felt-tip pen are useful as additional items.
Using a wire, a knife or a heated awl, a hole is made in the cup through which the wick will be drawn. The name of the violet variety is written on the glass, so as not to be confused in the future. Later, you can stick a stick into the ground with the indication of the variety. Sphagnum is crushed into 3-5 cm pieces - in the future, this will simplify the separation of children with roots from the moss. For successful rooting, 0.5% Nutrisol solution is used.
The planting process boils down to performing several actions:
- Wick watering violets can be done by hand.
The wick is pulled through the hole in such a way that a ring from the cord forms inside the pot. The rest of the wick should be outside.
- From above, the ring is slightly compacted with a layer of sphagnum 3 cm thick.
- Each stalk is cut with a sharp knife, leaving a length of 2-3 cm for easy rooting. Simple breaking off of cuttings is also good.
- The planting material is lowered into the biostimulator Kornevin, which accelerates the formation of roots in the plant.
- The planted leaves are supported with plastic sticks (for example, for stirring coffee). Do not use wooden sticks: they cause rotting of the leaf plate.
Cuttings should be placed in separate cups to prevent contamination from each other. If the leaves are large and do not fit in the cup, they can be cut along the edges parallel to the walls of the container, and the cut sites can be treated with activated carbon.
After planting, containers with cuttings are placed on a tank with Nutrisol solution: to moisten the moss, the wicks must become completely wet. After completing this procedure, the cups are placed on the vessels intended for wick irrigation.
After 2 weeks, the leaves will revive and start up the first roots, which indicates the successful course of the process. To speed up the birth process, many growers resort to using additional lighting. On average, babies appear in 1-3 months.
Important. If during this time the children have not appeared, artificial stimulation is carried out. It consists in cutting off a leaf 1/3 from the top, large sheets are cut in half.
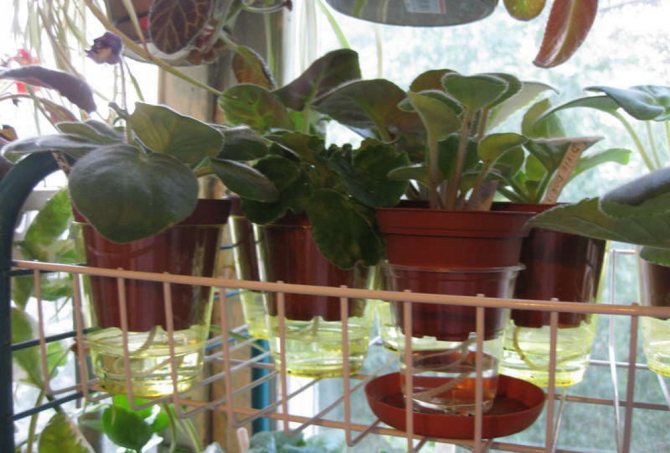
Violet cuttings are immediately accustomed to wick watering.
Fertilizers used
Use special fertilizers for violets:
- Agrecol NPK 9: 4: 5 - during growth and during budding and flowering (0.5 ml per liter of water);
- Fertika - 100 grams per 2.5 liters of water. Add to the solution during wick irrigation from the ratio of one teaspoon per liter of solution;
- Kemira Kombi - 2% concentrated solution: 20 grams per liter of water. To obtain a 0.05% solution, 25 ml is dissolved in a liter of water.
With the constant presence of violets in the solution, it should have a concentration 3-4 times less than that indicated in the instructions.
Features of the irrigation system
If you know for sure that wick irrigation is suitable for your indoor plants, you need to pay attention to some important points, such as the choice of soil, material, etc. So, in no case use heavy soil, it simply will not be able to conduct the liquid coming through the cord to the root system. The soil must have excellent air permeability and water retention. In the most favorable way, the plant will be affected by the content of vermiculite or perlite in the soil. You can prepare a mixture of the above substances, taken in a 1: 1 ratio, to which the same volume of peat soil is also added. Sphagnum moss also has a positive effect.
There is a wide variety of materials today. It is better to give preference to synthetic cords than natural ones. They are durable and are not afraid of decay. Wicks, twisted from thin nylon strips from women's tights, have proven themselves positively.
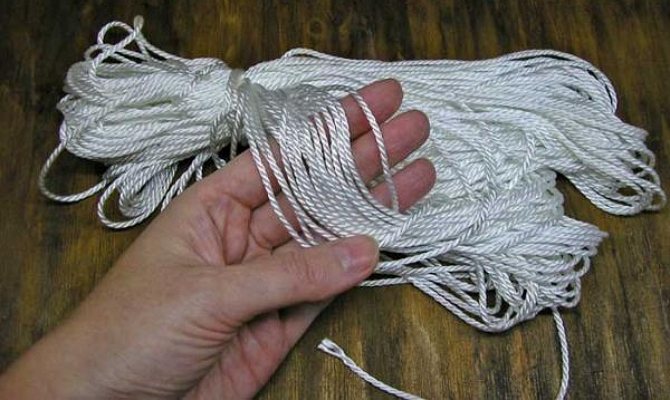
Also, special capillary mats proved to be the best. But it is advisable to use them when growing seedlings in greenhouses.
This material is a moisture-absorbing felt covered with a special porous film. It absorbs a huge amount of liquid, and then gives it to the plants through the drainage holes. As a result, the seedlings receive the right amount of water, and young leaves do not experience unnecessary stress from contact with it. Such mats are able to saturate representatives of the flora with life-giving moisture for about two weeks. But when using a wick, this time increases to three months.
How to put the cord in the pot correctly
There are several ways to put the cord in a flower pot.
Some sources recommend placing the cord on the bottom, twisting it in a circle.
But experienced florists recommend stretching the wick diagonally.
In the middle of the bottom of the flower pot, you need to make a hole for pulling the cord. Pay attention to this, because most pot manufacturers make holes in the bottom on the sides. In this case, the soil wetting will be uneven, which means that the root system will develop incorrectly.
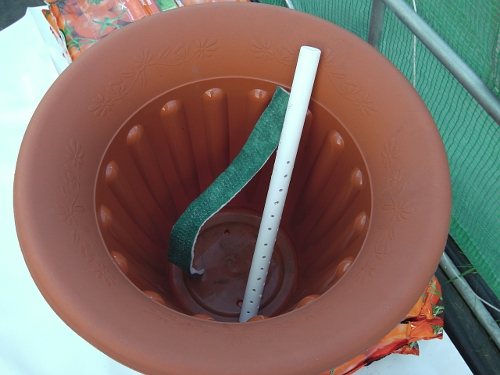
If the wick is unevenly positioned, only one side of the plant will be able to receive moisture. For example, the roots of streptocarpus, improperly planted and located, can dry out on one side, which will affect its aboveground part. So the plant may die altogether.
System of wick irrigation of flowers
How to organize the system:
- The reservoir for the solution will be dense disposable cups, the cut-off bottom of the plastic bottles:
- When planning the installation of several pots, use containers with lids, with pre-cut holes for the pots;
- Solution tanks should not be higher than 8-10 cm, otherwise a larger volume of solution will be needed;
- Ceramic pots already have holes in the bottom, and in plastic pots you can make them yourself using a nail heated on a fire or an awl;
- Cut the wick into pieces equal to 15-20 cm. Insert one end into the hole 1.5-2 cm or lay the cord at the bottom of the pot in a circle;
ATTENTION: If the substrate becomes very tight, the wick is carefully pulled out, leaving a shorter length in the pot.
- Fill in the selected soil and place the pot on a pallet. It is good to spill the substrate until it is completely wet. When the substrate subsides, add more soil;
- Excess water is drained, the plant is planted in a substrate and placed on a water tank. The water must be settled and always warm;
- There should be at least 1.5-2 cm between the solution and the bottom of the pot. As soon as the top layer of the substrate begins to dry, the solution rises up the wick and moisturizes the soil to the required state. Wick irrigation allows the topsoil to always be moistened;
- The soil dries up only when the wick is silted up, which does not allow water to flow into the pot, or if there is no solution in the tank. In this case, the wick is replaced by carefully pushing it into the hole with a knitting needle or crochet. To restart the system, the soil is spilled from above and the pot is placed on the tank with the solution.
ATTENTION: It is not recommended to allow overdrying of the soil, as this will lead to the death of the lateral roots of the root system, which will negatively affect the further development of plants. If algae appears on the walls of the tank, it is enough to thoroughly wash the tank.
To test the wick irrigation system, it is necessary to transfer several plants to it.By observing the flowers, you can determine the length of the wick, the correct concentration of the solution. To facilitate care and provide the violets with comfortable conditions, it is worth using a wick irrigation system.
Wick irrigation of violets from A to Z:
Irrigation container
Containers for plants and water storage must be made of plastic. They are easy to clean and disinfect when needed.
A plastic disposable cup or container with a lid with a hole can be used as a container. Better to use transparent containers. So keep an eye on the water level.
A plastic tray with a grid can be used as a general container.
Some growers notice that green algae appear on the walls of the water tank. They are not harmful to the plant. It is enough just to thoroughly wash the container.
Wick cord
Having decided to independently make wick irrigation, you need to pay special attention to the choice of the cord. It must be made of synthetic material. This eliminates the possibility of material decay.
The cord must conduct water well. To do this, just take a small piece of material and immerse its tip in water. He should get wet quickly.
For a flower pot with a diameter of 9 cm, you must use a cord with a diameter of 1.5-2 mm. The cord must be long enough to reach the bottom of the container.
After installing the wick cord, it is necessary during the first 2 weeks to check how much the earthen lump is wetted. Pay attention to whether the turgor of the plants changes, whether the water in the container decreases.
If the soil in the pot is dry, you need to run an additional cord. If the soil, on the contrary, is waterlogged, it is necessary to observe the plant for several days. Perhaps you have chosen a too thick cord or the root system of the plants is not too developed.
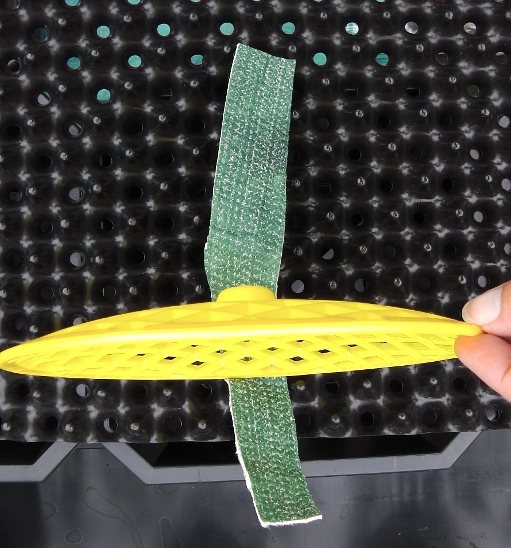
Features of wick irrigation
Many growers love small plants that grow in small pots with a loose substrate. Khirita, Saintpaulia, Achimenes, Episia, Gloxinia and other flowers must be watered every other day. If you only have a few of these plants, you can still manage watering them. But if the collection is large or you have to go on vacation for a week, the problem of watering becomes quite acute.
When planting a plant in a pot, never compact the soil. After all, air is as important to a plant as water. It is better not to use a large amount of high-moor peat as a planting mixture. After all, it will be quite difficult to wet it. How to make wick watering of violets correctly?
It is better to use a synthetic winterizer as a drainage layer. It is chemically neutral, conducts both water and air well. You can also use coarse perlite. The mesh at the bottom of the pot will keep it from getting enough sleep.
A plant will be able to absorb enough water if its root system is well developed. After transplanting, it is advisable to place the plant in a greenhouse for 2 weeks. After 1-2 weeks under normal conditions, it is better to keep the flower on regular watering. It is advisable that the liquid is in the pan so that the earthen lump does not compact.
For good development of the root system, you can use a solution of zircon or ecogel. Only a grown plant can be transferred to wick irrigation.
Reviews and recommendations of gardeners
Wick irrigation accelerates the course of all vital processes of plants. They grow faster, bloom actively and profusely, and age just as quickly. The soil needs to be changed frequently due to salt deposits that can be found on the edges of the flowerpot.
Wick watering of orchids is also well practiced. This method allows you to get abundant flowering of the plant in a short period of time.
There are flower growers who bring plants on a wick to the moment of flowering, and then transfer them to normal mode. This way they can quickly be convinced of the correct varietal coloration.If you decide to do the same, do not forget to transplant the plant into nutritious new soil.
Gardeners' reviews allow you to avoid mistakes in growing plants. For example, it is recommended to leave the planting date at the bottom of the pot. This will help you determine when the plant needs a transplant.
What should be the pot?
The best development in violets occurs in small pots, since they receive nutrients not from the soil, but from the solution. For a beautifully shaped rosette that has a large cap of flowers, a pot 5-8 cm in diameter is perfect.
REFERENCE: To prevent harmful impurities from accumulating in a small volume of soil, it is imperative to transplant violets every six months.
Soil selection
Ordinary soil, which is used to grow other plants, is quite difficult for violets: the ability to absorb a large volume of water leads to compaction and acidification of the substrate. To use wick irrigation, the substrate must be loose and breathable. A baking powder is added to the pot to the peat - the earth must be completely excluded. The soil should consist of:
- Shop soil for violets, pressed coco peat, perlite or vermiculite - in equal proportions;
- Coconut peat, perlite or vermiculite - also in equal proportions;
- Soil for violets, perlite, vermiculite.
ATTENTION: To prevent the substrate from becoming moldy, it is necessary to add phytosporin to it.
However, if the proportions are violated and the conditions of detention are not observed, phytosporin will not be effective. Coconut peat needs to be washed as it has a high salt content. Several washes are carried out.
Wick or cord
Basic requirements for the cord:
- Give preference to synthetic cord, since natural will quickly rot;
- The cord must be hygroscopic;
- The thickness of the cord when using a pot with a diameter of 5-8 cm should be 0.5 cm.
ATTENTION: It is not recommended to use wicks from stockings or nylon tights, since the high hygroscopicity of the material leads to the blocking of the substrate.
We make a humidification system for your flower garden
Now it's time to consider the instructions on how to organize such a do-it-yourself irrigation system. We need two containers - a pot in which we will plant a flower, and, for example, a glass where we will pour water. In this case, it is desirable that the pot enters a little into the neck of the glass, but does not reach its bottom. It is good if it is planted only a few centimeters.
In addition to soil, drainage is also needed. Styrofoam or perlite is perfect. But it is better not to use the well-known expanded clay. The fact is that it accumulates salts and acids in itself, and over time can harm flowers. So, we take out part of the wick through the hole at the bottom of the pot, and then put the drainage on the bottom of the container. Just if you chose polystyrene, do not forget to grind it. Small squares of about 1x1 cm will do. On top of the drainage, the second edge of the wick is neatly laid.
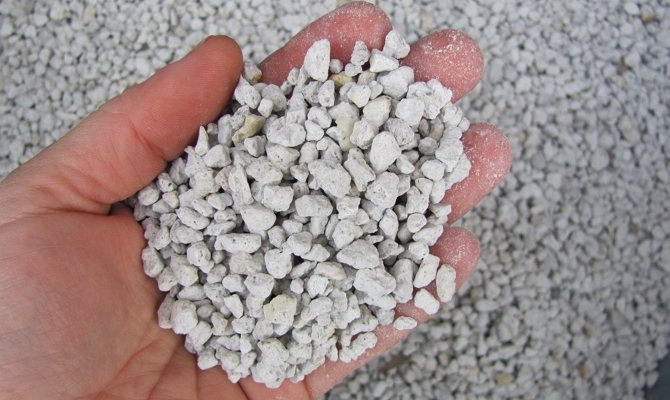
The diameter of the wick is in the range of 1.5–2 mm. It is possible to regulate soil moisture by the number of cords. And be sure to make sure that the wick is in contact with the ground, and not lost among the drainage.
Now we plant the plant according to all the rules. Pour water into the second container and place a pot with a new plant on top of it so that the free end of the cord reaches the bottom. However, too long a wick is also not very good, since the liquid will go a long way, and this is useless. The bottom of the pot should not come into contact with water, you should maintain a distance of at least 1 cm between them. And take care of the stability of the structure. Finally, water the ground abundantly from above. But just be careful, the leaves of not all plants tolerate contact with water. Everything, the system works, you can enjoy the abundant flowering and the wonderful development of your indoor pets.
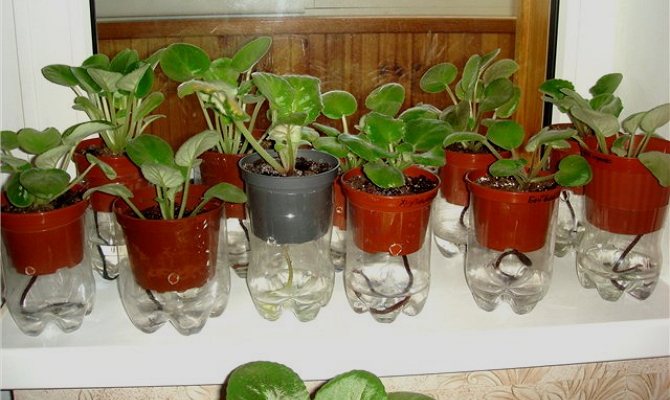
At first glance, there is nothing difficult in organizing such a method, however, some unpleasant moments may emerge over time, and they will not keep themselves waiting long. Therefore, it is recommended to first try wick irrigation on one copy, and then, if the result is positive, to transfer the rest of the "wards" to this system. Also, be sure to weigh the pros and cons. If there is no urgent need for such a system, and your collection has only a few hygrophilous representatives, it makes sense to abandon such an undertaking. Remember, any transplant is, first of all, stress for any plant. And, if you nevertheless decided to stop at the wick irrigation method, organize the process only at the optimal time for transplanting.
Pros of the wick irrigation system
- the roots of the plant are constantly in moist soil;
- the distribution of moisture occurs evenly - there is no overdried clod of earth and a wet surface;
- until the water in the container runs out, you can not worry about soil moisture;
- saves the time required to water large quantities of plants.
Like any medal, there is a downside here. Disadvantages of the wick irrigation system.
- it is difficult to set up the system the first time so that it works without waterlogging the soil;
- not all plants are suitable for watering in this way;
- in containers with water installed on the windowsill during the cold season, the water cools down, and the roots of the plant do not absorb cold water well;
- containers filled with irrigation water do not always look aesthetically pleasing.
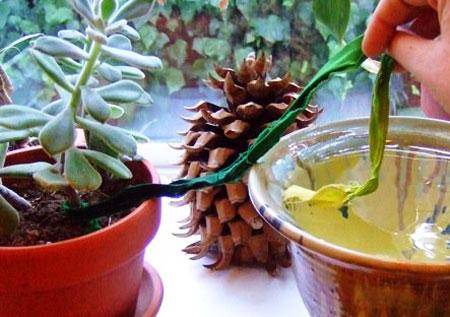
Growing plants on a wick in a land mix
First of all, you need to choose a soil that is suitable for a particular plant. For the manufacture of wick irrigation of plants, it is necessary that 35-40% of its volume is occupied by perlite, which ensures the looseness of the soil. You can apply fertilizer on the wick in the usual way, applying the solution in small doses, watering the soil from above. But make sure that fertilizers do not get into the water with the wick irrigation container. Foliar dressing can also be used.
It is imperative to observe the plant. If the leaves begin to discolor or turn yellow, it is better to transplant the plant into new soil.
Growing in a landless mixture
Many growers also use the wick method of growing plants in a landless mixture. In this case, the soil will consist of perlite and peat, taken in equal proportions. Such a mixture practically does not contain nutrients, therefore, when wick irrigation of violets, all plants are grown in special containers with a nutrient solution. In this case, such fertilizers are often used: Kemira Lux, Etisso, Pokon.
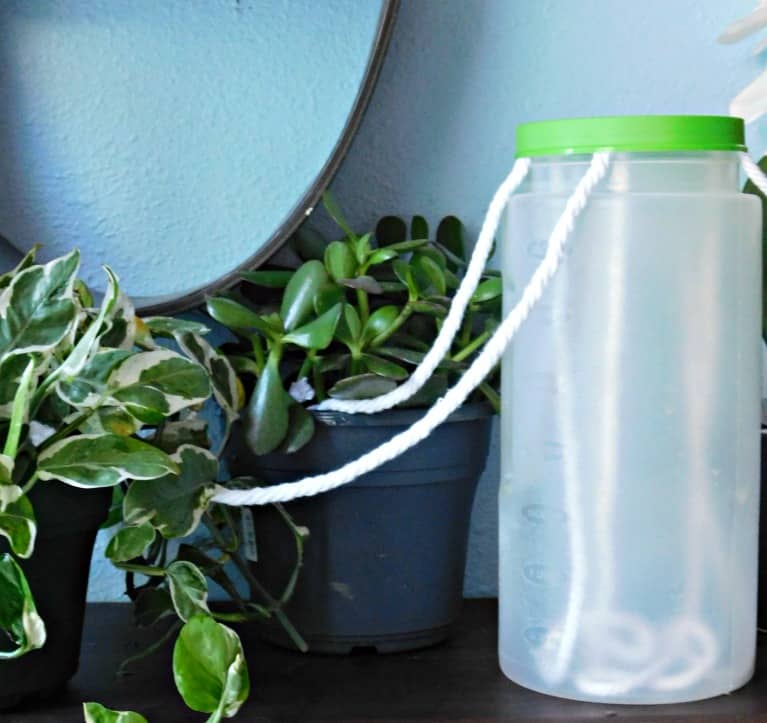
To create a nutrient solution, the manufacturer's recommendations should be consulted. For example, to make a nutrient solution from Etisso Hydro fertilizer, you need to use 3 ml of the agent per 1 liter of water.
Florist reviews about wick irrigation
Natalia. She transferred all adult plants from her collection of violets to wick irrigation about a year ago and did not regret it at all. I got a lot of free time, and the most important thing is that violets bloom quickly and from the first flowering they are covered with lush caps. In summer, in the heat, my violets never bloomed, but now it's 35-40 degrees outside, and they bloom and retain all the characteristics of the variety. I am very pleased.
Elena. I transferred all my violets to wick watering and I am very happy. I left for a couple of weeks on vacation, and my flowers became even more beautiful during this period, they picked up buds. But still, I do not dare to keep water in containers all the time: I pour it only when I am going to be absent for a long time. I just pull the wick through the drainage hole to the edge of the pot and sprinkle it with earth on top.
Maria. To celebrate, I put everyone on wick watering, but soon many plants had to be removed, because in the center, the leaves began to be attacked by fungi.After three years of experimenting with the wick, I kept a third of the violets, some permanently, others for periods. But when I go on a business trip, wick irrigation is a real salvation.
We offer you to watch a video, in which the wick watering of violets is considered in great detail.
Wick or string irrigation - what is it?
It is not always possible to water indoor plants on time and in the right amount, which can negatively affect their condition. Owners of violets can especially feel all the problems with soil moisture. It doesn't matter if you water them in a pan or bring life-giving moisture under the leaves, the slightest waterlogging or overdrying of the soil will immediately negatively affect the state of indoor pets. And it is very difficult to maintain optimal conditions all year round. After all, they are not only about regular watering. Temperature conditions, air humidity, etc. play a role. You can make your life easier by irrigating the soil of moisture-resistant plants through a wick.
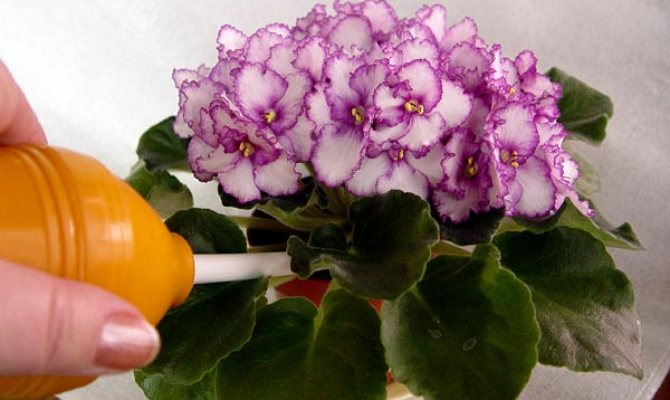
This method is based on the capillary properties of the cord. The flower is planted in a small pot and a container of water is placed under it. The connection between the two containers is carried out by means of a cord. According to the latter, the required amount of liquid rises and saturates the soil. As soon as the earth dries up, the water is pulled up again. At the same time, optimal hydration is maintained. Indeed, depending on the microclimate, plant age and other factors, a different amount of moisture is needed.
How to feed indoor plants and protect them from pests if you don't want to use chemicals? Read the tips in this article. Garlic from pests and fungi. The sulfur-containing allicin found in garlic is not only disliked by insects, but also mushrooms. Therefore, if the cloves of garlic are thrust into a pot with a plant, they will protect it from fungal diseases and will help to strengthen its immune system. And so that the cloves do not grow, cut them in half. Liquid soap against aphids. Plants can be protected from aphids with liquid soap - a good alternative to poisonous aerosols. Dissolve one tablespoon of pure, unscented soap in hot water, add up to one liter of water and add one tablespoon of alcohol. The mixture is sprayed on plants affected by aphids, mealy worms or scale insects. After a day, the soap solution can be washed off. Infusion of tansy from aphids. Due to the high concentration of essential oils, tansy repels various types of aphids. In case of damage to the root system of the plant, a lump with roots is immersed in an infusion (20 g / 1 l of water), in case of damage to the leaves, the plant is sprayed with this infusion. The effectiveness of the product will be higher if you add a drop of denatured alcohol to it. You can also dip the foliage in the infusion for a few minutes with small plants, and wrap the pot to keep the soil from spilling out. Coffee grounds for plant nutrition. Instead of pouring the coffee grounds, pour them over the flowers. Coffee not only nourishes the plants, but also strengthens the protective properties due to its high potassium content. It doesn't matter if the thick is slightly sweetened - sugar activates the soil. Eggshell infusion. This remedy has been known for a long time: eggshells are kept for several days in a vessel with water. This is done not in order to dissolve the lime contained in the shell in water, but to separate the protein residues adhering to it. True, the nutritional effect is small, so the plants will still have to be fed regularly. Mineral water for feeding. Watering plants with mineral water is, of course, too expensive, but the leftovers should not be poured into the sink. Such water is rich in biologically active substances. The carbon dioxide contained in it dissolves lime, is favorable for tropical indoor plants that prefer acidic soil, and prevents the formation of limescale
ALL ABOUT WILDING IRRIGATION
Everyone who has just started to get involved in violets water their plants in the usual way: in a tray or in the pot itself, right under the leaves. And most often the problems that appear over time when growing violets are associated either with the drying out of the earthen coma, or with its overflow. Because of the first, violets lose the turgor of the leaves and shed flowers, because of the second, root decay occurs and the plant may die altogether. And although each grower tries to comply with the watering regime, it is very difficult to take into account the individual characteristics of each outlet, the temperature and humidity in the room, as well as other nuances. So what should you do? Everything is very simple: switch to wick irrigation, and you will make life much easier for yourself, and provide your "wards" with the most comfortable conditions.
What is "wick irrigation"? Wick irrigation - This is an irrigation method in which the capillary properties of the cord are used, thanks to which the water from the container under the pot rises up the wick and gives off moisture to the substrate. As soon as the substrate dries up, the water is "pulled up" again. As a result, the plant receives only the amount of water that it needs at a given time under given conditions. If the conditions change (it becomes hot or cold, the air humidity has increased or decreased, the plant has grown, etc.), then the amount of incoming liquid will also change to what your violet needs.

Of course there are some minuses: 1. If the system is not arranged correctly and the substrate is overwetted, the roots can rot. However, even with ordinary watering, this phenomenon is by no means uncommon! 2. When waterlogged, small flies - sciarids (mushroom mosquitoes) may appear. However, since their larvae feed on decaying organic debris (leafy soil, etc.), the chances of getting them with ordinary soil mixture (and, accordingly, ordinary watering) are much greater. 3. Some complain that when converted to a wick, violets become much larger in size. This is so if you leave them in ordinary 10-12 cm pots. However, wick watering requires less capacity, and in a 5.5-8 cm pot, violets feel comfortable, bloom profusely, but the size of the outlet remains normal! 4. Many people worry that when the container with violets is on the windowsill, the water in the trays cools down and the plants drink cold water. Yes, that's a minus. But when you water each violet separately with warm water, then on the same windowsill the moistened earthy clod instantly cools down and the roots are in a cold substrate. That is, there is no difference in this case. The only way out, regardless of the method of watering, is either to insulate the windowsill, or to rearrange the violets to a warmer place for the cold period.

What are pros gives wick watering when used correctly: 1. Violets grow in the most comfortable conditions, not experiencing stress from overflow or overdrying; 2. Having found the optimal concentration of fertilizer solution, you will not overfeed or underfeed violets; 3. It becomes very easy to grow violets: you do not need to check every day if the earthen lump is dry and run around with a watering can / pear / pipette to measure out the amount of water that the plant needs; 4. In winter, due to the high dryness of the air, the topsoil dries up, but moisture remains inside. And you can easily flood the plant. Whereas with wick irrigation, the substrate is wetted evenly: the top layer dries up and moisture immediately draws up from below; 5. You can leave the violets for a long time (several weeks), for example, while on vacation, and not ask your neighbor / friend / mother to water your pets; 6. It is very easy to root and grow a large number of violets, since you do not have to water each pot separately; 7. If it comes to rooting of leafy cuttings, then you do not miss the moment of evaporation of water from the glass (also very important with a large number of violets); eight.Due to the comfortable conditions, violets not only bloom more luxuriantly, but also bloom much earlier;

9. Violets are very fond of high humidity, but it is quite difficult to provide it without special humidifiers. But with wick irrigation, water will constantly evaporate from the tanks with the solution, which will create additional humidity in the air next to the plant; 10. Mini-violets, which are grown in very small pots, with normal watering can dry out in just a day, so wick watering is very convenient when growing them; 11. Since food will come from the solution, and not from the soil, a small pot is needed (even less than 1/3 of the outlet diameter), and this is a certain saving both on the amount of substrate and on the pots themselves (the larger the diameter, the higher the price); 12. With a small diameter of the pot, the rosette turns out to be small, but evenly developed. The forces go to flowering, and not to a set of green mass; 13. As a result, you will get healthy, well-developed, profusely blooming violets, since with wick irrigation the plants receive all the necessary trace elements from the solution, and the violet regulates the soil moisture level itself.
We have been using wick irrigation since 2005 and noticed that violets began to grow much better than when watering in a pan. Their leaves are clean (without traces of drops, which are almost inevitable with ordinary watering), and the cap of flowers is much larger and denser.
How do you organize such a wonderful system? Consider 2 examples - rooting of leaf cuttings in sphagnum on wick irrigation and growing children and adult plants on wick irrigation. And for those and for others there is 3 general points: wick, solution and container for wick irrigation.
Wick must be synthetic (cotton will rot very quickly) and be well wetted, that is, have capillary properties. This is a very important point, since not all synthetic cords are hygroscopic, so it is advisable to check this in advance (you can ask to wet a small area right in the store). We cut the wick into pieces about 20 cm long. The thickness of the wick is usually small. We use a cord with a thickness of about 0.5 cm for pots with a diameter of 4-8 cm. The most common misconception is that many believe that the larger the diameter of the cord, the more the substrate is wetted. This is not true! The point is that the wick is just a "conductor", and the "pump" is the surface of the potted substrate. It is even simpler: the water does not "enter", but is "pulled" according to the law of capillaries, when the upper layer of the loose substrate dries up. That is, the substrate will take exactly as much water as it needs. Do not forget that this only works with the correct substrate for wick irrigation (very moisture and air permeable). If you are using a dense substrate, it will retain excess water.

The color of the wick does not matter, the main thing is that it does not paint the water (otherwise it may affect the color of the leaves and flowers). Some make wicks out of worn-out nylon tights. On the one hand, this is convenient, since they are almost always at hand, but, according to reviews, such wicks conduct water too well and the substrate freezes. The main thing is that the end of the wick constantly touches the solution, and the bottom of the pot remains dry. The distance between the bottom and the water level is usually about 1-5 cm and depends on the length of the wick and the amount of water in the tray. It is not the length of the wick itself that is important, but the distance from the water to the pot (the wick can lie still half a meter in the solution - it's not scary). This "air" section of the wick is a kind of "engine" of the entire system: when it dries up (which means that the soil in the pot also dries up), the water, according to the law of capillaries, is pulled upward - into the pot. If you make this distance too large, then the wick will dry out due to its long length, and not due to the fact that the soil has already dried up ... We use trays 7 cm high, which are about 6 cm filled with solution, on top there is a plastic plate with holes on which there are cups or pots. At the same time, the end of the wick touches the bottom of the tray, that is, the solution can be added quite rarely (depending on the number of pots, air humidity and other conditions).
For cooking solution you can use any water-soluble mineral complex micronutrient fertilizer.We have been using soluble fertilizer for many years "Kemira Kombi" Finnish production. In this case, we are preparing 0.05% solution... It is very convenient to dilute, for example, the entire pack (20 grams) in 1 liter of water and keep it closed away from children (so as not to be confused with soda). And as necessary, dilute in the proportion you need! By the way, do not forget to write on the bottle what is there and how to breed. For example, when diluting 1 package (20 grams) in 1 liter of water, a 2% solution is obtained. We take 25 ml (5 teaspoons) and dilute in 1 liter of water - a 0.05% solution is obtained. Or 50 ml in 2 liters - the same effect. It is more convenient for someone - who has how many plants. You can store Kemira's solution for a very long time. If precipitated, then shake up - and use as directed.
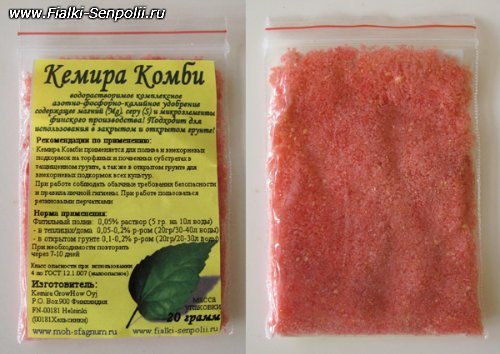
Solution container - container for wick irrigation - can be individual for each plant, or common for several. The first option has a definite plus in the fact that if some nasty thing starts in the water, then other violets will not suffer.
However, we have been growing violets on trays for many years, from which 6-8 children drink, or 2-3 sockets. And we never had any problems. And it is much easier to pour the solution into several large tanks than into many small ones.
Sometimes a green plaque appears on the walls of the container with the solution - these are algae. There is nothing wrong with them - they do not affect the vital activity of violets. Perhaps the only drawback is an aesthetic defect. But sometimes you can also wash your containers / trays / tanks to remove any greenery.
Another point is greenhouse... Everything is simple here: if there is an opportunity, then it is worth making it - both cuttings and children will grow in much more comfortable conditions. If this is not possible, then its absence will at least to some extent be compensated for by the evaporation of water from the trays and the correct moisture content of the substrate in the pot.
Now let's take a closer look at the technology.
When rooting of leaf cuttings in sphagnum on wick irrigation you will need: Basic: 1. Live sphagnum moss; 2. Plastic cups (180-200 ml); 3. Correct wick; 4. Fertilizer like Kemira Kombi; Additionally: 1. Marker or stickers (adhesive price tags); 2. Apparatus for burning or wire / awl; 3. Scissors; 4. Blade or utility knife; 5. Sticks for leaf spacers.

So, you need to make small holes in the cups so that the wick can be threaded into it. We usually use a burner for this, but a heated wire or thick awl will also work. You can cut holes with a sharp-tipped knife.
The names of varieties can be written on the cup with a marker or with a pen on adhesive labels. You can also use a marker to write sticks for stirring coffee and put them in cups. It's as convenient as anyone.
We cut the live sphagnum moss into pieces of 2-5 cm (as it happens) - so later it will be easier to separate the roots of the children from the moss itself.
By the way, do not be surprised when, after a while, the chopped moss begins to grow - new green stems will appear. This is a very good sign, as live moss has bactericidal properties and thus prevents cuttings from rotting. Sometimes the growth of moss is so intense that you have to remove its excess, so that later it will be more convenient to plant the children! We are preparing a 0.05% solution of Kemira Kombi, which our cuttings and later children will drink. It can also be rooted in clean water (before the formation of children), but in our experience, when using a fertilizer solution, children appear faster. We pass the wick through the hole so that at the bottom of the glass a half-circle is made from the cord, the rest remains outside. We put chopped sphagnum moss on the ring so that it takes about 3-4 cm in height, you can slightly compact it.

In leafy cuttings of violets, we make a cut at an angle, leaving the length of the petiole about 2-3 cm.Some people prefer not to cut, and breaking off the stalk is also the right option. If you are a beginner violet grower and are afraid that the cuttings will rot, then you can leave the petiole longer (in order to cut it if necessary), but it is more convenient to root not long petioles. Insert a leaf stalk into the sphagnum so that the cut is covered with moss, but does not reach the plastic bottom. Many recommend that you first dip the cuttings in Kornevin. We do not do this (we already have everything rooting well ), but, according to reviews, it really speeds up the process of root formation.

So that the leaf does not fall (if it is large or, on the contrary, too small), it is advisable to prop it up with a special stick. For this, all the same coffee stirrers, broken or cut in half, are suitable. You can think of something else, the main thing is not to use wooden sticks - from them the sheet plates begin to rot very quickly. It is best for each leaf to have its own glass (if one of the pair rots, then the second will not "get infected", and the children will then feel more at ease). But in order to save space, you can put 2 leaves of the same type in one glass. In this case, spacer sticks are essential.
If the plate is very large and does not fit into the cup, then you can safely cut the edges at a slight angle (as if parallel to the walls of the cup). For reliability, the slices can be sprinkled with crushed coal (if there is no charcoal, you can crush activated carbon tablets).
When all the leaves find their homes, the cups must be placed in a tray with the solution so that the wicks get wet and the moss is completely saturated with water. This is very important, otherwise the system will not work. If there is no pallet, then you can spill the moss well on top. After that, the cups can be placed on the wick irrigation container.
After about 10-14 days, you will see that the leaves seem to stand up in the cups and become more elastic. And if you pull them slightly, you will feel resistance. This means that everything is going well and the first roots have appeared. At this stage, you can do without backlighting. But babies will appear much faster if you arrange additional lighting. The rate of formation of babies in different varieties and depending on different conditions is very different, on average from 1 to 3 months and even longer. If the leaves sit without children for a long time, they need to be "stimulated" - cut off the top 1/3 of the sheet, and sometimes ½ if the sheet is very large. Do not forget that violets must be protected from drafts, and the optimum temperature for them is above 22 degrees.
Some leave the cuttings in the moss only until well-developed roots are formed, and then transplanted. We prefer the option when the leaves take root in the moss, give children and the children grow up in the moss on wick irrigation until the age when they can be planted separately.

This is usually determined by the size of the baby (about 1 / 3-1 / 4 from the mother leaf) and the amount of green pigment for variegated varieties. By the way, after the separation of the firstborn, the leaf can be left in the sphagnum and it will give you another generation of babies.
Now let's talk about growing children and adult plants on wick irrigation.
The difference between the leaves and the children is only that the sockets use a mixture for wick irrigation, in which there is no place for sphagnum. Also, according to our observations, it is not worth adding earth to the mixture, as this will lead to rotting of the roots of children and adult violets (sphagnum and earth strongly pull water towards themselves). So we use only landless mix... Usually we take 50% of high-moor (red) peat and 50% of perlite, vermiculite or their mixture.

You can also use a mixture of coco peat / substrate and perlite, as the coir remains porous even after being saturated with water, which promotes active root formation and better plant growth.But do not forget to rinse the "cocoa" before use - there are quite a lot of salts in it. Landless mixture for wick irrigation turns out to be very loose, moisture and air permeable, and thanks to this, the root system becomes well and evenly developed. At the bottom of the pot we put a turn / half-turn of the wick. We usually make the ring slightly smaller than the circumference of the pot.

Some people thread a wick through the entire thickness of the mixture, but this is not necessary: due to the looseness and moisture permeability of the substrate, the solution will evenly wet the entire mixture in the pot. Sometimes it is recommended to put some kind of synthetic material on the bottom so that the substrate does not spill out, but with a small diameter of the holes in the pot, the wet mixture will not go anywhere. Thus, we fill the wick on top with a substrate and plant the baby. No drainage is required for wick irrigation.
If, after separating from the leaf, you still have very small children, there is no need to put an end to them: be sure to put them in a pot with the same mixture, and they will surely take root. In such a substrate, roots develop very quickly!
We put the pot on a tray of water so that the whole system is sure to be saturated with the solution. You can also spill the system well from above, but this is less convenient. You may have to pour the substrate a little from above, as it will settle a little from the water. The main thing is not to deepen or fill the growth point, otherwise the baby will die. After that, you can place the pot on the wick irrigation container and add the solution as needed.
Landless substrates do not contain nutrients, therefore it is necessary to constantly use top dressing, which will always come to the plant with the help of a wick. We use a 0.05% Kemira solution.
With wick irrigation with Kemira Kombi solution, nutrients are supplied evenly, the plant does not experience stress from overfeeding / underfeeding. But do not forget to monitor the state of the plant. If it grows well, we don't change anything. If the lower leaves turn pale, and the plant becomes "skinny" - the concentration of the solution can be slightly increased. And if a reddish-whitish coating appears in the middle of the outlet, then the concentration must be reduced. No additional feeding is required.
Some violets sometimes "dry out" their plants (they do not immediately add the solution when it runs out). We never do this, and our violets feel great. By the way, as I noticed, lovers of soil are advised to "dry" not a landless substrate, but a soil mixture. And for them this is justified - because of the soil, the substrate gets too wet, and so that the violets do not rot, they have to be “dried”. With the right substrate, this simply isn't necessary.
Over time, as the baby grows up, roots can sprout through the hole in the bottom of the pot along the wick.

There is nothing wrong with that, on the contrary, it means that the plant feels great. We usually leave things as they are. But you can carefully transplant a violet. Most importantly, do not try to free the old wick from the roots - you can damage them. Just cut off what can obviously be cut off, especially since this will stimulate the formation of important and necessary lateral roots, and put the updated root system in the pot again.
It is advisable to transplant the violets once a year (not necessarily in a larger pot): this is done to renew the substrate so that salts and other nasty things do not accumulate in the soil. If a larger pot is not needed, then simply shake off the old substrate from the roots, and add a new one to the pot!
Some people worry about the size of the outlet. To prevent "elephants" from being made of violets, the diameter of the pot should be minimal (we have both children and adults primroses, and sometimes re-flowering rosettes live in pots 5.5 cm).If you plant violets in large pots, the result can be "burdocks"! If for some reason the system stopped working (for example, they forgot to pour the solution into the tray in time and the mixture with the cord dried out), you need to spill the substrate well or put it in a container with water / solution to soak it, and everything will fall into place again!
If you want to transfer violets that grew in the ground to wick irrigation, then you need to get them out of the pot and, if possible, remove the soil from the roots as much as possible, but carefully, but you should not rinse the roots. And only after that, transplant it into a mixture for wick irrigation. After several days of adaptation, the violets will rise and will only delight you! Some recommend that after transferring to the wick, water the plants only with clean water for a week or two. Of course, whether to immediately plant in a solution or wait is everyone's personal business. But don't forget that we are planting in a completely landless mixture, and it does not contain any nutrients. And in my opinion, it will be difficult for violets to come to their senses "on a starvation diet." Therefore, we recommend that when using a landless substrate, immediately put violets on Kemira's solution.
Wick irrigation - it is very convenient and really simple. If you are worried about the result, just start small: transfer a few not very valuable violets to the wick and observe them for a month. It may be necessary to reduce / increase the concentration of the solution, remove the wick from the pot a little, or, conversely, add. And when you find your optimal version of the system, you can safely translate the rest of the violets. They will thank you for this with their good health and lush flowering!

Pros and cons of wick irrigation
Positive aspects of wick irrigation:
- the most environmentally friendly environment (high humidity) for uzambara violets, close to the natural habitat of their original species;
- uninterrupted use of mineral substances by plants; trace elements, water as needed;
- rapid development of young plants;
- abundant flowering of many varieties;
- flowering without interruption of some varieties (Frozen in Time, etc.);
- saving time;
- relief from watering worries for several weeks - water remains in containers for a long time.
Negative sides of wick irrigation and how to eliminate them:
- lower temperatures in winter can lead to plant death. If your conditions do not allow increasing the temperature, temporarily water the Saintpaulias in the usual way, and remove the water from the tanks;
- decay of roots due to strong soil moisture. Experiment - replace successively the links of the system and observe the result - change the composition of the substrate, find a cord from a different material or take a smaller diameter, leave a shorter "tail" in the pot, remove or drain;
- stretching the petioles of leaves, peduncles, increasing the size of the rosette. Water these Saintpaulias as usual. Most often, these can be some specific varieties;
- the selection of tanks and the re-equipment of the place where the Saintpaulias are kept takes a long time. Try to think over the whole process and the aesthetic perception of the result of your efforts as much as possible. Take the time to do this work, do it efficiently and get relief from your further work on caring for Saintpaulias.
Wick irrigation for indoor plants
Ecology of life In recommendations for caring for indoor plants, there is often advice: watering should be moderate and regular. How to water the plants on time, especially if the collection exceeds 10-15 pots?
In recommendations for the care of indoor plants, there is often advice: watering should be moderate and regular. How to water the plants on time, especially if the collection exceeds 10-15 pots? We suggest using wick irrigation.
Wick irrigation method
Saintpaulias, gloxinia, achimenes, episis, hirita and other plants that need to be grown in small pots, in a loose substrate, have to be watered every other day. When keeping a large collection, or when you need to go on vacation, this can be a major problem. But the wick irrigation method comes to the rescue, in which water and nutrient solution rise to the roots of the plant along a synthetic cord.
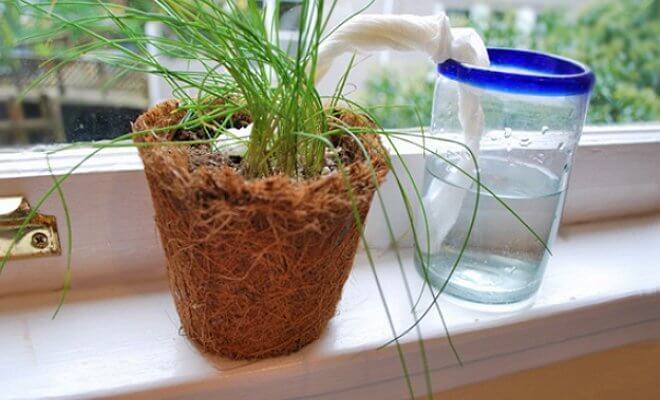
pros
plants grow quickly and bloom, watering time is reduced to 1 - 2 times a month, depending on the conditions, you can leave without fear of plant death, drying out of the roots is excluded; flowering in such plants is usually brighter and more magnificent, and the flowers are larger.
Minuses
in a humid room at a temperature below + 18 ° C there is a risk of root decay and the occurrence of fungal infections, vital processes pass faster, therefore, plants grown on wicks age faster, they turn out large - to save space, alas, it will not work.
Growing on a wick in a land mix
The soil must be selected in accordance with the requirements of a particular plant. For wick irrigation, there must be more perlite in it by 30-40% of the total volume so that the substrate is loose. You can fertilize plants on a wick in the usual way, pouring a small amount of fertilizer on top of it. It is necessary to ensure that fertilizers do not fall into a container with water, or use foliar dressing. If the foliage begins to turn yellow and discolor, it is better to transplant the plant into fresh soil.
Growing plants on a wick in a landless mixture
One way to grow is in a landless mixture. The composition of the soil for Gesneriaceae is peat + perlite in a 1: 1 ratio. Such a mixture is very poor, therefore, with wick irrigation, plants are grown in containers with a nutrient solution, using fertilizers such as Etisso, Pokon, Kemira Lux and others.
The approximate formula for growing in nutrient solution is (N: P: K) 5: 5: 5 + trace elements. You need to dilute at the rate of 1: 1000. If this is Etisso Hydro fertilizer, then the recommended dose for the nutrient solution is 3 ml per 1 liter of water.
Cord for making a wick
The cord should be made of synthetic material to prevent decay. Make sure it conducts well. To do this, take a small dry section of the cord and immerse the end in water - it should get wet quickly. A pot with a diameter of 9 cm requires a cord with a diameter of 1.5-2 mm. Try to keep it long enough to reach the bottom of the container.
For the first 2 weeks, check whether the earthen lump is sufficiently moistened, whether the plants have lost turgor, whether the water in the container is decreasing. If the soil is dry, stretch an additional cord, if it is waterlogged, observe the plant for several days: the roots may not be sufficiently developed or the cord is too thick.
Capacity for wick irrigation
The container should be plastic, like the pot you are planting in. Plastic is easy to clean and disinfect. The container can be a plastic cup or a container with a lid and a hole in it. Transparent containers are much more convenient - you can monitor the water level. A plastic pallet with a grid can be used as a common container.
Sometimes green algae form on the walls of the cups, they do not harm the plant in any way - you just need to wash the container.
Potting the cord
In some sources, it is recommended to lay the cord at the bottom in a circle:
But the best way to pull the wick is diagonally:
The hole for pulling the cord should be in the middle of the bottom of the pot, however, plastic pot manufacturers mainly make holes along the edge, so the wetting of the earthen will be uneven. Accordingly, the development of roots and plants will also be uneven.
If you distribute the wick unevenly, only one half of the earthy ball will be wetted.For example, the roots of an improperly planted streptocarpus will dry out where moisture does not enter, and half of the aerial part may die.
General rules for wick irrigation
Never compact the soil when planting - air for the roots is as important as moisture. It is advisable not to use a lot of high-moor peat as a planting mixture, otherwise it will be difficult to wet it.
It is best to use a synthetic winterizer as drainage - it conducts moisture and air, and is chemically neutral. Coarse perlite can also be used. So that he does not get enough sleep, you need to additionally put a net on the bottom of the pot.
For the plant to be able to assimilate a sufficient amount of water constantly flowing through the wick, it must have well-developed roots. For about 2 weeks after transplanting, try to keep the plant in a greenhouse, and after that for another 1-2 weeks - under normal conditions and on ordinary watering, preferably through a pallet so that the earthen lump does not condense. For better root development, plants can be watered with a solution of zircon or eco-gel (according to the instructions). And only grown plants can be transferred to wick irrigation.
To make sure that the wick conducts water, place the watered plants on a container with water.
When grown on wick irrigation, the development of plants is accelerated: they grow faster, bloom faster, but, accordingly, age faster. The soil has to be changed more often due to salt deposits on the edges of the pot. Some collectors bring plants to bloom on wicks to make sure the varietal coloration is correct, and then transfer the plants to regular watering. When changing watering, it is recommended to transplant the plant into a new nutrient, soil.
Indicate the planting date on the pots - this makes it easier to determine if the plant needs a transplant.
Uniform development
A properly planted plant on a wick can be easily removed from the pot, the root system is very tightly wrapped in an earthen ball, and the roots are alive and white.
Very often the roots are so well developed that they run down the wick into a container of water (nutrient solution). There is nothing wrong with that. But if you are going to transfer the plant to regular watering or transplant, the outer roots must be cut off.
If the plant on the wick has lost its turgor, and the earthy lump is wet, immediately remove it from the wick and check the roots. If they are brown, then they are dead or rotted. In this case, the plant can only be rescued by re-rooting.
The increased humidity when growing Saintpaulias stimulates the growth of lateral shoots, stepchildren. This is good if the variety is rare, because when propagated by stepchildren, the color is transmitted in 95% of cases. This is especially important when breeding chimeras. However, if you are preparing a plant for an exhibition, stepchildren need to be removed. They do not promote flowering, appearing in the axil of the leaf instead of the peduncle, moreover, the symmetry of the rosette is lost.
Summer care
If you need to leave and leave the mature plants, you can switch them from regular watering to wick watering and run a wick between them. This must be done 2-3 weeks before departure in order to see if the earthen lump is sufficiently wetted. It happens that different plants in the same pots need wicks of different diameters - the larger the outlet, the more water it needs. Flowering plants also absorb more moisture. published by
P.S. And remember, just by changing your consumption - together we are changing the world! <>
Wick irrigation for my collection.
Why wick irrigation?
When you have no more than 10 plants in your collection, you can easily monitor the soil moisture in the pots and water it on time. But regular watering of a large collection of standard varieties (starting from 30 or more specimens of adult plants) becomes a problem when busy at work and at home. In time, non-watered plants feel bad, they are more easily exposed to diseases and more difficult to tolerate the attack of pests.As long as my plants fit on the windowsills, everything was fine. The collection grew and required a large display rack with artificial light. ounces in small plastic pots dries out faster from the heat of the lamp, and the plants had to be checked daily for moisture and watered every other day. The solution was found - watering through the wicks. After rereading all the information available to me on the Internet and African Violet Magazine, I decided to try on a couple of adult copies. A month later, the entire collection was already sitting on wicks from adults to the smallest children, just separated from the mother's leaf. Now you can safely leave your collection unattended for 7-9 days and not worry about your favorites.
What is needed for wick irrigation?
The main condition for the normal development of the root system (and therefore the plant as a whole) is the optimal ratio of three components in the pot: water, air and substrate. They must be present in equal proportions. For wick irrigation, very loose, air-permeable materials that retain moisture well are used. I use a mixture of equal parts coarse perlite, vermiculite and commercially available peat potting soil (Fig. 1).
Fig. 1. Components of the substrate.
Before use, perlite and vermiculite must be moistened with water. The mixture should be moist, but not wet.
This mixture is poor in nutrients, and violets need very good feeding for abundant flowering and beautiful foliage. I constantly keep my collection on a highly diluted fertilizer solution. I use Pocon fertilizer for bonsai (N: P: K - 4: 4: 4), diluted a thousand times.
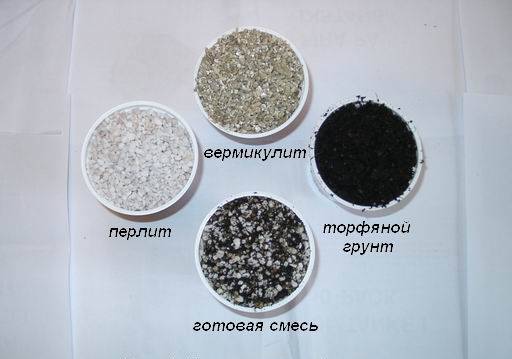
Fig. 1. Components of the substrate.
Any synthetic cord is suitable for wicks. Thanks to capillary forces, the nutrient solution from the reservoir under the pot will rise along it into the pot with the plant. It is important that it does not rot and that it absorbs moisture well. The last condition must be checked in advance. Soak the material of your choice in water, let dry and place in a glass of water. If it gets wet right away - it is suitable for a wick, if it remains to float on the surface without being wetted with water - look for another one. For the wicks, I use strips 7-8 mm wide, cut from ordinary nylon tights that have served their time. This material was suggested on the forum by Antonina

Fig. 2. Preparation of the wick.
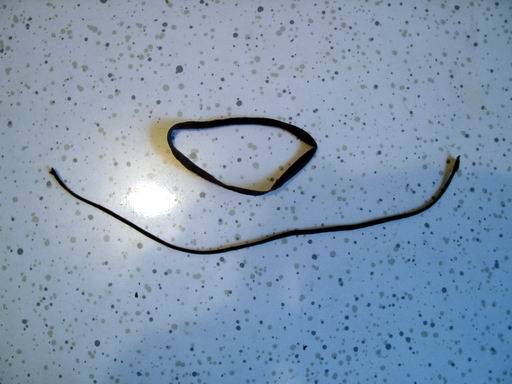
Fig. 3. Finished wick.
It turns out a strip 20-25 cm long. The wicks must first be well wet in water.
I use plastic pots in accordance with plant sizes from 7-8 to 10-11 cm. There are usually many holes in the bottom of such pots, which have to be covered with some kind of synthetic cloth to prevent loose substrate from spilling out (Fig. 4).
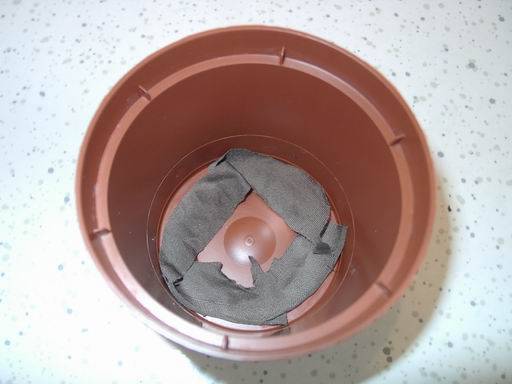
Fig. 4. A pot with covered holes.
Antonina suggests covering these holes with pieces of styrofoam.
Any suitable container can be used as a reservoir. I use plastic jars of yogurt or sour cream. I make a hole in the lid (Fig. 5), through which I thread a wick (Fig. 6), and put a pot with a plant on it (Fig. 7).
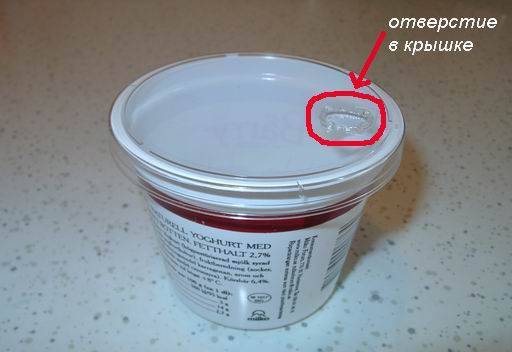
Fig. 5. Tank with lid.
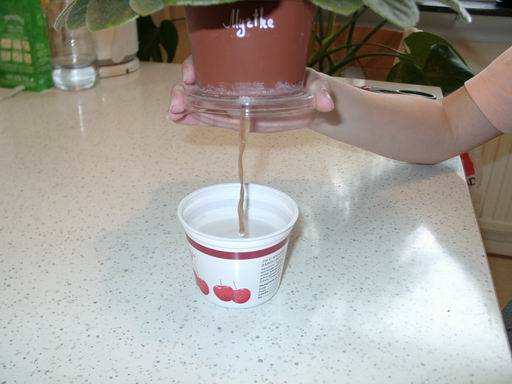
Fig. 6. A pot with a wick.
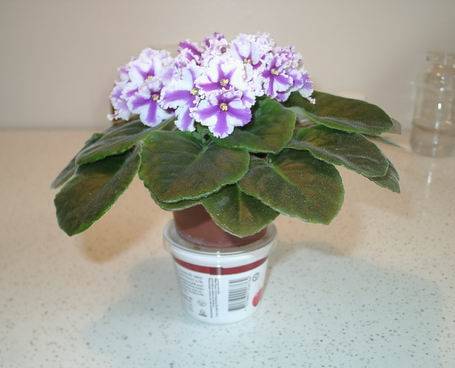
Fig. 7. Plant on wick irrigation.
Antonina uses plastic bottles that are cut to different heights for more compact placement of plants on the window. I put the pots with the kids on a common tank made of a plastic sandwich maker with holes in the lid (Fig. 8).
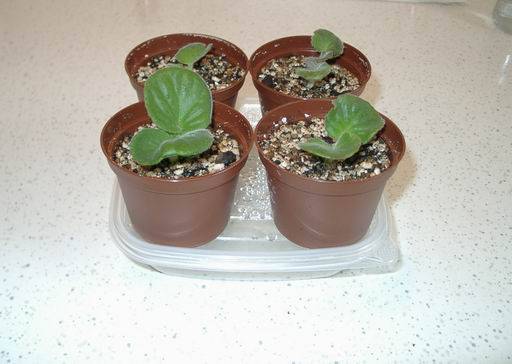
Fig. 8. Kids on a common tank.
How to plant a plant on a wick?
On the eve of transplanting, the plants must be watered so that during transplantation the earthen lump is moist, but not wet. Prepare a new planting mixture, mix the ingredients well. Prepare wicks and containers with holes in the lid. Cover the holes in the bottom of the pot. Insert a wick into one of the holes, leaving a tail 8-10 cm long outside. The length of the tail depends on the depth of the tank you have chosen (Fig. 9).
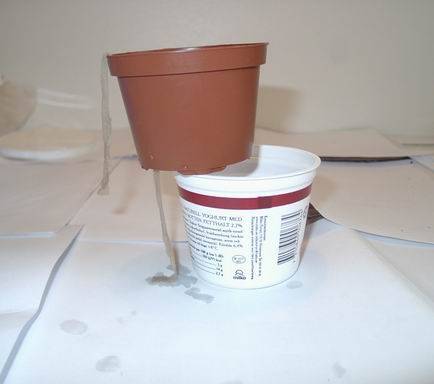
Fig. nine.The length of the tail corresponds to the depth of the tank.
Holding the inner part of the wick with your hand (Fig. 10), sprinkle a layer of pure perlite or ready-mixed mixture 1.5-2 cm thick on the bottom of the pot and place the wick in a ring on the surface (Fig. 11).
Fig. 10. Pour perlite on the bottom.
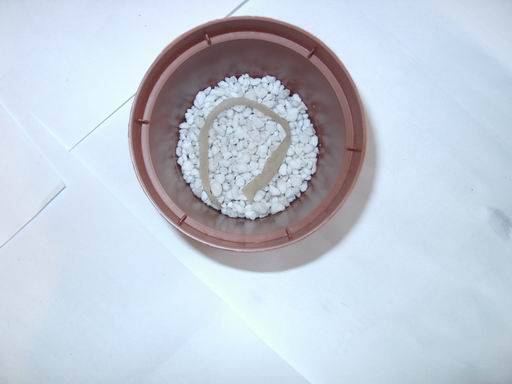
Fig. 11. The wick is placed in a ring.
Add the mixture to 2/3 the height of the pot if you are planting an adult plant, or to the top if you are planting a small child. The pot is ready for planting. Remove the plant from the pot and shake off as much old soil as possible from the roots, but try not to damage the roots (you cannot wash off the old soil (!), This can lead to decay of the roots) (Fig. 12).
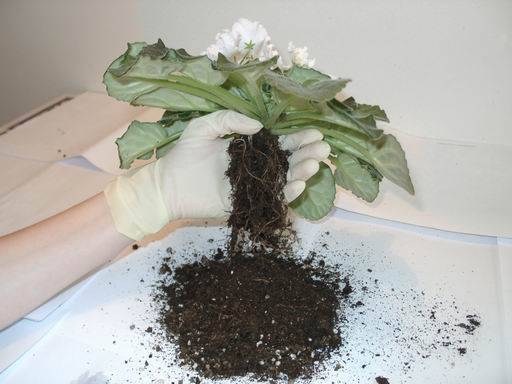
Fig. 12. Plant ready for planting.
Carefully plant the plant in the prepared pot, spread the roots on the surface of the soil and, holding the plant with your hand, pour the mixture to the top of the pot. Do not crush the substrate! Now place the pot on its designated reservoir and thread the wick through the hole in the lid. Water the plant abundantly on top of the substrate, being careful not to erode the roots. The water should seep through the wick into the tank. That's it (Fig. 13), the plant can be put in its original place and after a couple of days, pour a full reservoir of nutrient solution.
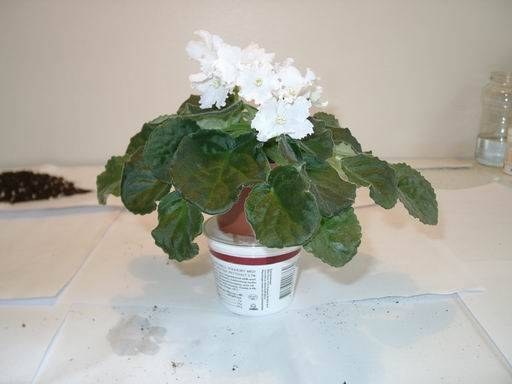
Fig. 13. Everything is ready.