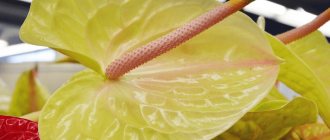
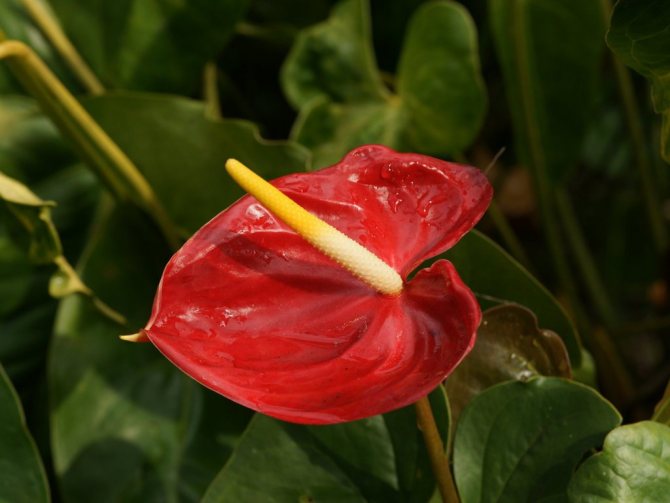
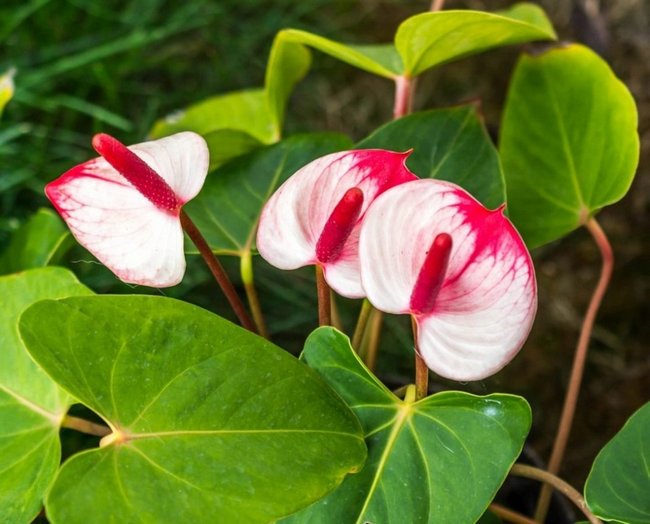
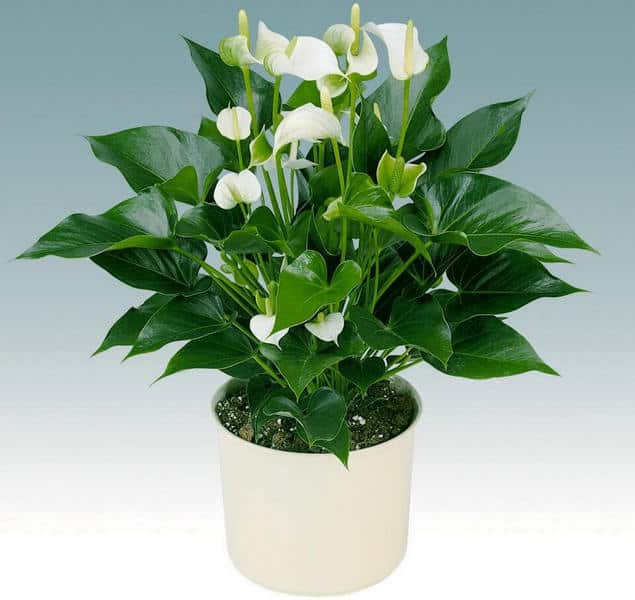
Anthurium is a plant that can often be found on window sills and home greenhouses. This flower, with its inflorescences, is very similar to exotic flamingo birds. Long stems with lush petals will impress even the most indifferent to flowers. Anthurium is a rather capricious plant that requires a lot of attention and care, and one of the important aspects of caring for anthurium is plant transplantation. How to properly transplant anthurium at home without harming it? Let's try to answer this question.
Reproduction of anthurium by a leaf
Like other representatives of the Aroid family, this culture is extremely difficult and reluctant to form roots on leaf petioles.
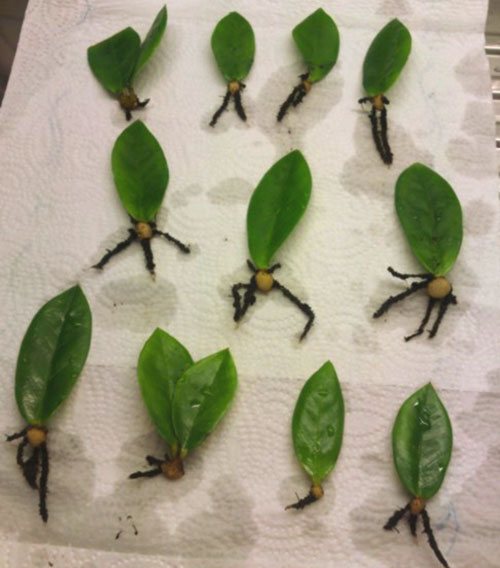
Reproduction of anthurium by a leaf in the overwhelming majority of cases fails. Unlike zamiokulkas, which forms small nodules at the base of the leaf and children with their own root system, the anthurium rots, and the leaf dies.
If there are decorative leafy species of anthurium in the gardener's collection, you can try using the leaves to get young rosettes. True, in this case, it is better not to immerse the petioles in water, but carefully dig the leaf plates into wet perlite.
In warm air and maintaining constant humidity after 3-4 weeks, the plant sometimes forms roots and are suitable for further growing anthurium children.
Breeding with air layers
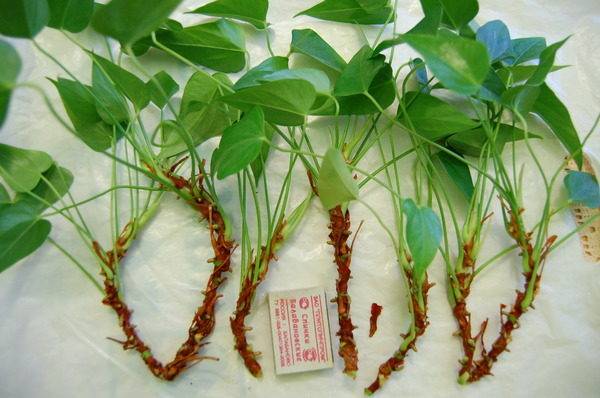
Anthurium uses air layers to get food from the air and fix on the surface, that is, they function as roots and are ready for transplantation.
- Cut off a stalk with aerial shoots and several leaves.
- Cut off the leaves and transplant into moist soil from a sandy-peat substrate.
- Cover with foil or glass, place in a warm, bright place.
- After the appearance of the first leaf, remove the greenhouse, take care of it like an adult flower.
Any part of the flower can be used to breed anthurium. The method chosen depends on the variety and condition of the mother plant. And proper care will make it a decoration of your flower collection.
How to grow anthurium from seeds?
With all the advantages of vegetative reproduction, these methods do not provide an opportunity to obtain mass seedlings. An adult anthurium bush when dividing can give no more than 5-6 young plants, a little more seedlings are obtained by cuttings.
Seed propagation is the only way available at home to grow several dozen small anthuriums at the same time.
However, the use of this method is associated with a number of difficulties and risks. For example, hybrid plants, which represent the majority on the modern flower market, do not always retain recognizable traits and properties. In addition, when planning to grow anthurium from seeds, the florist should know that the flowers will have to be pollinated artificially.
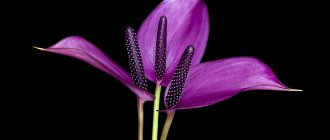
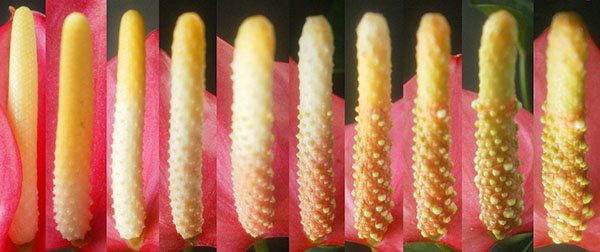
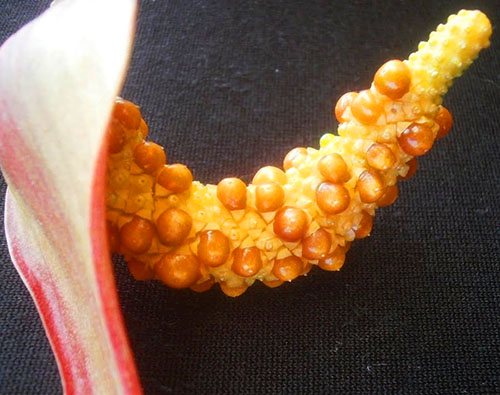
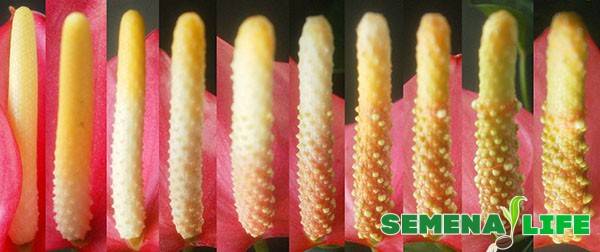
If you look at the anthurium inflorescence, you will notice that the ear consists of tiny bisexual flowers that bloom gradually from below, in the direction of the peduncle. First, the pistils ripen, and only after 20–25 days does pollen appear, that is, the male stage of flowering begins.
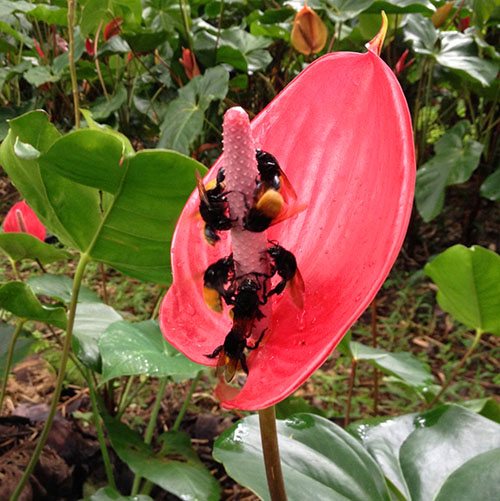
In nature, fragrant anthurium flowers attract a lot of pollinating insects, transferring pollen from one inflorescence to another.
But at home, the owner of the plant will have to take on this role. To do this, you need to stock up on a thin soft brush, choose a sunny day and, taking pollen from one inflorescence, pollinate another ear with it. To increase the likelihood of fruit production, the inflorescences need to be pollinated within 5–8 days.
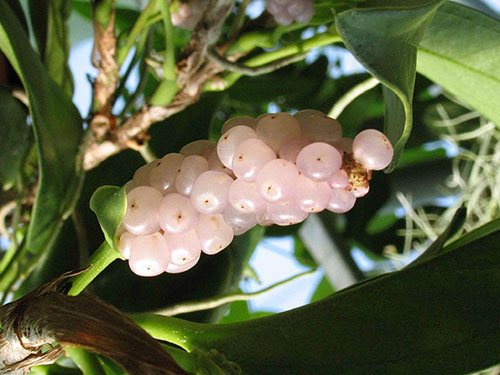
Depending on the cultivated species, anthurium in place of one inflorescence can tie from two to several dozen berries. Ripening lasts 8-12 months, while ripe fruits have different shapes, colors and sizes. You can find out that the anthurium berry has ripened by the fact that it has become noticeably more convex and poured. Sometimes juicy berries practically hang from the cob, holding on to a thin threadlike stalk.
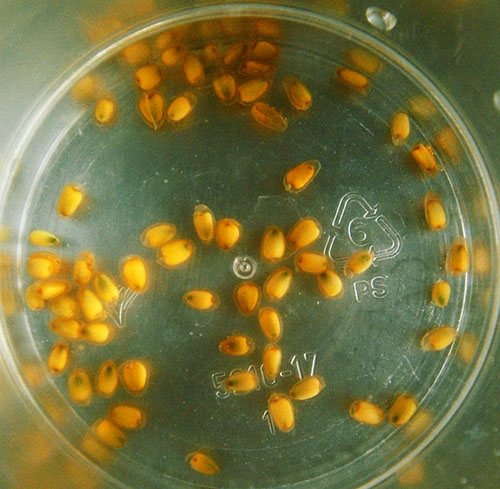
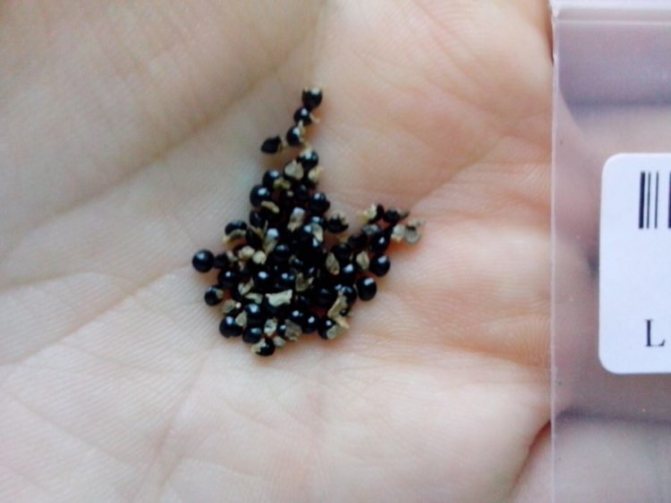
The number of seeds inside the fruit also fluctuates. As you can see in the photo, the seeds of anthurium are not very large, and since their germination rate decreases extremely quickly, it will not be possible to save the seed for future use.
To prepare seeds for planting:
- ripe fruits are kneaded;
- the seed is removed from the pulp and washed;
- the grains are treated with a 0.1% solution of potassium permanganate.
This measure is necessary, since anthurium seeds are not quickly dried before sowing, and they are threatened with decay and the formation of mold.
Like adult anthurium plants, seeds for growing need a loose, moisture and air permeable environment.
It is best to sow in flat containers with a small layer:
- light structured soil mixed with perlite or vermiculite;
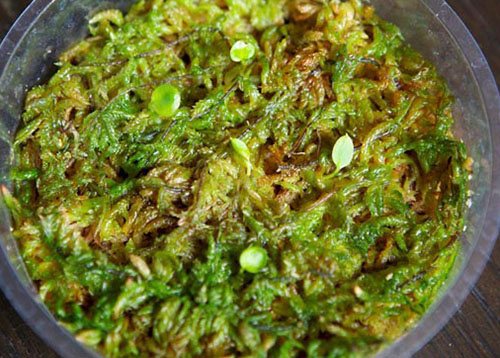
- perlite or sphagnum moss.
The seeds are laid out on a damp surface, easily pressing into the substrate, but not sprinkled. The container with crops should be covered with a lid, glass or foil, after which it is left at a temperature of 22 to 25 ° C.
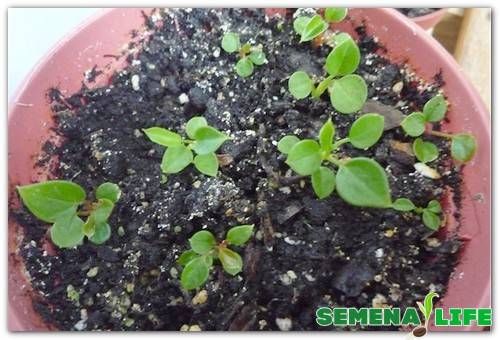
After 1.5–2 weeks, you can wait for the first shoots to appear, and their quality and speed of formation largely depends on the degree of maturity of the collected seeds and the conditions created for growth. Before growing anthurium from seeds, the grower will have to accumulate patience and know in advance that this is the longest and most laborious way of plant propagation.
When it is necessary?
It is best to combine the vegetative propagation of anthurium with a transplant. The rhizomes are divided after flowering, otherwise the peduncles will have to be cut off. Without this, the young anthurium will most likely die: the plant will not be able to maintain flowering and take root.
Plants propagate with apical or leaf cuttings with a piece of stems if the root system dies. Sometimes an old flower with an elongated stem is bought at a sale, which will not bloom without rejuvenation, so the top is cut off and rooted.
The climbing anthurium growing like a liana is propagated by cuttings with one or two internodes in late spring, trying not to damage the aerial roots.
Note! Self-obtained seeds are planted immediately after ripening, regardless of the season. Due to poor germination, you should not wait for spring.
General information about the plant, botanical description
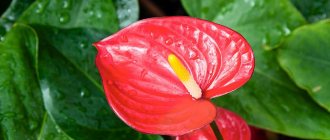
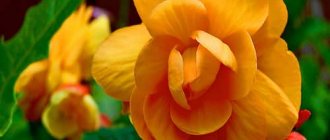
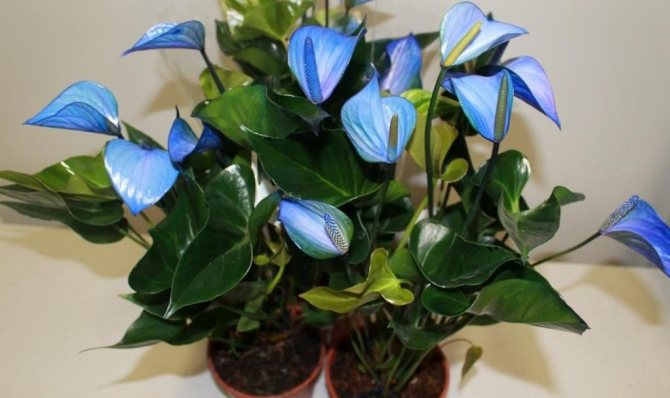
The word "anthurium" characterizes plants of the epiphytic type, belonging to the aroid family. Anthurium can be a liana, woody or semi-epiphytic culture. Plants belonging to the genus of the same name are found in North and South America, as well as in the subtropics. They form flowers of various colors:
Anthurium is distinguished by small leathery leaves, depending on the species, they can be whole or divided. Most flower growers prefer to grow indoor Anthurium. It should be noted that the plant is used to create unique bouquet arrangements.
Preparation
For reproduction of plants you will need:
- containers with holes in the bottom;
- planting substrate;
- drainage;
- "Epin", "Kornevin" or "Heteroauxin";
- a sharp knife sterilized with potassium permanganate or alcohol;
- sharpened wooden stick.
To root a divided bush, you will need small, wide containers and soil in which adult anthuriums are grown with the addition of perlite, coconut fiber or sphagnum moss. Seeds are sown in the same substrate, only the amount of baking powder is increased. Cuttings are planted in perlite or sphagnum.
Plant anthurium cuttings or cuttings in plastic or plastic containers. If you do not want unpresentable containers to spoil the interior, put them in a decorative planter or a beautiful larger pot, and fill the free space with wet sphagnum or sour peat.
Lighting, air temperature
In this article, we will talk about the conditions for keeping anthurium, and also consider breeding methods. Indoor culture thrives on the southwest and southeast window sills. In order for it to develop favorably at home, it must be kept in diffused light.
If you place the anthurium in the north, it is likely that it will be stunted. When placed in the south, it will be necessary to shade it with a curtain. Direct sunlight should not adversely affect anthurium photosynthesis.

Most of the species belonging to the genus are thermophilic. Anthurium feels good at air temperatures from + 23 to + 27 degrees. If for a while you lower the temperature to + 19 degrees, it is quite possible that the plant will start to hurt.
However, this does not apply to the winter dormant period, when the temperature needs to be lowered to + 17 degrees. If you are growing Scherzer Anthurium, lower the air temperature to + 13 degrees for about 50 days. The house plant should not be allowed to suffer from drafts and temperature extremes; care for it must be correct!
Reproduction
There is no need to be afraid to plant anthurium - the flower takes root well. Do everything correctly, without haste, with clean tools.
By dividing the bush
The easiest and most reliable way to get several plants from anthurium is to plant daughter rosettes or division during transplantation. Children root well, and a large bush, divided into parts, quickly gains vegetative mass and blooms. But anthurium does not like it when fragile roots are disturbed. Division can be performed no more than once every 3 years.
Step-by-step instruction:
- Water the flower 2-3 days before your procedure.
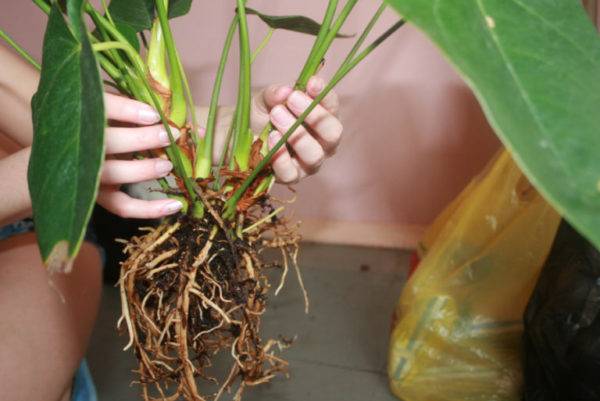
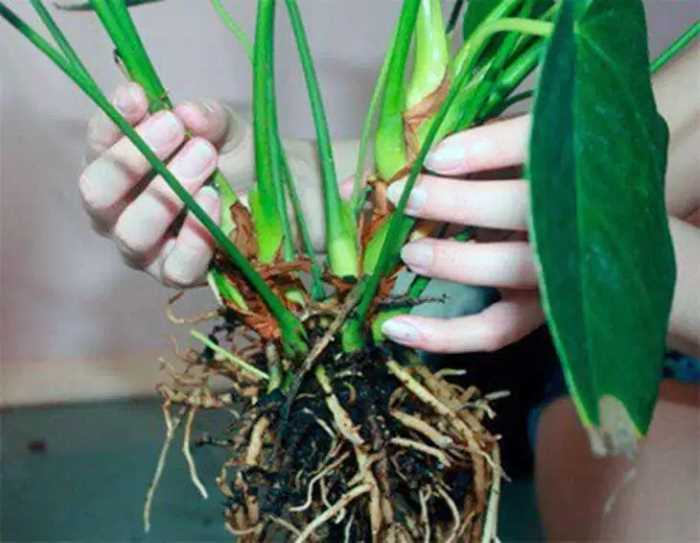
- Remove the anthurium from the pot.
- Use a sharpened wooden stick to free the roots of excess soil.
- Rinse them under a gentle stream of water at room temperature.
- Carefully separate the daughter outlets with your hands. Divide the rhizome of an adult plant into pieces if necessary. If it is not easy to separate, use a pre-sterilized knife.
- Remove any damaged, rotten, or shriveled roots.
- Sprinkle the cut sites with a mixture of crushed activated carbon and Heteroauxin.
- If among the daughter rosettes there is one devoid of roots, it is better to root it as an apical stalk.
- The landing tank should not be too spacious, low and wide.
- Place a drain on the bottom, filling 1/4 of the pot. Small expanded clay is best suited. Anthurium grows well - the aerial part significantly exceeds the mass of the roots, so the pot can turn over over time if foam is used as drainage.
- Pour the substrate on top. You can take a purchased soil for azaleas and add perlite, pre-soaked sphangum or coconut fiber. The soil is sold disinfected, and additional components must be sterilized with steam or in the oven.
- Place the plant on top and carefully cover it with the substrate. The soil in the pot must not be tamped.Tap it with its bottom on the edge of the table - the soil will settle without damaging the fragile roots.
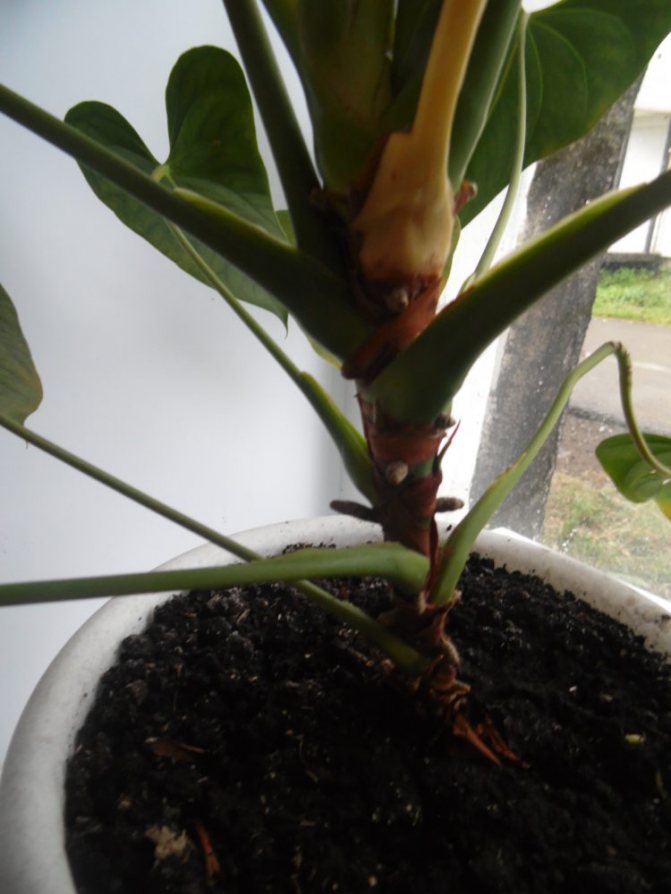
- The growth point must necessarily rise above the substrate, otherwise the anthurium will die.
- Set the pot aside for 2-3 hours, then gently pour warm water with Kornevin or Heteroauxin.
- Cover the soil with moist sphagnum.
- Spray the leaves with Epin.
- Place a clear plastic bag over the pot. If possible, place containers in an empty aquarium, after placing bowls of water next to them, and cover with glass.
- For 2-3 weeks, remove the planted anthurium in a warm place, well protected from direct sunlight.
- Remove film or glass daily for ventilation, check soil moisture and spray the flower. The soil should be constantly moist, but not wet.
- A new leaf serves as a signal that the plant is well rooted.
Anthurium has adventitious (aerial) roots that provide additional nutrition, moisture and can temporarily replace underground roots.
Stem cuttings
This method is suitable for flowers growing like liana, for example, climbing anthurium. But sometimes it becomes necessary to root part of the short stem of flowering species.
Apical cut
The root is cut off, most of the leaves are removed, leaving a few on the crown, the stem is cleaned with a sharp sterile knife to healthy tissue and set aside for 2-3 hours in the shade to form a callus. The wound is treated with a mixture of crushed activated carbon and "Heteroauxin", tightly wrapped with wet sphagnum moss, for reliability - with a thread.
Insert the handle into a plastic glass with a hole made at the bottom for the outflow of water and filled with the same sphagnum or wet perlite.
Watered with "Kornevin" or "Heteroauxin", dissolved in water according to the instructions, put under a film in a warm, sun-protected place for rooting for 2-3 weeks. Aerate daily, spray and check the moisture content of the substrate. Once a week, they are treated with "Epin", watered with "Kornevin" or "Heteroauxin".
If the container is filled with sphagnum, the roots that appear through the transparent walls can be seen. The signal for transplanting will be a young leaf. In this way, daughter rosettes are also rooted, which do not have underground or aerial roots.
Part of the stem
Climbing anthurium easily propagates by stem petioles with 1-2 internodes and aerial roots. At the end of spring, they are cut off with a sterile knife, dried in the open air in the shade for 2-3 hours to form callus. The wound surface is sprinkled with crushed activated carbon and planted in sphagnum, perlite or its mixture with peat.
Cover with transparent film, keep in a warm, shaded place for 2-3 weeks. Aerate daily, spray and check the moisture content of the substrate. When the anthurium gives underground roots, the petiole is planted in the soil mixture described above.
An old, unkempt flower that has not been transplanted for a long time can stretch out so that the trunk grows 10 cm or more. It can be divided into cuttings and planted in sphagnum or perlite.
Leafy cuttings with a piece of stem
An anthurium leaf with a petiole cannot be rooted. In order for the roots to form, at least a small piece of the stem must adjoin it. The cutting should be air-dried, treated with crushed activated carbon and Heteroauxin, and then planted.
Note! To reduce the area of evaporation of moisture, the sheet is twisted with a tube and secured with an elastic band.
Seeds
Only self-grown seeds are sown, but they quickly lose their germination. In nature, anthurium is pollinated by numerous insects, at home you need to take a soft brush or cotton swab and take care of it yourself. Cross-pollinate the flowers for 5-7 days.
It will take a long time to wait for the appearance and ripening of seeds - from 8 months. The peduncle can dry out without tying them.If you are lucky, the bedspread will turn green, the seeds will begin to ripen unevenly. The berry, ready for planting, will darken and fall out of the cob.
The fruit must be cleaned of pulp, rinsed with potassium permanganate and immediately planted in a wide bowl filled with a mixture of peat and sphagnum or perlite. Moisten the substrate, compact, spread anthurium seeds on the surface, cover with glass or transparent film. Ventilate container daily and spray with a spray bottle.
Seeds germinate in the light at a temperature of about 24 degrees. The first shoots can hatch in a week. Continue to spray, but do not rush to dive. Wait for the third leaf to appear, plant it in a plastic glass with a light sphagnum substrate and soil for azaleas. Don't forget drainage and water drainage holes.
Comment! It is possible to obtain an anthurium from seeds, similar to the mother plant, only through reproduction of species. The outward signs of seedlings of hybrids split, so the flower will be simple and unattractive. In rare cases, an unusually beautiful variety of anthurium is obtained. New varieties are created during seed propagation.
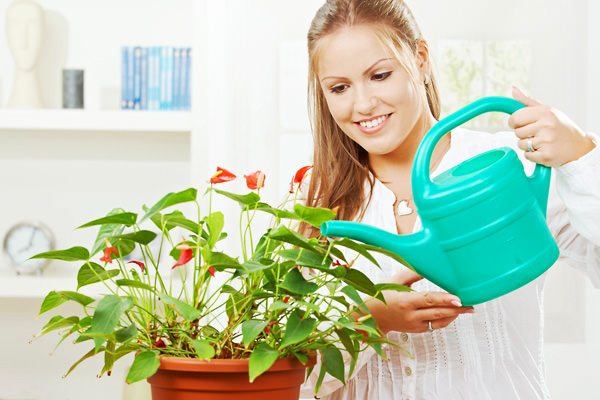
Watering, spraying
Now let's talk about watering.
- Water should be taken out as the soil dries up.
- During the growing season, anthurium needs to be watered more often.
- So that the plant does not hurt and does not suffer from the effects of pests, it is necessary to use high-quality settled water for irrigation.
- Waterlogging of the soil mixture is not recommended, since the anthurium can start to hurt. Excess water can cause root rot.
After you add water, remove any residual water from the sump. Anthurium blooms and breathes in high humidity conditions. I recommend spraying a houseplant. If it lacks moisture, growth retardation is observed. I wipe the leaves with a soft cotton cloth, which I advise you too!
If it is necessary to increase the level of humidity, spray air near the anthurium. Locate the pot on a pallet with moistened expanded clay. When you spray the plant, make sure that the water falls exclusively on the leaves. If the droplets are on the flowers, the decorative qualities of the culture will decrease.
Capacity for transplanting anthurium
The container should ensure the equality of the temperatures of the soil and ambient air. For this reason, plastic containers are chosen.
There must be a drainage hole in the bottom of a sufficient size so that moisture does not stagnate.
Deep containers are not suitable for roots that grow out to the sides or even upwards. In very small pots, the required drainage layer will take up too much of the volume.
Fresh articles about garden and vegetable garden
Shelter for blackberries for the winter. Video
Shelter of grapes in the fall video for beginners
Peach shelter for the winter
On the other hand, the width of the container depends on what is expected from the anthurium: in wider pots, the root system will develop and numerous children will appear, but flowering will sharply decrease. In too wide pots, the plant will not be able to quickly master the soil and pathogenic processes will take place in it.
As a result, for adult anthuriums, they choose low plastic containers with a diameter of 24 to 32 cm.
Application of mineral and organic compounds
In order for anthurium to grow well at home, it is necessary to periodically feed it. I recommend adding mineral products, but the dosage for this plant should be 2 times less. I feed anthurium in the spring, I apply fertilizers once every 20 days.
Foliar dressing is shown to this plant. Fertilizer intended for such feeding should be applied once every 15 days. As for organic matter, it is rarely used. To feed anthurium, you can use a solution prepared on the basis of chicken manure.
Instead of this organic fertilizer, you can use rotted manure. Organic solutions must be very weak, otherwise they will have a scalding effect!
Growing Anthurium by sowing seeds
Seed reproduction is the most difficult. Seeds of Anthurium are prone to a rapid loss of germination, therefore, for planting, you should use either freshly picked seeds with your own hands, or purchased, but fresh. The seeds of the plant are sown, slightly pressing into the soil, into shallow containers with soil prepared according to the above recipe. Then the substrate is covered with a thin layer of perlite, which will ensure sterility and will retain the moisture necessary for seed germination. The containers are covered with plastic wrap or glass.
If you adhere to a temperature of 20-24 degrees plus Celsius, then the first shoots will be noticeable after two weeks. At a temperature of 10 degrees plus Celsius, you can wait for the first shoots for a month. Meanwhile, there are cases of more belated germination - here everything depends on the maturity of the seeds.
Seedlings grow slowly. They need to be dived several times, with an interval of one and a half to two months. At first, the distance between plants should be two to three centimeters, with each subsequent pick it should be increased by a couple of centimeters. When the diameter of the outlet reaches five centimeters, young Anthuriums can be planted in personal pots with a capacity of 0.2 liters. The troubles with picks and transfers are due to the fact that the roots of the plant develop better in a strictly limited part of the soil.
The first flowering of an Anthurium grown from seed occurs in three years. Seed reproduction is troublesome and not always justified, because hybrid varieties are often sold on the market, which means that a plant that does not look like its parent can appear from the seed. For this reason, hybrids are propagated vegetatively, then they retain their maternal beauty and bloom, by the way, the next year.
- How to properly care for anthurium?
- Difficulties in growing anthurium
Other features of care, picking
In order for a house plant to plant buds well and please with abundant flowering, in winter it must be kept in a cool room. The air temperature should not exceed + 17 degrees. With proper care, the culture blooms from summer to autumn.
To stimulate flowering, it is necessary to remove inflorescences that have faded in time. As a result, the anthurium will spend energy on the formation of new flowers. Novice flower growers are interested in whether it is worth replanting anthurium.
The plant needs a pick. I recommend replanting it in early March. The procedure should be carried out very carefully, it is important not to injure the fragile root system. I advise you to replant young anthurium once a year.
Note that each subsequent pot should be 2 cm larger than the previous one. Dive mature plants if necessary. For example, if the pot has become cramped or diseases of the root system have arisen.
What is an anthurium transplant for?
Correct transplanting and caring for a flower allows it to grow quickly and bloom regularly. A flower that does not exceed 4-5 years old, experts recommend replanting once a year. The best time frame for this event is the end of February and the beginning of August. In doing so, you must be extremely careful. After all, both the leaves and the roots themselves are very delicate and fragile. They are very easy to damage. For a young flower, transplantation is carried out annually (usually this is necessary when the pot becomes too tight for the plant). For centenarians, this procedure should be done once every 3-4 years. This will be enough for them. It is not worth using special fertilizers for plant growth. Since it is very easy not to guess with the correct dosage!
Propagation using seeds
Some gardeners prefer generative reproduction of anthurium, others - vegetative. We will first look at seed propagation. I note that the seed must be used immediately after purchase or collection.
Seeds must be treated with a weak solution of potassium permanganate. It is necessary to place them in loose fertile soil, deepen only 2 mm. For sprouts to appear faster, crops must be kept in greenhouse conditions. You will need to cover them with plastic wrap.
When crops are kept at an air temperature of + 24 degrees, shoots appear in 2 weeks. After a while, the plants form 2 strengthened leaves. Then you will need to perform a pick - transplant the plants into individual containers.
If desired, use a sheet soil with a small amount of charcoal and peat. After a while, you will need to perform a pick again. If grown correctly, anthurium will bloom in 2 years. But it forms weakened flowers, full-fledged ones appear 5 years after sowing the seeds.
What soil is needed for transplanting anthurium
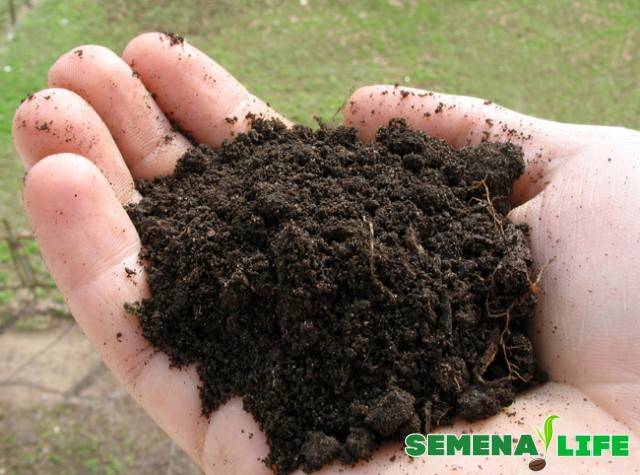
Choosing the right soil for anthurium is an important task. A simple solution is to buy a special substrate for flowering plants (for example, for aroids, bromeliads, and orchids): it has excellent air permeability and low acidity (pH-5.5-6.5). Visually, it should be loose, fibrous.
You can prepare the mixture yourself: take peat, sphagnum moss and fertile soil in equal parts, add a little coconut fiber and charcoal. Or you can mix crushed sphagnum, peat and turf in a 2: 2: 1 ratio. The flower will also like this soil mixture: humus, leafy earth, peat and sand in a ratio of 2: 1: 1: 0.5. It is worth remembering that the structure of the soil is important, so chopped sphagnum, fine expanded clay, pine bark, and charcoal are added to it in small quantities (10-15% of the total volume).
For anthurium, it is worth purchasing wide, low pots. Being in a small, slightly cramped container further stimulates the flowering of the plant, and growing in a larger pot has a positive effect on the formation of children.
Reproduction of anthurium by cuttings, dangerous properties of the plant
Anthurium planting material (cuttings) should be separated from the mother plant, rooted in the sand and covered with plastic wrap. Glass can be used instead. From time to time you need to remove the covering material and moisten the cutting.
This planting material should be kept at an air temperature of + 23 - + 25 degrees. An apical cutting can also be used to propagate anthurium. Anthurium is a poisonous plant. Children and animals should not be allowed to come into contact with him in any way. When eating any part of the anthurium, severe intoxication occurs, manifested by:
- nausea and vomiting;
- diarrhea;
- skin rash.
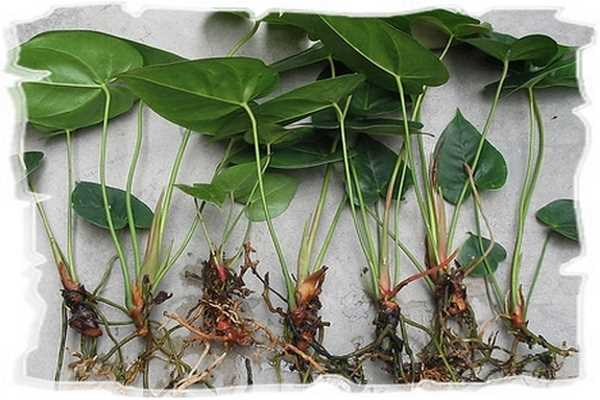
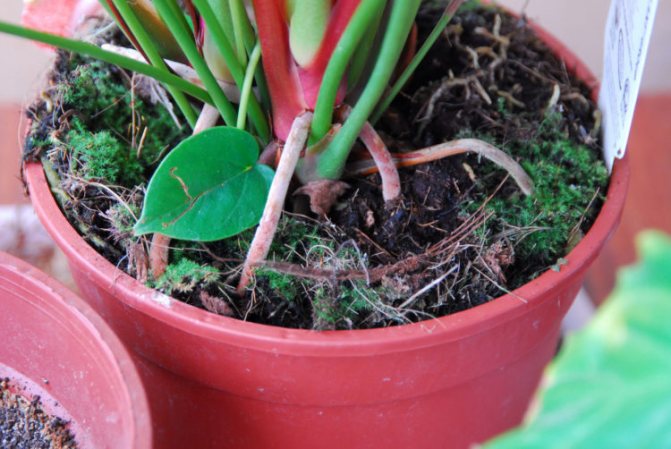
Breeding by root suckers
As the plant grows, root shoots appear on the sides, which can be transplanted as an independent flower. The roots of the offspring and the mother plant are intertwined and connected by a jumper, therefore, the shoots should be separated only during flower transplantation.
- Prepare containers with substrate, moisten well.
- Transplant root suckers, cover with foil or glass cover and place in a bright room at a temperature of 28-30 ° C.
- Ventilate the plants daily, spray with water or a solution of a growth biostimulator.
- After the shoots have taken root, the greenhouse can be removed.
Possible problems when growing anthurium
It so happens that the plant suffers from rot. To prevent disease, you need to moderately add water and maintain an optimal level of humidity in the room. With improper care, anthurium gets sick with anthracnose.
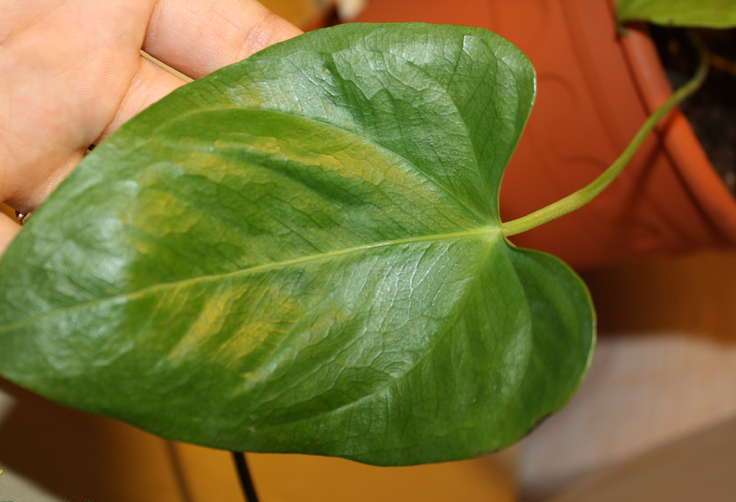
The disease is manifested by the drying out of the leaf plate (at the beginning it is affected only along the edges).A plant kept at home may not produce flowers. A common cause of the problem is pest infestation.
Anthurium turns yellow if the root system rots. In this case, you need to carefully remove the plant and remove the damaged parts. In the future, you will need to normalize watering. If you add water too often, the ends of the leaves will turn dark.
You can not abuse any fertilizers, including those that contain calcium. Possible causes of drying out:
- the flower received minerals in excess;
- he, on the contrary, lacks mineral components;
- anthurium receives a lot or little water.
In some cases, it is necessary to change the potting mix. To restore the anthurium, in the future it is necessary to properly care for it.
The reasons why the leaves curl:
- low humidity level;
- lack of lighting;
- being in drafts.
Anthurium can be affected by pests such as:
General description of anthurium
Anthuriums belong to the genus Aroids, a characteristic feature of which is a long inflorescence wrapped in a brightly colored leaf. In nature, there are simply a huge number of species of this plant. Most of them are epiphytes, that is, they grow high on trees. In indoor conditions, two types of anthuriums are usually grown:
Fresh articles about garden and vegetable garden
Shrew or mole how to determine
Ezhemalina: care in the fall and preparation for winter
How to deal with shrews in the garden?
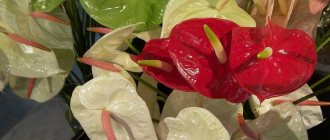
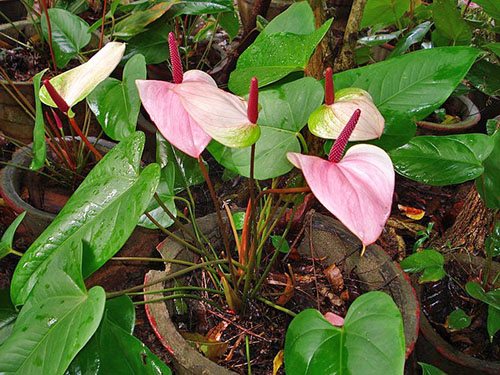
- Andre. This is a very beautiful variety with straight long inflorescences wrapped in a bright red or deep pink leaf.
- Scherzer. The inflorescences of this variety are also very long, but at the ends they are bent into a beautiful spectacular spiral. Their sheet wrap is bright orange in color.
Both varieties of domestic anthuriums are not epiphytes, but growing conditions require similar ones. Therefore, the soil, performing a procedure such as transplanting anthurium at home, should be prepared in a special way. We'll talk about which one below.
Advantages and disadvantages of the method
The advantages of growing a flower at home from seeds include the fact that this is the only propagation method that allows you to grow more than a dozen plants at the same time. For those who want to try themselves in the role of a breeder, this method is more suitable than others, since the grown plant is likely to be unlike the "parent".
Of the minuses, one can single out the fact that such a growing method will be fraught with certain difficulties. For example, you will have to pollinate a flower to get seeds yourself, and the characteristics of the grown plant can be unpredictable. The seed of anthurium has a short shelf life - less than 6 months, there is no point in planting after its expiration.
How to propagate anthurium correctly?
Anthurium is an elegant and dazzlingly beautiful plant with flamingo-shaped flowers. The surest way to reproduce a home Anthurium is vegetative. At home, flowering varieties are often propagated by dividing the bush, and decorative deciduous varieties by cuttings (apical cuttings and lateral offshoots). As a rule, the procedure takes place at the time of plant transplantation. Meanwhile, Anthurium is propagated by seeds. The most important thing when working with a plant is to remember that its juice is poisonous and try to work with gloves.
Time to breed at home
The most optimal time of the year for planting seeds (as well as for other breeding methods) is spring, namely the period from mid-April to mid-May. Landing at the beginning of summer is also considered permissible.
Planting in the winter is undesirable, but it will be effective with proper care. For winter sowing, it is better to choose the second half of February.The sprouts need to provide an ambient temperature of at least 22-25 degrees Celsius and additional lighting.
Cuttings - as a way of reproduction of Anthurium
Anthurium successfully propagates by apical cuttings. This should be done in the spring, as a last resort - at the beginning of summer. Using a sharp knife from the plant, it is necessary to cut off the upper part of the stem, which has roots and leaves. Then remove a couple of bottom sheets. The cutting should be planted in the soil described above, deepening it to the first leaf. If the stalk has about 5 leaves, then a pot about 10 centimeters in diameter will be enough to start the development of the bush. Do not forget about drainage for a third of the container. The temperature corridor for propagation by cuttings should be in the range from 20 to 25 degrees with plus Celsius. At first, the young Anthurium needs a "greenhouse". To do this, cover the pot with plastic wrap or glass. The rooting process usually takes several weeks. With successful reproduction within a month, the plant will acquire young leaves. Some growers, until these leaves appear, grow cuttings by a collective method - in a common container, and then plant them in personal pots.
Capacity selection
Anthurium has a superficial root system, therefore, a shallow and wide container is well suited for it. It is best to use a pot made from natural materials such as clay. In such dishes, the plant will feel more comfortable than in plastic.
- Anthurium seeds are first sown in small containers, which are then covered with foil to germinate the seeds.
- Then, 1-2 weeks after germination, the plant, along with the soil, is transplanted into a more spacious pot.
If you use too spacious dishes for seeds at once, the plant will develop much more slowly.
Anthurium transplant
Moving anthurium after purchase is associated with the need to inspect the root system and improve the quality of the soil. The first step is to remove the flower from the previous container, carefully remove the excess old soil and carefully examine the aforementioned roots. Having found sick or injured roots, it is necessary to cut them off with a sharp knife, and cut the sections thoroughly with crushed charcoal (wood or activated). Having found children on the anthurium, they should be carefully planted.
Seed handling
Seed material can be obtained both independently (by the procedure of pollination of a flower), or purchased ready-made.
We get it ourselves
Work with fruits and seeds is strongly recommended to be carried out with gloves, as direct skin contact may cause irritation or allergies.
- To obtain seeds, the flower must be manually pollinated, choosing a sunny day for this. You will need at least two plants.
- Next, you need to prepare a small soft brush.
- With a brush, you need to collect pollen from the inflorescence of one plant and transfer it to the inflorescence of the second.
- The pollination process is repeated for 5-7 days.
- Fruit ripening takes 10-12 months.
- Ripe berries are removed, the shell is removed.
- The resulting seeds must be dried in the open air (no more than 1-2 days), and then prepared for planting.
And here is what anthurium seeds look like in the photo

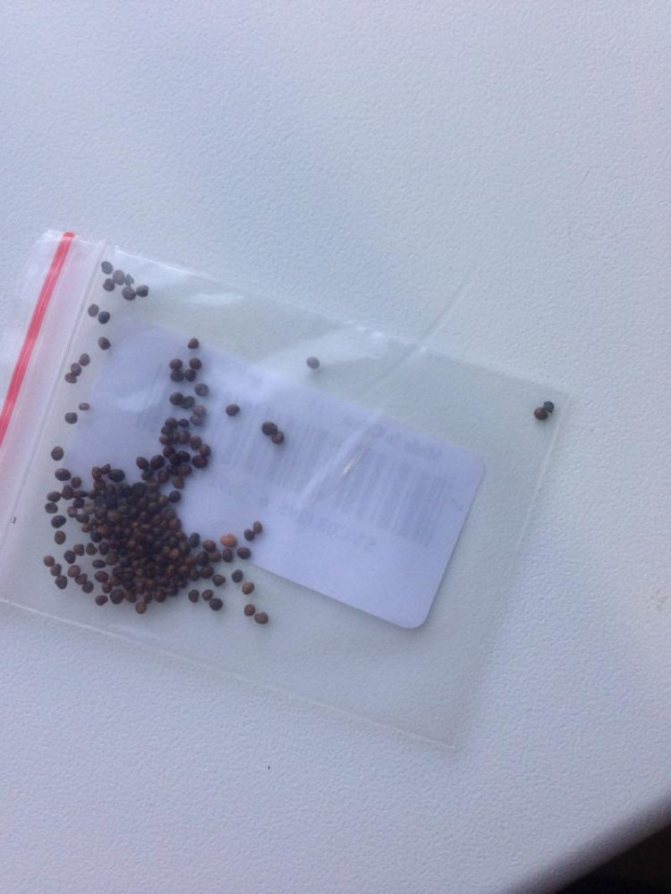
Buying from China
Reviews of anthurium seeds that were brought from China vary greatly. Some consider such a purchase to be risky, as they faced dishonest sellers who passed off the seeds of another plant as anthurium, or gave false information about the timing of the collection of seeds. However, there are relatively few such reviews.
When placing an order for seed, you should give your preference to trusted sellers with a good reputation (you can find out about it from customer reviews).Next, you need to contact the supplier and inquire about the quality of the seeds, the characteristics of the selected variety and the timing of collection.
Preliminary processing
Immediately before planting, the seeds must be soaked in a weak solution of potassium permanganate for 15 minutes, then place on a napkin or soft cloth to remove excess moisture. This procedure is necessary to decontaminate the inoculum.
How to get anthurium seeds
Seeds are formed only after pollination of the flower, which must be carried out independently. This process should be done on a sunny day. To do this, take a soft brush, with which you need to collect pollen from one inflorescence and transfer it to another. For more confidence, pollination can be carried out throughout the week.
After that, the seeds will ripen for about 12 months, depending on the selected plant variety. When the berries with seeds become convex, and sometimes they even begin to hang down, it is necessary to pluck them and extract them from each seed. For this, the berries are crushed, and the seeds are dipped in a weak solution of potassium permanganate.
This will save from decay and the development of diseases.
How to plant correctly?
- Pour the substrate prepared in advance into the container, pour it over and let the water soak.
- Spread the seeds over the surface of the soil, sprinkle it a little on top.
- Cover the container with plastic or glass.
- It is important to provide future plants with bottom heating and bright lighting. The room temperature must be at least 25 degrees.
- Every day you need to open the container with seeds for airing for 7-10 minutes.
- As it dries, the soil must be sprayed with water.
- The first shoots can be seen in a week after planting the seeds, the main ones - in 10-15 days. At the stage of forming the first real sheet, polyethylene (glass) can be removed.
- Further, anthurium can be transplanted into a pot (in addition to the soil, there must be drainage in the pot, for example, from crushed stone or river sand).
Soil for planting seeds
Anthurium loves loose soil, so a mixture of the following components is suitable for seeds:
- turf - 50%;
- perlite - 25%;
- vermiculite - 25%.
You can also use sphagnum moss. It should be placed on top of the potting mix.
Each seed should be placed on top of the moss or soil and pressed down slightly. After that, the pot is covered with foil, glass and placed in a bright place.
The room temperature must be at least 23.
The first shoots should appear within two weeks. After that, the pot with sprouts must be opened and the moisture of the soil must be monitored. For watering, you should use a spray bottle to spray the water evenly and gently. Anthurium should be protected from strong sunlight. For this, the seedlings must be placed in the sun when it will not burn the leaves. The best time is morning or sunset.
When the first real leaf blooms, then you can dive the plants. For this, a larger pot is taken and covered with a slightly different soil. For it, it is necessary to take in equal parts deciduous soil, peat and perlite. At the bottom of the pot, you need to put expanded clay so that a lot of moisture does not linger.
It is better not to use a very large seedling pot right away, since the soil, due to waterlogging, may become unsuitable for anthurium. It is better to replant the grown plant again when the flower has up to 7 leaves. It is worth knowing that anthurium has aerial roots, so you do not need to cover it with soil so that the plant can breathe freely.
After a year and a half, the first flowers should appear on the anthurium grown from seeds. If seeds from a hybrid plant were used, then the flower may differ from its "ancestor" in color and size.
Until the plant has bloomed, it must be fed with mineral complex fertilizer. And this must be done at least once a month. This will speed up the process of plant development.Also, regular feeding will always help to have beautiful inflorescences on the anthurium. In this case, the plant must be regularly watered and not to allow at least a little drying out of the soil.
semena.life
Follow-up care
The plant prefers warm and humid air, but it should be protected from the scorching sun rays. Before flowering, anthurium is monthly fertilized with a complex mineral fertilizer (preferably for flowering plants).
Watering is done regularly, about 2-3 times a week. Drying out of the soil must not be allowed. It will not be superfluous to periodically spray the foliage of the plant with water at room temperature.
If you put sphagnum moss near the base of the stem, moisture in the soil will persist longer.
The choice of soil for planting Anthurium
The correct selection of a substrate for growing a plant is the key to successful reproduction of Anthurium. If you don't want to mess around with homemade soil preparation, you can purchase a ready-made substrate specifically for planting Anthurium, or buy a mixture for bromeliads and orchids or for violets and spice it generously with pieces of boiled pine bark. You can also add other components related to the coarse fraction. The most important thing is to make the soil light and loose.
However, experienced flower growers prefer to prepare the mixture on their own. The basic rule for a recipe for a combination of components is to obtain a well-drained, air- and permeable soil with an acidic (pH from 4.5 to 5.5) or slightly acidic (pH from 5.5 to 6.5) reaction, that is, not heavy and not dense , meanwhile, holding the plant well. At the bottom - 1/3 of the pot, drainage must certainly be present, as a rule, expanded clay (see care).
If "Man's Happiness" does not take root
- Cold. If the temperature in the room falls below 16 degrees, it can negatively affect the tropical plant. You need to take care of a warmer growing room.
- Lack of moisture in the air. Dry air can also lead to deterioration of the anthurium - this problem can be solved by spraying the leaves and air around the plant.
- Drafts, like sudden changes in temperature, they negatively affect the anthurium.
- Violation of the watering regime. Too frequent or, conversely, insufficient watering can destroy the plant. Water the anthurium regularly and in moderation.
- Pests can cause the death of the flower. It is important every 2 months, as well as as necessary, to carry out treatment against parasites.
- Lack of light will provoke the wilting of the plant, and being in direct sunlight will dry it. It is important to maintain a healthy balance of lighting.
- Non-nutritive soil. Anthurium, like many other indoor plants, needs regular additional feeding, you should not neglect it.
The homeland of anthurium is the tropics, this is what causes some difficulty in caring for the plant for residents of temperate and northern latitudes. However, this does not stop flower growers impressed by the exotic beauty of a capricious flower. It has become popular for both horticultural and indoor cultivation in many countries around the world. With proper, conscientious care, anthurium will delight its owner with a long and bright flowering. Now you know how to plant seeds and grow "Male Happiness" from them.
If you find an error, please select a piece of text and press Ctrl + Enter.
Reproduction of Anthurium by dividing the bush
As we already mentioned, home propagation of a plant should be combined with a transplant. The division of the bush must be done during the dormant period of Anthurium - in the third or fourth year of its existence, picking up the time when the plant sheds almost all the leaves. It should be borne in mind that the roots of Anthurium are rather fragile, so the process must be performed carefully and delicately. It is necessary to divide the bush evenly, making sure that roots, buds, leaves are certainly present on the parts obtained.Divided bushes should be planted in the soil prepared above, kept warm and sprayed regularly. Experienced growers advise adding epin. If necessary, after dividing the bush, independent plants can be tied to a support.
In what cases is anthurium grown from seeds
How to grow anthurium at home? Let's describe the most common methods.
Growing from seeds
Growing and propagating by seeds is a rather complex process, consisting of several stages:
- First, you need to pollinate the plant, that is, with the help of a brush, transfer pollen from one flower to another. This procedure should be carried out for several days in a row. But from the moment of pollination to the appearance of fruits, it can take up to a year.
- When fruits appear, let them fully ripen.
- Remove the seeds from the berries and rinse them well in running water.
- To avoid the formation of mold and for disinfection, place the seeds in a weak solution of potassium permanganate for two to three hours.
- Take the foam rubber, wet it, put it in some container and place the seeds in it. Cover the neck with plastic. Instead of foam rubber, you can also use soil, but you should not immerse the seeds deeply, just press them lightly.
- Place the container in a warm place for two weeks and moisten the soil (or foam rubber) regularly.
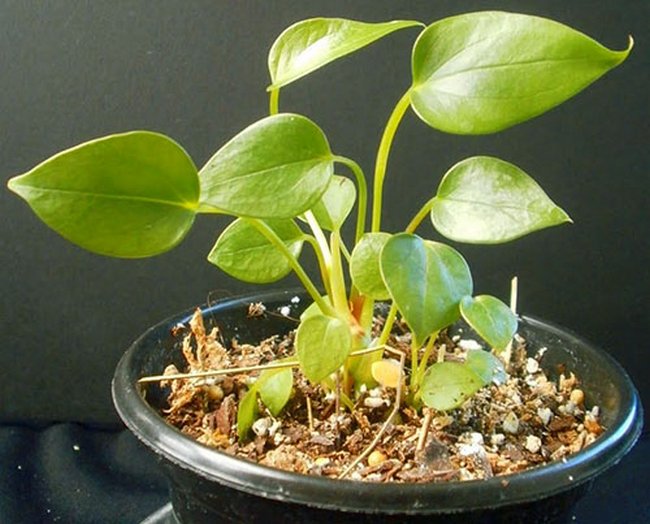
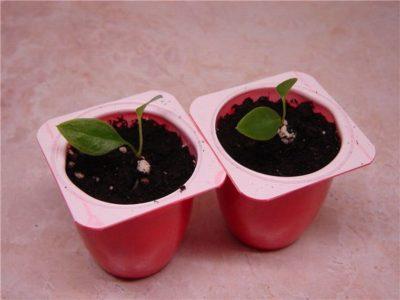
- When the first leaves appear, you need to dive the shoots, that is, plant them in a larger container. The pick is carried out two or three times (after one and a half to two months).
- When 6-8 full-fledged leaves appear, transplant the plant into a separate full-fledged pot.
Using a knife, carefully separate the young side shoot and place it in the ground. Water the sprout regularly, but avoid waterlogging.
For reproduction, the tops of the stem or the so-called aerial roots, that is, pieces of the stem with a part of the aerial root, can also be used.
How to care?
How to care for anthurium? It should be noted right away that such a plant is considered quite capricious, so a lot of effort will be required from you. The most important points are listed below.
The correct pot
The pot should be suitable for the size of the plant. But if you want to stimulate the formation of new shoots, then take a larger container. In a small pots, anthurium will bloom actively. It is advisable to choose a plastic rather wide and low pot
Correct soil
Ideal for the growth and development of anthurium is a slightly acidic soil mixture with a pH level of about 5.5-6.5. You can use a special primer for orchids or aroids. But you can also independently prepare a mixture consisting of two parts of humus, part of leafy land, part of peat and half of coarse river sand. You can also add some broken brick or charcoal, which will increase the air permeability of the soil.
Appropriate place
You can put the plant on the window, but first cover it with curtains or light curtains. But remember that the anthurium does not like drafts, so if you often and for a long time open the doors, then it is better to remove the pot from them. It is not recommended to place the plant near air conditioners and heating devices. And remember that it is poisonous, so keep it away from pets and children.
The optimum temperature for the growth of anthurium is considered to be in the range of 20-25 degrees. But in the cold season, it can drop to 17-18 degrees.
Lighting
Anthurium is a light-loving plant, but it can dry out in direct sunlight, so the light should be diffused, but sufficient. He will also endure partial shade, but will not actively grow. It is advisable to place the pot on the east or west side of your house or apartment.
Air humidity
Like all tropical plants, anthurium loves high humidity.It can be provided with a humidifier or wet expanded clay in the pan of the pot.
Maintenance includes regular watering. It should be carried out in the summer season about once every three days. The top layer of the earth must dry out; waterlogging must not be allowed. In winter, however, you can reduce the frequency to once a week, this is quite enough. The water should be warm (but not hot), as well as settled.
Only the leaves should be sprayed, with the smallest drops and settled water. If moisture gets on the flowers, stains may appear on them. You should also wipe the leaves with a damp cloth or sponge every one to two weeks.
How to feed?
Anthurium should be fed during the growing season about once every two weeks. As a fertilizer, you can use a mixture for aroid or orchids, but the concentration should be minimal.
How to transplant?
The transplant is carried out about once every one to two years if the plant is young, and about once every three years if the anthurium is adult. You can transplant the shoot with soil so as not to damage the roots, but it is advisable to gently shake it off. If some of the rhizomes remain on the surface, then they should be covered with coconut fiber or moss to avoid drying out.
This method of growing plants can be useful when there is a need to get many plants of the same type at a time. Using this method of planting, you can get more than three dozen.
The need to propagate a plant by seeds may arise from private breeders selling anthuriums or in fruit nurseries.
Also, sowing flowers from seeds is required when purchasing them from other cities or countries in order to replenish your collection with new rare specimens.
Breeding work also requires growing anthurium from seed from carefully selected parents.
Preparing for transplant
To transplant a flower, you need a disinfected soil, it can be calcined on a baking sheet in the oven or in a water bath. Anthurium soil is light, loose, always with sand and needles. Best pot - plastic or glass... Anthurium wraps around a ceramic pot and the roots break during transplantation. The inner side of the glass-ceramic pot has a special coating that does not allow roots to grow into the pot; there is always a drainage layer at the bottom.
An adult healthy anthurium is transferred to a larger pot every 2-3 years
When replanting, pruning shears or sharp scissors may be needed to cut rotten roots and separate lateral shoots.
Fungicides and potassium permanganate should be readily available, as the plant may need to be treated. Immediately before transplanting, the flower is watered abundantly separated water at room temperature.
Land and drainage requirements
What soil is needed to plant anthurium? This flower is suitable for a universal soil mixed with coniferous bark in a 1: 1 ratio ... To this mixture, you can add sand, pine needles, a little charcoal and small expanded clay. The main thing is that the soil is light and loose. Expanded clay or shards of broken pots can be used as drainage. If it is not possible to prepare the necessary soil, you can purchase a store-bought soil mixture, however, a good soil requires careful selection.
How to take a stalk without roots for planting?
Stem cuttings are the most suitable for anthurium propagation. At least one growth point should remain on each cutting. The ideal cutting length is 2-3 internodes, or about 12 cm.
It is not necessary to leave the leaves. They do not participate in the reproduction process, but it is imperative to consider before removing them if there were any unhealthy spots and dots on them. Cuttings should be sprinkled with activated charcoal and dried for 1-2 hours in a dark place. This will save them from decay.
It is necessary to harvest cuttings only from healthy plants.
Air humidification
In nature, anthurium grows in tropical forests, so it is important to create an appropriate microclimate for it. It cannot grow and flower in a dry environment. You will need a humidifier or other proven methods. You can adapt a tray with wet expanded clay for such a procedure. Moisture will evaporate from it, but will not get into the pot. The plant will feel comfortable if you regularly spray the air around it. Just try not to get on the leaves, otherwise it will lead to limescale on them. The flower then becomes unattractive.
Proper care after transplant
The first feeding is done 2.5 months after transplanting.... Mineral fertilizers can burn the damaged root system.
Further care consists of moderate watering (waterlogging of the substrate must not be allowed, this will lead to rotting of the roots), sufficient lighting and optimal temperature. Anthurium will not bloom on the north side, it needs more sunlight... Anthurium is native to the tropics, so it needs high humidity. A spray bottle will cope with this, spray the plant at least once a day.

They put the transplanted anthurium in a very bright place, but without exposure to sunlight
It is also necessary to inspect the plant for the presence of pests, feeding on juices, they are able to make the anthurium stop blooming. Daily inspection will allow you to identify in time the reason for stopping growth or flowering and destroy pests.
To maintain health and appearance, an adult anthurium is transplanted once every three years. The most affordable and easy way to propagate anthurium is division during transplantation., the favorable time for transplanting is the spring - summer period.
Anthuriums are one of the most numerous genera in the Aroid family. Today it includes about eight hundred natural species, and breeders have obtained a lot of interesting varieties and hybrids for flower growers. As an indoor flower, anthurium became popular at the end of the last century. Since then, the plant's circle of admirers has only expanded.
The success of anthurium among floriculture lovers became possible not only due to the relative simplicity of content, spectacular flowering and decorative foliage, but also the ability to propagate a plant you like at home, root a stalk or rejuvenate an existing flower.
Most often, flower growers use vegetative propagation methods, and take as planting material:
- cuttings with aerial roots;
- the whole top of the plant;
- stem offspring.
Anthurium can also be propagated by seeds, but this is more laborious and time-consuming work.
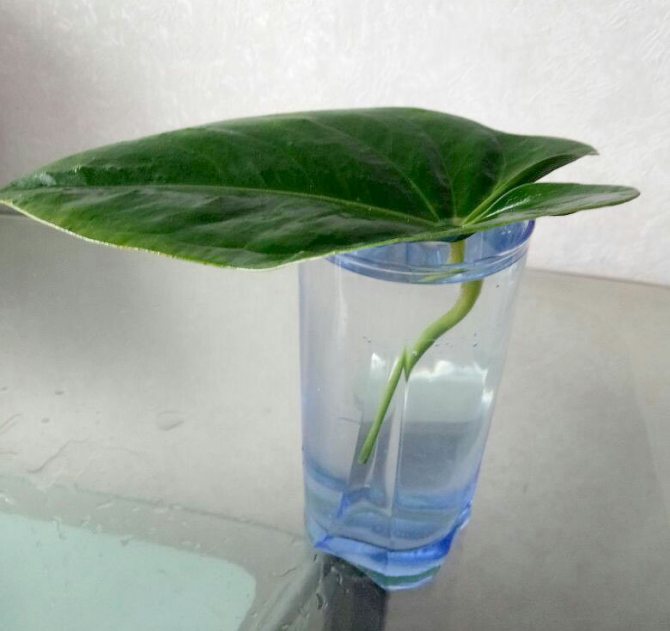
Sheet
- The leaf is taken with a stem fragment and an aerial root.
- The sheet rolled into a tube is planted in such a way that only a third of the sheet is above the ground surface.
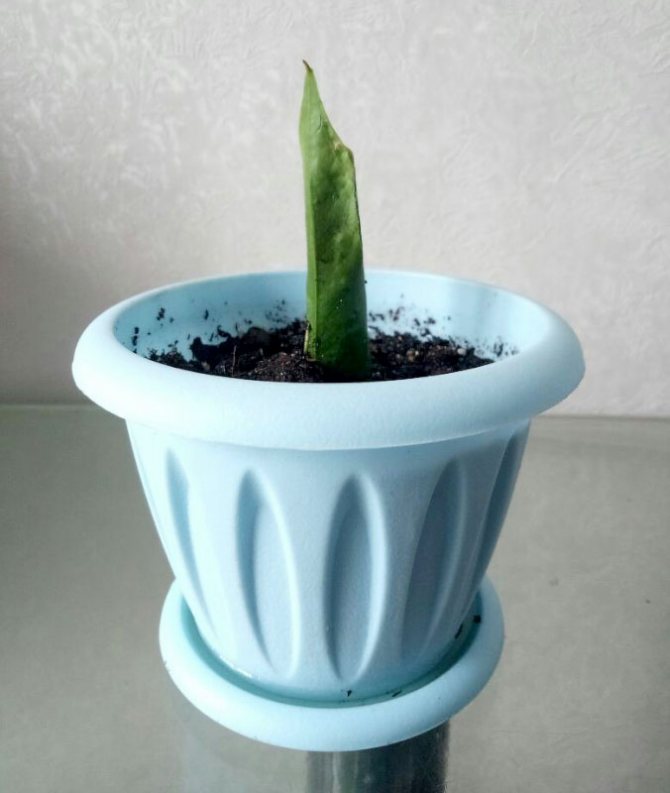
Approximately in a month (subject to all conditions) a sprout will appear from the center of the tube.
Attention! When a flower is propagated by a leaf, the probability of successful rooting is small.
Rooting stem cuttings
To propagate anthurium by cuttings, take an apical cutting with one leaf and several air roots. This shoot takes root very quickly. Rooting is carried out in the same way as with the help of lateral shoots. The method is described in the previous paragraph.
The apparent advantage of anthurium is the simplicity of reproduction and the unique survival rate of the species.
In the natural environment, anthuriums are most often epiphytes. This indicates that any vegetative part of the flower is capable of reproduction.
They quickly build up lost parts, making the plant very accessible for breeding. Home breeding is almost no different, so it is possible to get a new plant in any way:
- divide the bush;
- propagate lateral processes;
- cut the apical cuttings;
- separate cuttings that have aerial roots;
- sow seeds;
- you can even try leaf propagation, but this is not possible for all members of the species.
You can even grow a flower with only a part of the root, if you have at least a piece of the stem. The most suitable method is chosen for each type. With vegetative reproduction, a significant plus is the ability of a new individual to retain all maternal traits, even in hybrids.
For the normal development of a flower, it is necessary to carefully approach the soil composition. For its maintenance, earth is needed with a well-pronounced breathable effect, rich in trace elements. A prerequisite is the acidity level not lower than 4.5.
The trading network has ready-made substrates for Aroids and various epiphytes. But it is not at all difficult to prepare such a composition yourself. To do this, take:
- in equal parts - coniferous litter, sod land and peat mixture;
- river sand or other suitable material for better breathability - half as much. Shredded bark, sphagnum or coconut fiber may work for this.

It is important to carry out heat treatment or treatment with a bright pink solution of sodium permanganate. This will get rid of the possible entry of fungal spores or other pathogens into the soil.
Planting pot
The choice of a pot for anthurium must also be approached responsibly. In a container that is too large, the plant will not bloom. It will build up the root mass.
It should also be noted that anthurium roots can easily grow into the walls of a clay pot. Therefore, care must be taken that the container for planting has material that is strong enough.
Experts recommend choosing the volume of the container in such a way that the root system gradually takes up all the available space, braiding the entire earthen lump. This is the condition for the formation of buds.
A prerequisite is a thick drainage layer in the pot (30% of the volume). Large expanded clay is very good in this quality, which, when moistened, absorbs and retains water well.
If comfortable conditions are created for the flower, then this becomes clear by the rapid formation of lateral processes. This is the most accessible material for further propagation of the bush. In this case, you just need to remove them without injuring the fragile roots of the mother plant. It is best to carry out this procedure during the transplant.
In this way, it is possible not only to rejuvenate the old bush, but also to obtain young seedlings ready to bloom a year after transplanting to a new place.
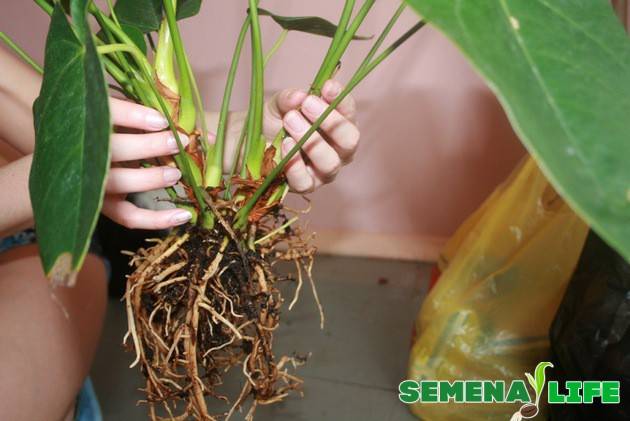
Step by step algorithm:
- the soil in the container is thoroughly spilled with water;
- remove the bush by turning the container over;
- clean the root system of old soil and remove darkened, rotten and dead roots with a sharp tool. Leave healthy and young roots, the color of which has a lighter shade;
- injured areas are treated with garden pitch or crushed coal;
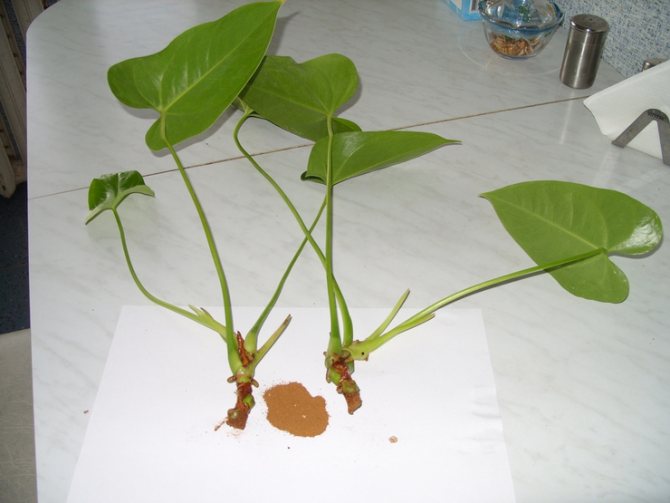
New lateral processes are well distinguishable, they have roots and leaves that form from the growth bud. Therefore, such children can be easily separated from the bush by cutting them off with a knife.
After that, they are planted in new containers, as independent plants, without filling the growth point.
Watering is carried out only on the fourth day, so that the “kids” do not start to rot in a too wet substrate.
If for some reason it was necessary to plant a flowering bush, then the flowers must be removed in order to facilitate survival.
This method is most popular in anthurium breeding. Thus literally any part of the bush reproduces.
Leaf cutting for propagation can be taken from representatives with dense, leathery leaf plates, or with prominent veins. To do this, cut the petiole from the selected sheet, leaving five centimeters.
Thereafter:
- fold the sheet vertically and tie it with a thread;
- they bury it in a moist substrate of sand and peat by 2/3;
- cover the container to make a greenhouse.
For germination, the structure is placed in a suitable place on the windowsill, not forgetting about the daily ventilation and moisture of the soil.
After about a month, a new sprout will erupt from the leaf, which is an independent plant.
This is an extremely simple method as the plant already has a root system.
The algorithm is as follows:
- cut off a stalk equipped with a pair of leaves and a root system;
- leaf plates are removed so as not to interfere with the formation of new roots;
- the cutting is planted in prepared moist soil so that the growing point is not covered with earth;
- cover the seedling to create a greenhouse effect and locate it in a suitable rooting site.
The same procedure can be carried out in a jar of water by adding a crushed coal tablet there.
This is the most popular breeding method. To do this, cut off the top with a height of 12 centimeters, which has at least two sheets. The cuttings are slightly dried and placed in a moist substrate, providing the maximum greenhouse conditions.
Within a month, the seedling can be transplanted to a permanent place.
The sections on the mother bush are treated with crushed charcoal or another disinfectant. You can use all available drugs: potassium permanganate, brilliant green, ground cinnamon.
By dividing the bush
Since the bush must be transplanted every three years, the separation of the roots has a sanitary and rejuvenating effect. And at the same time, young delenki are separated, having roots and a growth bud.
To propagate an indoor flower at home by cuttings, it is required to use stem cuttings, which take root quickly enough and, subject to the technology, after about a week, it is possible to get the first high-quality roots:
- separation of one leaf with a piece of stem part 60-80 mm long and the presence of a growth point;
- drying the cuttings at room temperature for a maximum of a quarter of an hour;
- placing the prepared cuttings in a container with water or in compressed and well-moistened sphagnum moss;
- cover the rooted planting material with plastic wrap and place in a sufficiently warm place.
After the rudiments of the root system of the ornamental culture are formed, the young plant can be transplanted to a permanent place.
Like most other plants, anthurium can be propagated by cuttings. Under indoor conditions, its apical cuttings root easily and quickly. The main thing is to follow the rules:
- Harvest planting material only from healthy plants.
- Each cutting must have an intact growing point.
- The optimum length of cuttings is no more than 2-3 internodes.
After cutting the cuttings, it is recommended to dry slightly for 10-15 minutes. During this time, a corky layer forms on their lower cut, which prevents subsequent rotting of the sprouts.
At home, when propagating anthurium by cuttings, depending on capabilities and preferences, one of the methods is used to root the shoots.
- In water. With this method of rooting, the cutting is placed in a container with cooled boiled water, on the bottom of which a piece of charcoal is placed. Water, as needed, will need to be added to the container. After the first roots appear, the cuttings are immediately planted in the soil mixture.
- In the substrate. For rooting according to this method, immediately after drying, the cuttings are planted in a mixture of peat, sand and perlite taken in equal proportions. Planting depth should be no more than 5cm. Top cuttings are covered with a glass jar or transparent bag. Their rooting period is on average 2 to 3 weeks.
- In moss. You can also root planting material in moss.To do this, the cuttings are placed in plastic containers filled with moist moss. The peculiarity of this method is that instead of traditional pots, you can even use a plastic bag for rooting. It is simply hung in a warm and bright place.
Above, the most common methods of breeding indoor anthurium were considered. Not all growers know that some types of this plant can be grown even from one single leaf.
The flower is propagated by stem (apical) and leaf cuttings. Cutting "male happiness" is best done in May - June.
Reproduction of anthurium by a leaf: step by step
- Cut a leaf with a petiole about three cm in length, twist it into a tube, and tie it with a thread, elastic band to reduce moisture evaporation (transpiration).
- Treat the leaf cutting with "Kornevin" and plant it in moist soil (peat and sand or leafy soil - 1: 1). Water it lightly and cover the container with a plastic wrap, bag, or jar.
- Maintain 20-24 ° C warm, ventilate and spray the cuttings daily.
- After a new leaf appears (which means it has taken root), transplant the cutting into a separate container (30-40 days).
- It is better to take a piece of the stem with a leaf and an aerial root, it sprouts faster and takes root more often.
- In general, a low percentage of successful rooting is observed during the propagation of "male happiness" by the leaf.
Reproduction by apical cuttings is closely related to the theme of flower rejuvenation, therefore this method is described in detail in the next section.
Over time, "male happiness", even with proper care, is gradually aging and loses its decorative effect. Different species and varieties begin to need rejuvenation at different ages, and this moment is determined by their appearance.
What is the best time of the year to propagate "male happiness"?
How does "male happiness" multiply? The period from April to August is most favorable for flower reproduction.... This is a period of active growth and the plant reproduces more easily, survives stress and takes root faster.
- Reproduction by dividing the bush of an adult plant is recommended in spring, from March to May.
- February is favorable for propagation of plants by cuttings. Just before the period of active growth, you can root the cutting.
- Seeds for seedlings are sown in February.
Major mistakes
If, after breeding, young anthuriums grow luxuriantly, but flowering is completely absent, then the reason may be planting in a nutrient mixture with an excessive amount of nitrogen-containing fertilizers. In this case, it is recommended to transplant a young plant into a substrate with a poorer composition based on non-acidic peat, medium-grained sand, crushed tree bark and expanded clay. After transplanting, it is advisable to use potassium-phosphorus fertilizers.
Quite often, after planting rooted ornamental plants, yellowing and browning of the tips of young leaves is observed, which is the result of the location of the culture in direct sunlight, but it can also be caused by exposure to drafts.
Propagation by cuttings
The most favorable breeding season for anthurium cuttings is late spring or early summer. To obtain a cutting, a stem with a height of at least 12 cm, with two leaves, is chosen. To obtain a cutting, a leaf is cut with a part of the stem. Only healthy leaves without damage are considered suitable for cutting.
Cuttings are harvested as follows:
- The leaf is cut off with a part of the stem from the bottom by 6-8 cm, the leaf plate is discarded.
- The place of the cut on the plant is burned with brilliant green or sprinkled with crushed chalk. Ash can also be used.
- Prepared cuttings should be dried in the open air for 12-15 minutes.
- The cuttings are planted in a small container filled with sand mixed with peat chips in a 1: 1 ratio. A drainage hole must first be made in the container.
- To accelerate root formation, the cut must be treated with a powdery root stimulant.
- The soil must be dry.
- You need to deepen the cutting by 4 cm.
- The container must be covered with a plastic bag.
- The room temperature should be + 26-28 degrees, humidity 80%.
- It is necessary to moisten the soil every 2 days.
- Roots will begin to form after 7 days.
- After a month and a half, when the roots grow 2-2.5 cm, the anthurium should be transplanted into the soil intended for adult plants.
Video: reproduction of anthurium by cuttings
You can also germinate cuttings in water. The water should be warm, you need to change it every day. Root activator solution can be used instead of water.
Seed propagation
It is possible to propagate anthurium by seeds, but it is quite difficult, therefore, this method is used when it is necessary to obtain unique hybrid forms with the same coloration. The maximum shelf life of seed is approximately three months, after which the germination rates drop sharply.
Sowing of anthurium seeds is carried out in a flat planting container filled with peat soil. On the surface of the moistened soil, you need to spread the seeds and cover with a layer of soil no more than 2-3 mm thick.
Watering is carried out by irrigating the soil with settled water at room temperature from a household spray bottle. The container with crops must be covered with glass or plastic. Even with the observance of the technology, seedlings appear quite unevenly, about. After the first leaf appears on the shoots, you need to remove the shelter from the crops. Seedlings with three true leaves can be transplanted to a permanent location.
Ready-made soil soils sold in flower shops are extremely rarely suitable for growing a flower. You can use nutrient substrates that are intended for growing epiphytic plants or make a soil mixture yourself by mixing one part of sod land, one part of coarse sand and three parts of leaf humus with charcoal. A good result is obtained by combining land for cultivating azaleas with peat chips, crushed pine bark, expanded clay and sphagnum moss.
Transplant during illness and during flowering
There are several factors that affect the appearance of a plant. First of all, it is the soil. Too heavy or waterlogged soil can lead to the death of the plant... Necessary urgent transplant.
When transplanting anthurium, all damaged roots should be cut off.
The roots freed from the soil should be examined for rot, cut off the affected parts with a disinfected knife, dip the cuts with root. For prevention, you can treat the root system with a fungicide... Yellowed or dying leaves are removed.
Anthurium is a strong enough flower, therefore his well-being will not be affected by a transplant during flowering... It is enough to correctly and carefully treat the roots of the plant and observe rest for several days after transplanting.
Advantages and features of vegetative reproduction of anthurium
The main advantage of vegetative reproduction of anthurium is the ability to get a strong plant ready to bloom in the shortest possible time. At the same time, the new specimens will completely repeat the features of the parent plants, that is, neither the shape of the leaves, nor the shade of the inflorescences will differ from those already available in the collection of anthuriums. This is extremely important if you are going to get offspring from a hybrid.
Anthuriums, in nature, for the most part, are epiphytes, quickly give powerful aerial roots, which they use when rooting stem cuttings, lateral offshoots and layering.
In addition, in the two or three years that pass between transplants, the bush grows seriously, and if you plant an anthurium flower, you can get from 2 to 5 independent plants. Such a measure should not be neglected, since it only benefits the anthurium and has a beneficial effect on both its growth and the quality of flowering.
Land selection
The land for planting a flower must meet the following requirements:
- Lightweight and breathable.
- Slight acidity.
- The ability to absorb moisture.
- The composition should include: high moor peat, coarse sand, leaf humus, sod land.
Before planting properly, the soil requires the following preparation:
- The soil must be steamed for disinfection.
- Soak in potassium permanganate for a few minutes.
- Dry to light moisture.
Pot selection
Material
Anthurium prefers plastic or glass, since these substances are not hygroscopic, and, therefore, do not allow air and heat to pass to the roots (there is no heat during the day, and the soil remains long at night), unlike natural materials.
The size
The pot for anthurium should not be spacious, since its roots will develop freely without intertwining in a cramped container, and the plant will be busy developing new lands, and not flowering. The pot should be wide: aerial shoots require access to the ground for rooting.
In appearance, the anthurium container should resemble a bowl - shallow and wide. A prerequisite: the presence of drainage holes and drainage material (expanded clay), which will fill the pot by a quarter of the volume. For a young plant, you can take a pot with a diameter of 8 - 10 cm.
Preparing seeds for planting
To prepare the seeds for this complex process, it is required to thoroughly knead the ripe fruits and extract the seed from the pulp. Rinse it thoroughly and treat it with a weak solution of potassium permanganate.
Treatment with this drug is required in order to avoid the formation and negative effects of mold on anthurium seeds and their rotting, since they are not bugged before sowing.
If you are a breeder or a novice amateur florist, or maybe you just want to get children from your favorite plant, the following material will help you in this endeavor. An important nuance is that the seeds themselves will never appear on the inflorescence of the plant. In the natural environment, pollination occurs thanks to various insects that fly from flower to flower and carry pollen.
Since these insects are not found in the apartments in the required quantity, their work will have to be done independently. You will need a soft brush or feather to gently brush over all the cobs of the plant. This procedure should be repeated within two to three days, since the maturity of each flower occurs in a different period of time, moreover, for a long time. Therefore, in order to be sure that the stamens and pistils of all inflorescences are ready, pollination is required for several days.
Engaging in this process, you should make sure that the plant has enough daylight, so it is better to spend it on a clear warm day.When the event is successfully completed, you can observe the appearance of berries on the inflorescences, which are nothing more than capsules for the seeds that have begun to form. The number of these berries depends on the species to which the anthurium belongs. One ear can have from thirty to several hundred berries.
The ripening period depends on the conditions in which the plant is kept, as well as on the variety to which it belongs, but in any case, this process takes time. In some species, it can take up to 12 months. You can understand that the seeds are ready by separating the berry from the inflorescence, from which it separates, remaining hanging on practically invisible stalks.
Ripe bolls should be removed from the plant and crushed.Then rinse in room temperature water and pass through a sieve to filter out the pulp. The remaining seeds should be soaked in a weak solution of potassium permanganate for 3-4 hours, then dried so that they do not have time to harden.
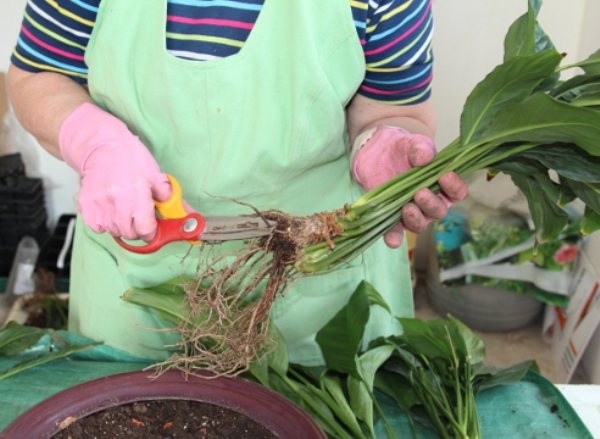
Reproduction by dividing the bush
Reproduction of anthurium by dividing the bush is applicable only for adult plants at the age of at least 3 years. This method makes it possible not only to propagate this species, but also to rejuvenate the plant.
It is recommended to carry out this procedure at the time of the planned transplant, that is, at the beginning of May. The bush is divided as follows:
- The plant must be watered abundantly 30 minutes before transplanting.
- Remove the plant from the flowerpot. It will be easier to do this by tapping lightly on the sides of the pot.
- Gently shake the soil off the roots.
- The roots must be carefully untangled by hand, as they are extremely fragile.
- When dividing, it is necessary that on each separated part there is a growth point and the presence of one leaf. The roots should be well developed.
- Sprinkle the cut points immediately with crushed chalk or cinnamon.
- Remove dry or rotten roots and leave the plants outdoors for an hour to allow the slices to dry.
- Plant the plants in pots at the same depth at which they grew earlier.
- It is necessary that the roots are well covered with soil, since uncovered roots will cause disease and death of the plant.
- If the flower needs support, then you need to install it in the pot before the plant is transplanted, and not after it.
Video: reproduction of anthurium
How to care for anthurium (video)
- a guarantee of good growth and development of decorative indoor culture is the creation of optimal, sufficiently high humidity indicators at the level of 70-80%;
- it is possible to increase the humidity in the anthurium growing room by regularly moistening the foliage with a damp cloth, spraying the leaves with settled warm water and weekly showering;
- feeding the indoor flower with fertilizers is especially important at the stage of active growing season, introducing nutrient compositions a couple of times a month;
- in the spring, it is advisable to feed the plant with fertilizers for growing indoor decorative deciduous plants;
- in the summer, preference should be given to feeding anthurium with special fertilizers intended for decorative flowering crops.
It is important to note that the most common diseases affecting indoor anthuriums in home floriculture are chlorosis, stem rot, plant pox, anthracnose, leaf bronzing virus, enations, septoria and fusarium wilting. To reduce the risk of damage to a fragile young ornamental culture by pathogenic microflora, it is necessary to observe all agrotechnical techniques at different stages of the plant's vegetation.
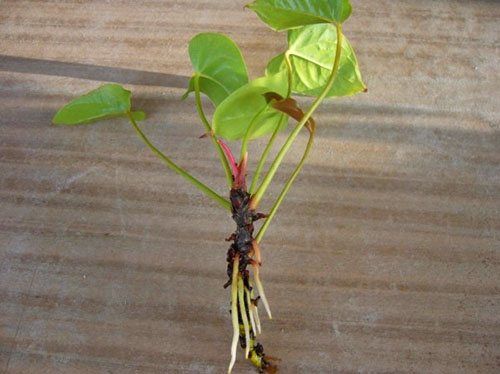
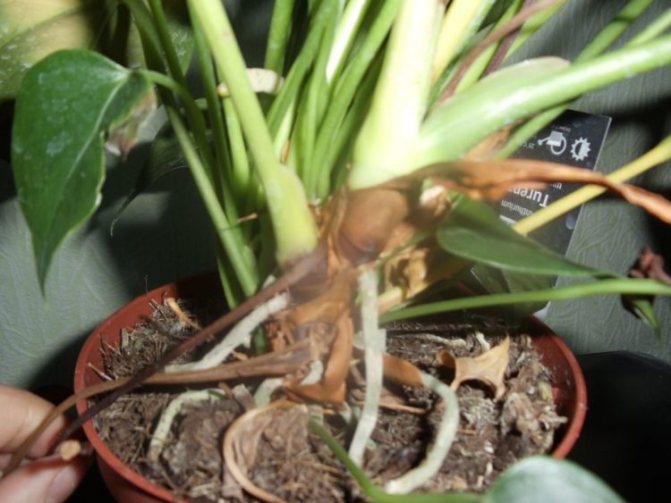
Photo
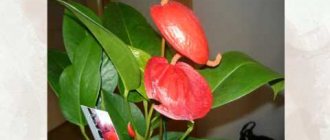
In the photo you can see what an anthurium flower with aerial roots looks like.
How is planting with a shoot without roots
It happens that the shoot was separated from the mother plant unsuccessfully, the roots broke off, became weak or severely damaged.
Phalaenopsis reproduction at home: examples by children and cuttings
Before planting such shoots in a separate pot, you should try to root them in wet moss, perlite or sand.
Important! A prerequisite for rooting is placing the plant in a mini-greenhouse. In order for the shoot to take root, and the root system to develop well, high temperature and humidity are needed. Options include a plastic bag that holds the scion in a container, a plastic container with a tight-fitting lid that has been used for food purposes, or just a cut bottle.
The greenhouse lid should be opened daily for airing so that the plant does not rot. When the roots appear, the greenhouse is removed, and the shoots are planted in a pot.
Rootless sprouts
Further care of crops
For a plant such as anthurium, seeds should be sown in large, but not deep pots. Suitable soil can be purchased at the store or made on your own, the main thing is that it is sufficiently loose, light, allows air to flow well to the roots and retains moisture. The ideal option would be if you pierce the soil in the oven or scald it with boiling water for disinfection.
The easiest way to prepare a soil mixture is to mix leafy soil, river sand and peat in equal portions. If necessary, the sand can be replaced with sphagnum moss or a natural mineral substrate (perlite). During sowing, you can use the following tips:
- Pour the potting soil into the prepared pot.
- Water the soil with soft, settled water with the addition of a small amount of potassium permanganate.
- Spread the seeds on the surface of the soil, at the same distance from each other.
- Using your finger or a spoon, gently press the seeds into the ground, but not deeply.
- Create greenhouse conditions for future plants by covering the pot with a transparent film to preserve soil moisture.
- Place the container in a warm and bright place, while the temperature in the room should be between 20 ° C and 22 ° C.
The higher the temperature in the room, the faster the change will hatch. However, heat exacerbates the risk of seed rot. If the temperature is above 22 ° C, the appearance of the first shoots can be observed after a week, however, mass growth will not be earlier than in 14 days.
If you create a heat deficit for anthuriums, then the first shoots will not be earlier than in 30 days, while most of them will most likely die. Keep in mind that the homemade greenhouse should be aired daily until the seeds are cursed, and the soil should not be too damp.
After the first shoots appear, you should not move the container to any other place, it is important to keep it there, while making sure that the light is bright and diffused. It is also very important to protect children from direct sunlight. Young anthuriums grow very slowly at first, so they should be watered with well-settled water using a spray bottle.
As soon as the shoots release the first leaves, a dive should be made. However, it is better to plant anthurium in spacious bowls, so that there is at least 3 cm of free space between the plants. Do not plant young plants separately, as anthuriums will develop faster in a common container.
Re-picking into individual flowerpots can be done after one and a half to two months. Its dimensions should still be left shallow. The ideal option would be a size not exceeding 1/4 liter. During the repeated picking, you can change the composition of the soil, for example, when making it yourself, you should be guided by the following scheme: mix peat, crushed bark of coniferous trees, leafy earth (humus) and river sand in the following proportions: 1 / 0.5 / 0.5 / 1.5.
Particular attention should be paid to the drainage layer, since anthuriums do not tolerate stagnant water. After the last transplant, the soil should be enriched with mineral fertilizers at least twice a month.
When is the best time to propagate?
Transplanting an adult plant and, therefore, propagation by shoots is best done in April - August. Spring and summer are the optimal times for vegetative propagation, as the plants are full of vitality, actively develop, the air temperature is high enough, and plenty of soft sunlight. During this time, the seedlings will be able to take root and get stronger.
If a forced plant transplant is carried out in winter (plant disease, after purchase), then, therefore, it is necessary to separate the processes.But it will be much more difficult for them to take root, there are high risks that the young plant will die.
Sowing seedlings
The most difficult way to reproduce anthurium is sowing seeds. If you decide on it, then get ready for a complex and lengthy process. Lovers of indoor plants will find it interesting and informative. Anthurium seeds are sold by collectors and distributed by specialist shops for florists. When buying planting material, pay attention to the packing date. The fact is that after 3-4 months the seeds may lose their germination.
If you can't get quality material, you can try pollination of your own plant. When the anthurium begins to bloom, collect the pollen from the cob. Wrap it in a paper bag and place it in the refrigerator. After another flower has bloomed, use a brush to gently transfer the pollen to its ear. Repeat this procedure for 5 days.
You can also use the self-pollination of the flower. After a week or two of blooming, run your hand down the cob and then up. When the seeds are ripe, collect and dry them. Better to sow them immediately after harvest. They will rise rather quickly. Within a week, the first shoots may appear on the soil surface. Do not forget to water the young seedlings on time. With the appearance of the third true leaf, pick the seedlings, transplant each rosette into a separate glass. Plant seedlings in the same substrate as for an adult anthurium. If you follow all the recommendations for the reproduction of anthurium by seeds, you will achieve a positive result.

Step-by-step instruction
- Remove the plant from the old pot.
- Soak an earthen lump in water for 5 - 10 minutes and separate it from the roots.
- From the outside of the bush, carefully separate the lateral process with a sharp knife from the mother plant.
- Sprinkle the cut sites with crushed activated charcoal or charcoal.
- Plant an adult plant in a pot, filling the resulting void with soil.
- Plant the shoot in a separate pot, without necessarily burying the growing point in the ground, and take care of it like an adult plant.
How to care after?
Caring for a young plant is very simple and consists of several rules:
Soil for anthurium
It is best to prepare the soil yourself. There are several cooking methods.
Method 1:
- peat - 4 parts;
- sod soil - 2 parts;
- washed river sand with the addition of bark — 1 part;
- chopped moss — 1 part.
Method 2:
- sheet soil - 2 parts;
- peat - 1 part;
- coniferous soil - 1 part;
- humus — 1 part.
Method 3:
- river sand - 0.5 parts;
- peat - 1 part;
- sheet soil - 1 part;
- humus — 2 parts.
Conditions required for indoor growing
Like all tropical plants, anthurium prefers high humidity, a warm location, and bright, diffused light. The soil is needed loose, water-absorbing, with the addition of vermiculite, crushed bark, coconut fiber or sphagnum moss.
The drainage layer should be at least 1/3 of the pot - this will protect the plant from root rot caused by moisture retention. Watering with settled, soft water is regular, especially in the summer months. For long-term flowering, anthurium needs fertilizing - once every two weeks, it is necessary to apply diluted micronutrient fertilizers for flowering plants on wet ground.
The secret of successful independent reproduction of anthuriums is not only the correct implementation of the procedure for obtaining a young plant, but also competent further care, including proper lighting, adherence to high humidity, providing the plant with a high-quality substrate and constant heat, as well as timely and high-quality transplantation of an ornamental culture.
Features of flowers
How to transplant Anthurium?
The basis for transplanting anthurium is filling the entire space of the pot with roots, poor soil or diseases of the root system. If the anthurium looks sluggish, sheds its leaves or refuses to bloom, this is a reason to think that you need to take care of the plant, a transplant will help.
The most favorable period for transplanting anthurium, like other potted plants, is April-August ... During this period, active growth occurs, so the culture is more likely to survive the stress received from the transplant.
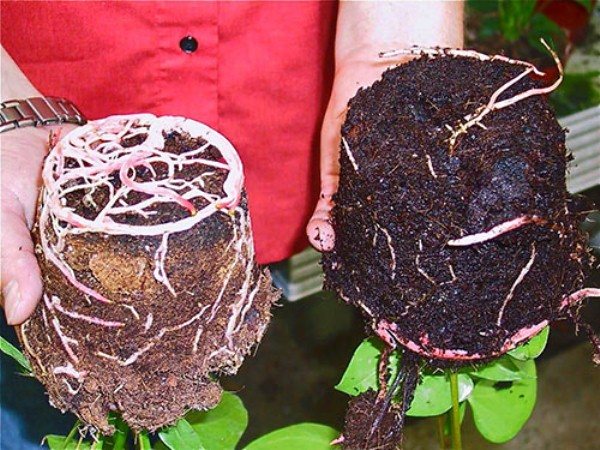
In order not to damage the root system during anthurium transplantation, the plant is abundantly watered before the procedure.
Anthurium transplanting is most often a transfer to a more spacious pot. If the plant was purchased at a store, then the substrate needs to be changed.
Transfer begins with wateringthis will keep the roots from breaking.
The pot should contain drainage and soil, place the bush in the center of the pot, fill and crush the earth. It is best not to buy a pot that is too loose, as the root system must fill the pot for growth and flowering.
During transplantation, you need to completely change the old substrate to a new one, at this moment the anthurium can be planted.
After transplanting, the flower must adapt, three to four days you need to keep anthurium in a dark place, then put on a permanent place. Anthurium needs a bright, well-lit place, but without direct sunlight.
Disadvantages and advantages of this method
The main advantages when growing anthurium from seeds have already been indicated in the previous subheading. Summing up, we can say that this method of reproduction comes to the rescue when other methods for one reason or another are not suitable. However, in addition to the advantages, this method also has some disadvantages. Such as the:
- seeds that are ordered from other countries, in most cases, may be of poor quality, moreover, they quickly lose their germination;
- in order for indoor flowers to grow from seeds that have not lost the characteristics of the mother plants, seeds from varietal specimens should be used (seeds from hybrids are not able to accurately produce an analogue of the mother plant);
- this method of obtaining offspring is quite energy-consuming, and also requires a lot of time.
Please note that the flowering of seedlings occurs when the plant reaches the age of two, while specimens propagated by cuttings are able to bloom during the first year of life.
Young plant care
Good care - will provide the plant with flowering throughout the year. Most varieties of anthurium are capricious. These are epiphytes, therefore they require special conditions and careful care.
Temperature
Anthuriums require evenly warm maintenance throughout the year. The plant does not tolerate drafts. In summer, the optimal temperature regime should fluctuate from 20C to 28 ° C, and in autumn and winter, it is best to keep it at a temperature of 15C to 16 ° C, not lower. Only hybrid varieties of anthurium, when flower buds are laid, need a temperature of 12 ° C during this period. Simultaneously with a decrease in temperature, watering should be reduced.
Lighting
Culture prefers lighting with diffused light, or rather partial shade, and the bright sun can burn it. Anthurium must be protected from sunlight. The best for these plants is a window facing the east or northwest side.
Air humidity
Anthuriums require high humidity: at least 85%.
With high dryness, the culture begins to hurt. Therefore, in dry weather, it should be sprayed more often, and the stems should be covered with moisture-saving materials. It is also necessary to remove dust from the leaves with a soft sponge dipped in warm water. During the flowering period, spray should be done with caution. Water should not come into contact with flowers, buds and leaves, so as not to impair their decorative effect.
The culture also requires abundant watering - drying out the soil in the pot is unacceptable, and in the fall watering should be reduced to ensure lush flowering. For this purpose it is necessary to take rainwater. Tap water needs softening. But it should be remembered that excessive watering and highly moistened soil can lead to rotting of the roots, and in the future, the death of the plant.
Transfer
It is best to replant plants at the very beginning of the active growing season. In this case, care must be taken when handling leaves and rhizomes.
- Each bush is planted a little deeper than the level at which they grew before.
- In this case, the pot can be left the same, but the soil needs to be enriched.
- After planting, the soil needs to be compacted a little. And in order to maintain air access to the rhizomes, a drainage layer is made at the bottom of the pot.
- The bushes are placed in a warm room and tied to a support, if required.
- For anthuriums, use spacious plastic pots, tiled in this case are not suitable.
A loose, moisture-permeable soil substrate with a weak pH reaction is most suitable for this plant. The mixture should be composed of large components, but it is good to hold the bush, as well as retain moisture, at the same time it dries easily and allows air to pass through. The mixture should not become compacted. The mixture should contain two parts of peat, the same amount of deciduous soil and one part of turf.
Fertilizer
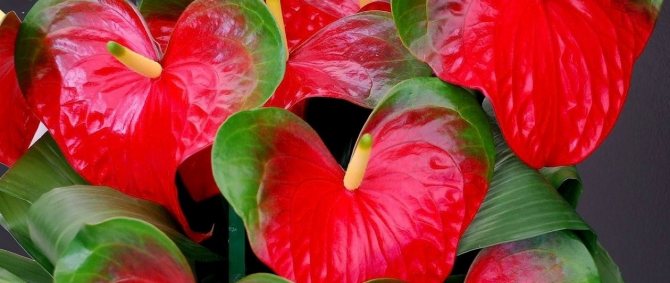
Top dressing is added to the soil, for this culture, in spring and summer at least once every 20 days. But you should not overfeed the plant, since chokeberries are sensitive to excess salt and lime. As a fertilizer, azofoska is most suitable, where potassium humate is added. If such top dressing is not available, rotted leaves or manure that is half-matted can be used.
Standard care for a young, newly planted plant is very simple, but it involves observing the following rules:
- along with other tropical inhabitants, anthuriums need sufficiently bright, but diffused lighting;
- do not allow direct sunlight to hit the aerial part of the plant, therefore it is best to place the decorative culture indoors on windows facing the west or east side;
- when placing a flower pot with a plant on the southern windows, artificial shading is used with light curtains or a self-made gauze screen;
- anthuriums grow and develop very well when placed on stands for flowers, standing at a distance of a meter from the southern windows, covered with tulle curtains;
- anthuriums with decorative foliage have sufficient shade tolerance, therefore, even when located on northern windows, they develop quite well;
- in winter, with insufficient natural lighting, anthuriums may need to organize additional lighting with a phytolamp with a power of 25-35 W;
- in spring and summer, it is recommended to provide the decorative culture with a temperature regime within 20-25 ° C, and in the autumn-winter period, the temperature should not fall below 18 ° C;
- anthuriums do not tolerate even a slight draft, therefore, when choosing a location, this fact must be taken into account;
- when growing anthurium, the plant needs to create an optimal level of humidity and strict adherence to the irrigation scheme;
- watering should be abundant, but not too frequent, and on hot days it is required to water the plant about three times a week with warm and settled water;
- all excess water accumulated in the pan after watering must be drained off, since stagnant moisture in the soil of the flower pot can cause rotting of the root system;
- for irrigation measures, soft and warm water is used, and tap water must be defended for a couple of days and softened with a few drops of citric acid;
Growing with seeds from China
Before ordering seeds, carefully read the product and seller reviews. It should be borne in mind that anthurium seeds remain viable for a short time, so find out when the seeds were collected.
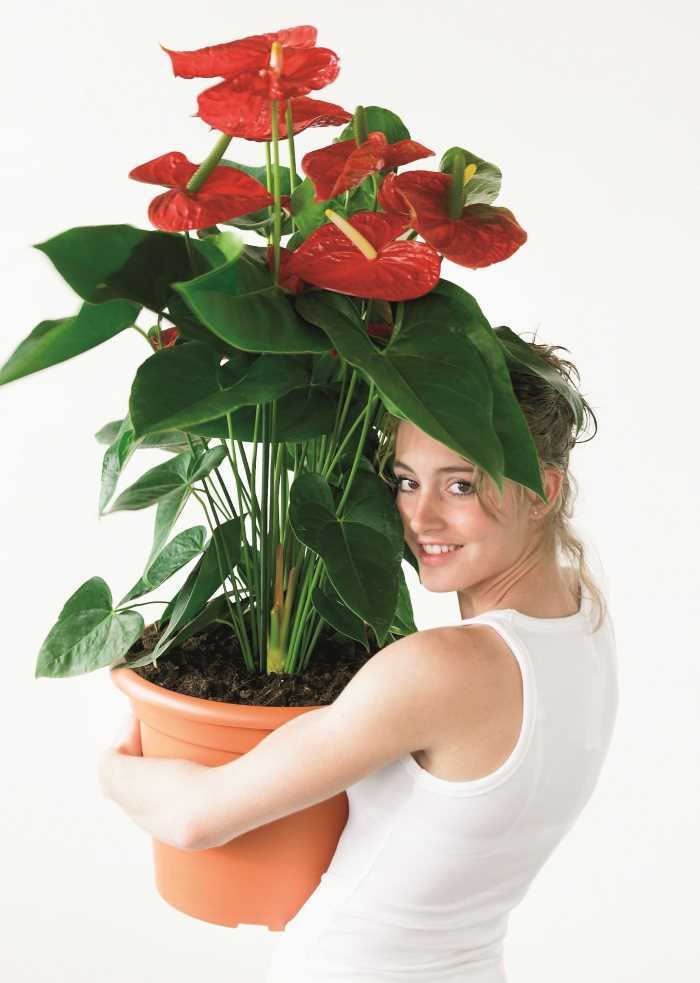
After receiving the seeds, before planting, they must be pre-soaked for 20 minutes in a 1% solution of potassium permanganate for disinfection. Prepare the soil for planting:
- pine soil;
- peat;
- shredded moss.
Mix all ingredients in a 1: 1 ratio and add 3 parts of gravel to this mixture. Seeds germinate better in coarse soil with drainage.
Moisten the prepared soil, spread the seeds on the surface and press lightly into the soil. You do not need to sprinkle seeds on top. Cover the container with glass or polyethylene and leave for two weeks in a room with a temperature of + 22-24 degrees. After 14 days, when the first shoots appear, the glass must be removed.
Video: experience of purchasing anthurium from AliExpress
If the sprouts have 5 sheets, they must be planted in separate containers with a volume of 150 ml. When the sprouts grow to 7 cm, they must be transplanted into a 200 ml container.
It is not recommended to plant seeds in large containers. This will significantly slow down the growth and development of the plant.
How to plant anthurium?
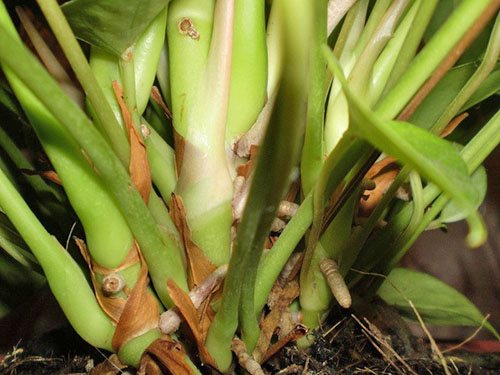
The division of an adult plant allows to rejuvenate the anthurium of many spectacularly flowering and decorative-deciduous species, as well as to maintain its external attractiveness. The best time for this event is a transplant periodically held in the spring, from the second half of February to May.
To separate the plant, you need to prepare in advance:
- a sharp knife treated with alcohol or a strong solution of potassium permanganate;
- loose soil mixture suitable for the growth of anthurium and disinfected in advance;
- material for arranging the drainage layer, for example, small expanded clay;
- containers with drainage holes for young seedlings.
Before planting anthurium, the plant must be removed from the pot, trying not to damage the roots. To do this, the earthen lump is watered abundantly so that the moisture soaks the entire soil. Then, having crumpled the pot, the anthurium flower is removed and the substrate trapped inside the root bundle is cleaned from the roots.
If the anthurium blooms at the time of transplantation and separation, it is better to cut the flower stalks in order to facilitate the adaptation period for the plant and reduce the loss of strength and moisture.
The same is done with tall shoots, which can later also be used for flower propagation. But the aerial roots of anthurium should be protected if possible. They can not only become an additional means of delivery of food, but fully replace the insufficiently developed soil root system in seedlings.

Anthurium can be planted by gradually separating and cutting off young shoots from the edge of the plant. For rooting and subsequent growth, such an anthurium process needs its own growth point, a pair of leaves and at least a pair of rhizomes.
Places of cuts, in order to avoid the appearance of rot or the development of fungal infections, it is useful to process crushed coal. Often, flower growers use ground cinnamon, which also has mild disinfecting properties.
If the shoot of an anthurium flower does not have its own root system, and there are only rudiments of roots on the stem, it is useful to root the plant in wet sphagnum moss or perlite before planting in the ground. As a rule, roots are formed within 7-15 days.