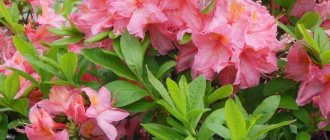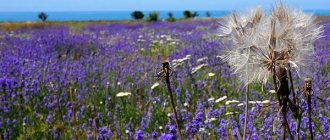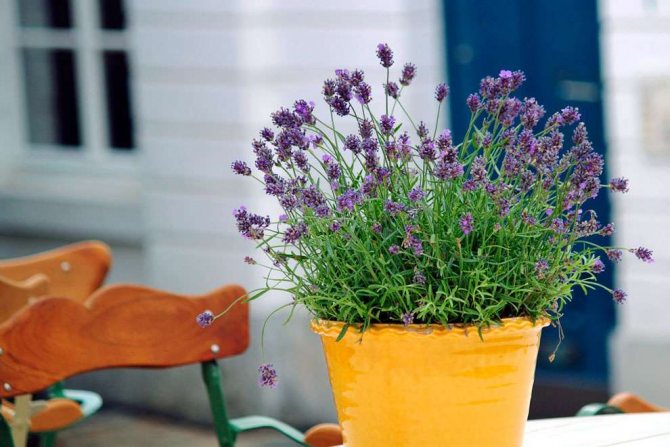
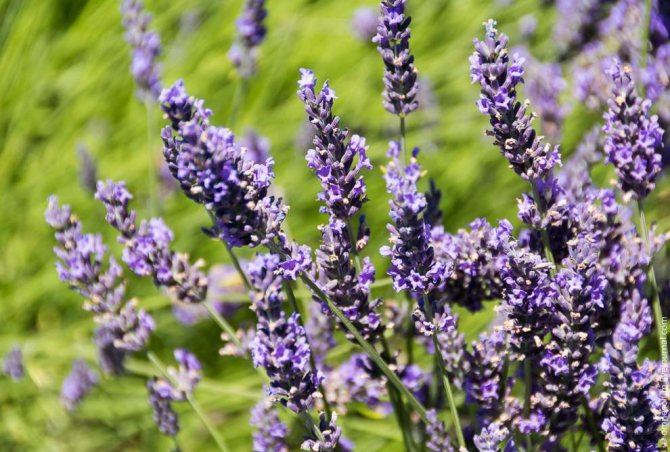
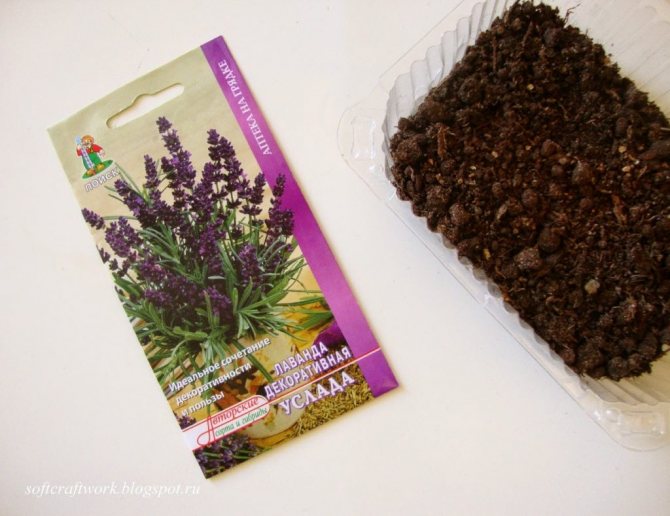
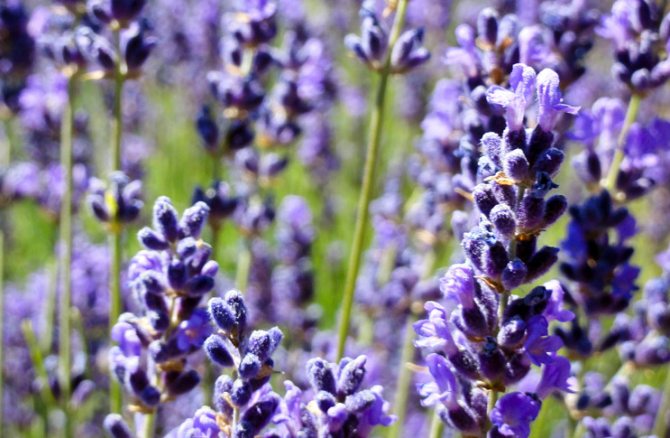
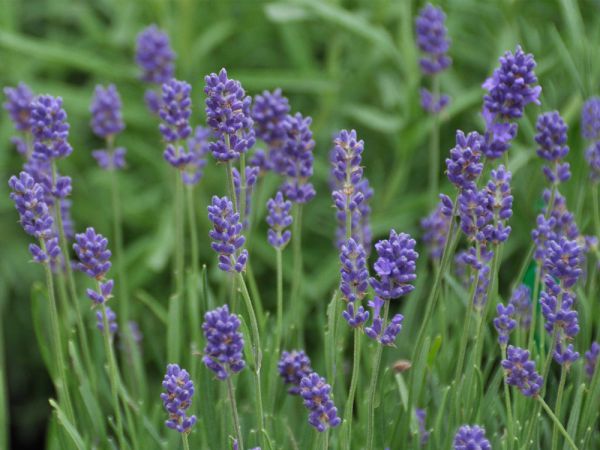
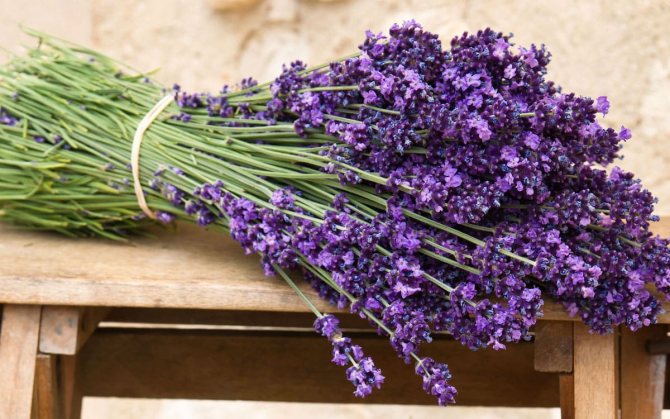
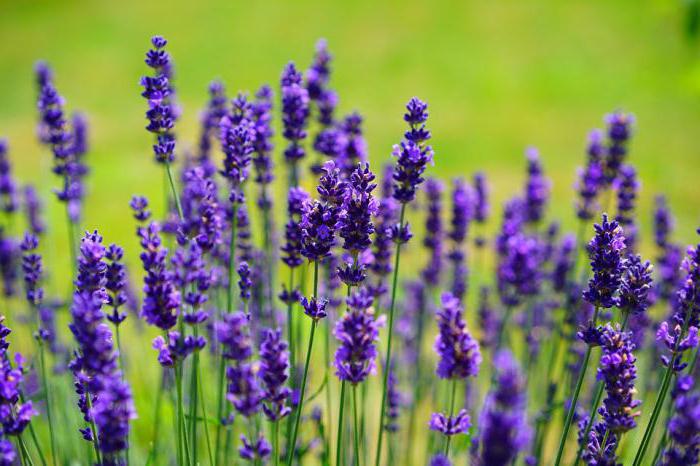
Lavender is one of the popular perennials that are grown in summer cottages. Despite the fact that the natural habitat is the Mediterranean, it has long become a "mistress" in gardens and flower beds, regardless of the region. Such popularity has led to the fact that many gardeners are interested in how to grow lavender from seeds at home, because it is impractical and very expensive to acquire a lot of planting material.
Stratification
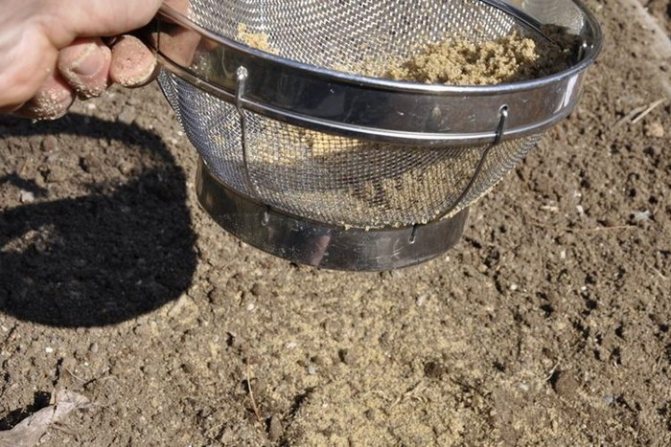
Stratification is a simple procedure (information is on the seed package). In February or March, the seeds are poured into a small container and mixed with a small amount of slightly damp sand or garden soil.
Then the container with seeds is placed in the refrigerator for 2-3 weeks. The temperature is approximately 0 ° C. After the elapsed period, the seeds are sown together with the sand (there is no need to sift) into boxes with earth on the windowsill, on the balcony or in the greenhouse.
When to plant lavender seeds?
Depending on the chosen method of planting lavender, the timing of planting seeds in the ground also varies:
- For pre-winter sowing, seeds are planted in the soil at the end of October, like other perennial crops. It is not recommended to deepen them, and after the procedure, experienced gardeners advise mulching the soil to protect it from bad weather. Shoots can be expected no earlier than May.
- Spring planting of seeds begins in mid-May, when temperatures are comfortable for planting material, even at night. With this method, only pre-stratified material is planted.
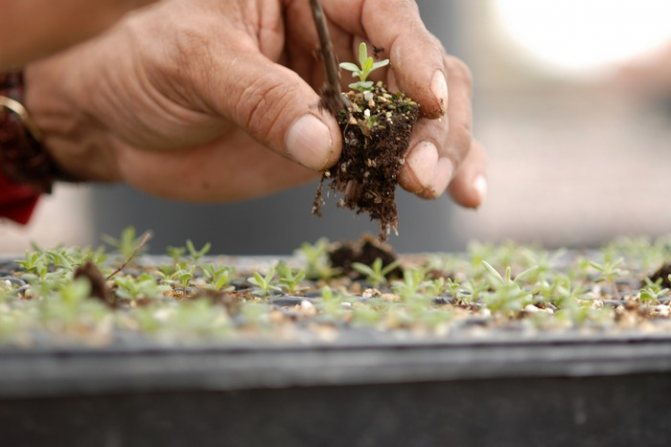
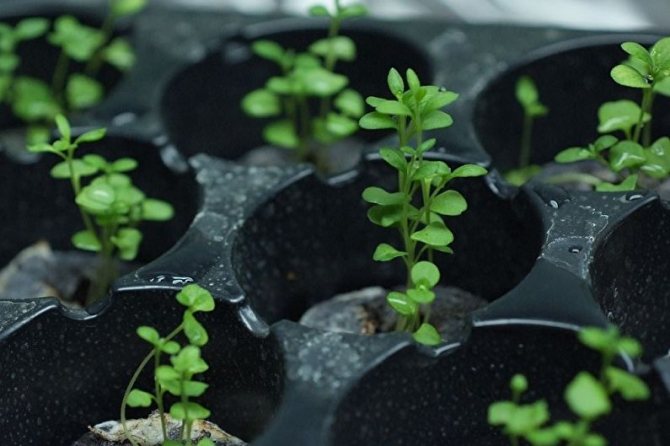
- Narrow-leaved lavender is considered the easiest crop to grow, so many people prefer sowing it for seedlings to get the best shoots. The procedure for growing seedlings can be started from late winter to early spring.
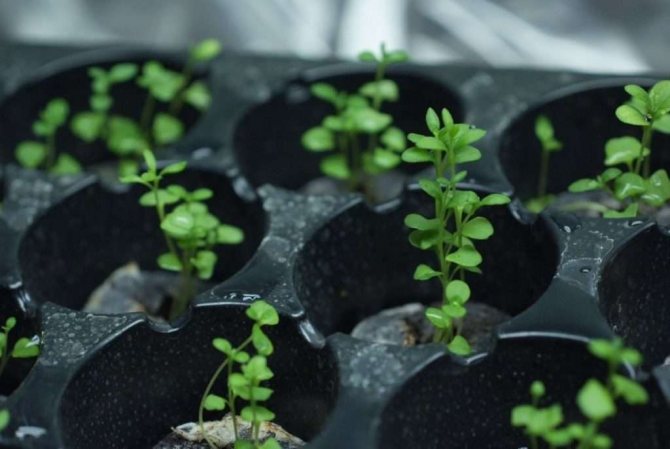
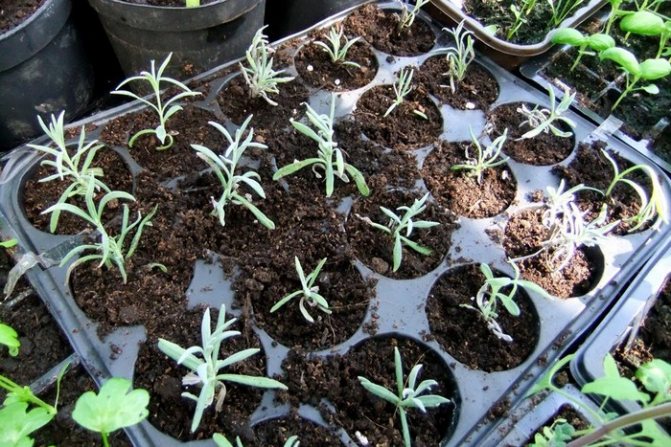
Sowing seeds
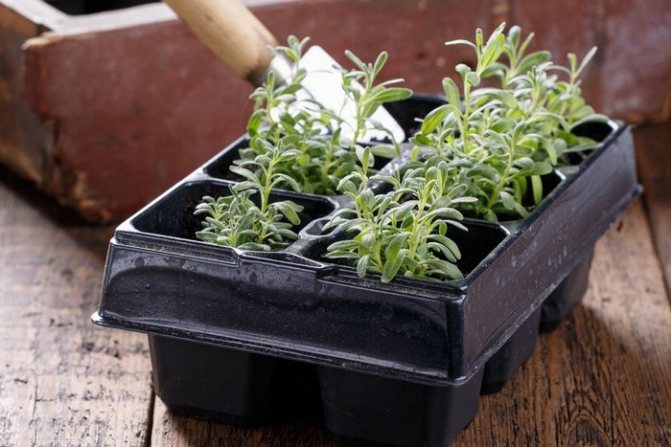
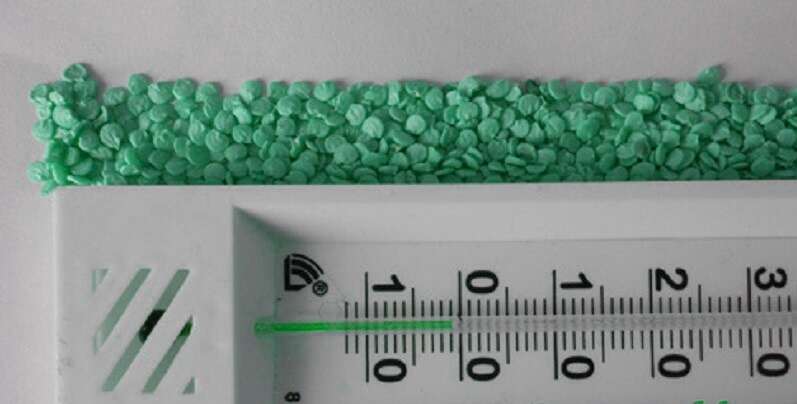
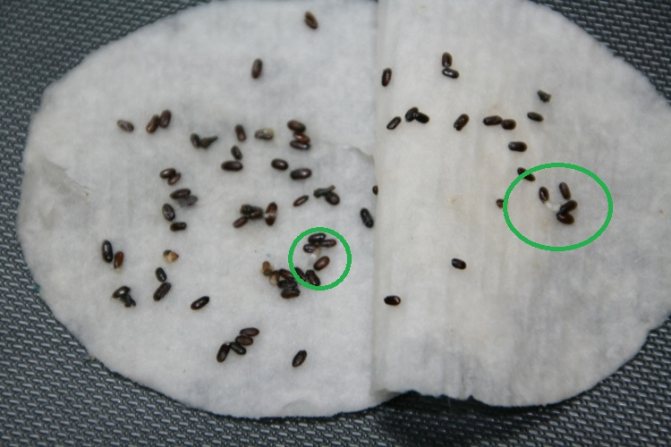
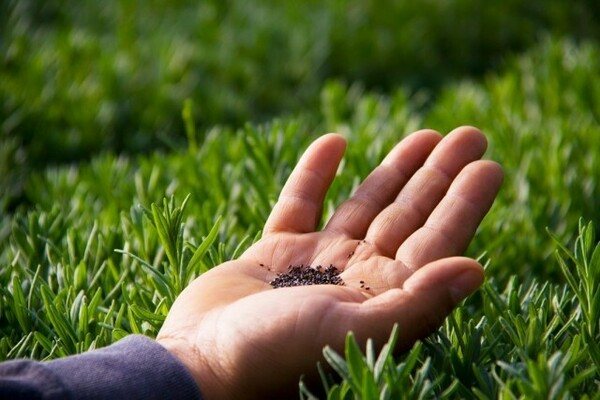
Land: versatile, lightweight, permeable. Lavender grows best when the soil has an acidic pH of about 7. Sowing depth: 1-1.5 cm. Distance between seeds: sowing in holes or rows. Lavender has small seeds, slightly larger than the head of a pin can be sown individually. If the seedlings grow too thick, you need to break through the seedlings (remove the weakest plants) or dive into separate pots in May.
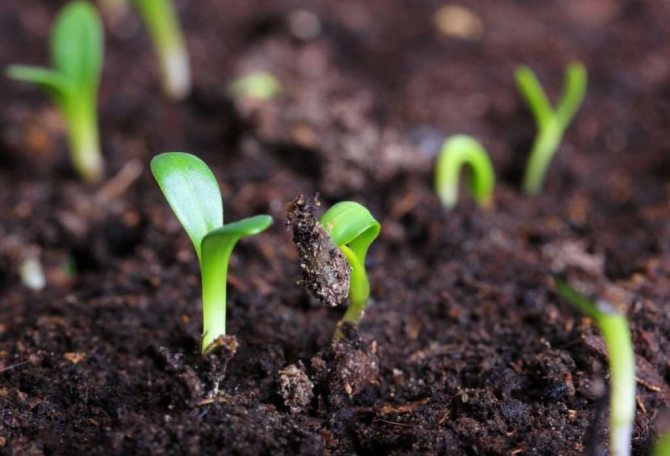
Germination of lavender seeds takes about 14 days; to germinate, seedlings need a temperature of about 7 ° C (soil). A sunny place is needed (it does not germinate in the shade) When germinating, the soil should be lightly sprinkled with water. Mature shrubs can withstand lack of water. Lavender seeds remain viable for about 3 years.


Sowing lavender in the ground
When to sow lavender from seeds in the garden - in the fall, namely in late October - early November. Gardening time is determined individually for each region.
Gardening steps:
- Dig up the area, level and loosen the soil.
- Make subtle lines.
- Sow the material, deepening only 1.5-2 cm.
- Mulch crops with dry grass, hay, sawdust.
Before sowing lavender, it is worth determining a site in the country. The plant prefers a bright area with enough sun.
Advice! Since the plant emerges late (mid May - early June), it is not worth weeding the flower bed in early spring.Patience will pay off, and lavender will sprout into an even, fluffy carpet.
With artificial stratification, the seeds of a fragrant culture are sown at the end of May, when the night temperature will be more than 8 degrees Celsius.
Planting seedlings
Lavender requires a fertile, light, dry and permeable soil rich in calcium that is neutral or alkaline. Grows poorly on heavy, moist and acidic soil. Loves the sun, tolerates light shade, requires a lot of sun during flowering. Medium resistant, withstands temperatures down to -10 ° C, high humidity and moist soil strongly affect, the plant may partially freeze. In cold winters, the remaining bushes without shelter are cold.
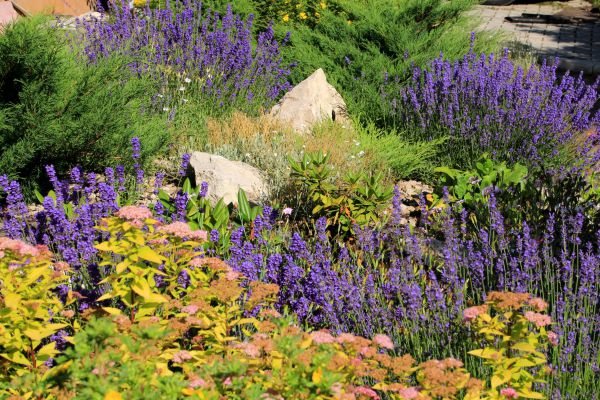
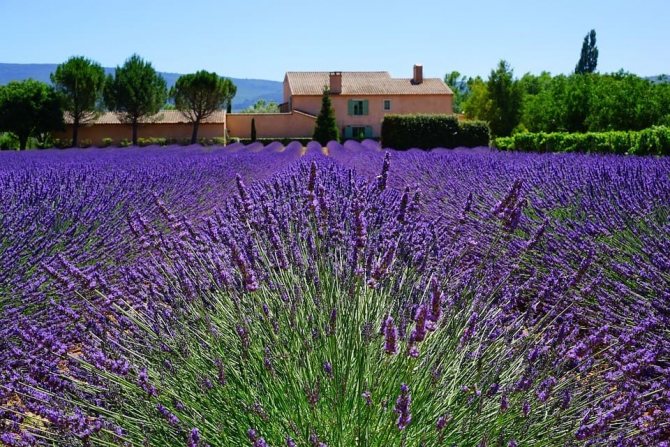
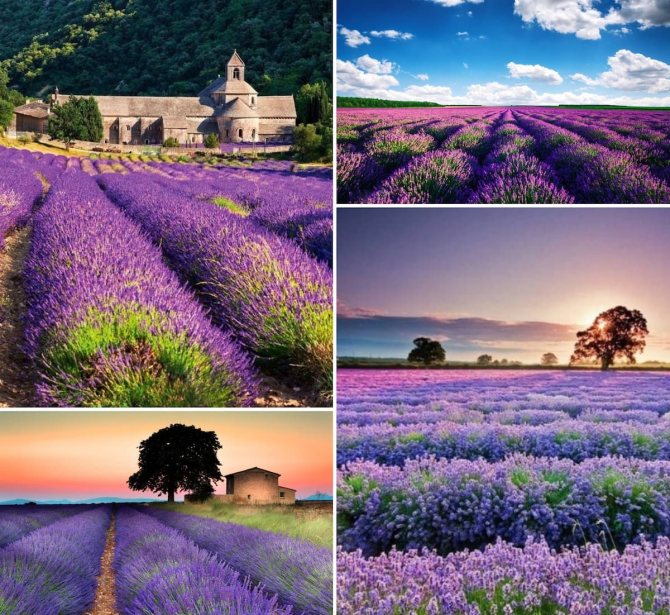
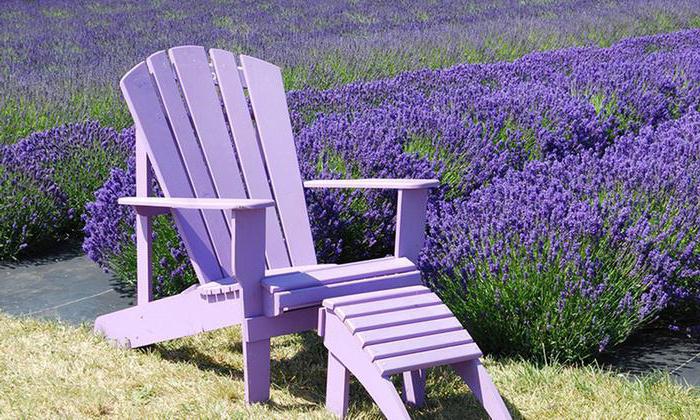
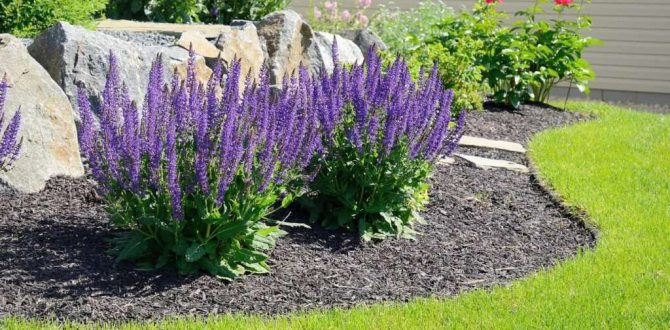
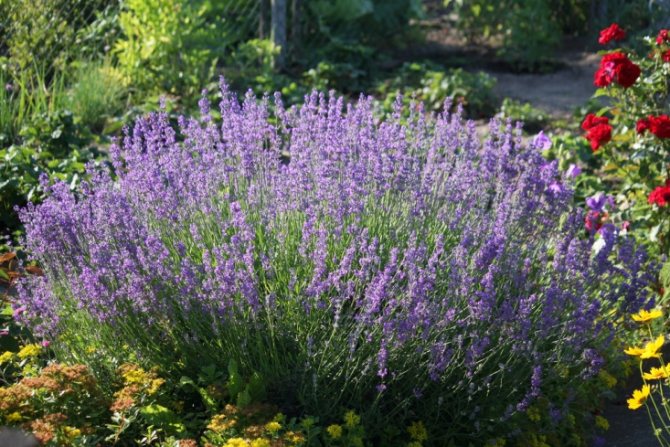
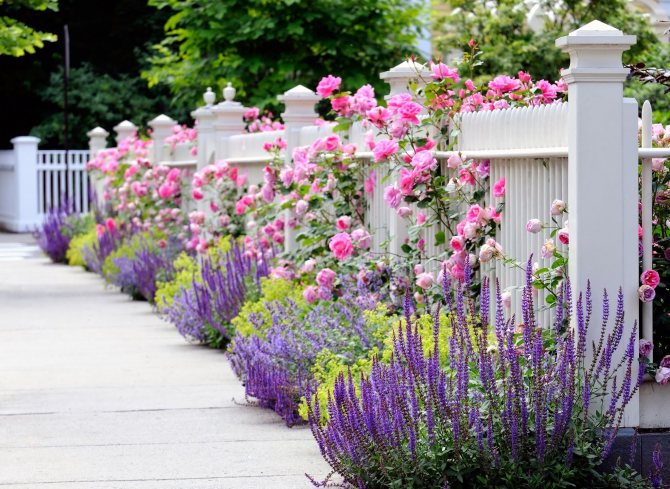
Grows naturally in warm and dry climates, grows well in deep pots and containers in versatile soil. Lavender can create a low hedge in regions where winters are not too cold. Often decorates the edges of lawns and alleys, slopes, rock gardens and ledges. Occurs even on the seashore. In a large garden it is worth planting several different varieties of lavender next to each other.
Where to plant: pots, boxes, rabatki, individual specimens and groups of plants, instead of lawns, rockeries, in the garden (promotes the cultivation of vegetables and herbs), next to fruit trees and shrubs (the aroma lures bees and bumblebees), next to the terrace, gazebo, garden grill, bench, path, sandpit or swing for children (smells great and repels mosquitoes). Location: sunny, tolerates light partial shade.
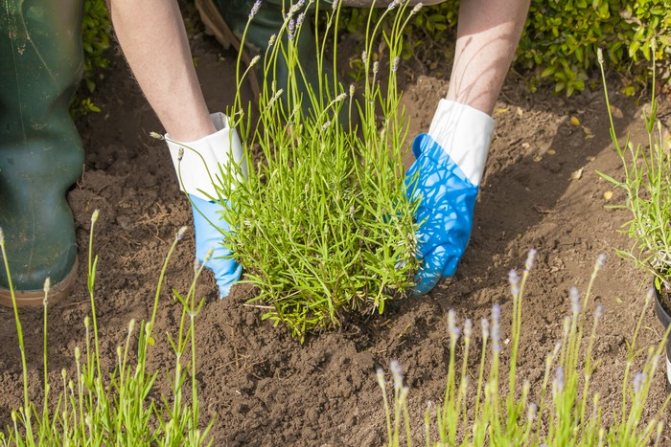
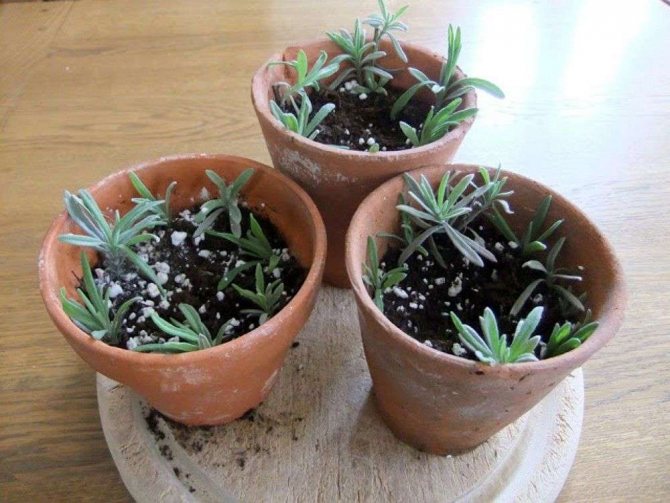
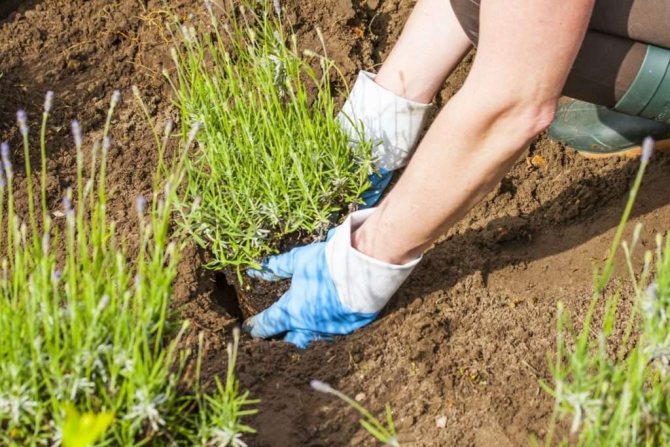
Home-grown lavender is planted in permanent places when it reaches at least 5-6 cm in height - usually June (VI). When lavender blooms, grows quickly, blooms next year, is ready for harvest, grows weakly and blooms in the shade.
It is best to plant lavender in several slices next to each other. The optimal distance between seedlings should be 30-40 cm, between rows - about 60 cm. In our climate, it is necessary to protect the shrub from frost, and in the fall to erect earthen embankments that protect the base of the shrubs. The bushes can be covered with dry leaves, pine branches, or straw. Lavender in optimal conditions lives up to 15-20 years. Over time, old and fairly woody plants should be pulled out and replaced with young ones.
General information about the plant
Lavender is an excellent member of the Yasnotkov family. Reproduction, in addition to sowing seeds, is possible by cuttings, stem layering, dividing the bush.
By the way! Lavender fits perfectly into the composition of an alpine slide, rockery. Looks very good along the paths on the site.
The plant is warm and sun-loving, so it grows well in the southern regions. In colder regions (for example, in the Middle Lane) cultivation is possible, however it is best to plant narrow-leaved lavender or English lavender (shown in the photo below), it is the most winter-hardy variety.
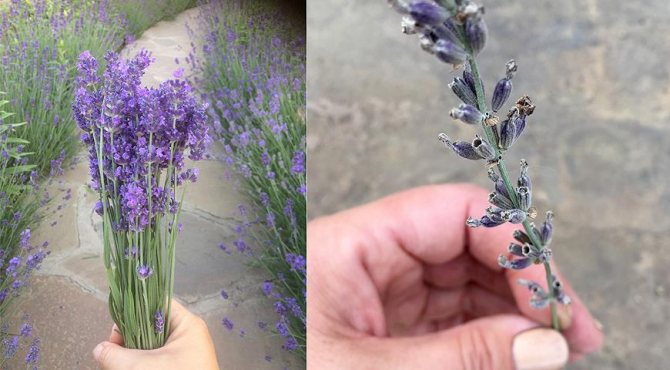
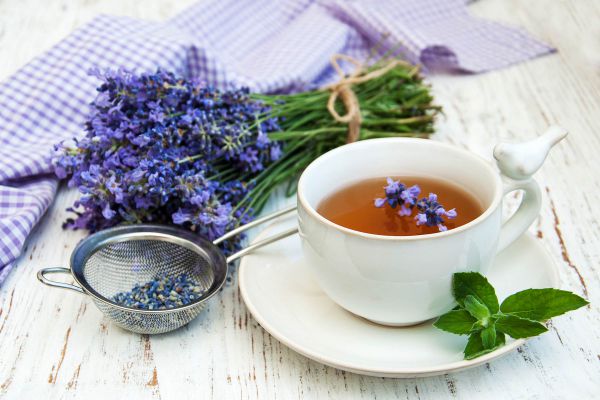
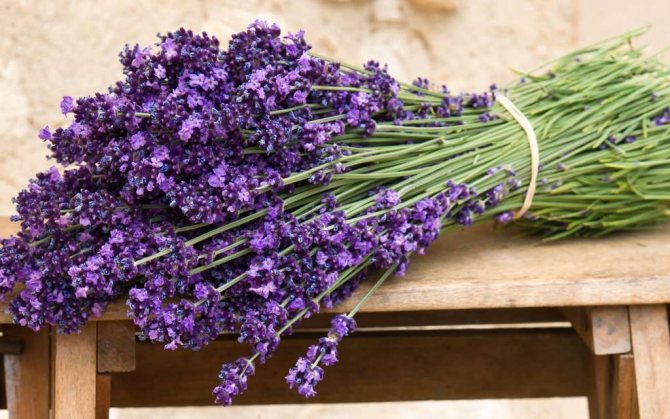
The smell of the plant cannot be confused with any other - spicy, rich, graceful, pleasant. Very often, the scent of a flower is used for aromatherapy, which uplifts and soothes. The flowers of the plant are used to make a delicious tea with a calming and relaxing effect.
By the way! Lavender blooms the next year after sowing.
Why is it worth planting a culture on your site? The plant is beautiful, has a wonderful aroma, you can make medicinal teas from flowers, or just make a sachet and use at home for aromatherapy, lavender is an excellent honey plant, so it can lure beneficial insects into your garden.
Alternative breeding
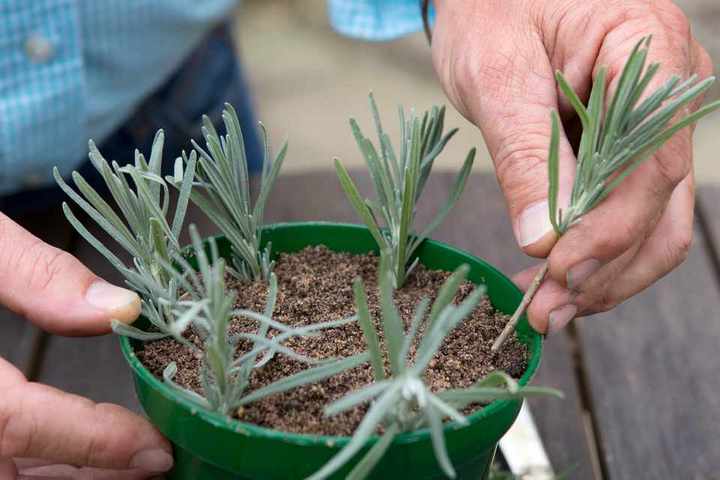
Lavender is propagated from seeds and by means of lignified or herbaceous cuttings obtained by dividing mother plants.
If lavender is grown from cuttings, cuttings with annual flowering shoots approximately 7 cm long should be cut in June or early July. Cut cuttings from three to four-year-old plants to obtain seedlings with a heel. Before planting, the leaves are removed from the lower part, the ends of the shoots are dipped into the root former and the plant is placed in a container. The best rooting medium is perlite, sand, or a mixture of peat and sand. Then the container with the cuttings is covered with foil. Every day you need to lift the film for a few minutes to ventilate the plants. After 5-6 weeks, the rooted plants are planted on the seedbed to a depth of about 2 cm, in the spring of next year, they are transplanted to a permanent place.
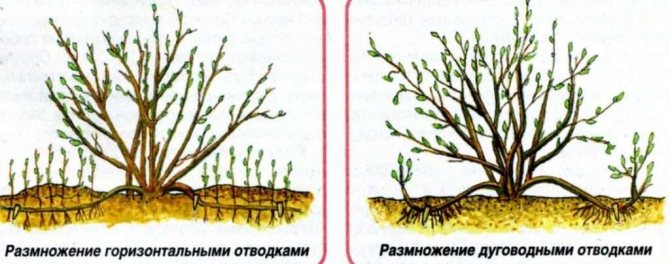
Another method of obtaining young plants is propagation by layering. In July, two-year-old shrubs are covered with soil up to one third of their height. During the growing season, plants should be moist, moisture encourages root growth on the shoots. Next year, when the threat of spring frosts passes, the soil is removed, the plant is divided into parts.

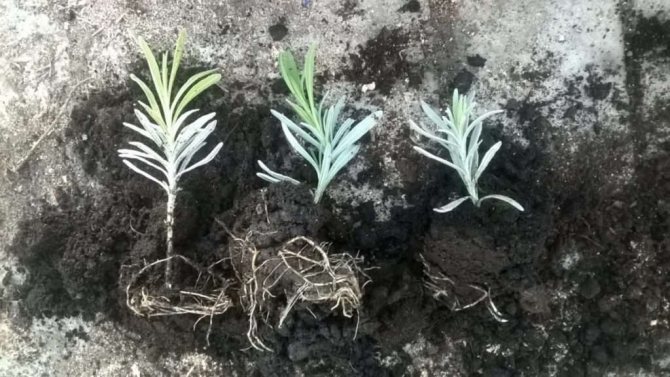
Dividing the lavender bush
This method is recommended as the last resort, as lavender does not tolerate division well. If nothing else remains, how to plant lavender in the fall by dividing the bush, then go ahead, but remember that reproduction in this way is best done in the spring. The plant is divided into several parts so that each of them includes at least 4-5 live stems. You can try to separate it with your hands, and if the roots are too strong and do not give in, then with a shovel.
Together with the roots and the ground, all lavender segments sink into pits, which should be twice the width of the plant's root system. It is advisable to fill the bottom of the holes with fertilizers. It can be compost or potassium-phosphorus mixtures. On top of the grooves, they are covered with ordinary earth, which is compacted abundantly so that excess air comes out, and poured with water.
If the reproduction of lavender by dividing the bush was successful, soon the roots will take root in a new place, and one large lavender will turn into a slightly smaller one.
Similar articles:
Growing a Palm from Seed - A Comprehensive Guide ...
How to properly prune lavender in summer - a practical ...

We preserve lavender outdoors in winter - ...
Seedling varieties
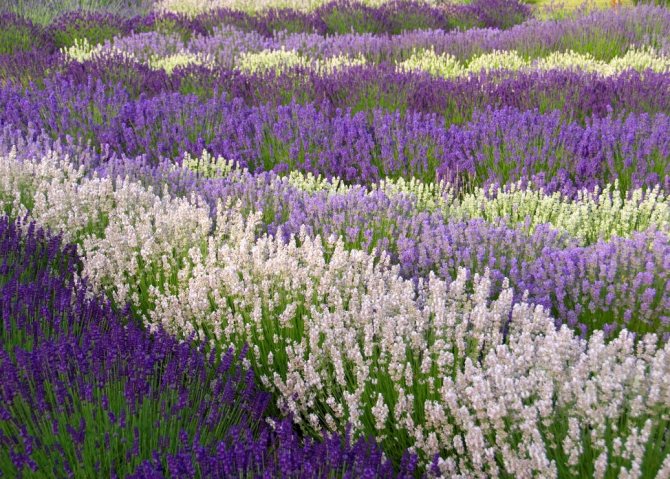
More than twenty species have been described, few have been grown, more often real lavender, known as medicinal or narrow-leaved. Many varieties can be found, varying in height, flower size and color intensity, the most popular are purple flowers, Hidcote Blue, Munstead or Dwarf Blue, and Alba white.
Top dressing
Lavender is a plant of poor soils, does not require regular feeding. Before the start of an active growing season, the plant is fertilized with ammonium nitrate or urea (urea).
Before laying the buds, you can add wood ash in a dry form, or pour it over with infusion. To improve the quality of the soil, plant compost is added to the root area throughout the season.

Feeding and fertilizing lavender should be done regularly.
Care
It is recommended to prune lavender one year after planting: in early spring (in April) or early autumn (no later than late August), after the flowering period, in frosty and humid climates, it is better to prune in the spring. Herbaceous stem fragments are cut at a height of about 10 cm. Pruning stimulates plant growth to create new shoots. It is important not to prune tree shoots, they will not release young shoots, which can lead to the death of the entire plant. Uncut bushes lose their shape and go bald from the inside.
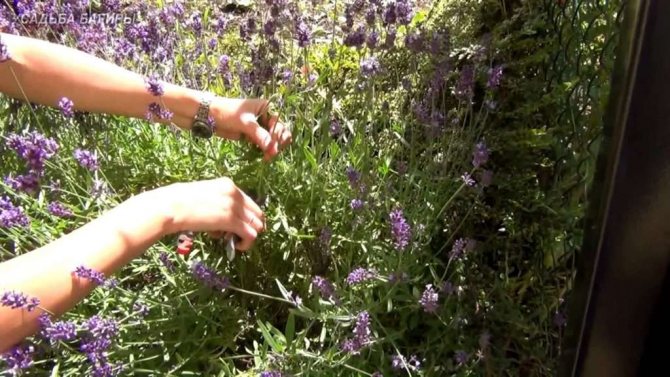
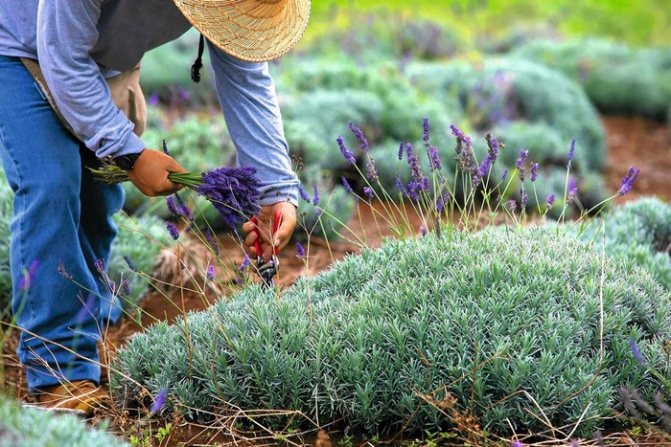
In summer, in July and August, before flowering, the leaves grow, the flowers come off. Leaves and flowers can be used fresh or dried. Shade dry at 35 ° C. Higher temperatures will damage, the raw material will lose its properties.Lavender is drought tolerant and does not need to be watered frequently. Has low fertilization requirements, fertilization is recommended every 2-3 years, well-distributed compost or manure.
How to care for lavender seedlings?
If you follow all the rules, lavender, planting and caring for which only seems difficult at first glance, will begin to germinate in 14 days. Dense shoots will appear no earlier than a month after sowing. For good germination, it is necessary to create optimal conditions for seedlings:
- Provide bright sunlight. To do this, you can put containers on the south or southwest window. In case of insufficient daylight, it is better to additionally use special phyto or LED lamps.
- Home lavender loves moderately warm air temperature, which is 19-22 ° C during the day, and does not drop below 15-18 ° C at night.
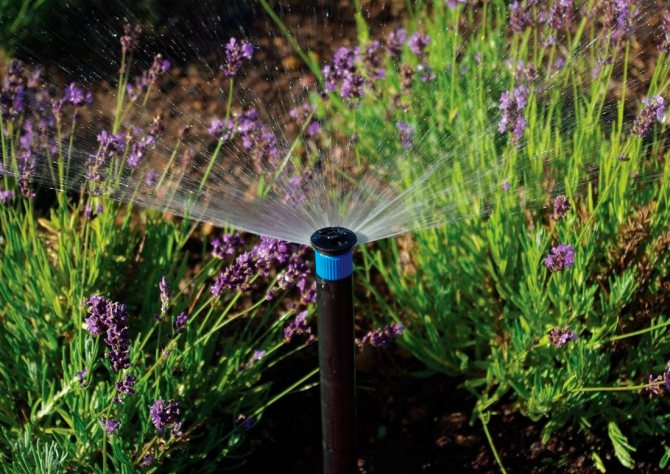
- It is important to water the plant properly and maintain optimal soil moisture.
- Before the first shoots, an impromptu greenhouse is ventilated daily for half an hour. In this case, be sure to wipe the condensate from the film or glass.
- After germination of seedlings, the covering material is removed.
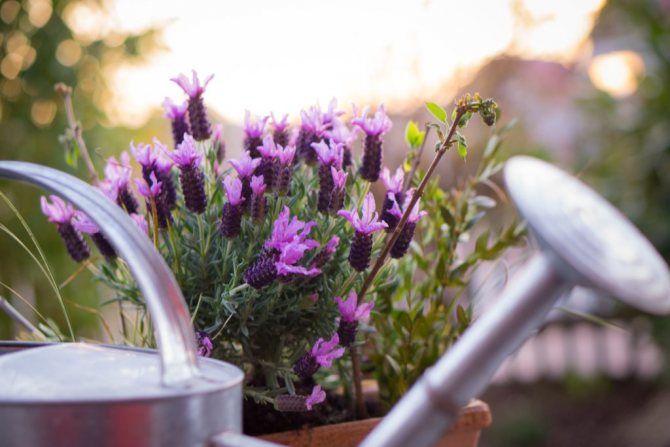
How to water lavender?
Proper care of lavender necessarily implies adherence to watering technology:
- Until the first shoots, the soil can only be moistened with a special spray bottle.
- When germinating seedlings, you can use a small watering can or syringe.
- The stream of water should not fall on the immature plant.
- The soil should not dry out, it is better to keep the optimum moisture at all times.
- Excess water threatens the development of fungal infections.
How to fertilize lavender?
An important part of the farming technique of how to grow lavender is proper plant nutrition. It should be done at least three times during the growing season:
- Initially, young seedlings for the development of green mass are fertilized with top dressings with a high nitrogen content. These can be complex mineral compositions for indoor plants.
- During flowering, a young plant should also be fed with a composition with a complex of minerals. It is not recommended to introduce fresh organic matter during this period.
- After the completion of flowering and active growth, around the middle of autumn, lavender needs fertilization with phosphorus-potassium compounds.
Diseases and pests of lavender
The main diseases of lavender appear with improper planting or plant care, because the shrub has good immunity:
- When affected by late blight, the shoots turn brown and die, rot appears at the base. Infection occurs through the soil or from other plants at elevated temperatures and humidity. Diseased plants are to be removed, and neighboring plants are treated with a fungicide, for example, "Fundazol".
- A disease called gray mold is also fungal in nature. It develops at low temperatures and high humidity. Often manifests itself with too dense plantings and the death of the upper stems. Control methods are similar to late blight.
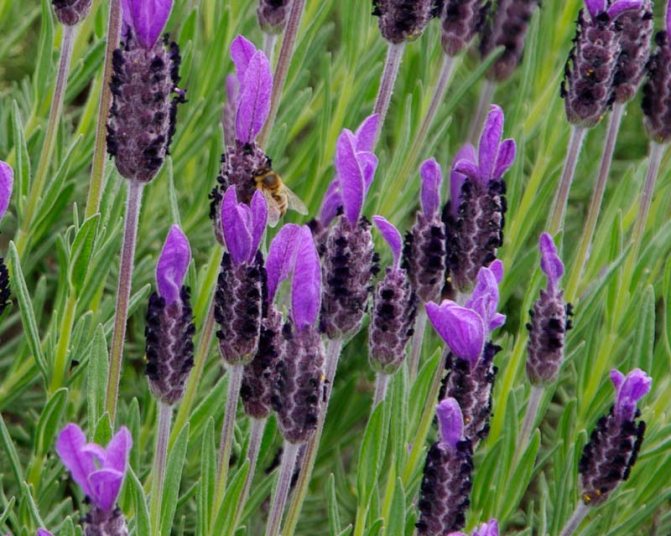
Almost all parts of lavender have an intense aroma that many insects cannot stand; the plant is often planted in a country house near residential buildings. Among the few pests attacking the bushes, you can find:
- aphids;
- caterpillars;
- slobbering penny;
- chrysanthemum nematode.
Application
- Lavender has been cultivated for centuries. A few drops of lavender oil were added to the bread so that the bread did not become moldy, used for dizziness, paralysis and spasm.
- In the garden, lavender is a wonderful decoration, it smells good. Lavender oil has aromatherapy properties (improves mood, promotes relaxation), has a bactericidal effect. Vegetables, other herbs, shrubs and fruit trees grow well next to lavender.
- The smell repels mosquitoes and moths.
- Lures bees and butterflies.
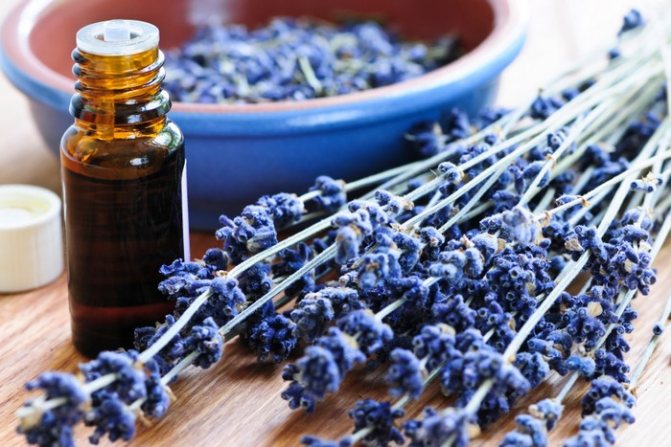
Lavender is rich in essential oils, contains tannins, phenolic acids, flavonoids and steroids. Scares away moths, bags filled with dried flowers are hung in cabinets to fill with a pleasant aroma. It has soothing properties, reduces feelings of anxiety and stress, and is used to treat insomnia. Supports digestive processes and acts as an antispasmodic agent, is an antiseptic and healing agent, helps in the treatment of wounds and burns. The essential oil contained in lavender relaxes muscles and relieves rheumatic pains.
Winter shelter
In warm and temperate climates, narrow-leaved lavender does not require shelter for the winter. Throw in spruce branches or wrap it with a covering material, you need only a young, just planted plant.
In the northern regions, shelter is required for the bushes. Poorly overwintered lavender is able to recover, the main danger for the plant may be waterlogging under cover.
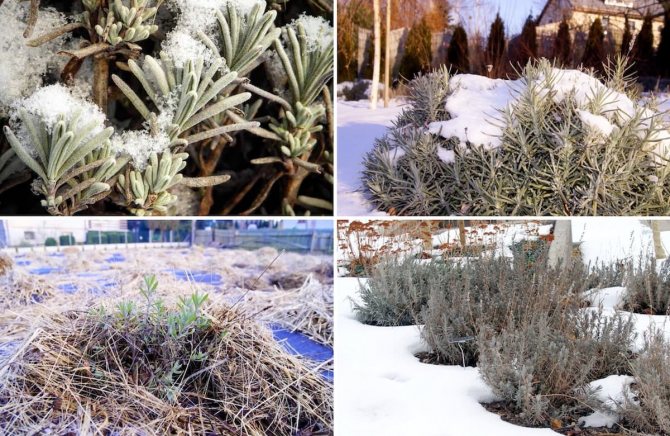
To shelter lavender for the winter, you can use straw or the legs of conifers.
Popular species (varieties)
The genus Lavender has more than 40 species, but most often only 2 can be found in culture: narrow-leaved lavender and broad-leaved lavender. Other species are rarely grown.
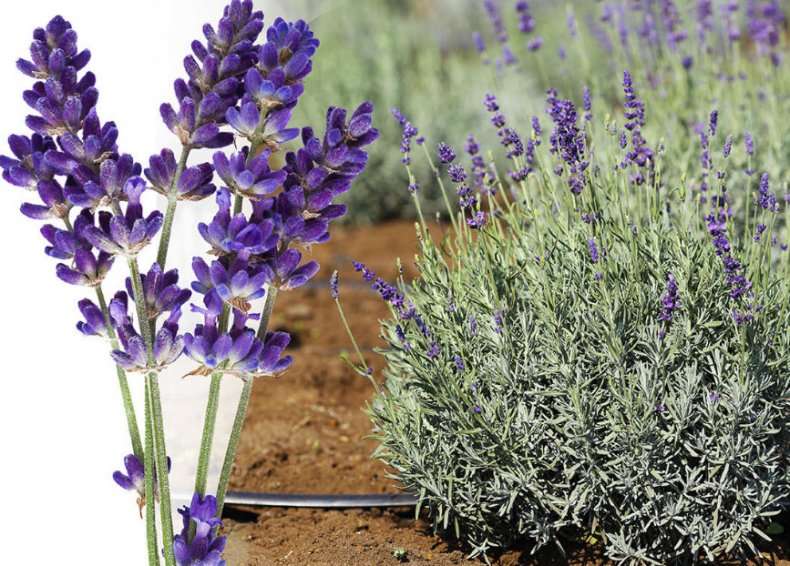
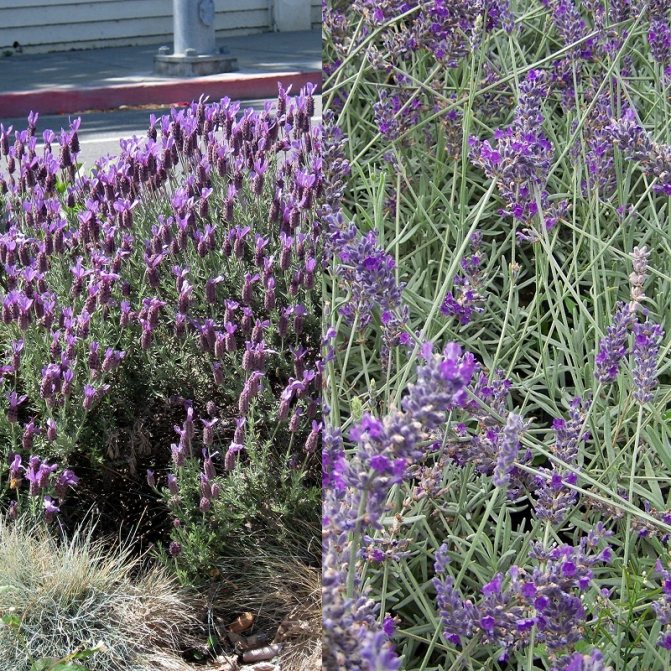
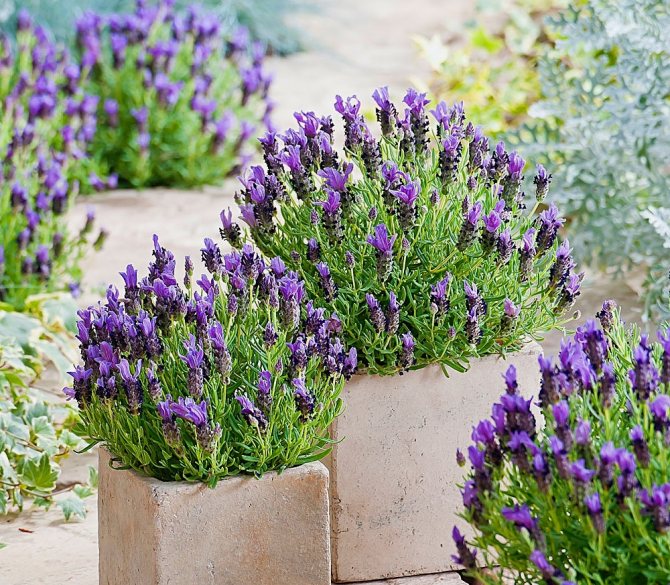
Narrow-leaved lavender (Lavandula officinalis)
This species is also known by the names: medicinal lavender or English lavender. Shrub up to 60 cm high and up to 1 m wide. Shoots at the base are lignified. Leaves are greenish-gray, as if silvery, narrow. The flowers are bluish-lilac, fragrant, collected in an intermittent spike-shaped inflorescence. Flowering period: July August. This species is considered the most frost-resistant and can withstand temperatures up to 20 ° C. The undersized variety var is known for this species. deiphinensis, the height of which does not exceed 30 cm.
A variety of varieties that differ in the color of the flowers or in the form of growth deserve attention. In ornamental horticulture, the white-flowered ‘Alba’ or the pink-flowered ‘Rosea’ is often used. Joint planting of various varieties looks extremely impressive.
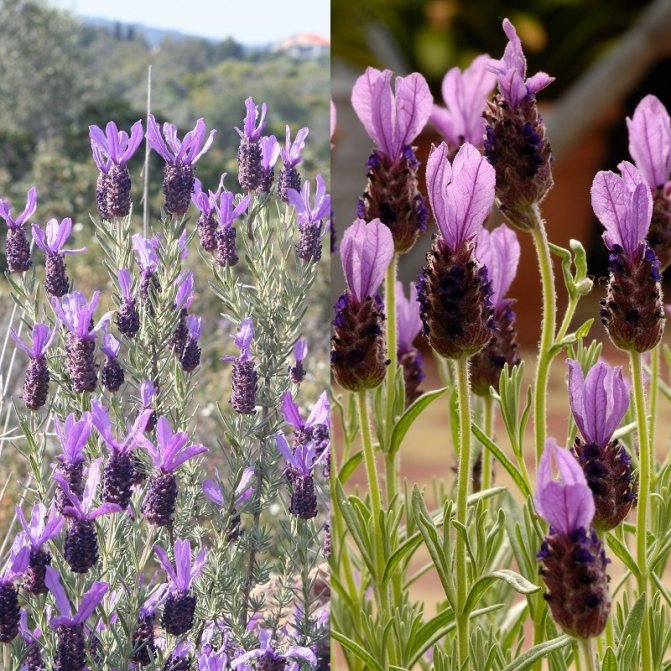
Broad-leaved lavender (Lavandula stoechas)
This species is commonly called French lavender. It is considered the most beautiful view. Flowers can be of a variety of colors: blue, blue, green, white, pink, lilac. Flowering period: April-July, much earlier than other species. The most famous variety is ‘Papillon’ (Butterfly). It is characterized by very long bracts at the top of a fairly dense spikelet.
Choosing a soil for a plant
It does not matter in what way lavender is propagated (by seeds, cuttings or layering), in any case, young plants need a soil of high quality in structure and composition. It is best if it is a sandy soil with a pH in the range of 6.5-8. If you doubt the quality of the soil, it will not be superfluous to add lime or wood ash to it before planting. They are effective deoxidizers. In order for the soil to be light and allow water and air to pass through, regularly add compost to the lavender garden.
The plant does not respond well to transplantation, therefore, it is recommended to choose a permanent place for it at once.
Which reproduction to choose: vegetative or from seeds?
Lavender can multiply both vegetatively and with the help of seeds. The bush of an adult plant produces a lot of growth that can take root on its own. If lavender grows nearby, for example, in a field next to a summer cottage, you can cut off the bends directly from it.
Cuttings are also well rooted, which are buried in the soil for 2-4 weeks, after which they are transplanted into a permanent pot.
Propagation by cuttings and shoots seems simple, but everyone who decides to use this method is faced with one difficulty: a limited number of plants. Not many cuttings and shoots can be removed from one adult bush, and whole thickets of lavender rarely grow within walking distance.
In most cases, this plant is not found at all, either in friends or in the wild. It is problematic to get cuttings.
A brief description of lavender
Lavender is a herb that has decorative, medicinal and cosmetic effects. Small bushes have practically no leaves. They are located near the ground around the stem. The plant blooms from June to September with a pleasant aroma. A small bush throws out a pedicel up to 80 cm long, along which small buds are located. The petals can be purple or blue. Less common are hybrids with pink or white flowers.
Lavender for the garden
The plant is native to the Mediterranean plains, but has recently been actively used in the decoration of our gardens and flower beds. To decorate the space near the house with such a flower, you need to know how lavender reproduces in the garden. It is advisable to inquire about the rules of care after the transplant.
Flower in landscape design
Required tools
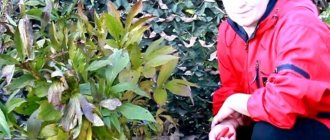
Transplanting will require regular gardening tools. First of all, it is a shovel. It should be sharp and clean. You can dig up a small plant with a pitchfork, while avoiding damage and pruning of roots.
A sharp garden knife and pruner will be useful. With their help, we cut off broken or dry branches and roots. To trim the walls of the planting hole and add earth to the roots, we use a small shovel or scoop. A bucket and a watering can are needed for watering and dissolving fertilizers.
Appearance and characteristics
Lavender is a warm and light-loving melliferous plant with healing properties. It is widely used in medicine, contains essential oils, due to which it emits a persistent strong aroma. It is a frost-hardy flower that can survive in temperatures below minus twenty-five degrees. Not afraid of drought.
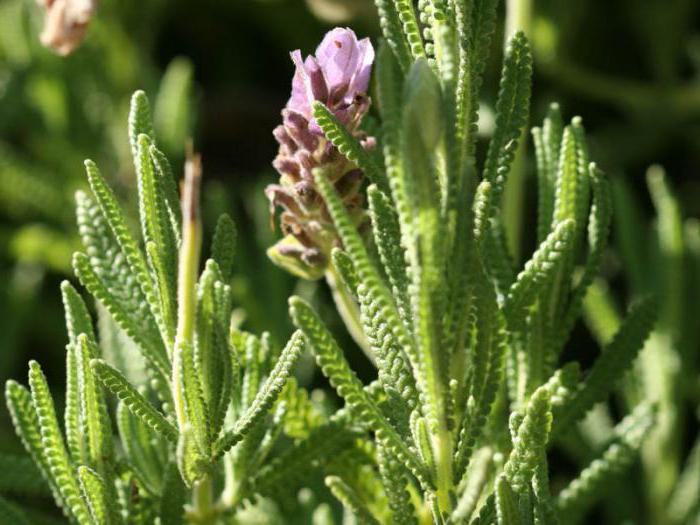
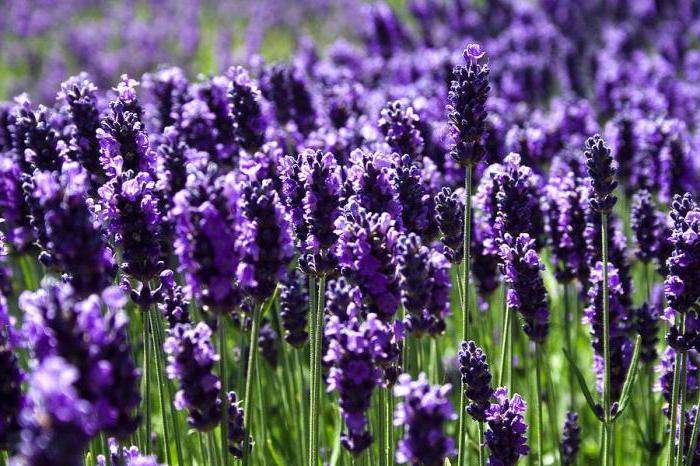
An evergreen shrub with a diameter of about a meter, some plant species are capable of reaching two meters in height. The standard size of lavender is about 70-80 centimeters, in dwarf varieties - no more than thirty. The plant blooms in the middle of summer, the flowers are oblong spikelets of lilac-blue, blue shades. The leaves are large enough, can be narrow or wide; deep green, with silvery pubescence, slightly curved down at the edges.
Lavender shelter for the winter
English narrow-leaved lavender is quite hardy, especially mature shrubs. They spend the winter calmly and without shelter. And they will calmly withstand frosts down to -25 ° C. The root system of lavender is pivotal and goes very deep, where it does not freeze.
On the other hand, under cover, there is a chance that lavender will get sick because it cannot tolerate the excess moisture that can form there. For this reason, I do not cover adult plants, but only those bushes that are 1-2 years old, their roots are not yet so well developed, therefore, they need protection.
Spruce branches (or lutrasil, or something like that) can be used to shelter such lavender bushes, it will create a warm air cushion for them. If you have a lot of snow all winter, then you can sprinkle the bush with snow and then it will winter well.
I cover young lavender bushes only when the air temperature is firmly around 0 ° C for several days, not earlier. I make a hut out of spruce branches and tie it with a rope so that it does not fall apart.
Steps
1 Choosing lavender breeding method
- 1 For new plants, prefer grafting over dividing.
If your goal is to increase the number of plants, propagate the lavender by cuttings instead of dividing the bush. Cuttings have a higher survival rate, and less effort will be required from you. The division of the bush carries with it a high risk of death of the plant, it should be resorted to only when it is necessary to save the plant itself, while certain criteria should be observed, which will be indicated below.- Skip to reading about young green cuttings if you want the fastest way to propagate lavender. This procedure is performed in spring or summer.
- Skip to reading the information on propagation by layers if you have enough space and time to allow the layers to develop a root system before you can transplant them from the main plant. You can do this at any time, but it will take at least three months of root growth before you can separate the rooted layers from the plant.
- 2 If your lavender shrub has grown too large, try trimming it.
Due to the high risk of plant death when dividing a bush, even overgrown specimens are trying not to divide. Instead, they resort to aggressive pruning, cutting about 1/3 of the plants every three years. This is done exclusively in the spring, while the growth of the plant is controlled by cutting off young stems, and not old woody ones, which are located in the center.- If the old woody part of the plant is already too large for your garden, consider taking a few cuttings from it and removing the old plant that you can replace with new ones throughout the year. Dividing the bush will be a quicker solution, but the likelihood of a successful outcome will be significantly lower.
- 3 Before dividing, notice the constant decrease in flowering from year to year.
Compare the abundance of flowers that the plant produces in comparison with previous years. Slight temporary deviations in flowering can occur due to weather fluctuations. However, if there has been a significant reduction in flowering over two years or more, then you may need to split the plant. A safer solution might be to take cuttings for propagation from an old plant and then observe what happens to it. - 4 Examine the center of the lavender bush.
Older plants may begin to die off in the middle, producing flowers only around the outer perimeter. This is one of those rare situations where dividing a bush may be necessary. However, it should be remembered that when dividing the risk of plant death is very significant.- There is no consensus as to whether young or old plants are more at risk of dying when dividing.
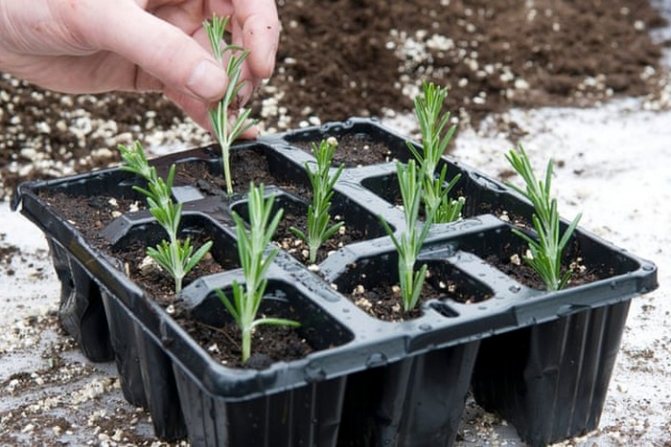
2 Cuttings lavender (young green or woody cuttings)
- 1 Get started in the spring or summer.
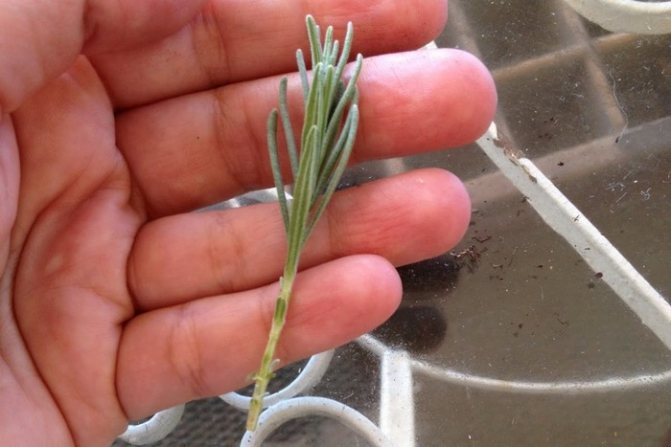
Cuttings should be taken during the warm growing season, otherwise the root system may not form. The best chance of success is when cutting cuttings in early spring, but if you want full bloom from the mother plant, wait until early or mid-summer and then cut the cuttings after the lavender has faded. It is not recommended to delay the wait longer than until mid-summer, unless you live where frosts do not come for a long time or are absent altogether, since the cuttings take six weeks to develop the root system even before the ground freezes. - 2 Select a branch with at least two growth nodes.
"Growth nodes" are thickenings on a branch from which tufts of leaves grow. Choose a young branch at the bottom of the plant with at least two growth nodes. There are two different approaches to branch selection:- For green
cuttings are used only by soft young branches of the current year, which have not yet become brown and woody. Such cuttings will grow the fastest, but only if they are at least 13 cm long and have at least two nodal growth points. - For stiff
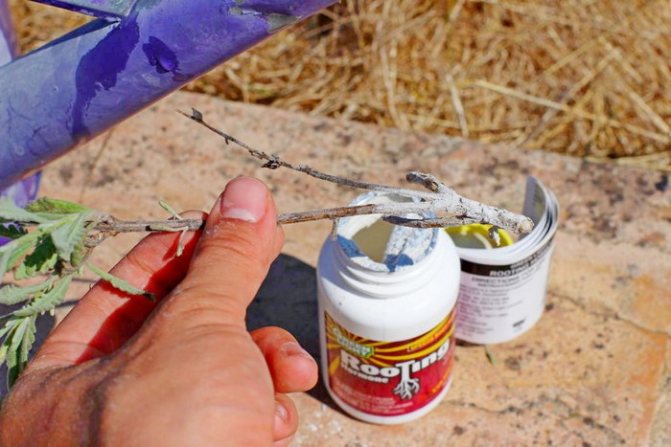
cuttings take hard brown stems, at the ends of which there is a patch of young soft greenery, at least 2.5-5 cm long. Such cuttings need to stimulate root formation. You can find the appropriate remedy at your garden supply store. - 3 Get a rooting stimulant (not always
required).
A rooting stimulant is required when used to propagate woody cuttings. For green cuttings, it is not necessary to use a root formation stimulator, since young stems give roots without its help. A rooting agent may be needed for young cuttings if you cut them very late from the mother plant (less than six weeks before the expected first frost).- Read the information on the packaging of the rooting stimulant before purchasing it. Choose a product that contains the rooting hormone, and not so easy
fertilizer and vitamin B1. - 4 Prepare small pots or pre-forcing tray and fill with special potting soil.
Prepare a common tray or small individual flower pots to grow cuttings in for the first few weeks after cutting. Since plants without roots are sensitive to both drying out and excess moisture, use a special potting mix of 50% organic compost and 50% perlite to maintain the correct water balance. Similar mixtures can be purchased ready-made, for example, a mixture of sphagnum and perlite.- Clay pots are preferable to plastic ones as they "breathe". This property is very useful, especially if you soak the pot in water overnight before moving on to the next step.
- 5 Cut off the branch with a sharp, clean knife.
Sharpen and wash the knife if necessary. This is required to obtain a neat cut with a minimal chance of infection. Cut the branch just below the anchor point. The stalk should be at least 13 cm long and have at least two nodal points. The longer the stalk and the more nodal points on it, the higher the probability of success of the entire operation.- It is not recommended to use scissors, as they can pinch the stem and hinder the process of root formation.
- 6 Cut off all the leaves from the cutting except the top.
Leave the leaves at the top of the cutting as they will supply energy to the new plant. Use a knife to cut off all the other leaves so that the cutting will direct all its energy to the formation of roots, and not to maintain the growth of foliage.- Be careful not to damage the bark of the stem when cutting the leaves.
- 7 Dip the lower end of the cutting into a rooting stimulator (not always
required).
Follow the instructions on the package to dilute the rooting stimulant to the correct concentration if sold in powder or concentrated form. Dip the bottom 2 cm of the cut into the prepared stimulant.- This step is required for woody cuttings and, as mentioned earlier, is optional for green cuttings.
- 8 Plant the cuttings in the containers prepared for them and water well.
Plant the cuttings in prepared containers just deep enough to keep them upright. Water them immediately (relative to the size of the container). - 9 Keep the soil moist and keep the cuttings shaded, but gradually start watering them less and exposing them to the sun more.
Over-watering is a common mistake in forcing lavender cuttings. After the initial wetting during planting, water the cuttings only when the soil begins to dry out, and not when it is still wet. Shade for the first few days will help minimize the stress of planting, but then the plant can be gradually transferred to brighter lighting conditions.- Greenhouse conditions may be too humid for lavender cuttings. However, if the stalk looks sluggish or dry after a day or two, moving it to a greenhouse or bag can help it absorb moisture before roots emerge.
- 10 When roots appear, transplant the cuttings into larger pots or open ground.
After a minimum of three, and usually six weeks, the cuttings develop a powerful root system in a small pot. Once the roots of the cuttings have held together the soil of the pot, you can transplant it with a lump of soil into a larger pot or flower bed. Plant the plant in well-draining nutrient soil and care for it as required by normal lavender care.
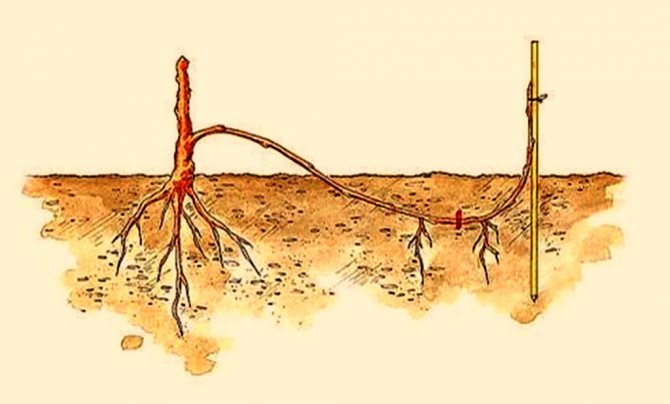
3 Propagation of lavender by layering
- 1 Select a small, young branch at the bottom of the lavender bush.
For each cut you are going to make, pick a small branch on the outside of the bottom of the bush. This requires young bending branches or those branches that grow horizontally directly above the ground.- When propagating by “layering”, various techniques can be used. In this article, we'll show you an easy way to propagate lavender by layering with minimal risk, but it can be time consuming if you plan on getting more than a few new plants. If you need to get dozens of new plants, refer to the tips at the end of the article.
- 2 Place the middle section of the branch in a small hole.
Dig a 10-15 cm hole in the ground at a short distance from the mother plant. Position it so that you can lower the middle section of the chosen branch into it, leaving its blooming and leafy end sticking out on the surface of the ground. - 3 Secure the position of the branch.
Press down on the branch with a stone or staple so that it does not pop out of the hole. Cover the hole with soil, leaving the flowering end of the branch above the ground. - 4 Keep the buried branch in moist soil.
Water it periodically, but don't overfill. Don't let the soil dry out during the hot summer months.- It is not recommended to water the plant during the winter dormant period.
- Mulch can help the soil retain moisture, but it can also cause plants to overheat in hot weather.
- 5 Dig up and cut the branch after at least three months of active growth.
Although you can start forming layers at any time, the branch may not have time to develop a strong stem and roots until the start of the spring-summer growing season. After three to four months of vigorous growth, preferably when the cool autumn weather begins, carefully dig in the buried section of the branch to check the roots. If they are present and bind a lump of earth, cut the branch so that the roots remain on the stem from the side of its flowering part. - 6 Transplant the cut branch as a stand-alone plant.
Transfer the new plant to the planting site along with a clod of earth to avoid damaging the roots. Cover the plant from the wind until its roots are more vigorous, and tend to it as required by normal lavender care.
4 Dividing the lavender bush
- 1 Use this method as a last resort.
Lavender, unlike most other perennials, does not tolerate division well. For more tips, read the section on choosing a lavender propagation method, or skip to grafting techniques if your main goal is to get new plants. - 2 Divide the lavender in early spring.
In winter, lavender is dormant, although it can retain its gray-green color. Wait until early spring to divide lavender, but don't wait for the plant to start growing. - 3 Select the areas to be divided.
If the middle of the bush is dead, then you should be able to pick out individual clusters of stems surrounding the dead center that are attached to one patch of plant roots. Plan the division of the plant so that each section contains at least three to five live stems and has the corresponding proportion of the roots of the bush.- For this reason, several clusters of stems can be included in one division site at once.
- 4 Dig holes for planting the split plants.
As a guide when preparing the holes, remember that they are about twice as wide as the earth ball and have a depth of about 30 cm. After the plant is divided into parts, the earth ball will become smaller. - 5 Place nutrient-rich soil at the bottom of the hole.
For this, organic material such as compost, pine bark and the like can be placed on the bottom of the hole in a layer of about 8 cm.- As an option, add some potassium phosphate fertilizer to the hole.
- 6 Dig all or part of the lavender shrub out of the ground.
If the plant is not overly large, and its middle is alive, or it is difficult to identify parts of the plant while it is in the soil, then you can dig it out entirely. Otherwise, dig in the plant to improve visibility and access to the roots.- Pick up a lump of earth with a shovel and press on its handle like a lever, moving around the bush until you lift it out of the ground.
- 7 Use a shovel to divide the bush.
For most lavender varieties, it is not easy to divide the bushes, but if the bush has distinct individual growth areas, you can simply try to pull them apart with two forks. Usually, to divide the bush into highlighted parts, you need a sharp, clean shovel, and the pitchfork will then help to unravel the tangled roots. - 8 Plant each of the selected areas of the plant in its own hole and plant at the same depth to which the plant grew before.
When filling the hole with soil, be sure to tamp it lightly. Water the plant thoroughly to encourage new roots and take root. Continue grooming your lavender as usual.
Possible problems
White or pink bloom may appear on the root collar of cuttings and mature plants. With its appearance, the plant begins to wilt. This disease is called fusarium wilting. For prevention, the soil is treated with special chemicals.
Young shoots may develop yellow spots that turn gray over time. Branches wither, dry and curl. This is a lesion of stems with phoma. All damaged branches must be removed and the bushes must be treated with Bordeaux liquid.
To grow lavender bushes in your country house or in the yard using cuttings or any other method, you need to be patient and knowledgeable. Then this amazing plant will delight its owners with abundant flowering and an unforgettable aroma.
The essence and benefits of cuttings
A stalk is a cut part of a plant, a branch that, when planted in the ground, gives roots and becomes a separate independent sprout. The main advantage of this approach to plant propagation is that it can be used with high efficiency on almost any type of lavender.
And for some hybrid varieties, this is the only way in which reproduction is possible. Reviews of avid gardeners show that, on average, out of 10 sprouts, 8-9 give an excellent root system and, with proper care, take root.
The first step is to select the branch of the flower. It should have at least two growth nodes, that is, thickenings on the twig, from which the leaves grow. You can take:
- Young green shoot;
- A numb escape.
The experience of many gardeners has shown that the best options are located near the bottom of the plant. Green cuttings are shoots that have appeared this year. They grow the fastest and even without a root stimulant produce a good root system. But their length should be at least 12 cm with the previously mentioned requirements for the nodes.
Rough cuttings are hardened, brown branches, the ends of which are usually adorned with young greenery.The length of the stem can vary within 2.5-5 cm. But they already require active stimulation of root formation with special preparations. On the other hand, they are easier to transplant after germination.
Origin
The Mediterranean, India and the Canary Islands are considered the birthplace of lavender. At the same time, it was already known to the ancient Egyptians, who grew it in Thebes. From Ancient Egypt, the flower came to Ancient Rome, from where it spread throughout Europe, including Britain. In the Middle Ages, English monks were very fond of this plant. After the reign of Henry VIII, lavender also appeared in private gardens throughout the British Empire.
At the beginning of the last century, a French chemist began to study lavender essential oil, thanks to which the flower received a "rebirth" - its popularity, which had faded by that time, flared up again with renewed vigor. Whole lavender plantations appeared, known all over the world - in particular, just in France, in the town of Provence. In Russia, the plant is currently cultivated in the Crimea. In the wild, it can still be found in the Canary Islands, Africa, southern Europe, and Arabia.