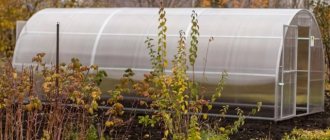
The best and agrotechnically correct solution is to carry out all the necessary work for the preparation and cleaning of the polycarbonate greenhouse in the fall. But if for some reason it was not possible to do this, we plan all the work for the spring. Processing a polycarbonate greenhouse is an important point, the quality and quantity of the crop depends on it. Polycarbonate greenhouses are prone to infection with fungal diseases, spider mites and late blight. At the same time, a separate control method is provided for each pest or disease.
Here you will find out:
Pest control in the greenhouse
Diseases and pests of greenhouses cause significant damage to vegetable crops. Therefore, one of the most important measures for the preparation of the greenhouse is its spring preventive treatment.
Timely implementation of protective measures guarantees high yields in greenhouses. At the same time, it is necessary to reduce the number of chemical treatments to a minimum and give preference to biological methods of pest control in the greenhouse.
How to get rid of insects
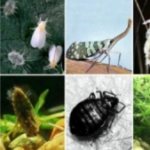
Among the insects of closed ground, the most dangerous for the crop are: whitefly, various types of aphids, nematodes.
The whitefly, like its larvae, feeds on plant sap, leaving sticky secretions in return. A sooty fungus appears in them, which manifests itself as a black bloom on the leaves. This plaque slows down the proper growth and development of plants, thereby significantly reducing the yield of vegetable crops.
The chemical method for controlling this insect is the regular spraying with karbofos (Figure 1). The biological method consists in the suppression of the whitefly by the parasite of formosis encarsia. The success of this method depends on the timely detection of harmful insects. For this purpose, it is necessary to inspect the plants once a week.
Greenhouse aphids feed on plant sap, which leads to stunted growth, leaf curling and insufficient harvest. In addition, this insect is also dangerous because it carries viral diseases.

Figure 1. Indoor pest control methods
Regular inspection of indoor plants will help to detect the pest in time. If symptoms of infection are detected, it is necessary to use a chemical or biological treatment method. The chemical method involves spraying plants with karbofos, and the biological method involves the use of cocoons of the gall midge aphidimiza. If this entomophage cannot cope with the excessive number of aphids, the biological preparation mycoafidin is used, which has a selective effect and does not pose a danger to the gall midge.
One of the most polyphagous pests of indoor ground is the rootworm nematode. Its larvae penetrate the roots of plants, slowing their growth and causing poor flowering and insufficient fruiting. Fighting nematodes indoors consists in steaming the soil with hot steam or boiling water.
Note: In addition to chemical and biological methods of control, it is worth taking the help of other plants that can scare off pests.These plants include marigolds, which do not allow nematodes to settle in the ground, and an infusion of dry leaves, stems and roots of this flower will help fight aphids. Calendula, medicinal chamomile, onions, garlic, and hot peppers have the same effect.
It is important to know that when using chemicals, their use should be discontinued two weeks before harvest. For herbal preparations, this period is 5 days. An exception among them is chamomile, preparations from it can be used at any time.
Ways to fight fungus
Treatment of the greenhouse in the spring from diseases and pests includes the prevention of fungus. Mold on the ground is a sign of a fungus that is unsafe for both plants and humans (Figure 2). The fact is that it contains toxic substances that enter the plant organism through the soil. Therefore, it is not recommended to use greenhouse plants grown on soil with a fungal bloom.
Note: The peculiarity of a fungal disease is that it appears on any soil, regardless of its composition and type of greenhouse. High humidity, inadequate ventilation and lack of direct sunlight play a decisive role here. In addition, mold grows at a fast rate and it is not easy to get rid of it. Therefore, it is advisable to take care of preventive measures in advance.
First of all, it is necessary to ensure regular ventilation, and if condensation appears on the walls, it must be wiped dry. Watering should be adjusted so that moisture does not stagnate on the ground or floor. To ensure the penetration of direct sunlight into the interior, it is necessary to open a part of the greenhouse 2 times a week.
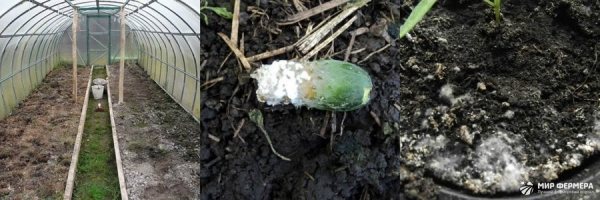

Figure 2. Infection of the soil in the greenhouse with a fungus (mold)
If mold does appear on the ground, it must be treated with special preparations such as phytosporin or a weak solution of potassium permanganate. Among the available tools, charcoal and ash (1: 2) will be effective, with a mixture of which the soil is sprinkled with subsequent loosening. The same applies to seedlings: plants with a bloom of mold cannot be planted in closed ground without treatment from the fungus.
How to fight infection
In addition to pests and all kinds of diseases, various infections that affect plants can also get into indoor ground. The best way to deal with them is through proper prevention.
Therefore, when preparing your greenhouse for planting, follow these tips.:
- Bring new soil to the greenhouse, not previously used for growing seedlings.
- Fertilizing the soil, remember that fresh manure cannot be used, as it has a detrimental effect on the plants, and compost prepared by yourself should not contain plant residues from an infected greenhouse.
- It is necessary to disinfect the frame and greenhouse coverings, completely replace the soil if an infection has been detected. In addition, the area adjacent to the greenhouse is subject to cleaning. Plants cannot be planted in an infected, untreated greenhouse.
- Choose your seeds responsibly: they must be healthy and disinfected.
- It is necessary to fight not only against diseasebut also insect pests, as they can spread infections.
- Watering it is better to carry out with warm enough water to increase the resistance of plants to various infectious diseases.
- Planting seedlings, try not to damage the stems, because an infection can develop in the place of even a small wound.
- Indoor plants should get enough sunlight because its ultraviolet radiation is a powerful infection-fighting agent.
If diseased plants are found, they must be treated or removed urgently, since they are a hotbed of infection that spreads very quickly in greenhouses.
Diseases of tomatoes in a polycarbonate greenhouse
Indoor Tomatoes, susceptible to various types of diseases. The most common tomato diseases in a polycarbonate greenhouse include (Figure 3):
- Late blight
- Leaf mold
- Rot
- Mosaic
- Fomoz
To preserve plants and get the desired yield, you need to learn to distinguish between the symptoms of these diseases and master the measures to combat them.
Disease of tomatoes late blight is caused by a fungus. It manifests itself in the appearance of brown spots on the leaves, stems and fruits. Most often late blight occurs in greenhouses with high humidity and large temperature fluctuations.
To combat this disease, the following measures are used:
- Strong and healthy plants are chosen as planting material;
- When planting seedlings, it is necessary to avoid damaging it, so as not to open the gate of a possible infection;
- The soil must be sufficiently fertile, since a significant imbalance between nutrients leads to the development of diseases;
- An important role is played by weather conditions when planting seedlings, because hypothermia and excessive moisture are extremely undesirable for a tomato;
- Finally, it is recommended to plant several varieties of tomatoes at the same time, since they all react differently to the fungus;
- Maintain a distance between the planted bushes. The necessary distance will protect healthy plants from those that have been susceptible to disease.
With a lack of moisture or excessive nitrogen content in the soil, the vertex gil of tomatoes appears. On green, still unripe fruits, spots appear, either watery and rotten, or dry and black. If signs of a disease are detected, it is necessary to spray the affected plants with a solution of calcium nitrate and establish regular watering of the tomatoes.


Figure 3. The main diseases of tomatoes in greenhouses: 1 - late blight, 2 - gray rot, 3 - mosaic, 4 - phomosis
Leaf mold (brown spot) is a fungal disease. It infects plant leaves and appears as brown-brown spots with a velvety bloom. Leaves of infected plants die, and fungal spores continue to spread when tomatoes are watered, as well as through fallen leaves and human clothing. To get rid of brown spots, it is necessary to lower the humidity in the greenhouse by reducing the amount of watering. From chemical methods of control, you can use the spraying of plants with copper chloride.
Tomato gray rot affects fruits at the end of the growing season. Unlike late blight, brown watery spots appear on the fruits. In some cases, gray rot affects not only the fruit, but also other aerial parts of the plant. Affected fruits should be removed, the soil should be disinfected, and the plants should be sprayed with a fungicide.
Note: In addition to gray rot, root rot is also known, affecting the root collar of plants, which leads to their death. Treatment of the soil with a solution of copper sulfate and replacing the topsoil with a new one will help to defeat the disease.
Mosaic is a common viral disease of greenhouses. Damaging the leaves of tomatoes, it changes their color and shape, as a result of which they turn yellow and dry out.
To combat this viral disease, the following set of measures is used:
- Watering tomato seedlings with a solution of potassium permanganate several times a day.
- Treating tomatoes with a mixture of skim milk and urea after 10 days.
- It is recommended not to touch the sap of plants when pinching, so as not to spread the virus.
A distinctive feature of phomosis is a large brown spot located around the base of the fetus. In this case, not only the surface is affected, but also the inside of the tomato.The cause of this disease is high humidity or excessive application of nitrogen or fresh manure to the soil.
Stage # 2 - cleaning and disposal of garbage
It is imperative to remove last year's pegs, pieces of twine used to tie cucumbers or tomatoes and other disposable devices. Definitely, the roots of the bushes that have completed fruiting, their stems and leaves on the surface should not remain in the soil. It is not difficult to guess the fate of the weeds. Although, according to unspoken greenhouse rules, they are removed along with the remains of cultivated plants in the fall.
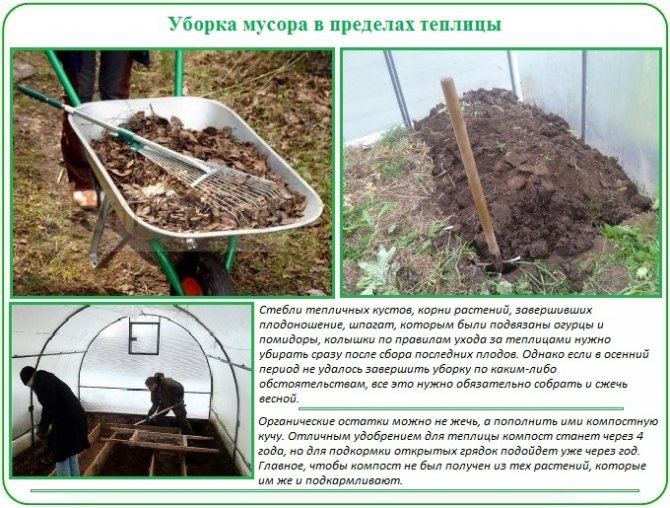

All greenhouse waste, including rotten wood from renovated structures, must be incinerated. Moreover, the resulting ash will serve as an excellent mineral fertilizer. And what pleases me is that absolutely free soil can be enriched with potassium, magnesium, sulfur, iron, calcium, phosphorus, etc. Only nitrogen in this homemade fertilizer will not be, because it evaporates during combustion.
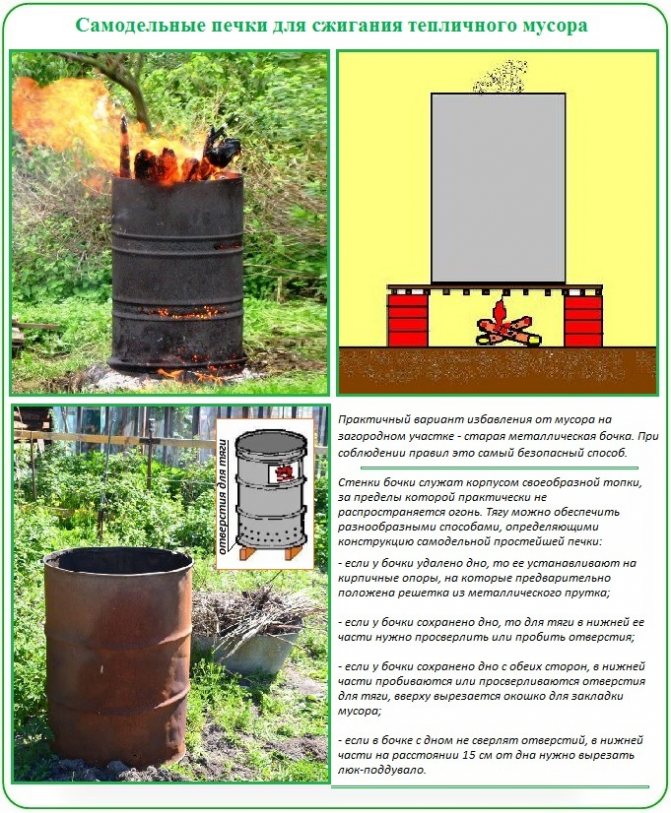
Suitable for garbage incineration:
- homemade stove from a metal barrel without a bottom. Its construction begins with the installation of brick posts, on which a metal grate is first placed, then a barrel is erected. The thrust is excellent, the sparks do not fly away, and the improvised grate will ensure a neat collection of ash;
- a site with a soil or other non-combustible surface with a diameter of 3-4 m, cleared of dry grass, pieces of wood; scraps of paper. There should be no stains of spilled gasoline, diesel, kerosene or other fuel on it;
- an open hearth lined with bricks, for the manufacture of which you can take broken or defective material.
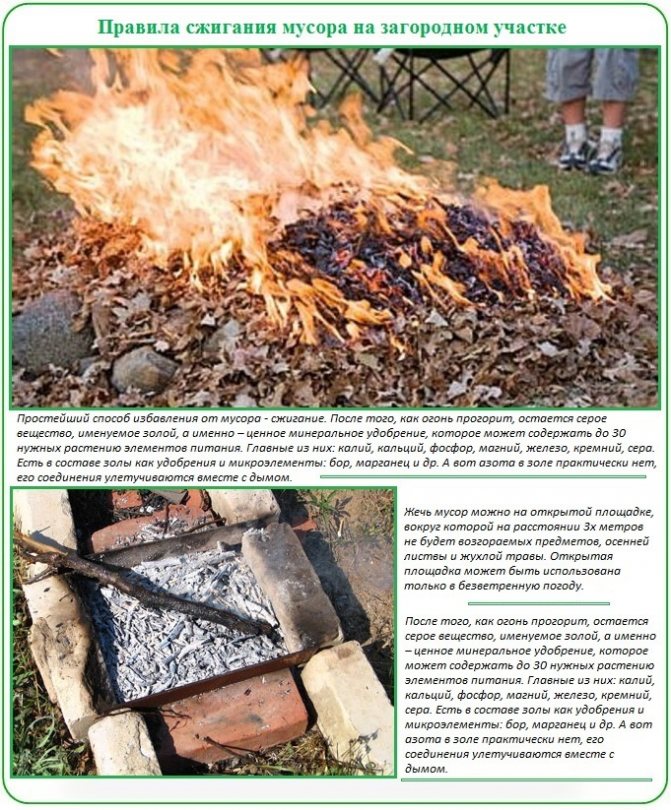

Ash will need 3-5 glasses per 1m², if it is applied dry as fertilizer. Scatter it before digging. If ash is used for feeding, one glass of dry matter is dissolved in a bucket of water.

How to deal with diseases of cucumbers in a greenhouse
Indoor cucumbers are most often susceptible to diseases such as anthracnose, white and gray rot, powdery and downy mildew, root rot, bacteriosis (Figure 4).
Anthracnose is caused by a fungus that actively reproduces throughout the growing season. It is manifested by the appearance of rounded spots on the leaves, in the place of which tissue necrosis begins. At the same time, the fruits are covered with ulcers, both single and multiple. Soon all these formations darken and begin to rot. As a result, cucumbers are bitter and cannot be stored.
The spores of the fungus that causes anthracnose are spread by airborne droplets in conditions of high humidity and temperature. They can persist in seeds and plant debris.
Therefore, the prevention of anthracnose infection will be the following requirements:
- Use only healthy planting material;
- Sowing seeds into well-heated and pre-prepared soil;
- Disinfection of soil in the greenhouse;
- Compliance with the rules of crop rotation;
- If infected plants are found, immediately treat them with a Bordeaux mixture or a suspension of bleach.
Another representative of fungal diseases is white rot, which affects all vegetative organs of cucumbers. Bushes die due to intoxication with a substance that secretes the fungus.
Note: Affected plants are easily recognizable by softened slippery tissue, with a white fluffy bloom of mycelium. Subsequently, the affected tissue decays. Methods for dealing with white rot are to remove and destroy plant residues after harvest, as well as systematically inspect and destroy infected and rotten fruits. If the land is contaminated, it must be replaced or disinfected.
A similar disease is the gray mold of cucumbers. It affects not only stems, fruits and leaves, but even flowers and ovary, as well as leaf axils.Control measures are similar to the previous ones, with the inclusion of dusting plants at the initial stage of growth with a powder of honey and chalk.
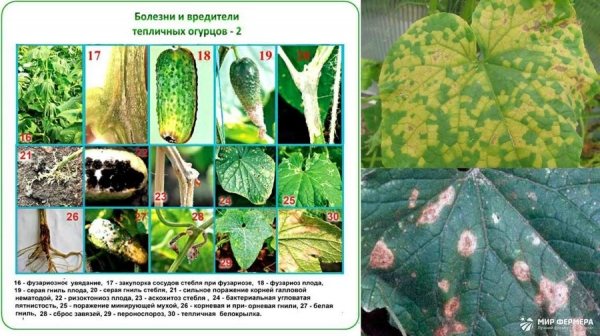

Figure 4. The main diseases and pests of cucumbers in the greenhouse
The most common disease in greenhouse cucumbers is powdery mildew. In damaged plants, the vegetative organs are covered with a white bloom, then darken and die off prematurely.
To secure the future harvest, it is necessary to carry out a number of measures in a timely manner:
- Thoroughly remove and destroy plant residues after harvesting, disinfect the greenhouse and its cover, as well as the tools used to grow the crop.
- Carefully approach the selection of seeds: for example, hybrids are more resistant to this type of infection.
- Maintain the required temperature regime inside the greenhouse.
- When the first signs of the disease appear, spray with any fungicide. Repeat treatment in 10-14 days.
Unlike powdery mildew, downy mildew affects only plant leaves, forming spots on their surface. As a result, the leaf plate darkens, dries up and falls off.
The preventive package of measures includes:
- Timely removal and destruction of affected plant parts;
- Ensuring normal temperature conditions;
- Selection of varieties that are most resistant to infections;
- Complete disinfection of the soil or its replacement in case of damage.
As a rule, root rot affects weakened plants. As a result of this fungal infection, seedlings grow very slowly or die. The roots of the remaining seedlings become brown, the stem becomes thinner, and the plant itself is very easily removed from the soil.
Among the methods of struggle, there are both preventive and proper therapeutic:
- Maintaining proper conditions for the growth of crops in the greenhouse;
- Treatment of plants with special biological products;
- Timely removal of infected bushes;
- Replacement of the topsoil;
- Disinfection of the greenhouse structure and its coating;
- Warming up and processing seeds before planting.
In practice, there are also various bacterioses of cucumbers. The defeat begins with the cotyledons, passes to the tissues of the leaves, leading to their death. Holes appear at the site of bacterial spots, and this can occur both on leaves and stems, and on petioles and fruits.
Measures to combat bacteriosis include compliance with the rules of crop rotation, timely detection and destruction of infected seedlings and plants, disinfection of closed ground and treatment of seedlings with fungicides.
The author of the video will tell you how to disinfect a greenhouse after growing cucumbers.
How to cultivate the soil
Soil disinfection is an equally important procedure. Usually, the soil is poured with the same bleach. By the way, all elements of garden tools are processed with it.
If the soil is heavily contaminated, there may not be enough bleach. In such cases, additional processing is carried out using fungicide preparations.
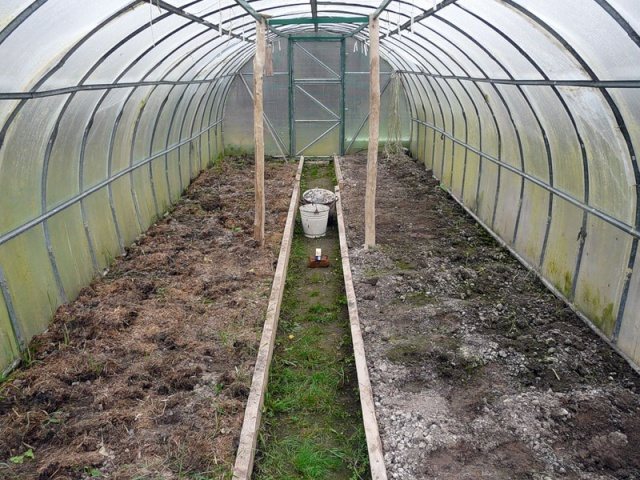

In the fall, the greenhouse is prepared for wintering. To do this, it is removed, thoroughly washed, and the premises and soil are disinfected.
Diseases of early cabbage in the greenhouse
The most common diseases of early greenhouse cabbage are called:
- Black leg;
- Keelu;
- Peronosporosis;
- False dew of cabbage.
The main symptom of blackleg is stem decay; peronosporosis - the appearance of spots and plaque; keels - the formation of swellings and outgrowths (Figure 5). All this can be avoided by pre-heat treatment of the seed. Do not forget that cabbage is a light-loving plant that loves moisture and airing.
Let us dwell in more detail on the diseases of early cabbage:
- Keela develops in the cells of the roots, forming growths on their surface that disrupt the process of absorption of nutrients by the culture. The affected plant is unable to form an ovary. Control measures are reduced to removing wilted or dead plants along with a clod of earth and disinfecting the soil in this place with lime. This substance also helps prevent disease when applied to the soil during seedling planting. Additional disinfection of the soil is not required, since cabbage keel affects only cruciferous plants, for everyone else it does not pose a danger.
- Blackleg develops if humidity standards are violated, and ventilation is not carried out properly. The disease affects the neck of the root and the base of the stem, leading to their thinning and decay, as a result of which the plant dies. Therefore, when planting seedlings, pay attention to the root collars of the seedlings: if they are affected by a black leg, then they cannot be planted.
If the previous harvest of early cabbage died from a black leg, it is necessary to replace the substrate in the greenhouse or plant seedlings in another place. Remember that black leg occurs when there is high humidity and insufficient ventilation.
Figure 5. Symptoms of the main diseases of cabbage in the greenhouse
A disease called cabbage downy mildew poses a serious threat to the future harvest. Most often, it appears at high humidity and is manifested by the death of leaves and lagging of plants in development, which is seriously reflected in the quantity and quality of the crop.
Normalizing moisture and spraying cabbage with Bordeaux mixture will help overcome downy mildew.
Stage # 1 - freeing the area from fixtures
It will be necessary to remove everything from the room that can place it with careful processing. Portable trellises, inventory buckets, racks, vessels for transplanting seedlings. If wooden supports or analogs offered by most manufacturers of factory greenhouses or polycarbonate were installed to support the roof in case of abundant snowfall, they should be dismantled.
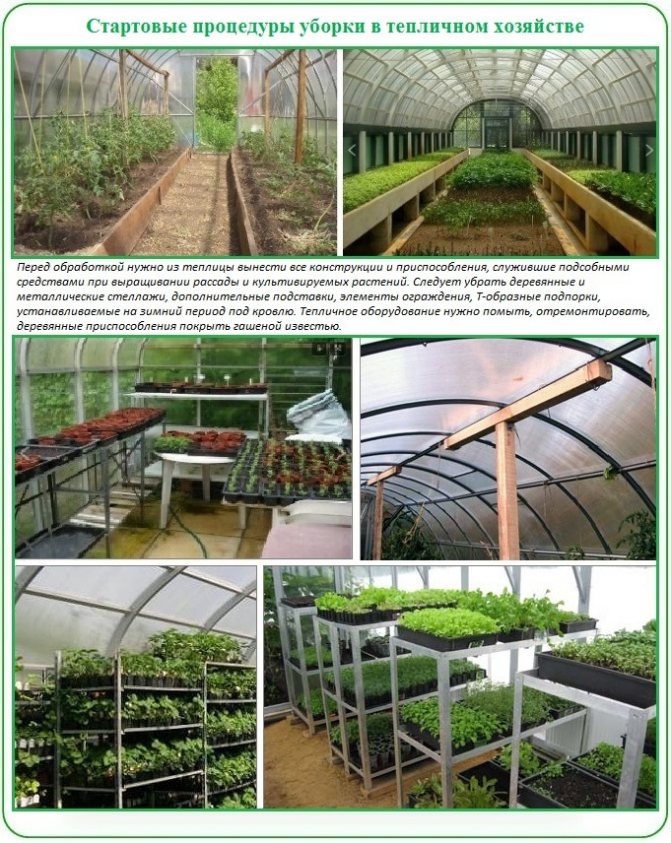

With the racks, trellises, shelves, props removed from the greenhouse, we proceed as follows:
- Wooden ancillary structures should be scrupulously inspected. Revealed rotten and fungal parts must be mercilessly replaced. After repair, wood fixtures should be whitewashed with settled slaked lime with the addition of painting glue.
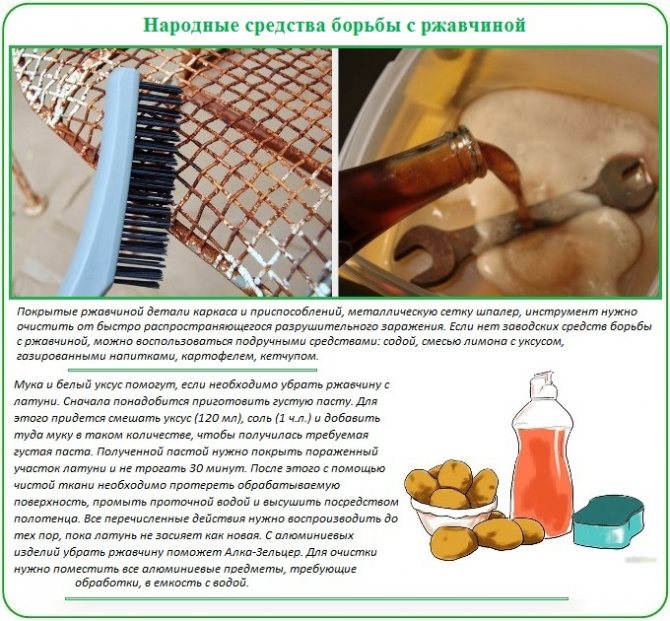
- Metal structures must be examined with equal care. Detected foci of rust must be treated with a rust remover. In the absence of a factory remedy, we remove the rust with half a potato. It contains a sufficient amount of oxalic acid to cope with a slight rusty crust. Baking soda or a mixture of vinegar and lemon juice work well. But the result of the last option will be visible only a couple of hours after application. Removed the rust? Primed and painted.
After removing the various devices, it's time to examine the condition of the metal supports to which the polycarbonate sheets are attached. Rusty areas are also treated and painted. It is clear that undamaged fixtures do not need to be repaired or refurbished.

As long as there are no plants in the greenhouse, the stove and plumbing equipment should be revised, if any. The potbelly stove is taken out into the street, where its condition is thoroughly studied. If the first elbow of the chimney burns out, we install a metal sheet bent by the cylinder inward. It can be changed again without problems before the next season. Happy owners of polycarbonate buildings with a heating system need to update the pipes with aluminum paint diluted with solvent or acetone. Drying oils must be added to the coloring composition to optimize adhesion.Heating equipment is not painted with oil: because of this, heat transfer deteriorates.
Greenhouse processing in spring from diseases and pests
Greenhouses create favorable conditions not only for the growth and development of cultivated plants, but also for all kinds of pathogens. This is especially true for those greenhouses where one type of plant has been cultivated for many years, which means that a significant number of viruses, bacteria, fungi, insects of a certain species are concentrated there. That is why it is so important to carry out an annual disinfection of the soil, greenhouse frame, working equipment and implements. Typically, polycarbonate greenhouses are treated in the fall after harvest. If such work was not carried out in the fall, they are postponed to the beginning of spring.
Spring treatment of the greenhouse from pests and diseases begins with the collection of garbage of various origins, from plant residues to garters and stakes. It is not recommended to use plant residues for composting.
The next step is to wash the polycarbonate coating with soapy water or other detergents that do not contain abrasive additives. This is because polycarbonate is easily damaged, so only soft brushes and rags can be used to clean it. After washing, all surfaces must be rinsed to remove soap residues. If an outbreak of any disease was noted in the previous season, then a disinfectant is added to the washing solution.
The video shows a popular way to disinfect a greenhouse in spring.
Greenhouse disinfection
Spring treatment before planting includes not only mechanical cleaning of the greenhouse surfaces, but also their disinfection. In this case, different substances are used: boiling water, solutions of copper and iron sulfate, as well as formalin and bleach (Figure 6).
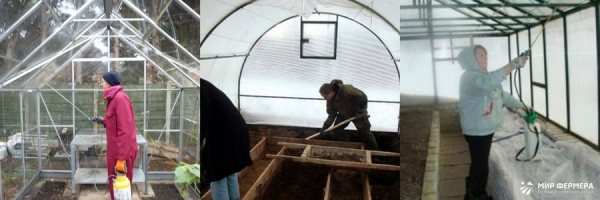

Figure 6. Mechanical disinfection (cleaning) of the greenhouse
As for the chemical disinfection of the soil, it is better to carry out it in the autumn months, since the spring treatment can adversely affect the development of plants. However, it is much easier to replace the topsoil than to decontaminate it. In the vacant space, you can lay rotted organic fertilizers and dig them up with the bulk of the soil.
Disinfection with gas
Fumigation will also help to treat the greenhouse just before sowing. For a greenhouse with a film coating, smoke from a fire will do with the vents and doors closed at night (Figure 7). If the greenhouse is covered with polycarbonate, then you will need lumps of sulfur or special sulfur checkers.
Note: It is important to know that some preparation should be done before using sulfur. It consists in cleaning up debris, watering the soil, filling up all the cracks and closing the vents. Then lumps are laid out on special metal sheets and set on fire, starting from the sections farthest from the entrance. After setting fire to all the pieces, the greenhouse must be closed.
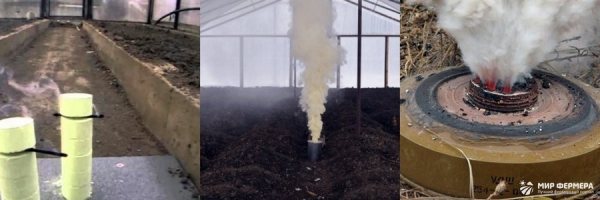

Figure 7. Gas application for greenhouse disinfection
In the process of combustion, poisonous gas is released, therefore, it is necessary to carry out disinfection with sulfur using a respirator and rubber gloves. The greenhouse can be opened after 4-5 days, after which the room should be thoroughly ventilated for 2-3 weeks. Disinfection of a greenhouse with sulfur gas is effective at an ambient temperature of at least 10 degrees Celsius.
Features of gas disinfection are shown in the video.
Chemical disinfection method
Depending on the goal, indoor ground is disinfected using the following chemicals:
- Colloidal sulfur and sulfur dioxide;
- Copper oxide;
- Quicklime;
- Freshly slaked lime;
- Poisonous drugs.
All of these products are best used in the coolest time of the day, best at night.
When burning, checkers of colloidal sulfur emit poisonous gas, which penetrates into the soil, where, when exposed to moisture, forms sulfurous acid. This acid will kill all infections, germs, mold, and insect pests. Note that in a similar way it affects the nutrients contained in the soil, thereby making it less fertile. Therefore, try not to overuse this disinfection method (Figure 8).
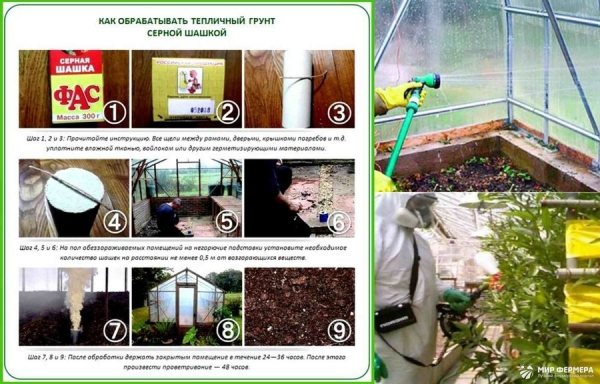

Figure 8. Chemical disinfection of the greenhouse
In addition to ready-made sticks, you can use individual pieces of sulfur. They are pre-crushed and mixed with charcoal. Then, containers are placed throughout the greenhouse, half filled with water, metal sheets (trays) are laid on them. The crushed sulfur is placed on baking trays and ignited with kerosene. The use of gasoline is strictly prohibited. The released sulfuric anhydride must be stored indoors for 3 days. This disinfection is suitable for all types of greenhouses, except those with an unpainted aluminum frame.
Disinfection with bleach will help to destroy, if not all pathogens, then most of them. To prepare the mixture, you will need 400 g of quicklime per bucket of water (10 L). Lime is poured into the water and infused for about 4 hours with occasional stirring. The solution does not need to be stirred for the next 4 hours. Then the upper liquid layer is selected and the soil is treated with it using a sprayer. The remaining sediment is used to whitewash the greenhouse frame.
The most radical method is considered to be processing with copper sulfate. It is used quite rarely due to the aggressiveness of the solution not only to pathogens, but also to beneficial soil microorganisms. After treatment with iron sulfate, the soil becomes empty, they are deprived of any species of life. However, this problem can be easily corrected by artificially introducing soil life.
Note: Before using the solution, it is recommended to clean the soil from plant residues. The cleaned beds are sprayed with a solution of ferrous sulfate at the rate of 250 g of substance per standard bucket of water or with a solution of copper sulfate (1 tbsp. Spoon per bucket of water).
There are many toxic substances for greenhouse disinfection. Formalin and creolin are called the most dangerous with low effectiveness. Formalin is used to combat the whitefly, in the secretions of which various types of fungi multiply. The action of formalin is so toxic that it affects not only the insect and its larvae, but also the fungus itself with spores. After treating the soil with formalin, it will take several weeks to ventilate the greenhouse.
Another outdated and unsafe remedy is creolin. This substance is capable of destroying all life in the soil. Therefore, if the soil is contaminated in a greenhouse or greenhouse, it is best to replace it rather than poison it.
Biological disinfection method
Biologicals are soft and effective in the fight against diseases and pests in greenhouses (Figure 9). At the same time, they do not affect the level of soil fertility and do not reduce the content of nutrients in it. In addition, these biological substances are able to bind heavy metals and decompose pesticide residues, fix nitrogen in the soil and produce natural growth hormones. The value of these preparations is that after their application there is no need for airing, which means that the seedlings can be planted almost immediately after soil treatment.
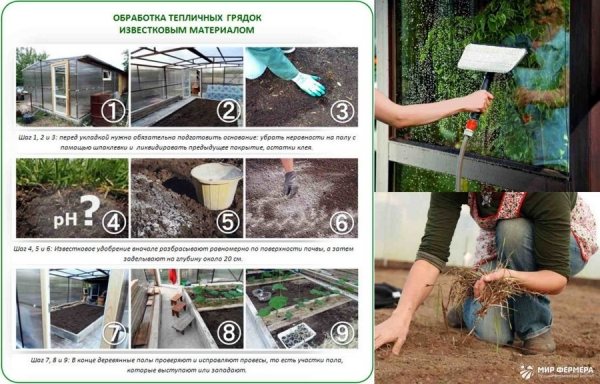

Figure 9. Carrying out biological disinfection of the greenhouse
For example, "Fitosporin" and "Baikal M" are effective against various types of mosses, lichens and fungi. "Fitolavin - 300" is used for the prevention of rot and destroys pathogenic organisms.Sour and black legs, as well as fusarium and verticillary wilting can be overcome with the help of the drug "Carbation". Action "Acrobat MC" is aimed at combating powdery mildew and late blight, and "Bayleton" against gray rot.
After using all biological preparations, it is necessary to restore the beneficial microflora of the soil. For this purpose, beneficial bacteria are introduced into it in a special way.
Scalding the soil with boiling water
One of the most effective methods of soil disinfection is the use of the thermal method. This type of disinfection allows you to kill everything harmful in the soil without damaging it (Figure 10).
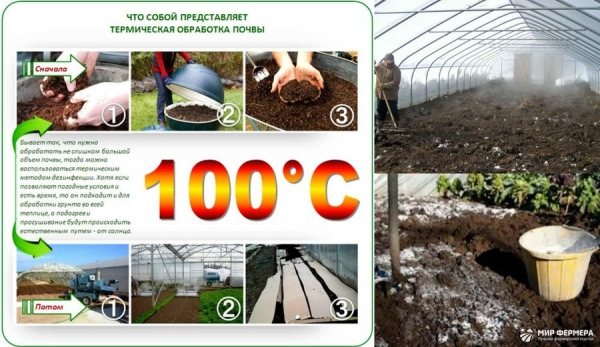

Figure 10. Heat treatment of soil in the greenhouse (scalding)
The traditional method of thermal treatment is to scald the beds with boiling water and keep them under a film. As a rule, this method is used to restore depleted soil, increase the resistance of plants to possible diseases and the rapid growth of the crops themselves. The soil becomes loose and healthy. Parboiled soil does not need abundant watering, which excludes acidification. However, this method is suitable for treating only a small area of greenhouses. It is also treated with steep boiling water for disinfection of the greenhouse structure, racks, and work equipment.
A set of measures
The preparation of the greenhouse in the fall should take place at an air temperature of 10-15 ° C, in dry weather. Competent prevention of the structure, high-quality soil care in the greenhouse in the fall is carried out in several stages:
- cleaning;
- spring-cleaning;
- disinfection of surfaces;
- repair of the structure;
- cultivation of the land in the greenhouse in autumn: the introduction of chemicals - fertilizers, drugs for pests and infections, fertilizing, improving the structure of the soil, digging or replacing the fertile layer;
- strengthening of the structure;
- insulation, supplementary lighting, heating (if necessary).
The video shows a step-by-step process of how the autumn processing of a polycarbonate greenhouse is carried out, the video recommends preparations for washing the structure.

