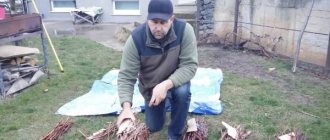
Some vineyards buy cuttings to plant a new grape variety on the site, while others propagate one that takes root well and gives a high yield.
In February, you can begin to germinate, in the fall, harvested cuttings and plant them on the site in the spring. The main thing is that the plant has a well-developed root system and after May 20 it can be planted in a permanent place in the ground.
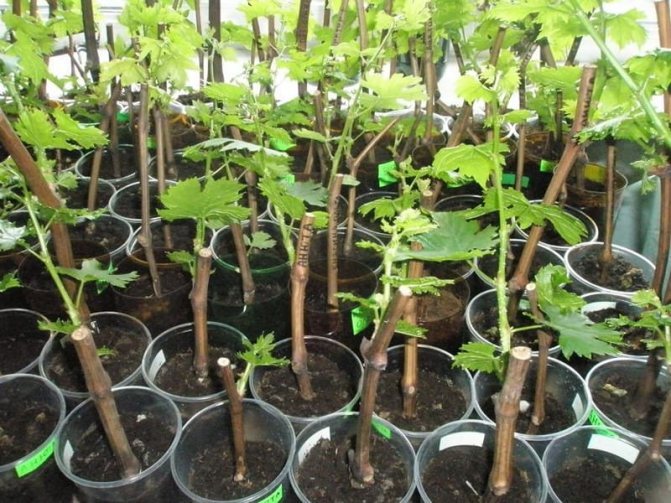
Do-it-yourself quality grape seedlings from cuttings
So I'll tell you how to grow vegetative seedlings.
Many growers know how to grow seedlings from cuttings at home.
This is not difficult at all, most varieties take root easily, even if you just stick them in wet soil in the spring.
However, additional preparation and proper storage of cuttings allows you to get better quality seedlings, accelerating fruiting.
TOOL FOR HOME AND GARDEN, NEEDLEWORK, ETC. PRICES VERY LOW

Winter storage of cuttings
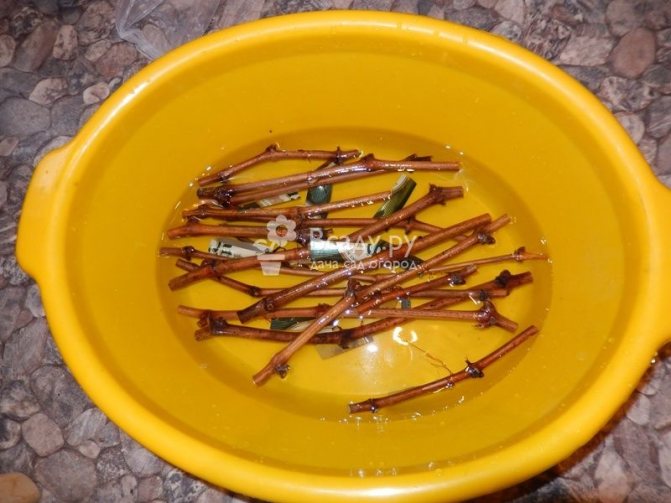
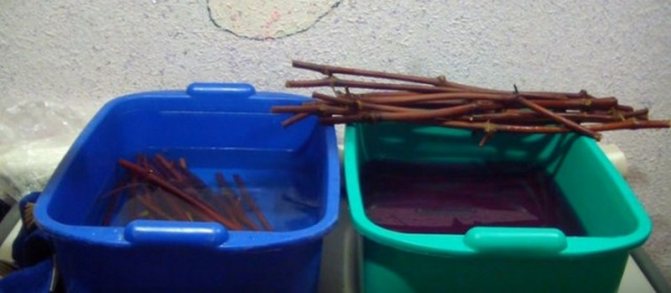
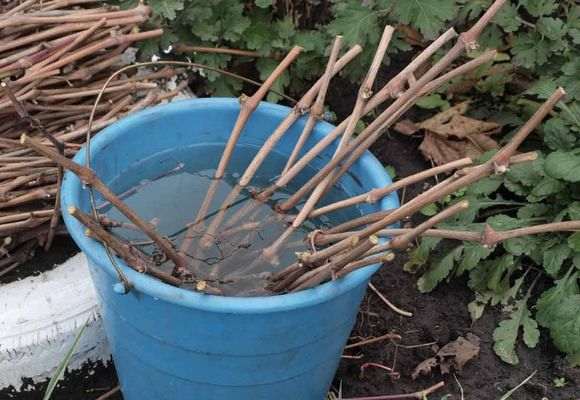
- The finished bundles are placed in cold water for a day to increase their natural moisture content;
- Before planting, the planting material is necessarily etched with a 5% solution of copper sulfate, after which it is slightly dried;
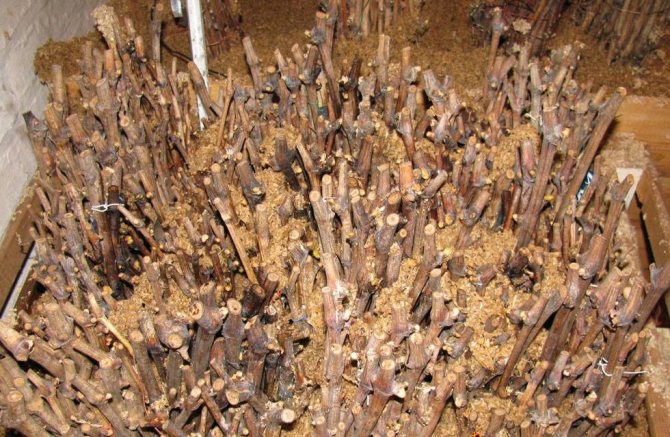
- After that, the bundles are wrapped in plastic wrap and placed in a cold place, usually a cellar;
- The cuttings put in storage are turned over to the other side several times during the winter months;
- For future grape bushes, changes in air temperature in the cellar are undesirable.
"Lean" land and small irrigation
The most important operation is the rooting of the cuttings. If it is not required for the spring cultivation of seedlings, then in the case of vegetative seedlings it is indispensable. Moreover, the task is to slow down the development of the shoot as much as possible by germinating the roots, since with the advanced growth of the shoot, it can die due to the lack of roots. This is achieved by carrying out kilchevaya, i.e. creating a temperature of 25-27 ° near the roots, and a lower temperature near the kidney, about 10 °. For this purpose, I use self-designed waggon
with heating and a thermostat, which I install in a cool room.
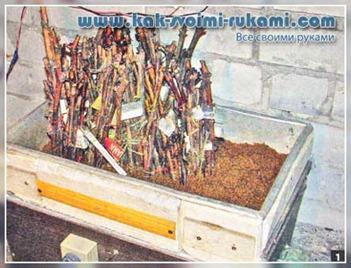
For a small number of cuttings, you can use a suitable container, which must be installed on the battery, filled with pre-steamed wet sawdust with a layer of 8-10 cm. Cuttings are set to a depth of half the sawdust layer. By grades, they can be tied into bundles. The room must be chosen cooler and, maintaining the humidity and temperature, after two weeks, you can check the condition of the roots. If they are available, even 1-2 mm long, cuttings should be planted in containers with soil. It must be remembered that the time before the formation of roots in different varieties can be different.
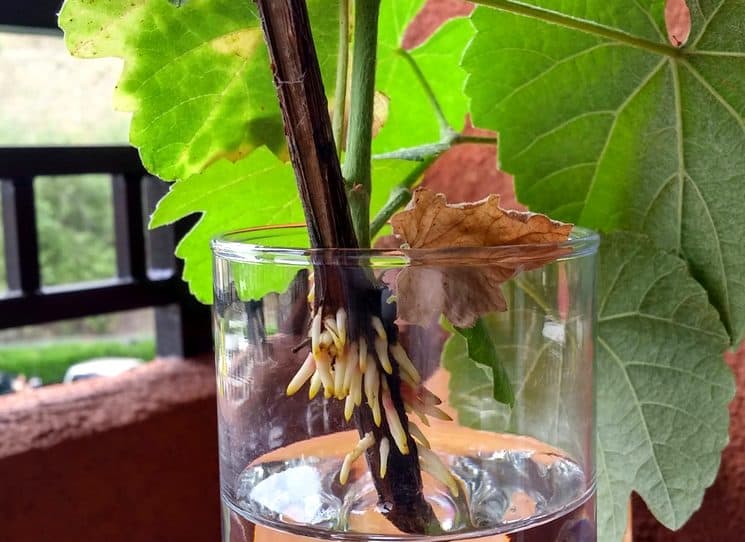
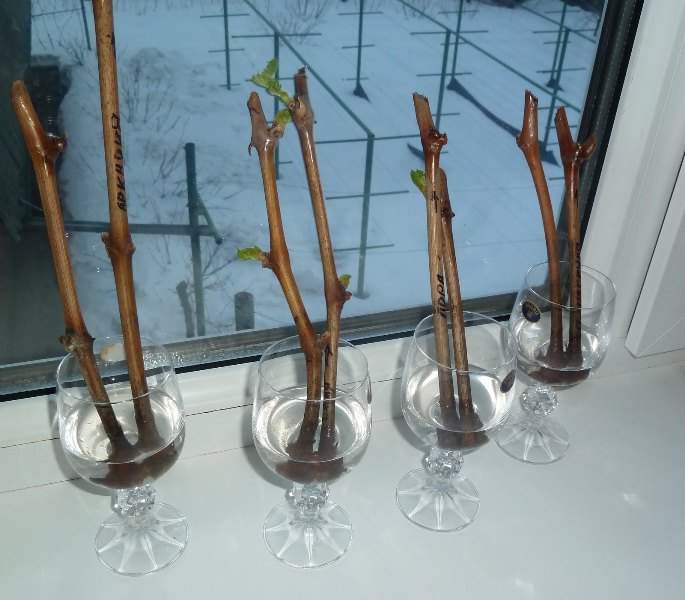
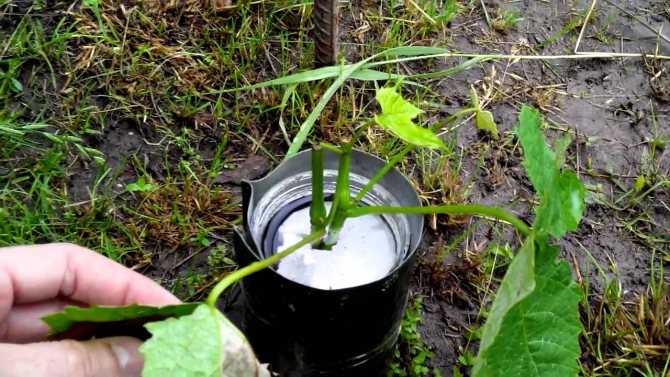
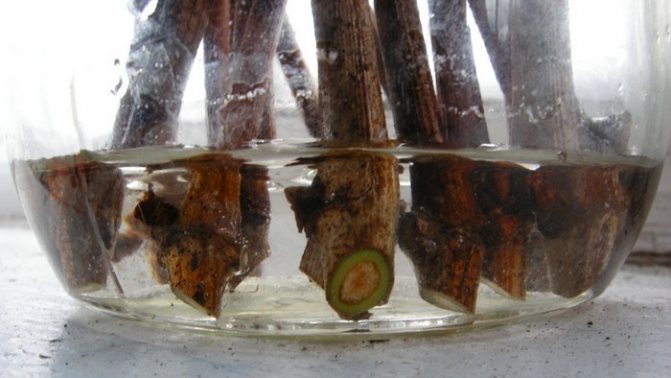
A fairly popular rooting method is method P.P. Radchevsky
- in a jar with a little water. With this method, the roots are formed at the water-air interface, and when germinating in sawdust (you can use a coconut substrate, but it will cost more) the cutting is all in a humid air environment, and the roots are stronger. In addition, when rooting in water, a green shoot germinates much faster, and this is undesirable.
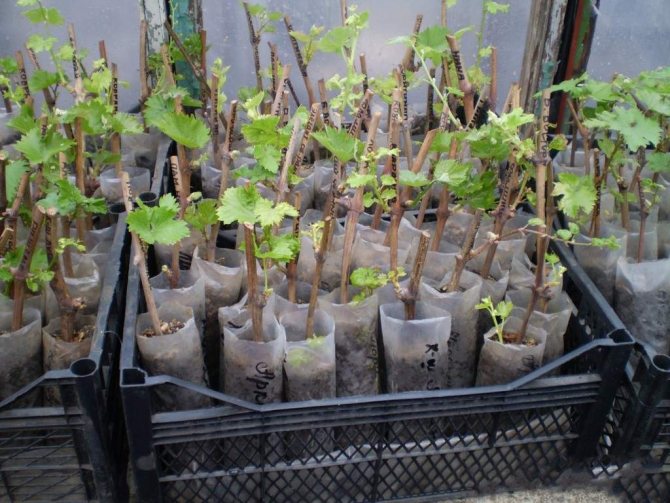
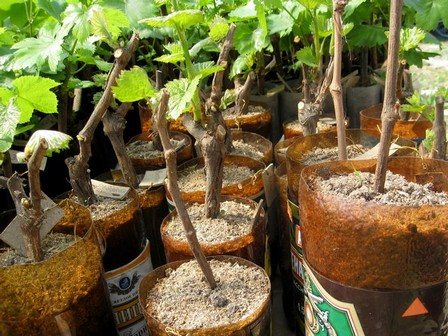
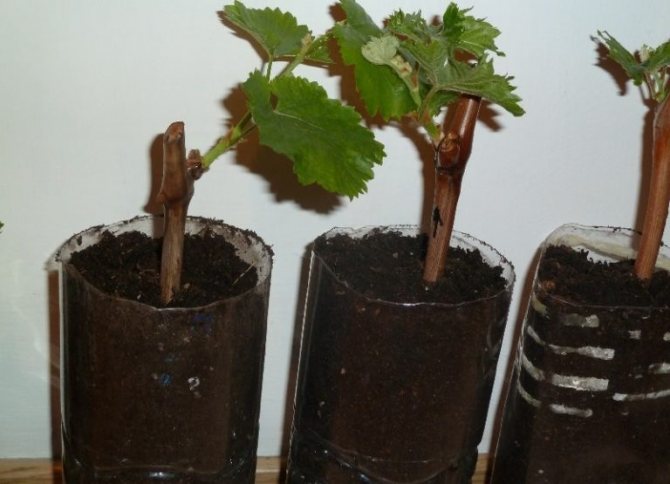
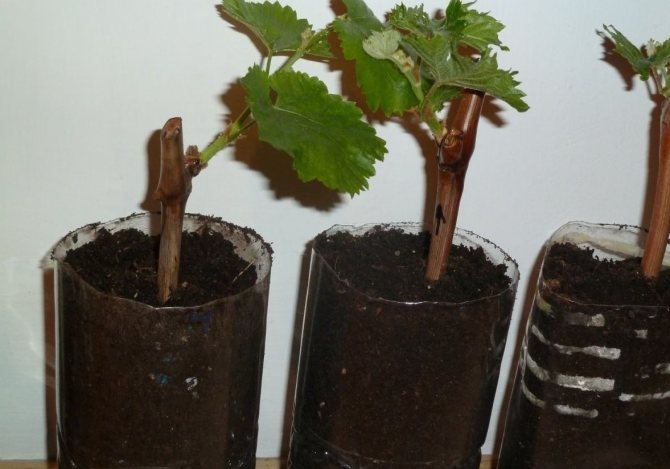
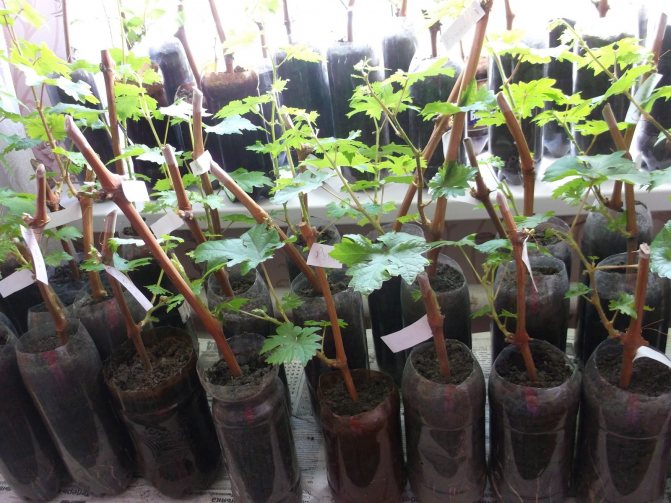
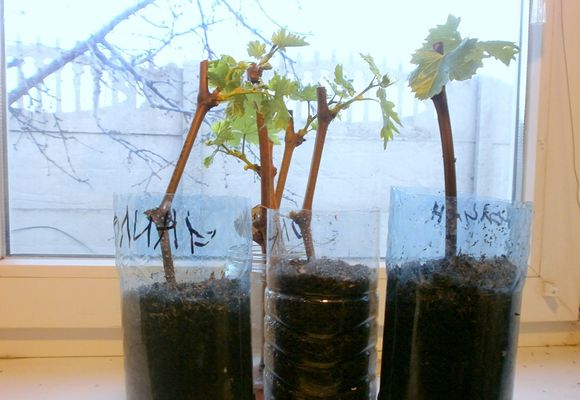
As containers for disembarkation, you can use a film sleeve or cut PET bottles with a capacity of 1.5 to 5 liters and a height of 15-20 cm, at the bottom of which drainage holes are made. The containers need to be filled halfway with the soil mixture, carefully set the stalk, fill to the top and water well - It is better to prepare the soil mixture yourself: ready mixes from the store are sometimes brought in. The mixture should be loose - the earth (preferably not from the garden, but from the planting) in half with sawdust or coconut soil. This land should be "lean" - no added humus. Top dressing, both root and foliar, can be carried out after the seedling grows.
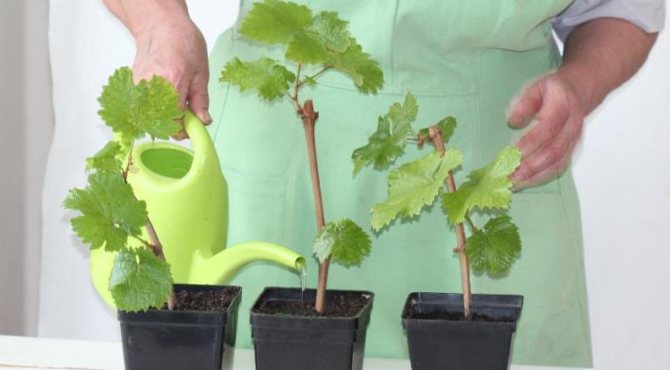
Excessive watering is a common mistake, as a result of which roots rot and growth stops. Watering is necessary 1-2 times a week.
Before planting in the ground, seedlings must undergo hardening, getting used to a lower temperature than room temperature and to the sun's rays. There are often cases when seedlings purchased on the market that have not undergone hardening die after planting in the ground due to the resulting stress.
Know the types of maiden grapes
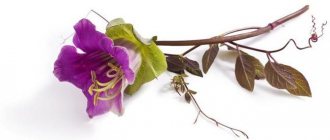
Of the 10 varieties of wild grapes, two grow in our country: ivy (triangular) and virgin (five-leaf).
- Ivy or triangular... Bears great resemblance to ivy. Able to grow vertically and horizontally, like groundcover. According to the color of the foliage, it is divided into 3 varieties: Vicha / orange grapes; purple; golden. Ivy varieties are leading in terms of growth rate. The stem grows by 3-4 m per year.
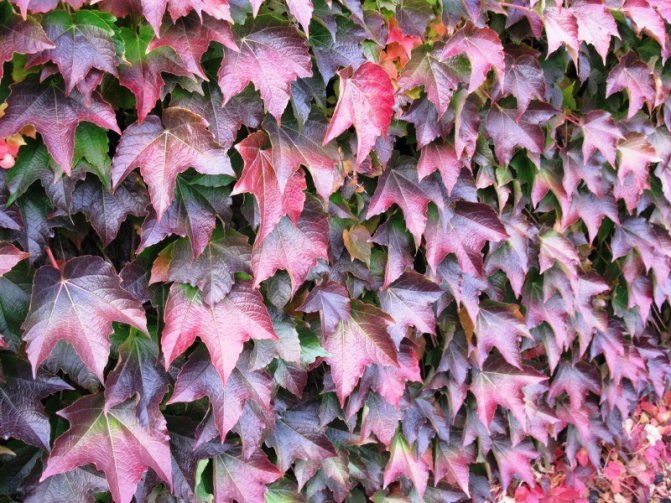
Ivy variety. Photo:
- Five-leafed or Virginian... It belongs to the most unpretentious species. Oblong leaves are located on long petioles (10–20 cm). Stems can grow up to 15 m, the annual growth is 200-300 cm. It grows anywhere, but it can be more beautiful and fast growing in shady places.
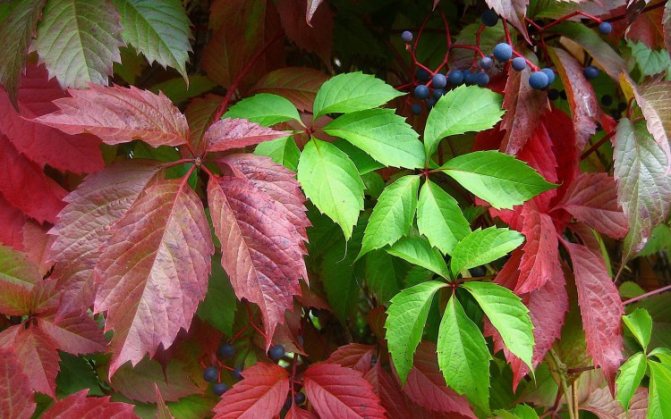
The virginian leaf consists of five separate plates attached to the petiole. Photo: ogorod-To give the desired shape, wild grapes need to be cut regularly, guided, tied up the stems, block growth, remove excess shoots.
Three tips for growing seedlings from cuttings
You can store well-ripened cuttings cut in the fall in the cellar by immersing the lower part a few centimeters in wet sand. It is better to make the lower cut much lower than the kidney - this "tail" may darken and will be trimmed in the future.
The temperature should be no higher than 8-10 °, but preferably 0-5 °. A small number of cuttings can be stored in the refrigerator wrapped in a damp cloth and then in a plastic bag (not too sealed), airing 1-2 times a month.
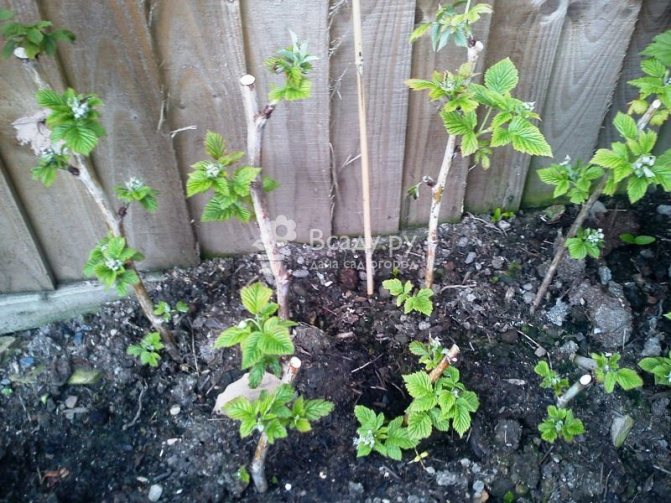
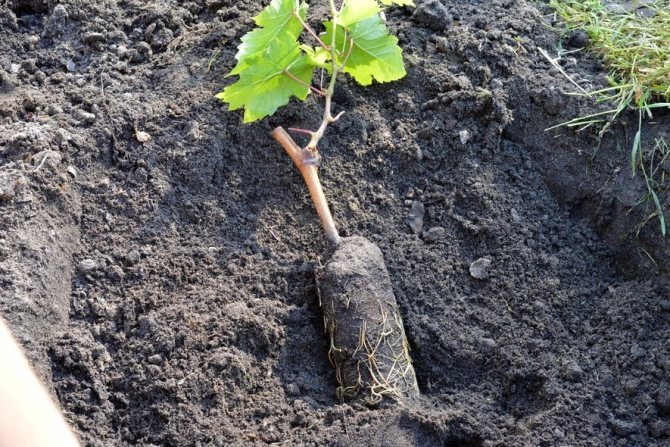
Practice shows that planting a growing seedling in the ground not in a permanent place, but in a school, with further transplantation to a permanent place in the fall, gives better results, since the root system develops better in a seedling planted to a depth of 10-15 cm.
Attaching Ground Packages to the Base of the Ground Escape
One of the most original ways to propagate grapes is to attach soil bags to the base of the ground shoot. At the end of June, you need to take a prepared package with soil mixed with peat and attach it to the base of the shoot. Several small holes must be punched in the bag so that the future root can "breathe". During the second half of the summer, roots will form in the bag, and you will receive a ready-made grape seedling. This method of reproduction has the same disadvantage as in the case of reproduction by euthanizing the vine. In this case, the root system is formed from the point of growth, which will be similar to the nutrition of the bush from dewy roots. Therefore, this method is usually not used in northern regions.
WE GROW VINE SEEDLINGS - TIPS
If you dream of acquiring your own grapes and you have cuttings harvested in the fall, then now is the time to start growing grape seedlings at home.
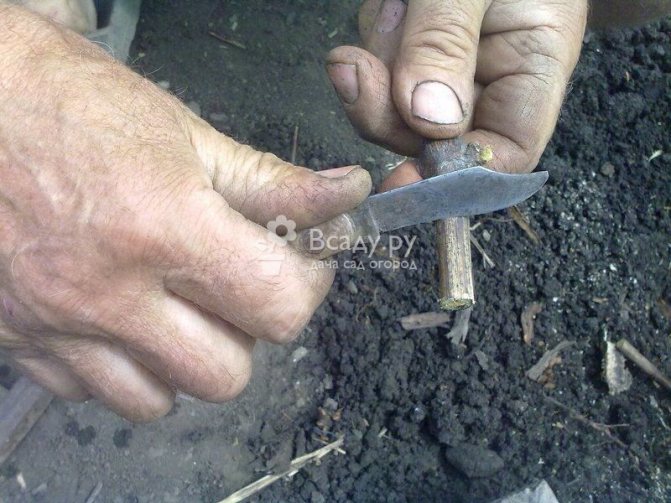
In the first half of February, cut the cuttings with two eyes with a sharp knife: 3-5 mm from the lower eye - obliquely and 10-15 mm from the upper eye - with a straight cut. Make a few longitudinal scratches at the lower end of the cutting without damaging the lower eyelet.
Soak the prepared cuttings in room temperature snow water for 2-3 days. During this time, prepare a 12x12x15 cm box with drainage holes in the bottom. Cover the holes with clay shards and cover the bottom with charcoal or broken brick chips in a layer of 1.5-2 cm. In the box, you can use glasses made of thick plastic film with a diameter of 10-12 cm and a height of 15 cm. Cut plastic drinks bottles with a capacity of 1.5 * 2 liters are also perfect for this purpose. Fill the box or glasses with a 2: 1 mixture of garden soil and coarse sand.
On the day of planting, it is advisable to hold the lower parts of the cuttings for 10-12 hours in a solution of Heteroauxin (1 tablet per 0.5 l of water) or in a weak solution of potassium permanganate, and then lower it for 2 hours in a clay chatterbox.
Plant the prepared cuttings in holes 5-7 cm deep, being careful not to damage the clay coating, squeeze the ground around and pour abundantly with water. Close the upper parts of the cuttings with plastic bags, tightly tying them with threads. Put the box on or near a battery (bright light is not necessary), and let it stand there until the buds open. As soon as this happens, the box must be rearranged on the windowsill and the bags must be cut from above to ventilate the plants.
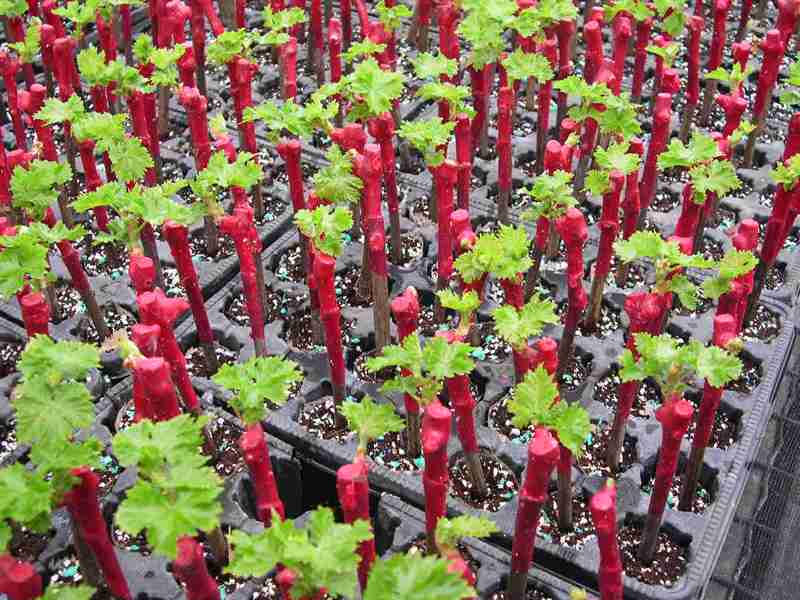
After a while, the packages will need to be removed. Place the tops of the cuttings in plastic or paper cups 6-7 cm in diameter and completely cover them with scalded wet sawdust. During the entire home period, the soil and sawdust are not allowed to dry out. In 3.5 months, you will grow grape seedlings with a well-developed root system, ready for planting in a permanent place.
Note: grape cuttings and sawdust
We have a private house with 10 acres. We tried to plant whatever we wanted, every corner was busy with something. And everyone had their own hobbies in this matter: the spouse mastered vaccinations for wild apple trees, and I "got sick" with grapes.
It all started when my nephew brought us cuttings of the Aleshenkin variety and taught me how to grow them. Slowly they turned into a real trellis of seven bushes. Well, since there is such beauty, and even the harvest is quite decent, then how can you stop at this? Moreover, it became clear what can be demanded from the grapes. So then I began to acquire varieties with specific characteristics. I contacted friends and got hold of saplings Delight, Attica and Pleven stable. All of them have taken root well and are already bearing fruit.
True, a whole story came out with the latter: at first the planted seedling was devoured by a goat, then it escaped from a dormant bud, but apparently did not manage to ripen and eventually died. I had to buy it again. And that year I planted seven more varieties, so now I will look forward to the harvest.
And I decided to write because questions began to appear about growing grapes using cuttings. This is a very interesting topic, but, in my opinion, the options offered by readers, although effective, are not particularly reliable.
For some reason, no one yet remembers the method using sawdust.
The bottom line is as follows. A layer of sawdust is poured into a box with a drainage hole, cuttings are laid, they are also sprinkled with sawdust on top and spilled with water.The box is covered with foil and placed in a warm place for two weeks, after which the appearance of powerful roots in the cuttings is guaranteed. I have heard a lot of good things about this technique, even when I just started doing viticulture.
And somehow a book by N.I. Kurdyumov "Smart vineyard for myself" (by the way, I like it the most on this topic, since everything is described very easily in it, especially about the formation, which scares many so much), and there again I saw a description of cuttings with sawdust. And since by this time I was already ripe to try to propagate grapes by cuttings, I decided to try out the methods of Orchakov and Kurdyumov in practice. And both of them turned out to be convenient (it was not for nothing that I immediately liked this path - apparently, intuition suggested), but each with its own characteristics and shortcomings (where can I do without them), so now I sometimes stick to a sort of average option.
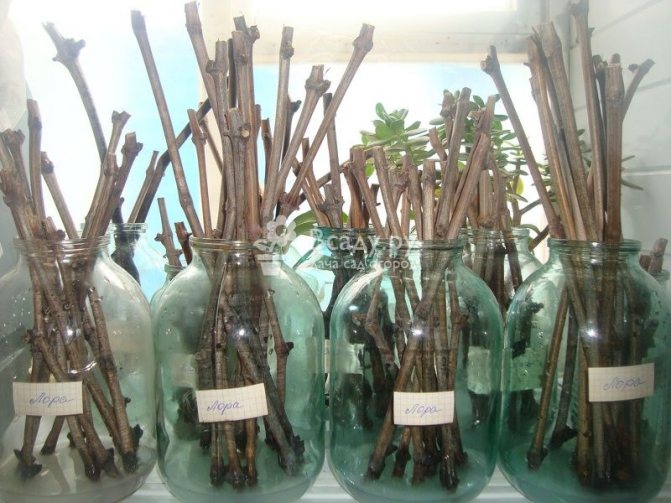
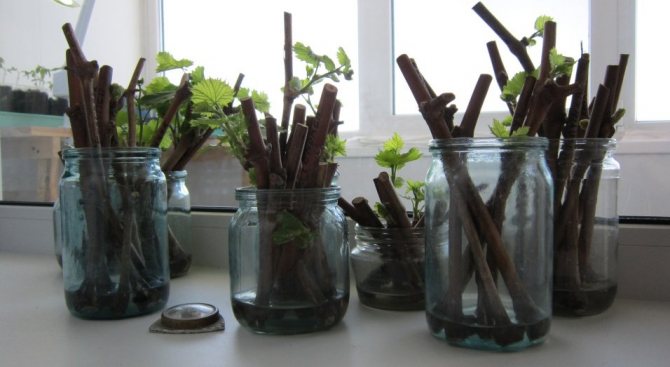
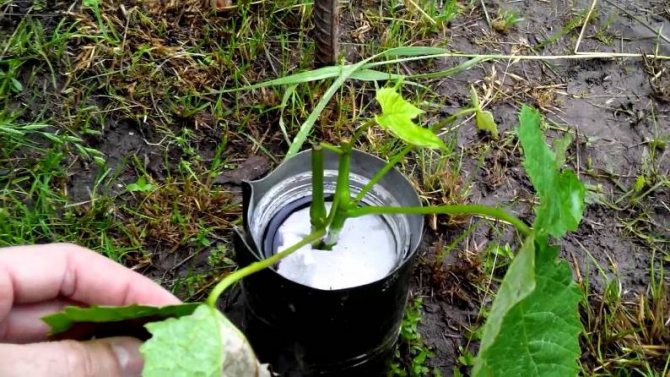
I prepare the cuttings themselves without any special tricks. But then I put them in three-liter jars, where I pour water, but a little - 2-3 cm. I put the cuttings there and put them on a sunny window on a high stand or make a backlight. As always, buds wake up first, then shoots appear because of the water, and then roots. Now they can be transplanted into the ground.
For this I use cut-off 6-bottle "polorashki" with perforated bottoms for drainage. First, in these containers I pour a 3-5 cm layer of loose (and this is a prerequisite!) Fertile soil, then I simply insert the cuttings there and carefully add the soil. Then I water it abundantly, add more soil on top and set the bottles with cuttings in plastic boxes on pallets. I keep everything in the shade for several days, and then I expose it to the window.
So, comparing this method with the method proposed by A.S. Orchakov, I want to say that when I prepared the cuttings according to his method, I thought that I would not do this anymore, because there is more fuss, and garbage from sawdust, and another box must be picked up so that the cuttings fit well.
And when I saw that the roots appeared a week earlier and they were really such that they had to be cut off, I decided that this method is more effective, but mine is simpler and cleaner. So, it is up to whom to decide how to do it. True, with my method I could not root Rapture and Attica. But according to the method of A.S. Orchakov - it worked.
Germination of shanks
Autumn harvesting of grape seedlings at home is not limited to cutting the source material and storing it competently in winter.
Cuttings are germinated in a pot or other container before planting.
The step-by-step process can be determined by the following actions:
- Holes are drilled in the pot for planting to drain excess moisture and ventilate young roots;
- The composition of the soil should include leafy soil from under fruit trees, turf, peat;
- Un-rammed earth is placed on the bottom of the dishes in a layer up to 5 cm thick;
- A sand ring is formed in the center of the pot, filled with water;
- A small depression is made in this ring, where the handle is placed;
- Then the dishes are filled with substrate, watered abundantly and mulched with sawdust or sand.
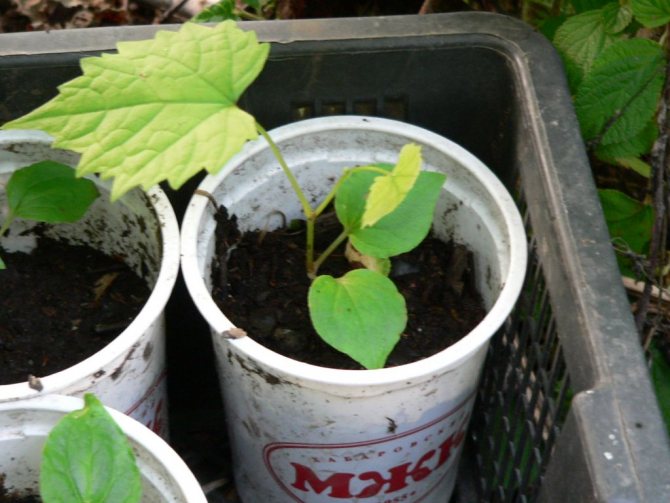
You need to water the plant daily, but in moderation. It is better to plant the stalk in a plastic transparent dish, so you can see the roots that appear. During this time, 4-6 small leaves should grow on the shanks themselves, this is a signal that the plant is ready to move into the open ground.

For cultivation, it is convenient to take a 1.5-2 liter bottle of mineral water, and in the store to buy soil for growing plants, which has already been fertilized.
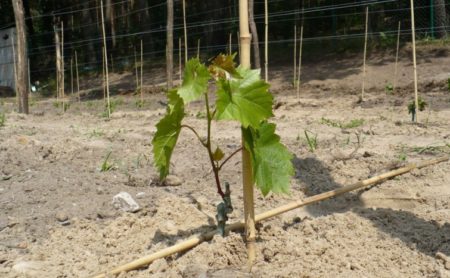
Saplings are planted in open ground to a depth of 0.7-0.8 m. When preparing a hole, fertile soil is laid in one direction, and clay in the other. Mineral fertilizers, ash, humus are added to the first, fertile heap.
Important! The success of growing grapes from cuttings largely depends on the condition of the soil.In fertile, light and loose soil, the plant will grow rapidly. Young leaves serve as an indicator of the state of the soil.
Read also: Top dressing of pepper for a big and good harvest
Unfavorable soil causes them to dry out along the edges. Watering with a solution of wood ash will help to save from this.
In warm areas planted "according to the rules" chubuki yield a harvest in two years, but it is better to count on the first good berries in three or four.
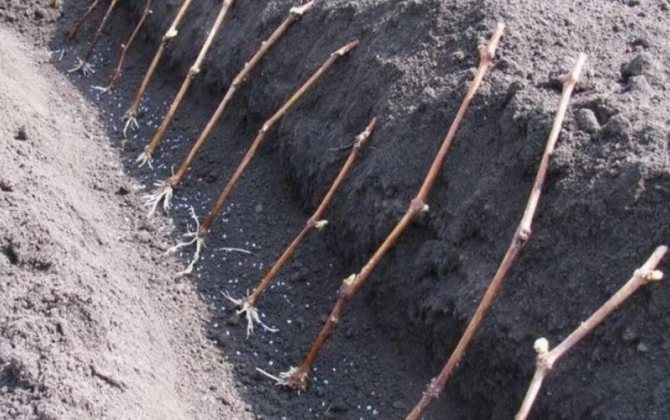
There is another good way to make productive bushes out of shanks. But this method can only be used in warm areas. Having selected the most beautiful vine during pruning in the fall, it is cut into traditional stalks and buried at an angle of 40-45 degrees for permanent residence.

As needed, the petioles are watered, and with the onset of frosty days they are covered with foil or agrofibre and covered with earth. From such a planting, a strong fruitful vineyard is obtained. Try it!
How to plant grapes with cuttings at home
Only by using a vegetative propagation method can a healthy, fruiting plant be obtained. In this case, you need to understand all the responsibility, and therefore observe the necessary technique. Methods for grape cuttings are different. Each gardener can share his advice and experience. Having received a shoot from a healthy plant, you can count on a good and voluminous harvest in the future.
First you need to cut the cuttings. To do this, choose healthy grapes with a stiff mother vine. The vine must be well ripe and have live buds. Take a long shoot or segment. The bigger it is, the better... They begin to harvest them even before the first frost. The stalk should be about 1 cm in diameter and have 4 to 8 buds. Basic rules of preparation:
- Slicing.
- Sort and label. It is advisable not to use paper labels.
- If it is not possible to immediately start preparing, then the cuttings are buried in earth and left to winter on the site.
- First of all, the slices are sent to a container of water for 24 hours.
- The settled cuttings must be disinfected so that rotting does not occur. Usually a weak solution of potassium permanganate is used for half an hour.
- After all the procedures, the blanks are blotted with paper towels and left to dry.
- At the very end, the cuttings should be wrapped in cellophane, tied tightly and stored. Suitable for this: basement, balcony, refrigerator and more. The temperature should be no more than 6 degrees and no less than 2.
Many gardeners it is recommended to check the workpieces every month for the moment of rotting, mold and drying out. If there are problems, then they do everything that is necessary again: they are washed, processed, dried and sent back for storage.
How to turn a stalk into a seedling
To grow a full-fledged vine, it is not enough to choose the right piece of a branch and preserve it during the winter cold.
Before you start planting autumn cuttings in the soil in spring, you need to get them out of the cellar and ventilate them well. Then the planting material is checked for safety. If you press firmly on the "correct" seedling with your fingers, juice is released from the cut.
A rotten stalk smells unpleasant, and the juice flows out of it without any effect. With such a seedling, you should not waste your energy and time, the bush will not grow out of it.
It happens that during the winter the plant dries up, and the juice does not stand out from it, such a shank is also discarded.
Important! Grapes are propagated by cuttings or spring layering not only at home. This method is also used in industrial crop cultivation.
Grape plantings will develop quickly if the shanks are well prepared. To do this, the selected best specimens are soaked in warm water before planting, this will wake up the dormant possibilities of the vine.The cuttings are soaked for two days.
To grow a good strong vineyard, cuttings must be carried out in accordance with all the terms and stages. Also, before planting, pruning, all components are needed - tools, fertilizers, utensils, and good weather conditions.

Planting grapes with cuttings at home: rooting
Breeding grapes with cuttings - troublesome businessrequired full adherence to the technique. Before planting a ready-made seedling, you need to carry out proper rooting. They do it in the following way:
- In the spring, workpieces are taken out, examined, trimmed and rejected. Cuttings need to be cut for further rooting. There should be an even cut from the bottom, about 2 cm to the kidney, and from above, an oblique cut 1-2 cm after the peephole. In this case, the top should be treated with garden varnish or paraffin. It is easy to choose healthy and suitable cuttings for growing. When pruned, they should be green on the inside and have live buds ready to bloom. If the buds look painful, and the inside of the stem is brown, then this material is not suitable for planting.
- To form the roots, make the grooves a thin and sharp object. Nails or needles work well. They make a furrow from the middle to the very end.
- After that, you need to completely immerse the cuttings in water for 24 hours. It is better if they are free in the container and do not interfere with each other.
- To help the roots wake up, a special stimulant is used. For example, Kornevin.
- After the stimulant, the cuttings are again sent to infuse 3-4 cm in water until they are ready for planting. After 2 weeks or earlier, the upper bud begins to bloom. The seedling will begin to absorb water, which means it needs to be added.
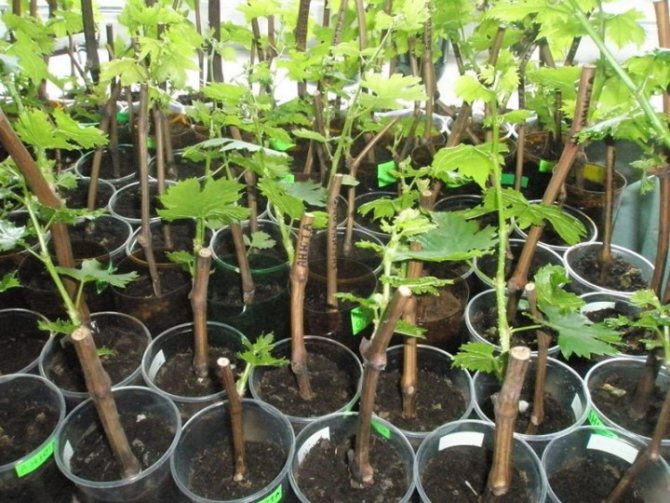
As soon as the first bud opens, after 10 days, the first roots should appear... When the root system begins to develop, the seedling is planted in a special substrate. At the bottom of the container, drainage is first laid, and then the grape substrate. The stalk is placed in a bowl and covered with the mixture to the top so that the highest bud alone remains on the surface. After rooting, the seedling is watered and placed on a south, sunny side for good growth. For good survival, some experts advise feeding young grapes. Growing grapes from cuttings does not take place without rooting. This is an important stage and condition for reproduction.
Powder the vine with earth
You can sprinkle the earth on a green or annual lignified vine. Green vines are usually sprinkled in late June, and one-year-olds in spring. In this case, the upper part of the shoot should be left above the soil surface. In this case, you will receive several grape sprouts above each bud of the dusted vine. In the fall, you need to separate them from each other and put them in markets or in a specially designated place. Often, young grape sprouts are planted in markets and stored in a greenhouse or in a specially protected area from frost, because if they are planted in open soil, they can die from severe frosts. Usually, this method of propagation is used in the southern regions, since the formation of roots occurs directly from the point of growth. That is, the future seedling will feed mainly on dewy roots, which often die from frost. Such grape bushes require systematic watering and feeding, which is a significant disadvantage. Therefore, this breeding method is almost never used in the northern regions.

Kilchev method
This is a very interesting way to help the plant develop roots quickly and take root after planting. This implies both planting in open ground and forcing. The method helps the cuttings to form calli. They are achieved due to different temperatures.... One half is in the cold and the other half is warm. To achieve this, the cutting is buried in the ground, and the rest of 10-15 cm is covered with humus.Through this method, the roots develop and grow earlier than the buds.
For a good effect, you can additionally create conditions like in a greenhouse. It is enough to cover with foil or glass. The germination time of the cuttings will directly depend on the weather conditions. The higher the temperature, the faster the kilchev method will pass.
Pros and cons of breeding grapes in summer
The summer period is the most active for all gardeners, it is at this time that it is most interesting to deal with the improvement of the vineyard and the cultivation of bushes.
- In addition, summer grape propagation has a number of advantages:
- in a warm climate and long daylight hours, the formation of roots of young plants is more active;
- the opportunity to get healthy and strong young plants with a developed root system;
- a high percentage of seedlings survival when transplanted into open ground;
- when propagated by layering, the harvest from young plants can be obtained in the first year after planting;
- the ability to choose strong green stepchildren with fully formed leaves for reproduction.
- The disadvantages of summer grape breeding include:
- laboriousness of the process, especially when propagating by layering;
- when propagated by cuttings, the seedling is usually ready for planting only in the fall and may not survive the winter in the open field.

Growing grapes from cuttings at home: school
The groove in which the cuttings should be planted is called a school. In the spring, around April, when the snow melts, they begin to prepare a plot of land. To do this, dig up the soil on a bayonet shovel, spend 2 buckets of sand, 1 humus and a shovel with wood ash for each square meter. All ingredients are mixed well again. Landing is carried out in prepared mounds.
The school should always be loose and free of weeds. To do this, after each watering or rain, fluff the ground around each cutting. In order for the seedlings to develop well and take root, they need feeding with organic fertilizers, which are applied along with water. Minting is carried out before autumn. This will allow the vine to mature before winter. Saplings are dug out of the school at a permanent place if the seedling has formed at least one woody shoot.
Planting seedlings in open ground
It is better to plant cuttings in the ground in the fall, when the first leaves appeared on the vine. The procedure is performed in several stages:
- Dig a hole 40-60 cm deep on the land plot.
- Put fertilizer in the hole and cover with water.
- Make two holes at the bottom of the hole at a distance of 20 cm.
- Place 1 seedling in the holes so that the bud is directed towards the row.
- Fill the hole with loose soil, closing the cuttings, tamping the soil a little.
Important!
Before planting, the seedlings are worth checking. To do this, make a small incision on the vine. The juice should appear on the cut. Otherwise, the stalk is gone.
Growing grapes at home from cuttings in spring
Grow grapes in the spring from cuttings it is easier, but due to climatic conditions, not everyone can do it. You need to breed following a specific technique:
- Cut off healthy and stiff shoots. It is desirable that they are even and have swelling buds. Ready cuts are placed in water.
- Shoots need to be distributed and cut into cuttings of 2-3 buds, making the lower cut oblique.
- Each cutting will require a planting in a glass. Growing takes place in a dark and warm place. You need to grow them until they begin to take root and develop their root system.
- In this form, the cuttings are grown all summer, and only in the fall they are sent for storage.
- Further, in the new spring, planting is carried out in a temporary place, and only in the fall they will go to a permanent one.
Winegrowers reviews
Maria, 59 years old, Arkhangelsk
I am using the grafting method. I prepare the chubuki in the summer and immediately place them in the soil.About 50% of the branches give a root and become suitable for planting seedlings. Watering in my garden is drip, so the soil moisture was maintained at an optimal level.
Oleg Petrovich, 47 years old, Rostov on Don
For propagation of grapes, I use the cuttings method, and for the renewal of the bushes, I like the cut method more, it does not injure the mother bush. The method gives a guaranteed result of obtaining a seedling.
Without special skills, you can propagate grapes yourself at home. Subject to simple rules using the methods of cuttings and layering, you can update the bushes or increase their number.
Planting grapes with green cuttings
Maybe, many will be interested in this particular method, which was developed by Yu.D. Lykov. His method is used by many gardeners. The cultivation of grapes takes place over one summer period. According to the author, July is considered the best period. Cuttings are taken from shoots or stepchildren with 3-4 buds. The bottom is cut 3-4 cm below the knot, and the top is just above the kidney. The cuts are placed in a container with rainwater.
For rooting in this case, you need a 5 liter bottle. The top is cut and filled with earth, and a hole is made at the bottom for drainage. Recommended soil: 50% compost and 50% regular soil. Lykov uses the soil dug up by moles for his method. After the earth is laid, it is compacted by shaking and slapping the bottle. For better shaking, also pour rainwater. In cuttings with 3 buds, the lower leaf is removed, and the 2 upper leaves are cut to reduce the surface evaporation area. In a two-eyed cutting only the top leaf is left. The bottle can be set on 4 cuts of 5-6 cm.
Wooden slats are placed in the bottle to make a frame. A plastic bag is put on top and fastened tightly. The finished greenhouse is placed on the sunny side. For the first 12 days, the cuttings do not need to be touched, because a natural moisture is created inside at a high level. Further, the seedlings are aired and watered every week. It takes an average of one month or one and a half to rooting. In early August, cuttings sent to open ground. This method promises full ripening of the seedling by October.

How to lay grapes
A simple method for propagating grapes is the layering method. The method consists in rooting the shoot without separating it from the mother bush. There are several options for layering, they are suitable for different grape varieties:
- The underground method (green layering) involves the use of a young shoot of the current year. The method is suitable for expanding bushes. It should be carried out in the fall after the foliage has fallen. The vine must be placed in a small hole without cutting it off from the mother plant. On the branch, you need to leave 3-4 buds immersed in the ground.
- Long-term layering is carried out by the underground method. The method is suitable only for perennial developed branches with several young vines that have grown in the current season. The branch must be laid in a trench and covered with loose soil. Several layers must be brought to the surface. Cut the processes so that there are 3-4 buds on each, the rest should be removed. As the seedlings will give an increase of 20 cm, another layer of earth should be added on top. The soil should be watered to maintain adequate moisture. By autumn, the seedlings must be separated from the mother bush and divided into parts.
- Hilling the head of the bush (spring method) involves the use of the mother bush as a source of nutrients for future seedlings. The root system of the main plant is depleted. The method is suitable for varieties with small bushes. Laying should be done in early spring. Cut the separated vines at a distance of 1-2 buds. After the seedlings grow 20-25 cm, they must be dug in with loose soil. The soil should be kept moist to form roots. In autumn, the sprouted layers are cut 15 cm from the ground level.
- Short green shoots should be prepared underground from the beginning of summer.
- The air method (air layering) is suitable if there is enough space next to the bush. The selected vine must be pulled along the wire stretched between the rods, or simply by stretching along the ground. The branches, when touched with the soil, will take root and take root in a new place. At the same time, fruits and branches are fed from the mother's root system.
- Kataviak, daldarama and lugenda are carried out in late autumn to rejuvenate or restore the bush. Cutting off the bushes will impair the healing process. the vines are wounded. The kataviak method is best suited for restoring a bush.
- Breeding with lignified cuttings requires only one ligneous vine, otherwise it repeats the method with perennial vines.
- The Chinese method is used for annual vines in early spring. The young vine is pruned, leaving 8-10 eyes on it. They are placed in a ditch of shallow depth, while those that protrude to the surface must be cut off. After an increase of 15 cm, the vine must be sprinkled with additional earth. With an increase of 40 cm, the soil is fertilized with organic materials. The cuttings are separated in late autumn and divided into seedlings.
Important!
It is worth installing drip irrigation, so that the layers do not dry out.
Output
Grapes are a very tasty berry that can be grown and propagated vegetatively using cuttings. If you follow all the recommendations and instructions, you can get the desired result. Such planting and reproduction promises a healthy plant with a high yield as a result. It's no secret that when buying seedlings, you can get a variety that is unsuitable for the required area. Growing by this method will allow you to avoid trouble and breed exactly the variety you need.
Practical use
So, the multiplication of grapes is a very important thing that a gardener must do in order to obtain stable yields for many years. With the help of high-quality grape propagation, the gardener can always receive additional profit from his garden. If you want to have quality planting material, it is better to grow it yourself, and not buy it from just anyone. If you know someone who grows a beautiful grape variety, take a cutting from them and grow your own bush. In this case, you will surely know what result you will get, since you have already seen how this variety bears fruit. With deep layering, you can always reliably grow the grape variety you like best.
How to grow grapes from cuttings
The dream of many summer residents is to have a vineyard on their site with beautiful, sweet, juicy clusters of grapes. Recently, the cost of grape seedlings has increased significantly, as well as the risk of acquiring a low-quality seedling and not the variety that we would like. To be confident in the variety and quality of planting material, growing seedlings with their own hands for summer residents has become a matter of honor.
Everyone can grow a grape seedling from a cutting, if simple rules are followed.
Breeding grapes by cuttings: tips for care
I am expanding and renovating my vineyard in the simplest and cheapest way - I use grape cuttings that remain in large quantities after the autumn pruning.
At first glance, this procedure seems very easy. But not everything is simple in this matter, you need to follow some rules, namely:
- Cut the planting material correctly;
- Correctly lay the cuttings for storage;
- Do the right rooting work.

Harvesting cuttings
The first and important stage in the process of growing seedlings is the preparation of shanks. The quality of the harvested planting materials determines the quality of future seedlings and the yield of the grown bush.
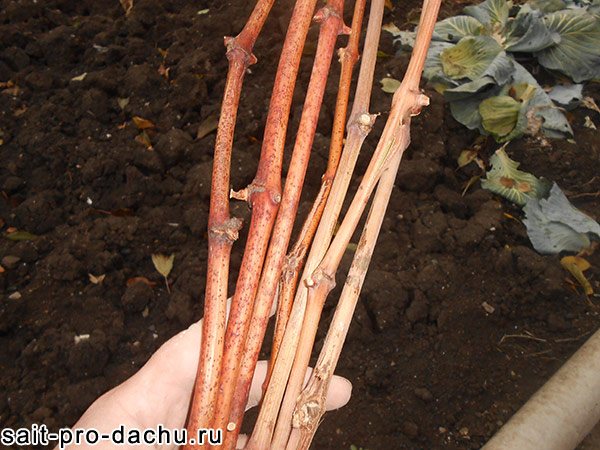
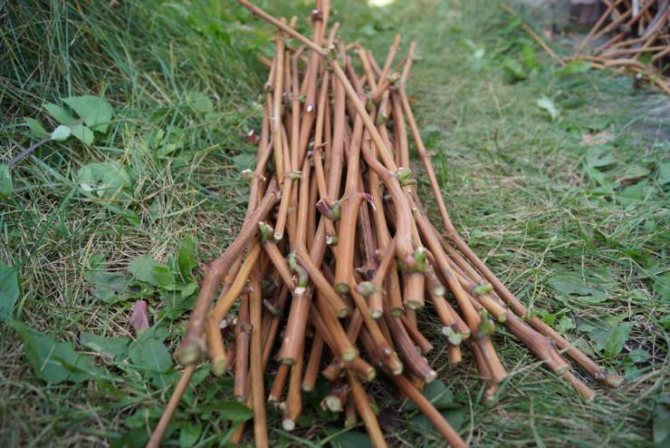
Grape cuttings are harvested in the fall during the pruning of mature bushes. For harvesting, a ripe healthy vine is selected, which has yielded a crop. The vines should be light green in color. The cut is made only with a sharp, clean instrument to prevent infection. The vine is cut into shafts, each of which has 3-4 eyes. Depending on the interrenal distance, the length of the shank varies between 40-70 cm.
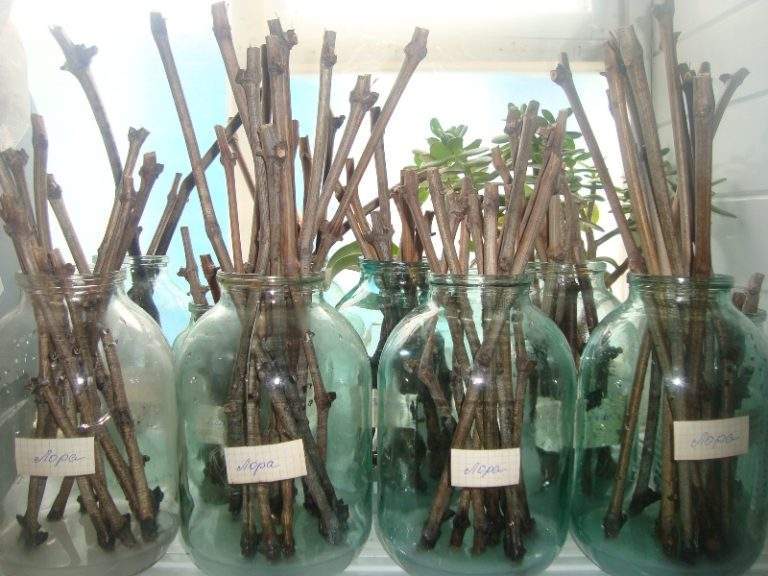
For storage, the shanks are tied. A tag with the name of the variety is attached to them. The lower part of the cuttings is wrapped with a damp cloth or paper and placed in cellophane. As such, the cuttings will overwinter in a basement or refrigerator. The optimum temperature for storing shafts is 0-5 degrees above zero.
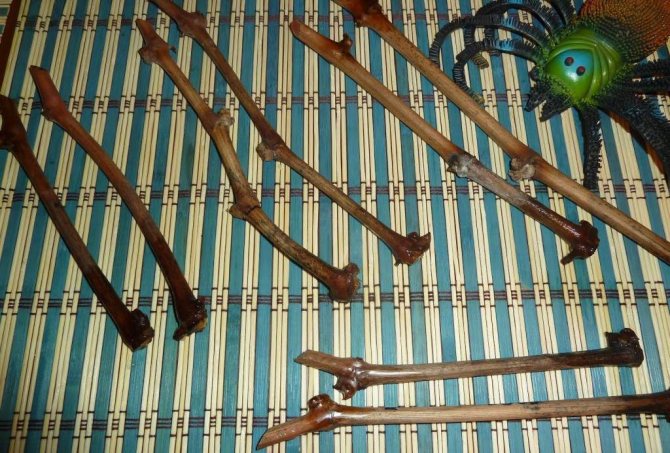
Cutting cuttings in the fall
Important! Growing grapes from seeds is a thankless task, and it is almost impossible to achieve success in this. At best 10-12 seeds grow from one thousand seeds.
To this it must be added that half of the plants obtained from the seeds are of high quality, and even they will not "inherit" the characteristics of the mother bush.
The experience of growers shows that the best time to harvest cuttings is autumn-winter, from mid-November to mid-December, when the leaves have already fallen, the harvest is harvested, and the vines are ready for the cold season.
At this time, useful substances are well preserved and are ready to endure winter frosts. For reproduction, take "naked" fruit lashes without leaves, antennae, shoots, from which cuttings 25-35 cm long are cut. Four buds are left on this segment.
The cut of the shank is made at a distance of 2-3 cm from the upper kidney, at an angle of 40-45 degrees, and the lower cut should be made under the lower eye in a straight line.
Experienced growers make vertical cuts at the bottom of the cutting. This operation accelerates the formation of young roots.
Carrying out the autumn pruning of unnecessary shoots, branches that bear fruit in the summer are used for cuttings. Their diameter should be 8-10 cm. A vine cut on a pinching knot is suitable for a cutting. The middle part of the fruit branch is also used.
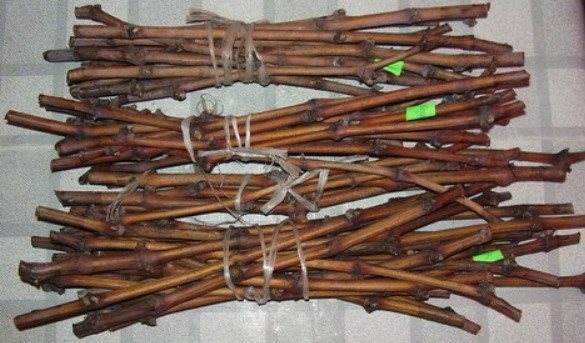
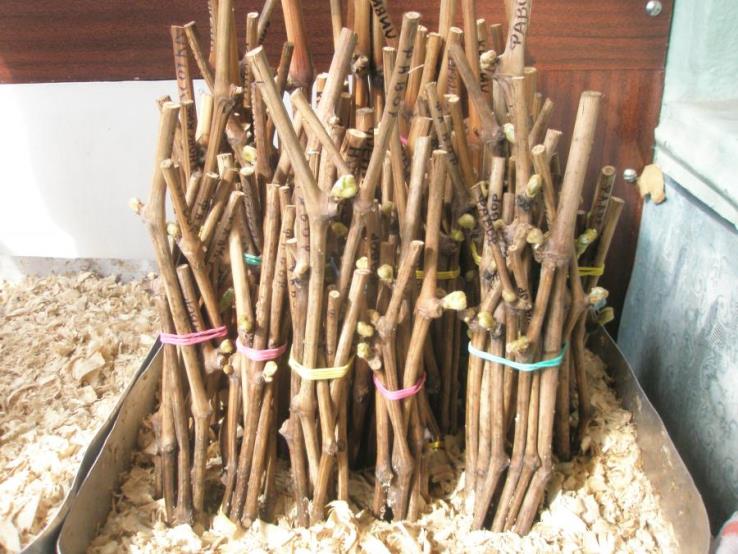
Prepared cuttings are grouped by varieties, marked and tied into bundles of several pieces.
Germination of grape cuttings
At the end of February, cuttings are taken out of storage, examined and prepared for germination.
The first step is to conduct a visual inspection of the shanks. They should be free of stains, rot, mold. After updating the cuts, you need to check the condition of the vine inside (it should be "alive" and have a light green color in the section).
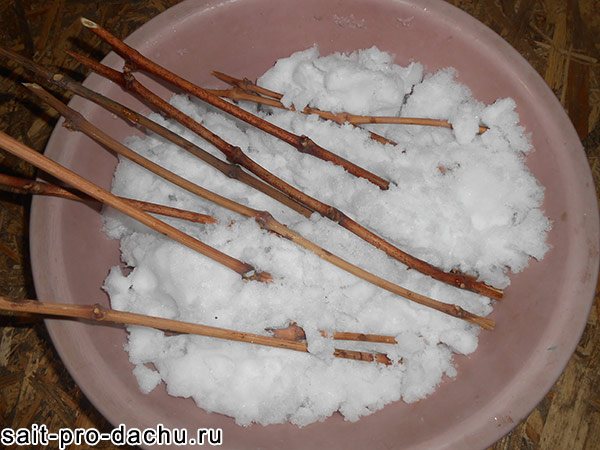
Before laying the stems for germination, they must be rinsed in running cold water and soaked. For soaking, settled or melted water is used. The melt water will saturate the shanks with all the necessary microelements, which, by the will of Mother Nature, is endowed with snow. Alternatively, the cuttings can be placed in a container and simply covered with snow. Place the capacity closer to the battery. The shanks should be 1/3 covered with water.
The shanks are soaked for 2 days. After the first day has elapsed, any root growth biostimulator that is sold in the store can be added to the water.
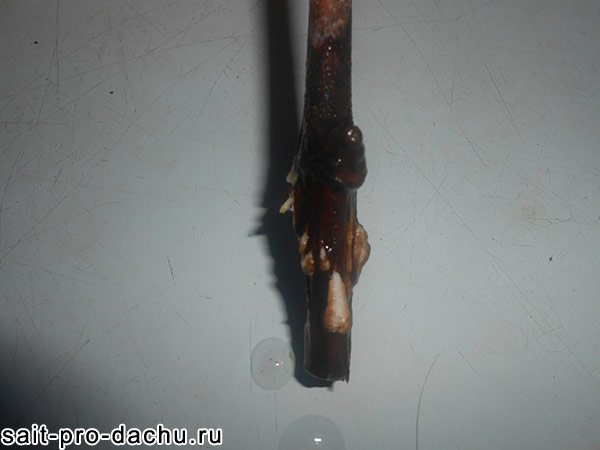
After soaking, the cuttings of the shanks are updated. Shallow longitudinal cuts are made in the "heel" of the shank, and the lower kidney is removed. A layer of cotton wool is placed on the bottom of the container for germination and water (settled or melted) is poured. The water level should be at a distance where roots are expected to appear. We put the shanks in the container and wait until the tops and roots appear.
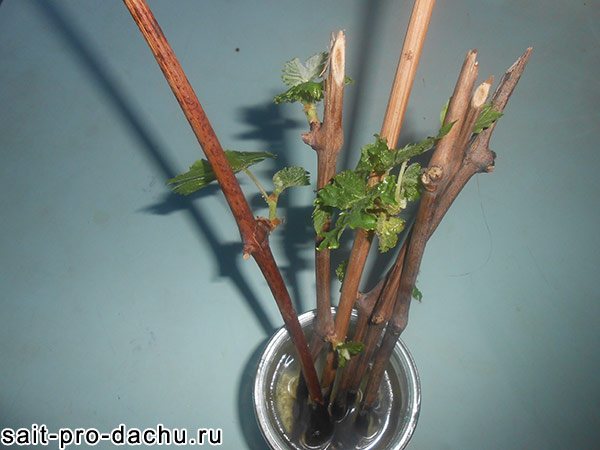
Often, green shoots appear before the roots. This absolutely does not interfere with the further development of the seedling root system. In the event that a second shoot began to develop from one bud, but there are still no roots, the first stronger sprout should be carefully broken off. This will save the strength and energy of the cuttings for root germination.
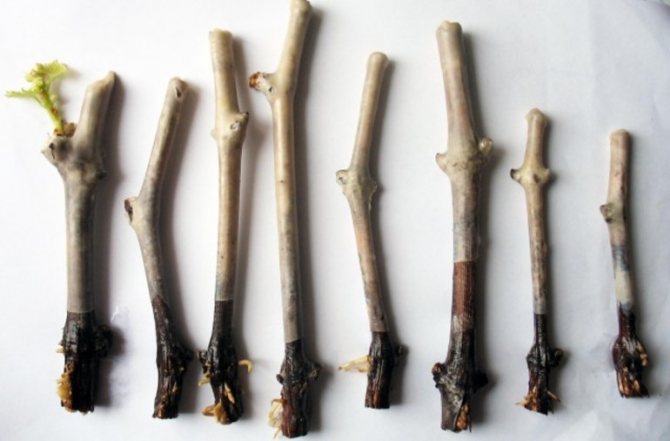
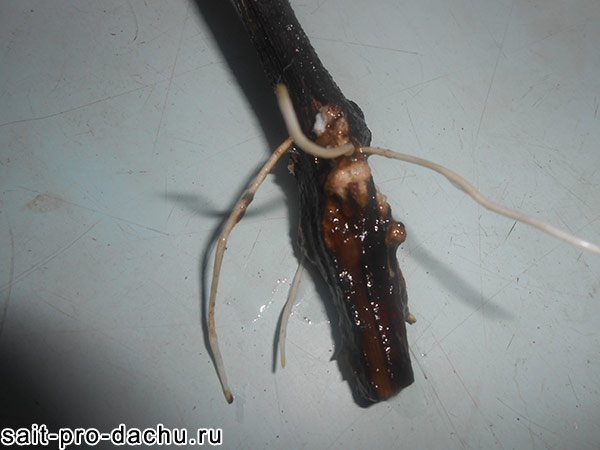
From the emergence of shoots to the germination of roots, an average of 2-3 weeks pass.The appearance of a white build-up on the heels indicates the imminent appearance of the long-awaited roots. When the roots reach 2 centimeters, the shanks are planted in containers with soil mixture for further cultivation.
Define characteristics
|
|
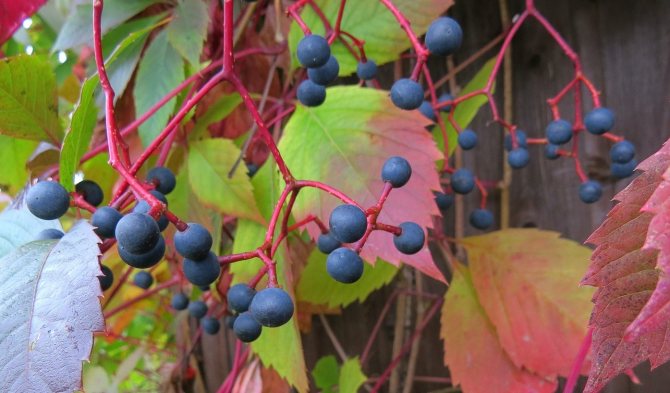
The fruits of wild grapes are small, have a tart-sour taste and are not used for food. They are used to prepare vinegar, medicinal decoctions, and wine tinctures.
Advantages:
- Fast growth (1.5–4 m per season).
- Unpretentiousness to the ground and lighting.
- Resistance to pests and diseases.
- Does not freeze in severe winters.
- Does not need additional feeding.
- Reproduces easily.
- It is a natural protection from wind, dust, precipitation.
- Creates a scenic look
Disadvantages:
- In confined spaces, a shaping haircut is required (4–5 times per summer).
- The need for the construction of supports.
- Without control, it can rapidly seize neighboring territories.
- Powerful roots go far to the sides and oppress adjacent plantings.
- Unsightly view in spring. Buds open slowly - until the end of May it stands with bare stems.
- Liana growing on the facade can penetrate under the roof and destroy it
Care of planted cuttings
Caring for planted cuttings at home consists in observing the temperature regime, watering, and organizing additional lighting. As already noted, the soil in the cups should not dry out, but stagnation of water is categorically excluded. However, in addition to soil moisture, air humidity is also of great importance, and in a city apartment during the heating season, as a rule, it is dry.
The simplest way out of the situation is that after removing the plastic bag from the handle, two open jars of water are placed next to the structure: one flush with the pot, the second higher, at the level of the upper kidney.
So that the removal of the package does not shock the plant, it can be taught to be without such a hat gradually, removing the package for a short time over several days, and then for a longer time.
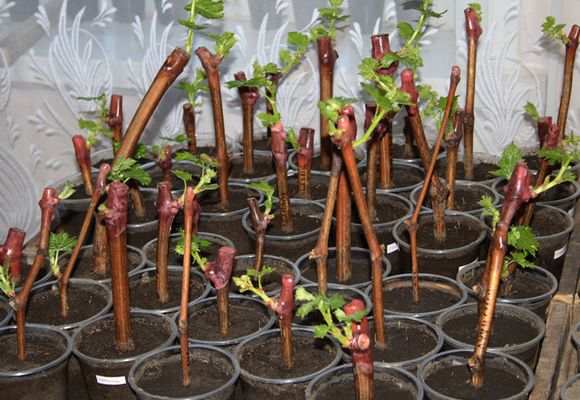
It is best to place the "vegetable garden" by the window and the radiator, but the light in March may not be enough for the good development of the future seedling. At the initial stage of growing, strong light is not required. But after the leaves unfold and the shoot begins to grow, most likely you will have to add a fluorescent lamp or a diode lamp to the sunlight. The best temperature for plant development is from 25 to 28 ° C, but even at slightly lower values, growth will be normal.
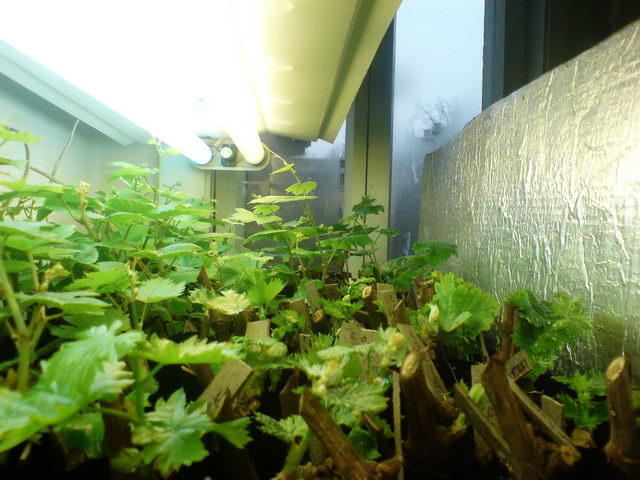
Cold light fluorescent lamp can be positioned directly above the vegetable garden
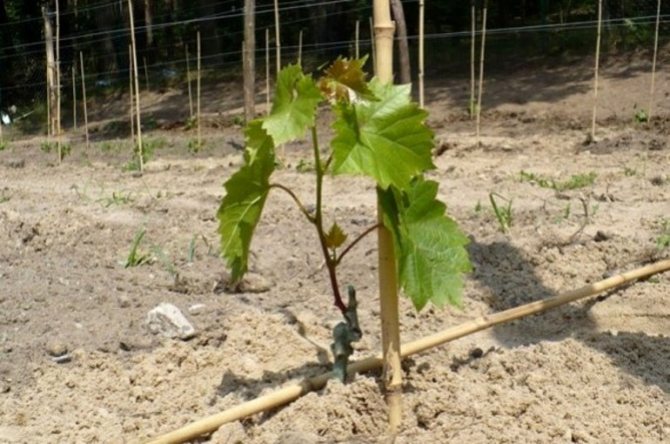
A month after planting the cuttings, they can be fed with a solution of complex mineral fertilizer according to the instructions, for example, azofoski or special fertilizers for grapes, such as Novofert. In May, it is gradually necessary to accustom future seedlings to fresh air, taking the pots to the balcony. From mid-May, in the absence of obvious cold weather, they should be on the balcony almost around the clock, and at the beginning of summer it is time to land in open ground.
When and how to plant grapes correctly, especially planting seedlings in the fall:
Possible diseases and how to treat them
The quality of seedlings grown from cuttings directly depends on which bushes the cuttings were cut from.If the bushes have been affected by mildew, oidium or gray rot, the cuttings will not take root well and grow. It is from this point of view that it is extremely important to treat cuttings both before winter storage and before planting in pots with chemicals (potassium permanganate, Fundazol, Rovral, etc.). Such treatment allows to destroy spores of infections on the surface and a significant part of diseases developing inside the wood.
During the germination of cuttings in water, it is possible for an infection to enter the water from the outside, which is prevented by changing the water in the jar and adding wood ash or activated carbon to it. Infection is also possible through sawdust used as a substrate. If the infection enters, the tissue of the cuttings dies or the young shoots rot. In severe cases, up to 100% of cuttings may die. Therefore, periodic preventive spraying once a week with Fundazol or Rovral is not an extra operation at all.
Already in the process of growing planting material at home, you can notice problems on young leaves. The signs of the disease are the same as on adult grape bushes. For example, unexpectedly and rather sharply, the leaves may turn yellow. Most likely, this is the most dangerous fungal mildew disease that affects not only leaves, but also young shoots. If the disease has not gone deep, when the first signs appear, the "vegetable garden" should be sprayed with Bordeaux mixture or Ridomil Gold.
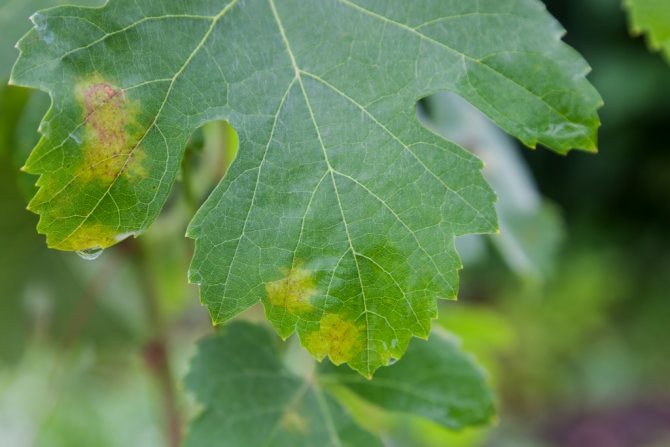
Mildew begins with small yellow spots, but soon covers the entire leaf
In another situation, the leaves may turn black, which also happens unexpectedly, the process progresses quickly. Sometimes this can happen simply from excess moisture or, conversely, from drying out of the soil. In this case, optimizing growing conditions can still save the day. This also happens due to too dense soil. You can try to transplant urgently: if the matter has not gone far and the roots have not died, the transplant can help. If the leaves have turned black from diseases (and this may be the consequences of several infections at once), it will no longer be possible to save the cuttings.
Planting pit preparation
Chubuki are planted in pits or trenches. Pits are made with a shovel or a drill. Since the soil on the site has already been prepared and filled with fertilizers, additional fertilizing is not required.
- depth - 30-40 cm;
- diameter - 20-40 cm.
To prevent decay of the planting material, river sand is poured onto the bottom of the pit. If the soil on the site is heavy, then sand is added during planting.
Cooking cuttings
How does the propagation of grapes by cuttings at home begin? That's right: with the preparation of this material. Most inexperienced summer residents are interested in how to breed a grape crop.
The fact is that such a process is not as simple as it seems at first glance. Therefore, it is worthwhile to find out in more detail how grape cuttings are carried out in practice.
To get a good planting material, you need to prepare it correctly. After grafting is a rather complicated and time-consuming process.
All preparation consists of several tasks, namely:
- first cut the grape cuttings for propagation;
- then correctly sent to storage;
- then the material is prepared for further cultivation.
Each step must be done responsibly. And if you do everything correctly, then you will definitely get new seedlings grown with your own hands. Well, now let's take a closer look at each of the points.
Making slicing
It is advisable to cut grapes with the onset of autumn. Of course, the propagation of grapes by cuttings in the spring is also a completely solvable problem. However, it is better to carry out a procedure such as harvesting grape cuttings in the fall. This time of the year is considered the most appropriate.
In order for the grapes to reproduce effectively, you will need to perform the following manipulations:
- as soon as the foliage falls from the grape bush, start cutting;
- choose only those branches that gave a good harvest;
- it is desirable that the vines are straight;
- the longer the stalk is, the better the reproduction will be.
Important! Cutting the shanks should be carried out before the onset of the first frost. As a rule, the procedure is performed towards the end of October.
As soon as you cut the material, remember to disinfect with copper sulfate. After this manipulation, you can begin to lay the sprouts for storage.
How to keep cuttings for the whole winter
Storing grape cuttings is safe if they are well prepared. First, soak fresh cuttings in clean water so that they are saturated with moisture. After that, copper sulfate must be added to the solution in order to disinfect and destroy all harmful bacteria that can destroy the shoots. After processing, they are thoroughly dried. Do not use vitriol stronger than 5% concentration.
How to preserve grape cuttings? Use your basement or cellar if it's dry enough. It is best to wrap the cuttings in plastic wrap and refrigerate on the bottom shelf.... Do not freeze the shoots! Cuttings stored throughout the winter must be removed several times during the storage period, ventilated and put on the other side.
Before planting grape cuttings in early spring, they must be pulled out of storage and ventilated in advance. Properly stored shoots will yield juice when pressed. A rotting cuttings will smell appropriately, and excess moisture will drain away without pressure. A plant without juice is also not suitable for planting, since it has dried up over the winter. The color of the shoot on the cut should be pale green without darkening.
Reproduction will be successful if the cuttings are well prepared. Soak the best stock in water. Keep the water warm, but not hot, you need to stimulate the dormant internal forces of the escape. It is not worth wasting time on unusable material, it will either not germinate or deteriorate. Soaking in warm water is carried out for 48 hours, then the cuttings must be treated with a special agent that stimulates root formation.
If you want to get good grapes, propagation by cuttings should take place according to all the rules, observing the stages and terms. Before planting them, take care of all the ingredients and good solar conditions.
Choosing a place for landing
In the fall, the shanks are planted both immediately at a permanent place and in the so-called school (with a subsequent transplant). The best place for future young seedlings is the sunny southern slope.
Optimal soils are sandy, sandy loam, chernozem. Not the best option would be to organize a school on heavy clay soils. They warm up for a long time in spring, which is why the percentage of rooting of cuttings will be minimal.
In the summer, the soil in the prepared area is dug up, saturating it with oxygen, and leveled. Fertilizers are applied at the same time (per m2):
- 2.5-4 kg of humus;
- 12-40 g superphosphate;
- 5-20 g of potassium salt (if there is a lack of potassium in the soil).
Nuances of reproduction of grapes in the autumn by layering
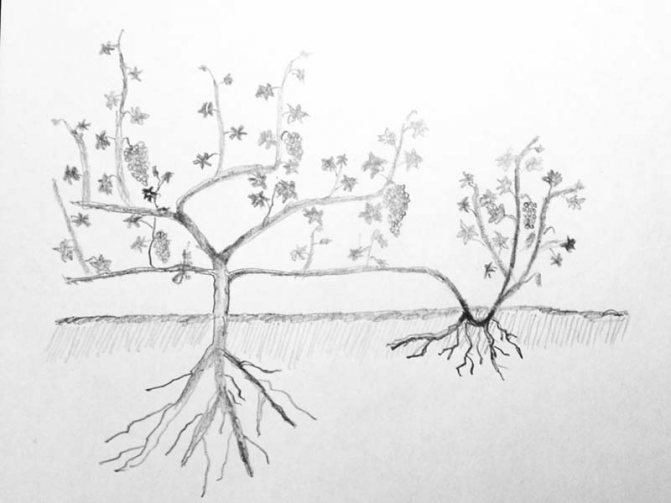
In addition to propagation by cuttings, layering is used. To do this, use mature healthy shoots that are closer to the ground. You can choose the branch for the layering, which will be located on the side of the place where the new bush will be formed.
A trench 50 cm deep is dug near the bush. The bottom is covered with a layer of humus or chernozem and the cuttings are placed there. At the same time, make sure that 3-4 eyes remain above the surface at the exit from the groove. The rest are covered with earth.
In this state, the layers are left until next year. During this time, the shoots will begin to grow, new branches will depart from them, forming a bush. A year later, the first harvest can be expected.
You can remove the layers from the main plant after 3 years. During this time, the new bush will be sufficiently developed, becausealready managed to get a double dose of nutrients: from the ground (through the root system) and from the mother bush.
Reproduction of grapes in autumn is a simple process if you study its features. It is worth performing this procedure once in order to understand all its subtleties and nuances.
Testimonials
For difficult-to-root varieties - honey can be used if there is nothing better. Small effect, nevertheless, gives. Two tablespoons of honey, the same for 20 liters of water, can be rooted about a thousand cuttings (after all, we only wet the heels). And if you need a couple of dozen, 1/4 teaspoon of honey is enough for 1 liter of water. These are small costs. Large doses of honey can also have the opposite effect (like other stimulants).
Evgeny Rodimin
First, you should prepare your own, not purchased soil, since that soil (peat) that is sold in stores has a lot of pathogenic bacteria and the roots in such soil rot. The soil (soil) should be as poor as possible, air-capacious, not rich in nitrogen, approximately: 40% coarse-grained, white, washed sand, + 40% light leafy soil (taken in the fall in plantings under leaves, a layer of 5 cm and there is leafy soil) , + 20 percent of steamed sawdust mixed with activated carbon (10 tablets of crushed coal per 0.5 liter volume). All this mixture is mixed and used for planting cuttings with short white roots extracted from the kilchevator.
Mikhail Akovantsev
The main thing when rooting is patience, do not torment your cuttings, do not hang out from place to place. The rooting time is always different (from 2 weeks to 2 months) and depends on many factors. From the quality of the cuttings, from the conditions that you created for him, from the variety, etc., etc. (you will not take into account everything). Not least is your patience. MANIFEST it ... and everything will be fine.
"Vlad51"
For planting grapes on the site, the easiest way, of course, is to buy a ready-made seedling. Sometimes it turns out not more expensive than going all the way from cutting to seedling in a city apartment. But self-cultivation is not only work, but also a great pleasure, especially in case of success. Therefore, most amateurs try to grow grape seedlings from cuttings themselves, and although it is not easy to do this, it is quite possible.
Features of cultivation in different regions
In the case of grapes, the process of growing planting material varies greatly depending on the climatic conditions of the region. If in the southernmost regions they are rarely associated with the cultivation of seedlings at home, in the north it cannot be otherwise.
Districts of the Kuban, including the Krasnodar Territory
In Russia, over half of the grapes are grown in the Krasnodar Territory. The main wine-growing regions are Temryuksky, Anapsky, Krymsky, the cities of Novorossiysk and Gelendzhik. The climate of the Krasnodar Territory is the best suited for viticulture. The weather conditions differ slightly in other regions, territories and republics of the Kuban region. It is quite warm everywhere here, only the amount of precipitation in certain areas can vary greatly. The soils are fertile, there is a lot of light, and this makes it possible to get rich harvests of grape berries.
The basic rules for planting in the Kuban do not differ from the usual norms, but seedlings are almost never grown here in a city apartment.
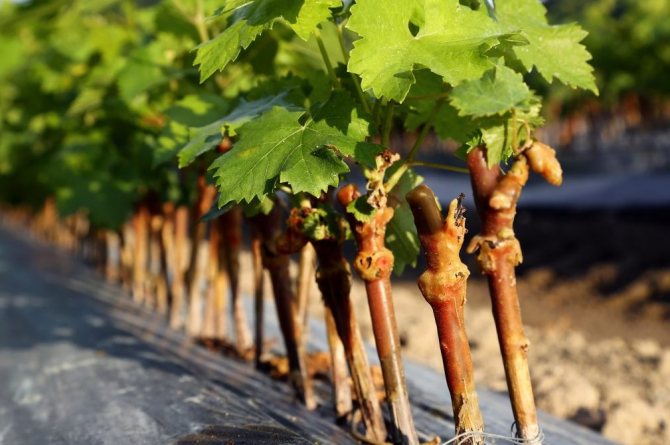
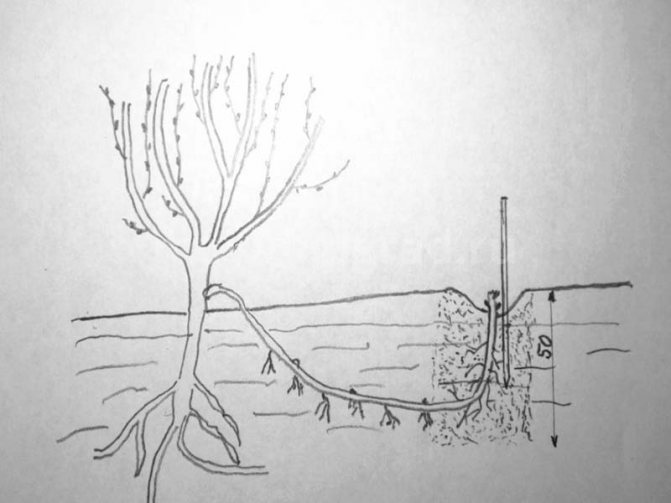
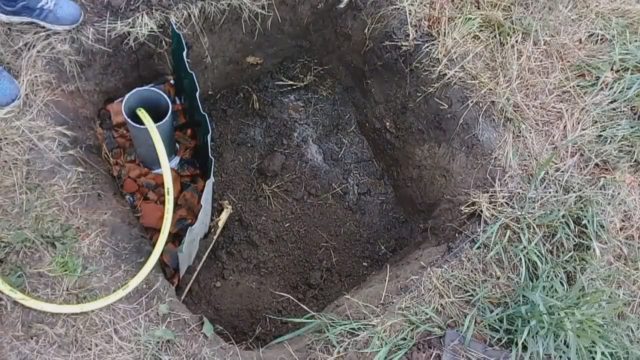
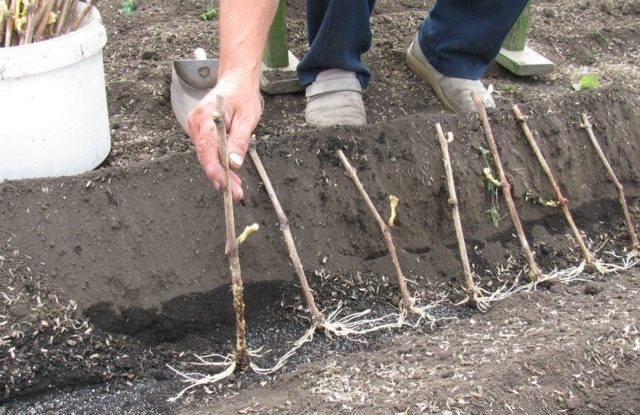
Most often, cuttings are planted directly in open ground, and the "long vine" option is often practiced: in the fall, a piece of vine about one and a half meters long is buried in a large planting hole, twisting it into a spiral and leaving 1-2 buds on the surface. For successful root formation in this option, an irrigation pipe is carried out into the zone of future roots, but a large drainage layer is necessarily arranged.
The soils in many regions of the Kuban are so good that many amateurs do not even dig planting holes, but plant cuttings in the fall “under the ramrod”.This is how they call the technique of making mini-holes with heavy metal scrap. It punches holes 10–12 cm wide and 10–15 cm deeper than the length of the cutting. Fertilized soil is poured onto the bottom of the well (only half a bucket!), Insert a long stalk, tamp the soil, water it well, fill the well so that no voids remain, and wait for a result that is close to 100% success.
Belarus
Previously, Belarus was not considered an area suitable for viticulture, but these times are long gone: now grapes on personal plots are a common thing, although it requires the application of strength and skills. The climate in the country is quite mild, although not very hot, many grape varieties have time to ripen successfully. But the cultivation of seedlings from cuttings is almost always carried out at home, in extreme cases - in a greenhouse, usually heated.
Planting cuttings for cultivation begins here at the usual dates indicated above - at the very end of winter. They use a variety of germination methods, but they do it without fail: almost no one plants cuttings without roots. There is a lot of peat in Belarus, so they try to add it to any soil, and the soil for growing grape seedlings is no exception: the most popular mixture is peat with sand and a small amount of sod land. All other operations are completely similar to those described in the main part of this article.
Moscow suburbs
The climate of the Moscow region is very similar to that of Belarus, but more unpredictable, although this refers to the winter period, when severe frosts alternate with unexpected thaws. Therefore, viticulture is a little more risky here, but this mainly concerns the shelter of adult bushes for the winter and the right choice of grape varieties: it is somewhat limited.
As for the cultivation of seedlings from cuttings, it is carried out in the same way as described above, with a slight shift in timing: cuttings are taken out of storage at the beginning of spring. Their germination for the formation of root rudiments is mandatory, cuttings with roots are planted in a container with soil composed of a mixture of peat and coarse sand. Cuttings are kept in containers a little longer than in Belarus, and are planted in a permanent place closer to mid-June.
Video: grapes from cuttings in the Moscow region
Ural region
Well, who would have thought half a century ago that grapes could be grown in the Urals? Now you can, however, not any varieties, but only the most frost-resistant. You can also grow planting material from cuttings, and this is no more difficult to do than in the middle zone of the European part of Russia. True, the timing is somewhat different here.
Planting cuttings at home is carried out in the same way as in the Moscow region, but they are not planted in June in open ground, but they are grown all summer: first in greenhouses or greenhouses, and from July in the open air. If the growth proceeds powerfully, in the summer the plant is gently transferred into deeper containers (old buckets).
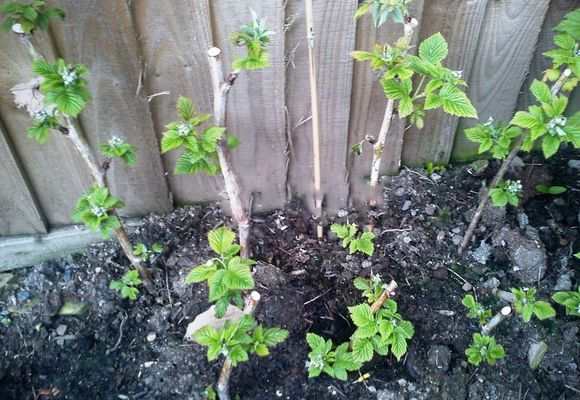
By autumn, planting holes are dug and before the onset of frost (and often already in September) grown seedlings are deeply planted in them, if they already have at least two well-ripened buds. When planting, only one bud is left on the surface, and it is spud and well covered for the winter.
What grape varieties to choose for growing grapes by cuttings
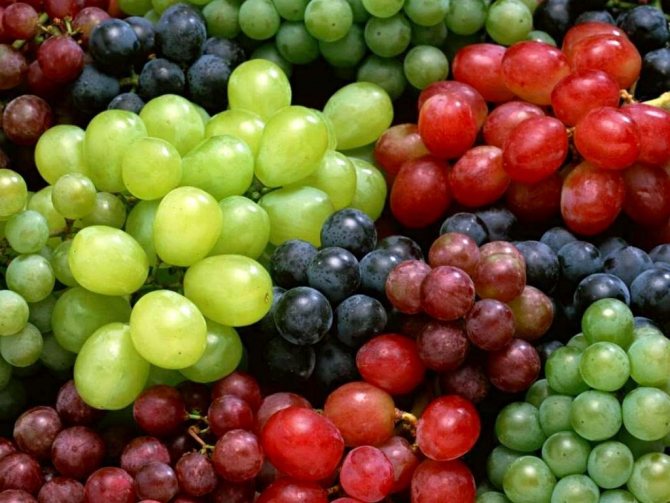
In order to start growing grapes at home, you must choose the most suitable grape variety for this purpose. It is necessary to take into account the climatic conditions of residence and the ripening periods of the berries. It is worth determining what you want to grow grapes for. There are three types of grape varieties:
- The technical varieties from which wine and juice are made. They are sweeter, but their fruits are small. It is easier to look after them. These are such varieties as Marinovsky grapes, Kristall and others.
- Table varieties are bred for human consumption. They are resistant to temperature changes.The berries are large, have early ripening species: Victoria, Cardinal, and so on.
- Mixed species - Lydia, Isabella. They have a sweet, tart taste and can be used to make wine or simply serve.
Early maturing varieties include: Muscat, Russian amber, Cardinal, early Georgian, Golden. The ripening period for fruits is from three months to four. These varietal species are cultivated in the northern regions.
How germination is carried out
Propagation of grapes with shanks includes the obligatory germination of the cut material. Start this procedure after you have checked and made sure that all the cuttings are viable. As a rule, it is optimal to do this in late January - early February.
Germination can be carried out using several methods, namely:
- germinate in a glass;
- use a bottle for these purposes.
Important! You can get new planting material for grapes by both methods. Both in a glass and in a bottle, they give equally excellent results. The only difference is in the germination process.
How to germinate material in a glass
Planting grapes in plastic cups is easy enough. To do this, you need to follow these steps:
- take a container and make three holes in the bottom with a gypsy needle;
- then add 3 cm of soil mixed with compost;
- inside a large plastic cup, install a second smaller one with a pre-cut bottom;
- the resulting gap between the walls of the glasses is covered with soil;
- then moisturize well;
- pour 2 cm of moistened sand;
- water again and install the handle in the resulting structure.
After you plant the stem for germination, put the cups in a well-lit room and moisten the future planting material daily.
Application of a bottle for germination
To germinate cuttings in a bottle, you will need to do the following:
- take a plastic container;
- cut off the neck;
- poke three holes in the bottom with a needle;
- pour broken red brick on the bottom;
- then pour some earth;
- after that, stick the sticks so that the upper kidney is located at the level of the neck of the bottle.
After sticking the shank in, pour sawdust into the bottle and cover the resulting structure on top with a piece of transparent plastic. In this way, the cuttings germinate in a plastic bottle.
Important: To make the cuttings germinate faster, place the containers in a place that is well lit by the sun.
After all the procedures carried out, your future planting material needs regular watering. It is advisable for these purposes to put a tray under the bottle, into which water is poured. Then, literally in half an hour, the pallet with water is removed from under the bottle.
Important: You can only get a healthy seedling if you provide it with proper daily care.
It is worth noting that today there are many ways how to germinate grape cuttings. To do this, you can use boxes or any other similar container. However, the most effective methods are those that we described above.
Preparation process
Planting material is selected with high quality, paying attention to the following points:
- Use only fruiting and mature shoots.
- The bark should be light brown or dark brown.
- Lack of defects and diseases of the bark.
Many growers wonder why the propagation of grapes with chubuk in autumn is the most effective? The answer is quite simple - it is the possibility of obtaining high-quality seedlings. Using this method of reproduction, many unknowingly lose a year or two. But there are several options for how this can be avoided:
- The possibility of grafting the obtained seedlings to an adult bush (often to wild grapes). Such grafting is considered the most favorable way for updating the range and testing new varieties of grapes.
- Growing a young seedling at home.
Seed propagation
Growing difficulties
Grapes can be grown from seeds, but it should be noted that this process is quite complicated, since preliminary preparation of seeds will be required, on which their ability to germinate depends; compliance with special technology; low germination rate. In addition, a crop grown in this way will yield a poorer crop for a long time.
For this reason, such a technique is usually required only in the following cases:
- Growing a plant solely for decorative purposes, and not for harvesting berries.
- Experimentation, interest in the germination process itself.
- The emergence of the need to breed a fundamentally new variety.
- The need for a rootstock for the variety you like.
Step-by-step description of the process
Below is a detailed description of growing grapes from seed, indicating all the actions that need to be taken:
- Initially, you need to collect well-ripe berries, from which the seeds are carefully removed. Only large seeds that are free from any damage are suitable, the color should be beige or brown. Planting material that is black or green is considered unsuitable for germination.
- All selected seeds must be washed in cold water to get rid of the remaining pulp. After that, they are wrapped in a soft, non-synthetic cloth or rag, which is removed in a plastic bag.
- The resulting package must be kept in the refrigerator for at least 1-2 months, but it is not allowed to be placed in the freezer. Periodically, it is necessary to check the condition of the bones and rewash them in cold water, and then return to their place.
- The appearance of the first cracks indicates the final maturation of the seeds. They must be laid out in an even layer on a slightly moistened gauze or napkin, and then placed near a battery or heater to dry.
- After the first white sprouts appear on the seeds, they will need to be transplanted into a mixture that is obtained by mixing humus and sand in proportions of 2 to 1. Strong deepening is not required, it should be no more than 1.5 cm, otherwise the probability of emergence of seedlings will be minimal. Small pots or ordinary plastic cups can be used as temporary containers.
- The container with the planting material is placed in a place where it will receive a sufficient amount of light and heat. If all the necessary conditions are met, the first shoots should appear after 1-1.5 weeks. The most difficult stage is left behind and from this moment the seedlings only need standard care, which consists in timely watering, fertilizing, providing conditions for development and protection from various parasites and diseases.
Storage of planting material before planting in the ground
To preserve the cuttings until winter, you need a cellar or shelf in your home refrigerator. They will have to lie there until about mid-February, the optimum temperature is about +1 oC.
Before sending to the cellar, the cuttings must be prepared. This will require:
- Treat with a chemical to destroy possible disease spores: you can use iron or copper sulfate (1% solution) or Chinosol (0.5%), soaking for a couple of hours.
- Soak for 1-2 days in water, so that they do not dry out too much during storage.
- Air dry until clear drops are removed (you can simply wipe off with a cloth).
- Put in a plastic bag, leaving only the tops of a few centimeters long outside, and tie.
- Do not forget to sign the package.
If possible, not "naked" cuttings are put into the bag. It is useful to overlay them with pine or spruce sawdust, but first the sawdust must be scalded with boiling water.Coniferous resin has a beneficial effect on the safety of cuttings, protecting them from accidental mold. During the winter, the sawdust should be changed once or twice. At the same time, carefully examine the cuttings for their suitability, throwing out the clearly blackened ones.
Before sending for storage, labels must be made indicating the variety and origin of the cuttings.
The maximum possible storage temperature for cuttings is 6–7 ° C. Air humidity should be slightly less than 100%. Periodically, a revision of the planting material is required: if even traces of mold are found, the cuttings must be wiped off and washed with a pink solution of potassium permanganate. If drying is found, soak for several hours (if necessary - up to a day) in water and send it back to the cold.
Stages of cultivation by cuttings
Propagation of grapes by cuttings is a lengthy process that consists of several components. Stages of cuttings:
- Harvesting cuttings.
- Preparation for storage, storage of blanks.
- Germination of shanks.
- Landing in the ground.
Time of cutting blanks
Harvesting cuttings for germination can take place at different times, depending on which cuttings you are going to plant the vine - woody or green. The cutting time for the green shanks that will be used this year is early spring, before the sap flow begins. In the autumn, after harvesting, foliage falling, before frost, woody blanks are cut, which are sent for winter storage and grown, starting from the end of winter. According to professionals, the best survival rate is in cuttings cut in spring, and it is better to cut lignified grapes suitable for storage in autumn.

Autumn harvesting of shanks
Autumn harvesting involves the preparation of branches for long-term storage, since the stems will need to germinate in the spring. Carry out the slicing process in accordance with the recommendations of the professionals:
- Choose a healthy starting bush for the cut. It should be a high-yielding vine growing in your area, preferably cold and disease resistant.
- A shoot suitable for cutting blanks must be woody (not green), ripe. The maturity of a branch is assessed by bending. As you bend the vine, you will hear a crunching sound. The branch should be healthy, undamaged, with live buds.
- Cut straight cuttings from the middle part of the fruit arrow or shoot cut into a replacement knot with pruning shears of the following dimensions: Length - 60-80 cm (longer stems are better preserved),
- Thickness - 0.7-1 cm.
Store prepared cuttings at 5 degrees on the bottom shelf of your refrigerator or in your basement. Experts recommend checking the planting material monthly. If it is dry, it should be kept in water, if it is covered with mold, treated with a weak solution of potassium permanganate.
Sprouting grape cuttings in spring
After winter, be sure to check the viability of the material in this order:
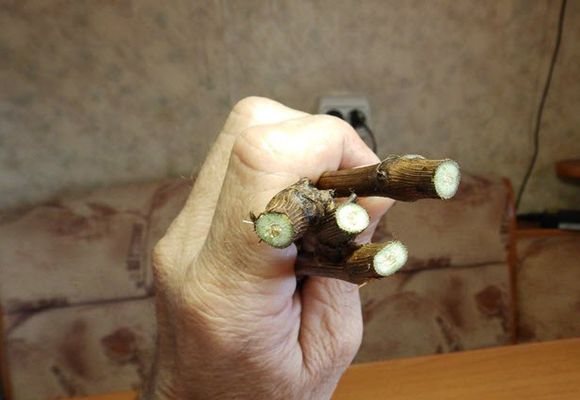
- Conduct a visual inspection. The twig should not be dry. There should be no damage or mold.
- Then cut the bark of the workpiece. Cuttings with healthy wood will be light green, unusable brown. Viable eyes will also be tight, not dry.
- Treat the cuttings with an antiseptic and rinse in clean water.
- Cut the cuttings on both sides, following the instructions: From the bottom, departing from the bud 0.5-2 cm. Straight cut.
- Make the upper cut 1-2 cm higher than the eye. The cut is oblique.
The most difficult thing when propagating by cuttings is to achieve the formation of the root system of the blank. The prepared cutting should be kept for 1-2 days in a growth stimulator for better rooting of the plant (for example, in Kornevin).
The special composition can be replaced with one of the homemade options:
- Aqueous solution with honey content.
- Composition with aloe: 1 tbsp. add a spoon to 10 liters of water.
- Dilute sodium humate, humisol with water according to the instructions for the preparation.
To increase the efficiency of rooting, experts recommend making vertical cuts 1-2 cm deep with a sharp knife along the lower internode. Rub a growth stimulator into these cuts. Carry out kilchevat (creating a temperature difference) Do not let the foliage bloom and grow until the formation of a root callus (callus), which will take away strength and nutrition from the cutting.
Methods of primary germination of blanks
The stage of germination of blanks is the main part of crop cultivation. If it is possible to form the root system of the shank, then the propagation of grapes by cuttings will be successful. Primary germination is quite difficult to organize at home. There are several different ways that gardeners have tried. Choose which one suits you best.
Using plastic bottles
Wrap the bottom of the cuttings with a rag. Wrap the blanks in plastic and place in boxes. Put on one side the box (where the bottom of the shank is) a bottle filled with 25-30 degrees water. Place a bottle of frozen water on the other side. Pour sawdust into the box from above and cover with a lid. Maintain a constant temperature of bottled water. The root part is checked after 3 days. Those cuttings that will have a white root ring are ready for the next stage of germination. The rest of the specimens remain in the box for further kilchevat.
R.P. Radchevsky's method
Melted, rain or boiled water 2-3 cm high is poured into the dishes. The shanks are placed in the water and covered with a plastic bag. The container is placed on the window (south, south-west). Shoots grow back after 14 days, one strong one should be left, the rest removed. Roots will grow back 2 days after the shoots appear.
Method "Germination on the cupboard"
Each shank is individually wrapped in a damp cloth and then wrapped in polyethylene. The tops are left open and directed towards the light. If necessary, the fabric is moistened with a spray. Root germination occurs in 18-20 days.

"Sprouting in sawdust" method
Pre-pour the sawdust with boiling water and squeeze out the water. Sawdust is poured into the container on 2-3 cm, the shafts are placed in them, the container is covered with a film. From time to time it is necessary to moisten the sawdust. The first roots appear in 2-3 weeks.
Sprouting in a jar on cotton wool
A 2-3 cm layer of cotton wool is placed on the bottom of the container. Boiled cold water is poured with the addition of potassium permanganate - 2 crystals to a slightly pink color. You should also put a piece of charcoal or an activated tablet. Cuttings are placed in the water, covered with a plastic bag and placed on a windowsill on a warm lining.
Planting shanks for growing
The containers for growing can be handy containers deep enough to form a root system, in which grapes can be propagated by cuttings in large quantities:
- Plastic bottles, the neck of which is pre-cut.
- Plastic cups.
- Flower pots.
- Boxes.

The soil mixture for planting is prepared in the following composition:
- Garden land - 1 part,
- Mature humus or compost - 1 part,
- Sand - 2 parts.
Please note that if growing at home, you should take care of the components of the mixture in advance, even in the fall. The shanks are planted in the soil carefully. The delicate roots are easy to damage.The workpiece is deepened into the ground by 1/3, 1/4 of the root heel. After planting, water the seedling liberally. To transplant cuttings into open ground, choose warm days in May - June, when the threat of frost has passed. Leave a maximum of 2 shoots on the seedlings.

The subtleties of grape propagation by cuttings
Cutting is beneficial both in terms of ease of execution and for the future harvest. The grapes take root on green and lignified shoots. Planting cuttings are taken from them. In spring, a young plant seedling can be grown from them.
Harvesting cuttings
The future breeding process depends on how the cuttings are prepared. Events are held in the fall, when seasonal pruning of the bushes is planned. The blanks are taken from healthy plants that bear fruit. If the vine is without berries, it is likely that the new plant will not yield or it will be very poor. There are several nuances to consider:
- cuttings are taken only from a well-ripened, lignified vine;
- the bark should be intact, without cracks or other damage;
- the bush and adjacent plants should not hurt;
- the donor branch should be green and 8-10 mm in diameter.
Cuttings of grapes are cut from the middle of the stem, because the lower part is rarely fertile, and the upper one simply does not have time to mature enough. The selected material must meet the following requirements:
- length of cuttings - 30-45 cm;
- branches are straight or with minimal bends;
- leaves and antennae are completely removed;
- hard brownish bark;
- there should be at least 3 buds on each cutting.
All harvested seedlings are processed with potassium permanganate or iron sulfate.
Storing cuttings
Cuttings harvested in the fall need to create suitable wintering conditions so that they are preserved until planting in the spring. They are evenly folded and tied together. If the varieties are different, a label with the name of the species is glued to each. Seedlings are stored in several ways.
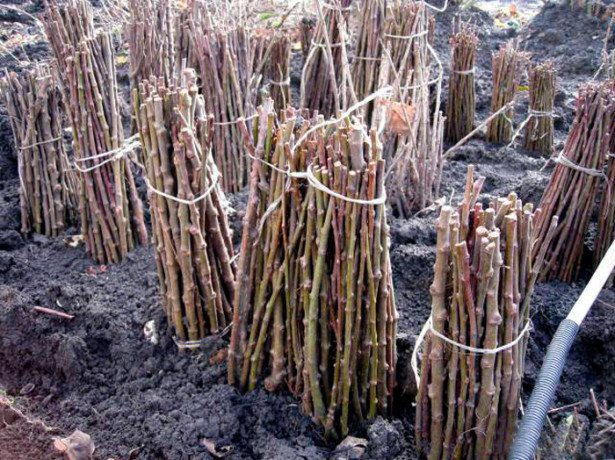
In the ground, a trench is dug up to a depth of 50 cm, with a length corresponding to the length of the cuttings. The location for the trench is chosen in such a way that groundwater does not lie near the surface. A layer of moistened sand 10 cm thick is poured at the bottom of the pit. Cuttings are laid on it and 40 cm of soil is covered. The wintering place of the branches must be insulated. Sawdust, straw, peat or dry foliage are spread on the surface of the earth. When frosts come, the storage is covered with foil.

Storage of grape cuttings in autumn
Another option to keep grape cuttings is in the refrigerator. This could be in the door or on the top shelf. Before laying, the twigs are soaked in water for 2 days, then placed in a bag so that they have access to air.
You can store the cuttings in the basement. Plastic bags are filled with sawdust, into which the cut stems are placed vertically. The bag is tied, but not tight so that the branches can breathe. During wintering, you need to ensure that the sawdust does not dry out and, as necessary, moisten them.
Time for breeding
The biological dormancy stage of the vine falls on 2-3 winter months after the full maturation of the vine. At this time, the kidneys are in a sleepy state, therefore, they do not start reproduction during biological rest in winter.
The rooting of the plant is carried out from the first days of February, when the length of daylight increases, and the formation of the root system of young shoots occurs in just a month.
With the artificial awakening of the vine in December-January, the average duration of the root formation process is delayed by 2 months.
At the end of the stage of biological dormancy, the tissues of young shoots respond positively to moisture and warm air and begin active growth and development, which serves as a suitable time to start the reproduction process, while:
- in spring, young shoots are rooted in pot containers after pruning,
- in the summer they get strong seedlings in a vegetative way, rooting layers and stepchildren,
- in the fall, the resulting planting material is stored for planting next spring.
The duration of the breeding time is up to the end of autumn.
Storage
Twigs prepared for reproduction in the fall are stored in a cold place. A basement, cellar, refrigerator will do. The optimum storage temperature is from 0 to +4 o C. Winegrowers sometimes practice the trench storage method. The shanks cut from the vine in the fall are buried for the winter in grooves 50 cm deep. In this state, they are stored until spring.
If you exclude the trench method, then it is better to store the twigs in boxes. Sand 10 cm thick is poured at the bottom of the container, the shanks are laid out, sand is poured on top again and this continues until the box is filled. The material prepared for reproduction in the fall is sent to a cold room. The moisture content of the sand is checked periodically. If it is dry, slightly moisten with water.
At least once a winter, the branches of the grapes are shifted. The upper shanks are sent to the bottom of the box, and the lower ones are sent to the top. At the same time, an inspection of the propagation material is carried out. Cuttings of grapes with severe rot are discarded. If mold has just begun to appear on the bark, the branches are washed with a solution of potassium permanganate, dried and sent back to the box.
The easiest way to store breeding material prepared in the fall is to store it in a trench. Chubuki grapes do not need to be shifted in winter. The optimum temperature and humidity are maintained under a layer of earth and snow. The storage technology is simple. After grafting in the fall, the grape shanks are disinfected. In the garden, they dig a trench 50 cm deep, cover the bottom with a film so that its edges extend beyond the walls. Twigs of grapes are laid along the groove, covered with free edges of the film. A board or any other shield is laid on top, which is covered with a layer of earth 25 cm thick. The grape twigs buried in the fall are taken out only in the spring after the snow melts.
Conditions for successful breeding
In order for the roots to form on the vine, several conditions must be met:
- high humidity;
- the presence of nutrients;
- lack of light;
- correct deepening.
Humidity. The main condition for root formation is a constantly moist soil. An earthy ball, clenched into a fist, should not lose shape when thrown. Several methods are used to retain moisture:
- abundant regular watering;
- mulching with straw, grass, leaves;
- shading the soil with cardboard, boards, slate, metal or plastic sheet.
Nutrients. The rate of root formation and their number is influenced by the supply of nutrients. Therefore, it is recommended to feed the layering. For this purpose, organic and mineral fertilizers are applied.
Shine. Active root growth takes place in the dark. Therefore, if the vine is dug shallowly, the soil is covered with dense material.
Breeding by layering
Layers are the lower shoots from which the roots have sprouted. They are located in the soil without detachment from the mother vine until the period when the seedling is fully ripe. Depending on all the nuances of laying the branching tubules and the age of the shoot, reproduction methods are as follows:
- Katavlak.
- Chinese and deep.
- Horizontal.
- Semi-green and green.
- Dry.
The algorithm for propagating vines by the layering method is as follows:
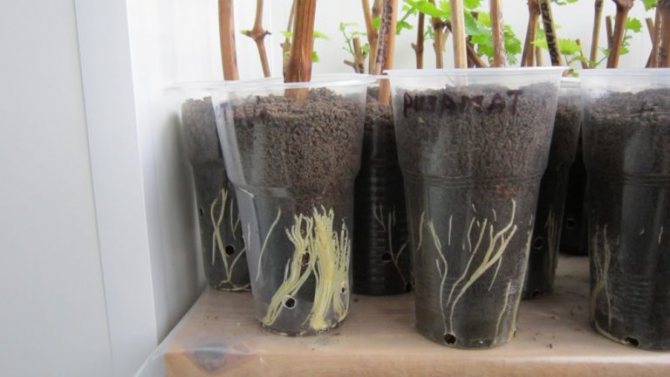
You need to form a groove, the size of which will be 15 cm wide and 20 cm long. These grooves are made from the mother vine in the desired direction. Such manipulations are carried out before the formation of buds on the vine.- The groove by 0.75 volume is filled with a mixture of soil and humus.
- The vine is laid along the groove using a slingshot, wire and other devices in order to fix the position of the bush.
- The vine is sprinkled with a soil mixture, the groove is watered with water with the addition of manganese.
- Before the first leaves appear, the layers must be covered with foil. Thanks to this method, the most suitable microclimate is formed.
- Young shoots should be tied to pegs and watered regularly.
- The ripening of young shoots is facilitated by their pinching in the last month of summer.
- Layers need to be dug out at the beginning of autumn. After that, it is divided into several parts and the roots are dipped into a clay solution. In this form, the seedlings are sent for storage.
How can you germinate a walnut at home
No more than two layers can be formed from one mother bush. This method can be used in the summer as well. Before laying the shoot in the trench, all leaves must be removed from it.
Reproduction by layering
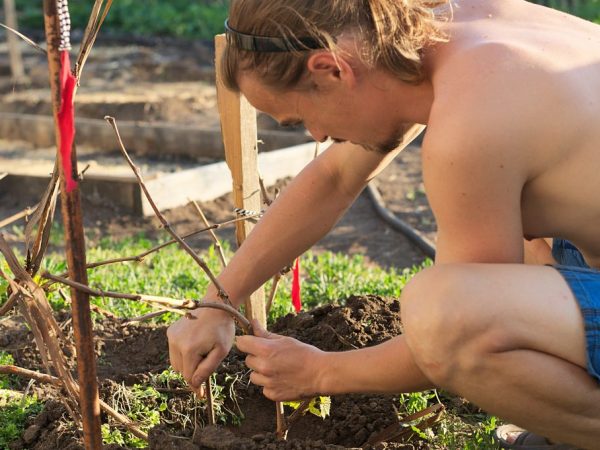
Layers can be added in during the whole season
Propagating grapes by layering is considered the most promising and easy. This method is used in the summer.
A cut is a part of a grape bush, including a young shoot, a ripe vine or its sleeve.
Reproduction of grapes by layering involves the cultivation of the vegetative part of it by dropping it with earth, followed by fertilization and watering until it takes root on its own. The rooted cuttings are separated from the parent plant and planted as an independent one.
The duration of propagation of the vineyard by layering is 1-2 months.
The rooting process of cuttings has a number of features:
- sleeve abduction propagation rejuvenates the vine and strengthens the vineyard by spreading vines throughout the site,
- with any technology for growing layering, in order to dig in them, it is required to dig trenches for laying and powdering to a depth of 0.2-0.4 m; fertilizing organic matter is spread on the bottom,
- for reproduction, shoots are selected from the lower tier of the grape bush, cleaned from foliage and only the stalks are left,
- during the summer, the cuttings are able to form a root system, in volume 2 times the mass of the roots of the parent bush.
Green layering is added throughout the garden season from spring to autumn. Having done this in early summer, they get strong bushes by the beginning of autumn. The survival rate of cuttings is 99%.
Advantages and disadvantages of the method
The branching method has many advantages:
- ease of implementation - does not require special skill and special skills;
- minimal time and material costs;
- preservation of the characteristics of the variety;
- a high degree of survival rate (even for difficult-to-root varieties for which other methods are not suitable) due to high-quality nutrition and the formation of many adventitious roots;
- variety of breeding options;
- harvesting for the next season;
- the rapid increase in the area of the vineyard;
- the formation of the original shape of the bush (optional) to decorate the site;
- the opportunity to profit from the sale of seedlings.
But this method also has disadvantages:
- severely depletes parent plant;
- suitable only for those areas where there were no root diseases (phylloxera lesions).
How to store it correctly
One of the most important stages of such a process as the cultivation of grapes by cuttings is its proper storage. As a rule, before sending the collected material for wintering, it must be packed in an oilcloth.
This process is performed in late autumn or even in the first days of winter. As for the storage of shanks, it is performed in several ways:
- stored in a refrigerator;
- if a lot of shanks are cut, then they are sent to the cellar or basement;
- the cut sprouts are placed in a container, and then the bottle with the handle is buried in the ground.
If you choose one of the first two storage methods, then you need to check the material once a month for mold.And if such are found, immediately carry out rejection, otherwise you risk that all the shanks will deteriorate.
How to choose grape cuttings for planting
Many people wonder how to grow grapes from cuttings. The best time to choose cuttings for further planting is autumn. This is the time of year when pruning is done before winter. From cut branches, shoots are chosen with often located 5 - 6 buds, no more than 70 cm in size, of average thickness. Chubuki (cuttings) should be selected fully ripe and healthy. Many avid growers prefer to harvest stems in early spring, while the plant has not yet begun its active vegetative life.
When buying grape cuttings, the following factors must be considered:
- dry root system is detrimental to the plant;
- do not buy cuttings with leaves;
- learn to determine the viability of the appendage. Scrape off the bark lightly, it should be pale green and moist. Cut off the root a little, if the cut turns out to be dark, then the roots are dead.
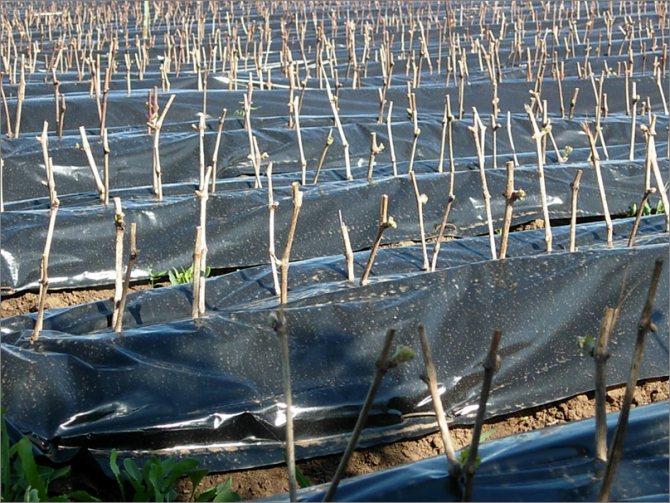
Germination of planting material
In early February, when several weeks remain before planting in the ground for germination, it is necessary to remove the planting material from the storage and inspect it for suitability. To do this, press on the cross section with a secateurs. If water droplets appear, then the cuttings are well preserved. But a dry twig can be considered when not a single drop has appeared. If moisture appears without pressure, then the planting material is rotten. It is necessary to make a transverse fresh cut and pay special attention to its shade: it should be light green, without any black blotches.
How to sprout beans at home
For more successful reproduction, the cuttings should be well soaked in warm water for 48 hours. Change the water every day. Next, the cuttings are placed in a root-forming stimulant.
Before propagation by cuttings, grapes should be germinated at home using plastic bottles or cups.
Germination of cuttings:
- In large cups made of plastic, you need to make 3 holes with an awl, puncture the bottom.
- Pour a two-centimeter layer of a mixture of leaf humus and earth on the bottom.
- Insert a smaller bottomless glass on top. The gap between the glasses must be covered with earth, compacted and watered.
- Pour the washed sand from the river into the inner glass. Pour in a little water and remove the container.
- In the middle of the sand embankment, make a hole 4 cm deep and place the planting material in it. Pour the sand.
- Pour more sand on top, cover the glass with a plastic bottle with a cut off bottom and without a lid.
Water the seedlings with warm water daily or once every 48 hours. The bottle is removed only after there are 4 leaves on the seedling, and the roots are visible through the glass.
To germinate vines in a bottle, it is worth making the following manipulations:
- In a plastic bottle, you need to cut off the neck, and make several holes in the bottom.
- Place the drainage layer inside, and on top - 7 tbsp. l. soil mixtures.
- Stick the handle into this mixture at an angle so that the peephole opens at the upper level of the bottle.
- Pour old steamed sawdust on top and close the handle using a plastic cup.
Place this blank so that the peephole does not look at the window. When the shoot will not fit in the cup, it can be removed. Watering is carried out through the pallet: a small amount of water is poured, and the bottle is placed in it for a quarter of an hour.
Features of cuttings
To grow grapes, they must be propagated. Reproduction occurs by seeds and vegetatively. The seed method is used by breeders. Under normal conditions, a vegetative method is used, which is divided into the following subspecies:
When cuttings, the entire biological complex from the main bush is preserved in the vine.
This is due to the ability of grapes to regenerate, i.e. complete healing of wounds on the roots, leaf stalks, stems and other parts of the vine. It is easier to plant varietal grapes with cuttings in the fall.
Seedling preparation
Before planting grapes by cuttings in the fall, the vine is cut and prepared. The process of harvesting cuttings:
- healthy;
- with a ripe vine;
- the length of the vine is 1.2 m, the thickness is 8-10 mm;
- white root cut;
- 3-4 buds on the selected vine.
The vine should crackle slightly when bent. On the cut, the main healthy root is white, and the young root is green. When pressed, the eyes do not crumble in a healthy vine.
To plant grapes in autumn with cuttings, they should not be dried or wrapped in plastic. Insufficient moisture destroys the cut vine, and poor ventilation will give an impetus to the decay of the trunk. For planting, grape cuttings are selected in the fall, with a bud on a segment of shoots.
Rooting
The rooting procedure is being carried out. Separate the selected vine from the root, cut into pieces (cuttings), 35-45 cm long, taking into account 3 buds on each. Cuts are made near the eye with a sharp knife or razor.
The cuttings are soaked in clean water at room temperature for 48 hours. After that, the upper cut is dipped in paraffin and the lower end is dipped into a special solution with stimulants (left for a day).
After the procedures, the grapes take root better. Storage and cultivation of this material in spring is possible.
Kilchevanie
After kilchevaniya, roots and callus appear on the sprout. The cut vines should first sit in a naturally heated container. For this, a substrate is prepared, in which there are steamed sawdust from hardwoods, pretreated with potassium permanganate. Wet sphagnum moss, hydrogel and coarse wet sand are added to the sawdust.
The substrate saturates the process with moisture, supports it, and the formation of callus is faster. The substrate needs to be watered, then roots will quickly form on the cuttings. This method of propagating and rooting cuttings is simple and effective.
Soil selection
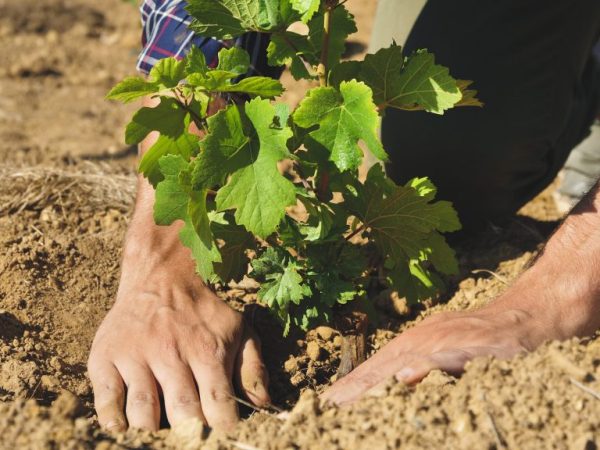
It is not recommended to plant grapes in swampy soil.
A soil with a large amount of humus and a depth of groundwater up to 2.5-3 m is chosen. Stony and dark soils are also suitable, they perfectly absorb excess radiation from the sun.
Plants do not take root well in wetlands. The lack of oxygen in the soil will ruin it.
Ripens quickly on light-colored sandy soil. Shoots grow quickly on black soil or red soil.
At home, it is better to plant the vine in light soil (super sandy soil, chestnut soil or gray soil). It warms up quickly. If the soil is heavy at the landing site, sand or other available drainage material is added to it. Rotted manure is added to improve the quality of the soil. Soils with abundant salt are watered and drained before planting.
In places of old vineyards, plant new plants 3-4 years after uprooting. Well ventilated southern slopes of the hills, closed from winter drafts. Plant effectively in the soil prepared by the plantation. This method consists in the complete transshipment of the soil and its fertilization.
Rooting shafts in soil or sawdust
In a large planting box (or greenhouse), shanks with root buds are planted according to the same principle:
- install neatly;
- fall asleep with filler;
- watered;
- fill to the top.
The distance between the shanks must be at least 10 cm, otherwise they will intertwine with roots and it will be impossible to plant them without damage.
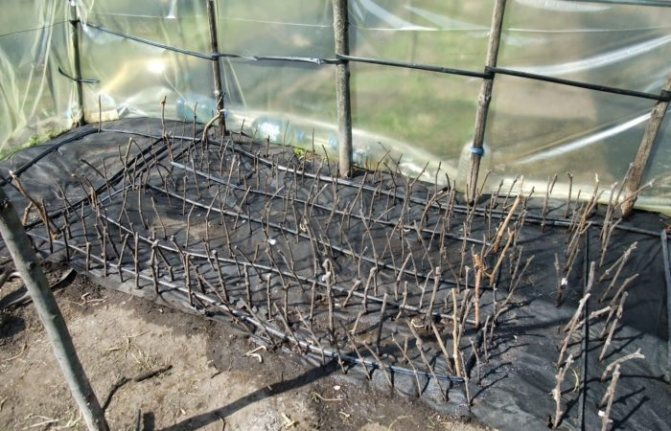
Plant wild grapes
When planting purchased or your own seedlings, planting dates should be observed. Plants grown in a container can be planted anytime through September. Rooted cuttings do not take root well in the July heat, but if watering is ensured, planting will be successful.
Better to plant in autumn, as it is already cool and the soil is moistened by rains.In the spring, such seedlings grow rapidly. In the Moscow region, the term lasts until mid-October. I offer step-by-step instructions.
- Seat selection
Liana's longevity suggests taking the choice of location seriously. You can plant on any site. In the sun, survival rate is worse, in active growth the bush will move only for 2-3 years. In a shady, semi-shady place, the plant will quickly take root and will give a large growth in the second year.
If you want to decorate a fence, gazebo, pergola, arch, take into account the volume of an adult plant. The thickness of the plane, with regular pruning, will be 50–70 cm. When planting near a building, you should step back 1 meter from the foundation and immediately put the guides.
- Landing
The interval between plants is maintained at 80–100 cm. If you want to get a dense mass of greenery in a short time, the distance is reduced to 50 cm. Having marked a place for holes, a 15–20 cm hole is dug into it, fertile soil (humus, compost) is poured into it.
When planting, deepen the root collar by 3-5 cm. Mulch the planting circle or cover it with peat, water it. For the first 3-4 days, make a sun screen or cover with a non-woven fabric. Keep the ground moist. In the first year, weed the planting site.
Features of planting cuttings in the spring in a greenhouse or open ground
It is not always convenient to plant a garden in an apartment, often there is simply not enough space for it. In the middle zone, and even more so in the south of our country, the cultivation of grape seedlings from cuttings can often be transferred to a greenhouse. And in the southern regions they even practice planting cuttings directly in open ground.
Planting cuttings in a greenhouse
The period of physiological rest in grapes ends in January, and its cuttings can already be put on germination. However, for growing in a greenhouse, as well as in an apartment, all work begins no earlier than the end of February. All preparatory operations are identical to those performed at home (washing and disinfecting cuttings, cutting them into three-eyed pieces, etc.).
For cultivation in a greenhouse, cuttings are almost always germinated to form roots by placing their ends in a jar of water. Even more often they are planted for the emergence of roots in wet sand directly into the greenhouse, if only the temperature in it has reached values of at least 10–12 ° C. This is the lowest possible temperature for root formation, but heating in the root zone is required for guaranteed success. Therefore, a greenhouse, in which there is no possibility of connecting heating devices at all, in the middle lane or in the north for the early spring cultivation of grape seedlings from cuttings is not suitable.
In case of mass cultivation on racks, sand is poured in a layer of up to 15 cm and cuttings are densely planted in it. In amateur viticulture, we are talking about several copies, so any acceptable capacity can be suitable for sand. If the weather in the region is such that the greenhouse needs to be heated, this should not be done especially for grapes, it will be easier to grow seedlings in an apartment.
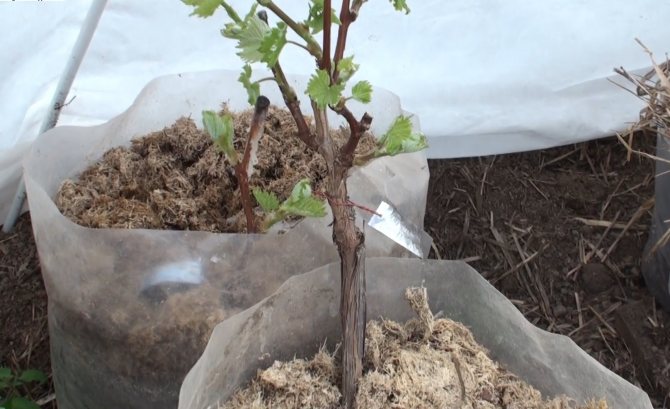
It hardly makes sense to use a greenhouse for growing several seedlings, but as a temporary, "staging" point, it will also work in amateur viticulture.
After planting the cuttings, the sand must be watered with warm water so that it is constantly slightly moistened. The optimum temperature in the greenhouse is about 18 ° C, and the sand in the root zone is about 23 ° C, the air humidity is about 75%. Under such conditions, the roots are well laid, and bud breakup is temporarily delayed.
After 2-3 weeks, leaves and root rudiments should appear at the same time. After another week, the cuttings are carefully transplanted into any containers of sufficient volume (large cups, cut plastic bottles, etc.). It is desirable that by this time the roots of the branch are at least up to 2 cm. The best soil composition for planting containers is sod soil, compost and sand (approximately 40: 40: 20%).In the future, a high temperature is needed, not lower than 25 ° C, and good lighting.
It takes about 2 months from planting in a container to transplanting seedlings to a permanent place. In May, it is necessary to accustom future seedlings to fresh air, opening windows and doors of the greenhouse for a while. At this time, if the shoots have grown from several buds, only one, the most powerful, is left. If it grows too long, then when it reaches a height of half a meter, the top is pinched to it: for planting in open ground, the main shoot should not be long, but strong, let it continue to grow in thickness.
Planting cuttings in open ground
In the southernmost regions of our country, it is possible to plant cuttings directly in open ground. Moreover, this is often done even in the fall, immediately after cutting the cuttings, and good results are obtained at the same time. When planted in autumn, cuttings root well and grow back with the onset of warm weather in spring. The stalk is completely buried in the ground in the fall, leaving only one bud on the surface. But for the winter they huddle it too, and cover the bed with a film and sprinkle it with a layer of earth. In the spring, the structure is opened, a hole is cut in the film for the escape. The stalk is uncooked only when the grapes are clearly growing and there is a steady heat.
Spring planting of cuttings in open ground is possible when the soil at a depth of 10 cm warms up to 10–12 ° C, in the south this time falls on March. Processing of cuttings before planting is standard, keeping cuttings in a jar of water or wet sawdust is mandatory, at least before the roots begin to grow back.
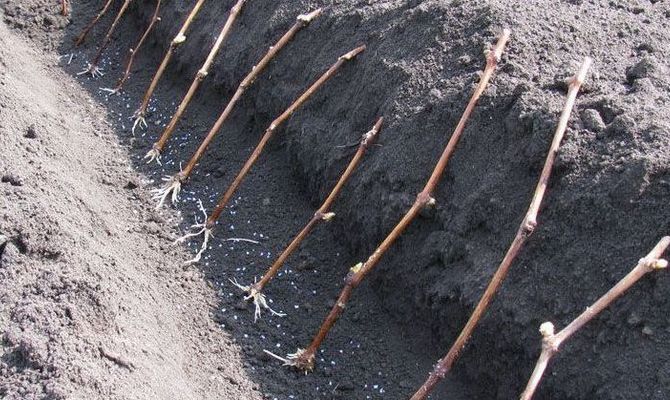
Cuttings are planted in open ground in spring only after they have given roots
Cuttings are planted in well-fertilized soil to a depth of 40 cm: since this is open ground, you do not need to limit yourself to the size of the cuttings, they can have more than 3 buds so that the roots grow powerful immediately. Cuttings are planted with a slight slope, leaving two buds on the surface. If it's still cool, you can temporarily cover them with non-woven materials.