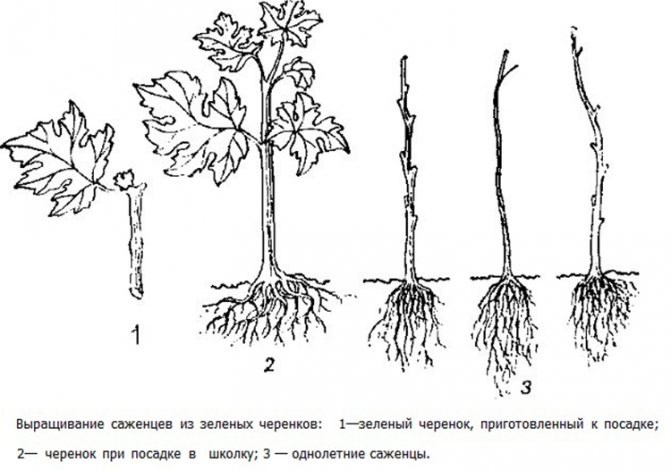
March has come - a hot time for the rooting of grape cuttings. When exactly to start rooting, you need to calculate based on your individual conditions - climate and the ability to provide additional lighting of plants before planting in a school or in a permanent place. If you provide 16-18 hours of lighting for all blossoming grape seedlings, then rooting can begin as early as January. If this is not possible, then you should start rooting not earlier than March-April, otherwise, due to a lack of light, you will only weaken young plants, keeping them without the proper amount of light before planting.
Supplementary lighting can be provided with fluorescent lamps, phytolamps, LED lighting. Household incandescent lamps are uneconomical, they get very hot and, if placed close to plants, can cause burns to young shoots and foliage.
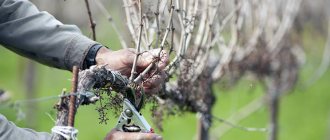
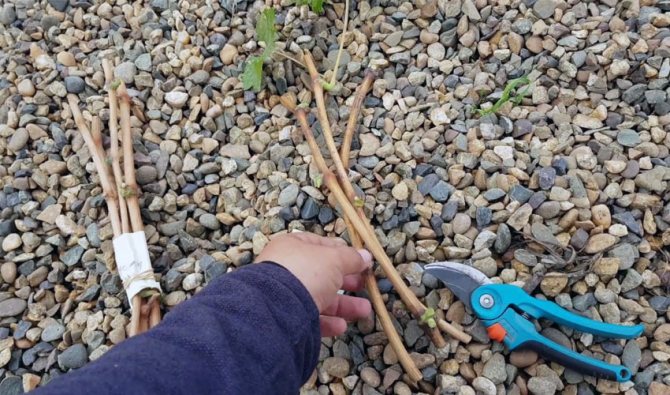
The selection of cuttings from the places of winter storage and their introduction into the room is started a few days before the start of rooting. First of all, we clean the vine from adhering sand, then rinse in a weak solution of potassium permanganate (potassium permanganate) for disinfection. After that, they begin to check the condition of the eyes, the freshness of the cuttings, culling vines with damaged, dead eyes, with darkened wood internodes.
Why harvest grape cuttings in the fall for the winter
How to cut grapes in the fall? In spring or autumn, seedlings of the selected grape variety are planted in the plots at home. To obtain seedlings, cuttings are pre-harvested. They are pruned from a well-developed vine that has matured over the summer. Bush maintenance includes pruning in the fall to form the plant and remove excess shoots, which prevents crop overload.
In spring, it will not be possible to cut chubuki from grapes peeled in autumn, in winter it is hibernation time, the development of shoots does not occur. In addition, a large number of eyes and vines die during the winter due to frost. For this reason, cuttings are stocked at the end of the season. This must be done before the onset of frost.
The process of harvesting the shanks is combined with the autumn pruning of the vine, aimed at forming a bush and removing unnecessary branches. The presence of cuttings makes it possible to preserve the cultivated variety, since no one will undertake to predict weather moods and the survival rate of a heat-loving plant in the harsh conditions.
It is advisable to harvest grape cuttings in autumn.
The need for germination
For the propagation of grape bushes, germination of seeds, rooting of cuttings or cuttings, planting of ready-made seedlings are used. The seed method of growing is very rarely used. It takes a lot of time to get the finished plant. At the same time, many young plants die or do not retain varietal characteristics. Ready-made seedlings are good because they allow you to immediately get a ready-made young plant. But the purchase of seedlings always turns out to be significant costs.
Most often, cuttings or rooting of grapes by layering are used for home breeding of the varieties you like. In this case, the use of a particular option is determined by the weather and climatic conditions of the region where the plants are grown.If warm weather sets in early and is not limited to one summer month, cuttings rooting are used. In all other cases, cultivation with cuttings or shanks is recommended.
Cuttings are the preferred method of growing grapes in northern regions with short summers, few sunny days and a high risk of recurrent frost.
Benefits of growing grape vines by cuttings:
- A young fruiting vine is used for cutting cuttings.
- Any varieties are suitable for grafting.
- To obtain a high-class planting material, the cut planting material is prepared in a certain way. Rooting is carried out so that the cuttings give roots by the time of transplantation to a permanent site.
- The transplanting of a planting material adapted to the conditions of the site is faster than the rooting of cuttings.
Before planting in a place of constant growth, the harvested shanks must be germinated. Only then can you get a healthy, strong bush, which in a short time will be well accepted, give foliage and withstand diseases.
How to prepare seedlings in the fall
In order for the cuttings to tolerate storage conditions well and begin to develop quickly after planting, it is necessary to take into account the rules for harvesting.
How to select a vine for harvesting cuttings
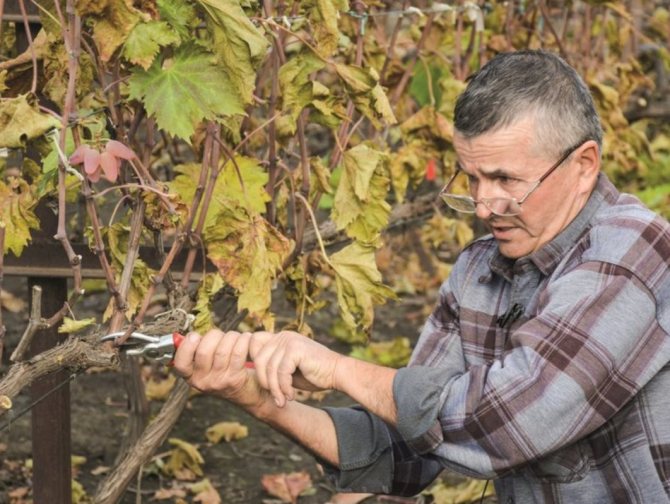
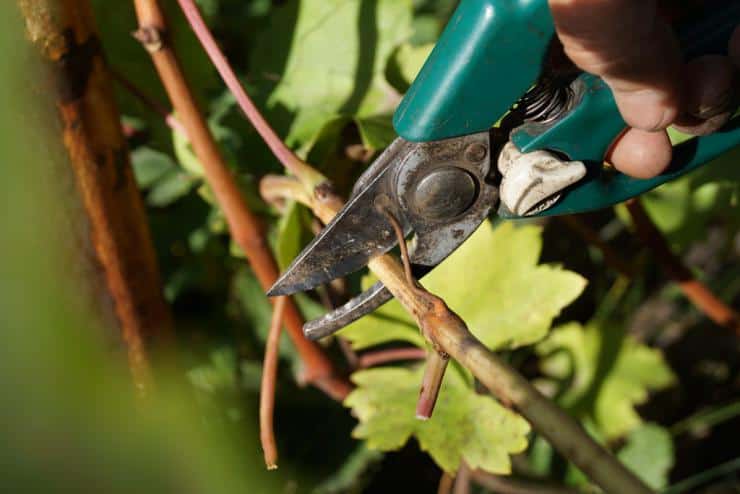
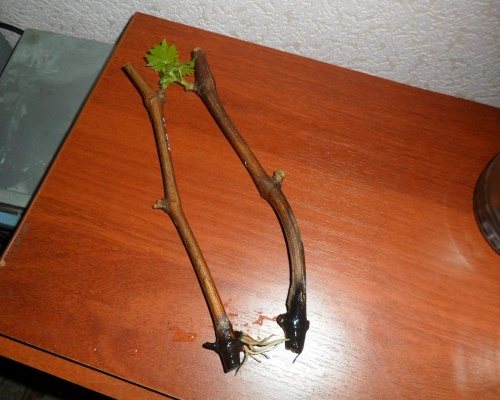
Healthy fertile bushes are selected for cutting the shanks. The vine from which the shoot selection is planned must be of a uniform color (dark straw) without signs of disease or insect damage. The diameter is 5-8 mm. Thin and thick shoots are not recommended to be harvested; preference should be given not to an old, but well-ripened branch.
You can check maturity with iodine. In a 1% solution, you need to lower the cut and see how its color changes. Unripe specimens will remain light green, and a suitable option will acquire a purple-black hue. For the cutting, the middle part of the branch is chosen, since the tip is too young and underdeveloped. Chubuki are made from the 4th eye; strong and fertile shoots grow from such blanks.
Experienced growers are advised to choose for pruning the vine that developed on the sunny side, branches sprouting in the shade grow worse. It is not recommended to use fat and growth shoots for cuttings.
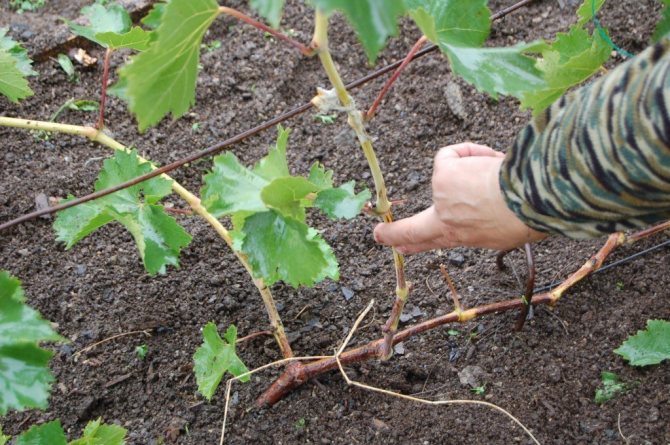
Pruning is carried out after the foliage has fallen in about 2-3 weeks (end of September - October).

The vine for cuttings must be strong and young.
Ways to cut grape cuttings
You can cut off for storage a long branch with 6-8 eyes, from which in the spring they make pruning for germination. You can also prepare one of the following options:
- shortened shoot for 1-2 eyes (used more often for vaccination);
- medium-length pruning for 3-4 eyes (this method is the most popular);
- long cuttings with 5 or more eyes.
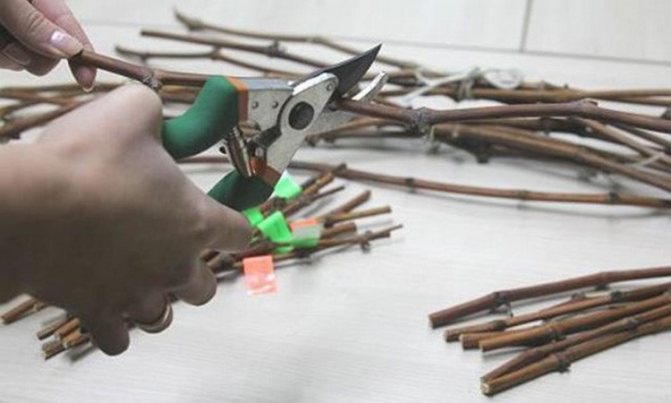
Use a disinfected garden pruner for pruning.
Disinfection of seedlings
Before sending the shafts for storage, you need to disinfect. Scraps can contain microorganisms and bacteria, which will begin to multiply intensively in conditions of moisture and heat. This will destroy all planting material.
Processing should be carried out immediately after cutting the shoot. If this is not possible, it is recommended to wrap the workpiece in foil or a dry, clean cloth.
To prepare a disinfectant solution, dissolve a teaspoon of copper sulfate in a glass of water. Spray the shafts generously with the liquid poured into the spray bottle and let them dry naturally. Disinfection will protect the planting material from the formation of mold and mildew during storage.

Chopped shanks for 4-5 eyes

We prepare a vine for grafting
Germinated cuttings for growing grapes are also called shanks. For them, a green or lignified vine is used.Cuttings are prepared from green vines in early spring, before the plant sap begins to move. The time for harvesting lignified options is autumn.
The grafting process is considered time consuming, but self-justifying.
Procurement terms
Cuttings, lignified and green, are harvested at different times.
Green cuttings
The collection is carried out in the spring (early summer). The weather should preferably be cloudy. Spring shanks take root better.
Lignified cuttings
Planting material is prepared in the fall, during the pruning of the vine. It is important to carry out the procedure before the onset of frost. In late autumn (early winter), the vine contains a maximum of nutrients.
The advantages of using lignified material are explained, among other things, by the shorter harvesting period, storage and the probability of rooting of about 100%. Harvesting of such cuttings begins 15 days after the fall of the bulk of the grape leaves.
How to determine the right vine
For grafting, grape bushes with the best taste and high yield are selected. The vine should be brown, 8-12 mm thick, with 10 cm internodes. It is important to exclude the presence of dark spots, other damage and signs of disease.
It is better to use vines from healthy bushes of varieties that bear fruit in your area. She should be mature, with healthy kidneys.
Correct cutting of cuttings
Properly cut cuttings will produce good quality planting material.
Green (spring) options
The middle and lower parts of the shoot are ideal for rooting. The upper parts are prone to decay, so their use is not recommended.
Rules for cutting spring vines:
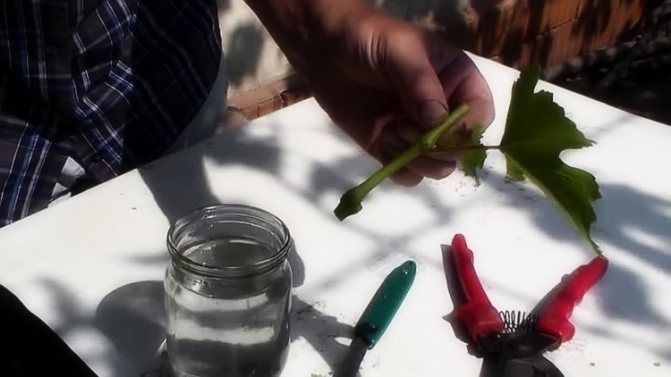
- the cutting should have 2 or more leaves;
- the bottom sheet is removed;
- half of the plate of the top sheet is removed;
- cut from the bottom oblique (approximately 45 °);
- straight cut from above;
- handle length - 30-40 cm;
- thickness - up to 1 cm;
- 2-4 buds (eyes) are present.
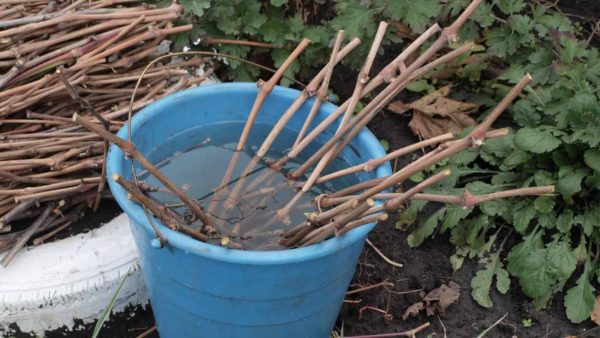
Green shanks are cut at the very beginning of the flowering of the vine. The oblique cut helps to further distinguish the bottom from the top. At the end of cutting, the shoots are placed in a container (bucket), covered with a damp cloth on top to prevent drying out.
Lignified (autumn) options
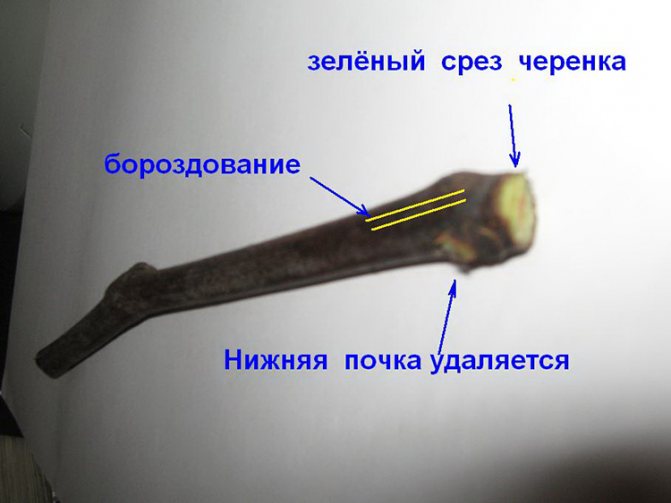
They are harvested from the middle parts of the shoot. It is not recommended to use damaged, crooked shanks - this will negatively affect the quality of the seedling. 2-4 buds should contain each stalk from which the whiskers and leaves have been removed. On the sides of the planted branches, grooves are made with a sharp object (needle, nail).
A high-quality stalk is considered if it is characterized by:
- hardness to the touch, characteristic crackling when bending;
- lack of mechanical damage;
- brown color without brown specks;
- green at the cut level;
- appropriate dimensions.
The grapes are able to develop well the root system on both lignified and green shoots.
Preparing for storage in a cellar or refrigerator
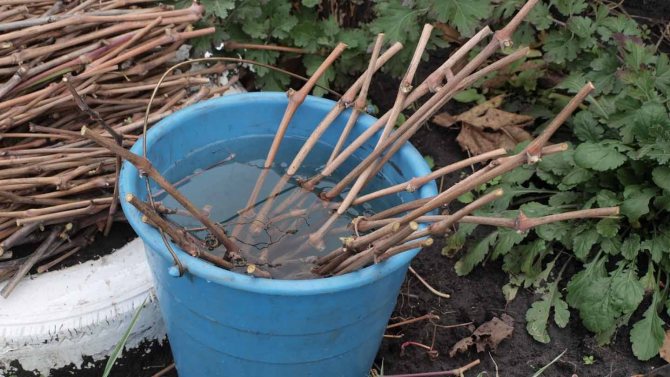
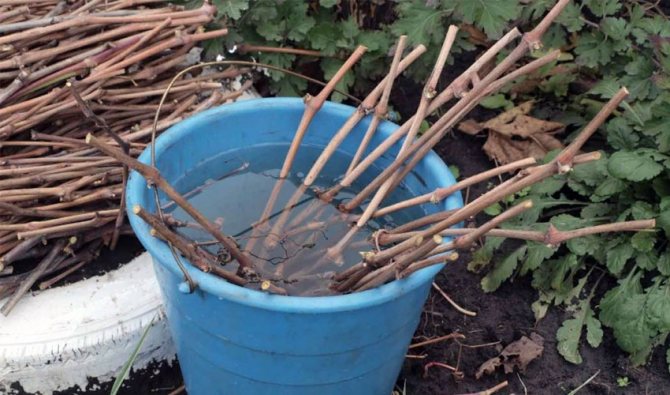
The preparatory process involves saturating the shanks with moisture so that they do not dry out during the wintering period. To do this, cut off shoots are immersed in a container with water and kept in it for 24 hours. After that, the planting material is disinfected in a solution of potassium permanganate for 30 minutes.
Instead of potassium permanganate, you can use a 3% composition of copper sulfate. Cuttings treated in this way are dipped in a paper towel and laid out on paper to dry.
Proper preparation increases the chances of preserving the planting material. Store the workpieces in a tightly wrapped film in a cool place.
Before storage, the shanks must be saturated with moisture.


Germinating cuttings after rooting
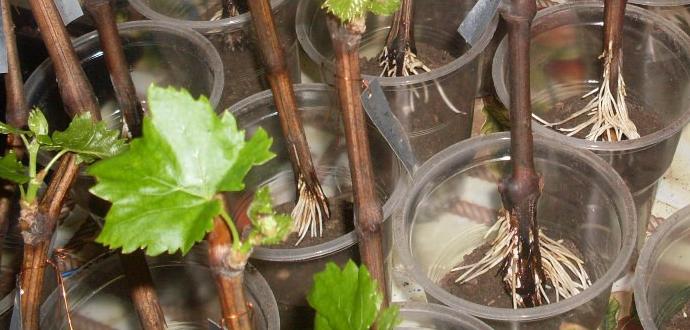
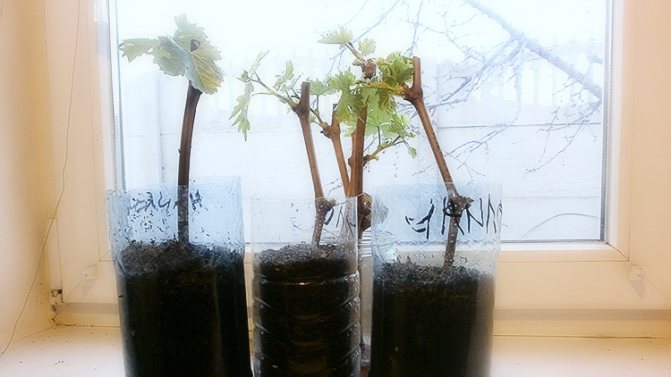
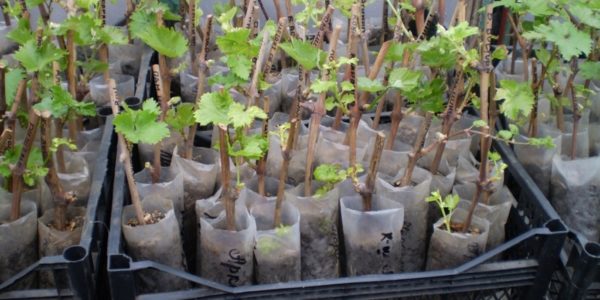
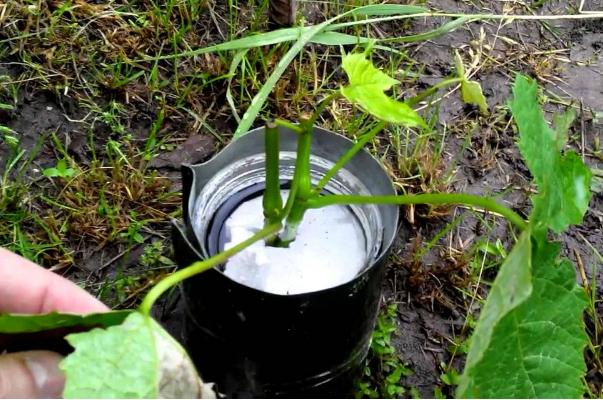
Sprouted cuttings, before planting in open ground, must be strengthened.After any method of rooting, they are transplanted into containers with earth. The volume of the vessel should be 0.5-1 liter. Use glasses of sour cream or yogurt, cut plastic bottles, or special containers. If rooting at home begins in winter, then planting in the ground is already in the spring.
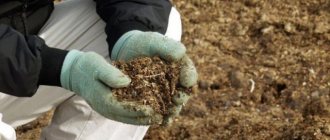
An earthen mixture is prepared in different ways. You can take one part of turf or garden soil, one part of humus and two parts of sand. Humus can be prepared from equal parts sawdust, dry fallen leaves, earth, and bird droppings. You can also add some finely chopped green grass there. Bokashi microorganisms are added to this mixture, packed in plastic bags and placed in a cool place until the end of winter. A mixture of equal parts of purchased universal soil and sand is suitable for transplanting cuttings.
Most often, gardeners propagate grapes using an affordable method of cuttings. Planting material is taken from the strongest plants. After germination, for rooting, use the land of the site on which the plant will grow constantly. Therefore, young grapes adapt quickly. Cuttings are rooted in several ways: in water or immediately in a nutrient substrate. Each of them has its own advantages.
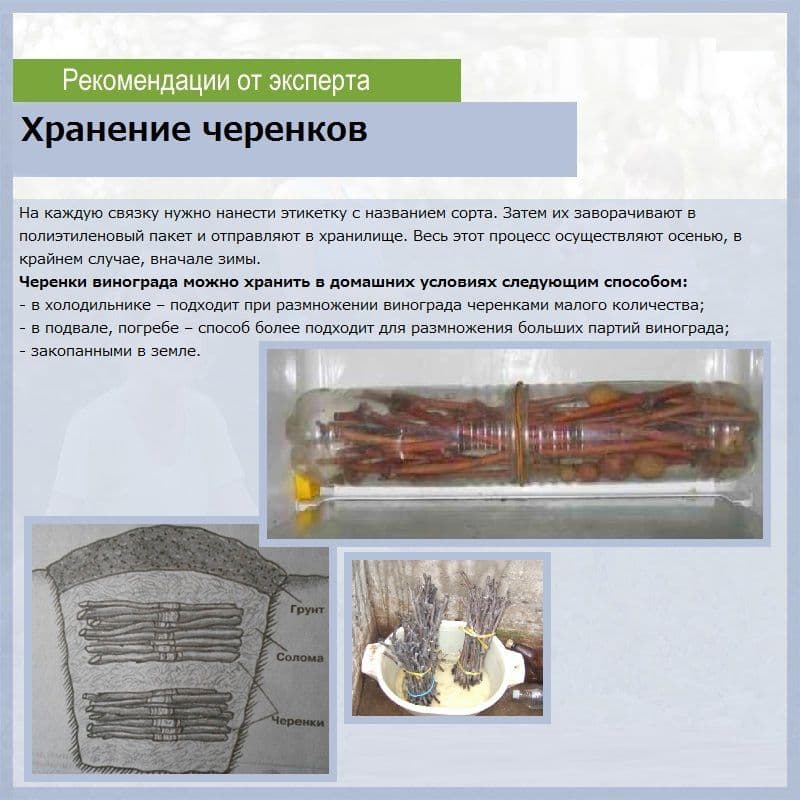
How to keep grape cuttings in winter until spring
Cuttings are stored in cellars or refrigerators at temperatures ranging from 2 to 6 degrees. Some gardeners use a storage method in which prepared stems are buried in the ground. It is important to choose the right place so that the soil remains dry in the fall, and after the snow melts, it does not turn into a swamp. The immersion depth of the planting material is at least 25 cm.
Cuttings stored in basements or refrigerators are periodically checked (about once a month). If mold growth or drying of the workpieces is detected, it is necessary to urgently take measures to save them. If there is not enough moisture, the cuttings should be immersed in a container of water for 6 hours and dried as in the preparation of the material. And in case of mold formation, the shoots are thoroughly washed and disinfected with a solution of potassium permanganate or copper sulfate.
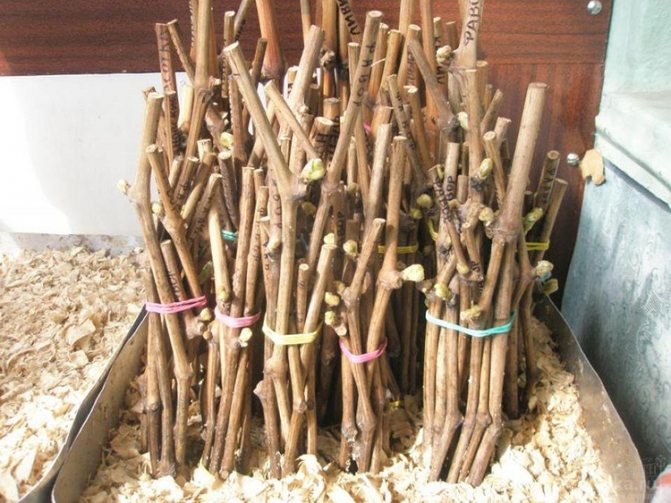
There is a popular method of storing cuttings, described in the book on growing grapes. For reproduction, annual shoots with healthy buds are selected (the distance between them should be 20 cm or more), the diameter of the branch is 5-6 mm. After disinfection and drying, the cuttings are wrapped in a roll using polyethylene and a layer of steamed sawdust. A tightly tied roll is placed in a bag and stored in a refrigerator (temperature 2-6 ° C). During periodic monitoring, you should pay attention to the color of the shoot, it should remain light green.
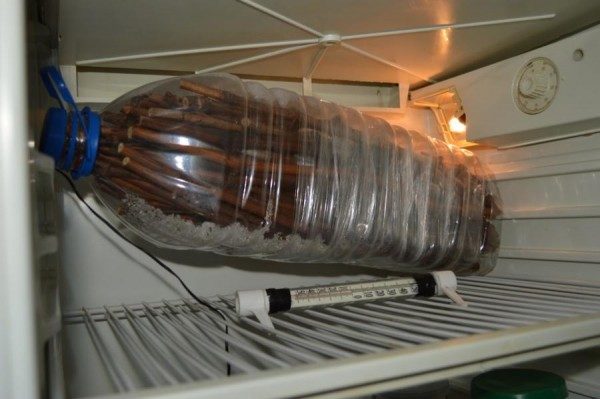
Storing grape cuttings in the refrigerator
Germination time
At home, cuttings are taken out and begin to germinate, focusing on the climate of the region. Chubuki with sprouted roots are planted in the soil only after warming it up to +10 degrees. Germination and rooting takes about two months.
Therefore, the cuttings are taken out and germinated in the following terms:
- In the southern part of Russia at the end of January or in the first half of February.
- In the Moscow region or in the middle lane from the last days of February to the first half of March.
- In the Urals or Siberia, the soil gains sufficient temperature only in the last decade of May. Therefore, the germination of cuttings begins in the second half of March.
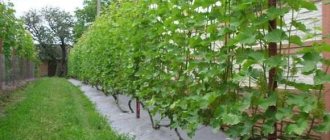
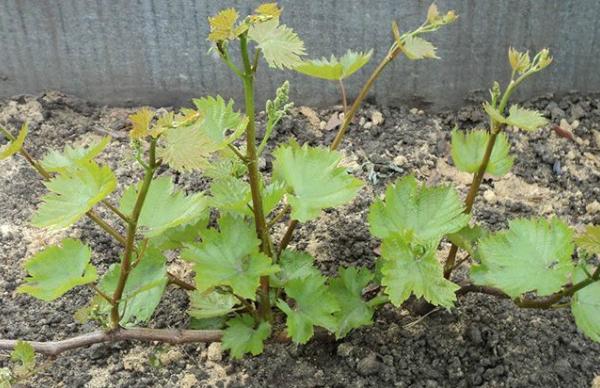
Until the threat of recurrent frosts has passed, grape cuttings are transplanted to the garden bed, but covered with covering material when the weather worsens.
The spring germination of shanks is difficult, since you have to go early in the spring or even in winter to the dacha for material for cuttings. We have to get the vine of the table varieties from under the snow, because during this period the snow cover has not yet melted. There is a high probability of damage to the kidneys by frost, damping.Therefore, autumn grafting of the vine is preferable.
Germination of shanks at home
Radchevsky's method
This method is characterized by the simplicity of the technology and the production of a fast-growing bush with a high level of survival. The essence of the method is as follows.
- In autumn, cuttings 60-90 cm long are harvested. After processing, they are wrapped in a film and sent to storage in a trench with sand.
- In the spring, shoots are taken and cut 30-40 cm each, while removing the lower eyes is not at all necessary.
- The cuttings are soaked for about 2 days in water. The container with them is installed in a cool place (temperature regime 15-18 °).
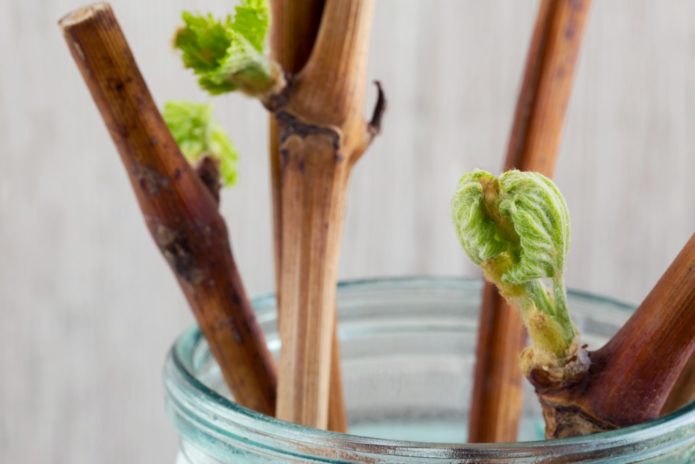
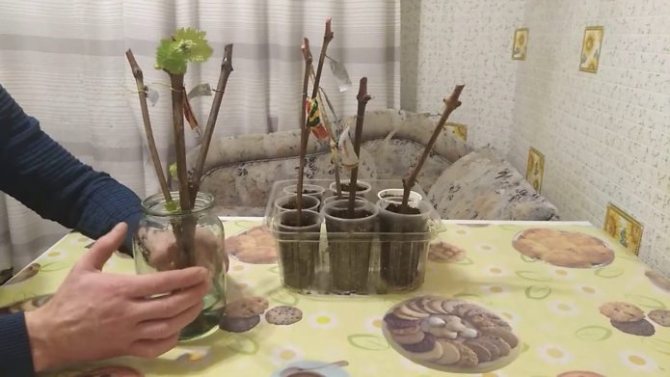
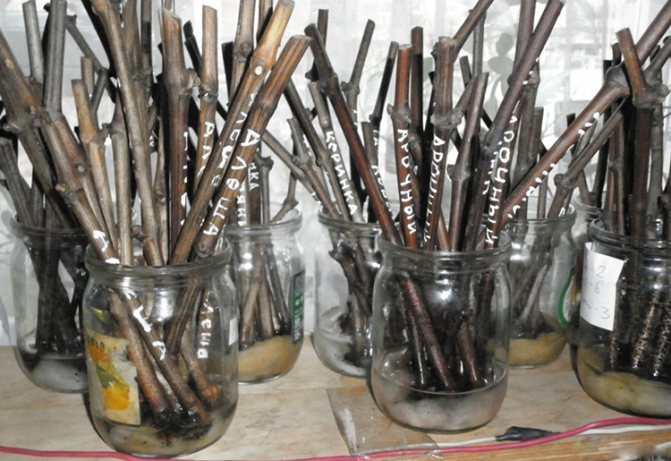
- After moistening, the cuttings are dipped into liter jars.filled with water by 2-3 cm. Up to 10 shoots are placed in one container. Containers with cuttings are exposed on the windowsill from the sunny side. In case of a lack of light, it is recommended to use a backlight with fluorescent lamps.
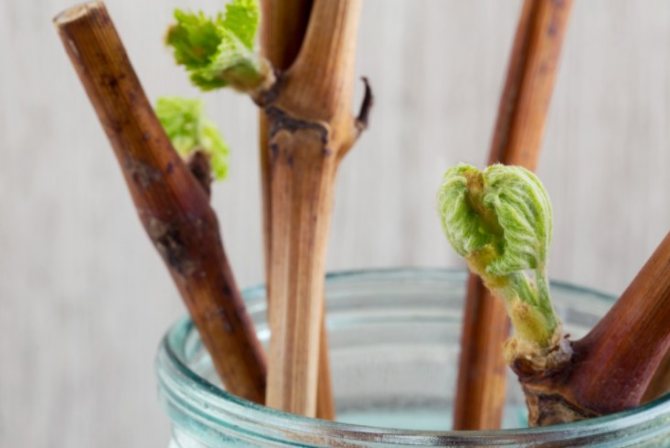
- After 10-12 days, young shoots are formed from the shanks, and the roots appear in another week.
- After the roots appear, the cuttings are transplanted into bags with soil mixture (soil, sand, humus). Before planting, you need to prune, leaving only one, but the strongest sprout (in the presence of a short internode, two sprouts are allowed to be preserved). Sprinkling with earth is done so that 10-15 cm of the cutting remains on top.
Further, moderate watering and loosening of the soil is carried out. In the first decade of May, the plant is planted in open ground.

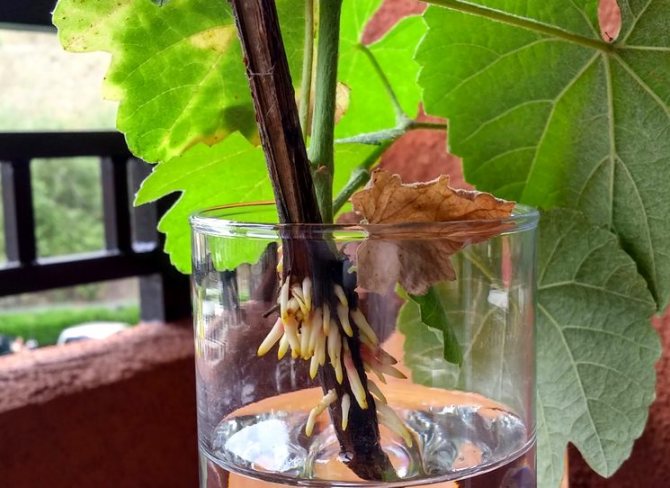
Germinating cuttings in water
How to germinate shanks according to the Pusenko method
This method is also called a dressing room, since the prepared cuttings are folded on the closet. The preparatory process involves moistening a dense fabric and wrapping the handle with it (each is wrapped separately).
The lower part of the roll is placed in a film, after which all the blanks are placed on the cabinet in a horizontal position. The tops of the shanks are directed towards the wall or window, this will create an optimal temperature for them. Excessive heat will provoke intensive blooming of the upper part of the shoot. Features methods:
- periodic moistening of the tissue;
- temperature regime up to 25 °.
Roots appear after 3-4 weeks. Upon reaching their length of 1-2 mm, transplantation into open ground or a separate container will be required. This method is suitable for cuttings that are at least 0.7 cm thick.
Method of correct germination in the litter
This method is simple and favorable for the plant, which is not stressed during transplantation.
The essence of the method is to immerse the cutting in a container filled with sawdust with hydrogel / sand or other alternative material.
The components used for filling the container need preparation:
- sand is cleaned of debris, washed and filled with boiling water;
- sawdust is also poured with boiling water and squeezed.
The cooled sawdust is mixed with sand or hydrogel and the prepared container is filled with the resulting mixture. In the center, the cutting is immersed in the filler and periodically moistened. The roots appear after 2 weeks, after which the plant is transplanted to a permanent place.
Germination of shanks in filler
Other rooting methods
The rooting method is also available and simple. The bottom line is the effect on the shoot at the same time of two different temperatures. This is achieved by immersing most of the cuttings in the ground, sprinkle the rest with sawdust or sand, and then cover with a film.
The root system forms on the surface, while the submerged fragment does not develop due to the cool temperature. As soon as the antennae of the root appear on the surface of the cutting, rooting has occurred and the stem is transplanted into the ground.
Planting cuttings
The quality of planting largely determines the entire subsequent process of growing a plant. There are several ways of rooting: in sawdust, in the ground, in water.
In sawdust
Sawdust is placed in the container, slightly moistened, in which bunches of cuttings are located. The container is placed in a warm place. The sawdust is moistened every 5 days. The period before the appearance of the root system is 3 weeks.
In the ground
Prepared containers (plastic pots, glasses) are filled with a prepared nutrient substrate.
The substrate is prepared by mixing:
- garden land - 35%;
- humus - 25%;
- rotted sawdust - 25%;
- sand - 15%.
A drainage layer (expanded clay, pebbles) is equipped at the bottom of the tank. When adding the soil mixture, the stalk is set at a slight slope, so that only the upper peephole is on the surface.
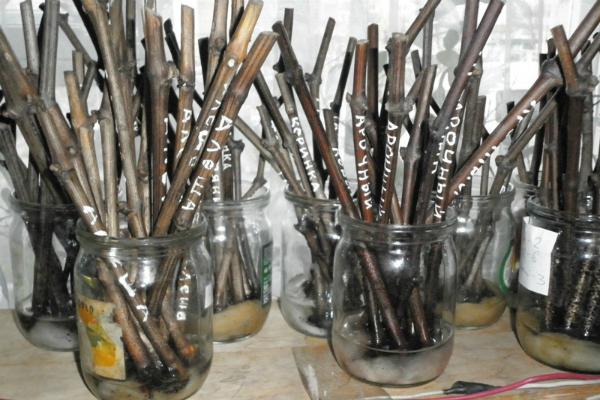
In water
The shanks are simply placed in a glass jar of water.
The shafts with overgrown roots are planted in a special cardboard or plastic container with earth (containers, boxes, pots, bags). Holes are made in them to remove excess fluid. Preferred container sizes: height up to 25 cm, diameter up to 10 cm.
For subsequent transportation to the vineyard, it is convenient to place small containers in larger boxes.
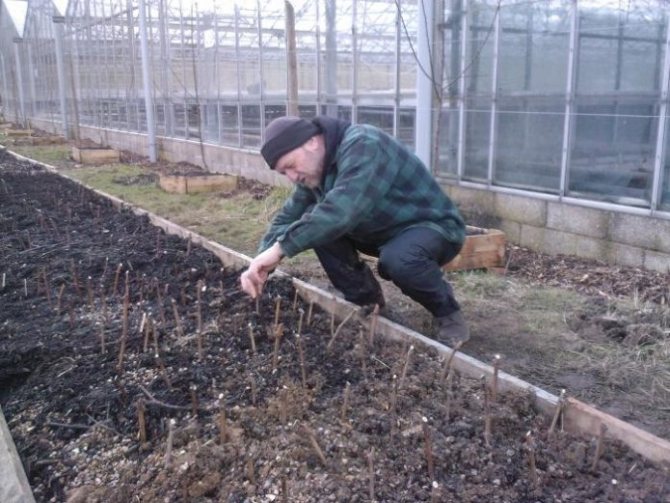
With a large amount of planting material, greenhouses are used. The soil for rooting must be fertile. The thickness of the soil layer is up to 12-15 cm. Above - up to 5 cm. River sand. Before planting, the soil is moistened until it is completely impregnated.
Landing requirements:
- planting depth - 3-5 cm;
- landing frequency - after 10 cm;
- moistening, film coating is provided;
- the need for kilchevka.
The stalk is placed in the soil mixture, covered with water, watered.
Kilchevanie is the placing of shafts in plastic dishes with wet sawdust over a radiator. Purpose: Keep the bottom warm and the top cool.
What and when to do with sprouted cuttings
The sprouted stems are planted in the spring, when 2-3 true leaves are formed on the seedling. Previously, the container with the grapes is watered and the shoot is taken out. The roots are immersed in a clay mash before being buried. Also, honey water is used for processing, which is prepared from 1 liter of water and 1 spoonful of honey. The planting process is completed by burying the cutting and placing the peg as a support. It is recommended to mulch the soil around the bush.
After germination, the shanks are planted in the ground and then transplanted to a permanent place of residence.
The planting of shanks in the spring is characterized by a high survival rate of the material (up to 95%). Such a plant can bear fruit the next year. The timing is determined by weather conditions, night temperatures should not fall below 0 ° C.
There are many ways of harvesting and storing cuttings, of which you can easily choose the most suitable one. Then there will be no need to worry about the loss of the variety as a result of freezing of the vine. During the warm period, the seedling will gain strength and gain strength, which will help it survive the harsh winter under reliable shelter. And then it can be germinated and propagated.
Rooting in filler
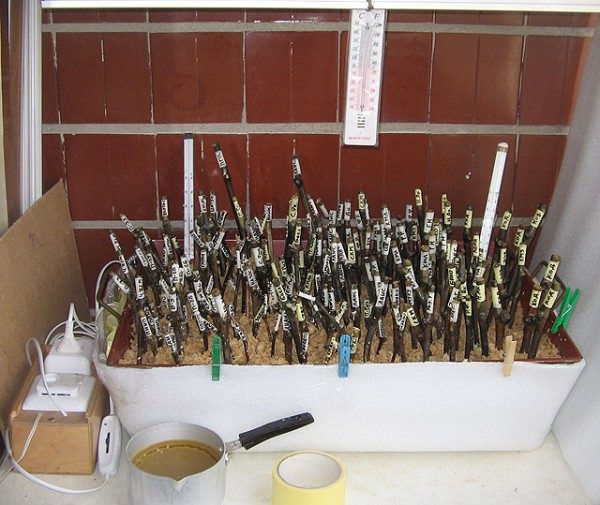
You can germinate grape cuttings directly in the ground or filler. Sawdust is most often used. They are pre-scalded with boiling water to kill molds and bacteria. Then allow to cool and squeeze out excess water. A layer of sawdust is poured into a container or any other container. Chubuki is inserted into sawdust, sprinkled on top with a second layer. The kidneys should remain outside. Once every 2-3 days, the sawdust is moistened with warm water. After two weeks, they check if roots have appeared on the cuttings. Such twigs are grown in the ground.
You can plant the vine directly into the ground. The soil is made from a mixture of sand, peat, turf. Cut the stalk along an oblique line, so it is easier to stick it into the ground. Pots with cuttings are added every 2-3 days.When rooting occurs, green leaves and shoots will appear on the branches. The seedlings can be transferred directly into the open ground. This method is easier than rooting in water. But not all shanks take root at the same time, the waste of material is quite large. To reduce rejects, you need to treat the branches well with stimulants like Kornevin. Under its action, the roots germinate better.
conclusions
- For propagation of grapes in the fall, after harvesting, cuttings are harvested.
- After cutting the vines, the raw material is freed from leaves and shoots and prepared for storage.
- In order for the cuttings to survive until spring, the plant is kept at a temperature of +0.4 to +8 0 C or buried in the ground.
- In the spring, before planting raw materials, the cuttings are rooted.
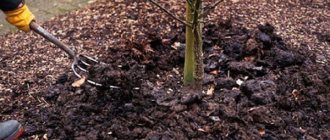
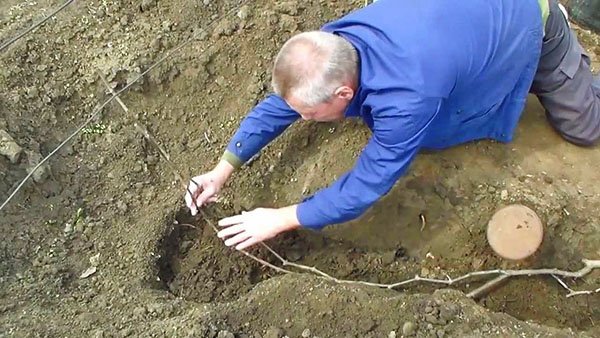
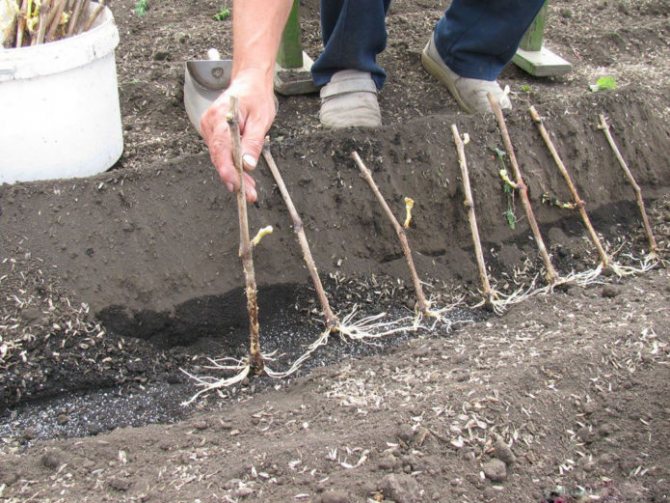
Before planting the plants, a pit or trench is prepared, after which the cuttings, together with the soil from the container, are planted in the soil.
Cutting is the most popular and affordable method of grape propagation (germination). On the one hand, it takes a lot of time and some effort, but on the other hand, it has a number of advantages. Cuttings are guaranteed to be cut from the best, powerful bushes, when rooting, the soil of the backyard is used, which allows the plant to quickly adapt. In addition, this is how the planting material is obtained exactly in time for planting.
There are several different ways to germinate shanks. So, rooting in water provides clarity. And this allows you to prevent the emergence of shoots before the roots appear. Growing in a substrate, in turn, makes it possible to dispense with an intermediate transplant, which is traumatic for young grapes.
Landing in the soil
After the roots appear in the plant, the cuttings are planted in any containers, up to 1 liter in volume. At the same time, no fertilizers are used to avoid overheating of the root part of the raw material. In the spring, the plant is planted in the soil.
It is recommended to plant the vine in a trench or hole. The depression is filled with earth, which is mixed with sand. A small layer of gravel can be placed on the bottom.
The plant is removed from the container along with the ground and planted in a prepared recess. After that, abundant irrigation is carried out. A support for tying is installed next to the vine.
The video in this article shows how to properly store and plant grape cuttings:
Table: difficulties in growing cuttings and ways to overcome them
| Problem | Possible reasons | Solution method |
| Cuttings dry and curl leaves | Excess nitrogen fertilization or improper soil acidity. | It is necessary to remove the stalk and inspect the roots, if damaged roots are found, remove them, rinse the branch and transplant into a suitable soil. |
| The roots of cuttings darken | Decay of roots during overflow. | Reduce or temporarily stop watering, or remove rot and root the cutting again. |
| Leaves turn yellow and turn pale | Insufficient lighting. | Choose a brighter spot or use additional artificial light. |
| Roots do not appear |
|
|
| Cuttings dry | Overflowing. | Reduce or temporarily stop watering. |
Cutting grapes is a low-cost and time-saving way to renew your plants or expand your plantation. Even a beginner can master this process.
Storage methods
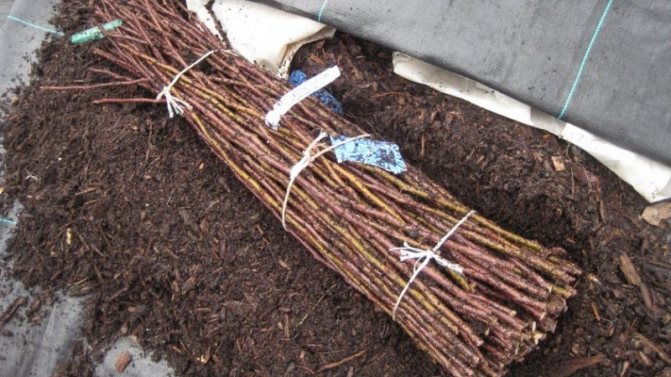
In the cellar, bundles of cuttings are buried in slightly wet sand or covered with sawdust.
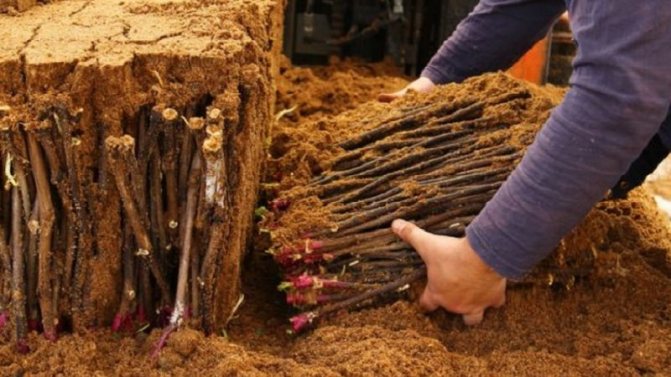
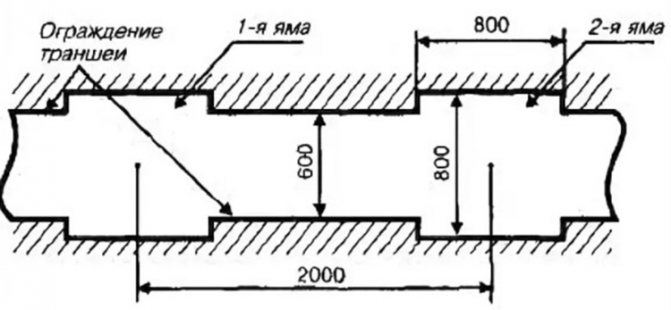
The trench is dug taking into account the length of the shanks and add 25-30 cm to the free space above them. The walls and bottom are moistened with water.A layer of sand 3-4 cm is poured onto the bottom and the bundles are set vertically. From above, the cuttings are covered with a layer of sand 5 cm high. Then they are covered with earth to the edge of the pit. With the onset of frost, a hill of earth 30-40 cm high is poured over the trench. During the winter, the pit is constantly covered with snow. A groove is dug along the edge of the trench for the outflow of water.
Bulgarian storage method:
- Chubuki harvested two more eyes than necessary.
- In the basement, they are installed vertically, immersing the lower ends in water or wet sand.
- Before planting, remove the lower part and the dried upper part with one eye.
In the refrigerator, bundles are stacked in stacks and wrapped in plastic wrap on all sides. Periodically, the film is removed for airing.
Carbon dioxide collects under the film, which partially preserves harmful microflora and restrains the consumption of carbohydrates for respiration.
Propagation of grapes by dropping the vine
Many shrubs are propagated by layering, that is, by dropping branches (shoots) in one way or another. This option is also possible in the case of grapes, and with a successful outcome, several new grape plants can be obtained in one summer. In this way, they usually try to propagate varieties that are difficult to take root. Since the future seedlings, in fact, feed on the roots of the mother bush, they develop well and form a powerful root system of their own.
Digging in a lignified shoot
This is usually done in early spring, before the start of the growing season. Choose conveniently located powerful last year's shoots. In the right place, they dig a rather deep, up to half a meter, ditch, stretching from the bush to the place where they are going to dig in the vine. Naturally, directly at the bush, it should not be deep, so as not to damage the roots. A soil well fertilized with humus and superphosphate is poured into the ditch, at the very bottom, and the shoot is laid. It must be bent carefully so as not to break it, and you can attach it to the bottom of the ditch with a piece of bent thick wire or simply press down with a heavy stone.
It is not difficult to spread the vine, but you need to do it carefully so as not to break
Where there will be a new bush, the vine is carefully bent, taken out and tied to a stake. Remove all eyes located from the mother bush up to the place of this bend. Many specialists at the very beginning of the shoot, near the mother bush, pull it tight with wire, so that in the future it will be easier to separate the new plant. The ditch is gradually covered with soil and watered well. As a rule, good roots grow in a buried place in a year, and the next spring the new plant is separated from the mother plant.
Digging in a green shoot
In the summer, in June or July, you can dig in the powerfully grown green shoots of this year. This is done in the same way, bringing to the surface the top of the shoot with two or three leaves. If the shoot is very long, it can be dug in with a "sinusoid", bringing it to the surface several times. All parts remaining underground must be attached to the bottom of the ditch with studs.
If the soil does not dry out in the summer, for well-rooted varieties by next spring you can even get a few new bushes in this way.
Execution of "Chinese" layering
Layers performed by completely laying the lignified shoot into the ground are called Chinese. This is the case for the most poorly rooted varieties. For laying in early spring, a long shoot is chosen, located at the very base of the bush. They dig it all the way into a ditch with a depth of no more than 20 cm. Also into the fertilized soil, also pinning it to the bottom of the ditch. But the ditch is not completely filled up: the soil layer above the vine is first made no more than 5 cm.And only as new shoots emerge from the buds and grow, they gradually add soil to the ditch. They keep the ditch wet all the time.
Usually new shoots grow from each buried bud; in the fall, they carefully dig up the vine and cut it into several new plants.However, in order to do this, you have to sacrifice part of the harvest, reduce the load on the mother bush. It is necessary to break out in the summer not only the extra bunches, but also all the stepsons and part of the young shoots.
Video: laying green vines in the ground
Tips for Beginners
To avoid serious problems during the entire long cuttings procedure, you should adhere to the basic tips:
- At the time of harvesting the cuttings, it is worth choosing ripe, lignified parts of the vine - unlike young green ones, sap flows more intensively in them, making them easier to take root.
- It is recommended to disinfect the instrument after each cut to avoid contamination of the material.
- To minimize the loss of moisture during storage, the sections of the shanks are treated with paraffin.
- When germinating, a hydrogel can be added to the soil for additional moisture retention. This will not be an obstacle - the roots will grow through it perfectly.
- In the conditions of the middle lane before spring planting, the option of early rooting of cuttings (at the end of February) with subsequent rearing than later, but with planting directly into the ground, is considered optimal.
- When growing, plant grapes in transparent containers to monitor the development and condition of the root system.
How to pick a good grape variety
Note! The site already has a number of detailed review articles on the most popular and best grape varieties:
- General article on the best grape varieties.
- The best table varieties.
- Wine varieties.
- The best early varieties.
- Black (blue) varieties of table and wine grapes.
- Pink varieties of table and technical.
- White varieties.
conclusions
- Rooting a large number of cuttings before planting in open ground is a mandatory element for northern and middle latitudes / bands (Siberia, the distant Urals). Too short summer limits the growth and development of the plant.
- To prepare for autumn propagation, cuttings are cut from annual, fruiting vines only after the dormant phase begins.
- Cuttings are stored all winter (in winter): at home in the refrigerator, in the cellar, in a special storage.
- In late February-mid-March, when the growth phase begins, the shanks germinate. Any suitable method is used for this.
- Cuttings can be rooted (planted) in jars and pots, in a substrate, in a damp cloth. Each way to germinate seedlings has its own advantages and disadvantages.
How to do spring grape grafting can be found here.
One of the most popular ways to propagate grapes is by cuttings. The vine is very tenacious, it easily tolerates pruning and forms roots. It is easy to grow a strong young bush from cuttings, if they are prepared on time and correctly. In warm southern regions, the vines are often cut in the spring and immediately planted in the open ground in the summer. However, this method will not work in temperate climates with cold summers. Therefore, it is better to start harvesting planting material in the fall and plant already rooted cuttings. How to germinate grape cuttings, how and when to harvest them - this will be discussed today. Read the article: preparing grapes for winter!
The time of the preparation of the shanks
Having made the decision to carry out grape cuttings, correctly determine the time for harvesting shoots. Cutting of the planting material takes place in the fall at different times for different climatic zones. The selection time also depends on the variety of culture. Roughly, the procurement process takes place at the end of autumn after the harvest and the end of the plant's growing season. When the grapes shed their leaves, you can start cutting the shanks. In early grape varieties, the growing season ends earlier (starting at the end of July). You can cut the material at an earlier date. Late crop varieties may not shed their foliage until the end of November. The blanks should be done before the first frost. Wild grapes are planted by cuttings in the spring, between May and June.
About the readiness of seedlings for transplanting into the ground
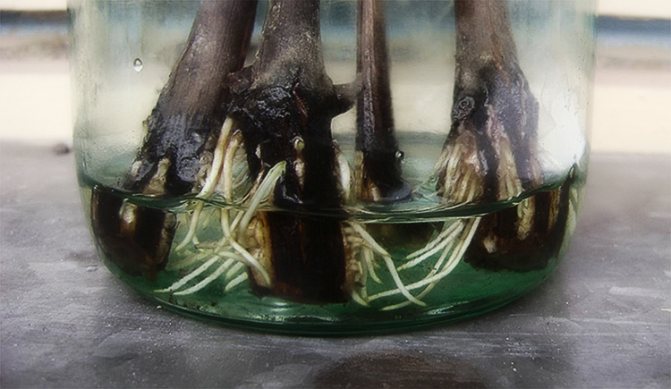
When rooting in water, it is not difficult to understand that the shanks are ready for transplantation. The roots are visible to the naked eye. When their length reaches 3 cm, they need to be transplanted into the ground. They will be well received.
When rooting in soil, the root system cannot be considered. Then, 20 days after the start of the process, the plant is slightly twitched. If resistance is felt, then roots have formed. Now reduce watering and wait for foliage to appear.
Plants can be left in the substrate until transplanted into open ground. Planting of germinated plants is performed in the first half of May, when the weather is finally warm.
Propagation of grapes by grafting
Like most fruit trees, grapes can be grafted. Vaccination is no more difficult than, for example, in the case of an apple tree, but not all varieties are compatible, and success in each case is not guaranteed. Therefore, it is advisable to study the literature before the operation, look for which adult bushes can be grafted with this or that variety. If you have not found such information, it remains only to experiment.
Grafting grapes is as common as grafting fruit trees
In the case of grapes, all known grafting methods are used (splitting, copulation, budding, etc.), but the number of variants is even greater. They are inoculated with both last year's cuttings and those cut from the shoots of the current year. As in the stem or last year's escape, and in the current year's escape. Therefore, the appropriate terminology is used: "black to black", "black to green", etc. There is even a desktop, winter vaccination.
So, for example, grafting "black on black" is carried out in the spring, when the active growing season has not yet begun. The graft is cuttings cut in the fall and kept in the cold. For this grafting, the buds on the cuttings should be slightly swollen. It is performed by copulation methods. Cuttings are selected that are suitable in thickness to the rootstock shoot, soak, make oblique cuts on the cutting and rootstock, connect and firmly tie the graft site. When new shoots on cuttings grow up to 25-30 cm, they are pinched.
In the case of grafting "black in green" last year's cuttings with budding buds are grafted onto young powerful green shoots of the current year. Such inoculation is usually carried out in a "split" manner. It is possible during the entire growing season, as long as it is possible to preserve lignified cuttings harvested in the fall in the cellar.
It is also possible to inoculate an old bush into the bole, when the top layer of the soil is dug up in early spring; cuttings are grafted underground, usually by splitting. They do it at a depth of about 15 cm. The stalk is completely buried in the ground.
Video: grafting grapes into a stem
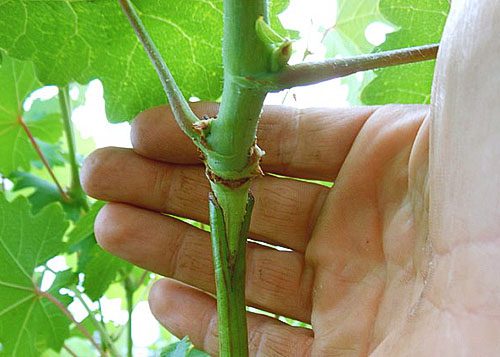
Budding, that is, inoculation with a kidney, is carried out on a green vine in June or July. As in fruit trees, it is possible to implant a bud into the shoot behind the bark by making various incisions: T-shaped, longitudinal, into a gap, etc. The site of inoculation is very well wrapped with foil, and after a month the bud takes root well.
A detailed description of how to graft grapes is beyond the scope of this article, but it is quite accessible. After reading and practicing a little, any gardener with minimal skills in caring for trees and shrubs will be able to plant grapes.
A grape is a liana, but, in fact, it is very similar to many fruit bushes, and its propagation methods are generally the same as, for example, currants. The goal - getting a new seedling - can be achieved by known methods: germination of cuttings, layering, grafting. Performing all these operations to one degree or another is available even to a beginner, and if at first it is scary, you just have to try.
Material handling before winter storage
When preparing shoots for storage, follow this order:
- Remove leaves, mustaches, stepsons from the branch.
- If the cuttings are dry, soak them for 24 hours in water with the addition of honey.
- Make grooves on the bark of the shank for the germination of future additional roots.
- Treat with a root growth stimulant (eg heteroauxin).
- To disinfect the cuttings, immerse them in a 5% solution of ferrous sulfate for 30 minutes.
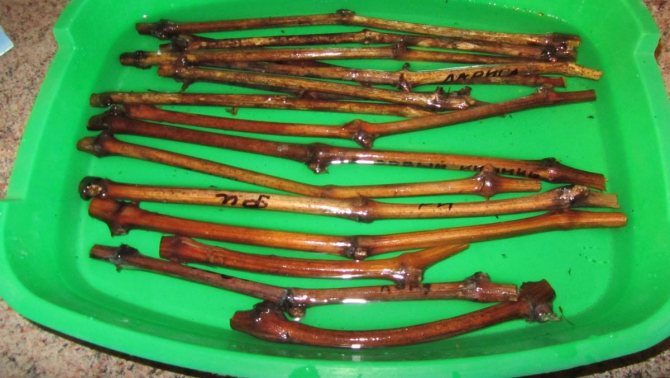
- Dry the blanks, tie them in bunches and sign the names of the varieties (or label them).
Vine preparation (winter, early spring)
In late February-early March, depending on the expected date of planting, the plants are removed from storage. Preparation for germination takes no more than 2-3 days. However, the preparatory stage should be treated with full attention.
- First of all, they inspect the stored shanks. During the winter, no spots should appear on them, the bark should not change color. Then the good shafts are separated from the dried ones. To do this, the stalk is carefully cut. The upper cut is made at a distance of 1–2 cm from the upper kidney, the lower one - obliquely, at a distance of 1 cm from the lower one. If moisture does not appear on the incision, the cutting has dried up, and it makes no sense to germinate it.
In a well-wintered shank, moisture appears on the cut. In addition, the cut itself has a deep green color.
- The lower cuts on the cuttings are smoothed out with a sharp knife.
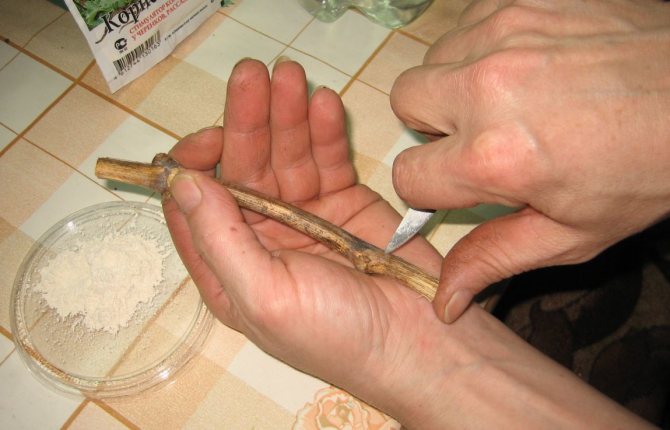
- A container of the required volume is filled with lukewarm water - best of all, thawed, and the shank is placed in it for 2 days.
- After soaking, it is treated with a solution to stimulate root growth. To do this, add heteroauxin, root, sodium humate or even ordinary honey to the water.
Growing from seeds
At home, you can germinate grapes from seeds. To do this, take seeds from a certain variety of berries. They should be strong and of normal color. They put them in water, healthy seeds drown, and do not float to the surface. Further landing steps:
- The seeds are washed from the pulp.
- Soak for about a day.
- Stratification of seeds is carried out at a temperature of 3 degrees. To do this, they are placed in a mixture of moss and universal soil, the container is closed and stored in the refrigerator. The best time to start stratification is December.
- In early spring, seeds are planted in moist soil, one at a time in a pot.
- The first shoots after planting appear after 2-8 weeks.
- Sprouted seedlings are transplanted into a new container when they reach eight centimeters.
- When the vine grows 30 cm, it is transferred to open ground. Disembarkation dates are late May or early June.
Growing grapes from seeds at home is a long and painstaking process. In this way, you cannot get high-quality hybrid varieties. Therefore, growers rarely use these methods, it is easier to germinate a stalk.
When is it time to germinate
20 days before planting, the shanks are removed from storage and the sections are updated - the lower one is made under the knot perpendicular to the axis of the cutting, the upper one - 2 cm above the peephole, obliquely in the direction opposite from the peephole.
Furrowing the bottom of the shank will allow the roots to hatch faster... Longitudinal damage to the bark is inflicted by holding one or two internodes along the teeth of a garden saw. If the stalk is of full size, then the lower end is furrowed with two eyes, if it is two-eyed, the lower third is furrowed.
Photo gallery
Aerial breeding method
Reproduction by branches
Green cuttings
Reproduction by chubaks
How to do it right
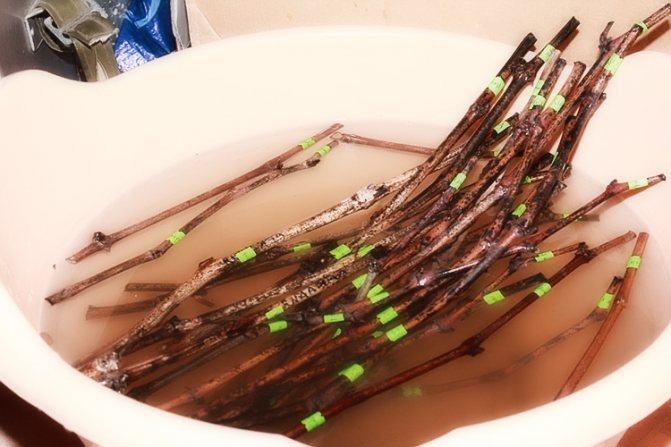
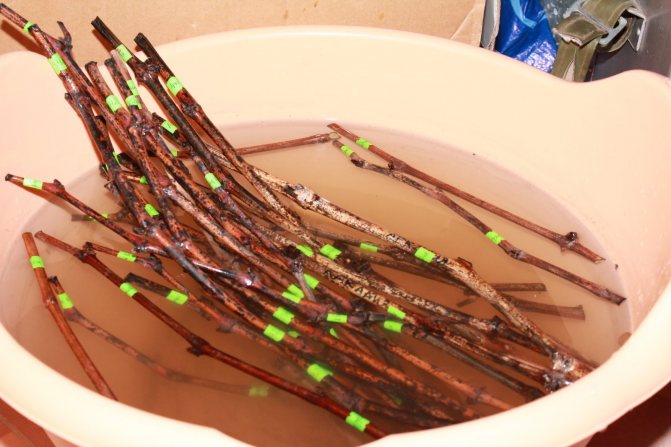
Cuttings with updated cuts are soaked - immersed two-thirds of their length in water at room temperature for 1-6 days... A day later, check the moisture content of the shanks - make a fresh cut in the upper part with a sharp knife. If it is wet, then the soaking is finished, if not, it is continued for three more days. Then they check again. If the cut is dry, change the water and continue to soak for another three days.
In large nurseries, after soaking, cuttings are harvested in special greenhouses.to start the formation of root buds before bud break.This is achieved by cooling the upper part of the segments and heating the lower one. If the cuttings are planted without pickling, the buds will bloom before the roots are formed. Such specimens may dry out in insufficiently moist soil.
At home, kilchevka is replaced by stratification.:
- Germinated in a box, equal in height to the length of the cutting.
- Steamed earth or sawdust is poured onto the bottom with a layer of 1-2 cm. The bundles are vertically installed.
- The bases are sprinkled with earth 5-7 cm, covered with wet sawdust to the top, leaving one upper peephole open.
- The box is installed in a room with a temperature of + 20 ... + 25 ° C for 14-20 days.
In the conditions of the apartment, they are stratified in long plastic bags with loosely tied top edges. The bags are placed on a cabinet for 16-20 days at a temperature of + 22 ... + 25 ° C, in daylight. The package is opened 3-4 times for airing. If the surface of the cutting dries out noticeably, it is slightly moistened.
At the lower ends of the cuttings formed gray-white influx (callus) with punctate tubercles - root buds. Roots often grow from 2 to 7 cm long. Green shoots 2-5 cm long appear from the upper two eyes.
Root regrowth is accelerated by treatment with growth stimulants within 12-16 hours:
- heteroauxin - 1-2 tablets per 1 liter of water;
- bee honey - 1 tsp for 1 liter of water;
- hyperauxin - 1-2 tablets per 1 liter of water.
The temperature of the solution should be no higher than 17 ° C ambient air, and during treatment with stimulants - not higher than + 22 ... + 23 ° C.
Double spraying with gibberellin at a concentration of 25 mg / l increases shoot growth by 15-17%.
Planting vegetative seedlings in a permanent place and care
The readiness of vegetative seedlings for transplantation to a permanent place is determined according to the following criteria:
- there must be at least 7 leaves on the bushes;
- green shoots should be 15 cm long or more;
- the root system must be sufficiently developed to completely fill a 1 liter container.
Before planting a young plant on a permanent site, it is hardened for several days. To do this, take out the plant for several minutes a day on the street. The length of time spent on the street is constantly increasing. Within a week, the young seedling fully adapts to the new growth conditions.
Transfer is carried out using the standard transfer method. for this, they make a landing for him, the dimensions of which for the widow exceed the dimensions of an earthen coma. The plant is moved into it along with the soil in which it grew. Then fill the open space with earth.
In the first two weeks, the bush is monitored especially carefully. It is recommended to create a shade for it so that the sun's rays do not burn out the necessary chlorophyll. If frosts are expected, the plants are covered with covering material. In the event of a strong drop in temperature, a more thorough shelter is made.
To protect plants from recurrent frosts, it is recommended to plant them in a permanent place only after the final establishment of warm weather.
The process of growing grapes by seeds
In this way, those types of varieties that are difficult to root are propagated. Most often, the method is used for growing decorative grapes. Also, new grape varieties are grown, which are not available on the site.
Take grapes with large, developed seeds:
- Wrap them in gauze, hang them on the cornice. The room must be dry and cool.
- Before sowing, open the cheesecloth, remove the seeds, wash off the rest of the berries and sow.
- If you don't plan on planting seeds during the winter, remove them, wash them, and store them dry in a cool, dry place.
- Prepare pots or boxes for germination.
- Buy fertile soil, fertilize, water.
- Plant the seeds to a depth of 1 centimeter, cover with earth. Water again.
- Place the pot or drawer in a warm, sunny place.
- When the sprouts sprout, spray them with fertilizer and monitor the soil moisture.
When the weather is warm outside, without temperature changes, these sprouts can be transplanted to the site. If this is not possible, the seedlings must be planted in separate containers.