Indoor decorative thuja is a neat bushes of a wide variety of shapes. It is called the tree of life for its ability to purify the air and energy of the room in which it is located.


Few know that the thuja plant does not have a room type. What flower growers call decorative thuja, in fact, is not a thuja. The Vostochny ploskovetochnik is the only representative of the genus Ploskovetochnik (Platycladus, Biota) of the Cypress family. In some sources it can be found as Eastern Tuyu. This name is associated with the previous position of the plant in the systematic classification.
Florists love Ploskovetochnik for their exotic appearance and unpretentiousness. Caring for room thuja does not require special skills and at home this plant takes root very well. And the variety of possibilities for forming the crown gives the flower an additional charm.
Indoor thuja: plant description
For growing at home, use the eastern thuja. Based on this species, many dwarf forms have been created, which are ideal for indoor cultivation. Thuja emits essential oils, which, in addition to a pleasant smell, help purify the air from bacteria. It is because of this that thuja in an apartment is suitable not only as an ornamental plant, but also improves the microclimate in the room, while caring for it and growing it is possible for absolutely everyone.
Follow-up care
After transplanting young seedlings to a permanent place, trees need to be given appropriate care. Thuja reacts negatively to a lack of moisture, so when growing it, the main attention should be paid to proper watering.
Did you know? The aroma of thuja essential oil in aromatherapy is the base note. It dominates well in elite men's colognes (such as Hugo Boss).
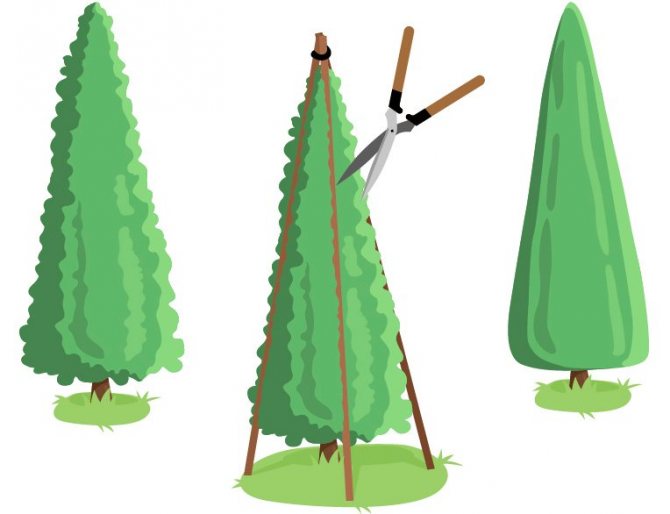
For decorative cultivation, the tree must be shaped by pruning its branches annually. And in order to prevent the seedling from dying from frost and snowfalls in winter, you need to organize a shelter for it.
Watering
When watering the thuja, a balance must be observed so that the tree receives a sufficient amount of liquid for growth, but at the same time it does not begin to rot from waterlogging of the soil.
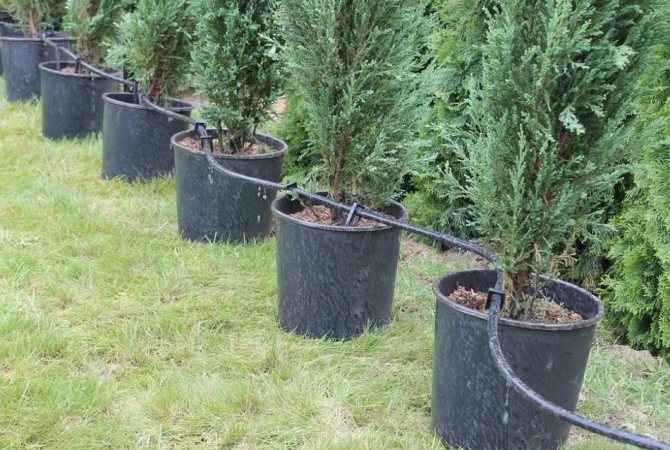
Drip irrigation of thuja.
Basic recommendations for irrigation:
- watering is carried out as the soil surface around the tree dries up (about 1-2 times a week);
- for each thuja you need to spend about 10 liters of water;
- in hot weather, tree branches are sprayed from a spray bottle to remove dust from them and improve the appearance of the plant;
- watering is best done in the morning or evening to reduce the evaporation of moisture from the soil;
- for irrigation of thuja, only settled water at room temperature is used.
Preparing for winter
Thuja does not "like" frost and cold winds, so the tree needs to be covered before the onset of winter. The protective shelter is built in late October or early November, and removed in the spring - with the onset of stable heat.
Important! When growing a tree in areas with a moderately cold climate for the winter, it is enough to mulch the soil around the thuja. But when snow falls, you need to carefully sweep it off the branches by hand so that they do not break.
The basic rules for shelter for the winter are as follows:
- the soil around the trunk is mulched with peat, fallen dry leaves and coniferous branches - while you need to make sure that the lower shoots of the thuja are above the layer of mulch and do not rot;
- in regions with frosts below -40 ° C, the tree trunk is bent to the ground and covered with spruce branches, and after the formation of a snow cover, it is additionally covered with snow;
- to protect it from the bright winter sun and wind, the trunk can be wrapped with a white cloth, fixing it with a rope.
Video: preparing thuja for winter
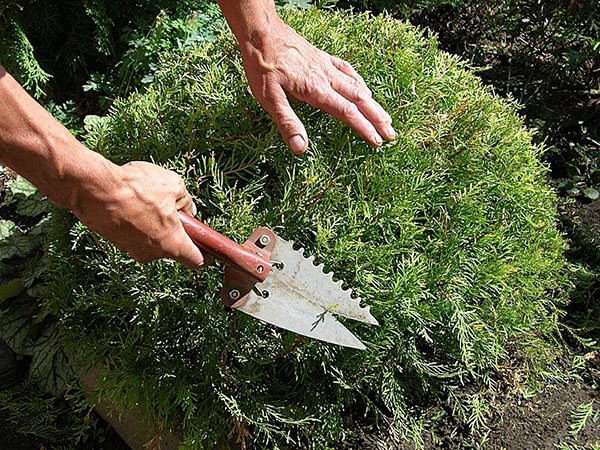
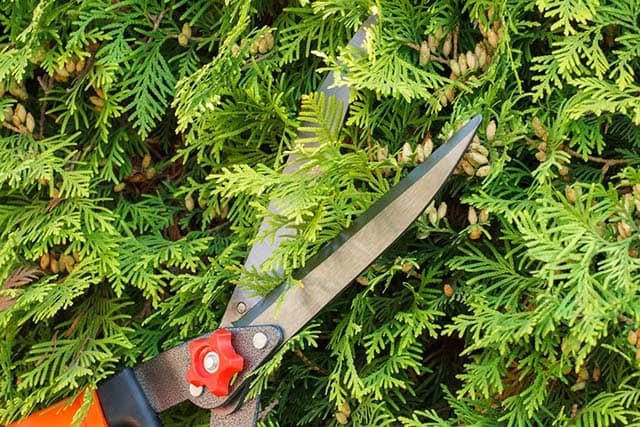
Pruning
Most gardeners grow thuja on their plots as a decorative decoration. In the process of growth, they give the tree the required shape by regular pruning.
Did you know? Thuja essential oil is used as a natural fragrance during the production of some brands of footwear.
This procedure is carried out according to the following rules:
- the formation of thuja begins from 2-3 years of age;
- pruning is done in early spring, as well as during the summer (if necessary);
- damaged and dried shoots are cut off without fail;
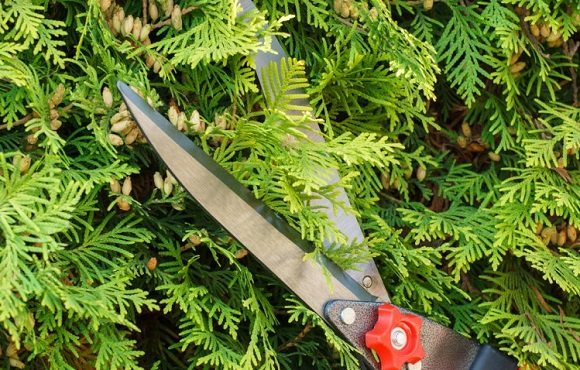
- removal of excess growth is carried out with a sharp pruner so that the cut is even;
- unnecessary shoots are removed in small "portions", but often - this is how the thuja tolerates the "haircut" more easily;
- healthy branches of the tree are shortened depending on what shape the gardener wants to give the crown.
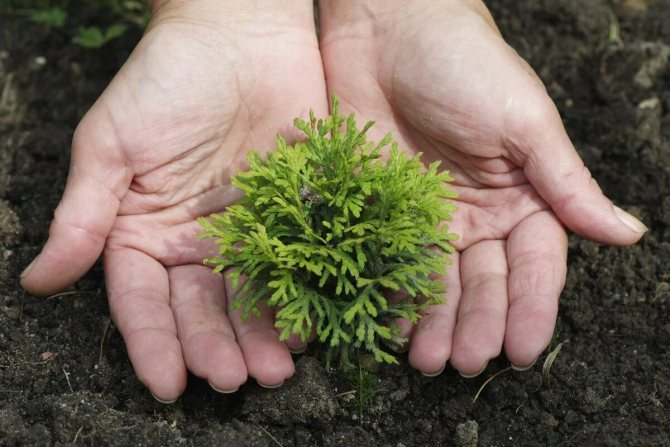
Thuja can become a bright and unusual decoration of any garden plot, and with the help of pruning, the tree is given various bizarre shapes. Even a novice gardener can grow an adult tree from a cutting. The information presented in the article will help to properly prepare planting material, rooting and planting seedlings in open ground, and also provide them with the necessary care.
How to choose a place for a thuja
As with all indoor plants, it is necessary to create the correct microclimate for thuja. Fortunately, the plant is unpretentious, but there are still some guidelines for optimal growth.
Lighting requirements
Indoor thuja loves light, but does not tolerate too bright lighting; a good solution would be to place the plant on the north side of the room. In spring and winter, direct sunlight is not recommended.
Temperature regime
In the summer, the optimum temperature is +20. +30 ° C. At this time, the thuja can be taken out into the air, but it is best placed in shaded places. In winter, such a high temperature is not at all suitable for thuja. The optimum temperature at this time is not higher than +15 ° С. Thuja easily tolerates frosts, but it is still better not to overcool indoor plants.
What should be the humidity
The plant is not demanding on humidity, so it can easily tolerate dry air in an apartment and extreme heat. But if the temperature is too high, and the humidity is low, then you need to occasionally spray the thuja from the spray bottle.

Pests and diseases
Diseases and pests in thuja grown at home can appear only as a result of improper care. One of the most common problems is the yellowness of the leaves, there are several reasons for this:
- The planting rules are violated, the root collar is exposed, or is too deep in the soil.
- Direct sunlight falls.
Found in home thuja and fungal diseases:
- Fusarium.
- Cytospore.
When infected, needles and shoots are damaged. For the treatment of thuja, specialized drugs are used. The procedures begin in the spring, and do not stop until the tree recovers.
With the onset of a dormant period, thuja can change color - this is a natural process, and there is no need to look for diseases here.
There are also known pests that pose a danger to thuja at home (in an apartment):
- Bark beetle. Holes appear in the bark of the tree.
- Shield. Harmful to bark and buds by damaging them.
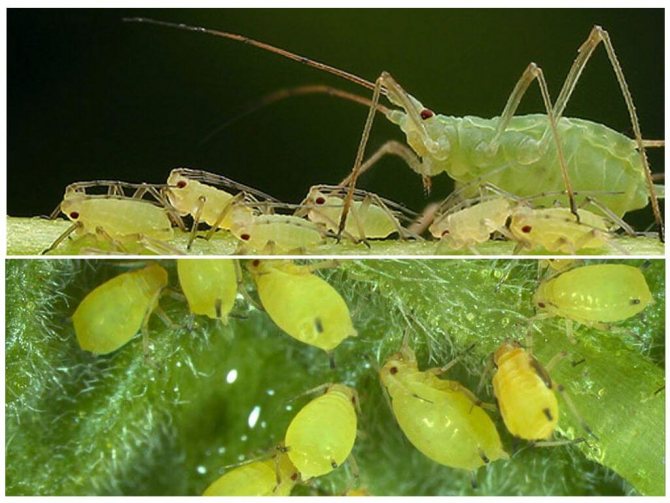
- Aphid. The first signs of damage are the needles turn yellow.
You can fight pests with insecticides.
Important! The sooner you spot a problem, the easier and faster it is to deal with. Provide the plant with proper care, and diseases, the pest will not be scary.
How to plant thuja in a pot
Due to its unpretentiousness in the open air, thuja takes root well almost everywhere and in any conditions. However, if you want to plant a thuja at home, then there are some important tips and tricks to consider. But despite this, caring for a thuja in a pot is easier than for a street plant.
Soil requirements
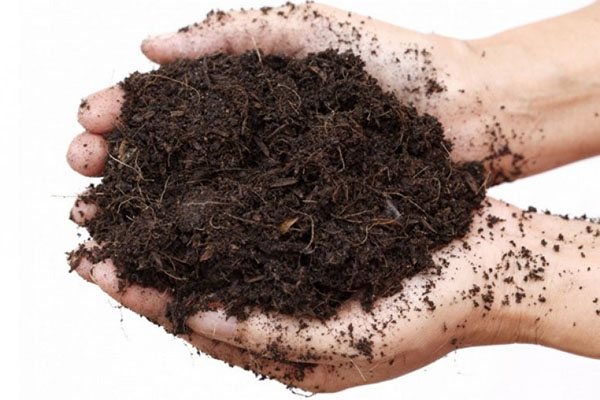
Thuja, as a house plant, feels great in a pot, if you choose the right soil. The most suitable soil for thuja is slightly acidic. You can prepare the soil yourself. For young plants, the following mixture will be optimal:
- 1 part sand;
- 2 parts of coniferous land;
- 4 pieces of leafy land.
Adult thuja requires a different soil composition:
- 1 part peat;
- 0.5 parts of sand;
- 1 part of turf land.
However, substrates similar in composition can also be bought in specialty stores.
Pot requirements
Any pot is suitable for growing indoors for a thuja, the main thing is to take a flowerpot with a margin so that the plant can grow normally. Any container should have a drain to prevent stagnation of water in the soil. However, if you are going to grow thuja outdoors, for example on a balcony, then not every pot is suitable. The pots must be frost-resistant, their assortment on the market is now large enough, you can choose for every taste.
Planting thuja
For a successful planting, you need to make sure that the pot releases water well, fill the bottom with a good layer of drainage. Planting a thuja, in fact, does not differ from other indoor plants, the main thing is to plant the plant in the correct soil and not damage it. Next, the question arises of how to care for thuja after planting. Caring for the plant is not particularly difficult, it takes root quickly.
Landing site preparation
Before planting young seedlings in open ground, you need to prepare a suitable place for them.
Important! If thuja cuttings cut from the side of the tree were used as planting material, then a curved seedling can grow from them.
The selected site must meet the following basic requirements:
- in the morning it is well lit by the sun, and in the afternoon to be in partial shade - only in such conditions normal growth and a beautiful appearance of the tree is possible;
- be protected from drafts - in the cold wind, thuja is more often affected by diseases and grows worse;
- have a loose and moderately acidic fertile soil that is good for air and water;
- lack of groundwater lying close to the soil surface.
A few days before the transplantation of young trees to a permanent plot, the land is dug up on it. The surface of the soil is loosened, removing large clods of earth.
Did you know? The Russian name for thuja comes from the Greek word "thuja", which translates as "incense". The branches of this tree were previously used for sacrificial fires.
Features of thuja care at home
In general, indoor growing is not demanding when growing in a pot, but, like any other plant, it will need to be looked after regularly. Basically, care consists in proper watering, feeding and pruning. It is also worth considering the temperature regime.
How to water a plant at home
The most important thing is watering, the splendor of the branches and the overall attractiveness of the plant will depend on it. Water the plant regularly so that the soil is always moist. Dry soil will not kill the plant, but it will definitely affect its appearance.
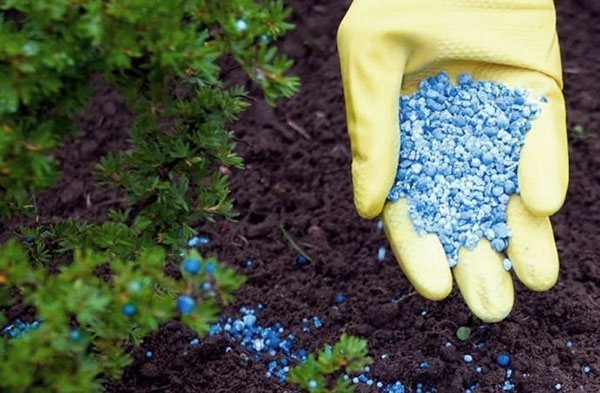
Top dressing and fertilization of room thuja
Thuja room does not need frequent feeding, since you can not take care of it too closely.It is recommended to use organic and mineral fertilizers in combination, and nitrogen fertilizers are usually used in spring, and potash fertilizers no more than once a month in summer. Sometimes, depending on the condition of the plant, phosphorus fertilizers can be added to the top dressing. That's all that you can feed the thuja for beautiful needles, the above fertilizers are ideal for the plant.
Plant pruning
Here the only requirement is pruning dried branches that will periodically appear. However, to give the plant the look you want, you can trim it whenever you want, experimenting with a variety of shapes.
Wintering thuja
Thuja is not afraid of cold weather, especially at home. Moreover, in winter it is advisable to keep thuja at temperatures from +10 to +12 degrees; a well-glazed balcony may be suitable for this. The only thing that absolutely must not be done is to drastically change the temperature where the plant is kept. Also, strong wind and strong drafts are contraindicated in thuja.
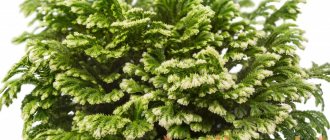
Characteristics of room thuja and species diversity
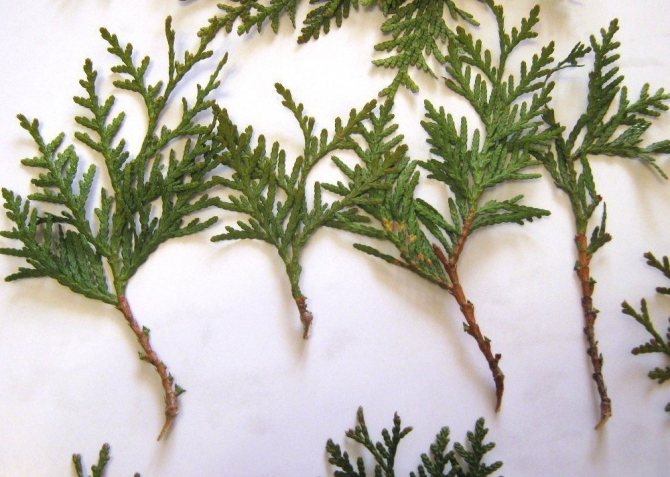
The root system of thuja is of a surface type, and the roots develop rapidly. The trunk is upright. The surface is covered with a thin bark of light shades of brown. Straight, upward branches are placed on the trunk. The bark of the branches is slightly darker than the stem bark.
Shoots are flattened. A system of plates is formed on them, located radially to the main bore. The color of the shoots is light brown.

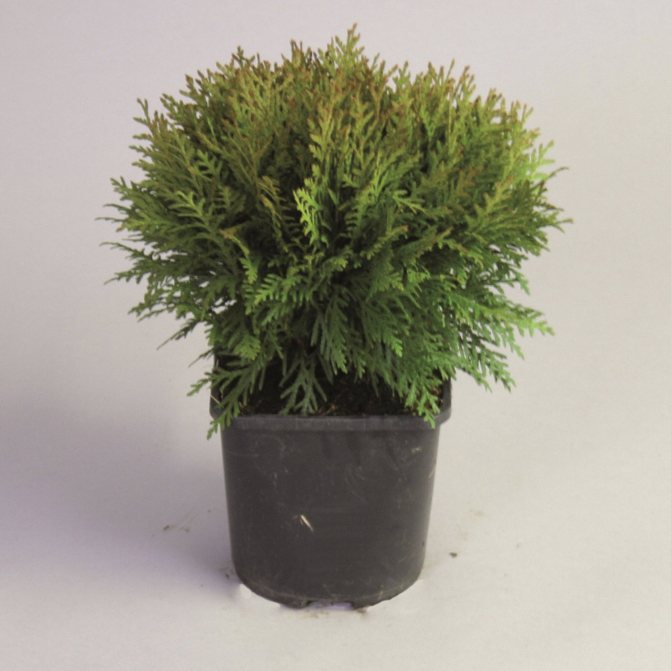
Thuja room
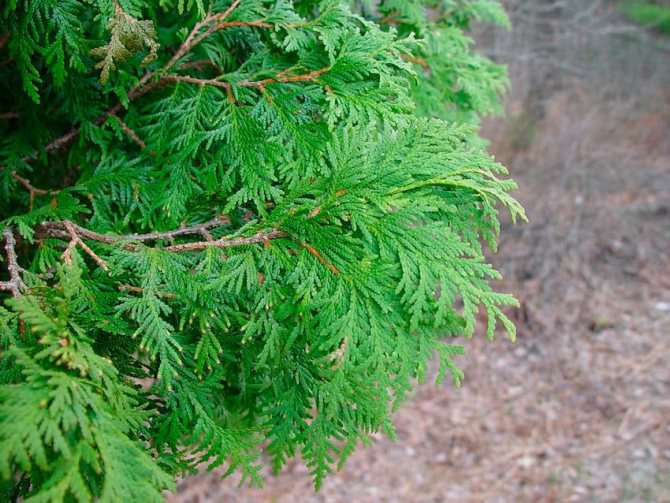
Unlike many other conifers, the leaves are not needles, but flat scales. They grow very densely, tightly adjacent to each other. The color of the leaves is green. The shade depends on the variety. There are no resin glands on the needles.
Distinguish between male and female cones. Male microstrobiles (cones) have an oblong shape and are located at the tips of the shoots. Female microstrobilis are placed on the tips of individual branches and are spherical.
Eastern thuja is represented by the following varieties:
- Aurea. Slow-growing shade-loving trees.
- Aurea Nano. Dwarf thuja.
- Cupressoidess. Representatives of the variety have similarities with cypress trees.
- Magnifica. Densely branched thuja.
In indoor floriculture, only the Aurea Nano hybrid is widely used.
How home thuja is propagated
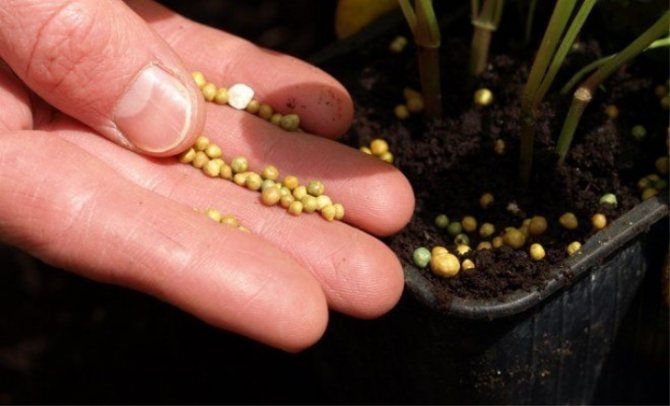
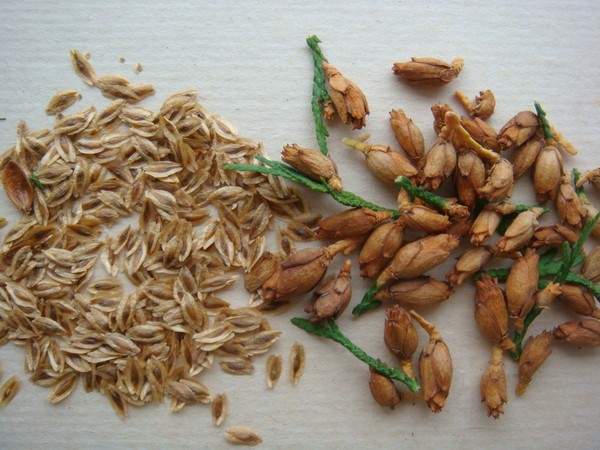
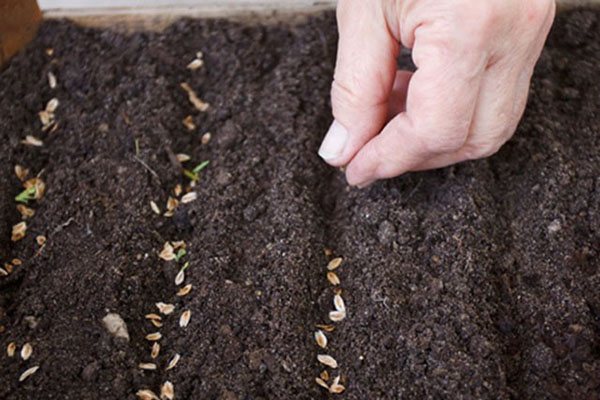
Thuja at home propagates by seeds and cuttings. This will require an adult plant. The seeds are taken directly from it, they are inside the cones. Cut them along with the branches they grow on. Place the buds in a warm place, they will dry out and open over time. Then the seeds can be extracted from them. The seeds should be wrapped in a wet cloth and left for a day, periodically moistening the cloth with water. A small step-by-step instruction for planting seeds:
- Prepare the tub, it is necessary to pour the substrate into it, fill the bottom with drainage.
- Pour water over the ground.
- Plant one seed per pot.
- The seeds do not need to be buried, just sprinkle them with wet sawdust on top.
- Moisten the soil.
And then you need to be patient, the first shoots will appear no earlier than a month later. And a full-fledged thuja bush - already after 5 years. Therefore, thuja is rarely propagated by seeds, since there is a simpler and more effective way for this.
Thuja in a pot works well at home. If you decide to choose this plant for your home, you are not mistaken: indoor thuja will give you a good mood, purify the air and decorate the room.
We multiply
At home, thuja is propagated using:
- Cherenkov.
- Seed.
Breeding seeds are not used as often. Unfortunately, there is no guarantee that the seedlings will be successful. Propagating by seeds is painstaking work and a long journey.
Step-by-step instructions for seed propagation:
- In an adult and healthy plant, the cones are carefully cut off.
- Put them in a warm (and cold) place.
- After a while, the cones will open and the seeds can be removed.
- The seeds are wrapped in a cloth, which is pre-moistened with water. They are in this state for 24 hours. The fabric should be dampened as it dries.
- Take a small pot, fill it with soil, and water it. Then the seed is placed.
- It is not necessary to deepen the seeds, it is enough to sprinkle it with earth and cover with wet sawdust.
- The first shoots can be observed in 1-1.5 months.
When growing thuja with seeds, the characteristics of the variety (for example, the color of the needles) may be lost.
Seeds that are ripe in the fall can be germinated by spring. For this, stratification is carried out. That is, the seeds are mixed with moistened sand and for about 90 days they should be kept in a room with a low temperature (3-5 degrees). Alternatively, put the seed box in the refrigerator or take it out to an unglazed balcony. After that, the seeds are sown into the soil, while the temperature should be about 20-23 degrees. After 2 months, sprouts will appear.
When the seeds have sprouted, favorable conditions and proper care for growth should be created:
- Moderate soil moisture.
- Diffused lighting.
The grown seedlings can be transplanted into a pot to a permanent place, they do it very carefully so as not to damage the delicate root system. Thuja will be fully formed in 3 years, or even 5 years.
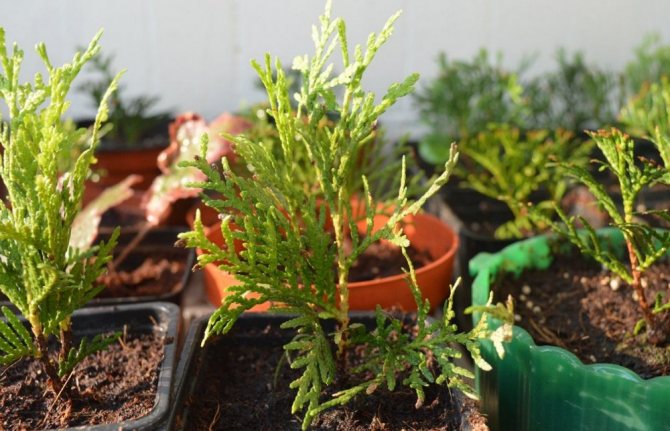
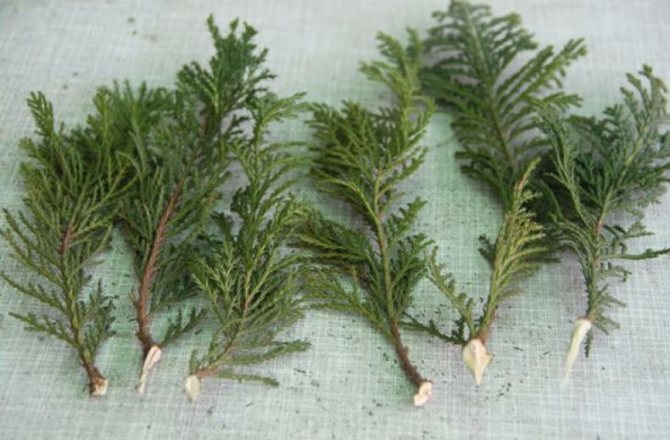
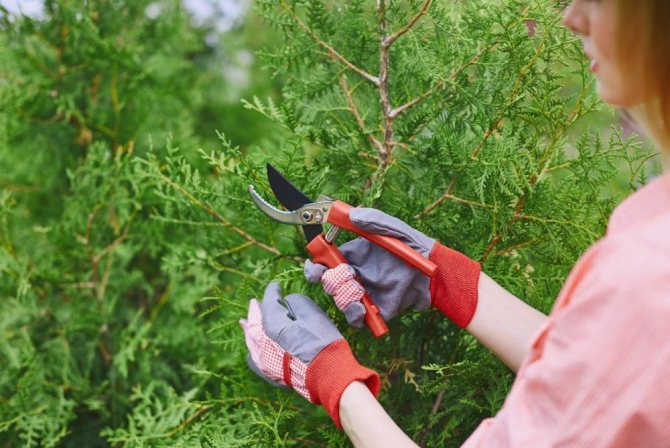
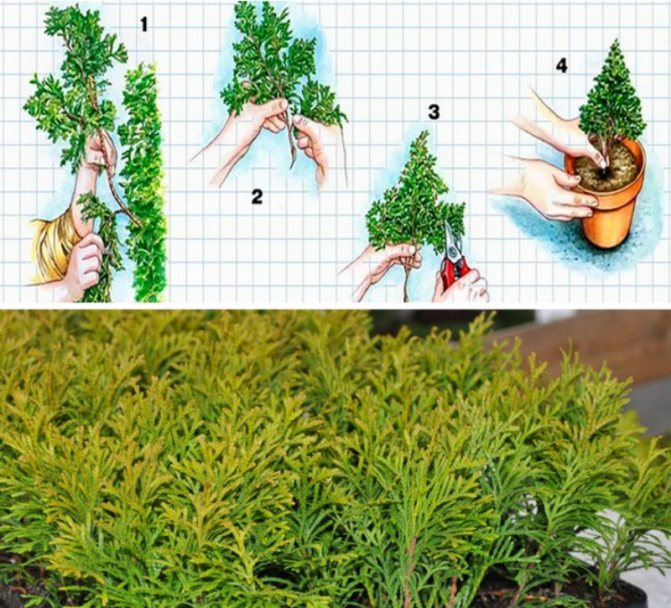
Thuja is easier to propagate by cuttings than by seeds. Step-by-step instructions for propagation by cuttings:
- A stalk is carefully separated from an adult thuja. This is done with a sharp knife or pruning shears.
- The optimal cutting size is 10-12 centimeters.
- The resulting cutting is deepened by 2-3 centimeters into the soil.
- The pot of cuttings should be kept in a warm house (apartment).
- Frequent ventilation is required.
- The shoot does not need watering; it can be replaced by spraying.
- When roots appear, the plant can be taken outside and transplanted.
So that rooting occurs faster, the sections are recommended to be treated with a means to accelerate growth.
Interesting to know! Some growers recommend not cutting, but tearing off the stalk. Pieces of mature wood come off, which in the future contributes to rapid rooting.
Thuja room will find its place in your house
Thuja indoor is a gymnosperm coniferous plant from the Cypress family. In its natural environment, its height reaches 7 - 12 meters. Thuja was brought to us from North America and Japan. Indoor views will not only add a festive mood for the New Year, but also become a wonderful gift for loved ones and friends. Compared to other conifers, it is not difficult to grow thuja at home.
What is the benefit
Thuja is not just a beautiful green plant, but also useful. It is recommended to grow it in the house, on the balcony, on the veranda for people who have problems with the respiratory tract. Thuja secretes essential oils that are very beneficial. They contribute to:
- Air purification from dust.
- Air purification from viruses.
- Calming the nervous system.
When there is a thuja in the house, depression, stress and insomnia are not terrible. The smell of pine needles soothes and pacifies. It's nice to sit on the balcony after a hard day at work and enjoy the magical scent.
Thuja extract is used for the manufacture of cosmetics and medicines. Tuyu is actively used in folk medicine.
The healing qualities of thuja:
- Has a tonic effect.
- Used as an expectorant.
- It is part of diuretics and anticancer drugs.
- It has hemostatic and antimicrobial properties.
Thuja needles are collected for the preparation of tinctures and decoctions. They help to fight:
- With acne.
- Papillomas and warts.
- Pigmentation.
- Colds.
- Cystitis.
Thuja is a part of medicines for the treatment of cervical erosion.
You can talk about the benefits of thuja for a long time. Therefore, when planting it at home, you should understand that not just a plant grows in a pot, but a kind of doctor.
Take proper care of her and she will definitely thank you.
Everyone knows that conifers have a special healing magic. Therefore, if there is a park with firs, pines or cypresses near the house, it is worth walking there more often. And a sick person does not at all interfere with inhalations based on pine oils. Those who have a dacha or a country house with the ability to plant evergreens are lucky. But what should those living in stuffy apartments, even the largest ones, do? Fortunately, some types of conifers, cypress, can be grown at home if you know the rules of care. These include the beautiful thuja.
Description of flatfish - thuja
Native to Japan and North America, thuja belongs to the cypress family. Some also call it an iron tree, biota or flattened: wild thuja can reach a height of 7-12 meters. It is an evergreen shrub with a pyramidal crown and spreading branches. On them are placed flat scaly modified leaves of silvery or golden motley, green needles. At the end of the branches there are neat elongated cones with an end bent downwards. Its clear outline allows you to give the tree a variety of shapes. Thanks to this, modern interior designers love her so much. And whoever would like to keep a beautiful ephedra in a pot at home, the needles of which, due to the release of essential oils, phytoncides, destroy pathogens? However, those who have not yet come across the cultivation of conifers at home do not know that there are no special potted indoor thujas or cypresses. It's just that experienced gardeners choose those species that can get used to the conditions of a closed room. The maintenance of such species will simply be minimal. Eastern thuja, called Thuja orientalis, from Southeast Asia. The dry climate prepared her perfectly for home conditions with batteries in winter and hot summer sun. Therefore, it will not be difficult to take care of her.
Features of growing thuja at home
In many ways, we are lucky that thuja is not a demanding plant. It is not necessary to create special conditions for her, because she is able to withstand heat and drought, dry air and shade. Therefore, you will not have any problems with leaving. For example, a thuja tolerates a haircut. All she asks for in return is regular watering, nutrient soil for conifers, and avoidance of direct rays. It should be borne in mind that they can burn the needles, and it will turn yellow and lose its decorative appearance. But you will get a huge number of cones. A too thick shadow will lead to a thinning of the crown. The ideal place for it would be a north or west window. Choose such a place right away so as not to rearrange your thuja once again. You can place it in a tub in the largest room. Believe me, the hall will immediately take on a luxurious look. Or put it in a pot on a windowsill. Some people spend a lot of time on thuja. But in order to grow a miniature tree or bonsai out of it, you will have to carefully look after it.
Basic rules of care
Usually, for any unpretentious indoor plant, the rules of care are quite simple. For better orientation, we have placed them in a table:
| Lighting | diffused light, does not tolerate direct rays, shading is necessary in spring and summer |
| Temperature | the optimal temperature is 10-15 ˚С, in the summer you need to keep it cool, you can place it in fresh air, for example, on an open balcony |
| Air humidity | resistant to dry air, but it will grow better with moderate humidity, in summer care is reduced to periodic spraying |
| Watering | moderate and regular watering, avoid waterlogging and drying out, requires fertilizing with mineral fertilizers in a half dosage |
| Land | 4 parts of leaf and 2 - coniferous land with one part of sand for young shoots and 1 part of peat and the same amount of sod land with ½ part of sand for adult trees, requires well-arranged drainage |
| Accommodation | north or west window, shaded cool place, open air in summer, placed in deep oblong pots or in a tub |
| Reproduction | cuttings in July - August, sowing in early spring with seeds ripened in September - August (preferable for domestic conifers due to rapid growth, but you will have to take care of them carefully) |
More about thuja breeding
Thuja is cultivated both by seeds and by layering and cuttings. At home, they prefer propagation by cuttings. Thuja cuttings should be started between July and August. To do this, cut off non-lignified 2 - 3 cm shoots. Tip: torn off with a "heel" (a piece of ripe wood), shoots take root much faster. For the early formation of the root system, it is necessary to use solutions of "Kornevin" or "Heteroauxin". As for propagation by seeds, here you can lose the varietal characteristics of the "parents". However, it is the seedlings that grow much faster and denser. In addition, they are more adapted to the home environment, so it will be easier to care for them. Collect the seeds ripe in the fall and sow them in the spring in the loose earthen mixture for young shoots shown in the table above. Advice: be sure to carry out stratification - mixing seeds with coarse-grained, processed moist river sands and keeping them in this state in a refrigerator at a temperature of 3-5 ° C for three months. This is exactly what happens in winter. For good growth, they need a temperature of 20-23 degrees Celsius. In a couple of months, you will have seedlings. Avoid direct sunlight and waterlogging or drying out of the soil. It is necessary to replant the grown shoots by the "transshipment" method.
Thuja: diseases and pests
It is believed that conifers very rarely get sick, since their essential secretions are able to suppress harmful microorganisms. However, with negligent care, any plant weakens and begins to get sick. So, the main diseases of thuja include:
- mushrooms of the genus Fusarium;
- cytospores;
- Thomas;
- shyute (brown needles and premature death);
- yellowing and falling off of needles occurs from sunburn.
Basically, these diseases are associated with fungal pathogens, which can be destroyed with the help of Bordeaux liquid or cartoid. Processing should be carried out outdoors in spring. It is best to remove the affected shoots. As for the last point among the diseases, then it will be enough to remove the burnt shoots and place the thuja in the shade.
Among the pests of thuja, thuja aphids and false shields are known.
| Thuvaya aphid | Yellowing and falling of needles | Spraying with solutions such as karbofos, rogor or decis |
| Thuya false shield | Yellow spots on shoots, chlorotic formations | Spraying with karbofos before bud break, treatment at the end of June once every two weeks with actellik, chlorophos or rogor |
Now you are completely ready to grow thuja indoors. But caring for her is not a hassle. But the whole house will be filled with the refreshing scent of pine needles.
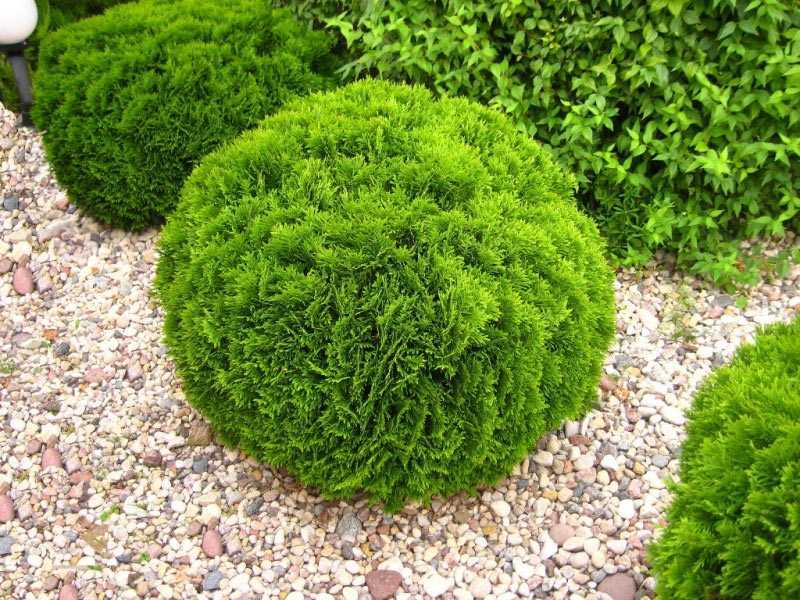
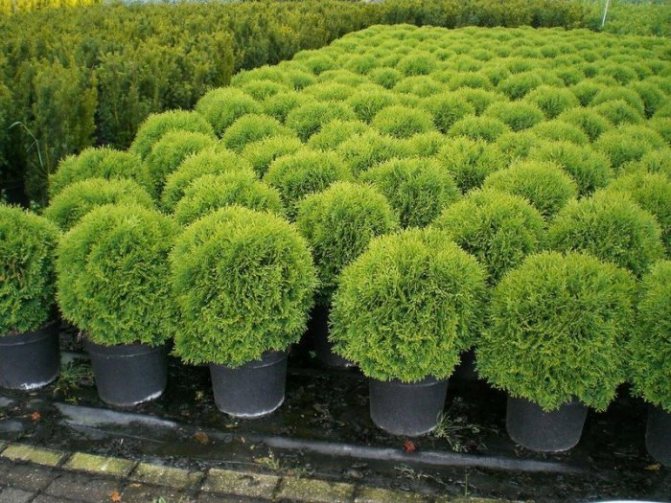
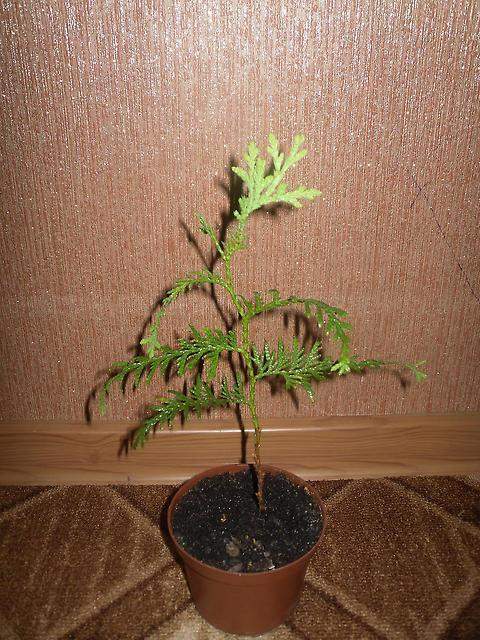
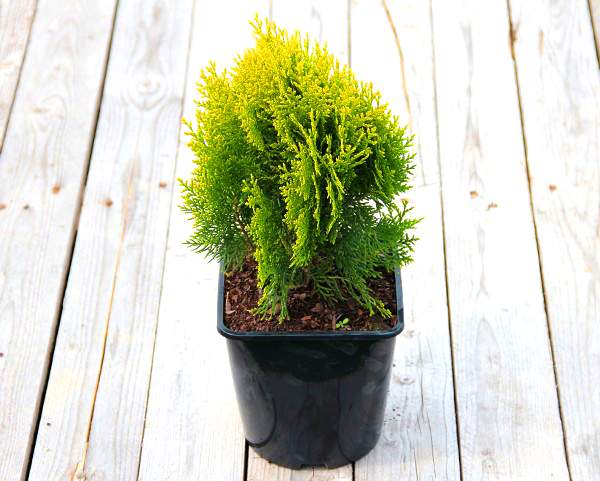
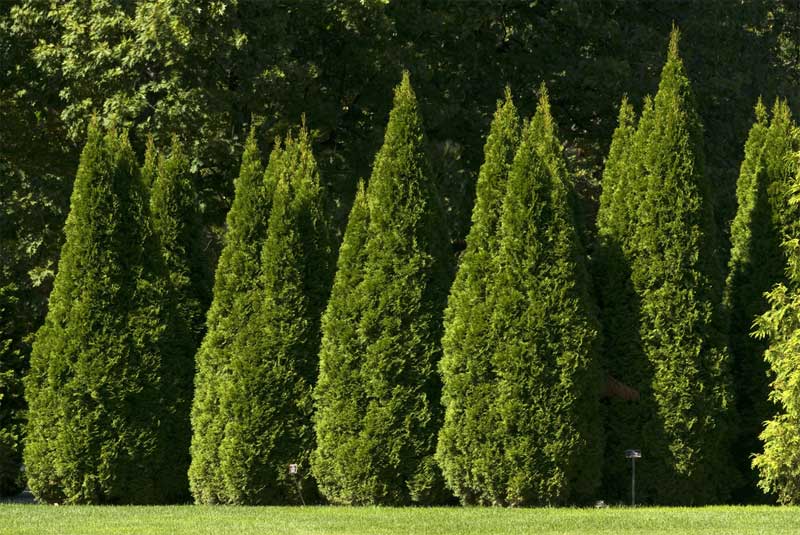
Tuya or Tuya (Thuja, Tree of Life, Northern Cypress) from the Cypress family (Cupressaceae) includes 4 types of gymnosperms evergreen coniferous shrubs and low-growing trees. In our country, it is widely used as a hedge along fenced areas, and is also often used to form landscape design, to decorate alpine slides and rockeries. But some indoor plant lovers grow thuja at home, the care of which does not require special knowledge and skills. A photo of a room thuja in a pot and tips for home care for a coniferous tree can be found further in this material.
Regular formative pruning can change the appearance of the tree. Despite the fact that thuja belongs to conifers, the crown is formed not by needles on the branches, but by opposite scaly leaves, consisting of flat scales overlapping each other. The period of "flowering" (dusting) usually occurs in autumn: a flower bud appears from the leaf axils at the tops of the lateral shoots, and then a "flower" opens (a female kidney-shaped spikelet of yellowish color appears in the upper part of the crown, and a male spikelet of brownish color at the bottom) ... Then, among the scaly leaves, oval-shaped cones are formed, after which ripening seeds with narrow wings under the scales appear.
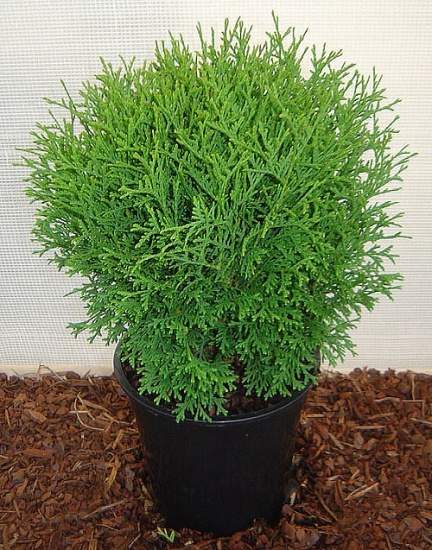
If you saw a potted thuja on the floor or on the windowsill of a dwelling, then most likely it is an oriental thuja (Thuja orientalis, Platikladus, Plosovetochnik, Biota). This is an evergreen shrub with spreading branches, flat scaly leaves of a silvery-variegated color and oblong cones, bent downwards. The usual shape of the eastern thuja is pyramidal, but with the help of pruning and pinching, you can give the crown the desired appearance. Some craftsmen form a tree in the form of a topiary or bonsai from a thuja in a pot. To do this, the trunk and branches must be bent and fixed almost on the verge of breaking, so that, in combination with correct pruning and timely pinching of young shoots, a very beautiful bonsai is obtained. Formed decorative coniferous thuja tree will look interesting in an ensemble with such flowering bonsai trees as indoor azalea, fuchsia, hibiscus Chinese rose.
- photo: bonsai from thuja It is necessary to make a reservation right away that the potted thuja, as a specially bred room variety, does not exist. At home, the oriental thuja or Platovetochnik, which we mentioned above, takes root best of all. Caring for this unpretentious type of coniferous plant is very simple and an elegant dwarf tree grows at home to a miniature size. Phytodesigners create very interesting compositions of flowering houseplants against the background of evergreen thuja for interior decoration, choosing such decorative potted flowers as phalaenopsis or dendrobium orchid, tuberous begonia, Persian cyclamen, gerbera with bright chamomile flowers, miniature hydrangea, New Guinea balsam, Tompérodendona ... And in gardening and for landscape design, such types of thuja as T. western, T. Korean, T. Japanese, T. folded are most suitable.
- photo: oriental thuja in a pot Interestingly, Buddhist philosophy relates thuja to plants that contribute to longevity and the restoration of vital energy. And some designers use thuja in a pot to symbolically organize living space in feng shui, along with indoor plants such as home violets of Saintpaulia, zamioculcas Dollar tree, gloxinia with very bright flowers, Crassula Money tree. In addition, indoor thuja exudes a very delicate aroma, reminiscent of the pleasant smell of spruce resin, which will not leave anyone indifferent.
By the way, this coniferous plant has very effective healing properties. It is recommended to grow thuja at home for people suffering from various respiratory diseases. Along with such popular houseplants as dieffenbachia and house chrysanthemum, potted thuja enriches the space with useful essential oils and volatile secretions - phytoncides. These substances cleanse the air from pathogenic microbes, dust and calm the nervous system. The coniferous scent of thuja helps to restore emotional and physical fatigue after a hard day's work, effectively relieves stress.
Thuja extract is widely used in perfumery to create useful cosmetics, and is also used in traditional and folk medicine for the preparation of effective medicines. Funds that contain thuja extract have different healing properties (today there are tonic, antimicrobial, antineoplastic, expectorant, hemostatic, anti-inflammatory, diuretic drugs). Various decoctions and infusions are made from chopped thuja needles. There are many popular recipes for the preparation of therapeutic antiseptics against age spots, warts, papillomas, acne on the skin. Medicines with thuja extract in the composition treat adenoids in children and acute respiratory viral infections, as well as cervical erosion, cystitis, Trichomonas colpitis. Thuja can compete for the status of "the best home doctor" with such well-known indoor medicinal plants as aloe vera or centenary, medicinal Kalanchoe, Benjamin ficus, geranium pelargonium, gardenia jasmine, myrtle tree, euphorbia, primrose primrose.
► RECIPES: NASTY AND BREWS FROM TUI NEEDLES.
♦ WHAT IS IMPORTANT!Location and lighting.Direct sunlight can cause burns on the delicate scaly leaves of the thuja. At home, under the bright rays of the sun, the leaves turn yellow and fall off. It is best to place the coniferous pot in partial shade, with indirect indirect lighting during the day. You can place the pot on a floor stand next to a window on the north side of the room. If you shade the window glass on hot summer days, then the thuja will feel comfortable on a dais next to the western or eastern window.
Temperature conditions.In spring and summer, you can take home thuja out on a balcony, loggia or in a garden in a shaded place. The optimum temperature is 18-24 ° C. In winter, it is necessary to keep the thuja pot away from heating appliances; it is best to place the plant on a glazed loggia. It is desirable that the temperature does not rise above 14-16 ° C in winter.
Air humidity.Moderate or slightly increased humidity level (40-60%). If the air in the room is too dry (summer heat, the heating system is working), be sure to spray the coniferous plant from a spray bottle with warm soft water.
Watering.Use warm, settled water for irrigation. It is recommended to observe a moderate watering regime (several times a week). You should not overmoisten the soil, but drying out the soil is also detrimental to the thuja.
Dredge and top dressing.For planting a young plant, you can make an earthen mixture from coniferous soil. leafy land and coarse sand in a ratio of 2: 4: 1, and for an adult - sod land, peat and sand in a ratio of 2: 2: 1.
For feeding, you can use complex organic and mineral fertilizers for conifers (in a half dose). In the summer period, thuja most of all needs potash fertilizers, and in the spring - nitrogen fertilizers (for adult plants, you can add a little phosphorus fertilizers). You need to feed it no more than 2 times a month. No fertilization is required in winter.
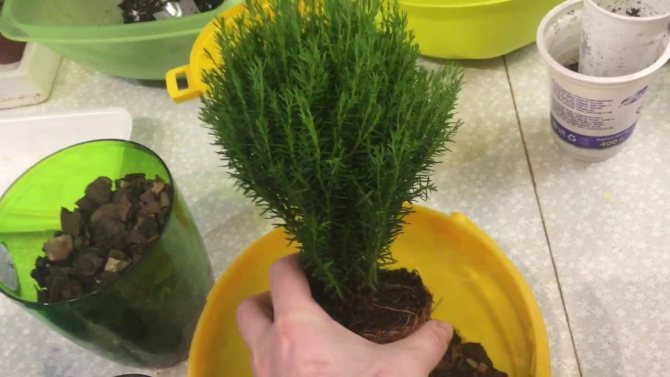
Transfer.The roots of a coniferous plant are quite long. For planting thuja, choose a tall, but not very wide pot. A drainage layer of broken bricks or tiles must be poured onto the bottom of the pot. A young plant is transplanted annually, and an adult once every two years. Landing is carried out by the transshipment method together with an earthen clod.
Reproduction.Can be propagated by cuttings, cuttings and seeds. At home, the plant is usually propagated by cuttings. A stalk 10-12 cm long is carefully separated with a pruner or a sharp knife from an adult plant. The place of the cut on the cutting should be treated with a rooting stimulator. Then you need to deepen the cutting a few centimeters into the ground and put the container in a warm place and ventilate the room more often.Instead of watering, spray the cutting with a spray bottle with water. When the cutting takes root, you can transplant it into a suitable pot.
♦ MINIATURE TOUIS FOR DECORATION OF ROCARIA OR ALPINARY. PHOTO VARIETIES:
♦ VIDEO. HOW TO CARE FOR THAT HOME:Useful tips for caring for room thuja:
Growing western thuja Danica at home:
Reproduction of thuja:
Room thuja care
Thuja is one of the unpretentious plants. But despite this, before caring for the room thuja, you should know some subtleties.
Lighting. Thuya in the apartment does not like too bright light. With this in mind, keep the plant near the north windows. In winter and spring, it is necessary to shade the flowerpot from direct sunlight.

Temperature. In summer, a comfortable temperature is considered to be 20 - 30 degrees. During this period, thuja is useful to grow in the air. Find a shady, draft-free place for her. As for winter, these thermometer indicators for a tree are too high. Make sure that the temperature does not rise above + 15 ° C. Thuja is frost-resistant, but it is better not to expose indoor specimens to the cold test.
For planting thuja, you can use a pots.
Humidity. This plant reacts normally to dry indoor air. The heat does not frighten her either. But high temperature and low humidity are not the best combination. Periodically, you still need to spray the plant with a spray bottle.
It is not recommended to grow thuja in plastic, ceramic or metal pots. These materials will not be able to protect the roots of the plant from the cold. They also crack easily.
The soil. At home, thuja grows well in a pot. You just need to choose the right soil. The best soil for thuja is a mixture with a slightly acidic reaction. You can prepare the ground yourself. For a young plant: take coniferous (2 parts) and leafy soil (4 parts) + sand (1 part). An adult thuja will feel comfortable in such a mixture: prepare turf soil (1 part) + peat (1 part) + sand (1/2 part). The ready-made store substrate has an almost identical composition.
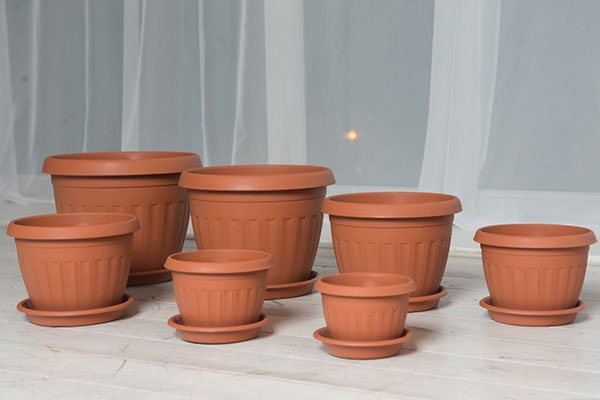
Pot. For thuja that grows indoors, the pot can be anything. The only condition is that the capacity should be taken deeper than the root system itself. This will help the thuja grow properly. It is also worth taking care of the drainage holes in the bottom of the pot. Stagnant moisture is detrimental to this plant. If your thuja will be on the balcony or veranda, the pot will have to be selected more carefully. It is best to buy a container that is made of frost-resistant material.
Winter and summer care
You need to take care of the thuja regardless of the season. At the same time, the care is different at different times. In the warm season, the plant feels great on the balcony. During the growing season, frequent watering is required. On hot days, you should spray thuja in the morning and evening. They take warm water.
Winter is the dormant time of the plant, no special care is required. The temperature should fluctuate between 6-12 degrees. If the balcony and loggia are glazed, the thuja can be kept there. At a higher temperature, the thuja will dry out, and watering will not help her. It is rarely necessary to water the green beauty, and only with warm water.
In the spring, the plant is transplanted. Planting at home should be done carefully. Any damage to the root system can lead to the death of the plant. Do not add too much to the root collar - this will also destroy the thuja. Thorough watering is required after planting.
Sowing seeds in autumn
Try propagating thuja using seeds. This is a laborious and rather long process that takes 3 to 5 years. The initial stage is the harvesting of fresh seeds. This is a prerequisite for good germination.
It is best to harvest seeds in late summer or early fall.
You need to have time to collect cones with grains before they begin to open. Then place them in a dry place to allow the planting material to dry completely.
The seeds are ready for planting when they begin to easily fall out of the buds (this will take 2 to 3 days). They look small, reddish or brownish in color. The resulting grains must be sown as early as possible. The longer they stay warm, the worse they will emerge later.

Thanks to this breeding of thuja at home, stratification for crops takes place naturally, which will make the seedlings more viable. Thus, it will grow faster.
This will require:
- Cover a wooden box of the optimal size with pre-prepared soil: turf soil (1 part) + peat (2 parts) + fine sand (1/2 part).
- Lay the substrate in an even layer and compact slightly.
- Make deepened grooves every 5 - 6 cm. To make it easier to plant seeds, you can expand them at your discretion.
- Distribute the planting material evenly between all grooves. Cover them on top with a thin layer of earth (about 1 cm).
- Moisten the soil gently with a spray bottle. Your task is not to wash the seeds out of the soil.
Put the box outside, for example, under a tree with a lush crown. The branches of the tree will provide reliable protection from the direct spring sun. Seedling care is very simple: water regularly, protect from direct sunlight and get rid of weeds in a timely manner. As soon as several leaves appear on young plants, the seedlings will need to be planted in separate containers.
After a year, small thuja need to be transplanted. This will allow them to develop quickly and fully. From early summer to autumn, the pots can be kept outside in the shade of a tree.
Where to place the thuja in the house, what temperature does it need
The pot with the plant should not be exposed to the sun, the rays can burn the needles. On the windowsill of the sunny side, the thuja will also not be comfortable, the leaves will begin to turn yellow and crumble. The optimal place for a plant is partial shade, diffused daylight.
You can put the thuja pot in a flower stand and place it near the window. Another option for protection from direct rays of the sun is to fit the window glass. In this case, the thuja will grow beautiful and green.
In the warm season, the thuja can be put on a balcony or loggia. Also, the pot can be taken out into the garden, but placed in the shade.
The air temperature that suits the plant is 18-25 degrees. In winter, it is recommended to keep the pot away from heating objects. The temperature in winter should not drop below 15 degrees Celsius. If the balcony is glazed, the thuja will be comfortable on it.
Thuja propagation by cuttings
This method is often used by gardeners. This will require semi-lignified twigs. Cut off cuttings only from a healthy plant. They should be separated so that a small part of the bark remains on each element. The longer it is, the better.
For rooting, it is better to use a mixture of sand and peat. Both components must be in equal parts. Before placing the elements in the soil, it is necessary to remove the lower leaves from them and hold for some time in Kornevin's solution or another growth stimulator.
Cuttings should be planted in prepared soil at an angle of 60 0. For quick germination, it is better to cover the container with polyethylene or a jar on top. You can also use a cut plastic bottle. Keep the container at a temperature of about 23 0 C.
So that the stalk does not disappear, you need to periodically open the mini-greenhouse. It will be enough 15 minutes so that mold does not appear on the surface of the soil.
Moisten the earth as needed. This is best done with a spray bottle. Water should be taken only at room temperature and without any impurities. You need to shoot a mini-greenhouse when it will be seen that the thuja has begun to grow rapidly.
You can also propagate indoor thuja with branches. The procedure is the same as with the handle. In order for the twigs to take root faster, the soil must be calcined before use.
Some experts also use the layering method, but this option is quite complex and requires effort. This is due to the small space of free soil around the trunk.
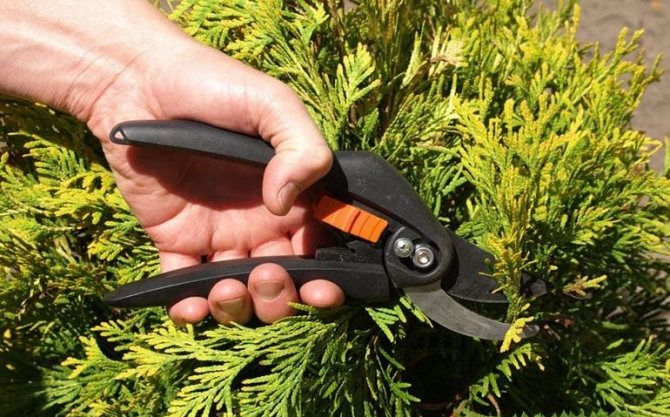
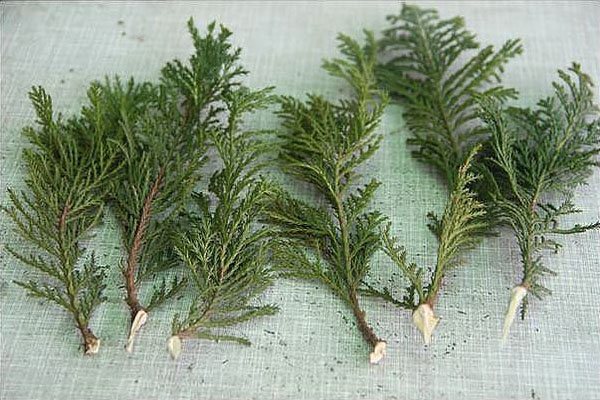
Harvesting cuttings
Thuja propagation by cuttings begins with the correct preparation of planting material. This process is not particularly difficult, but it requires adherence to certain rules.
When harvesting tree cuttings, follow these recommendations:
- you need to take planting material only with a healthy thuja;
- it is best to use strong lignified branches cut from the top of a 2-3 year old tree;
- the length of the handle should be no more than 0.5 m, and the diameter should be about 7 mm;
- cuttings are best done early in the morning in cloudy weather;
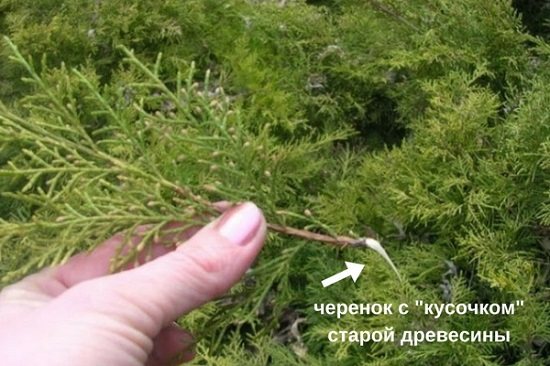
- the branch must be sharply torn off from top to bottom or cut diagonally with a knife, leaving on it a small piece of bark up to 2 cm long ("heel");
- to stimulate the growth of roots on the surface of the cutting, it is necessary to make cuts and remove the needles, leaving only a small amount at the end of the branch;
- freshly cut shoots before planting for 12 hours are placed in a solution of a root growth stimulator (for example, "Kornevin");
- prepared cuttings must be rooted immediately, as as a result of storage they become unsuitable for planting.
Watering and wintering thuja at home
The most important condition in caring for thuja is proper watering. In return, you will receive a beautiful plant with lush branches. Thuja is watered regularly. The earth ball should always be moist. The plant will not die from dry soil, but it will greatly lose its decorative effect.
Pruning the plant. This procedure is periodically performed in order to get rid of dry branches. To give the plant a beautiful shape, you can trim it at any time for you, without limiting your imagination.
Thuja care in winter
The plant easily tolerates cold weather. In winter, at home, it will be better for her on a glazed balcony, where the temperature will not rise above +10 - +12 degrees. Make sure that the temperature is even, without fluctuations. In order to keep the thuja in a pot in winter, one must remember that it is afraid of drafts and strong winds.
Thuja is very easy to maintain. She does not need frequent feeding. Organic and mineral fertilizers are applied in turn. In the spring, more attention is paid to nitrogen-containing fertilizers, and in the summer they use potash fertilizers (once a month is enough). Optionally, you can also use phosphate fertilizers. All these dressings have a beneficial effect on the condition of the plant, and you will have beautiful and fragrant needles all year round.
Young thuja are transplanted once a year. Adult specimens - less often, when the pot becomes cramped for roots. Better to take a special land for conifers. The transplant is done by the transshipment method. The old soil on the roots must be preserved. It protects them from damage.
Homemade thuja in a pot will be a real decoration for any home or office. It not only looks original in any room, but also perfectly cleans the air.
Coniferous keeping at home - video
Water the thuja, what should be the humidity of the air
Thuja can be attributed to those plants that tolerate drought without problems. Therefore, it does not need frequent watering. On hot and dry days, the plant should be watered several times a week. Waterlogging will not be beneficial. But it is impossible to bring the earthen coma to complete drying.
For watering, use warm water, previously settled. It is forbidden to take from the crane.
During the growing season, and for a newly planted tree, watering changes somewhat. It is carried out regularly, avoiding drying out. So that there is no stagnation of water, good drainage is installed during transplantation.
The optimum air humidity for thuja is 40-60%. If the room is too stuffy, or heating objects are working, the plant should be sprayed with warm water. Do this as needed.
Thuja western
Cypress family. Homeland North America.
Thuja occidentalis Thuja occidentalis is an evergreen coniferous plant with a pyramidal crown, in good conditions lives for a very long time, reaching an average of 10-15 m in height with a trunk thickness of about 40 cm.The bark of young plants is smooth, reddish-brown, furrowed with age, stratifies stripes. The needles are scaly, dense, small (scales about 3-4 mm), saturated green, by winter they acquire a brown color. Every 2-3 years, thuja renews foliage, throwing in twigs and overgrowing with new needles. Thuja have small 10-15 mm ovoid cones with delicate scales, similar to dried buds. There are more than 300 varieties of thuja.
The original species, thuja occidentalis, is a garden plant, but is sometimes grown as a pre-bonsai. However, there are various varieties of western Polish thuja on sale. Among them are compact plants that grow well in pots. For example, Miky's miniature cultivar Thuja occidentalis ‘Miky’ has a fine foliage structure that remains a rich green color throughout the growing season. The crown is very dense, dense, in an adult plant with a wide conical shape. In winter, it can take on a copper tint. The shoots are slightly twisted, which gives the variety an additional charm. Thuja grows rather slowly: in 8-10 years it will grow about 70-80 cm in height and about 50 cm in girth. This variety practically does not need pruning of shoots.
General information
Tuyu is also called the “tree of life”, the green beauty belongs to the cypress family. It includes 6 types, but in room conditions only two types can be kept:
- Eastern. Outwardly it resembles a shrub. The needles are deep green.
- Western. A small tree in the shape of a cone. The needles are dark green in color, sometimes there is a yellow tint. Quite popular, but growing for a very long time.
Thuja room
You will not find needles on the tree, the branches are covered with scaly leaves that overlap each other. In the autumn, the thuja begins to bloom, after which small cones form.
Thuja planting and care
At home, thuja is a wonderful decoration of a balcony or terrace - it loves fresh air, does not tolerate content in the kitchen or in a smoky room. It also looks attractive in the garden: in the rock garden, rocky gardens, it goes well with other conifers.
Temperature
Plant frost resistance - zone 5b if you plan to grow thuja in a greenhouse or garden. At home, in the summer, we have the temperature that is dictated by the weather, but cypress trees do not tolerate heat - they need 22-24 ° C for optimal growth. In winter, a cool content is required, + 8-10 ° C is enough, at least + 2 ° C. At the same time, the soil in the pot is almost completely dry. At the lower temperature limit, the plant must be insulated. You can put the pot in a box of sawdust, wrap it with foam rubber, put it in a large pot and fill it with dry earth between the walls. Coolness must be ensured with the onset of the heating season and until early February.
Lighting
Thuja is photophilous, prefers a certain amount of sunlight, preferably before lunchtime - the east or southeast side, or in the evening - northwest. In the period from February to May, from 12 to 15 o'clock, openwork shading is desirable - at this time the most active sun can cause burns (brown needles). By summer, the thuja gets used to the sun well and does not need shading if it has enough fresh air.
- Attention: at temperatures above 26-27 ° C, the direct sun is hard for thuja to endure. Therefore, if the pot is on an open balcony or near an open window (not micro ventilation, but a well-open window), shading is not required. If you close your windows, it's best to move the pot to a shady, but not hot, windowsill. Young plants especially need shading. In nature, thuja seedlings (from self-seeding) have been growing for decades in the shade of taller trees.
You may have heard that thuja is shade-tolerant - this statement applies only to garden conifers, at home the lighting is always one-sided, and growing on the north side can lead to the formation of uneven foliage of the crown. Therefore, if you have a north side, gradually turn the pot on the window.
Watering
During the growing period, especially in hot weather, watering is abundant enough, with drying of the top layer of the earth. Do not leave water in the pan after watering. Thuja does not tolerate overdrying - as soon as the soil dries up, it deplorably lowers the branches, but after moistening it immediately restores turgor. If it is too dry, especially in the heat, it is irreversible. When the rainy season begins in the fall and a sharp cold snap, make sure that watering is infrequent and the soil has time to dry out almost completely in 3 days.
- Important: the correctness of watering is regulated not only by its frequency and volume of water, but also by the composition and structure of the soil.
- For reference: in nature, thuja grows in humid forests, especially abundantly in coniferous bogs, but at the same time it is a surface root, not completely submerged in water, but on a well-drained substrate. But the most famous long-lived thuja, up to 1000 years old, have survived on cliffs and rocky terrain. For thuja, air humidity is more important than soil moisture - avoid both waterlogging and overdrying.
Fertilization: Thuja fertilizing is required two months after transplanting if the soil is too poor. You can purchase a special fertilizer for conifers or use a universal non-alkaline and chlorine-free fertilizer for common indoor plants.
Air humidity: Thuja loves very humid air, optimally 60-80%, humidity below 40% requires humidification - spraying 2-3 times a day or placing the pot on a wide pan with water (water should not come into contact with the roots). When the heating season begins, move the plant to a cool room.
- If there is no possibility of a cool winter, you have two options: fence the edge of the window sill from the battery with plexiglass or greenhouse film, put a humidifier and add artificial lighting. Or, if the size of the bush exceeds the size of the window sill, do not torture the plant - grow it in the garden.
Thuja transplant
Potted thuja is transplanted annually or every two years, very carefully, as carefully as possible, preserving the root ball. When planting, it is important not to tamp the soil too tightly and not to deepen the root collar (the soil level is at the same level, without hilling). Healthy roots are brick-brown and firm in appearance. Soil: 1 part of clay-sod land, 1 part of leaf (or peat), 1 part of baking powder (zeolite granules or akadama, vermiculite or agroperlite can be used, coarse river sand - sifted up to 2-4 mm). The pot should not be too large - slightly larger than the root system. At the bottom, make many holes for water drainage, drainage if desired (in a tall pot, required). If the soil is closer to neutral in acidity, add a couple of tablespoons of pine needles or bark to the pot.
Thuja grows well on weakly acidic soils, does not tolerate alkalization and strongly acidic soil - the optimum pH is 5.5-6.5. If the substrate is caked and compacted, you need to carefully loosen it to a depth of 5-6 cm.If a salt deposit appears on the surface of the soil, it must be removed and the plant should be watered with softer water (filter, boil, soften with aquarium water agents).
If you use peat-based store-bought soil, keep in mind that it quickly depletes nutrients, and in its pure form is far from ideal for thuja (it dries quickly), but it can serve as one of the components. In addition, store-bought soils are often filled with a large dose of fertilizers, even specialized coniferous mixtures, as a rule, are based on pure peat and sand, while light loam will be the ideal soil base for thuja.But do not forget that growing in a closed system (limited by the walls of the pot) deprives the roots of an important element - oxygen. Excessive watering will suffocate the roots if the soil is not porous enough (clean loam). This is why we add baking powder. Drained soil does not mean drainage at the bottom, but drainage particles in the soil itself between the roots.
Topic on the forum: Bonsai from thuja - options for the formation of thuja, as well as the theme of Ephedra
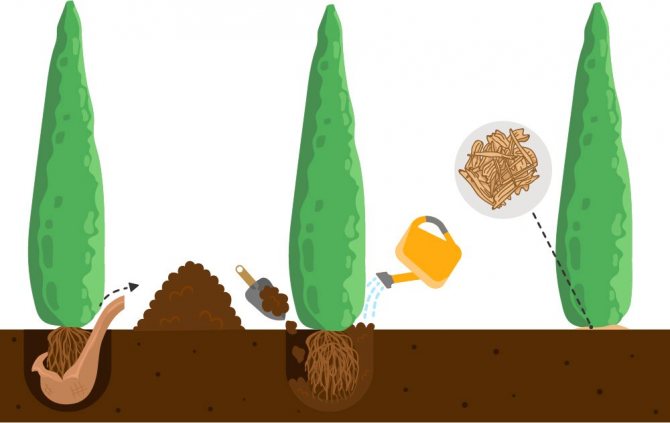
Transfer to a permanent place
After the cuttings have taken root and released 1-2 new shoots, they are planted from the container in the open ground on a temporary bed in the garden - a school. In this case, the soil is dug on it with the addition of one bucket of peat per 1 m², and then small holes are made in it. The soil in the container with rooted cuttings is well watered to facilitate the extraction of the seedlings.
Important! Autumn cuttings are transplanted to the school next year in the spring, and the rooted spring branches - in the fall of this year.
After that, the cutting is carefully removed and placed in the hole along with the earthen lump, placing it in relation to the soil surface at the same level as in the container. Neighboring seedlings are placed at a distance of 25 cm from each other. Further care for thuja at the school consists of watering and removing weeds, and for the winter the plants are covered with a layer of mulch and spruce branches. In the school, the seedling should grow stronger and grow, and after 2-3 years it is transplanted to a permanent place.
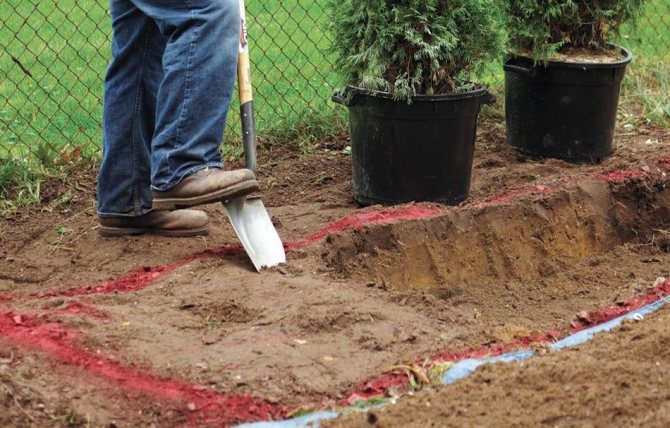
Step-by-step algorithm for transplanting young trees:
- Prepare holes in the selected area with a width and depth of about 1 m. A distance of 2–5 m is left between adjacent recesses (depending on the variety).
- Put a small layer of drainage from stones or gravel on the bottom of the hole.
- Mix the soil obtained by digging a hole in equal proportions with peat and sand. Fill each well with a small amount of the resulting soil mixture.
- Carefully remove the thuja seedling from the school along with an earthen lump formed around its roots. Transfer the tree to the prepared hole - while the root collar should be flush with the ground.
- Fill the remaining space of the planting pit with loose nutrient mixture. Slightly tamp the surface of the earth around the thuja with your hands.
- Water the trees lightly with a little warm water, moistening the ground around them.
- After complete absorption of the liquid, the soil surface around the trunk is mulched with dry sawdust.
Reproduction of thuja
Thuja propagates by seeds and cuttings. Seed cultivation is impractical - a representative of cypress grows very slowly. But it is a pleasure to grow cuttings - it is important to know how! Very simple: in the fall or spring, cut a twig of a thuja about 15 cm long.
Take a spacious zip-bag (with a fastener), prepare the soil: 1 part of the universal soil (for example, Terra Vita living earth) and 1 part of sand or vermiculite. Stir and microwave for 3 minutes. Cool and pour into a bag. The substrate should be moist, but not too damp (moisten with boiled water). Place the cutting in the substrate and close the bag tightly. Hang it in a bright place - if the stalk is cut in the fall (in October-November), then you can hang it on the south window without shading. If in early spring, then only under shade from the direct sun. There is no need to open the bag, it retains about 90% humidity. Just wait for the roots to appear. They are dark, and not light, like in many indoor plants, therefore they are hardly noticeable.
When the thuja takes root, it must be transplanted into a pot in the soil described above for adult plants. Put the pot in a bag and tie. Shade the first week from any sun and ventilate 2-3 times a day. After a week, the bag can be untied, but not removed, but gradually accustom the young plant to drier air. As soon as the opportunity arises, expose the pot to fresh air on the balcony.
Topic on the forum: Reproduction of thuja, you can discuss, add your comments and share your experience.
Best time to grow
In order for the cut branches to take root safely, it is necessary to choose the most successful season for planting the plant.
Did you know? Thuja wood is very fragile, but it is widely used in carpentry to create finely carved furniture.
You can propagate a tree by cuttings at this time of the year:
- from the end of March to the first half of April - in the spring, sap flow begins in the shoots of trees, so rooting is faster;
- in June - in the summer, the tree continues to grow actively, but the likelihood of damage to the seedling by spring frosts disappears;
- in October - in the fall, the probability of survival of the seedling is much higher, since the sap flow in the shoots slows down, and the cool and humid weather promotes the formation of young roots.
Care after rooting
After the appearance of roots in seedlings placed in a substrate or sphagnum, they are transplanted into separate containers for growing. After the grown thuja seedlings are sent to a special garden bed, which is called a school. The optimal time for transplanting after rooting of autumn shoots is spring, spring ones - autumn.
The place for the bed should be shaded, peat is added to the soil in the amount of 1 bucket per 1 m 2. Seedlings are placed at a short distance from each other. Care consists in maintaining soil moisture and removing weeds. For the winter, young thuja are covered with spruce branches. After 2-3 years, the grown seedlings are transplanted to a permanent place.
Cutting is a simple process, as a result of which, after a couple of years, you can enrich the site with new conifers. For maximum root germination and adaptation of the seedling, the recommended rules should not be ignored.
Thuja is especially loved by summer residents. Living fences made of thuja very much decorate the site. But for such work, dozens of seedlings are needed. Therefore, the question of how to propagate thuja is very relevant for summer residents and owners of suburban areas. The unpretentious frost-resistant thuja is often used to decorate summer cottages, adjoining territories. Reproduction of this ephedra involves three methods: seed, cuttings, grown trees (ready-made seedlings). Let's take a look at all three.
The option with seeds is very long, labor-intensive, since at least 5 years will have passed by the time the bush is planted in the ground. In addition, thuja can lose its varietal characteristics during development, and the only advantage of such a situation will be the adaptation of the plant to the local climate. However, if you are interested in the process itself, then you will need a soil mixture (sand, coniferous, deciduous soil), high-quality seeds. It is important that the seed material has previously undergone stratification - overwintered under a layer of snow.
With the arrival of spring, thuja seeds are placed in containers with nutrient soil, and they are covered with soil mixed with sawdust of coniferous crops. Reproduction of thuja seeds at home entails traditional concerns: protecting seedlings from the scorching rays of the sun, timely watering, getting rid of weeds, feeding. After 5 or even 6 years, young thuja can be planted on the site.
Cutting propagation is the most convenient, effective way. A big plus of this method is the preservation of the varietal qualities of the tree, as well as the ability to get full-fledged small trees in two or three years. Of the minuses, it is worth noting a reduced endurance and a small percentage of bushes survival. For this situation, this is normal, if you do everything according to the rules, then a positive result will not be long in coming.
Consider the reproduction of thuja at home by cuttings. Which season should you choose for this - spring or autumn?
Thuja propagation by cuttings in spring
Most often, novice gardeners are worried about the question of reproduction of thuja in the spring, how best to do it.With spring rooting, all processes are faster, as the movement of juices in the shoots is activated. The procurement of planting material is practically no different from the above method. For the selection of cuttings, healthy branches from the top of the thuja, which are no more than 3 years old, are also used.
Reproduction of thuja in the spring is best done in April, with manual separation of the branch, the "heel" should be preserved. If for some reason you missed April, then you can have time to "catch" the repeated period of shoot growth - this is June. It should be borne in mind that June cuttings "sleep through" summer, autumn, winter, and take root only by spring.
The best way for spring propagation is the substrate method and active hydration. Water or the diaper method will not work here due to insufficient moisture during the activation of the root system. The process itself is very similar to autumn cuttings, but sometimes the soil mixture is replaced with clean sand.
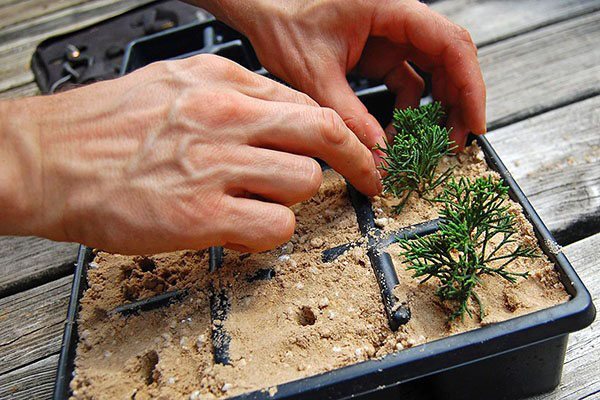
Thuja - propagation by cuttings in spring, stages:
- We put the selected shoots in water with "Kornevin" for 24 hours.
- We take boxes or other containers with a large number of holes in the bottom, lay a layer of medium-sized rubble.
- Pour clean sand on top, which can be ignited or doused with boiling water. You can also use the potting mix mentioned above.
- We spill the sand with a solution of potassium permanganate, it should be pink, but not too dark.
- When the sand or substrate has cooled down, we immerse the thuja twigs there to a depth of 1-1.5 cm, slightly trample them with our hands.
- Since it is still cool in spring, containers with cuttings should be placed where conditions will be similar to greenhouse ones. At the same time, the air temperature should not be below + 17 ° C, above + 23 ° C.
This place should be shaded, seedlings should be irrigated daily from a spray bottle. If the spring is hot, then spraying should be done twice a day. At the same time, make sure that moisture does not get on the green leaf plates - the process of decay may begin. After two months, it will become clear which cuttings have taken root, by this time the risk of drying out the planting material is significantly reduced.
Thuja - propagation by cuttings in autumn
But there is also an opinion that it is the autumn harvesting of branches for planting that is more expedient, since in the fall the sap flow slows down, respectively, the number of seedlings dying from a lack of moisture decreases. It should be borne in mind that the rooting process will take longer. Let's look at the breeding of thuja in spring
To collect twigs, it is better to choose a not sunny day in October, when the foliage has already fallen from the trees (in the Kuban it may be the beginning of November). It is best to pinch off the shoots from the top, it is best to choose those branches that are already 3 or 4 years old.
Select only lignified branches that do not exceed 50 cm in length. At the end of the "correct" shoot, a tree "heel" should be preserved at the end - a part of the bark, thanks to which new roots will develop. The longer this "heel" is, the better the rooting process will be. Remove about 3-4 cm of leaf plates from the end of the shoot and proceed to the next step.
Thuja propagation by cuttings in a jar of water
Water is the easiest, most affordable way to revitalize thuja roots. To do this, take a small container, fill it with water, set the branches so that the water covers the ends by about 2 cm. Do not place more than 3 or 5 cuttings. Make sure that the green parts of the shoots do not come into contact with water - this contributes to further decay of the planting material. After that, choose a bright, slightly cool place for the container.
Seedling care is a timely replacement of water (when it becomes cloudy). At this time, the cuttings are removed from the jar, the roots are wrapped in a clean, damp cloth. New water should be disinfected with a pair of potassium permanganate crystals.
Rooting of thuja cuttings in the substrate, sphagnum
Thuja propagation by cuttings in autumn is possible in different ways, for example, using a substrate. This method is more advantageous than the option with water, which does not contain any nutrients, but with the substrate, the rooting process will be much more productive.
To make the seedlings healthier, more hardy, prepare:
- Drawers or other forms with holes (for soil aeration). Lay fine gravel (drainage) on the bottom, mix equal shares of deciduous humus, sand, peat.
- Heat the resulting soil mixture in the oven. If you have potassium permanganate at home, then make a dark solution and additionally shed soil for reliability.
- Place the cuttings in water with a previously diluted biostimulating drug "Kornevin" for 10-12 hours.
- Fill the containers with the substrate, make grooves for the cuttings. Deepen the seedlings themselves by 1.5-2 cm, sprinkle with sand on top (which can also be pre-calcined), lightly tamp.
- Next, the box should be covered with plastic wrap, placed in a bright place, while the air temperature should be + 18..22 ° C. When condensation appears on the walls of the mini-greenhouse, slightly open the film on one side (for ventilation).
When rooting on a substrate, it is important not to overdo it with watering and to prevent the soil from drying out. Moistening is best done by irrigation with a spray gun, since the weight of the water can crush the soil, expose the "heel".
There is another interesting way in which the autumn reproduction of thuja is carried out using sphagnum (peat moss). This method implies, as it were, swaddling the shoots with a kind of cocoon, this method is called so - rooting of thuja cuttings in swaddling clothes.
In addition to sphagnum, you will need plastic wrap, a clean cloth, and Kornevin.
- As described above, we place the thuja shoots in water with a root formation stimulator (for 10-12 hours).
- Fill the sphagnum with boiled water for about 3 hours so that it swells and is saturated with moisture.
- We lay out a wide strip of fabric on the table, visually divide its width in half, evenly lay out wet sphagnum along the entire length of the upper strip. The lower free part of the width of the diaper is needed in order to cover the cuttings and moss, and then we carefully roll this strip into a roll.
- At a short distance from each other we lay thuja twigs, surrounding the "heels" with sphagnum.
- We cover the cuttings with the lower part of the strip, so that the green tops are free, we roll up the roll.
- We place the resulting sack inside a plastic bag, hang it in a well-lit place (but not in the direct rays of the sun).
Such reproduction of thuja by cuttings is considered the easiest, thanks to the moss, the required moisture level is maintained for a long time. Lack of moisture can be determined by the absence of condensation on the inner walls of the bag - if it is dry, then moisten the diaper with a spray bottle.
What is the best time to harvest cuttings?
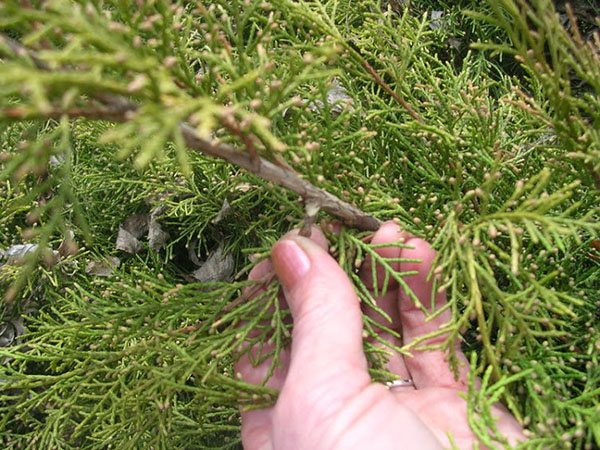
The choice of shoots must be approached responsibly, since not all of them are suitable. Collection rules:
- In order for the crown of the future plant to actively develop upward, the apical shoots are cut off. If you take a lateral process, and not an axial one, then the seedling will grow in breadth, forming a creeping bush.
- The best seedlings are harvested from actively growing trees 4-9 years old.
- The branches for cutting should be lignified, the color of the needles should be uniform.
- The branch is broken off with a sharp movement, it is not recommended to use a pruner. At the end there should be a small piece of bark - "heel".
Cuttings - The shoot should not be more than 40 cm, the optimal length is 10-17 cm. The size of the cutting is a controversial issue, so experienced gardeners break off several branches of different lengths.
- Twigs and needles are removed from the bottom of the workpiece by 3 cm.They can provoke rotting, in contact with the moistened soil. All the bark that has begun to flake off is cut off. The top should be slightly pinched.
You can collect material at any time of the year. It is not forbidden to reproduce Tuyu in spring, summer, autumn and winter. The first stage of tree growth occurs in spring. Thuja propagation by cuttings in the spring is most popular, since root formation occurs faster at this time of the year. The optimal time for collection is April.
The rooting result depends on the period of cuttings. The twigs collected in the summer will take root only in the spring. Summer cuttings are similar to spring cuttings. This method is not used in cold regions, since the young seedling will not have time to get stronger before the first frost.
Harvesting of thuja branches
The second stage of growth of a coniferous tree falls on June, at which time shoots are harvested. The collection is carried out on a sunny day.
In the fall, it is better to harvest cuttings in October. In winter, thuja is propagated no earlier than December 20.
Autumn and winter cuttings are carried out in order to obtain more hardy seedlings. The reason is that with the onset of autumn, all processes in the plant slow down, which means that more moisture is stored in the branches, and a smaller percentage of plantings perish. Rooting of branches collected during this period will also take a long time.
- Can the cuttings be stored or do they need to be rooted right away?
Usually, the collection is not stored, but collected just before rooting. If it is not possible to prepare the shoot for planting in the near future, then it is wrapped in a damp cloth and removed for a short while in a cool place.
Possible causes of yellowing needles
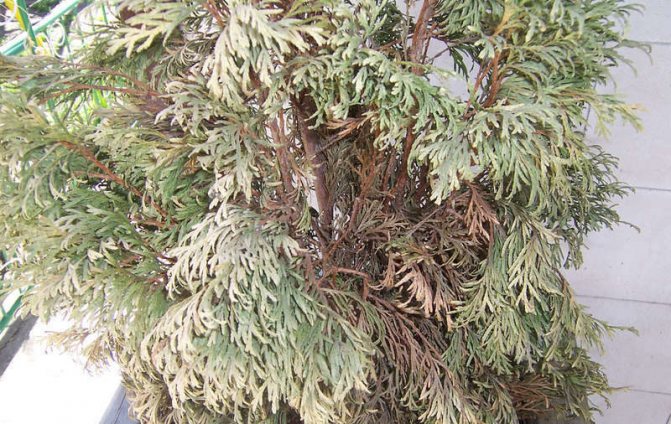
Problems such as a change in the color of needles, the appearance of an ugly yellow or brown color are not uncommon in the cultivation of this plant. The question of why thuja turns yellow in summer and what to do worries many gardeners. The appearance of yellow needles signals a problem, and if you do not start eliminating it in time, the tree will begin to dry, shed the needles and then die altogether.
It is important to understand for what reasons the thuja dries what to do at the same time.
Lack or excess of light, moisture
With a sharp change of residence to more sunny areas, if the seedling previously grew in a dense planting or in a shaded place, the appearance of yellowness in the plant in the first couple of days is inevitable.
A thickened planting of thuja can cause yellowing of the foliage on a volumetric scale, the area of contact between the foliage of neighboring bushes, as well as the lower branches that lack sunlight, turns yellow.
Thuja planting thickened can cause yellowing of foliage
Perhaps thuja turned yellow due to insufficient watering, which, absolutely, like excess, negatively affects the needles. The high occurrence of groundwater, which negatively affects the root system, causes sticking, decay of the roots and, as a result, yellowing of the foliage.
Lack of nutrients in the soil
Iron deficiency in the soil can lead to yellowing or even whitening. Lack of nitrogen is manifested by the appearance of various kinds of spots: yellow, brown, brown or whitish. Lack of phosphorus is reflected by the appearance of a red-violet tint on the needles.
If you plant plants too close to each other, there is a deficiency of nutrients, since the powerful root system of each of them "pulls on itself".
Perhaps there is not enough space for the overgrown root system of the plant. Often this situation occurs 5-7 years after planting.
Yellowing before molting

Yellowing before molting
The needles are able to turn yellow before "molting" - this process is not annual, during which the tree sheds part of the old needles. The needles that have outlived their life (3-6 years, depending on the species) are distinguished by yellowing coming from the inside: from the trunk and skeletal branches to the outer parts of the crown, it is hardly noticeable and does not have a massive character, this usually happens in late autumn.
Pests
Aphid
The appearance of this pest is also characterized by yellowing of the foliage, its drying and falling off. If you do not start the fight against aphids in time, the whole tree will die.
Thuvaya miner moth
In addition to yellow needles, dead apical shoots signal about this pest. The larvae of the parasite eat out peculiar passages in the shoots and foliage. It is easy to find a mole, it is enough to carefully examine the gnawed holes.
Spider mite
Spider mite
When infected with a tick, individual thuja needles are covered with yellowish spots, over time they turn red, turn brown and fall off. The needles are covered with small cobwebs, especially towards the end of summer.
Leaf roll
Thuja needles, damaged by the larvae of the gray larch leafworm, turn yellow.
Thuy bark beetle
The yellowed needles can signal a defeat by the thuja bark beetle, or by the Crimean thuja bark beetle. Its presence is betrayed by the presence of inlets in the bark and passages on the wood.
Diseases
Plant diseases occur, as a rule, with improper care. Thuja is often susceptible to fungal diseases. In a diseased plant, the needles begin to turn yellow and fall off.
The natural process of needles renewal and color changes when seasons change
If in the spring the needles have turned yellow or acquired a bronze tint, then perhaps this is just a natural process of needles renewal and color change when the seasons change. If, in addition to the needles, the shoots also have an abnormal appearance, then, most likely, this is some kind of problem.
For example, varieties of thuja western and folded for the winter acquire a golden-bronze color, such yellowing is not a pathology.
There are also varieties with yellow needles from nature: thuja western Danica Aurea, Sankist, Clot of Gold.
Correct pruning of thuja
Don't forget about pruning. Dry and yellow parts of the plant should be removed annually in spring. Timely haircut will allow you to preserve the beautiful appearance and dimensions of the picturesque fence. It should be formed after the plant reaches the desired height. Cutting off a lot of needles at once is not worth it, so that the bush does not weaken.
If the thuja is young, then it is necessary for a year or two to be given the opportunity to take root and determine whether it is good enough for it in this place, or is it worth looking for the most suitable one for transplantation. When pruning, you must follow the rules:
- pruning should take place in the spring and just adjust the shape before frost;
- pruning is recommended in dry weather;
- you need to carefully cut off the dried branches and cut some healthy ones to get air;
- if as a result it should not be high, but wide thuja, for example, under a hedge, cut the top of the head by a couple of cm.
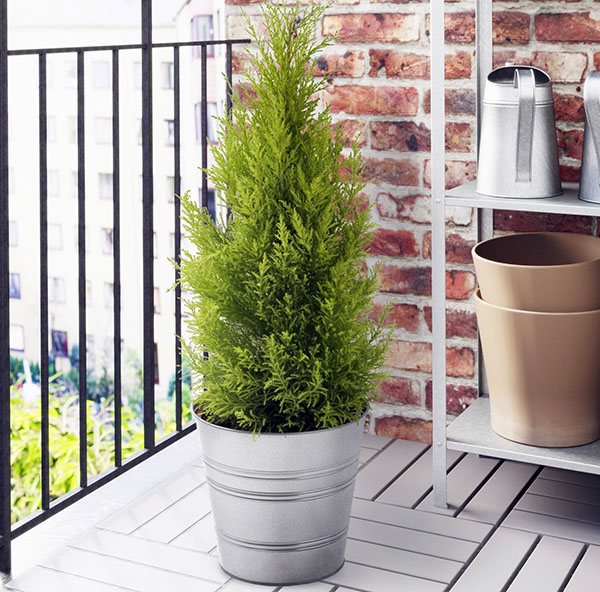
Requirements and care - how to grow thuja on the balcony?
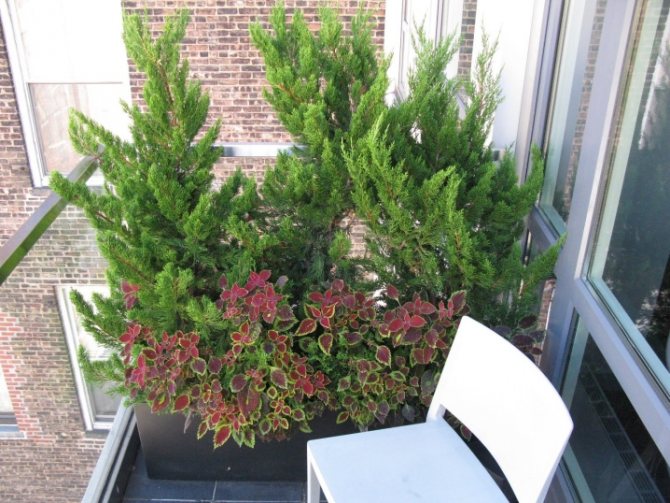
Thuja in a pot, can decorate balconies and terraces all year round, but requires more care than plants growing outdoors to maintain an attractive appearance.
A place
Most thujas grow better in the sun. In the shade, they will look bad and stretch excessively towards the sun. On shady balconies, it is better to abandon the thuja, and plant a yew or cross-paired microbiota.
When planning the planting of thuja on the balcony, you should prepare enough space for them (do not forget that some varieties can grow to considerable sizes). You can read about this in the article: Thuja planting - how, where and when to plant thuja
The place must be protected from strong winds (which can throw the plant, and in winter lead to freezing).
The soil
To grow conifers, a suitable soil is required, which must be fertile and permeable, and must also have an acidic or slightly acidic pH reaction (except for varieties that prefer a different type of soil).
Plants should be provided with as much soil as possible in pots, so that the soil will stay moist longer and better protect the roots of the plant from the cold winter.
Pots and boxes
For growing thujas, it is best to choose wooden, soaked boxes or large, frost-resistant pots.Plants should not be planted in plastic, ceramic or metal pots, as they will poorly protect the plants from the cold and may crack in the cold (ceramic and plastic).
Each container intended for growing thuja should have a drain or a thick layer of drainage at the bottom to protect the roots from flooding. Boxes and pots should also have a cold-proof bottom, so it is worth installing them on a thick wood substrate or on a polystyrene foam board.
Watering and fertilizing
A limited amount of soil leads to a faster loss of moisture and nutrients, therefore, during the summer heat and winter thaws, thujas in pots may dry out. And during the growing season - nutritional deficiencies.
To avoid problems, plants should be systematically watered in summer, and from March to July, appropriate fertilizers intended for conifers should be applied (at a lower dose than the manufacturer recommends).
Wintering
In order for the conifers growing in containers to decorate the balcony for many years, careful care is required. The biggest threats to them are frost and drought.
Due to a lack of space, plants cannot root deeply enough, and are not protected from the cold, as in a large layer in open ground, therefore they are prone to freezing in winter.
In late autumn, plant pots must be protected from frost by wrapping the pots with straw mats or thick non-woven fabric. It should also be borne in mind that during the thaw in winter, the soil in the pots dries out a lot and needs to be slightly moistened.
The rest of the procedures for the care of thuja growing in pots do not differ from the procedures carried out for thuja in the open field. More in the article - Growing thuja - requirements and care
If you have something to add, please be sure to leave your comment on the site.
- View the full image
Description and varieties
Reproduction of thuja
Planting and replanting
Thuja care
Diseases and pests
Using thuja
Evergreens are attractive because they retain their appearance all year round. One of the representatives is thuja. It can be grown not only in the garden. Having planted the thuja in a pot, you can use it to decorate the garden in the summer and at home in the winter.
Pests
- stem;
- sucking.
The first type can be found by the entrance holes in the bark, as well as very bizarre passages on the wood itself, located under the bark. A plant should be rescued from this kind of pests immediately, because otherwise it often dies.
Sucking insects cause a brownish tint in thuja leaves, as well as their tarnishing. And if the crown is covered with a black bloom and hordes of ants are crawling along it, this is the first sign that sucking pests have appeared on the plant.
Hello. Thank you for everything you write about in your wonderful newspaper.
Thuja grows on our site. She is already five years old. This year I noticed that branches on the main trunk began to brown and crumble. I no longer know what to do: is she really dying? Help me please.
Thanks in advance, Nikulina I.A., Volgograd-2
If thuja or junipers look bad, be patient - it may take a year or two to make them “divine”. Start acting now, without wasting a day.
1. Take a pruner and ruthlessly clean the plant of dry, reddened needles. She herself will not fall, and the tree will never be cleansed. Prune boldly. Sometimes the "final" tree looks terrible, having lost half of the needles.
2. Cut off the growing point (shorten the top of the plant by 10-15 cm).
3. Buy sour peat (pH 3-4) and sprinkle thickly under the plant. You can gently mix the peat with the topsoil.
4. Apply the fertilizer "Buiskoe coniferous" together with the peat - the rate is 20 g per plant.
five.In the spring, spray the needles with diluted "Epin", after ten days - with "Zircon", after another ten days - with mullein (dilute 1/2 cup in 5 liters of water).
6. Admire the result - partial recovery will take place by the end of the summer. The needles will turn green and actively grow.
Unfortunately, in the south, almost all conifers must be covered in the spring so that there is no sunburn. And we also need land from under the coniferous trees. This does not mean that you have to go or go to the nearest forest and start scooping up the ground from under the roots of living trees. It is necessary to gently slightly rake the earth from one tree, slightly from another.
It is very good if the earth is with needles. There is no need to worry and try to gain only one land. After all, it is known that conifers are mycorrhizal plants (that is, they live in close symbiosis with microscopic organisms, fungi and bacteria), so for this we need earth, at least a handful, to sprinkle it on the trunk circle.
So that the thuja does not disappear and looks good, it is necessary to spray it with a solution of "Zircon" or "Epin" for prevention. Spray generously to drip from the needles. Repeat spraying once a month.
New from users
Climatic zones of the Russian Federation
Replenishment expected in your garden? Try to have "local varieties" settled in you, and not those that ...
Who can eat your eggplant
The most famous eggplant pest is the Colorado potato beetle. He used to eat it much faster than potatoes. But with ...
Gardening passions: spots began to appear on the trees ...
Apple and pear scab It so happened that at first my garden consisted of only apple trees. The biggest problem was ...
Most popular on the site
01/18/2017 / Veterinarian
BUSINESS PLAN for breeding chinchillas from Pl ...
In modern conditions of the economy and the market as a whole, for starting a business ...
12/01/2015 / Veterinarian
If we compare people who sleep completely naked under a blanket and those ...
11/19/2016 / Health
The lunar sowing calendar of the gardener-ogoro ...
11.11.2015 / Vegetable garden
Many gardeners make the mistake of letting gooseberry bushes grow like ...
07/11/2019 / People's Reporter
For cucumbers, it is best to cook not only the holes, but also the whole garden….
04/30/2018 / Vegetable garden
"Dead" is, of course, very cruel. But how does she to ...
06/07/2019 / People's Reporter
Unkind summer: first aid for warm ...
Recently, my elderly dad, having worked hard on a construction site, ...
07/21/2019 / Health
A magical mixture for expelling aphids from u ...
Anyone sucking and gnawing on the site are not our comrades. You need to part with them ...
05/26/2019 / People's Reporter
The FIVE most important mistakes when growing ...
To get good harvests of grapes, you need to follow simple rules ...
05/28/2019 / Grapes
Only the laziest gardener does not want to reap the second crop with the release ...
A very sad sight in spring or autumn is the yellowed, brownish, in some places covered with a grayish bloom twigs of evergreen thuja. One should react extremely quickly and responsibly to such a clearly painful state of a beautiful coniferous tree. Our article will tell you how in a warm season to understand the reasons for the ailment of the universal favorite, the unpretentious "tree of life" and how to help her.
Correct care
Experienced gardeners believe that the most common factor in yellowing and shedding leaves is wrong planting. Perhaps the tree is too buried or the main bud of the root has remained uncovered with earth. Another reason for yellowing is insufficient or improper care of the thuja.
After the plant is planted, it must be covered from the sun, and the soil around it should be mulched. If the groundwater is high, the thuja can exist without irrigation. But after planting for a month, watering is done every week for a bucket of liquid per bush. In dry weather, water a couple of times every 7 days, 20 liters of liquid per plant.
If the heat is unbearable, the bushes must be sprayed with water.
It is recommended to sprinkle with peat chips, sawdust or chips with a layer of up to 5 cm. This must be done in order to exclude overheating and drying of thuja in summer, as well as freezing in winter. If the weather is dry, then to retain liquid in the ground, you can add moss, cut into small pieces. When watering, it will retain moisture around the thuja.
General description of the culture
This evergreen plant has excellent decorative properties. Thuja is a very durable tree. It is bred by many gardeners, the shrub is considered very popular among landscape designers. The wood of the plant is often used for making furniture and for carving.
Thuja is a short tree or shrub covered with cracking bark. The whole plant consists of skeletal branches, short, they can be sticking up or spread out in different directions. The branches create a narrow crown. In young shrubs, the needles are needle-shaped, eventually transforming into falling out.
The crown of thuja is oval or pyramidal in shape, the root system is not too voluminous. The plant grows very slowly, however, it can reach a height of 20 m. In young specimens, the bark is smooth, red-brown in color, but with age it turns brown. In older plants, the bark flakes off, and narrow stripes extend from the trunk. In thuja, fruits are formed in the form of scaly cones, the diameter of which is from 8 to 12 mm. These buds give off a pleasant pine scent.
How thuja blooms
Good lighting is favorable for the formation of flower buds in the lower parts of the plant. Thuja is a wind-pollinated plant, however, full pollination occurs only when the flowers are close to each other. Male flowers are located in the lower parts of the thuja, and female flowers are in the upper ones.
For this reason, in solitary trees, pollination is difficult, and seed germination will be low. Thuja flower buds are in the form of shortened shoots, they ripen in the fall. Female flowers take the form of brown cones, and male flowers look like a spikelet, which are covered with scales.
With proper care, the thuja will delight everyone with its luxurious and elegant look.
How to propagate and grow thuja - on video:
Plant propagation
Reproduction of this plant can be done in various ways:
- seeds;
- cuttings;
- layering;
- branches.
The most viable plants are obtained using seeds. However, the procedure for growing seedlings takes six years. Only after they have expired, you can start growing the plant.
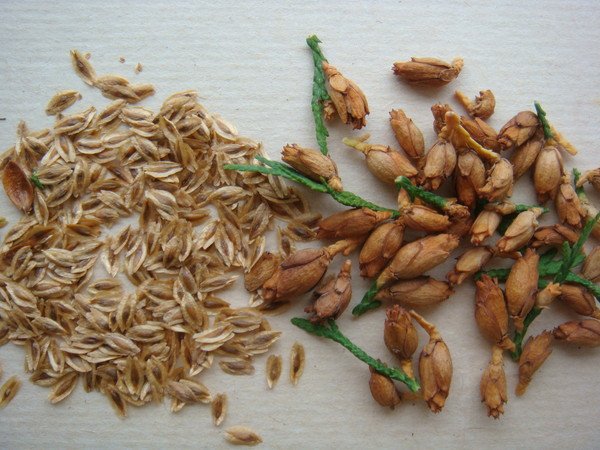
Thuja seeds
There is another important point here. When thuja is grown from seed, the properties of the mother plant are not transferred.
Seed use
If it is decided to grow thuja from seeds, then it is important to provide them with suitable storage conditions. If they stay warm for a long time, they will most likely lose their germination. Therefore, it will be more preferable if you start preparing for growing by taking fresh seeds for this.
First, it is recommended to get the seeds out of the cones. To do this, you need to separate them. Then it is necessary to sift through a coarse sieve. To preserve the seeds during the winter, they need to be placed in moist sand and stored for several months in the refrigerator or in the cellar.
In regions where snow persists, it is a good idea to place it in the snow to a depth of 30 cm and leave it there for several months.
Important! The seeds should be checked periodically. It is important to ensure that they do not dry out or become moldy.
As soon as the seeds begin to germinate, they are placed in sand, provided with high temperature and covered with a film.
It is allowed to germinate in a different way, if the climate and weather provide such an opportunity. The seeds can be germinated in the garden bed.Previously, it is necessary to loosen the earth there and add a little sand to it. It is also necessary to put up a small greenhouse for them.
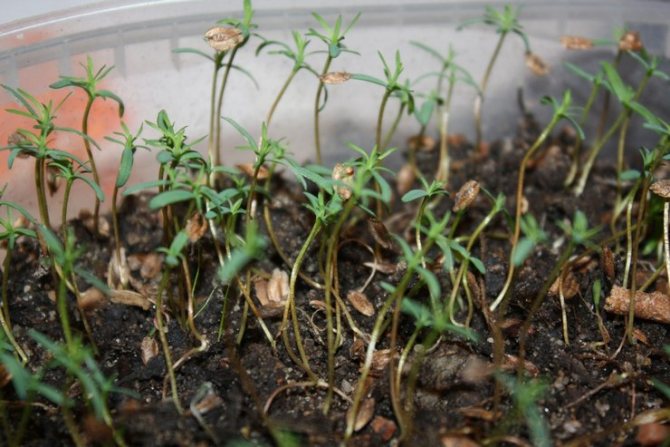
Growing from seeds
Growing from cuttings
To do this, you first need to prepare the cuttings. It is better for this purpose to take branches from the middle part of the plant trunk. They don't have to be old and dry. It is also not recommended to take completely green ones.
It is recommended not to cut them off, but to tear them off with a sharp downward movement. In this case, together with a twig, a heel will remain at the end of the cutting. Its presence will help the plant to undergo rooting.
Before planting them, you need to remove the lower leaves. The fact is that if, during planting, they remain and touch the surface, then the cutting may rot.
They are planted in a specially prepared mixture of sand and peat, taken in equal parts. Before that, it is recommended to keep the cuttings in a solution of Kornevin or another growth stimulator for 12 hours.
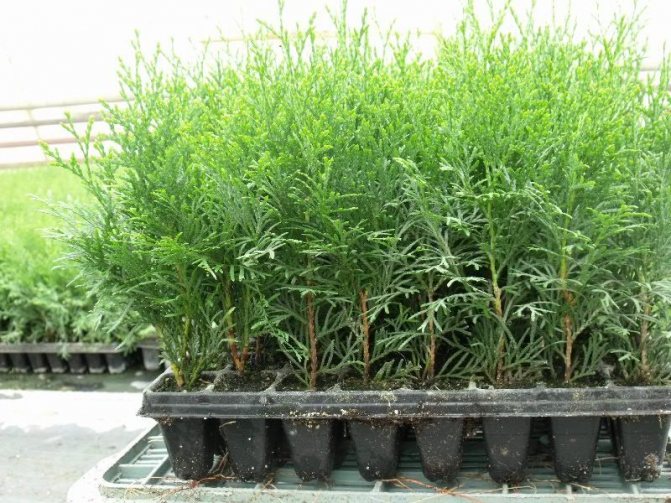
Growing thuja from cuttings
When planting, the plant is placed at an angle of 60 degrees. A hole is made for it, 2 cm deep, then it is covered with fingers and slightly compacted.
In order for the rooting procedure to take place correctly, it is necessary to provide an appropriate microclimate. At the same time, the recommended humidity is 70%, the temperature should be approximately equal to 23 degrees.
Plants are watered by spraying. This should be done daily. In this case, it is necessary to control the presence of mold. When the cuttings begin to sprout, the film covering them can be removed.
Growing by branches
It is produced in the same way as it is done with cuttings. However, they are usually planted in sand, which is previously recommended to be disinfected with a weak solution of potassium permanganate.
Growing by branches
Growing by layering
In this case, one more pot is required at home. In this case, you need to tilt a suitable section of the branch and sprinkle it with earth, having previously cleaned the leaves from this place. Then you will need to water it regularly. It can be pinned to anchor it in the ground. As soon as the cuttings begin to germinate, they must be separated from the mother plant.
Transfer after purchase
In the photo, thuja in goshka
Very often, coniferous plants are presented for the New Year, decorating them like a Christmas tree with New Year's toys. If you were presented with a thuja, or you bought it yourself, the tree should be transplanted into a new pot and a place suitable for growing should be chosen for it.
They are transplanted about 7-10 days after the tree was brought into the house. The plant needs to be given time to adapt. It is imperative to transplant the purchased thuja, since flowers in stores are sold in shipping pots.
Choose a new ephedra pot 2-3 cm larger than the old one. Plants cannot be transplanted directly into a large pot. The soil should be slightly acidic, special for conifers. You can buy it at the store or prepare it yourself from the following components:
- 2 parts of coniferous land (you can collect in the country or in the forest under the coniferous trees growing there);
- 4 pieces of leafy land;
- 1 part coarse sand.
The transplant is done by the transshipment method:
- Water the tree a day before the procedure.
- Place drainage in the bottom of the new pot. If the thuja is small, a layer of 1-2 cm is enough.For a large tree, the drainage layer should be 3-5 cm.
- Put some soil on the drain.
- Carefully remove the plant from the old pot along with a lump of earth and place in a new container.
- Fill the space between the walls of the pot and the roots with soil, compact the soil a little. You also need to pour a little substrate on top.
After transplanting, water the thuja and remove for a few days in partial shade. The transplanted plant should not be exposed to sunlight.
Landing features
Depending on which variety of thuja you purchased, you will need to take into account the size of the container in which you are going to plant the plant.At home, you can plant thuja in the ground in tubs or pots. The most important point is the selection of land. You can buy the substrate in flower shops or prepare it yourself. To do this, you should take sand, coniferous soil and leafy soil in a ratio of 1: 2: 4. The tub, flowerpot or pot should have holes in the bottom for water to drain. To grow a thuja tree or shrub in an apartment, you should initially purchase a container. Not every container is suitable for growing on the balcony. You should not purchase tubs made of ceramics or plastic, as well as metal. With a decrease in the air temperature outside, they will noticeably cool down, the thuja in them will begin to freeze.
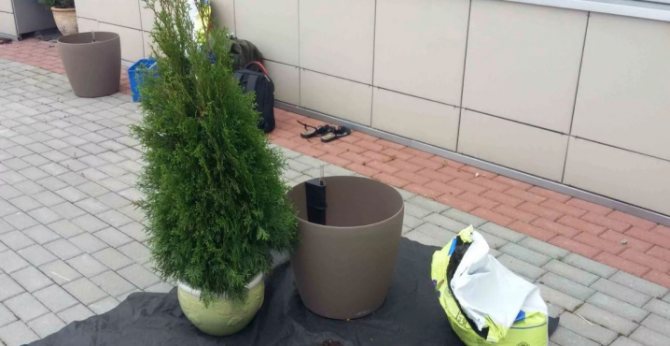
Planting a plant at home will not be difficult. Drainage should be poured onto the bottom of the tub or pot, and then the container should be 2/3 filled with soil. Place the thuja inside, holding it with one hand, and with the other pour the remaining substrate into the container, lightly tamping it around the plant. The soil should not reach the edge of the tub or pot. After planting, you need to water the bush.
Thuja diseases
In the event of the appearance of fungal diseases in thuja, which caused its yellowing, it is urgent to do its sanitary pruning, and then for a long time to spray the crown of the tree with various kinds of fungicides, for example, an acrobat.
By the way! It often happens that the cause of a fungal disease in thuja is the lawn. Most likely, in this case, the ephedra caught Fusarium, which often happens both in the grass, and, incidentally, on the ephedra itself.
Newly planted thuja after winter, when the snow melts, may be amazed by the brown shute. The needles acquire a brownish tint, and then a gray-black bloom appears on it. As a preventive measure, in early spring, the ephedra should be treated with phytosporin.
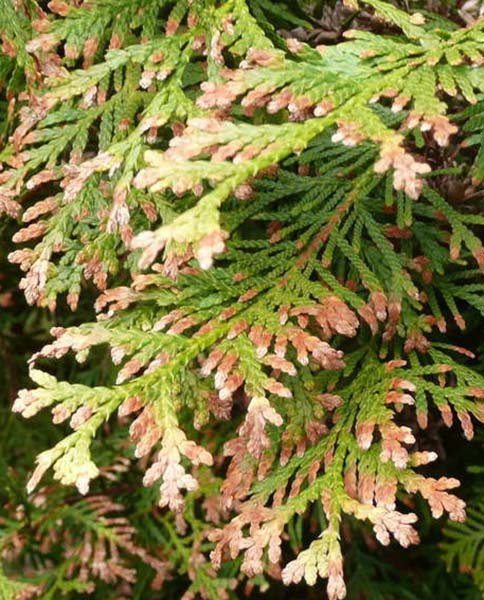
Suitable timing for grafting thuja
Thuja can be cut in spring, summer and autumn, but it is worth considering all the features of each period.
Spring cuttings allow seedlings to take root faster, because all processes are more active. Shoots should be harvested at the end of March or the very beginning of April. It is best to root spring cuttings in a soil substrate. Other methods will not work, the seedlings need abundant moisture.
If time is lost, then cuttings can be postponed to the summer. The appropriate month is June. However, such seedlings will take root only by next spring, and their survival rate is worse. When there is an opportunity to wait, it is better to postpone the harvesting of cuttings until autumn.
Autumn cuttings are carried out in October, when all processes slow down. The rooting itself takes longer than the spring rooting, but the survival rate of the cuttings is better. Shoots do not die from lack of moisture, because they are naturally prepared for winter. Such cuttings can be rooted in any way.
How to grow thuja from seeds
For those who are going to propagate thuja in a quick and easy way, it is better to choose planting cuttings, since germinating seeds is an extremely time-consuming and lengthy task.
For breeding, only fresh seeds are required. They are harvested in the fall from September to December. There is a simple way to extract seeds from buds. To do this, the cones are placed in a warm place on paper. During the night they open, and the seeds spill out on their own. All that remains is to collect them and start growing.
Important! First of all, you need to get rid of diseased seeds. To do this, they are placed in a refrigerator for 2-4 months. When spring comes, the seeds are removed from the cold environment and soaked in warm water. An alternative is to place seeds in wet sand for 10-12 hours. Grains swollen from moisture can be planted in the soil.
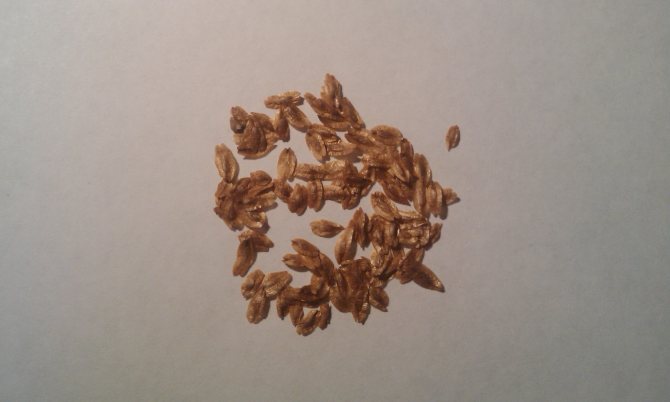
Soaked seeds are planted in the ground
Using thuja
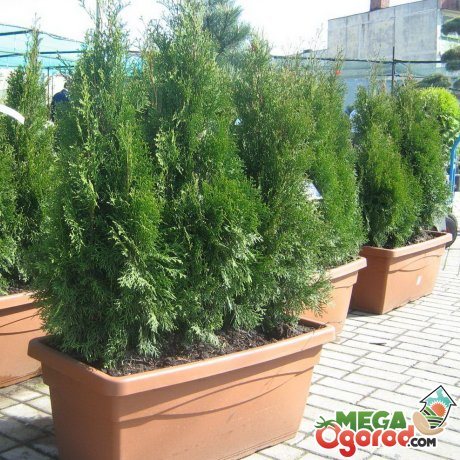
Thuja pleases with its appearance all year round. After all, she does not shed leaves. It can be used as a substitute for a Christmas tree by decorating with toys and a serpentine.Phytoncides, which secrete thuja leaves, purify the air, destroying pathogens. In addition, it emits a pleasant aroma. It has a positive effect on the nervous system of others.
Thuja needles are used to make preparations that stimulate the nervous and cardiovascular system.
Thuja juice has an antiseptic and hemostatic effect. Thuja-based preparations help in the treatment of colds due to diaphoretic and expectorant effects. Use a decoction of thuja branches to strengthen hair. However, in large quantities, thuja essential oils are poisonous. Therefore, they should not be used by pregnant women with epilepsy.
In summer, thuja pots can be used to decorate the yard by placing them in shaded areas. In winter, they are taken to the house, where they look great against the background of flowers and deciduous plants. They will feel even better on insulated loggias or in a winter garden.
More information can be found in the video:
Thuja is a coniferous plant with a bright smell. In general, this plant grows in open ground, but it can also be grown at home in an ordinary pot. True, it will be very difficult, but worth it. When growing a thuja on a plot, it grows quite large, and has recently become very often used in landscape design. Of course, you cannot plant such plants in a pot, so after a while decorative varieties appeared.
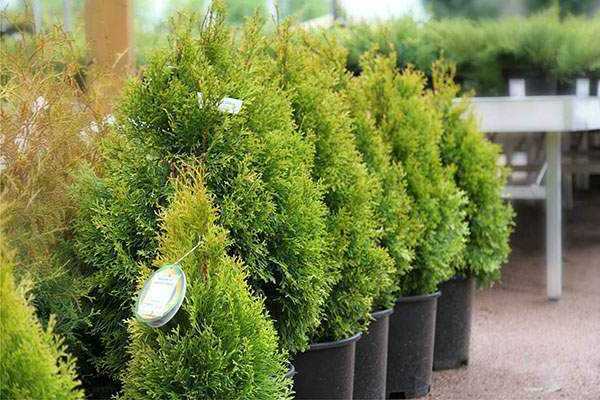
Features in growing plants
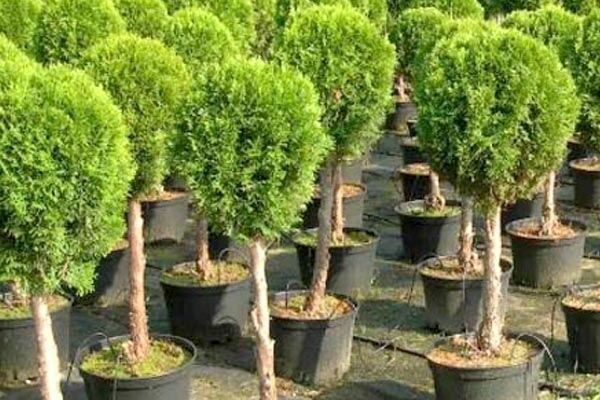
Having chosen the variety you like for planting, you need to think in advance about the size of the pot in which the plant will grow. And also a very important step will be what kind of land you choose for planting. A special composition of the earth can be bought ready-made, it is sold in any gardening store. But if you simply cannot purchase it, it is not difficult to make it yourself, you need to take sand, coniferous soil and leafy soil in a ratio of 1: 2: 4 and mix it all thoroughly.
Also, pay attention to the fact that there must be holes in the pot where the thuja will grow so that excess water can drain. If there are no holes, then after a while the roots of the plant will simply rot. Also, there must be drainage at the bottom of the pot. After the drainage is poured in the pot and the earth can be placed in it, the plant itself can be placed. It must be placed in the center and carefully cover the seedling with earth, gradually tamping it down. A distance of at least 5 cm should remain from the edge of the pot to the ground. After the seedling is planted, it must be watered.
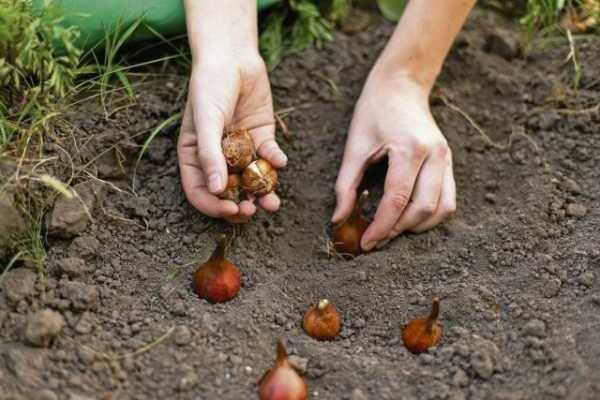
If you want your thuja to grow well and develop properly, you need to take proper care of it. Firstly, plants should receive a lot of sunlight, but not direct rays, but slightly diffused ones. For the summer, the plant can generally be put on the balcony, just not on the south side. But in winter, thuja should be in a room where the temperature is constant and does not drop below +20 degrees. Air humidity does not particularly affect the development of thuja, but still in the heat it is best to spray it from a spray bottle.
Leaves dry: causes and their elimination
If the thuja turns yellow and dries up, it is necessary to decide what to do, how to help, as soon as possible, otherwise the plant may simply die. The first step in solving a problem is to establish the root cause.
There are a lot of reasons why thuja dries:
- pests;
- illness;
- burn;
- excess of applied fertilizers;
- insufficient or excessive watering;
- poor care.
The fight against them is as follows.
Special chemicals are used against pests. If the thuja is infected with a false shield (small insects of 3-5 mm, located on the back of the needles, cause the plant to dry out and wilt), apply the Commander, Champion, Decis. With a spider mite, use Aktofit, Aktellik.
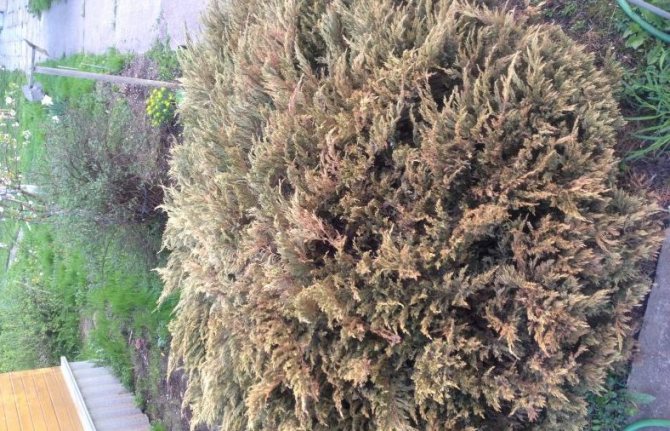
Thuja burn
Diseases in which thuja is able to dry out and wither: late blight, brown shoots and fusarium.With late blight, there is no chance of a cure; fungicides are used for prevention. Drying and subsequent dying off occurs with brown shoots, while the affected areas are eliminated, and the tree is systematically sprinkled with limestone, for prophylaxis, from mid-June to the end of September, the tree is sprayed with foundation. Watering at the root of a 0.2% solution of foundationol helps against fusarium.
If the cause of the burn is not eliminated, in which the needles become brown, then over time most of the plant can dry out. The following protective measures are taken:
- the near-trunk circle is covered with peat chips and ash, to reduce the reflection of sunlight;
- the use of special tools to obtain shading.
When overfeeding thuja, there is practically no way to help, you need to wait a while and until you stop fertilizing the plant.
Important! Fresh manure is absolutely not suitable for fertilizing, it will ruin the entire plant.
Thuja dries up how and what to do in this case - this is a question that needs to be raised at the very initial stages of plant damage. Large foci of yellowed or dried needles cause tremendous damage to the entire plant, and, perhaps, no rescue manipulations will help. The main thing is to provide thuya with proper, full-fledged care, then such a problem as yellowing of the needles will never appear.
Indoor decorative thuja is a neat bushes of a wide variety of shapes. It is called the tree of life for its ability to purify the air and energy of the room in which it is located.

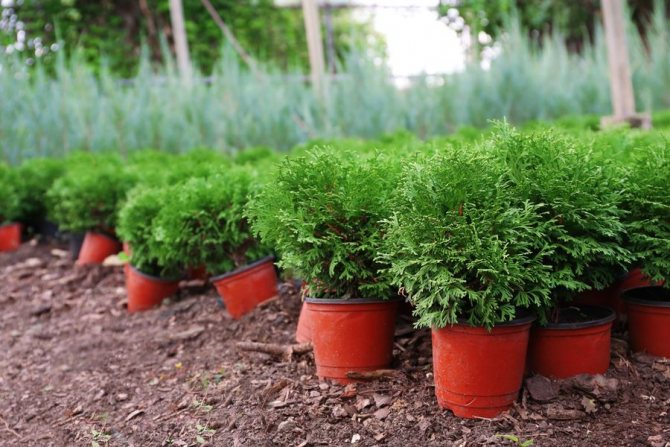

Few know that the thuja plant does not have a room type. What flower growers call decorative thuja, in fact, is not a thuja. The Vostochny ploskovetochnik is the only representative of the genus Ploskovetochnik (Platycladus, Biota) of the Cypress family. In some sources, it can be found as Eastern Tuyu. This name is associated with the previous position of the plant in the systematic classification.
Florists love Ploskovetochnik for their exotic appearance and unpretentiousness. Caring for room thuja does not require special skills and at home this plant takes root very well. And the variety of possibilities for crown formation gives the flower an additional charm.
How to propagate thuja: a quick and easy way
Thuja reproduces in two ways: seeds and cuttings. Each of these options has its own characteristics and difficulties, therefore, it requires at least basic knowledge and experience from gardeners.
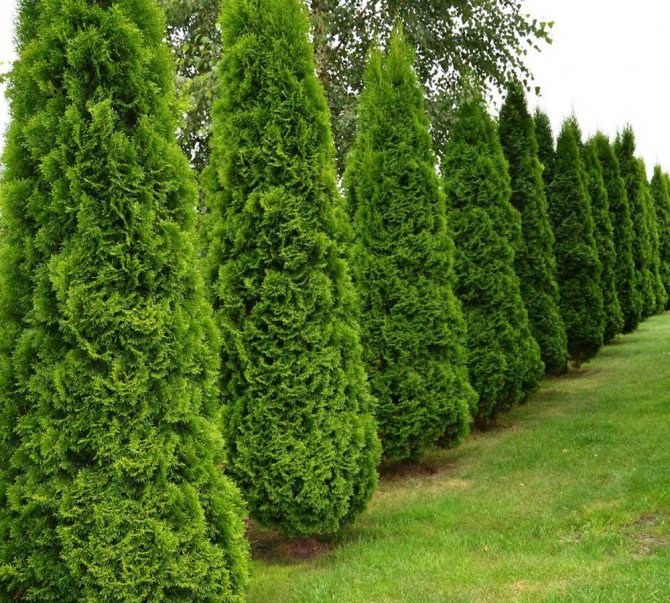
What does it look like
Reproduction of thuja using seeds is a long process, during which the plant goes through several stages of development. The following features are named as advantages of this approach:
- quick adaptation to the climate of the region after transplanting into open ground;
- increased resistance to adverse environmental conditions.
However, there are a number of disadvantages:
- the duration of the preparation of seedlings (it will take about 5-6 seasons to grow a seedling from seeds);
- the need for mandatory stratification (by this definition it is customary to understand the aging of the sprout in the cold);
- small chance of maintaining the qualities of the mother tree.
Cutting thuja for propagation is used much more often than germinating seeds. There are several reasons for this:
- the speed of obtaining seedlings;
- complete preservation of the quality indicators of the donor (the tree from which the shoot was cut).
This breeding technology also has disadvantages:
- lower endurance rates of young trees;
- the survival rate of seedlings after transplantation is only 70-80%.
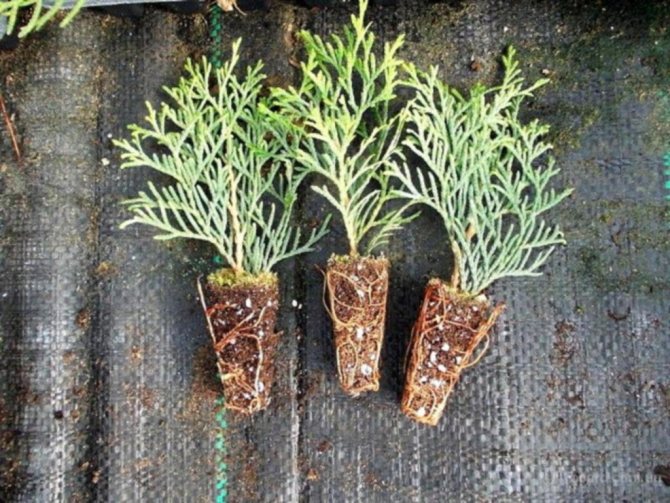
Thuja propagation by cuttings
What is grafting?
Cutting is a procedure that involves growing a thuja from a cuttings (a separated part of the parent plant). This takes about two to three years. Such a long growing period is explained by some features of the growing season of a coniferous plant:
- long root formation, which takes about two to six months;
- slow growth in general, which requires rearing over two to three years.
In many ways, the success of the procedure depends on how well all the conditions for rooting cuttings are met. If everything is done correctly, it will be possible to optimize the breeding process and significantly speed it up.
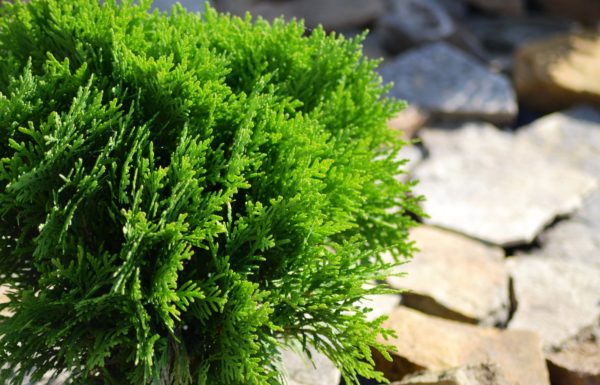
Can cuttings be grown in water?
Gardeners do not recommend sprouting branches in jars of water. The method is simple to implement, but the seedlings are frail. This is because there are few nutrients in the water. Rules to be followed when growing thuja cuttings in water:
- put 1, maximum 3 branches in one container;
- pour water so that it only covers the "heels";
- add water, but do not change.
The needles must be dry, if moisture gets on them, they can rot and the cutting will die.
Types and varieties of tui
Tui has many types, and here are the most popular of them: Chinese and Korean, Japanese, Western, Eastern.
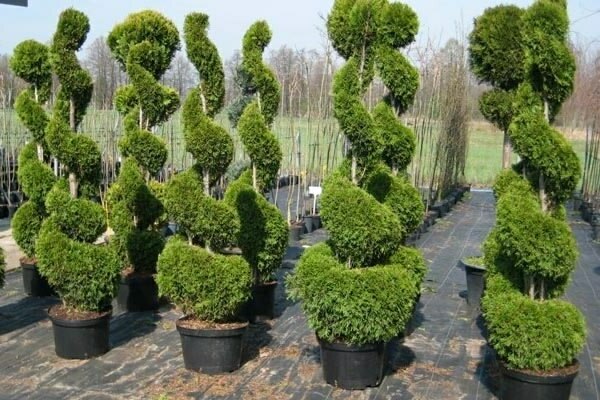
As for the Chinese and Korean thuja, they mainly grow in their historical homeland. Their needles are always dark green, soft and very spreading. The leaves are quite small, grow only up to 2 cm, and the cones are elongated, always half the length of the foliage, which has a triangular shape.
In Russia, these types of thuja are actively grown in the southern regions, both on the street as landscaping and at home for decoration and aromatization. And it is grown in these regions because it is always warm.
But the Japanese thuja easily grows up to 2 meters in height. This species grows well in absolutely any region. It takes root very well in any climate due to the fact that it tolerates both drought and frost well. This species is also good because it is practically not whimsical and is able to grow in almost any conditions. The height in the open field and in the pot is the same. Shrubs grow up to 1.5 meters, but trees grow up to 2.
Eastern thuja can grow in pots of almost any size. And in this they have the main advantage over the rest. In general, breeders were able to bring out just a huge number of decorative varieties of thuja. All dwarf varieties differ from each other in color, height and leaf size.

The most popular varieties of decorative thuja are: "Folded Vipcord", "Eastern Aurea Nana", "Miriam", "Eastern Biota".
By itself, the eastern thuja grows very slowly. all thuja that grow at home begin to bloom in May, and bloom throughout the month. Initially, its cones are green-blue, but already in the second year of life they turn brown. But the seeds of the cones outwardly somewhat resemble wheat grains. In general, such forms of thuja as cone-shaped, spherical, triangular or willow-shaped are suitable for home cultivation.
As for the conical shape, it grows slowly and can easily grow up to 2 meters in height. Its shape is slightly oval. The crown is very soft in summer, bright green, and in winter it has a shade of bronze. The most famous varieties of this thuja are: Golden Tuffet, Mister Bowling Ball, Filiformis and Teddy.
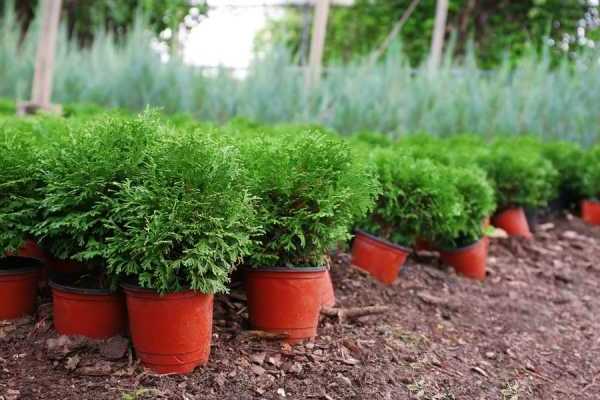
If you decide to grow a spherical thuja, then it also grows slowly and can be up to 1.5 meters high. Outwardly, it lives up to its name and grows in the shape of a ball. Its color changes every season. In summer, it always has a dark green color. The most famous varieties grown in pots are: "Danica", "Globoza", "Hozeri", "Stolvik", "Little Champion".
If the thuja grows in the form of a triangle, then it grows up no more than 2 meters. And by the way, she grows throughout her life. It looks very original due to the fact that while the plant is young, they have a golden color, but as they grow slowly, they gradually turn green in accordance with age.
But the willow-shaped thuja look very original and beautiful. The most popular of all varieties is the Weeping Willow.Her color has its own peculiarity in that in the warm season it stands brightly green, but with the onset of cold weather it gradually brightens and fades. Thuja grows to a height of no more than 1.5 meters, and the branches are bent down and hang down to the floor. Also, in addition to this port, such as: "Pendula", "Umbrakulifera" and others like them are also often found.
Description of thuja
Thuja belongs to the cypress family, it is an evergreen coniferous tree with a characteristic aroma. Thuja is a monoecious gymnosperm with male and female cones. As a result of pollination, which takes place from April to May, seeds ripen in the form of an egg-shaped cone. In the fall, seeds are shot from a ripe box.
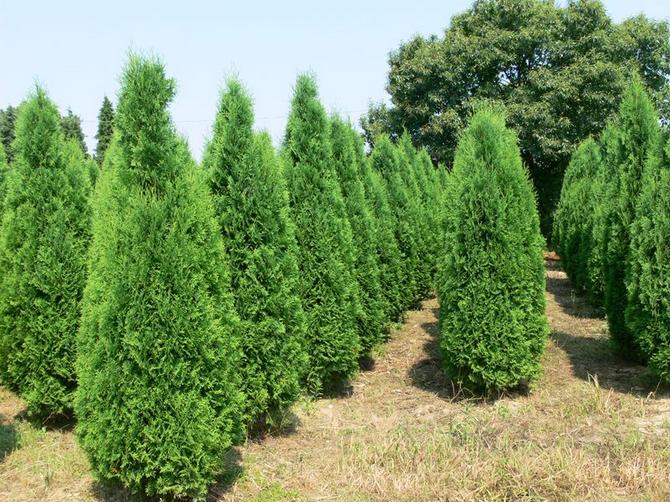
Thuja grows naturally in North and Northeast America (Canada, USA). It reaches a height of five to ten meters, but is slow in growth and longevity. The Indians call it "iron" wood for its strong, rot-resistant wood. Thuja, imported from the American continent, is usually called western. The pyramidal shape of the western thuja was brought to Europe in the sixteenth century. At the end of the eighteenth century, thuja began to be grown in the southern regions of Russia. It becomes part of the park landscape in the Crimea, in the Caucasus.
In the East, the eastern thuja is grown, which is cultivated as an ornamental and medicinal plant. In nature, it can be found on mountain slopes in China, Japan and Korea. Tuyu is also called the “tree of life”. On the one hand, this name is attributed to the French king. On the other hand, this is how it is called in the East, where it is considered a cult tree. In Central Asia, it was planted in holy places, near mosques. Oriental healers use thuja to prepare medicines.
Natural causes
There are times when the yellowness of thuja leaves appears closer to autumn. This is because their lifespan is coming to an end. Most often, 5-6 years after the emergence of the shoot, it loses its chlorophyll grains, after which it turns yellow and eventually dies. It is replaced by another. In this case, individual thuja branches turn yellow and gradually fall off. This happens in the inner parts of the crown around the trunk. This process is completely natural, and nothing can be done about it.
Watering and feeding
Thuja care is a pleasant and rewarding pastime. It must be watered on time, fed on time, loosened the soil and pruned to form the crown. In spring, thuja (it belongs to heat-loving plants) is watered once a week. For each bush, you need to spend 10 liters of water. With frequent rains, you can do without watering. In the summer, the thuja are watered every 3-4 days, and the heat - more often, after 2-3 days, increasing the amount of water twice as much as usual. Watering should be done alternating with watering tree crowns with water using sprinklers. With such artificial bathing, the dust is washed off from them, the leaves of the thuja become bright and juicy in color, acquire an elegant and fresh look.
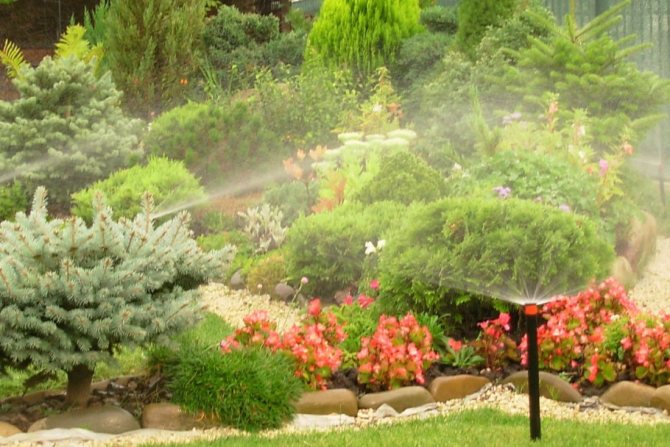
Landscape watering
The first feeding is carried out after planting the plant. Using a growth stimulant will help the plant to root well and promote further development. The components included in the growth agent will increase immunity. Mature trees need phosphorus and potash fertilizers in the spring, which are applied twice during this period, with a 15-day break.
If thujas lack moisture, you can find out about this by the leaves of the plant, then the top of it begins to turn yellow. This means that you need to increase the amount of water when watering.
Planting and replanting
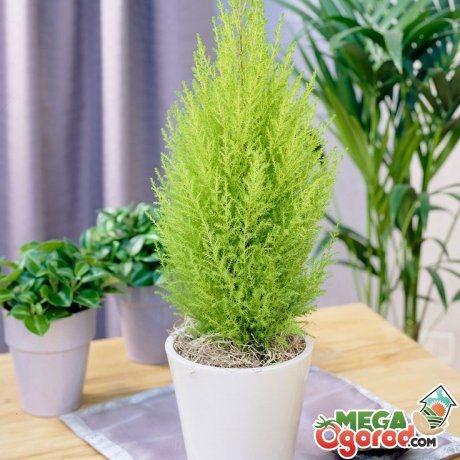
The soil for growing young thuja should be loose, it is good to let moisture and air pass to the roots of the plant. You can buy it for growing thuja at a flower shop by choosing a composition for conifers. You can cook it yourself. Mix 2 parts of coniferous, 4 parts of leafy earth. Add half a portion of the sand.
Containers or pots for dwarf thuja can have a volume of 20-30 liters. For larger plants, you need dishes for 100-150 liters. In this case, the plants can be left outside for the winter. A pot for planting a thuja is taken 3 times more than a clod of earth with roots. A drainage layer is placed on the bottom of the pot. It will prevent moisture from stagnating near the root system of the plant. You can make it from pieces of foam or cut corks. You can add gravel, but this will significantly affect the weight of the pot.
Set the thuja so that the root collar is at the level of the topsoil. Watering. Install in a fairly bright place, but away from direct sunlight. Even northern windows can be used, but the amount of light should be sufficient. Otherwise, the crown will become sparse and ugly.
The first years of life are transplanted every year, while increasing the diameter of the pot by several centimeters.
The soil for the older thuja is not needed the same as for young plants. Mix 3 parts of peat and one part of sand and leafy earth. The tree is installed so that the ground level remains the same as before transplanting. If you deepen the root collar further, the root can rot. The root system of the thuja is at the top of the soil. Therefore, it is impossible to loosen it strongly, so as not to damage the roots.
Choice of mother plant and propagation time
Before growing thuja from a twig, you must carefully choose a donor tree. The shrub must be completely healthy and strong. Shoots take root from a weak and diseased tree more difficult, in addition, there is a high risk of getting the same diseased seedling.
Transplanting a rhododendron from one place to another
No less requirements are imposed on the branch from which the shoot will be separated. The one located at the top of the bush is best suited for this purpose. Curved shrubs often grow from the lateral processes.
Note! The best way to cut thuja is to separate the shoots 10-15 cm long and 2-3 years old. The bases of such increments have already become numb.
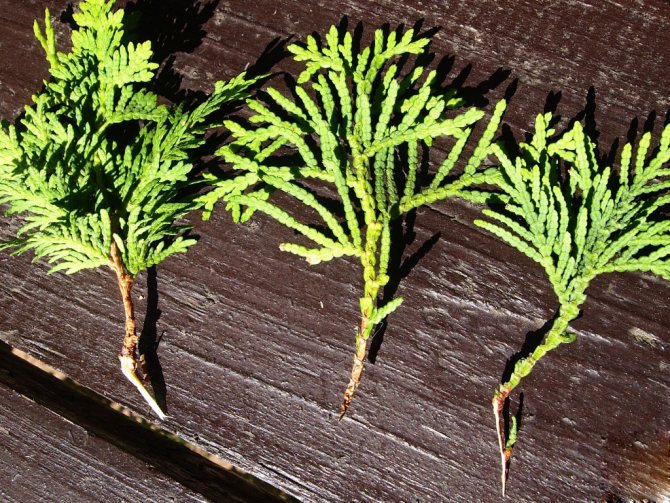
Thuja shoots need to be selected and prepared correctly
Description
"Iron tree" - this is how they call it in its homeland - in North America. In the wild, it grows in the form of a bush or tree, rising up to 2 meters in height. To date, breeders have bred more than a hundred different varieties of ornamental shrubs and dwarf thuja trees. They became decorations for large loggias, took their place among the landscape plantings in country estates. Evergreen thuja with tiled, stacked small leaves, has oblong, bent down cones under them. Their size is 10 mm. Cones appear with the arrival of autumn. The branches of the plant are light green at a young age, and later acquire a brownish tone.

Indoor thuja secretes essential oils in large quantities. They not only contribute to the fact that a very pleasant aroma comes from the shrub, but also have a kind of filtering effect. The air in the room where it grows is purified, any pathogenic bacteria die. You can grow thuja at home in a pot or flowerpot on the balcony, it develops well and grows indoors like an ordinary indoor flower. In order for the cultivation to become effective, you do not need much effort, it is enough to keep the plant in a favorable microclimate, to properly care for it.
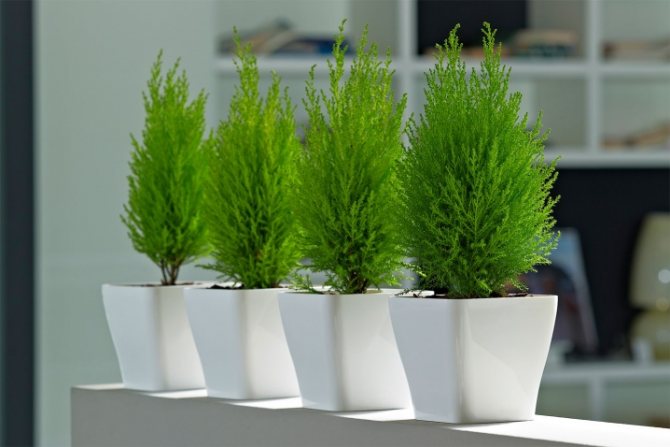
Pruning
At the beginning of summer, after the development of new shoots and buds, thuja pruning begins. It is made to form the crown of a tree in order to give it a decorative effect. Re-pruning is done at the end of summer. The main thing is to do it regularly, and it will not take much time and effort. When the branches grow large and begin to bend under their own weight, then you will have to work hard to give the plant at least some form.
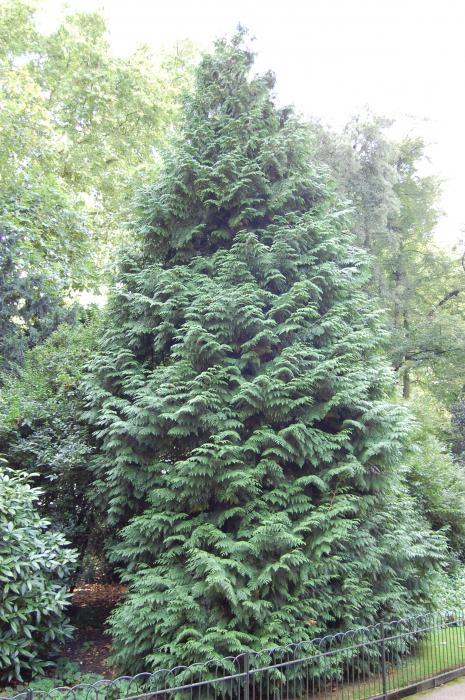
If, for some reason, the crown has already acquired a neglected look, and cutting the tips of the branches cannot be dispensed with, then gaps may form during pruning, which is very undesirable. This spoils the decorative effect. Prune branches only with a clean and sharp garden tool. With this approach, the tree will suffer less, and the cuts will quickly tighten. Before the beginning of the formation of the crown, it is carefully studied. This is necessary in order to determine where the contour already exists, and where it needs to be formed anew.
Disease prevention
Often, thuja is susceptible to fungal diseases (brown shoots, rust, shute, late blight), the fight against which involves the use of antifungal agents (Fundazol, HOM, Topsin-M). Some diseases, for example, phytophthora, are useless to treat, the plant is dug up and burned. The following preventive measures help to avoid infection with various diseases or significantly minimize the risks of their occurrence:
How to grow thuja from a twig
Juniper - shrub or tree, how to propagate and plant it
In order for cut cuttings to quickly root and take root well in the open field, gardeners recommend following a few tips:
- the right choice of the mother tree. When propagated by cuttings, the young tree adopts all the characteristics of the donor;
- cutting off shoots and preparing them for further work is the most important component of growing;
- the correct choice of soil for transplanting thuja affects the growth rate;
- seedlings care. If the rules of care are not followed, even those plants that have already managed to give roots can die.
The named features of reproduction are applicable for all varieties of these plants (both globular and emerald).
Output
Tui look perfect as one of the elements of landscape design. They look impressive in both single and group plantings. Herbal compositions, complemented by thuja, cannot but delight the eye. Dense plantings will look very impressive, which allow you to form amazing alleys or hedges. By the way, after planting a thuja, you can form a crown of almost any shape.
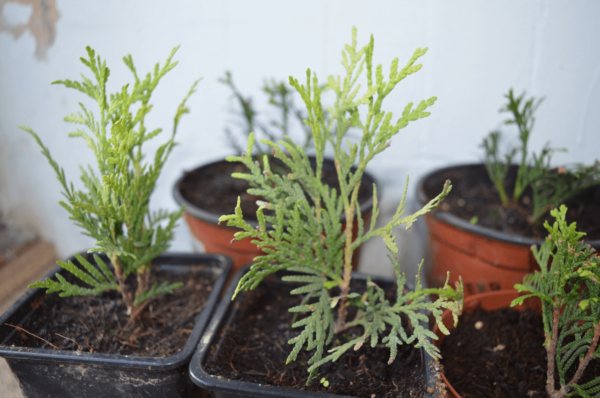
There are many ways to breed a coniferous tree like thuja, but still the best one is cuttings. It is both simple and effective. The grafting itself can be carried out by various methods, all of them are equally effective. The main thing is to adhere to the instructions, and then after a while the young evergreen trees will decorate the garden or garden plot.
You may be interested in: Manchurian walnut: planting and care
Dates of the
Winter is the only time of the year in which it is unacceptable to carry out the thuja cuttings procedure. Opinions differ on this issue. But it is important to know that the choice of the period for planting determines the rate of formation of the root mass. Each option has advantages and disadvantages.
The features of choosing a suitable planting period are summarized in the table.
| Season | Root mass formation time | Advantages / Disadvantages |
| Spring Can be planted immediately after the snow cover has melted and at the end of frost. | The roots will form in about two to three months. | The main plus is the accelerated formation of the root system. The main disadvantage is that the plants will leave in winter with an insufficiently strong root system. |
| Summer You can plant at the beginning of June, that is, until the active growth of shoots begins. An alternative planting option is the last two weeks of summer, when growth processes slow down. | The roots take about two to five months to form. | The main advantage, according to experienced gardeners, is that long and warm summer nights have the most positive effect on the development of the root mass. One of the disadvantages of June rooting is that the growing period is shortened due to the late formation of the root system. As a result, plants enter wintering weakened. Another significant drawback: summer temperatures increase the likelihood of root decay. |
| Fall In southern latitudes, planting is carried out in November, and in middle latitudes a little earlier - in October. | Roots can form from three months to six months. | The advantages include the possibility of planting for growing in the spring. In other words, the thuja seedlings will have enough time for strengthening and favorable wintering. The main disadvantage is the slow growth of roots. Another possible drawback is the increased likelihood that the roots can start to rot. |
The main condition that will determine the period of the beginning of harvesting cuttings is the cessation of the process of active growth in a coniferous plant.

Preparation
For reproduction of thuja, branches not younger than 2 years of age, with fully matured wood, are suitable. The needles on the shoots must be healthy. It is preferable to cut the planting material from the top of the tree; in this case, seedlings with the correct spherical shape of the crown will grow.
Important! The optimal age of the donor tree selected for harvesting shoots is from 4 to 10 years. Thuja should not have traces of disease, pests.
Rules for cutting planting material using the example of thuja Smaragd:
- the shoot is separated from the trunk only manually;
- break it off with a sharp movement from top to bottom;
- on the lower part of the branch there should be a section of bark with traces of cambium (the so-called "heel");
- the size of the cutting is 15–30 cm;
- places of separation of shoots on a tree are covered with resin or garden pitch.
Thuja cuttings after collection are not subject to storage. They must be planted immediately, so the substrate and seedling containers are prepared in advance. It is permissible to wrap the shoots in a damp cloth or moistened sphagnum moss and postpone rooting for several hours.
Attention! Before rooting, cuttings require preparation: removing excess needles and freeing the lower part of the stem from the bark.
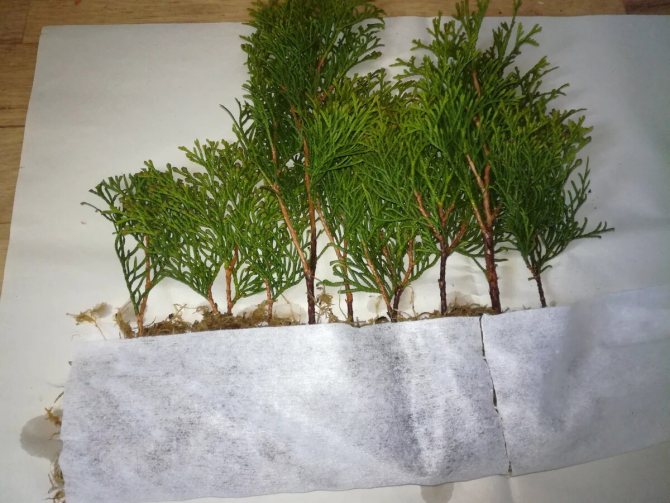
Thuja cuttings after collection are not subject to storage.
Rooting substrate preparation
For rooting thuja, a light type of soil is best suited, which is characterized by good drainage properties. You can choose one of two options:
- clean river sand (it is important that there is no pollution in it);
- substrate.
To prepare a substrate at home, you will need several components:
- leafy land;
- peat;
- sand.
These components must be mixed in equal proportions. It is recommended to add a solution of potassium permanganate (3%) to the resulting soil, after which the soil is mixed and used for its intended purpose.
If sand is used for rooting, then it is preliminarily boiled for 5 minutes, after which it is treated with a solution of potassium permanganate.
As containers for planting seedlings, you can use special boxes, cassettes or seedling jars. Check for holes (drainage and aeration). Expanded clay is laid at the bottom of the container as a drainage layer and the container is filled with soil.
Rules for harvesting cuttings for home rooting
To quickly germinate seedlings, cuttings need to be harvested taking into account several conditions. The intended outgrowths must be torn off from the mother tree. This should be done with your hands, with a confident, sharp movement from top to bottom.
As a result of this action, the shoot should come off with a small piece of last year's tree bark. This part of the cutting is called the heel. It contains nutrients that the tree has managed to accumulate. As practice shows, twigs with a heel give roots faster and take root better.
Important! The leaves, located near the heel, are removed in such a way that the bottom is a bare trunk measuring 2-3 cm. The upper green leaves of the thuja are pruned.
Rooting cuttings with moss
There is also an alternative way to propagate thuja. This will require moss (sphagnum). The advantage of this option is called rare decay and rapid appearance of roots.
To do this work, you need to stock up on the following materials:
- plastic bag;
- a piece of fabric;
- growth stimulant (any can be diluted);
- a piece of moss.
First of all, moss is soaked in cool boiled water. In this form, it should be about 2-3 hours. After that, the sphagnum is placed in the center of a piece of fabric and several cuttings are placed on it. All of them should be at some distance from each other.
The fabric is rolled up, and then pulled over with an elastic band or rope and placed in a bag. In this form, the cuttings should spend some time before the roots appear.
Rooting methods
Gardeners practice several cultivation options:
Breeding cuttings in water is the easiest way to root them. You will need a clear jar and warm water. The workpieces are immersed in water to a depth of 2 cm. The maximum number of branches in a jar is 3-5 pieces. Green parts must not be submerged in water. When in contact with the liquid, branches and needles will begin to rot. Caring for seedlings in a bank comes down to providing proper lighting and changing water. For disinfection, a couple of potassium permanganate crystals are added to the new water. In this way, Brabant, juniper, cypress are successfully rooted.
Planting substrate
For planting, you will need a small flower pot with drainage holes at the bottom. First, the container is 1/4 filled with expanded clay, then the substrate for rooting is poured. For cooking, take sand, peat and deciduous humus in equal proportions. The substrate is disinfected by watering with a saturated solution of potassium permanganate.
The formation of roots in the substrate will be more active, since, unlike water, it is saturated with nutrients. Before planting, the tips of the branches are treated with Kornevin (growth stimulant). Then the cuttings are immersed at an angle of 45 ° into previously prepared holes 1.5-2 cm deep, the soil is tamped. The container is covered with polyethylene film and sent to a light windowsill. The film will have to be periodically lifted to remove condensation from its surface, and to spray the substrate from a spray bottle. The substrate method is more suitable for spring cuttings.
We use wet sphagnum moss
Some gardeners prefer rooting thuja cuttings in sphagnum. This is a type of peat moss that is used to wrap branches before germination. Sphagnum perfectly retains moisture and at the same time serves as an antiseptic.
Agricultural technology is as follows:
2 weeks after the formation of planting roots, they are sent for growing in separate containers. The fact that the branches have taken root can be recognized by the formation of new shoots.
The wick is a guarantee of the result
Rooting with a wick is more costly, but gives the most consistent result. The work is carried out in the following sequence:
- They take a 200 ml plastic cup, make a hole at the bottom so that it is convenient to pass the cord through it.
- A small layer of drainage is placed on the bottom of the glass. The rest of the container is covered with a nutrient substrate.
- The glass is placed in a jar of water so that the wick is in the liquid.
- 3-5 branches are planted in the soil. From above, the structure is covered with another plastic glass. This will keep the moisture in. The roots will appear after 3-4 weeks.
For the rapid formation of the root system in the substrate or sphagnum, it is recommended to pre-immerse the cuttings in a stimulant solution. They use Kornevin, Epin, Ecopin. The workpieces are placed in a solution prepared according to the instructions, and left for at least 12 hours, and preferably overnight.
Video with a story about the wick method.
Description of the species
Thuja has won the love of gardeners and the popularity of exotic lovers for its decorative qualities. can be cone-shaped, pyramidal or spherical. It is easy to shape, for which it is enough to mow the tree at your own discretion. The needles of different types of thuja have different shades: from dark green to emerald. Young trees are distinguished by soft leaves that look like needles. And in adults, they are scaly and resemble oblong cones, consisting of paired scales. How to propagate by cuttings and seeds, you will learn later.
Thuja seeds are flat in shape, have two wings. They ripen in autumn, and in spring they give good germination if they are placed in natural cold for stratification. Thuja propagation by cuttings in the fall strengthens the plant, thanks to which it tolerates frost well and easily copes with gas pollution and air pollution. This tree is a natural air purifier and fragrance.
Species overview
Thuja belongs to the type of Asian cultures. There are such main types of it:
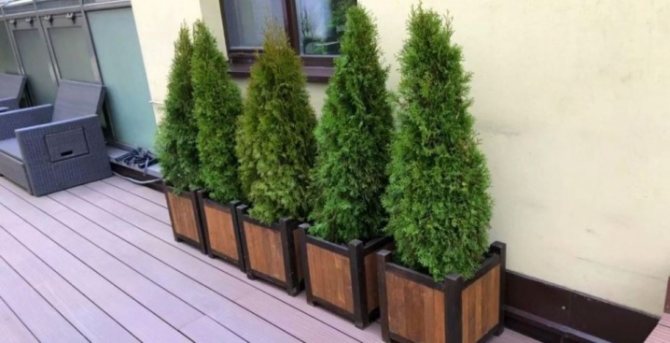
- Japanese;
- western and eastern.
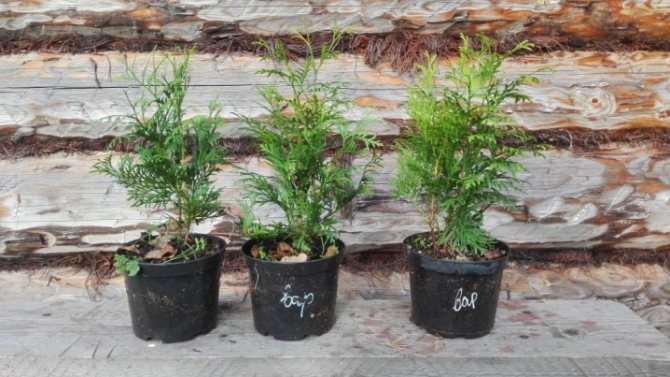
Chinese and Korean thuja most often grow in their homeland. Their needles are very soft and spreading. Branches can be silvery or dark green in color. The length of the leaves reaches 18-20 mm, and the cones grow up to 8-10 mm. The shape of the leaves resembles a triangle.
In our country, Chinese and Korean thuja are planted mainly for greening cities in warm southern regions, or they are grown in apartments and houses at freezing temperatures. The hardy Japanese thuja can grow up to 2 meters in height. Its needles are beautiful and soft to the touch. In Russia, it has taken root well, because it is able to do without wet soil for a long time and firmly tolerates small frosts if it remains on the balcony at low air temperatures. Folded thuja grows in the form of a shrub, reaching 1.5-2 meters in height. She is very unpretentious in content. The western variety of this plant looks both in the form of an ornamental tree up to two meters high, and in the form of a shrub up to 1.5 meters. The needles of the plant are scaly, and the bush is not spreading, its branches hang down.
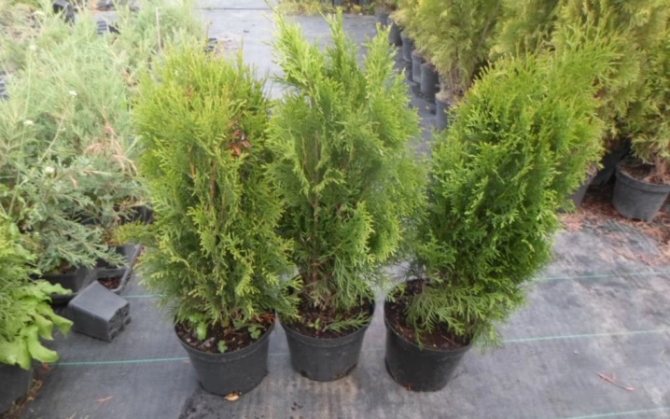
Eastern thuja differs from others in that it can be grown not only in tubs, but also in small pots at home. Scientists managed to get a wide variety of decorative dwarf species, differing in color and size of leaves, as well as the height of the plant itself. Thuja leaves are blue, green, golden and have a silvery tint. The most popular plants for planting in a pot are varieties:
- "Folded Vipcord";
- "Eastern Aurea Nana";
- "Miriam";
- "Eastern biota" and others.
All about the plant
Thuja themselves belong to the cypress family. They have a very strong coniferous aroma and just look very beautiful both outdoors and indoors.
Thuja originally came to us from North America. And it grows in two species, either a bush or a tree. Both options are capable of growing up to 2 meters in height.
At the moment, there are just a huge number of varieties of decorative thuja. Moreover, there are both shrubs and trees. They very often began to grow in order to decorate loggias, balconies or just rooms. Decorative thuja is always a green plant, quite lush, small cones actively grow on it. They are oblong in shape and only 1 cm long, and they begin in the fall and remain hanging until spring, and in some cases even until summer.
In a young plant, the branches themselves are always light green, and over the years they darken and turn brown.
A strong coniferous smell, indoor thuja have due to the fact that they emit a lot of essential oils. They are very useful, not only do they only benefit the body, but also cleanse the air well. This plant generally works as a filter and has antibacterial properties.
It is possible to grow thuja just at home in an ordinary pot just like any houseplant. In order for the thuja to grow correctly and delight with their beauty and benefits, too much effort and time will not be needed, all that is needed for this is to fully observe the climate that is necessary for these plants and always take proper care.
How to plant thuja correctly
The evergreen beauty is planted from spring to early autumn. However, trees planted in April-May take root best of all. Then they will hurt less, take root faster. Gardeners warn that the autumn planting is associated with risk, does not always give the result of survival. There is no complete confidence that the culture will have time to take root before the onset of severe cold weather. The weather is always unpredictable, no one knows when the autumn - winter cold starts.
When planting trees, holes are dug wide and deep, it is necessary to adhere to the size of about 80-100 cm. The accuracy of the size of the hole is determined by the volume of the root system of the shrub. The root of the seedling, together with the earthen lump, should fit freely in the pit. The bottom of the pit is covered with loose soil, consisting of humus, wood ash and compost, fertilizers are added, the addition of which eliminates feeding. Top dressing will only be needed after 2-3 years.
If the roots of the seedling are dry, they should be kept in a bucket of water. When planting, the seedling is carefully placed in a hole, the root is sprinkled with a mixture of soil, peat and sand, taken in equal parts.
If a thuja seedling is planted in a pot, it must be carefully removed from the container, then placed in a hole and covered with soil. After planting, the soil around the seedling must be tamped and watered well with 1-2 buckets of water. The root collar of the plant should be left just above the soil level.
How to prepare thuja cuttings?
You can make cuttings of a coniferous tree at almost any desired time of the year. But still, it is advisable not to do this in the cold winter period, since the tree is dormant at this time. In other periods, it is recommended to harvest the shoots either on a cloudy day or on a rainy day. Choose only a healthy parent plant. In addition, focus on the following characteristics: it should be in the growth stage and it should be a young donor tree (preferably about four to nine years old).
Twigs that are no more than two to three years old are ideal. Their length should be at least ten centimeters, but no longer than 50 centimeters.
Advice! If you breed thuja "pyramidal", then the lateral shoots should be cut into cuttings. To get the same "spherical", which will inherit the characteristics of the parent specimen, cut off the apical or lateral shoots.
How to get the escape right? It must either be carefully trimmed, or very abruptly ripped off with a downward movement. Just keep in mind that a "tree heel" should form on each branch. It is desirable that it turn out as long as possible, since it is in this area that the formation of the root mass and its development takes place.
Next, you need to remove a section of exfoliated bark. It is necessary to remove those leaves that are located at a distance of about 3-4 centimeters from the heel. All remaining leaves must be shortened, removing about one third of their length.
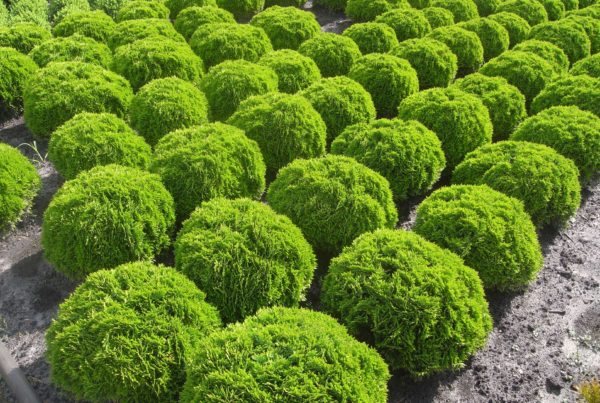
What to do if thuja turns yellow
After planting and throughout the season, thuyu should be treated with various bactericidal infusions. The plant needs to be monitored, damaged and yellow dried branches should be cut out in time. The cut points must be lubricated with a 5% solution of copper sulfate. Unfortunately, anti-yellowing treatment alone is not enough. For prevention, spraying should be carried out in late autumn and early spring.
There is another thuja pest - aphids.
Its appearance leads to yellowing, drying out and falling of the needles. This insect sucks out all the juices from the young bush, thereby damaging the decorative effect of the thuja.Thuja treatment consists, again, in spraying with insecticides.
Each summer resident should take note that at the end of the growing season, almost all dark conifers, especially thuja, change their color. Looking at the plant, there is a feeling that the tree is drying out: the needles are darkening or turning brown. It should be remembered that the sign of yellowness is considered a protective reflex to the coming decrease in temperature and adaptation to winter.
Diseases
Brown snow mold, or brown shute, can be found on young specimens of thuja in early spring, as soon as the snow melts. A black-gray cobweb bloom of the mycelium will be noticeable on the leaves, after which point fruiting bodies of the pathogen will appear. Due to this, they do not fall off for a long time, and the thin branches will soon die off.
And it also happens that some fungi settle on the branches of the thuja, which destroy the tissues of the bark and infect the surface layers of the wood of the plant. In this case, the tree initially turns yellow unevenly, but over time, the shade becomes the same everywhere and is very dull. Further, the entire affected shoot turns brown. However, these symptoms are not characteristic of this disease. To confirm the diagnosis, it is necessary to detect fungal spores, which appear in the form of dark dots, as well as tubercles with a diameter of 1-2 mm.
When to transplant
As already mentioned above, the first time the thuja is transplanted after purchase.
Conifers grow slowly, so in the first 2-3 years they are transplanted annually, and then once every few years.
Pot selection
The roots of the thuja are long, which is why the pot is selected high. For large plants, higher containers are chosen, since the narrow ones are not very stable.
Since the trees are kept in a cool room in winter, the pot is chosen so that the material from which it is made can withstand frost. At the same time, if the air temperature in winter does not fall below +10 degrees, the planting container can be chosen from any material.
Landing rules
If it's time to transplant thuja, choose a pot 2-3 cm higher and wider than the old container. Repot the tree according to the following guidelines:
- use only slightly acidic soil for conifers;
- be sure to fill the drainage at the bottom of the pot;
- in order not to disturb the roots, transplant by the transshipment method;
- water the plants a day before planting;
- do sanitary pruning before planting mature trees;
- filling the roots with soil, slightly deepen the root collar so that additional roots begin to form;
- after planting, water the soil.
Growing cuttings in sphagnum
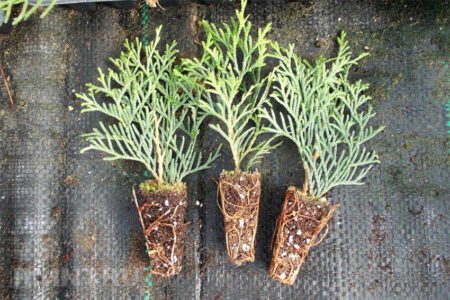
Sphagnum is peat moss. It is highly hygroscopic, so it is very convenient to root thuja cuttings in it. Moisture does not evaporate from it, it contains nutrients. In addition, it has bactericidal properties, stops the development of fungal infections.
Sphagnum is soaked for 3 hours in water, then it is laid out on a cloth. The canvas is taken wide enough, the moss is laid in a strip along the entire length. It should cover ½ of the width. Prepared cuttings are laid out, the heels are immersed in the moss.
The other half of the fabric is placed on top of the sphagnum. The upper part of the cuttings with needles should be on top. The canvas is folded. It turns out not a tight roll. It is placed in a transparent plastic bag. It is hung in a light, moderately warm room and roots are expected to appear.