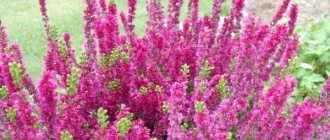
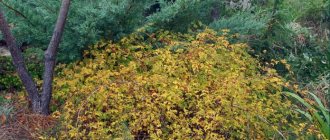
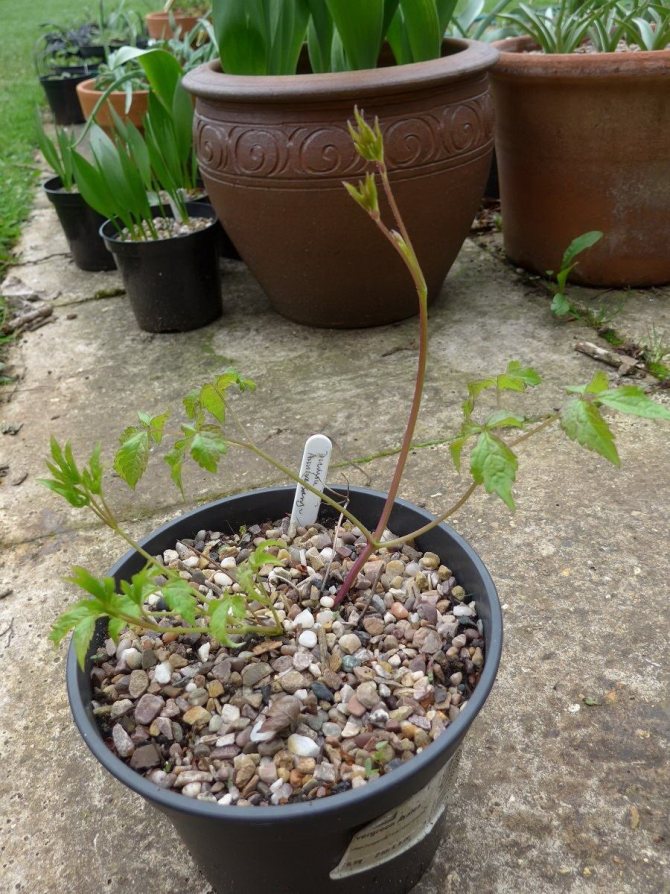
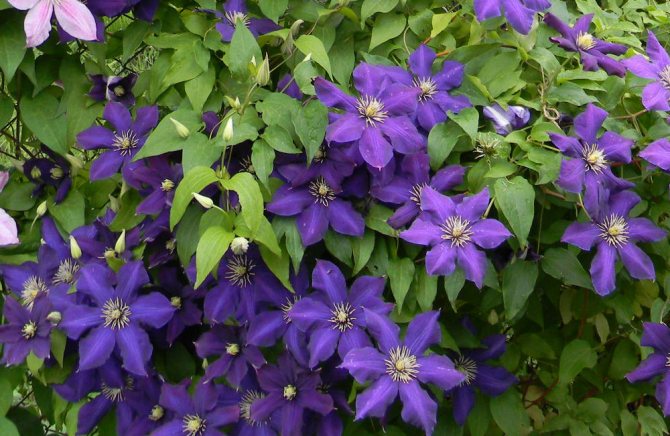
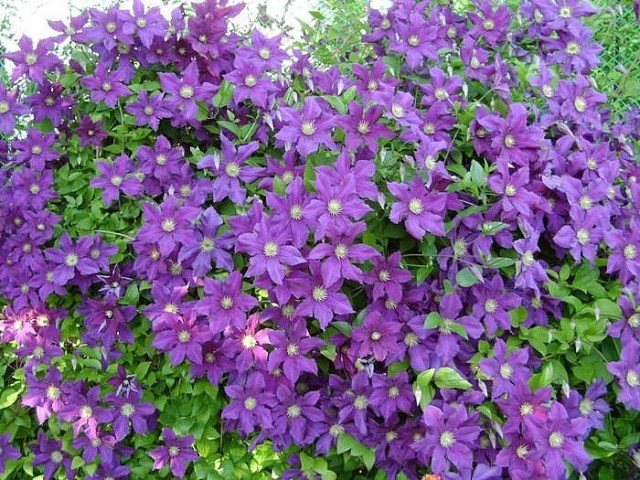
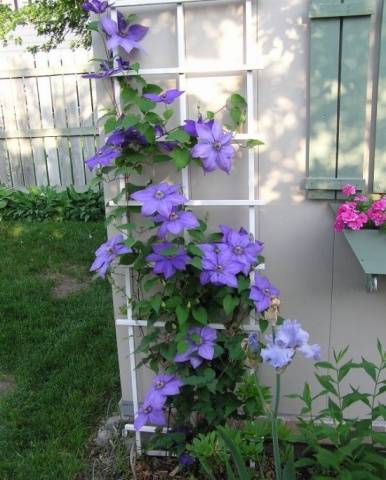
The best partners for roses and the second most popular flowering vines - clematis are considered to be unique treetops. Huge flowers, bright greenery and amazing flexibility allow this vine to climb to new heights and win the hearts of gardeners. A huge palette of luxurious clematis varieties still could not oust the more hardy and unpretentious clematis from the gardens. But unlike old clematis, new ones are not so easy to propagate. In order to independently increase the collection of your favorite vines, you will have to be patient.
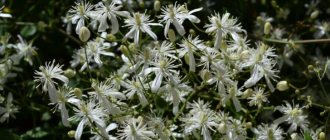
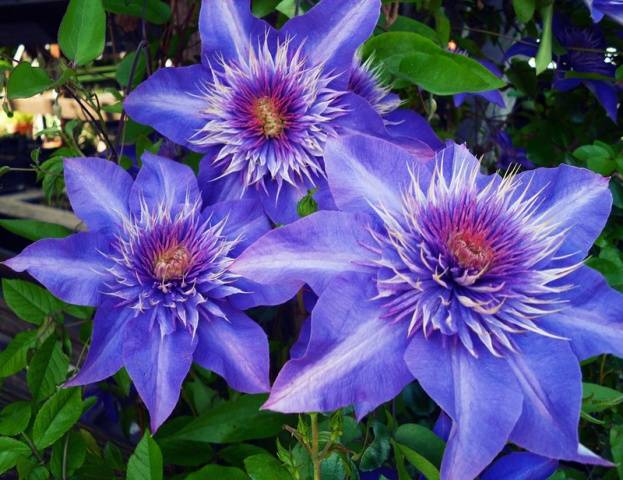
Clematis jackmanii. <>
The unpleasant aroma of clematis, which gave them the popular name clematis, even at the beginning of a gardening career, did not scare away admirers of their beauty from this plant. Clematis has been cultivated as an ornamental crop since the 16th century, but the full potential of these plants was revealed only in the 19th and 20th centuries. Active hybridization and selection led to the fact that the modest species clematis was replaced by an extensive palette of varieties with improved flowering.
The appearance of flowers similar to luxurious saucers in the masterpiece varieties of breeding did not at all lead to the fact that the best species clematis - white, paniculate, Virginia woolly, purple, Tangut - went into the shadows. After all, varietal clematis need difficult care (it is rightly believed that the more beautiful and unusual the flowering, the more difficult it is to grow clematis), but the species clematis are surprisingly unpretentious.
The appearance of varietal clematis has changed and significantly expanded the breeding methods of this vine. Species clematis were easily grown and grown from seeds, but varietal clematis can be propagated exclusively vegetatively.
Clematis reproduce:
- cuttings;
- division;
- sowing seeds;
- rooting of cuttings;
- vaccination.
Successful propagation of clematis by cuttings
Amateur gardeners and professional gardeners pay special attention to such an important process as the propagation of clematis by cuttings. It is this method that makes it possible to obtain several more copies of your favorite plant variety. The process is quite easy and fast, if you consider some important points and tips. When the cuttings are successful, beautiful young clematis grow.
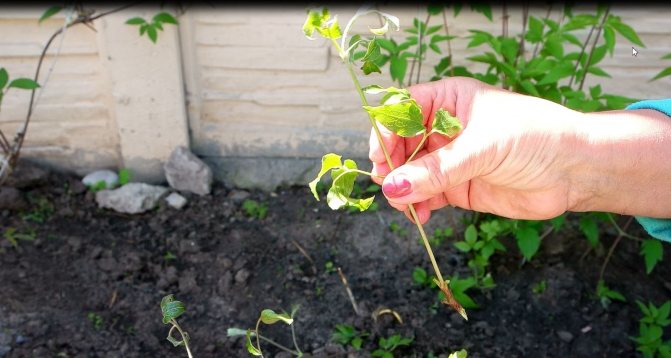
How to choose a bush for propagation
It is very important to choose the right bush for propagation. It must be clematis, at least 3 years old and not older than 7 years. An absolutely healthy and well-developed plant is selected.
Before cutting off the stems, the vine must be carefully inspected for the presence of pests and diseases. Sometimes parasites hide under plant leaves or in the soil and are difficult to spot.
If no flaws are found on the shrub, you can start pruning the shoots.
Reproduction of clematis by cuttings at different times of the year
Obtaining new clematis bushes can be carried out all year round: in spring and autumn, in winter and summer.
Cutting clematis in autumn
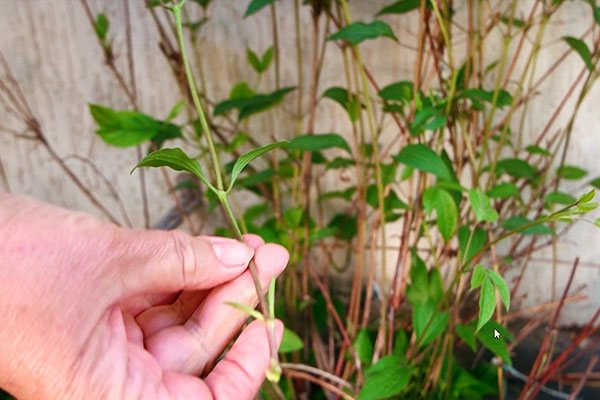
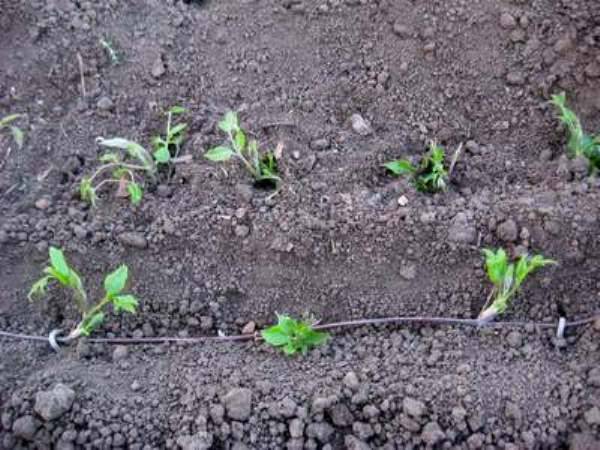
When pruning clematis in autumn, well-ripened and long shoots (about a meter long) are selected. They must be twisted into a ring and buried in loose, moist soil (about 10 centimeters). This part of the soil will crust over after a while.As soon as this happens, sprinkle the clematis with a layer of foliage.
By the end of summer, a young clematis bush will grow. It is important to ensure that the ground does not dry out.
Attention is needed to the temperature regime for the plant to take well.
Winter cuttings of clematis
For winter cuttings, the use of woody branches is characteristic. This is necessary in order to increase the chance of survival of cuttings during the cold winter, when the sunlight contains fewer nutrients.
The stalk should be small (less than twenty centimeters) so that it is convenient to make a small greenhouse for it. This will provide the young plant with warmth and moderate moisture.
Cuttings are less likely to be accepted and require more care.
Reproduction of clematis cuttings in spring
To get cuttings, you need to cut off a shoot of at least 70 centimeters from the bush. The upper part of the branch is not needed, since this is the unripe part of the shoot, the buds are not laid in the axils of the leaves here.
It is best to take cuttings from the middle part, which do not have large green shoots.
When cutting cuttings, about 7 centimeters are left. After that, the cuttings are placed in a solution of heteroauxin or root for half an hour. This stimulates the emergence of the root system. This makes clematis propagation by cuttings more efficient.
The earth can be loosened with a flat cutter, add humus so that the earth is fertile and soft. A groove is created, spilled with water. After the water is partially absorbed, the hole is partially covered with earth. Cuttings are inserted there up to the very sprouts.
How to properly cut clematis cuttings:
- Use a sharp knife. Pruning shears can crush and damage delicate, thin twigs. A sharp knife will not spoil the cuttings.
- Cut at a 45 degree angle. You need to cut the shoot obliquely, ideally, at an angle of 45 degrees. With the help of such pruning, the area of root appearance is increased.
- Pull back 1.5 centimeters. For a successful cut of cuttings, you need to retreat 1.2 - 2 centimeters from the nodule.
Cuttings are well accepted from both old and young shrubs.
How clematis reproduces by cuttings in summer
Reproduction of this plant is very simple. There is no need to use additional materials.
When grafting, half or a third of the leaf should be cut off, since it is in the summer that large leaves bloom at clematis.
Cuttings are going well. By the next season, young and beautiful clematis grow.
Reproduction of clematis by cuttings in water
This method follows a similar principle.
It is worth considering several important factors that prevent possible errors (rotting of cuttings):
- Clean container. It is very important that the container in which the cuttings will grow is perfectly clean. This is the main mistake after which the cuttings deteriorate and rot.
- Quality cut. A smooth and neat cut is a guarantee of a well-developing root system. A bad cut can ruin the plant.
A sharp tool is used for work.
If you are interested in the question of how to grow clematis from a cuttings, then there is one good advice.
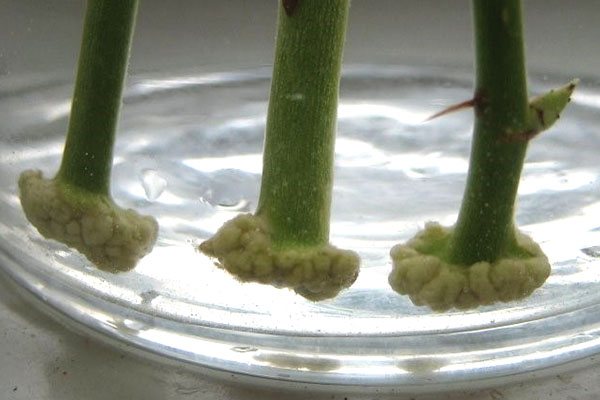
When rooting, plants secrete a liquid that contains natural root-forming substances. If the gardener has grown cuttings in water before, then it is good to add liquid from previous cuttings to new plants. This reduces the time for the formation of kalyus and the first grooves of the roots.
As soon as the grooves of the roots have appeared, the plant can be transplanted into the ground, or you can wait until a full-fledged root grows.
The stalk is transplanted into a small container, which must be covered with something on top to create an airtight package.You can take a bottle, cut it into two parts, in one of which you plant a stalk, and on the second you make small cuts from the bottom (thanks to this you can combine the bottles with each other). This is how clematis propagates by cuttings in water.
It is interesting: Basil: planting and leaving

A small depression is made in the ground (it is not necessary to stick the cutting directly into the ground, so as not to damage the kalyus), where the clematis is then placed.
It is advisable to keep the plant at a temperature of 22 ° C, since at a lower temperature the roots either do not grow at all, or grow slowly.


Features of autumn breeding
Correct pruning of branches, pruning of stalks, their leaving and soil affect the further development of clemitis. Incorrect cut or abundant watering can destroy the young.
Preparing cuttings
Pruning cuttings is best done during bud formation. This is mainly late spring - early summer.
The sequence of harvesting cuttings:
- the cut is made over 1-2 sheets;
- take the middle part of the branch;
- cut at an angle of 45 degrees by 5 cm under the first knot and 2-3 cm above the second knot;
- large leaves are removed;
- placed in water for 1/3 of the petiole;
- shoots are placed for 9 hours in a dark place in a growth stimulator: root, sodium humate, heteroauxin;
- after the twigs are washed under running water.
Soil preparation

Clematis prefers an alkaline habitat. Soil with high acidity is lime. Prepare a light, moisture-absorbing and breathable soil:
- Use the composition: sand, humus, peat (1: 1: 1).
- A mixture of river sand and sphagnum moss.
- Land from the garden, peat, humus in 1 part, 0.5 parts of sand, 20 g of superphosphate per 5 kg of the mixture.
- You can root the petioles in coconut fiber, perlite, vermiculite.
Attention!
Any soil mixture must be poured with a solution of potassium permanganate for disinfection - for 9 liters of water, 4 g of the substance.
Planting and caring for cuttings
To achieve abundant flowering, you should not plant clematis in a sunny place, it is better to choose partial shade. Do not plant a plant near an iron fence and near the walls of the house. Roof water should not flood the bushes. Vines are not grown in drafts and windy areas.
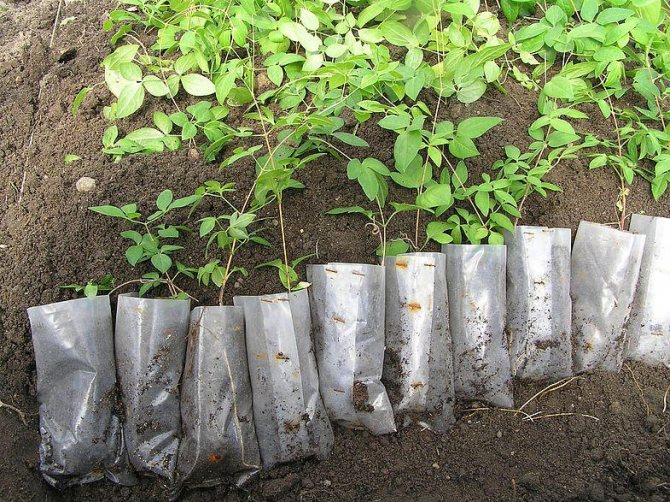
For rooting lignified cuttings, seedlings of small-flowered and wild varieties are taken. Branches are cut in August 8-12 cm long with two nodes. After the shoots are let in the water, the roots are planted in boxes for rooting. The lower part of the petiole is deepened by 3 cm.To keep the buds from drying out, the knot is deepened by 1 cm.The distance between the seedlings is 6 cm, and between the rows is 15 cm.
To actively build up the root system, you need to take care of clematis:
- temperature regime in the room 19-22 degrees;
- the first three weeks, the plants are watered a little daily, then once every 10 days is enough;
- seedlings need high humidity, they are sprayed 3 times a month;
- regular ventilation of the room;
- once every 8 days, the petioles are sprayed with zircon, a plant growth regulator.
- after the rooting of the cuttings, the film is removed, in the spring they are dived, and in the fall they are planted in the garden.
Attention!
Air temperature above 30 degrees is destructive for young animals.
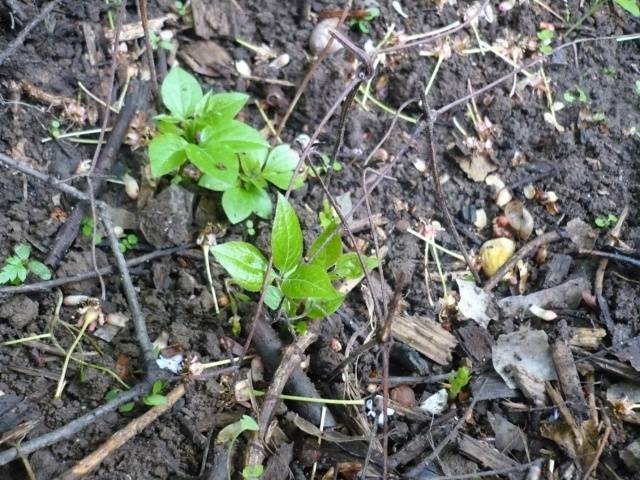
Reproduction of clematis by layering
Among gardeners, a favorite way to increase the number of plants is to propagate clematis by layering. Unlike cuttings, this method gives one hundred percent results, requires less effort.
A twig is taken, part of which is buried in the ground (attached with a hairpin or other fastener so that it does not fly away).
This method is good because the mother branch will feed the bush with fashion until it gets strong enough to become independent. From the mother, the cuttings receive all the necessary nutrients, trace elements. But this does not mean that the bush itself does not need to be fertilized. He needs the same care as his brethren: adequate watering and good feeding.
Only if all these recommendations are followed will this method become successful.
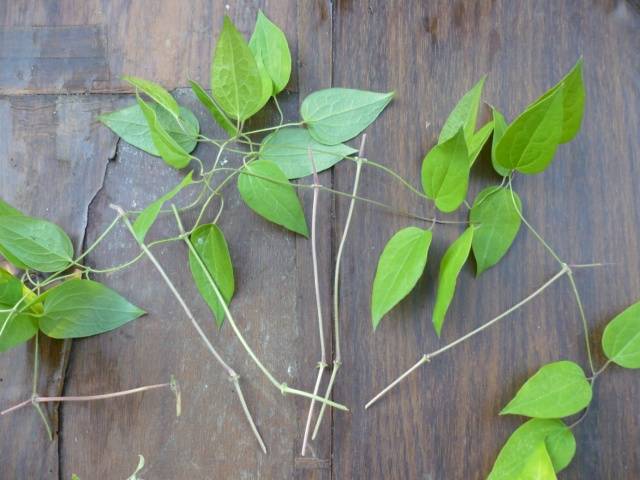
Reproduction of clematis by green cuttings has several important features. This method is considered to be quite simple. Even a novice gardener can cope with it, but despite this, experienced gardeners also prefer to breed clematis with cuttings.
This method has several advantages:
- Low cost. With the help of cuttings, you can grow a new plant for free. Seeing a beautiful clematis from a neighbor or friend, you can ask him for a cutting. Then you will be able to grow exactly the same plant at home. At the same time, saving both time and money.
- Quantity and quality. By taking cuttings of good varieties, you will grow a plant identical to those from which the fence was taken. With the correct cultivation of cuttings, you can grow an entire garden without buying a single bush or flower.

Reproduction methods
Clematis is an unpretentious plant. The variety of new varieties and hybrids has significantly increased the number of flower propagation methods. Most of the hybrids reproduce mainly by vegetative methods, which guarantee the preservation of the species and varietal characteristics of the original plant. Clematis can be propagated:
- cuttings (green or lignified);
- dividing the bush;
- rooting of cuttings;
- seeds;
- vaccination.
Each method has its own pros and cons. The first three methods are the simplest and most effective. But vaccination is a rather troublesome method that requires special skills. Most often it is used by professionals for grafting rare, hybrid varieties of clematis.
Growing Clematis from seeds
Clematis seeds are propagated extremely rarely and only species and small-flowered varieties. Also, breeders use this method when creating new hybrid varieties.
Advice! With the seed propagation method, hybrid flower varieties do not retain the varietal characteristics of the parent plant.
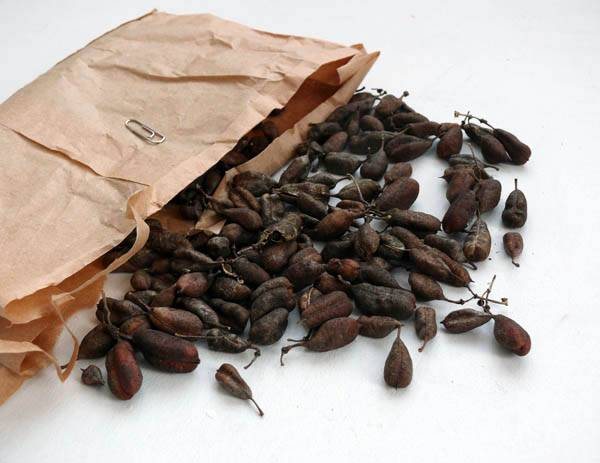
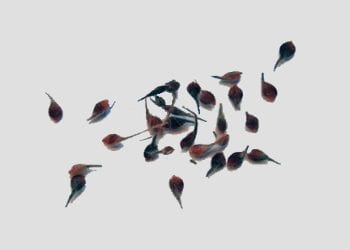
Clematis seeds are of three types:
- Small ones. Germinate within 3.5-4 months, a high percentage of germination.
- Seeds are medium in size. The first signs of germination appear only after 1.5-6 months, depending on the type of plant. Germinate amicably and evenly.
- When sowing large seeds of clematis, you will have to be patient, since the first shoots can be seen only after a year. Uneven germination and low germination of seeds of this group are noted.
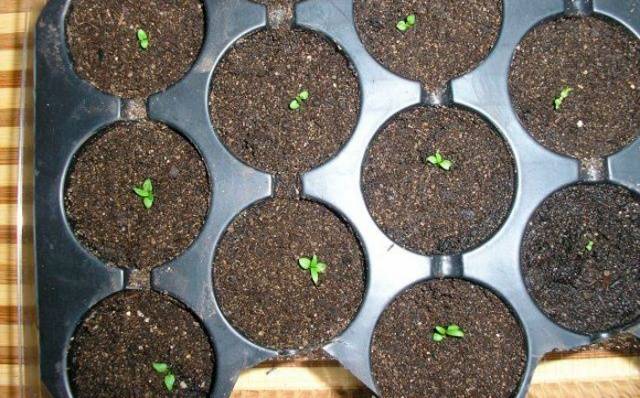
When clematis is propagated by seeds at home, the composition of the soil is of great importance. Light, loose, fertile - these are the main requirements for the soil. The ideal composition is earth and sand in a 2: 1 ratio.
Containers with drainage holes are filled with soil prepared in advance. Seeds are laid out on the surface in increments of 4-5 cm, which are covered with a thin layer of sand. The thickness of the top layer should not exceed three times the diameter of the seed.
Watering the planting needs sprinkling methods. A spray bottle or small strainer is perfect for this. When clematis is propagated by seeds, containers should be kept in a warm, ventilated room.
Follow-up care consists of regular watering.
Dividing the bush
Propagate clematis by dividing the bush, preferably in autumn, in mid-late September. This is due to the fragility of the buds, which in spring easily break off and crumble after transplantation. In autumn, after flowering, the plant has sufficient reserves and easily tolerates the division process.
Advice! Experienced gardeners advise to pluck all the buds in the first year after planting clematis seedlings in open ground.
This simple event will not take you much time and effort and will allow you to preserve all varietal characteristics of flowers. The algorithm for dividing the clematis bush is as follows:
- Carefully, trying not to damage the root system, dig up the bush and put it in the shade for 2-3 hours. Fragile roots will slightly tighten during this time, and will not break.
- Rinse the roots well in warm water to wash off the soil.
- Using a sharp, sanitized garden knife, divide the bush into equal parts. Each section should consist of 2-3 healthy, full-fledged shoots and adventitious roots.
- Delenki are kept in a pink solution of potassium permanganate for 2-2.5 hours, and then planted in a permanent place.
Propagation by dividing the bush is necessary only for healthy clematis. Ideally, this method is suitable for the propagation of flowers that are at least 4-6 years old.
The author of the video will share with you the secrets of correct reproduction of clematis by the method of dividing the bush:
Cuttings
Reproduction of clematis by cuttings is the easiest, most affordable and effective method that allows you to immediately get a large amount of planting material. On average, the result of rooting green and lignified cuttings is at least 90-95%, provided that all the recommendations of experienced florists are followed.
Advice! The tops of clematis shoots root very poorly, so often growers do not use this part of the plant for reproduction.
Clematis can be propagated by both green and lignified cuttings. The meaning of this method is to cut the required amount of planting material, and create favorable conditions for rooting. Cuttings of clematis are rooted in water or in a soil suitable for composition.
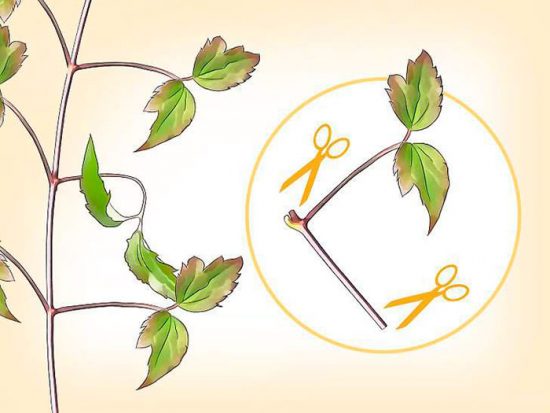
Green cuttings are cut from the side shoots of the growing plant. When cutting the material, please note that there should be no buds on the selected shoot. Remove the top of the shoot, and cut the rest of the clematis branch into equal cuttings. Each cutting should have 2 internodes.
Lignified cuttings are cut before the plant enters the budding phase or at the end of flowering. The requirements for planting material are identical, as in the propagation of clematis with green cuttings.
The lower cut on the handle should be oblique and located 2-3 mm below the internode, the upper one - straight, at a distance of 1-1.5 cm above the upper internode. The upper leaf plates are cut by 2/3, the bottom pair of leaves is cut off completely.
The lower part of clematis cuttings must be immediately processed in a stimulator for the formation and active growth of the root system. Further actions depend on the method of rooting you have chosen.
Advice! Often, flower growers share their success in rooting clematis cuttings even with one internode, which allows them to get more planting material.

Rooting in water
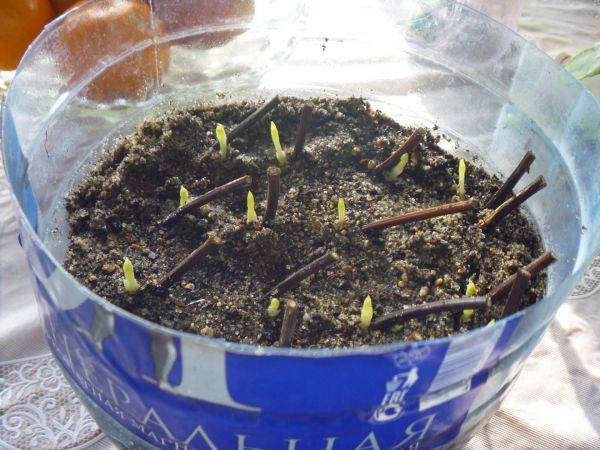
If you decide to root a clematis stalk in water, select a container that is suitable for the size in advance. The main condition: only the lower part of the cuttings should be in the water. Containers with planting material must be placed in a darkened place. Window sills located on the sunny side are completely unsuitable for this purpose.
Water in containers with cuttings should be changed 2-3 times a week. The first signs of the formation of a root system on clematis cuttings during reproduction at home should appear no earlier than in a month and a half.
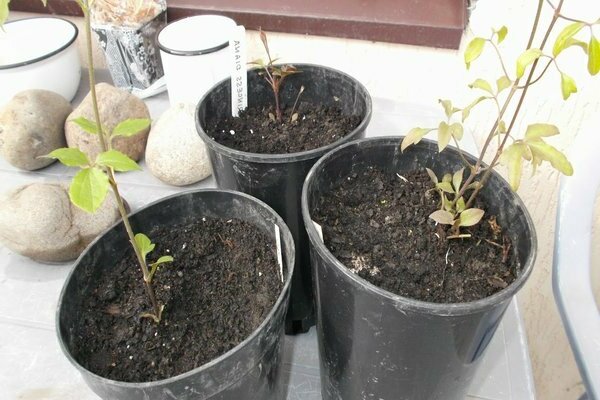
Subsequently, the cuttings, in which the roots grow up to 4-5 cm, are transplanted into prepared soil, in separate containers, and grown at home until they are planted in open ground.
Rooting in the ground
The soil for cutting clematis at home must be prepared in advance. An optimal soil mixture consists of:
- earth - 2 hours;
- sand - 1 tsp;
- peat - 1 tsp
If you wish, you can add a small portion of perlite to the soil. Disinfect the soil in any way convenient for you. Lay a 5 cm layer of sand on top of the prepared soil.
Cuttings of clematis cut and processed in a growth stimulator are planted at an inclination of 30˚- 40˚.The lower buds are deepened by no more than 1 cm. When planting cuttings with one node, the rate of deepening is identical.
Important! The minimum distance between adjacent cuttings should be at least 10-12 cm. Ideally, it is desirable to plant cuttings in separate containers.
Containers with clematis cuttings must be placed in a shaded place. The room should be regularly ventilated so that the plants get enough clean air.
Particular attention should be paid to soil moisture. Before the first signs of rooting appear, the planting is sprayed at least 3-5 times a day from a spray bottle with warm water. Subsequently, this procedure can be abandoned. Rooted clematis seedlings are properly cared for before being transplanted into open ground.
After the first young shoots appear, transfer the containers with flowers to a lighted place.
Reproduction using layering
This breeding method for clematis is ideal for both beginners and busy florists. Ease of execution, the ability to obtain several healthy rooted seedlings at once with minimal labor costs - these are its main advantages.
Any types and varieties of clematis can be propagated by layering. Rooted seedlings perfectly preserve all varietal and specific characteristics of the mother bush. Moreover, this method is ideal for breeding clematis hybrid varieties.
When clematis is propagated by layering, there are no special requirements and recommendations regarding the variety or timing for work in the garden. It is desirable that the age of the bush was at least three years. The algorithm of actions will look like this:
- dig a shallow groove from the bush in an arbitrary direction;
- place the shoot in it and pin it with U-shaped wire pins, leaving the top 7-10 cm above the ground;
- carefully fill the groove with soil and water.
Interesting! Before propagating clematis at home, you should know that the minimum rooting period for cuttings is two months.
Most importantly, do not forget to water the groove regularly. The soil must be constantly moist. After 2-3 months, the first shoots of young seedlings will appear. Let them grow a little stronger, and only then transplant to a permanent place.
In more detail about how to propagate clematis by layering in spring, the author of the video will tell you
Cutting clematis in summer
Clematis is a climbing ornamental plant that can decorate any vertical structures on the site. The plant blooms remarkably, pleasing the eye with exquisite delicate buds throughout the summer. The main breeding method for clematis is cuttings. In the article, we will consider the features of plant cuttings in the summer, find out the advantages, and get to know the procedure in detail.
Temperature background
It is very difficult to ensure the optimal temperature regime for normal root formation. It is good when the cuttings are transplanted at 20-24 ° C. Indicators above have a detrimental effect on the flower. On hot days, the chances of survival of the cuttings are reduced.
When landscaping a garden plot, very often the attention of summer residents falls on clematis. This perennial shrub will delight you with a very long flowering, throughout the season and unpretentious care. In this article, we will talk about plant propagation.
Benefits of propagation by cuttings
In general, clematis can be propagated in different ways: by seeds, and by layering, and by grafting, and even by dividing the bush. However, most gardeners prefer to use cuttings for this purpose, and there are several reasons for this.
- First, grafting is the easiest of the options. Even the most inexperienced novice gardener can propagate a climbing liana in this way.
- Since cuttings are a vegetative method, as a result, all species and varietal characteristics of the plant are fully preserved. This aspect is especially important if the reproduction of rare and expensive varieties of clematis occurs.
- Cutting allows you to immediately get a large amount of planting material, which significantly increases the chances of the success of the enterprise.
- The probability of successful rooting of properly cut and properly prepared cuttings is very high and reaches 90-5%.
When can you cut flowers
To the question: when you can start cutting clematis - in spring, summer, or autumn - there is no definite answer. You can root cuttings of flowers all year round. Only one feature should be taken into account - it will take at least 4-6 months to get a full-fledged seedling.
This factor is of great importance when choosing a breeding method for clematis, as well as the conditions in which the planting material will take root. In spring and early summer, you can plant cuttings in open ground, on a specially equipped garden bed. By autumn, the root system has already formed, and under cover the plant will calmly endure winter frosts.
In the second half of summer and autumn, clematis should be propagated by cuttings at home. Until spring, the seedlings will take root, grow, and in the spring they can be safely planted in open ground. In addition, in the autumn preparation of bushes for winter, you can use cut vines for subsequent reproduction.
You can start breeding clematis by layering in spring or early autumn. In the first version, the rooted seedlings are planted in a permanent place in early to mid-autumn, in the second - in the spring.
Important! It is undesirable to start breeding clematis during the period of active flowering.
Clematis seeds can be propagated at home at any time of the year.
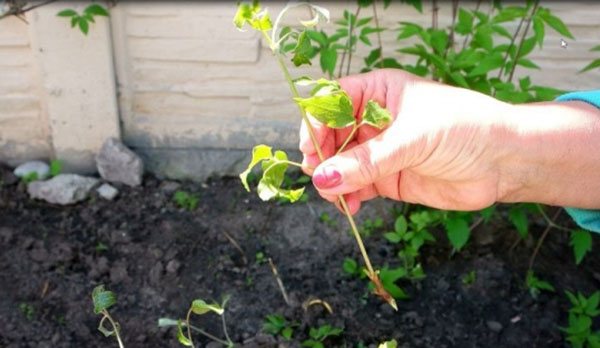
Summer cuttings
There are different opinions about exactly what time of the year it is better to propagate clematis by cuttings. Someone thinks spring is the best period, someone prefers summer. However, most gardeners tend to be flexible in timing, focusing on the bud development phase.
The optimal time for propagation of clematis is, therefore, the period of active formation of plant buds, its intensive development. It is at this time that the tissues of the plant are full of vital juices and strength, so the probability of successful rooting of cuttings is much greater.
The budding period occurs most often in the summer - in June-early July, therefore, summer time is considered optimal for propagation by cuttings.

Advantages and disadvantages of autumn cuttings
The formation of clematis bushes occurs in the fall. Pruning is mandatory for this plant species. It improves development and growth, promotes spring awakening of the kidneys. During the formation, many branches remain, they are cut into petioles, which can be used for planting and propagation of plants.
Benefits of planting in the fall:
- plants get hardened, get used to temperature extremes;
- autumn seedlings are ahead of spring bushes in growth;
- in a rainy season, no need to waste water for irrigation;
- in the fall, gardeners have more free time for pruning than in the spring, when mass work is underway.
In the spring, the branches have not yet grown back after the autumn pruning, you can overdo it with pruning. In addition, in the spring, the buds swell and the juice moves along the branches. At such a time, it is better not to disturb the vine.
The disadvantage of autumn cuttings is that you can not guess with early frosts, and the seedlings will freeze before they take root. Cuttings take root in autumn harder than in summer. In summer, they are rich in biostimulants, they stimulate the appearance of buds.
How to prepare cuttings
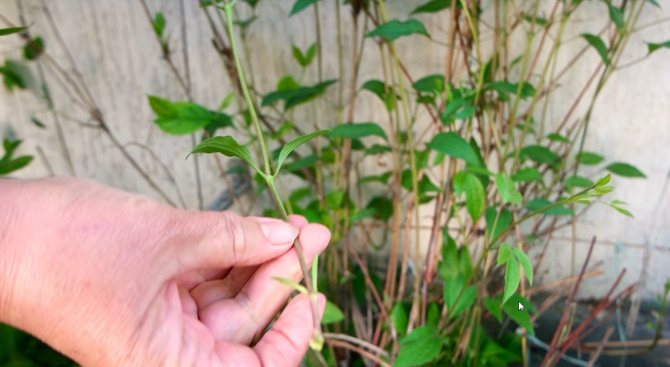
Unlike many other plants, the apical parts of the shoots are rarely used for cutting clematis - they simply root poorly. It is better to take lateral or middle shoots.You can use both green young shoots and partially lignified ones - both of them take root well.
It is recommended to cut green cuttings from the side shoots devoid of buds. The apical part must be removed, and then cut the shoot into cuttings of the same length (10-15 cm). Make sure that each stalk has a pair of internodes - this is important for the subsequent growth of the vine. If we are talking about a lignified shoot, it should be cut off when the budding phase is either just beginning or has already ended.
The cut from the bottom should be oblique, 2-3 mm above the internode. Be sure to make the upper cut straight.
Preparation
If there is foliage below, remove it; it is also advisable to shorten the upper leaves by two-thirds of the length.
This is interesting: Why is variegated meadowsweet useful and how to grow it
Soak cuttings deprived of foliage with the bottom part in a root stimulator. This measure will direct the vitality of the cuttings to the active formation of the root system. Prepared cuttings of clematis can be rooted both in water and in a nutritious substrate.
Origin and varieties
The first mentions of clematis date back to the 15th century. They began to grow it in Western Europe, in the 16th century. The name of the flower in translation from Greek means "climbing plant". And clematis lives up to this word, since almost all species and varieties are vines.

The widespread distribution of clematis began after the flower show, which took place in 1860. G. Zhakman presented the first hybrid to flower growers, which was later named after an English gardener. The popularity of this type of flower does not fade to this day.
The genus of clematis has about 265 species and more than 2000 varieties. Depending on the variety, the plant height can reach 18-20 m, however, some types of flowers have erect stems and grow no higher than 1-1.2 m.The size and color of the inflorescences ranges from 1-25 cm.
Interesting! These luxurious flowers have two more names - Lomonos or Lozinka.
The variety of colors and shapes of flowers can amaze even the most sophisticated flower growers. The foliage of clematis also has a varied shape, depending on the species. Plants are so unpretentious that they can grow in almost any climatic conditions. The only exception is Antarctica.
Thanks to Lomonosov, you can decorate any home plot with bright, fragrant flowers. And about when and how clematis multiplies, you will learn from the article.
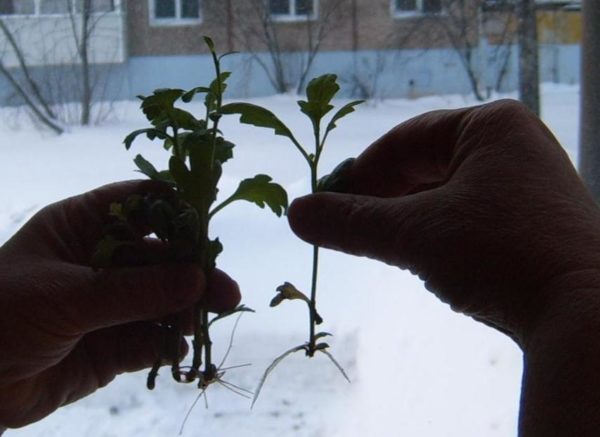
Rooting
As already mentioned above, the rooting of cuttings of this vine is carried out either in the ground or in water. Let's take a closer look at both options below.
In water
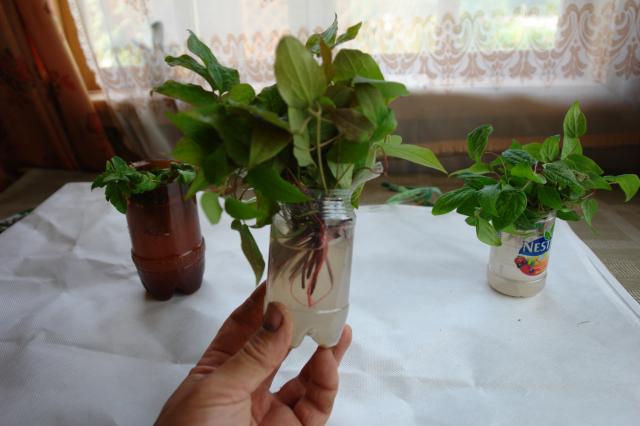
It is very important in this case to choose the right container. The most important thing is that only the lower part of the shoots should be soaked in water, otherwise decay is likely.
In this case, you need to wait for the growth of the roots by placing the container with cuttings in a dark place. You cannot succeed in the sun. Water roots are formed a month and a half after placing the cuttings in water. After the roots germinate, the cuttings are transplanted into containers, grown at home and only then placed in the garden.
In the ground
In order for the cuttings to take root safely in the soil, the substrate must be prepared in advance. Usually the following soil mixture is formed:
- sod (garden) land - 2 parts;
- river sand - 1 part;
- peat - 1 part.
If there is perlite at home, it is not forbidden to add it to the mixture, or replace the sandy part with perlite. If you took any components for the substrate from the street, be sure to decontaminate them. After filling the container with soil, place a 5 cm layer of sand on top - this layer will serve as a kind of mulch.
Important: containers must be equipped with drainage holes. If this nuance is not foreseen, the lower part of the plant in the ground may simply rot.
How to root
Cuttings are planted in the ground at a slope of 30-40 degrees.The slope increases the area of contact of the wood with the ground, which means the chances of successful rooting. Make sure that when planting, the lower bud of each cutting does not deepen by more than 1 cm. Otherwise, it is very likely to rot.
When planting several cuttings in one container, keep the distance between the plants at 10-12 cm. Ideally, of course, for each cutting to provide its own container.
Place the cuttings for root growth in a shaded but regularly ventilated area. The soil must be periodically moistened using a spray bottle.
Wintering and maintenance of clematis petioles
Because of how the petioles overwinter, their further development depends. It is good if the buds on the stalks do not wake up, they winter calmly, and begin to grow in the spring. In the northern regions, petioles are dug up, planted in containers and stored during the winter season in a cold, frost-free place.
Features of wintering shoots:
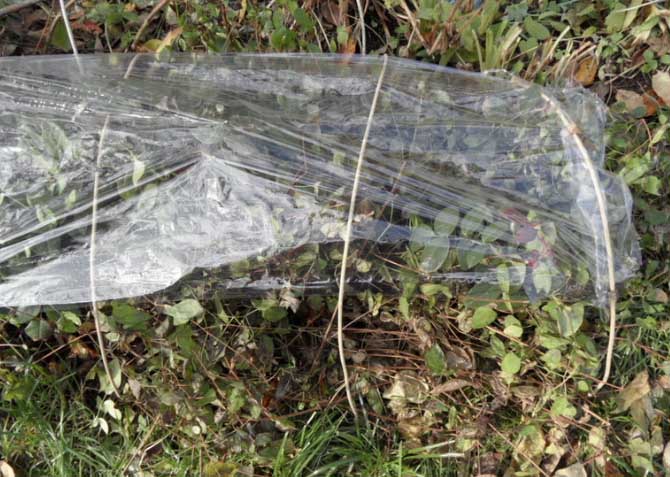
- for the winter, the seedlings are covered with a film;
- as soon as the shoots reach a height of 12-15 cm, they are pinched over the second node to accelerate rooting;
- you can leave the petioles for the winter in the basement in boxes, pots or in a greenhouse under a film or peat;
- if the greenhouse is not heated, you can cover the shoots with spruce branches, sawdust, and a special cloth;
- with the arrival of spring, young clematis are transplanted to a permanent place in the garden.
In the greenhouse, when the seedlings get stronger, after a couple of months they begin to harden. The building is ventilated, opening its first days for half an hour, then the airing time is increased. After 15-20 days, the greenhouse is opened for the whole day.
Subject to the conditions of care and planting, clematis can grow in one place for 20-25 years. The main thing is to water on time, loosen the ground and cut off the bushes. Lianas are not afraid of harmful insects, beautiful flowers will decorate the site for a long time.
Rooting rules
The best and faster roots will grow from cuttings if containers (even with water, even with soil) are placed in a greenhouse. It is not difficult to make such a greenhouse - you just need to cover the stalk on top with plastic wrap. The shelter creates a humid, misty and warm atmosphere inside, which is the best for rooting.
The film needs to be lifted every day. This must be done for airing so that the cuttings do not suffocate. And after the roots appear, the shelter should be removed altogether.
If we are talking about rooting in the ground, the ground should also be sprayed twice a day. And once a week, it is recommended to water with water with a root former dissolved in it (Zircon, for example).
Briefly about clematis.
Back in the 18th century, the first clematis hybrid appeared, which was named after its founder. Since then, clematis has gained its popularity, which is growing every year. In the genus of clematis, you can count about 260 species of which more than 2000 varieties are recruited. There are varieties of clematis that grow up to 20 meters in length. But there are also varieties that grow about 1 meter. And the flowers themselves can grow in diameter as only 1 cm and 25 cm.
Also, these flowers have two more names, this is Clematis or Lozinka.
Clematis flowers can be of completely different shapes and colors. They can win the heart of absolutely any person who sees them. The leaves of this vine can also have completely different shapes and sizes. Another advantage of this flower is that it is not whimsical at all and can grow almost anywhere. The only thing is that clematis does not like frost, and it must be insulated for the winter. In general, you can decorate absolutely any site with these vines, and from a simple, nondescript piece of land, your garden can turn into a blooming paradise.
Outdoor planting and care

Rooted cuttings of clematis are transferred to the garden after they grow up a little.Do not rush and plant insufficiently strong plants - they can weaken, not take root, die.
Set aside a sunny and well-warmed place in your garden for this plant. It is important to provide a support nearby - do not forget that this is a vine.
Place the plants in the holes carefully so as not to hurt their roots. We recommend covering the garden bed with translucent polyethylene after transplanting for the first week so that the direct sun does not interfere with young clematis to calmly root in a new place.
Care
In general, caring for these plants after they successfully take root in the open field is not very difficult. Further recommendations.
Young clematis need regular watering, about two to three times a week.
Top dressing is carried out once or a couple of times a month: at first, it is better to use nitrogenous fertilizers or complexes with a predominance of nitrogen. This mineral will help plants gain green mass faster.
If you notice a hard crust on the ground, gently loosen the soil. The substrate must be permeable. The loosening procedure must be done shallowly and carefully, since the roots of the plant are highly sensitive.
We learned how to cut clematis in the summer. This vine is not difficult to propagate if there is already one copy on the site. Cutting is a simple and accessible process even for beginners: after completing basic procedures, you will definitely get a young, actively growing and blooming vine.

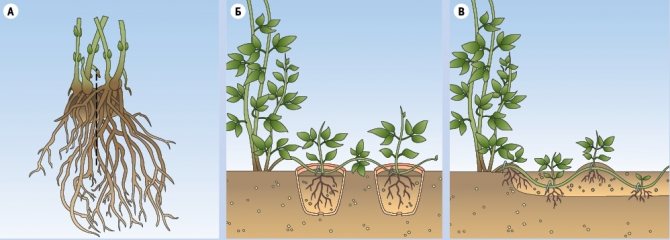
Splitting the clematis bush
Clematis older than 5-6 years, if they have formed a large number of shoots, can be divided into several parts. This is a fairly simple method that allows you to quickly achieve active growth and not wait several years before reaching maximum decorative effect (plants will bloom in the year of separation). But it should be remembered that clematis - a steeplejack is not so simple. The plant is afraid of root injuries, it is hard to tolerate transplants, and even separation is even more so. It is better to resort to division when the plant itself needs it, only in two cases:
- if necessary, transfer the vine to a new place or need for a transplant due to other objective factors;
- with a strong growth of clematis with a visible need for rejuvenation and a loss of decorativeness (usually typical for varieties with dense tillering).
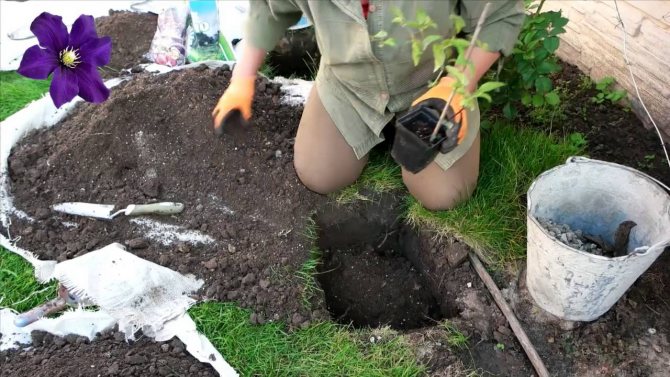
The planting site must be prepared in advance by improving the soil and preparing the planting pits.
The separation procedure is carried out even in the middle lane either in autumn or early spring. The latter option, although less dangerous in terms of preparing for winter, is fraught with great difficulties. The thing is that the separation must be carried out as soon as the weather permits, the snow melts and the soil thaws, but the shoots should not start growing before separation, the buds can only be slightly swollen. The timing of a possible separation in this case is very limited, clematis lags behind in development, so the autumn separation is considered simpler and less risky.
The procedure for dividing clematis is quite complicated:
- Prepared planting holes are watered abundantly, saturating the soil with moisture. If possible, it is better to add a growth stimulator to the water for irrigation.
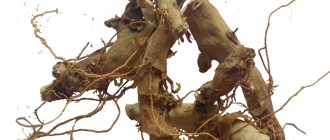
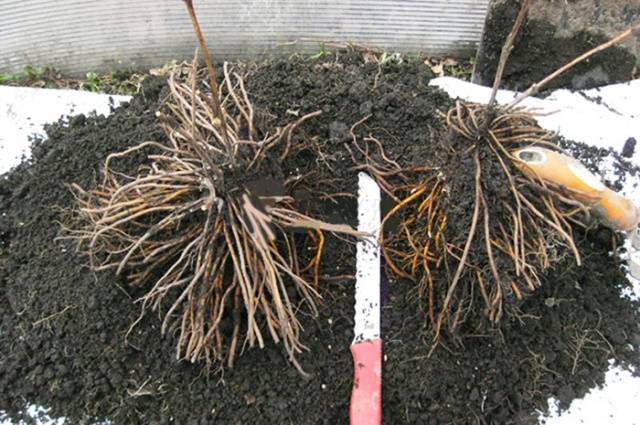
- If the plant is divided in autumn, the aerial part is cut off, leaving 2-3 pairs of buds. Clematis bushes are very carefully dug out, keeping a large supply of soil around the roots and trying not to harm the long "laces". The earth is gently shaken off and washed so that the structure of the plant can be seen.
- After inspection, the bush is divided in any convenient way into large divisions containing a large bunch of roots, at least 2 - 3 shoots with visible lower buds of renewal. If you have experience in dividing clematis, then you can separate one shoot at a time, but the larger the cut, the better. The best option is not to divide even strongly overgrown clematis into more than 2-3 parts.
- The roots are examined, shortened, damaged and dry parts are removed. Delenki are soaked in a solution of fungicide or potassium permanganate.
- Clematis are carefully planted in a new place, observing the general planting rules, be sure to deepen the root collar by 10 cm.
There is also an alternative way to divide clematis - without digging. The bushes are dug on one side, creating a trench or hole up to 70 cm deep, trying not to damage the roots and moving in a circle. From the excavated side, the base of the bush is carefully exposed manually and the shoots with roots are cut off with a sharp pruner or knife, the rest of the bush is added back and watered. Separated parts are handled in the same way as ordinary divisions.
Watering after planting is not carried out: the supply of water poured into the planting hole is quite enough for an adapting plant. The first watering is carried out only a week after planting the divisions. Growth stimulants can also be added to the water for irrigation.
Reproduction of clematis by dividing the bush. <>
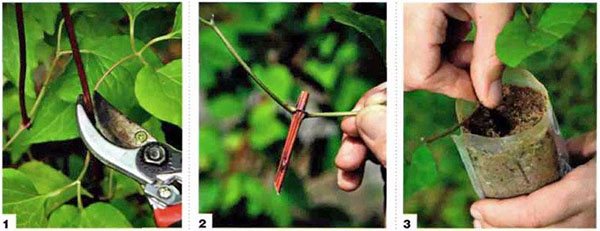
How to properly cut cuttings
Whatever time you choose to propagate clematis, start the procedure by obtaining cuttings. Florists advise using healthy, well-developed and well-groomed specimens no more than 5 years old as mother plants:
- Slice them from the middle of the shoots. You should not take an immature segment for planting, which is located at the tip, as well as nodes with buds.
- Cuttings that have one internode and at least a couple of developed buds in deciduous petioles adapt best in the ground.
- Cut the shoot into pieces, leaving about 3-5 cm under the knot and 1.5-3 cm above the knot. Remove the remaining parts. It is better to make the upper cut straight, the lower one oblique.
- If large leaves remain on the prepared cuttings, they should be shortened by about a third. This advice is not relevant if you will be rooting a bottled plant.
Attention! Roots most quickly form short lateral shoots, which clematis released after strong pruning. They contain the largest amount of substances useful for rooting.
When preparing cuttings, cut no more than 1/3 of the shoots. It is important that the mother plant continues to live and develop normally. After the procedure, feed the flower with mineral fertilizer. For example, Kemira-wagon.
Interesting: Monstera is an unusual "monster"
To strengthen the stalk, soak it in Kornevin's solution before planting. The drug is prepared according to the instructions. An alternative for soaking is succinic acid solution. Dilute 2 g of powder in half a liter of water and soak the cuttings for about 10 hours. If there is a shortage of time, the cut of the cuttings can be simply processed with dry Kornevin.
How to cook cuttings
To propagate the plant in the fall, it is necessary to prepare healthy shrubs that are 2 to 4 years old. The flower grower cuts cuttings at a height of 20-30 cm from the ground. New root systems form lateral stems faster, which grow in spring after careful pruning of the bush. You should not take shoots from the top of clematis, because no matter when they are pruned in spring or autumn, the end result is the same - poor rooting. Single-node cuttings acclimatize better.
Planting a new flower by layering is done in several stages:
- Preparatory: the florist prepares a sharp knife or scissors in advance.
- Basic: to propagate clematis with cuttings, a knife or scissors, a small straight cut is made, a couple of cm above and 4-5 cm below the node. The large upper leaves are shortened by half or by a third, the lower ones are completely cut off.
- Completion: until planting in open ground begins in the fall, the cuttings are kept in containers with water in the shade.
The flower grower cuts the cuttings of clematis at a height of 20-30 cm from the ground
Proper soil preparation for rooting cuttings
One of the key conditions for the survival of clematis shoots is loose and light soil with a high level of moisture absorption.This requirement is met, for example, by a soil of 2/3 plant humus and 1/3 river sand. In this case, your main task in the process of growing a flower is to make sure that the ground under it does not dry out.
Attention! Alternative materials for planting cuttings are also very popular: perlite, vermiculite, coconut fiber.
For ground rooting of clematis, ordinary plastic cups are often used:
- make holes in them for drainage;
- pour in the substrate;
- moisturize abundantly;
- deepen the stalk so that the internode is half in the ground.

If planting in a large container or on an area, dig a hole in the ground. Fill it with a nutritious substrate, cover it with a 3 cm layer of sand on top. The cuttings are deepened according to the same principle.
With both planting methods, at the first stage of rooting, the cuttings will need a moist environment. For this:
- build a greenhouse;
- spray the plant with water at least 2 times a day;
- irrigate the cutting with zircon solution once a week;
- after 2 weeks, start airing the plant by opening the film or glass for 15 minutes. per day;
- remove the greenhouse after the shoots appear.
Advice. Irrigation with sodium humate 2 times a month has a good effect on a young plant.
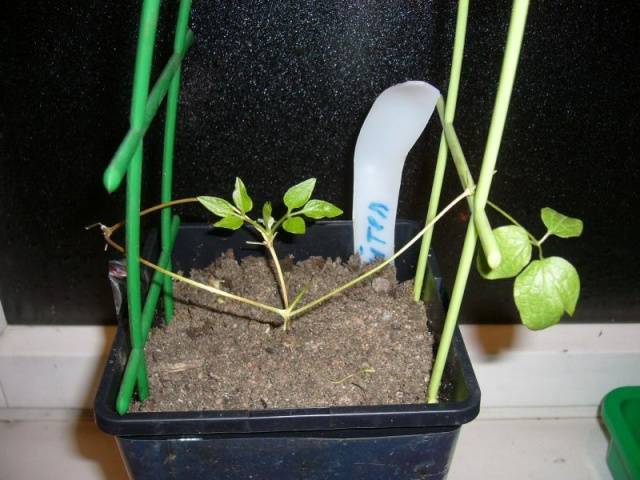
An alternative way of rooting clematis cuttings - in bottles - is considered even simpler and more effective. Plastic containers are suitable for this procedure. Cut off the top of the bottle. Root the cuttings into a stable bottom, as is the case with cups. After that, put the top of the bottle back in place and wrap it with tape. You will get a mini greenhouse.
Take the bottles out into the garden and bury them to ground level inside. For the formation of roots, the plant needs light, but direct rays and overheating are contraindicated. It is best to choose partial shade. To ventilate the plant (after 2 weeks), simply unscrew the plug for 20 minutes. After the formation of strong shoots, remove the top of the bottle, and make drainage holes at the bottom.
How to root a scion

You can grow clematis cuttings in greenhouses, greenhouses, tunnels and in boxes on windowsills. If the pruning of the bushes is done in the fall, then the cuttings must first be rooted and planted in the spring in the ground. There are several ways to grow petioles.
Plastic cups
In a transparent plastic glass, you can clearly see what is happening with the roots of plants. Application of cups:
- fall asleep with a nutrient mixture;
- small holes are made in the container for drainage;
- watering the ground;
- the petiole is added dropwise so that the knot is half filled with soil;
- cover the glasses with foil before rooting.
When the time comes for planting plants from the cups, the seedlings are transferred to the hole along with the soil in which they grew.
You may be interested in:
Reproduction of chrysanthemums in autumn: cuttings method Cutting is one of the most effective ways to breed garden chrysanthemums. The main advantage of the method ... Read more ...
The soil
The petioles are planted in a soil mixture in a film greenhouse. A cardboard box is driven into the ground. The soil must be free of weeds and harmful microorganisms. It is better to make the soil in two layers. The first layer - peat and sand are poured for drainage with the addition of humus, and everything is covered with sand on top. Spill with a manganese solution. For fast rooting, seedlings are treated with heteroauxin or sodium 2 g per liter of water for 8-10 hours, washed, transferred to the soil.
Water

Use dishes with a wide neck for rooting shoots. Pour water, immerse the twigs so that only the ends are 1 cm submerged in the liquid. The container is placed in a dark place. As the water evaporates, it is topped up to the previous level. When the rhizome is 4-5 cm, the shoot is planted in a greenhouse.
Bottle
Resourceful gardeners have come up with a way of rooting flowers using plastic 2 liter bottles. This saves space, the cuttings take root faster.
The bottle is cut in half.An earthen mixture is poured into its lower part, the seedling is deepened, watered on top, and covered with the second part of the bottle. The docking point is connected with tape, the cork is closed. A mini greenhouse is buried in the ground to the level of the ground in a bottle. After a couple of weeks, the greenhouse is ventilated - the plug is unscrewed for half an hour a day. When shoots appear, the bottle is left open, drainage holes are made.
In addition to bottles and cups, plastic bags, pots, containers are used. Basically, these containers are located in flower beds or greenhouses.
Rooting conditions for cuttings in the substrate
In clematis blooming on last year's branches, cuttings begin before flowering in May or in July after flowering. In the middle of summer, green petioles are planted in pots, boxes, or directly into the open ground. At the end of August, vines are cut and healthy shoots are rooted only in greenhouses.
Prepared shoots can be immediately planted in fertile soil:
- Individually - cups, bottles, pots.
- Planting in a common cuttings - in this case, you will not be able to follow the rooting process. The soil is made in two layers: first, the substrate is 20-25 cm, then 5 cm perlite or sand. The earth is leveled, compacted and moistened.
Features of cuttings of clematis at different times of the year
Some growers call May the best time for cutting clematis, others - the end of June and the beginning of July. In fact, focus on the flower development phase first. The optimal time is the beginning of budding or a period of intensive growth. At this time, the green mass of clematis is filled with sap, which stimulates the growth of the flower.

Spring, summer and autumn breeding differ slightly:
- In the spring, not cutting, but breaking out is used to obtain planting material. Perform the procedure carefully.
- In June, when clematis begins to bloom, the shoots are cut off. Leave at least a couple of developed buds on each stump.
- In summer, cuttings are rooted in spacious pots, containers or directly in a flower garden. Beforehand, you can put the shoots in the water to take root. In spring, it is better to plant them in small containers indoors.
- In autumn, clematis is propagated in September. To do this, use a flowering liana. Rooting is carried out exclusively in closed ground.
The most important thing when rooting a cutting is proper preparation and temperature. It is optimal to keep it in a greenhouse at about + 25 ° C. With proper care, a new plant will take root in about 1-1.5 months.
How grafting is carried out
To propagate clematis by seeds, any convenient time will do.
Cuttings have a time frame that depends on the shoots. Basically, a new flower is planted in the spring. Although the most successful time is the first month of summer. At this time, the shoots are rich in natural biological stimulants and the first buds appear on them. Reproduction of clematis by cuttings in the fall requires a lot of effort, since it is more difficult for the shoots to take root at this time.
Ways to propagate clematis
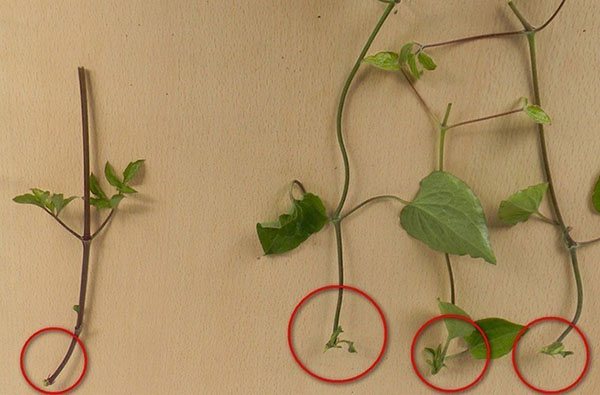
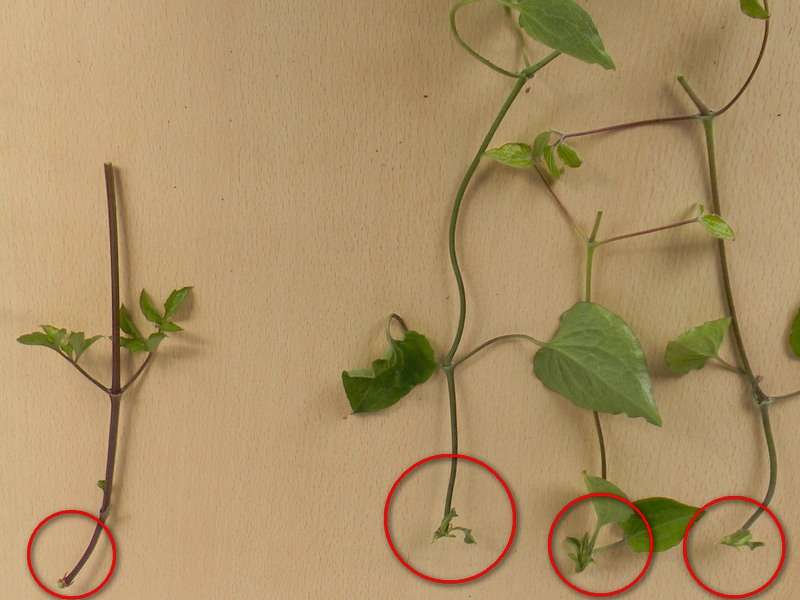
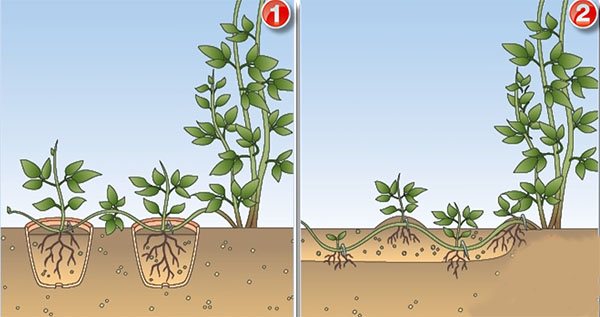
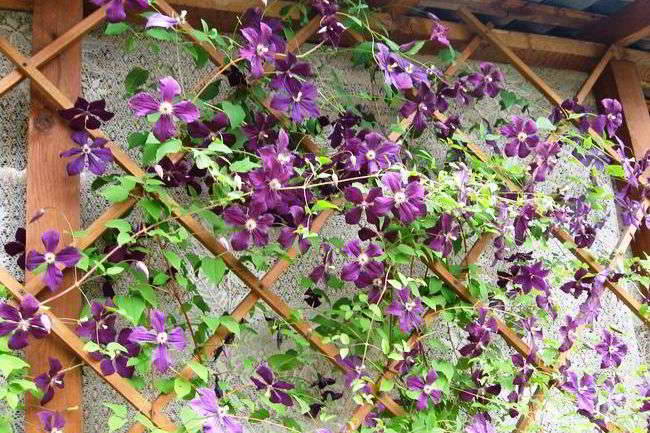
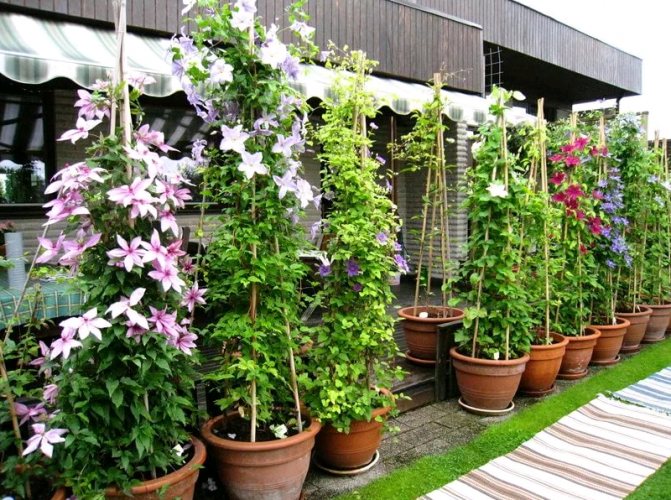
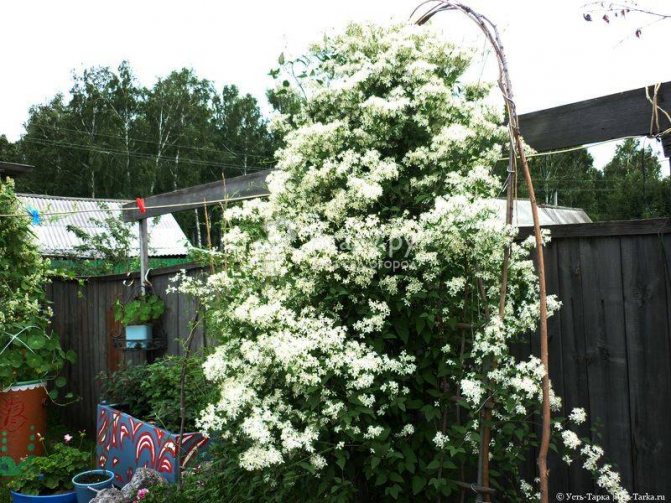
Traditionally, clematis is used in summer cottages and gardens for vertical landscaping of buildings or for creating hedges. Such an unusual scope of use is explained by the fact that clematis is considered a liana, and its flexible shoots cling perfectly to the supports and grow rapidly (Figure 1).
Note: The flexibility of the shoots of the bush allows you to show unlimited imagination when decorating your yard or garden. All you need to do is install a support of a suitable shape, and over time, the clematis will braid it.
The advantage of this decorative culture is also that you do not have to spend extra money to buy varietal planting material in specialized stores or nurseries. You can easily grow a full-fledged healthy bush on your own using one of the methods below.In general, at home, clematis can be propagated in any way: grown from seeds, cuttings, or using cuttings of the mother plant.
Figure 1. Flexible flower vine will adorn any site
Since each of these methods has its own characteristics and algorithm, we will consider all the nuances of different breeding options in more detail so that you can choose the right one.
Buy clematis or propagate yourself
Seedlings can also be purchased in specialized stores. In this case, you will spend less time growing them and can plant them outdoors immediately after purchase. But it is much more pleasant to propagate clematis yourself, using one of the proposed methods. In addition, a purchased plant may not take root or get sick, and buying an adapted crop in a nursery is not always possible and expensive.
Cultivation of clematis in their summer cottage
Layers grown on their own site, or cuttings prepared in advance, will allow to grow a liana while maintaining all the qualities of the mother bush. Clematis will be adapted to climatic conditions and not demanding to care for, he will not be afraid of early frosts and strong winds.
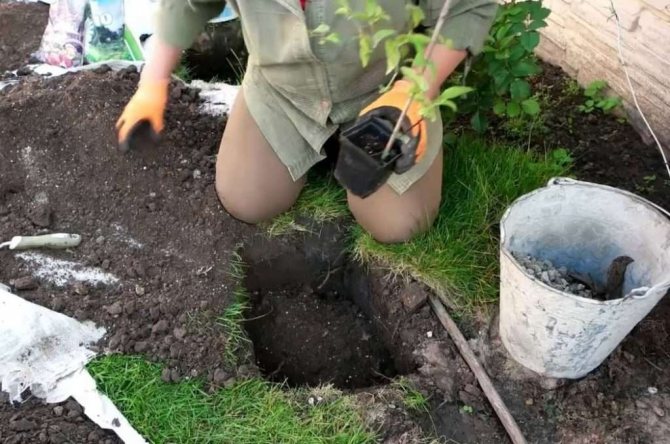
Master Class
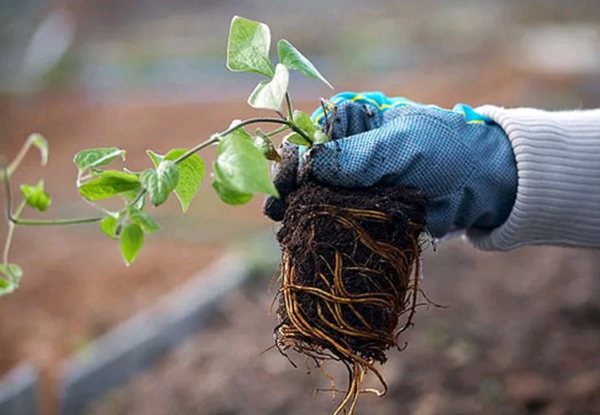
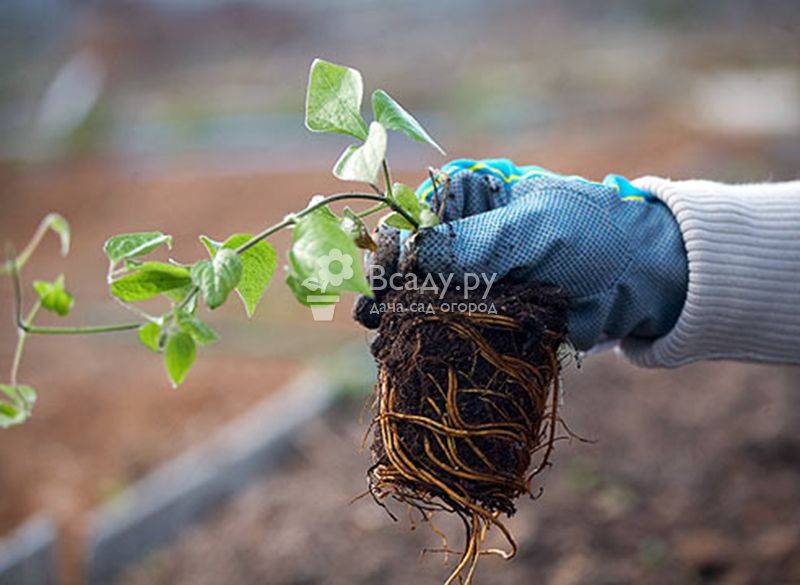
1. For a humane transplant, it is enough that a lump of earth in height approximately corresponds to the bayonet of a shovel. There is no point in trying to keep all the roots! This is impossible due to the vastness of their distribution underground. The weight of the root ball will also have to be considered - it can be quite significant.
Photo: From personal archive / Elena Grigoryan
2. Dig in the bush and remove the root ball from the ground. The age of the plant in the photo is approximately 5–6 years old - this clematis can be easily divided.
Photo: From personal archive / Elena Grigoryan
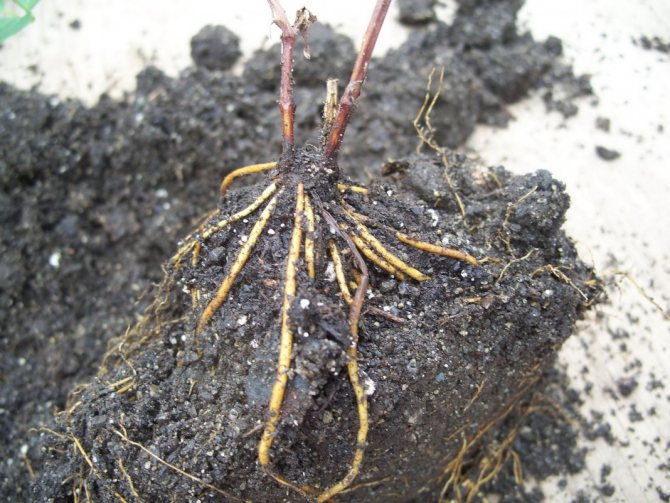
3. Remove excess soil and untangle the intertwined root "laces" if possible. This is a painstaking occupation that requires diligence. It is convenient to free the roots with a thin peg or even a Chinese bamboo chopstick.
Photo: From personal archive / Elena Grigoryan
4. When the roots are bare enough, the bush can be divided with much less loss.
Important Remember that when working with a bare root system, it must not be allowed to dry out.Photo: From personal archive / Elena Grigoryan
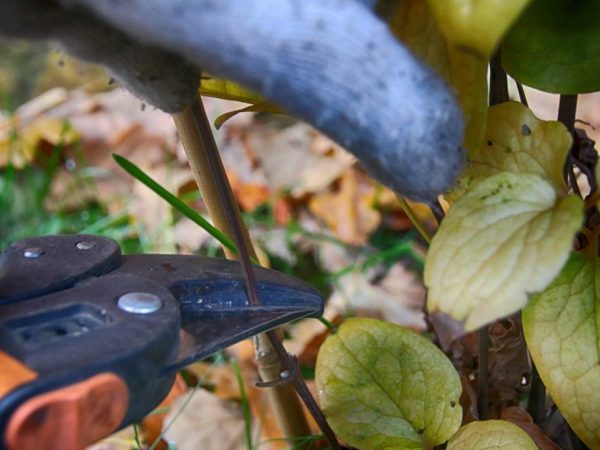
5. A suitable dividing tool is a kitchen knife. The main thing is that it is strong and sharp. Cut carefully! Do not damage the budding buds on the roots and root collar.
Photo: From personal archive / Elena Grigoryan
6. Be sure to remove the “extra” roots that are not attached to the root collar and remain after cutting from each cut. Roots that are too long are also best pruned with a sharp pruner, as they tend to be damaged and die off during planting.
By the way These recommendations are suitable for clematis of all pruning groups.Photo: From personal archive / Elena Grigoryan
7. The result of our efforts is two full-fledged plants instead of one. You can start planting. Do not delay with this!
Photo: From personal archive / Elena Grigoryan
8. In our case, one "half" of the bush will be planted in a container, the other - for permanent residence. Divided plants do not need to be deliberately buried in the ground. It is enough to do with light hilling of the root collar.
Flower propagation by layering
Experienced gardeners are advised to propagate clematis by layering. After all, this method can be considered the simplest and most reliable. However, unlike cuttings, such propagation will have to spend more time. For the procedure, you will need horizontal layering:
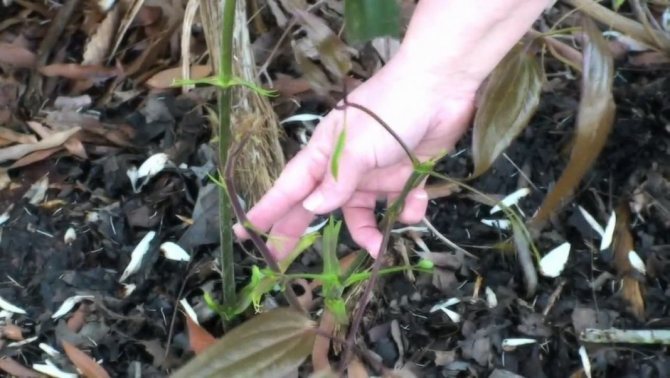
- 1 First of all, a groove of 10 cm is made near the bush. The selected shoot will be laid in it. It is very important to be extremely careful when tilting it, because clematis shoots are fragile.
- 2 Fertile soil is sprinkled on top of the laid branch and compacted.
- 3 When laying the bush, one must not forget about the careful attachment of the shoot to the ground.
- 4 It is important that the land is not overdried, so you should take care of regular watering of the cuttings.
Already in the spring, new shoots will sprout from the cuttings made. Several times during the summer, hilling of young clematis should be carried out with prepared fertile soil. After a year, the shoots will get strong enough, and they can be transplanted.
Existing clematis breeding procedures are considered quite troublesome and time-consuming. However, the result will bring joy to the gardener, because after 3 years there will be an opportunity to get a beautiful and strong shrub, which will become a source of pride and decoration of the site.
Popular ones that are grown in our area are usually hybrid. Therefore, the only suitable option for their reproduction is vegetative. Very often, plant owners root cuttings. This can be done not only in spring or summer, but also in autumn. Florists give step-by-step recommendations with photos and videos on how to properly cut clematis.
Seed reproduction
A similar method is used to develop new varieties of shrubs. However, young hybrid shrubs do not always retain their parental qualities.
The seeds differ in their size:
- 1 Large. Sometimes they are at least 8 mm. The seeds provide new shoots in 5 years. Almost always these are clematis with small flowers.
- 2 Medium. The diameter of such seeds is no more than 5 mm, and these are six-petalled varieties that can remain viable for 3 years.
- 3 Small. Such plants are characterized by very small sizes. They sprout well, but at the same time they cannot be stored for a long time.
If you plan to propagate clematis by seeds, it is recommended to do this in the spring. The pre-selected seeds are sown in open soil or in a container. When the first leaves of new plants appear, you need to transplant them to a place with good shading. And only a year later it will be possible to plant the strengthened plant in a permanent place.
How to propagate clematis in spring and summer: the main methods of reproduction
Today there are many varieties of clematis. A seedling of such a plant is quite expensive today, and the purchase of even several clematis to decorate the garden will require significant financial costs. Few know that reproduction of clematis with their own hands is a fairly simple process and even a novice florist can do such work.
There are several ways to propagate a plant, and with the correct sequence of actions in the future, it is easy to get a strong and luxuriantly flowering plant.
Requirements for planting material
You need to know the basic requirements for clematis planting material:
- autumn planting requires the presence of developed vegetative buds on the plant;
- for spring planting, there must be at least one shoot on clematis;
- seedlings should have at least three roots from ten centimeters long.
Plants with a weak root system must be placed in special containers for growing. It is required to use exclusively healthy planting material, and the root system must be elastic and free from damage, discoloration, thickening and swelling.
Breeding clematis with lignified cuttings
Successful reproduction of clematis by cuttings in the fall must be carried out with lignified shoots. The procedure is similar to spring cuttings, but there are some differences. For their rooting, greenhouse conditions should be created for the plant, because during this period the shrub is being prepared for rest.
On blanks, there must be 1 or 2 nodes and several side leaves. It is recommended to use the middle part of the shoot no more than 10 cm long. For better development, the bottom of the workpiece is cut off at an angle, and the leaves are shortened.It is also necessary to treat the cutting with a special solution (Kornevin).
In order for the development of the roots to take place properly, and a sufficient amount of air penetrates them, gardeners are advised to mix 1 part of peat or humus with 2 parts of sand.
In the case when lignified clematis propagation by cuttings takes place, it is better to plant each shoot separately. Small containers with pre-prepared soil are suitable, which should be watered well. Clematis deepen into the ground so that the first node is half covered by the ground.
After planting the shoot, you need to take care of creating optimal conditions for its growth, because it is in the warmth (at + 25 ° C) that it develops well. In order to ensure a sufficient level of humidity, young clematis should be sprayed several times daily.
If you decide to cut clematis in the autumn, you should know that after rooting, it is recommended to store new shoots in the basement until spring.
Vegetative propagation of a flower
This method is based on the ability to restore missing plant organs (shoots, buds or roots). The main advantages of the vegetative method include:
- Faster budding and seed germination;
- homogeneity at the genetic and physiological level;
- the ability to self-renewal as a result of the loss of any upper organ;
- longevity and endurance of the flower;
- the ability to protect a young plant from viral and other dangerous diseases.
Vegetative methods include grafting, grafting, using cuttings, and dividing the bushes. Each method has its own characteristics, and in order to get a healthy and strong plant, you should know how to propagate clematis, while observing the technology of planting.
The main features of the structure of clematis
The root system of clematis performs not only a mechanical function, but also absorbs nutrient and organic nutrients from the incoming moisture. Depending on the structure, tree roots can be represented by the following types, which include:
1. Rod.
Development comes from the embryonic roots and is considered the simplest. Therefore, the reproduction of clematis presupposes their careful strengthening due to the absence of secondary processes.
2. Secondary.
Their development occurs from the buds of the stems.
3. Fibrous.
Typical for most varieties, transplanting takes place without any particular complications.
The stem of the plant is the main organ that connects the root system to the leaves. The buds are located in the leaf axil, they are vegetative, generative and mixed. The leaf can be simple or complex, and the flowers consist of stamens, pistils and perianth.
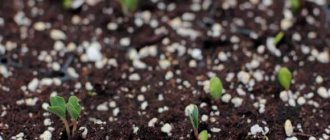
Growing from seeds.
Clematis seeds can be of several types: small - they can germinate in only 4 months, but almost all germinate. Medium - can germinate up to six months. Moreover, they germinate in the same way absolutely all and at the same time. Large - when planting such seeds, the first shoots can be seen only after a year. They do not germinate evenly, and many seeds simply do not germinate.
If you decide to grow clematis from seeds at home, then you need to be careful about the land, it should be light, loosened and always fertile. The best soil for germinating seeds is soil mixed with sand in a 2: 1 ratio. There must be a drainage layer in the container into which you will sow seeds at the bottom, and fertile soil must be poured on top of it. Moreover, the container for landing must be prepared in advance. Sow the seeds one at a time at a distance of at least 3 cm.A small layer of sand should be poured on top of the seeds. The soil in which the seeds are planted should always be moistened, it cannot be simply watered, in this case you need to use a spray bottle and just spray it.The container itself must be kept warm. Prior to seed germination, all care in principle is to moisturize.
Properly prepared soil substrate
Green cuttings of clematis require preparation of the soil substrate. It is not worth planting "cubs" in purchased land, as it does not quite suit them. Professionals recommend preparing two-layer soil:
- The top layer is clean river sand that has been disinfected.
- The bottom one is an equal amount of sand, black soil and peat.
The soil, which will be the bottom layer, is thoroughly mixed until all components are evenly distributed. Peat must be of weak acidity.
When studying the question of how to cut clematis in the summer, it is worth paying special attention to the section on soil, since a lot depends on it. Delicate clematis is susceptible to fungal infection, the spores of which develop in the soil. That is why, before planting a bush, it is necessary to disinfect. Use a manganese solution, phytosporin, or foundazol. In addition, the soil should be loose and air-permeable.
Reproduction by dividing the bush
Reproduction of clematis by dividing the bush is considered an effective, but more time-consuming method. It is recommended to transplant in the autumn or spring, after the onset of warm weather.
The division process depends on the age of the clematis bush.... A plant at the age of 5-6 years is simply dug out of the ground and divided into parts using a cutting tool. To divide a small bush, you can use a pruner, if the plant has a large and strong root system, then you should use an ax. The division must be performed in such a way that each of the parts has a good bunch of roots and at least 1-2 shoots.
The next year, the digging can be carried out from the opposite side and get new material for breeding. From one bush of clematis can be obtained per year 2-6 new seedlings, which, with successful digging and engraftment in a new place, are capable of blooming in the same year.
Features of using clematis seeds
Reproduction of clematis by seeds is carried out in the process of their selection or by natural pollination of wild species. Seeds ripen, as a rule, within three months, and their period corresponds to the flowering period, which falls on the end of May.
Clematis seeds begin to ripen in mid-autumn, and they come in different sizes. Depending on the mass of the seed and the period of its ripening, they are subdivided into subgroups.
Which include:
1. Large-fruited.
The seed size ranges from 6 × 5 to 12 × 10 mm. They are characterized by uneven germination and a long period. Mostly the first shoots emerge after about one year. Germination rate is 4 years.
2. Average.
Fruits are 6 × 5 mm in size, germination is 3 years, which occurs in 3-6 months.
3. Small ones.
Sizes up to 5 × 3 mm, and germination from 20 days to 4 months, which lasts for up to two years.
In order to increase the germination period of seeds, they are washed and soaked with simultaneous exposure to air. For this, a glass cylinder is used, at the bottom of which a valve is located.
An aquarium compressor is attached to it, which through it feeds air into the cylinder. Experts recommend flushing with seeds with air supply for five days, while changing the water 4 times.
The sowing date depends on the size of the fruit, and the seeds are sown in prepared pots after autumn harvest. The containers are placed in a warm room to provide a comfortable environment for active germination.
Small seeds are sown in pots in March, they germinate better when wet than dry. They germinate in the second year, and in some cases in the first. Large-fruited plants germinate later and bloom mainly in the third year.
When is the best time to propagate a plant?
The nuances of breeding creepers include the exact date of planting in open ground. Experienced gardeners have identified 2 suitable time periods:
- In the spring.
- In the autumn.
Both options require compliance with the accompanying conditions, a combination of air temperature and soil moisture. In the spring, it is important to transfer the seedling before the heat has set in, and in the fall, before the cold begins. Both methods are equivalent, subject to simple planting rules, they give the expected result - a healthy, flowering plant.
Gardeners practice soaking the seedling before planting - for an hour, in water, with the addition of potassium permanganate ("potassium permanganate"). A temporary "residence" of clematis is acceptable in any suitable place in the garden or plot.
Tying to the support, like the device of the mulching layer, is one of the main planting conditions.
Reproduction is carried out in spring or autumn, to choose from. But the autumn is considered more preferable by connoisseurs. Breeding of clematis is applied using seeds, cuttings, cuttings or by dividing a bush. The first method is more often used for plants with small inflorescences; for the rest, cuttings, division and layering are used.
In the spring
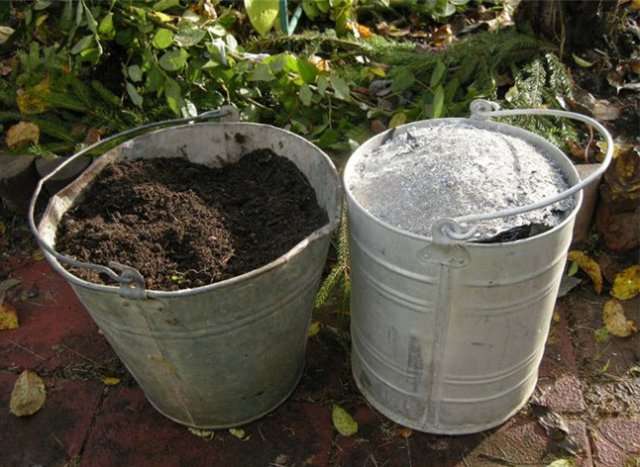
For the landing procedure to be successful, you first need to dig a hole of sufficient depth. At the bottom, a drainage layer must be created (at least 15 centimeters). A brick break or large rubble will do. The mixture itself for a clematis seedling is prepared in several ways. For example, they mix fertile soil with rotted manure, wood ash, sand. Superphosphate is added to the soil as a fertilizer. Everything is thoroughly mixed, poured into the pit.
The seedling is immersed in the mixture so that the root collar is hidden, it is sprinkled with earth. At the end of the process, the bush must be watered abundantly. In the spring, clematis is sometimes propagated in one of the existing ways, but most gardeners prefer to postpone this until the fall.
In autumn
Experienced "clematists" call September as a temporary period for autumn planting, and not October, as is customary for some other plants. If the required deadline is missed, it doesn't matter. The seedling will overwinter in a utility room, cellar or basement, and in the spring will go to the ground.
A plant is able to develop steadily in one place for 3 decades, if the planting point is correctly (and immediately) determined. A seedling, and an adult clematis, is contraindicated in sunbathing in an open space. You should also not plant close to the walls of buildings (fences or fences). Liana is not durable - strong gusts of wind can easily break off flowers or break the stem.
See also
Planting, growing and caring for clematis in the open fieldRead
Does not like clematis and excessively moist or with a high level of groundwater, flooded soil, acidic (with a pH of more than 6.5 units). The earthen mixture is chosen complex, with the obligatory drainage of the bottom of the trench or pit (depth - about 2 times the length of a shovel bayonet).
It is better to sprinkle the neck of the root with sand, and not with earth, so that 2 lower buds are hidden under it.
A plant planted correctly and on time will get stronger over the winter, gain strength, and with the arrival of heat, it will begin to delight with large and frequent inflorescences. In the fall, a transplant or reproduction of clematis is carried out. To do this, use the division of bushes or the method of layering.
In summer
The summer period is used for cutting clematis. This is better than buying a "pig in a poke" - cuttings from private owners or garden partnerships with an unknown future. And cheaper, besides. To do this, choose the period from May to July (the exact date depends on the climatic zone).
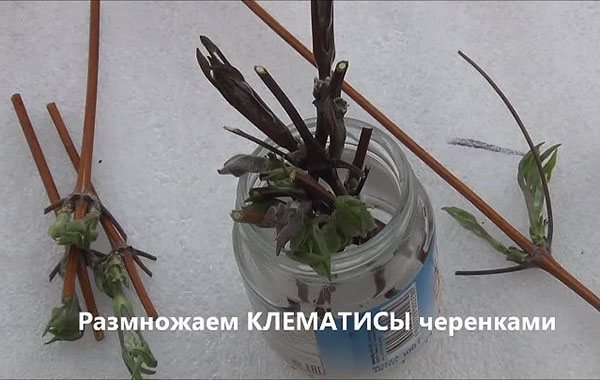
Rooting conditions for clematis cuttings in water
For convenience, several harvested clematis cuttings can be tied into a bunch, but in such a way that their lower ends are at the same level.
For water rooting of clematis cuttings, it is better to take a brown pharmacy container.In the absence of a dark container, you can use an ordinary glass jar, having previously wrapped it in thick opaque paper. It is advisable to collect clean rainwater and put pieces of charcoal in it.
Important: just enough water must be poured into the bottle so that only the tips of the cuttings touch it, without the nodes with the buds getting wet. In the future, as its level decreases, it is necessary to regularly and in time to top up the water to the original volume.
Place the vial with the cuttings in a large plastic bottle, not completely cut across, with a screwed cap. This creates the necessary greenhouse effect for the rooted plants, which slows down the evaporation of water and accelerates the formation of roots.
Clematis cuttings should be in a warm, bright place (preferably + 22 ... 25 degrees, but not higher than +30 degrees), protected from direct sunlight. In such conditions, they take root in water for about two months. After about 4 weeks, a root outgrowth (callus) is formed on the cuts of the ends of the cuttings, from which the rudiments of the bulk of the roots of the future seedling soon appear. When the length of the decorated young roots reaches 3 cm, it is time to plant the rooted cuttings of clematis in individual pots.
Also, be sure to put pots with young clematis for rooting in a common greenhouse (under glass or film) to ensure high humidity. Then the process of rooting cuttings in the substrate will go faster, and most importantly, dormant buds in the nodes will be preserved. Otherwise, with insufficient air humidity, the vegetative buds will dry out, and then the rooted cuttings will die.
Flower care rules
Clematis is considered an unpretentious plant, but requires some care. The plant does not like acidic, waterlogged soils. Drafts and an excessively sunny side do not suit him. Pruning is carried out in spring and autumn. At the same time, weak shoots are removed, flowering is controlled and a crown is formed. Autumn procedures are to prepare for winter. The clematis bush is cut and bent to the ground, sheltered from the cold. In the spring, as soon as the vine is open, it is permissible to add additional fertilizing - organic matter or mineral complexes.
Rooting conditions for clematis cuttings in the substrate
Prepared cuttings of clematis can be immediately planted for rooting in a loose fertile substrate: - individually (for example, in large transparent cups with drainage holes made from below); - together into a common cuttings, but in this case it will be impossible to control the process of root formation for each cuttings.
When using a cuticle for rooting clematis cuttings, it is filled with a layer of drainage and then with a substrate. The bottom layer of the substrate (about 25 cm) should consist of matured compost or humus. As the top layer (about 5 cm), perlite or washed coarse river sand, or a mixture of sand with high-moor peat in equal proportions, is used. The soil of the cuticle is carefully leveled and easily compacted, abundantly moistened.
Cuttings of clematis are planted in the substrate using a peg so that the upper part of the node of each cutting with buds is on the surface of the soil, but the base of the node would have close contact with the substrate. In this case, with proper planting of cuttings, the root system grows not only from the callus, but also from the subrenal zone of the node, and in some cases also from the tissue of the internode.
After planting the cuttings, very careful watering is done. For rooting cuttings of clematis, high air humidity is provided with the use of film or glass, while ensuring timely watering and regular spraying of plants.