Periodic digging and replanting of the bulbs is the key to good flowering of future tulips. The longer the bulbs are stored in the ground, the less chance they have of further propagation. Every gardener seriously involved in the cultivation of these beautiful plants is faced with the question of when to dig up and plant tulips. Indeed, premature or late planting can put an end to the entire crop. In addition to determining the correct dates, it is also important to take care of the processing of the planting material so that it does not pick up serious diseases in the soil and does not wither. We will talk about the timing of digging and transplanting, as well as the correct preparation of the bulbs in this article.
When to dig and plant tulips
How to properly prepare planting material for storage
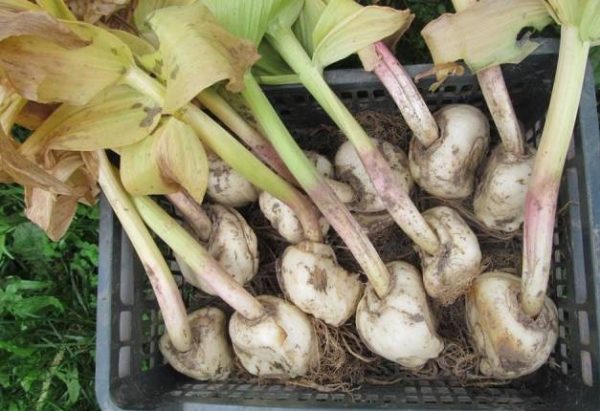
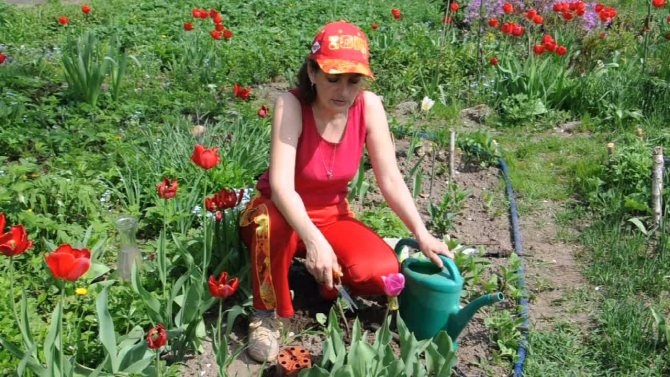
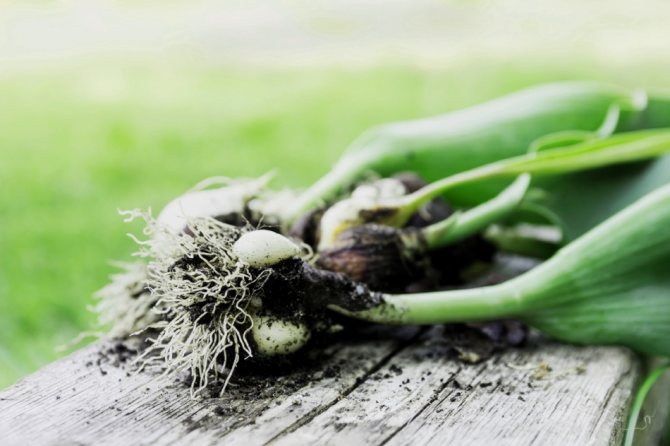
It is necessary to extract tulips from the ground at the beginning of summer, after they have faded. There is no exact date for this procedure.
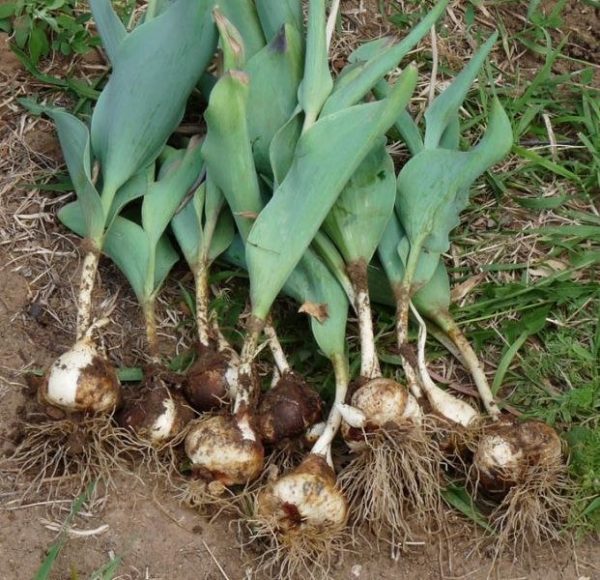
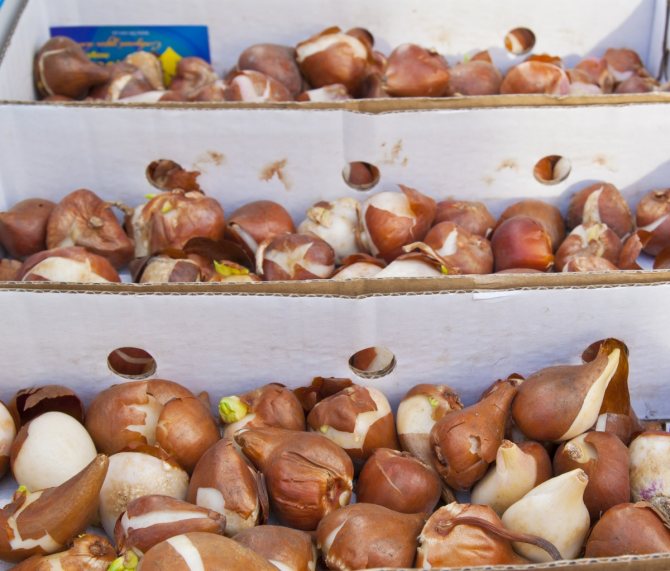
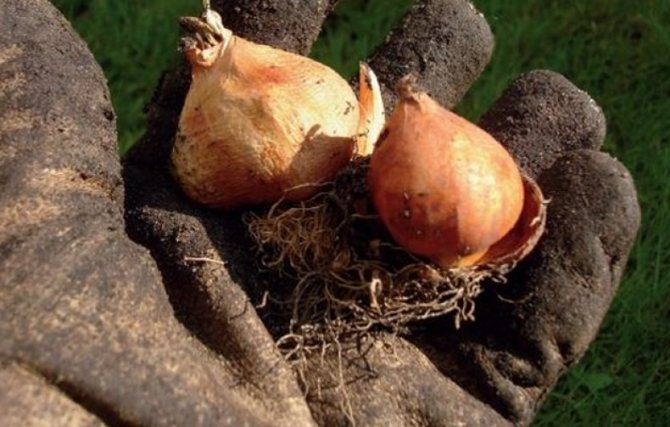
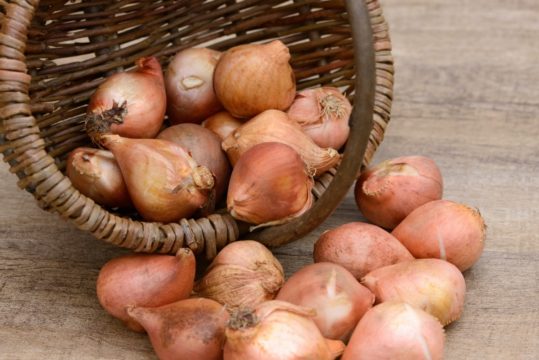
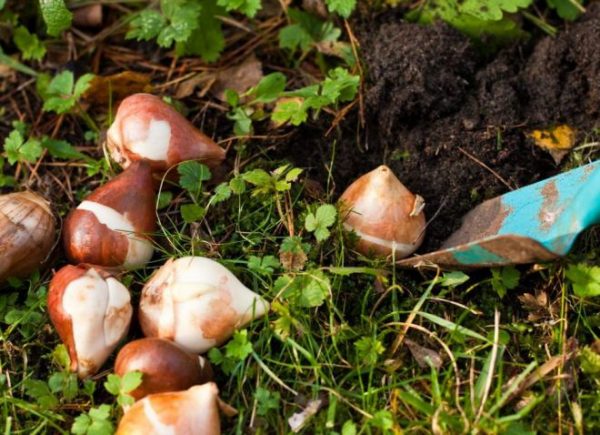
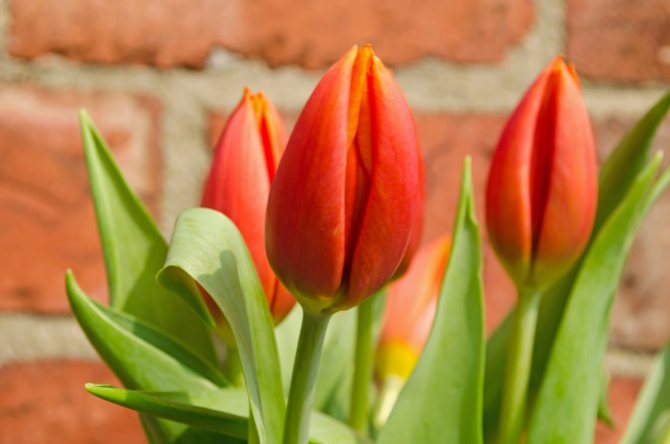
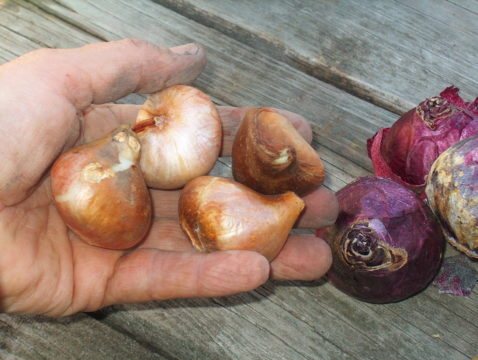
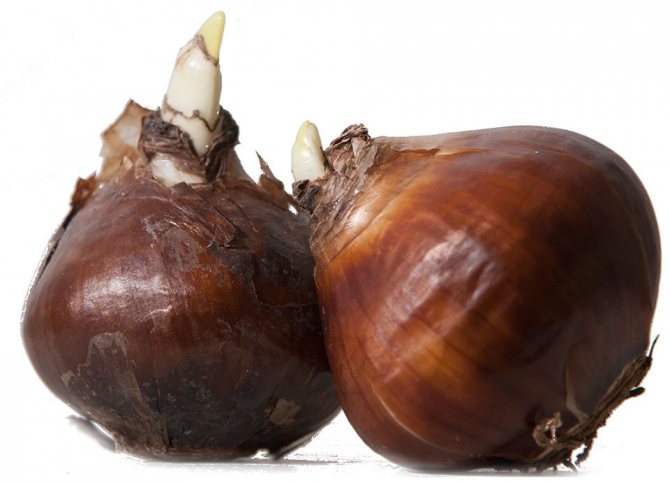
You should focus on the appearance of the leaves: faded and yellowed leaves indicate that the bulb has formed and it is time to dig it out. Also look at the bulbs - brown scales indicate maturity.
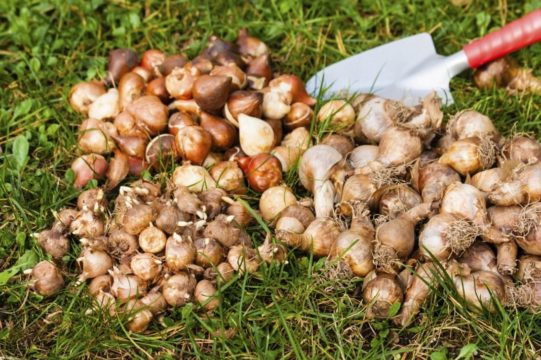
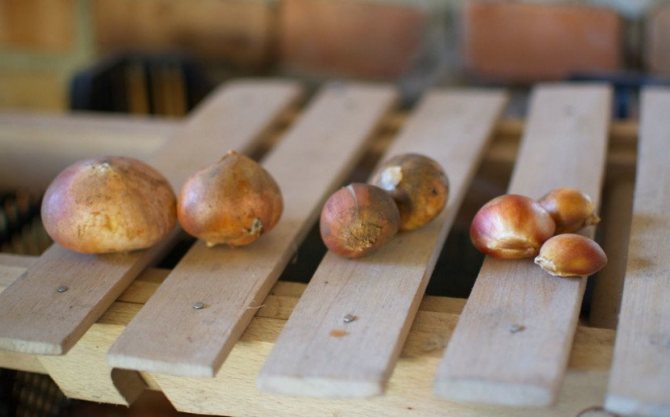
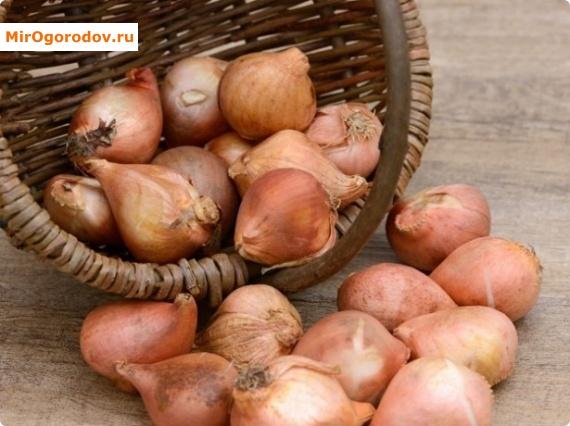
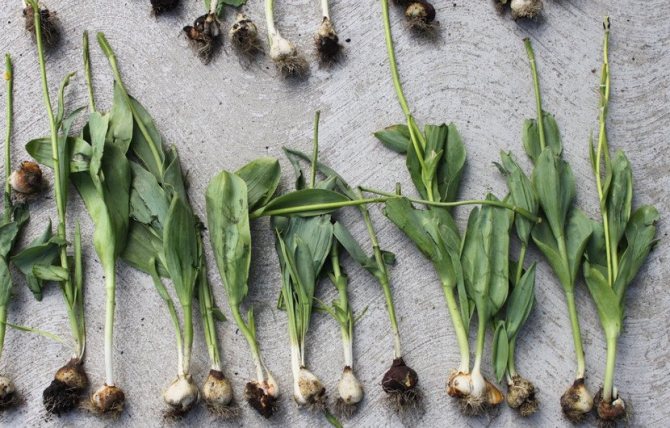
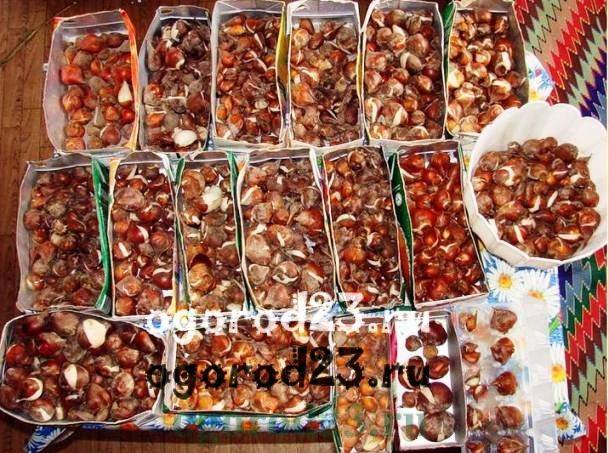
The tulip bulbs should be sorted. After they have been removed in the summer, they are sorted by grade and volume and placed in separate containers to make it easier to store.
Discard damaged and diseased bulbs. From the rest, they clean the ground. Then they are washed and disinfected in a weak solution of potassium permanganate for half an hour so that they do not deteriorate before planting.
Then they must be dried by sprinkling in the shade. The procedure is best carried out in a room that is ventilated - rains can interfere outside.
After 7 days, the dried bulbs are sorted again, removing the remnants of the stems and small embryonic bulbs. Then they need to be dried for a few more days.
The preparation of the tulip bulbs is complete. Now you need to decide on a place where they will be comfortable in winter. It is very important to store the planting material in appropriate conditions, as otherwise it may deteriorate.
Get tulip tubers out of the ground or not

All varieties and hybrids of tulips are divided into three groups according to the frequency of transplantation:
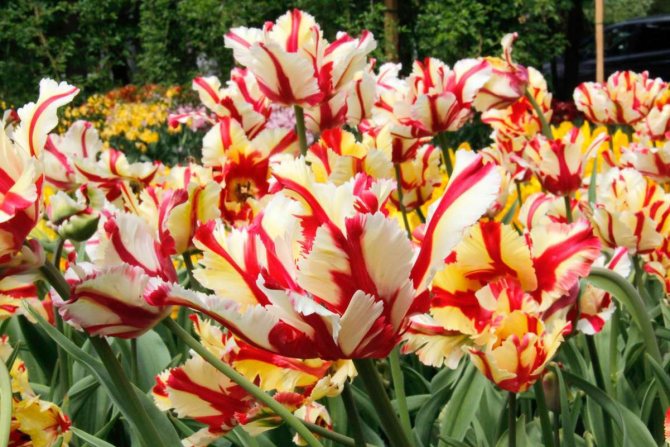
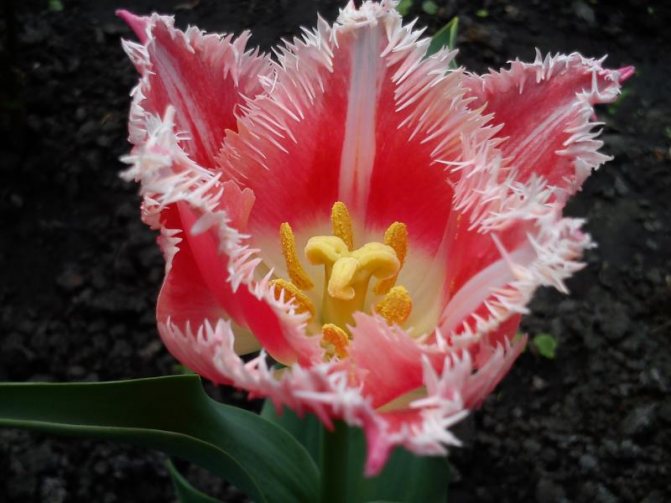
- Annually. Parrot, lily-like, fringed, all late and Rembrandt hybrids. If you do not dig these tulips at the end of each season, they quickly lose their characteristics and degenerate.
- Once every two years. Varieties Triumph, Darwin hybrids, not varietal. During one growing season, full-fledged tubers are poorly formed, therefore, it is not recommended to disturb them more often.
- Once every five years. Varietal tulips of Foster, Greig, Kaufman. These are low-growing plants, they are used in the design of paths. Over the course of a five-year period, they do not degenerate and give a small number of children.

What should be the place suitable for storing bulbs
Consider the places where it is recommended to store tulips until spring. It is better to choose a cool room such as a barn, basement, or attic. The place should be ventilated, without access to the sun, dry.
Suitable humidity is not more than 70%. There should be almost no light, because the onions are underground in the dark. Only weak diffused lighting is allowed so that physiological processes are not disturbed.
Drying rules
Dry flower bulbs in well-ventilated areas. For this purpose, gazebos, awnings, dry basements, verandas, attics, balconies are suitable. The main thing is to make sure that the temperature regime is observed, not higher than 25 degrees.
Direct sunlight is detrimental to the rhizomes. Only diffused light, twilight or shaded conditions are suitable for harmless drying.
Methods for storing tulip bulbs
Let's find out how to store tulips in winter.
You can select a cool pantry, end or dark room, where there is no dampness. The place should be away from batteries. It is also allowed to put the box on the insulated balcony. It is recommended to make a hole for a thermometer in the container so that the temperature can be controlled.
The storage cellar must be ventilated and dry. Sprinkle the bulbs with sawdust, sand or vermiculite. It is important to control the temperature.
You can also store tulip bulbs in the basement after flowering in this way: light soil is poured into the box, which consists of garden soil, peat, vermiculite, and it is steamed for 1 hour using a water bath.
Bulbs are planted in this soil. They take root into it, but do not grow, since the temperature is too low for this.
But storage in the cellar has one drawback - rodents like to feast on planting material. Therefore, if you have ever noticed these pests in your home, it is better to find another place for the bulbs.
Refrigerator
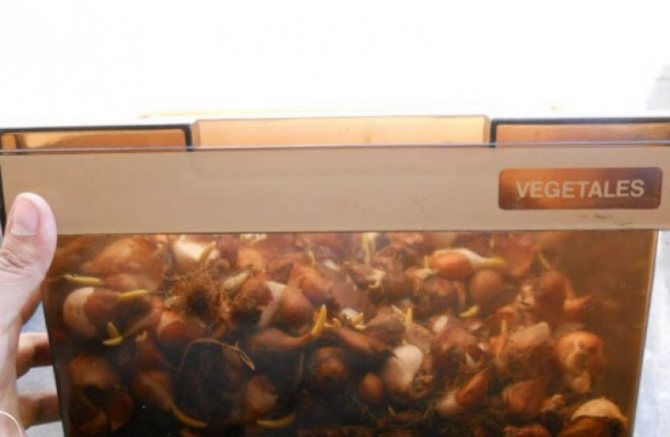
If the bulbs are few, you can put them in the refrigerator, where vegetables and fruits are stored. Before that, each onion should be wrapped in paper and put in a paper or cloth bag.
Thermal camera
Thermal chambers are considered the most suitable place. They are ventilated and automatically maintain the desired temperature. But such a device has a high cost, so not everyone can afford to purchase it.
What to do with the onions after drying

After final drying, the seed is prepared for sorting and storage:
- Each tuber is examined, dry, easily detachable scales are removed.
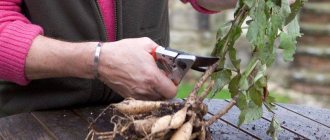
- The aerial part is carefully trimmed with pruning shears or small garden shears, but not too deep, so as not to damage the root.
- Disinfected for 30 minutes in a pale pink manganese solution and dried.
Possible storage problems and solutions
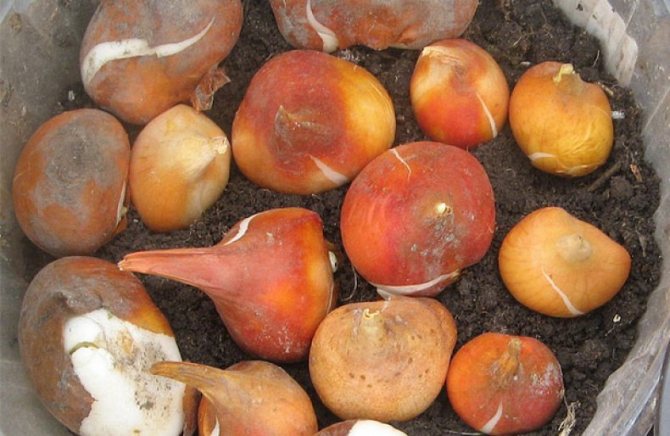
Problems can arise due to improper storage conditions, for example, when the humidity or temperature is high. This can cause the bulbs to rot, mold, or germinate ahead of time.
In a too dry place, the planting material can dry out and die. Therefore, observe the correct storage conditions.
When mold occurs, tulip bulbs are sorted out, healthy ones are laid and stored separately. And the damaged ones are treated with foundation or potassium permanganate. A large amount of mold is removed with a dry towel.

If the planting material begins to rot, it is necessary to select the diseased bulbs and destroy them in order to protect the healthy ones. But in the case of small areas of damage, they can be saved by cutting off the rot and treating the cut with greenery.
By choosing the right place to save future tulips, you can completely protect them from problems. And during planting, you will have only healthy planting material.
Read also: Tomato "Azhur F1": high-yielding and heat-resistant variety
Storage container
For winter storage, wicker baskets, plastic or wooden boxes, plank shelves are used.
To absorb excess moisture, wood shavings are poured into the container with tulip tubers. For the same purpose, each spine is wrapped with newsprint or wrapping paper. This method will save you from contact with neighboring bulbs and prevent the rapid multiplication of diseases and fungi.
It is not recommended to use glass, plastic and plastic containers for storing planting material. The environment created in such a container is detrimental to the future plant.
Storing tulip bulbs in winter
In order for tulips to bloom luxuriously on your site, at the end of flowering, the bulbs should be dug out annually (or at least once every 2 years), laid out in size and pickled to provide protection against fungal diseases.
Read on Dacha6.ru:
It is worth remembering that the onions left in the ground eventually go deeper and deeper into the depths, and then it will be more problematic to find them there.
When tulips are grown for many years in the same place without digging out the bulbs, their varietal properties will gradually begin to be lost. Be sure to dig up the bulbs in late June - early June, sort, process and store.
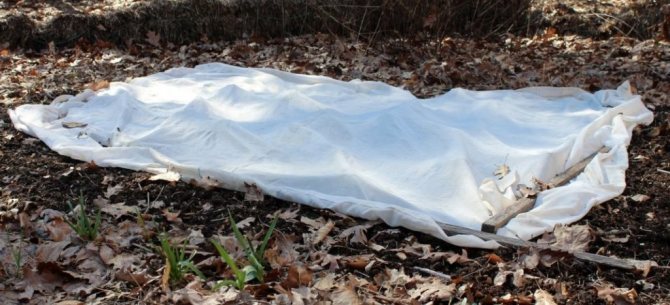
We traditionally plant tulips on the ridges in late autumn. However, it may happen that for some reason you will not be able to plant flowers in the open ground (severe frosts hit the ground ahead of time, snow fell or the road to the village was smashed by rains). In such a situation, you should take care of additional storage of the bulbs in the winter.
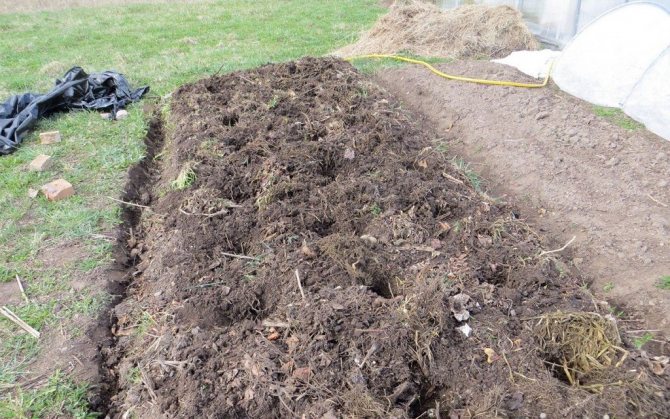
Preparing the soil for planting
In addition to tulips, the soil itself also needs processing, which will feed the bulbs for a long time. Tulips are quite demanding on the soil and prefer loamy or sandy types. Heavy, peaty, and also poorly absorbing soil will be a real test for the bulbs, which they may not cope with. Soils with high acidity are also poorly suited, but the gardener can easily change the acidity of the soil.
In order for tulips to grow well in the soil, it is necessary to fertilize and disinfect it.
Soil deacidification
The main substance that contributes to the neutralization of the soil is lime and all fertilizers in which it, in one way or another, is present. To consolidate the effect, liming is sufficient to carry out no more than once every ten years. The amount of material used depends on the degree of acidity of the soil:
- Strongly acidic soils are treated with fifty kilograms of substance per one hundred square meters;
- Acidic soils require at least forty kilograms of lime per one hundred square meters;
- Weakly acidic soils need thirty kilograms of material per one hundred square meters.
Soil deacidification is most often carried out with lime
Please note that after the autumn liming of the soil, it is forbidden to fertilize it with manure, since their interaction will lead to the loss of a large amount of nitrogen.
Siderates - plants that are subsequently used for embedding into the soil in order to improve its composition and structure - can also help fight acidity. The following are actively cultivated as green manure:
- Rye;
- Mustard;
- Oats.
Lime prices
lime
Ground water
In order for the bulbs to have room for germination, it is necessary that the water table does not rise above seventy-five centimeters. If this parameter is not observed, the bulbs will constantly become waterlogged, which sooner or later will lead to their rotting.
In order to increase the distance between soil and groundwater, an artificial embankment of peat and sand should be created.
If your site is running too close to the soil surface, you can increase the distance by using an embankment. Sand is a good material for artificial drainage. On top of the clay type soil, you can apply a mound of sand and peat. In order to prevent increased moistening of the soil by groundwater during digging, add coarse washed sand to the ground during digging.
On the eve of landing
If the soil meets all the parameters, the last preparations remain before planting the bulbs:
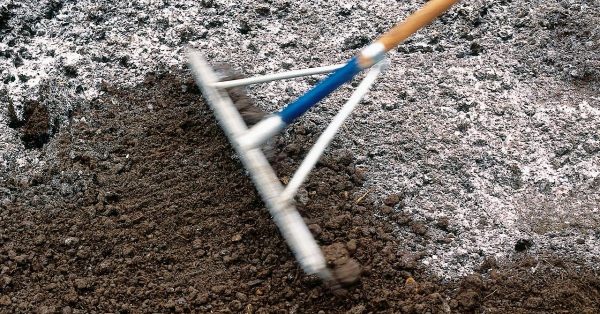
- The day before planting, the garden should be loosened, deepening thirty centimeters;
- Removing weeds is optional, but it will allow the tulips to grow faster and easier;
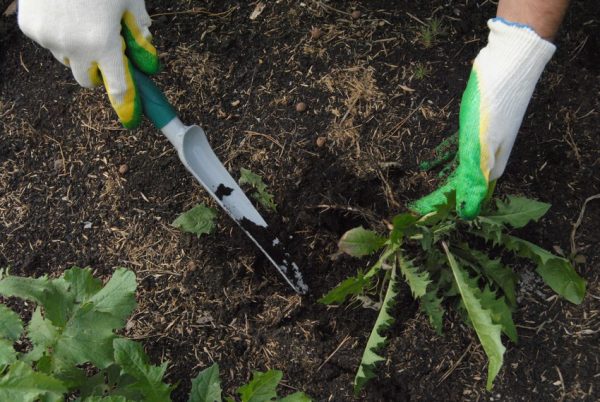
By cutting out weeds, you allow the bulbs to get more nutrients from the soil.
- If you suspect the presence of pathogenic bacteria in the soil, treat it with a weak solution of potassium permanganate. You can skip this step if you have already disinfected the seeds before.
Storage features
Store the bulbs you plan to plant in the fall at room temperature in a shaded area in cardboard boxes or baskets. The optimal layer height is 3-5 cm, that is, it is not particularly worth piling the bulbs on top of each other.
If you plan to plant the bulbs in advance in the spring, then it is advisable to lower the storage temperature to +15 C from August.
I read on forums on the Internet that many people store bulbs until spring on the lower shelves of the refrigerator. Indeed, such tulips will start growing well in the spring, but not all of them will bloom.
The ideal place for storing planting material is a dry subfloor. With the arrival of cold weather, the temperature in it will gradually decrease, reaching + 8 ... + 11 C in winter.
If you live in an apartment in winter, it is more convenient to store bulbs during this period in a cool closet or on a well-insulated balcony.
Transfer
The transplant procedure is quite complicated.
It consists of a set of measures that must be followed in a strict order:
- Digging up.
- Drying.
- Selection of healthy specimens.
- Storage and second stage of drying.
- Processing before planting in the soil.
- Soil preparation.
- Disembarkation.
Did you know? There are approximately 150 varieties of tulips. Moreover, each of them is divided into more than 3000 varieties.
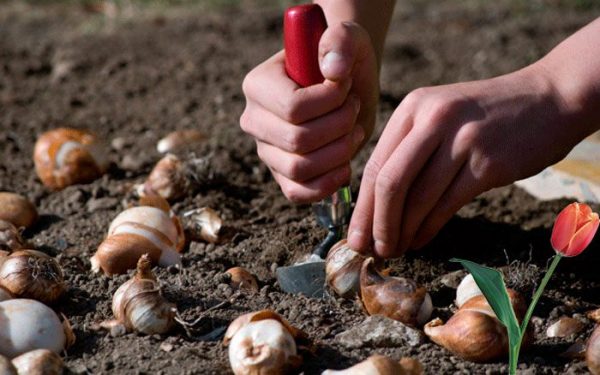
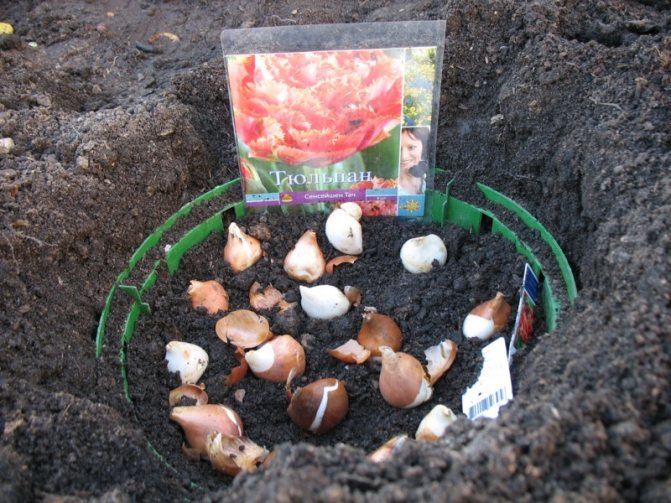
An important point in the transplant is also considered to be soil preparation. It is recommended to dig up the selected area on the eve of disembarkation. During this time, the earth will settle down. Weeds are removed from its surface. The optimal planting depth for a tulip is considered to be 2-3 sizes of its bulb.
Digging out the bulbs
The first sign that a tulip is ready to transplant is a lack of color and partial yellowness of the stems. In this case, the bulbs themselves should acquire a characteristic brown tint, but not take root.
Did you know? In Turkey, a flag-shaped composition was created from 168,000 tulips and entered the Guinness Book of Records. It was formed by 400,000 people, and the process took 12 hours.
To avoid the formation of a root system in flowers, they are usually dug up in the spring or summer. Timely extraction from the ground helps to avoid fungal diseases as well. They are very dangerous, since the affected planting material is not suitable for transplantation. Another important factor in the choice of these particular periods of the year is the absence of excessive wetting and reproduction of the tuber.
The tulip bulb can lose its varietal value. This happens due to reproduction, which is why it is so important for gardeners to know the exact time of transplantation. Digging begins before it dries.
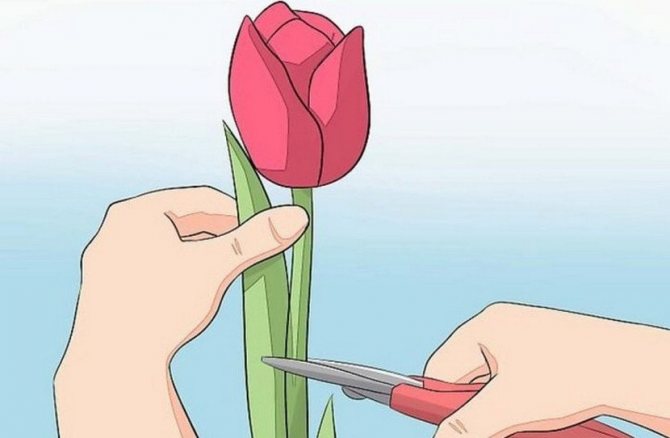
Be sure to cut the stem of the plant after the flower has completely faded. In this case, the root system receives maximum nutrition. It is better to cut the stem of the flower at the root, and after a month dig up the bulb itself.
The extraction process from the soil is carried out in dry and slightly windy weather. In this case, any damage to the root is not allowed. Over time, such a bulb can rot or become infected with bacteria. If during the growth of a tulip pest infestation, damage to the root system or unsuitable soil is noticed, in order to save the plant, it must be transplanted immediately.
Drying
After digging, tulips are necessarily divided into varietal species. To dry them, special containers are prepared.They are placed in a room where sunlight does not penetrate. In this case, the space should be warm and well ventilated. If the bulbs are left in the sun, they can get burned.
Did you know? Tulips first appeared in Central Asia. However, the popularity of flowers came only after their cultivation in the Netherlands.
The correct drying process consists of two separate steps. The second involves moving containers to a cooler room or place. Before this, the bulbs are carefully examined again. Remove those that are unsuitable for further storage. As in the previous case, an important condition is the absence of sunlight and good ventilation.

During both stages of drying, the planting material should be carefully checked for rot. Those that are damaged are promptly removed. Only in this way can you get really healthy bulbs, which will turn into beautiful and bright flowers in the summer. Drying period - from 3 to 6 months, depending on the time of planting. August is the best month to prepare for this process.
Processing before planting
Processing tulips before planting is carried out in order to disinfect them.
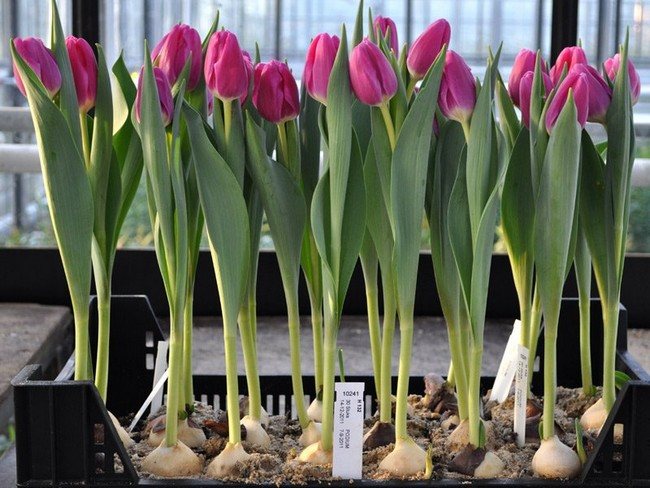
Also learn how to grow tulips in a greenhouse by March 8th.
They can be treated with the following solutions, which you can prepare yourself:
- Potassium permanganate. Take 2 g of the substance and dissolve in 10 l of water.
- Fundazol... Dissolve 30 g of the drug in 10 l of water.

Before direct planting in the ground, the bulbs are soaked for no more than 1 hour in one of the solutions described above.
Among amateur gardeners who willingly share their knowledge on the Internet, you can find other recipes, namely:
- "Vitaros". A solution is prepared from 2 ml of the substance, which is diluted in a liter of water. For the convenience of measurements, a measuring cup is purchased. Be sure to protect your hands with rubber gloves. The bulbs are immersed in the prepared solution so that each is immersed in the liquid. For soaking, 30 minutes is enough.
- "Epin"... This solution is prepared from 2 liters of water and 1 drop of the substance. For ease of measurement, a pipette is used. The bulbs remain in this solution for up to 24 hours. After processing, planting in the ground is allowed. This amount is sufficient for only a few bulbs. If it is necessary to process a larger quantity, the volume of the solution increases proportionally.

There is no need to rinse tulip bulbs after soaking in fungicidal solutions. It is enough to let them dry without sunlight.
In addition to the methods described above, there is another new integrated approach, namely:
- Sorting. Carried out according to the size of the bulbs. The larger it is, the higher the quality of the planting material. Large tubers produce more beautiful and larger flowers than small ones, so they need to be separated already at the stage of preparation. Some gardeners recommend not paying attention to small bulbs at all. They are just thrown away. If the site is small, for example, a flower bed in a country house, then they can be used in another flower bed. And plant larger bulbs in the main territory.
- Visual inspection. During it, it is required to isolate damaged bulbs (cuts, rot) or those infected with diseases. In the same period, the husk is removed, which by this time has become tough. The process of separating the top layer is carried out due to the likelihood of damage under it. It should also be remembered that the husk interferes with normal germination. It is only important not to damage the bulb during this procedure.
- Soaking in a special solution. Most often, a fungicide or a growth stimulant is chosen for this purpose. The different varieties are processed separately. In this way, they can be prevented from mixing.
- Last drying. After processing, allow the bulbs to dry.To do this, they are laid out far from each other in a shaded place for 30 minutes.
There is no best or ideal preparation option, so every gardener tries different methods and chooses the one that suits him best. The solution you need can be purchased from a specialist store.
Plan for laying tulip bulbs for winter storage:
- Immediately divide the bulbs dug up in the summer according to varieties, then according to size and spread out. Pay more attention to the large bulbs 1 and 2 of the parsing, since it is from them that abundant flowering plants will turn out next season. All diseased and damaged bulbs should be discarded immediately.
- Next, the selected bulbs should be carefully cleaned of the soil adhering to them. If they are not to be used for forcing, they must be rinsed and disinfected by soaking in a pink potassium permanganate solution for 35 minutes.
- The treated tulip bulbs are evenly scattered to dry in a shaded, ventilated area. An open veranda is not very suitable for these purposes, since in addition to precipitation, the structure must reliably protect the planting material from drafts.
- After about 1 week, the bulbs are sorted out again, while removing the remnants of the stems covering the scales and small embryos. After that, the planting material is dried for another 2-3 days.
Now everything is ready for placing the bulbs for long-term storage until spring.
Long-term storage is better tolerated by large bulbs, the size of which exceeds 3 cm.In the next season, full flowering can be expected from them. Plants from smaller bulbs will bloom modestly at best, or may even postpone flowering for 1 year. Children less than 1 cm in size are not suitable for long-term storage, so they can be thrown away immediately. Even if they remain viable by spring, the flowering of such tulips will be delayed for 2-3 seasons.
Planting material should be stored in one, maximum two layers in wooden boxes or baskets. The bottom and sides should have multiple openings for good ventilation. Sometimes the bulbs are hung from the ceiling in old nylon stockings or natural fabric bags.
If you store bulbs in an apartment, find a cool, dry, shady, draft-free location away from batteries.
To prevent the bulbs from spoiling for many months, it is advisable to sprinkle them with a layer of dry sawdust. If they are not at hand, wrap each planting material with dry newspaper. Thus, the infection from the rotten "neighbors" will not be able to spread quickly.
In a dry cellar or basement, the bulbs can be planted in boxes with forest soil or peat mixed with vermiculite. During the winter, they should root properly, however, due to the low temperature, they will not start growing.
Be sure to regularly inspect the planting material during storage. Dispose of spoiled bulbs on time.
When to dig up tulips?
Like many other yielding plants, tulips come in many varieties with different ripening times. Early, middle and late - all of these tulips are harvested at different times.
The timing of digging tulips depends on the specific variety.
For example, the flowering period for early varieties ends in mid-June, while later varieties can be in the soil until early August. In the Moscow region, the main season for bulbs digging begins in mid-June and ends in the first days of July.
Signs of maturity of tulips
To dig up tulips on time, you need to be well-versed in the external indicators that indicate ripening. They can help you tell digging times better than approximate dates. Signs that tulips are ready for digging include:
- Yellowing and drying of leaves (the symptom may not be relevant for arid regions with hot summers, which "yellows" the plants ahead of time);
Dry yellow leaves indicate the end of the growing season.
Bulbs harvested on time keep better and longer
Timely digging of the bulbs is the key to good storage of the fruit. Prematurely harvested bulbs do not have time to grow the integumentary scales mentioned above. As a result of missing the deadline, the gardener has inevitable difficulties with storing immature specimens. In addition, unripe bulbs are less effective for plant propagation.
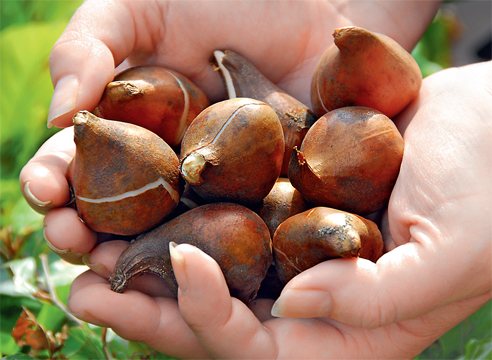
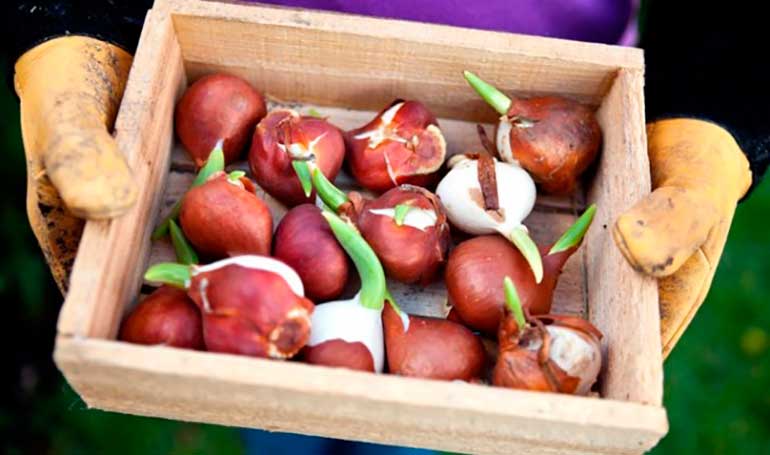
One of the main signs of a ripe bulb is a dense skin.
When collecting overripe bulbs, you may simply not find some of them, since the leaves of the tulips will have time to fade, which will only make it difficult to find. Also, after a long stay in the soil, the bulbs are dug out worse due to the fact that their nests crumble. The likelihood of damaging the plant also increases when removing it from the ground with a shovel. In the event that the rhizome of the plant separates from the bulb and remains underground, it will become a source of dangerous infections.
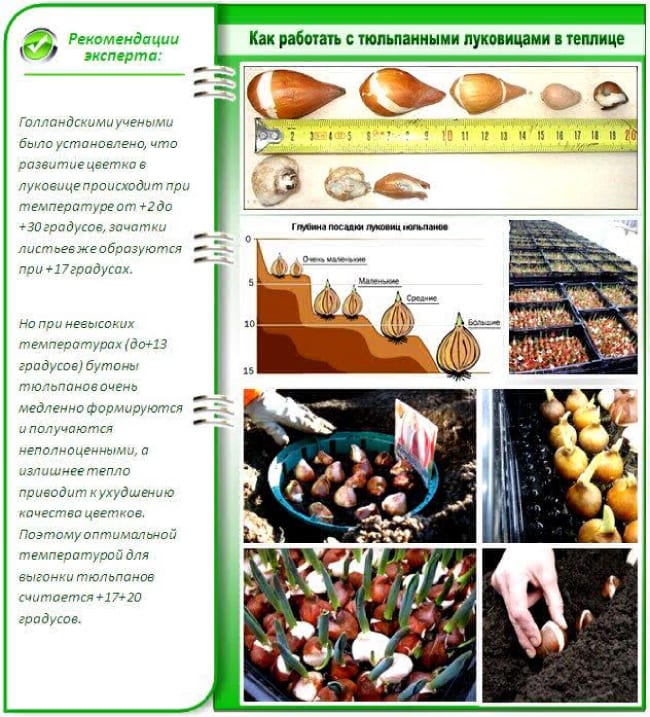
Forcing tulips by March 8 at home: planting dates
It is an indisputable fact that the degree of a rainbow festive mood helps to raise a bouquet of magnificent tulips. Unfortunately, it can be easy to make a mistake and buy flowers that are not the first freshness. But there is a means not to trivially solve this problem. Flawless buds of excellent quality can be obtained using forcing tulips. How not to miss the deadline for distilling tulips by March 8, about the correct technology, direct planting and further care at home, we will tell in this article.
Read also: How to quickly ferment cabbage at home
Optimal digging time
Many gardeners have worked out the following general rule for themselves: as soon as the leaves turn yellow by a third, you can start digging out the bulbs. In Central Russia, plants approach this state somewhere in the end of June - beginning of July. In this case, the nest of bulbs will not have time to fall apart and will remain unified.
The end of the stem will soften as well. If you can wrap it around your index finger, then the bulb can be removed from the ground.
If you tighten the deadline and let the tops completely dry out, then the bulbs will decay, and it will be extremely difficult to find all the children in the ground.
First of all, you should dig up early varieties, the flowering of which fell at the end of April - beginning of May. Late varieties, upon completion of flowering, are fed and kept in the ground for about 2 more weeks.
↑
When to plant tulips at home
Those who are just taking their first steps in this field of floriculture may consider this fact a luck or a miracle. However, he has a very common explanation. This is a thorough knowledge of the daily routine of the bulbous culture.
When to plant tulips so that your loved ones get fresh, spring-smelling bouquets by March 8? The dormant period for the bulbs lasts about 16 weeks, and the rooting and growth of the peduncle takes another 3 weeks. Counting back 19 weeks on the calendar, you can find out that you need to plant tulips for an early spring cut in the last week of October. Using the same methodology, they calculate the planting time for distillation on New Year's Eve, Valentine's Day and other solemn dates.
Useful articles for gardeners and gardeners
Digging time
Nobody will tell you the exact date when the time comes to dig up tulips after flowering.I usually answer this question - at the beginning of summer. But this is true for the Kuban, although not specifically. Here you can dig up tulip bulbs in the first half of June, in central Russia - a month later.
The main reference point is the state and color of tulip leaves after flowering. That is, yellowed, wilted leaves let us know that the bulb has formed. As soon as you notice that the leaves have begun to turn yellow, have faded, it is time to remove the tulip bulbs from the soil.
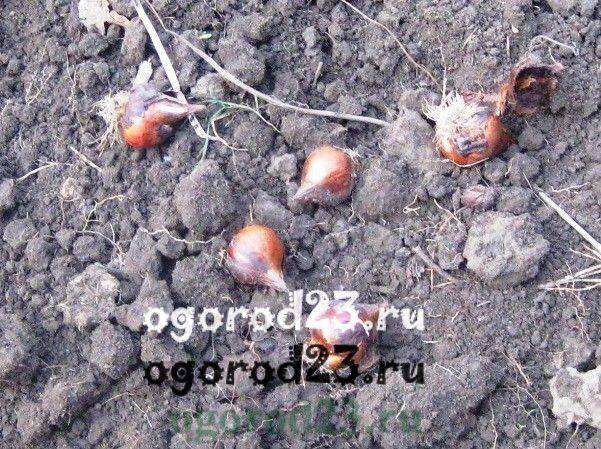
There is one more landmark - the color of the cover scales of the bulbs. On ripe tulip bulbs, the top scales should be brown.
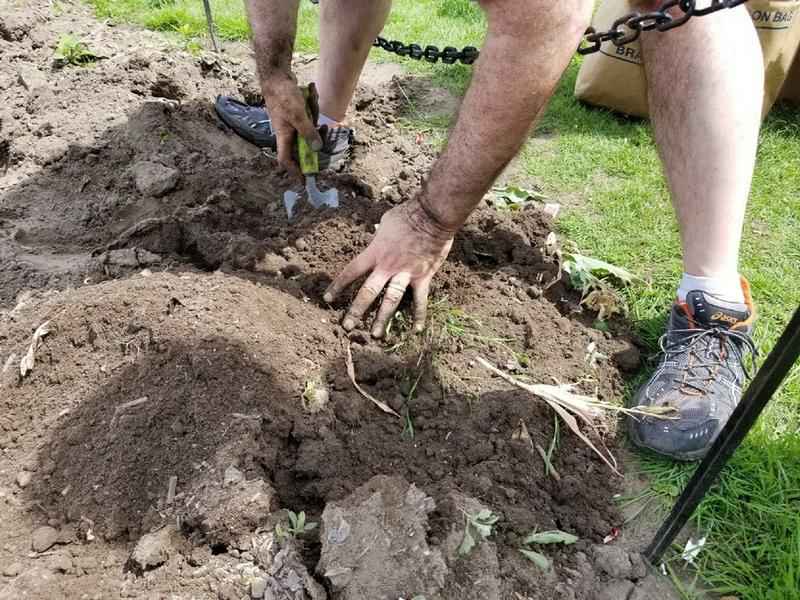
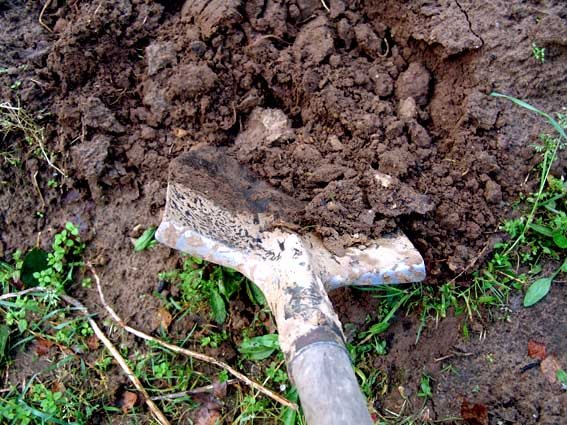
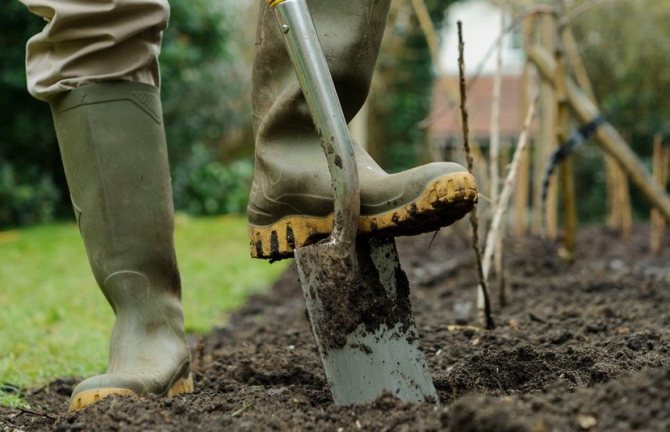
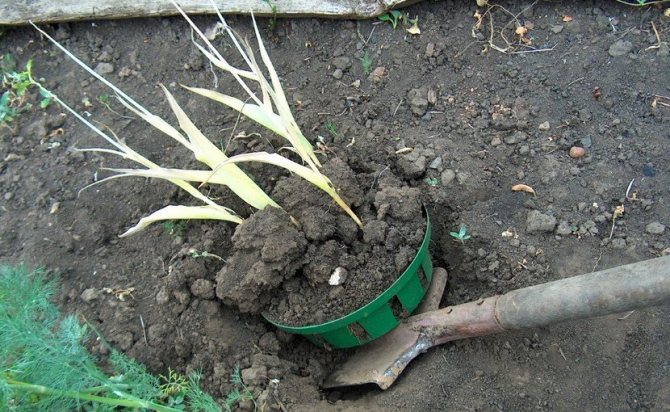
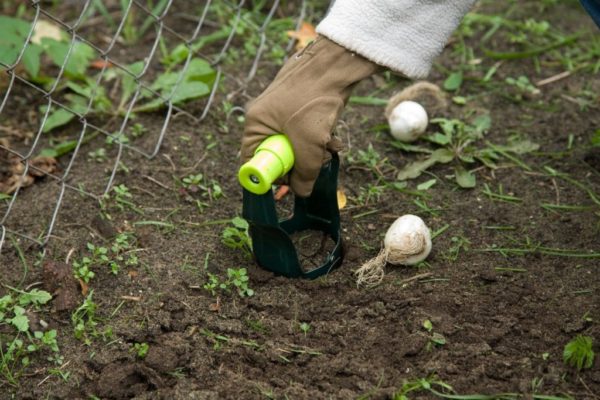
The digging must be done very carefully. I use a pitchfork for this purpose, as a shovel can damage the bulbs. Then I also go through the excavated area with a trident manual cultivator, since it is undesirable to leave children in the ground - small bulbs - this will simply clog up the future flower bed, make it not very beautiful.
It should be noted that if you have tulips of early, middle and late flowering, then it is better to dig them up at different times. Postponing this work until later, until all varieties have faded, you risk not finding the place where the early flowers grew. Sorting the bulbs by type will also be easier. Digging up a flower bed with early tulips too late increases the risk of damaging the bulbs.
↑
Selection of tulip varieties for distillation by March 8
The process of forcing tulips at home always starts with choosing a variety of flowers at the end of summer. There are many of them now. For this purpose, Darwin hybrids, Parrot, Terry late and Fringed tulips are quite suitable. When choosing specific varieties of flowers, you need to pay attention to their color, stem height, flowering time, resistance to various diseases. Experts advise novice flower growers to use tulips of the Edd Ram, Princess Victoria, Hamilton varieties.
Where to store
Bulbs are stored in mesh-bottom boxes in a dark, well-ventilated area. Prepare the container and the room in advance: thoroughly disinfect them, adjust the temperature and humidity indicators inside the room. After the expiration date, gradually lower the temperature and shorten the ventilation time. Remember that adherence to normal conditions ensures the development of buds and leaf buds.
Temperature regime
Conditions for storing and planting tulip bulbs
Storing tulips at home is carried out when a certain temperature and humidity are set. Consider the following indicators:
| Temperature (° C) | Moisture (%) | |
| July | 21–25 | 65 |
| August | 19 | |
| September | 16 |
Culling the bulbs before planting in autumn
To avoid spoilage of all seed, check it regularly: every 7-10 days, try to select diseased specimens so that they do not infect good onions. Frequent airing, which lasts 1-4 hours, will help to preserve whole specimens, prevent rotting, mold formation. In the first month of storage, the procedure is carried out every 3 days, then the ventilation frequency is reduced.
Before planting in the fall, which is carried out in September - October, carefully sort the material. Remember that the heads are often infected with gray, white, penicillous rot, futariosis: a gray-green bloom and reddish spots appear on the affected specimens. Spoiled onions should be selected and burned. If the damage is small, then try to cure the onion: peel it off with a sharp knife, sprinkle the treated area with crushed coal. Place the bulbs in 1 tbsp saline solution for 3-5 minutes before planting. l. salt and 1 liter of water.
Preparing the soil for forcing tulips by March 8
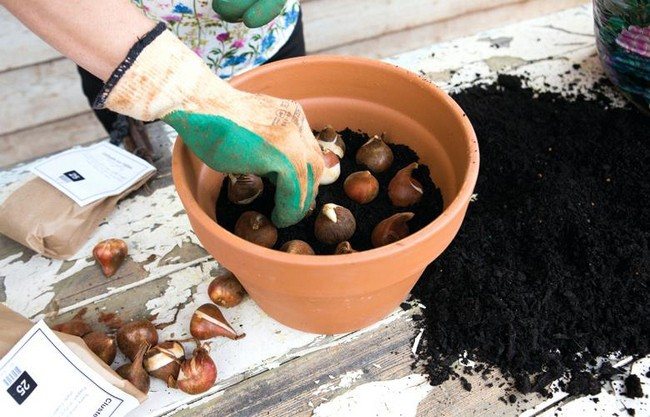
For the successful distillation of tulips, containers and soil are prepared. Ceramic dishes with drainage holes are better suited. If the containers are new, they are filled with water for a day. Pots, containers, and wooden crates are also fine. If the containers have already been used, then they are disinfected before planting.A nutritious substrate is used as a soil for forcing tulips. The soil should be light, absorb water well and allow air to pass through. There should be neutral acidity.
For distillation, use as a substrate:
- sand;
- a mixture of earth and sand;
- peat;
- peat with sand;
- perlite.
You can use such mixtures:
- two parts of land from the garden, part of compost, river sand;
- part of the land is garden, part of peat, part of sand.
They use steamed sawdust of wood species, pre-treated with a lime solution. Before planting, it will not hurt to treat the soil with Aktar insecticide. To do this, take 1.4 grams of substance per ten liters of water and spill the substrate before planting. This will kill the worms and larvae. Florists advise using only a new, clean substrate every year.
When preparing the soil for forcing tulips, it must be remembered that the flowers will calmly tolerate the lack of nutrients, because the bulb has everything you need. But excess moisture is destructive for them. Water should not stagnate in the container, otherwise the bulbs may simply rot. Therefore, the use of drainage is mandatory.
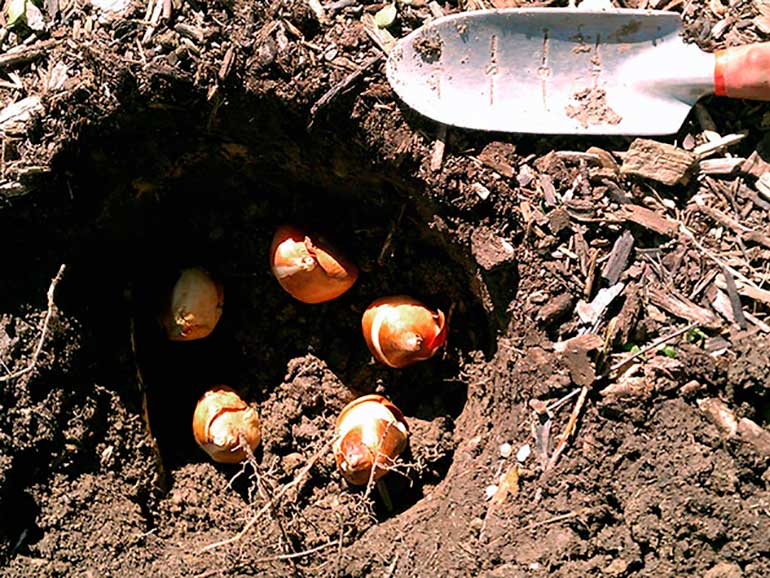
How to dig up and store tulip bulbs
Dig the tulips with a pitchfork when the ground is dry. They deliberately step back from the plants to minimize the risk of damage to their bulbs.
If the weather is humid, then the dug out bulbs should be thoroughly rinsed under running water and carefully examined for the development of fungal diseases.
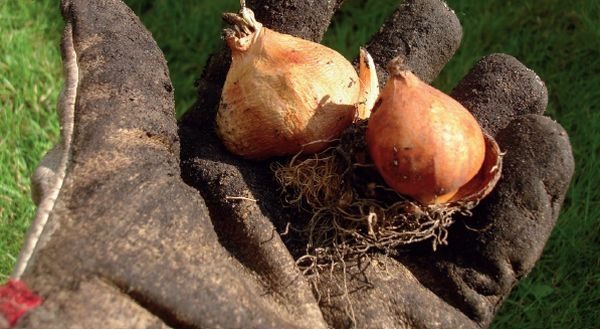
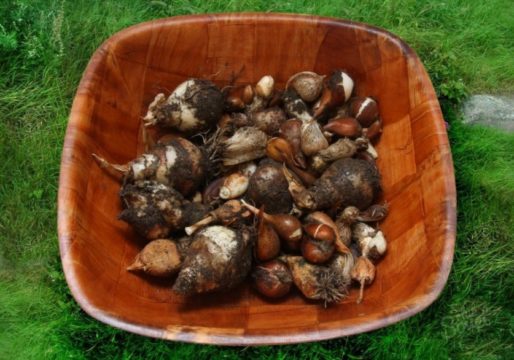
Ripe bulbs are covered with dense golden brown scales. Before storage, they must be kept in a solution of potassium permanganate or Fundazol for 30 minutes.
It is better to put suspicious bulbs in a separate container to exclude the possibility of contamination of healthy planting material.
The bulbs are allowed to dry thoroughly, after which they are sorted by varieties and laid out strictly in 1 layer on signed cardboard boxes. To dry, we lay out the bulbs on the veranda floor, in a shaded area. After 2 days, it is necessary to remove the outgoing covering scales from the bulbs and remove the remnants of dried roots together with earthy lumps adhered to them.
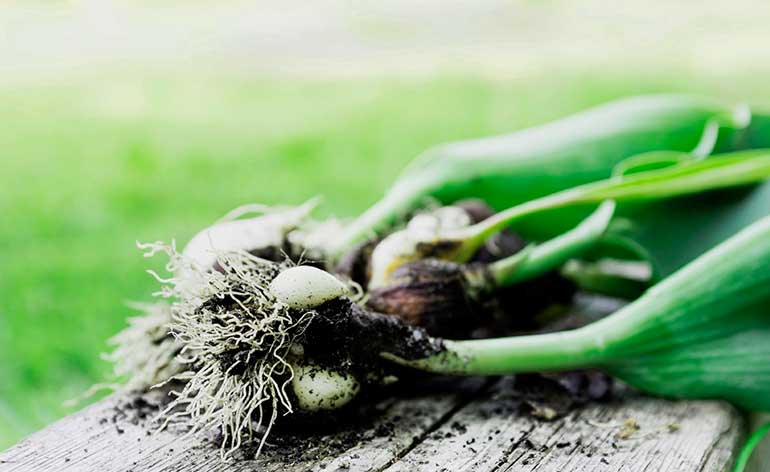
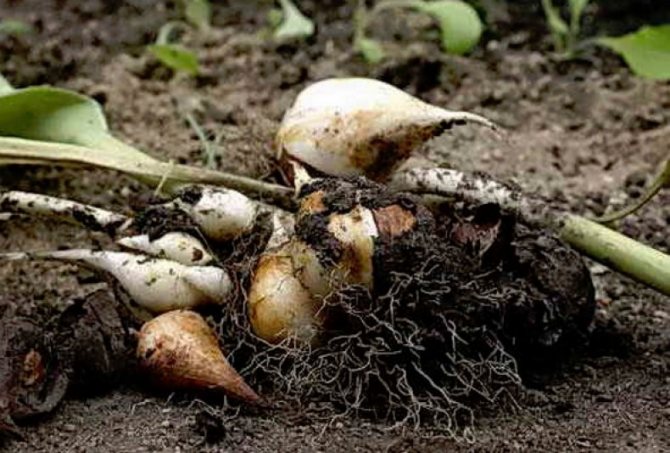
Dried onion nests disintegrate quite easily, and you can disconnect the babies without unnecessary problems.
For further autumn planting in flower beds, large rounded bulbs with a diameter of at least 4 cm are better suited.It is better to plant a trifle separately in the first year, since they are unlikely to bloom next season.
The optimal parameters for storing tulip bulbs in July are temperatures from +23 to +25 C and humidity levels up to 70%. Fringed and parrot varieties should be stored in mid-summer at a temperature of about +30 C. Such indicators are extremely important for the formation of a flower bud, which is laid in the first month of storage.
In August, the temperature is lowered to +20 C, in September - to +16 C.
Planting bulbs in the ground is carried out in the second half of September, when the soil temperature is between +9 and +12 C.
↑
Planting and rooting tulips by March 8
After the bulbs have passed the cooling stage, you can start planting them. Typically, such work begins in early October. Prepare plastic boxes filled 3 cm in height with river sand mixed with peat. The use of ready-made potting soil mixtures for flowering plants based on peat is also not prohibited. The bulbs are placed at a distance of 1–2 cm from each other, by slightly deepening them into the prepared substrate.
After watering, the bulbs are sprinkled with sand so that the tops remain uncovered. After that, they are watered again. Then the boxes are placed for storage in basements or special refrigerators with the obligatory observance of the temperature regime (about 5 degrees Celsius). As the substrate dries, it is watered a little.
Reasons for transplanting tulips
It is recommended to replant flowers annually for several reasons, namely:
- the preservation of the varietal characteristics of the plant;
- slowing down the rapid development of the tulip;
- the landing remains decorative.
Did you know? Flower bulbs in the Netherlands were sold very expensive in
mid 17th century... Each of them was more expensive than the house of a person with an average income.In their natural habitat, tulip bulbs grow on the mountains, and each year sewage deepens them into the ground, which leads to the death of the plant. In home gardens, much the same process takes place, which is why the annual transplanting of tulips is so important. Then the flowering of this spring plant will delight every year.
Leaving after planting tulips for distillation by March 8
During the entire period of forcing, the substrate with the bulbs must be moistened as the soil dries up, but not poured. Watering once a week is optimal. Despite the low temperature, the bulbs will release roots, and sprouts will break through in January. In early February, the shoots will grow up to 5 centimeters. Now you can take the pots out of the refrigerator or basement and grow in the light, in a warm place (+18 degrees). You can not put the plant in sunlight and keep it at a high temperature. A windowsill on the north side would be a good spot.
Checking the seed regularly
Primary processing before storage is often not enough. All bulbs should be periodically turned over and inspected for new spots and decay. The spoiled roots are immediately removed, and the adjacent ones are wiped with a clean cloth and transferred to a separate box to prevent further spread of bacteria.
How to create optimal storage conditions for tulip bulbs
Tulips, like most spring bulbous plants, have a special biological calendar - the growing season is short (3-4 months), the rest of the time the bulb ripens and the potential for the next year is laid. Digging and the period of summer dormancy for them is an indispensable element of agricultural technology and a guarantee of the preservation of varietal characteristics. Hence the numerous questions, where and how to store tulip bulbs so as not to spoil and get abundant flowering in spring?
Read also: How to plant and grow Alligator cucumbers

When are tulips planted?
Since each region has its own temperature characteristics, tulips are planted at different times. In the southern regions, planting can be postponed until the end of October, while gardeners in the northern regions submerge tulips in the soil as early as mid-September. The main condition that must be met during the operation is that the temperature of the earth must reach nine to ten degrees above zero.
Planting time of tulips depends on the climate of a particular region.
Premature, like late planting, is undesirable, since the plant takes time to get used to the soil in order to tolerate the impending cold well.
Prices for tulip bulbs
bulbs tulips
Video - Timing of digging tulips
Summer storage features
Within a month after flowering, the bulb ripens. At this time, there is an intensive outflow of nutrients from the stem and leaves, they gradually turn yellow and wither. The bulb itself becomes yellowish brown. When ⅔ of the leaves are withered and the stem becomes soft and pliable, the tulips can be harvested. In central Russia - this is the second half of June.
Seed preparation
The dug nests of bulbs, along with roots, covering scales and soil residues, are placed in baskets or boxes (perforated) and left to dry for a week in a warm, dry and ventilated place. At home, a canopy, a shed, a veranda is suitable. Avoid direct sun exposure - this can burn delicate scales.
Next, the bulbs are disassembled.They are cleaned of integumentary scales and old roots, rotted, damaged specimens are discarded, calibrated by size. If the defects are insignificant (mold, superficial sores) they are removed mechanically - washed off, scraped off with a knife. To protect the planting material from further infection, it is etched in a manganese solution and dried.
Note! Experienced growers recommend treating the bulbs with the "Maxim" preparation before storing them. It is a contact fungicide, the action of which is aimed at protecting the seed from fungal diseases and rot.
Storage conditions
How to store tulip bulbs until autumn so that they do not rot, dry out, and germinate prematurely? Disassembled planting material is laid out in containers in 1-2 layers. During July-August, complex processes of laying the organs of the future plant (leaves, flowers) will take place in the bulbs, and for this it is necessary to provide conditions.
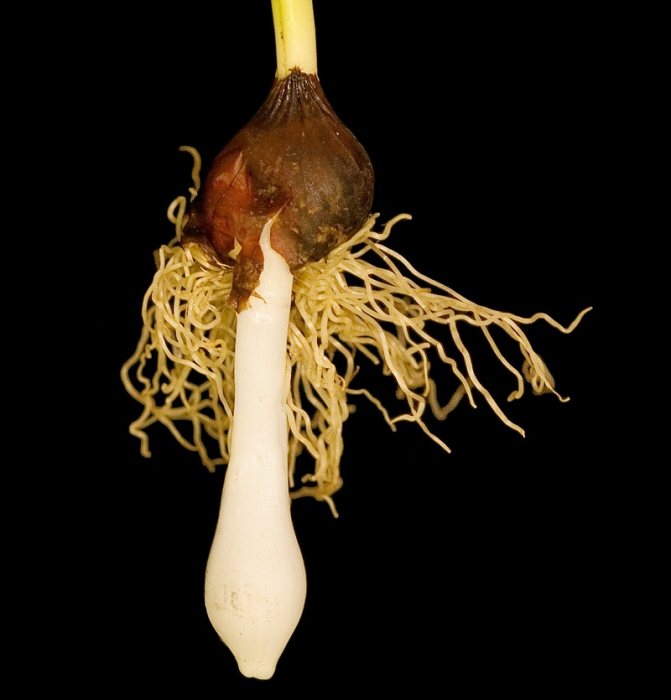
The evidence of proper storage is a clean, dry, firm bulb, with no signs of bottom sprouting at the time of planting (mid-September).
Note! If there is a risk of damage to the bulbs by rodents, it is better to keep them hanging. For this purpose, vegetable nets, old tights, stockings are suitable.
When is it better to transplant
There are several signs that experienced gardeners are guided by. This is a confluence of ideal conditions under which plant bulbs begin to be harvested.
Among them:
- Flowers should not bloom. This season starts on June 20 and lasts until July 10, depending on the climatic zone and weather conditions.
- The scales of the bulb change their color, gradually turning yellow. Moreover, its surface should not be hard.
- Suitable weather conditions. Ideally, this is a windy and dry day.
Naturally, there are many different situations in which it is impossible to act in a certain period.
Before flowering
It is believed that spring is not the best time to transplant tulips. But if there is no other way out, then this action must be performed correctly. The first step is to choose the largest and healthiest of the available bulbs. They are pre-planted in a separate container with pre-prepared soil. The only condition is that the depth of the container should not exceed 15 cm. It is recommended that this transplanting process be completed by April 15th.
Important! During flowering, tulips are very rarely transplanted, since in most cases they do not take root in a new place. If such a situation cannot be avoided, then dig up a plant with a large clod of earth around the root.
Planting the bulbs will also require a minimum distance between the individual tubers. It should be equal to 3 cm. Sprinkle a little earth on top of them and gently watered them. As soon as the first shoots begin to appear on the surface of the soil, the plant can be planted in a flower bed.
After flowering
Tulips usually fade by summer. PThe transplant period after flowering falls on the month of September. Moreover, this option is ideal, since this period is considered the most gentle for plants. The first bulbs can be dug up as early as mid-July. At this time, their scales become a characteristic light brown hue. This moment should not be missed, as the plant takes root very quickly. In this form, tulips are much more difficult to replant.
The bulbs removed from the ground are left to dry either outdoors or indoors. At the beginning of autumn, they are cleaned of husks and existing stems. A weak solution of potassium permanganate is made in a separate container. Flower bulbs should be kept in this solution for some time. This procedure will protect the plant from diseases and pests in the future. All that remains is to dry the bulbs again and plant them in open ground.
You should carefully consider the landing site.The plot of land or flower bed should be located in a calm area, but with direct and abundant access to sunlight. Before planting, the soil must be additionally fertilized. Autumn is considered the ideal time to transplant tulips.
Ways to preserve bulbs until spring
If you purchased tulip planting material in the fall and do not have time to plant, there are several options for how to keep it until spring. The fundamental condition is that the bulb must undergo mandatory stratification (cooling at a positive temperature close to 0⁰C), otherwise the tulip will not bloom in the spring.
Dry storage
If there are few tulips, you can put them in the refrigerator - in a container with vegetables and fruits. First, wrap each onion in a separate sheet of paper, put it in a bag made of breathable material (fabric, paper).
In a private house, a basement is a suitable place with a low but positive temperature. To bring the conditions as close as possible to natural, sprinkle the bulbs with a dry substrate - sand, sawdust, vermiculite, etc. In plants planted in spring, the growing season will slightly shift, they will bloom later, but the bulb will have time to ripen by the autumn planting.
Wet germination
Wet storage of tulip bulbs is a good option. Pour a layer of slightly moistened sawdust or peat into a plastic box with holes. Spread the bulbs upside down, cover with a damp substrate on top. In this form, the boxes are sent to the basement. During the storage period, roots and seedlings are formed, and the planted tulip will bloom at its usual time.
Preparing the bulbs for storage
Stages of preparing seed for storage:
- Dug tulip bulbs in dry weather. The ground should be relatively moist, but not wet. Therefore, if there are other flowers nearby on the flower bed, the watering of which continues, it should be stopped for a couple of days.
- The roots are removed from the ground annually, at least once every two years, the size of the future flower depends on it. If you neglect this procedure, then the bulbs go deep into the ground and gradually degenerate. Plus, when the tubers are removed, it is easier to dig up the site thoroughly, apply the necessary fertilizing and fertilizers to increase the fertility of the soil.
- The bulbs are dug up and, without peeling off the surface scales and adhering earth, they are laid for a week in perforated paper boxes or wicker baskets.
- The container with the seed is removed on the veranda, under a canopy or in any ventilated room. The main rule: no direct sunlight! When it gets in, burns remain on the delicate roots, which then dry out or lead to rot. It is pointless to use damaged bulbs, they will not give flowering.
- After a week, the tubers are cleaned of soil clods, old scales, rotten or dry parts. Separate mature roots from babies. Washed and sorted by size. Treat with a fungicide to prevent bacteria from growing on the surface.
On a note!
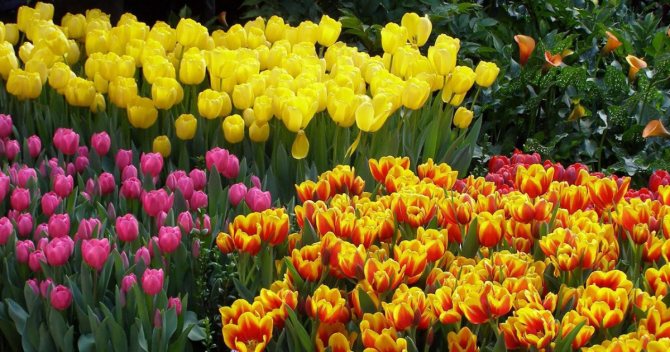
If multi-colored tulips grow on the flowerbed, then tie a thread to the stem in the color of the bud. Then, when digging and laying the tubers for storage, it will be easier to sort them. And when landing, it will turn out to make harmonious compositions in advance.
Can blooming tulips be transplanted?
Situations often arise when there is an urgent need to transplant an already flowering plant. For example, when forming a new garden bed or when changing the layout of the garden design.
Tulips in the flowering phase can be transplanted with a high probability of its survival, but the flower itself cannot be preserved.
When transplanting a flowering plant, you need to dig it out with a lump of earth.
For a successful event, the following rules must be observed:
- cut the flower in advance, leaving the stem with 2 lower leaves.
- you should dig the plant with a bayonet shovel along with a clod of earth, trying to minimize the disturbance of the root and tuberous system of the flower.
Transplanting tulips during their flowering period has a huge advantage in the ability to decorate your home with beautiful floral elements.
When to plant tulips
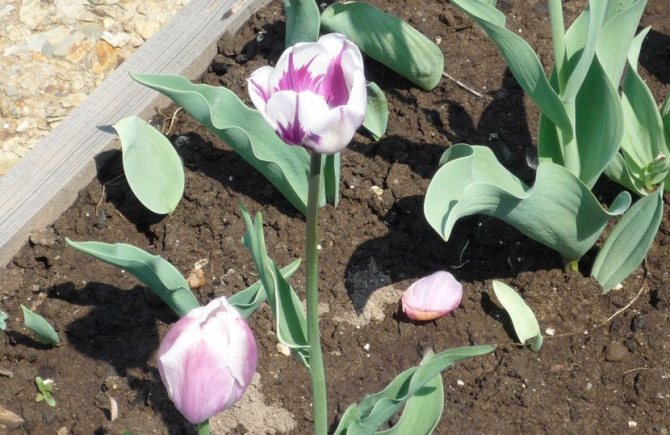
Before planting flowers, it is worth considering the possibility of leaves drying in the middle of summer, which does not look very aesthetically pleasing. To do this, you need to plant the bulbs next to summer flowers so that their bushes then cover the fading tulips.
Pruning tulips
You cannot trim the leaves immediately after flowering. To the bulbs there is an outflow of nutrients that are needed for proper growth and the appearance of children. An infection can penetrate through the cut, because it is not protected by anything. Flower buds can be trimmed, it is even useful. Then they will not waste energy on the germination of seeds.
The best time for planting is considered to be autumn, September and early October, when the soil temperature is 6-10 ° C. Landing is possible later in November. But then you should take care of covering the tulips with leaves or other equipment.
Planting too early can cause bulbs to become ill, as higher temperatures encourage the development of viruses. If planted later, the onion may not develop sufficiently.
For planting, it is better to choose a dry, windless place where the sun's rays penetrate. Grow well in any fertilized and cultivated soil. Loose, humus-containing soil is most suitable. It can also be planted in clay soils, but on condition that it is fertilized with compost or peat. The main thing is that there is no stagnation of water, otherwise in winter the bulbs can be exposed to diseases or simply freeze.
Important! Fresh manure should never be used as a fertilizer for tulip bulbs.
When planting, you can and even need to use special bulb fertilizers. You can buy them at specialized stores. They contain all the essential minerals and nutrients that are needed for normal growth and development.
Before planting, you need to look at all bulbs for damage and disease. Selected tulips must be treated with a solution of potassium manganese acid for 1 hour. It is worth planting in the garden immediately after processing.
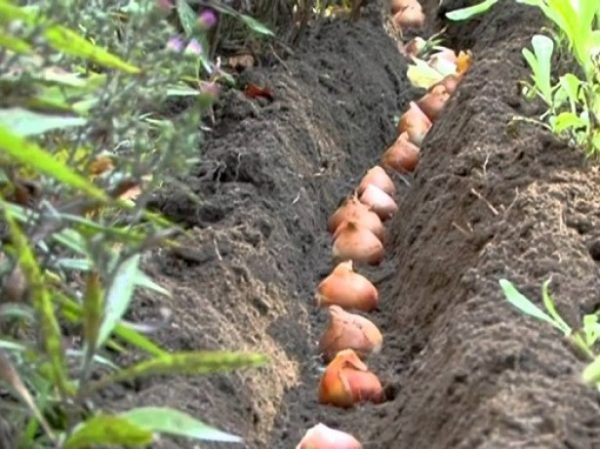
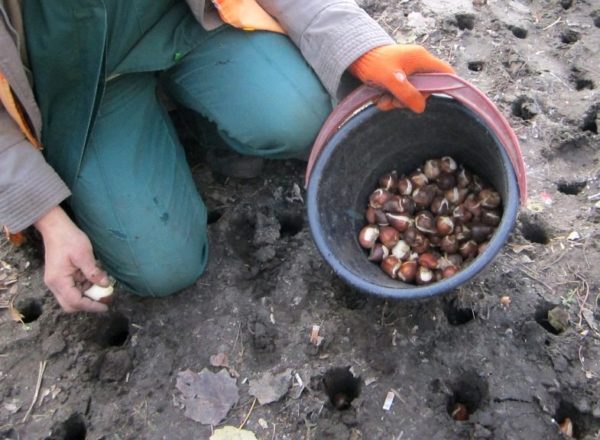
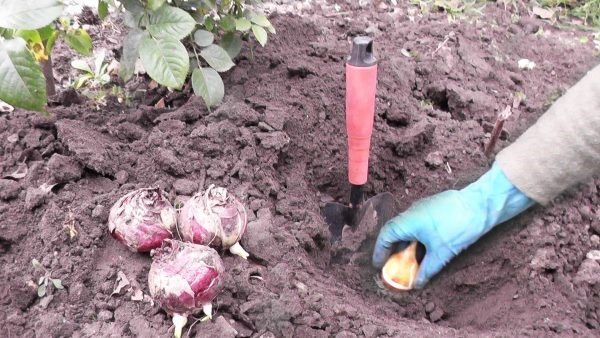
For the extra-class, the planting depth is 17 cm, the second and third fences are planted at a depth of 13 cm, there are even fewer children - about 7-9 cm.It is not necessary to press strongly into the soil so as not to damage the roots.
If planting is carried out on dry soil, then the furrows must first be watered abundantly with water, then put fertilizer and sprinkle with earth. Only after that is the bulb itself planted to a depth of 9-10 cm with the roots down.
Note! You constantly need to change the landing site, they return to the previous one no earlier than 3 years later. When frosts begin, it is worth putting a little peat on top of the beds, then the flowers will be protected from frost. This layer creates favorable conditions for development. It is not removed in the spring.
Planting flowers
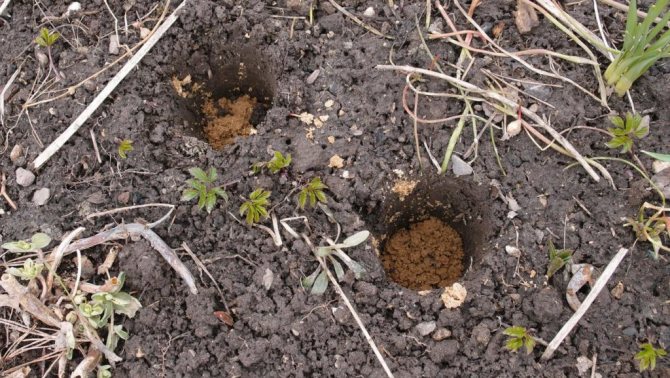
- Tubers are planted in holes or furrows up to 15 cm deep, large tubers are placed deeper into the soil, small ones less deep.
- Make an indent between the rows - 25 cm, the distance between the holes depends on the size of the tuber, it is 6-10 cm.
- Plant the tubers in a checkerboard pattern.
- In order not to confuse where to be what color and grade, it is advised to drive nameplates into the ground.
- To prevent mice from eating tubers, they are treated with kerosene or Vishnevsky's ointment before planting.
- Plant the tubers gently, leaving no gap between the bulbs and the soil.
- Place the tubers in the soil, sprinkle with soil and level.
How many tulips are planted per square meter?
About 10 tulips are planted on 1 m². We also recommend watching the video below about planting flowers.
In what time period should tulips be placed in the ground
Compared to most horticultural crops that are traditionally planted in spring, tulips are planted in the fall.
Let's understand why they are planted during this period? Wild tulips bloom in very early spring, immediately when the snow melts, they bloom for a short period of time, and by the onset of summer they wither and dry. Only tubers remain, in which new buds are formed. Ovaries are especially actively formed in the bulbs in the fall.
Frost spurs the processes that take place in the bulb, therefore, with the arrival of spring, tulips have new shoots and buds. Tulips and other bulbous plants need a frost period for further flowering.
With the autumn planting of bulbs, the plant will have time to strengthen, gain strength for active growth.
If the bulbs are planted in the spring, then they do not have time to warm up, take root, gain the strength they need to bloom. In addition, tulips need careful care and prevention from fungal diseases. Everyone does it in the fall.
Planting bulbs in spring is possible, but involves certain difficulties and hassles. The bulb will have to be hardened or stratified at home, as well as more complex preparation and processing.
Do I need to dig up tulips, why do it?
They need to be dug out every year and planted again due to the fact that:
- if you do not dig up the bulbs, then they begin to deteriorate, rot, and the flowers that appear become smaller and smaller;
- the plant is very unstable to fungal diseases;
- when digging up the bulbs, it will be possible to throw out the diseased;
- in the fall, you can adjust the flower bed.
When to replant tulips?
If you do not carry out an annual transplant, then a maximum of five years after the growth of the culture in one place, this procedure is required. For transplant pick up another site.
So when to plant the bulbs?
They need to be planted in the fall, but there is no need to rush, otherwise the flowers will have new shoots even before the onset of frost.
And it is also important to plant the bulbs on time, and not pull with planting, otherwise the buds will appear much later than required. A culture on average takes 21 days to take root.
Therefore, choose such a day from the middle of the first month of autumn to mid-October, when the ground temperature will be warmed up to + 8-10 ° C at a depth of 15 cm. And the air temperature is not lower than + 2-3 ° C.
Bulbs are planted in the Moscow region from September 20 to October 15.
When to plant tulips in Siberia and other regions?
- In Siberia - in August from about 20 September to 20 September.
- In the Urals - from September 20 to October 10.
- If you live in the southern regions, then plant the bulbs in the ground no earlier than October 20.
- Plant flowers in the sun, there should be no shade nearby.
- Protect flowers from the wind.
- Dig up the soil in which you place the tubers in a week. 2 days before digging the soil, it must be watered abundantly if there is no rain.
- The soil should be light.
- Pour sand into the ground, then the culture will not rot.
- The flower prefers alkaline soil.
- Pour in dolomite flour, wood ash to reduce the acidity of the soil, in case of increased indicators.
- Add compost, potassium nitrate to the soil to enrich it.
- The depth of the groundwater should be no higher than 2 m.
- Make the area flat.
- The flower does not tolerate fresh manure.
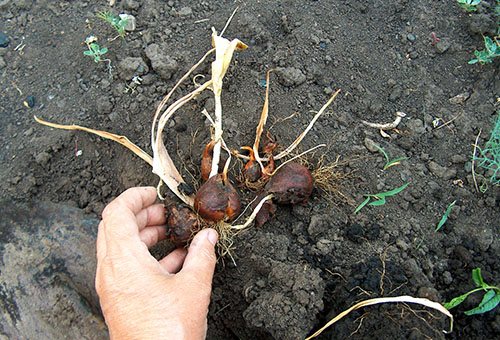
Tulips have faded: when, in what month to dig out the bulbs after flowering?
dug tulips after they have faded
Tulip breeders dig up tulip tubers as soon as the flower stalks wilt. That is, in late May - early June.
Land owners who are independently engaged in landscape design leave the bulbs until the end of June - early July.
Storage tips
With some effort and following simple storage rules, it is quite possible to keep tulips at home before planting in the ground.
Tips on how to save planting material
- When removing from the ground, the bulbs should be handled very carefully so as not to damage them.Violation of the upper protective layer will increase the possibility of infection with fungal diseases.
- For storage, it is optimal to use a wooden box, since it is difficult to ensure good air circulation in cardboard boxes, moreover, they are damp and can become a breeding ground for bacteria and fungi.
- To protect against excessive moisture, it is recommended to sprinkle the planting material with sawdust.
- It is necessary to lay the material in one layer so as not to impair ventilation.
- If the house has a basement, then the seed can be laid out directly on a dry shelf and the air temperature can be constantly monitored.
- When breeding bulbs in an apartment, you can place them in wooden boxes and store them on the balcony, controlling the temperature inside the container with a thermometer.
- For professional cultivation of flowers, a heat chamber is used that maintains the temperature within the required range.
- In some cases, you can store the material in the lower compartment of the refrigerator, where the temperature ranges from 3 to 5 ° C.
The health and further development of flowers after planting in the ground will depend on how accurately these recommendations are followed.
How to create a microclimate for storing tulip tubers
It is important to know how to store tulips, namely, what microclimate to create for installing containers with roots. Conditions for saving tubers:
- Air humidity should be no more than 70%.
- The sun must not fall on the boxes. Lighting should be generally diffused or completely absent.
- The room should be periodically ventilated.
- Avoid places where the crop is threatened by mechanical stress.
Temperature conditions change during each storage period, so it is worth choosing a place where this can be regulated.
Post-transplant care
After the autumn planting, the first shoots will appear after the snow melts, in late March or early April, depending on the climatic conditions of the region.
After the sprouts appear, certain rules should be followed for optimal plant growth, ensuring its long-term flowering with bright and beautiful flowers:
- If mulching was carried out in the fall, then in the spring the material must be removed immediately after the snow melts for better warming up of the earth. The earlier the earth warms up, the faster the sprouts will appear and the faster the delicate petals of beautiful flowers will open.
- No need to water tulips abundantly before buds appear.
When germinating tubers, special attention should be paid to diseased plants, which are characterized by underdevelopment or damage to the shoots. Such flowers must be dug up and removed so as not to infect healthy specimens. - The soil should be loosened regularly around the seedlings.
- Before the buds appear, do not water the plant too much, so as not to provoke various tuberous diseases caused by putrefactive bacteria. However, the ground should not dry out. When flowers appear, the degree of watering should be increased, ensuring its intensity.
- Top dressing must be carried out when the first shoots appear. In the future, fertilization of the soil on which tulips grow can be skipped. However, regular weekly feeding can lead to the formation of taller stems and vigorous flowering of the plant.
How to dig up the bulbs
The bulbs are removed from the ground in good, clear weather. A week before the procedure, watering of tulips is stopped: you need to choose bulbs from dry soil. This must be done carefully, trying not to damage small children - planting material for the propagation of tulips. Dig deeper: if you haven't dug out the bulbs for several years, they probably went deep. It is better to use a fork instead of a shovel for this purpose to reduce the risk of damaging the bulbs.

How to properly store tulip bulbs before planting
The dug out bulbs are dried in the open air, always in the shade. Pre-drying times depend on the soil you dug them from.If the ground was dry, then 2-5 days are enough, and if it is wet, then the drying time increases - sometimes up to 2 weeks.
Then tulips, or rather, bulbs, you need:
- to clear from the earth;
- remove the covering scales, the one that easily separates itself;
- tear off old dried up roots;
- sort the bulbs by size.
Sorting into small, medium, large is mandatory, since the depth of planting in autumn and the place of planting will depend on the size of the bulb.
Small and medium-sized bulbs, most likely, will not bloom next year - they can be planted for growing in a more modest, but sunny place, out of sight. And for planting large bulbs, we will choose the most honorable place.
Sorted, peeled bulbs should be placed in a ventilated, dry, warm room - an attic, a shed, a country house. They will be stored there until the autumn planting at a temperature of 25-28 ° C.
Planting and caring for tulips in the Urals
The Ural climate is continental, characterized by rather cold winters and moderately warm summers. Therefore, the cultivation of tulips has its own characteristics, expressed mainly in the timing of the care measures.
When to cut faded tulips
Withering flowers are cut a few days after the bud is fully open, so the bulb can replenish its supply of nutrients faster and more efficiently. You can only remove the flower itself, leaving the peduncle in place.
For the Urals, this moment comes in June. As with normal tulip care, the plant continues to water until the leaves turn yellow and it is time to dig out the bulbs.
Important! When cutting tulips for the purpose of making bouquets, leave 1-2 leaves in place in order to allow the bulb to form better.
How to plant tulips and when
When to replant tulips depends on the time of their flowering. In the Urals, usually in July, the bulbs are ready, you can dig them out. If the flowers grow too often, then when planting again, they need to be planted away from each other.
At the end of September, in the Urals, the earth cools enough, so tulips are planted in the ground. Stages of landing:
- Process the bulbs with a 5% potassium permanganate solution;
- Sick, damaged bulbs are discarded;
- Babies (small onions) are planted first, as they need more time to root. It should be noted that larger tulips will grow from large onions, so they are planted in the central part of the garden, small ones - at the edges. Thus, powerful plants will not interfere with the weaker ones from getting enough sunlight;
- The bulbs are placed in pits, with a sharp tip up, to a depth of 10-15 cm. The composition of the soil also affects the planting depth. In heavy clay soils, tulips should be planted at a depth of less than 10 cm;
Important! Small onions should be placed closer to the ground.
- The bulbs should be planted so that the distance between them is at least 10 cm so that the plant and flower can develop correctly;
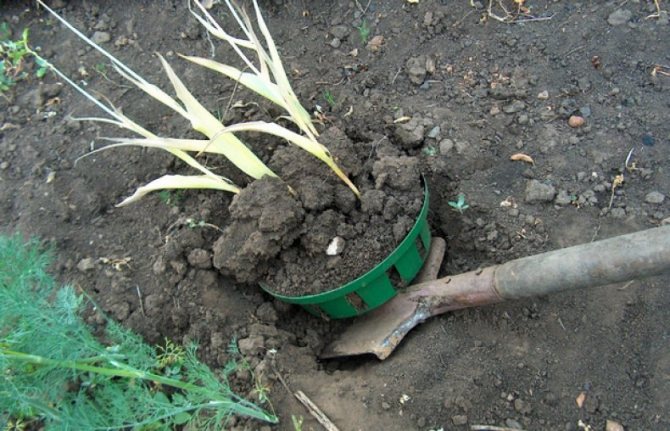
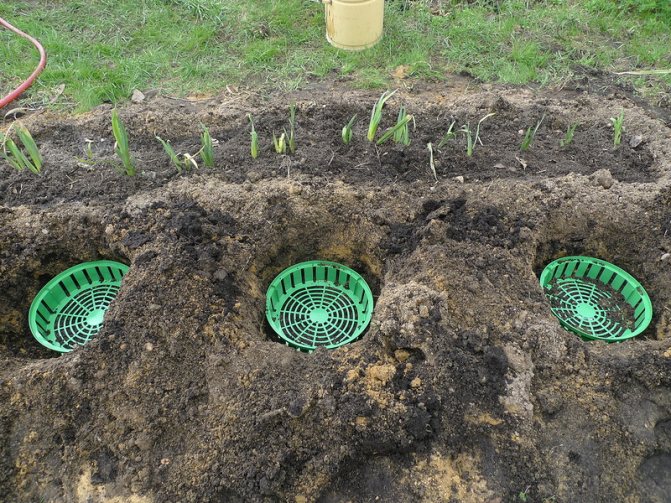
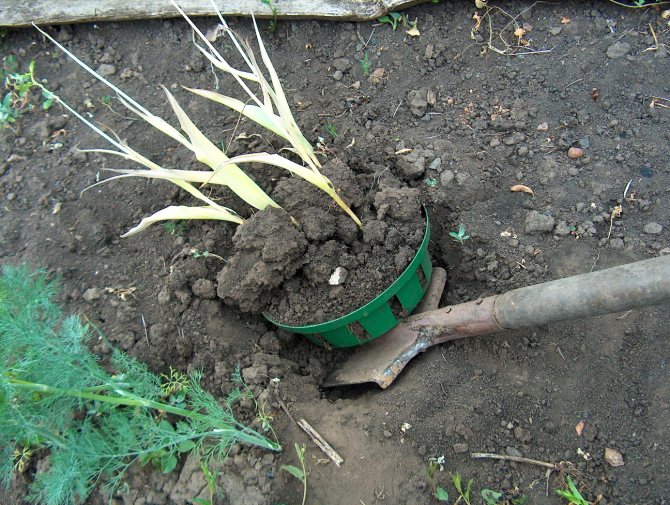
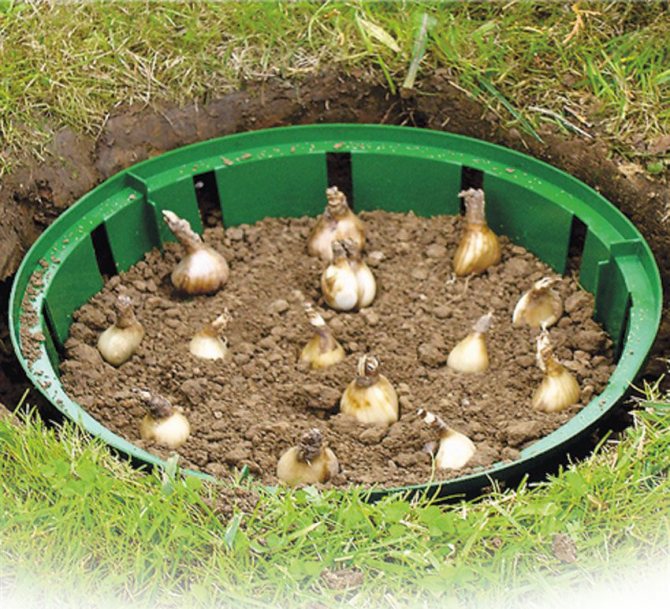
- A good way to protect your bulbs from rodents is to plant them in baskets.
- Cover the holes with earth and cover the garden with spruce branches, dry grass or leaves to save from frost. As soon as the snow melts, the cover can be removed.
Tulip bulbs are sensitive to excessive moisture and are prone to rotting. Therefore, it is recommended to plant them in places where moisture does not collect. Better if it is a small hill.
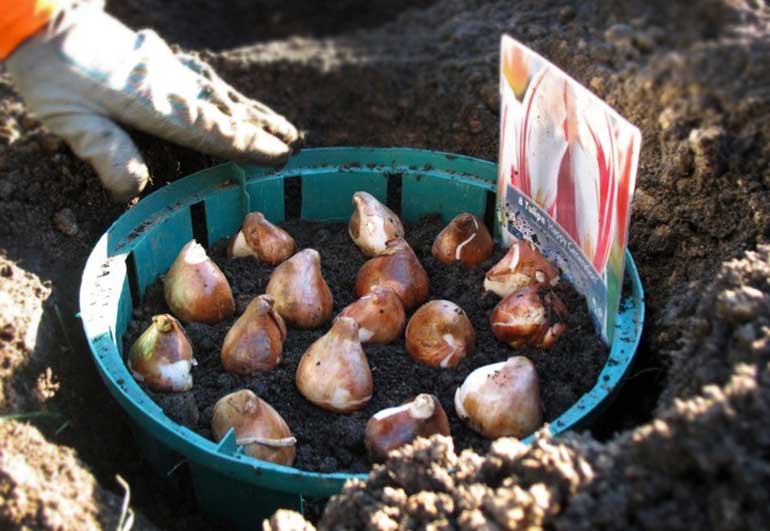
Planting tulips in baskets
In the Urals, planting tulips in spring is a big risk, the land warms up too late for successful germination. To shorten this time, gardeners plant the bulbs in special containers, only then in open ground. This can help.
How to save tulips before planting
After digging up, the main task is to preserve the bulbs.If they were dug out of damp earth, then first they must be rinsed in lukewarm water, then dried, for example, in nets suspended in a dry place.
Important! Only healthy onions should be stored. Rotten, shriveled, dry, spotty must be thrown into the trash. They should not be placed in compost, because from there plant diseases can spread throughout the garden.
After drying, the bulbs are stored in a dark, cool and dry place, such as in a paper bag or basket. A cardboard box is also suitable, in which they are stacked in layers, each separated by newsprint. Experienced gardeners always label such boxes so as not to confuse them with planting material of other plants later.
Features of the transplant procedure
Whichever period is chosen for the transplant, in general, it is carried out according to the same technique. First you need to make sure that the plant is still or is not blooming, for which it is carefully examined. In the spring, bulbs prepared in advance from the summer are selected; in the fall, plants with yellowed and dead leaves are dug up.
Suitable specimens need to be kept in quarantine for about a month - in a dry, cool, well-ventilated room, without allowing direct sunlight. You need to make sure that tulips do not rot, deteriorate, or be exposed to pests.
Only dry onions can be planted.
After drying, the bulbs are carefully freed from the remnants of scales, old soil and dead roots. Next, you should sort them by type and size, because large and small samples need to be planted separately. For an autumn transplant, the plants are immediately placed in the garden bed. In the spring: either first germinated in containers, or stored in a special way.
Before digging tulips from an old place, you must definitely choose a new one and prepare it correctly. It is necessary to extract plants from the ground very carefully, without leaving stepchildren, who will hatch again in the spring. To select all the bulbs, check the plot with a garden pitchfork.
From the former garden, you need to carefully select all the bulbs along with the stepsons
Soil preparation
A new place for flowers must be chosen very carefully, especially if they did not grow well in the old area. Perhaps the whole thing was in poor soil or inappropriate lighting. Then these shortcomings should be eliminated first. Tulips do not like the wind, so the planting must be protected from it with a hedge or taller plants near the garden.
Bulbous culture belongs to the thermophilic group, therefore it needs a well-lit area. And the flowers also need good watering, but without excessive waterlogging of the soil, so low-lying places are not suitable.

When transplanting, the soil is prepared and fertilized in advance.
The soil for transplanting must be well loosened and slightly moistened if it is dry. Sand should be added to clay soil (20 kg per 1 sq. M). It is also necessary not to forget about fertilizers when it comes to the spring period. In the fall, you do not need to fertilize so that the tulips do not immediately grow. The procedure must be postponed until March. You can make top dressing in advance - a month before the proposed transplant, if you have already decided on a new place for sure. A mineral complex with superphosphates and potassium salt is introduced into the soil.

Landing technology
The bulbs begin to be planted in pre-prepared soil with a temperature of no more than 9-7 degrees. The plants will stir to a depth of about ten centimeters. The distance between flowers should be 9-10 cm (for large specimens) or 7-8 cm (for smaller ones).
Before planting in the ground, dead scales and roots are cut from the bulb. Damaged and decayed specimens are discarded, only healthy and undamaged specimens are used.
The bulbs are planted at a distance from each other.
Table 2. How to plant: step by step instructions
| Illustration | Description |
| Step one: make grooves in the ground for the bulbs, 10-11 cm deep. |
| Step two: sand is poured into the hole, it should be slightly moistened. |
| Step three: we place the bulb vertically in the hole so that the flower grows in a tedious direction. |
| Step four: fill the holes with dry earth mixed with wood ash (two-thirds of the soil is one-third of the ash). |
| Step five: we place the covering material over the bed, since in the fall it is already close to frost, and in the spring they are not yet excluded. |
What to do right after flowering
When to transplant gooseberries to a new location
After the tulips have withered, only the dried flowers need to be cut if they have not been previously cut for placement in vases. The stems and leaves are not cut until they turn yellow.
Tulips in the garden
So the bulb can gain strength for flowering next year, and premature pruning stops its development. It is from the leaf that the onion receives a supply of nutrients for survival in the dormant phase and preparation for the new growing season.
Important! During the rest period, which can begin in spring, in May, and end in July, watering of tulips should continue until the leaves dry, otherwise the bulb will not accumulate enough strength for a new flowering cycle.
The tulips have faded. What to do next?
Inexperienced growers often have a question about what to do with tulip bulbs after flowering. There are several rules regarding the further care of the flower that will help keep the bulbs in perfect condition and allow them to develop:
- After flowering, you cannot immediately tear off the leaves, but it is advisable to get rid of the peduncle.
- For the first 3 weeks, fertilize with magnesium and potassium to strengthen the bulb.
- Water regularly so that moisture penetrates more than 40 centimeters deep.
- You can remove the leaves only after they are completely dry. You can not cut off the remnants of the aboveground part if it is not completely dry.
Some varieties keep the aerial part green for a very long time. It is not necessary to cut it off, as this can impair the development of the root system. You do not need to cut off the leaves and stem after drying, but do this after digging out the tuber.
Tips for Subsequent Transplants
Gardeners may ask how often tulips are transplanted? In theory, tulips are transplanted every year to maintain varietal qualities.... But practice shows that gardeners have learned to preserve flowers without replanting.
There are different varieties: some need an annual transplant, and some do not. Nature is very intelligent and cunning at the same time. Therefore, take into account the scientific approach, and each gardener will have to decide for himself how and when to plant tulips.
Useful Tips
Experienced growers recommend following these tips when growing tulips:
- If you need to get a large, full-fledged bulb, then the emerging flower sprout must be cut off, then all the vitality of the plant will go to the formation of the bulb itself, and excellent planting material will be ready by the next season.
- You cannot dig up tulips during the flowering process. This will lead to shrinkage of the bulbs and a deterioration in the appearance of the flower.
- When planning the period for digging the bulbs, it is advisable to look into the gardener's lunar calendar.
- If, for some reason, it was not possible to plant the bulbs on time, then they can be stored in the cellar, having previously sprinkled them with sawdust or sand.
- When cutting tulips for bouquets, at least 3 leaves should be left on the stem. This will also help the bulb grow larger.
Planting in spring
As usual, this planting period is almost never practiced, since tulips come out very weak. They either do not bloom, or the buds do not form at all.
This is because the flowering time is determined by the outside temperature.If it is warm and even a little hot outside during the planting period, you can not wait for tulips. Flowers, planted late, simply do not have time to form and release buds before the arrival of hot weather.
As well as when to plant tulips
in the warm season? First you need to choose the right time for disembarkation. The sooner the tulips are in the soil, the safer. This will allow them to develop calmly and provide a real opportunity to bloom on time. You can start planting as soon as the weather is favorable enough. In some regions, this can happen even in February. However, as usual
tulips
planted in March or in the first days of April.
The site for landing must be selected according to a similar scheme, already described earlier. The soil is prepared in the same way. Top dressing in the spring period can be applied a little more, because the plant begins to actively develop and assimilates fertilizers much better.
After the cold has receded, not all bulbs survive. Therefore, it is better to inspect them even before the start of the disembarkation. Dry or affected by diseases or pests can be thrown away immediately - they will not be able to germinate. Among other things, it will not be superfluous, as a preventive measure, to treat all tulips with a special preparation that protects against fungus.
In spring, planted flowers should be watered more often. It is also equally important to apply nitrogen fertilizers to the soil every four weeks. And during the flowering period - add phosphorus and potash. And don't forget about weeding! Weeds give tulips a lot of problems. In order not to burden yourself with unnecessary work, you can poison weeds with special solutions from the fall.
Choosing a planting site for tulips
- Tulips prefer an area with full or midday sun. Choose a shady spot or a spot with only the morning sun.
- The soil should be well-drained, neutral or slightly acidic, fertile, dry or sandy. Tulips do not like areas with excessive moisture.
- Higher varieties must be protected from strong winds.
- It is best to place the bulbs at a distance of 10-15 centimeters from each other, so choose a large enough planting area.
When to plant tulips
- Plant tulip bulbs in the fall, 6-8 weeks before expected frost and when soil temperatures are below 15 ºC. (Refer to local frost forecast.) This usually occurs in September or October in northern latitudes and November or December in the south.
- Do not delay planting the bulbs after purchasing.
- In southern climates with mild winters, plant bulbs in late November or December. The best shoots will sprout. Bulbs chilled in the refrigerator for 12 weeks before planting.
How to plant tulips
- Prepare your garden bed using a garden fork or hoe to loosen the soil to a depth of 30 to 35 cm, then mix with a 10 cm layer of compost.
- Plant the bulbs deeply, at least 20 cm from the base of the bulb. This means digging deeper to loosen the soil and allow for drainage. Raised layers need to be created. Remember, the larger the bulb, the deeper the hole it needs.
- Place the onion in the hole with the pointed end up. Cover with earth and press down firmly.
- Water the bulbs immediately after planting. Although tulips cannot tolerate wet soil, bulbs need water to induce growth.
- If you plan on growing perennial tulips, feed them a balanced fertilizer. Especially if you plant them in the fall. The bulbs are their own balanced storage system. They contain all the nutrients they need for one year. Use organic material, compost to feed the bulb.
- To keep mice from the temptation to feast on the bulbs if they were a problem, place the thorny leaves in the planting holes. Some gardeners use cat litter or rubble.If zealous voles and rodents are a real problem, you may need to take more drastic measures, such as planting bulbs in buried wire cages.
- Don't lose hope if you are planting tulips at the end of the season!
How to handle tulips in containers
Container - an additional way to plant tulips
... This option has proven itself well among flower lovers. The reasons are as follows:
- Loose soil saturated with useful substances can be poured into the container, which is especially suitable for this type of flowers. This option is many times more convenient than digging the entire flower bed and mixing additives.
- Flowers planted in a container can be easily transplanted later. No need to waste time looking for bulbs in the flower bed. You just need to dig out the container.
- Tulips that are planted in a container will not get lost. If you need to transplant, you can easily and quickly do this.
- Rodents will not get to the flowers through small holes. This will provide them with protection.
If this is your first time encountering this method, you will surely face the question of when to plant tulips in a container way. As in the case of a conventional landing - both in spring and autumn.
By the way, there is absolutely no need to purchase baskets for bulbous vegetation. The container is easy to make yourself. You can use a linen pouch, a plastic vegetable drawer, or even cut a regular plastic bottle in half. The main thing is to have a frame and holes in the bottom.
Do not think that planting tulips in containers is very difficult. You will need to dig a hole that is the right size. It is necessary to place a container with prepared soil in it. Plant the onion in it. And after planting, the plant must be watered.
Remember to take care of mulching for the winter if you are planting flowers in the fall.
It will not be superfluous to notice - experienced gardeners are advised to replant tulips annually. And it is better to do this in the autumn period. Thanks to this, the flowers receive good nutrition on a regular basis. It is advisable to return them to their old place only after four years. If you do not transplant, over time, the tulips will degenerate, the buds are crushed, and soon the flower will wither completely.
How to care for tulips
- If it rains every week, skip watering. However, if the summer turned out to be without rain, you will have to water the bulbs weekly, up to freezing in the soil.
- Rainy summers, irrigation systems and moist soil are death for tulips. Never water the bulbs unless there is a drought. Wet soil leads to fungus and disease, which leads to rotting. Add chopped pine bark, sand, or any other coarse material to the soil to speed up drainage.
- Apply compost annually to provide the nutrients needed for future tulip blooms.
- In the spring when leaves appear, feed the tulips with the same bulb food or bone meal that you used when planting.
- Remove faded tulips leaving only leaves!
- Allow the leaves to remain on the plants for about 6 weeks after flowering. Tulips need foliage to harvest energy and bloom next year. After the foliage turns yellow and dies off, it can be removed.
- Large tulip varieties may need replanting every few years; small species usually reproduce and spread on their own.
Fun facts about tulips
- Did you know: If you are digging a tulip bulb in the middle of summer, this is not the bulb you planted last fall. This is her "daughter". Even when the tulip is in bloom, the bulb is divided for the next generation.
- To extend the life of the vase, cut the stems of the tulip diagonally. Then wrap the top two-thirds of the flowers in a funnel of newspaper and let them sit in cool water for an hour or two. After that, the tulips will stay in the vase for at least a week.
- In 17th century Holland, the new tulip was so popular and fashionable that a handful of bulbs cost about $ 44,000 in modern money !!!
- Red tulips symbolize a declaration of love.
How to keep bulbs before planting in the fall?
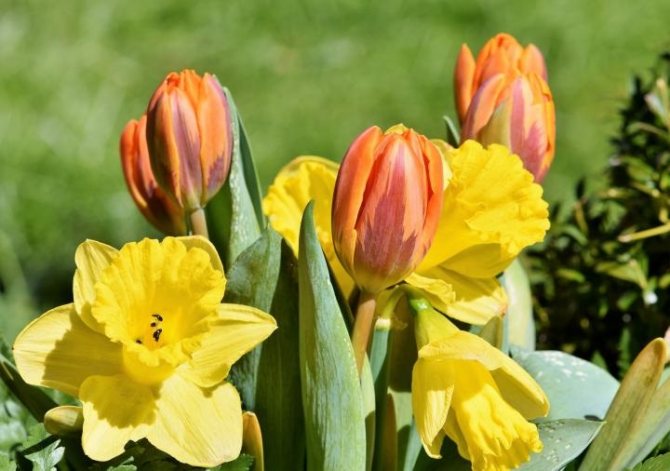
Favorite bulbous - tulips, daffodils, crocuses and hyacinths have faded. We won't see them until next spring. But here's the problem, but will we see at all? After all, some of them have to be dug every year. Otherwise, the flowering is weak, small, or it will not bloom at all.
About a month after flowering, the leaves turn yellow and dry, and it's time for digging. Otherwise, then you will not find a single bulb, or you will have to dig up the entire flower bed. And this is not very good.
So let's start with tulips.
To preserve all the bulbs from the smallest to the largest, we dig out in time. Only the leaves turned yellow and lay down, that's it, it's time.
To store the bulbs, they must first be sorted, all the babies must be separated from the mother's bulb. Arrange to size and dry for 2-3 days in a room, not in the sun. Then clean it from excess scales, dried peduncle and roots, it is advisable to soak for about 30 minutes in a pink solution of potassium permanganate (you don't need to soak it, if the bulbs are all healthy, then nothing will be for them), dry and put them in boxes, boxes, canvas bags. Not plastic bags, not hermetically sealed boxes. All natural and breathable. Store properly in a cool, dry place with good ventilation. But it is also possible in a room on a closet, for example, or in a pantry, in a barn, in an attic ... In order not to get too hot, otherwise your bulbs will turn to ash by autumn. 23-25 degrees is the best temperature. The usual room. If only the humidity was normal, then until autumn all the bulbs are well preserved. After all, they have already grown up and fell into hibernation. By autumn they will wake up and take root.
Old tulips, those varieties that our grandmothers still grew, can not be dug out every year. They bloom beautifully and not for the second year and for the third. But modern hybrid varieties, especially Dutch ones, if not dug up, will disappear altogether, disappear, rot, and if they bloom, then not everything is smaller. Therefore, it is imperative to dig them up.
Hyacinths
Hyacinths are dug up later than tulips. We also wait for the leaves to dry and dig them out.
This must be done every year, otherwise you will not see lush flowering. They are so capricious.
The dug out onion must be dried within 5 - 7 days (at a temperature of + 20 ° C). Then the remnants of the earth and roots are cleaned off from it, subjected to a thorough "sanitary" inspection and placed in storage. We often immediately rinse the newly dug hyacinth bulbs with a water jet from a hose, then discard those that have caused the slightest doubt. After that, we dry all the bulbs and put them for further storage. It is desirable to sort them (by size, variety, color or other characteristics). For the first two months, hyacinth bulbs are kept at an air temperature of + 25 ° C, this is not difficult, since it is usually hot during these summer months. If possible, then in the first ten days the air temperature should be increased to +27 - 30 ° С. Of course, you need to make sure that the planting material is in a well-ventilated dry area. The remaining time before planting, the bulbs are kept in cooler conditions (about + 18 ° C). One to two weeks before planting, it must be hardened at +10 degrees.
Daffodils
These flowers can grow beautifully and bloom in one place for several years. But still the time comes when they have to be dug up. Usually the bush grows strongly, blooms poorly or stops blooming altogether.
We are waiting for the leaves to dry completely, about six weeks.
When digging, be careful not to damage the bulb. Handle them carefully because broken bulbs will rot.
All bulbs that have grown together in a group, be sure to separate one by one.
Inspect the bulbs for any signs of rot, deterioration, or damage. Throw away any bulbs you don't think are healthy.
Dry in a warm, dry place with good ventilation. However, like all bulbous ones - so that it is warm and dry. Dry the bulbs in this way for 2-3 weeks and only then process with a solution of potassium permanganate. Good planting material, until it is planted in the ground, should be stored in a ventilated room with an air humidity of no more than 80% and a temperature of about 17 ° C. (This, if you are seriously engaged in breeding), (but room temperature is also fine, where can we get +17 in summer?)
Crocuses
My favorite. They can grow in one place for up to 5 years. Then it is imperative to dig up and divide. Otherwise, the quality of flowering will leave much to be desired.
You can dig up the bulbs throughout the summer until September (as soon as the leaves turn yellow). The planting material must be cleared of the ground and dried within 2-3 days, it is possible in the open air. After that, remove the roots, excess scales, you can treat possible damage with a solution of potassium permanganate. Then spread the crocus bulbs in a thin layer and store in a dry, dark, ventilated place (I put the onions in low cardboard boxes from under the chocolates and put them under the furniture). The temperature is not lower than 22 degrees, otherwise the flower buds will not be laid in the bulbs.
So, we looked at how to properly preserve the bulbs of tulips, daffodils, hyacinths and crocuses before the autumn planting. Planting in autumn is the most optimal. It is not a fact that the bulbs planted in spring will bloom at all.
And one more piece of advice. Before planting, bulbs of all colors should be slightly hardened by keeping them at a temperature close to street temperature. This procedure will help the plants adapt faster, winter easily and give amicable shoots in spring.
Although in the southern regions it is not necessary to do this, and so they winter well.
Click on the pictures and
Disembarkation
Tulips are planted in the ground 6-8 weeks before the onset of frost, when the soil temperature drops to about + 7 ... + 10 ℃. Some growers advise doing this after the first frost. Before planting the bulbs, it is recommended to soak again for up to 30 minutes in potassium permanganate.

Autumn planting is sometimes carried out after the first frost.
The bulbs are planted to a depth three times their size: for large ones it is 12-14 cm, for small ones - 6-8 cm.
Tulips can be planted in the same place every four years.
Before the onset of winter frosts, the soil can be mulched with a layer of peat (up to 3 cm thick). In the spring, the mulch is removed immediately after the snow melts to avoid the bulbs warming up.