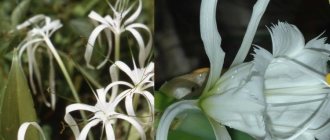
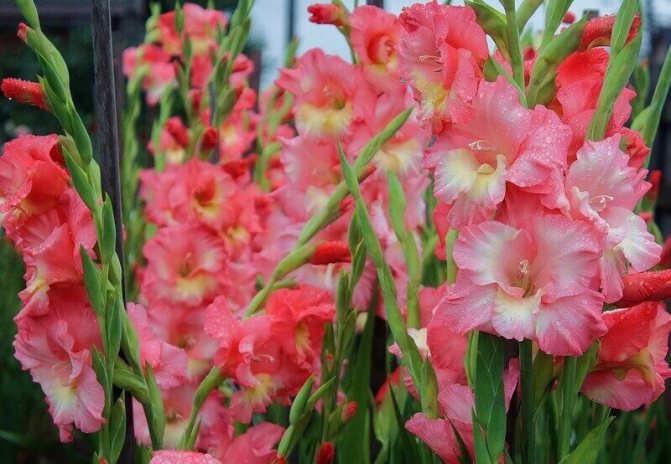
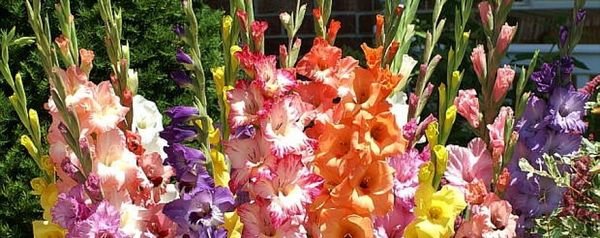
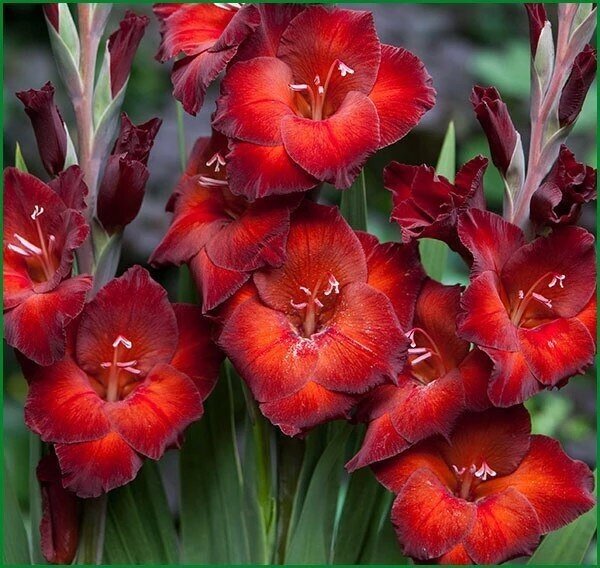
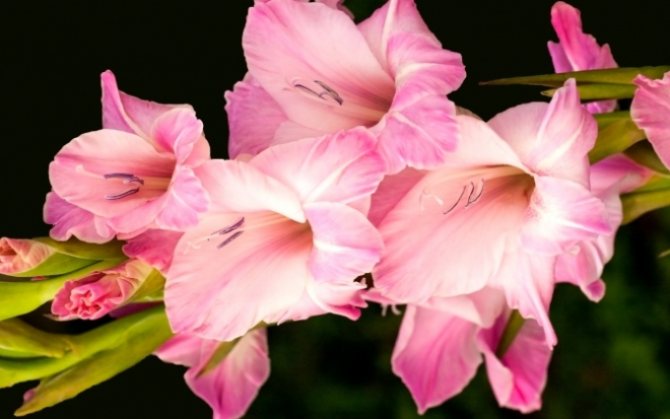
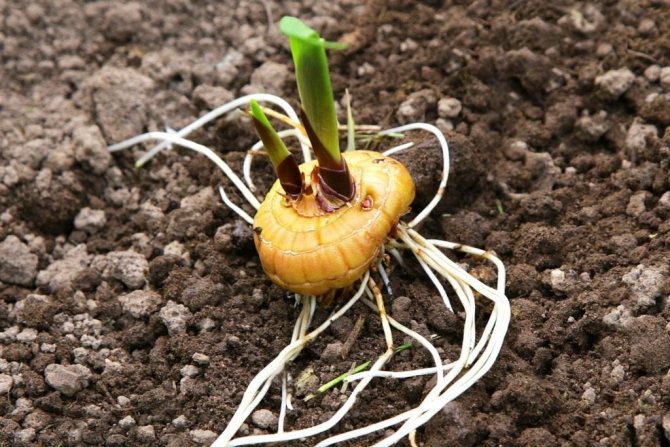
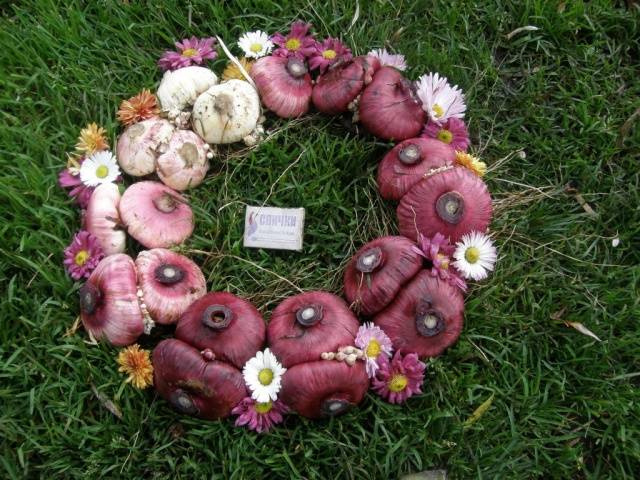
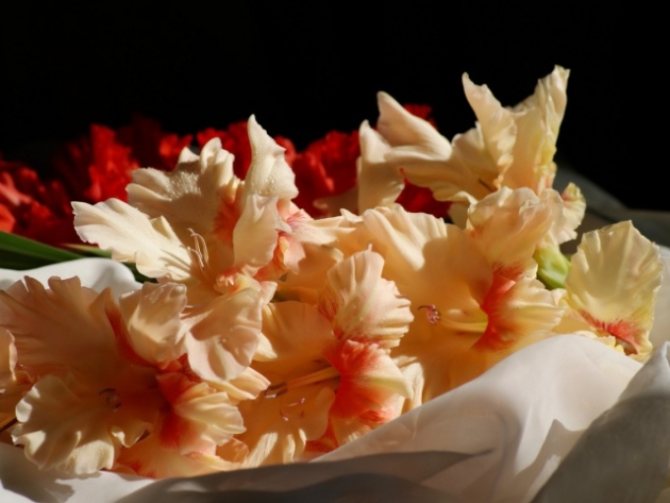
Gladioli are bulbous flowers, tall, with large voluminous inflorescences. These flowers will definitely not get lost in the garden, they invariably become the center of attention, thanks to their bright colors and exotic appearance. It is not difficult to grow gladioli: they are not too whimsical, except for watering, tying and fertilizing, the plants do not need anything. Difficulties begin at the end of the summer season, when the flowers have faded, the question arises of how to preserve the bulbs until next spring.
How to store gladioli in the winter at home, how to properly collect the bulbs, and how to prepare them for winter storage, can be found in this article.
Preparing gladiolus for winter
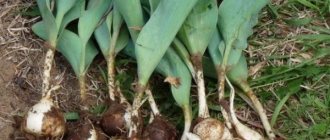
After the flower has faded approximately after a month the bulbs are ready to be dug up. Consider preparing tubers and caring for them in the fall.

Proper wintering is important, since it is even advised to buy in the spring, when the condition of the tubers is visible.
How does the digging take place
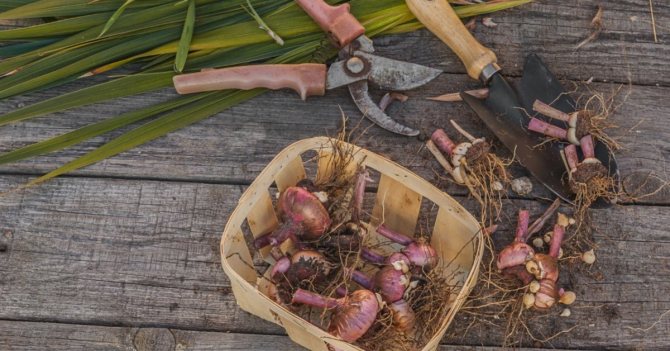
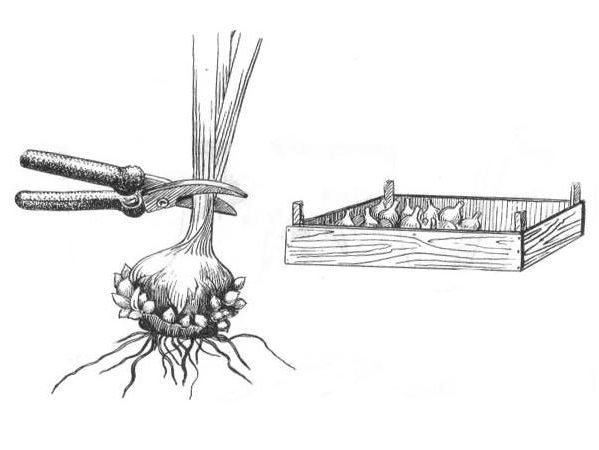
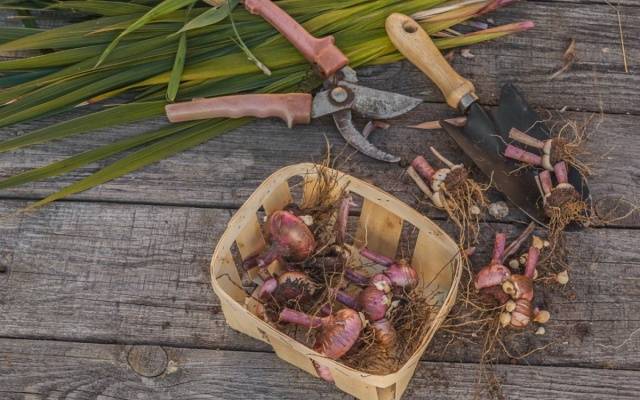
In order for the digging to go well, you need to have the following tools with you:
- Pruner.
- Shovel.
- Box or other containerwhere the dug Gladiolus bulbs will be stored.
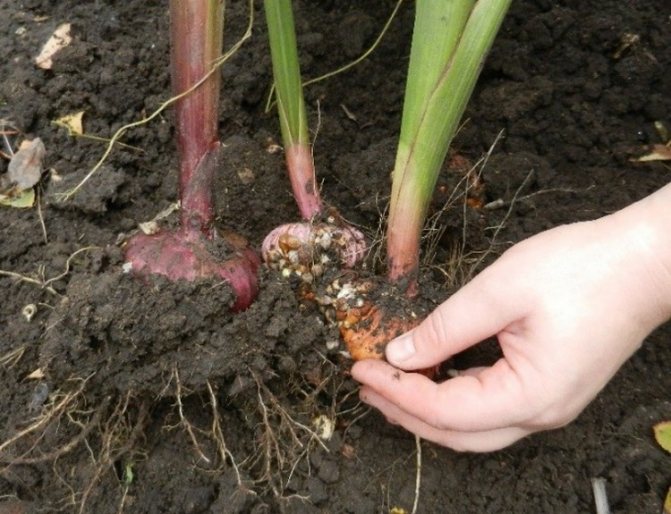
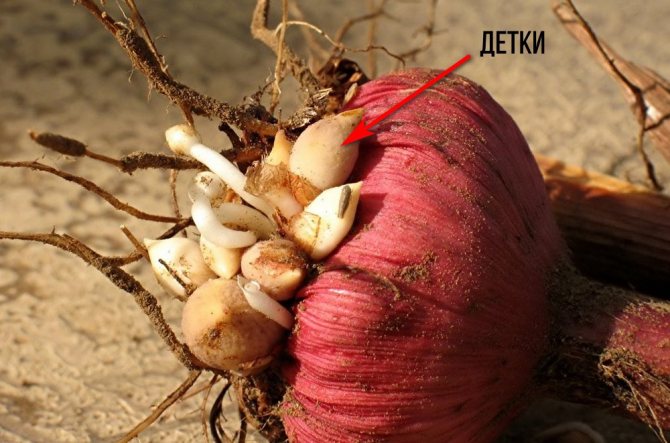
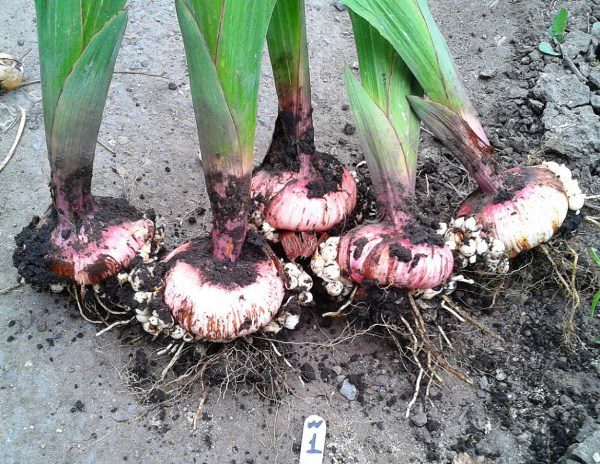
In order not to accidentally cut the tuber with a shovel, it is driven into the ground at a distance of 20 cm from the tuber. When digging, you can slightly help with your hands, supporting from below, so as not to lose the children.
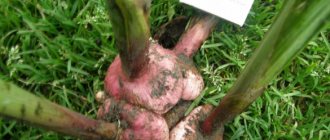
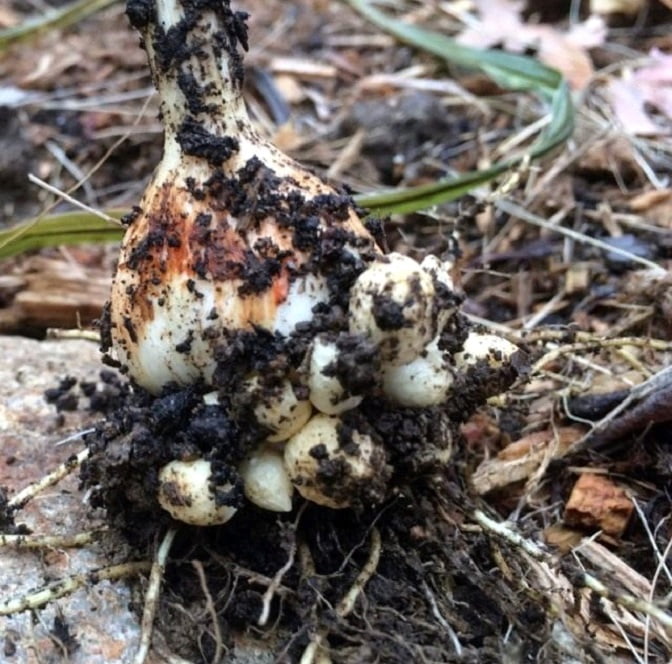
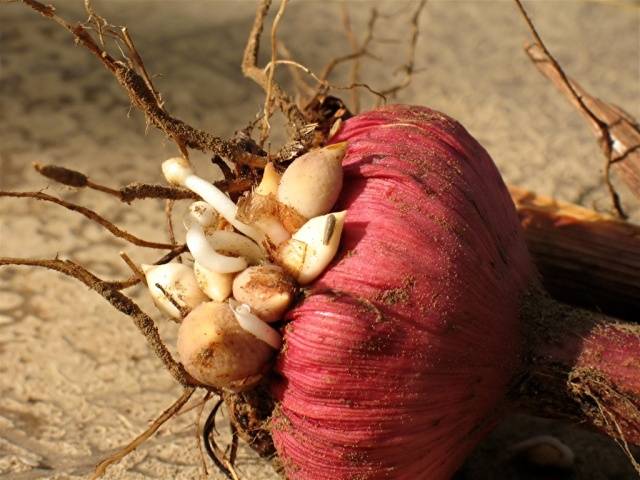
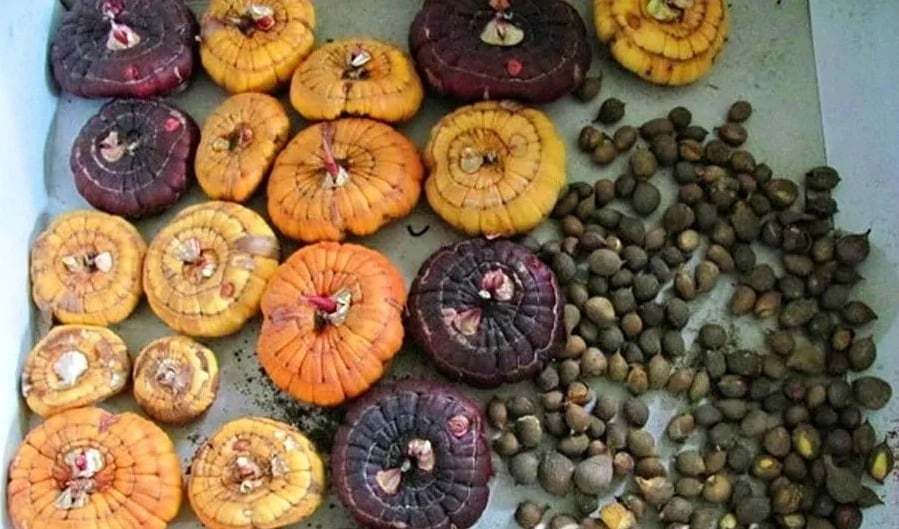
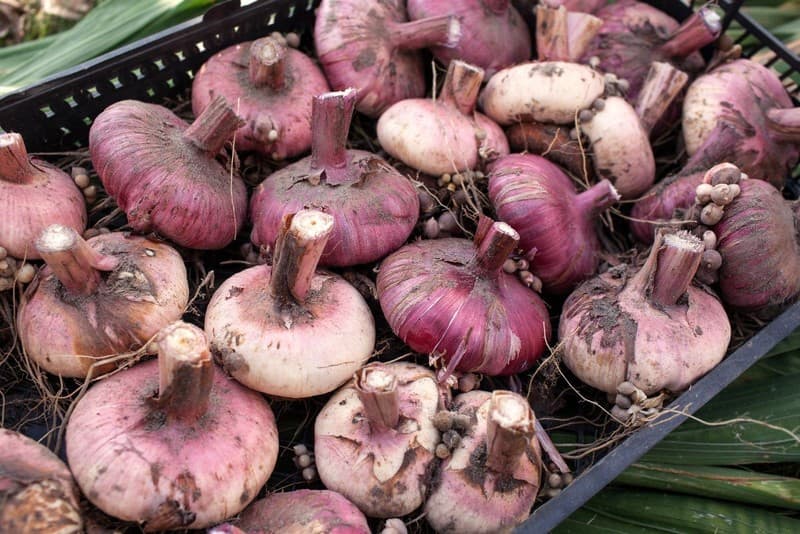
This is a wonderful seedling material for the next season. After digging, each is shaken off the ground and folded according to the variety. When the excavation has come to an end, the stem is shortened on all tubers to a height of 20 cm.
From the dug it stands remove those that are clearly affected by the disease or severely damaged by worms or larvae.
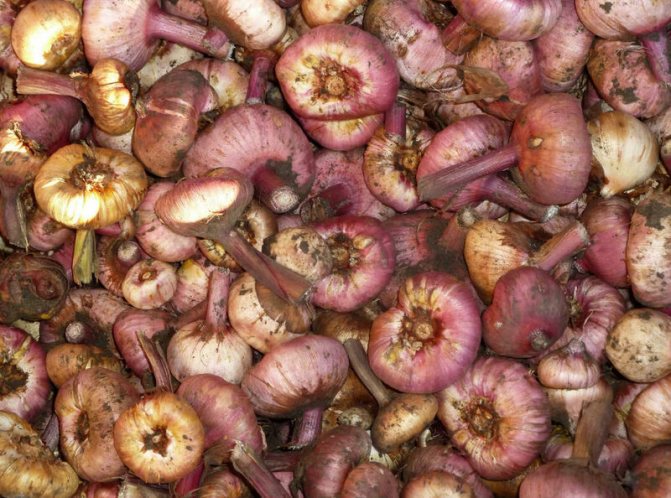
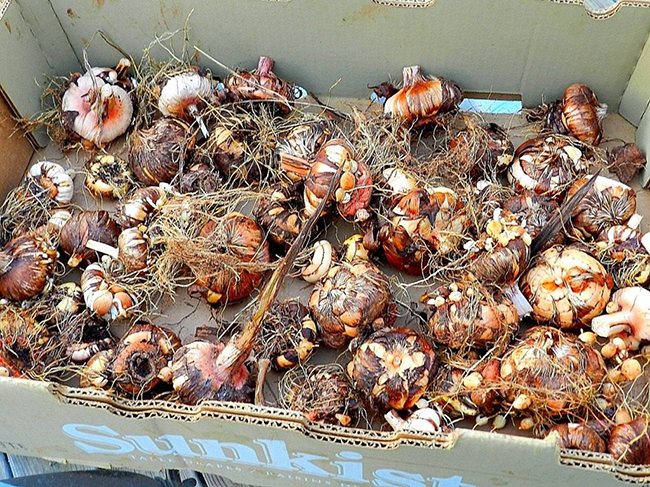
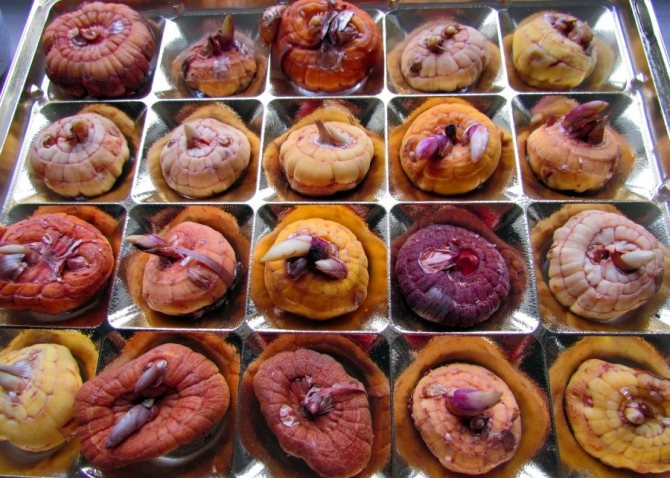
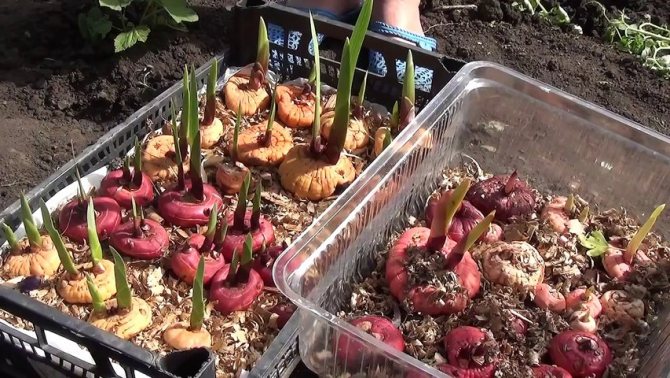
Drying the bulbs
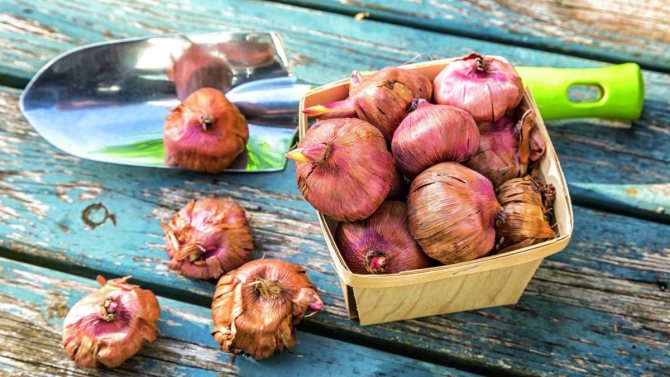
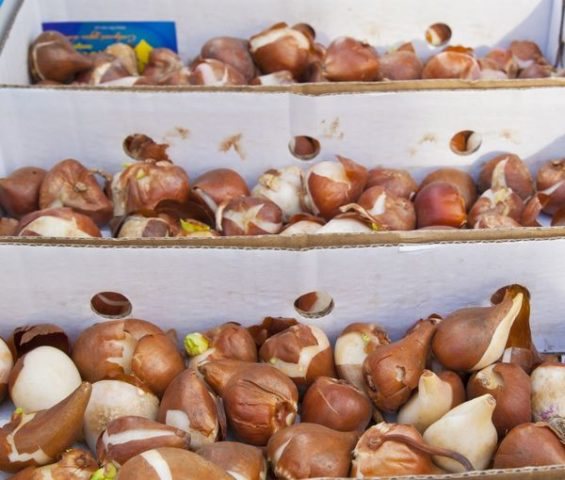
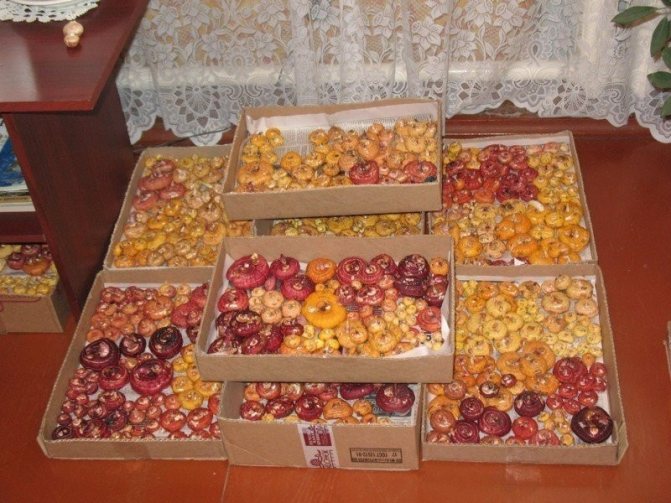
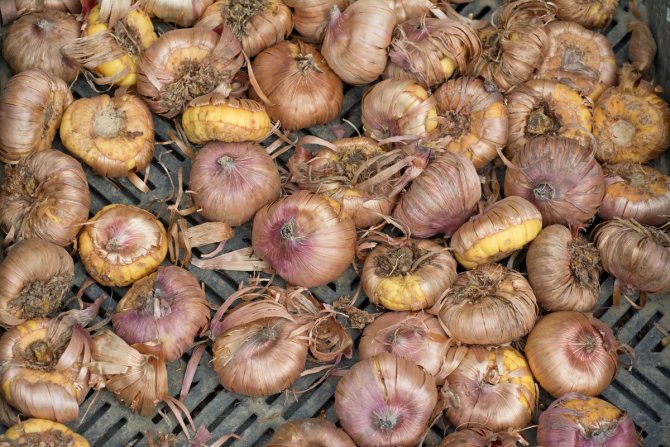
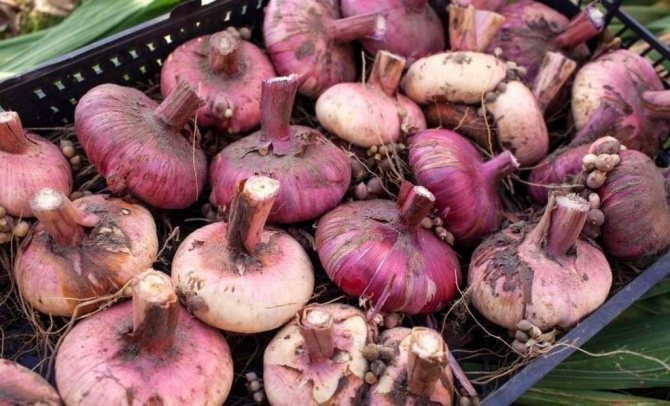
To keep the bulbs well in the winter, they require good drying. It is very convenient to fold for drying in black fruit and vegetable boxes.
Nice little thing - no need to prepare special storage containers
In order for the Gladiolus tubers to dry well right in the boxes, they are placed to dry in a dry room with an air temperature of 24 degrees Celsius. In this form, they can dry up to one and a half months.
Processing for the winter
Many people forget to process their planting material by storing them. You need to store only those that are not damaged by various diseases.
For example, a disease such as Scab can spread during the winter from one tuber to everything that was stored nearby.
To make it convenient to handle and not to confuse the varieties prepared tubers are laid out according to the variety on gauze bags and tied, and the name of the variety should be attached to the tie. Then they are dipped in a preparation that disinfects.
To do this, you can purchase drugs:

Procedure for digging gladioli
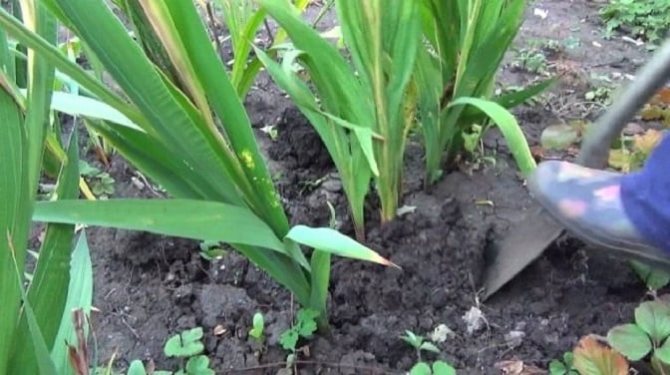
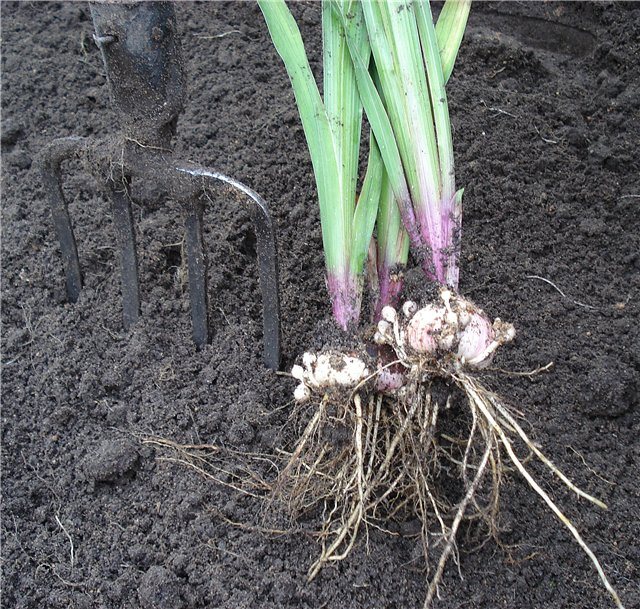
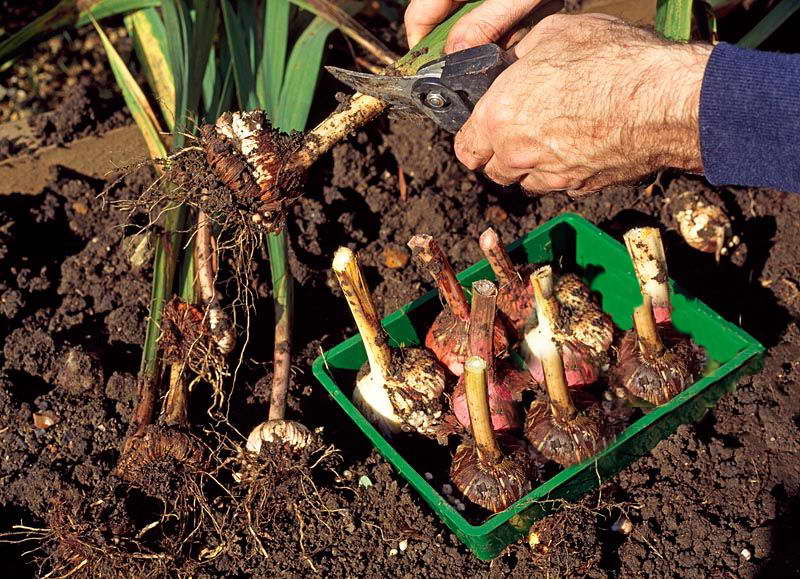
The ideal time for harvesting skewers from open ground is warm, clear weather at least 1 hour before sunset (in this case, minimal drying of the bulbs will be required). To properly remove gladioli, you need to have an ordinary shovel at your disposal (you can also use a garden pitchfork). It is worth highlighting the following main stages:
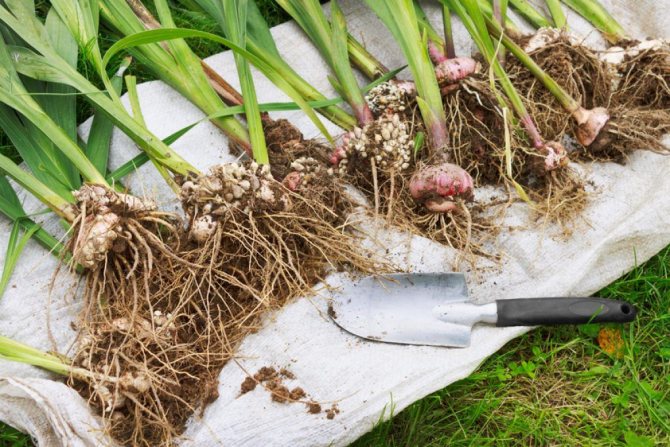
- Retreat 20-25 cm from the stem, drive a shovel or pitchfork into the ground in an upright position.Making light swaying movements with a shovel, you need to lift the earth mass with tubers and lay it entirely on a tarp.
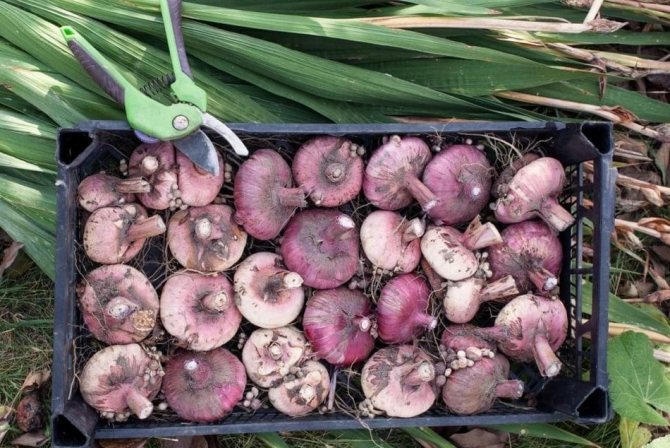
- After light drying of the earth on the roots of the skewer, it must be shaken off, after which the tubers of the plant must be separated from each other and the children are collected. The stems should be cut at a distance of 5-7 cm from the bulbs. It is necessary to get rid of sick and old tubers.
- As a prophylaxis for diseases, gladioli should be soaked - for this, a solution of phytosporin or a soda-salt solution is excellent (5 tablespoons of soda + 1 glass of sodium chloride in 10 liters of water).
- After sampling, you need to sort the tubers by varieties. It is important to leave the husks on the dug out bulbs.
- At the end, leave the gladiolus tubers in a cool and dry room (basement, not a damp cellar).
Winter storage at home
To bulbs did not dry out over the long winter months, they should be stored in a cool place with high humidity.
At what temperature are Gladioli bulbs stored
The ideal storage temperature is considered to be 8 degrees above zero. At a higher temperature, they begin to get under way, and then by the spring, elongated seedlings are obtained that are not able to give a flower.
At lower temperatures, the tubers freeze out. At the same time, it is necessary that the humidity in the room is 80%.
How to store until spring in an apartment
To save in winter in a city apartment it is necessary to find such a place so that the air temperature in it is within 8-10 degrees Celsius.
The following places are suitable:
- The window sill is by a wooden frame, it is usually not very airtight.
- In the hallway by the front door or in the common vestibule in a cardboard box.
- Glazed loggia is also suitable, but here you need to watch out and in severe frosts it would be better to bring it into the apartment and put it at the balcony door.
They must be examined and removed from the diseased in order to avoid complete infection of the entire collection of Gladioli.
Winter storage in the cellar
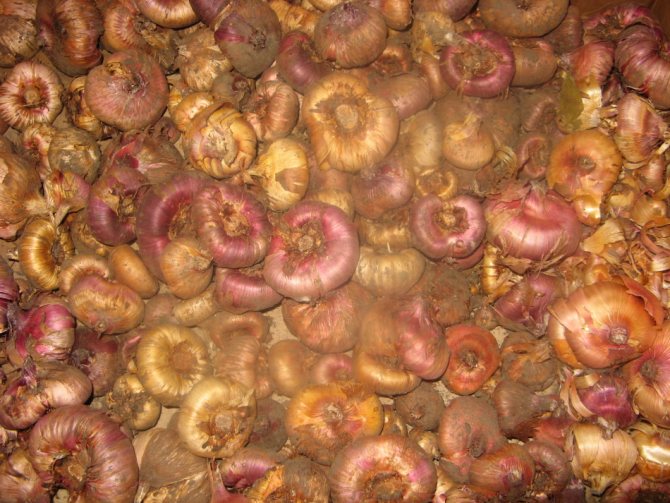
Basement or the cellar is the perfect place, where you can properly preserve the entire crop of tubers with virtually no loss. In the basement, in a natural way, the air temperature is always from 3 degrees to 7 and the humidity is almost the same throughout the winter in the range of 60-80%.
Ideal preservation will be if the tubers are laid out in mesh boxes and put one on one. And there will be little space, and it will be well ventilated and stored until spring.
In the basement do not put fruits and vegetables on the same shelf with tubers, since they release a lot of moisture during storage, and the latter can rot.
When storing in a cellar, do not stack fruits, vegetables and overwintering bulbs together
Cold storage
Storing Gladioli bulbs in the refrigerator is quite convenient.
Differences can occur, only if you turn it off for a long time... It is good if the refrigerator has a compartment for herbs or vegetable containers that fit the tubers well enough.
Each variety is wrapped in two or three newspapers and placed in the designated compartment in the refrigerator.
In the first month, check the humidity in the refrigerator. If mold appears, you need to pull out the material, dry it and replace the newspaper with a new one.
If a high humidity in the compartment, in the future it will be necessary to change the newspaper in which the bulbs are wrapped about once a month.
Possible complications
As already mentioned, it is necessary to make it a habit to examine the planting material once a month to identify various deviations from the norm.
Here are some options for deviations from the storage norm:
- The appearance of gray mold - too high humidity, drying and paper replacement is required;
- The appearance of thrips - remove damaged tubers, treat the rest with Hom.
On the laid out damaged bulbs, put cotton wool soaked in medical alcohol 96%, and seal it with a lid. With this method, alcohol-resistant thrips die. Then it is worth drying the tubers.
- Manipulation is best done twice with an interval of 4 days.
- Spreading cotton wool dipped in alcohol lay between the onion and cotton woolsuch as a plastic cover.
Protection of tubers from pests
Thrips are practically the only pest that can appear. They crawl under the husk and hibernate with the tuber. During wintering, thrips can completely drink the juice from the bulb, and it dies.
Therefore, it is worth processing the material before storage in order to avoid its death.
Experienced florists advise do such processing as sprinkle the onions with powder from cockroaches, it is carried out twice - before laying for storage and in early January.
We've covered storing gladiolus in winter. We described in detail the general features of care in the section on planting gladioli in open ground.
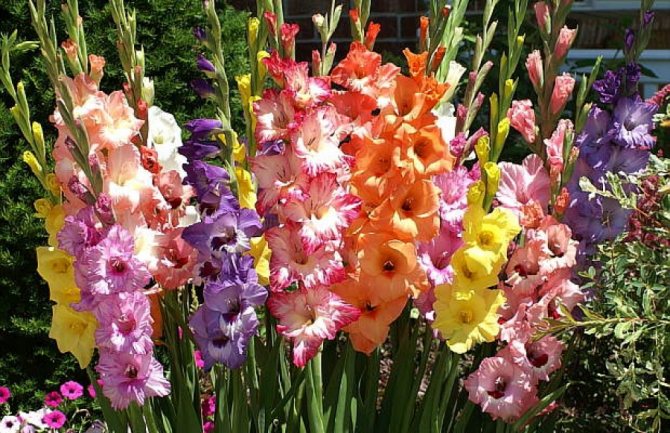
Ease of wintering allows you to choose different varieties every year
It is absolutely not profitable to buy the same varieties every year. Preserving Gladiolus bulbs is not so difficult, the main thing is choose which method storage will suit a specific florist.
Gladioli - flowers loved by many gardeners require attention. They need to be dug up in time, cut off, and then stored in gladioli in winter. There are many different options for storing gladioli in winter, and we will tell you about all of them. We hope you find the most suitable method for yourself and save your favorite varieties of gladioli until spring.
The best time to dig up skewers
Gladioli are quite thermophilic flowers, so they cannot survive wintering in open soil. Low temperatures and excessive soil moisture lead to diseases and rotting of the bulbs. Also, tubers often suffer from soil pests that can cause irreparable harm to them.
The most important determining factor for the timely digging of skewers is the ambient temperature. You can start removing the bulbs from the soil on those days when the temperature at night begins to drop below + 5 ... + 10 ° C. In the first half of September, it is advisable to cut the peduncles of gladioli, and here it is not necessary to wait for the complete dissolution of all flowers. It is advisable to prune peduncles when one or two lower flowers are opened. This should be done only with a sharp knife at an angle of 30-45 degrees, so as not to touch the leaves. You can dig up the bushes of gladioli already 12-18 days after cutting the peduncles.
Digging up different varieties of skewers
An important factor that should be taken into account when determining the optimal time for harvesting gladioli bulbs from open ground is a flower variety. The fact is that different plant families have their own flowering period, so the exact date of excavation can vary greatly.
It is advisable that the harvesting was carried out no earlier than 30 days after the flowering was completed. At this time, tubers are still ripening and they are gaining strength for winter overexposure. You need to dig up the plants while their leaves remain green. Yellowed leaves indicate a weakness or disease of gladioli - the bulbs of such plants should be harvested early, as they can infect healthy flowers.
There are several important points to highlight here:
- first, skewers of early and middle varieties are to be dug out, and only then later, and those that are grown from children;
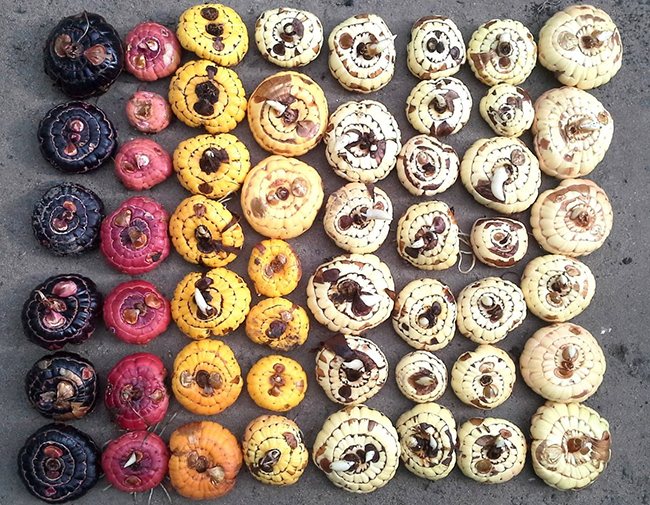
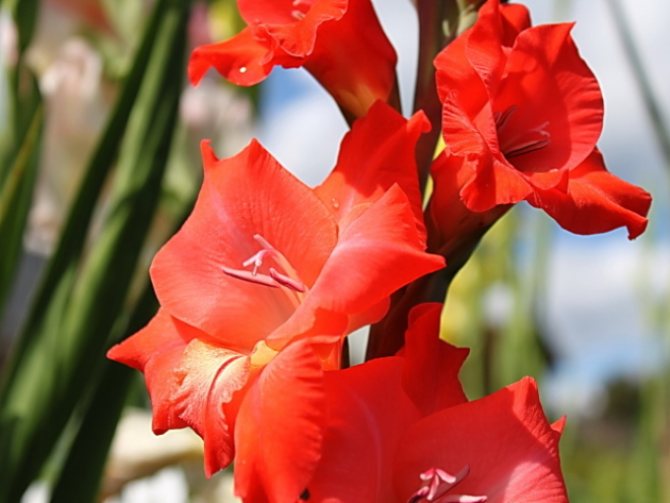
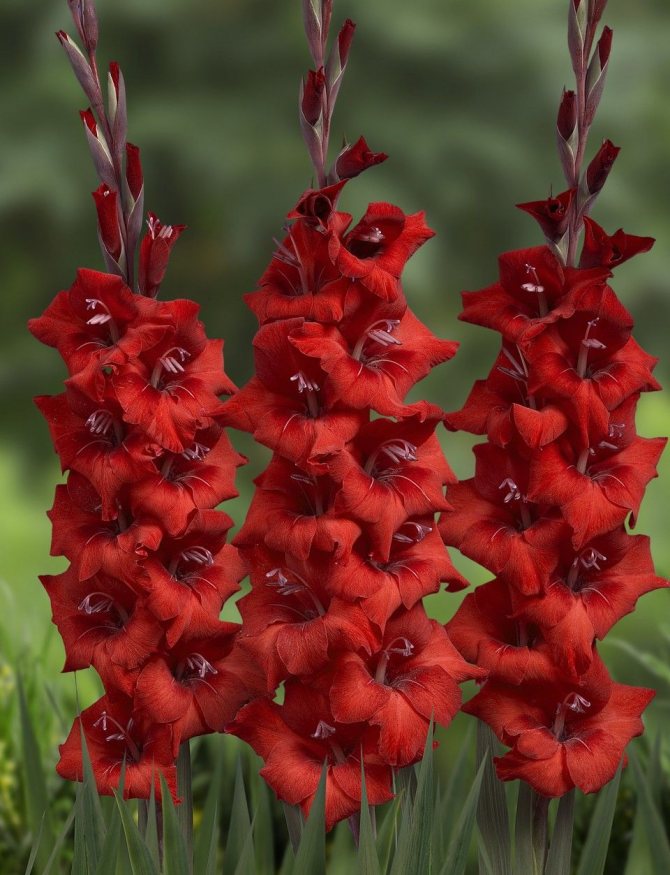
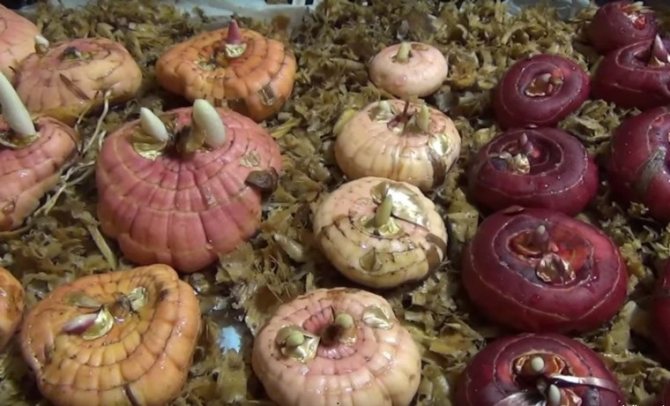
- firstly, gladioli of dark varieties (red, burgundy, purple, black) should be removed, since they are the most susceptible to diseases;
- young and non-flowering plants require more time for good maturation of tubers - usually they need to be dug up last (flower arrows in young skewers appear by the end of August);
- it is advisable to remove the bulbs a little unripe (so you can choose the rhizome with the children), since overripe tubers crumble, and the fallen children often remain in the ground;
- there is a separate type of gladioli that need to be left for wintering in the ground (this includes a tiled skewer, but it is very difficult to find it for sale);
- among experienced gardeners there is an opinion that the best time to dig up gladioli is when the potatoes have already been dug up, and the cabbage still remains to grow in the garden.
Dependence on the growing region
In all localities, the timing of the autumn digging of skewers is different. The basic rule in this case is to maintain a period of 35 to 50 days after the end of flowering. It should be borne in mind that if the peduncle was cut, then the ripening of the bulbs occurs faster.
- In Moscow and the surrounding regions, flowering of almost all varieties of skewers falls in July-August. In this case, you will need to dig up the tubers in mid to late September.
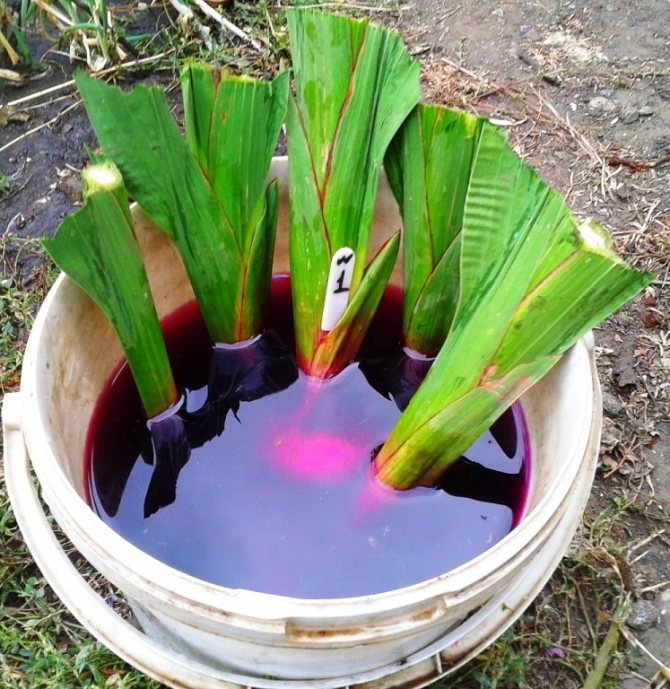
- In the Siberian and Ural regions, the climate is favorable only for the cultivation of early varieties of gladioli, which manage to grow and bloom in a few months. Usually in these regions of Russia flowering occurs in September, when temperatures are sometimes low at night. It is necessary to dig up the bulbs until the temperature during the day drops below + 5-7 degrees. Important! If, due to cold weather, it was not possible to withstand the skewer bulbs in the open field, you need to dig up the tubers along with the soil and uncut stems, placing them in a bucket or other container in a frost-free place for 4-6 weeks, after which it will be possible to select and process the bulbs with children.
- In the southern regions of Russia, it is necessary to dig up a skewer, depending on the type of flower and the timing of flowering. Bulbs are usually harvested in August-October. The same applies to Ukraine, where summers are long and hot. Due to the heat, the tubers often suffer, so you should not delay harvesting the bulbs. If dry weather is observed after flowering, gladioli need to be watered regularly in order to soak the ground well.
- If we talk about Belarus, the skewers should be removed there in August - early September. If it often rains during this period, then the tubers must first be thoroughly dried after digging up, and only then put into storage.
Dependence on the lunar calendar
In 2019, it is worth highlighting such favorable days for digging out gladioli:
- August (until 20:00): 9-13, 15-18, 22-30;
- September (until 17:00): 1-2, 5-14, 18-19, 21-29;
- October: 3, 5-11, 15-20.
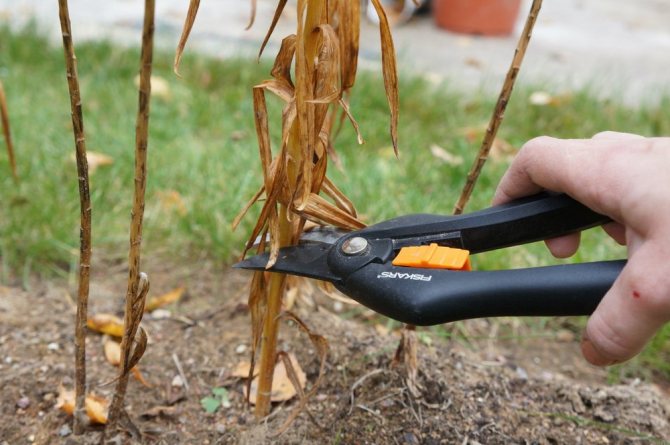
How to trim gladioli for storage
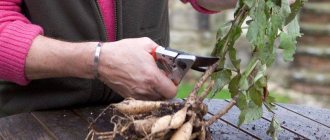
The stems of gladioli are cut, leaving a small stump (0.5 - 1.0 cm) at the corms. I advise you to leave just such a small stump, since by the fall, a very common pest of gladioli, thrips gathers closer to the base of the stem. By pruning shorter, we reduce the possibility of thrips damaging gladioli during winter storage. Here are the basic rules for pruning gladioli for the winter:
- In adult corms, the roots and old, maternal corms are removed immediately. This reduces the drying time of the planting material and prevents the spread of diseases.
- In juvenile bulbs grown from babies, the roots are only shortened well, and they are removed the next year in preparation for spring planting.
After trimming gladioli for the winter, the corms are washed from the soil and treated in a solution of potassium permanganate (potassium permanganate) 5-10 g per 10 liters of water for 20-25 minutes.

Wintering in the basement
The tubers in the basement tolerate the hibernation period well. There is a constant air temperature and humidity, which is favorable for storing planting material. Corms are also "sprouted up and roots down" in layers in dense cardboard boxes or wooden boxes, placed on racks away from vegetables that cause evaporation.
Unpeeled garlic cloves placed in the aisle help to protect the planting material from infection.
It is important from time to time to look through the planting material, to reject damaged tubers. Small "sores" can be treated with brilliant green or potassium permanganate solution, and then put back in storage.
Tip: When choosing a place and storage conditions, carefully select the material. Although gladiolus can bloom safely for up to 10 years, its vitality decreases over the years, and its susceptibility to disease increases. Gardeners should take this aspect into account and try to give way to the younger generation.
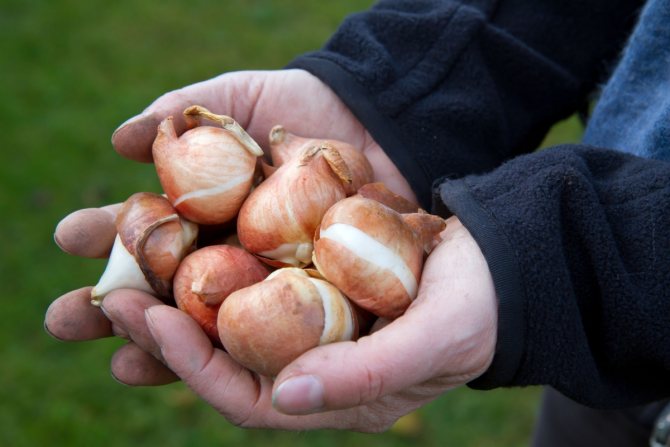
It is recommended to choose young, rounded tubers with a small bottom diameter for storage and subsequent planting.
How to dry gladioli before storing
Drying of gladioli begins as early as possible, immediately after digging.
- The corms are laid out by varieties in bags and dried in the open air from 1 to 3 days, if possible. After that, gladioli are brought into the house and dried at a temperature of 25-30 ° for 15 days.
- And then, it is dried at a temperature of 20-22 ° for 30-35 days. For better drying, it is useful to stir the planting material at least 2 times a day. The good condition of the planting material during winter storage depends on good drying.
Poorly dried corms, due to high humidity under the scales, begin to get sick with fungal and bacterial diseases, they are poorly stored and die. Therefore, it is necessary to lay only well-dried and healthy corms without signs of diseases for storage. All corms of gladioli with signs of disease and cracked children are discarded.
If the varieties are small or the gladiolus variety is very valuable, and the damage is small, then you can cut out the damaged areas to healthy tissue and cover with brilliant green (brilliant green) or treat with a strong solution of potassium permanganate.
Harvesting gladioli bulbs
How to prepare gladioli for winter storage? The main thing is to comply with the cleaning time. Only in time will the dug planting material be well stored. The main reason for his death in winter is fungal diseases. Timely processing and high-quality drying will help to avoid losses.
Digging time

Only fully ripe bulbs keep well and give abundant flowering in the next season. It should take a little over a month for them to accumulate enough nutrients from flowering to digging. This is if the gladiolus was cut for a bouquet. If the plant is allowed to bloom in a flower bed, you need to add another half month to these dates. Experienced flower growers planted gladioli according to varieties, this makes it possible to clearly determine the timing of harvesting the bulbs - the flowering time of each variety is known.
Advice! In order not to forget anything, it is better to write down the number when this or that variety bloomed.
If the bulbs are planted chaotically, the timing of harvesting is more difficult to determine. There are patterns that you should be guided by.
- The approximate harvest time is mid-September, during warm autumn and later.
- The early varieties are dug up first, followed by those that bloom in the middle and the last - late flowering.
- Gladioli grown from babies are harvested later than those obtained from bulbs.
Advice! The first of the varieties of the same flowering period are removed those that have a dark color - their immunity to fungal diseases is weaker.
The timing of harvesting also depends on the weather: in dry autumn, you can hold the bulbs in the beds longer, the rains can force them to be removed and not fully ripe. This will not greatly affect the quality of the planting material if the bulbs are well dried and covered with a layer of paraffin. In this case, it is even easier to choose a baby - it has not yet separated from the mother plant and there will be less losses. In a wet autumn, experienced florists carry out a trial dig earlier than usual. If the bulb is affected by a fungus, you cannot wait with harvesting. To protect the planting material of gladioli from thrips, it is better to carry it out before the air temperature drops below 10 degrees Celsius. Otherwise, the pests will concentrate at the base of the stem and may hide among the dry scales.
Advice! Cleaning is carried out in sunny dry weather.
Harvesting the bulbs
What is the best way to dig up the bulbs? A pitchfork and a scoop and a shovel are also suitable, the main thing is not to injure them and collect all the children. It is problematic to preserve damaged planting material before planting. What is done immediately after digging?
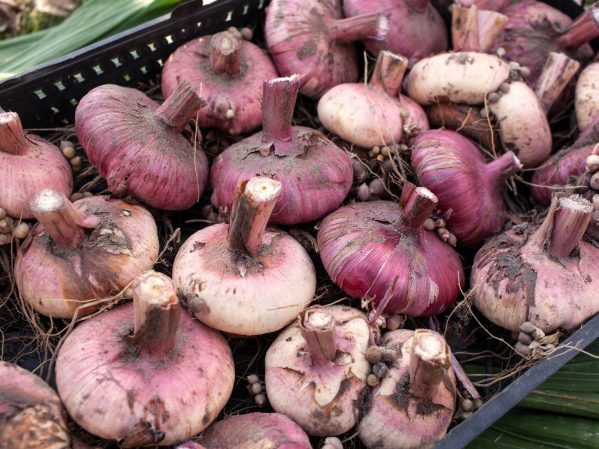
- The stem is cut, the length of the hemp should not exceed 1 cm, or better still shorter - most often the thrips that strike gladioli settle at its base. When working with a pruner, it should be disinfected after each cut in a strong solution of potassium permanganate.
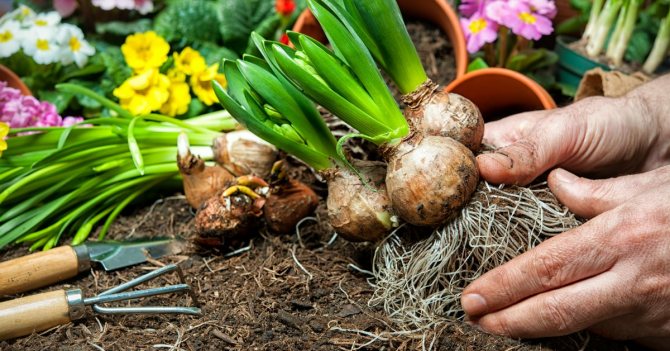
- Remove the mother bulb. If this does not work right away, they separate it after drying - the resulting cork layer will help to do this with ease. You cannot leave the old onion - it can be a source of infection.
- The roots are removed, but not from the bulbs obtained from the children. Their root system is only slightly pruned. So they will dry out less in winter. The roots of these bulbs are removed just before planting.
Advice! It is impossible to get rid of the covering scales on the bulbs; they are cleaned shortly before planting.
Now is the time to send the harvested planting material for drying. But first it needs to be processed.
Processing gladiolus bulbs before storage
Dug out bulbs must be well washed from the soil. It is best to do this on a sieve under running water - each variety separately. Then - prevention against fungal diseases and pests:
- with a solution of a fungicide, for example, "Maxim", diluted according to the instructions or in 3% potassium permanganate, the bulbs are kept in it for about half an hour;
- karbofos solution according to the instructions.
Advice! It is convenient to carry out processing by placing the planting material of each variety in a separate cloth bag.
Further drying is carried out.
Drying the bulbs
If all operations were carried out on a sunny day, allow the bulbs to dry in the sun. Further drying consists of two stages:
- about 3 weeks at a temperature of 25 to 30 degrees;
- up to 6 weeks at a temperature of 20 to 25 degrees.
For drying, the planting material is laid out in 1-2 layers, with paper or cloth under it. You can arrange the bulbs in wooden boxes with mesh bottom and walls. Before storage, they are reviewed again and all patients are thrown away without regret. If this is a valuable variety and the damage is small, you can try to save the bulb by cutting off the sore spot until healthy tissue appears and smearing it with brilliant green. But it will have to be stored separately from the rest of the planting material.
Advice! Do not dry the bulbs close to heating devices, otherwise they may simply boil.
8 ways to store gladioli in winter
Waxing is a great way to keep gladioli at home, in an apartment in winter.
Storing gladioli in the winter at home is possible with the use of waxing. Dip the peeled corms in the paraffin melted in a water bath and immediately put them in cold water to quickly harden the paraffin. A shell forms on the surface, which prevents the formation of moisture and drying out of the corms. However, in the spring, when planting, you will need to rinse each corm in warm water to wash off the paraffin. It's not that easy. Sometimes you have to use a brush to clean it, and this can damage the bulb.
How to keep gladioli in the trench until spring.
If you live in your own home, then it will be very easy for you to keep gladioli until spring. Place the corms in a box, sprinkling them with dry sawdust or peat. Dig a trench about a meter deep and wide enough to accommodate a box of planting material on an elevated site. Place a box in the trench when the ground begins to freeze at night and thaw during the day. Cover the top of the box with dry foliage and plastic to prevent water from getting inside. Cover the trench with soil with a slide so that the water rolls off and trample it down. Such storage of gladioli bulbs in a trench is possible until spring.Of the minuses, it is worth noting that due to diseases, high humidity and lack of oxygen, part of the planting material may die.
How to keep gladioli in the apartment until spring.
Where to store gladioli at home in winter - for this you need to find a place where the temperature is kept at a constant level, about 5 - 10 degrees. Most often, such a place is a basement or cellar. Place the corms prepared for storage in a box with a mesh bottom and place them in the basement where the vegetables are stored. If the storage conditions are correct, then the planting material can lie like this for 2 winters without landing in the ground in the spring.

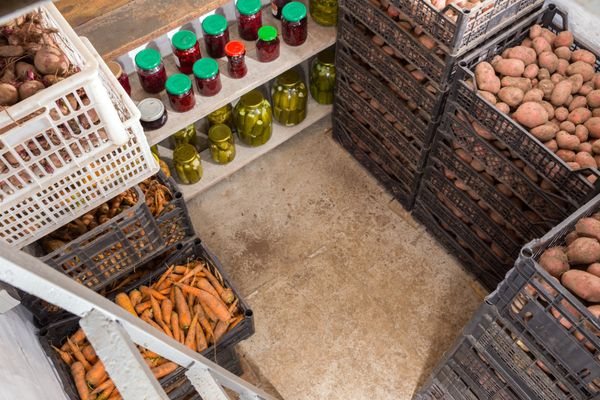
4. How to keep gladioli in the pantry in winter
In the pantry where canned vegetables are stored, you can also find a corner for storing gladiolus bulbs. It is advisable that the temperature in the pantry does not rise more than 18 degrees. Properly prepared gladioli bulbs are placed in nylon stockings and hung on the walls. During the winter, they need to be periodically checked and dried corms that have begun to hurt should be removed.
5. Storing gladioli in a warm attic
In the insulated attic of a private house, you can make a wintering place for bulbous flowers. Pack them in a newspaper, put them in a drawer and place them close to the chimney.
How to properly store gladioli on a glazed loggia
You can store gladioli on a glazed loggia if you put the corms in a foam box with a wall thickness of at least 5 cm, and install a thermometer next to it to control the temperature. With a significant drop in temperature, it will be necessary to additionally insulate the box with the planting material with a sleeping bag or old fur clothes.
A way to store gladioli tubers in an apartment in winter
In a city apartment, near a window facing north and away from heating appliances, it is possible to store gladioli in winter. To do this, the gladiolus bulbs are placed in a box in rows so that the corms do not come into contact with each other. Then they are covered with calcined river sand, charcoal or ash. The box is closed and periodically checked for safety.
In the refrigerator, in the lower vegetable compartment.
A very common way to store gladioli in the winter at home. Each corm is wrapped in paper and then placed in a bag with holes for air circulation. Store the bundle on the bottom shelf, not in a plastic container. It is humid there, a lot of bacteria collect, and this is harmful to gladioli. Storing gladioli bulbs in the refrigerator requires extra care. The bag with planting material must be sorted out 2 times a month, replacing the damp paper, drying the wet bulbs with a hairdryer and returning everything to its place.
Cleaning and storage of gladioli
To the great regret of gardeners, it will not work to leave gladioli tubers right in the ground for the winter - these flowers are too thermophilic, they will not tolerate Russian frosts. Even in southern regions with a mild climate, gladioli are dug up in the fall in order to examine the bulbs, sort and remove diseased specimens, separate large tubers and babies (gladiolus tubers).
In the ground, the bulbs are saturated with moisture, begin to get sick with fungal infections, rot and deteriorate. Because of this, you have to dig up gladioli tubers every year in order to re-plant them in the same or another place in the garden in the spring.
The work of a gardener with faded gladioli can be divided into several stages:
- Digging bulbs out of the ground.
- Pruning the stems.
- Drying and sorting of tubers.
- Disinfection of gladioli.
- Storing the bulbs.
Attention! It is possible not to disinfect gladiolus bulbs in the fall. If the tubers look healthy, this procedure is postponed until spring.
So, before sending flower tubers for storage, they need to be dug up and properly prepared.
How to prepare gladiolus bulbs before winter storage
It is quite difficult to save gladioli and their bulbs - the tubers are capricious and react too much to fluctuations in temperature and humidity. In addition, flower bulbs are a real treat for insect pests (most often, these are tips), they are often affected by rot and fungal infections.
Storing gladiolus bulbs is challenging, but doable. A large percentage of tubers can be saved if they are properly prepared for storage.
So, the preparation of tubers is as follows:
- The optimal period for harvesting gladioli is the beginning of October. In most regions, it is already cool at this time, but heavy rains and frosts are still ahead. Different varieties of gladioli differ in terms of flowering, so it is impossible to name the exact date of harvesting flowers. It is optimal if the bulbs are dug out a month after the last bud wilted. If the variety is late, and cold weather comes, you need to dig out the flowers as early as possible, regardless of the recommended time (frost is much more dangerous than premature harvesting).
- It is recommended to dig up the bulbs with a pitchfork, but you can also do this with a shovel. 10-15 cm recede from the bush and carefully dig in the ground, lifting it up. Hand grasp the lower part of the stem and pull out the bulbs, being careful not to damage them.

- The soil should be carefully cleaned and the stems should be trimmed with a sharp, clean knife or garden pruner. It is recommended to leave hemp no shorter than 20 cm - this way the bulb will not dry out too much, and a tag with the name of the variety and a shade of gladiolus can be attached to the rest of the stem (this will help when drawing up a flower bed in spring).
- Peeled and trimmed bulbs are examined, trying to identify all diseased, damaged, rotten or pest-eaten specimens. If the defects are small, you can try to cut them out with a sharp knife, and fill the wound with strong potassium permanganate or cover with brilliant green. At this stage, different varieties of gladioli are sorted and signed.
- Now you should separate the babies and annual unripe bulbs. Children are stored in the same way as the rest of the tubers. The only recommendation: if possible, it is better to create slightly different conditions for tubers, with a temperature of about 5 degrees and a humidity of 85-90%. Corms that did not have time to ripen are unlikely to survive until spring if stored along with the rest of the gladioli. Such onions are best preserved in paraffin. You just need to melt a candle, grab the stem of the gladiolus with your hand and dip it in a liquid solution for a few seconds. Then quickly put it in cold water and put it in a cardboard or wooden box.
- The main rule responsible for the preservation of gladioli until spring is that the bulbs must be thoroughly dried. Tubers of flowers are dried at room temperature - about 18-20 degrees. The scales are not removed from the bulbs, otherwise the tubers will evaporate moisture too quickly and fade. They lay out gladioli in a dry place on a shelf or on a table, provide them with regular ventilation and a constant temperature. So gladioli should lie down for about 20-30 days.
- After drying, gladioli are best disinfected. This will protect them from fungus, rot, and the spread of infections. You can use a solution of potassium permanganate or chlorophos in a proportion of 20 grams per bucket of water. The corms are soaked in a disinfectant solution for 20-30 minutes. After that, they need to be thoroughly dried again!
Advice! If the cold comes suddenly, you can stimulate the bulbs to ripen as soon as possible. To do this, cut off the green stems with a pruner or knife, leaving at least 20 cm. After a week or two, you can start digging out the bulbs.
The preparatory work is over, you can start laying the bulbs for storage.
How to save gladioli bulbs affected by thrips?
In winter, it is advisable to periodically inspect the corms of gladioli in order to identify the presence of pests in them in time. The main enemy of gladioli is thrips - a skillful concealer. Pest infested bulbs may appear completely healthy during sorting. If you notice traces of insect bites (small black dots) on the bulbs, do not despair - all is not lost. You can get rid of thrips. There are several ways to provide "first aid" to infected bulbs. We will present three of the most effective ones.
- Alcohol. Some growers advise putting the bulbs in a glass jar, putting a cotton swab generously moistened with alcohol inside and sealing tightly. After a few hours, you should notice that the insects have crawled out from under the scales of the bulb and, most likely, have died. You can repeat the procedure if necessary.
- Decis solution. Two ampoules of the substance are dissolved in 10 liters of warm water. The bulbs are left in solution for 30-40 minutes. Then they are dried again.
- Actellic solution. The substance is diluted with water in a ratio of 2 g per liter. The bulbs are dipped in the solution for 5 minutes. After that, the bulbs are dried again at a temperature of 20-25 ° C.
Gladiolus is a flower that belongs to the iris family, and the number of its varieties exceeds 180 names. The most common plant in Russia is the hybrid gladiolus. It is distinguished by high aesthetic indicators, but at the same time not every gardener is ready to grow it. Many gardeners are wondering how to store gladioli in the winter at home.
Preventive measures
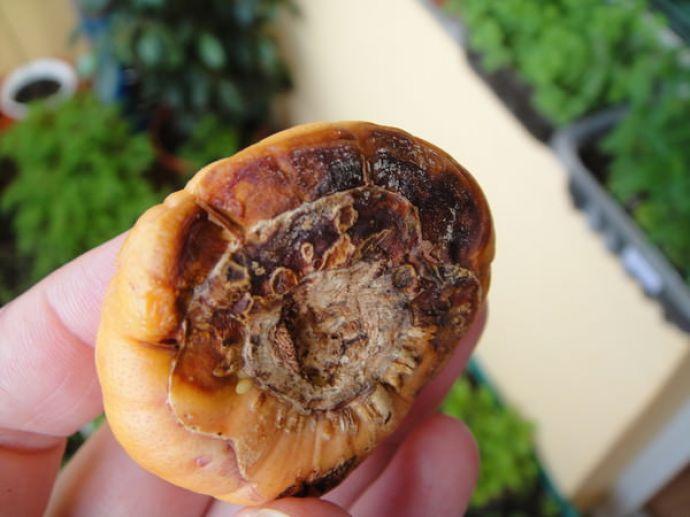
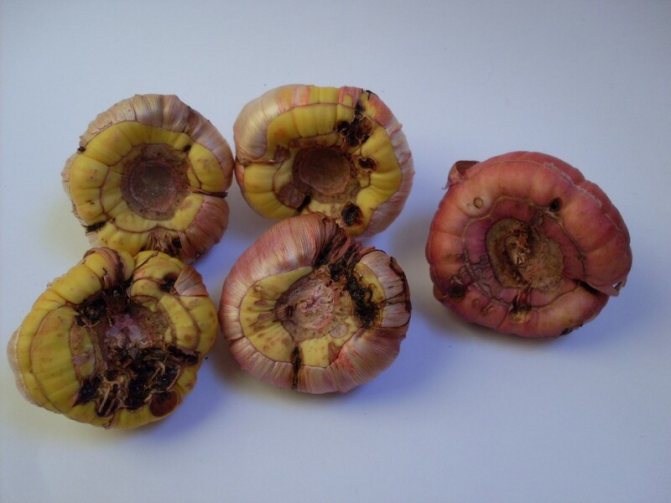
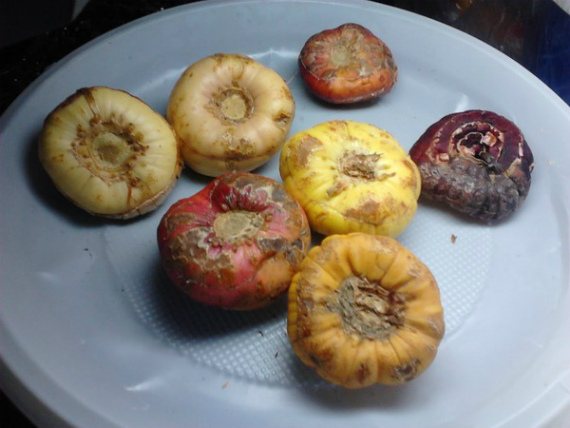
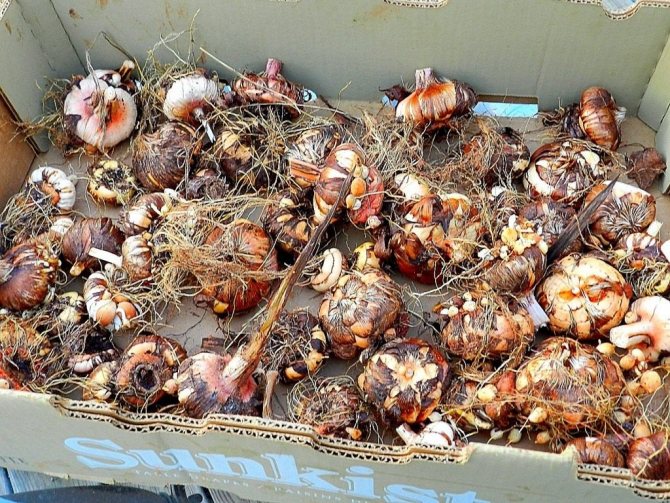
A bulb affected by a fungus
When storing gladioli in unfavorable conditions (high humidity, unacceptable temperature, lack of ventilation), tubers are more susceptible to dangerous diseases of viral, fungal or bacterial etiology. Pests lurking at the base of the foliage or under the scales of the bulbs can also be the culprit. Breeders who are constantly working to improve the species use all kinds of chemical agents, which also negatively affects the viability of the bulbous culture.
Signs of disease and freezing - lethargy, excessive lightness or hardness of the tuber, covered with green or brown mold, spots of different shades.
Gladiolus bulbs are susceptible to fungal infections, among which are often found dry rot (fusarium) or sclerotinia... Refined yellowed leaves with crooked stems, dark spots on them are external signs of plant damage by these insidious diseases. If such signs are found, it is worthwhile to be wary, since the disease manifests itself on the tubers with red-brown, black or yellowish depressed spots. Subsequently, the gladiolus bulb hardens and rots. Such tubers are not suitable for storage, it is better to remove them immediately.
It is easy to store gladioli in winter if you take a number of preventive measures in advance. Before storage, you can disinfect them in a Fundazol solution, and before planting in the ground, dust them with a dry powder of this drug. Contrasting baths with alternate immersion of tubers in hot (55 C) and cold (4 C) water are also justified. It helps the treatment of corms with a solution of drinking soda immediately before planting (2.5 tablespoons of powder per bucket of water).
Timeliness of the measures taken will serve as a prophylaxis against diseases and protect healthy neighbors from infection. The selection of healthy material and compliance with storage conditions are the key to a healthy harvest.
Why dig up for the winter
The need to dig a gladiolus in winter time can be explained by its sensitivity to cold, in winter the culture can easily freeze. A critical indicator for a flower is a temperature below minus three degrees.It is in such conditions that the corms of the plant begin to die, and it is no longer possible to fix such a process. That is why the tubers of the plant must be harvested and stored in a warm room until spring.
Digging a gladiolus is a rather responsible process for every summer resident, since the correctness will directly affect the state of the planting material.
It is necessary to clarify that the name of gladiolus came from the Latin word gladiolus, which means "sword" in translation. Its leaves strongly resemble swords, which gives the plant its name. Science knows about 2,000 varieties of gladioli.
How to dig
Digging up the flower bulbs is best done on a warm, sunny day. This will ensure faster drying of the seed in the future and reduce the risk of rot. You will need a shovel or garden pitchfork.
Stages:
- The shovel is stuck vertically into the ground, while stepping back about 20 cm from the base of the flower. After that, they swing the tool in opposite directions, carefully take out the root system along with a lump of earth and place it on any covering material.
- When the substrate is dry enough, it is shaken off. The bulbs are sorted out by sorting out the children. Dispose of old, damaged and rotten segments. Additionally, the leaf plates should be cut, leaving 5-8 cm of the entire length.
- Are subjected to treatment with Fitosporin according to the instructions. It is also allowed to prepare a soda-salt solution (5 tablespoons of soda and 1 tablespoon of salt per 10 liters of liquid). Such manipulations are carried out in order to prevent diseases.
- Sorted by size and variety. It is not recommended to peel the outer layer of the bulbs.
- Dry thoroughly. They are sent for storage to a basement or cellar, where there is no high humidity.
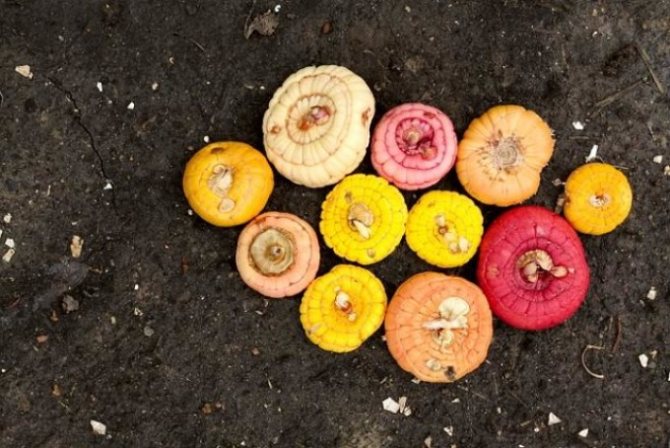
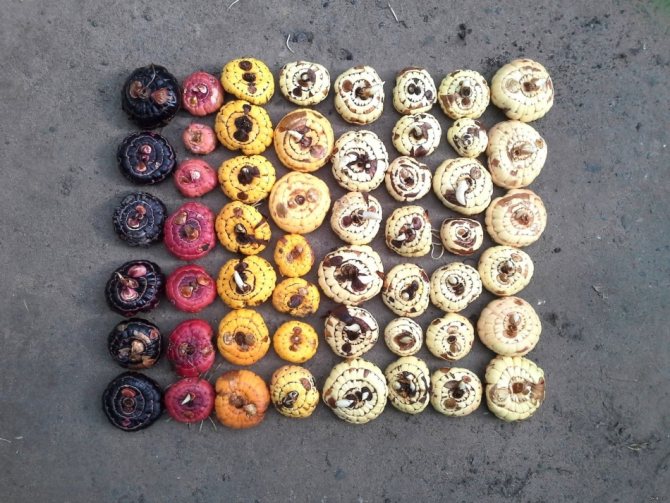
When sorting tubers, you should pay attention to the quality characteristics of the seed, which can be determined by several criteria.
- Age. The youngest segments (kids) are considered the most productive.
- Dimensions. Ideally, the diameter of the bulb does not exceed 4 cm, in the bottom - 1.
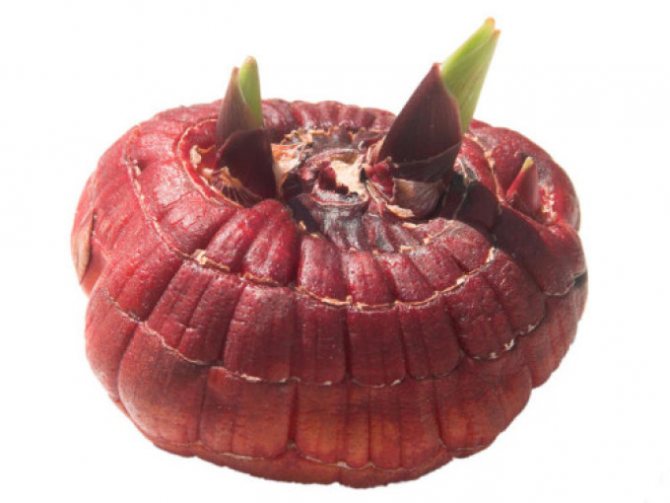
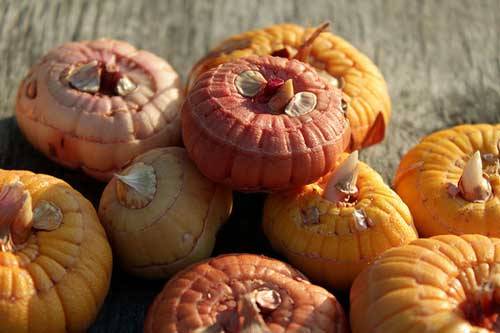
- External characteristics. In quality specimens, the scales have a golden or reddish tint, there are no dark stripes or blotches on the surface. Also, the root tubercles should be examined, which should be sufficiently formed by the time of autumn work.
When to carry out the procedure
Gladioli should be dug out 35-45 days after flowering. it second half of September - early October. It is impossible to pull when digging out the bulbs, since such a plant should not stay in cold soil for too long. To make sure that the corms are ripe, they need to be carefully examined. If cover scales are visible on them, then the plant must be immediately dug out of the ground. When carrying out such work, you need to take into account some features:
- first you need to remove the large onions, after the small ones, and at the end, dig out the children. Digging is carried out using a special pitchfork or a wide garden shovel;
- it is necessary to pull out gladiolus corms from the soil at a time when the streets will be warm and there will be no rain, since it is then that the soil will be moderately moist and it can be easily shaken off the surface of the bulb;
- the potting mix should not be too dry. In this case, it will be difficult to pull out the babies, which retain the ability to emerge for several years. As a result, this can lead to mixing of varieties.
Optimal timing
The question of when to dig out gladioli worries many novice florists. At this point, several factors should be taken into account: the growing area and the variety.
Depending on the variety
Relying on the variety of thermophilic perennial should be due to the different times of its flowering - each species releases the last bud at a certain period, therefore, it is problematic to define the exact dates for the excavation of the culture.
It is important to withstand about 30 days from the moment when the gladiolus faded. This is enough for the plant to gain strength before wintering.
It is better to dig up the bulbs in an immature state, which will save the maximum number of babies, which are sifted from the mother bush as they grow older.
When carrying out agrotechnical work, it is required to adhere to some nuances:
- First of all, the early and middle varieties are harvested, then the late ones and those specimens that were grown in the current season from children.
- Varieties with a dark color of buds - red, black, burgundy, purple - have the weakest immunity to diseases and pests, so they are removed first.
- At the end, young corms are dug out due to their long ripening. The same goes for the Japanese gladiolus Montbrecia.
Depending on the region
Timing differs due to varying climatic conditions.
In the Central lane and the Moscow region, gladioli are dug up in September due to the flowering at the end of July.
In the Urals and Siberia, it is possible to grow exceptionally early varieties, which ripen only by the last days of September. Work is carried out until the first subzero temperatures are established.
In the south, the time for carrying out agrotechnical measures falls on August-October.
How to remove gladioli correctly
You need to dig out gladioli in the autumn. Wherein very important carry out such a procedure before the onset of sub-zero temperatures and cold weather. Tubers are highly sensitive to frost, and even slight freezing as a result can make them completely unsuitable for planting.
Most often, they begin to dig up the plant in mid-October, when potatoes are harvested from the garden, but the cabbage harvest has not yet begun. At the same time, it is important to adhere to one important condition: the digging of the plant can be carried out no less than 35 days after the beginning of its flowering.
It is forbidden to store flower bulbs in a cold chamber (refrigerator). As a result, they will freeze and become simply unsuitable for disembarkation.
When removing gladioli using a pitchfork and a spatula, you need to carefully dig in the bush and stretch the plant. After that, you need to shake the soil off them as soon as possible and cut off the excess leaves.
The thing is that moisture actively evaporates through the leaves, and when the bulb is stored, they begin to dry out too quickly, begin to become limp. Various harmful insects can also crawl from the leaves. To avoid possible problems, it is best to cut off the aerial part of the plant with a secateurs, and then dry it in the sun for one week. To prevent the decay process from starting, the cut site must be well ventilated.
When to dig gladioli in the fall
The optimal time for digging up gladiolus bulbs is a month after the end of flowering. Late varieties can be dug out a little earlier, but in some cases, an increase in the term is permissible.
The deadline for digging is before the onset of frost below 10 ° C. If everything is done correctly, and the storage conditions for the bulbs are met, then in the next season the gladioli will continue to delight the grower with their appearance.
Important! If the flower is cut, then it will take 15 days more for the formation of the bulb than in the case when the gladiolus simply faded.
Most often, the period of excavation in Central Russia falls on the middle and end of September. If the flowers were cut by September 1, then the deadline moves to mid-October.


Winter storage preparation
Preparation of gladiolus bulbs for storage in winter is special. She is should happen in several stages:
- timely cleaning of the plant - it is very important to choose the right moment to dig up the plant, otherwise the earth will have time to freeze;
- pruning;
- cleaning and drying the bulbs for a month;
- processing of gladioli bulbs before storage.
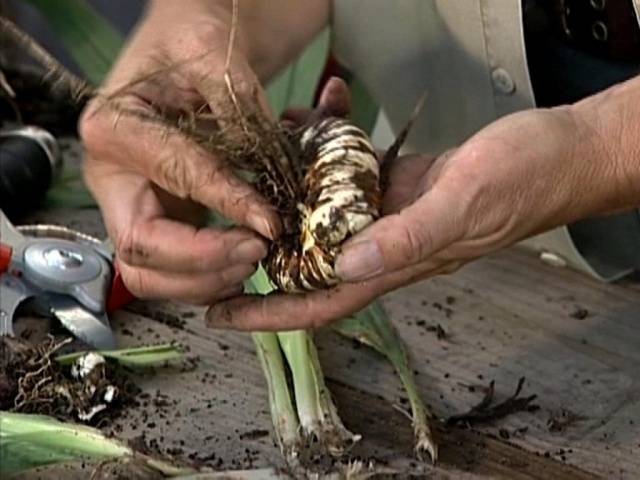
To begin with, after digging the bulbs, you need to carefully remove the old shell so that you do not accidentally damage the bottom that is under it. In case of severe contamination, the bulb must be rinsed with tap water.
Also, bulbous flowers include: tulips, crocus, lily, decorative onions, hyacinth, iris, hazel grouse, anemone, daffodil.
After that, the corms must be treated with a weak solution of Fundazole and pink potassium permanganate. In each solution, the tubers are kept for half an hour.
The next step is to thoroughly dry the material. The bulbs are placed in a room with room temperature for 30-40 days. In the case when the number of tubers is small, they can be thoroughly dried with the help of improvised tools, for example, using a hairdryer. Such a procedure will help stop the progression of the fungus, which often occurs with conventional drying.
Disinfection and drying
After all the bad tubers have been rejected, we proceed to further processing:
- It is necessary to thoroughly rinse the tubers of gladioli with running water.
- For primary disinfection, the bulbs are soaked for 20-30 minutes in a disinfecting 1% solution of foundationol, then washed with water.
- Then it is dipped into a solution of potassium permanganate, in a proportion of 10 g per bucket of water, for half an hour, again washed with water.
- After all procedures, the tubers are dried for a month in a well-ventilated room at room temperature (20-23 ℃). It is best to arrange future flowers in one layer and sort by size or color.
Storing inside the refrigerator
Many gardeners store gladiolus bulbs in a simple refrigerator. The best place to store vegetables is on the lowest shelf.
The main advantage of storing tubers in the refrigerator is the ability to regularly monitor their general condition. At any time, the grower will be able to reduce the storage temperature by shifting the bundle of tubers to a higher shelf. Before laying out the tubers for further wintering, they should be thoroughly dried. After that, they are well wrapped in a simple newspaper. Having combined several bundles at once, they need to be rolled into paper with a high density. In this case, it is imperative to think over small holes, the diameter of which will not exceed one centimeter - they are important for ventilation.
Back in the third century BC, the tubers of this plant were baked, and then they were ground with onions and cakes were prepared.
After wrapping, the tubers must be placed in a plastic bag, at the bottom of which small holes must also be made. Once a month, you need to carefully examine the condition of the bulbs for diseases. If you suddenly notice that some tubers have become too raw, then they must be removed from the package.
Storage in earthen trenches
Among gardeners, a method of storing gladiolus bulbs in the ground is also used. Even in regions with a mild climate, it is impossible to leave corms in the ground for the winter uncontrollably, they will die.
For the safety of planting material, special trenches are used. To do this, a place with a low groundwater flow is selected in the garden area or in the courtyard. Every private trader has the geodata of his court plot.
A trench is dug 0.8 m deep and 0.7 m wide. The dried tubers are placed in the trench layer by layer, sprinkled with sawdust and dry sand. Dried foliage, spruce spruce branches are placed on top of such a "winter house"; roofing paper, slate, carbonate will do.
The storage of tubers in such a special facility is favorable. The plant that has gained strength manifests itself in a lush color in the new season, thanking the owner for the provided comfortable rest conditions.
Features storage of bulbs
The owner does not always manage to take out the tubers from cottage territory for the winter in the city. In this case, you do not need to be very upset, since such flowers can be stored right outside the city.
Using the cellar
A cool and dry cellar with good ventilation is a good place to store the tubers of the plant. But if you decide to place the tubers in this place for the winter, then you need to take into account one feature: in addition to gladioli, there should not be any vegetables and fruits in the cellar, since they can release a large amount of moisture, which provokes the appearance of mold.
The large bottom of the bulb indicates its old age. In this case, you need to try to rejuvenate the plant.
Inside the cellar, it is important to maintain a uniform temperature regime of 4-76 degrees Celsius - this condition is considered mandatory. You also need to closely monitor the humidity indicator, it should fluctuate between 65-80 percent. The storage of gladiolus babies is carried out in a cooler place with high humidity.
If you have a special mesh, then you can create boxes for storing material. The mesh, which is stretched to the bottom, will help to provide high-quality ventilation, which will protect the tubers from rotting.
Inside the trench
To store tubers, you can use a special trench. This method can work well if your area does not have too frosty winters. Groundwater should flow near the selected storage location. In this case, it is very important to complete the construction of the trench before the onset of a cold snap.
Home storage
Storing gladioli after digging in an apartment will be quite difficult. It is very important for this to find a place where there will be no sudden changes in temperature. In this case, the indicator on the thermometer should range from 5 to 10 degrees, and the humidity should be in the range from 60 to 70 percent. Such conditions can only be found in rooms that are isolated from batteries.
A more suitable place for storing bulbs in an apartment would be:
- openings between frames, windows or doors to the balcony;
- glazed loggia;
- entrance hall next to the front door (entrance area);
- toilet (bulbs can also be placed in the toilet next to cold water pipes);
- pantry without heating system.
Loggia in this case will be the best option for storage. With the onset of frost, the tubers are best placed in an insulated box with a thermometer inside. Do not place the box on the floor; use boards or underlays for this. If the frosts are too strong outside, then a blanket or a warm and blanket can be thrown over the bulbs.
Regardless of the storage location of the gladiolus material, it is imperative to ventilate it. If you notice that mold has suddenly appeared on the bulbs, then it must be thoroughly dried. When any spots are formed, pruning is necessarily carried out, and the sections are filled with a solution of potassium permanganate. In this case, the bulbs must be treated with Maxim, dried and put in an airtight bag. If some tubers become too hard, then they must be thrown out immediately - they are not allowed to be used for planting a plant.
Where to store gladiolus bulbs in winter
It is important to observe the storage conditions:
- temperature - (4-6) ℃;
- relative air humidity - (65-80)%.
Children prefer slightly lower temperatures and higher humidity.
The best wintering place is a dry, cold and well-ventilated area such as a basement. It should be borne in mind that a lot of moisture evaporates from the tubers of gladioli, so they are not recommended to be left with vegetables and fruits. Small boxes with a mesh bottom are ideal for sorting.
If you don't have a basement, then let's look at other options where you can store the bulbs for winter storage.
Possible plant difficulties
Without fail, tubers must be inspected once a month in order to quickly identify deviations from the norm.
Some options for plant problems:
- The development of gray mold - too high humidity, it is necessary to dry and replace the paper.
- Thrips development - for this, damaged tubers are harvested, and healthy ones are treated with Hom.
If there are no suitable means to eliminate thrips, then you can put the diseased bulbs in a special container, which must be tightly closed.
On the damaged bulbs laid out in the container, special cotton wool soaked in medical alcohol with a concentration of 96 percent is placed, well closed with a lid. With this method, thrips, which cannot withstand the effects of alcohol, simply die. After that, the tubers are well dried:
- such a procedure must be carried out twice with a total interval of four days;
- Be sure to put a plastic cover between the cotton wool and the bulb.
If the tubers are poorly stored
During long overexposure, it is recommended to examine gladioli at least once a month in order to detect possible diseases in time. When mold appears, the bulbs are removed from the container, laid out on cardboard and dried, and then wrapped in new newspaper or replaced with the backfill in the box.
Mold appears due to excess moisture, and if it is impossible to transfer to a drier room, it will be advisable to put a container with quicklime lump in a box with gladioli. After that, the box is closed, but not airtight. Quicklime will gradually take moisture from the air, turning into fluff. About 1 kg of lime is enough for a container of 15-20 liters.
When thrips (small white insects) appear, the affected bulbs are separated from the healthy ones, placed in an airtight container and covered with cotton wool soaked in medical alcohol. Then close the lid and incubate for 10-12 hours. The tubers are taken out and dried. Store separately and repeat the treatment after 4-5 days. The state of the rest of the planting material is also monitored, and in case of mass infestation, general processing is carried out.
In the spring, the bulbs are examined again and, if they find that they have lost their elasticity, sluggish tubers, they are soaked in water with a growth stimulator. If the softness is due to low humidity, such a measure can revive them. If this happened due to hypothermia, then the kidneys will not hatch.
What gladioli are not dug up in the fall
When to dig up tulip bulbs after flowering
Sometimes you can find gladioli on sale, which, according to rumors spreading among gardeners, is not necessary to dig. If you buy such gladioli, how to store and when to dig them out will not be a problem. However, this is not always true.
Miniature varieties with small flowers are often considered winter-hardy. This is a misconception. All hybrid varieties of gladioli do not tolerate Russian winters in the ground.
Only some types of gladioli can be frost-resistant. They are practically not on sale.
Frost-resistant types of gladioli:
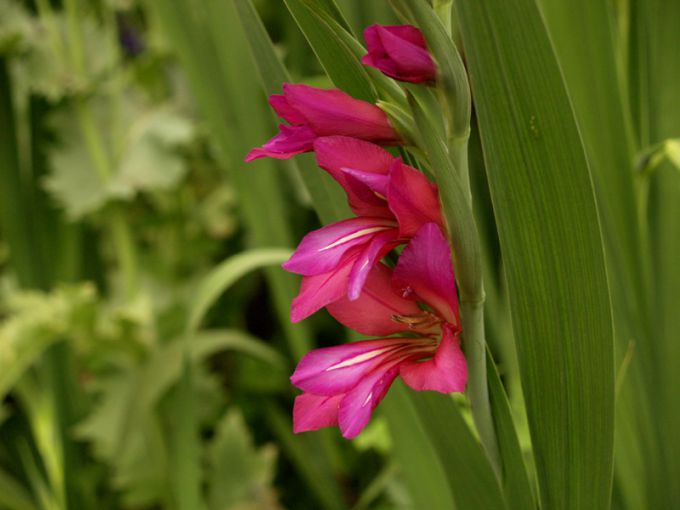
- Scratched (Gladíolus imbricatus). In the temperate climate of Russia, it is able to grow without digging;
- Sowing (Gladíolus segetum);
- Common (Gladíolus communis);
- Byzantine (Gladíolus byzantinus).

Gladíolus imbricatus
As for the last three, although they belong to the hardy species, in Russian conditions there is no guarantee of their successful wintering without digging up.
Treatment of tubers from diseases and pests
Gladioli are susceptible to disease and are often attacked by harmful insects. Bacteria and fungi can be found in the soil, and, for example, thrips live on the plant in summer, moving into bulbs in winter. This necessitates processing the tubers before storing them.
Autumn disinfection of gladiolus bulbs
Autumn disinfection consists of immersing the bulbs in a strong solution of potassium permanganate, which can be replaced with fungicide treatment.
Soaking gladioli in potassium permanganate
To carry out prophylaxis against harmful insects, after the potassium permanganate or fungicide, the bulbs can be dipped in a solution of karbofos or another insecticide.
What will happen if you do not dig up gladioli in time
If the gladiolus corms are dug up later than the prescribed period, in the cold, they may begin to rot during storage. The immune system of supercooled bulbs suffers, and water, when it freezes, destroys cells.
The peduncles are pruned when 1 or 2 lower flowers are open
In the winter season, negative temperatures are established on the territory of Russia and the CIS countries. One night in frozen soil is enough for the corm to die. All breeding hybrids are not winter-hardy and do not survive when the soil freezes. Neither mulching nor the construction of shelters helps.
The exception is the species winter-hardy old hybrids - Colville's gladiolus and Nantes (dwarf). They endure mild winters under multi-layered shelter (plus a thick layer of snow).
If the bulbs are dug up ahead of time, they will survive if properly pruned and treated with pest chemicals. But they will need more time to adapt to storage conditions. The scales of such planting material are soft, they are easily scratched, with an accidental impact on the tuber, dents appear. The bulb spends a lot of energy preparing for winter, loses water. Do not dig out gladioli woundsabout... it you can doif the onions are affected by rot, pests, but the variety is valuableth and I want to keep it (but not earlier than July).
When to cut gladioli for the winter
Preparation for harvesting gladioli begins long before the arrival of winter. At the initial stage, it is necessary to cut the peduncles.
Important! If you allow gladioli to bloom until the very frost and dig them out without letting them stand without peduncles, it is highly likely that they will not have enough strength to bloom next year.
It is important to perform the cut technically correct:
- The works are carried out in the early morning or after sunset.
- A sharp knife is used as a tool.
- It is necessary to keep at least 4 leaf plates on the bush for further growth and development of the bulb.
- The rest of the peduncle should be located deep between the leaves.
Gladioli already without inflorescences should be left in the garden for 40-45 days - give the corn bulbs the opportunity to accumulate a sufficient supply of nutrients, increase vitality and immunity. Often during this time, the aerial part of the plant has time to turn yellow and gradually dies off. When determining the correct cutoff time, local climatic conditions must be taken into account.
For example, in the Leningrad region (central zone of Russia), stable cold weather occurs in the middle or at the end of October. This means that after the first decade of October, you can dig up the bulbs so that they do not freeze and die. Subtracting 40 days from the date of the proposed excavation, we get the date of the general cutting of inflorescences - the end of summer or the beginning of autumn.
Is it possible to store sick and thrips infected corms?
Even gladiolus corms affected by thrips can not be thrown away, but saved... What's more, they can grow back in the spring if stored properly.
But first you need to cut off all the affected areas with a sharp knife. Of course, in this case we are talking about those parts of the plants in which the pests have chosen a smaller part.
After trimming, the planting material is placed in a weak solution of potassium permanganate, and then the cut points must be passed with brilliant green.
Further, it is stored according to general rules. However, it is still desirable to allocate a separate place for it from completely healthy plants or place it together with the same cured corms.
By the way, this method can be used not only in case of thrips injury, but also in case of other unpleasant diseases. For example, rot.
Storage of diseased corms
Characteristics
Types of gladioli differ from each other in shape, size, color and appearance of flowers. It is a bulbous plant that is not grown from seed other than the production of new varieties. Its name comes from the Latin word "gladius", which means sword.
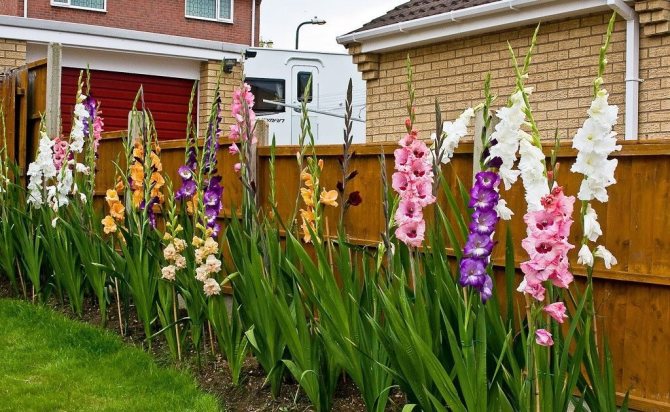
Gladioli in the garden
In botanical terminology, gladioli bulbs are called "corm", or corms. Corm is a shortened and thickened section of the stem surrounded by several layers of brownish fibrous membranes. A young corm is formed annually, drawing nutrients from the old, then dying off.
The stems of the plant are erect, up to 1 m high, densely surrounded by leaves, long, leathery, with a slightly pointed end, of bright green color.
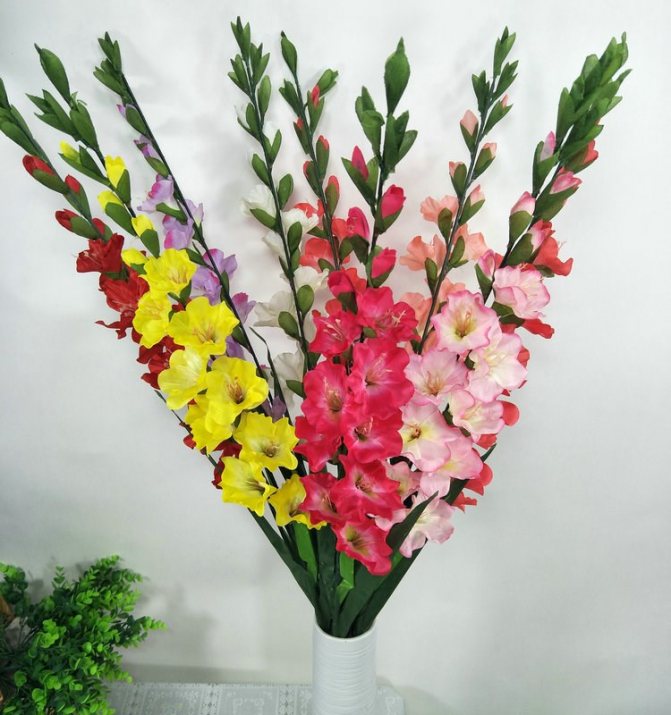
Inflorescences of gladiolus
Fragrant spike of gladiolus inflorescence consists of large, in most species - one-sided flowers that are bisexual. Each flower has two leathery green bracts. Sepals and petals are combined into a tubular structure. Stamens are attached to the base of the funnel-shaped perianth. The color of the flowers is varied: from white, yellow, pale pink to ruby red and purple, sometimes they are multi-colored, as in the case of hybrid varieties.
Features of the plant and indications for digging out the bulbs
When deciding whether to remove the bulbs from the ground for the winter, it is worth starting from the prevailing climatic conditions. In particular, in the southern regions in cold months the temperature is kept mostly at zero; here it is not relevant to dig up gladioli in the fall. During the frost period, it is advisable to cover the plantings with a protective material, for example, agrospan or film.
In the middle and northern latitudes, severe and long winters are expected, the autumn preparation of gladioli, in addition to digging, is to protect them from diseases and freezing. It must be remembered that in the north the plant is planted rather late, in some cases the bulbs do not reach maturity. The term for harvesting the skewer in the middle latitudes is the end of September, by these days frosts come.
How to properly harvest corms?

You need to dig out gladioli in dry and sunny weather.
Dry weather and a sunny day are best for digging out corms.... Since in this case it will be easier to clean them from the soil, carefully inspect and sort them correctly.
For digging, it is best to stock up on a pitchfork (so there is less chance of damaging the corms themselves). But some gardeners do a great job with a shovel. The main thing is to step back from the bush by 20 cm and gently raise the ground, while holding onto the aerial part of the plant, as if slightly pulling it out of the ground.
- After digging up, you first need to lay the corms, without breaking them in any way, on a cloth, tarpaulin or polyethylene.
- You should wait some time for the earth to dry well and crumble under the influence of the wind. Only then should you start dividing the roots, removing all the soil.
- Old corms are definitely not suitable for storage. They need to be removed. And the maternal corm can even be dangerous, because putrefactive diseases usually develop in it, thrips multiply. The same applies to other sick-looking, rotten corms. For all suitable gladioli, the aerial part should be cut off, leaving the tails of about 2-5 cm.
- In corms, it is recommended to remove the root shoots, because they will evaporate the accumulated moisture and reduce their shelf life.
And remember that in no case should the husk be removed from the corms - this is the most important barrier against diseases and pests, as well as natural protection against adverse factors... Hull-free material will store very poorly and is unlikely to be suitable for growing in spring.
After digging up, you can immediately start preparing gladioli for storage for the period of cold weather.
Growing gladioli
Taking care of gladioli is quite simple. When creating comfortable conditions for plants, they generously endow gardeners with luxurious flowers.
Gladioli in pots
What to look for:
- Landing place. Gladioli love places in full sun and sheltered from the winds;
- The soil. They prefer moist, loose, well-drained soils rich in organic matter;
- Watering. It is carried out regularly during the flowering period and throughout the summer season (about twice a week). However, you should avoid getting moisture on flowers, even if they have not yet blossomed. The optimal way of watering is in the grooves dug next to the plant to a depth of 5 cm;
- Top dressing. Need periodic feeding with complex fertilizers for flowering plants, diluted in water for irrigation. Preferable to feed before flowering.
Important! During the first phases of growth, watering should be more abundant, after the appearance of the first shoots, the amount of water for irrigation decreases.
Another feature when caring for gladioli is to remove weeds in time, as they take away some of the nutrients intended for flowers.
Bouquet of gladioli
If gladioli are cut to make bouquets, then it is better to do this when 2-3 blossoming flowers appear. Cutting time - early in the morning or in the evening. It is better to cut diagonally, leaving 4-6 leaves on the stem remaining in the ground. Leaves are essential for proper corm formation.
The quality of the planting material
The value of gladioli corms is determined by many features. The first is age. The most valuable planting qualities are children (young bulbs that have not yet bloomed).
Size also plays an important role: the bulb should not be large, its diameter should not exceed 4 cm, the diameter of the bottom should not exceed 1 cm.
The root tubercles must be fully formed. The scales covering the bulb should be shiny, golden yellow or reddish, without dark streaks or spots.
Gladioli are wonderful flowers. If you want them to delight you at your summer cottage, it is important to know when to dig out gladioli in the fall, as well as how to store gladioli in the winter at home.
Protection of bulbs from rotting and pests during storage
During winter storage, one should conduct an audit and inspect perennial corms once every 1.5-2 months. It is not necessary to shake up all the contents of the boxes, it is enough to open them and inspect the planting material. Signs of rot or the development of the disease are immediately visible - these are wet spots on the husk of the bulb, mold. The presence of a common pest of gladiolus - thrips, is indicated by the appearance of black dots on the surface of the tuber.
The affected bulbs are immediately removed from their stores. With a large focus of rot, the corm is thrown away. If the rot has captured no more than one fifth of the surface of the tuber, it is cleaned and the cut is treated with brilliant green or iodine. The cured onion is stored in a separate box, wrapped in newspaper.
Against thrips, gladioli are immersed in an aqueous solution of an insecticide (Aktara, Aktellik) for 5-7 minutes. For 1 liter of water, you will need to take the powder on the tip of a knife (about 2 g). After soaking, the corms are dried at +25 degrees until completely dry and returned to storage.
Against thrips, gladioli can also be treated "dry". It requires a dry glass jar with a tight-fitting lid and a piece of cotton wool or foam soaked in alcohol or vodka. A tampon soaked in alcohol is placed in a jar and corms are poured there. The container is corked and left alone for 6-8 hours. This time is enough for the pest to leave the shelter in the bulb and die.
When to take out of the refrigerator for germination
For germination, gladiolus bulbs are taken out of the refrigerator when the outside temperature already allows them to be planted in the near future.In many respects, the exact time depends on the climatic characteristics of the region and the current weather. Before making a final decision, it is recommended to review the weather forecast for the next 2-3 weeks and find out for sure whether there will be recurrent spring frosts. The approximate timeframes for the regions are as follows:
- In the Urals - the last April, first May days.
- In Siberia - the first decade of May.
- In the Leningrad region - mid or late April.
- In Moscow and Moscow region - 2-3 decades of April.
- In the southern regions - in the last decade of March and in the first days of April.
- In Ukraine, they are harvested for germination in the first half of April.
- In Belarus, they take it out of the refrigerator in the second half of April.
- In the middle lane, they begin to germinate approximately in the second decade of April.
On a note! If gladiolus babies are not planted for the next season, then, subject to the temperature and humidity conditions, they lie well for another year.
On average, it is necessary to start preparing for the germination of stored gladiolus corms from April 1 to April 20. Some growers say that later germination is possible - so nothing terrible will happen if you start germinating them in the last April days. Nevertheless, the main indicator is climatic features, since before the gladioli are sent into the ground and the beginning of their germination, there should be an interval of 15-20 days.
Processing and drying of gladioli bulbs
The main difficulty in wintering tubers is exposure to changes in humidity and temperature. Several measures will help reduce the negative impact of external factors:
- before laying in boxes, the seed is washed first with water, followed by a very weak manganese solution. Next, the onions are sorted, transferred by type into gauze bags and dipped in a solution of a disinfectant such as Inta-vir, Maxim;
- corms are dried for 3-4 days unfolded, then placed in ventilated wooden boxes. In the room where it is planned to place them, the temperature should not exceed 22 ° C. Under these conditions, the material is dried for about 6 weeks;
- for even drying, the bulbs need to be turned over once a day. Otherwise, there is a high risk of fungal or bacterial diseases that can destroy all the material;
- in specimens with small defects, the damaged area can be cut off by immediately treating this place with potassium permanganate or brilliant green. It is important to isolate such bulbs from intact ones;
- after drying for a month and a half, you can move the boxes to a room with a temperature of + 8 ° C for keeping during the winter months. Exceeding this temperature causes early germination of the bulbs, lowering - freezing of the material. Care must be taken that the humidity level does not exceed 75%.
In the middle of winter, corms can germinate, by which time they should be sufficiently lit. Instances with green shoots survive without problems until planting in the spring.
How to prepare corms for storage step by step
Gladiolus corms
In the autumn-winter period, the underground structures of gladioli lay most of the buds, from which plants will form with the onset of warmth. Therefore, the beauty of the future flower bed directly depends on how carefully it turns out to prepare the gladiolus for wintering.
- First of all, it is necessary to deal with the processing of planting material of gladioli from pests... Someone prefers to do with the help of proven folk methods. For example, thoroughly rinse the corms with soapy water or soak them in a weak solution of potassium permanganate for about 20 minutes. But some from year to year prefer purchased products: Inta-Vir, Maxim, Hom. You should not be afraid of them, they are unlikely to harm the plants, but they should be used strictly according to the instructions.
- Then gladiolus corms need good drying.... First, this should be done outdoors, in the sun. The best option is to spread them one at a time on a baking sheet with lined paper towels. The moisture will evaporate relatively quickly under the sun's rays. After that, gladioli must be brought indoors and left in a dry, shady place.
- Containers for permanent storage of gladiolus corms must have a ventilated bottom... Ordinary wooden or plastic boxes for vegetables have proven themselves well for these purposes. Gladioli must be stacked in two layers on top of each other. If there is too much material, do not place it too crowded: it is better to take a new container.
As you can see, there is nothing complicated in preparing gladiolus corms for winter. If you complete all the necessary stages consistently and correctly, then the plants will certainly survive until spring and then give new healthy offspring.
Cleaning rules
You should start harvesting gladioli in autumn when the night temperature is below + 100C. The removal of the corms begins with the dismantling of the pegs and binding material. You will need a shovel or pitchfork to work. The tool should be inserted vertically into the ground. Tubers are more likely to be damaged with inclined feed.
It is necessary to extract the plant from the ground together with green foliage.
Where does the cleaning start:
- With a shovel or pitchfork, carefully raise the layer of earth at a distance of about 7 cm from the plant.
- Grasp the stem with your hand and gently pull it out of the ground. Put on the prepared place. Do not pull out the plant by force, so as not to harm the seed.
- Check for small onions left in the hole.
The stems should be removed immediately after harvest. Because the moisture accumulated in the tuber will evaporate through the leaves. During the growing season, useful substances have accumulated in the bulb, which will evaporate with moisture. Such planting material by the spring will be sluggish and become unusable.
There are two ways to remove the stem:
- Gently break off the stem with your hands.
- Trim with garden shears.
The stem should be cut at a distance of about 1.5-2 cm from the tuber.
After removal, the corms are cleaned of adhering earth, washed in water, and dried.
The mother bulb should be carefully removed so as not to damage it. You need to prune the roots through which moisture will evaporate. Damaged and wide-bottomed specimens are not left for storage.
It is not necessary to completely remove the roots of the bulbs grown from the buds, it is enough to cut them a little. The largest ones are taken for storage. They keep better and bloom earlier.
Preparing the bulbs before storage
In addition to observing the norms and terms of digging corms, it is also important to store gladioli correctly in winter. Without observing the storage rules, preparing the corms for planting will be meaningless, since they will have time to deteriorate during the maturation period. It is necessary to keep the planting material during all winter months at a certain temperature and humidity, and they must also be regularly checked for integrity and health. The basic rules for storing gladiolus corms are as follows:
- Before being sent to winter bedding, the planting material is well washed with running cool water, treated with a disinfectant solution.
- After processing and cleaning, the corms are distributed according to the variety, laid out in gauze bags and dipped in a special preparation - Inta-vir, Maxim, Chorus, similar.
- Then the disinfected corms are laid out to dry.
- After 4 days, the planting material is distributed in boxes with mesh walls, they are kept in a room where the air temperature does not exceed + 22˚ C and left that way for approximately 1.5 months.
- Every day, the bulbous material is turned over - this allows it to dry evenly. If the drying is not good enough, fungal or bacterial diseases can develop on the corms.
- When there is minor damage on the bulb, this area is cut off and treated with purple manganese permanganate or brilliant green. Keep damaged corms separate from healthy ones.
- Planting material is stored at a temperature of + 8˚ C and a humidity of approximately 75%. An elevated temperature relative to the recommended temperature provokes the germination of corms, and at a lower temperature, they freeze.
- When the material begins to germinate (approximately - mid-January), they are satisfied with increased lighting. Corms with green shoots are able to lie until spring planting.
In addition to the above, increased attention is focused on the drying scheme for planting material. This manipulation is required before sending for storage. Well-dried corms can last until the spring season and preserve germination. The basic norms for drying dug out and sorted gladiolus bulbs are as follows:
- After rinsing, disinfecting and briefly exposing the corms to the sun, they are sent to the room for drying.
- For approximately a couple of weeks, planting material is kept at temperatures of + 29 ... + 34˚ C, after, for 2-3 days, they are dried at + 35 ... + 38˚ C, while it is important that a fan blows them.
- When such conditions cannot be provided, then they are dried in a warm room (kitchen), hanging the corms from the ceiling, leaving them so for 3-4 weeks. At the same time, it is important to maintain the humidity in the room at a level of about 20%.
Attention! If the storage or drying conditions have been violated, the bulbs become moldy, sometimes soften, turn brown and rot.
Features and conditions of winter storage
In the first period after drying, the corms are kept at a temperature of + 23 ... + 26˚ C, while the room must have good ventilation. Periodically they are changed in places - the upper ones are lowered down, and the lower ones are raised. This helps to reduce dampness of the planting material. Gradually, towards winter, the temperature for the bulbs is lowered to + 20˚ C, while the lower the thermometer mark, the less often the planting material needs to be moved. But, it is imperative to monitor how the corms look. If purple or reddish marks appear on the bulbs, this is a sign of infection with thrips and such specimens should be kept separate from healthy ones. Immediately before winter, the temperature is brought to + 8˚ C and left in such conditions until spring
How many corms lie

The tubers have a shelf life - approximately at 4-5 years of life, they degenerate completely. The most valuable are those corms that have not yet bloomed, they are called juvenile. In old bulbs, the process of degeneration is represented by the fact that the ground part of the plant is weakened, its flowering is underdeveloped, there are almost no children, and the number of buds is small. By this age, the bottom of the corms reaches 1.5 cm in diameter.
With regard to the shelf life - the corm is able to stay well until spring, subject to the storage rules. But, the landing time depends on the region, in all regions, except for Siberia and the Urals, it is permissible to deepen the bulbs already in April-May. But in the northernmost regions, suitable weather comes only in the last decade of May, or even in June. The main criterion for disembarkation is a stable outside temperature above + 10˚ C and the absence of risks of recurrent frost.
Drying corms

Incorrectly or insufficiently dried planting material will not be able to survive throughout the winter.
It is more convenient to dry processed specimens in cardboard boxes with low sides or in wooden crates. The entire drying process takes two weeks.
- Corms are placed in boxes in one row. It is recommended to take it outside in sunny weather for only two hours.
- It should be kept warm for seven days, at an air temperature of at least + 200C, but preferably + 300C. The boxes can be placed next to the heater. Do not be afraid of drying out.The drying process can prevent the spread of bacteria and fungus.
Another drying method requires a stem up to 10cm long. Prepared bulbs are collected in bunches and tied. Then they are hung under a roof in a well-ventilated place. However, protection must be provided, both from direct sunlight and precipitation.
After two weeks of drying, it is required to check all the seed material.
Inspection will identify and remove damaged instances. But if the variety of gladioli is rare, you can cut out the affected areas. And then cover it with brilliant green.
How to prepare gladiolus bulbs for winter storage
So, you have removed the future planting material from the ground, but what next to do with the bulbs and gladiolus babies after digging? Now they need to be prepared for winter storage.
By the way! Children and full-fledged bulbs must be divided and put in different piles.
Sorting
First of all, you need to carefully examine all copies. All diseased, damaged, pest-infested bulbs should be discarded.so that they do not infect healthy specimens during storage.
Samples affected by disease and disease must be burned!
Processing and disinfection
After sorting, it is recommended treat bulbs and babies in a solution of a fungicide preparation for the prevention of fungal diseases... For soaking, you can use, for example, "Maxim", "Fundazol", "Fitosporin-M". It is necessary to make a solution for disinfection and soak according to the instructions for the drug, while it is imperative to observe safety precautions and use personal protective equipment!
Gladioli can be attacked by thrips, which are very dangerous pests. For, to protect plants from thrips, you can soak in a solution of an insecticide preparation, for example, "Inta-Vir", "Akarin", "Iskra", "Aktellik". In this case, you must act strictly according to the instructions! Such treatment will serve as an excellent prevention of thrips. And it is especially important to perform soaking if plants in your area have been exposed to them previously.
Important! After processing by soaking, it is worth cutting off the stem of the onion, while a stump of 1 or 2 centimeters should remain.
Drying
After soaking, you need to dry the bulbs in 2 stages:
- First, two or three days on the street.
- Then three to four weeks at home.
First you need to dry it outside, but only in warm and dry weather! It will take about 3 days to dry, and at the same time you need to bring them into a warm room at night. If it is humid, damp and rainy outside, then dry it during the day in a warm and dry room.
Advice! When drying bulbs and babies outside, it is recommended to cover them with gauze so that various pests and insects do not lay eggs.
After 2-3 days, you need transfer the bulbs to home conditions for 3-4 weeks into the room of an apartment or private house, and only then send it for winter storage. They need to be laid out in a box, boxes or baskets in one layer. The temperature should be around 23-25 degrees Celsius, while good air circulation and ventilation are also important.
In such conditions, they will be able to completely dry out and survive the winter safely. Moreover, within a month, it is required to regularly turn them over and examine them for rot or other pathological processes.
Note! If the bulbs are not completely dried, they can easily rot or get sick when stored in winter.
Pest Control Tricks
Gladioli are vulnerable to pathogens and thrips. The latter penetrate under the husk and intensively feed on the sap of the plant, as a result of which the bulb dies. To protect the seed from pests, you can use garlic: it is placed in boxes designed for winter storage of flowers, in the form of chopped slices. The bulbs should be checked from time to time and replaced with fresh dried garlic.
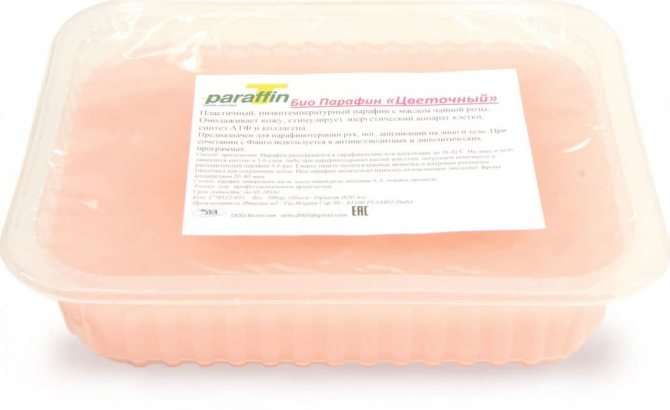
Paraffin - a remedy against pests of gladioli
Paraffin wax can also be helpful. The candle is melted into a container, the latter is placed in a water bath to keep the wax warm, but not scalding hot. All the bulbs are dipped one by one in the mixture and then in water, thus creating a shell that prevents moisture loss and infection from the outside. In spring, the paraffin wax will be easy to remove by hand. It should be remembered that this measure will not save already infected specimens.
The drug Tsineb helps to cope with pests. The tubers are kept in it for half an hour, then dried for at least 2-3 days, laid out in a frost-free, ventilated room, and then returned to the initial storage location.
When to plant
Correct preparation of gladioli for winter is a good contribution to the development of this lush, gorgeous flower for the next year; among the advantages, a small degree of time and effort can be noted.
The interval from digging to the moment of the first awakening is 35-40 days.
It is recommended to plant a flower in a new place before May 10, preliminary preparations for planting are carried out: the bulbs are peeled, soaked for 12 hours in potassium permanganate (0.5%), and a soda solution (1%) is also used for more intensive germination.
Timing and nuances of the procedure
When deciding when to dig up the bulbs, you need to start not only from the region, but also from the variety. Heat-loving species necessarily go through this stage, since they are not able to survive the cold months in open ground, excessive humidity and low temperatures are fraught with rotting, disease, and pest damage for them.
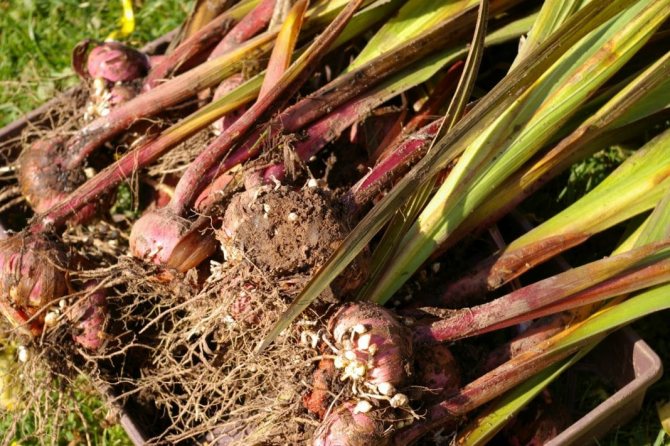
The digging of gladioli should be carried out in the first months of autumn.
The timing of digging out gladioli in the fall is determined by the changing air temperature, the optimal border is 5-10 degrees in the plus range. At the beginning of September, you need to remove the peduncles, when 1-2 lower buds open, you do not need to wait for all the available ones to bloom. The peduncles are cut off with a sharp knife at such an angle that the leaves are not damaged. After 14-15 days, the plant can be removed from the ground.
Depending on the terrain
It must be remembered that the maturation of the underground part occurs in 35-50 days from the moment of flowering. When the flower stalks are cut, the bulbs ripen faster.
Since flowering in the Moscow region occurs in late July or early August, the extraction of the bulbs can be organized in September. In the southern regions, they are guided by varietal agrotechnical characteristics, on average, digging is organized in August-September.
The climate in the Ural and Siberian regions allows enjoying only early varieties, because only they can grow and give birth to flowers during the short summer. Here flowering often occurs in September by the time of the first frost. It is necessary to dig up gladioli before zero temperature is established during the day. If the tubers do not have time to ripen in the ground due to bad weather, they are removed from the soil along with a lump and uncut stems, placed in a frost-free room for about a month, and only then proceed to standard processing.
Depending on the characteristics of the variety
When planning to dig up gladioli, in this aspect, it is important to focus on the end date of the plant's flowering, and all varieties have their own terms, which are undesirable to average. They start harvesting only if more than a month has passed since the end of flowering. This period is characterized by incessant maturation of the bulbs, so they gain strength for long-term storage.
The tubers are removed from the ground while the leaves of the plant are still green. In diseased and weakened flowers, the leaves begin to turn yellow early, it is advisable to dig them out before they have time to infect the neighbors.
Experienced florists share their recommendations:
- first of all, early and middle species are stored for storage, a little later it is the turn of those that originated from children;
- young plants that have not gone through the flowering stage need a long ripening period for the bulbs. They are removed after the rest of the tubers have been harvested. Young representatives shoot a flower arrow towards the end of August;
- the most vulnerable to diseases are dark varieties, so you should first remove the bulbs of burgundy, black, red, purple gladioli;
- if you remove the bulbs slightly unripe, it is easier to collect the rhizomes in conjunction with the existing children. In the event that the tubers have time to overripe, they often crumble when dug up, the children fall off, and in the future it is difficult to find them in the ground.

First, you should remove the bulbs of burgundy, black, red, purple gladioli
Certain types of flowers are left for the wintering period in a flower bed. A striking example is the tiled gladiolus, which painlessly waits out the cold months in the soil and does not require laborious measures to ensure storage. Its only drawback is that it is difficult to find this species on the free market.
Flower lovers note that it is best to dig up the bulbs after the potatoes have been harvested, but before the cabbage.
The subtleties of the organization of the procedure
It is recommended to start work in warm sunny weather, in this case, you can expect accelerated drying of root crops. From the tools, you will need the usual garden pitchfork or a shovel.
Step by step guide:
- It is necessary to retreat from the stem about 20-25 cm and stick the pitchfork vertically into the flower bed. The tool should be wiggled slightly to pull the earthy clump that surrounds the bulbs to the surface. This piece of soil is taken out entirely and placed on a tarp or oilcloth.
- After the roots are slightly dry, the earth is shaken off the bulbs, so they are separated from each other, the babies are released. When pruning, it is advisable to leave 5 cm of stems on the bulbs; at this stage, old and diseased specimens are discarded.
- To prevent the spread of diseases, deciding what to do with the children of gladioli after digging, first of all, they need to be soaked. A solution of 1 glass of salt and 5 tbsp is suitable here. l. soda per 10 liters of water or from Fitosporin in accordance with the manufacturer's instructions.
- Next, the corms are sorted by size and varietal characteristics.
The dried seed is stored in a cool, dry place. During preliminary processing, it is important to preserve the husk on the onions.
Frequent mistakes
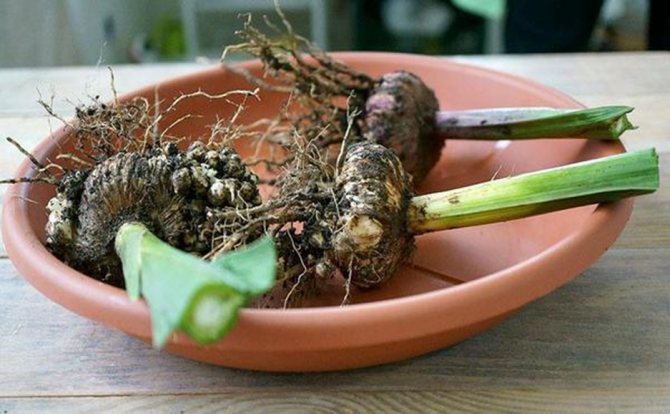
There are some mistakes that not only beginners make, but also quite experienced growers. Sometimes such inaccuracies in the preparation and storage of corms do not greatly affect the safety of the planting material, but more often these violations lead to the fact that the flower bulb dies. The main mistakes that are made more often than others are as follows:
- Storage on the windowsill when blowing from the window. A sign that the place is not suitable is the softening of frozen corms.
- Sending bulbs to a refrigerator that does not have an automatic temperature control function. When the temperature drops below + 3˚ C, the planting material freezes and is no longer suitable for germination.
- Cleaning the dug and dried bulbs from the husk before sending for storage - you need to clean the planting material only before planting in 1-2 weeks, while only the upper husk is removed.
Digging up and storing gladioli in winter is not as complicated a process as it seems. The main difficulty is following all the stages of preparation and maintaining the microclimate in the room where the bulbs are located that they need. Nevertheless, all the rules are simple, and they are concluded in observance of the terms of digging, good drying, sorting and selection of a place suitable for gladiolus corms.
Is it possible to leave gladioli bulbs in the ground for the winter
Bulbs of species gladioli remain without consequences to winter in the ground. But these progenitors of the ordinary gladiolus are difficult to find in a garden flower bed. You can leave for the winter in the open ground and the tiled gladiolus, which is not afraid of low temperatures. Bulbs of all other varieties need not be disturbed only in the southern regions, where the plant is almost always at a comfortable temperature - not lower than 0 ° C.
Did you know? Gladius is Latin for sword. Gladiators wore a gladiolus bulb on their chests as an amulet bringing good luck in battle.
In case of frost, it is recommended to protect the planting with agrospan or other covering material. You can put a box, which is covered with a film, and foliage or sawdust is thrown on top. For active growth and future lush flowering, bulbs must winter at a temperature of + 3 ° ... + 9 ° C. In central Russia, and even more so in the northern regions, it is impossible to achieve such conditions in the soil, so the bulbs must be dug up.
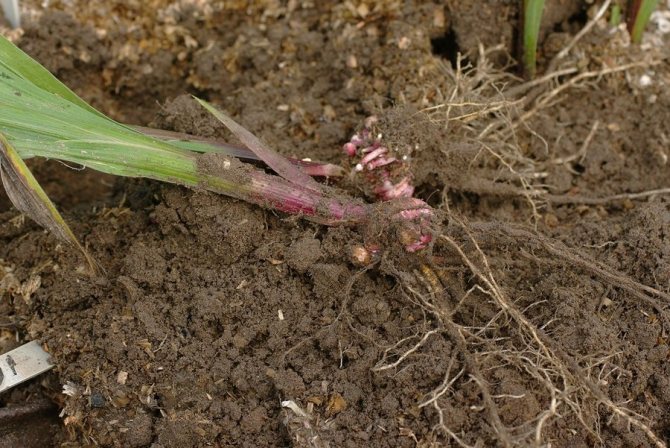
Leaving the bulbs in the ground is not worth it for a number of reasons:
- a great risk of freezing and death;
- may rot during the thaw;
- rodents willingly eat them;
- become weak, unarmed in the face of disease and decay.
Features of storing planting material in winter and what conditions are needed
Initially, in the fall, even in a constant container, gladioli continue to dry. The optimum temperature for them is + 23-26Со. But the most important thing to watch out for is that they are well ventilated. Every 3-4 days, they should be changed in places: the lower ones should be lifted up, and the upper ones should be lowered down. This will make it more effective to get rid of the remaining moisture and dampness.
Gradually, the constant temperature for gladioli decreases. By winter, it should not be higher than + 20Со. The lower the temperature, the less often the corms need to be turned over. Already in the winter months, you can leave them alone for 1-1.5 months.
But it is simply necessary to follow the appearance. So it will turn out to notice the trouble in time and protect healthy planting material from infection.
For example, reddish or purple spots on corms are a sure sign of thrips infestation. Such copies should be removed as soon as possible, or at least started to be stored in a separate place.
How long is the corm stored?
If all storage conditions are observed, then the gladiolus corm will easily be preserved until spring. But the timing of planting flowers in different regions can differ significantly:
- in the South, for example, gladioli are sometimes not dug up at all for the winter (unless there is a serious drop in temperature in winter). In other cases, they can be planted as early as April.
- In central Russia, the end of April-May is considered the optimal planting period.
- In Siberia, in the Urals, in some northern regions, gladioli are planted in late May or even early summer.
In general, one should adhere to such characteristics as + 10Со outdoors on an ongoing basis.
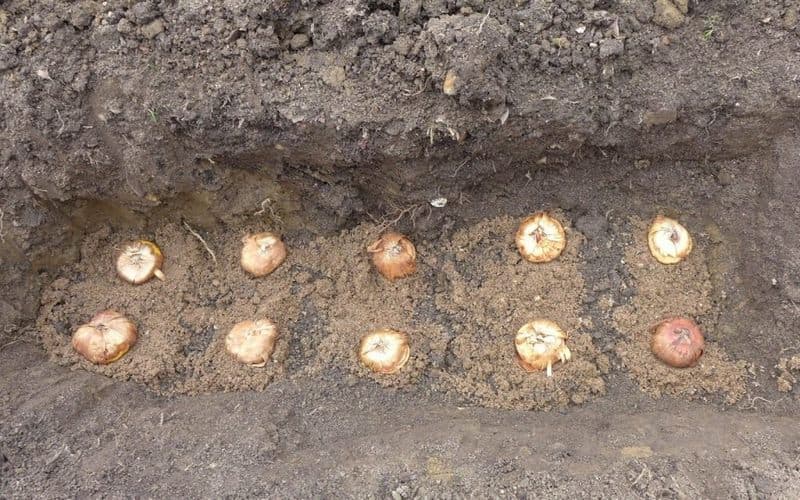
Planting gladiolus corms
And one more important point. Before planting, in 2-3 weeks, gladiolus corms must be removed from permanent storage sites. You can also prepare them for planting - treat them with a weak solution of potassium permanganate, soak in warm water, but only strictly just before planting.