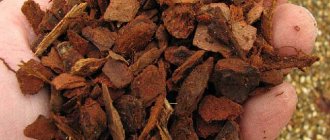
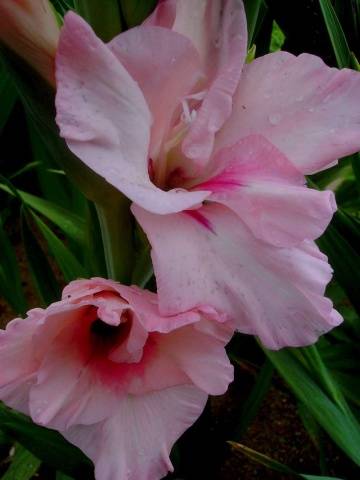
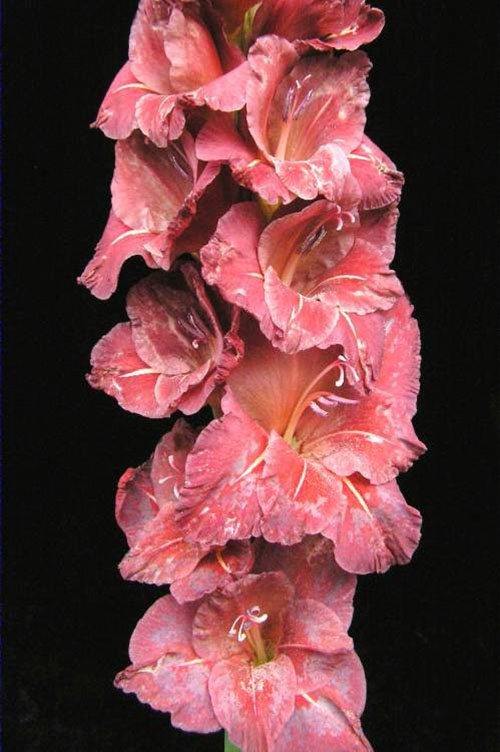
According to a beautiful legend, gladioli grew out of the swords of two best friends who refused to fight against each other in gladiatorial battles. The sharp and long leaves of these flowers really look like blades, which is probably why gladioli are also called a skewer.
Many gardeners are afraid to associate with these flowers, considering that they are difficult to grow.
But, as practice shows, you do not need to know any special tricks to get beautiful flowers on your site. The most important thing is to properly prepare the corms for spring planting.
What is the processing of gladiolus bulbs, how to properly store the planting material, and what rules should be followed during planting - this is the article about this.
Gladioli: disease prevention and pest control
author Ziborova E.Yu., photo Ziborov T.Yu.
Gladioli are thermophilic, and in August the days become noticeably cooler and colder at night. If prolonged rains are added to the cool weather, then the likelihood of fungal diseases in gladioli increases. Gladioli, which lack warmth in bad weather, should be treated against fungal diseases as a prophylaxis from the beginning of summer until the very excavation, even if there are no signs of diseases.
The famous Moscow gladiolus breeder V.A. Lobaznov advises flower growers to develop their own system for caring for gladioli, specifically for their site with soil and climatic conditions characteristic of the area. Applying a high level of agrotechnical measures necessary for gladiolus more than for any other crop, it is possible to completely exclude non-infectious diseases arising under the influence of unfavorable environmental factors.
The greatest harm to gladioli is caused by pathogenic fungi and bacteria - the cause of infectious diseases.
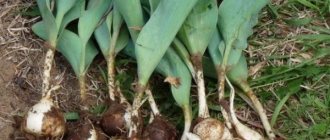
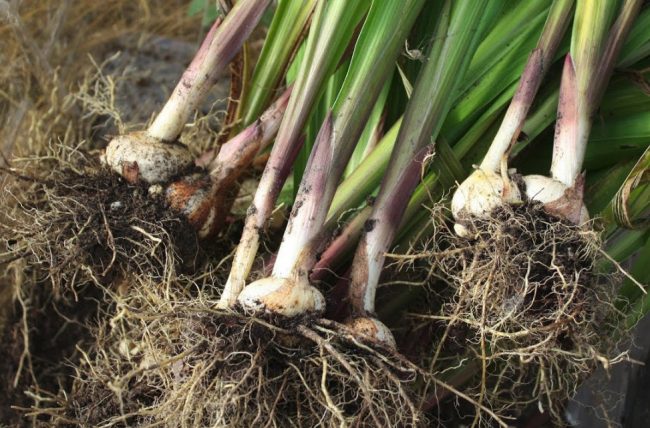
How gladioli are dug
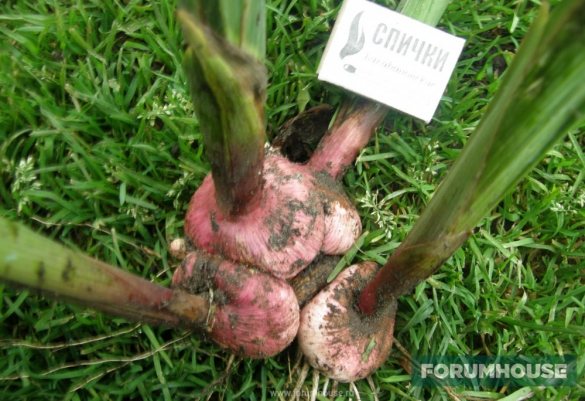
The stems of gladioli can be either cut on the eve of the digging or cut off after digging. The corm is cut with a pruner so that there is nothing superfluous, both the roots and the entire ground part are cut off (but you can leave a stump up to 1 cm in size).
The trimmed corms are placed in a foundationol (0.1%) for half an hour, then washed and put in a solution of potassium permanganate (0.3%) for another half hour. This, of course, is the ideal processing option, but as a last resort, you can be content with the minimum.
GALE Member of FORUMHOUSE
It is imperative to treat at least a dark cherry solution of potassium permanganate (30 min.).
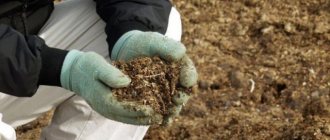
How to process gladiolus bulbs before planting?
Fungi, which are specific parasites of gladiolus, live mainly in the surface layer of the soil, where the zone of occurrence of the main part of the gladiolus root system is located. Microparasites cannot feed on living tissues and are activated when dead tissue appears to invade the dead parts of the roots and corms of gladioli. Therefore, it is very important to keep the soil free from plant debris - then the parasites will not have a refuge and they will be destroyed by other antagonistic fungi.
If, for some reason, the gladiolus root dies off, a parasitic fungus can invade it, emitting toxins that kill nearby tissue to move deeper into the plant.From this point of view, it is important to less often expose the roots of the root system to mechanical stress - this can occur when loosening solid soil, which, turning over in large pieces, can break off the roots. Therefore, it is necessary to monitor the structure of the soil, making it loose and easy to cultivate. Other fungi penetrate the gladiolus leaf blade, emitting toxins and killing leaf tissue; spots appear that prevent the penetration of nutrients into the gladiolus corms. The introduction of manure, especially unripe manure, can contribute to the development of fusarium in gladioli.
Damp cold soils can cause gray rot on gladioli. In heavy, damp, acidic soils, the causative agent of dry rot, a soil fungus, is activated. Damp clay and peat soils with nearby groundwater, as well as excessive liming, contribute to the multiplication of bacterial colonies that are the causative agents of scab - infection occurs in the soil when the corms come into contact with bacteria.
Gladioli are also susceptible to viral diseases (jaundice, mosaic) - they are transmitted from diseased plants to healthy ones by sucking insects or by mechanical damage to parts of the gladiolus (wounds when cutting off inflorescences, micro-wounds from friction by neighboring plants with frequent planting). Cutting the inflorescences must be done carefully, using a sharp narrow knife, piercing the peduncle at the point of divergence of the fourth and fifth leaves and carefully twisting it.
The diagnosis of diseases and the fight against them in amateur floriculture are difficult due to the lack of simple and accurate methods for determining the lesions, as well as the low effectiveness and toxicity of chemicals. To protect gladioli from diseases V.A. Lobaznov recommends carrying out the most important measures: - sanitary (destruction of infected plants from gladiolus beds); - warning (planting healthy corms and prophylactic spraying of healthy plants). For the prevention of diseases, spraying with an infusion of garlic (100 g of garlic per 10 l of water) is used, in early September - watering gladioli with a solution of potassium permanganate (5 g per 10 l of water) to disinfect and enrich the soil with potassium; - exterminatory (destruction of pathogens); - medicinal (treatment of diseased plants).
In addition, the following complex methods are of great importance in the fight against diseases: - agrotechnical (plowing, weed control, crop rotation, etc.); - biological (use of antibiotics and antagonist fungi); - physical (using high temperatures to warm the soil); - chemical (the use of fungicides to combat gladioli diseases, while not forgetting that chemical preparations have a negative effect on humans). Periodic spraying of gladioli from thrips and diseases is carried out alternately with solutions of copper sulfate, copper oxychloride (20 g per 10 l of water), and with a strong spread of diseases (yellow leaves), after 3-4 days, you need to spray gladioli several times with a solution of copper oxychloride at the rate of 30 g 10 liters of water.
Breeder A.N. Gromov notes that August and September are very important months for the culture of gladioli: plants must receive all the elements of mineral nutrition and physiologically active substances to form healthy bulbs that are not susceptible to pests and diseases. From the first days of September, they are especially closely monitoring the sanitary state of the plantings, "suspicious" specimens are immediately removed, while choosing a part of the land around the diseased plant. Infected plants are destroyed, and the earth must be calcined on a metal sheet, placing it on an iron barrel with incinerated garbage. To combat fungal diseases, you can use decoctions and infusions from protective plants (marigolds, garlic, wormwood, celandine, tomato leaves, etc.).Against thrips and whiteflies, focal spraying of gladioli with insecticides is carried out.
Florist M. Lunev uses celandine and calendula for the prevention of diseases (chop the green parts of the plants, put them in a container, pour hot water (1: 2), leave for 2-3 days, add a handful of washing powder to 10 liters of infusion before processing), processing gladioli are held once a week during the summer. To scare off thrips, he plants garlic between the rows of gladioli.
Florist D.A. Kurdyapin advises, in bad weather, to spray the planting of gladioli once a week (and in warm dry weather once every 2 weeks) alternately with one of the solutions (in a warm form): - potassium permanganate (potassium permanganate) 1.5 g per 10 liters of water; - copper sulfate - 20 g and green soap - 200 g per 10 liters of water; - copper oxychloride - 25 g per 10 liters of water.
Disease prevention, prevention of pests, culling and destruction of sick gladioli, disinfection of tools when cutting inflorescences in a 0.5% solution of potassium permanganate, avoiding a lack or excess of fertilizers, proper planting care is the key to growing healthy gladioli.
Ziborova E.Yu.
All about gladiolus
Online
How to process gladiolus bulbs in spring
The bulbs are taken out of the cellars two weeks before planting in the ground, so this date may differ significantly in different regions. For example, in southern Russia, gladioli are planted in flower beds, usually in mid-April. This means that it is necessary to get the bulbs out of the shelter already at the end of March.
But in the northern part of the country, the land warms up only by the end of May, sometimes gladioli have to be planted here even in early June. Therefore, you need to get boxes with tubers from basements not earlier than the first decade of May.
Important! If gladioli are planted in June, they will definitely not have time to form good corms for the next season - after all, autumn frosts in this part of the country also begin very early. To give the flowers time, they are covered with foil, sometimes mini-greenhouses are created over the bushes.

In general, you need to be guided by the following rule - gladioli bulbs can be planted in the soil when the ground at a depth of 10 cm warms up to 10 degrees and above. Remembering past seasons and climatic features of several previous years, you can calculate the approximate date of planting flowers. 10-14 days before the expected planting, the bulbs begin to cook for this.
Comment! Many gardeners recommend pre-germinating the bulbs of gladioli so that the shoots reach a height of 10-15 cm. Allegedly, this will significantly accelerate the flowering of gladioli - the flower stalks will appear two weeks earlier. In practice, it turned out that such an approach is unreasonable - the bulbs with shoots transplanted into the ground take a very long time to acclimatize, as a result, they give flower stalks just a couple of days earlier.
So, before you process the bulbs, peel them off. This is necessary in order to recognize diseased specimens, to see the buds and root buds, to divide the corms into several parts.
After examining the planting material, it is necessary to discard those bulbs that are affected by rot, mold or fungus - they can no longer be saved. But you can help those gladioli that are struck by scab or dry rot. In this case, the brown spots must be cut off with a sharp disinfected knife, and the cut must be smeared with brilliant green or sprinkled with wood ash. After a couple of days, the wound will heal, and the gladiolus can be planted in the ground.
They also do with the bulbs of gladioli that want to renew or propagate - they are cut with a knife, focusing on the number of buds that have hatched. After cutting, at least one "live" bud should remain on each part of the tuber.This stage is especially important for expensive bulbs of elite gladioli, because so rare flowers can be propagated faster and more efficiently than with the help of "children".
Sections must be dipped in wood ash or thickly treated with brilliant green. Now they are allowed to weather for 1-2 days.
To disinfect gladioli and stimulate them earlier and profuse flowering, gardeners use many methods and tricks. The most popular methods for processing bulbs are:
- Soaking the bulbs in a manganese solution. To do this, prepare a strong solution of potassium permanganate and place the tubers there for 25-30 minutes. After the procedure, gladioli are washed with running water and dried thoroughly. All this is necessary for disinfecting gladioli, protecting the bulbs from fungal and other infectious diseases.
- The use of growth and flowering stimulants for indoor or garden flowers. It can be "Epin", "Kornevin" or other similar drugs. They also force the roots of flowers to form faster, which facilitates the adaptation of gladioli in flower beds.
- Some gardeners recommend scalding the planting material with boiling water. This is done for a short time, in the form of an application, after which the bulbs are washed with cold water. This method is effective both for stimulating flowers and for disinfecting them. But it is better not to use the method with boiling water for beginners of gardening - you can seriously injure the already hatched shoots and roots.
- A complex solution of trace elements is less safe than boiling water, but no less effective. To prepare the mixture, take manganese, boric acid, ammonium molybdide, zinc, magnesium sulfate and copper sulfate, dissolve all the components in water and soak the bulbs in this solution for 10-12 hours. This will speed up the flowering of gladioli, increase the size of the flowers, increase the immunity of plants and make them stronger. But not every owner has at hand all the drugs from this list.
You can process gladiolus bulbs in any way - many gardeners skip this stage altogether, immediately starting to germinate tubers.
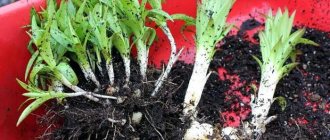
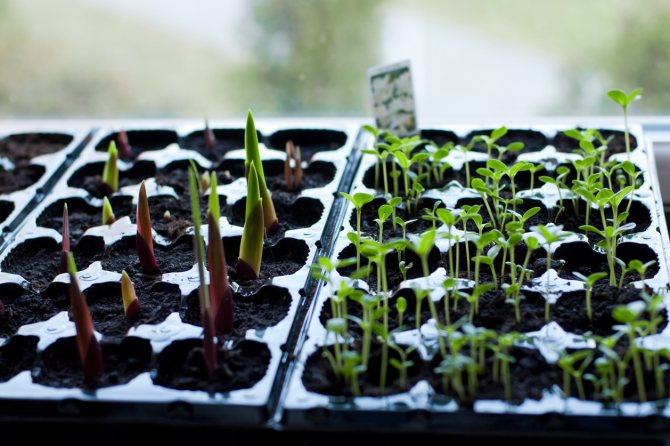
How to germinate gladioli
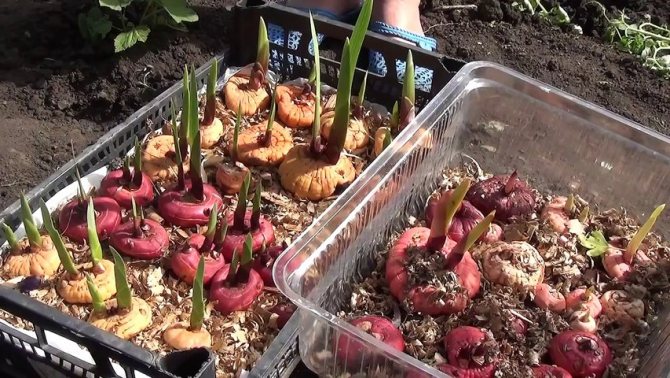
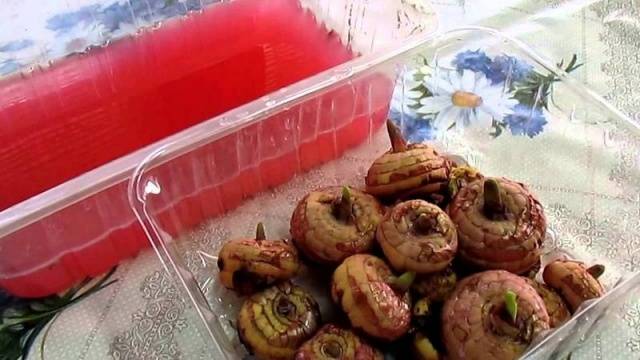
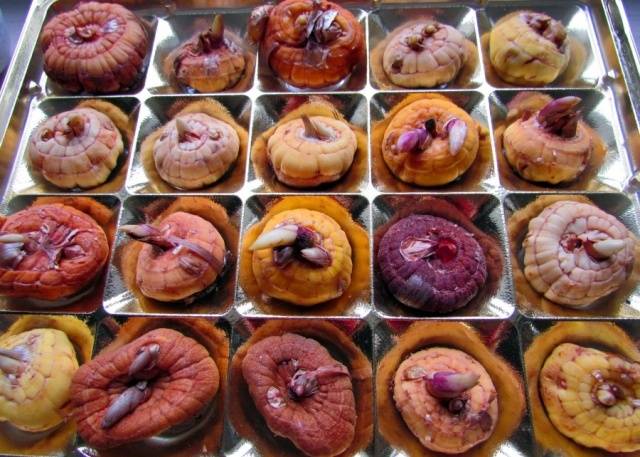
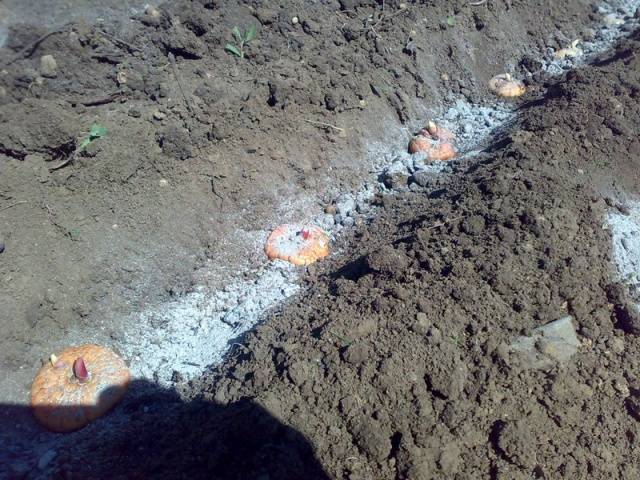
Prepared bulbs must be placed in wooden or plastic containers. They are laid out in one or two layers, so that the buds are directed upwards, and the bulb lies on the bottom.
If there are two layers, it is necessary to make sure that all the buds are in sight - the bulbs of the top row are stacked in a checkerboard pattern.
Containers with gladioli are placed in a warm place, with a temperature of 25-28 degrees. They should also have enough sunlight, so the best place for germination is a windowsill or a table by the window.
If the owner notices that the gladioli bulbs are becoming lethargic and faded, they need to be watered a little - spray from a spray bottle or pour water into a container with bulbs. But gladioli are watered only as a last resort, this can lead to too rapid formation of the root system, and this is undesirable. This is because the roots of gladioli are too fragile, when transplanted, they will certainly break off, which will complicate the adaptation of flowers.
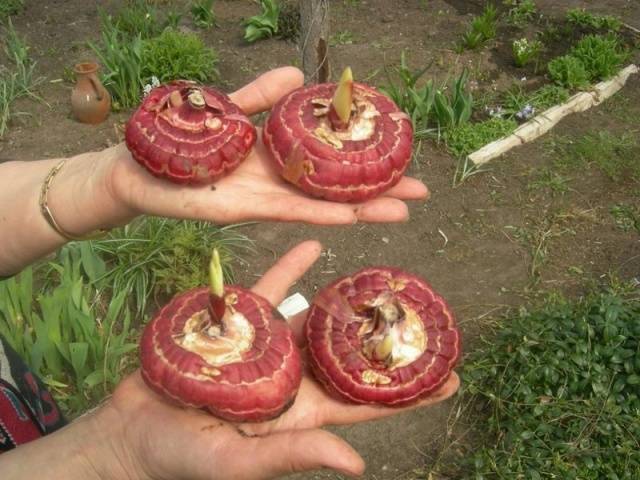
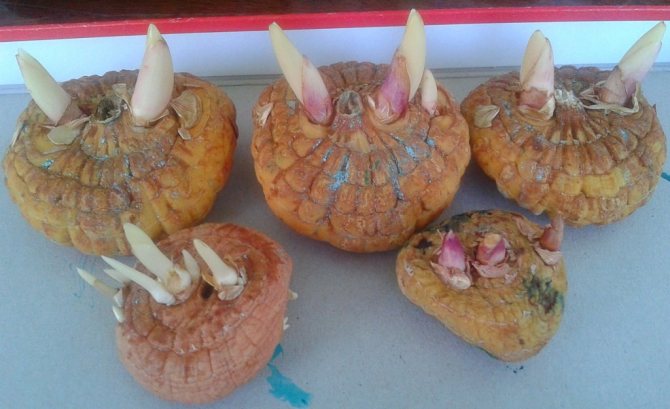
After a few days, the buds on the bulbs of gladioli should hatch - small green tubercles will appear from them. These are future flower stalks. After 7-10 days, the sprouts should reach 1-3 cm in height, and swollen root tubercles should be visible in the lower part of the bulb.
In this state, gladioli are ready for planting in the ground. Immediately before planting, it is recommended to treat the bulbs with fungicidal solutions, such as "Maxim" or "Fundazim". Preparations are prepared in accordance with the instructions, gladioli are soaked in them for about two hours.
Gladiolus: winter care for corms and vernalization
author Kofanova S.V., author's photo
Gladioli are perhaps the most labor-intensive of all the flower crops grown in the garden.Novice florists are concerned about many questions: about the selection of the best varieties of gladioli for their garden and about their cultivation, about the autumn digging and the successful storage of corms in winter.
January is on the calendar, and flower growers are already preparing planting material for gladioli for vernalization. To grow beautiful gladioli, you need to know a lot and be able to. You have to work hard throughout the year.
I have been involved in this culture for over 20 years. I would like to share my experience in growing and storing gladioli with flower growers, to answer the most pressing questions of novice gladiolus growers.
Preparing gladioli for planting. When to germinate gladioli in spring.
Gladioli create a magnificent autumnal charm for our gardens, amaze with their bright colors and colors, therefore, at Dom-we believe that they must be grown. See how gorgeous an autumn backyard flower bed can look. Moreover, there are no special difficulties in planting and growing gladioli. All you need is the correct preparation of gladioli for planting, which is done in advance.
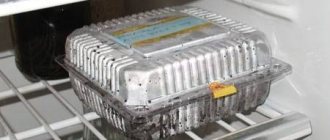
It is usually recommended to store gladiolus tubers in a cool, dark place with a constant temperature. This can be a cellar, basement, or the bottom compartment of the refrigerator. The most important question is when to get gladioli from the refrigerator for germination.
Depending on the region of planting, follow the advice below.
In about 2 to 4 weeks of planting, the bulbs are taken out of the refrigerator or cellar, examined, treated if necessary, and placed on the germination of gladioli. From late March to late April is a great time to germinate gladioli in spring. If you do sprouting gladioli before planting, they will bloom faster.
The best planting material for gladioli
High-quality planting material for gladioli is the basis for the successful cultivation of healthy plants and beautiful flowers. When purchasing gladioli corms, do not chase large specimens. Do not take corms with a large curved bottom (bottom diameter is more than 1 cm). Such large bulbs were already blooming; may have bloomed many times. This means that they are already old, so they will not give powerful inflorescences and good quality babies.
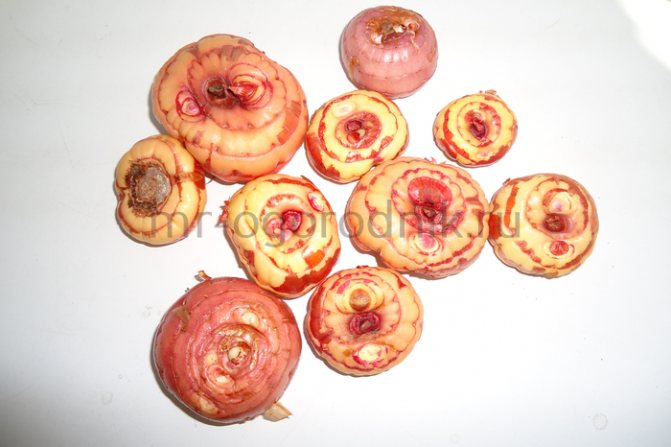
To get a good flowering, buy only medium-sized young (juvenile) corms of gladioli. The diameter of high-quality young bulbs is 2-4 cm, and their small bottom is 3-7 mm in size. The selected corms of gladioli should be shiny, not wrinkled, clean - without external signs of diseases (spots, ulcers, rotten areas).
When buying gladioli corms in the spring, pay attention to the presence of root tubercles and their condition. As a rule, in most varieties of gladioli, by April, the root tubercles have already been formed. They should be light and firm, not brown and shriveled up.
The best young corms of gladioli, which have not yet bloomed, have one powerful central sprout. Then a single inflorescence will develop - strong and showy, with a lot of large flowers.
In no case, do not purchase gladioli corms with three (or more) sprouts. Do not think that you will get several full-fledged inflorescences from a multi-germ bulb! As a rule, this is a sign of the presence of one of the incurable diseases in the corms - herbaceousness. The diseased plant has small deformed greenish flowers. Experienced growers recognize these defective bulbs and burn them.
So, it is the young healthy corms of gladioli that bloom well and give good offspring. Therefore, flower growers need to annually grow new high-quality planting material from the baby of gladioli, obtained from juvenile bulbs.
Planting only high-quality corms is the first rule of the gladiolus, which must be observed!
We take out gladioli for germination
It will be correct to get gladioli after winter storage in a cellar or refrigerator, not just before planting, but in advance. He needs to set aside several weeks for germination. Planting is often planned for early May, which means that the bulbs should be taken out in April. What to do right after that?
- The first step is to remove the scales so that the sprouts can easily hatch later.
- Next, it is worth examining the bulbs for the detection of rotten or painful areas, which are immediately removed. The cut site must be treated with activated carbon or brilliant green.
- If the defeat is great, then, sadly, but such material is not suitable for planting, it should be thrown away.
- If last season the gladioli were pestered by insects or any diseases, then before planting, you need to treat the planting material with a suitable fungicide or insecticide.
- It is important to take care that during germination the air temperature is warm enough, and the sprouts can freely stretch strictly vertically.
Observing all of the above conditions, you can plant sprouted gladioli on time and already in July contemplate their indescribable splendor. It is highly advisable to plant the bulbs in a different place from where you took them for storage in the fall.
It's good if the new site for growing gladioli will have a slightly different soil composition. In addition, it should be borne in mind that this plant does not like transfer to another climatic zone. It is better not to plant young gladioli next to old ones. It is also important to plant the gladioli at the correct depth - 3-4 times the diameter of the bulb. With a deeper planting, the plant may not bloom, and if the depth shifts to the other side, it will have to be tied up.
Now you know when to take out gladioli after winter storage. This should be done a few weeks before planting so that sufficiently powerful shoots can form. Gladioli are planted in the absence of frost, and they usually bloom in July.
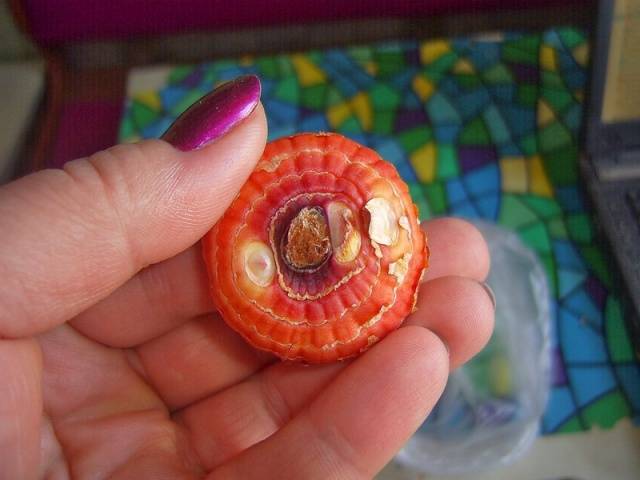
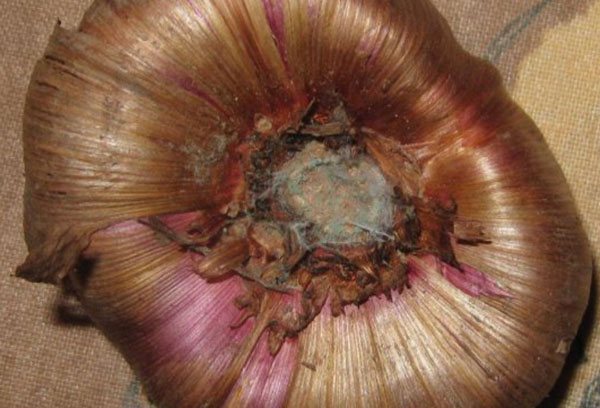
Signs of the presence of thrips and diseases on the corms of gladioli
Great harm to gladioli corms is caused by thrips. Then, reddish spots appear on the surface of the bulbs affected by thrips, sometimes they are, as it were, sprinkled with purple powder. Sometimes, with the late detection of thrips, the corms are already deeply eaten by pests, such planting material dries quickly.
With a strong infection with thrips, it is better to burn such gladioli corms, because you cannot get strong plants with beautiful flowering from them. In case of slight damage to the corms of valuable varieties of gladioli by thrips, they can be treated with Arrivo solution (4%) or another insecticide, according to the instructions for the preparation.
In addition to harmful thrips, growers can see signs of diseases on the corms of gladioli. The most common in gladioli are fungal and bacterial diseases: bacterial scab, fusarium roots, hard rot. Gladioli corms slightly affected by bacterial scab can be treated. Single ulcers on the corms are cut out to healthy tissue, then the sections are processed with greenery. Sick gladiolus bulbs with signs of fusarium and hard rot must be destroyed, they must not be planted in the ground!
Cold storage
In a city apartment, a refrigerator is a great place for flowers. How to store gladiolus bulbs there in winter?
- Prepare the lower compartment for vegetables and fruits. At this level, the desired temperature and humidity.
- Wrap each planting material in paper, place in polyethylene, in which make many holes for air circulation, and carefully fold into the compartment.
- To preserve your bulbs until spring, be sure to check them every two weeks to keep them dry.
- If this happens, remove the corms, remove the damp paper, dry in a draft and return to the refrigerator.
Having decided to store gladioli in the refrigerator in winter, make sure that they do not germinate ahead of time. If it is still very long before planting, transfer the flowers to a shelf where the temperature is lower. It should be approximately plus 0.5-1 C.
Winter preparation of gladioli corms for vernalization
It is in January-February that you need to take care of checking the stored planting material of gladioli and preparing the corms for vernalization.
The corms of gladioli should be cleaned of covering scales (do not clean the baby of gladioli in winter!) And discard diseased specimens.
Thoroughly rinse the peeled corms of gladioli under running warm water, then dry them well on newspapers.
Having wrapped the dried corms of gladioli in newspapers, you need to put them back for further storage. Moreover, these bulbs can be stored further in an apartment - at normal room temperature. For healthy corms and gladioli babies, such a storage regime will even be useful: they will bloom earlier (about 2 weeks) and form more high-quality babies.
The second stage of preparing the bulbs
Any rotten areas - remove. If you have to cut the gladioli bulbs into several parts or leave one small stump, do it - any rot can affect the rest of the healthy ones. It is important that the lower part of the bulbs is preserved - the bottom with root buds. Leave ½ part of the total to be able to germinate gladioli. In addition to the bottom, the bulbs of gladioli retain their growth point - without it, the flower arrow will not break through.
The third stage of processing the bulbs is germination
Peeled from the husk, cut off in places of rot and processed gladioli bulbs are laid out to dry. At the same time, the room temperature is + 8-10 ° С, the air humidity is 60%, the lighting is diffused. If your bulbs have been treated with paraffin prior to storage, remove the protective layer before planting.
Disinfection and stimulation:
- 1% solution of potassium permanganate.
- Fitosporin solution.
For normal processing, for example, if the gladiolus bulbs are healthy, have not undergone significant pruning, you can dip in hot water without impurities for 30 minutes, dry and spread out for airing. In the first two solutions, the bulbs are kept for no more than 20 minutes. Can gladioli bulbs be kept in the refrigerator?
How to germinate gladiolus bulbs:
- Forcing by temperature: place in the refrigerator.
- Transfer to a warm place.
- Substitute under diffused lighting.
When to plant in the ground: May 1-15. The soil is warmed up, loosened and flavored. When to plant gladioli bulbs outdoors?
Before planting in the ground: fertilize the hole with a mixture of potassium chloride and superphosphates in volumes of 40 and 10 grams. Plant gladioli at a safe distance of 15 cm. More details here: how to plant gladioli bulbs in spring?
Spring vernalization and planting of gladioli corms
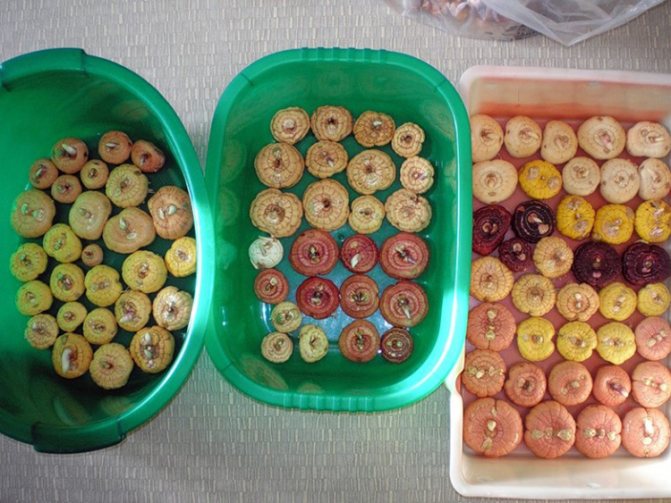
In April, you need to remove the corms of gladioli from newspaper packages for vernalization. It is better to put them in low cardboard boxes and put them on shelves and cabinets. Keep gladioli like this until planting in the garden. It is impossible that direct sunlight falls on the decomposed corms during the vernalization process.
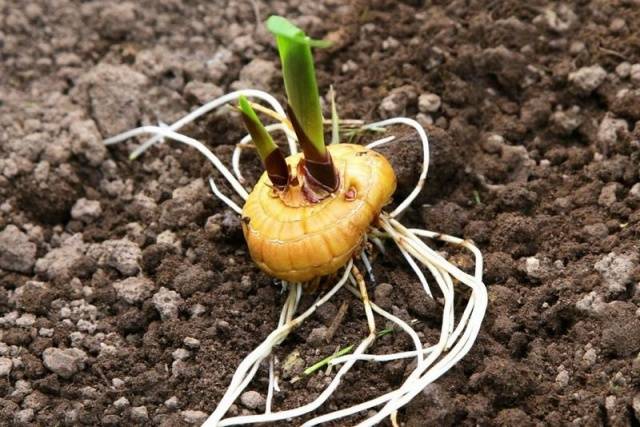
By the beginning of May, this planting material of gladioli will be vernalized and successfully prepared for planting in open ground. By the time of planting, such corms will develop strong green shoots, root tubercles will swell well.
Immediately before planting gladioli, it will be enough to process them in a raspberry solution of potassium permanganate (for an hour).Even better results are obtained by pre-planting corms in a garlic solution (insist 50 g of garlic gruel in 1 liter of water).
And one more important rule of a gladiolus grower is not to rush to planting gladioli corms in cold soil!
Germination
Florists should know how to prepare gladioli bulbs for planting after winter. Many people advise to sprout them in the house. Having taken out gladioli from a cold place, having cleaned them of scales, it is necessary to put them in prepared cardboard boxes or other containers with sprouts up. They should not be exposed to direct sunlight. Otherwise, they will begin to sprout quickly. The sprouts will be elongated, pale, weak.
Store them in a warm, dry place for 15-20 days; this is the best way to prepare the plants. They do not need to be laid out on a damp cloth. Also, there is no need to pour water into the containers in which they are kept. Water will come to the appearance of rot on the bulbs. At a high level of humidity, gladioli cannot be germinated because roots begin to develop under these conditions. When transplanted into the ground, they will certainly be damaged. Violation of their integrity leads to a slowdown in growth and a deterioration in the development process.
Important! Treatment with disinfectant solutions, growth stimulants, flowering is carried out before planting.
This is required for additional disinfection of plants and stimulation of their growth and development. It is impossible to prepare them this way in advance in the fall. The tubers are soaked in the spring.
If the bulbs are large and 2 sprouts have sprouted from them during storage, then they can be divided. They are cut with a sharp disinfected knife so that a sprout and a part of the bottom remain on each half. The operation is carried out no later than 10 days before the planned date of transplantation into the ground. The incision can be sprinkled with crushed coal (pharmacy activated carbon is suitable) or filled with brilliant green. Before planting, you need to make sure that the cut is dry and covered with a cork layer.
If you do not figure out how to germinate gladioli before transplanting, and immediately send them to the hole, taking them out of a cold cellar, then you should not count on previously abundant flowering. The buds in these flowers grow small.
Having decided to prepare gladioli, keep in mind that root tubercles should appear. If the tubercles and sprout have not appeared within 2-3 weeks of germination, then the tuber is not suitable for planting.
Selection of suitable varieties of gladioli for various factors
Many flower growers are interested in the question of competent selection of gladioli varieties with different flowering periods (the flowering period is included in the description of the variety). Thus, gladioli grown from corms of correctly selected varieties will bloom for a long time in the garden from July to September.
When planning the flowering period of a particular gladiolus, in addition to taking into account information in the characteristics of its variety, you need to keep in mind: the flowering time also depends on the preparation for planting (vernalization) and on the size of the corm.
A smaller planting material blooms a little later than a larger one. For example, in the same variety of gladiolus, corms with a diameter of 1.5-2 cm usually bloom 15-25 days later than corms with a diameter of 2.5-3 cm.
The shift in the timing of flowering of gladioli is also significantly influenced by the weather conditions during the growing season (the sum of positive temperatures), the frequency and intensity of precipitation, the regularity and sufficiency of watering plants in drought.
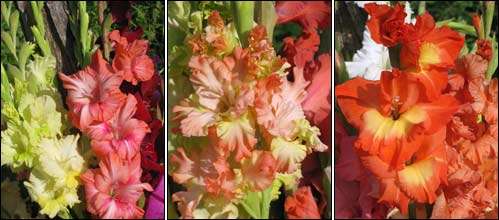
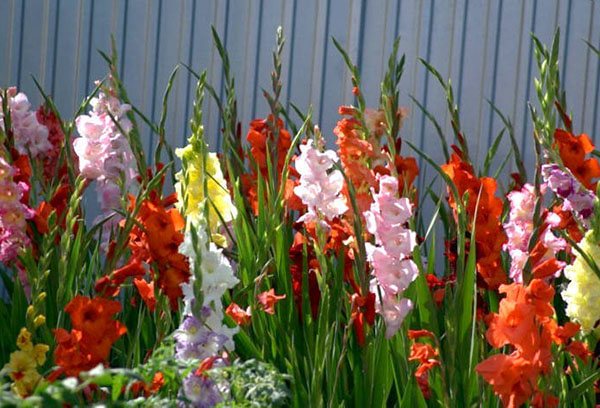
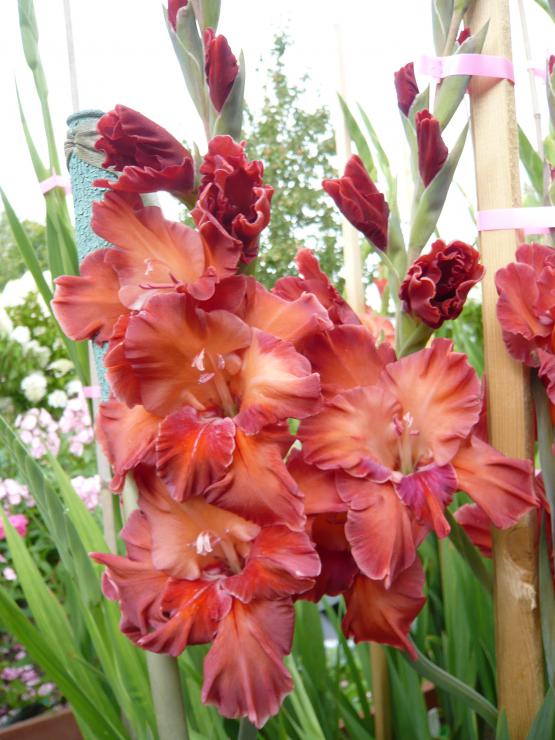
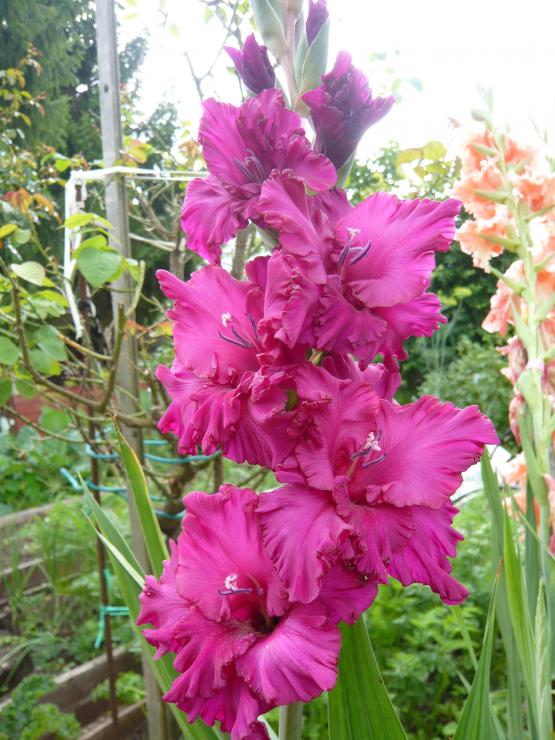
Among the many varieties of gladioli, grouped by flowering time, you can choose a lot of beautiful plants of various colors to your taste - their palette is fantastically diverse!
For guaranteed blooming of gladioli, I advise you to purchase planting material of those varieties that have proven themselves well not only in your area, but also in more northern regions.For example, in my own experience and in the opinion of other flower growers, reliable varieties of gladioli include: BALLET ON ICE, WINTER WHITE, ELENA PREKRASNAYA, ROYAL GOLD, GOLDEN WAVE, PERO PAVLINA, BLUE ELEGIA, PARIS-PARIS, MUENMAUETI CORAL EMBERS, etc. These elegant varieties are very good for cutting and for decorating the garden.
Svetlana Vadimovna Kofanova (Samara) https: //www.gladiolus.
All about gladiolus
Online
Home • Floriculture • The structure of the gladiolus corm, development features
Basement storage
How to store gladioli until spring depends on their germination and flowering. A well-ventilated dry basement is considered the best place.
- The storage should be kept at a temperature of 5 to 10 C and optimum humidity. Otherwise, the scales of the plants will dry out.
- If you prefer to fold flowers in nets, be sure to hang them with garlands on the walls or from the ceiling.
- Place the tubers in boxes in a thin layer on the shelves in the basement. When there is little space in the room, boxes or boxes can be stacked.
Remember that storing gladiolus bulbs in winter is not allowed with vegetables. The latter give off a lot of moisture, from which mold appears. When storing crops in your cellar, make a separate compartment for the flowers with good ventilation.
The structure of the gladiolus corm, development features
| Fig. Gladiolus structure: 1 - the roots of the first tier, 2 - the roots of the second tier, 3 - maternal corm, 4 - tubers (kids), 5 - replacement corm, 6 - vaginal leaves, 7 - corm leaves, 8 - peduncle stem, 9 - inflorescence. |
The genus gladiolus (Gladiolus L.) belongs to the iris family. In nature, there are up to 250 species of this plant. Most of them grow in the subtropical and tropical regions of South Africa, only 20 species in the Mediterranean and 9 in the Caucasus and Central Asia.
Gladiolus - a perennial plant, but since our winter is too cold for it, it is grown here as an annual. In the fall, the corms are dug up, they winter at home, and in the spring they are planted in open ground.
Gladioli can be found on flooded meadows, hillsides, plateaus. Representatives of certain species even climb high into the mountains. All gladioli love sunny places with well-moisturized and fertile loose soil.
Possible problems
Novice growers do not know what to do with gladioli bulbs in spring. They cannot correctly calculate when to cook for their planting. In this case, it is necessary to focus on the averaged norms. If you plant flowers a little later, then there will be no tragedy. The flowering period will simply shift.
If the storage conditions are violated, flowers may begin to sprout earlier than planned. Often, from novice florists, you can hear the question of what to do if gladioli sprouted in February. This situation is possible if they were stored at temperatures above + 10 ° C and humidity over 70%.
Usually a long sprout is visible on the tubers. In this case, the roots are not yet formed. Many people advise planting such a gladiolus in a flower pot. But if it is immediately planted in the ground, then it will not bloom, the lack of sunlight, which is observed in early spring, will affect.
Experienced florists advise to enroll as follows:
- gladioli are dried by laying them out in a warm place;
- after drying, the bulbs are sent to a dry place where the temperature does not exceed 5 ° C;
- 2-3 weeks before disembarking, they are preparing gladioli for further planting.
A warning! If the bulbs could not be saved, then next year it is advisable to prepare another place for storage.
It is known that gladioli cannot be left outdoors for the whole winter. But it is also not worth keeping them warm either - usually they use a refrigerator or basement for this.But when spring comes, a completely logical question arises: "When to get gladioli after winter storage?" This is what we will try to figure out now.
In order for gladioli to retain their original quality after winter storage, you need to know how to properly handle them during this period. After all, non-observance of certain uncomplicated tips can lead to the fact that these flowers, pleasing to the eye of a summer resident or gardener in the past, will cease to give so much joy to observers.
What is gladiolus corm
According to botanical characteristics the corm of gladiolus is a strongly overgrown lower part of the shoot. A supply of nutrients accumulated during the summer is deposited in the corm. Depending on the age of the plant, growing conditions, varieties, its shape is more or less rounded.
From above it is covered with dry scales from golden brown to brown, they are easily removed. In diameter, an adult corm can reach 8 cm. The color ranges from milky white to dark cherry.
At the top, on the sides and in the axils of the lower leaves of the corms are the buds of renewal. Usually there are 6-8 of them, in the largest 12-15, but, as a rule, 1-2 wake up, less often 3-4. One or more central shoots develop from them.
If for some reason the shoot or the central kidney dies, then the lateral ones wake up.
Deadlines
The timing when it is recommended to get gladioli after winter storage and start germinating them in the spring depends on the planned planting conditions and the growing region. If they are planted on the street, then the preparation of gladioli for planting in the spring does not begin until April.
Throughout the winter, they must be stored in basements, in which the temperature is maintained from + 50C to + 100C. In the absence of a basement, they are left for the winter, on the lower shelves of the refrigerator. The timing of when to get the gladiolus bulbs for germination from the refrigerator, when to pull them out of the basement, does not differ.
When determining the date of the beginning of pre-sowing preparation, please note that they are planted in soil, the temperature of which is not less than + 100C. Depending on the region, the soil warms up to this temperature in April or May. Knowing the estimated date of planting, you can determine when gladioli begin to germinate. This is done 15-20 days before landing at the designated place.
Attention! Florists figuring out when to take out gladioli for germination and start peeling the bulbs in order to prepare them for planting should take into account that the germination rate of large and small bulbs differs.
How the gladiolus corm develops
Annually by the end of the growing season, the mother corm dies off. Before that, she transfers all the reserves of nutrients and the genetic code to the younger generation. Instead of it, 1-2 replacing corms are formed and small corms (tubers) attached to their base with short shoots, which are also called children.
Their number depends on the variety., the age of the maternal corm, the length of the growing season and the characteristics of cultivation.
On average, there are 25-30 children, in some varieties, up to 500 are formed, and least of all - in the most decorative ones. Tuber size is from 2 mm to 3 cm.
The daughter substitute corm is already an adult plant in terms of its physiological and biological characteristics. Its full bloom lasts 2-3 years, after which aging begins. As a rule, the variety retains its best qualities for 6-8 years.
But this period can be extended, if you grow corms from tubers. They grow for 1-2 years and get juvenile corms - the most valuable young planting material.
Old corms flat, its diameter exceeds the height, the bottom is wide and even. Young, almost round in shape, often its height is greater than the diameter, and the bottom is small.A full flowering shoot develops from a corm with a diameter of at least 3 cm.
Another way
In warm climates, you can leave the bulbs in a trench at your summer cottage. Consider the groundwater flow when digging a depression. If they are close, the method will not work, as the tubers may flood.
You need to dig a hole 80 cm deep and a little wider than the size of the box. Fold the plants into a wooden container, sprinkle with sawdust and lower them into a trench. Dig in, cover with dry foliage and cover with plastic. It is necessary to protect against rain and melted snow.
When storing gladioli bulbs in the apartment, on the balcony, in the refrigerator and in the basement, they must be regularly checked, spoiled and dried if necessary.
Proper winter storage of gladiolus bulbs is the key to beautiful flower beds for the next year. We will be too lazy, we will not prepare the tubers for winter, or even worse, we will leave them in the ground, they say, the winters are not the same now, and we will have to start anew to look for beautiful varieties and healthy planting material. Wasted time and money. In addition, it is not a fact that someone prepared the gladiolus bulbs for storage correctly, and the planting material retained its viability. I will not say anything about sellers who are not entirely clean on hand.
When to dig up gladiolus bulbs?
Gladiolus bulbs must be dug out 30-40 days after the end of flowering. In most regions, this is the second half of September.
How to process gladiolus bulbs before planting
Gladioli have one more feature. - all plants formed from young corms (regardless of their size) bloom 10-14 days later than their "older brothers" of the same variety.
In gladiolus, all buds, regardless of their location on the corm, are growth buds. Of each upon the onset of favorable conditions for development (moisture supply, supply of nutrients, etc.), a plant can be formed, ending with a peduncle.
By the way, the method of reproduction by dividing the corms is based on this feature.
Summarizing what has been said, we note that during the growing season, corms give life to three generations:
♦ maternal corm is the underground part of the oldest shoot;
♦ daughter replacement corm with leaves forms the shoot of the current year;
♦ kidney renewal on the daughter corm, it is the carrier of the next year's shoot.
How to store corms in winter
The processing of gladioli bulbs is, of course, very important, but no less important is to be able to correctly collect and store planting material in the autumn-winter period. After all, it depends on this how many bulbs will sprout and turn into beautiful flowers.
Collecting bulbs is necessary when:
- freezing temperatures outside;
- the land between the flowers is dry;
- the stem and leaves of gladioli are dry;
- there are no strong frosts yet.
If all conditions are met, then the bulbs will be fully ripe, dry and ready for long-term storage.
Unfortunately, not in all regions of Russia, the climate allows you to keep corms in the ground as much as they need for their final formation. After all, early frosts, strong and prolonged rains are not uncommon here - all this has a bad effect on the quality of planting material and significantly increases the risk of infection of the bulbs with fungal diseases.
Important! In order for the bulbs to form, residents of the central part of the country and the northern regions are advised to grow varieties of early flowering gladioli or cover the flowers with agrofibre or film when it rains and the temperature drops too low.
In order for the bulb to complete its formation faster, it is recommended to cut off the stem of the gladiolus a week before digging it out - only 10-15 cm of the peduncle are left.
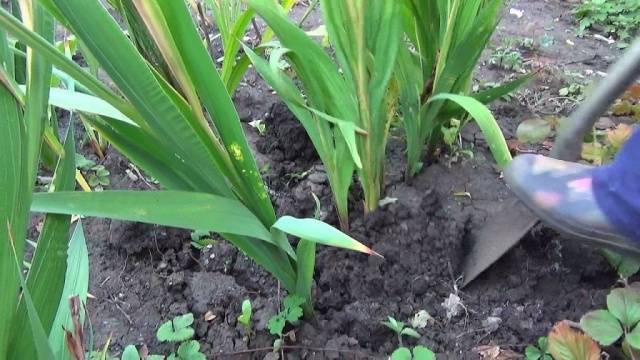
In dry and warm weather, they begin to dig up the bulbs. Before that, gladioli stop watering for about 10-14 days.The earth around the flowers is carefully dug in and slowly pulled by the stem or its trim - the bulb should easily come out of the ground. If the roots hold it, it means that the corm is not yet ripe enough, it is better to give it a few extra days.
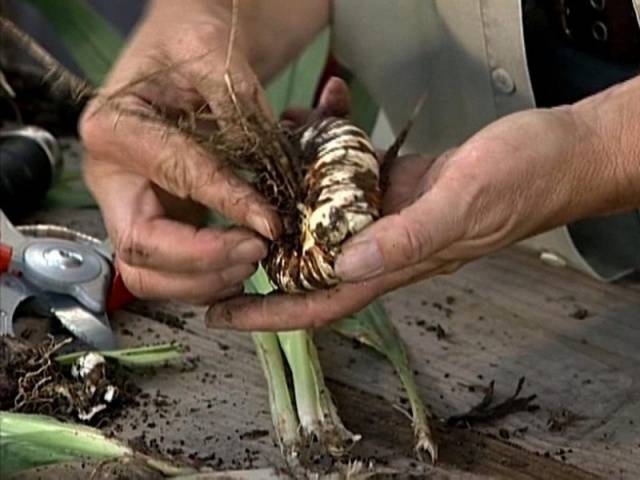
Dug out bulbs must be cleaned of the ground, remove old dry roots by cutting them off with pruning shears or scissors (leave about a centimeter of rhizomes). Peduncles are also cut, leaving only a couple of centimeters. If the stem is easily separated from the gladiolus tuber, you can remove it altogether.
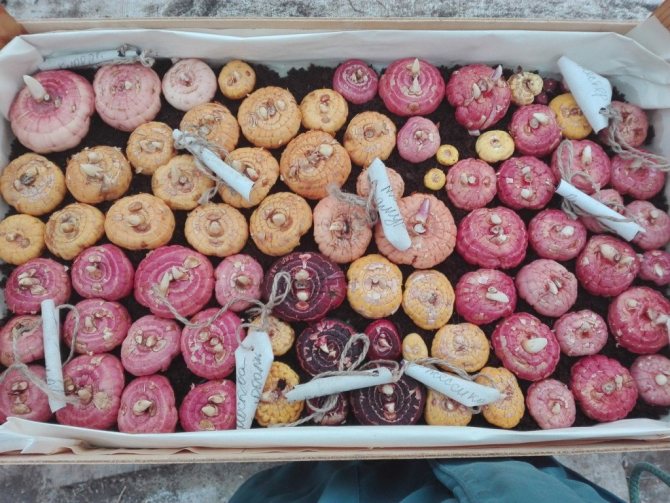
The bulbs must be sorted and marked so that you know where certain varieties and shades of gladioli are stored. This will help in the next season to properly arrange a flower garden or flower bed.
Now the bulbs are dried for several days in a dark and dry place. If there are rotten or infected corms, they must be removed and, best of all, burned so that the infection does not enter the ground.
It is necessary to store gladiolus bulbs in a cool and dark place with constant temperature and humidity. Fluctuations in temperature and humidity conditions can cause gladioli to "wake up" too early, so you can lose all flowers.
The best place to store planting material is in the basement. Here gladioli are kept in boxes filled with sand, peat or sawdust. The bulbs are sprinkled with layers of porous materials, slightly moisten the sand or sawdust.

Advice! In order for moisture not to evaporate too quickly from boxes with gladioli, it is recommended to cover their walls and bottom with old newspapers. Otherwise, the bulbs may dry out and disappear.
In this form, gladioli are stored until next spring.
Our Tips
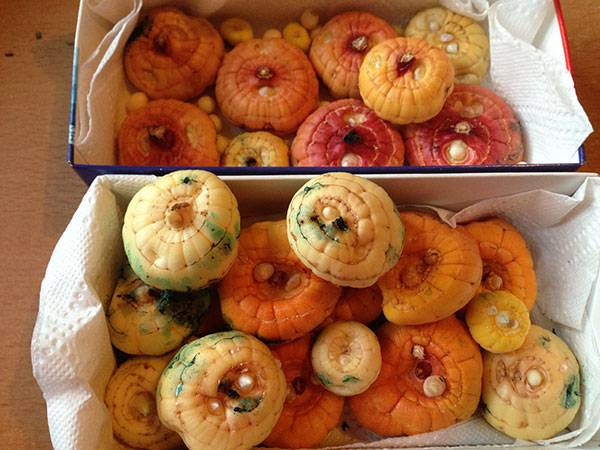
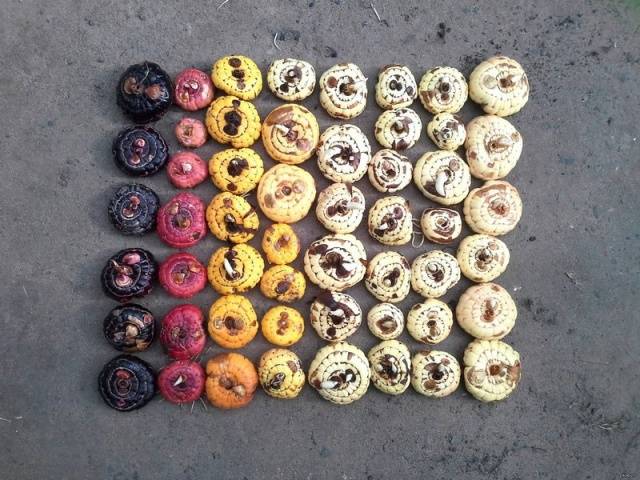
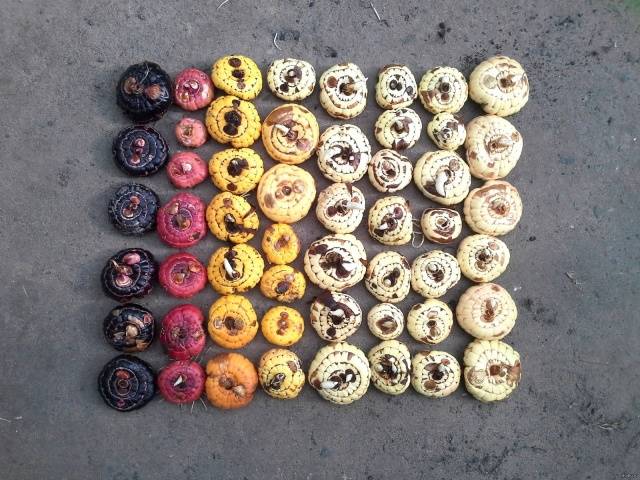
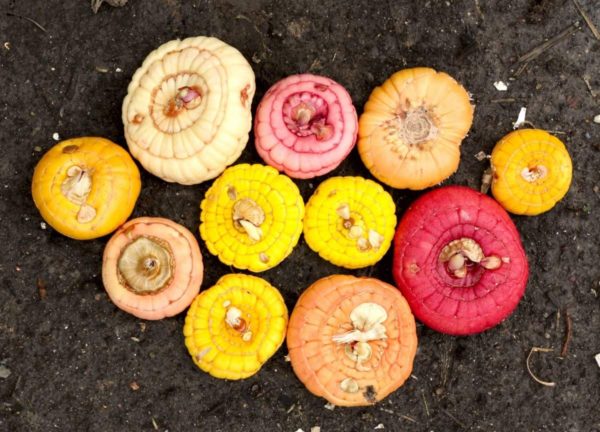
If you, removing the corms of gladioli for storage, forgot to mark the color of the flowers, you can partially correct the oversight. There is no direct relationship between the color of the corm and the flower, but some regularity can still be traced.
So, in varieties with white, yellow, pink flowers, corms are usually yellow or cream... They can be cream, orange, sometimes crimson, if the flowers are purple, lilac or lilac. In dark-colored varieties, corms are usually raspberry or burgundy.
Continued ... The device of the root system of gladioli
N. Ya. Ippolitova, candidate of agricultural sciences
Return - to the top of the page
Back to section - Floriculture
Digging and storing gladioli at home on the experience of FORUMHOUSE participants.
The main school flowers, gladioli, have faded, and now we have to dig up the corms and properly preserve them until a new planting. It seems that there is nothing complicated here, but the simple rules of gladioli agricultural technology are difficult to apply to specific climatic conditions. We have to retreat from them, and this may ultimately affect the flowering next year. In this article we will tell you what the members of our portal are doing with gladioli in September.
And on our portal you can read an article on how to make a school bouquet of gladioli and other summer flowers.
Why do I need pre-planting treatment?
Gladioli (especially elite) are not naturally resistant to infections and pests. It is dangerous to plant such plants without additional measures, because:
- Pathogens usually persist on corms during the winter.
- The eggs of the parasites were also kept in comfortable conditions during storage. The larvae will hatch and start feeding in the garden.
The faster the planting material takes root, the more chances of getting early and high-quality flowering. Preventive methods of accelerating acclimatization are recommended.
Selection of bulbs for planting
It is necessary to start preparing gladioli bulbs about a month before planting them in the ground in order to select sick and dead bulbs.
Each corm is carefully peeled completely from the husk.
And we make an inspection.If there are traces of damage or decay on the bulb, then such bulbs should be separated from healthy ones.
What to do with damaged ones:
- If the damage is not very large and shallow, then carefully cut out the damaged area with a sharp knife and cover it with brilliant green.
- It is best to discard any rotting bulbs right away to avoid contamination of other bulbs.
- It is also better to get rid of those that are too dry.
The bulbs should be sized according to their size. This will help when decorating a flower bed on the site. Larger bulbs produce larger flowers as opposed to small ones. If you plant large onions with small ones, then the large ones will simply drown them out.
It is worth noting that the larger the corm, the older it is.
Well, sort of sorted out with the choice of bulbs. Now let's move on.
How to prepare gladioli for planting in spring with minimal material loss and guaranteed luxurious flowering? Having violated at least one important rule, you can easily be left without flowers or wait for them much later than the due dates, and even get crooked, weak and exhausted peduncles. After such a result, many summer residents abandon all attempts to grow gladioli on their site, considering it impossible or relying on the lack of special talent.
First you need to calibrate the planting material. First of all, sort by grade and size, labeling with appropriate labels. The most valuable specimens are large (juvenile) bulbs, which have never produced peduncles. They make the largest, most powerful inflorescences and high-quality offspring - strong, large babies with a good gene pool.
Good, but lower quality material can be obtained from bulbs that flower a second or third time after the first flowering. Old material that has bloomed for more than three years in a row is considered to be of low quality. This is due to the fact that such corms are several times more likely to get sick with the onset of unfavorable conditions for them in the summer (extreme heat, rains), are affected by various pests and diseases, or completely degenerate and stop germinating.
In both the first and second cases, the planting material must be prepared in the same way for the spring, since before getting to the store, it was also stored in the manufacturer's winter storage facilities and was not subjected to preliminary preparation.
DETAILS: How to treat fruit trees in early spring from pests
Inspection of gladiolus bulbs after winter storage
There are many varieties of gladioli, but the rules for storage, preparation, processing of bulbs and planting are the same. When starting to inspect the bulbs, you need to clearly understand which ones are suitable for planting, and which ones you need to pay close attention to. The procedure for preparing for planting in the spring must be followed step by step.
Winter lasts a long time and it is impossible to say with certainty how well the planting material was preserved during storage. Gladioli are not considered a capricious plant, but a violation of storage conditions could negate the efforts of the past year. The most common mistake is to store it in a cold room, unprotected from frost. Such storage will lead to the fact that in the spring empty skins will be on your hands, and the bulb will shrivel and dry out. The entire stock will have to be sent to the trash heap.
Do not overheat the bulbs either. This will provoke premature sprouting of the arrow, and what to do with it in the middle of winter? The best option would be a dark corner in the cellar, away from vegetables and fruits. Or in an apartment between frames, on a glazed loggia. The optimum storage temperature is 8 - 10 degrees Celsius.
If the storage conditions are respected and the seed has been properly dried and processed, the bulbs will easily survive the harsh winter. Inspection should be started 2-3 weeks before planting. The time when to prepare gladioli for planting is calculated based on the timing of planting them in the ground.In mid-latitudes, the optimal time is early May.
It is necessary to clean the bulbs from the exfoliated husks and carefully examine them from all sides in good lighting. If you find decaying spots or mechanical damage, you need to remove them with a sharp knife, and sprinkle the incision with activated carbon powder or treat with a solution of brilliant green. Bulbs that are soft to the touch and carry large areas of rotting will have to be thrown away.
Description of the plant
Gladioli are amazingly beautiful and vibrant plants that continue to bloom until early fall. Translated from Latin, gladiolus means "sword". It got this name because of its appearance. And among the people he was nicknamed the skewer, because the leaves of the flower have a long and sharp shape.
Gladioli are regular and terry, have many colors and shades, depending on the variety.
When choosing a place for planting gladioli, they give preference to sunny areas. This will provide them with good flowering and prevent the development of diseases.
You can not plant gladioli where asters used to grow. These flowers are susceptible to fusarium and can infect the land for several years.
You should not plant gladioli in an area where root crops used to grow, due to the presence of a wireworm in the soil. Neighborhood with cruciferous plants is also not recommended due to thrips.
And a little about secrets ...
Have you ever experienced unbearable joint pain? And you know firsthand what it is:
- inability to move easily and comfortably;
- discomfort when going up and down stairs;
- unpleasant crunching, clicking not on their own;
- pain during or after exercise;
- joint inflammation and swelling;
- unreasonable and sometimes unbearable aching pain in the joints ...
Now answer the question: does this suit you? How can you endure such pain? And how much money have you already "poured" on ineffective treatment? That's right - it's time to end it! Do you agree? That is why we decided to publish an exclusive interview with Professor Dikul, in which he revealed the secrets of getting rid of joint pain, arthritis and arthrosis.
Just one bulb, infected with any fungal or infectious disease, when planted in a common flower bed, can lead to the death of other flowers. Just imagine what sad consequences can be due to a single small oversight! While correct handling of the bulbs will protect tulips from disease and pests, help them grow faster and flower better.
Viral diseases of gladioli
Mosaic has a negative effect not only on the color, but also on the growth of gladiolus. Such a specimen lags behind neighboring plants, its inflorescences contain fewer buds, and the flowers themselves are smaller.
The bulb outwardly practically does not suffer, but with insects feeding on gladiolus juices and equipment, the disease passes to healthy plants.

Harvesting the bulbs
We figured out how to process the gladioli bulbs before planting, the summer has passed, the flowers have pleased with abundant flowering. New questions arise: when to dig out, how to store planting material until spring. Dry stem and leaves are signs that the bulbs can be dug.
Cleaning of gladioli is carried out while the average daily temperature is above zero. It is desirable that the ground be dry. In rainy weather, the flowers can be covered so that the soil does not get wet and the gladiolus bulbs are dry when digging. From rain, use PVC film, from cold air - spunbond. All irrigation works are completed 2 weeks before harvesting.
Important! A week before digging, cut the stem at a height of 15 cm. This technique accelerates the maturation of the corms.
They make a tunnel around the bush, pull the gladiolus by the remainder of the stem. If the plant easily comes out of the ground, it means that the gladiolus is ready for harvesting and the bulbs are ripe, if the roots sit firmly in the ground, postpone the digging for two days until the corms are fully ripe.
Pre-planting processing
How to prepare gladioli bulbs for planting in spring? After inspection and rejection, flower tubers are soaked in solutions of disinfectants.
An important stage of pre-planting preparation is disinfection in order to prevent the development of possible fungal infections. For these purposes, a 0.3% Fundazole solution is used. With its help, you can get rid of fungal spores, thrips, mycoparasites. To prepare gladioli for planting after winter, you need to soak them for 30-50 minutes.
They can also be placed in a pink potassium permanganate solution for 1-2 hours. Instead of potassium permanganate, you can use Maxim or a strong solution of sodium chloride. After processing, the tubers are thoroughly rinsed and dried. Do not keep wet gladioli in a closed container.
100 g of garlic is diluted in 1 liter of water. Gladioli are placed in a solution for 2-3 hours. Soaking in a garlic solution often results in a delay of 10 days in flowering.
It is recommended to use the following mixture as a growth and flowering stimulant:
- 0.2 g of boric acid;
- 0.3 g vitriol;
- 0.1 g of cobalt nitrate.
These elements are diluted in a liter of water. Gladioli are soaked in such a solution overnight (10-12 hours). If you prepare them according to this recipe, then the output will be able to get large flowers and significantly increase the number of buds.
Sodium humate is used as growth stimulants, which are recommended to prepare gladioli seedlings for planting (make a 0.2% solution). Bulbs are soaked for 3 hours. You can take a ready-made Epin solution, add 2.5 ml to 5 liters of water. Withstand gladioli in it for up to 10 hours.
Finding out how to prepare gladioli for planting in spring, many find a recipe for soaking in a solution of copper sulfate and potassium permanganate. It can be used to disinfect the bulbs and prevent copper deficiency in plants. In a liter of water, 1 g of potassium permanganate and 5 g of copper sulfate are diluted. The peeled tubers are soaked for an hour.
It is also necessary to prepare children for disembarkation. But solutions for soaking them are made less concentrated.
Growing conditions and choice of planting site
To create the best conditions for plant growth, it is necessary to take into account that gladiolus does not like low-lying, with stagnant moisture, soils. Oversaturation with moisture contributes to rotting of the bulb. Slopes with hummocks will also be unacceptable. Only a flat, dry place, which will not only be well lit, but also protected from the wind, will be suitable for planting gladioli. But you can not also overdo it with this, since complete calm can contribute to the development of diseases of a fungal nature.
Semi-shady places are suitable for growing only early varieties of gladioli
... If late flower varieties are planted in such a place, they will not bloom at all. And the reason will lie in the lack of lighting. It should also be borne in mind that this is a very thermophilic flower.
Before planting, remember what kind of crop was cultivated on this plot of land last season. If these were flowers from the genus of dahlias, marigolds or plants from the legume family, strawberries and tomatoes, then feel free to use this piece of land to grow gladioli. Be wary of the area where potatoes, carrots or cabbage grew last season, as well as all those plants that were fertilized with manure. But it is very important that every 2 years the gladiolus is transplanted to a new place.
Sorting
During digging, all the material must be laid out by varieties in separate containers and supplied with tags, and the children must be immediately separated from the mother's tubers.
It is best to immediately place the gladiolus bulbs in separate boxes according to the varieties when digging.
Bulbs are chosen for winter storage:
- healthy, without traces of damage from diseases or insect pests;
- not older than four years;
- rounded, in which the height approximately corresponds to the diameter;
- the largest babies with intact covering scales.
The healthiest and strongest bulbs are selected for winter storage.
At the same time, sick, old and flat with an excessively large bottom, as well as suspicious specimens, are rejected.
Sick, old, dry and damaged bulbs are discarded
All plant residues (excess and discarded bulbs, leaves, etc.) I prefer to burn immediately.
Preparations for stimulating growth, root formation and budding
To stimulate plant growth, increase the number and quality of buds, you need to soak the tubers in a solution of trace elements.
You may be interested in: Planting grapes in the spring: step by step instructions
The following drugs will be most effective:
- MicroMix. Its composition is represented by the following nutrients: magnesium (4%), nitrogen (11%), potassium (30%), phosphorus (11%), iron (0.054%), boron (0.042%), copper (0.01%) , manganese (0.042%), molybdenum (0.004%), zinc (0.014%). The duration and features of processing are given in the instructions.
- "Quotes". It contains the following trace elements (based on the number of grams in one liter): - nitrogen (30), copper (6), phosphorus (5), iron (35), copper (6), potassium (25), manganese (30 ), molybdenum (4), cobalt (2), boron (8), magnesium (10), sulfur (35), zinc (6). The duration and features of processing are given in the instructions.
- "Domotsvet". Here, the main active ingredient is hydroxycinnamic acid, contained in an amount of 0.05 grams per one liter of the composition. The duration and features of processing are given in the instructions.
- Home composition. You can make a solution with your own hands, mixing in equal amounts copper sulfate, zinc sulfate, boric acid, potassium permanganate, ammonium molybdate. In this composition, the bulbs are processed within 6-12 hours.
It is advisable to process the tubers in root formation stimulants. You can give preference to one of these options:
- Epin. It is an artificial biostimulant with anti-stress effect. The tool helps both accelerate the growth of roots and activate the protective functions of the plant in the fight against various diseases. In addition, the composition helps to increase the duration of flowering. It can be used both for soaking tubers and for further spraying.
- Kornevin. It is a biostimulant for a plant. The main active ingredient is indolylbutyric acid, contained in an amount of 5 grams per kilogram. The principle of action of the composition is as follows: the active substance enters the plant and leads to irritation of the integumentary tissues, as well as stimulation of the appearance of callus (living cells appearing on the surface of the wounds) and roots. When it enters the soil, the agent acts as a root stimulator, forming heteroauxin. Keep in mind that Kornevin acts more slowly than pure heteroauxin, but longer.
- "Kornerost". Heteroauxin analog.
- Humic acids. They are a mixture of high molecular weight organic compounds that are formed during the decomposition of plants and further humification. Acids are found in coal, peat and some soils.
- "Zircon". It cannot be called a fertilizer in the full sense of the word. In fact, this is a dietary supplement, which contains useful minerals to accelerate the growth of gladioli.
When using any of the above drugs, you must carefully read the instructions. The treatment time for tubers with a product can vary from half an hour to three hours. In most cases, this procedure can be combined with the treatment of gladioli from parasites. Simultaneous soaking in a solution with microelements is also allowed (in this case, the water for preparing the compositions is slightly acidified with citric or succinic acid due to the fact that the effectiveness of the root former decreases in an alkaline medium).
Resuscitation of dried bulbs
With insufficient humidity in the storage room, tubers often dry out. For rescue use solutions of 5% hydrogen peroxide (1 tablespoon per liter of water), soda (1 teaspoon per liter) or "Epin". The duration of the water procedure is 30 minutes.
The bulbs require drying after each wet treatment.
We save rotten corms
It is pointless to plant rotten bulbs, but if the affected area is small, and the bottom has not suffered, you can try to save the planting material:
- with a sharp disinfected instrument, the affected part is cut out to healthy scales;
- the sections are treated with brilliant green, cinnamon (powder), activated or crushed wood charcoal;
- leave to dry.
It is better to plant such bulbs separately from the rest with preliminary treatment of the soil with fungicides to prevent the spread of the disease.
When and how to plant gladioli?
Doses of microelements for processing planting material are as follows (in g per 10 l of water):
Gladioli - preparing bulbs for planting
For the formation of the root system, gladioli need low positive temperatures (10-15 ° C), active growth of shoots occurs at 20-25 ° C. However, in order for the corms to develop well, it is necessary to pre-store them at temperatures around 3-9 ° C. During this period, the root system is not yet formed, so low temperatures cannot delay the development of the plant.
It is better to dig up in stable dry weather. As a rule, it is
, Mineral fertilizers. Depending on what kind of soil you have, once every 4 years, you can add lime when digging. If in the fall you did not have time to prepare the soil, then in the spring you can apply all the necessary fertilizers. Approximate calculation: for 1 m2 - 2-3 buckets of humus.
Children of gladioli
Children of gladioli are a special topic. You need to know how to treat the children of gladioli before planting in order to prevent possible diseases. Preparing them for planting begins with cleaning from hard scales. They serve as an obstacle to germination. The size of gladiolus babies suitable for planting is 6-8 mm.
Important! When selecting planting material, it must be borne in mind that there are varieties whose children are always small.
On visual inspection, there should be several root tubercles on the gladiolus bulbs. To speed up the laborious process of cleaning from scales, children can be processed: soak in a solution of manganese for 12 hours or for a day in a solution of baking soda. After processing, cleaning of gladioli from scales can be carried out faster, potassium permanganate accelerates germination.
Potassium permanganate is a proven remedy for most diseases of gladioli. After cleaning, children, like the bulbs of gladioli, should be treated with any fungicide, the better the processing, the healthier the plants.
Recommendations for cleaning gladioli
To better preserve the bulbs, they must be quickly removed for storage.
It is advisable to dig up the early varieties a month after the end of flowering, and the late varieties are dug up after about 50 days.... Too long overexposure can provoke rotting and fungal diseases.
Dig up gladioli with a shovel and a pitchfork, then remove the rest of the soil. Sort out good bulbs, get rid of rotten ones, spoiled by insects and diseases.
Before pruning, the stems of gladioli must be dried. To do this, spread the bulbs on planks or plywood. Prune with a sharp knife or scissors, leaving about 2 cm of stem.
Preparing the soil for planting gladioli
When to plant gladioli in open ground in spring Planting and care photo
For gladioli, soil structure is very important. Therefore, sandy loam or loamy soil is quite suitable for planting a plant. With a planned transplant of a flower (and this is every 2 years), you also need to change the soil.
- The optimal PH-environment for the soil is slightly acidic, it should be in the range from 6.5 to 6.8.Overly acidic soils negatively affect the flowering of the plant. The appearance of a disease such as fusarium (the fungal nature of which is manifested by yellowness on the leaves, root rot and thinning of the stem) is also associated with increased acidity of the soil.
- The alkaline nature of the soil will cause the leaves to turn yellow due to the slowed-down formation of chlorophyll. This is caused by the intake of insufficient iron from alkaline soils.
To prepare the ideal soil for the growth of gladioli, it is necessary to add sand to the clay soil, that is, dilute the clay with sand. After you have decided on a site for planting, dig it up. The soil in a drier region should be prepared in the fall by digging it 15 centimeters deeper than if you did this procedure in the spring. At the same time, apply dry fertilizers (potash and phosphorus). This approach will maximize the preservation of moisture and before planting the gladiolus, all that remains is to loosen the soil.
The most difficult thing in caring for gladioli is their winter storage, it is at this time that various diseases cling to them. In order for the plants to successfully overwinter, it is necessary to prepare them correctly: to dig them up in time, carry out preventive treatments and create the most comfortable conditions for "hibernation".
Digging gladioli in autumn
It is very important to dig up gladioli and store them on time. Therefore, carefully monitor the timing of the digging and focus more on the weather and soil condition than on calendar dates. After digging, in order for the bulbs to be stored reliably, they must be disinfected to prevent fungal diseases and pests.
Dates of digging gladioli
The health of the bulbs is negatively affected by cold, moist soil. Therefore, keep track of the timing of the excavation of gladioli, trying not to allow the plants to stay in damp ground for a long time.
So, in the Moscow region, gladioli bulbs are dug up in the 20th of September. However, in rainy weather, the digging is done earlier. In exceptional cases, when autumn is dry and warm, gladioli can be removed at the beginning of October.
Processing the bulbs after digging
After digging, I recommend carrying out preventive treatment of the bulbs. In order to prevent the development of fungal diseases, the bulbs are treated with either a special fungicidal preparation (for example, "Maxim"), or they are kept for about 20 minutes in a dark solution of potassium permanganate.
To protect against pests, karbofos (or other broad-spectrum insecticidal preparations) are used. A solution is prepared in a separate container, and the bulbs are dipped in it immediately after treatment with a fungicide (or potassium permanganate).
Photo: processing of bulbs after digging
Storing gladiolus bulbs in winter
Before sending the bulbs, like other flower sissies, for winter storage, they must be sorted and dried thoroughly. The bulbs are dried for a long time: first in the sun, and then in a dry room.
Sorting gladiolus bulbs before winter storage
After preventive treatment, the bulbs must be sorted. The stems of gladioli are cut, leaving 5 cm stumps. It is better to separate the old onion immediately or after a few days. You should not delay with this - the young bulb remains wet and does not have time to dry out in time.
Together with the old onion, children are also separated. The largest of them are left. On the eve of winter, they save more children for insurance, in the spring they can be got rid of. In the most valuable, as well as in the dark capricious varieties, they leave a baby the size of a pea, in other varieties - the largest baby.
How to dry gladiolus bulbs before winter storage
The first two weeks after digging are perhaps the most crucial time in handling gladioli. It is important to thoroughly dry the bulbs, avoiding the slightest stagnation of moisture - this way the plants will be stored for a long time and reliably.
- After processing, the bulbs of each variety are separately laid out in boxes in one layer.
- In sunny weather, you can leave gladioli outside for several hours, and then bring them into a warm room.
- Do not leave the bulbs in the shed - in such conditions, it will not dry out.
- It is better to place the drawers on the cupboards in the kitchen or place them next to the stove.
- After a month - one and a half bulbs are laid for winter storage.
Storing gladioli at home in winter
Few growers can provide gladioli with ideal storage conditions - in a cellar, basement or storage. But even at home, it is possible to create a comfortable winter for gladioli.
- In the apartment, the bulbs are placed in cardboard boxes in the coolest room near the balcony door.
- If the door is wooden, then a warm layer of the same cardboard is placed between it and the box with gladioli, for example. Then, in severe frost, the bulbs will not freeze.
_____________________________________________________________
How to process gladiolus bulbs from thrips
Before removing gladioli for winter storage, you need to exclude the presence of thrips. Thrips are small insects that feed on the top layer of the bulb.
How to see thrips on gladioli bulbs:
- In case of severe pest infestation, the bulbs will be dotted with dots. They are especially noticeable on dark varieties. At the same time, the hands will turn dark. Unblown buds are also a sign of thrips. If in the summer your plants literally froze in a half-release, this is definitely a pest trick.
- Look under the husk and carefully examine the onion. You can easily see small insects quickly scurrying back and forth on the bulb. For convenience, the husks can be removed over a white sheet of paper - so dark bugs will be visible immediately.
How to deal with thrips on gladioli:
- If you find thrips, remove the husks from all bulbs completely. Do not worry, the bulbs will not be affected, they will not dry out during storage. Then the peeled onions are "powdered" with dry karbofos, in much the same way as baked goods with powdered sugar.
- For my collection, I use the obligatory sprinkling of karbofos on top of the husk, regardless of the presence of thrips - practice has shown that this is the best way to keep the bulbs intact. If there are at least a few insects, they are able to multiply to an incredible amount during the winter.
When growing gladioli in the middle lane, for example, in the Moscow region, it must be remembered that the plant needs a transplant. After flowering, the root of the gladiolus is dug out of the ground and stored for further planting with the onset of spring heat. What else needs to be done and how to properly prepare gladiolus bulbs for storage?
After the gladioli have faded, wilted peduncles remain in place of the lush lancet inflorescences, which violates the flower arrangement created in the garden. At the end of flowering, the stems of the flower must be cut, leaving a height of 20-30 cm, depending on the variety.
This measure gives a neat and tidy garden design and prepares the bulbs for wintering.
Note! An important stage in the maturation of a tuber is the concentration of nutrients in it. Pruning the peduncle allows the perennial to accumulate mineral components in the thickness of the bulb, which later make it possible to get a new crop, characterized by high germination and good decorative qualities.
When the flowering period is over, flower care is carried out in several stages:
- trimming leaves and peduncles;
- fertilizing the plant with mineral fertilizers;
- processing and protection from pests.
These measures contribute to the high-quality ripening of the planting material, obtaining healthy and strong bulbs. Cutting leaves and peduncles promotes the formation of tubers, since the plant does not spend energy on ripening the seeds.It is necessary to ensure that the green part of the plant remains at least 20 cm, this will allow the bulbs to receive a sufficient amount of nutrients.
Top dressing of perennials with the help of potassium-phosphorus fertilizers stimulates the growth of the root part, therefore it is especially important to use it for small tubers that are lagging behind in growth and development. Wood ash and superphosphate are also used as top dressing.
Important! Gladioli do not take dry dressings well, therefore fertilizers, for the best effect, are introduced in the form of an aqueous solution.
Superphosphates hardly dissolve in water, therefore, special extracts are used to maintain a perennial. You can prepare a superphosphate extract as follows: 200 grams of dry matter is poured with a liter of boiling water and left for 90 minutes, stirring constantly. The cooled solution is diluted with water at the rate of 200 ml of extract per 10 liters of water, this amount of solution is enough to process a square meter of plantings.
Watering gladioli after pruning should be stopped in order to prevent the development of fungal diseases. In addition, insufficient soil moisture stimulates the process of accumulation of useful substances by tubers.
The last feeding of gladioli should be carried out no later than September. Potassium permanganate is used, for this they take 5 grams of potassium permanganate and dilute them in 10 liters of water. Such treatment is at the same time a disinfection treatment that protects the bulbs from diseases and rot.
Another problem for gardeners when preserving planting material is thrips - winged pests that destroy the stems, leaves, and then the tubers of gladioli. In order to protect against insects, it is worth pruning as quickly as possible. The area where the bulbs remained before ripening are carefully weeded and inspected for the presence of pests. Planting material, as a preventive measure against thrips, is treated with a solution of karbofos; for this, the bulbs are left in a container with the drug for 30-40 minutes.
The feeding of gladioli is stopped at the beginning of September, allowing the bulbs to ripen in the ground and prepare for wintering.
Pruning peduncles
As soon as half of the flowers droop on the peduncle, it is necessary to remove it, while trying not to touch the leaves. At this time, the bulb continues to build up its mass and accumulate nutrients, as well as form babies near it.
Fading peduncles must be cut off.
The formation of seeds should not be allowed, since they will pull vital juices from the plant and the main bulb will not fully ripen.
Some growers cut all flower stalks into bouquets
Questions and answers about landing gladioli
Is it possible to plant gladioli before winter?
Better to buy
When shoots begin to appear on the bulbs, the root system also develops, and then it is already possible to plant the planting material in the soil.
If there is an opportunity to shelter in case of something, then early.
Corms are planted more deeply.
Is it possible to grow gladioli for the New Year and March 8?
Film shelters with short-term heating of the air with a drop in temperature at night and cold late autumn days allow you to get high-quality inflorescences of gladioli in November.
How to ensure that gladioli do not bloom all at once?
Depending on the purpose of the treatment, the temperature is maintained within the following limits (in ° C): 52; 55 and 57.
- Boric acid - 3,
- Gladioli in all regions are cultivated as
- Corms can withstand not only low positive temperatures, but also short-term negative ones, but their development is delayed. Large corms die at minus 2 ° C. Therefore, planting before winter is possible only in the southern regions with shelter to create a wintering regime similar to the storage regime.The baby, which has a hard, dense shell, tolerates low temperatures more easily, which can be observed in warm winters in the Non-Chernozem zone. In such cases, it can withstand temperatures as low as minus 4 ° C.
Is it possible to cut a corm with two sprouts?
Second half of September
Can a baby with a cracked shell be planted?
All experienced gardeners will tell you that if gladioli are not properly looked after and fed on time, then you will not be lucky to see its beautiful flowers on your site.
During the winter, the corms have dried out a lot. What should be done with them before boarding?
Young gladioli bulbs
Before preparing gladioli for planting directly into the ground, prepare the soil. Gladioli love loose and soft ground. Therefore, you need to dig it up, shovel rotted leaves. Selected bulbs are planted at a distance of at least 40 cm from each other.
I bought an interesting variety. How to multiply it faster?
If not, it is best to plant when the danger of frost has passed.
Can a baby be planted in a shell without cleaning?
Planting to a depth of less than 10 cm, regardless of the texture of the soil, is not recommended here.
How to plant gladioli so as not to confuse young and old corms?
In this case, the landing is carried out on August 15 - 20.
Exposure from 20 to 30 min.
Potassium permanganate - 2,
One-yearThose growers who provide conditions on the site that protect the soil from freezing, plant gladioli before winter.
Bacterial diseases of gladiolus bulbs, their treatment and photos
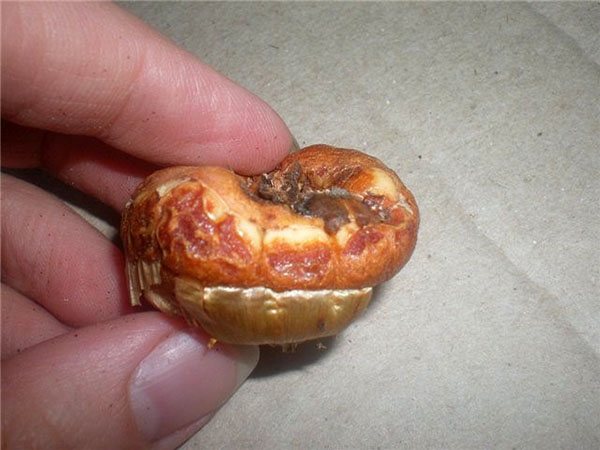
Signs of untreated gladiolus disease, as in the photo, are clearly visible when the bulbs are harvested and dried.
Root carcinoma also shows up on already dug out bulbs as watery, greenish-yellow formations that can be easily separated from the underlying tissue. The cause of the disease is the activity of bacteria that change the "program" of cells responsible for the formation of children.
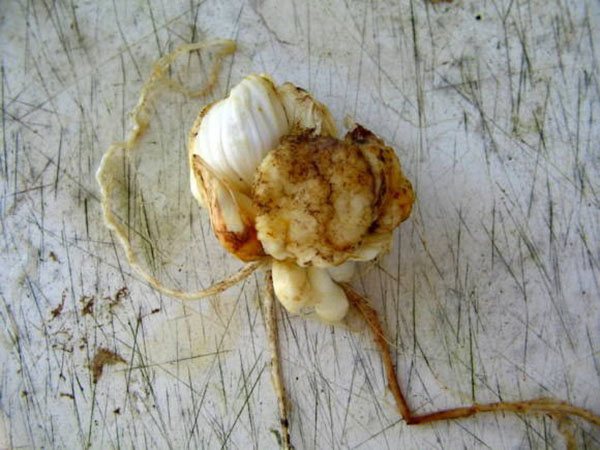
Spring storage
In March, I take out the planting material and begin to peel off the scales. The process is lengthy and requires careful handling. In a hurry, you can break off the escape that has come out. If, nevertheless, this trouble happened, I don't really worry.
Removal of the main shoot contributes to the restructuring of the development of the corm. The dormant buds receive a signal to start growing, and then in the fall, instead of one bulb, you can get two.
Together with the bulbs, I clean the babies from the shell. Processing their jewelry work, although there is an opinion that children can be planted and not cleaned. The water will soften the shell and the shoot will break through it. But for me it is important to accelerate growth and while cleaning takes time, the result is worth it.
The cleaned planting material is sent to the upper shelves of the kitchen set to wait for the end of April and the beginning of May, when it is time to plant.
Winter storage
The dormant period for bulbs is a crucial stage. During this period, the future peduncle is laid. Two or three months is enough for the necessary processes to take place, and the bulb wakes up for a new life.
In January, I take out the containers and put them on with a radiator to dry them slightly. Excess moisture sometimes forms in the refrigerator, which is absorbed into textiles and onion scales. Once I even got mold, after cleaning the bulbs in the spring, there was no trace of it, but it was unpleasant to see the wards in such a neglected state.
Treatment
Dug out gladioli, if necessary, process - rinse in a bucket of water to remove the earth. Remove easily detachable stems completely, those that sit firmly, cut off, leave hemp 1 cm high. Gladiolus bulbs are examined to identify and reject sick and pest-affected specimens. The rotten and the infected are destroyed.
Advice! Process the peeled corms. Soak in manganese solution for 20 minutes. Dry in a draft.
After processing, all onions are laid out by variety and size, dried in an apartment (25 ° C) for at least 3 weeks. You can dry gladioli next to the battery.
What to do if the corms wake up in the middle of winter
In winter, gladioli corms undergo two phases. The first phase, the phase of natural rest, lasts about 40 days. At this time, the corm will not sprout, even if it is warm and humid. Then a period of forced dormancy begins, and here it can already germinate. If this nevertheless happens, you will have to get the corms, spread them out for a week to dry in a room with the heating turned on and send them back to a cold place. When 2-3 weeks remain before planting, the storage temperature will need to be increased to +15 degrees.
At FORUMHOUSE you can find any information on the agricultural technology of gladioli and information on the agricultural technology of other bulbous plants. Check out our gladiolus show: photos of the most beautiful blooming gladioli grown by members of our portal. Read our article on how to store, root, and divide dahlias. Watch our video on forcing, overexposing and planting bulbs.
Recommendations for planting gladioli
What a beginner florist needs to know:
- The preparation of gladiolus bulbs in the southern regions begins at the beginning of March, in the central regions - in the first ten days of April, in the North-Western District, Siberia and the Urals - at the end of April.
- The planting of a flower culture is carried out in soil warmed up to a temperature of + 10 ° C, in sunny places protected from cold winds.
- The distance between the corms is 10 - 15 cm, in the row spacing - 25 - 30 cm. For children, a distance of 4 - 5 cm is recommended; between the rows - 20 - 25.
- Planting depth depends on the size of the bulb: the larger the bulb, the more depth is required. For small and medium tubers, this will be 2 - 3 cm, for large ones, the optimal depth is 4 - 6 cm.
- In no case fresh organic fertilizers are applied to the soil under gladioli.
- The soil should be loose, moisture-permeable, loamy or sandy loam, with a slightly acidic reaction. Flowers do not tolerate even short-term stagnation of moisture, so they need a drainage layer of coarse river sand.
- It is best to prepare the soil in the fall. At high acidity, add dolomite flour or lime, add 100 g of superphosphate and 40 g of sodium sulfate per 1 sq. m plot. In the spring, 30 g of urea, 50 g of wood ash, 40 g of superphosphate are added to the soil for each square meter. m.
- It is recommended to change the planting site of the flower crop annually.
- The processing of gladioli from thrips can be carried out with an infusion of garlic - 100 g of garlic juice per 1 liter of water with soaking for 2 - 3 hours.
- You can disinfect tubers with the help of wood ash infusion (2 tablespoons ash per 1 liter of water). They are soaked for a day, which further stimulates the growth of flowers.
- After each treatment, the corms are thoroughly dried in air.
- It is good to shed the earth before planting gladioli with garlic infusion. In addition, garlic can be planted along the edges of a flower bed: it will perfectly protect gladioli from pests.
- To protect exquisite flowers from rot and fusarium, it is effective to plant marigolds, calendula, nasturtium in the immediate vicinity.
Important! All solutions for processing in spring should be at a warm temperature (30 - 35 ° C), which enhances the effect.
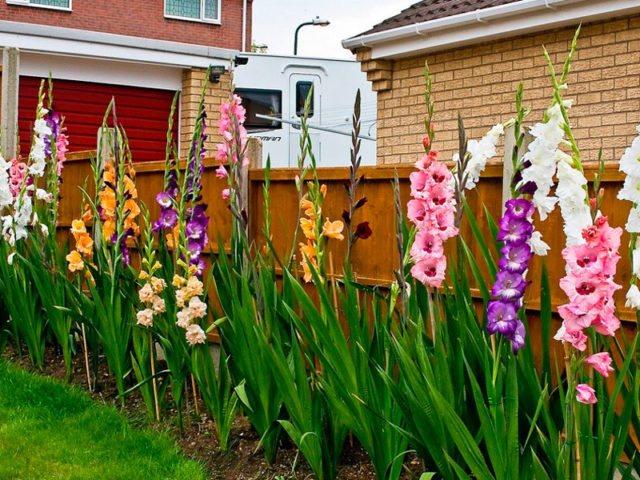
Gladiolus transplant after flowering
If necessary, gladioli are transplanted to a new place in the fall, after they have faded. To do this, take care of the plant, pruning it and stimulating the ripening of the tubers. In early September, the bulbs should be dug up, processed and dried. Beforehand, it is necessary to carefully examine the planting material and remove small, weak tubers affected by pests and diseases. Well-formed bulbs, large enough, covered with dark husks, are suitable for rooting and wintering.
In autumn, gladioli are planted in open ground starting from the second half of October, rooting and wintering in the garden is possible only in the southern regions, since the perennial is thermophilic and does not tolerate frost.
The preparation of the planting material consists in the rejection of low-quality material and the processing of the bulbs. Ripe tubers after digging are cleaned, placed for pickling in a solution of karbofos and potassium permanganate, dried thoroughly. Further, the mother bulb is divided into several parts in accordance with the number of tubers.
For disinfection purposes, all sections on the planting material are treated with brilliant green or sprinkled with crushed activated carbon. Two days before planting, the bulbs are soaked in a special solution - a growth stimulator, sometimes it is enough to apply it to the slices and the sprout zone. This helps the tuber to take root quickly, provokes the appearance of roots and shoots.
Gladiolus is one of the most spectacular garden flowers, and it is doubly offensive when the plants wither, the buds do not open, and the corms rot. To prevent this from happening, you need to know the diseases of gladioli and their treatment, and photos and descriptions of the most common problems will help to cope with them in time.
Most often, flower growers are faced with diseases caused by bacteria, harmful fungi and viruses. A lot of troubles can be caused by pests dangerous for bulb crops.