The bulbs will not germinate at low temperatures, and when the owners decide to move them to the warmth, they will start growing together. To push bulbs at home, the pots should be at least 30 cm high for large bulbs and 20 cm for small ones. For the diameter of the top of the pot, 20 cm is enough; in such a pot, about 5 large onions will fit. It is better to take ceramic pots, since ceramics allow air to pass through better, and for good formation of the root system of tulips, it is necessary. Plastic containers are much cheaper and less fragile, but they overheat in the sun and do not provide protection from the cold.
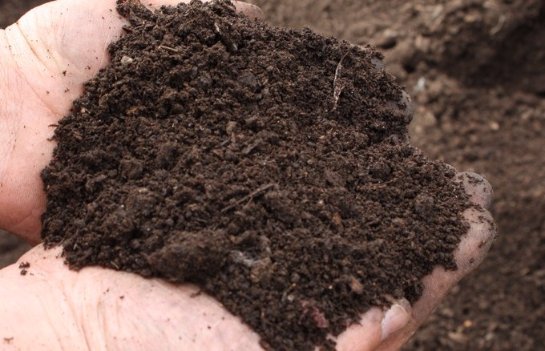
Drainage holes are required in the pot so that excess moisture does not stagnate at the roots. To create good soil for tulips, take in equal parts leaf, garden and humus soil with the addition of peat and coarse river sand. The reaction of the soil should be neutral or slightly alkaline. Tulip preferences do not change whether they grow in a flower bed or in a pot on a windowsill. Bulb soil sold in specialty stores will also work well.
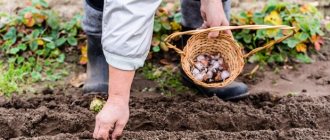
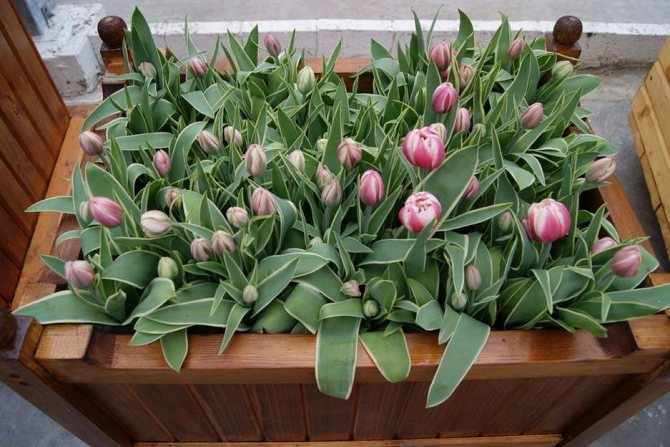
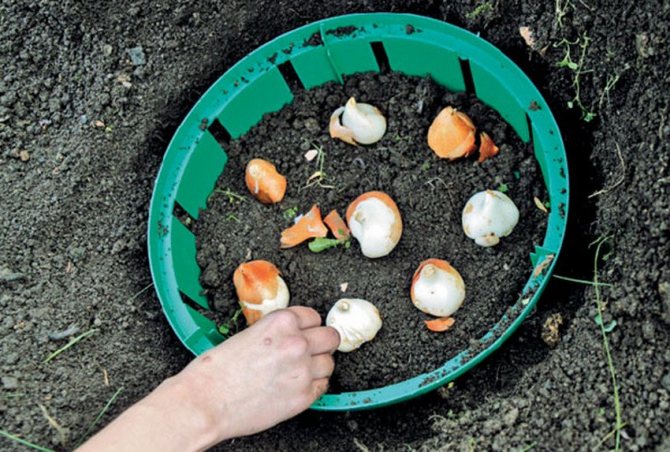
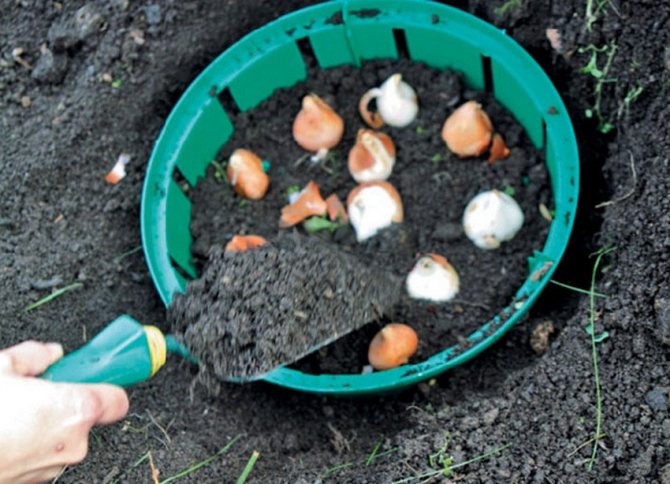
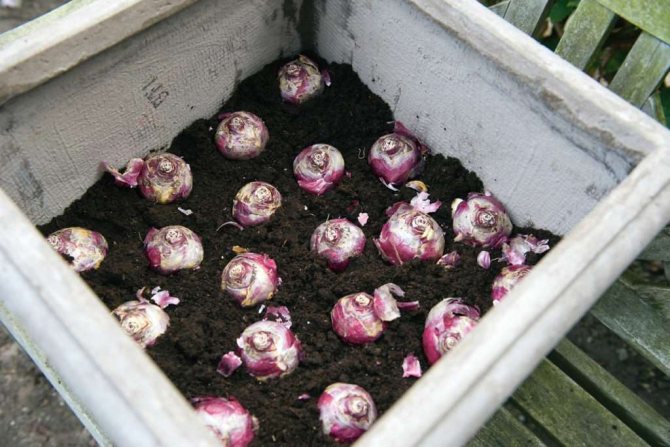
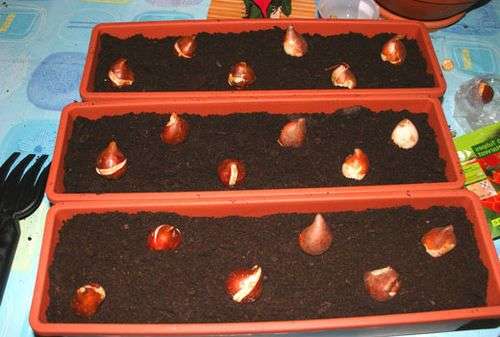
The bulbs are planted in September-October, as well as outdoors. Expanded clay, gravel, ceramic fragments or charcoal are poured at the bottom of the pot, making sure that too small particles do not completely clog the hole. From the edge of the pot, the distance to which the bulbs will need to be planted is measured; to this level, the pot is filled with a substrate. The bulbs are located almost close to each other, that is, much denser than in a flower bed. The soil is poured to the edge of the pot, watered so that the volume of the donkey decreases. If necessary, fill up the soil.
So that the result of distillation does not turn out to be a disappointment, you need to choose high-quality, smooth, firm bulbs.
Then the containers with bulbs are moved to a cool room, simulating wintering. If it's September and it's very warm outside, the vegetable compartment in the fridge will do. The containers are checked about once a week to ensure that the soil does not dry out or mold grows. You can place the pots with tulips in a bright place and start full watering in 3-4 months.
If there are varieties in the pot that bloom at different times, you can use the layering method. To do this, after the drainage layer in the pot, add about 10 cm of soil and place the bulbs on it, fill them with soil completely and lay the next layer. The earliest flowering varieties are placed below, and those that bloom later are placed on top. The last layer is covered with soil and watered abundantly. The liquid will drain through the drain, after which the pot can be stored.
Land is not required to grow tulips at home
So that the result of distillation does not turn out to be a disappointment, the bulbs need to be selected of high quality, smooth, firm. When watering, water should be used warm, providing tulips with high air humidity, if possible. Top dressing with complex fertilizers should not contain much nitrogen; it is better to give preference to phosphorus fertilizers. Do not put pots in the hot sun, tulips will die from direct sunlight.After the tulips have bloomed, the bulbs are left in pots for about a month, fertilizing and watering so that they gain strength for the next flowering. Watering is stopped when the penultimate leaf begins to fade. When the soil dries up, the bulbs are taken out, peeled from the old peel, sorted for future planting and sent back to storage.
Again, this tip is suitable for those who like to experiment with growing different plants. Tulips cannot be classified as indoor plants. Rather, these flowers are classified as garden flowers. It is there that we are used to seeing them in the spring. But it turns out that they can be grown quite successfully at home. In winter now it is difficult to surprise anyone with tulips. You can easily buy a bouquet of these flowers at any time of the year. But, now, if you present such a lively bouquet in the winter right in a pot, then this is a completely different matter. And if you also say that you raised them at home, then I think this will add additional value to your “living” gift. After all, you have put your work into this lively bouquet.
Advantages and disadvantages of container landing
It should be noted right away that before planting tulips in a special basket or container, dropping them into the ground, you need to purchase them in a store or adapt them for this:
- wicker baskets without bottom or boxes for vegetables, incl. made of plastic;
- old large pots or buckets with holes in the bottom;
- damaged plastic buckets: kitchen or construction buckets, pots and garden utensils;
- halves of plastic bottles - 5-20 liters, mesh bags for vegetables.
The holes in the containers are necessary for roots to grow through them. In these cases, the bulbs do not crumble, they can be easily removed from the soil for drying and replanting and not lose even the smallest. If the bulbs are planted in portable containers or pots, then there should be only one drainage hole at the bottom and handles on the sides (preferably).
When choosing a container for bulbous plants in a store or among household utensils, you need to take into account its size. A large basket or container will fit more bulbs, but then they will have to be planted less often, and the containers should be placed further from each other, taking into account the composition. Sometimes it is more convenient to plant tulips in smaller containers, they are less bulky, more convenient to work with, and can be used to design more easily.
Benefits of containers and baskets
The advantages of dropping containers for bulbous plants into the ground are obvious and there are many of them:
- Tulips tolerate winter more easily, since tulips are planted in containers in the fall. The containers, if desired, can be easily insulated.
- Bulbs and babies are not lost, as is usual in the ground, when you have to dig them up one by one for drying and storage in the summer. Here, from one container, you can get 1-2 dozen bulbs at once.
- Bulbs and roots are not damaged: when carrying the container, with a shovel and rodents. You can not use a shovel, but simply moisten the ground and turn the container over, then carefully remove the planting material with your hands.
- The composition of flower beds is not disturbed, since the culture does not grow beyond the container.
- There is no need to change the nutrient-poor soil throughout the entire plot, but to plant the plant in good soil right in the container.
- An opportunity is provided for digging and moving bulbous plants during flowering, since stable comfortable conditions are not disturbed even when you change your place of residence.
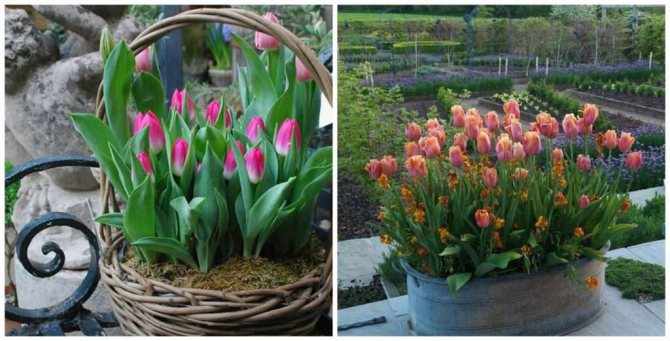
- Islets of blooming tulips can be used to mask voids in any flower garden and rabat.
- It is easier to control plants by variety, color and flowering period, since one variety is planted in one container so as not to be confused, and you can make a tag with the name and date of flowering.
- To create a summer dormant period, you can exclude sorting, drying and sorting of bulbs, and set the container in suitable comfortable conditions. At the same time, the bulbs dry out less in the soil than in the open dry air with a lack of moisture.
- Compact islands of blooming tulips look neater and more attractive.
- Top dressing is applied starting from the second season, since the fertile soil in the container is enough to feed the bulbs for one season.
Disadvantages of container planting
Cons of planting bulbous flowers in buried containers:
- additional cash costs;
- tightness during the growth of bulbs, requiring transplanting even from the largest containers;
- heavy weight of containers with soil and bulbs when carried to another place in the garden.


How beautiful to plant tulips so that the flower beds look unusual and original
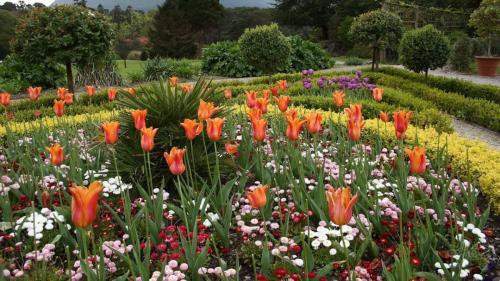
Large color spots
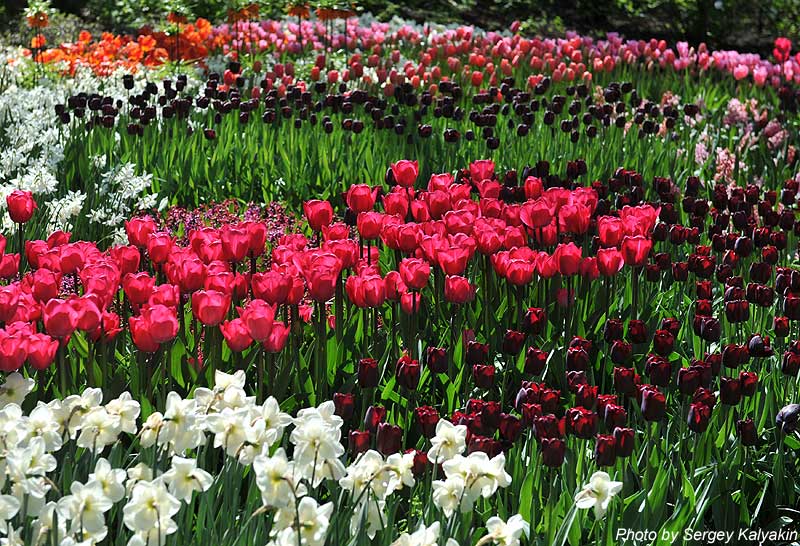
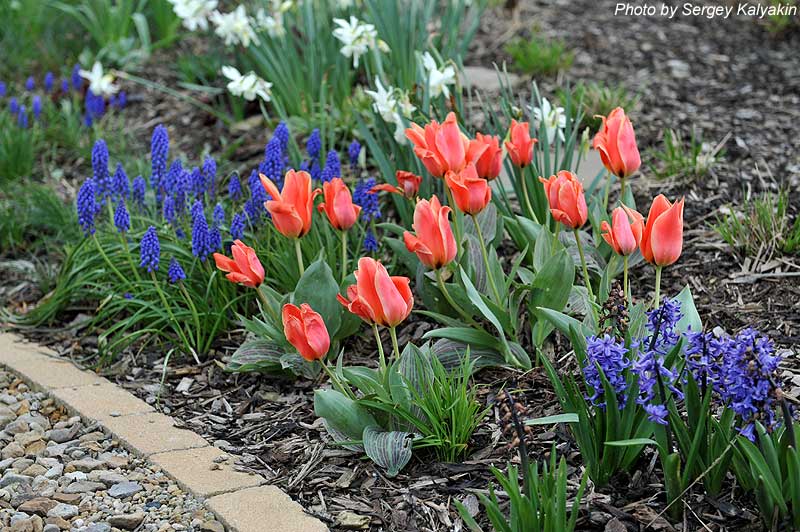
Flower beds look very beautiful, on which flowers are planted in large groups. Choose tulips of different varieties and colors, and plant them in large groups that close together. Choose tulip varieties of the same flowering time and height.
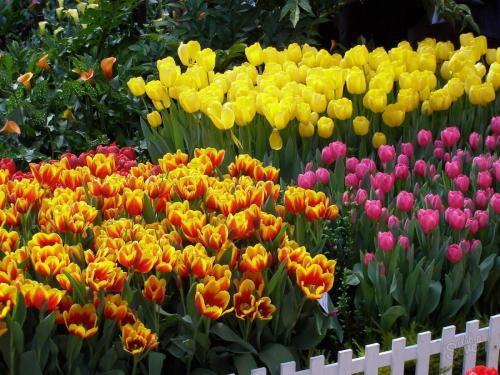
Below you can see an example of a large group of tulips, made up of plants of the same color range, but of different shapes and colors.
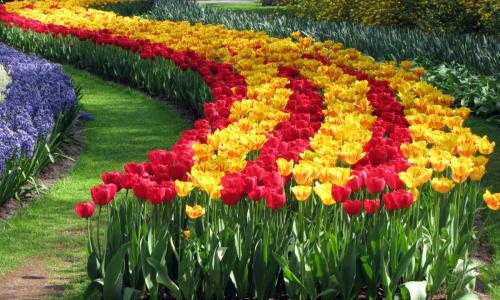
Winding path
It is wonderful and very unusual to see a kind of flower path. Plant tulips in such a flower bed of the same variety and be sure to shade them with flowers of a contrasting color. It is better to plant small flowers such that they will bloom all summer. Then you can plant some other flowers in place of the tulips and the path will delight you all season.
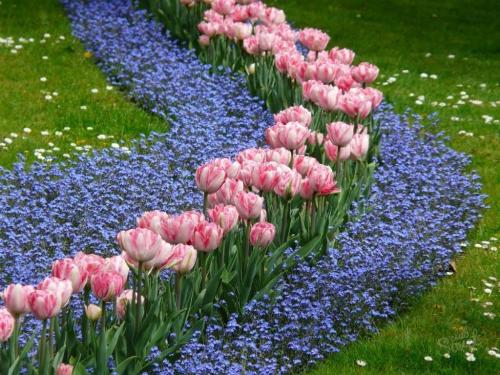
And here is the same path, but made up of only tulips, contrasting in color.
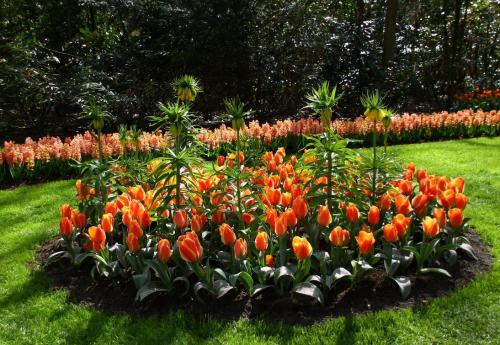
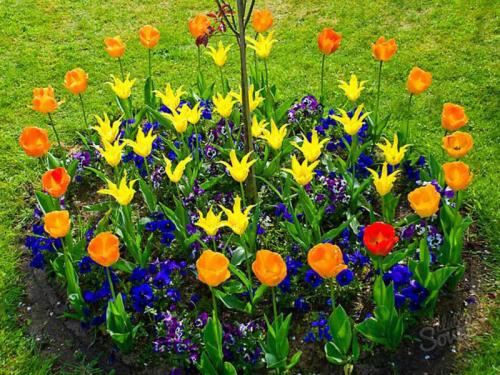
Round flower beds
Standard round flower beds with tulips can look very original if you plant low multi-colored daisies or undersized daisies between tall solid flowers.
And this round flowerbed looks absolutely charming due to the fact that botanical tulips grow on it. The so-called botanical varieties look more robust due to their low height and powerful peduncles. You can dilute the overall compact picture with several tall flowering plants. In this case, it is a common hazel grouse. In color, it can match the color of tulips or be of the opposite shade.
Another example of a round flower bed with tulips, which also serves as a fence for a tree.
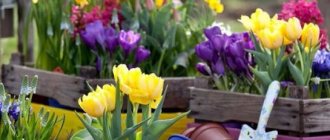
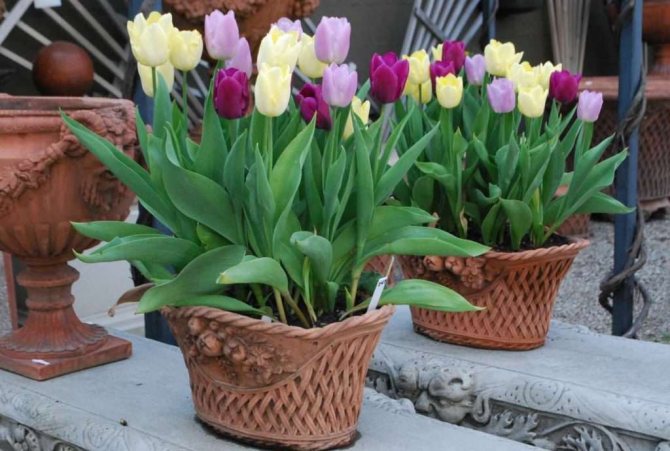
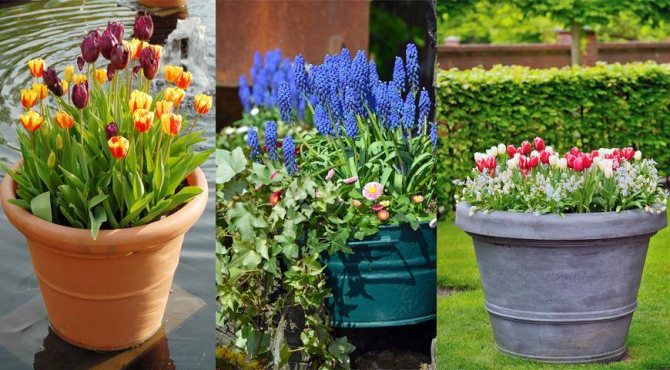
Into various containers
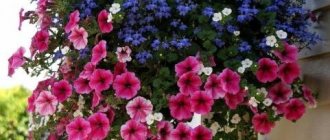
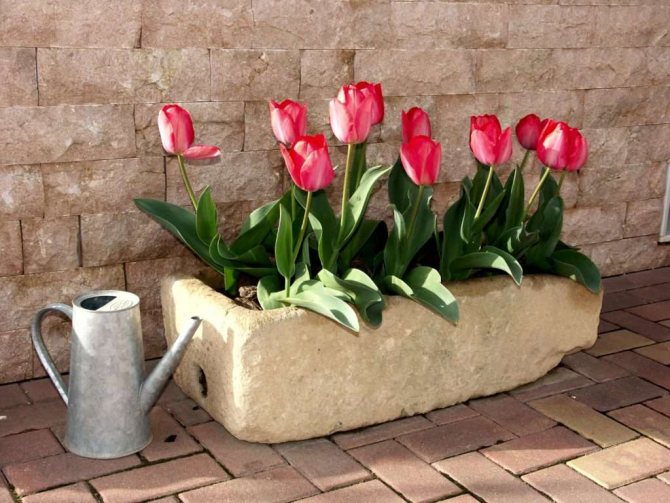
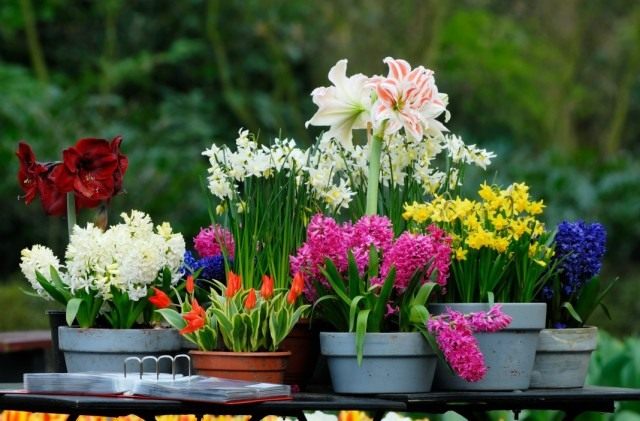
Blooming tulips in ceramic home flower pots will decorate the entrance to your home.
Bulb container growing strategy
Planting of tulips in boxes in the ground is carried out in the fall, starting from the second half of August, in order to get beautiful bright groups of flowers in spring. There are two strategies for growing tulips in containers:
- Bulbs overwinter in the soil
The planting material is planted in the fall in containers after the summer digging, then they are buried in the ground. Or, baskets or containers are first buried in the ground, and then the bulbs are planted, saving themselves from carrying heavy loads. You can leave tulips in the ground without digging out in summer, insulate them for the winter with spruce branches, fallen leaves, sprinkle them with snow and wait for the spring period of flowering plants.
As well as from open ground, bulbs are removed from the container at the same time and stored in comfortable conditions. You can plant the bulbs in a container in the fall, but do not drop it into the ground, but keep it outdoors until the first frost. Then you should transfer containers with soil and bulbs during the winter to a dry, cool room.
To decorate the garden after the snow melts and the establishment of stable warm weather - 7-9 ° C, they stimulate early flowering of bulbous plants by increasing the air temperature, humidity and lighting in the room where they winter in containers. Forcing is not necessary, containers are added in places where there are few spring flowers in the open field. For the next season, you can think about forcing tulips.
Recommendation... It is more convenient to plant bulbs in containers, placing them on the table. Since they have many holes, they put moistened old newspapers on the bottom so that they do not puff up and adhere to the walls. This measure is necessary so that drainage and earth do not spill through the holes. Newspapers or other paper will decompose in the soil and will not interfere with root growth.
Drainage in containers made of broken brick, expanded clay or used disposable pots is done on a layer of 2-3 cm. Then sand and fertile soil are poured, since tulips should be planted in containers in autumn only in a highly nutritious environment. Then feeding can be carried out only in the second year.
Read also Useful properties of boiled beets and contraindications
Greenhouse
When forcing bulbs in boxes, no special requirements are imposed on the greenhouse. Both glazed and film greenhouses are suitable for this purpose. Tulips also do not require a special lighting mode, as getting good results is highly dependent on the lighting mode. However, it is preferable to use greenhouses with a height of about three meters for forcing, as in this case it is possible to more effectively control the growing area and provide the greenhouse with energy. Very va; ensure good ventilation of the greenhouse; there are mg of ventilation systems.
Bulb soil in container
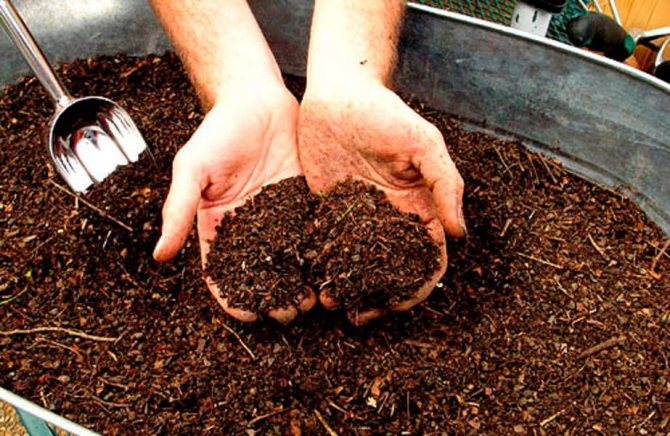
Loose soil is poured into the container, it is better to buy it, since it has already been disinfected and there are no pests in it. When self-preparing the substrate, it is mixed with perlite, perliculite, sand, coconut fiber (if possible). In such soil, water is not retained and there is air access to the roots. The root system will take nutrients from humus and dry fertilizers, which are applied as top dressing according to the instructions.
Working with planting material
Before planting, sick and damaged bulbs are discarded, then the planting material is disinfected with a weak solution of potassium permanganate or a special preparation from a flower shop, for example, Fitosporin.
How to replace baskets for bulbous
If for some reason it was not possible to buy the basket or you just don’t like it, you can make the structure yourself or find an alternative.
Grids. Some growers use string bags or mesh bags made of elastic material. They dig a hole, spread a mesh bag in it, then lay out an onion and tie a string bag. You can leave a small piece of netting so that you can easily pull the bulbs to the surface later. The bulbs can be stored in the net until next year and treated with a fungicide. Cons - the mesh will not hold rodents, and it is impossible to carry out a multilayer planting.
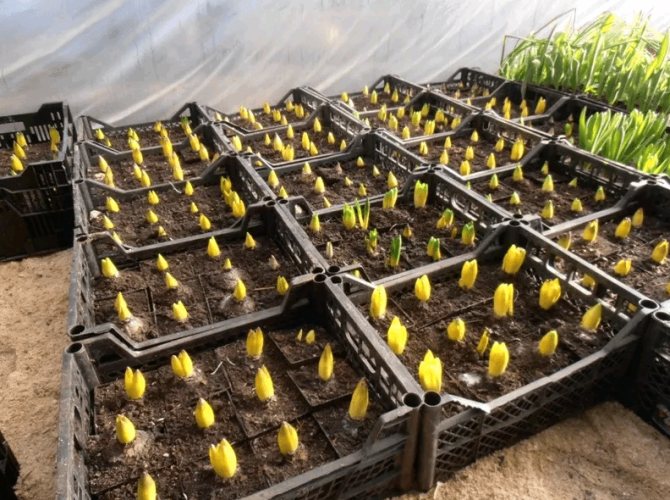
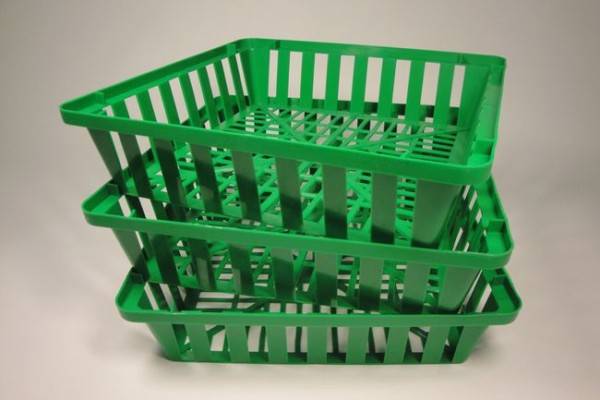
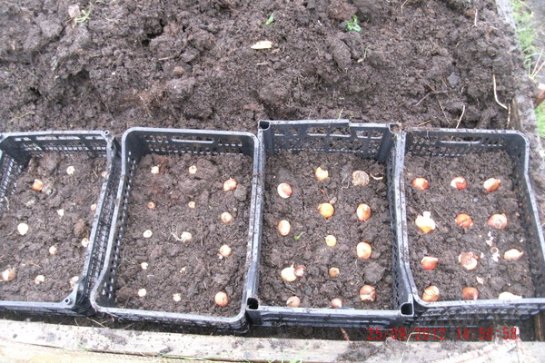
Boxes for vegetables. Such containers are similar to baskets, but larger in volume. On the lawn, such a container cannot fit, and a beautiful landing cannot be done. But for multi-level planting, boxes are the best fit.
Plastic bottles. You can make holes in the bottle and put the bulbs there. For planting a small number of bulbs, bottles will work. The disadvantage of using them is that it is difficult to make holes in the bottles. For those who decide to try, we offer a detailed diagram:
- Take a canister or large plastic bottle and a sharp cutter or knife.
- Cut off the side.
- Cut straight rectangles on the other side.
- Make the same holes at the bottom, only staggered with holes on the sides.
- Pour fertile soil, a layer of sand, and then onions into the resulting basket. This makeshift construction can hold about eight bulbs. Then they land in the usual way.

Planting nuances
So, we add a container, sprinkle it with drainage, sand and part of the earth and plant the bulbs:
- With balls - we press large ones to the bottom, sprinkle with earth, distribute small bulbs from above to get seedlings at different times.
- Rows or circles - these are created in large containers or boxes.
- In layers - several layers of bulbs are placed in deep containers at different depths. The largest ones are laid out on the bottom, then a layer of earth and then the middle specimens are distributed in a checkerboard pattern in relation to the lower ones, the smallest bulbs are pressed into the upper layer of the earth. This method is called "lasagna" with onion filling. It extends the flowering period of the tulip island if each layer has a different flowering period, respectively. Small bulbs are the first to flower. If the large lower bulbs bloom at the same time, they will germinate later anyway and will not interfere with the upper flowers.
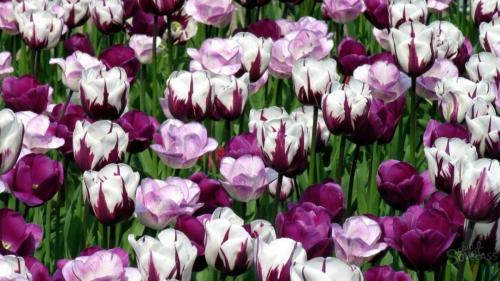
When growing two-tone tulips in containers in a pair, you need to choose flowers in contrasting tones.
Helpful information. Extra-class bulbs have a diameter of more than 4 cm, first-class (parsing) bulbs - 3.5-4 cm. Bulbs of foreign collections are classified according to the circumference at the widest point. 12 cm long - this is the first analysis of bulbs with a diameter of more than 3.8 cm.The girth of 14 cm and above and a kidney diameter above 4.5 cm is classified as extra class.
The cultivation of bulbous plants is fraught with some difficulties. The need to dig up plants for the summer and then plant them in the fall, storage difficulties, problems with rodents, rot and shredding of modern hybrid varieties are familiar to every gardener. And if the baskets-nets for planting bulbs that protect against mice-voles and other garden pests are known to everyone, then the method of dropping bulbs in plastic containers - in baskets, pots and other containers - is still unpopular with us. Meanwhile, such an approach to cultivation will not only help to preserve bulbous from year to year, but also greatly simplify all the most common procedures, reducing them to a minimum.
Bulbous flowers in containers.
Content:
Description
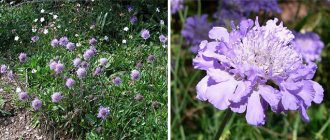
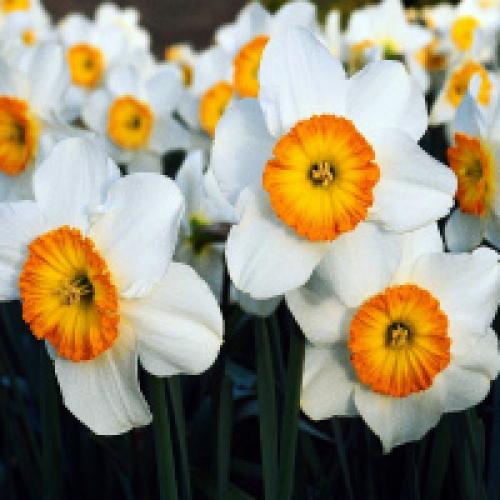
Depending on the selected variety, the height of a tulip can range from 10 centimeters to 1 meter. The root part of this plant consists of adventitious roots that develop and die off every year.
The stem of the flower is erect, cylindrical in shape. The leaves are elongated lanceolate, green with a barely noticeable waxy bloom. The bottom leaf is considered the largest, the largest leaf blade is in the upper part of the culture.
Note:
most tulip varieties have only one inflorescence, but some species can form three to five flowers at the same time.
Inflorescences are white, yellow or red, consist of 6 petals and the same number of stamens. In hybrid varieties, the color is slightly different, in this case the flowers can be purple or violet.
Tulip petals also have different shapes:
- bowl-shaped;
- star-shaped;
- fringed;
- oval;
- lily-shaped.
The size of the blossoming inflorescence also depends on the variety. If the length of the flower can be up to 12 centimeters, then the diameter of the inflorescence ranges from 3 ... 10 centimeters. Tulips usually open in cloudy weather and finish flowering at nightfall or in adverse weather conditions.
Benefits of growing bulbs in buried containers
Beautiful islands of ideal shape, in which the soil is not visible because of the sea of your favorite bulbous flowers - this is the main effect, which is achieved by the "dropping" method. This is the cultivation of bulbs in plastic containers, which are not placed in potted gardens, but literally put into the soil like many tub stars, and when necessary, they are easily dug out of it.
Unlike the method of planting in mesh baskets, "buried" bulbs can boast not only effective protection from rodents.Thus, you get both a beautiful group of flowering bulbs, and the most mobile option for their introduction into flower beds and flower beds.
The "dropping" method has a lot of advantages:
- the ability to transfer bulbs from place to place at any desired time, to place accents in the garden, focusing on its decorativeness in specific seasons;
- islets of bulbous can be used to mask voids in flower beds and in flower beds;
- no need to dig out the bulbs one by one from the soil for summer storage: it is enough to dig up and take out one single container, and not dozens of plants;
- the ability to plant only when necessary, as the soil is filled, and not annually;
- bulbous with this planting option are never lost;
- easier to control varieties;
- the roots of the plant are not injured even when carried, and the bulbous ones themselves do not suffer from digging, the problem of "searching" in the ground and burying the children disappears;
- simplification of preparation for the summer dormant period (there is no need to sort, dry, sort the bulbous ones), you just need to put the container in suitable conditions;
- less risk of drying out the bulbs with insufficient air humidity due to the fact that they are resting in the ground;
- despite the fact that the bulbs are planted in plastic pots, they need exactly the same care as those planted one by one in the soil - in favorable weather they are practically not looked after (with the exception of the obligatory dressings, which are introduced as for depleted soil from the second of the year);
- bulbs can be dug up and moved even during flowering, since the plants themselves will continue to be in stable conditions and will not even notice a change in location;
- bulbs dug in the soil in plastic containers look like a compact, colorful group - a real blooming spot, under which the soil is practically invisible: compact, neat, attractive;
- you yourself can change the form of growing your favorite flowers - drop it into the soil or use it as potted plants.
Bulbous flowers in containers. <>
But the most important thing is that even after digging in containers with bulbs for the winter, you do not deprive yourself of the opportunity to transfer them from place to place. You can even add the container to the potted garden at any time, and not just dig it in another place in the garden at your discretion. Thanks to this method, you can forget about the time-consuming fiddling with each individual bulb and work with dozens of plants at once "in one fell swoop".
This method is especially good for tulips and, of course, for those who collect them, collecting and carefully sorting the bulbs of the latest varieties. Firstly, it allows you not to lose the small bulbs formed by the mother plant. Secondly, dropping creates a more stable environment and allows tulips to grow in a denser planting.
Tulip islet mugs look amazingly impressive and become real stars of spring bloom. But the method of digging is promising for those bulbous plants that do not hibernate in the soil and also need to be dug up annually - from rare capricious exotics to the familiar gladioli.
Read also Why does the earth grow moldy in flower pots
Digging a container with bulbs. <>
Tulip care
Caring for basket tulips is no different from caring for regular flower beds. It includes watering, loosening, weeding and feeding regularly.
Although loosening and weeding may not be necessary if good soil is used.
In the spring, fertilizing is carried out with a complex fertilizer containing nitrogen. It is essential for rapid development. Top dressing with phosphorus and potassium is applied before flowering.
You can dig up baskets of bulbs after flowering and remove from a dark place. In warm regions, you can leave them in the soil, insulating them with sawdust or peat. It is not recommended to use pine needles, tulips do not like resin.
Tulips are gentle messengers of spring, which, after primroses, are among the first to bloom on our site. Today, a wide variety of these wonderful flowers is on sale, and every gardener will be able to find something close to his liking. Distinctive qualities of various varieties - unpretentiousness, different timing and duration of flowering, a wide variety of shapes, sizes and colors.
Many summer residents are interested in when it is better to plant tulips - in spring or autumn, what to focus on in order not to miss the deadline?
Autumn planting is most suitable for tulips. For central Russia, the optimal time is from the end of September to the beginning of the second decade of October. You need to focus primarily on the temperature of the soil. Optimum values are from +7 to +9 C.
Even if for some reason the deadline is missed, you can still plant tulips in the exhaust gas until the beginning of December! The main thing in this case is to better cover the plantings with spruce branches, fallen leaves and throw a thick layer of snow on top.
Many summer residents use tulips in mixed plantings, in which some plants bloom earlier, others later. A reasonable question arises - how to hide faded tulips that have begun to dry out in time, so that they do not spoil the general appearance of the flower bed?
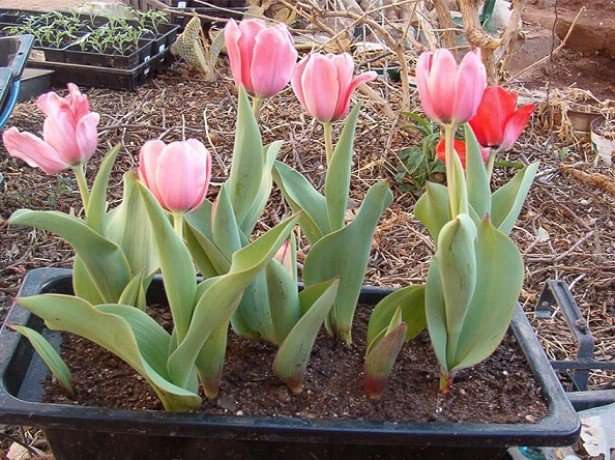
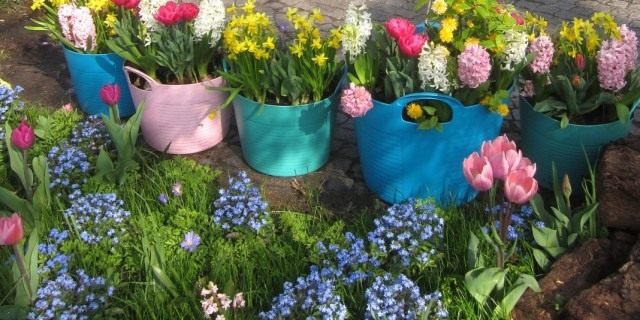
One of the elegant solutions is to plant tulips in autumn in buckets or small containers (same as above). During the abundant flowering in the spring, you can put flowers in the most prominent place, in the center of the composition, and by the time of wilting, rearrange them somewhere on the outskirts of the site. It is very convenient!
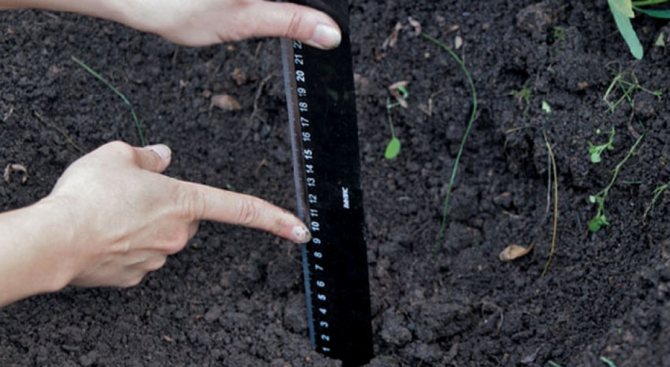
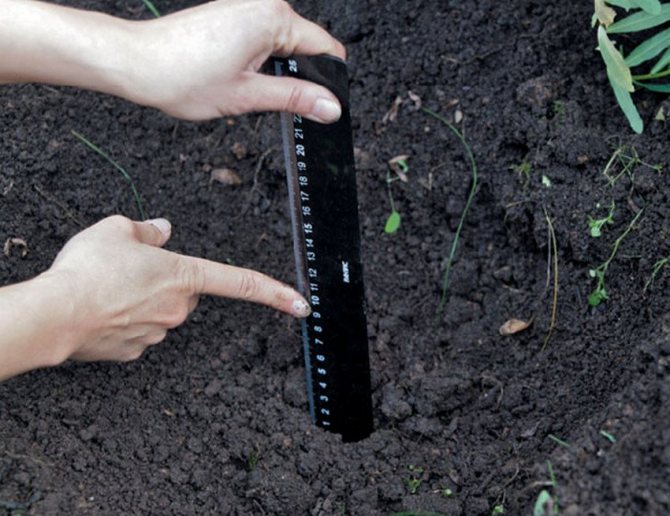
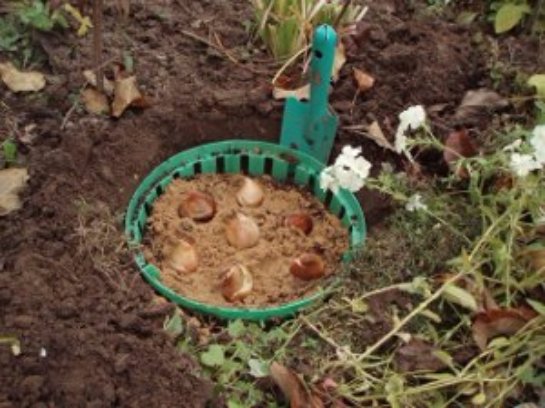
At the bottom of the planting containers, place expanded clay, pieces of broken brick, pebbles or any other suitable drainage. Fill the space above them with fertile soil. The bulbs should be planted to a depth of about 15-20 cm. Immediately after planting, containers with tulips should be dug in on the site, and covered with spruce branches or dry foliage from above. After the first snow falls, also connect it as an additional shelter (rake for landings).
It is possible not to leave tulips to winter outdoors, but to transfer them to a cool cellar with a minimum above-zero temperature. In this case, you only need to make sure that the soil in the tub always remains moist and does not dry out.
Published: 2018-10-02 Ilya
Disadvantages of dropping
Of course, like any other growing method, dripping has its drawbacks.
The main and most serious argument against this growing method is the need for some investment in the containers themselves. But in fact, this method rather "helps", because it allows you to continue to use old unnecessary containers without requiring the purchase of new ones.
Of course, plastic practical containers, which in garden centers are called so - plastic baskets for bulbs - can be bought on purpose, but you cannot put them to other pottery containers and their volume is limited to 30 cm.But other containers are also ideal for this purpose. :
- old plastic pots in "poor" condition, even with cracks or damage, chips or other injuries that you cannot use for their intended purpose for potted gardens or decorating rooms, balconies and terraces;
- garden plastic utensils, including half-cut buckets and bowls that "have served their purpose";
- kitchen and construction plastic buckets that can be used for plants, cut to the desired height;
- plastic boxes lined with mesh or agrofiber;
- any other not too deep plastic containers, utensils and dishes.
The main and only condition: in the containers in which you plan to plant bulbs and add them to the soil, the water should not stagnate and the permeability of the soil should be equal to the usual cultivation in open soil.A sufficient number of holes for water drainage, if the container does not have them initially, you can always make yourself in any quantity, both at the bottom and on the walls.
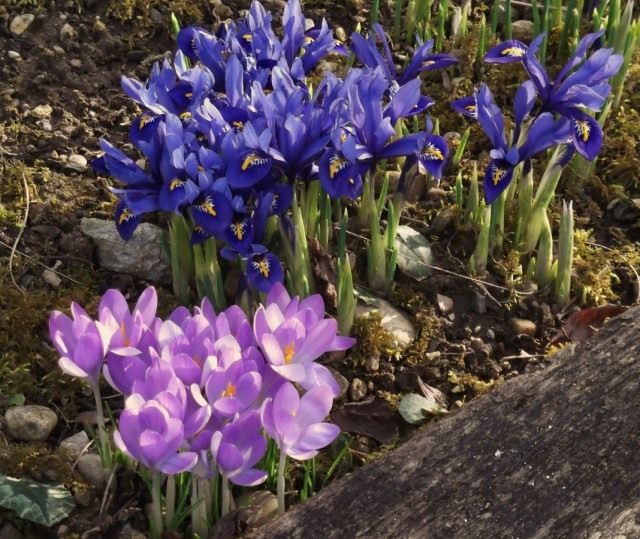
A group of early spring bulbous flowers. <>
But what really has to be taken into account is the difficulties of transporting around the site and taking out a heavy container filled with earth: a large bucket of bulbs will weigh a lot. True, the containers are smaller and the standard baskets are not that heavy, and transportation around the site can always be simplified using garden equipment. All the same, efforts, and even more so the time spent on digging and digging containers, will take much less than planting and summer storage of each individual bulb.
Planting plants in plastic containers that you plan to drop into the soil is best done in the fall, at the time of planting all spring bulbs. For tulips, the planting season starts in the second half of August, after which you can start planting hyacinths (gladioli and other bulbs are planted at the same time as just in the soil). Lay drainage on the bottom of the tank, check the number and size of the holes for water drain Use good quality, loose and fertile garden soil or ready-made substrate.
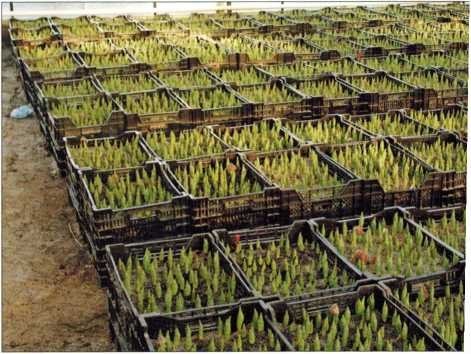
Distillation boxes
It is very important to choose the right container (box) for forcing tulip bulbs. In practice, this means using containers suitable for exporting the bulbs. The export version of the box is a plastic box measuring 60 x 40 cm, 18 cm high and at least 8.5 cm deep to accommodate a sufficient amount of soil substrate. The thickness of the layer under the bulbs must be at least 5 cm. This layer of soil is necessary for mechanical support of the plants. It also serves as a buffer for water and oxygen (prevents bulbs from suffocating when there is a lack of oxygen in conditions of excessive soil moisture). With a lack of water, the tips of the tulip petals turn pale, the buds fall off and the leaves turn yellow.
Another important factor is the bottom of the container: it must have slots. The presence of cracks in the bottom of the box reduces the volume of the root system and thereby reduces the risk of damage by trichoderma. An insufficient number of gaps can cause the bulbs to suffocate due to high soil moisture, especially when they are kept in growth chambers. If the slots are too wide (wider than 2 mm), the soil will spill out and may damage the bulb sprouts in the boxes below. Too many holes in the side walls of the drawers will dry out. When placing boxes in stacks in the growth chamber, they must be placed, leaving at least 7 cm between them, and even better - 10-11 cm. In addition, the boxes must be durable and easy to handle and stack.
Some farms still use wooden crates, but reusing them can lead to the spread of disease.
Strategies for growing bulbs in digging containers
There are two strategies for growing bulbs in plastic baskets for digging in:
Wintering in soil - the main option for bulbs in need of summer digging:
- the bulbs are either first planted in containers in the fall and immediately drop the containers into the soil, or they first dig in the pots, fill them with soil, and then plant the bulbs in them (thereby eliminating the need to carry heavy containers filled with earth);
- they are left to winter, like all tulips, in the garden, in the ground, in their natural environment, and in the spring they wait for flowering at typical times
Spring bulbous.
Digging for the winter - a method of digging for bulbs that do not winter and bloom in summer and autumn. Digging is carried out at the same time as for the plants planted one by one in the ground, stored in similar conditions.It is also a rarer and less productive method for tulips and co - overwintering indoors with varying flowering times complicates both care and cultivation. She assumes that the bulbs are planted in containers in the fall, but do not add containers to the soil until spring. They are left in the garden until the first frost, and then taken to a cold place for "dry wintering".
Thanks to storage indoors, it is possible to stimulate earlier flowering of the bulbs by raising the temperature and lighting and increasing the humidity, and therefore decorate the garden with flowering bulbs as soon as the snow melts and the temperatures rise. But it is not at all necessary to expel the plants. You can dig in containers anywhere where spring accents are lacking. But for the first time, be sure to dig in the spring bulbs in a plastic container in the garden for the winter, from the second year you can also use the forcing option.
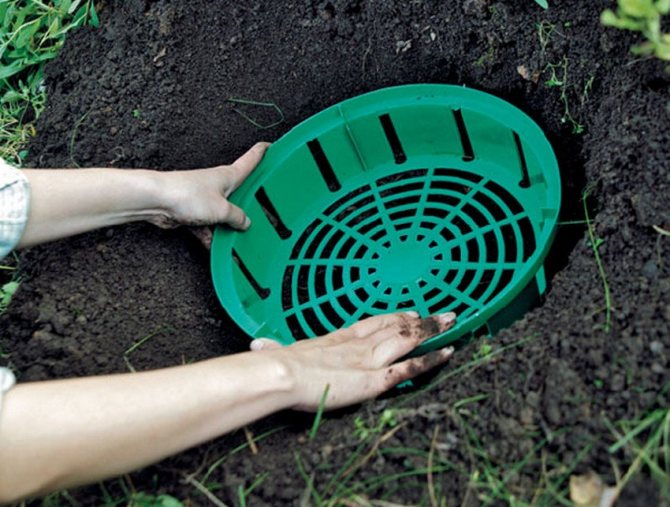
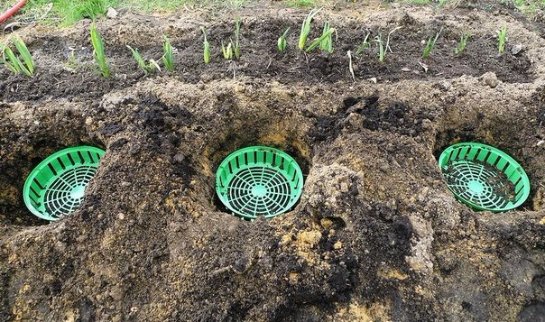
Dropping plastic containers with bulbs has its own rules:
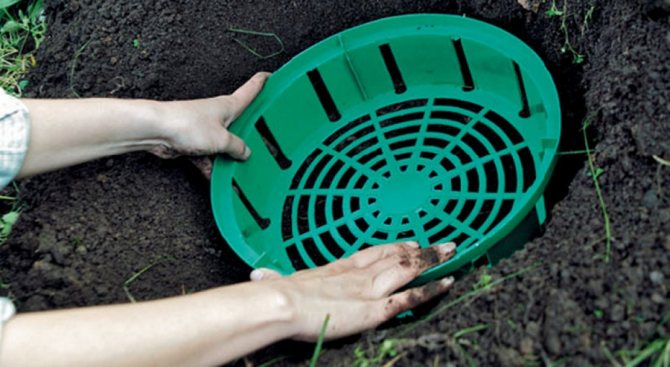
- the planting hole should correspond to the size of the pot, be only slightly deeper and wider;
- the plastic container is installed so that its edge is exactly at the level of the soil, and only then the soil is poured from the outside of the walls, without tamping it, but simply "dropping" the container.
Caring for plants is similar to classic planting in the ground.
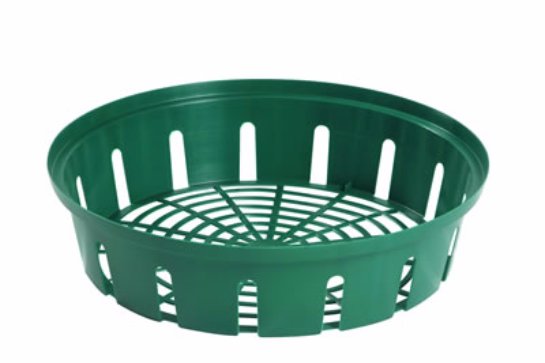
Planting tulips in baskets is widely practiced. This gadget can be found in almost any flower shop. They look like a slotted plastic container. The holes are located on the bottom and sometimes on the walls of the product. The diameter of such baskets is usually from 30 to 50 centimeters. There are many advantages to using this device. We will tell you about them, as well as how to plant tulips in baskets for bulbs, how to plant tulips in a pot at home, in this article.
Area use
In a greenhouse, boxes are usually placed on racks, made of different materials. Below are the dimensions of the stele; calculated based on the average height of the greenhouse worker.
| Side racks width | 60 | CM |
| Width of other racks | 120 | cm |
| Rack height | 65 | cm |
| Passage width | 45-50 | cm |
| Main aisle width, if any | 200 | cm |
In standard greenhouses, compliance with these dimensions will provide 70% efficiency in the use of the greenhouse area, the efficiency of the use of the area is achieved with a number of mobile shelves. The boxes can also be installed on the floor of the greenhouse. In this case, after cutting the flowers, the boxes will not be killed. and the next row of boxes is installed on top of them. When you get "racks". A well-known method for calculating the required number of boxes per greenhouse area of 500m2 (with 75% use of the greenhouse area:
Installation of boxes directly on the ground in the greenhouse
the total area of the greenhouse must be multiplied by 3 = 1500 boxes (cf. box size 60 x 40 cm, 4 boxes per 1 m2).
In large farms, mobile racks are widely used) On these 120 cm wide racks, 2 (2 x 60 cm) can be installed. Every 40 cm the rack can be moved apart, the length of the rack is usually 560 cm. The racks are placed throughout the greenhouse in such a way that in a certain place it is possible to install boxes on them, as well as remove boxes. Typically, the racks are placed along a fixed line from which you can cut on both sides. There are also 80 cm wide racks on which the drawers can be placed side by side, but in a different direction (2 x 40 cm). These racks are positioned in such a way that the color can only be cut from one side.
What are the advantages of this tulip planting method?
Bulb baskets come in handy because:
- Bulbs in baskets hibernate better. They are sheltered from frost better than if they were simply planted in the ground. In addition, the basket itself can also be insulated.
- After flowering, the bulbs are usually dug up for replanting in the fall. This allows you to get abundant and beautiful flowering in a year. But finding all the bulbs, especially the small ones, can be difficult.But if they are planted in a basket, then it will be enough to dig only it. Then you dump the soil and quickly find everything you were looking for.
- To dig up the bulbs without damaging them, you also need a tulip planting basket. It is worth buying it for these purposes. You don’t have to dig at random, which means you don’t accidentally chop up the bulbs with a shovel. It will be enough for you to soak the soil and turn the basket upside down. Then simply mash its contents with your hands and separate the tulip bulbs from it.
- Tulips planted in a basket will not grow beyond its limits, so the composition of the flower garden will not be disturbed.
- The basket protects tulips from rodents. It will not be so easy for mice to get to the bulbs and eat them.
- You can put good nutritious soil into the basket, if suddenly it is not of the best quality on the site. Thus, you and tulips will grow in good conditions, and do not spend money on filling the entire plot with new soil.
As you can see, there are many benefits to planting tulips in a basket. But there are also disadvantages. First, it is tightness. Tulips will grow anyway. Sooner or later, they will become cramped in the basket, which will negatively affect their flowering. To prevent this from happening, it is important to replant the bulbs on time. You can also buy larger baskets initially so that flowers can grow in them for as long as possible.
Storage in the winter of a container with bulbous crops
The bulbs are either first planted in containers in the fall and immediately put the containers in the soil, or first they dig in the pots, fill them with soil, and then plant the bulbs in them, in this case you will not have to carry heavy pots with soil in the fall.
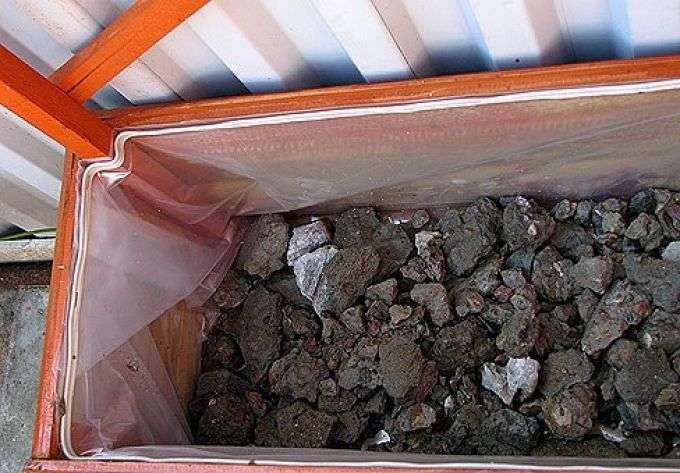
In the conditions of the middle lane and the Moscow region, it is better to dig a pot of bulbs into the ground to its full height, and cover it with lutrasil or spruce branches on top. In the spring, the pots are dug up, put out in a sunny place and watering begins.
If you want to get the coloratplants ahead of time, then simply leave the pot with planted bulbs outside until the first frost... After that, move the pots with bulbs for the winter to a cold dark room (a basement, an unheated greenhouse, a greenhouse or a loggia will do). With "dry wintering" bulbs can stimulate earlier flowering.
Planting tulips in bulb baskets
How to plant tulips in baskets is not difficult. To do this, follow some tips. You should start by choosing a basket of the appropriate size.
How to choose the right container
So, from the very beginning, it is worth choosing the right basket for bulbous flowers. Pay attention to its dimensions right away. They shouldn't be minimal if you have a lot of bulbs in stock. The larger the basket, the less often you will need to plant flowers. At the same time, take into account the peculiarities of the flower arrangement that will be present in your garden. You may find many small baskets useful.
Instead of a basket, you can take a regular mesh. It is placed in the ground, and flowers are planted on top. But the grid is not very comfortable to use. In addition, it is easily gnawed by mice. If it is not possible to purchase special baskets, then it is better to use boxes for vegetables. They are plastic and have pre-made holes. Their minus is bulkiness. But at the same time, planting tulips in boxes is not expensive. In some flower shops you can buy tulip planting boxes. They are more convenient to use.
Soil: what should it be?
Pick up the soil for planting tulips in a basket, as usual, for these flowers. The soil should be loose and sufficiently nutritious. It should let the water pass well without holding it too much.
It is good to buy ready-made soil, since there are definitely no pests in it and it is disinfected. Anything can be in the garden soil.
You can prepare a suitable soil for tulips yourself.To do this, take soil or a purchased substrate, and then add some enhancing ingredients to the base. You can mix:
All these components increase the looseness of the soil. It then does not retain water, which reduces the likelihood that the bulbs will rot. The availability of air promotes root formation, which speeds up the germination of the bulbs.
Humus adds nutrients to the soil. Tulips will need them during the period of active growth. Dry fertilizers can also be used.
What should you do before boarding?
Before planting, it is important to sort out the available planting material. Review the bulbs and be sure to reject those that are not healthy. Anything that makes you suspicious, send it to a separate container. After all, putrefactive infections and pests can quickly spread to all bulbs.
It is important to additionally disinfect everything that will be selected for planting. This will increase the persistence of the bulbs. If there was any infection on them, then disinfecting drugs will remove it. Then, while in the ground, the bulbs will no longer rot. For treatment, use preparations sold in flower shops. Phytosporin is effective and therefore popular.
Planting tulips in a basket: features and nuances
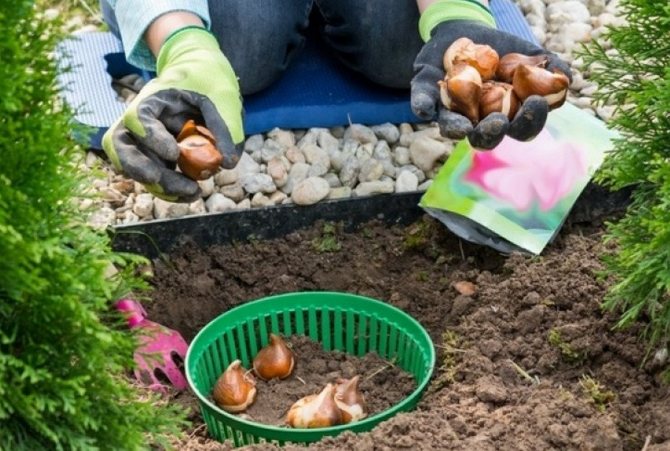
How to plant tulips in bulb baskets? To do this, dig a hole that matches the size of the container. Install the basket in it. Pour some sand at the bottom. This will eliminate water retention. After that, add some cooked earth, spread the bulbs and cover them.
You can plant the bulbs in the basket with balls. Put the largest ones on the bottom, and the smallest ones on top. Shoots will not appear at the same time. Thus, you will get a long blooming flower bed. In one place, first some, and then other tulips will bloom. Such experiments can be done with different plant varieties.
Planting tulips in boxes in the ground can be done according to a conceived plan. Distribute the containers as you like. Then plant flowers. Seeing the boxes, you can better navigate how the finished flower bed will look like.
Tulips planted in a basket are looked after in the same way as those that were planted in the traditional way.
Cleaning drawers
The causative agents of Rhizoctonia, Pythium and Olpidium (see Diseases in August, Chapter 17) causing gray bulb rot, root rot, and late summer diseases easily survive in forcing boxes. Therefore, used wooden boxes must be disinfected and plastic boxes thoroughly cleaned. In order not to harm the bulbs intended for forcing, the boxes must be disinfected long before the forcing begins and left to dry for several weeks. Plastic boxes are washed with a strong stream of water; the corners of the boxes must be washed especially thoroughly.
The risk associated with the survival of pathogens is much higher with hydroponic forcing tulips compared to distillation in potting mix. For more information on cleaning crates, see Chapter 10.
Planting tulips in pots
Can tulips be potted at home? Yes, they do that often. Thus, you can get a beautiful blooming flowerpot even during the cold season. Planting tulips in pots at home is usually practiced if:
- want to wait for winter flowering in indoor conditions;
- already sprouted bulbs have to be saved.
Planting tulips at home in a pot is carried out in late autumn - early winter. At the same time, planting tulips in pots in winter often becomes a necessity. If you have sprouted bulbs, and it is severe frost outside, then the only smart solution is to plant tulips in a pot.
How to plant tulips in a pot?
Whether it is possible to plant tulips in a pot at home, we have decided. Now it is worth describing how to plant tulip bulbs in a pot. To do this, follow these steps:
- prepare a container suitable for planting;
- mix soil base and additives to make the soil suitable;
- select the bulbs and disinfect them;
- plant flowers;
- locate the flowerpot in a cold place.
After that, it is important to properly care for the flowers. You can keep them all winter in this form in an unheated room or, by a certain date, put them out in the warmth so that the flowers can germinate and bloom.
See the video article on how to plant tulips in a pot at home.
Read also Lightly salted herring at home quickly
Heating
Greenhouses must be provided with a heating system to maintain a constant temperature.
For forcing tulips, heating with heating pipes (even heat distribution) is most suitable. It is also possible to use a warm air supply system for the greenhouse, but it is difficult to achieve an even distribution of warm air. Changes in temperature lead to uneven flowering and numerous losses. Temperature changes can be avoided by providing the greenhouse with a horizontal duct. Correct installation of heating elements (including heating air fan and gas burners) is essential. Improper installation or chimney leaks can release ethylene when carbon dioxide is burned. The presence of ethylene in the air leads to uneven growth, stunted growth and the formation of leaves with a thin surface waxy layer. Even a very low concentration of ethylene in the air (0.1 ppm) causes the buds to open very quickly. In this regard, the heating system must be carefully prepared for each distillation season.
Planting bulbs: 5 small tricks with great effect
When working with bulbous flowers, there are some simple rules and tricks that can help you save time and money.
1. Buying tulips, it is better to give preference to varieties of the following garden groups: Kaufman, Foster, Greig, species, Darwin hybrids, Simple early and Simple late, Triumph tulips
... Their bulbs can be left in the ground for 3-6 years. At the same time, a noticeable loss of decorativeness does not threaten them. But with the bulbs of tulip varieties of more fastidious groups (Fringed, Green-flowered, Lily-colored, Terry early, Terry late, Parrot, Rembrandt) you will have to tinker - they need to be dug out annually and kept until autumn planting at the appropriate temperature regime.
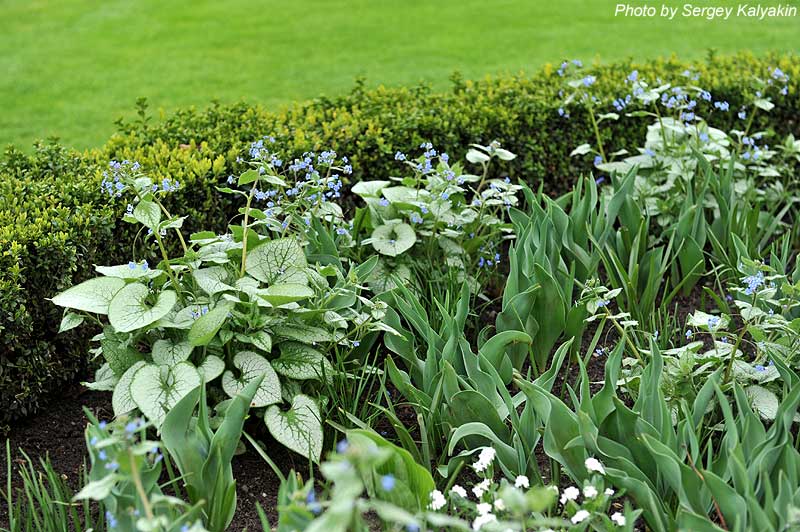
2. If you want to plant tulips, daffodils or hyacinths in flower beds with perennials, then it is better to give them a place in the second row
- in the foreground, unsightly fading bulbous plants will be impossible to disguise. Planting in plain sight is still possible, but it is more costly and time-consuming: you will have to dig up the bulbous ones immediately after flowering (and not as expected when the leaves wither) and put them in a dry, shady place, sprinkling with earth. Letniki are planted in their place in the flower garden. After the leaves and stems of the dug tulips, hyacinths, etc. finally wilted, the bulbs are stored, observing the appropriate temperature conditions for each species.
3. Moles are a very big problem for flower beds with bulbs. Standard plastic baskets for bulbs are not a hindrance to these animals. But the most common plastic containers
that remain from purchased plants -
excellent protection against moles
... It is convenient to plant single tulip bulbs in containers with a square section of 9x9 cm (and how convenient it is to transport them in boxes!), Several bulbs can be planted in containers with a diameter of 10 to 25 cm.This planting method, in addition to protection against moles, has other advantages ... First, it is very easy to follow agricultural practices (annual digging). Secondly, we plant it in fresh soil every year. Thirdly, without any problems, you can plant anywhere (see paragraph 3).

four.If you want to surprise everyone with the variety of bulbous plants, the brightness and duration of flowering, and at the same time save the landing area, you can
try landing so called
lasagna method
, that is, layer by layer. Different types of bulbs are planted at different depths. The lower layer is assigned to late-flowering tulip varieties, the upper layer - to early-flowering small-bulbous plants, the rest are planted on the middle layer.
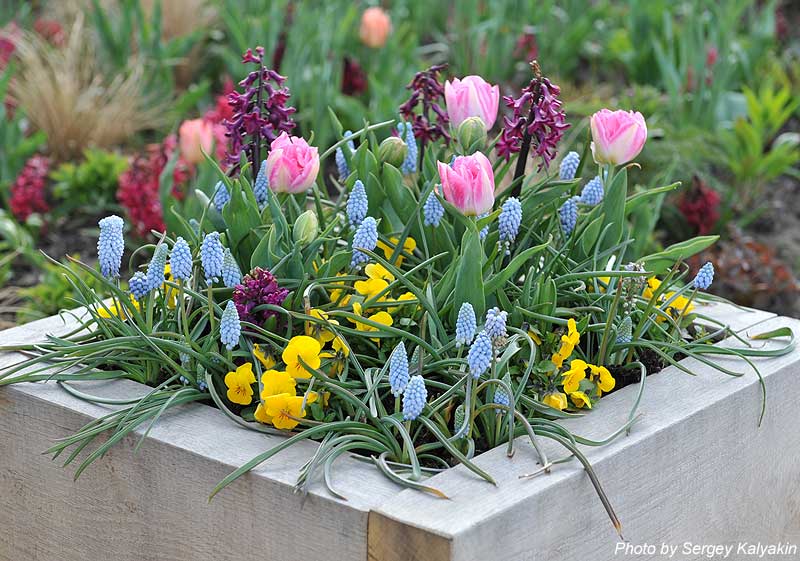
5. Planting bulbs in containers
will allow you to create a bright spring flash of color not only in flower beds, but also on cobbled areas or a veranda. And when tulips, daffodils, hyacinths and other plants have faded, the pots are simply rearranged in the economic zone and wait for the foliage to completely dry out in order to dig up the bulbs for storage. The bulbs are usually planted in plastic pots, which are buried in the ground for the winter in central Russia, and in the spring they are removed and inserted into a decorative container matched to the diameter.
I decided to experiment and combine the fourth and fifth tricks))) And I removed each step of my experiment. For planting, I have chosen four types of spring-flowering bulbs.
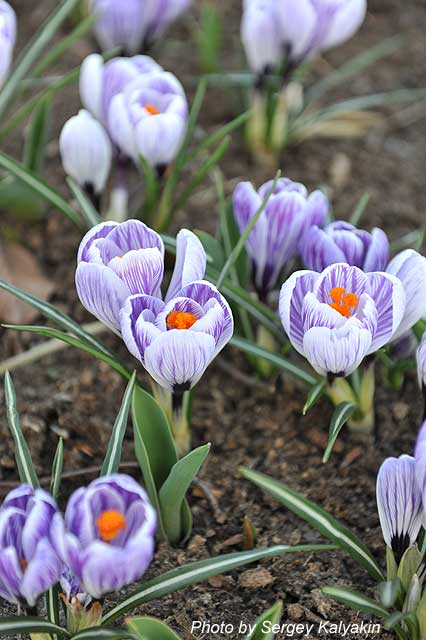
Crocus Pickwick
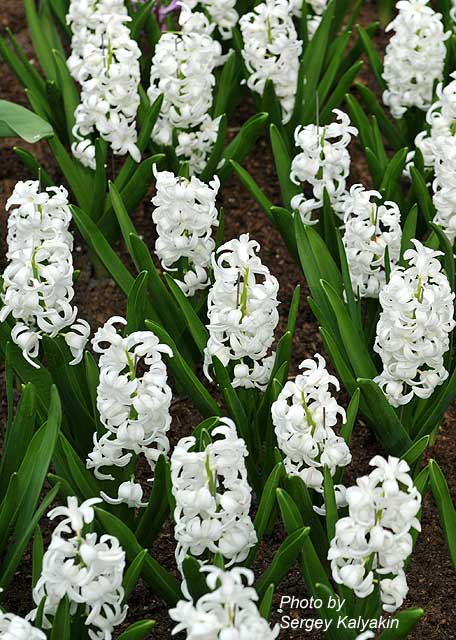
Hyacinth (Hyacinthus) Carnegie
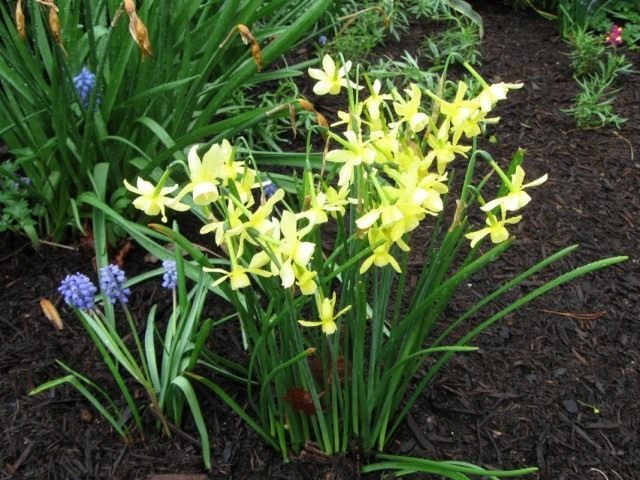
Narcissus Golden Harvest

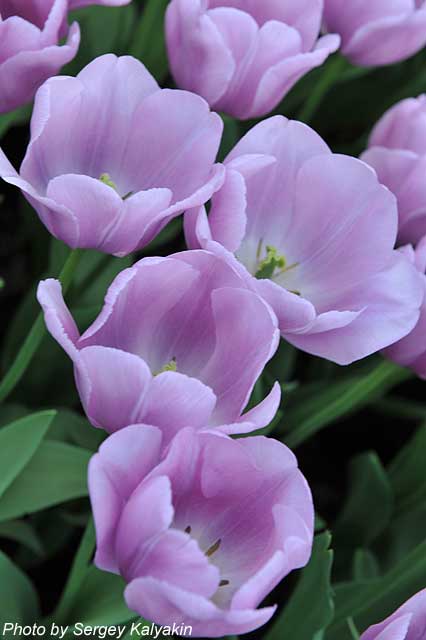
Tulip (Tulipa) Alibi
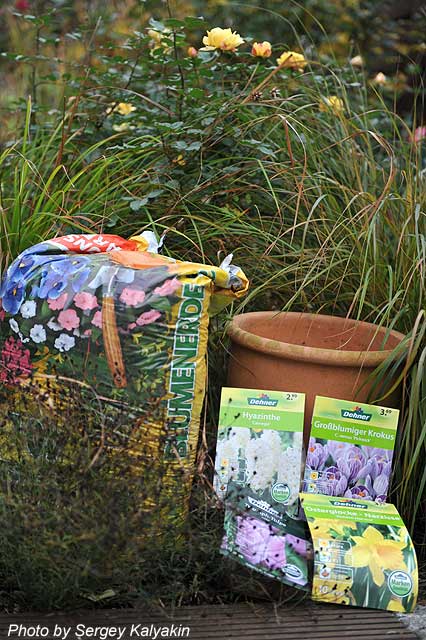
Well, as I chose. ran into the nearest store and grabbed what came to hand. This was a big mistake, because when buying, you should always inspect the bulbs for rot and mold. I got sick tulips. In an amicable way, it would be worth throwing them away or at least etching with Maxim before planting. But I don't have it, I don't want to run to the store again, but I want to conduct an experiment. Therefore, at the same time, we will check what will grow, and the bulbs will still be discarded after flowering.
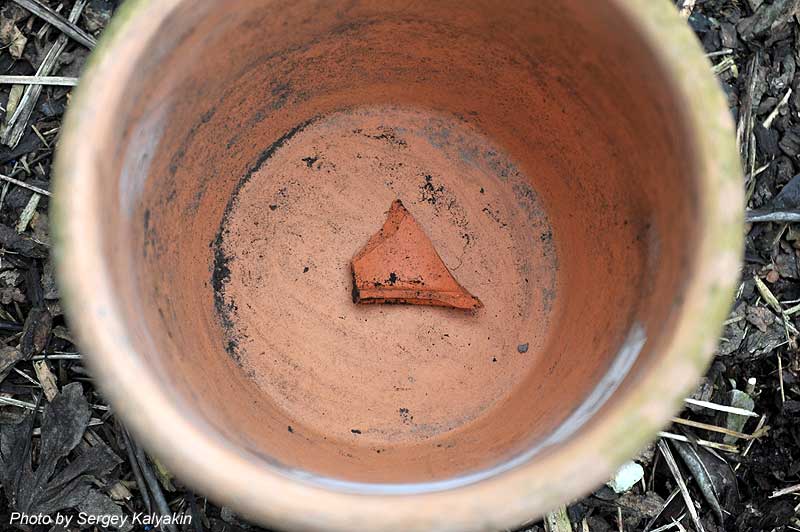
So, you need a roomy pot. In my case, it is terracotta, and in conditions near Moscow, it is better to have a large thick-walled plastic one that can be dug into the ground for the winter without fear of damage. Also, soil for planting flowers and, in fact, the bulbs themselves.
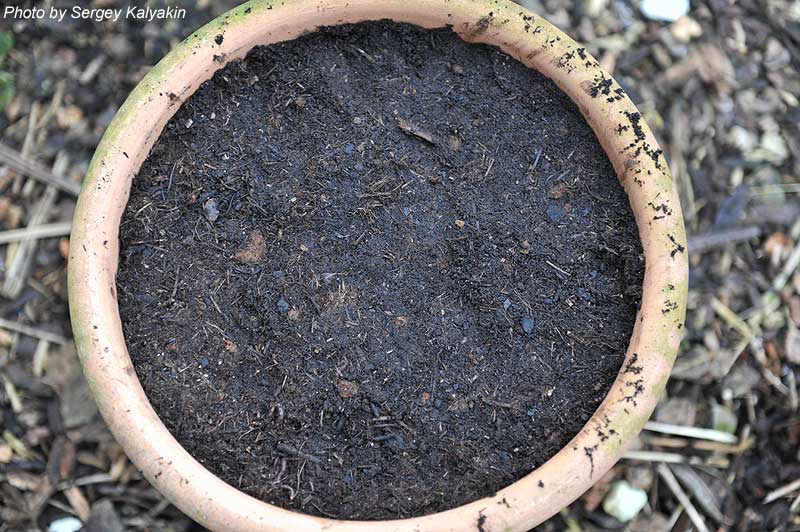
We close the drainage hole (it must be in the pot, or even better several) with a shard.
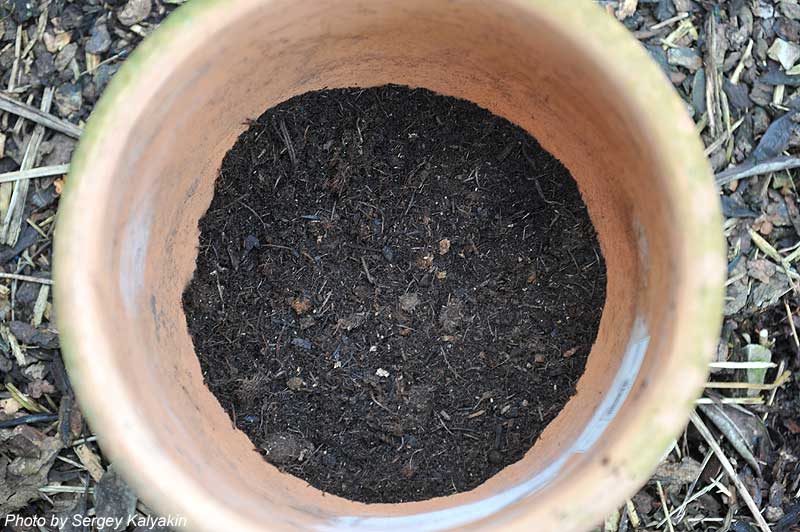
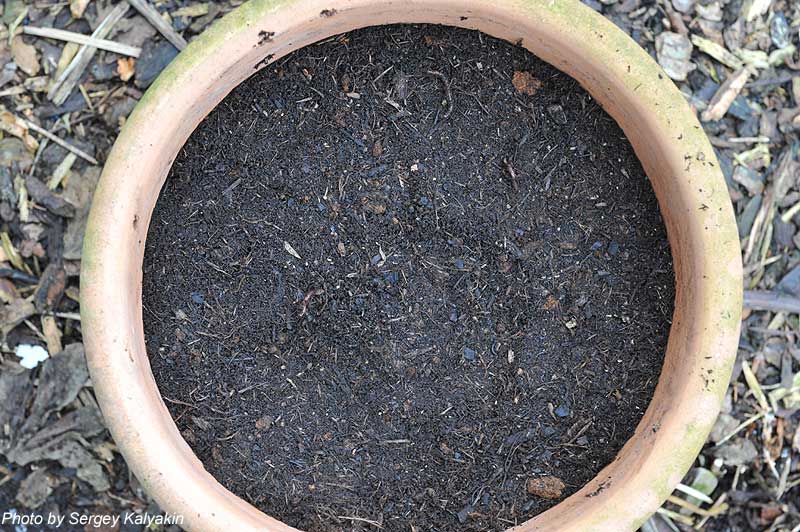
We fill the sand with a layer about 5 cm thick and the same layer of soil. We seal.
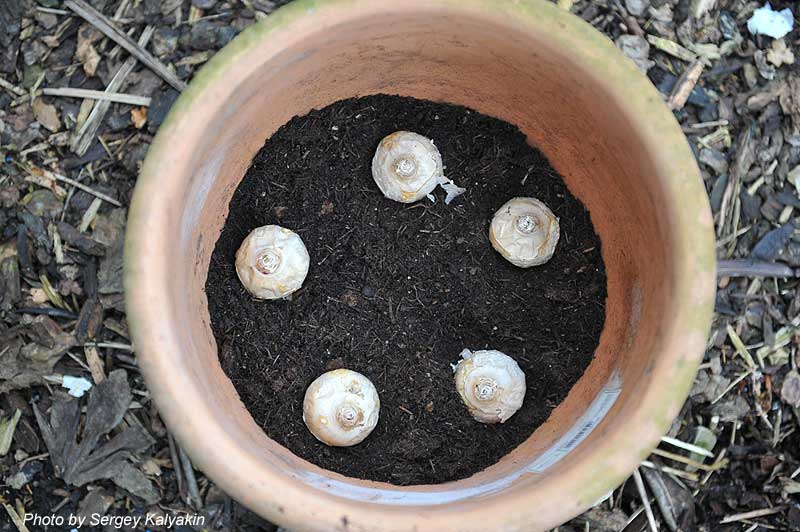
Arrange the hyacinth bulbs evenly.
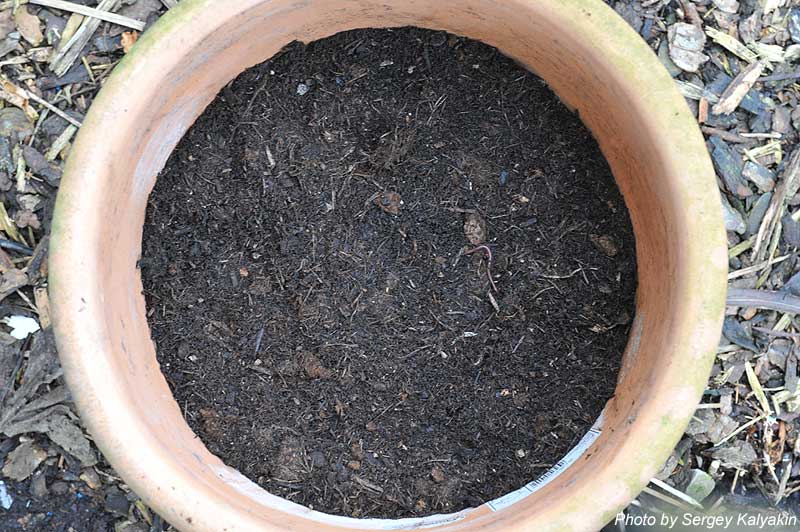
We fill them with soil and compact.
We place the tulip bulbs.
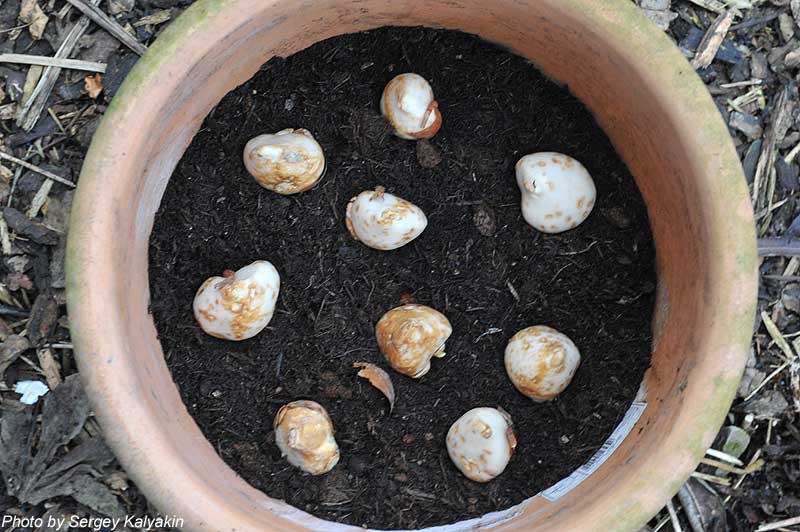
We fill in the soil again and compact it.
Arrange the daffodil bulbs evenly.
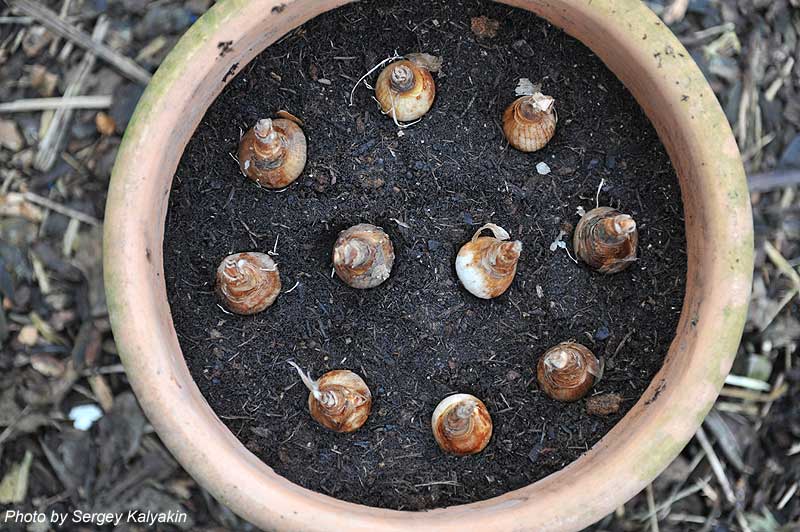
We fill in soil and compact.
The last are the smallest and most numerous crocus corms.
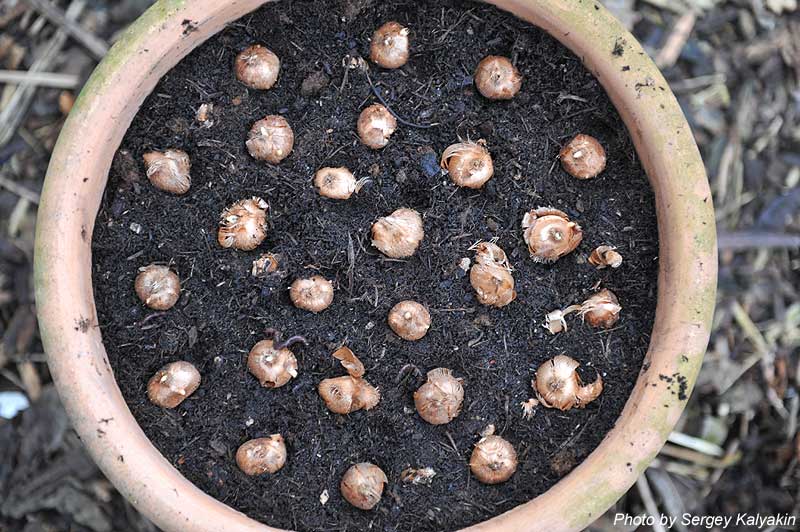
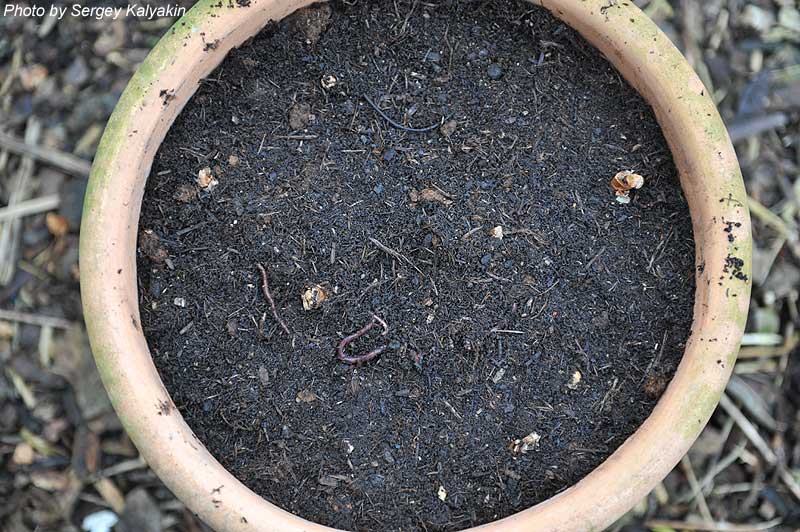
We fill them with soil and compact. As a result, the soil should not reach the edge of the pot by 1-2 cm.
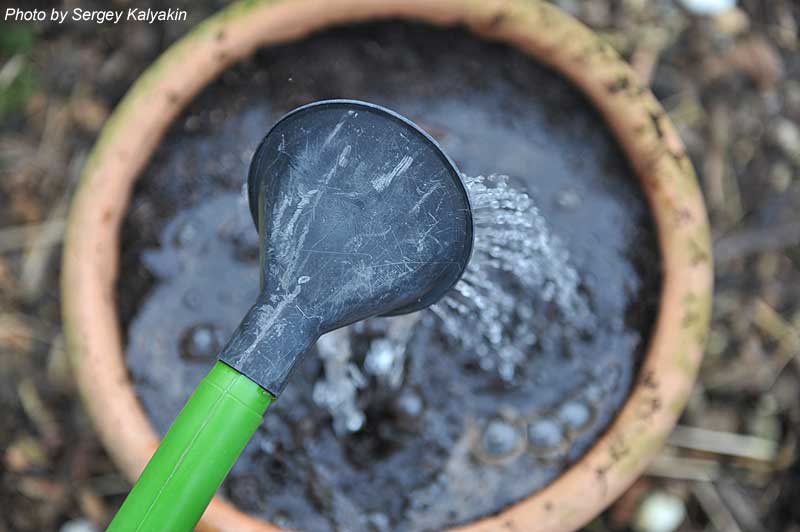
We water our pot well.
We put markers so as not to forget what we put in it. And we are waiting for spring)))
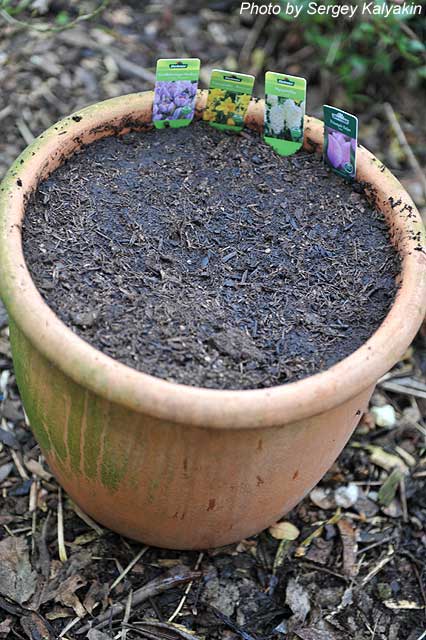
In conditions near Moscow, of course, the pot will have to be dug into the ground to its full height, covered with an oak leaf and film, and dug up early in the spring, put in a sunny place and do not forget to water.
In the spring I will show you what came of it. At the same time, we will analyze the errors.
In the meantime, I suggest you make bets on what will come of it and will anything at all work out))) What do you think?
When to plant daffodils
Daffodils belong to spring flowers, because they are one of the first to sprout in flower beds and begin to delight the owners with flowering while the rest of the plants are still sleeping. However, such an early start of the growing season does not mean at all that it is necessary to plant the bulbs in the ground only in spring. In fact, autumn is considered the best time to plant, although spring cultivation can be practiced under certain conditions.
In this article, we will look at when you can plant daffodils in open ground, when it is better to do it, and what planting rules should be followed so that the bulbs quickly take root in a new place and begin to delight you with abundant flowering.
When to plant daffodils
The landing time is primarily determined by the climate of your residence.For example, in the middle lane, the procedure is carried out in late summer or early autumn, and in warm climates, the bulbs can be placed in the ground in early spring (Figure 1).
However, it should be borne in mind that during spring planting, the bulbs must undergo cold treatment, for example, in the refrigerator. Under natural conditions, the planting material is processed naturally in the soil frozen in winter, but if you did not manage to equip the garden in the fall, you can easily reproduce this procedure at home by placing the planting material in an ordinary refrigerator.
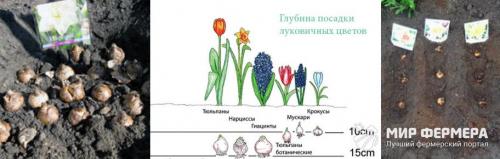
Figure 1. The basic rule is to observe the optimum planting depth of the bulbs
Since autumn and spring planting has many differences, we will consider them in more detail, and also pay attention to the correct preparation of the planting material.
Selection of bulbs for planting
For planting for distillation, only very large specimens, dense, heavy and, most importantly, absolutely healthy
.
The bulbs must be 10/11 (first parsed) or 12/12 + (extra size), the numbers on the package indicate a circumference of 10-12 mm, the diameter is 35-40 mm.
Heads must be heavy in weight
, their weight is not allowed less than 25 grams (lower weight indicates that there is no flower bud in it). The larger the bulb, the more powerful the plant will be and the larger the flower.
Diseases and pests
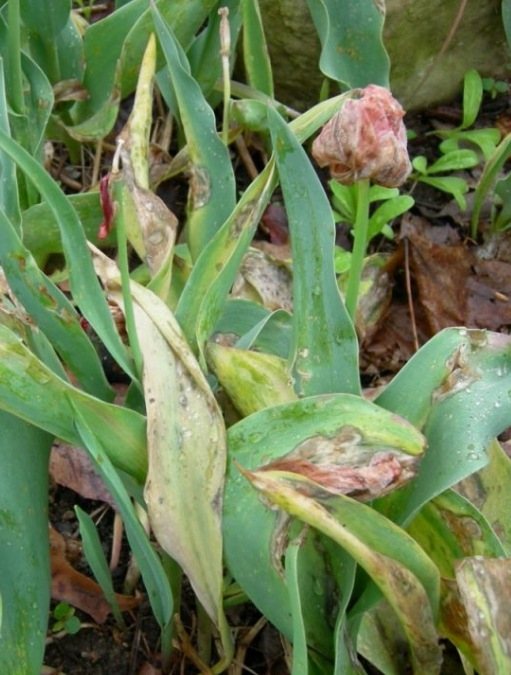
| Gray rot Symptoms:
Treatment:
|
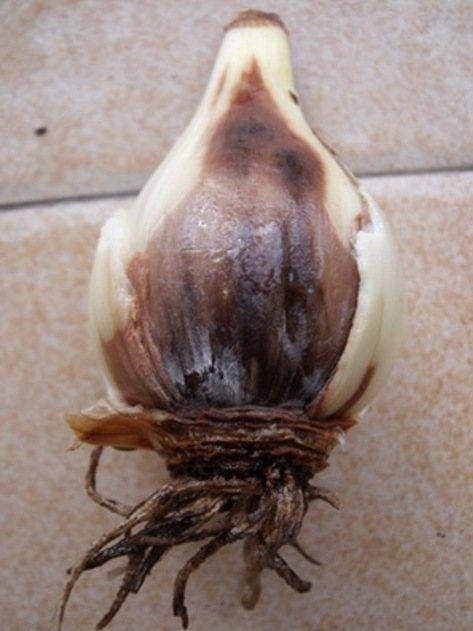
| Fusarium Symptoms:
Treatment:
|
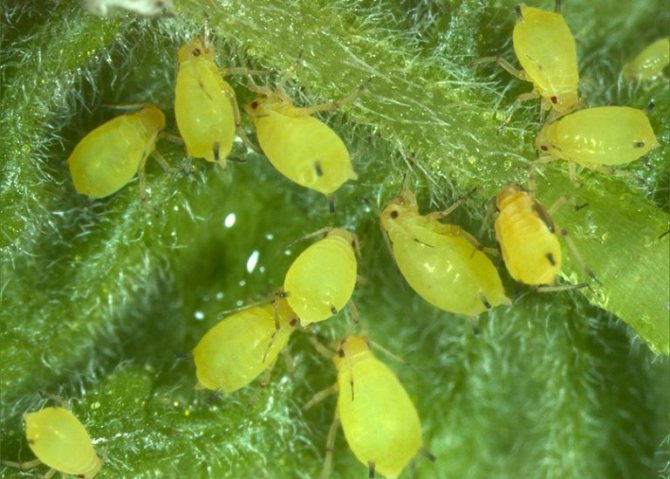
| Greenhouse aphid Symptoms:
Treatment:
|
Bulbous garden
It is a large arrangement (usually at least 3 square meters), in which flowers are complemented by stones, pebbles, gravel or beautiful or roots. It is better to choose the form for the composition not geometric, but landscape. Plant bulbs within the "garden" in clumps, alternating different species and varieties.
And perennial onions (edible:,) can also be introduced into the garden. Their greenery goes well with blooming tulips, daffodils, hazel grouses, etc. After all, perennial onions are also bulbous, and they bloom beautifully too.
The bulbous garden involves the use of decorations. It can be supplemented with terracotta or chamotte figurines and even ceramic tiles dug into the ground.
About landing rules
Novice flower growers ask themselves the question: "How to plant bulbs in baskets?" Everything is much simpler than it seems at first glance.
First, prepare the land necessary for planting. The garden soil is mixed with peat and filled with mineral fertilizers. Flower bulbs are treated in a solution of the drug "Maxim".
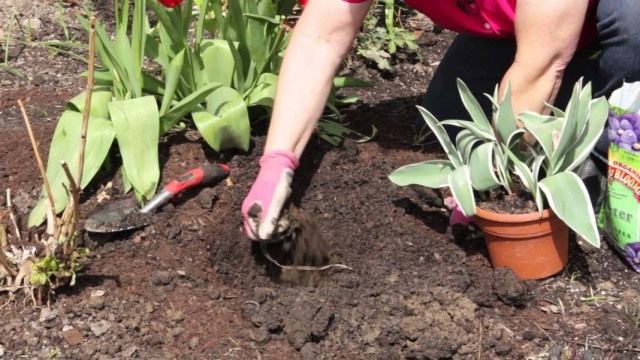
On the garden bed, where it is supposed to break the flower garden, they carry out a continuous digging of the earth. Small pits are prepared, the size corresponding to the diameter of the container. A layer of sand 5 cm thick is poured onto the bottom of them. A basket is placed on top. Sand is also added to it. Then the planting material is laid out, covered with prepared earth.
Planting bulbs in baskets is carried out in several ways.If it is necessary to create curtains in a flower bed of the same color, then only one variety is planted in each basket.
Mixborders have a variety of color compositions. Here you can make a combination of large and small-bulbous flowers. The following condition must be observed: the larger the planting material, the deeper it is planted. Therefore, large ones are laid out at the bottom of the container, medium-sized in the middle, small-bulbous plants in the upper layer. All layers are covered with a layer of earth.
In order not to lose the landing site in the spring, it is necessary to mark it with flags or markers.
These baskets can be used to decorate an existing lawn without damaging it. The sod is cut to fit the size of the planting container. Carefully remove the top layer, make a small hole. They put a container with bulbs, return the earth. Lay a layer of sod on top. Sprinkle with water. After the end of flowering in spring, the basket is removed, the sod is returned to its place.
Growing tulips from seeds
Tulips can be grown not only from ready-made bulbs, but also from seeds. This method is quite complicated, the process is lengthy, it is mainly used by breeders:
- In autumn, in September-October, seeds are sown in a greenhouse in loose nutrient soil.
- Seeds are sown densely.
- In spring, a plant grows with thin leaves in the form of a tube and with one root.
- During the summer, the plant develops, several roots and a bulb with roots appear.
- In the following spring, the bulb already gives several leaves and after 3 years it can be dug up in the summer, when the leaves turn yellow and wither.
- The onion is peeled, dried and stored.
- From September to December, the bulb can be planted in a flower pot.
Fence border
The tallest bulbous ones can be used to decorate and "demolish" a continuous fence. To do this, they must be planted in a row along this very fence. I recommend using hazel grouses and giant onions. But tall tulips will also come in handy.
And also all bulbous ones go well with forging. So give them such a background! You can, for example, plant a group of tulips against a wrought-iron background, and even add this group with a wrought-iron decoration. In addition, bulbous flowers look stylish next to graceful ones., As a last resort. You can also use blue spruce and mountain pine. Plant it not in the very center of the module, but somewhat with a shift, asymmetrically, and create a background for it with the help of a "carpet" planting of bulbs.
Output
Tulips decorate the site only in spring, and then the flowerbed looks unsightly due to fading greenery. Planting bulbous plants in a special basket will help solve this problem: immediately after flowering, the container can be moved to another place, and the vacated area can be occupied with other decorative crops. This method is indispensable if you want to use different shapes in the design of the flower garden: the bulbs will not "spread" beyond the boundaries of the container, and the outline of the picture will be clear.
This method is perfect for the elderly and disabled: young relatives will move the containers indoors, and all the work on planting and harvesting the bulbs can be done on a comfortable table. It becomes much easier to care for flowers, they do not need weeding or loosening. If the site is located on infertile soils, you do not need to enrich the entire flower garden with humus and compost, it is enough to fill the basket with good soil. Working with flowers should not bring fatigue, but pleasure. Bulb baskets will make plant care as easy as possible, and you will be happy to admire the beautiful flower arrangements.
No comments yet
Bulbous plants create bright and beautiful compositions on the flower bed. They bloom in early spring when other perennials are just starting to grow. They can be planted in open beds and in special baskets.
How to grow tulips from seeds
Reproduction by seeds is a long, painstaking process; as a rule, breeders use this method. Growing from seeds from China is an exciting activity, usually the seeds have good germination. The cost of seeds is from 5 to 14 rubles, in a package of 10 - 20 pcs. seeds. The reviews are the most favorable. Planting material arrives in a short time, images of a flower are attached to the seeds, its type is indicated, packages with seeds are numbered.
- In autumn - from September to October, it is necessary to sow seeds in a greenhouse, the soil should be taken loose, nutritious;
- Seeds are sown thickly;
- With the onset of spring, narrow leaves that look like a single tube will sprout. Such a plant has one root;
- During the summer, the plant develops slowly and forms a small bulb with several roots;
- The next spring, such a bulb will give a full-fledged large leaf. The plant develops gradually, after three years, the bulbs are dug up in the summer (when the leaves turn yellow);
- Then they are dried, then from September to December they are planted.
Analogs
Plastic pots
In principle, containers for bulbous plants can be easily purchased from specialized stores. However, the parameters are not suitable for someone, someone does not want to incur additional costs. In any case, you can make containers for planting yourself and use materials at hand for this.
When planting in pots, the bulbs should be purchased in September and planted in October. They are planted in pots using the "sandwich" method - in several layers. The containers will look great for months. Planting is seasonal; at the end of spring, the containers will be empty again.
First, you should prepare the ground. It shouldn't be heavy. Gravel and sand can lighten it. There should be a drainage layer at the bottom of the pot. After planting, irrigation without fertilization is required.
Having planted the pots with bulbous, they should be covered for the winter. A suitable place would be a garage, a greenhouse. The soil should be controlled - it should not be waterlogged and overdried. When sprouts up to 10 cm appear, then the pots need to be located in a bright place.
Plastic bottles
You can also plant in plastic bottles. Great for small quantities of bulbs. If the walls are suddenly damaged, the bottles are easy to replace. But there is one caveat: the plastic is thin and it will not be easy to make holes without damaging the container. In addition, it is unlikely to serve as an obstacle for rodents.
You can use the vegetable storage box to plant bulbous plants. But they need to be buried deep so that the edges do not stick out. You can take some smaller container. Some creative gardeners even try fridge grates. They are iron and do not allow the bulbs to go deep.
Grids
Some gardeners use a variety of nets and mesh bags. The advantage of this material is that it is elastic and difficult to split or tear. If you decide to plant tulips in mesh bags, then you should first dig a hole, then line it with mesh. Place the bulbous flowers on top and tie a net.
When covering with earth, leave a small piece of mesh on the surface to mark the spot. When you need to dig up, then gently pull the tail and remove the bag from the ground without damaging the bulbs. In this form, you can store the planting material, as well as treat it with a fungicide.
In any hand-made device, you can find both positive and negative sides. Therefore, everyone will choose the option that suits him.
New technologies are coming to summer cottages, making it easier for owners to care for plants. Why dig up the ground every summer looking for tulip bulbs when they can be planted in baskets and containers? The flowers have withered and no longer decorate the flower bed, and it is too early to dig the underground part, it is not yet ripe for development in the next season.The question is solved simply: take out the basket, and in its place the planting of seedlings of summer flowers begins. You can dig a container with rhizomes in an inconspicuous corner of the site, the tubers will continue to develop and will not notice the transplant.
Site design
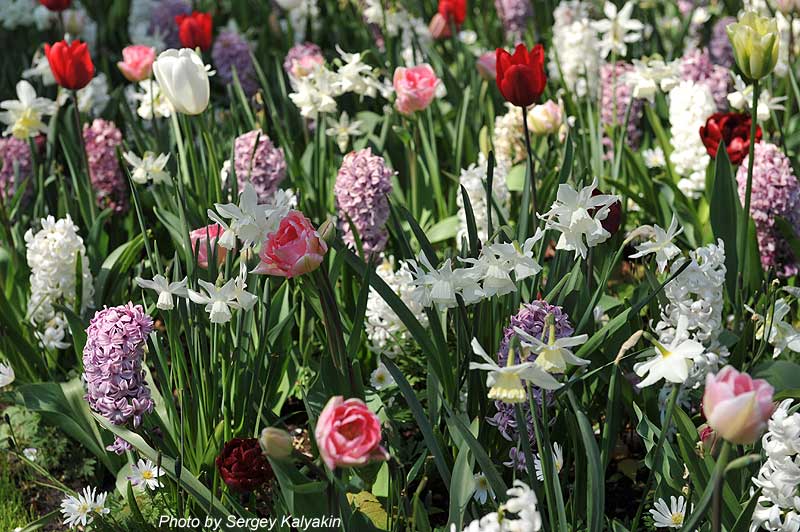
In the baskets, you can grow not only tulips, but also many other bulbous crops. Crocuses, daffodils, snowdrops usually bloom in early spring, and in summer they only spread the tubers throughout the flower bed. If you want to create an artistic mess at the dacha, there will be nothing wrong if tulips of different colors are mixed, lilies of the valley and hyacinths will appear among the irises. Flowers that do not need to be dug out will, in a few years, go beyond the space allotted to them and begin to spread to foreign territories.
You can do it differently. Planting bulbs of different types in separate baskets will allow you to create a beautiful spring composition in a flower garden. When flowering stops, the container can be moved to another corner of the garden, the bulbs will be protected from rodents all summer, and new plants will appear on the flower bed. Instead of an ornament of tulips and crocuses, a clearing of marigolds, snapdragons and calendula forms in front of the house.
Baskets with the underground part of the plants, which do not need to be replanted every year, can be left in the ground until autumn. Tulip bulbs must be removed from the ground in summer and planted again in August. Before freezing, return all containers to the flower garden, bury them according to a well-thought-out scheme and leave them for the winter. In the spring, early flowers will open up again in the flower bed.