Growing gloxinia from seeds at home
Gloxinia or Sinningia speciosa are very popular with flower growers. Most often, this plant is propagated vegetatively, but there is another way - to grow gloxinia from seeds at home.
Although it will take a little more effort, the result will live up to expectations. This is the only way a florist can:
- become the owner of self-created hybrids;
- to see on your windowsill the flowering of rare varietal specimens that local lovers of indoor plants do not have.
Unfortunately, not everyone has the patience and perseverance to get adult flowering plants from gloxinia seeds. Sometimes annoying mistakes in germination and care interfere with success. How to avoid them and where to start if you want to propagate this indoor culture using seeds? First you need to take care of the seed.
Preparation
To successfully grow gloxinia from a leaf, you need to properly prepare not only the planting material, but also the substrate, pots, and garden tools.
Pot selection
Gloxinia is planted in small containers. The root system of this plant is not massive, it does not need deep volumetric pots. The flower consumes all water and nutrients from the upper layers of the soil.
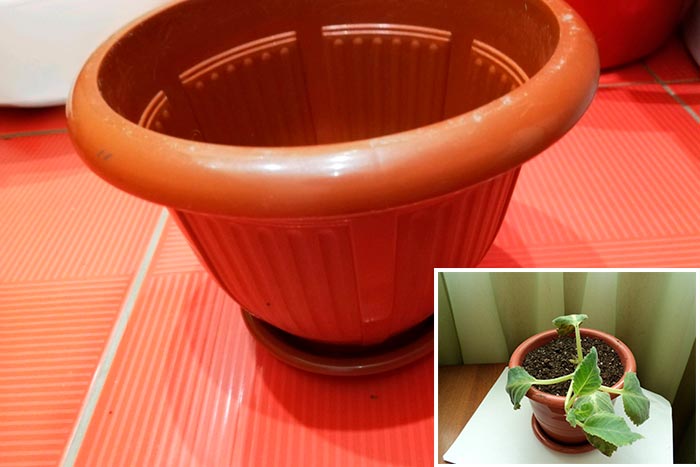
The rooting container should be wide. The sizes depend on which part of the plant is being used. If this is a stalk, then the diameter of the pot can be no more than 5–7 cm. When rooting a whole leaf, you need to take a container 2–3 cm wider.
A clay, ceramic, or regular plastic pot will work. At the bottom, there must be small drainage holes through which excess moisture will drain during watering and spraying.
Soil selection
Gloxinia belongs to decorative flowering plants, so the soil for it should be loose, nutritious, moisture and air permeable. The acidity is low - within 6–6.5 pH. Ready-made storey soil, which already contains the necessary nutrients, is optimal. You can use potting soil for violets, azaleas, and other indoor flowers.
You can plant cuttings or leaves in your own soil. It is mixed from sod land with the addition of peat and a small amount of washed river sand (1: 1: 0.5). It is not recommended to take peat with a high level of acidity, otherwise the plant will not bloom and will develop poorly. When preparing the soil mixture, all components are washed, ignited or frozen for disinfection.
For the drainage layer, the height of which should be at least 1 cm, take perlite, expanded clay, finely crushed pottery shards or pebbles.

How to get gloxinia seeds at home?
If the seeds of varietal or hybrid plants are purchased at the store, they do not need special preparation, and they are completely ready for planting in the ground. But when the goal of the grower is to get his own copyright hybrids, you will have to go all the way: from pollination to collecting mature seeds of gloxinia.
After the pollen from one flower is transferred to the pistil of another, after a few days the corolla withers, and the future seed capsule remains on the peduncle.The development and maturation of seeds, depending on the variety and conditions of maintenance, takes from 6 to 9 weeks.
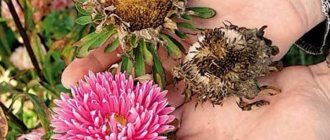
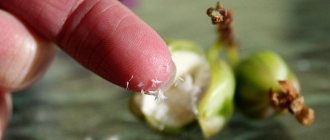
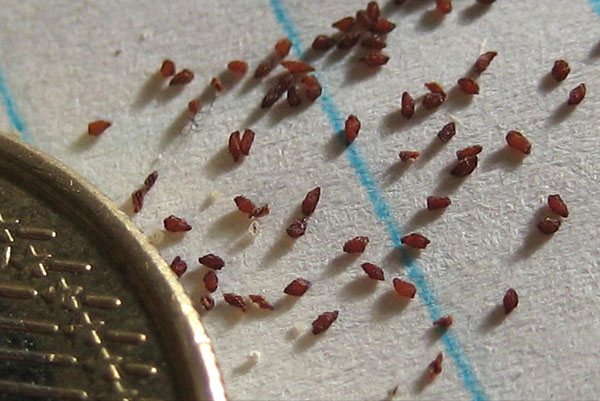
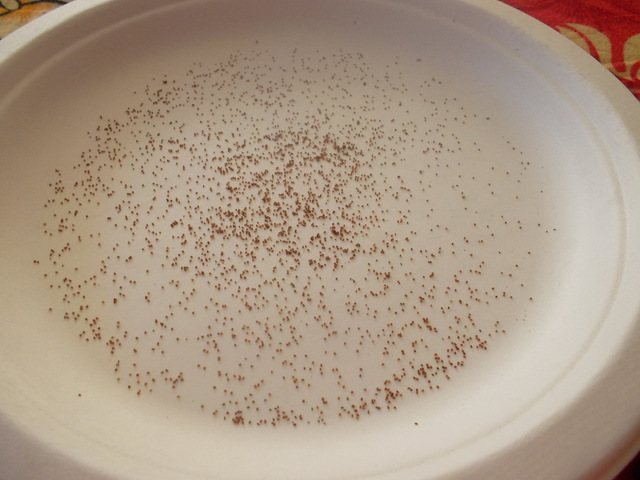
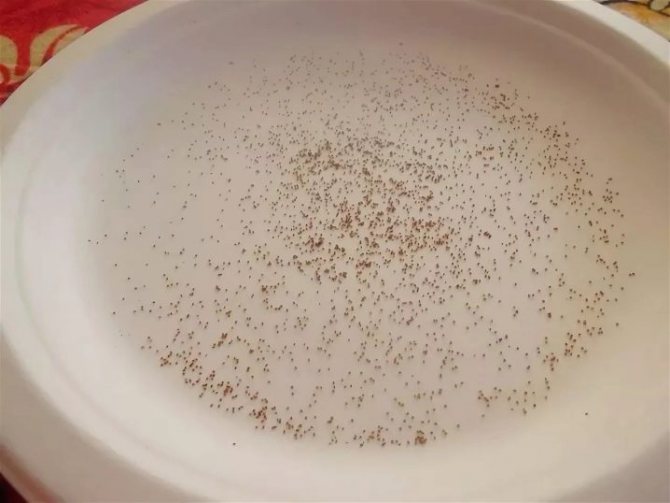
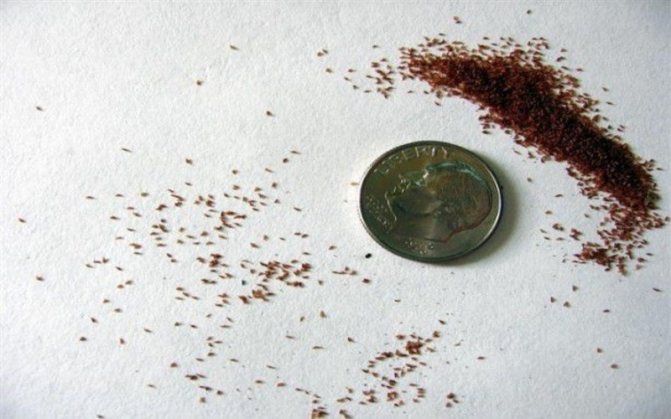
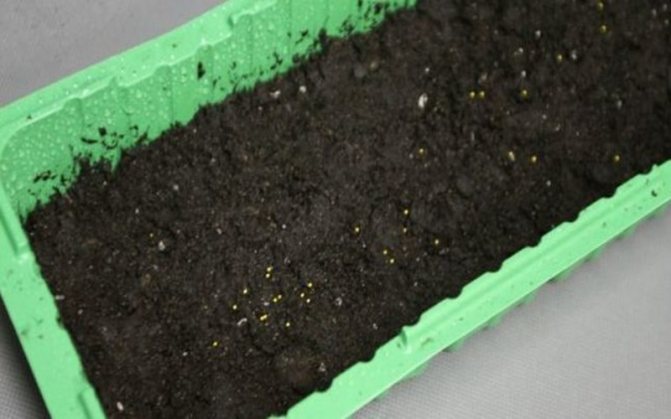
The seeds are very small. Therefore, before planting gloxinia with seeds, you need to try to collect them. As soon as signs of opening of the capsule appear, it is cut off and carefully transferred to a separate dry container. This will make it easier to collect the brown, pointed-oval seeds needed for planting.
When will the sprouts appear
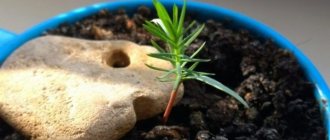
When gloxinia is propagated by a leaf, the rooting process proceeds at a rapid pace if optimal greenhouse conditions have been created. To speed up the process of emergence of roots, you can add special growth stimulants to the water where the leaf is. They are safe for the plant, strengthen its immunity and allow the root system to actively develop.
Roots appear no earlier than 2 weeks later. When the roots reach a length of at least 1 cm, you can plant them in the ground.
How to plant gloxinia seeds?
Sowing is carried out on the surface of a moist loose substrate without embedding into the soil. At this stage, there is no need to make a special mixture, it is enough to add a little vermiculite and crushed charcoal to the ready-made universal peat-based soil. Gloxinia seedlings feel good in small peat tablets.
The soil for gloxinia grown from seeds at home must be sterilized using a microwave, oven or freezer. In the latter case, it takes at least 1-2 days to get rid of pathogens and pests.
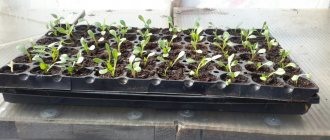
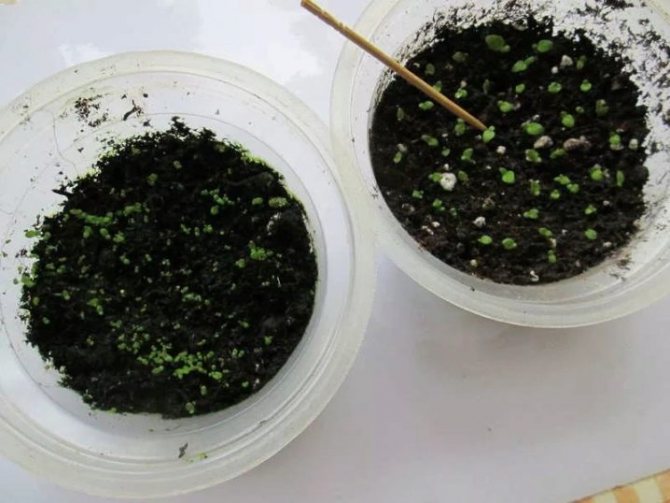
Getting gloxinia seedlings from seeds at home can be carried out in shallow containers. During the growth, the senses dive several times, so a layer of soil no more than 3 cm is sufficient for sowing
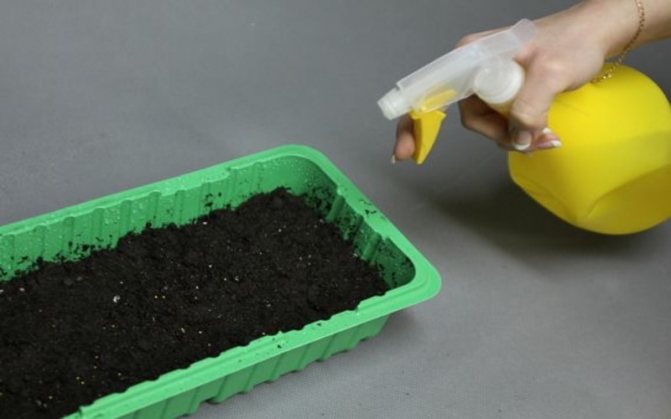
When the seeds are evenly distributed over the surface of the substrate, it is additionally sprayed with a spray gun, taking care not to wash out the small seed material. Then the container is tightly covered with a film to prevent moisture evaporation, and placed in a warm, bright place for germination.
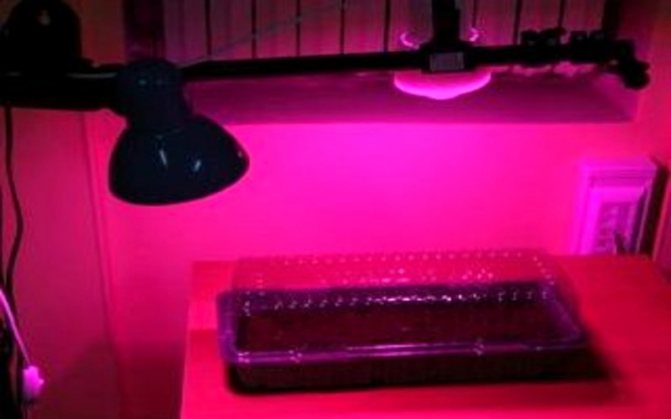
To facilitate growing from seeds and caring for gloxinia in autumn and winter, when development is hampered by a lack of light, you need to take care of additional lighting in the room greenhouse in advance.
Daylight hours, regardless of the season, should be at least 12-14 hours, and the temperature should be 20-24 ° C.
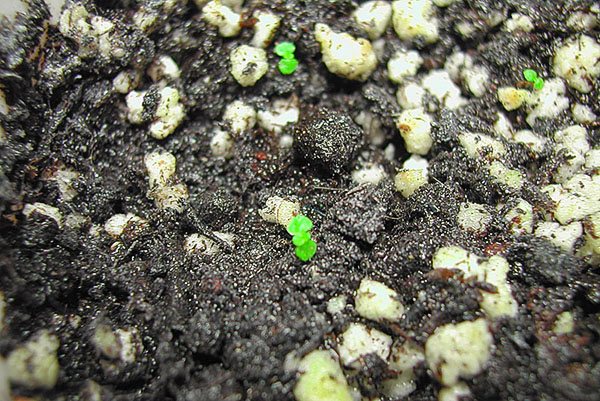
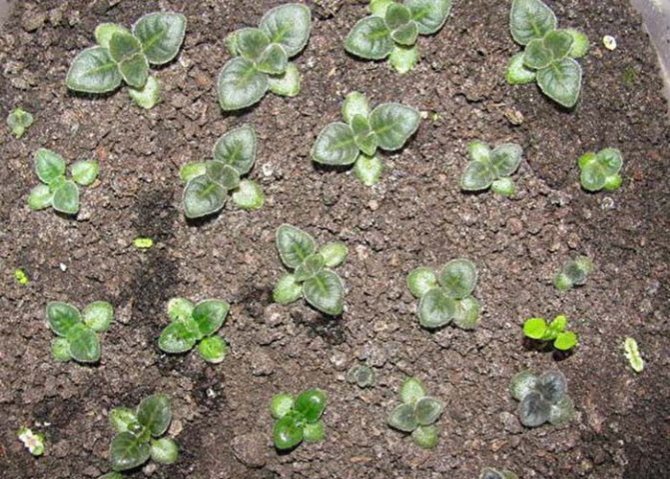
After 7-10 days, tiny green shoots appear on the surface of the substrate, and later gloxinia from seeds at home need watering and several picks.
Reproduction of gloxinia leaf
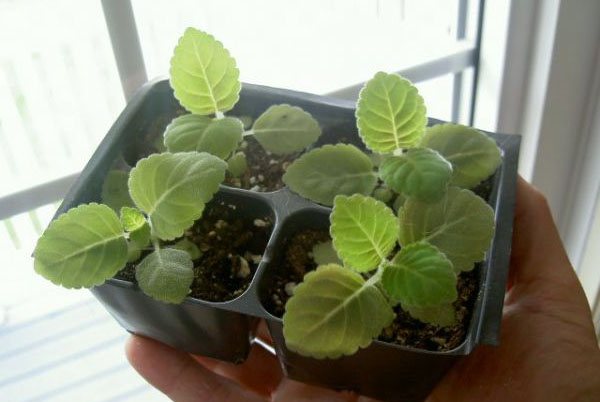
Reproduction of gloxinia at home using its leaves is the most common and reliable method (vegetative propagation). Healthy adult Gloxinia has many large, succulent leaves. But for rooting, we choose a young leaf with a short stump, no more than 2 - 3 cm. If the stalk is too long, it must be cut with a clean blade to a length of 3 cm. Reproduction by a leaf is best done in late spring or summer.
Rooting in the substrate
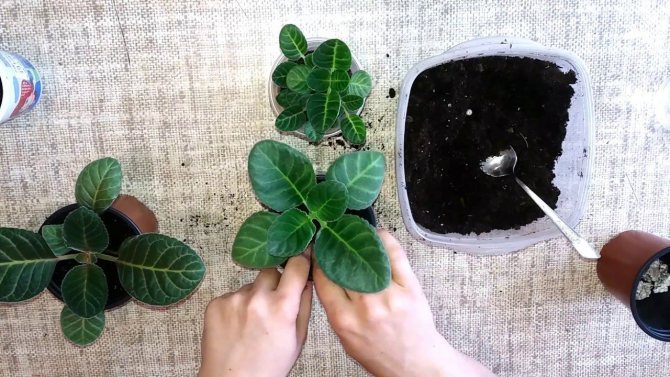
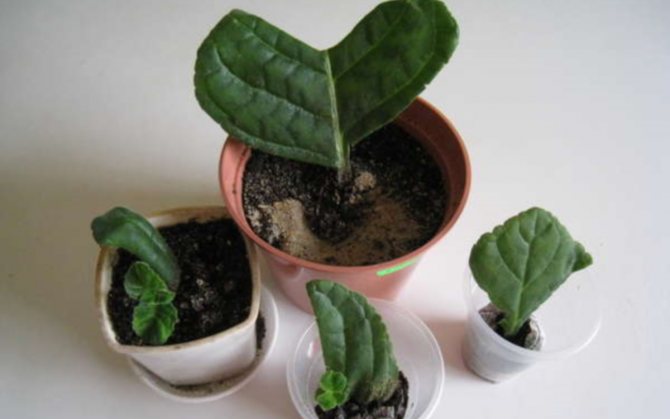
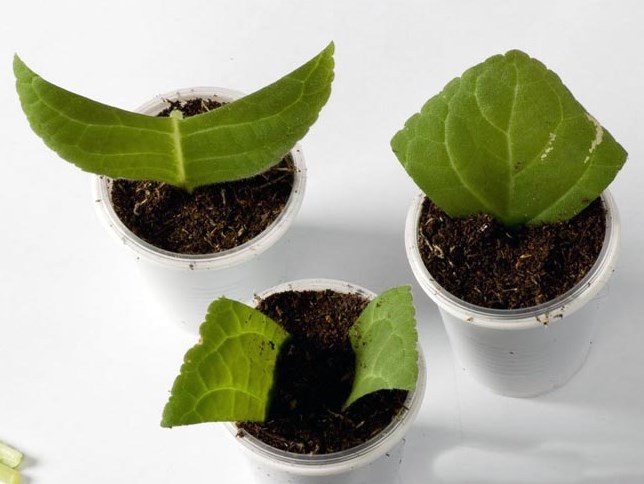
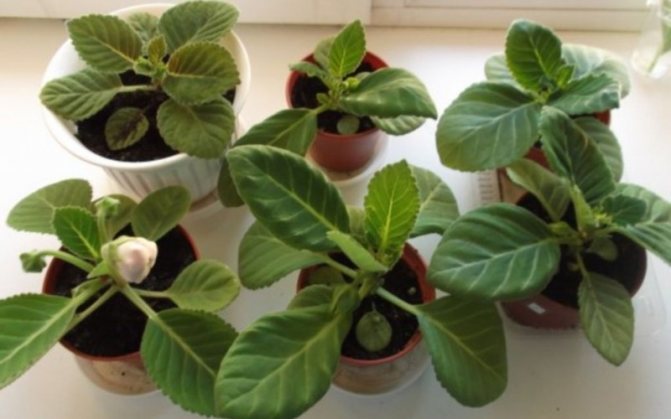
You can root the prepared leaves directly into the substrate. To do this, use small disposable cups of 50-100 ml in size, fill with soil for flowering plants, moisten it and carefully bury the end of the cutting 1 cm into the soil. Cover the glass with a jar or bag to create a greenhouse effect. Place the glass on a light warm windowsill and wait for the roots to appear. Usually, the leaf takes a month to root. When small sprouts appear, the greenhouse can be opened. After a couple of months, several children will form on your leaf. Then the leaf is carefully cut off, and young seedlings are planted in small pots for further growing a flower.
Recently, flower growers began to use peat tablets for rooting gloxinia with a leaf.It is better to immediately place the tablet in a small disposable cup, without earth, soak well with warm water. Using a toothpick or a match, expand the upper recess in the peat and carefully, without pressing hard, place the stalk of our leaf. Create a greenhouse by covering the glass with a bag or jar and wait for the spine to appear. In about a month, maybe earlier, the roots will appear. Then, carefully transplant the leaf together with the pill into a pot of earth. It is better to tear the mesh on the pill to make it easier for the gloxinia roots to grow.
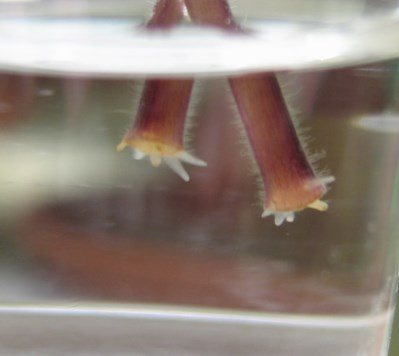
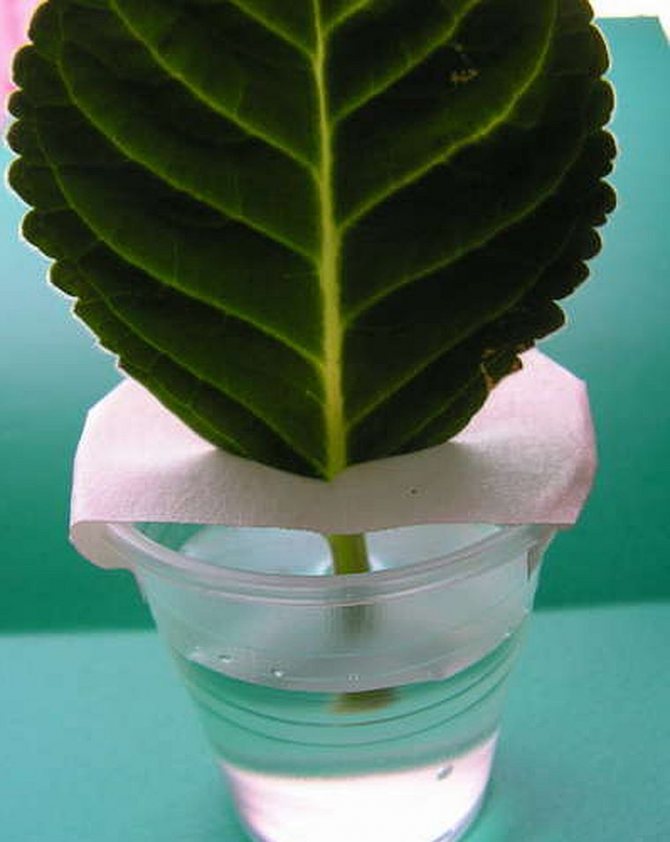
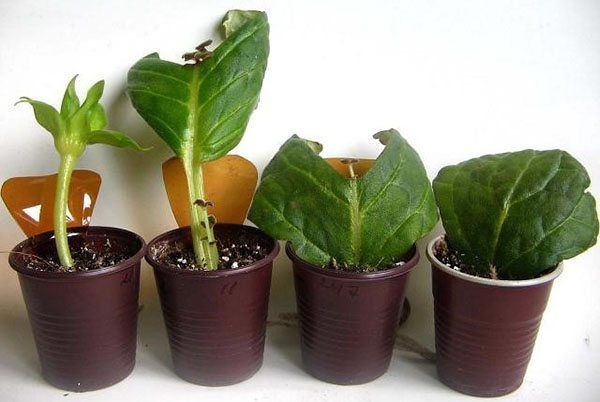
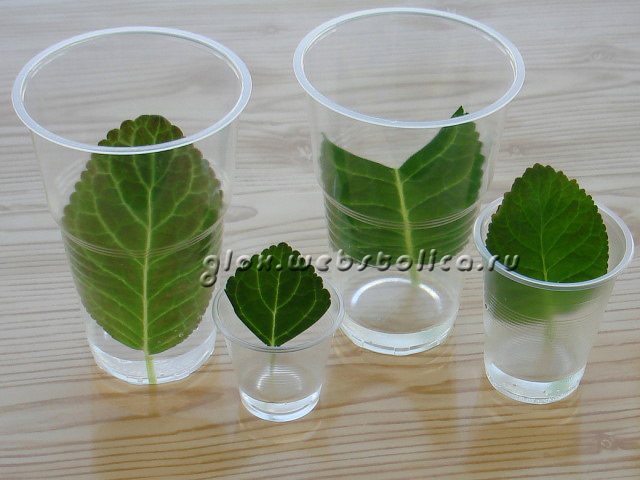
Rooting in water
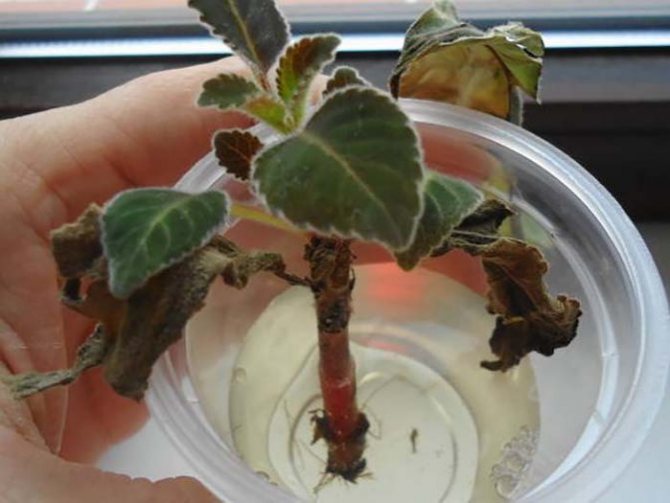
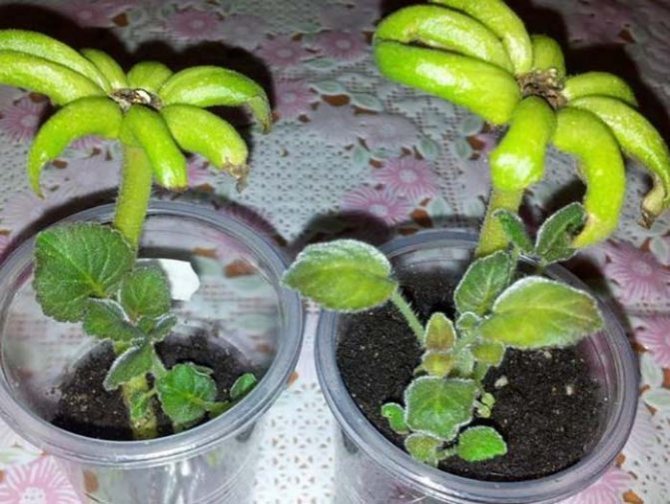
You can root young gloxinia leaves in water by placing them in small cups with 1 - 2 cm of water, no more. Water is used settled, warm, preferably 2-3 ° C above room temperature, boiled, it is possible. The glass with leaves should be in a well-lit place, but not in the sun. Water is added, occasionally changed. When stable roots appear, a leaf with roots is planted in a prepared pot. After one and a half - two months, your seedling will have babies. Then the sheet that has served its time is carefully cut off.
Sometimes it happens that the leaf, having taken root and giving you a nodule and a baby, is still strong and healthy. It can be reused. To do this, cut out a fragment with a handle from it and try to root again.
Reproduction of gloxinia by leaf cuttings
For reproduction of gloxinia by cutting, a cutting of a young leaf is taken, preferably during the period of bud formation on a flower. The procedure and methods for rooting the cuttings are the same as for rooting gloxinia with a leaf. (see above)
It may be interesting: Kislitsa (Oxalis) - species and varieties
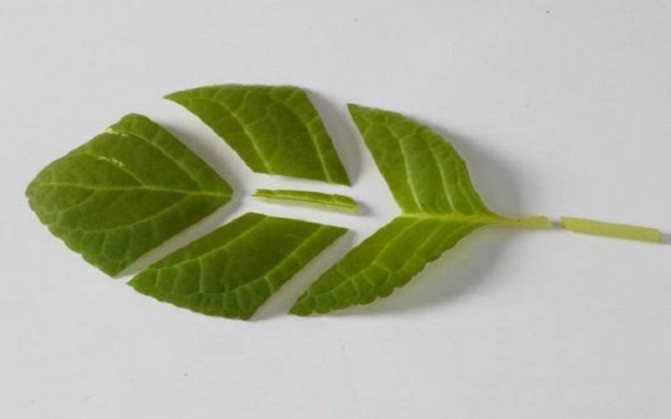
Reproduction of gloxinia by leaf fragments
If you have only one gloxinia leaf, but it is large and healthy, you can get several copies of your favorite flower from it. The old sheet is not good for this. Cut a clean, healthy leaf plate into fragments. To do this, use a clean and sharp knife. Plant each part of the leaf with a piece of cutting or central vein in prepared, well-moistened soil, preferably in a separate small disposable cup. Cover with a plastic bag for a greenhouse effect. Place on a well-lit, warm windowsill. Watch. If the soil is dry, moisten it. In less than a month, your planters will have roots. As soon as the first toy leaves look out of the soil, the greenhouse can be opened, let the young bushes get used to indoor conditions.
Likewise, you can root the leaf fragments in peat tablets. Place the tablets tightly in the container, add warm water to the bottom of the container in small portions so that dry tablets do not float, wait for half an hour for them to be properly moistened, drain the excess water. In the upper part of the peat washers, make holes with a match or a toothpick into which you gently insert your leaf fragments. Close the container with a transparent lid. Place it in a warm, bright place. Make sure that the tablets do not dry out, moisten them by pouring water to the bottom, do not pour water on the plates - gloxinia do not like this. After a month, all fragments should take root. Begin to open the greenhouse, let the new sprouts get used to the room conditions and develop faster. When the first leaves appear, the tablets can be transplanted into pots with soil. It is better to carefully cut the mesh on the tablet so as not to damage the roots, and to enable them to develop more easily in the future. If you were presented with only one small leaf of the coveted gloxinia variety, then you can use it as follows. With a disinfected sharp knife or scalpel, cuts are made on the veins of a leaf, put it in a greenhouse on a wet substrate with its bottom side, flat, lightly pressed. The greenhouse is covered and placed in a warm, bright place.Make sure that the soil does not dry out, and the temperature was 23 - 25 grams. After a couple of weeks, small rosettes of leaves will appear along the edges of the cuts. So, from one small leaf of gloxinia, you, with your efforts, can get several new flowers.
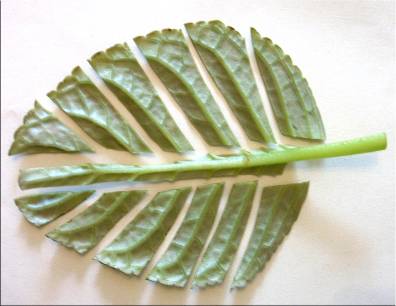
You can use this leaf in a different way. Divide your leaf in half by cutting out the center vein. Cut each half of the leaf with a clean tool between the lateral veins into pieces, there can be a lot of them, up to 10 or more pieces. Plant each section of the leaf as described above.
Causes of root rotting during leaf propagation
- Perhaps, when landing, you pressed hard on them, thrusting them into the ground, and damaged them. You can not do it this way. It is better to make a hole in the soil or peat tablet with a toothpick or a match, put the cutting in the hole and gently press the soil against it.
- If direct sunlight is shining on your greenhouse, they will have a detrimental effect on the cuttings that have not yet rooted. It is necessary to ensure that the lighting is diffused, and the temperature does not exceed 25 ° C
- If, on the contrary, our greenhouse is in a dark place, and the seedlings simply do not have enough light. Move the container with cuttings to a lighter place to the window or under the phyto lamp.
- You may have cut the cuttings with a poorly sanitized knife. Or they simply broke off unsuccessfully from the mother plant. Cut new cuttings and try to do everything without mistakes.
- You may have used old leaves for propagation. It is best to use young leaves during bud formation or gloxinia flowering.
- If the soil under the cuttings was constantly waterlogged, they rotted. Gloxinia does not tolerate high soil moisture.
- The time has been chosen for rooting the cutting. The best time for this is spring or early summer.
It may be interesting: Varieties of Medinilla are favorites among flowering
How to grow gloxinia from seeds?
Getting tiny seedlings of gloxinia is not as difficult as then growing them into independent plants that can bloom. Receiving enough light, heat and moisture in a greenhouse, the sprouts continue to develop until after about a month real leaves appear on them, and individual gloxinia begin to crowd each other.
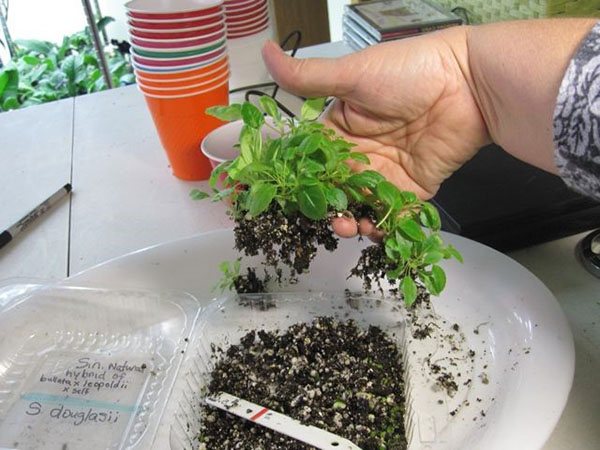
At this time, young specimens should be dived. This procedure, which is important for growing and caring for gloxinia, activates the growth slowed down due to the density of plantings, as a result, the plants will get stronger faster.
From sowing to planting young rosettes in separate pots, 3 to 4 picks may be required. Their number depends on the varietal characteristics of the plant, the conditions created and the density of sowing.
The gloxinia seeds obtained from the seeds are carefully removed from the old container, taking care not to damage the roots and crown of neighboring outlets. The first transplant is carried out into a fresh substrate in 10-15 pieces. And after that, the plants are again placed in the greenhouse under the lamps.
At the stage of the second and third picking of gloxinia, it is already possible to transplant individual pots with a volume of no more than 50-100 ml. Such sockets are already strong enough to harden them, gradually accustoming them to air in the room.
Additional feeding of young gloxinia from seeds is not required, since during picks they are transferred to a nutrient substrate that meets the needs of small seedlings.
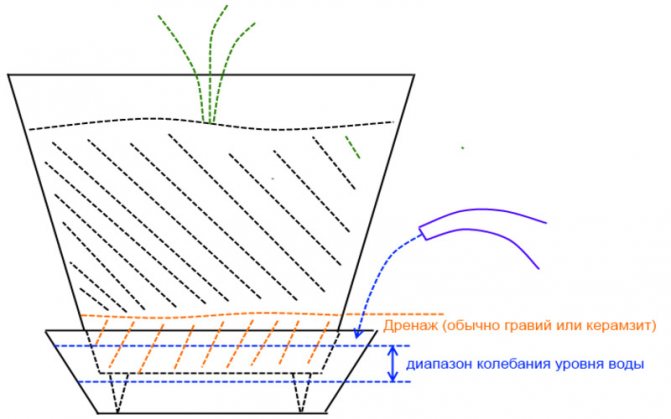
By the age of ten weeks, young bushes are transplanted into their own pots. It is better to take small containers with a diameter of 9-10 cm, in which the width is equal to the height. For constant soil moisture, you can use a simple wick, passed through a drainage hole, or a room drip irrigation system.
With good care, growing gloxinia from seed gives consistently high yields. And already at the age of three months, the strongest seedlings are gaining the first buds.
Growing amazing gloxinia from seeds - video
Conditions for rooting cuttings
Cuttings of leaves and cut leaves of gloxinia are not recommended to be placed in water. The effect will be much better if you plant them in pots or cups with well-moistened soil.
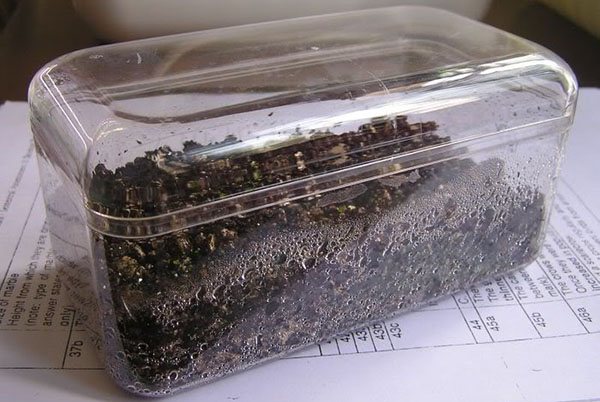
Containers with planted flower leaves can be placed in a greenhouse. Thus, almost all cuttings and leaves have a chance for successful germination. There will be practically no losses.
Many growers do not consider it necessary to air the greenhouse with seedlings. Thanks to the moistened soil, it feels great and does not need watering for about 25-30 days.
Based on the above data, the use of a greenhouse makes it possible to get flowers in full, practically without loss, the growth of gloxinia will be much faster. In addition, the gardener saves personal time by having the opportunity to do other flowers.
After 25-30 days, all planted leaf cuttings and leaf fragments take root. During this period, you can remove the greenhouse. This should be done gradually so that the plants adapt to room temperature. Further actions for the care and watering of gloxinia are carried out in the usual way, as with adult plants.
During all periods of synningia growth, rooting is no exception, the flower needs a sufficient amount of light. Otherwise, rooting will be slowed down very much, in young shoots may be lengthened.
Gloxinia - the intricacies of growing from seeds at home
Have you decided to update your floral collection and have chosen Gloxinia? You don't have to buy an adult plant from the store to do this. Gloxinia is very easy to grow from seed at home. To do this, it is enough to choose the right gloxinia seeds, sow them, followed by picking the seedlings. After 6 months, gloxinia from seeds at home will reward its owner with abundant flowering.
What is this flower?
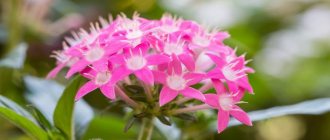
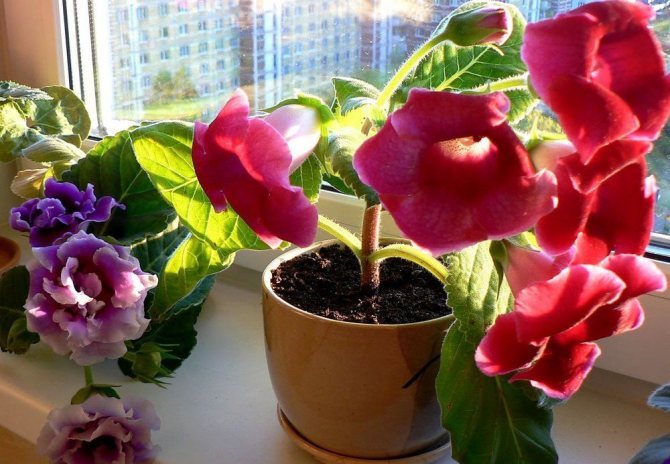
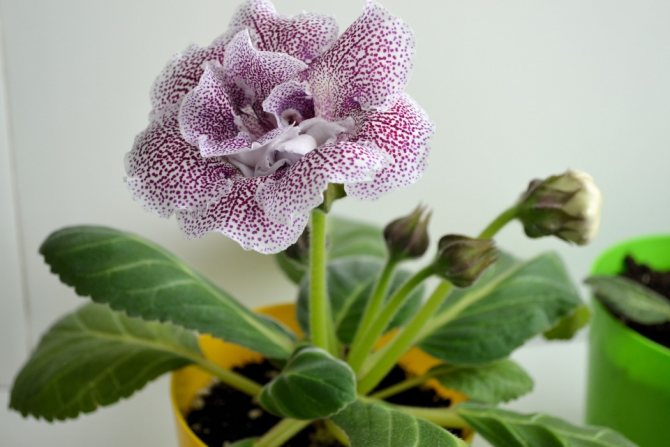
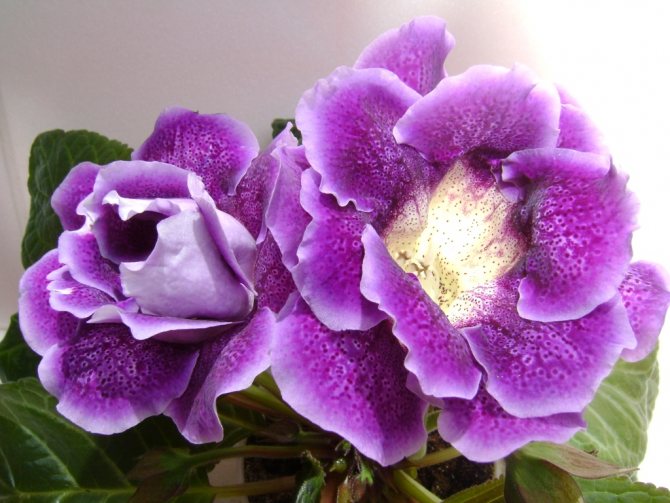
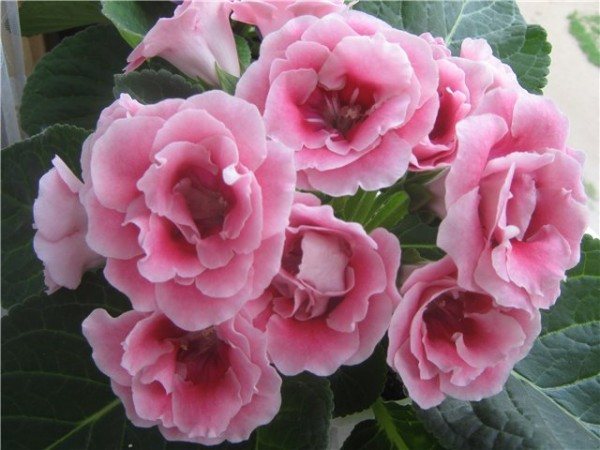
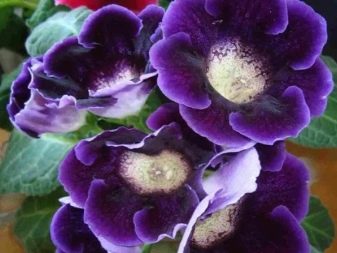
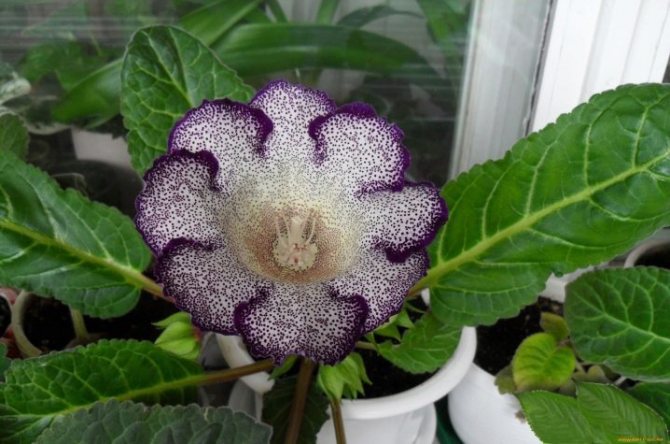
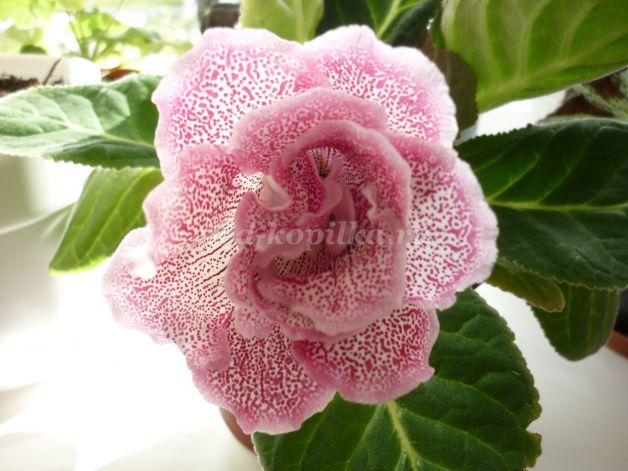
Reference! Flowers come with luxurious ruffles, combining several tones in one flower, flowing into one another or monochromatic, with smooth edges of the petals. The most popular colors are red, white and yellow.
The second name of the plant is Sinningia, it belongs to the Gesneriaceae. Sinningia is a perennial with a tuberous root and plump dense leaves... It can bloom with regular and double flowers. They flaunt over the rosette, in the form of velvet bells.
Gloxinia was originally an inhabitant of the deciduous tropical forests of Central America, and more precisely, it is most likely to be found in Brazil. She hides in the lower tiers of the forest, in the shady part.
The climate there is very humid, combined with periods of drought and heat, when the ground part of the plants dries up, ceasing to function, and the center of life shifts, dying in the root system, which "falls asleep" in anticipation of beneficial moisture for several months. So gloxinia learned to preserve its life, adjusting to the climatic rhythms of the region.
Professional cultivation of gloxinia from seeds at home. Photo instruction
How is gloxinia obtained from seeds? How is a flower grown from seeds at home? How is the planting carried out, the choice of the soil mixture, the subsequent care of the crops? Professionals share their experience with photography.
In addition, experts recommend propagating gloxinia with a leaf, if you have never had to work with seeds.
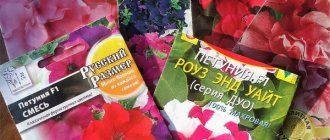
How to choose gloxinia seeds? Photos of popular brands... The best varieties are imported from Germany, Holland and Great Britain. A domestic manufacturer has a good seed.
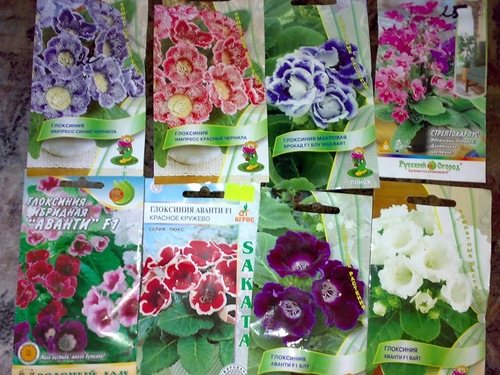
Beautiful and healthy seedlings are produced by a hybrid seed of the first (F1) and second (F2) reproduction. If flowers are pollinated from these seeds, then the next generation may not have the quality characteristics of the parents.Gloxinia seeds in the photo are very small, dusty.
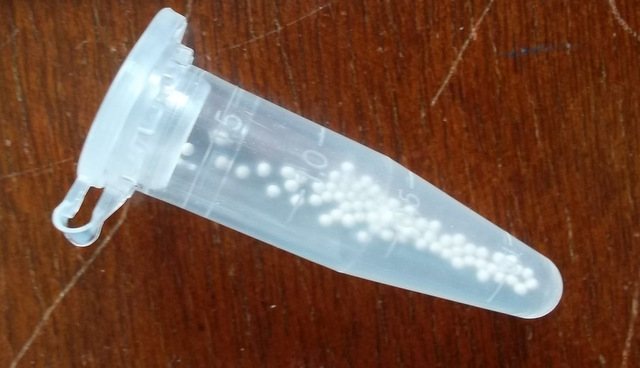
To improve germination and convenience during sowing, they are treated with special nutrients (pelleted). As a result, the seed is covered with a film.
The germination capacity of gloxinia seeds, if stored correctly, do not change for 5 years. However, experts recommend planting in the first year after harvesting or packaging grain.
When to sow gloxinia from seeds? Planting time is not critical. Sowing gloxinia seeds for seedlings can be carried out both in autumn and in winter. However, in this case, the plants are provided with the desired temperature regime and the length of daylight hours. Seedlings are highlighted. Otherwise, it stretches and falls.
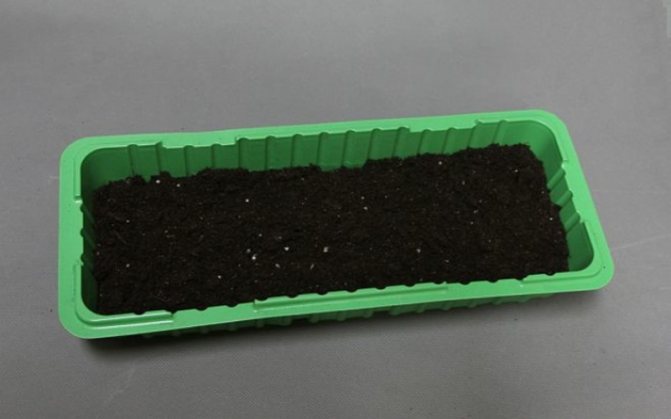
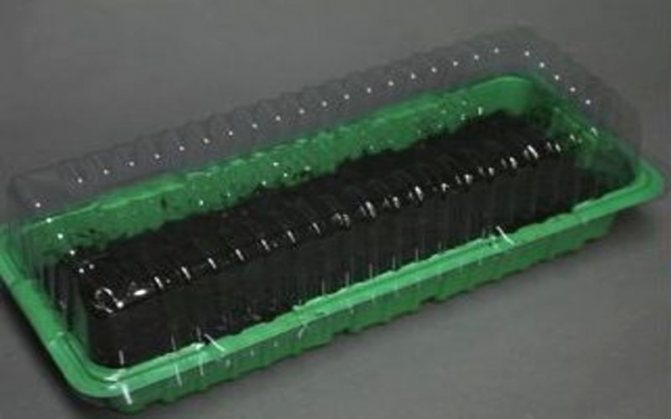
Grow pots... Sowing gloxinia with seeds is carried out in shallow and wide containers, which must be equipped with drainage holes. The containers should be convenient for organizing a greenhouse. You can use food grade, plastic containers with a lid.
Soil selection. Planting gloxinia seeds is carried out in the following soil mixture: take one part of coniferous soil and deciduous soil. There should be no humus in the mixture.
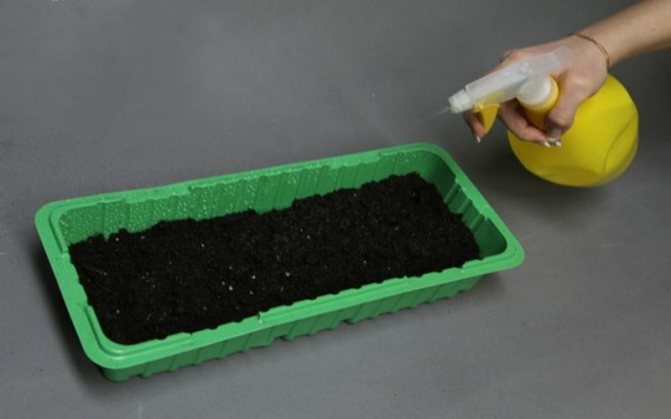
Planting directly... How to plant gloxinia seeds? Small expanded clay is poured onto the bottom of a pre-prepared container with drainage holes. Then a soil mixture is laid on top of the expanded clay. It is preliminarily placed in the microwave for 2 minutes. The soil should be moist, but there should not be an excess of moisture in it. For this, the earth is sprayed from a spray bottle. If properly prepared earth is squeezed in your hand, it forms a lump, which disintegrates when lightly pressed.
Reproduction of sinningia using leaves
Reproduction of gloxinia leaves requires responsibility. Of all the possible, the most whole and healthy one is chosen, without any defects. Step-by-step instruction:
- The leaf is cut from the cutting by dividing it into parts. The blade must be sharp and disinfected.
- Preparing the right soil:
- Soil for violets.
- Sand.
- Coconut flakes.
Before planting leaves in the ground, it is treated with a solution of potassium permanganate for the purpose of disinfection. Small pieces of foam are placed under the small leaves for stability.
- To create the effect of a greenhouse, the container with sprouts is covered with a bag and periodically ventilated.
- When roots appear, the package can be removed.
- In early spring (the last days of March), the formed tubers are planted in pots.
Growing gloxinia from seeds

The variety of indoor flowers today is simply amazing. Among them there are varieties that have been loved by flower growers for many years, and there are those that have appeared relatively recently. In this article, we will look at the correct sowing of a flower such as gloxinia, and further care for it at home. After all, for many decades it has been Gloxinia is one of the most popular potted plants.
Reproduction of indoor gloxinia by a peduncle
peduncle
At home, gloxinia can be propagated in another interesting way - with the help of a peduncle... A faded flower is suitable for this. Carefully cut off its peduncle, remove the wilted bud, dry the pedicel slightly and place it in a container with settled warm water to a depth of no more than 1 cm.Make sure that the water is always about 1 cm, top up if necessary. You can dissolve a piece of activated charcoal tablet in water to ensure it does not rot. The glass should be placed in a bright, warm place and wait until, after 25-30 days, the long-awaited roots appear at the peduncle. And after another half a month, small nodules and leaves will appear at the peduncle. That's when you can plant them in pots with soil and take care of them, as described above.
Keep in mind that simple gloxinia easily reproduce in this way, but terry varieties often rot. Therefore, it is advisable to propagate them in another way.
Features of the
Gloxinia belongs to the Gesneriaceae family, America is considered its homeland, and for its name the flower was named in honor of the botanist Benjamin Peter Gloxin. Its second name is sinningia.
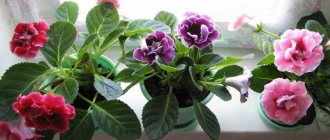
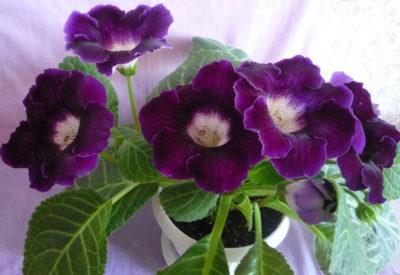
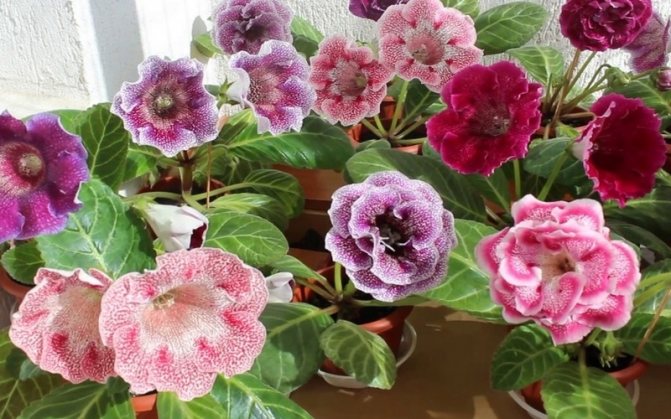
It is a small houseplant that has bell-shaped flowers of a large size and a wide variety of colors. Their border can be smooth and terry, monochrome or multi-colored. For example, the Avanti F1 hybrid gloxinia has white flower petals, while the Hollywood sinningia is dark purple.
Such indoor bushes look very stylish and bright, their leaves also have a different ornament on their surface, depending on the cultivated variety.
The key features of this chic indoor bush are:
- the possibility of growing indoors or in special greenhouses;
- the presence of a tuberous root, which, if necessary, can be stored in a subfield just like ordinary potatoes;
- regardless of the variety, the leaves always grow in the form of a rosette, and their surface is covered with small villi;
- the stem of gloxinia is short, but very thick;
- the tone of the flowers themselves depends only on the type of gloxinia.
Against the background of other indoor plants, sinningia always stands out favorably for its lush and incredibly bright flowering.
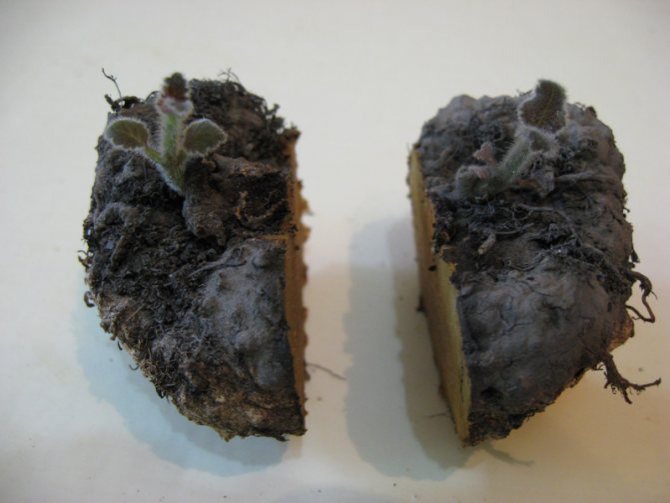
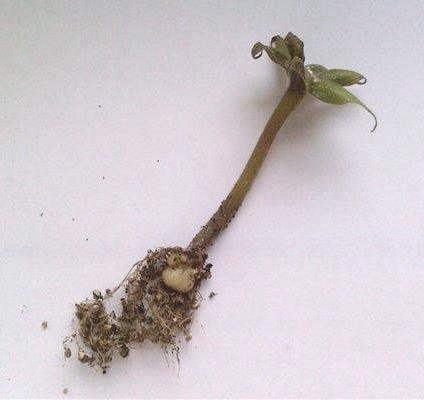
The rooted leaf begins to rot
The process of decay of the rooted leaf is most often found during vegetative reproduction. A single case is most likely an accident, and systematic decay is a problem that needs to be addressed. Factors contributing to decay that cannot be ignored:
- The base of the cutting was damaged. This can happen if there is pressure on the leaf during planting.
- The plant was in direct sunlight or shade. Both factors are contraindicated. The plant needs light, but diffused.
- It is forbidden to break off the sheets of gloxinia; they are cut off with a sharp blade, which must be disinfected.
- The timing of rooting is important. The best moment is spring or the first days of summer. Caring for the plant during this period is quite simple.
- If you take a very old leaf, then decay will turn out in most cases. Leaves are chosen young, healthy and small in size.
How do I get seeds?
In order to get seed, you can choose one of two ways.
- Contact a specialized store... There, gloxinia seeds are presented in an unusually wide range, with both classic and hybrid varieties. Another great advantage is that reproduction in this case will be quick and simple, because the seeds are already completely ready for further use.
- Hand-picking seeds... The main difficulty here is that you first need to manually pollinate the flowers themselves. For these purposes, during direct flowering, pollen is planted in the pistil of a flower from another plant. It is advisable to use flowers with different colors for this procedure. A few days after the procedure, the corolla dries up, and a seed capsule appears in its place. Its formation and maturation can take up to 56 days.
As soon as the first signs of opening of the box appear, it is carefully cut with sharp scissors and placed in a dry container. After full disclosure, the seeds are carefully poured into a clean container for further use.
The best time to sow seeds is February. Therefore, pollination of plants should be started in late November - early December.
When and how to plant?
So, it is better to plant the collected or acquired material in the first half of February. But in addition to the seeds themselves, you also need to take care of the following.
- Correct dishes. The container should be shallow, rather wide, and must have a tight-fitting lid, which, if necessary, can be replaced with cling film or a piece of clean transparent glass.You can also use special peat tablets. In that case, a container with a pallet is prepared for them, in which they are installed, and the germination of seeds itself is carried out in this case without land.
- Now about the ground. You can sow seeds either in ready-made mixtures of the substrate, or you can make it yourself. Land harvested under a pine or birch tree and, of course, as far from the road as possible is best suited. But only such a substrate should be disinfected in an oven at a temperature of 150 degrees for 1 hour, and only after it has completely cooled down can it be used in the future.
- Drainage. For sowing gloxinia at home, its presence is not necessary. But if you wish, you can use clean and fine pebbles.
Problems to face
When gloxinia propagates with a leaf, you may encounter some problems:
- Often the leaves can rot, become soft. More often this happens if the soil was infected during planting, the sunlight shines too brightly on the plant, or, conversely, it is not enough. Garden tools can be contaminated.
- Roots may not appear due to the pot being too deep and wide. It is important to choose the right container in which the plant will receive enough moisture, but there will be no stagnant water.
- For a leaf to take root and grow actively, it must be no more than 5 cm in size. It is better to divide old large leaves into separate fragments before planting. It is necessary to separate the leaf from the plant by neat cutting with a sharp knife, and not just tear it off.
In addition to water, wet soil based on peat and leafy soil can be used to root gloxinia leaves. Some growers for these purposes take moss, which is moistened with water, and then attached to the bottom of the leaf. Some plant the planting material in peat tablets, but then the rooting process takes place at a slower pace.
The procedure is carried out in late spring or early summer, in order to dive the shoots with roots into the pot by the fall. Before winter, when the dormant phase begins, they will have time to adapt and take root, and in the next season they will already begin to bloom.
Seedling care
A week after planting the seeds, the container must be ventilated. For this the container is opened daily for 10-15 minutes. This procedure is necessary both for the access of fresh air and to prevent the appearance of mold on the surface of the substrate.
Watering is carried out regularly, but only when the soil begins to dry out. The room temperature should be about 22 degrees. And it is very important to exclude direct sunlight on crops.
After the shoots appear en masse, the shelter is removed from the container. Now it's time to pick plants. Experienced growers are sure that for the normal growth and development of gloxinia, it is necessary to carry out at least 3 picks, ideally, this procedure is performed 4 times.
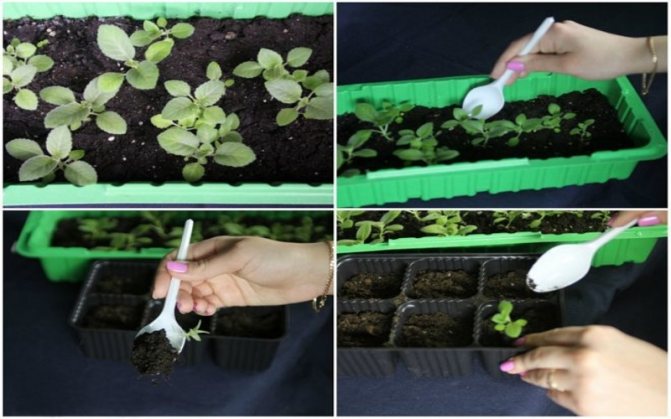
- First time - 1 month after sowing. To do this, using a spoon, carefully remove the seedling from the container with the earth and transplant it into a separate container with the same soil. Lightly irrigate on top. At this stage, plants can be planted in 2-3 pieces in one box.
- Second transfer carried out at the moment when the height of the flower becomes more than 2 cm. Here, each plant is already planted in a separate container, the capacity of which is at least 100 ml of soil.
- Third time the pick should be carried out after about another 15–20 days. The container capacity is no less than 200 ml.
- Fourth transfer - this is the planting of a plant in its permanent place.
If everything was done correctly, then gloxinia will bloom in the first year. But such a picking of sprouts is necessary only in the case of sowing seeds in the ground.
Reviews of the owners of this plant indicate that it is better to sow seeds in peat tablets - so picking is easier and faster, and the plants do not get sick. To do this, choose a container with a volume of about 250-300 ml at once, pour drainage on its bottom, then a little substrate, and set tablets with sprouts. The container is again filled with soil from above and the surface is sprayed with warm water.
Gloxinia is not just a beautiful indoor flower, but also a plant that is extremely demanding on lighting and regular feeding.
- It is best to place pots on windows facing east or north. In the presence of a large amount of direct sunlight, the flower needs darkening. If during the active growing season the daylight hours are shorter than 16 hours, it is necessary to install special phytolamps.
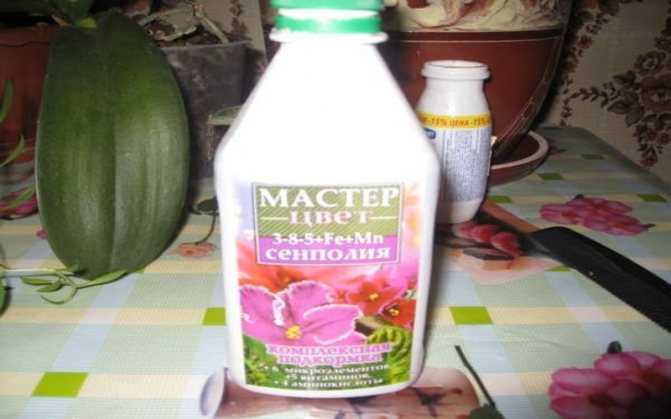
- During the budding period and in the most active flowering, gloxinia must be fed with special mineral fertilizers. It is necessary to choose those that are designed specifically for flowering indoor plants, and it is imperative to observe the dosage indicated by the manufacturer.
Some people think that it is impossible to plant gloxinia seeds in peat tablets. Allegedly, due to a weak root system, the plant will not be able to fully develop. This is not entirely true. In small tablets, the seed feels great, but it is better to refuse to use even the smallest peat pots.
Reproduction of room gloxinia by stepsons
It happens that indoor gloxinia, during its emergence from hibernation, forms many basal shoots. And it happens that such sprouts - stepchildren, appear in the axils of the leaves. If all of them are left, the plant will not have enough strength and nutrition to develop normally and bloom luxuriantly. Leave the strongest stepchildren, 2 - 3 pieces, and the rest are removed.
Superfluous stepchildren are very good for propagation of the bush, try to root it.
You can place it in the water before the roots appear, as when propagating with a peduncle. Or you can root it immediately in a 50 ml glass of soil. The soil should be loose, moisture and breathable. Insert the stepson into a slightly damp ground, no deeper than 1 cm, cover the glass with foil. Further rooting is similar to the previously described method using a cutting.
You can root your stepson in a peat tablet. Prepare the tablet, saturate it with water, with a toothpick or a match, deepen the hole in the top of the tablet, and insert the stepson of gloxinia into it to a depth of 1 cm.Keep the tablet in a greenhouse on a bright warm window until signs of rooting appear.
Tips from growers
If you want gloxinia to grow beautifully and delight with its lush and bright flowering, then you need to heed the following recommendations.
- Plants should be free to sit on windowsills and not be too dark.
- Yellow leaves and dried flowers should be carefully removed.
- Do not allow stagnation of water in the pot - the roots will begin to rot.
- Feeding gloxinia is necessary only during the flowering period; during dormancy, you cannot feed the flower.
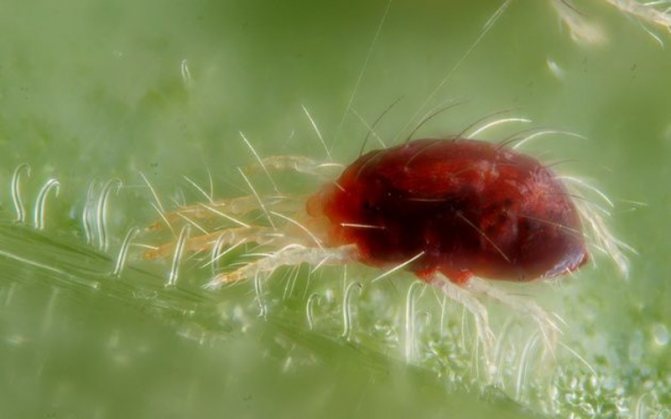
- If the leaves begin to curl, the buds fall off, and the plant itself withers, it means that ticks or thrips hit it. The affected areas of the bushes are cut off, and the plant itself is treated with special insecticides.
If necessary, with the onset of autumn, the tubers are dug up, dried and put into bags. Store in a dark and dry room at temperatures up to +15 degrees. In early March, gloxinia is planted in new soil.
Strictly following the specified recommendations, even a novice grower can easily grow this flower on his own at home.
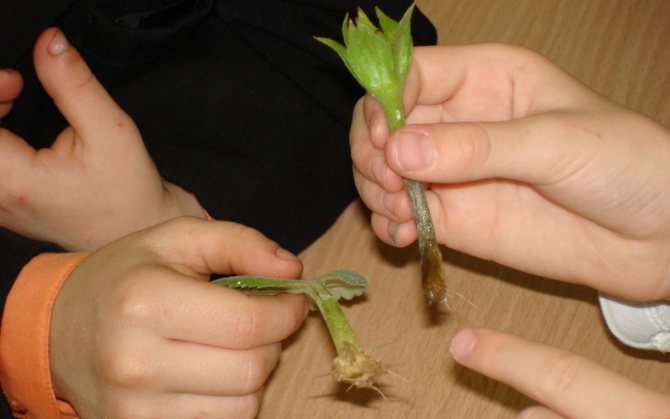
How to properly separate babies from the cutting of sinningia
One leaf and even a fragment of it can be produced by several children at once. When the leaves get stronger, they are ready for independent germination, they are carefully separated from the mother leaf.
Small children are seated in separate containers and care begins.
If you want to grow a lot of gloxinia flowers, then you need to plant all the leaves. When you want to have only one flower, break off the leaf so that the baby can freely grow and fully develop.
If you want to have several flowers of the same variety, proceed as follows:
- Gloxinia babies are carefully separated, while the main tuber remains on the leaf.
- Detached children are put away. They do not have their own tuber yet, but it will appear very soon.
A little substrate is poured into the container where the mother tuber is located. After a certain period, the sheet will start up the children again. They can also be planted in the future.
How to grow gloxinia from seeds at home step by step with a photo
The master class is intended for middle-aged and older schoolchildren, educators, teachers of additional education, for all lovers of indoor floriculture, it will be useful for parents to organize joint activities with children.
Performed: Lapteva Svetlana Khristianovna, educator of the state budgetary institution of the Novosibirsk region "Social rehabilitation center for minors", Tatarsk Purpose: decoration of the interior of the apartment, a gift Purpose. Growing gloxinia from seeds Tasks: - to acquaint and teach the techniques of growing gloxinia from seeds; - to acquaint with the basic conditions of keeping gloxinia; - to cultivate a respectful attitude towards indoor plants, the desire to take care of them; - to replenish knowledge about wildlife.
How to grow this attractive gloxinia at home? Gloxinia is propagated by seeds, shoots, tuber division, peduncles, leaf cuttings and part of the leaf. But I love to grow it from seed. Unfortunately, not everyone has the patience and perseverance to get adult flowering plants from gloxinia seeds. Sometimes annoying mistakes in germination and care interfere with success. How to avoid them and where to start if you want to propagate this indoor culture using seeds, I want to share in my master class. I hope this master class will help you acquire gloxinia and achieve its lush flowering. Give it a try - and you will also enjoy these beautiful flowers!
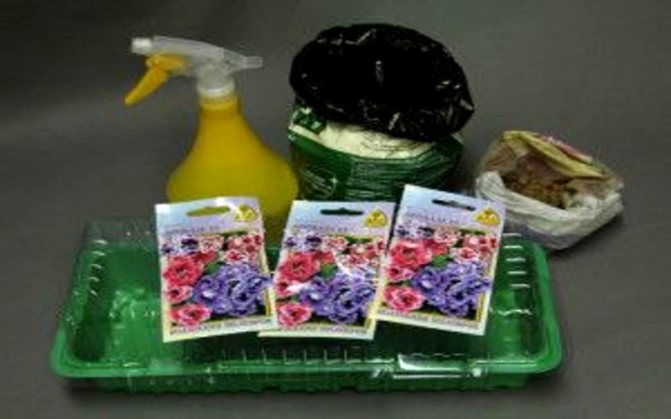
Required materials and tools:
Growing gloxinia from seeds at home: step by step instructions
An indoor (greenhouse) plant of the Gesneriaceae family, originally from America, is named gloxinia in honor of the scientist Gloxin who studied it. The second name is synningia. Most often, this flower is usually propagated by dividing the tubers and leafy cuttings. But to obtain new varieties, it is advisable to use the cultivation of gloxinia from seeds at home. This process is quite long and laborious, but if you follow the instructions, then after 6-7 months the plant will bloom in lush color.
Frequent mistakes and why leaves fold
Problems may arise during reproduction - the stalk does not germinate. The most common mistakes that growers make when preparing cuttings:
- excessive pressure when placing the cutting in the ground;
- direct sunlight on ready-made greenhouses with cuttings;
- lack of light;
- performing work with dirty tools;
- wrong air temperature;
- non-viable cuttings were selected for division.
In the process of caring for a flower, many also make a number of mistakes. The most common of these are over-watering, insufficient lighting. When the roots decay, the plant must be urgently transplanted into looser and more breathable soil, with a high sand content. Watering should be done carefully as the soil dries out.
Most often, when the plant is "bad", its leaves curl. This can happen if the air in the room where the flower pot stands is too dry or the temperature is too low.
From over-watering and over-fertilization, gloxinia leaves become excessively large and can also curl. The same sign can indicate the presence of pests on the flower and the development of diseases.
Features of gloxinia and its types
Gloxinia is a short houseplant with bell-shaped large flowers of various shades, a short and thick stem and fleshy dark green leaves with a velvety texture, characterized by lush flowering. The border of its flowers can be smooth or double, one-color, two-color or multi-color, with bright specks or contrasting frills around the edges, depending on the variety.
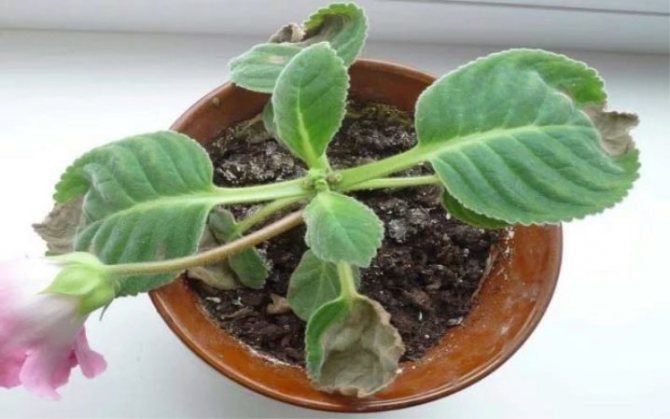
The rooted leaf begins to wither
Another unpleasant situation that can occur during the reproduction of gloxinia is when the leaves wither. But everything is not so scary, and it can be easily corrected.
Reasons for wilting foliage:
- The plant is exposed to direct rays of the sun. The plant is moved to a place where the light is diffused.
- No greenhouse was used for transplanting. Gloxinia really needs it, especially in the early stages of development. With its help, the heat and humidity necessary for full development are created.
- Excessive watering of the plant.
- During transplantation, the root system was damaged in plants with an already appeared leaf. Such work should be treated with care.
- Too large pieces of paper were taken. In this case, it is better to cut (cut) it.
Reproduction of gloxinia requires a sufficient amount of knowledge to get a good result.
Planting and care rules
Gloxinia can be grown at home in the following ways:
- using a leaf plate or cutting taken from an adult plant;
- rooting of the peduncle;

- dividing tubers;
- sowing seeds.
Breeding a flower by germinating seed is one of the most difficult methods. The seeds are very small, dusty, and their germination rate is low. The sprouts also develop at a slow pace. However, to obtain new varieties of gloxinia, it is recommended to resort to seed propagation.
To ensure healthy seedlings, hybrid seeds of the first (F1) and second (F2) reproduction should be used. But the flowers of the third generation will no longer have the quality characteristics of their parents.
Sowing seedlings can be carried out both in autumn and winter (no later than mid-February)... The optimal period is November or December. It is only important to maintain a certain temperature regime and observe the duration of daylight hours at least 12-14 hours a day using artificial lighting lamps in order to prevent the stems from stretching and falling. Flowering will begin 6-7 months after the first shoots appear.
Step-by-step instruction
For planting, you need to prepare:
- shallow and wide container for seedlings with drainage holes;
- translucent sealed cover or film;
- soil from one part of coniferous land and deciduous soil containing peat, which will provide the root system with the necessary elements;
- plain or granular seeds;
- expanded clay gravel for drainage;
- spray;
- paper;
- a needle.
- Fill the bottom of the container with drainage so that a layer 1 cm high is formed. Smooth it out.
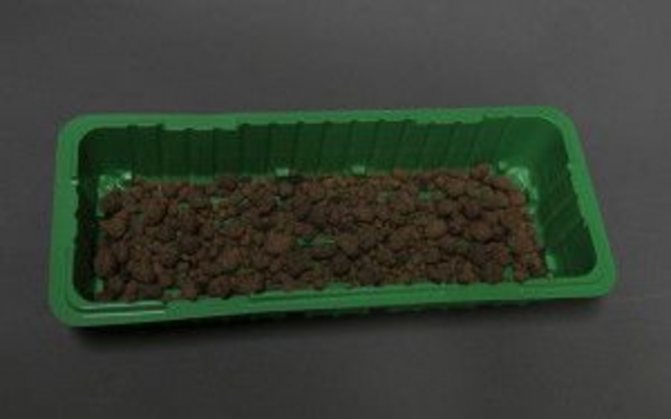
- Pour soil over the expanded clay gravel with a layer of 3 cm, lightly tamp. Previously, it can be disinfected in the oven at a temperature of 150 degrees and allowed to cool.
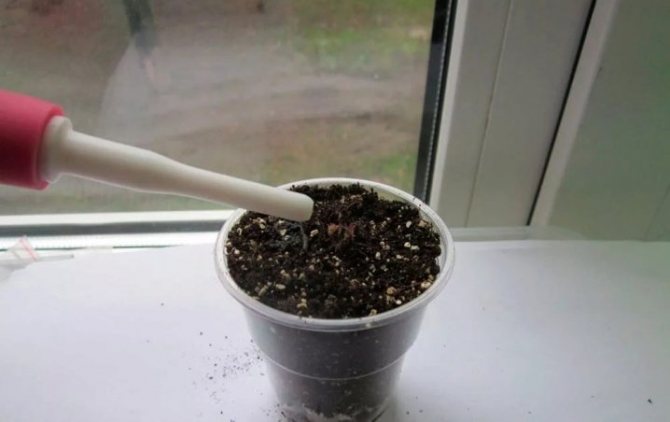
- Spray the soil abundantly with water from a spray bottle.
- Bend a sheet of paper in the middle, sprinkle seeds on the fold.

- Distribute them over the top layer of the soil, throwing off one seed at a time with a needle.
- Slightly deepen the seeds by spraying them from a spray bottle at a distance of at least 40 cm.
- Cover the container with a lid or transparent film with small ventilation holes.
The container with the sown seeds should be placed in a warm place with a temperature of 22 to 26 degrees Celsius under artificial lighting.It is not recommended to ventilate the container until sprouts appear to avoid moisture evaporation.
Seedling care
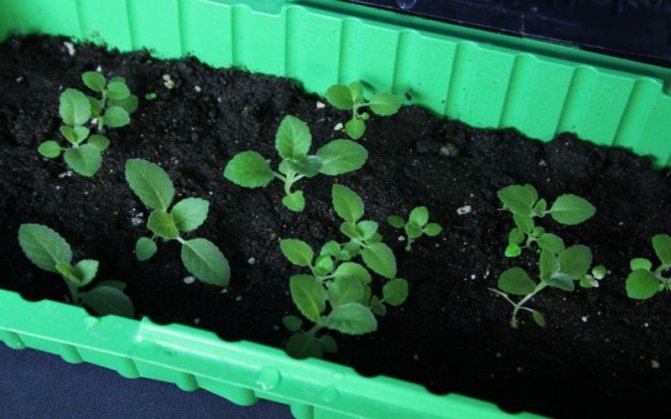
The first shoots should appear approximately 10-14 days after planting, in some varieties germination can take up to 20 days. All this time, they must be irrigated from a spray bottle at least three times a week. And after a month, the seedlings will become so large that they will be cramped. Therefore, it is necessary to make a pick of the seedlings by transplanting some of the plants into a similar container.
In total, the picking of gloxinia should be carried out up to three times over the entire period:
- The first is done 30 days after germination, if the seedlings are heavily thickened. During this time, one rosette of full-fledged leaves should appear on the plants. To do this, you need to remove the sprouts together with a lump of earth with a spoon and transplant to a new place at a distance of 2 cm from each other. Then the soil in the container should be abundantly sprayed with water from a spray bottle, and the container should be covered with a lid, which must be removed for 10-15 minutes twice a day in order to ventilate the greenhouse to avoid condensation accumulation.
- The second is carried out 60 days after germination. By that time, young plants usually have two pairs of leaves. For seedlings to grow, they need to be planted at a distance of 4–5 cm.
- The third is done as soon as the leaves are 20 mm wide. Plants must be placed in separate containers, for example, plastic cups, and placed in a lighted place.
The grown and matured plants are transplanted into pots with a diameter of at least 12 cm. For transplanting, you should use the soil of the same composition as for planting seeds.
How to care for mature plants
Caring for gloxinia growing at home is based on three main factors:
- Timely watering. During the period of rapid growth and flowering, it is recommended to periodically irrigate garcinia abundantly from a spray bottle with filtered water just above room temperature, avoiding contact with leaves and flowers. It can also be poured into a pallet. It is important to prevent the topsoil from drying out, but excess moisture will also adversely affect the plant and lead to decay of the root system. When the earth is sufficiently saturated with water, the liquid must be poured out of the pan.
- Fertilizing the soil. During the growing season, gloxinia is fed with fertilizers for indoor plants three times a month. At the end of summer, the flower plunges into a dormant stage, at which time it needs fertilizing without nitrogen, containing potassium and phosphorus. Fertilizing the soil is necessary until the end of growth. Fertilization is also necessary if the foliage turns pale, the flowers decrease in size, and the flowering period is shortened.
- Lighting of sufficient intensity. Gloxinia needs a long day of light, so the use of a phytolamp will be required for its growth. In this case, it is recommended to avoid direct sunlight on the leaves and flowers, which can burn them. Lack or excess of light leads to a lightening of the color or yellowing and bending of the edges of the leaves and elongation or shortening of the stems, respectively.
Also, the plant cannot stand:
- Sharp changes in room temperature. It is advisable to maintain the temperature regime at +18 degrees Celsius. In the resting phase, the plant can develop normally at temperatures not lower than +10 degrees.
- Drafts. Gloxinia does not need airing, as this can lead to hypothermia of the flower and lowering of the leaves.
- Dry air. To maintain optimal humidity in the room, you need to place a container of water next to the plant. But you cannot spray the leaves and flowers from a spray bottle.
Fight disease
The delicate leaves of gloxinia seedlings can suffer from the following diseases:
- Spider mite. You can detect the pest by the twisted leaves and cobwebs on them. Over time, dots appear that grow to brown spots.It is recommended to fight the disease with insecticides. They are used three times, taking a break between spraying for 4 days.
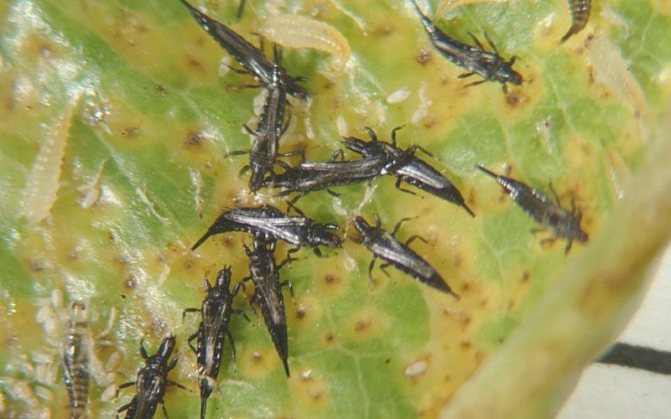
- Thrips. Due to these insects, gray marks appear on the plant. To get rid of the disease, it is necessary to remove the affected flowers and buds, treat the soil with Aktara, and spray the foliage with insecticides.
To grow gloxinia from seeds, you need to follow many rules for planting and caring for seedlings. Adult plants are no less capricious and need proper watering, feeding and compliance with the conditions necessary for a flower.
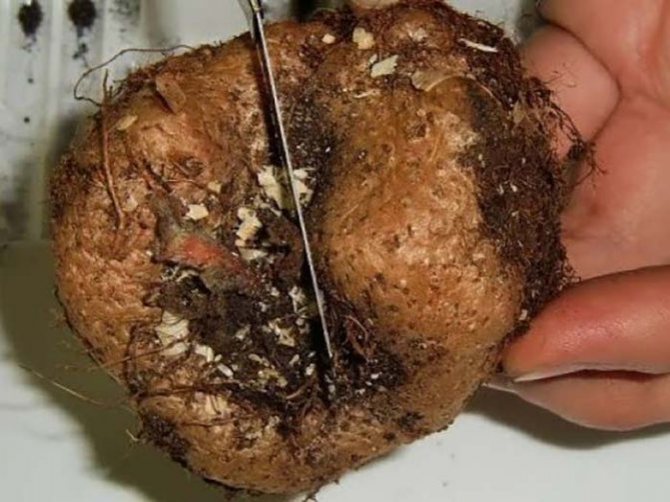
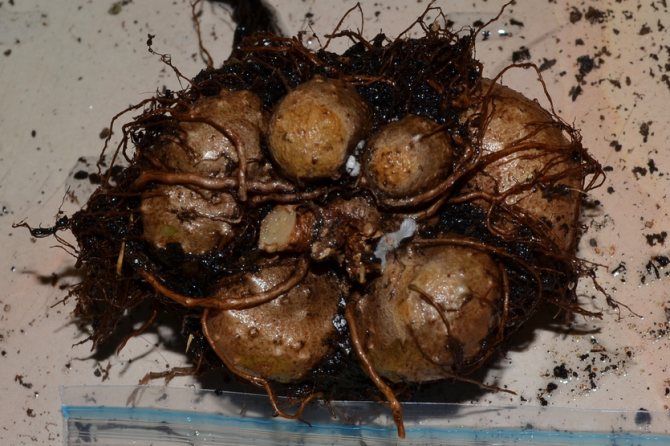
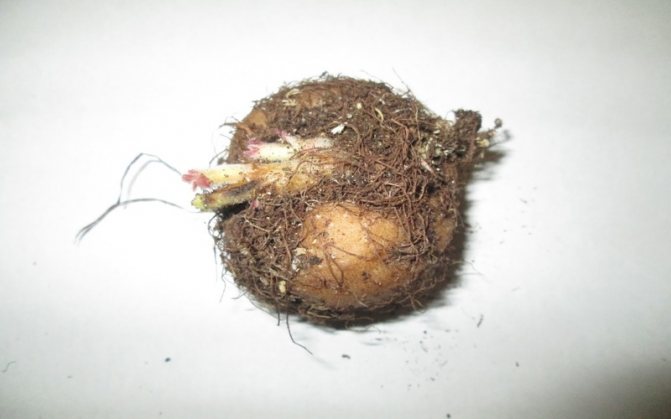
Reproduction of gloxinia by dividing the tuber
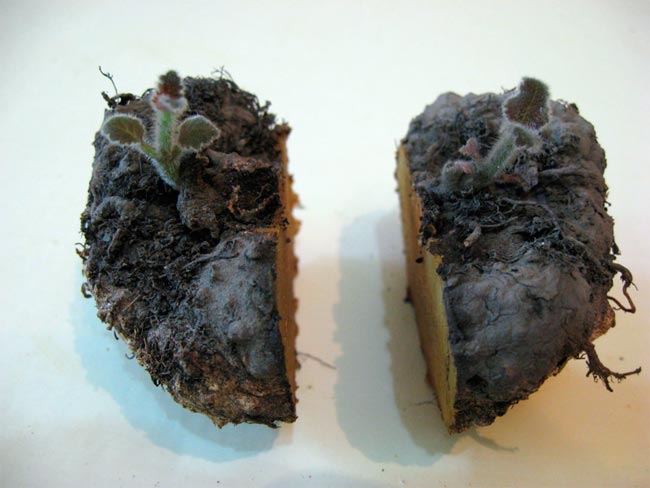
An adult gloxinia plant usually has a well-formed, healthy tuber. After leaving the dormant period, when a large number of growing shoots are formed on it, you can use this method of reproduction, namely, dividing the tuber into parts.
It must be understood that the division of tubers is resorted to in extreme cases, since for a plant this is a dangerous and painful process.
And yet, with the onset of spring, when the tuber grows strongly, it can be divided into parts according to the number of strong shoots on it, having one or two small leaves. Use a clean, sanitized, sharp knife. The tuber cuts should be sprinkled with crushed activated carbon, dried and each part should be planted in its own disposable cup in slightly damp soil under the film. You should not bury the entire tuber in the soil - only two-thirds of its size. The growth point should be above the soil. This will prevent the process of rotting. For a couple of days, the tubers do not disturb. Then, as the soil dries up, they begin to moisten it.
Young gloxinia are very sensitive to excessive moisture - the tubers can rot and the plant will die. Don't miss this moment. At the slightest suspicion of decay, dig the tuber out of the ground as soon as possible, rinse it with water, cut off the decayed parts to a healthy tuber. Hold for 15 - 20 minutes in potassium permanganate. Powder the sections with crushed charcoal, dry and plant again in fresh soil. Throw away the heavily damaged part of the tuber without regret.