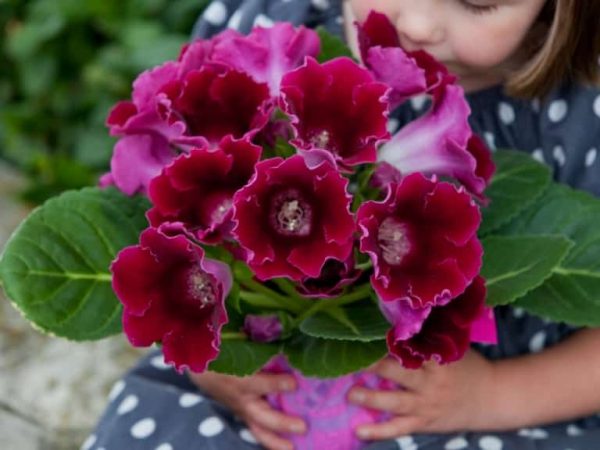
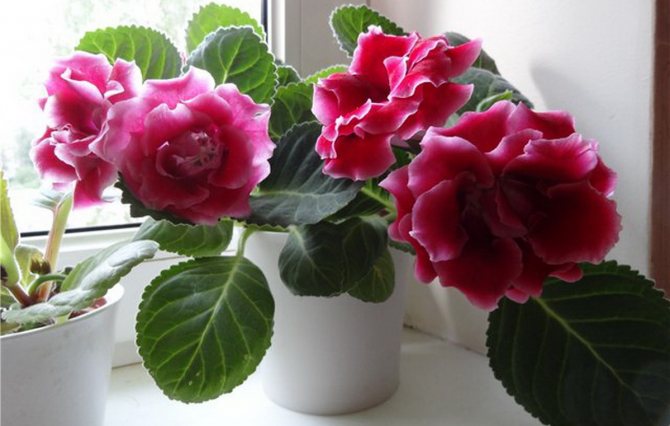
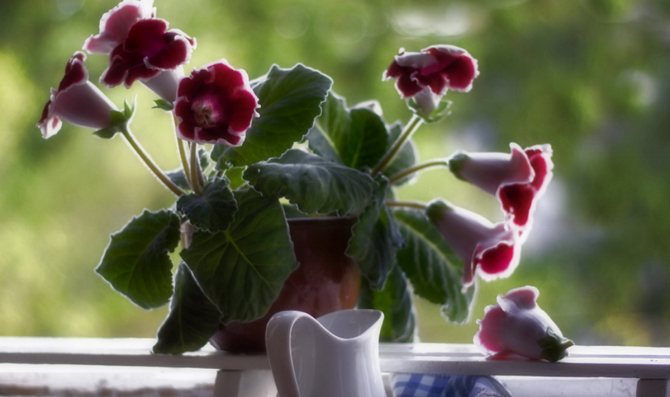
Gloxinia (Gloxinia) is a member of the Gesneriaceae family. This plant was so named after the Alsatian botanist and physician Benjamin Peter Gloxin. This flowering plant is represented by shrubs and tropical herbaceous perennials. This flower comes from South and Central America, where it prefers to grow on rocks in Mexico, in the deciduous forests of Peru and Brazil, on the river banks and in the Andes. Gloxinia is also called Sinningia, as the flower was named after Wilhelm Sinning, who was a gardener at Boston University, this person was engaged in hybridization and selection of gloxinia for most of his life. The result of his labors was the emergence of domestic or hybrid gloxinia, which has a large number of hybrids and varieties.
Home care
Gloxinia blooms in summer, and sometimes twice a year, after which the aerial part dies off. The flower needs a dormant period, which occurs in the winter.
Temperature and lighting
Gloxinia needs sufficient diffused lighting for 12-14 hours a day. Placing a flower on sunny windows requires shading, as direct UV rays leave burns on the leaves. On the northern windows of the gloxinia, stems and flower stalks are stretched out due to a lack of light, and you can not wait for the second flowering in the year. To form a neat bush, gloxinia must be turned once a week with the other side to the light source.
The optimum air temperature for gloxinia is 18-22 ° C during the growing season. When the flower sprouts tubers, it must be increased to 25 degrees, and during the dormant period, it must be reduced to 10-14 ° C. Drafts should be avoided. Elevated temperatures lead to overheating of the root system - gloxinia stops developing, leaves wither, flowers do not open or quickly fall off. At low temperatures, the plant also suffers - the leaves turn black and yellow, the buds wither.
Soil and watering
Gloxinia loves moisture. In a dry room, the leaves begin to curl, and the buds may not open. You cannot spray the fluffy leaves of the plant, but you can put pallets of water next to it. During the growing season, gloxinia should be watered abundantly, excluding the ingress of water on the leaves and the outlet. The top layer of the earth should dry out between waterings.
When the flowering period ends at the end of August, watering should be slightly reduced. After that, gloxinia will begin to prepare for the dormant period and wither - then you need to water even less often. Gloxinia roots are thin and superficial, so wide pots are chosen for them, but very deep. You can prepare the best soil for a flower yourself: mix leaf and peat soil with river sand in a ratio of 2: 1: 1. Purchased soil for violets is suitable.
Gloxinia fertilizer
Growing gloxinia outdoors
Gloxinia should be fed weekly from April to early August. Fertilizers are suitable for flowering plants containing more potassium and phosphorus than nitrogen. The use of humic acids gives a good effect. Fertilizers can be combined with the introduction of growth stimulants, but not with fungicides.
It is important not to overfeed the plant, since in such a gloxinia the buds will rot, the cuttings will take root badly.It is better to prepare a weaker solution than prescribed on the fertilizer package. You should not fertilize sick, weakened, recently transplanted flowers, as well as those in a dormant period. If healthy gloxinia are not fertilized at all, the plant will develop worse, the flowers will turn pale and become smaller.
Transfer
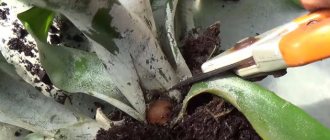
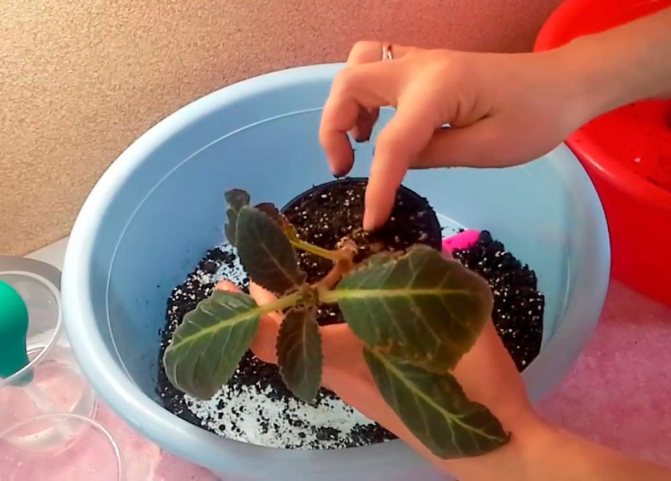
Every spring, with a new germination of tubers, they are transplanted into a new soil. In the spring, the tubers are removed, even if stored in the ground, cleaned of old roots, in addition to the largest ones, and planted in fresh soil. The distance between the tuber and the walls of the pot should be 3-4 cm. It is better to plant immediately after the sprout appears. Before that, you can treat it with a fungicide solution to exclude the development of fungal diseases.
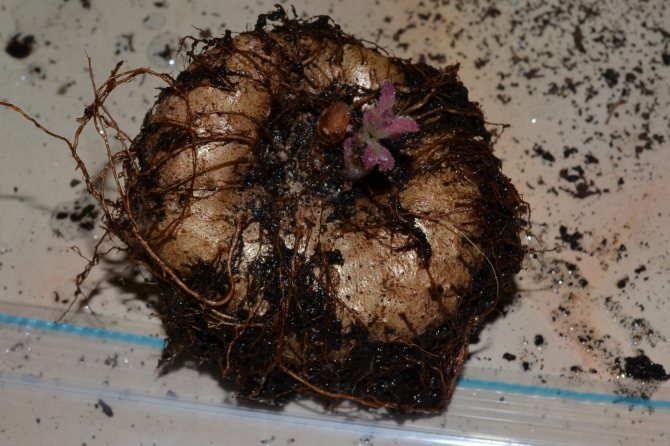
Before planting, the tuber should be inspected for damage. If there are rotten areas, they are removed with a sharp, clean blade, and the cuts are sprinkled with crushed charcoal. It so happens that after wintering, the tuber has become lethargic and wrinkled. In this case, you can try to restore it.
- Soak in a solution of epin or zircon. For its preparation, 10 drops are dissolved in 200 ml of boiled water at room temperature. A day later, the tuber is planted in the ground.
- Wrap the soft and shriveled tuber for 2-3 days in a damp cloth. If over time it becomes hard, plant it in the ground.
- You can moisten vermiculite with the above solution and place the tuber in it for 1-2 days. If it has not sprouted, then it is buried entirely, and if there is a sprout, then it is left on the surface.
Before planting on the bottom of the pot, you need to put a drainage layer of 1-2 cm - it can be polystyrene, expanded clay. Then fill the container with soil, and place the tuber in the center, deepening 2/3 into the ground. Now cover the pot with cellophane or a transparent container and put in a warm place for germination.
Once a day, the greenhouse needs to be aired for 10-15 minutes. With the appearance of the first pair of leaves, the greenhouse can be covered only at night, and after 4 days it can be removed completely. After the stem grows, the tuber must be covered with 1 cm of earth.
How to store gloxinia without soil
Sinningia is native to the mountain forests of South America. Only not from the evergreen selva, but from the upper reaches of the Amazon, where the rainy summer months are replaced by arid winter relative coolness. Why the physiology of the Gesneriaceae requires a rest period. Otherwise, you can not only weaken the plant, not allowing it to bloom next spring, but also completely destroy it.
There are two main ways to store gloxinia tubers in winter.
- We store the tuber taken from the pot;
- The plant hibernates with an earthen clod.
Video about home gloxinia
Let's take a closer look at them. So the first one.
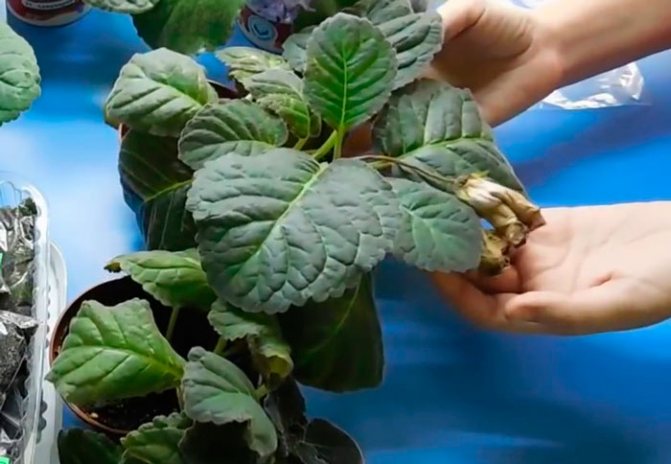
The foliage begins to fade - we slowly stop watering, complete the cycle of fertilizing with fertilizers. Thus, we are preparing the plant for winter sleep. Closer to the end of September and mid-October, synningia sheds its leaves. Its roots are dying off. Only the tuber that has matured over the summer remains. We're going to keep it. To do this, carefully remove it from the soil.
This is best done using the transshipment method:
- We take a large container for soil, for example, a basin
- Turn over the pots with gloxinia over it
- Gently knead the earthen ball with your fingers until it breaks up into several parts
- We clean the tuber from pieces of soil and root residues
We can wash the tuber under running water, after which it is necessary to dry it. It is highly discouraged to lay a wet tuber for storage - it is fraught with the development of putrefactive processes.
We will store the developed spine in a bag with wet sand or wet sawdust. But sand is preferable. Only you need to use the gray river, we first wash it from dust, and then bake it in the oven with a thin layer on a baking sheet. Thus, we get rid of the infection.
The storage sand should be slightly damp, just do not overmoisten it. Otherwise, the roots can sour from lack of oxygen and excess fluid. Now we are preparing a strong bag, pour wet sand on the bottom, put the tuber, cover it with sand to hide it from sight. Now you need to decide on a place.
Wintering of the root systems of home Gesneriaceae must meet three conditions:
- Lack of bright light
- Temperature from +3 ° C to +15 ° C
- The air should not be drier than 60%, but not more than 90%
This ensures normal conditions similar to those of the places where Sinningia comes from. Winter storage works best at the bottom of the refrigerator, where we usually store vegetables and herbs. If you have a lot of free space and a few gloxinia tubers, then put your bags there. But remember that the air inside is very dry. You will need to check periodically to see if the sand is dry. Most likely, once or twice a winter you will have to slightly moisten it.
Another option is to consider an insulated unheated loggia or balcony. It is important that the temperature does not rise to +20 ° C. This can provoke tubers to wake up early from sleep.
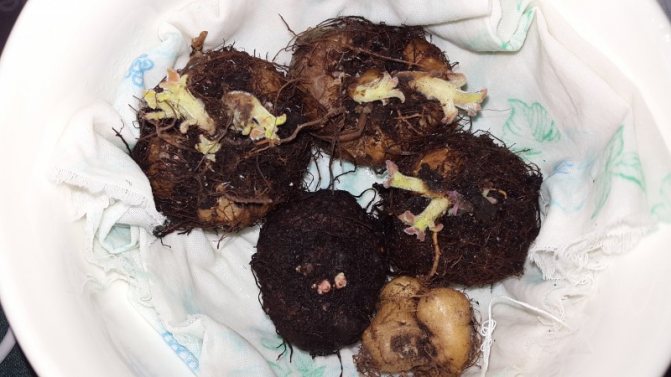
Gloxinia tuber photo
It is also good to hide the plants in a warm deep cellar, where winter temperatures are around +5 ° C, high relative humidity, and there is almost no or almost no fungal moldy processes on the walls and shelves. Then you don't even have to check the moisture content of the sandy or sawdust substrate - it will always be optimal.
You can also store bags under the bathroom. This is the most compromise option. Not everyone has a lot of space in the refrigerator, warm cellar or balcony. The humidity and darkness of the bathroom allow us to hope for a good winter. Only the temperature is high.
Another option is to store bags of tubers on the mezzanine of the hallway. But you can forget about them, not water on time. And this is bad for the bulbs.
It is recommended to periodically check the tubers for putrefaction. If these make themselves felt, we cut them out with a sharp knife or razor until healthy tissue. Be careful and attentive. Do not notice rot in time - you risk losing the entire plant. Powder the place of the cut for disinfection with ash.
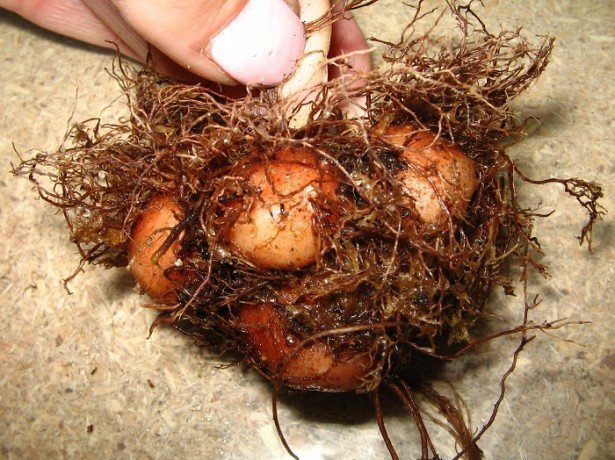
Gloxinia tuber photo
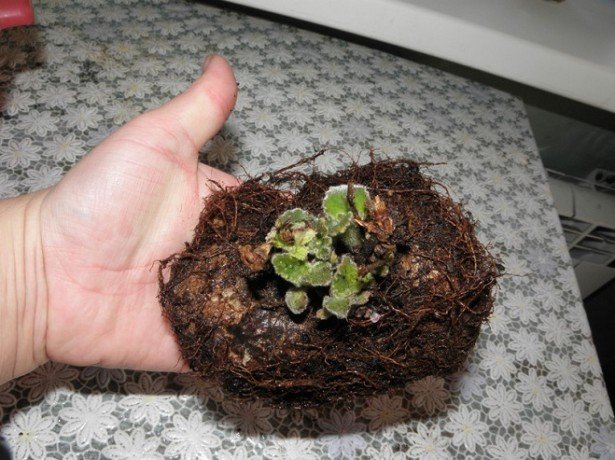
We are waiting until spring. We watch when the first shoots appear. Then we remove the tuber, inspect it for rot, clean it if necessary, dip it in a pale pink solution of potassium permanganate. Can then be placed in the root - very nutritious for future flowers. Now we are planting in a new substrate for leaf growth and flowering.
If you bought tubers in the fall, then we store them without soil with mandatory pre-winter and pre-spring treatment with disinfectants, for example, potassium permanganate.

When the gloxinia faded
After the end of the flowering period, the stem dies off. It is important to let the plant complete this process on its own. Caring for gloxinia after flowering is simple: when the leaves wither, watering is reduced, and when the upper part dries up, they stop it altogether.
Now the tuber can be dug out or left to be stored in a pot, providing an air temperature of 10-14 degrees. If gloxinia is still young and has not grown a tuber of sufficient size, it does not need a winter rest period.
If the gloxinia has faded in early summer, you can bloom it again. To do this, after the end of flowering, the stem and leaves are cut off, leaving only a couple of the lower ones. Stepchildren form in their sinuses. It is necessary to leave the strongest, and remove the rest. During this period, fertilizing is applied with nitrogen for growth, and with the appearance of buds, a phosphorus-potassium complex. The second bloom will be less lush.
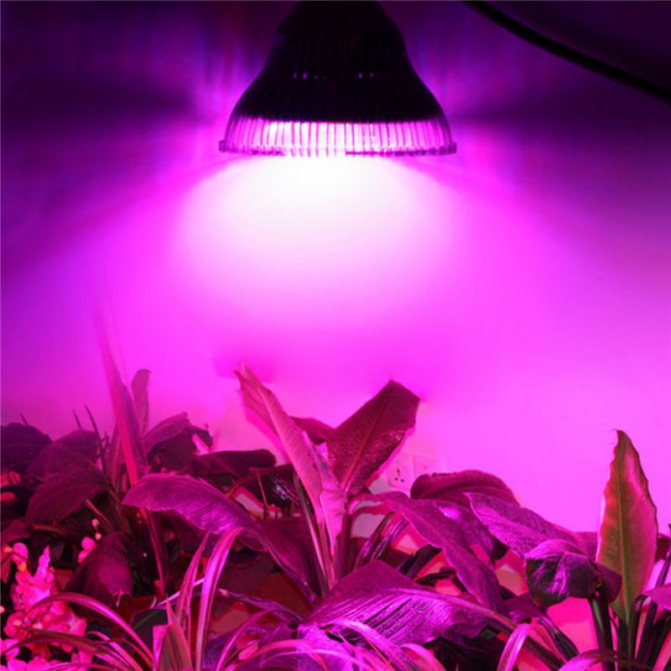
We provide the necessary lighting
It is best to plant flowers on southwest, west windows or east windows, with bright, diffused light. Growing gloxinia on the north side and lack of lighting can affect the formation of its buds, their number and abundance of flowering, saturation of the color of the petals. Also, this will lead to the fact that gloxinia will bloom poorly, giving one flower at a time or may not produce flowers at all. The stem of the plant will stretch out and it will look like a vine. Gloxinia flowers can become pale or covered with green spots, be unpainted. The more light the synningia receives, the more colors it will have.
Therefore, if you have got yourself these indoor plants, you need to try to provide them with such conditions under which they will feel comfortable, so that the flower does not shade other plants on the window, and it is well lit. When growing gloxinia on a north window, you will have to install fluorescent lamps with soft lighting for it, and make a slight dimming on the south. The duration of daylight hours, during the period of flower bud formation, should be at least 10-14 hours, and the distance between flowers should be about 30 cm. Only under these conditions can you achieve a bouquet bloom of gloxinia.
Outdoor cultivation
Gloxinia can be planted in the garden during the summer. For this, large tubers with a diameter of 8-10 cm are selected. Planting is carried out when the air temperature is stable at 18-20 degrees. Choose a damp shaded place, protected from the wind. Plants grow larger outdoors than in pots, so they need to be planted at a sufficient distance from each other. Before frost, you need to dig up the tubers for storage, without waiting for the natural drying of the stem.
Difficulties of growing gloxinia and ways to eliminate
Although the culture is picky about care, there are still a number of difficulties in growing this beautiful flower.
If notches appear on the leaves of gloxinia, the plant must be fertilized with boric solution (2%).
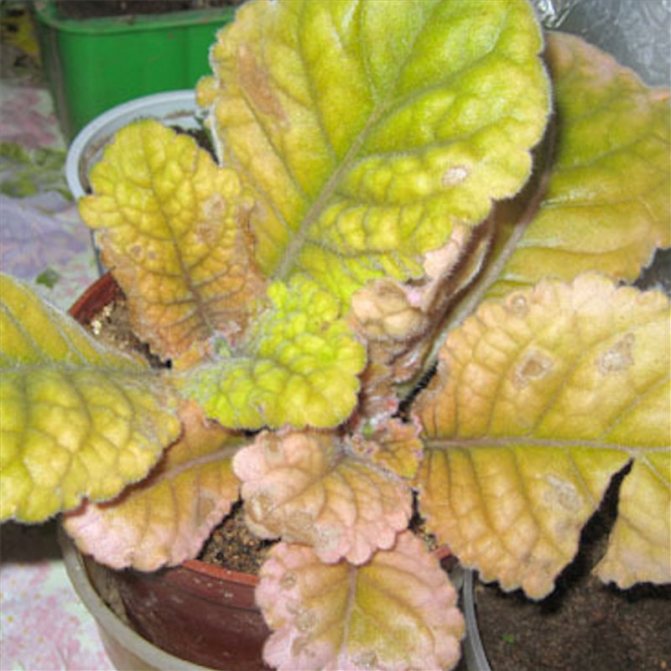
If the leaves are crumbling, turning yellow, it may be necessary to reduce watering or the culture lacks nitrogen.
Gloxinia leaves curl - check moisture. The problem is solved by placing a bowl of water next to the flower.
If the leaves wither in the fall, it means that the flower is preparing for rest, do not worry.
During the growing season, did the leaves darken, become lethargic? Then rot from abundant watering attacked the root system.
If the gloxinia has not bloomed, it means that it does not have enough light, perhaps you have overdone it with nitrogen fertilization or it is too cold in the room where the flower is located.
Growing difficulties
Due to errors in the conditions of keeping, gloxinia are attacked by pests. If the leaves of gloxinia have become thicker, deformed, curled around the edges - most likely, the plant is affected by a cyclamen mite.
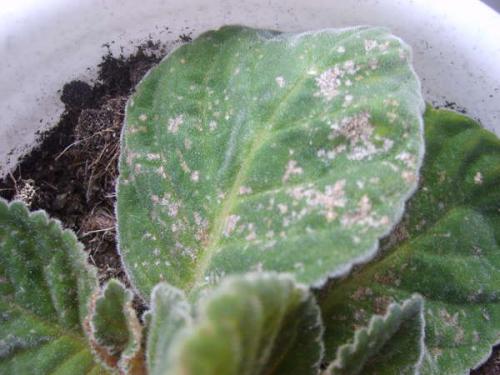
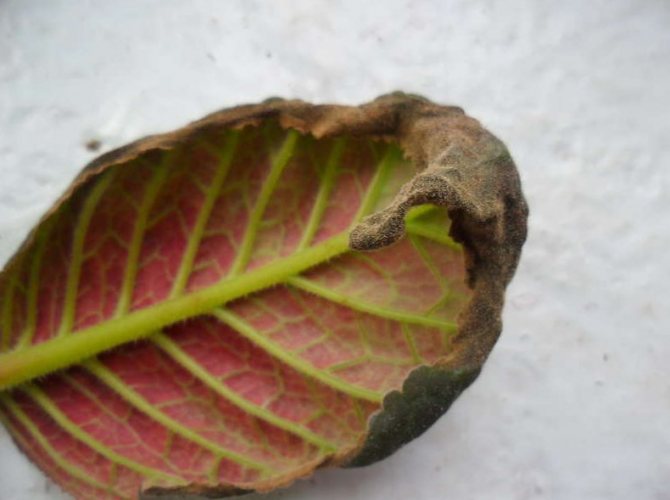
When infected with a spider mite, white dots appear on the leaves, which subsequently turn into yellow-brown spots. When thrips settle on gloxinia, the leaves acquire a silvery hue, white strokes and dots appear on them. Gradually they turn brown and dry, and their edges curl upward.
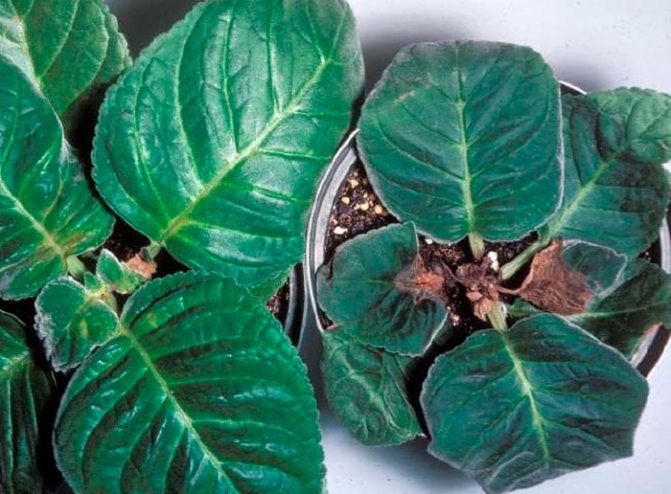
Often the tubers and root system rot from excessive watering. In this case, the leaves lose their turgor, which is not restored after watering. In this case, the plant can only be saved by re-rooting the top. The tuber must be removed and inspected, the rot must be cut out, soaked in a fungicide solution and tried to germinate again. The buds may not bloom due to drafts and cold watering.
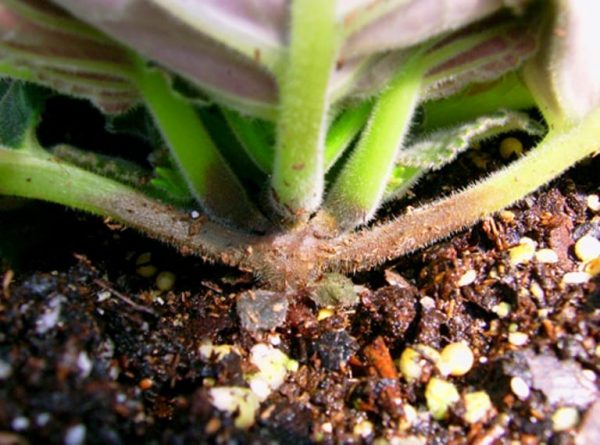
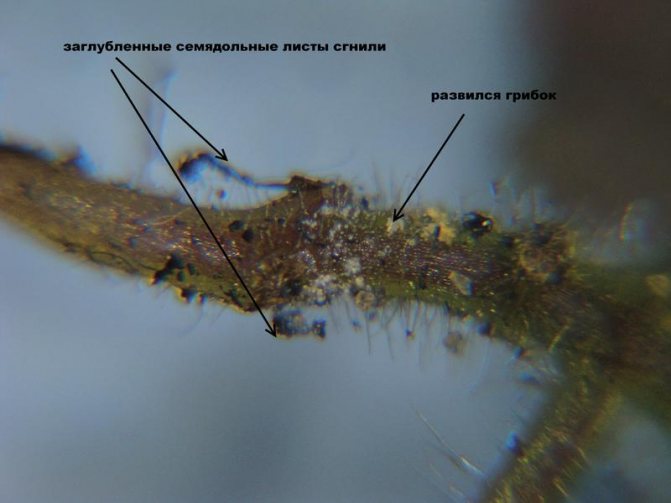
Root and stem rot
Gloxinia are susceptible to fungal diseases. Their development is facilitated by excessive watering, keeping in a cold and damp room, the use of contaminated soil or planting material. Watery dark spots appear on the leaves, the stem becomes soft.The plant can be saved by removing all infected parts and further processing with drugs such as "Maxim", "Fitosporin".
Diseases and pests
Diseases
Gloxinia, like many other home-grown plants, is susceptible to various diseases. Most often, those flowers that are improperly looked after are sick.
Gray rot - brown specks form on the foliage of the affected specimen. Cut out all affected parts of the plant and spray the bush with a fungicidal solution.
Root rot - Gloxinia is most often affected by it. The root system turns dark brown, and rotting of the stem at the base is also observed, after which the flower dies. This disease develops if cold water is used to water the bush, and it can also happen if liquid stagnates in the substrate all the time.
In addition, such a flower can infect a black leg, late blight, powdery mildew and other fungal diseases. For prophylaxis, spray the plant with Fitosporin, and in order to cure a diseased bush, it must be treated with Fundazol.
Pests
This plant is susceptible to disease and viral diseases, the main carriers of which are spider mites or cyclamen mites and thrips.
Cyclamen pliers very small and can only be seen with a microscope. However, if there are a lot of mites, then their accumulation can be seen on the seamy surface of the leaves, while they look like a layer of ordinary dust. It is possible to understand that such mites have settled on gloxinia by the following signs: deformation and thickening of the leaf plates is observed, while they turn down along the edge, twisting of the stem, wilting of buds, deformation of petals on flowers and drying of the tops of the shoots also take place.
Spider mite is also very difficult to see. This pest also settles on the seamy surface of the foliage, while it sucks out the cell sap from the plant. A sign of infection of a plant with a spider mite is the presence of dots of white color on the surface of the leaf plates, which eventually turn into brownish-yellow specks. If there are a lot of pests on the bush, then a thin web can be found on its surface.
If they settled on gloxinia thrips, then streaks, dots and specks of light color appear on its leaf plates, while the intact section of the plate acquires a silvery sheen. After a while, these areas dry up, and on the lower side they turn brown, while the edges of the plate are curled upward. Treat the bush 3 times with an interval of 7 days with an insecticidal agent (Karbofos, Aktellik, Aktara or Fitoverm), after which you will need to replace the top layer of the substrate or completely change it. This is done because the larvae of the pest go into the substrate. The same insecticides can also kill ticks, but in this case, replacing the soil mixture will not be needed.
Reproduction
Gloxinia are easy to reproduce. This can be done using a leaf (both part of it and a cutting), seeds, peduncle, shoot, and also by dividing the tuber.
Reproduction using a leaf
Reproduction of gloxinia by cuttings is the most popular method. A young leaf with a small petiole up to 3 cm is best rooted in boiled water and dark glass containers. To avoid decay, an activated carbon tablet is placed in the water.
The cuttings are rooted and immediately in the soil. To do this, fill the container with nutrient soil, and make a hole with river sand in the center. A stalk is fixed in it and covered with a transparent container or polyethylene on top to create a mini-greenhouse. It can be harvested to form tubers - usually after a month.
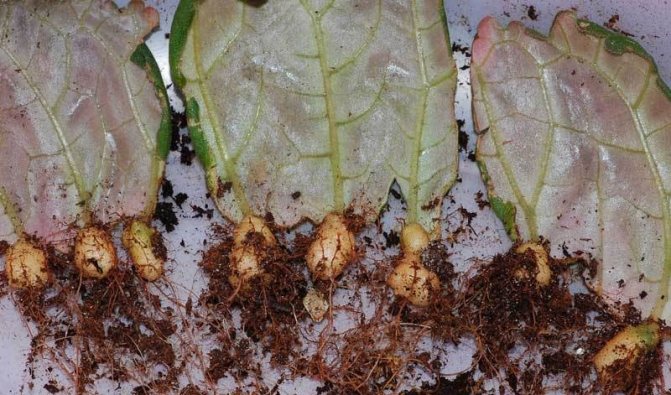
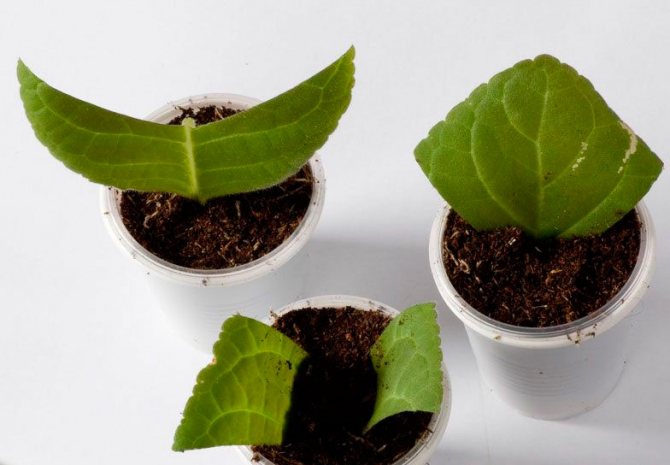
Reproduction of gloxinia by parts of a leaf plate
Can be propagated by part of the leaf. To do this, take a large sheet and make cuts along the veins. The sheet is placed on the ground, pressed a little and covered with a greenhouse. This way you can get several young babies of gloxinia, but the tubers will be smaller than when rooting the cuttings.
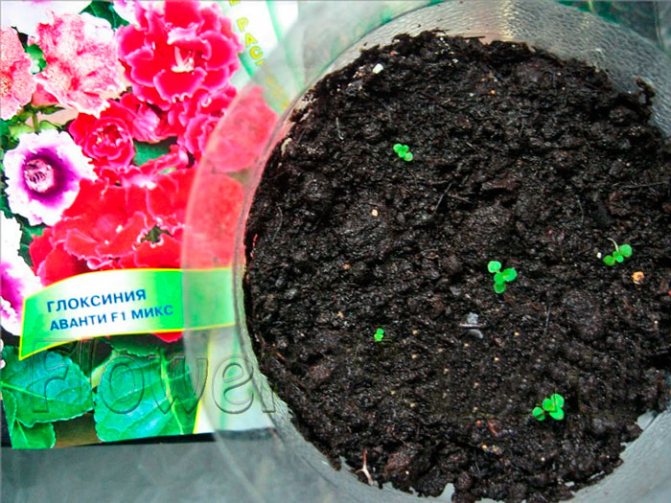
Seed propagation
For reproduction, seeds are taken that are harvested less than 3 years ago. They are sown during the cold season - from November to February. To do this, take a wide, shallow container, cover it with leafy soil and sow seeds, without sprinkling them with anything on top. The container is covered with a transparent material and kept in a bright room with a temperature of 22 degrees.
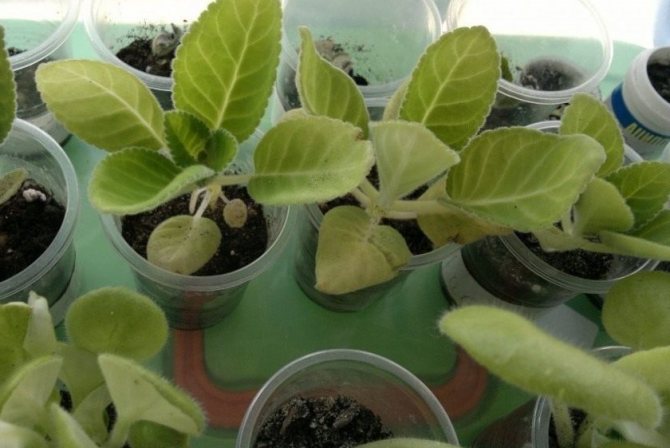
When the first 2 leaves grow in the sprouts, gloxinia are planted at a distance of 2 cm from each other. And when the seedlings grow up to 3 leaves, they are planted 5 cm. After these leaves develop well, the plants are planted 10 cm, but again in a common bowl. It is possible to finally plant gloxinia in pots only when the bushes begin to touch each other.
Peduncle propagation
When the gloxinia fades, you need to cut off the peduncle and put it on rooting in the water. After the roots grow back, they do the same with the cuttings.
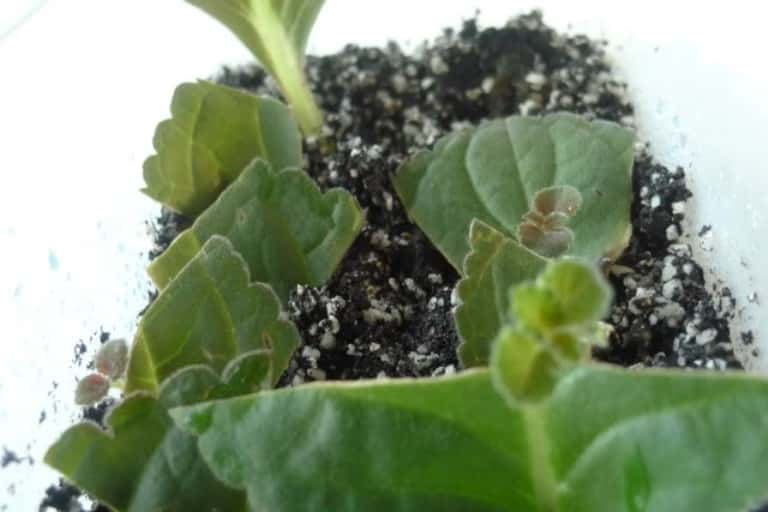
Reproduction by stepchildren
In the spring, several shoots form on the tuber. All or only the strongest can be rooted. Such outgrowths easily take root in water, and then they are planted in the ground.
Tuber division
The overgrown tuber in the spring is cut into pieces with 1-2 sprouts each. The cuts are sprinkled with crushed coal, after which the cuttings are planted in separate pots and germinated in the same way as a regular tuber after wintering. Two days after planting, the soil is not moistened. The method is risky for valuable varieties, since in places of fresh cuts there is a high risk of developing fungal infections and, as a result, loss of sprouts.
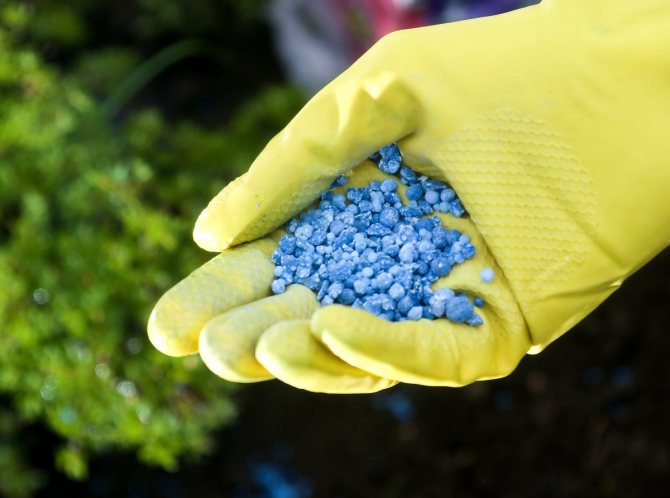
Fertilizing with mineral fertilizers
When growing gloxinia at home, you cannot do without introducing mineral fertilizers into its soil, which will help it develop, grow and be healthy, as well as bloom abundantly and for a long time. Fertilizer is applied to the soil of the flowerpot, a month after planting the gloxinia tuber. The best option for this would be Kemira Lux fertilizer, which has been tested by many growers. It is packaged in packages of 20 and 100 grams. Half a teaspoon of fertilizer is diluted in two liters of water, and the earth is watered in a flowerpot - two to three times a month, depending on the size of the bush and flowerpot. During the flowering period of gloxinia, fertilizer must be applied at least three times a month.
Why does not it bloom
The lack of flowering in gloxinia can be caused by several reasons:
- Lack of lighting. The stems and leaves are stretched out.
- Excess nitrogen in the soil - using the wrong fertilizer.
- Cold, dry indoor air.
- Improper wintering of tubers.
- The pot is too big.
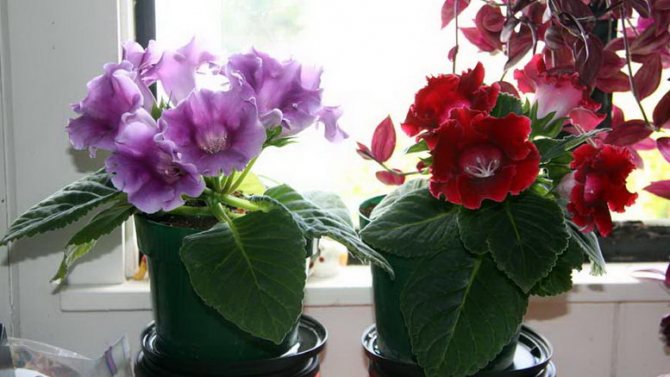
Subject to the conditions of keeping, gloxinia pleases with lush flowering.
Observing all the rules of care, you can achieve lush flowering. And in order for the period to last longer, the faded peduncles must be removed immediately.
Problems caused by improper care and maintenance
With improper care and maintenance, at home, overflow or contaminated soil, gloxinia will suffer from rot, fusarium, rust, late blight or be attacked by pests - nematodes, thrips, mealybugs, ticks, aphids. But even in the absence of disease, with a lack of light, underfilling or overflow, improper fertilization, gloxinia can: stop blooming, lose buds, not go into hibernation and die in the autumn-winter period, lose the brightness of leaves and flowers. Its leaves can curl and become covered with dark spots, even when water gets on them, during watering, or turn red, with a lack of potassium and phosphorus.
The beauty of gloxinia and its flowers can enchant any grower.With proper home care, gloxinia flowers will delight you every year and become a source of pride for you. They will create coziness and comfort in the apartment, and fill it with bright colors.
Purchase
At the flower shop, you can buy both gloxinia seeds and tubers, or a flowering plant that has formed. The price usually depends on the variety. Among lovers of these flowers, the site "Alenushkin Gloxinia" is popular - there you can buy both adult plants and cuttings, tubers of your favorite varieties. On average, you can purchase gloxinia in the range of 100-200 rubles per piece.
If you choose a tuber in a store, inspect it carefully. It should be whole and firm, not have dark rotten areas, and reach 3-4 cm in diameter. In its upper part there is a small depression with dormant buds. If they have awakened, then you can see small furry sprouts.
When buying a mature plant, carefully inspect the leaves for pests. The flower should look healthy, not have suspicious spots, with elastic, uniform leaves. By choosing the right plant and providing it with proper care, you will get a bright bouquet on the windowsill.
Detailed description
To maintain the viability of adult tubers, gloxinia must be properly prepared for winter rest:
- In September-October, after flowering, place the gloxinia in a less illuminated place, for example, on the northern windowsill. Provide a temperature of + 15 ° C. Feed once with potash fertilizer. Reduce watering gradually. Moisten the soil with small portions of water no more than once a week.
- When the leaves begin to dry, stop moisturizing the substrate. You cannot immediately cut off the aerial part of the plant. It is necessary to allow the nutrients to gradually transfer into the tuber from the stem and leaves. If green foliage is cut off, vegetation processes may resume.
- After complete self-withering away of the upper part, cut it off, leaving a small stump with a height of one to one and a half centimeters.
Landing
For this procedure, soil specifically for tuberous is purchased at the store. Add some hydrogel. Fill the pot, place the tuber there.
It is checked for damage before landing. If there are any, they should be eliminated. Treat damaged areas with ash, brilliant green, Fundazol.
REFERENCE... The hydrogel is useful in that it absorbs moisture. As the soil dries up, it gives it up, decreasing in size. Thus, the flowers are not poured, do not dry out.
For the prevention of diseases, treat healthy potatoes with a weak solution of potassium permanganate (7 minutes).
ATTENTION... The container for a potted plant should not be much larger than a potato. Otherwise, there will be no flowering. Due to the growth of roots by the plant.
Temperature regime
Gloxinia is considered a heat-loving plant, therefore it is desirable to maintain an optimal temperature regime at the level of 18-22 degrees. During tuber germination, the plant requires a higher temperature - about 25 degrees. Under such conditions, young shoots develop much faster.
If the temperature exceeds 28 degrees, there is a risk of cessation of culture development. This has the following consequences:
- overheating of the roots;
- loss of leaf turgor;
- lack of buds;
- rapid wilting of flowers.
With a decrease in temperature, there is a risk of slowing down the growth of the plant. In such a situation, gloxinia is supercooled, which entails rotting of the roots, dropping of buds, yellowing of the foliage.
Useful video
We recommend watching a video about the features of the gloxinia rest period and its preparation for winter:
We also recommend that you familiarize yourself with our materials on the rules and intricacies of the gloxinia breeding process:
- seeds;
- sheet;
- cuttings.
Additional Tips
Experienced flower growers often give a number of tips for the care of gloxinia.
Here are some of them:
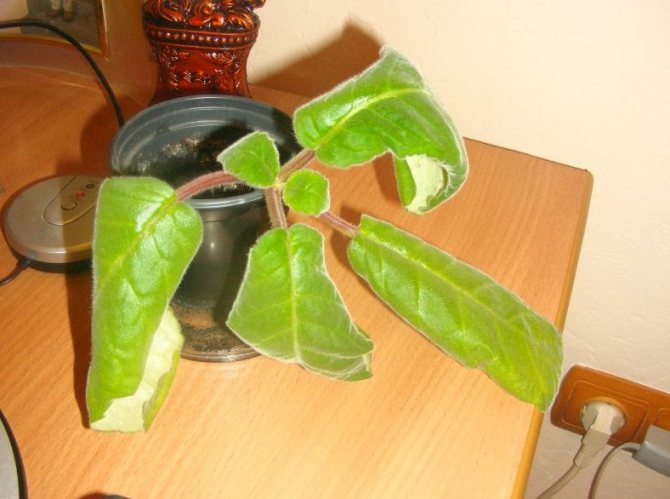
- Young shoots are grown from seeds and are ready for wintering only at 5–6 months. If the seeds are planted late, the tuber may not have time to form. Such a flower cannot be sent to winter. Otherwise, there is a risk of losing it altogether, therefore, in winter, it is enough to maintain the necessary humidity and light level so that the plant does not stretch.
- In order to determine whether a flower has matured enough for wintering, you can simply count the number of leaves. Only the presence of at least 6 pairs indicates that the plant is ready.
- Too much stretching of the shoots may indicate a lack of lighting, too high a temperature in the room, or oversaturation of gloxinia with nitrogen. To eliminate the problem, analyze the conditions in which the flower is located, and either add light to the room, or more often ventilate the rooms (but without drafts), or temporarily stop feeding with nitrogen fertilizers. It is advisable to cut off extended shoots.
- Rolling leaves in gloxinia may indicate that the room is too cold or the plant is over-watered. To eliminate the problem, just in case, carry out treatment against pests, check the room for drafts or low temperatures, and also analyze if watering is carried out in too large doses.
- Gloxinia leaves can turn yellow with chlorosis, a lack of nitrogen, or from excessive watering. If we have already considered the third option, then chlorosis is caused by too hard water for irrigation. Apply warm, settled moisture. Add a drop of lemon juice or vinegar to soften it. On the issue of nitrogen deficiency, it is necessary to analyze in what period of its flowering the plant is. As described above in the article, the ratio of elements in fertilizers varies depending on the life cycle of the plant.
- If the leaves are discolored, then this may indicate magnesium starvation. Use special liquid formulations that already contain all the necessary elements.
- When spots appear on the leaves, it is worth treating with insecticides. Although the same can speak about watering with too cold water, and about an excessive level of lighting, causing burns to the plant.
- If the leaves of your gloxinia turn red, then this indicates a lack of phosphorus. It also leads to the fact that the flower may stop growing altogether. To fix the problem, feed the plant with superphosphate.
- To force a blooming gloxinia to bloom again, cut it back to 2-3 pairs of leaves. In one and a half or two months, the plant will grow a new stem, and flowering will begin anew. You can speed up the process by adding a composition containing phosphorus and potassium.
Learn more about planting and caring for gloxinia at home.
Gloxinia needs care and attention, therefore, for abundant flowering, it must be properly prepared for the dormant period. At this time, the plant needs regular, but rare watering and minimal lighting. Subject to the basic rules of care in winter, gloxinia will delight its owners with lush and long flowering.
Watering
Rules:
- Warm water at room temperature.
- If the water is hard, add a third of a teaspoon of baking soda or boil and cool.
- From the tap, the water is defended (to remove chlorine, heavy compounds).
- Better morning watering. Evenings can lead to fungal infections. In the afternoon it is also undesirable.
- Water cannot be poured onto the green mass. Rot may appear.
- Better around the edge of the pot or from the pallet.
- Moisten as needed. Excessively impossible: the root will rot.
- For proper moisture, there must be a structured substrate with drainage. There is a hole in the bottom of the container.
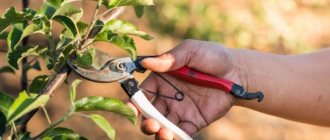
Winter preparation and pruning
If the plant is young, then in the first year gloxinia does not need to be cut off in order for the flower to gain strength.
If the plant has shed all its leaves, you need to cut off its stem. so that the height of the remaining small stem above the ground is no more than one centimeter.
Then, for a month, the plant is supplied with a minimum amount of moisture and is not fed. And only after that, the tubers are carefully dug out of the ground and harvested to rest.
Proper care of gloxinia bulbs during hibernation, then they can be saved until the next season. After proper rest, the plant will begin to give new shoots and roots.

Before wintering, cut the leaves and stem up to 1 cm tall
Different varieties
There are 25 types. Of these, two types (royal and beautiful) are the basis of many varieties.
Most popular:
Cleopatra... Differs in the refinement of the petals. Their wavy edges are covered with peas, which are connected to the middle in solid purple lines.
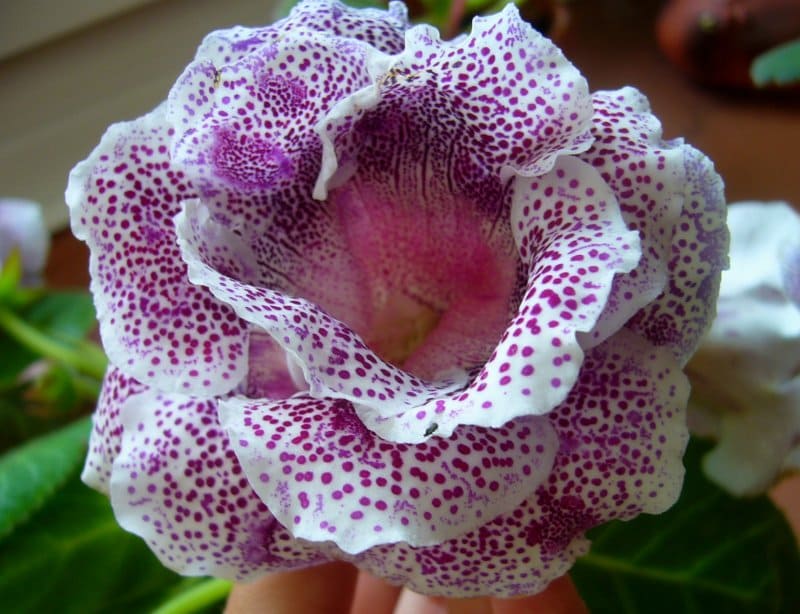
Gloxinia Cleopatra
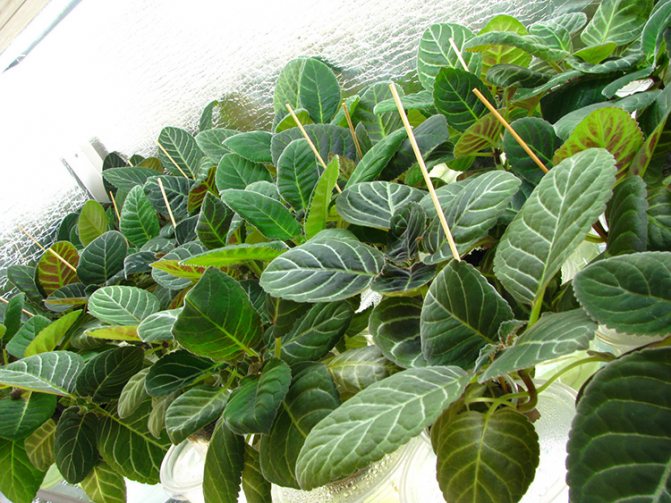
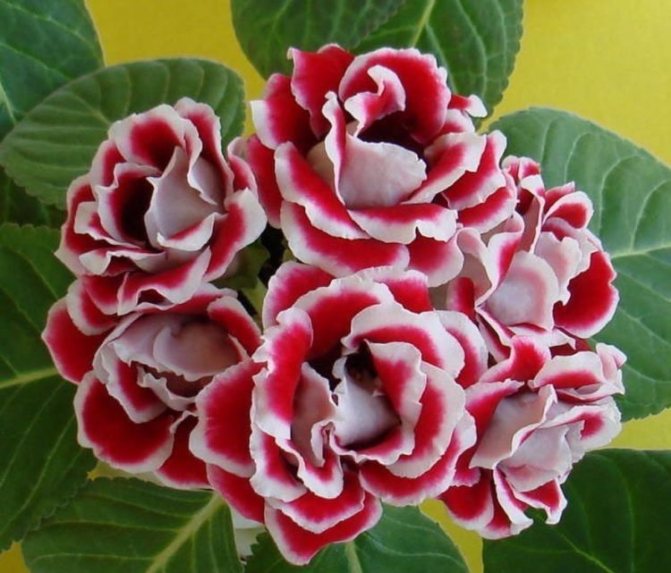
Kaiser Wilhelm... Lots of fleshy leaves. Flowering begins after 3 years. At the same time, it produces a large number of peduncles. The petals are dark purple, with a white border along the edge.
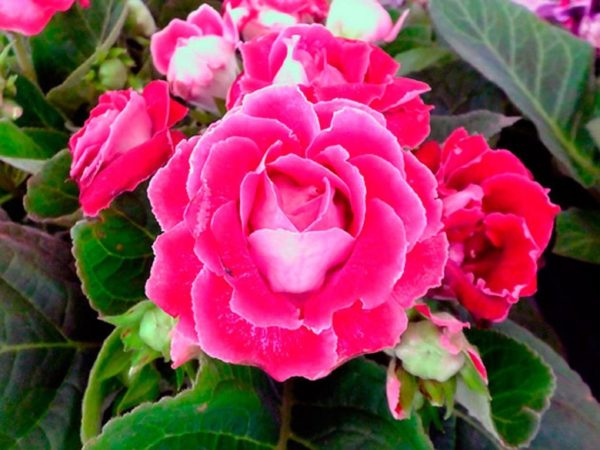
Yesenia... Lush harmonious bush with dark pink flowers.
Gloxinia Yesenia
Winter cherry. Lush bush. It has buds with large white petals covered with red, maroon dots.
Photo
Check out the photo of a flower with the beautiful name "sinningia" below:

Synningia care after purchase
It is immediately necessary to make a transplant. The transport substrate is not suitable for permanent plant growth. Instead, a more nutritious soil is needed. Otherwise, the root system may rot.
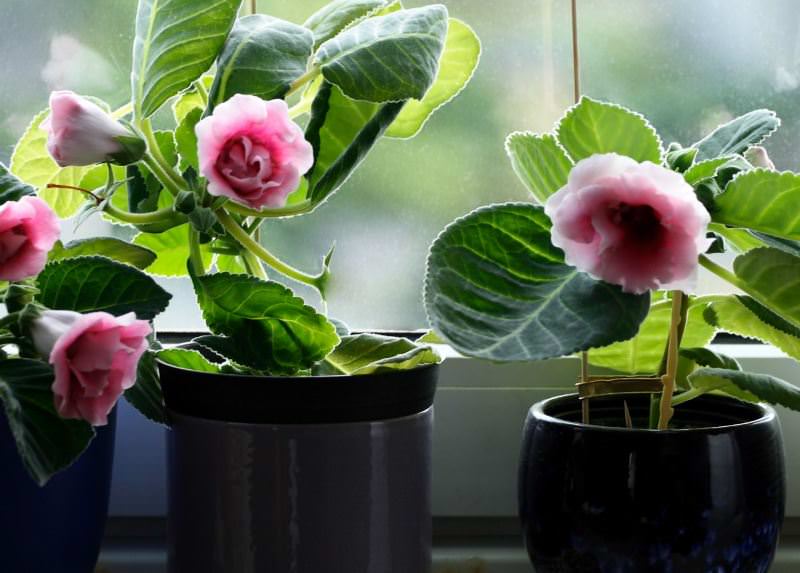
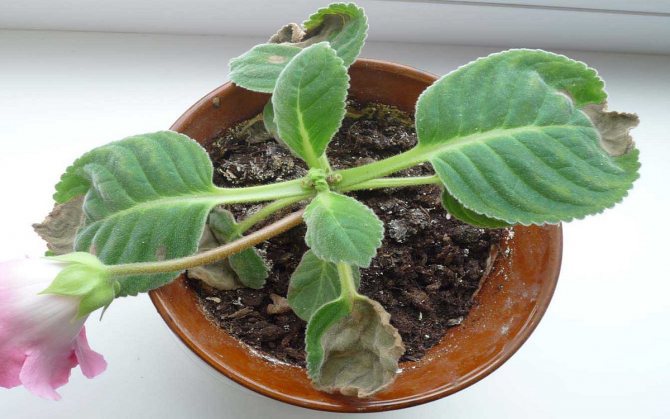
Gloxinia in a pot
When transplanting, you should inspect the tuber. If damage is found, repair. Cover the wound with ash or cover it with brilliant green.
How to wake up a plant
If the tubers of the flower are healthy, then they will wake up on their own.... But if for some reason this does not happen and the flower continues to rest, then you can wake up the sleeping plant as follows:
- Prepare a plastic bag.
- At the bottom of the bag, place two tablespoons of soil, which is based on peat.
- Moisten the soil a little with cold water.
- Remove the tuber, rinse it well with running cold water and carefully check it for rot. If everything is fine, then it needs to be dried and placed in a plastic bag.
- Tie the bag well and place it in a place where it is light and warm, under the lamp.
After two weeks, condensation will begin to appear on the walls inside the bag, and green shoots will begin to appear from the tuber of the plant. The gloxinia root has already woken up and needs to be planted in a flower pot.
The brighter the light that hits the gloxinia bulb, the more new and young shoots will form on it.
To wake up the flower, moisten the tuber with water, place in a bag and place under the lamp
The most popular types of indoor gloxinia
Gloxinia has many different types. The flower is subdivided according to the length of the peduncle, the shape of the bell, the color of the petals, the velvety texture of the petals. The most popular varieties:
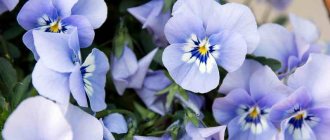
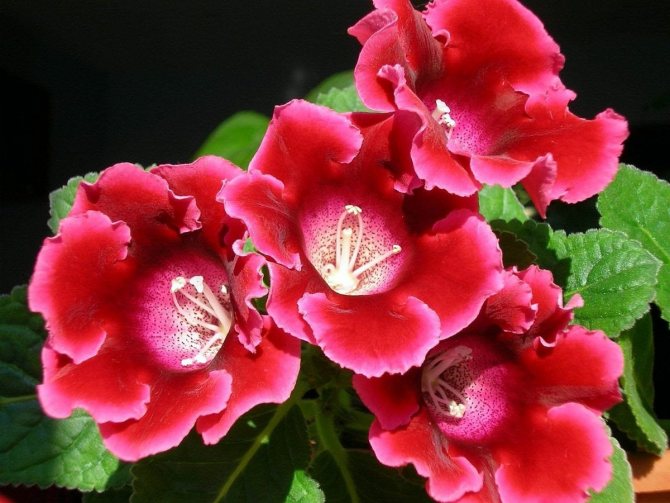
"Beautiful"
Gloxinia "Beautiful"
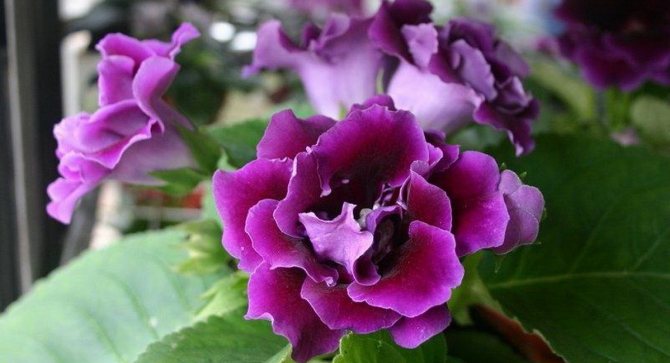
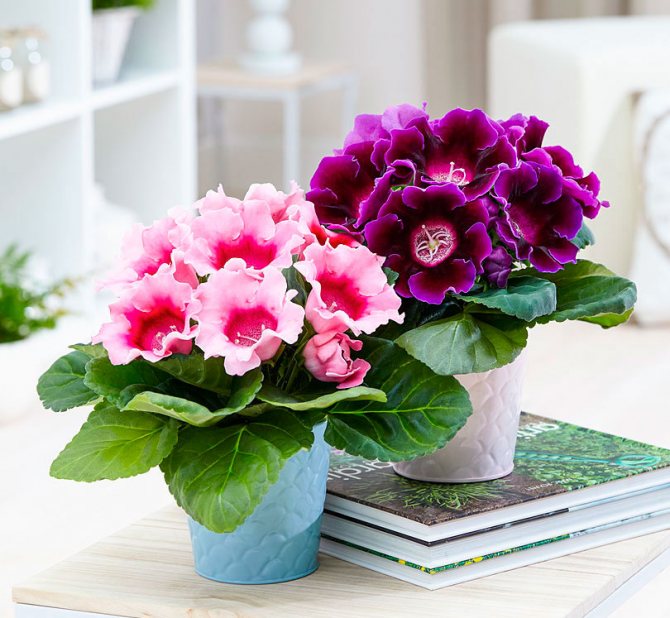
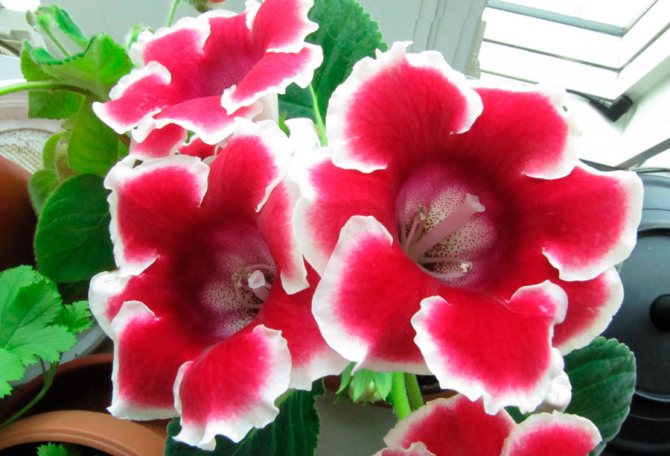
This variety is the most common. It can be bought in specialized stores and in the market. The flower can be of different colors: brindle, pink, purple, blue, etc. Some varieties have smooth petals, others double.
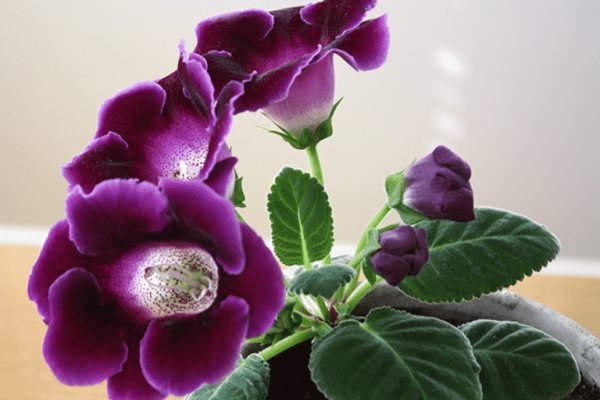
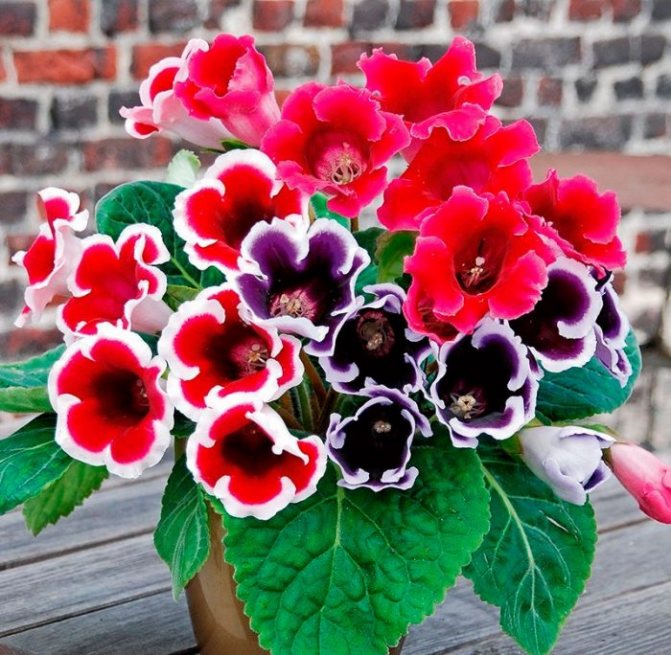
"Royal"
Gloxinia "Royal"
This variety has large flowers that resemble a rose flower. And all because the petals grow straight. The royal gloxinia has a rich color palette.
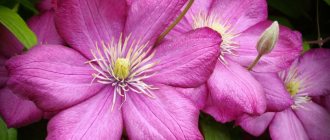
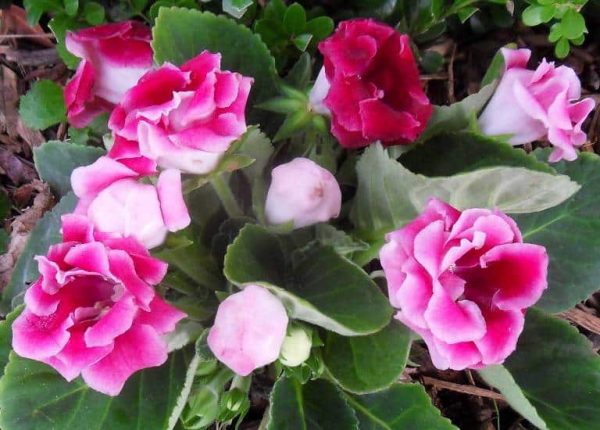
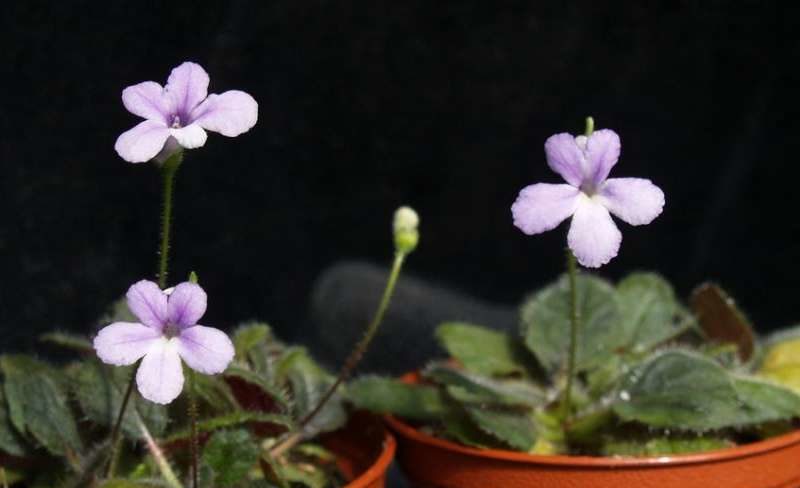
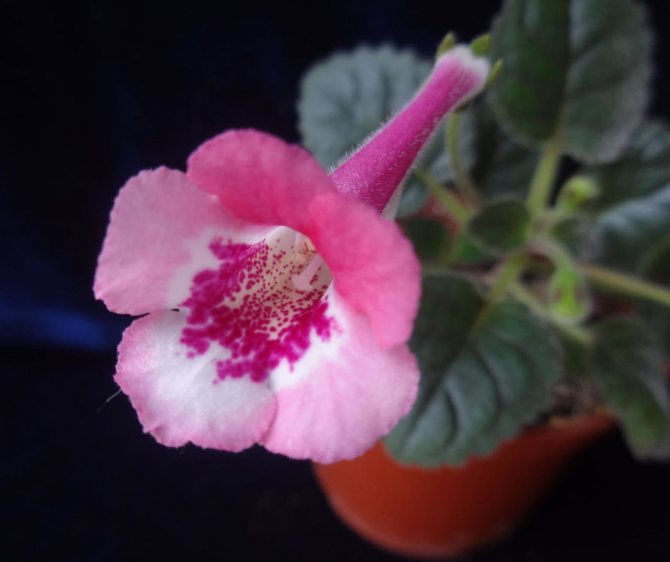
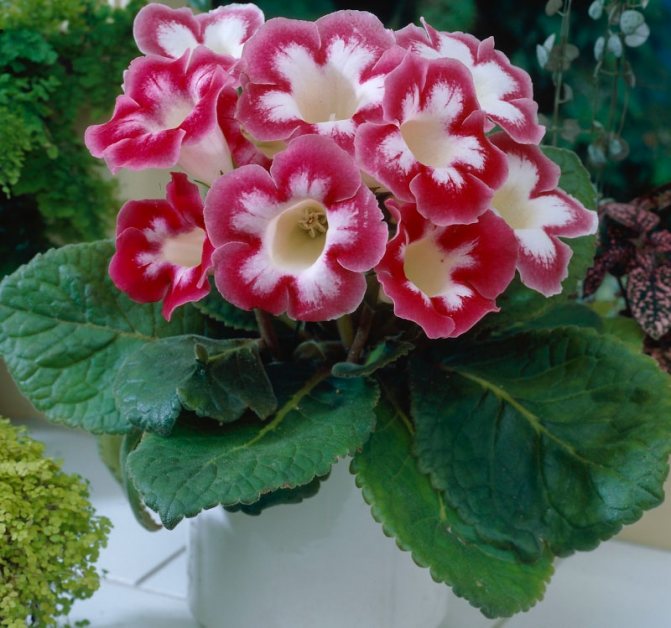
"Pink Flamingo"
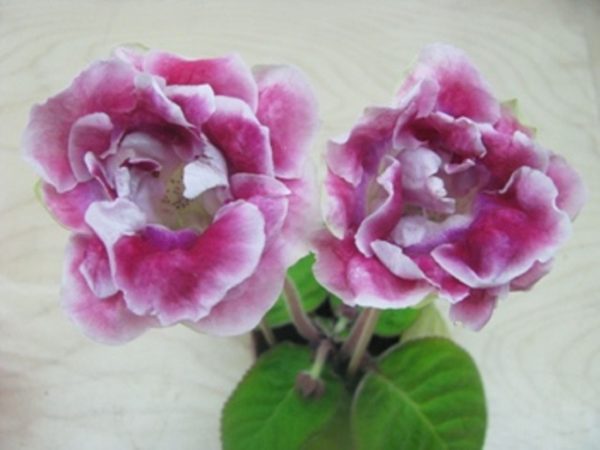
"Pink flamingo"
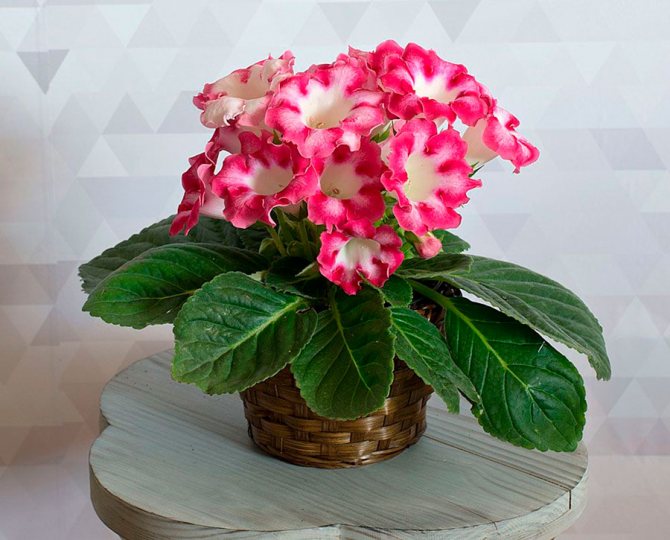
Very delicate small pink inflorescences with a white border around the edges.
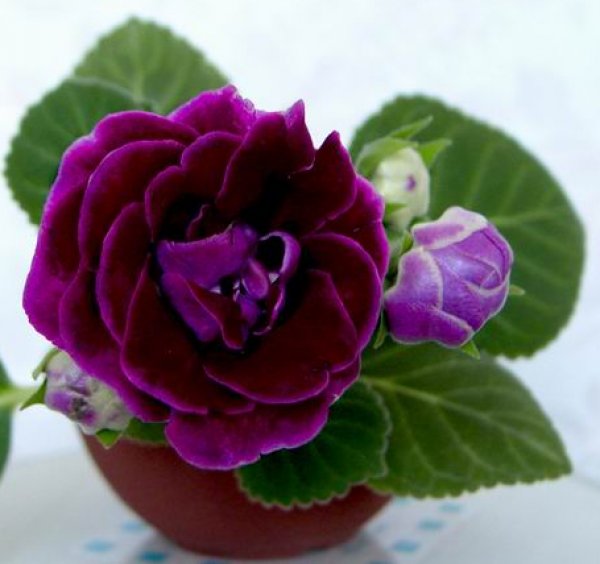
"Yesenia"
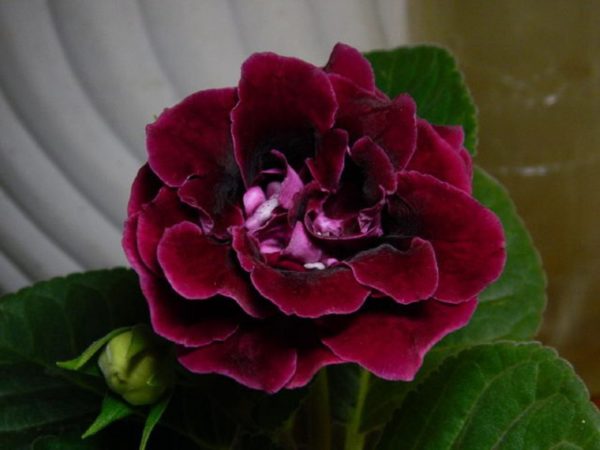
"Yesenia"
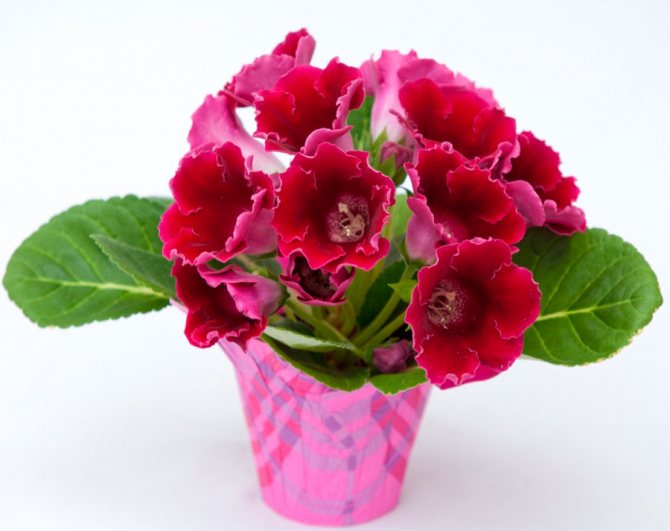
The unique deep rich burgundy color of the petals, with a terry coating, makes this flower incredible.
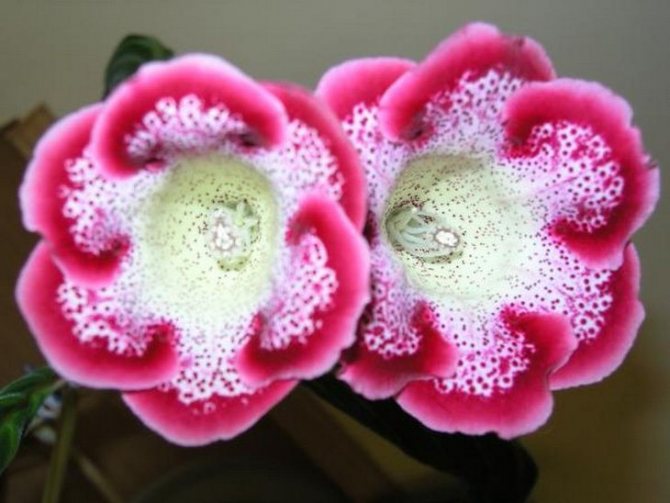
"Winter cherry"
"Winter cherry"
This flower has several rows of white petals, sprinkled with a burgundy speck.
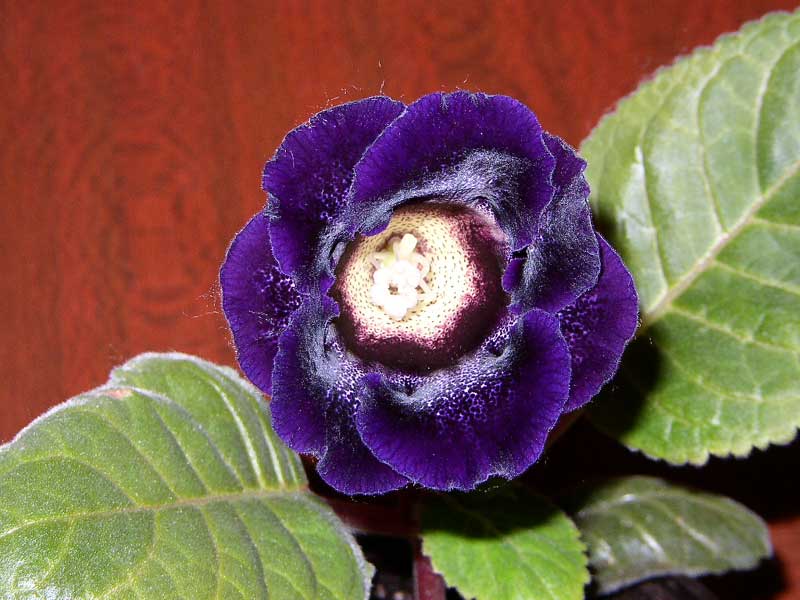
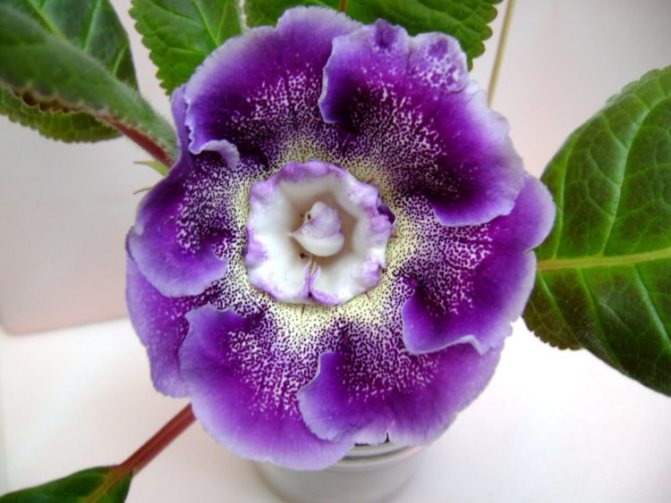
"South night"
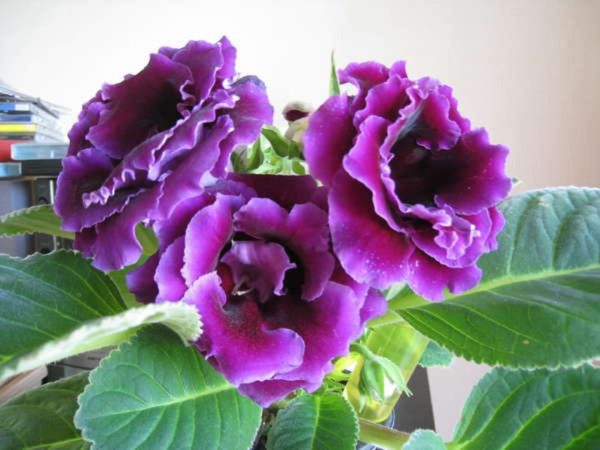
"South night"
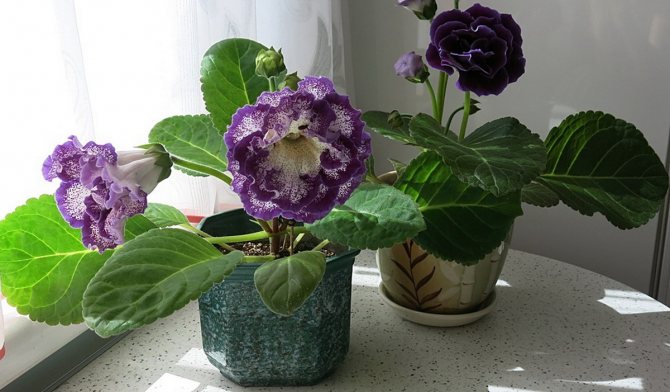
Intensely dark purple color, almost black, at the very base of the inflorescence, gradually brightens, turning into light purple at the edges of the petals. Such an unusual design, as if with overflows, makes Southern Night an extremely popular gloxinia variety.
"High Ligh"
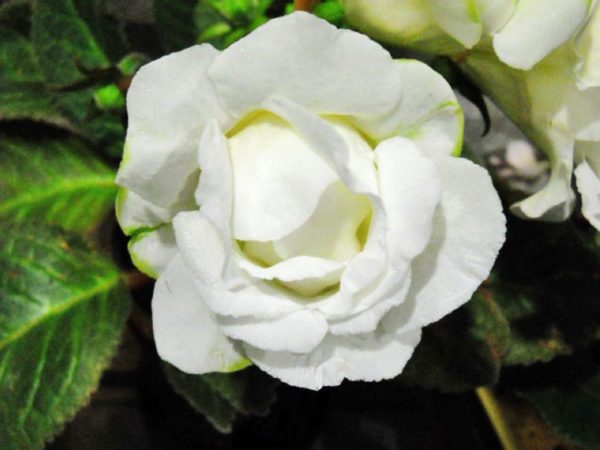
"High Ligh"
Decorative, artificially bred variety. Large snow-white flowers are so attractive that they often decorate not only rooms, but also bouquets. They even make bouquets for brides or add flowers to holiday gift bouquets.
Conditions for storing gloxinia in winter
This tropical plant has 3 main growth stages: dormancy, vigorous growth and flowering. Rest for a flower is very important, since in its absence it ceases to bloom altogether or blooms, but not abundantly enough. In order for the plant to overwinter correctly, it needs to create certain conditions. However, these conditions depend on the storage method.
Regardless of the method of storing gloxinia in winter, the following conditions must be observed:
- lack of access to sunlight;
- temperature regime - within + 5 ... + 18 degrees;
- humidity - 60–90%.
At temperatures above +18 ºС, a tropical flower can also be stored during the dormant period, but its duration will be significantly reduced (from several months to several weeks). Knowing the storage features, it is necessary to properly prepare gloxinia for wintering.
Did you know? According to the language of flowers, which was introduced by King Charles II of Sweden in the XYIII century, gloxinia meant "love at first sight."
Exit from the resting state of gloxinia

The appearance of young shoots on tubers at the end of February indicates the beginning awakening of gloxinia. Then the tubers are transplanted into a fresh, slightly moistened soil substrate, without deepening. It is better that the tops of the tubers are not covered with earth. Watering begins a week after transplanting. Watering should be moderate, waterlogging threatens fungal root diseases. At the beginning of the growing season, it is advisable to remove several shoots, leaving a few strong shoots. This is done in order to direct the vitality of the plant to the development of tubers, the quality of which will determine the beauty and splendor of flowering. Broken shoots that have reached a length of 5 cm can be used for plant propagation. They are planted in other pots for rooting and covered with transparent plastic caps with ventilation holes. It is convenient to use plastic bottles for making shelters.
Possible growing problems and diseases of gloxinia leaves.
Possible problems
If the tubers were stored in unsuitable conditions, they wake up early. There are several solutions to solve this problem:
- If very small sprouts appear on the tuber, then they are left and the amount and amount of moisture is reduced.
- Large shoots are cut, and the root is returned to the storage location. In the spring, it is transplanted into the prepared soil.
- The tuber is immediately planted in a container and illuminated with fluorescent lamps. Then the plant grows weak and very thin. At the end of winter, the top of such a flower is cut off and rooted in another pot. After a short time, gloxinia gives young shoots.
- Keep awake tubers in cooler conditions to slow down development. At the same time, they create high-quality natural lighting.
You may be interested in:
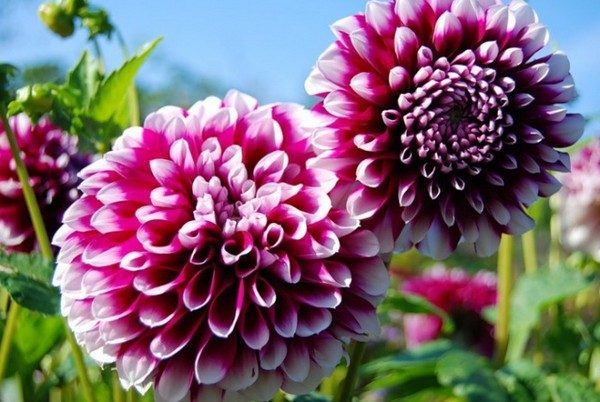
When to dig dahlias in the fall in the fall and how to store Dahlias are a flower bed decoration, when to dig out and how to store them are of interest to many summer residents. Autumn period ... Read more ...
When a flower does not wake up at the right time, its vitality is restored as follows:
- 2-3 tbsp are placed at the bottom of the plastic bag. l. light soil, moistened with water.
- Place the onion on the ground and seal the bag.
- The bag is placed in a well-lit place so that it has a temperature from +24 to +28 degrees.
- The bulb is ventilated every 3 days.
After 15 days, the tuber sprouts. Their number depends on the quality of the lighting. The better it is, the more sprouts are formed. The awakened plant is transplanted into a pot, leaving 2 shoots on the tuber. Unnecessary ones are cut off and used as a means for propagation.
While in the greenhouse, the tuber can turn green. This is normal, after planting in the ground, it will become a normal shade. Sometimes, when you wake up, the roots appear first, and not the green mass. Then it is also transplanted into a pot, sprouts appear after a few days.
Answers to popular questions
What to do when gloxinia fades?
Answer... It is necessary to cut off the stem. Leave 1.5 cm closer to the ground. Move to a more illuminated place, feed. Re-flowering will occur.
Allow the leaves to dry completely before going on winter holidays.
Sinningia doesn't want to retire.
Answer... Do nothing by force. This means that the nodules are young, small. wintering may not survive. In winter they must be watered very carefully, provide adequate lighting and food.
Common varieties
There are many varieties of gloxinia, given to us by nature. In indoor floriculture, two of them have taken root: royal gloxinia (Gloxinia regina) and beautiful gloxinia (Sinningia speciosa). Thanks to active breeding work, many varieties and hybrids have appeared within each species.
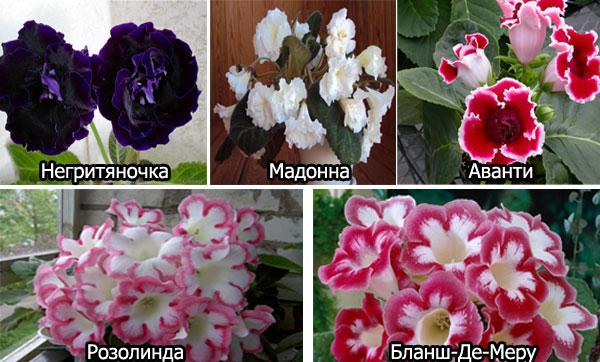
By size, gloxinia are divided into standard (25-35 cm), compact (15-25 cm), miniature (5-15 cm) and microminiature species (5 cm or less). For example, the popular Gloxinia Avanti is a series of hybrids with compact, not prone to stretching, and at the same time, abundant flowering bushes.
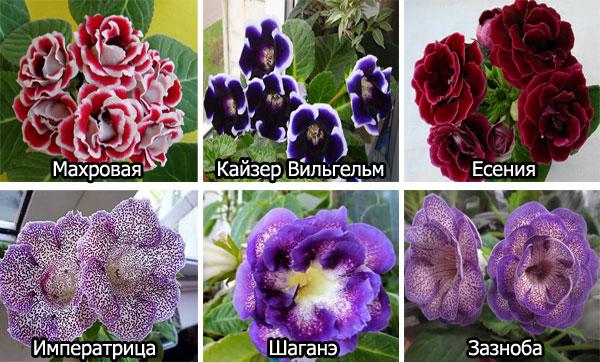
According to the location of the petals in the bud, gloxinia are divided into double and simple. Gloxinia terry is more attractive, but it is more difficult for it to open the buds. Due to the demand, more and more terry varieties appear. For example, the Negro, which is distinguished by the rich purple color of the petals. Among the white terry varieties, the large-flowered High Light and the marshmallow-pink Triumph Tender are remembered.
Gloxinia Yesenia, a standard Dutch hybrid with raspberry-colored petals, which has become widespread, also boasts a large double flower. Simple varieties are not inferior in beauty and popularity. For example, gloxinia Kaiser Wilhelm with dark purple petals bordered by a clear white stripe. Gloxinia Rosalinda is also not losing ground - a variety with simple snow-white petals bordered by a wide crimson stripe.
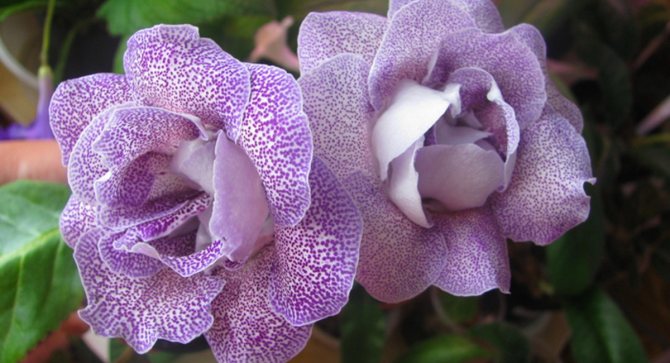
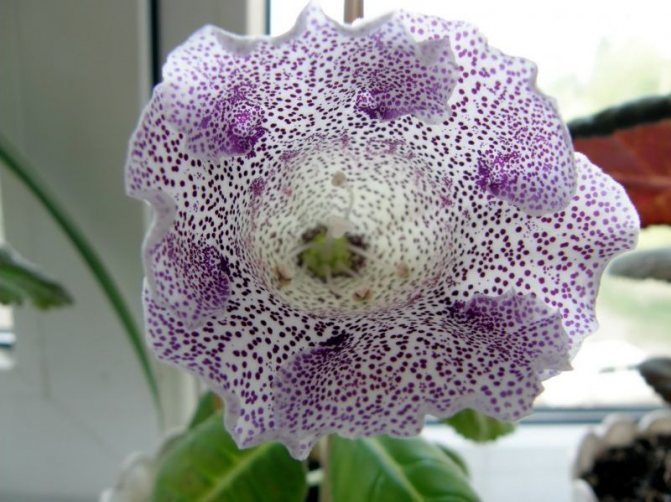
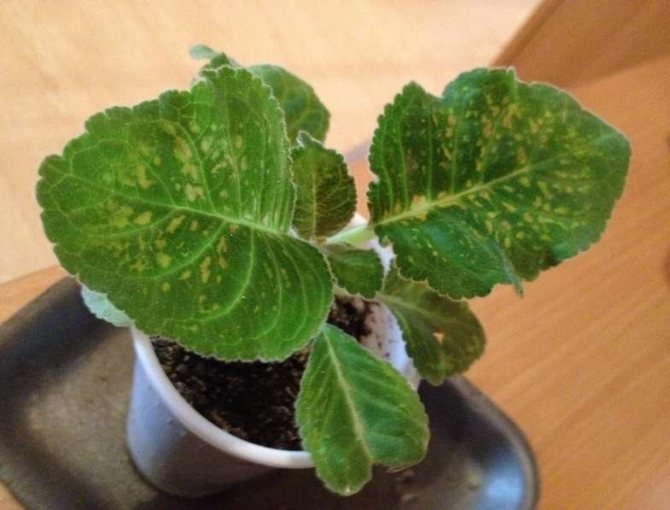
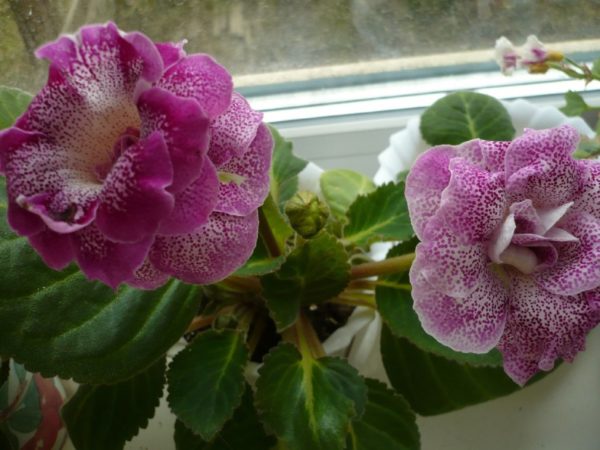
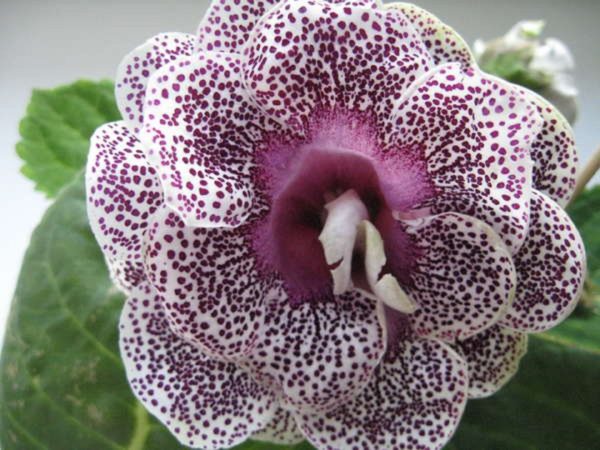
According to the color of the petals, monochromatic, chintz and tiger gloxinia are distinguished. Gloxinia Madonna is an example of a monochromatic color - a large-flowered snow-white plant. Gloxinia Empress, a popular variety with a simple flower in indoor floriculture, can be classified as calico. Its white petals are covered with small purple specks. Another calico gloxinia, Zaznoba, is decorated with a larger speck. Gloxinia Shagane is an example of a tiger coloration. In addition to the speck, it has a wide strip along the edge of the petals.
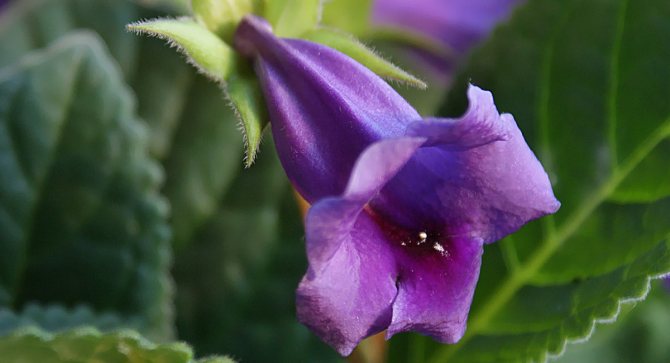
Gloxinia are also distinguished by the shape of flower buds, highlighting cup-shaped, tubular, funnel-shaped, gramophones and unusual shoe-shaped tedeas. Among all the variety of varieties, everyone will be able to choose a suitable "pet" for themselves.