What are the flowers of gloxinia?
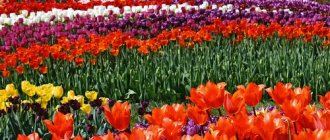
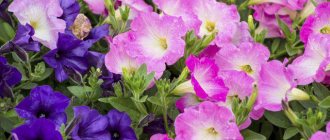
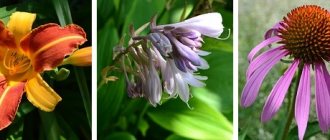
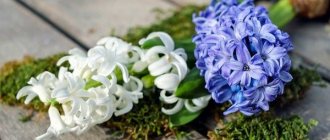
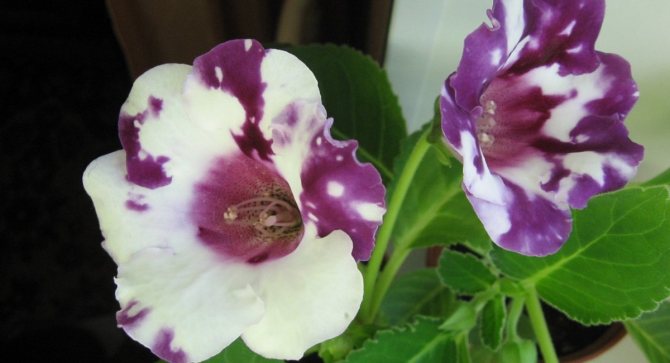
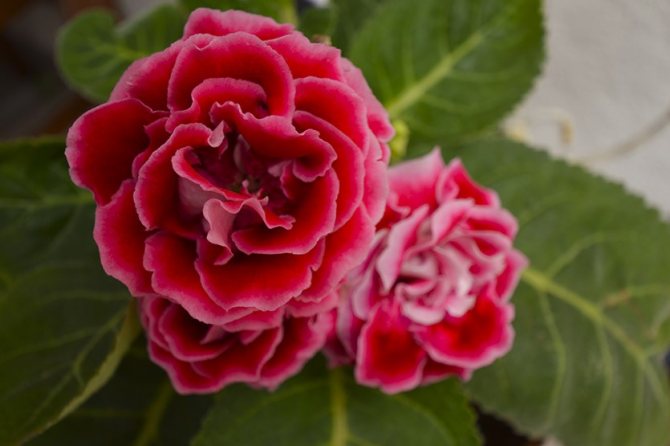
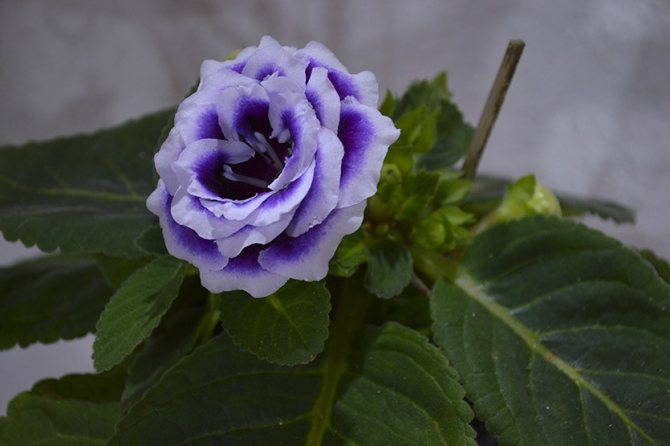
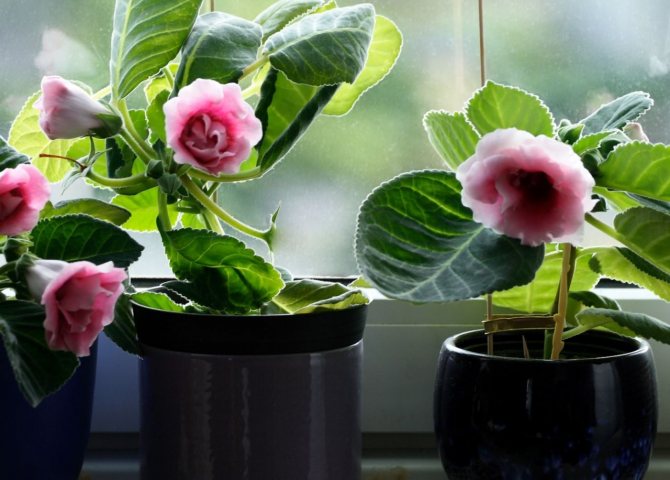
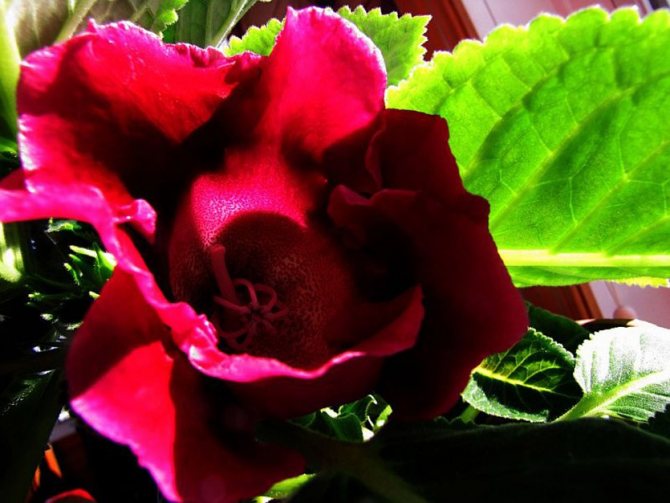
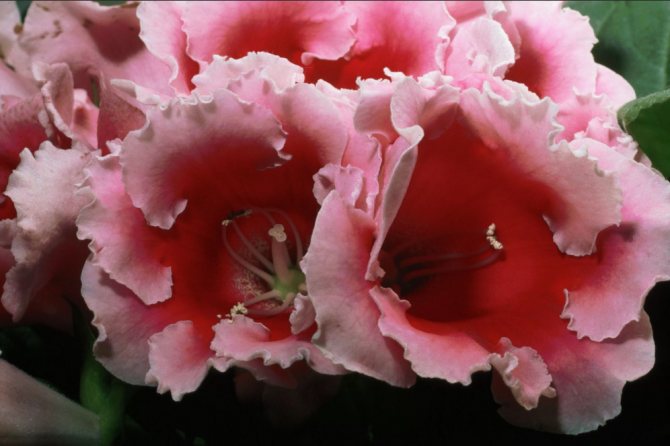
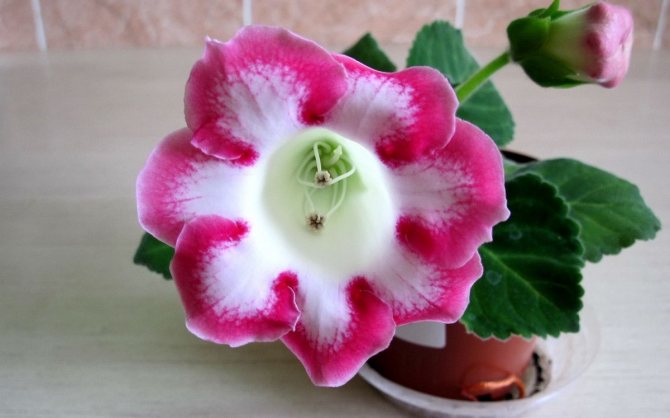
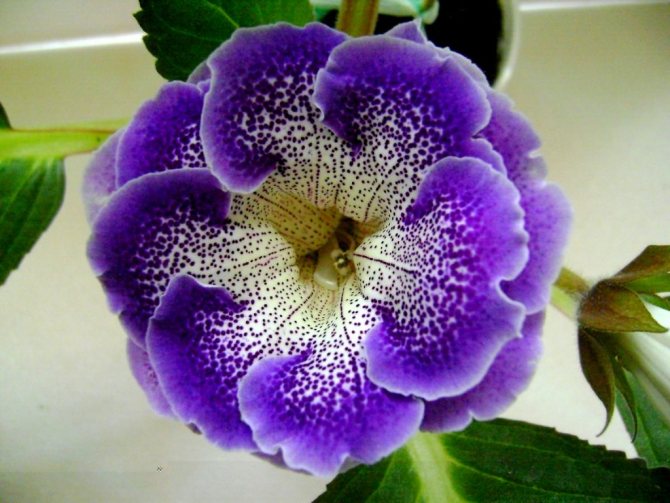
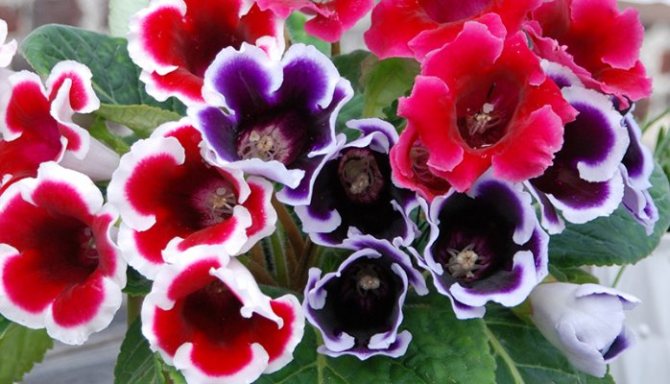
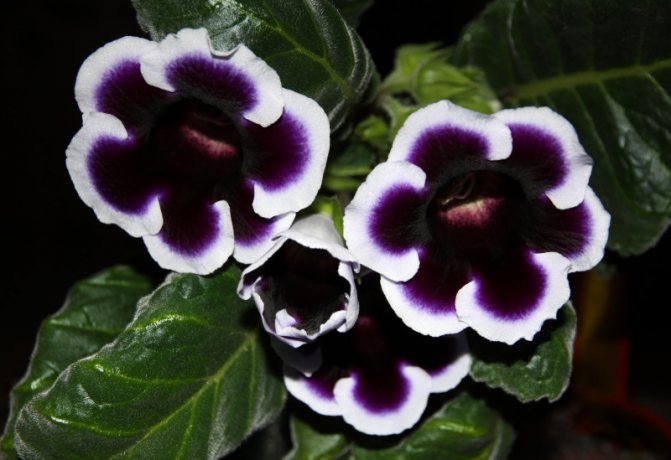
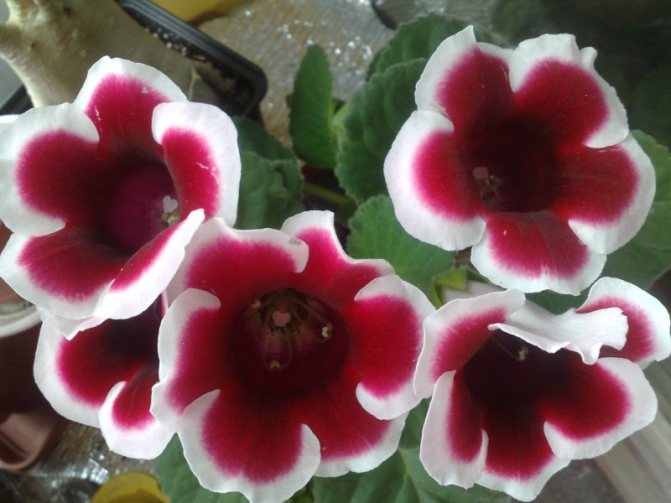
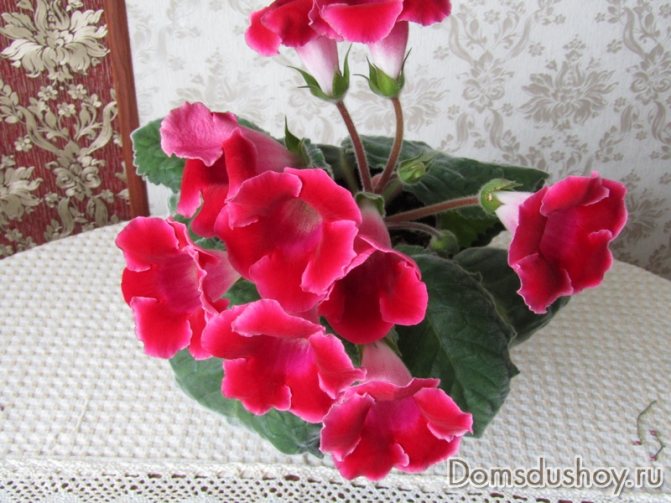
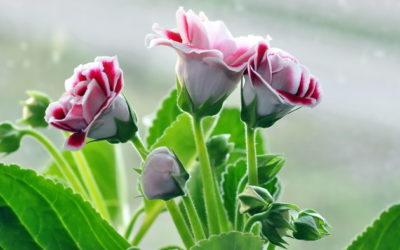
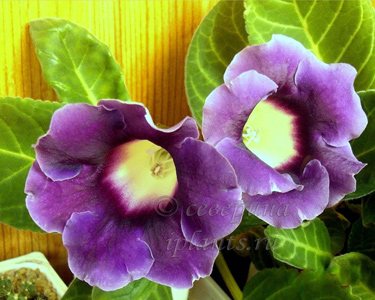
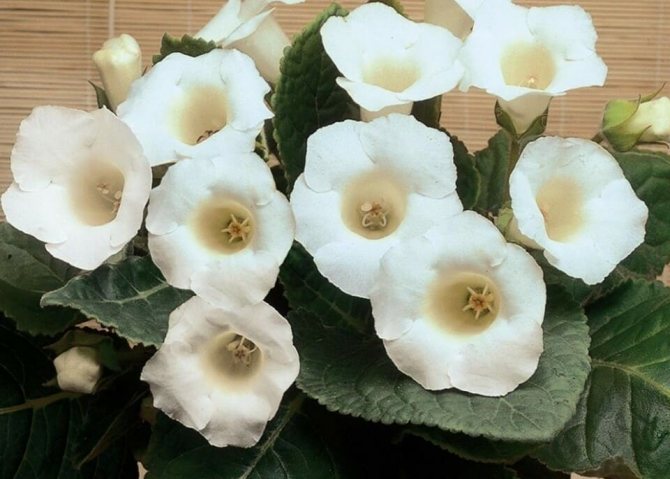
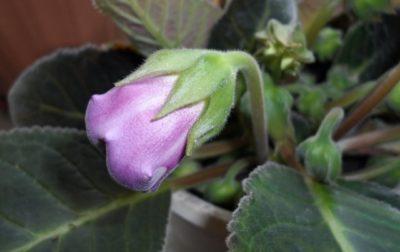
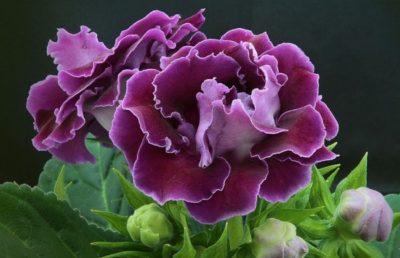
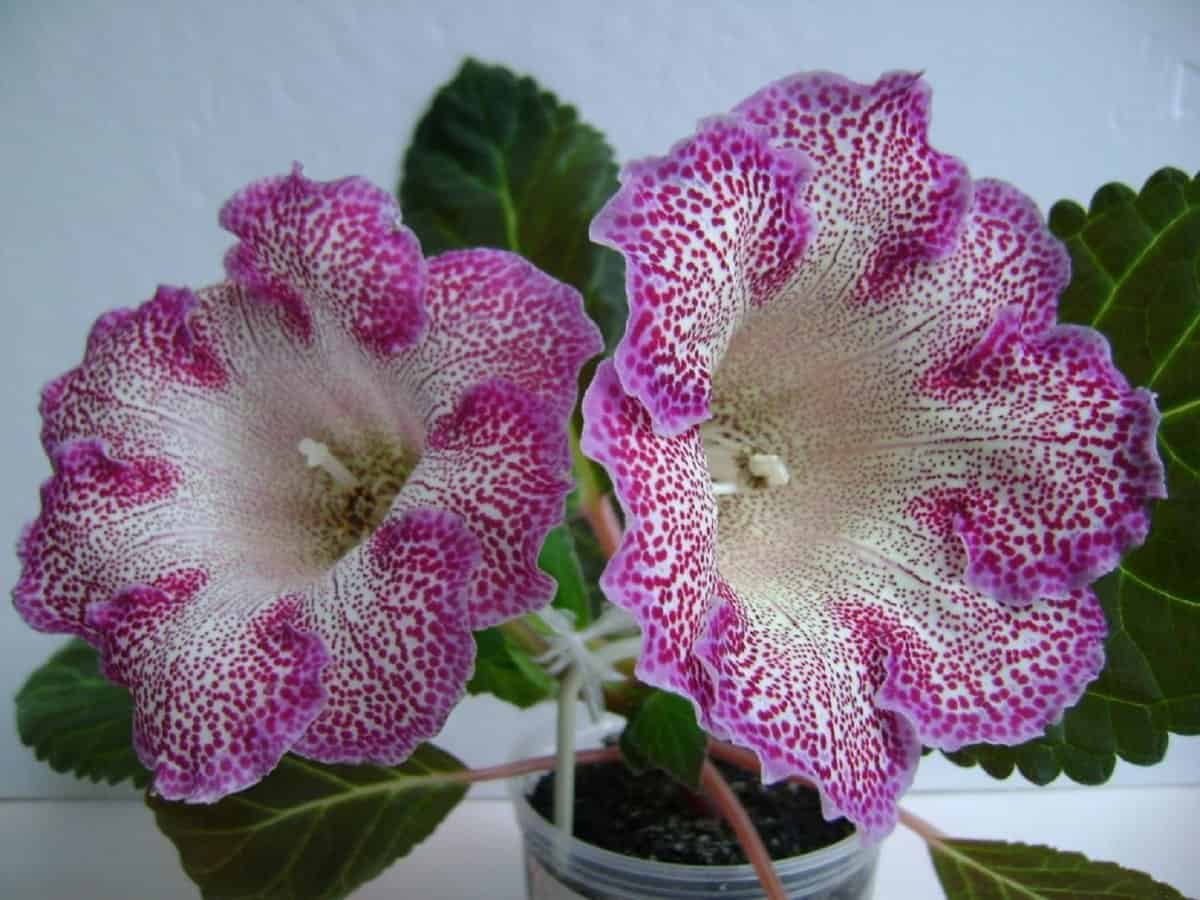
It is especially interesting to observe the plant during the flowering period. Flowers can be of completely different shades: pink, purple, snow-white. There are both monochromatic and combined colors. The combination of white with purple or burgundy looks beautiful.
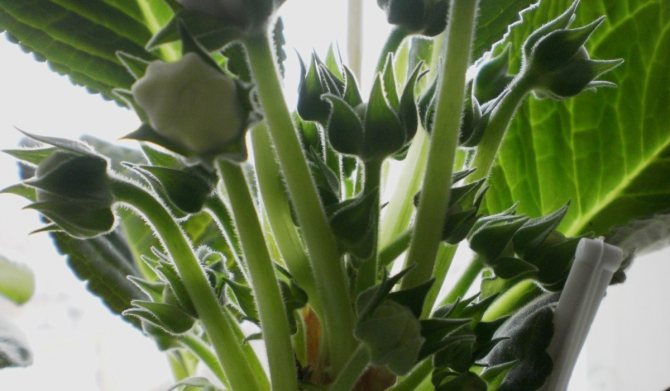
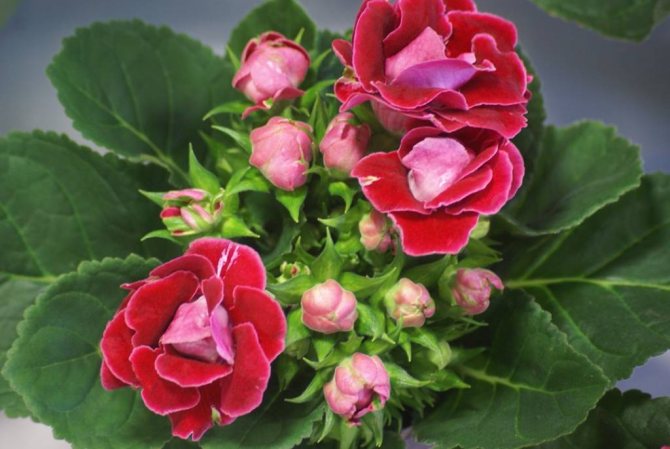
During flowering on one plant up to 20 buds may appear... Blooming bell-shaped flowers can be regular and double, with simple or wavy petals. The plant reaches a height of 30 cm.
Attention! You can admire the indescribable beauty of gloxinia from April to August.
Flowering process
The number and color of inflorescences depend on the variety of gloxinia, and the duration depends on compliance with agrotechnical recommendations for growing. Timely feeding with a suitable composition of fertilizers will allow the bush to form from 20 large single velvety flowers at the same time. The color of the petals is possible white, pink, purple, brown.
Errors in the care of gloxinia can provoke shedding of inflorescences, therefore it is required to create an optimal microclimate.
In order for a houseplant to release new flower stalks in the spring, it is important to know what to do with gloxinia after the flowers wither.
What does feng shui say?
Each plant should have its own place in the house. According to the teachings of feng shui, correctly placed flowers can fill the space with positive Qi.
It should be clarified to which element the plant and household members belong... Of course, all family members and a flower cannot fit into one element. If it turns out that there is not a single representative of a suitable element (Earth) in the house, it is better to put the green assistant in a corner. He will delight with his beauty.
Advice! For love and happiness, the plant should be placed in the south-west of the apartment (house), for children - in the east or in the children's room.

In the language of flowers created in the 18th century by Charles II, Gloxinia translates as "love at first sight."
Important! Greatest plant compatibility with Taurus... They are distinguished by their proximity to the earth and material spheres. Gloxinia helps this sign achieve financial stability, as well as maintain vitality and health.
but and representatives of other signs of the zodiac, she gives energy and well-being.
Life cycle features
The annual cycle of gloxinia can be conditionally divided into three periods:
- the period of winter dormancy;
- period of development and growth;
- flowering period of buds;
Let's go straight to the case where gloxinia lacks a resting period. If you become the owner of a young specimen of gloxinia, which has a small tuber and has not yet formed buds, then you need to be ready for its winter wakefulness. However, during this period, you need to take care of it, creating conditions for a long daylight hours. This is achieved by organizing artificial lighting with lamps in the morning and evening hours. It is also imperative to ensure a temperature level from +18 to +22 degrees. During the winter months, the young gloxinia will increase the diameter of the tuber and will be ready for the first summer flowering. For adults, gloxinia flowers require a rest period of 3-4 months.
What will gloxinia bring to the house: signs
According to popular beliefs, gloxinia brings comfort, warmth to the house, and helps to establish relationships. Gloxinia is considered the talisman of love. During flowering, it literally fills the space with energy that helps closed and uncommunicative people.
Esotericists advise a flower to indecisive people, they will be able to “burn bridges” and start living from scratch. The plant has a positive effect only during the flowering period. The plant brings love, happiness, good luck into the house, family, in all spheres. It is flowers that are a sign, an excellent omen.
When the aboveground part dies off, the energy field will rest.
Important! Having put a couple of bushes in the children's room, mothers will be able to calm their baby. The child will be more obedient and accommodating without unnecessary persuasion.
How to care for gloxinia after flowering
Regardless of the length of the period, in the fall it is necessary to change the care of the indoor flower. The tuber must receive proper nutrition and rest so that it has time to stock up on the strength for a new flowering until spring. Violation of cultivation techniques will lead to depletion of the rhizome, and a decrease in immunity will provoke infectious diseases. As a result of improper actions, the plant will die.
Care is also important during flowering so that the bush does not drop the buds ahead of time. The temperature regime should be maintained within + 20-25 ° C, protected from drafts and sudden temperature changes. Lighting should be bright and diffused, at least 12-14 hours a day, direct sunlight is unacceptable in order to avoid burns of leaves and flowers. It is required to maintain an optimal irrigation and feeding regime.

Essential conditions for a healthy bloom
With proper care, gloxinia blooms from spring to early fall.... To ensure a healthy bloom, certain conditions must be met:
A warm, light room, preferably an east window.- If the soil is formed at home, it is required to prepare a mixture of leafy, turfy soil, humus and sand in a ratio of 2: 1: 1: 1.
- Drainage is required to prevent stagnation of water in the pot. It is recommended to use expanded clay, crushed foam.
- Correct and timely feeding.
- Prevention of diseases and pests.
- Suitable pot size. Do not use too large a container, otherwise the plant will grow a tuber instead of flowering.
- Adequate lighting in humid air.
- In order for the flowering period to last longer, faded flower stalks must be removed immediately.
- Compliance with rest periods.
- Proper care after flowering. At the end of flowering, the plant is prepared for wintering. The dry ground part of the plant is cut off, leaving a small stump of 1-2 cm and the pots with tubers are removed to a cool, dark place. At the end of February, the tubers are carefully removed, cleaned from the ground, cut off the rotten parts, disinfected the sections, dried for a day and planted in a new substrate.
In order for the gloxinia to bloom again, the stem is cut off after flowering, leaving several pairs of lower leaves. Stepchildren grow out of their sinuses. Only the most powerful of them should be left. At this time, it is important to feed with a high concentration of nitrogen. These procedures will stimulate the growth of new leaves. When buds appear, fertilizers containing potassium and phosphorus must be applied. Re-flowering is always less lush than the first.
ATTENTION: Consider the age of gloxinia. The older the plant, the less it blooms.
You can additionally read about caring for gloxinia at home here, and here we talked about the rules for watering and feeding.
Fertilizing
After planting the tuber, the first 1.5 - 2 months do not need to be fed with gloxinia. Fertilizers are applied one hour after the main watering, along the edges of the pot, making sure that the solution does not fall on the leaves and at the growing point.It is advisable to do this in cloudy weather or in the evening, so that after feeding the plant is not in the sun. Top dressing with full mineral fertilizer, alternate with organic fertilizers every two weeks, but the first top dressing should be mineral.
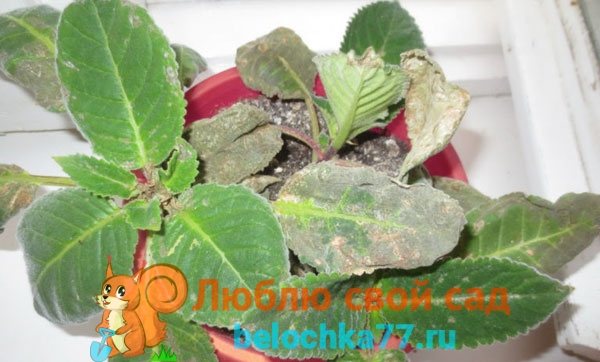
Iron deficiency on gloxinia
You can feed it once every 10 days, but then make the concentration of the solution weaker.
Before the appearance of buds, organic matter alternates with nitrogen: (potassium nitrate, ammonium nitrate) With the appearance of buds, organic matter alternates with phosphoric ones: superphosphate, phosphoric acid potassium), if this is not done, dormant vegetative buds will awaken, which will lead to a suspension of the normal development of the plant.
- Nitrogen fertilizers cause enhanced vegetative growth, with an excess of them, flower buds are almost not formed. Excess nitrogen can also cause root rot. For this reason, nitrogen fertilization is given only at the beginning of growth.
- Phosphate fertilizers - enhance flowering, but theirs. excess causes premature aging of the leaves and leads to plant chlorosis.
- Potash fertilizers - improve flowering. Excess leads to the formation of shortened peduncles, yellowing of the lower leaves, deterioration of the color of flowers.
- Trace elements - affect the size of flowers, their color and the number of buds.
Organic fertilizer for tuberous flowers
Bird droppings
Dung is a very potent fertilizer and its concentration must be strictly observed when using it. Pour 1 tablespoon of droppings with 2 liters of water, close the lid and place in a warm and dark place. In the next 3-4 days, stir with a stick until fermentation begins (bubbles appear on the surface). After the completion of the fermentation process (about a week), the bubbles disappear, solid particles settle to the bottom of the jar, the solution brightens. It is now ready for use.
250 ml of the concentrated solution is poured into 1 liter of water and mixed well, this solution is watered with the plants after preliminary moistening. (one hour after the main watering).
You can just buy a ready-made organic fertilizer.
Mineral dressing for tuberous flowers
for 10 liters of water take:
- 10 g simple superphosphate
- 10 g potassium chloride
- 4 g ammonium nitrate
- 5 g magnesium sulfate
- 0.1 g ferric chloride
- 0.07 g boric acid
- 0.004 g of copper sulfate
- 0.05 g of manganese sulfate
- 0.008 g of zinc sulfate.
If it is not possible or too lazy to look for everything separately, then just buy a phosphorus-potassium mineral fertilizer and trace elements.
I use Uniflor - flower, Uniflor-bud or Malyshok (dry, granulated for pepper and tomato), as phosphorus-potassium, Uniflor - growth, Uniflor - green leaf, as nitrogen and Uniflor-micro, as trace elements.
After flowering, feed 2 times with potassium-phosphorus fertilizers with an interval of 14 days. This will help the tuber to regain strength and survive the rest period well.
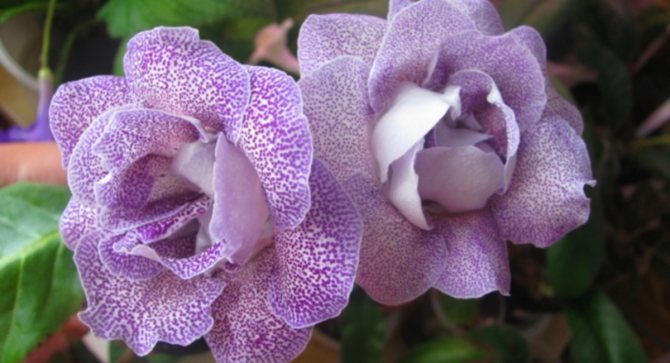
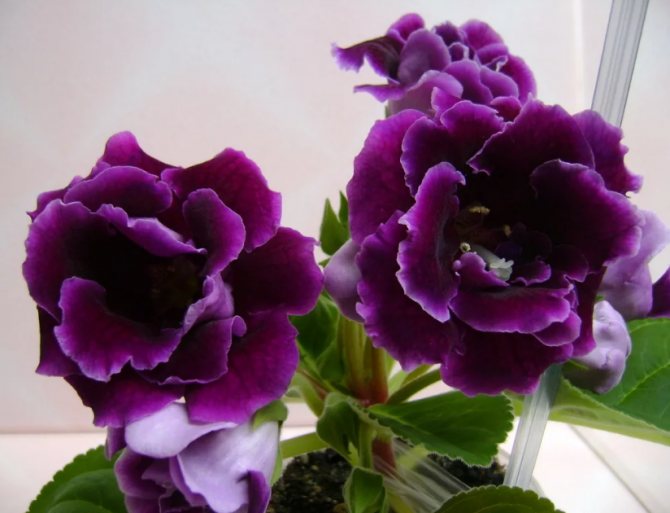
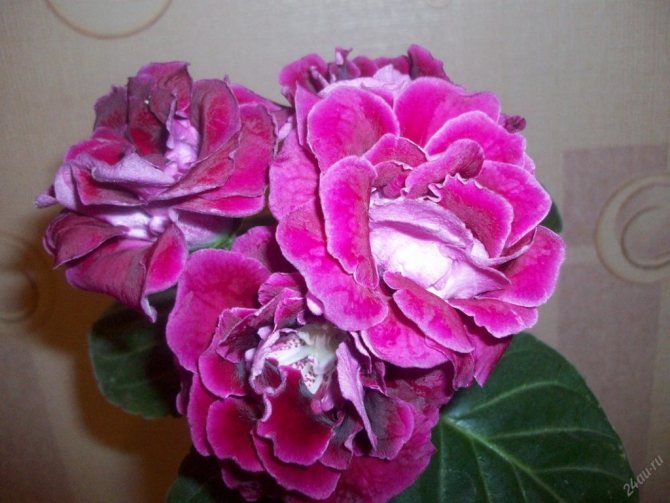
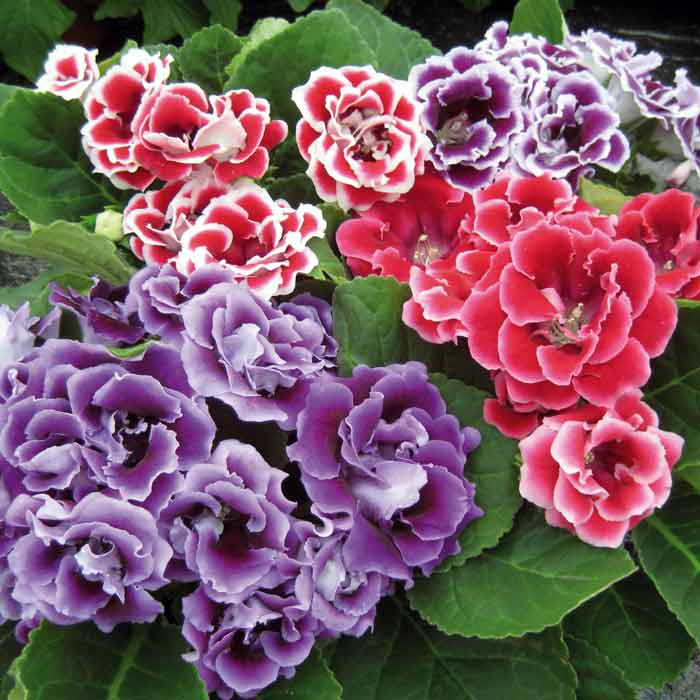
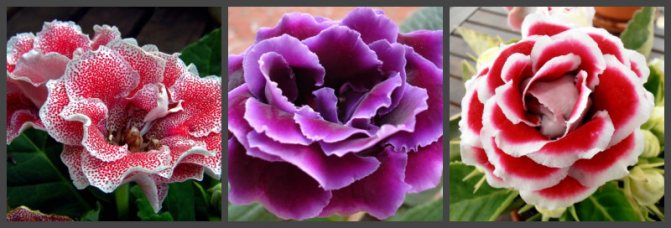
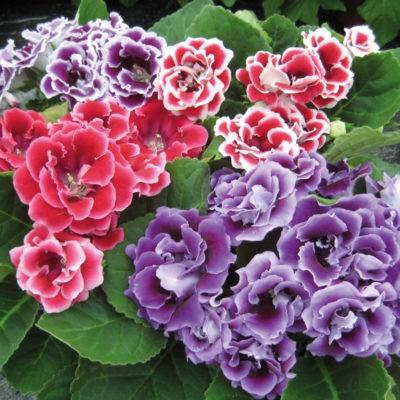
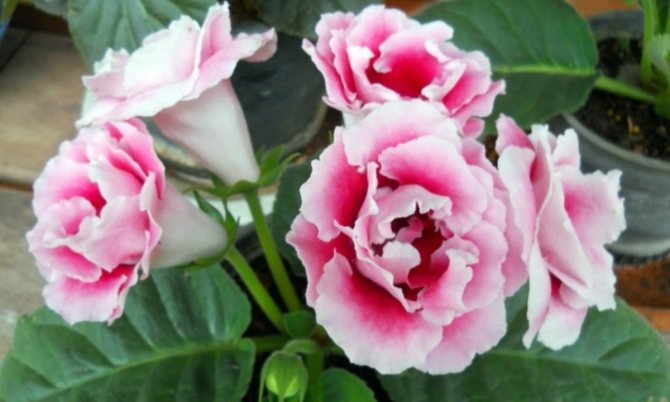
Gloxinia hybrids F1
Gloxinia hybrids F1
Gloxinia hybrids F1
Doesn't bloom: 9 "why"
It so happens that even after a good winter rest, gloxinia does not bloom. As a rule, the main reasons for the absence of flowers in gloxinia are:
- Improper care and storage.
- Old tuber. In order for gloxinia to bloom, it is necessary to increase watering. Water even slightly dry soil.
- Infection or overfeeding of the tuber: the plant loses strength, which in the future is simply not enough for flowering.
- Contaminated soil. When the soil is infected with pests, it is necessary to transplant it into another soil, previously treated with boiling water.
- Lack of light at elevated air temperatures: the stems of gloxinia stretch out, the flowering period begins much later or is completely absent.
- Improper use of fertilizer. The plant will react to an excess or lack of fertilization by yellowing foliage and poor flowering.To avoid this, apply the fertilizer strictly according to the instructions on the package.
- Draft. In the cold and in the draft, the flowers of the gloxinia curl. The favorable air temperature for her is 18–20оС. Move the flower pot to a warmer, draft-free place.
- Insufficient air humidity. Dry indoor air leads to delayed flowering. Moisten the air by placing a glass of water next to the gloxinia.
- Incorrect selection of capacity. Ideally, you need a low and wide planter. In a large pot, the plant spends energy on tuber growth, not flowering. Ideal proportions for pots: diameter - 12 cm, height - 10 cm.
With proper care, the gloxinia tuber can live for about ten years, delighting those around it with luxurious velvet bells. The more powerful the tuber, the more peduncles are formed on it, therefore, pay special attention to its choice. And one more tip: in order to prolong the flowering of gloxinia, remove the faded inflorescences in time. And remember, in order for this plant to grow and bloom easily in your home, you need to put a little effort.
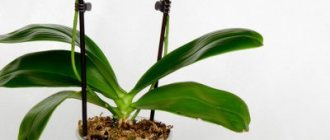
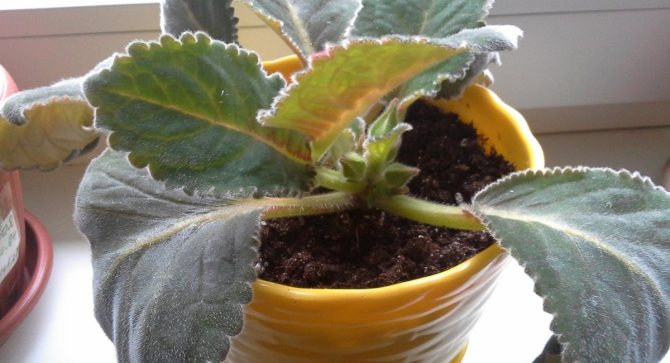
Leaving after a dormant period
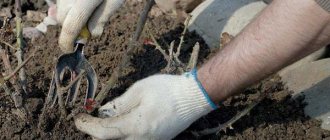
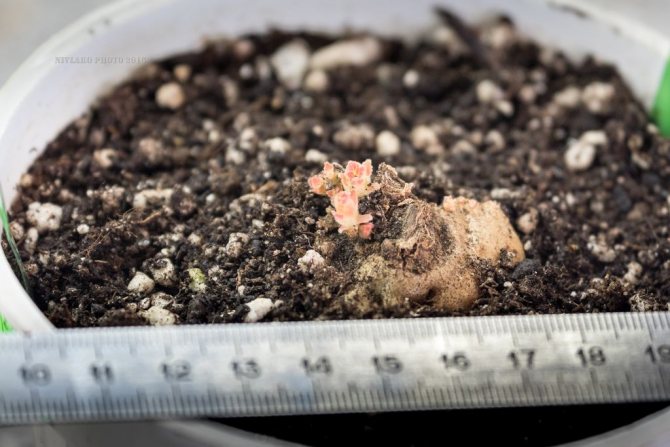
In January, after wintering, when the first shoots hatch, gloxinia tubers are planted in a new, more nutritious soil. To transplant a tuber:
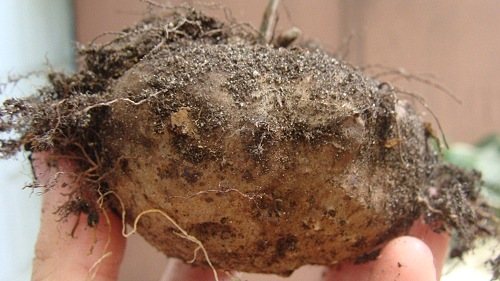
- Carefully remove it from the ground and cut off the bad roots (rotten places are also cut with a knife, sprinkling the cuts with charcoal or ash).
- Before planting, for disinfection, the tubers are dipped in a weak solution of manganese for half an hour, dried for about a day and planted in the ground, covered with a film until the first leaves appear from the ground.
- The greenhouse is periodically ventilated by removing the film in the morning and evening for one hour.
- After the appearance of the first pair of leaves, the film can be removed, and the soil must be poured into the pot in order to completely cover the tuber with earth, without burying the sprouts.
It may be that gloxinia wakes up too early and the first leaves appear prematurely from the ground. In this case, if the tuber is large and strong, then it is better to remove the early leaf so that the plant does not stretch in the future.
Do not worry: when you remove the first shoots, after a while new ones grow in their place.
Preparing for winter
In the fall, after secondary flowering, gloxinia prepares for the dormant period necessary to gain strength for future flowering. Gloxinia leaves gradually wither. What to do in this case?
If the gloxinia continues to bloom in November, allow the plant to bloom and then cut back on watering.
Gloxinia should not be fed at this time. The only thing that is practiced: to prepare for the dormant period, you can fertilize the plants once with a potassium fertilizer (for example, potassium monophosphate). When the leaves are completely dry, watering is stopped altogether.
To prepare the plant for wintering, yellowed and withered foliage is cut off, leaving a stump of 1–2 cm
Do not immediately cut off the entire aerial part of gloxinia: for successful wintering and the subsequent awakening of the plant, nutrients must gradually move from the leaves and stem to the tuber.
There are two ways to store gloxinia tuber in winter:
- in a pot with a substrate;
- in a plastic bag (dug out tuber).
Let's take a closer look at them.
Wintering in the ground
If your plant is still in the pot for the winter:
- Cover the container with tubers (you can sprinkle it with sand) with a pallet and pack in a plastic bag (you do not need to tie the bag).
- Hide gloxinia in a cool place with a temperature of at least 10 ° C.
With such storage, there is a drawback: it is necessary to ensure that the tubers do not dry out and the plant does not wake up ahead of time.
If your gloxinia stays in the soil for the winter, moisten the soil once a month so that the tuber does not dry out.
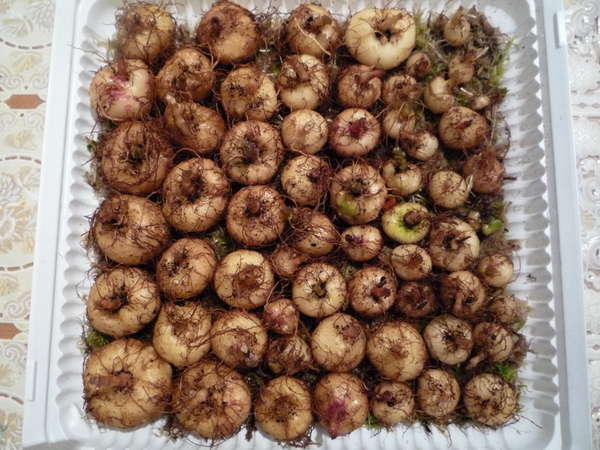
Storing the excavated tuber
Some growers dig gloxinia tubers from the pot for the winter storage period and put them in a bag. This storage method is good because the tubers do not wake up prematurely.
To "put them to bed" correctly, you need:
- In autumn, remove the tubers from the pot and place in a plastic bag.
- Inside the bag, add vermiculite in half with moistened soil or sawdust. Put it in the refrigerator for 2-3 months in the vegetable storage compartment, where the temperature is maintained at about 12 ° C. In January, remove the tubers and place them in a warm and bright place to wake them up.
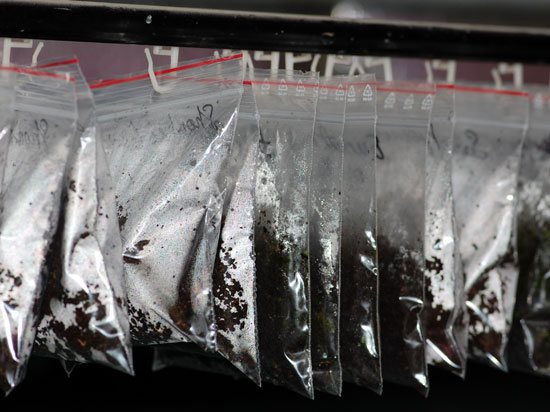
Write on the labels of the packages the variety of gloxinia and the date of laying the tuber for wintering, because early awakening can negatively affect flowering
Video: preparing gloxinia for winter
"Restless" wintering
If gloxinia is not put to sleep for the winter, its stem will stretch out and become ugly, moreover, this will affect flowering: the tuber still needs rest. But young plants grown from seeds do not have a dormant period: otherwise, a small tuber may die during the winter.
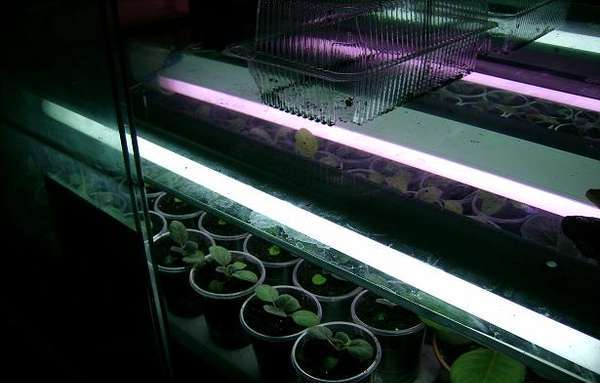
When wintering gloxinias that are not dormant, they need additional illumination
What is this plant?
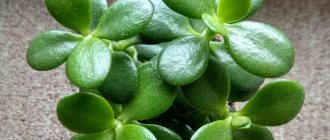
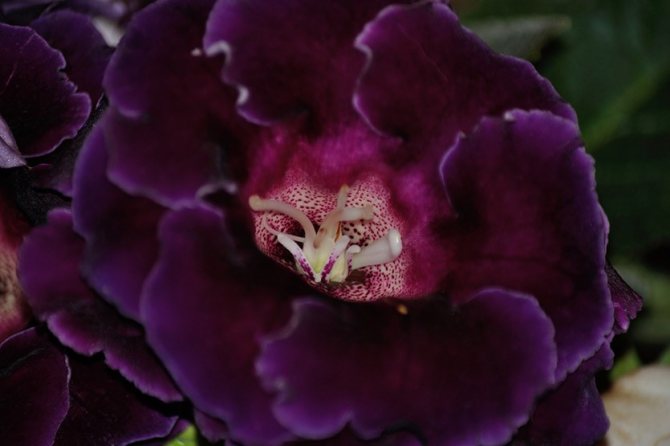
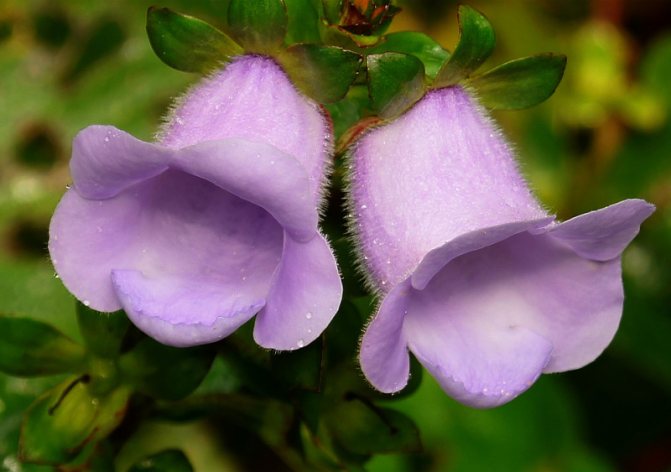
Gloxinia is a tuber culture belonging to the genus Gesnerievs. Differs in fleshy leaves concentrated on short stems. Flowers and leaves are characterized by a velvety surface, bright color.
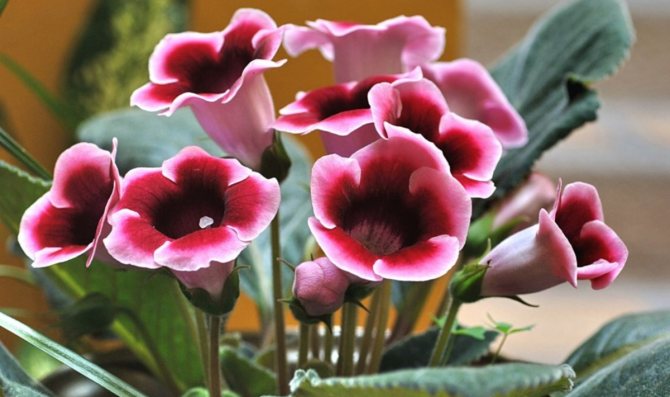
The flowers are presented in the form of a bell. Their size is 7 cm in diameter and 5 cm in length. In nature, there are about 25 species of this amazing culture, but breeding work was carried out with only two representatives of the species - beautiful and royal gloxinia.
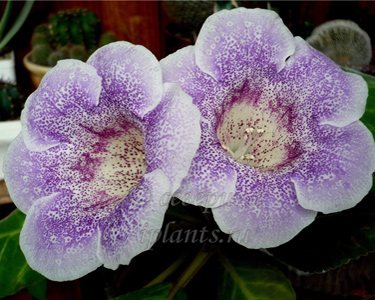
Inflorescences can take the following color:
- white;
- red;
- pink;
- mottled;
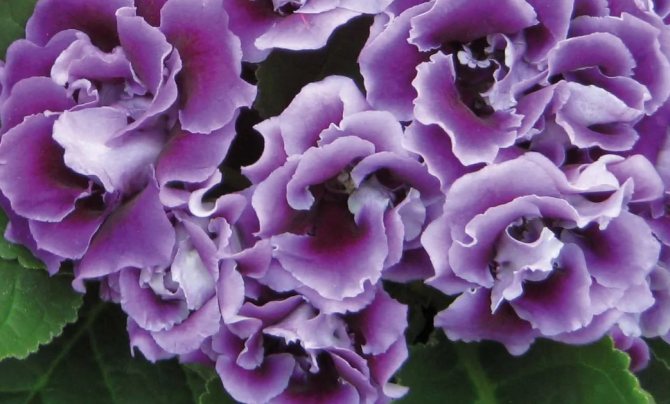
- purple;
- bicolor flowers.
Royal gloxinia is distinguished by its high growth - 5 cm, with a lowered wide-oval shape of leaves with pronounced veins. The inside of the leaves is purple with red. The drooping inflorescences are lilac in color, the peduncles are elongated, the bells have a pronounced shape.
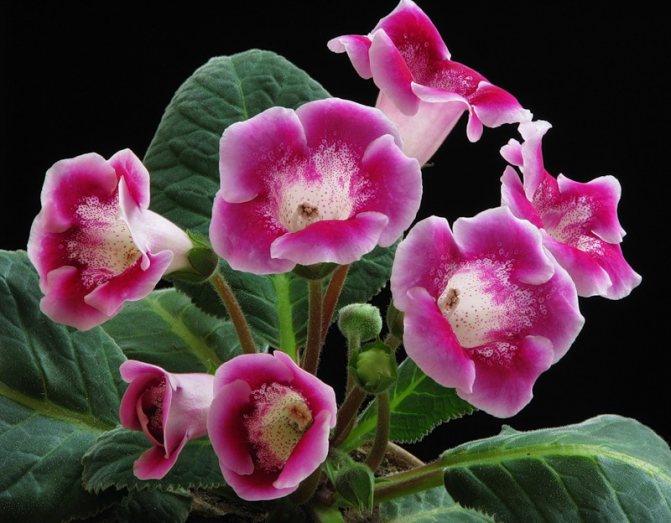
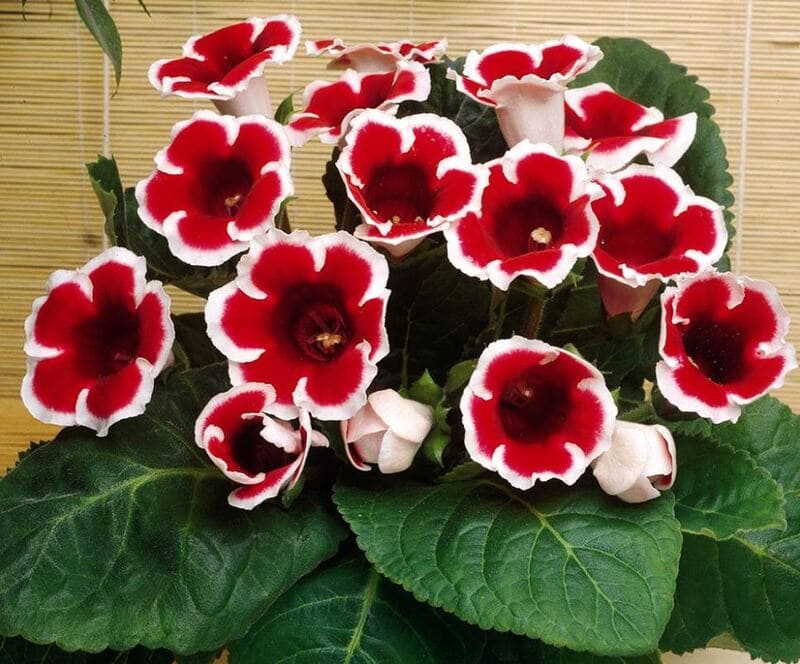
Gloxinia beautiful is characterized by a variety of shapes and shades of flowers, which can even be two-colored. Flowers with a snow-white border around the edges look very impressive.
Preventive measures
- Feeding the plant with phosphate-potassium fertilizers.
- Compliance with agrotechnical conditions of maintenance: moderate watering, complex feeding, good lighting (how to properly water and feed the plant?).
- Transplanting the tuber after a dormant period into a fresh substrate.
- Use drugs "Epin" or "Zircon" to stimulate the development and enhance the immune system.
Reproduction of gloxinia
Gloxinia are easily propagated by seeds, leaf and stem cuttings, part of the leaf blade, pedicel and tuber division. Seed propagation is predominantly for the species gloxinia; you can get a lot of young plants at once and it is not desirable for varietal and hybrid ones; splitting of traits can occur at the genetic level, which manifests itself in the external appearance of the plant. There is no guarantee that you will receive a plant with the original, parental characteristics.
Sowing Gloxinia Seeds
Sowing is carried out at the end of January - February (with obligatory supplementary lighting with fluorescent lamps) or in March. Seeds germinate in the light, they are sown superficially on a moist substrate (the composition is the same as for planting tubers), lightly pressed against it and covered with glass or film. The seed plate is placed in a bright place. At a temperature of 24-26 degrees, germination begins 12-14 days from the moment of sowing, at lower temperatures it takes up to one month or even longer. Crop care is reduced to maintaining temperature and humidity, preventing the soil from drying out. If it becomes necessary to moisten the soil, then this should be done from the pallet. There is no need to water on top.the seeds are small and can be easily washed off with water.
About a month after the appearance of the cotyledons, you can make the first pick, especially if the crops are thickened. They dive according to the 2 * 2 cm scheme into light soil. A month later, after the appearance of the first pair of true leaves, young plants dive a second time or immediately plant them in separate pots with a diameter of 6 cm (cactus). The temperature is maintained at least +20 degrees. Gloxinia tolerates picking well, and after it begins to grow intensively.
I do this: if the seeds are granular, I spread them at a distance of 4 * 4 cm from each other in order to do without picking in the cotyledon phase in the future. I put a bowl with crops in a transparent cake box, and there they are until 1-2 pairs of real leaves appear. After that, I put them in separate pots and put them in this mini-greenhouse again for 2 weeks for rooting and survival. In the future, I accustom them to the open air of the room and, if necessary, transfer them into larger pots. My seedlings bloom 4-5 months after germination. Gloxinia grown from seed may not have a dormant period in the first year and will vegetate (continue to grow) throughout the winter.
How to get Gloxinia Seeds
On the second day of flowering, after blooming, take a soft brush and transfer the pollen to the stigma of the pistil. Repeat this procedure the next day to ensure pollination. If pollination has occurred, then the perianth falls off after a few days, the ovary begins to grow, and with it the receptacle noticeably thickens. The former flower, and now an unripe fruit of a dark green color, does not dry out for a long time. Ripening of seeds lasts 1.5 - 2 months and it is uneven, that is, seeds ripen in a capsule at different times. After the fruit (box) opens, bring a piece of paper and, tapping on the peduncle, shake out the seeds. After a couple of days, repeat the collection of seeds. The seeds are very small, dusty. Germination remains for 2-3 years. Germination is good. Normally, the plant should have no more than 3 boxes of seeds. If the plant is young or the tuber is insufficient in mass and size, limit yourself to one fruit, remove the excess.
Vegetative propagation of gloxinia
Vegetative propagation is the most common method, it is the simplest and most affordable. If rooting occurs in the spring or in the first half of summer, then from the formed young plants you can see flowering in the same season.
Reproduction of gloxinia leaf cuttings
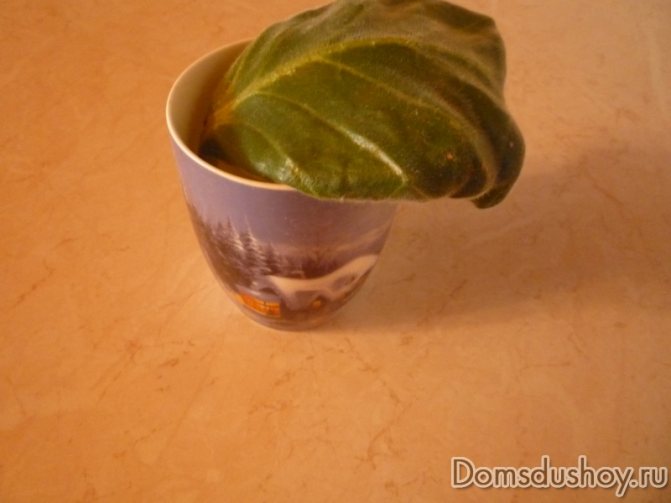
In the budding phase or during flowering, the leaf of the lower tier of the rosette is cut off (young, the upper leaves should not be taken). It is desirable that the petiole be short and thick; the size of the resulting tuber will depend on the diameter of the petiole. Then you can proceed in a convenient way for you:
- Submerge the cuttings in water by 1 - 1.5 cm and keep it until roots are formed (you do not need to change the water, just top up if necessary), and then plant it in the ground to a depth of 2-2.5 cm.For better survival of the cuttings in the soil, you can cover with a jar or bag.
- The stalk is dipped in charcoal powder and planted in moist soil. Cover with a glass jar on top. At a temperature not lower than +22 degrees, rooting occurs within 2-3 weeks, then the jar can be removed. A little trick: if you have only one leaf, and you need to get two tubers, split the base of the petiole lengthwise to a length of 1 - 1.5 cm, after rooting, 2 smaller nodules will form.
Reproduction of gloxinia stem cuttings
If a lot of lateral shoots have woken up at the gloxinia tuber, 1-2 are left, and the rest are broken out. Stem cuttings are, in fact, finished plants, but without roots. They are rooted in the same way as leafy ones and they bloom in the same season.
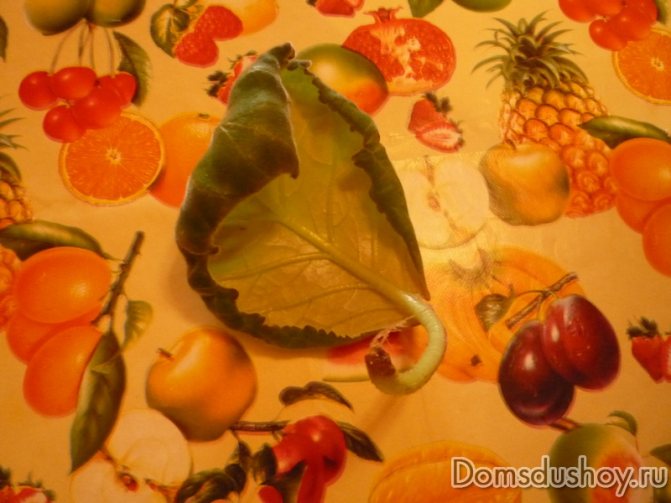
Reproduction of gloxinia leaf plate
- Cut off a large sheet at the base of the rosette.On the back of the leaf blade, make cuts across the prominent veins at the thickest points. Lay the sheet on a damp ground, press it against the soil at the cuts and cover with a bag or place in a greenhouse. Roots will soon appear at the incision sites, and then nodules form. It is important to maintain high humidity.
- The sheet plate is cut across into 2-3 parts, depending on the size of the sheet, and each part is planted in soil or sand, covered with a jar or bag to maintain moisture. Rooted at a temperature not lower than +22 degrees. The optimal one is about +25.
Reproduction of gloxinia peduncle
It should be mentioned that not all gloxinia varieties can be propagated in this way. Some varieties root well with peduncles, while others do not take root at all.
After the corolla wilts, the peduncle is broken out and placed in water 1 - 1.5 cm and make sure that it does not touch the walls of the vessel. Do not change the water, add as it evaporates. After about a month, roots and nodules are formed on it. After that, the peduncle is planted in moist soil to a depth of 1.5 - 2 cm. Care like a leaf cuttings.
Reproduction of gloxinia by dividing the tuber
Large tubers that have more than two sprouts can be divided. The tuber is cut into pieces so that each of them has at least one sprout. Sections of tuber parts are sprinkled with crushed charcoal, dried for 3-4 days in a dark place at room temperature and then planted in moist soil. Further care is similar to caring for a whole tuber after planting.
Photo
Below you can see the photo:
Flowering period
This is the most beautiful stage in the annual cycle of gloxinia - the buds gain strength and bloom. Finally, caring flower growers have the happiness of contemplating the results of their labors. But even during this period, it is necessary to continue to care for the buds. When watering, avoid getting water droplets on delicate petals. When you have fully enjoyed the abundant flowering of gloxinia, you may want to consider re-flowering. Gloxinia blooms again when the first flowering was not too late. Almost all varieties are capable of producing a second wave of bud development. To do this, you just need to help the faded plant. After the last buds have wilted, it is recommended to cut off the upper part of the rosette, leaving 2-4 lower leaf processes. Shoots of the second generation reappear on the shortened outlet. Of these, the strongest are left and watered with water with the addition of growth stimulants, for example, Uniflor-growth. After a while, buds appear on new peduncles. At this stage, it is necessary to switch to fertilizers to enhance flowering - Uniflor-flower or Uniflor-bud. Re-flowering buds are usually slightly smaller and paler than first wave bells. Gloxinia blooms again when the first flowering was not too late.
Flower varieties
For decorative purposes, only 10-15 varieties of Gloxinia are used. Below are the most popular ones:
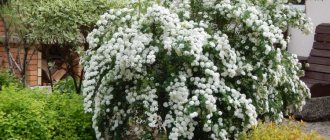
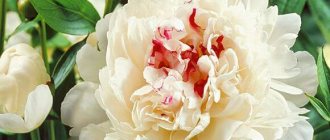
- Mont Blanc Is a slow growing variety with white flowers.
- Blue Tiger - a variety with large leaves and flowers, even by Gloxinia's standards, blue on the outside, white on the inside and with a blue speck.
- Prince Albert - differs in dark purple bells. Very capricious about the lack of lighting.
- Royal Sinningia - undersized variety. Leaves with silvery veins. The flowers are purple or pink.
- Kaiser Friedrich Is a fast growing variety with deep red flowers and a white border. Unpretentious to lighting.
Mont Blanc variety
Why does not it bloom and how to deal with it?
Often, flower growers notice that their favorite is in no hurry to please them with a stormy flowering. The reason for this phenomenon is most often the illiterate care of the plant. Incorrect content can be judged if:
- the plant is overfed with nitrogen-based fertilizers.Nitrogen acts as a stimulant for the rapid growth of greenery and at the same time an obstacle to flowering. The best feeding for gloxinia is phosphorus-potassium fertilizer;
- lacks lighting. Sinningia is a light-loving plant, and she just needs lighting to lay new buds and beautiful flowers.
If there is a lack of natural light of gloxinia, additional artificial lighting can be organized. - the plant does not fit the size of the pot where it grows. An ideal pot for sinningia is low, wide and small, with a diameter of about 9-15 cm.In a large and deep one, it will spend energy on growing a tuber, to the detriment of flowering (the dormant period of gloxinia and the preservation of a tuber until spring is described here).
- there is no transplant. The transplant should be carried out annually;
- the soil in which synningia grows is scarce. Gloxinia needs fertile soil containing humus, coniferous and leafy soil, sand, perlite (or hydrogel) and peat. You can make a planting mixture for a plant yourself, or buy a ready-made one.
Before planting the plant, the soil must be calcined for about half an hour in the oven to destroy pathogens.
Bloom - a wonderful sight that can give a sea of aesthetic pleasure. In order for it to be lush, abundant and long, it is required to provide this unpretentious beauty with competent care.
Causes and solutions to common problems
In case of violation of agricultural techniques for growing gloxinia, problems with buds appear... A quick search for the cause and elimination of errors will help restore the health of the plant. You can find out about why gloxinia does not bloom and how to make it release buds here.
Why aren't they blooming?
The first step is to examine the flower. The presence of spots on the leaves indicates a fungal disease (read about what diseases of gloxinia leaves are and how they are treated in our material). It is treated with fungicides.
The delay in blooming is caused by the influence of pests - thrips or spider mites (about what pests and infections can kill gloxinia, as well as the methods of their treatment, you can find out here). Insects suck the sap of the plant, slowing down its development.
Noticing moving light spots or cobwebs on the underside of the leaves, gloxinia is isolated. Treatment with insecticides "Aktara", "Fitoverm" will save you from pests.
Other sources of the problem:
- Condensatethat occurs when the temperature in the room changes abruptly. Due to moisture, the petals stick together. They help the flower to open up using a brush.
- Lack of light... A characteristic symptom is that the leaves stretch upward. It is necessary to move the pot to another windowsill or turn on the lamp.
- Cold or heat... The optimum temperature of the content is 18-20 °, a deviation from it provokes a slowdown in vegetative processes.
- Dry air... The lack of moisture in the air can be compensated for by spraying water near the plant (without getting on the leaves). Another option is to install a pallet with wet pebbles or moss.
- Lack of strength... With a lack of nutrients, gloxinia dries out individual buds. The solution is to transplant gloxinia into fresh soil, apply top dressing.
Advice! A gloxinia pot should not be drafted, this is a common cause of flowering problems.
Informational video about why gloxinia buds do not bloom:
Empty
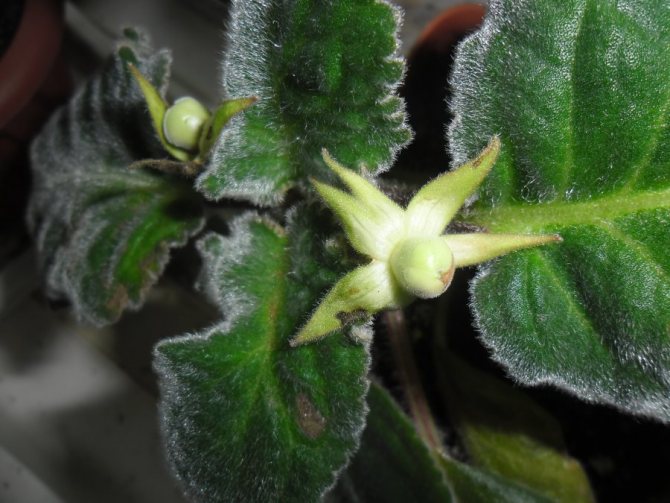
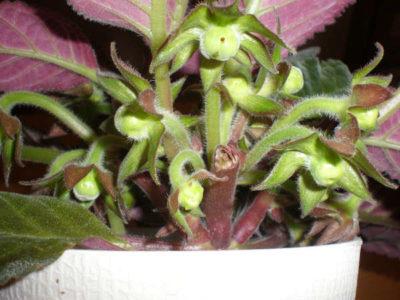
Periodically, after the sepals open, a green pea appears instead of a bud. Over time, the peduncle darkens and disappears.
There are several possible reasons for the appearance of a wasteland:
- storing the tuber in a cold place;
- lack of nutrients in the soil or high acidity of the soil;
- young or old tuber.
Transplanting into new nutrient soil is recommended. The barren flowers are cut off, after a while new flower stalks will appear. The Epin solution will help stimulate growth.
Petals turn black
The buds turn black and dry in poor soil, with low air humidity, due to the flooding of the soil. The option of incorrectly selected soil acidity is possible.
- Treat the soil with one of the fungicides (Fitosporin, Fundazol).
- Increase the humidity in the room - install a humidifier, a container with water.
- Trim off dried parts of the plant.
- Transplant the flower into new soil. Treat with Epin growth stimulant. The optimal soil acidity index is 6-6.5 pH.
- Protect the flower from direct sunlight, which causes burns to the buds.
Dry
Why do buds dry up? The main cause of drying is inadequate lighting. Lack of light and direct rays of the sun are equally detrimental to the plant. Other reasons include:
- dry, stale air in the room;
- drafts;
- low or high temperature;
- depleted soil;
- lack of moisture;
- spider mite.
Each problem has its own solution:
- Increase the humidity level in the apartment or directly next to gloxinia.
- Keep the air fresh, but avoid drafts.
- Adjust the temperature to optimal values (18-20 °).
- Top dressing with complex mineral fertilizer. Repeat the procedure every week.
- Water the plant immediately after the top layer of the earth dries.
- The spider mite is one of the reasons for the drying out of the buds. Symptoms of its presence are punctures on the leaves. Often the pest is found on the cobweb on the leaves. The means "Aktellik", "Fitoverm" will help to destroy it. It is advisable to carry out 2-3 treatments.
Video about the reasons for the drying of gloxinia buds:
Rotting
Rotting buds turn brown, soft and damp... The problem arises when using fertilizers with a high nitrogen content. Rot also appears after waterlogging. Virus and fungal infection cannot be ruled out. Plant rescue activities:
- Removal of decayed parts of gloxinia.
- Complex treatment of the tuber with preparations "Fitosporin", "Fundazol", "Maxim".
- Check soil moisture, refusal to water until the substrate dries out.
- Find out the acidity of the soil, if it is high, replace the soil.
- Choose fertilizers with a high content of phosphorus and potassium.
Low temperature in combination with high humidity provokes the appearance of rot on the buds.
Air humidity
The air humidity should be in the range of 70-80%, but gloxinia feels good even at a lower humidity of 50%, but even lower humidity is undesirable, the plant does not develop well, growth slows down and leaves deform. The edges of the leaf blade are bent downward.
To increase the humidity of the air, you can place the plant on pallets with wet expanded clay, moss, water, but you cannot spray gloxinia itself because brown, dry spots are formed. However, far from light and draft, gloxinia tolerates water procedures very well. At night, you can bring it into the bathroom, sprinkle it or wash it with warm water and leave it there with the doors closed and the lights off until the water on the leaves is completely dry.
Conditions for keeping a flower
As we found out above, the main reason why the inflorescences die (rot, dry) are violations in the care of the plant, which then entail the occurrence of a number of diseases and the appearance of pests. Therefore, in this section, we will briefly consider the main points of growing gloxinia.
Location. The flower pot must be placed on the windowsills on the east and west sides. During the short daylight hours, it is provided with additional lighting.
The optimum temperature for growing a plant is 18-20 degrees. Often in apartments it is slightly higher, so the window sill is a good place for flowerpots.
Watering is carried out along the edge of the pot so that water does not fall on the flower or through the pallet (the pot is placed in the water for 15-20 minutes, then the liquid is removed). Watered once a week, sprayed every three days with warm soft water.
It is important to correctly send the plant to rest. When the flower fades, they stop watering it, the entire surface part dies off. It must be removed to a dry and dark place where the air temperature should be within 10-18 degrees. Tubers can be stored in pots in winter, or they can be placed in river sand. They must be protected both from drying out and from excess moisture.
It is necessary to take into account the moment that young annual plants are not sent to rest. They spend the winter on the windowsill.
Adult tubers in February are planted in specially prepared soil and placed in a warm and bright place. The pot should be wide, but the depth should be medium. The drainage layer is laid down, and only then the soil. You can buy it in the store or prepare it yourself. Considering any gloxinia to loose and pH neutral soil.
These are the key points that beginner growers should know in order for a capricious and demanding plant to please the eye.
Gloxinia stands out among other decorative specimens due to its large bright bell flowers. However, the plant does not always please with abundant flowering.
Improper care often causes problems with the development of gloxinia buds, they do not bloom or dry. With a competent and timely determination of the causes, it is possible to eliminate the diseases that have arisen in the plant. We will talk about this in detail in our article. Also watch a helpful video on this topic.
Gloxinia disease
- Rotting tuber. Occurs with excessive watering. At the initial stage, the disease is manifested by a decrease in leaf turgor; after watering, the turgor is not restored. With a strong defeat of the tuber, gloxinia droops completely. It is necessary to cut and re-root the leafy cuttings. If the tuber has rotted not from the point of growth, then the rotted parts are cut off to healthy tissue, disinfected in a strong solution of potassium permanganate or another fungicide, powdered with crushed coal and dried for 2-3 days, after which they are planted again in moist soil.
- Late blight. It is the most common disease of the Gesneriaceae family. It develops rapidly and leads to the sudden death of gloxinia. It begins with a slight wilting, then the growth of the stem stops and its color changes. After watering, the leaves fade even more, the base of the stem begins to rot, passing to the petioles and leaves. An attempt to save the plant is unsuccessful, cut leaf cuttings do not take root, quickly turn black and rot. The plant must be destroyed along with the earth.
- Fusarium. The plant becomes infected through the soil. The leaves turn brown, curl and wither. Dark streaks and cracks form on the stem. The defeat of the plant by fusarium is facilitated by excessive watering and constant soil moisture.
More fusarium
Gloxinia diseases and pests
The change in the color of the leaf plates, their deformation, the depressed state of the whole plant indicate the onset of diseases. Most often this happens as a result of improper care.
Anthracosis
This disease manifests itself in the formation of brown spots on the leaves. Over time, they "creep away", infecting the stems and adjacent leaf plates.
Anthracosis can be caused by high acidity of the soil, excessive humidification of the air, or a lack of phosphorus-potassium fertilizers.
If the leaf plates are significantly damaged, they are removed and treated with fungicides. To do this, use copper oxychloride or preparations "Oxyhom" and "Cuprosat".
If the initial stage of development of anthracosis was missed, then the flower must be destroyed. Otherwise, there will be a threat of infection of all indoor plants.
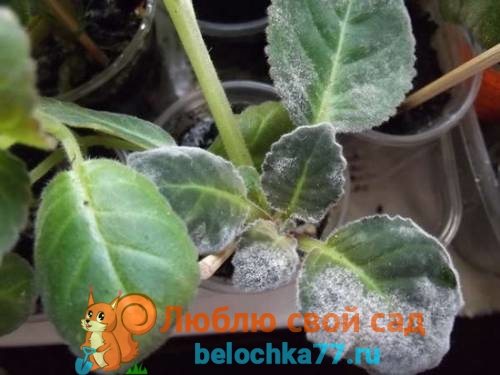
Powdery mildew
The high humidity of the place where the gloxinia is located, and even in combination with the low temperature, is the most favorable conditions for the defeat of the flower with powdery mildew. Also, the reasons for the appearance of the fungus include excessive nitrogen content in the soil and excessive watering.
This disease can affect all parts of the plant - stems, leaves, buds - a powdery coating forms on them.
Treatment is effective only at the initial stage, gloxinia is sprayed with fungicides every 7-10 days. All flowers located nearby should undergo this treatment.
It is better to destroy a neglected plant.
Thrips
This insect reveals itself by the appearance on the leaves of small blotches, spots and stripes on the outside of the leaf. On the back side, brown-brown spots are formed. The edge of the sheet plate is deformed. Thrips can harm the entire aerial part of the flower.
The fight against them is carried out with "Intavir", "Fitoverm", "Aktara" or "Karate" insecticides. It is necessary to carry out at least 3 treatments with an interval of 7-10 days.
Spider mite
For flowers growing in a room with dry air, there is a high probability that this pest will settle on them. Plants should be constantly examined and if a cobweb is found between the leaves, then gloxinia is in serious danger. Slightly yellowish dots appear on the affected leaves, and then they become brown spots. Leaves, deprived of plant sap, first discolor, and then dry up.
Acaricides are required to kill the tick. Gloxinia treatment must be carried out 2-3 times with a weekly difference.
The soil in the pot is also subject to processing, there may be mite larvae. For these purposes, the chemicals "Temik" or "Aldikabr" are suitable. It is also necessary to increase the humidity in the area where the flower is located.
Zamioculcas: home care for an unpretentious flower!
Watering gloxinia
For irrigation, you need to use soft water (thawed, rain, filtered or partially boiled), chlorinated tap water must first be defended for at least a day.
It is better to water from a pallet or carefully along the edge of the pot, not allowing water to get on the leaves and in the center of the tuber (where the sprouts come from) because in most cases, not from the roots, but from above, from the point of growth, rotting of the tuber begins. The water for irrigation should be warm, but if the gloxinia is at a temperature of +18 degrees, then this does not mean at all that you need to water it with water at a temperature of +25 degrees, nothing good will come of it. The water should be 2-3 degrees above the ambient air temperature. After 20-30 minutes after watering, drain the remaining water from the pan.
Between watering, you need to dry a clod of earth. Reduce the frequency of watering in rainy, cloudy and cold weather. At this time, the soil does not dry out for a long time, and the roots can rot from the excess of moisture.
The possibility of plant propagation by stepchildren
If you have a goal of propagating wisteria, do not rush to get rid of the cut stepchildren. They can become an excellent planting material. They must be placed in a container with water and a root formation stimulator, for example, Kornevin, must be added.
You can plant stepchildren directly into the ground, they can also take root and take root directly into the soil. In this case, it is necessary to look after the humidity of the earth and air. It is impossible to overdry the soil, but cuttings should not be poured either, as they can rot.
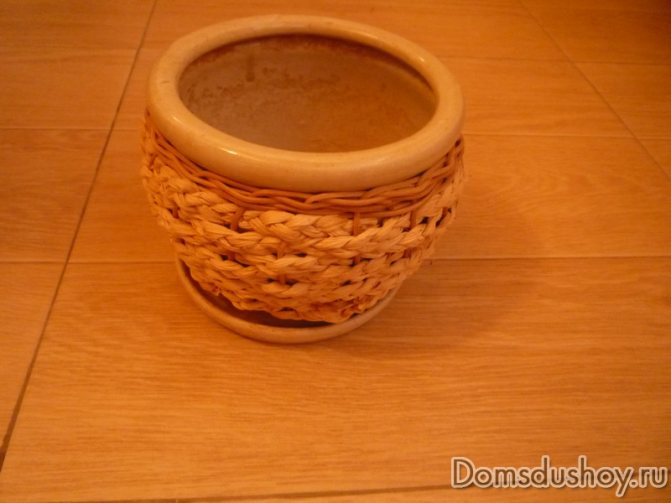
Soil for gloxinia
You can use a mixture of leaf, peat soil and sand (1: 1: 0.5), but the composition may be different, the main condition is that the soil is loose and breathable. The acidity is pH 5.5 - 6.5, on more acidic soils, gloxinia grows poorly and for this reason, clean, unoxidized peat is not suitable for it. Before planting the plant, I highly recommend disinfecting the soil.Now I use the drug Maxim (1 ampoule for 2 liters of water).
For growing gloxinia, wide and shallow dishes are more suitable. For young tubers, pots with a diameter of 7-10 cm are suitable, and for larger and adults 11-15 cm. Pots can be either plastic or clay.