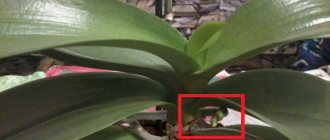
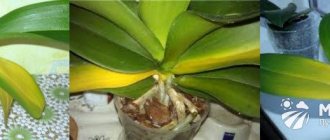
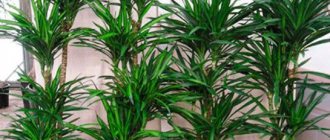
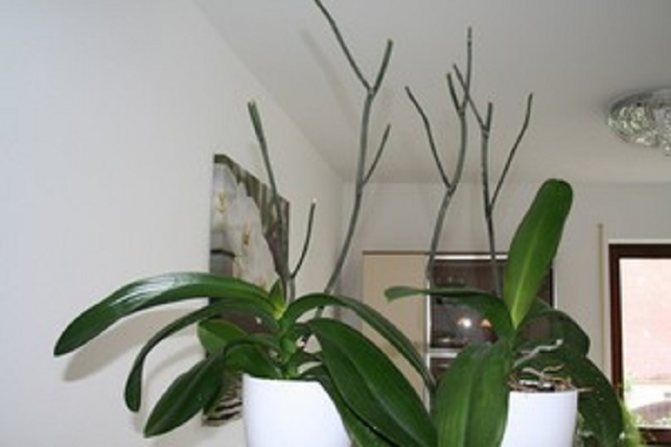
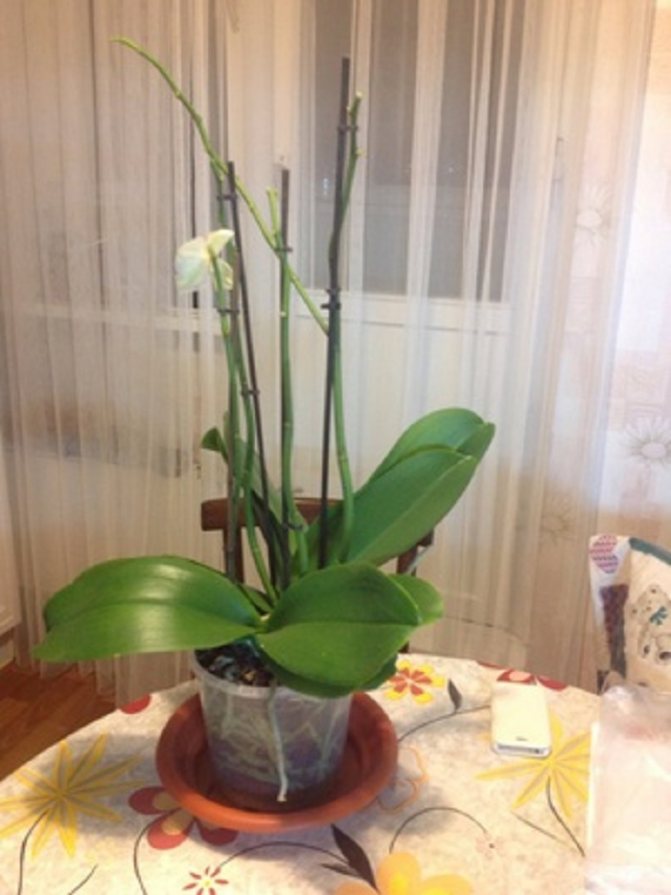
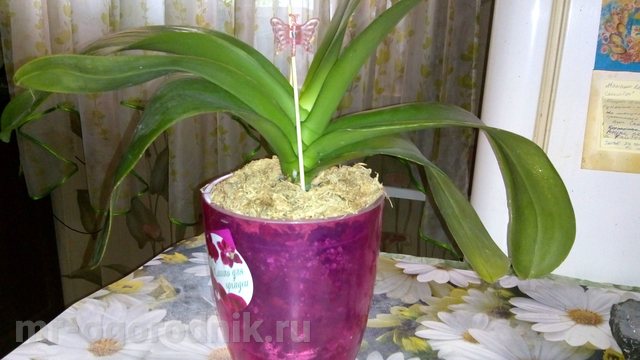
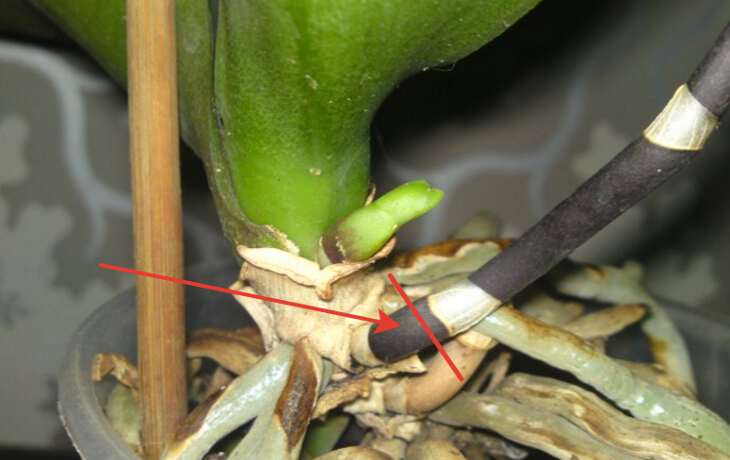
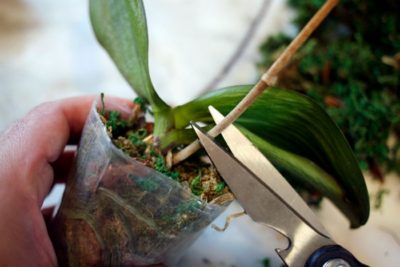
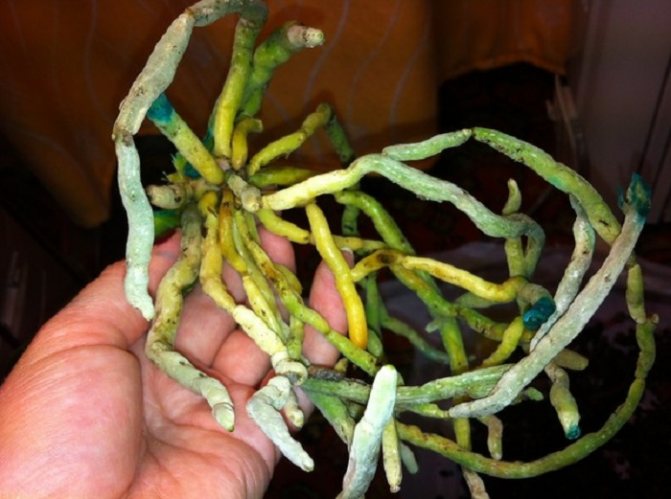
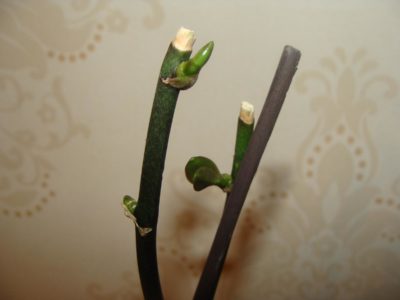
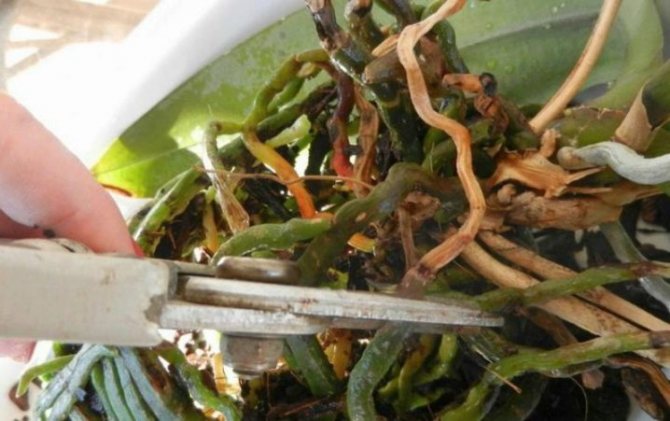
Judging by the appearance of the orchid, the plant is already quite mature, moreover, its root system is thoroughly rotted. As a result, the leaves began to wilt and turn yellow, since the rotten roots are no longer able to provide them with moisture. However, it is quite possible to save the flower, because the upper part of the main root seems to be still alive. On closer inspection, dormant kidneys should be visible.
To resuscitate the orchid, it is necessary to carry out a number of manipulations:
- thoroughly clean the plant from rotten residues;
- process the flower;
- prepare the pot and substrate;
- plant an orchid.
What is cropping?
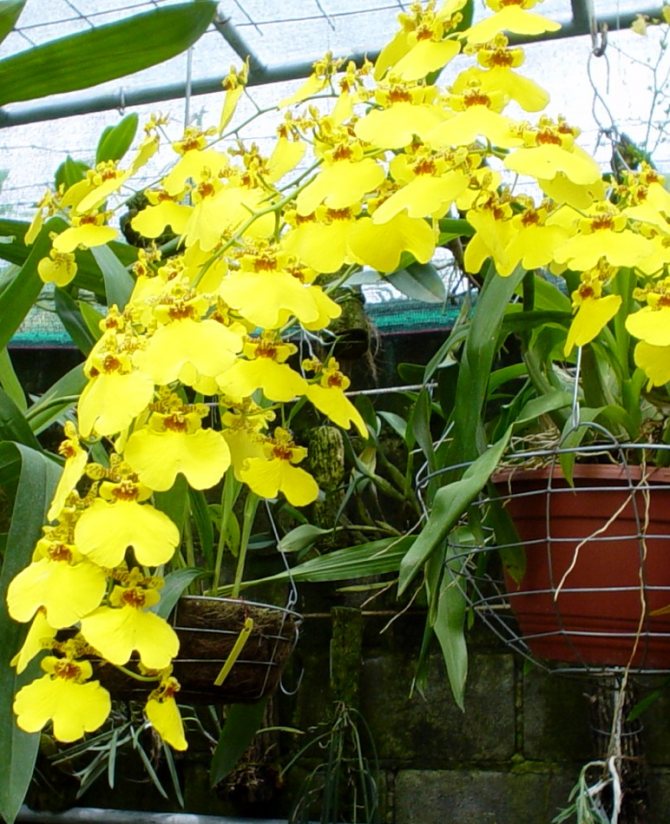
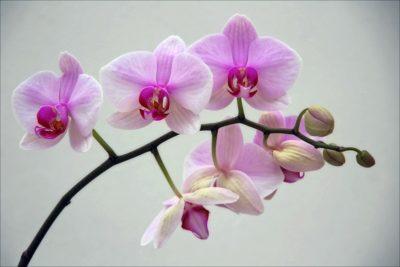
Pruning is the removal of individual parts from a flower... It is carried out so that the orchid will soon throw out new flower stalks with buds. Orchid is a flower of extraordinary beauty, which can delight with its flowering for almost 6 months. But for the next flowering to come quickly, the orchid needs to be cut off.
When no buds and flowers remain on the orchid's peduncle, this means that it has faded and goes into a dormant period. This is the best time to prune your plant.
Important: During the period of "sleep" the flower needs special careful care: watering every 2 days, maintain a certain level of humidity and proper lighting.

Signs of wilting peduncles
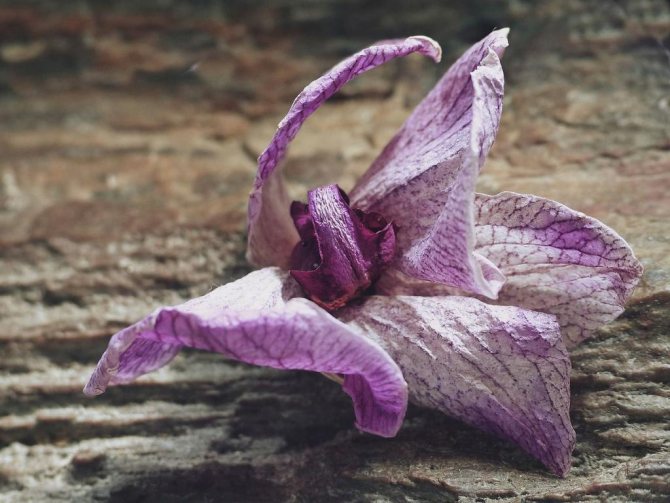
At the very end of flowering, the buds lose their elasticity, and the entire flower arrow looks lifeless and as if covered with a thin layer of wax.
Regardless of the varietal affiliation of the plant, there are several common signs indicating the wilting of the peduncles:
- the arrow retains its juiciness and green color, but is at rest for a long time (several months);
- the flower shoot dries up completely almost immediately;
- daughter rosettes and fresh shoots are formed in the axils of flowering shoots;
- the color of the arrow changes: green darkens or turns yellow, purple becomes dark pink.
You should not rush to pruning, you need to wait and watch the plant.
Should I do it or not?
Some newcomers to floriculture prune as soon as the orchid has faded, so that it will immediately bloom again. But it is advisable not to do this. When pruning live peduncles, the plant receives irreparable damage to health and this is considered a significant disadvantage. There are also controversial advantages:
- healing by removing leaves;
- elimination of wilted plant elements to redirect forces.
Do I need to do it?
Selection does not stand still, and currently there are many varieties of this plant. Florists disagree on whether it is necessary to cut the stem after the orchid has faded, how and when is it done? Some believe that it is necessary, others say the opposite. Both points of view are correct, since everything here depends on the type of plant. If you are not sure what kind of care will be most suitable for your plant, you can contact a specialized store and check this information with a specialist.
It is necessary to cut the peduncle when it is completely dry - this rule is the same for all species. If there are still buds on the branches, then flowers will soon germinate there. In this case, cropping is undesirable.The correct solution is to leave the stalks intact. This unpretentious process has its own subtleties. There are two ways to crop: full cut and incomplete cut.
Full circumcision
The peduncle is pruned to the very root, dried arrows are removed. It is necessary to leave a stump of 3.5-4 cm. The arrows are cut in different places, it all depends on the breeding variety of the hybrid.
Incomplete
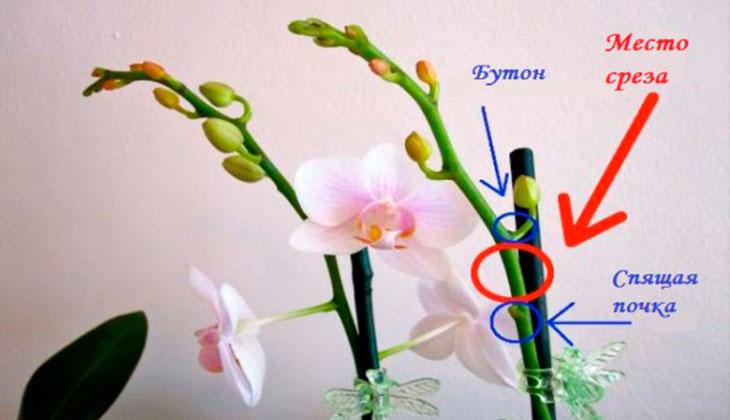
In this case the peduncle is shortened above the sleeping bud (2-2.5 cm higher)... From it, subsequently, new buds will appear, the so-called "babies". There are cases that even after cutting, the peduncle can dry out. The plant variety should be taken into account, some species have a good ability to form daughter rosettes, in others it all depends on the season.
What are the consequences?
Everything is very individual and directly depends on how well the procedure is carried out. It should be understood that the orchid is very demanding on hygiene, therefore, for a positive result when pruning, you need to use only a sterile tool. In addition, if everything is done according to the rules, then the orchid will release new flower stalks in a short time and will delight with its beauty.
If you prune with a non-sterile tool and then do not close the cut, then the orchid will very soon begin to rot... The plant will die very quickly, while often flower growers do not combine this phenomenon with improper pruning.
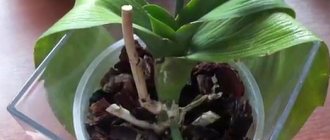
Landing
The volume of the pot should correspond to the size of the root system.
We put expanded clay into the selected container, scald it with boiling water. Above - a small layer of soil. We place Phalaenopsis in the center and pour the substrate into the pot, periodically tapping it on the surface of the table. Protecting the soil from rapid drying, cover it with a layer of sphagnum moss.
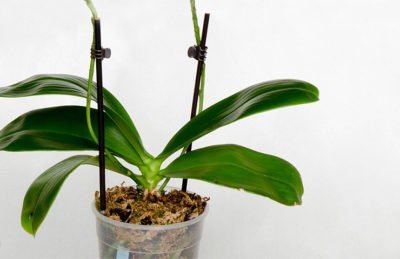
To prevent Phalaenopsis from swinging in the pot and injuring the roots, for the first time we fix it with wooden skewers and clips or wire. It will be possible to water it in 3-4 days.
When is it recommended to carry out?
Many newcomers to floriculture are interested in what time it is best to prune. In order not to harm the plant, you need to wait for a period of complete rest, which occurs after flowering. Do not touch a blooming orchid, it may not survive improper pruning during the active growing season.
Time for pruning phalaenopsis - late October, early November... This process must be carried out with special care, taking into account the type of plant and the characteristics of growth. It should be understood that each orchid variety has its own characteristics. For example, phalaenopsis can be cut off immediately after flowering, but in other species, peduncles must be cut off only after they have dried (for details on how to properly cut an orchid after flowering, read here).


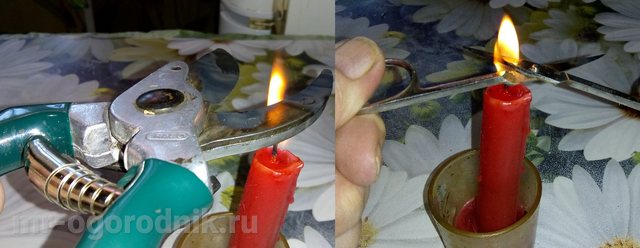
Preparing for surgery
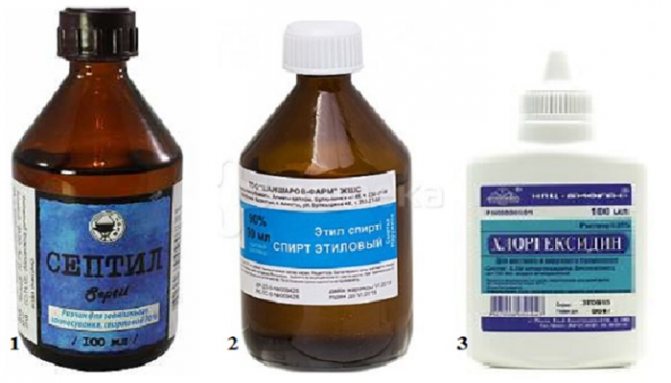
First of all, you need to disinfect the instruments. It is best to ignite them over a fire, and then wipe them with a swab of vodka or calendula tincture.
Make a solution of Zircon or Epin, prepare the substrate. This soil contains:
- bark - 70%,
- coal - 10%,
- peat - 10%,
- moss - 10%,
- perlite - 10%.

Of the drugs, you will need undiluted Maxim summer resident, cinnamon or activated carbon.
Is it possible to cut off individual parts of a faded plant?
This procedure is quite controversial, so some growers do not prune their orchids, and note that there are no special changes in the growth and development of the plant. There are often situations when beautiful and bright buds appear on a wilted peduncle.
Other orchid lovers regularly prune, believing that in this way they stimulate the plant to form layers and children. So, let's look at how to properly trim certain parts of the plant.
Peduncle
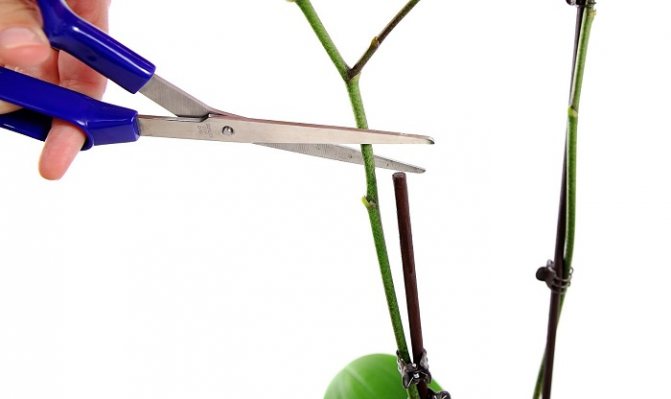
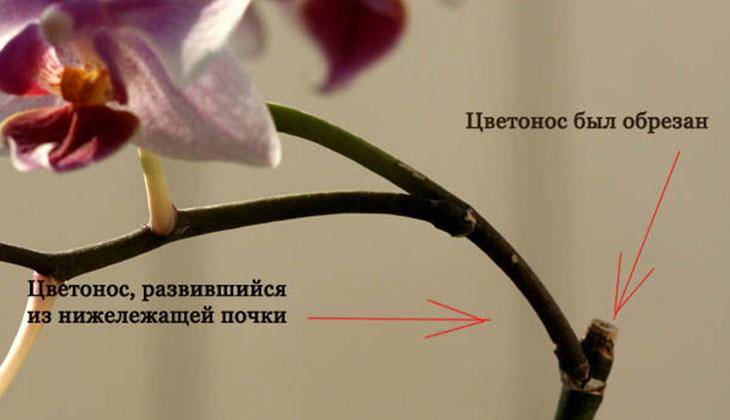
The peduncle is the shoot that the plant releases before flowering.... As soon as a large erect stem has appeared on a flower, beautiful buds can be expected soon. Should you remove the peduncle after flowering? First of all, it is worth carefully examining this part of the plant. If traces of yellowing and drying are clearly visible on it, it is removed at the root, leaving only a small stump.
If you remove the peduncle while it is in a "living" and not faded state, the orchid will start to ache and spend a lot of energy on recovery. She, of course, will not die, but re-flowering will have to wait at least 6 months.
Advice: If, when viewed on the peduncle, there are living buds or small buds, then it is worth cutting off the peduncle 1 cm above this area - later a baby or a flower may appear.
We recommend watching a video on the correct pruning of an orchid peduncle:
Arrows
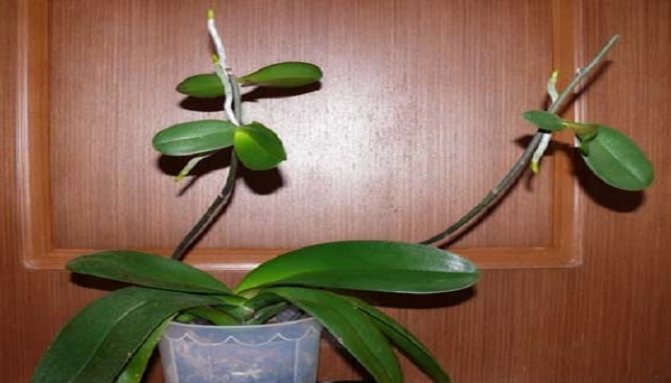
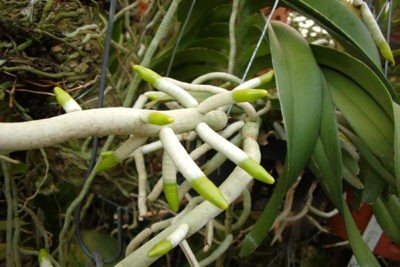
Before removing the arrow, it is worth carefully examining it, since babies from dormant kidneys are often formed on them. If the arrow began to turn yellow, then the question of whether it is necessary to wait for the appearance of new layers with peduncles does not make sense - the faded arrow is cut off 2 cm above the nodules... If there are no knots, then you do not need to touch the arrow, just leave it to dry completely, and then carefully remove it.
The lower the arrow is cut, the longer the peduncle will be at the next flowering. If you remove it at the very root, then the plant may not please you with flowering for a long time.
If a lot of layering and branching appears on the arrow, then it is worth making the formation by cutting... All side arrows are removed, the cuts are processed with crushed activated carbon.
Stem
Do I need to cut off the sluggish part of the stem? Yes, this must be done right away, since the plant spends a lot of energy on restoring this area. After removing the faded trunk, do not rush to throw it away - put it in water, a baby may appear on it.
Throughout its life cycle, the orchid grows, develops, pleases its owner with beautiful flowers. You can extend the life of a plant by updating its root part - cut off the bottom plates. And if the plant is sick, then it can be saved by cutting off the diseased areas: roots or leaves. How to correctly perform this procedure - read on our Internet portal.

Products for processing orchid slices
There are many tools that can be used to treat the damaged area of an orchid. Among them are medications from a regular first-aid kit, and special disinfectants, and folk remedies:
| Treatment agent | Advantages and disadvantages |
| Zelenka | A versatile and affordable tool that is always at hand. Suitable for processing sections on all parts of the plant - roots, leaves, trunks, flower arrows. Disadvantage - if handled carelessly, it can cause chemical burns to tissues. |
| Potassium permanganate | Good disinfectant for root treatment. Disadvantages: requires proper preparation of the solution, not quite convenient for working with leaves and trunk. |
| Activated carbon | An affordable and cheap tool, it dries sections on the trunks well, adsorbs external moisture when it gets on the wound surface. Disadvantages: requires careful grinding, crumbles, which makes it inconvenient to use on roots and leaves. |
| Cinnamon powder | Popular and cheap treatment for trimmed roots. Protects against fungal infections and stimulates cell regeneration. Disadvantage: ineffective against bacterial lesions, crumbles, not suitable for working with leaves and trunk. |
| Fundazol | A strong systemic fungicide that penetrates deeply through the conductive system in orchid tissue. Disadvantages: provokes the development of resistance of pathogens to fungicides, is toxic to humans, does not protect against bacterial lesions. |
| Chlorhexidine | An excellent antiseptic solution, effective against fungi and bacteria. Heals slices quickly. Suitable for the treatment of any part of the orchid - both roots and other organs. Disadvantage - it can only be used in a low concentration (0.05%), since a stronger one causes a chemical burn of tissues. |
| Hydrogen peroxide | Good for trimmed roots. It is used in a 3% concentration. Disadvantage - if handled carelessly, it can cause chemical burns to tissues. |
In addition to the listed drugs, a solution of any copper-containing fungicide can be applied to the wound surface:
- Oxyhom;
- Abiga Peak;
- "Cuproxat", etc.
“Copper preparations dry out the slices slightly and block the way for fungal spores. But they must be applied carefully and in moderation so that the orchid does not experience a "copper shock". "
L. Vlasova, florist with 14 years of experience
It is also important to remember that fungicides are not a universal remedy. They do not protect against bacterial pathogens.
Tip # 1. Some growers are trying to process orchid cuts with Furaplast. It is a powerful antiseptic used in medicine for the healing of purulent wounds and pressure sores. However, it forms the thinnest film on the surface of the plant, which does not allow the tissues to breathe. Therefore, if there is nothing else, it is better to replace it with regular furacilin.
Zelenka is the most popular means for processing slices. When used correctly, it is completely safe for orchids, and its protective properties are very high.


What if the procedure was not performed on time?
If you prune before the peduncle dries, you can greatly harm the plant.... It will start spending energy on restoration, and will not bloom for a long time. Any interference with the growth of the orchid is stress for it. Watering in this case should be very sparing and only from a sprayer.
At the same time, it is important to observe the correct temperature regime - at night +16, during the day - 24 degrees, strong drops should be avoided. If pruning is carried out in the summer, then you need to remove the orchid from the sun - it can get burned. Fertilization is practically not carried out.
It is better to leave the plant alone for a while and allow the orchid to calmly regain its strength. If you provide a comfortable environment, she will cope with this quickly enough. Just watch the state of your flower - it is necessary not to allow the earthen coma to dry out and maintain the required air humidity.
It seems to some amateur flower growers that the orchid is a very demanding and capricious plant that requires increased attention, this is not entirely true. You don't need to spend a lot of time for leaving, it just needs to be regular, and then the flowering will be lush and long-lasting.
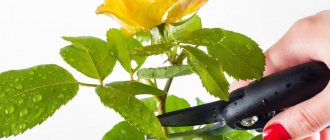
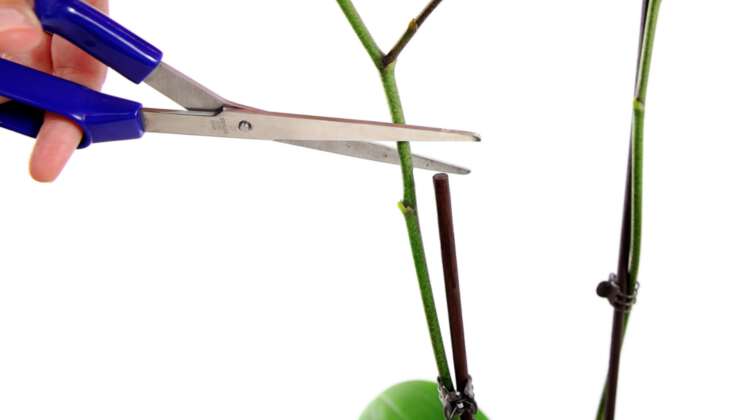
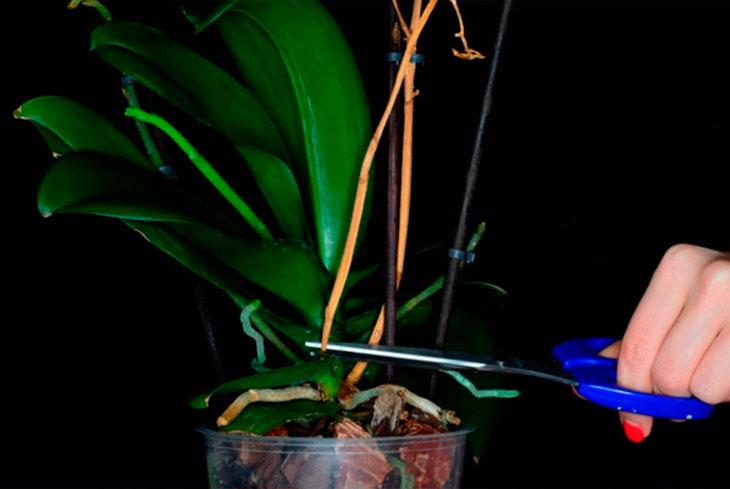
Attention: Pruning is best done with pruning shears, as it does not leave a large amount of burrs, the cut is smooth. Disinfection of the cut must be done without fail so as not to infect.
Photo
In the photo below, you can see the highlights of pruning a faded orchid.
Timing
The flower-bearing shoots should be removed when the plant is preparing for the dormant period. This can be recognized by the following signs:
- Change in color of the peduncle - it becomes brown or purple.
- Its drying up and wilting.
- Lack of flowering for six months, despite the fact that the shoot remains green.
Usually rest phase in orchids accounts for end of October-November... For trimming, this is the optimal time. However, one must also focus on the state of the flowering stem, described above.
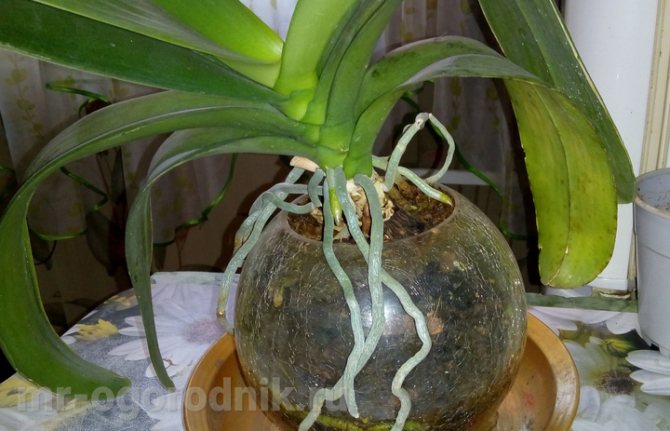
How to transplant if the roots grow from a pot?
Novice flower growers do not know what to do with a donated plant if the roots have grown and stick out right out of the pot. Can they be shortened or just trimmed? Sometimes it is necessary to do this, for example, if:
- the roots are dry;
- putrefaction appeared;
- if the volume of the roots is very large, they are strongly intertwined and therefore moisture does not enter the plant well.
Important! Without risk to the plant, only 1/3 of the total volume of roots can be removed, otherwise the flower will need resuscitation.
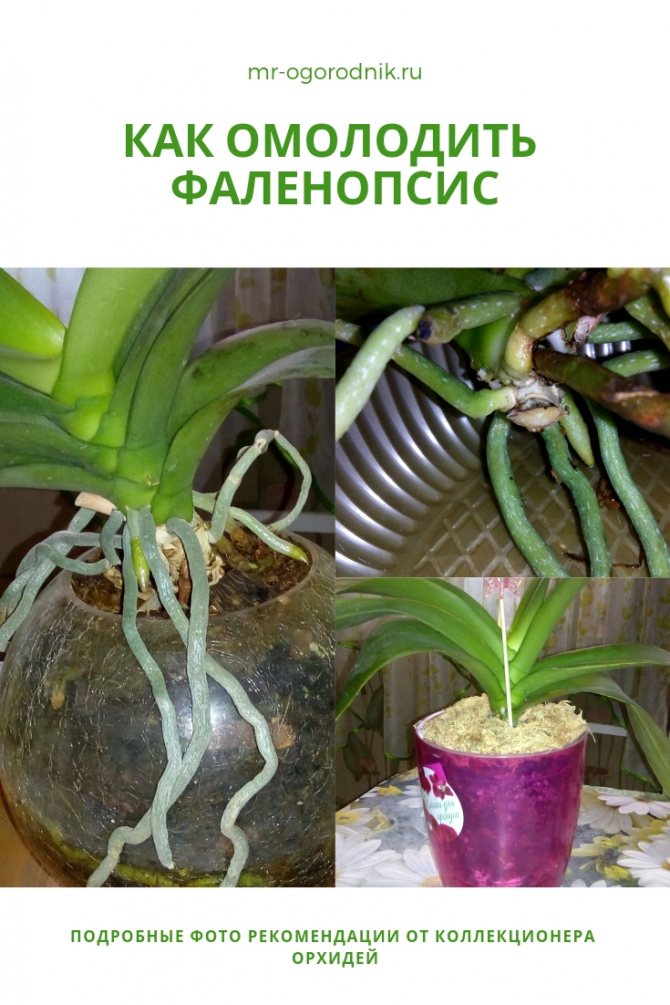
Resuscitation methods
If something goes wrong, you can always revive the orchid. Transplantation and treatment from decay, pruning of damaged parts leads to positive results.
And then you need to take a number of measures to prevent further blackening of the roots.
- Make sure the orchid is in a pot with good drainage.
- Organize a clear watering regime.
- The leaves of some types of orchids act like a water siphon, which can trap water in the base. Make sure that after watering the flower, all excess moisture is absorbed into the paper towel.
- There should always be air movement around the flower. Blowing can be done by a fan, air conditioner, or you just need to constantly ventilate the room through a window.
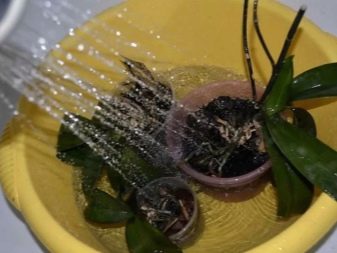
Rot can be treated with hydrogen peroxide, which is poured onto the crown of the orchid.... The procedure is repeated every 2-3 days until the product stops hissing. Then sprinkle with cinnamon, which is a natural fungicide against fungus.
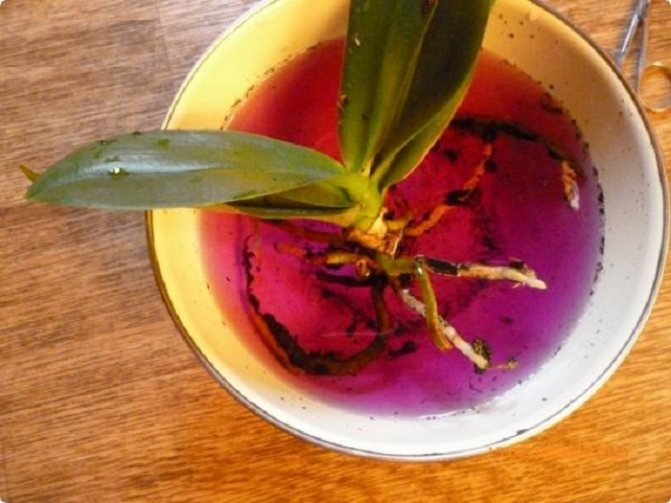
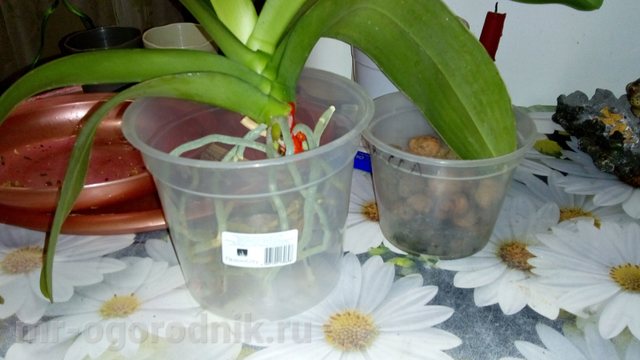
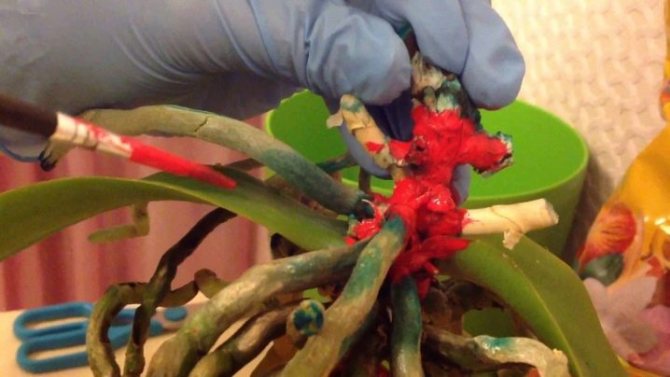
While maintaining viable roots, the orchid can be fully restored. To do this, remove the roots from the pot and clean them with a brush. The scissor blades are dipped in alcohol for sterilization, and then they cut off the roots infected with rot. Drain the standing water in a drain pan, thoroughly rinse the container and tray in soapy water.
Change the substrate to a new one, slightly moisten it with clean water without bleach... Allow excess liquid to drain. Place the roots of the orchid in a pot, add extra bark around to anchor the plant. Place the container on the drainage tray.
The next watering is done only when the top few centimeters of the soil is completely dry. Stagnant water must not be allowed to remain at the bottom.
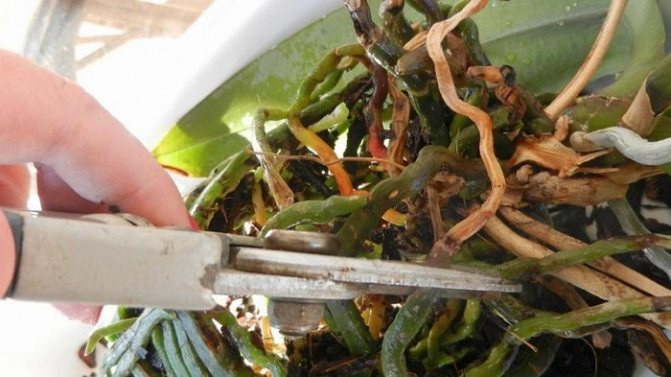
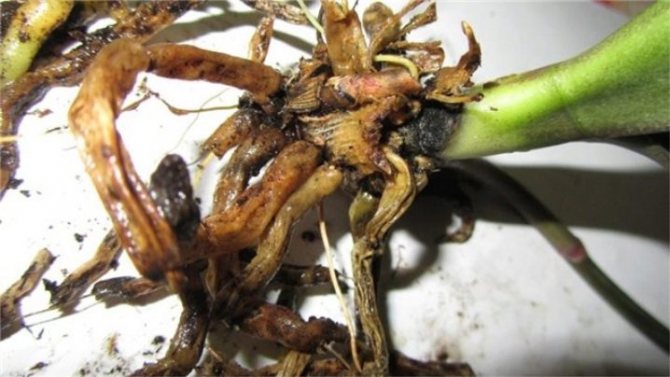
Most of it rotted away
You can save a flower even when most of the root system is damaged. Cutting off decaying roots will restore the health of the plant.
The process is as follows step by step.
- Pour 9 parts warm water and 1 part bleach into a container. Stir the solution with a spoon, lower the cutting tool into the liquid for 20-30 seconds. Draw out the blades, allowing the solution to drain, and then dry the inventory on paper towels.
- Wear rubber gloves to protect hands from possible irritation when handling orchid roots. Cover the work surface with newspapers. Carefully remove the flower from the pot.
- Free the roots from the old substrate.
- Rinse the roots in warm water to clean them well. The plant is laid on a newspaper-covered surface.
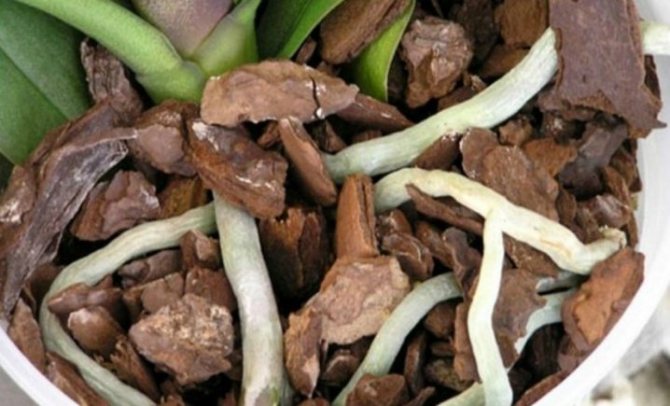
- Examine each root, noting areas of dark brown or black rotted tissue. You can pull on the discolored root to see if it slips, leaving a thin, string-like appendage behind. This is a sign that the root is dead.
- Take the end of the rotten root and cut it off at a point where living tissue is still present. Cut off at the base if it rots along its entire length.
- Each time the cut is made, the scissor blades are dipped into the bleach solution and held there for 20-30 seconds to kill the pathogen. Allow the instrument to dry before making the next cut. This is how the entire root system is treated.
- Wash the pot and drain pan with soap and hot water.
- Fill container one-quarter with sterile substrate.
- Spray the fungicide onto the root system. Place the plant in the center of the container, spreading the roots over the potting mixture. Fill the pot with the rest of the substrate without tamping it.
After this treatment, the plants and the change of the substrate produce high-quality watering, and the excess liquid is allowed to drain.
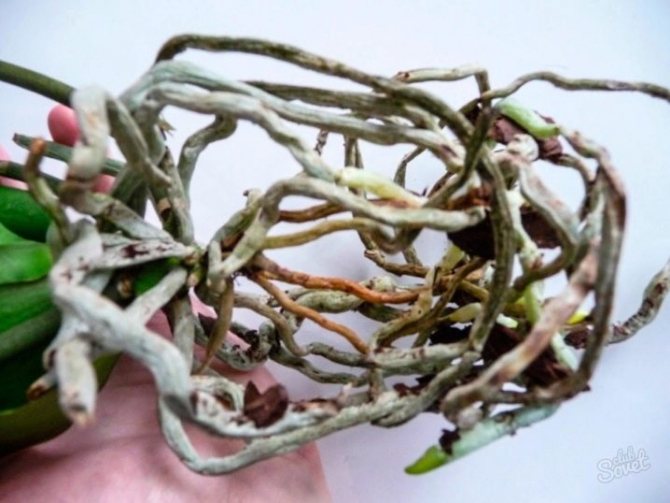
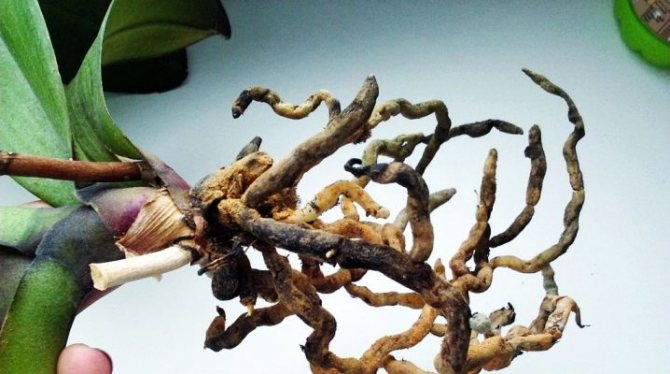
A small part rotted away
It also happens that only a few roots of the orchid have rotted. In this case, it is even easier to revive the plant at home.
The step-by-step process is as follows.
- Mix water and bleach in a 4/1 ratio. The entire instrument that is to be worked is sterilized, but the liquid is not poured out, since after each cut, the secateurs will need to be processed again.
- To cure a flower, you will need to transplant it into a different substrate, since the old one is already affected by the fungus. Take out the orchid and clean the roots well, you can rinse them under warm water.
- Cut off infected roots with a sharp knife, pruning shears or scissors.
- Cover the rest of the root system with a fungicide. You can mix 500 ml of isopropyl alcohol and 2 tablespoons of cinnamon powder. Leave the mixture overnight, strain it through a coffee filter and pour into a spray bottle.
- Thoroughly rinse the old pot and sterilize it in a 10% bleach solution (keep in the solution for several hours).
- You may need to treat other flowers from decay with a fungicide. This precaution helps keep the rest of the plants from becoming infected with rot.
The affected plant should always be isolated immediately as soon as root rot is suspected. Some fungal diseases, such as black rot, spread very quickly from one orchid to another.
It is possible to leave infected plants in quarantine until it is clear that the infection has been completely eradicated.
What can be processed?
Drugs used
The orchid is susceptible to many types of infections and diseases. To prevent the plant from getting sick, the following formulations can be used once a month:
- "Fitosporin" - helps in the treatment of orchids from viral diseases and as a prophylactic agent when transplanting a plant with root damage.
- «Chlorhexidine " - destroys all diseases caused by pathogenic bacteria.
- Fundazol - a means of universal action, before planting the orchid in a new substrate, you can simply dust it with powder.
- "Oxyhom" - fights against all rot and other orchid diseases.
- "Fito Plus" - This drug copes well with powdery mildew and rot.
- "Topaz" - saves from rust and powdery mildew.
- "Streptomycin sulfate" - will help well with bacterial infections, with 1 ampoule diluted per liter of water.
- "Immunocytophyte" - an immunomodulator for orchids, which is able to suppress many diseases.
Reference! But the best prevention is considered to be strict adherence to the rules of plant care.
Powders and drying
After trimming, all wounds must be treated to prevent diseases, infections and decay. Apply:
- fungicidal compositions;
- wood ash in powder;
- crushed activated carbon;
- brilliant green;
- potassium permanganate solution;
- cinnamon powder.
After treatment, the plant is left in the air for 5-7 hours to dry the roots, and only then placed in a new substrate.
Potassium permanganate from parasites and pests.
It is believed that a solution of potassium permanganate not only disinfects and disinfects, but also helps in the fight against insect pests. There is a deal of truth in it. My experience shows that potassium permanganate can be used in combination with other means of pest control, but do not rely only on it for this, since potassium permanganate is not poison for most insect pests.
Potassium permanganate alone will not help you cope with pests.
Will potassium permanganate help from midges? No - you cannot remove flying insects from your plant using potassium permanganate alone. Use special insecticides for this.To combat insect pests, I advise you to use ready-made preparations Fufanon and Aktellik.
Safety precautions when working with potassium permanganate.
Important! A highly concentrated solution of potassium permanganate, as well as undissolved crystals, can cause severe chemical burns.
- Do not allow potassium permanganate to interact with any other substances, especially aluminum, magnesium, phosphorus, etc. to avoid fire and explosions.
- Avoid direct skin contact as potassium permanganate stains and dries the skin.
- Perform all manipulations with the solution with rubber gloves.
Important: If crystals get on your skin, try not to rinse them off with water, but remove them with a dry cotton pad. Only after the crystals are completely removed from the skin, you can rinse the infected area with water and lubricate it with a fat cream.
For prophylaxis - 1 time in 6 months, for treatment or subcortex no more than 1 time in 1-2 weeks.
Important! Before organizing watering, study which plants do not tolerate high soil pH values, since regular use of a potassium permanganate solution can greatly acidify it.
Potassium permanganate as fertilizer for indoor plants.
How do you know if your home plant lacks potassium or magnesium?
- curling the sheet plate along the edge
- yellowing of leaf tips
- pallor of leaves
- chlorosis
Diagnostics of the deficiency of microelements of the plant.
- boric acid 1/3 teaspoon
- potassium permanganate on the tip of a toothpick
- 3-5 drops of iodine
- 3 liters of water
Boric acid must be dissolved separately in warm water (40-45 degrees), until the crystals are completely dissolved. Dissolve potassium permanganate in a prepared container in 3 liters of water until a pale pink color is obtained. Then add 3-5 drops of iodine. And lastly add the dissolved boric acid. With this solution, it is necessary to carry out both root and outside root feeding of domestic plants.
Important! Top dressing should be carried out only on watered plants; it is not recommended to make top dressing in dry soil.
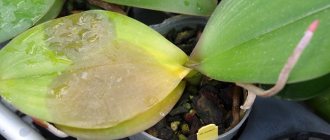
The reasons
Damage to the root system often occurs because before that it was simply flooded with water. This is a common mistake of novice florists who think that excess moisture will only benefit a tropical flower. Wet and waterlogged substrate are two different things.... Root rot makes the roots brown and soft, and nutrients are no longer delivered to the plant through its food system, which is almost certainly a death sentence for an orchid.
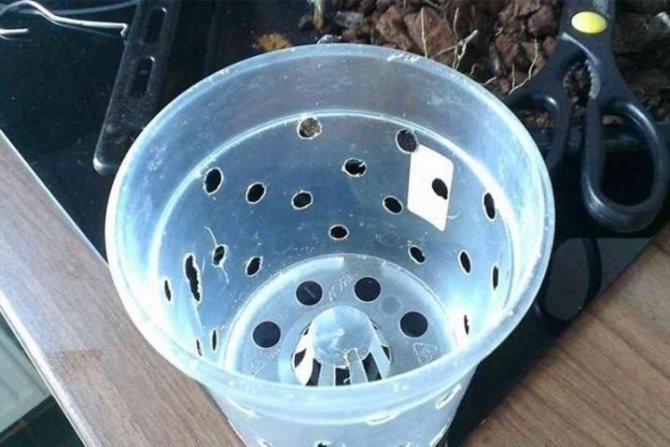
To avoid the problem, it is necessary to choose the right pot with good drainage.
With this system, the roots will remain hydrated, but excess moisture will go away. When the first signs of decay appear, the roots must be removed immediately, since the spreading rate is very high.
Too much water prevents oxygen from penetrating to the roots, hence the unfavorable processes. Leaves will begin to slow down, new ones will appear pleated, and existing leaves will turn yellow.