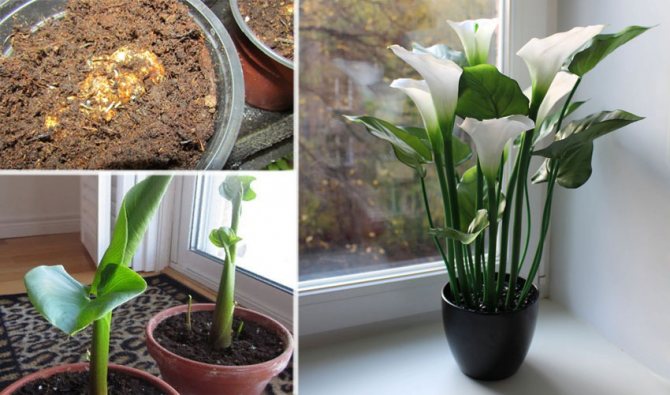
Growing calla lilies at home involves following certain recommendations regarding planting and further care. This popular ornamental plant for active growing needs a sufficient amount of light, heat and a well-chosen capacity. But there are situations when the expected flowering phase is not observed, which greatly upsets the owner. To understand why calla lilies do not bloom, you need to consider in more detail the main reasons for such negative consequences and methods for their elimination.
Varieties of calla lilies
If a beginner starts asking experts about the peculiarities of growing calla lilies, he runs the risk of getting into a dead end. Some will say that the plant sleeps in winter and blooms profusely in summer, while others, on the contrary, will assure that you need to wait for flowers exactly by Christmas. The former argue that calla lilies need to be transplanted as rarely as possible, while their opponents are eagerly teaching how to properly store the dug tubers. Who is right? Oddly enough, both. It's all about calla lilies: they are conventionally divided into 2 groups - white and colored:
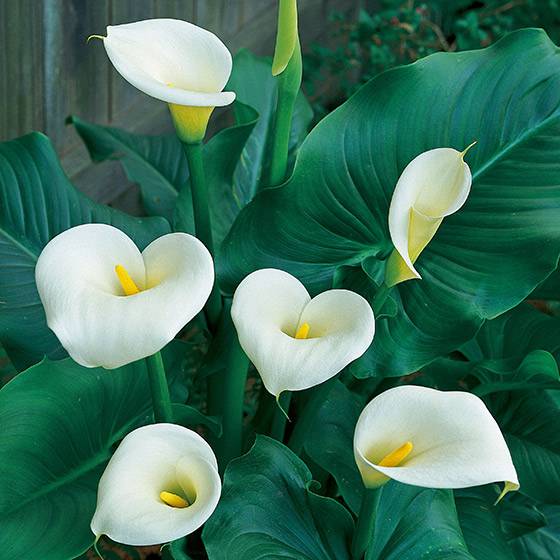
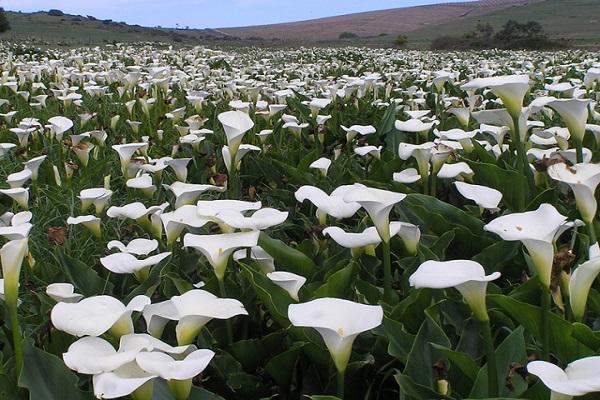
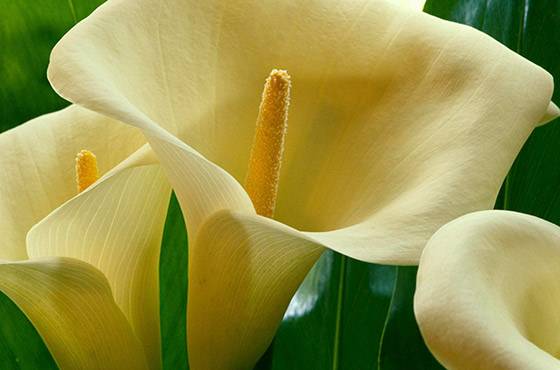
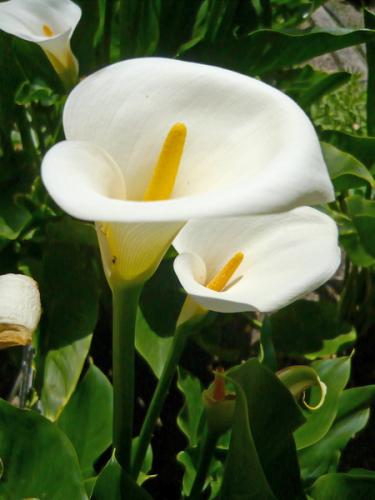
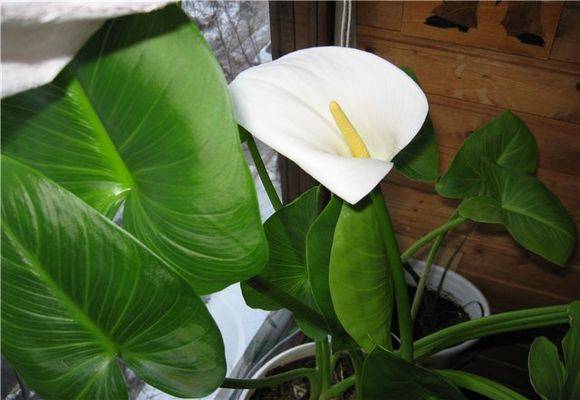
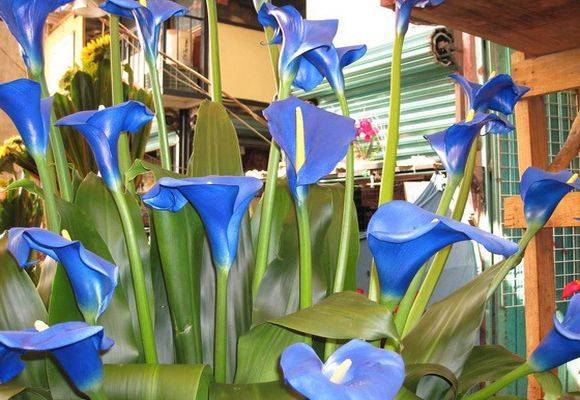
- All specimens with snow-white bedspreads belong to the Ethiopian group. These are real giants - the height of some plants reaches 1.5 m. Under the ground, close to the surface, they have powerful fleshy rhizomes with roots extending in different directions. Flowering occurs in December-January and continues until early spring.
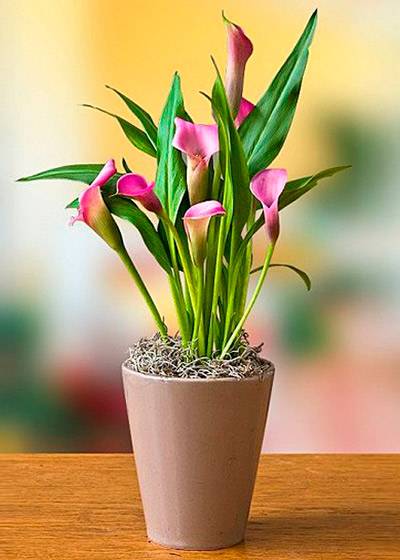
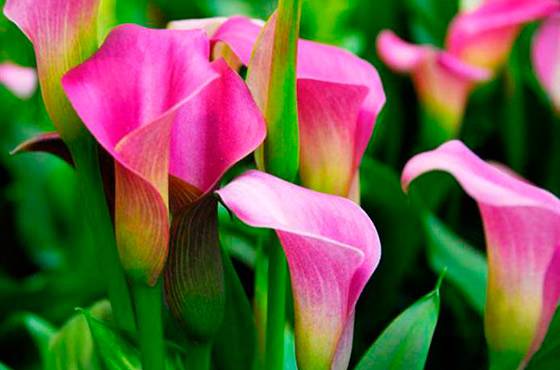
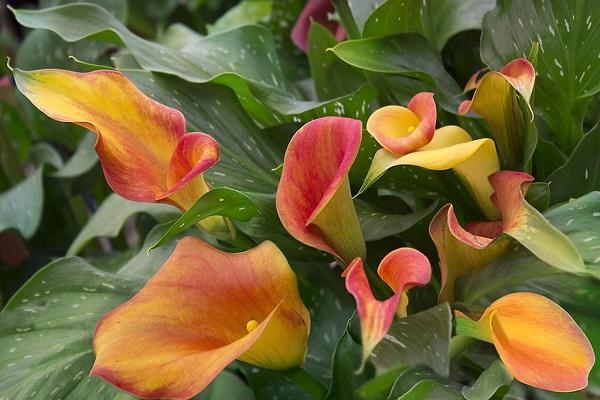
- The second variety is low plants with bedspreads of all kinds of shades. In terms of a variety of colors, only tropical butterflies can compete with these calla lilies. Members of this group accumulate nutrients in rounded underground tubers. Bloom profusely in summer, rest in winter.
The shape of the flowers of all calla lilies is the same - an ear-candle, wrapped in a cover sheet (blanket), bending over which, in clear weather, you can feel the light scent of pineapple. Caring for rhizome and tuberous specimens is somewhat different, but it also has many common points.
Factors provoking the lack of flowering
In order for callas to bloom regularly, you need to know what factors adversely affect the plant:
- disturbances in care when the decorative culture is at rest;
- no root division, the procedure should be performed once every 2-3 years;
- unsuitable flower container, it can be either small or very large;
- surface embedding of tubers in the ground;
- an excess of nutrients in the soil in the soil substrate;
- lack of moisture;
- care errors.
See also
Planting and caring for gazania in the open field, reproduction and cultivationRead
Lighting and temperature
In the room for potted calla lilies, it is recommended to find a brightly lit place, protected from direct sun and drafts. In the winter months, fluorescent lamps should be turned on over the plants of the Ethiopian group in order to increase the length of daylight hours to 10-12 hours.
The optimum temperature of the content during growth and flowering is from +20 to +25 ° С, during the dormant period the indicators are reduced to + 14 ... + 16 ° С. Tuberous calla lilies in the summer months are allowed to be taken out into the open air - slight differences in night and day temperatures have a positive effect on their development.
Lighting
Calla is a light-loving plant, but the lighting for its growth and flowering must be diffused. Does not tolerate direct sunlight.
The flower can be grown in partial shade, it can even tolerate shade, but such lighting negatively affects its flowering.
Poor lighting can be the reason why calla lilies do not bloom or blooms very poorly.
On hot summer days, it is especially important to protect the flower from the scorching rays of the sun. To do this, the pot can be rearranged on a floor stand and / or covered with a translucent curtain.
Calla needs good lighting all year round. She prefers a long daylight hours, therefore, in autumn and winter, it is recommended to supplement the plant with artificial fluorescent or phytolamps.
Watering and ambient humidity
In their homeland, callas grow in swampy areas, so in room culture they readily respond to any water procedures, especially during flowering. Spraying, bathing in the shower or in the warm summer rain - everything will benefit these beauties. For rhizome calla lilies, the ambient humidity is maintained at 70-80%, for tuberous calla lilies 50-60% will be sufficient. Plants are watered often and abundantly, barely the top layer of soil in the pot dries out 1 cm deep.After flowering, watering of white orchids is gradually reduced to a minimum, and for colored specimens, the water supply is completely canceled 1-2 months after the flowers wither.
Ways to make a plant bloom
Often novice plant growers do not know what to do to make calla lilies bloom. But there are several effective ways to achieve the formation and blooming of buds.
We provide proper watering
Callas are moisture-loving plants and need regular watering. The optimal frequency of irrigation activities is every day or every other day, the main thing is that the water is constantly in the sump. Especially water procedures are useful for feces at the stage of budding. Effectively arrange a shower flower or expose it in the summer rain.
The recommended humidity level for rhizome calla lilies is 70-80%, and for tuberous callas in the range of 50-60%.
Calla lilies should be moistened as soon as the soil dries out to a depth of 1 centimeter. The main thing is that the complete drying out of the soil mixture in the pot must not be allowed, otherwise the flowering phase will be postponed for six months. It is desirable to use a settled and soft liquid for irrigation, cold water is the reason for the lack of flowering in calla lilies. When the budding stage is over, the white varieties of calla lilies are watered as little as possible, and the colored ones only begin to moisturize after 1-2 months.
Top dressing
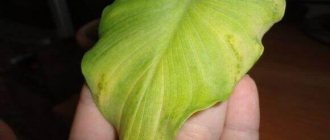
If your marsh beauty feels great and turns luxuriantly green, but stubbornly refuses to form peduncles, most likely you overdid it with the introduction of nitrogen. Balanced liquid fertilizers, such as Kemira Lux, are suitable for feeding calla lilies. The nutrient solution is served after every fifth watering of the plant throughout the growing season. The lack of this or that element can be judged by the appearance of the calla: with a deficiency of potassium, the tips of its leaves are bent in the opposite direction, and from a lack of nitrogen, the foliage turns pale and loses its characteristic gloss.
Temperature
It is a plant with a pronounced dormant period that lasts 2 months a year and begins after flowering ends. From the beginning of the growing season, a stable temperature with small average daily differences is needed.
It is best to keep the flower in a room at a temperature of 18-22 ° C. This plant does not like heat; at temperatures above 27 ° C, its leaves begin to dry out, despite the humidification of the air. The cold is also detrimental to him, although the Ethiopian calla can withstand a short-term temperature drop of up to 5 ° C.
During the dormant period, the temperature of the plant should be between 10-15 ° C.
Transfer
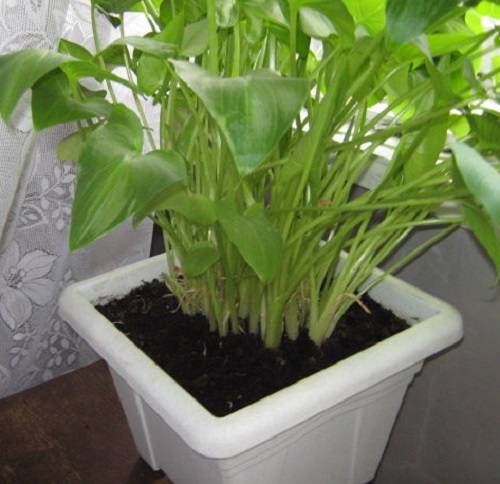
Rhizome calla lilies do not like frequent transplants; it is recommended to change the soil and the pot under them no more than 1 time in 5-6 years. The transplant can be postponed indefinitely if the top layer of the substrate is regularly renewed. Certain requirements are imposed on the planting tank: it must be stable and spacious enough (at least 20 cm in diameter), since Ethiopian calla lilies do not bloom in crowded conditions. For planting less whimsical tuberous calla lilies, a three-liter flowerpot is suitable. It is good if you choose a pot for your pet made of natural porous material so that excess moisture can evaporate from it. Plants of the "white group" are planted to an insignificant depth, lightly sprinkling the rhizome with fresh soil mixture, composed of sod soil, humus and peat (1: 1: 1), the tubers of colored calla lilies are buried into the substrate by 5 cm.
Watering
It is a marsh plant for which abundant watering is vital. When growing in pots, the lump of earth during the growth and flowering period should never dry out. You need to water it daily, but it is better from the bottom through the pallet. When watering from above, care must be taken so that water does not fall on top of the tuber or growing point.
During the rest period, watered about 1 time in 10 days. The soil should be slightly damp at this time. For watering the plant, only warm, settled soft water is used.
Calla lilies stop growing due to insufficient soil moisture.
15 minutes after watering, all the water that has flowed into the sump is drained. This will prevent decay of the root system.
After flowering, the regularity of watering for all species is reduced to 1 time in 7-10 days. After 1-2 months, watering of colored calla lilies must be stopped until the end of the dormant period (end of February).
Rest period organization
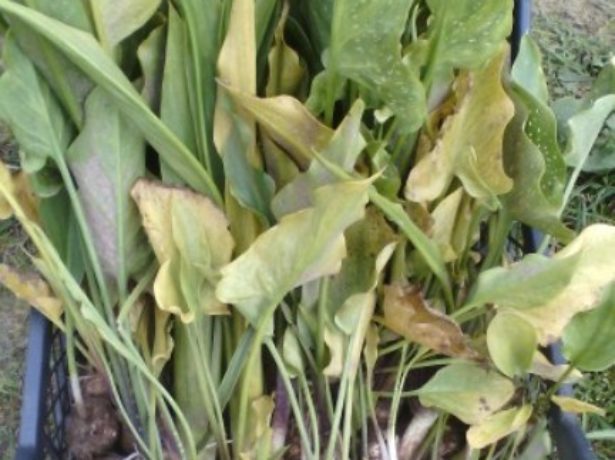
In late spring-early summer, rhizome calla completes its next life cycle: plant growth slows down, foliage turns yellow. From this time on, watering the pet needs to be reduced, and she herself must be moved to a well-lit place in the garden or on the balcony, protected from precipitation. Around mid-July, the plant begins to prepare for the next flowering: it is freed from old leaves and young shoots, the substrate is refreshed in the pot, and the previous irrigation and fertilization regime is resumed.
Tuberous calla lilies are sent to rest in the fall: after removing withered leaves, the pots with "bulbs" are transferred to the veranda or removed to the cellar. Some growers annually dig up plants of this group and keep them at a temperature of + 5 ... + 10 ° C for 2 weeks, so that the remnants of nutrients are transferred from the wilted leaves of the nodule. Then the foliage is cut off, the "bulbs" are washed, etched in a solution of potassium permanganate, washed again and, after drying, are stored in the vegetable compartment of the refrigerator.
It will take 1.5-2 months to recuperate a room calla. If you deprive your pet of proper rest, it will quickly deplete, and, alas, the next flowering will not come.
yfnecz-Natusy
РІСЃРµ Р · Р ° РїРёСЃРё Р ° вторР°
Why does indoor calla not bloom?
Article source: https://enn.imadeself.com/section/cvetnik

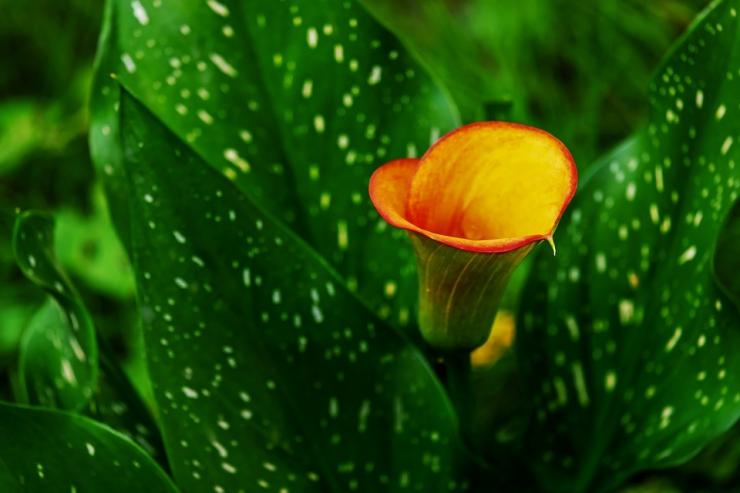
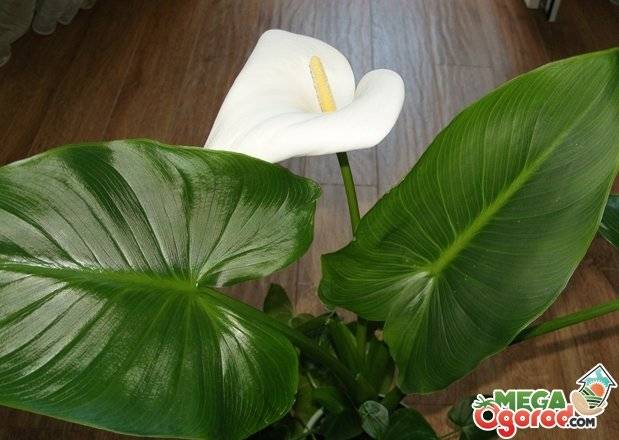
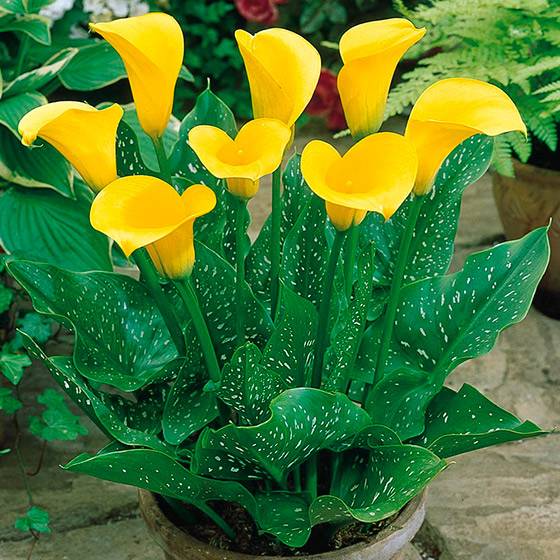
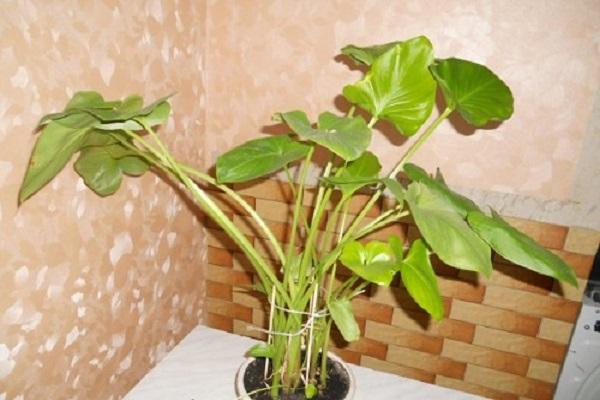
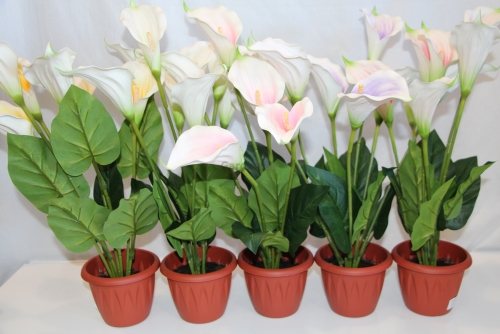
This is what calla lilies look like
Calla lilies belong to the aroid family and are subdivided into two groups. The first includes rhizome plants derived from Ethiopian calla lilies. They have large white flowers. The second group includes tuberous varieties with variegated colors, originating from calla lilies Eliota and Remani.
White and colored calla lilies are cared for in different ways. The former prefer an increased level of humidity, therefore they need periodic spraying. They do not shed foliage during the dormant period and love spacious planting containers. Representatives of the second group do not grow higher than 65-70 cm and completely shed their leaves when they rest.
Calla lilies have a thick root system, which often comes to the surface of the soil.The leaves of the flower are distinguished by an oval-heart-shaped shape with a pointed tip and a single arrangement. Leaves of deep green color, glossy and fleshy, 7-15 cm long and 6-13 cm wide.
Some varieties are distinguished by white blotches on a green background.
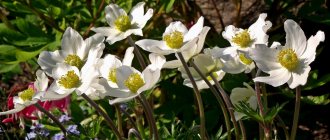
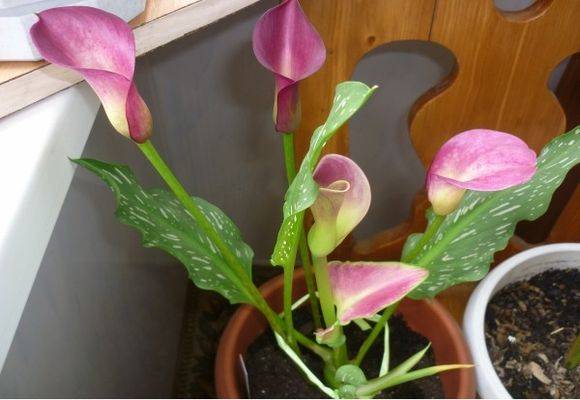
A thick, upright stem is crowned with a candle-shaped ear formed by very small bright yellow or orange flowers. The candle is wrapped in a peduncle, like a blanket, which has the shape of a funnel. In natural calla lilies, this veil is painted white on the inside, and slightly greenish on the outside. Hybrid varieties have stipules of various bright and pastel colors.
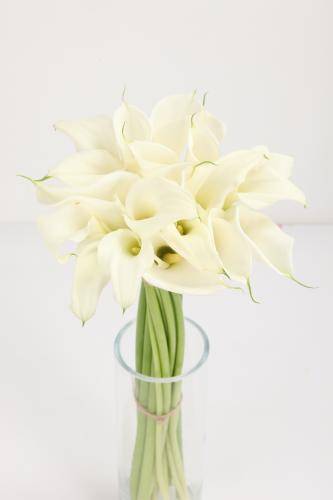
In nature, the flowering of the plant lasts from May to August and at this moment they are very decorative. This is exactly the effect that flower growers want to achieve by planting calla lilies at home. But the flowers are quite capricious in nature and do not always fulfill the wishes of the owner.
Reasons for the lack of flowering
Calla lilies begin to bloom from the age of two, so you should not sound the alarm if the young plant is not gaining color. But if the flower is already adult, but does not form buds, then you should understand the reason for this behavior, of which there may be several:
Failure to comply with the conditions of the rest period. If the flower is not allowed to rest in the winter, then it refuses to bloom at all.
The plant stops blooming if the root is not divided every two to three years.
A pot that is too large or too small can also cause a lack of flowering.
Shallow embedding of the tuber in the ground.
Calla does not form buds if it feels an excess of nitrogen fertilizers, which contribute to the growth of green mass.
The most important condition for the flowering of calla lilies is a properly organized rest period, so that the plant has time to recover and gain strength. To do this, after flowering (in autumn), you should move the flowers to a cool place, stop feeding and gradually reduce watering to nothing. In such conditions, the plants must remain for at least three months. After the aboveground part dries out, the tubers are dug up, transferred to a container with dried sand and sent to a cool place.
In the spring, the tubers are treated with a manganese solution for the purpose of disinfection and kept in a moist tissue. When calla lilies show signs of growth, they can be safely planted in prepared soil. The duration and abundance of flowering largely depends on the correct planting.
It should be remembered that tropical beauties prefer acidic soils, therefore it is recommended to enrich the soil with peat.
With active growth, calla lilies need abundant irrigation and the land should not be allowed to dry out. You also need to regularly make balanced feeding. In order for the plant to lay the buds, phosphorus and potassium fertilizers should be applied. "Zircon" also acts as a good stimulant of flowering.
Calla lilies should be kept at a temperature of at least 22 degrees and an air humidity of at least 80%. To ensure tropical conditions, you need to spray or place containers with water nearby. Plants should be planted every two to three years. For this, the tubers of the flower are divided, separating small children from the mother's root.
For the successful cultivation of calla lilies, it is recommended to follow a number of rules:
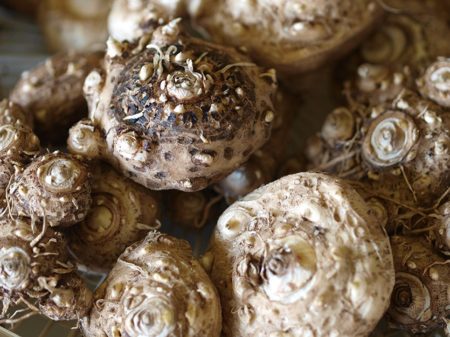
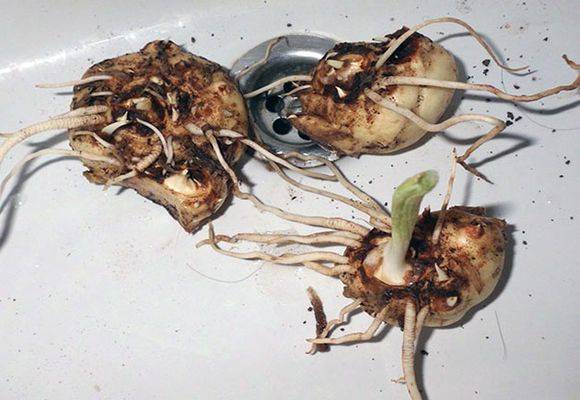
select planting material correctly - tubers should be large, soft and slightly wrinkled. The larger the root, the sooner flowering will come.
compliance with storage conditions during the rest period
a competent choice of a landing capacity - it should be small, no more than a liter
compliance with the rules of landing. First, the tuber is buried in half and watered for several days. And when the first leaves appear, fill the ground
care during flowering consists of trimming faded flowers. This stimulates the growth of tubers and ensures abundant flowering.
With proper care and all conditions for the growth and development of this decorative and vanilla-scented flower, you can achieve abundant flowering and decorate any room.
More information can be found in the video:
Preparing tubers for the winter period
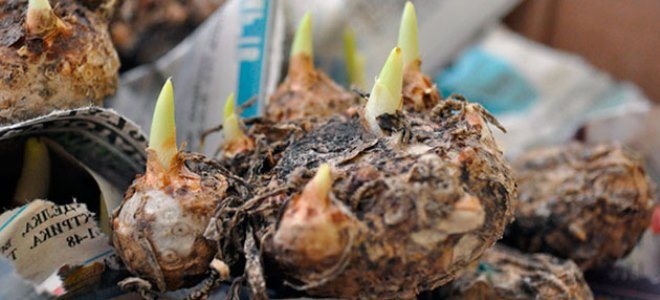
Tubers should not be left in the ground for the winter, as they will not be able to withstand frost. They need to be dug out in mid-September, carefully examining the entire root system. If damage is found, it should be repaired and treated with a disinfectant. Next, the tubers are laid out to dry in a shaded place that will be well ventilated.
You can process tubers with potassium permanganate in both spring and autumn. If this event is carried out in the fall, then after processing, the tubers must again be laid out for drying. After that, the planting material is folded into a paper bag and placed for storage in the refrigerator, in the lowest compartment. With the onset of spring, small shoots are separated from the main tuber, which are called children. All planting material is processed with potassium permanganate, after which they can be planted again.
25
The reasons why the plant does not give color
Originally from African rainforests, calla lilies are especially thriving in the southern latitudes of the country, where, with good care, they can bloom almost all year round. It is possible to achieve such an excellent result by understanding the reasons for the lack of color and observing a set of rules.
Before taking any action to make the plant bloom, it is worth understanding the factors that can interfere with the calla.
Among the main reasons for the lack of color are:
- Insufficient watering
- Small plant pot
- Weak or small tubers
- Incorrect soil composition or depleted soil
Most often, the florist knows the conditions in which he grows calla lilies and can guess what exactly prevents the plant from blooming. Having understood this, you can try to fix the situation.
The soil
Calla lilies need a very fertile and acidified soil. In earth with an alkaline reaction, they will not grow.
Peat as a substrate for calla lilies must be present.
The best earthen mixture for growing them is the following: sod land, peat, humus and coarse sand in a ratio of 1: 1: 2: 1.
For white varieties, you can use a commercially available flowering aroid substrate. Another option is to prepare the soil mixture yourself, mixing one part of humus, sand and leafy earth, adding ¼ part of clay and 2 parts of sod land.
For colored varieties, the recommended soil composition is as follows: one part of humus and leafy soil, 2 parts of sod land and 0.5 parts of sand.
For all types of calla lilies, 1 tbsp is added to 3 liters of substrate. spoon of superphosphate.
How to help a plant to bloom
There are several basic guidelines that can help you get a calla bud. First of all, you need room for tubers, regardless of whether the calla is planted in open ground or in a room pot. The tightness and appearance of children interferes with the normal development of tubers, which negatively affects flowering. When transplanting, you need to carefully separate the processes of the bulbs from the mother bush and transplant them into a separate flowerpot. Each tuber must have at least one bud. It is also recommended to remove excess leaves.
Plant fertilization
To achieve abundant and long-lasting flowering, regardless of the type of calla, it is necessary to periodically feed. If the plant is transplanted into open soil for the summer, then it will be enough to feed the calla once a month with any organic fertilizer, but during the flowering period it is better to add mineral fertilizers, urea and egg shell infusion. Home calla lilies require constant feeding with complex fertilizers at least once every two weeks.
An excessive abundance of nitrogen fertilizers leads to increased leaf growth, and this negatively affects flowering. When peduncles appear and during the entire flowering period, it is necessary to give the plant phosphorus and potassium fertilizers.
Flower rest
Calla is a plant that needs rest from time to time. In winter, you need to stop watering it and let the leaves dry out on their own. It is recommended to sprinkle the tubers in the ground with sawdust and keep in a dark, cool place and very rarely and little by little water only to avoid unwanted drying out. During this period, calla bulbs gain strength.
The minimum rest period is one and a half to two months.
From the middle of spring, you can start abundant watering, and in the summer it is brought out into the light or planted in open ground, which has an excellent effect on strengthening the tubers and further leads to long flowering. If this is not possible, you can expose the pot of calla lilies to fresh air, a loggia or a balcony. In this case, the plant should be protected from excessively scorching sunlight.
Need for water
Kalle needs abundant watering. The best will be soft, settled warm water. Drying out of the soil will postpone the flowering of calla lilies up to six months. Ideally, the calla needs a tray of water. In this case, you need to ensure that the water in the sump does not stagnate. This will adversely affect the root system of the calla lily. With irregular watering, this plant may stop growing altogether. This is especially true for white calla lilies. This species grows naturally in swampy or very wet soils. Colored calla lilies are less demanding for watering.
How to store it correctly
Selected material for planting in winter must be periodically inspected. This will not allow to miss the formed rot, in a timely manner, if necessary, remove damaged areas. Bulbs should be stored in cardboard boxes in a cool, dry place. They are dormant from October to April. Of course, these terms are shifted depending on the region. Indeed, in the northern regions, plants need to be dug up already in August, and planted when constant heat is established. Gardeners believe that the best place to grow flowers is in the Middle Lane, Southern Regions.
You may be interested in:
How to save tulip bulbs after flowering until next spring Many people love tulips. Gardeners grow these beautiful flowers in a variety of colors. In July, it's time to dig ... Read more ...
Wintering plants in a pot
Callas have successfully become plants that are found in many homes. They should also be at rest periodically. It is artificially necessary to stimulate the termination of the vegetative period of the plant. To do this, the pot should simply be placed in a dark, cool place. Watering of the flower is also reduced. Many people doubt whether it is necessary to dig calla lilies out of the pot for the winter and store according to the established technology. Experts say this procedure is optional. Tubers overwinter perfectly in a pot, container.
Choosing a storage location
Proper storage will ensure further good flowering of the plant. For storage, you can put containers with tubers in an apartment, basement, refrigerator or on a loggia. Each place has certain characteristics that are important to consider.
Content in the basement

This place is the most common for wintering planting material. This storage technique requires certain rules to be followed.
- It is important to observe the temperature regime. Boxes with bulbs should be in the basement at a temperature not lower than +5 and not higher than +10 degrees.
- Excessive temperature conditions can cause premature sprouting of tubers.
- The storage period should last until the end of March. After, the bulbs need to be transplanted into the ground, pots.
Note!
The basement is not the best place for storing tubers, as the humidity in it constantly rises.The flower requires a room with dry air.
Accommodation for the winter on the loggia
Loggia is one of the common places where it is very convenient to store flower bulbs. This is a great way to grow a potted flower at home. For such a technique, the following conditions must be met:
- by the onset of autumn, it is necessary to reduce watering, gradually preparing the plant for hibernation;
- when the leaves die off, the flower pot must be moved to the balcony (always glazed) or loggia. They are stored there until spring.
Location until spring in the apartment
You can store prepared tubers in an apartment for those who do not have the opportunity to place the plant in the basement or on the balcony. An apartment is a risky storage method. It requires certain conditions:
- the container with tubers should be in the coldest place of the apartment. For example, on the windowsills, away from the radiator, near the balcony doors;
- it is important to provide temperature conditions (not higher than +20 degrees). Even at this temperature, the tubers can withstand wintering, however, closer to spring they dry out and wrinkle. This can negatively affect the flowering process in the summer.
You may be interested in:
When to dig up and how to store dahlias Dahlias can be grown on your site for many years. It is only important to dig out the seedlings on time in the autumn ... Read more ...
In a refrigerator
If you need to overwinter a small number of tubers, then a refrigerator is suitable for this at home. This is the second method of storing a flower after the basement. For him, two important conditions must be met:
- the tubers must be wrapped in paper, placed in a separate compartment of the refrigerator, in which vegetables are usually stored;
- the temperature should be within + 5-7 degrees.
Callas - from spring to spring
Recently I read in a newspaper a woman's complaints that her PєP ° R »R» S ‹does not bloom and I wanted to share my experience of growing this wonderful flower. My calla lilies bloom annually on New Year's Eve and continue to bloom almost until the end of spring. How do I do it?
In the spring, when the weather settles and the threat of frost passes, I take my favorites out into the street, pick up a place in partial shade, but preferably somewhere in the lowlands, since calla is a marsh plant and loves water very much. It can be placed near a well, where you can always pour warm water on it. Our land is good - I don’t apply any fertilizers. I plant calla lilies from pots into the ground at a distance of 20-25 cm. If you are a very busy person, then you can dig it right in from the pot, but the pot may deteriorate.
In summer calla lilies
I do not bloom, maybe because the sun falls on them for a very short time, but they love the sun. During this time, very green and large leaves grow on strong stalks. Their height is somewhere around 50-60 cm. And many children also appear.
In the fall, without waiting for the cold weather, I begin to transplant the plant into pots. In order for the calla to bloom, it is imperative to cut off the children and put them in a separate container.
For planting flowers, I buy Universal land (pH 5.5-6). The supply of nutrients in such a substrate is enough for calla lilies until spring, until I again plant them in the ground. You can take ordinary soil, but you should definitely add peat. If you do not have the opportunity to plant calla lilies in the ground, then be sure and regularly remove the appearing children and feed the plant with solutions of mineral fertilizers. Whenever I have such a need, I use superphosphate and bone meal.
I keep the transplanted calla lilies outside for a few more days until they take root, and only then I bring it into the house. If this condition is not met, they can shed some beautiful leaves.
Here, my beauties would have more light, but my windows face the north-west, so they have to continue to grow and bloom on these windows. And if you have a south side, put the calla lilies there for the winter, and you will see how the plant will thank you with abundant flowering. Just keep in mind this plant is not suitable for the bedroom - there is too little light there.
I water it often, in a pallet. Since there is no escape from the battery under the window and how not to cut off the warm air from the flower, it is still hot for its root system and the leaves stretch up a little (10-15 cm), but this does not spoil its appearance. The leaf stalks remain thick and firm.
And one more thing: calla lilies cannot be planted very deeply - they will not bloom, and children cannot grow vigorously.
My favorite is a very unpretentious plant. And what a variety of these plants is now! You can choose for every taste. And then - few indoor plants bloom in winter, and it will delight you with beautiful foliage and lovely flowers when it is snowing and cold outside.
sad-
When and why to dig up calla lilies in the fall
Despite the fact that calla lilies are considered unpretentious plants, they have one feature - they need to be dug up for the winter. Like gladioli, which are also native to Africa, these flowers do not withstand frost more than -2 ° C, and the climate conditions are such that winter frosts are much stronger in almost all regions of the country.
That is why the tubers of these plants are subject to mandatory digging and storage during the winter at a temperature of 3-7 ° C.
Calla lilies can die even with slight changes in air temperature, so it is better not to postpone digging them out. If you do not remove the flower tubers from the ground before the onset of frost, it will no longer be possible to restore life to the plant, even if you follow all the rules for drying and storing tubers in the winter.
Note that there is a certain period in a plant's life cycle when it is ready to be dug out of the ground. There are also certain rules for drying and maintaining the temperature, which are not very difficult, but must be followed. Therefore, you need to consider all the subtleties associated with the wintering of calla lilies in the Russian cold climate.
Calla lilies biorhythm is somewhat different from plants that are traditional for our latitudes. On some horticultural sites, you can find information that calla lilies bloom from October to April.
But this is a misjudgment, which arose due to the confusion with the change of seasons in different parts of the globe.
At a time when our country is covered with snow, Africa has a dry hot summer, and the flower, not receiving enough water, goes into hibernation. But our end of spring and summer coincide with the African autumn - the rainy period when the plant wakes up and begins to actively grow and bloom. From this follows the obvious conclusion that calla lilies must be dug up in autumn, and this procedure is annual for this culture.
Recall that this plant tolerates severe frosts rather problematically, so it will be necessary to adjust to the rhythm of calla lilies in order to keep them alive.
It will also be interesting: When to dig up lilies - for transplanting, after flowering and whether it is necessary ⚜
Identifying errors
It is the lack of colors that is the first signal that you are doing something wrong. There may be several reasons why calla does not bloom.
- Zantedeschia will not bloom with improper watering. When the callas are in bloom, water them abundantly every other day. Humidify the air near the plant. Water sparsely and a little at rest.
- Calla can grow without flowers due to the tightness of the pot. This often happens when a grower inexperienced plants this plant in a deep but narrow pot instead of choosing a wide and shallow version. The depth of the pot should be twice the length of the roots, and the width should be slightly more than the diameter of the crown of the plant.In this case, homemade zantedeschia will bloom, provided that during transplantation you will separate the daughter bulbs from the mother tuber.
- The flowering time will have to wait a long time if the plant has not been provided with the correct dormancy. Typically, this regimen begins in winter when the leaves begin to dry out. Move the pot to a cool place and keep watering to a minimum. One watering per week is enough for a dormant plant. Calla lilies need this rest to restore the strength of the mother tuber. If you do not let the flower rest in the temperature regime necessary for it, then it will not please the flowers next year.
Care for newly planted tubers
As soon as the calla lilies are planted, watering should be stopped for about 1.5-2 weeks, depending on weather conditions, since the tubers already get into a fairly moist soil. If watering is not stopped, the root system can succumb to the decay process and die.
If after the specified period the sprouts are not visible, the flower should be slightly moistened, trying not to touch the tuber itself when watering. After the leaves appear, the bush should be watered 2-3 times a week, taking into account the weather conditions of the region.
How to make zantedeschia bloom?
For future violent flowering, it is good to take the plant out into the open air after waking up. Just do not leave it in the scorching midday sun. Some growers generally transplant calla lilies in open ground for the whole summer.
Callas need to be fed with phosphorus-potassium fertilizers. With their lack, the plant will also not bloom. Be aware that these flowers require more phosphorus and less potassium. Sometimes it happens that there are a lot of leaves, but the flowers still do not appear. This is due to the excess nitrogen in the soil. If there are not enough nutrients, the stems become brittle.
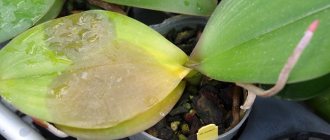
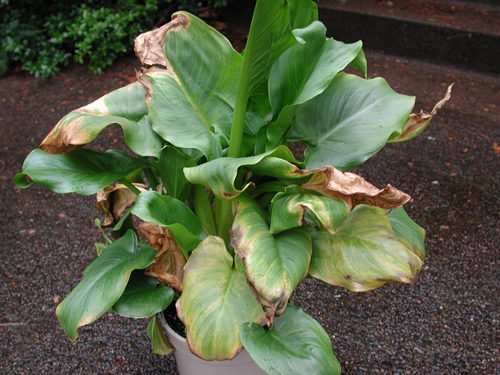
With improper home care, calla lilies not only do not bloom, but also get sick, and are also exposed to harmful organisms. Both that and another are very quickly detected by the appearance of plants. At first, zantedeschia lose the brightness of their leaves and buds. Then the buds fall off, and the leaves begin to roll up into tubes, turn yellow and dry out. You can save the plant if you find out the cause of the disease and take appropriate measures.
Why calla lilies don't bloom
There are several main reasons that calla lilies lack flowers. In total, they are the same, both for growing an African guest in an open area, and at home.
In the open field
Garden calla lilies do not respond well to planting them in the shade. It is better to choose a place for disembarkation in a slightly darkened place, where the sun's rays appear in the first half of the day. Identifying calla lilies in a clearing under the open sun is also dangerous, there is a high probability of burns on the leaf plates. For calla lilies to bloom, the light must be diffused.
Planting on a hill can also cause calla lilies to not bloom; it is recommended to choose an area in the lowlands. Even the close location of groundwater is not afraid of them. Thickened or shallow plantings often lead to such negative consequences. The distance between the calla lilies should be 30-40 centimeters, and the planting depth should be 10-20 centimeters.
Calla lilies often do not have flowers when planted in soil with high acidity, the soil should be neutral. To achieve flowering from calla lilies in the garden, do not overdo it with the introduction of nitrogen-containing preparations.
At home
When kept at home, calla lilies bloom only twice a year (in May and October). If flowering does not occur, then it is worth revising the growing conditions. Common reasons include:
- frequent movement of the flowerpot from one place to another;
- overgrown tubers;
- transplant abuse;
- lack of lighting;
- nutritional deficiencies;
- mistakes when leaving during the active growing season.
It is better to add fertilizer mixtures to the soil in January-March, with a frequency of 1 time in 7 days.
Pests are the enemies of the plant
- The spider mite is found the fastest. If you notice that small gray spots have appeared on at least two adjacent leaves, and a cobweb, barely visible to the eye, has formed between them, then this means that the tick has chosen your flower and should be rescued from an uninvited guest that appears when the air in the room is too dry , insufficient watering. Wash the plant with soapy water. For a greater guarantee of success, treat the calla with "Neoron" or "Fufan".
- The second and no less dangerous pest is thrips. They suck the sap out of the plant. White spots may appear on the leaves. You can get rid of thrips: remove all affected areas and treat the plants with insecticides. After that, provide the calla lilies with sufficient air humidity.
- Aphids also feed on plant sap. These tiny insects destroy callas with their waste products. Aphids take root on the underside of the leaves. They soon start to turn yellow. If nothing is done, the aphids begin to multiply rapidly. As a result, the buds wither, mucus appears on the leaves, and they soon rot. To get rid of aphids, remove all affected areas, fertilize the soil with a solution of potassium oil at the rate of 20 grams per liter of water, stop feeding with nitrogen fertilizers and treat the entire flower with Decis or Aktara.
If you strictly follow all the rules for caring for calla lilies, then no trouble
will not happen to your flower.
Olga Danilina
sait-pro-
How should calla lilies grow?
It should be noted that the Aronnik family has a special way of growing. Here you can highlight the following points:
- the root system of the flower initially begins to form;
- after that small shoots will develop;
- it may take a month for them to germinate;
- if during this time the growth of the flower will not be observed, do not despair, since this is a natural process of the growth of Aronnik.
However, throughout the entire time, caring for the flower should be very serious, since otherwise the calla lilies will simply stop developing and die.
The influence of planting and transplanting a plant on its flowering
Only well-developed and healthy tubers are able to form a peduncle, and for this they need space. It is important to choose a suitable flowerpot for the calla, which will have enough space for the development of the root system.
For a young bush, a container of up to 1 liter is sufficient. Adult flowers should choose a pot, guided by the following requirements:
- the height of the flowerpot should be twice the length of the roots;
- the diameter of the pot should be a couple of centimeters larger than the size of the crown of the bush.
When planting, you should first deepen the tubers into the soil to half. They fill up the earth after the flower begins to release new leaves.
In addition, over time, calla grows and many babies appear in the pot. The plant becomes cramped, and there is no time for flowering. It is important to regularly transplant adult specimens, separating the children (at least once every two years).
Wintering indoor calla lilies
Indoor flowers need winter rest no less than garden flowers. The process of preparing them for winter is not very different from that which garden plants must go through. For indoor plants, as well as for garden plants, the process of preparing for winter is also important. With the onset of autumn, they need to be watered less so that the flower understands that the flowering period is over.
Gardeners disagree about whether to dig up indoor calla lilies from pots for the winter.
Part claims that they are no different from garden ones, so they must also go through the process of digging and drying. Others say that after hibernation, they can be left in pots.
All gardeners agree that both garden and indoor species should winter at the same temperature, in a dry place with good ventilation. Houseplants are susceptible to a large number of diseases, so they should also be carefully checked for damage and rot. In case of disease, the affected flower must be removed from healthy tubers.
Watering and feeding
Since calla is native to the tropics, it needs regular watering and high humidity. If the soil often dries up due to missed watering, this will not only delay the onset of flowering for up to 6 months, but will negatively affect the development of the flower and it will stop growing.
During the growing season, it is necessary to water the calla every other day, as well as spray the leaves or wipe them.
Balanced feeding is equally important. With an excess of nitrogen, the bush spends all its energy on the formation of a deciduous mass. To stimulate flowering, it is necessary to use preparations with a predominance of phosphorus and potassium.
Optimal conditions for the growth and flowering of calla lilies
Calla loves warmth and moisture. She will feel especially comfortable with air humidity from 70 to 80%. That is why it is recommended to spray the plant or wipe the leaves with a damp sponge. You can reduce the intensity of watering after the end of flowering.
A slightly acidic soil is best suited for calla lilies. The ideal combination would be a mixture of sand, earth and peat in equal proportions with the addition of humus. If this is not possible, you can water the calla in a universal soil with a weak solution of table vinegar at the rate of 10 ml per five-liter container of water. In this way, you can oxidize the soil for other plants.
Calla is very sensitive to sudden changes in air temperature. Such changes are detrimental to the vegetative system of culture. The most optimal temperature for flowering calla lilies is from 18 to 24 C. During the rest period, it is recommended to lower the temperature to 10 C, but this should be done gradually. Only small daily temperature fluctuations have a positive effect on the calla.
By bringing together all the rules and approaches to the plant, as well as trying to implement them, the gardener can achieve a good and stable flowering of the calla. In this case, a person will receive pleasure, both from the result and from the very process of leaving.
Growing calla lilies at home involves following certain recommendations regarding planting and further care. This popular ornamental plant for active vegetation needs a sufficient amount of light, heat and a well-chosen capacity. But there are situations when the expected flowering phase is not observed, which greatly upsets the owner. To understand why calla lilies do not bloom, you need to consider in more detail the main reasons for such negative consequences and methods for their elimination.
How much calla lilies should rest?
In order for the plant to bloom next season, it needs a dormant period, during which the tubers will gain strength. In the fall, move the pot to a cooler room and gradually reduce watering to a minimum, occasionally moistening the soil so it doesn't dry out completely.
Interestingly, varieties of calla lilies with colored inflorescences completely shed their foliage during dormancy, but white calla lilies do not.
Calla lilies should be on leave for 2 to 3 months. With the onset of spring, the pot must be returned to a light windowsill and abundant watering must be resumed.
www.glav-
The main stages of preparation for winter
Experienced gardeners do not have a question whether it is necessary to dig up calla lilies for the coming winter. The plant is stored exclusively indoors, for this the necessary conditions are created. The tubers must be properly prepared for storage. The time of these works is also different. You should focus on the onset of the first frost.
- In the middle lane, they come in mid-October.
- In the southern regions, stable cold snaps begin in early November.
You may be interested in:
About digging up and storing hyacinth bulbs after flowering All bulbous plants bloom beautifully and decorate the flower bed or individual parts of the garden plot. But, minus ... Read more ...
How to properly dig up calla lilies
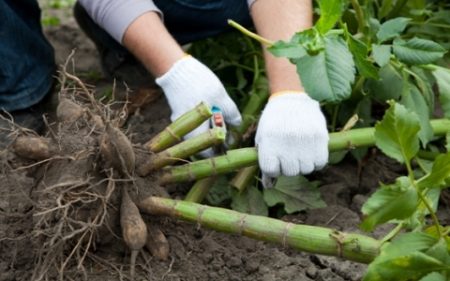
Digging calla bulbs begins with the first drops in temperature to minus values. They will not damage the plants. The process of the end of the growing season will start. The nutrients of the flower will not be directed to maintaining the leaves, the formation of new ones. Gardeners have several guidelines for properly preparing the plant before digging it up.
- Watering should be stopped about 2-3 weeks before the tubers are removed.
- The leaves need to be cut, leaving them at the level of 7-8 cm. After the first frost, it is easy to do it with pruning shears and scissors.
- It is better to dig up tubers with a pitchfork. This reduces the risk of damage to the part underground.
- It is better to make the hole around the root system larger. After completing the process, carefully remove the soil from the tubers.
Note!
After digging up the tubers, you need to carefully. It is easy to damage the root system even with a strong jet of water. It is not always possible to cure a damaged plant.
Drying calla lilies
Planting material needs careful drying. Beforehand, the tubers should be inspected, damaged tissues or parts should be removed. There must be a healthy foundation. To remove individual areas, it is better to use a garden shovel, a teaspoon. After removing damaged tissue, healthy areas must be treated with a solution of brilliant green, sprinkled with crushed activated carbon. This will eliminate the risk of developing diseases affecting the root system. Dispose of removed areas. They are not used for future fertilization that will be applied to the garden. So, the disease can easily spread over the site.
It is better to dry the bulbs in low cardboard boxes, plastic boxes, which are used to store fruit. Be sure to cover the bottom of the container with paper. Drying is carried out:
- in a dark and cool place;
- subject to free air circulation;
- in the absence of sunlight;
- the temperature regime in the room should be at the level of 15-20 degrees.
Gardeners prefer to place boxes of harvested calla lilies in the basement, well-ventilated garage. After a week, you can already remove all the remaining leaves without any problems. After another week, the roots will completely move away from the tubers. Young “babies” should not be removed from the mother plant. They do not have a separate partition. It is easy to injure the plant when separating. This process is carried out in the winter, when the "kids" are already ripe.
If the mother plant is damaged at the time of separation, the injured area must be treated with brilliant green, sprinkled with coal. On average, the drying time of the planting material takes from 2 to 3 weeks.
Calla lilies care rules
Due to its unique structure, caring for a flower will be slightly different from caring for similar pets.
Watering and humidity
This is one of the most important things to consider when caring for room calla lilies. The houseplant loves sufficient watering and a moist earthy ball. Dry soil leads to the cessation of development. White calla is most in need of watering. It belongs to marsh plants. It is necessary to increase watering at the time of active development. This process can be started only when the soil dries up by 1 centimeter. After watering, after 15 minutes, you need to drain all the remaining water.
As for the colored varieties of calla lilies, we can say that they do not like abundant moisture in the soil. The water should not stagnate in the pan, otherwise the root system may rot. Watering is carried out only when the earthen lump dries up a couple of centimeters.
It is necessary to maintain optimum air humidity, which is 70-80%.To maintain it, you need to carry out daily spraying, twice a day, wipe the leaves with a damp cloth and put moss or moistened pieces of expanded clay in the pallet area.
Regardless of the species, after the end of the flowering period, watering should be significantly reduced. Colored varieties are not watered at all 30-60 days after flowering. An indoor plant should not be abruptly translated into a dormant period. We need to wait until the tubers are fully ripe. This is the period from the end of the fall season to the end of the winter season.
Lighting
Throughout the entire annual cycle, you need to take care of sufficient lighting for the calla lilies. The optimal light is diffused. In winter, the plant will feel its lack, so flowering may not come. White varieties need to be illuminated even at the time of their rest, but colored ones can completely lose their color without proper lighting.
Temperature regime
Taking care of calla lilies at home is not as easy as it might seem at first glance. For example, at a high temperature with low air humidity, an indoor flower can be attacked by pests, which are sometimes not so easy to get rid of. Sudden changes in temperature can lead to a lack of flowering.
During the flowering period, proper care must be taken and the temperature limit must be maintained between 18 and 20 degrees Celsius. After the end of flowering, you need to gradually switch to a temperature of 10 to 12 degrees. Calla should rest for at least 60 days.
As for the colored varieties of calla lilies, their optimal temperature is considered to be 20-24 degrees above zero. Small fluctuations in temperature during the day and night have a positive effect on the development of leaves and tubers. As soon as flowering is complete, the tubers must be kept for 30 days at a temperature of 25-27 degrees Celsius without watering. When they are fully ripe, it is necessary to remove all the leaves and prepare them for wintering in a dry room by sprinkling sawdust on top. The temperature should be between 3 and 5 degrees.
Soil and fertilization
Calla lilies love acidified soil. You can buy it in a specialty store or prepare it yourself at home. We need:
- leafy ground (1);
- sand (1);
- sod land (2);
- peat (1).
Caring for calla lilies in a pot at home implies timely fertilization for the proper development of the plant. From time to time, calla lilies can be planted in open ground with the onset of summer. It is there that they will be able to feed on all the missing nutrients and elements. If you constantly keep calla lilies in a pot, then do not forget about making complex dressings. They need to be alternated with dressings every 2 weeks.
Why does Ethiopian calla or another variety increase its green mass, and the flowering is so poor? Because during the period of active development of the plant, too much nitrogen-rich fertilizers were applied. At the first appearance of peduncles, it is necessary to nourish the soil with urea, and during the flowering period - with an egg shell infusion. Top dressing should not fall on the plant itself, otherwise its appearance will be lost.
Frequent beginner mistakes
In order for the flower to grow actively, it is necessary to adhere to certain recommendations. However, most novice gardeners often make mistakes, which later lead to disastrous consequences and the plant cannot achieve the desired result.
- You need to dig out the tubers carefully - the root system is very delicate, the slightest sharp movement will lead to damage.
- If there are children on the roots, it is better to wait for them to separate independently, then remove from the main bulb.
- If you do not remove the small roots from the tuber, they will germinate during the wintering period.
- In the storage location, the temperature should be within 3-7 degrees above zero with a minimum level of humidity.
Calla lily transplant
Absolutely every variety of calla lilies needs a transplant, and it does not matter at all whether it is Ethiopian calla, black or red in a pot. After completing dormancy, you need to transplant the calla into fresh soil. The flower can not be transplanted for 2 years, provided that the top layer of the soil is regularly changed to nutritious and timely pinching.
White varieties of calla lilies are transplanted at home into containers suitable for all sizes with tubers. Their diameter should not be less than 15 centimeters, they should not be too deep. A good drainage layer and a versatile substrate for growing flowering plants should be placed at the bottom of each container.
The calla rhizome should be in the middle. The correct planting depth is calculated by multiplying the diameter of the rhizome by a constant 3. The temperature regime after the completion of the transplantation process should be gradually increased. And after a couple of weeks, fertilization and watering are activated.
Tips and tricks from gardeners
If there is a desire to acquire such a luxurious and abundantly flowering plant like calla lilies, then you must adhere to the following recommendations:
- You need to determine the flower pot on the windowsill, where the sun shines in the morning.
- The transplant container should be spacious, at least 60 centimeters high. The radius from the point of growth of the calla should be at least 20 centimeters.
- You should not ignore the feeding procedures, the flower responds to them with gratitude. Not only ready-made nutritional compositions are suitable for these purposes, but also folk methods. Around the ornamental plantation, you need to form a groove and place fragments of the peel from fruit, husk from seeds in it. They should be sprinkled with soil mixture.
- Irrigation measures must be carried out exclusively with filtered water or separated room temperature. Watering and brewing is useful.
- To avoid trouble when growing an African guest, it is necessary to remove the top layer of soil and replace it with a new, fertile one. The main thing is to do everything with caution, otherwise there is a high probability of injury to the root system. This technique makes it possible to further reduce the frequency of transfer operations.
- White calla lilies require more moisture than colored ones, bright light is more important for them, and should not be thrown away if they shed their leaves during the rest period.
Calla lilies, not in vain, occupy one of the leading positions among the ornamental crops used in home floriculture. This unpretentious plant grows and develops quite normally in indoor conditions, the main thing is to observe a certain temperature regime and humidity level.
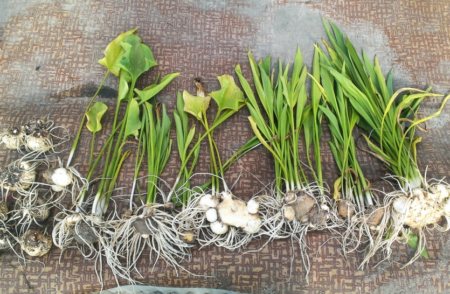
Calla lilies breeding methods
The tuber of the plant is in the shape of a bulb. It is able to grow independently and take up more and more space over time. It is very important to dig up the extra parts of the rhizome in a timely manner, transplant them or throw them away altogether. The dug out bulb should be cared for in drained soil. A well-lit place is chosen for landing.
It is necessary to plant the bulb exclusively in a horizontal position in a hole no more than 10 centimeters deep. It is necessary to provide abundant watering for good development of the bulb.
Growing calla lilies from seeds
Calla is a flower that can be propagated and grown from seed. In this case, caring for calla lilies should be extremely careful. To grow a flower at home, the seeds are soaked for 6 hours in a special agent - potassium humate. Then they are laid out on a damp towel on a prepared tray. They are covered with the same moistened towel and transferred to a warm room for 7 days. Constantly ventilate our little greenhouse and make sure that the seeds do not dry out. After germination, you need to sow the seeds in trays with soil and place them in a warm place before the first shoots appear.We throw out the defective seeds, and transplant the seedlings into separate containers.
End of cycle
The homeland of the plant is southern Africa. Despite this, calla grows well at home as long as it is kept in moist soil. Vegetation ends in early - mid-autumn. The leaves begin to fall off over time, and watering is reduced at the first appearance of yellowness. After a couple of weeks, you need to completely abandon watering so that the leaves can fall off on their own.
How to plant calla lilies
To see how calla lilies bloom, you should plant a flower according to the recommendations of professional gardeners:
- Good drainage must be introduced into the soil for planting, since calla lilies will not develop or bloom if they begin to grow in constant dampness.
- Plants do not bloom due to the fact that the soil does not contain the required amount of mineral and organic substances for replenishment. To properly fertilize the soil and help the flower bloom, you need to do the following:
- create a small depression, about the size of a conventional shovel's bayonet;
- loosen the bottom layer of the planting pit well, add rotted manure from cows or birds to the ground;
- pour out the top layer of earth, mix it with fertilizer, pour water;
- after the water is absorbed, calla lilies can be planted in the planting pit.
- The correct answer to the question of why seemingly unpretentious flowers do not bloom is the wrong place for planting. No matter how hard the gardener tries, he will not be able to help the plant bloom if it is planted in the shade. The ideal place would be a slightly shaded place, which is illuminated by the sun in the morning, and in the midday heat will be a real salvation for calla lilies from the heat.
- For planting tubers in open ground, it is recommended to choose the spring period of the year, after the ground has warmed up enough and the threat of frost goes away. There are two ways to grow a flower:
- planting a tuber in a pot;
- further transplantation into open ground or planting in a permanent place for growth.
The second method is chosen most often, since it does not require much hassle and does not take much time. The dug tubers should be refrigerated before planting. Before direct planting, the planting material should be soaked for about 30-40 minutes in a weak solution of potassium permanganate. If damaged spots are visible on the tubers, they must be carefully removed with a sharp knife, and the sections must be treated with a disinfectant, for example, with a pharmacy green paint. As mentioned earlier, calla lilies are planted in a well-fertilized soil, into which a drainage layer is introduced in advance.
- The planting hole should be 10-15 centimeters deep, the distance between the tubers should be 40-45 centimeters.
Place the tuber in the hole carefully, in no case press on it. For effective growth, it is enough to cover the planting material with fertile soil, which contains complex fertilizer.
Calla lilies
As a rule, calla lilies at home can be affected by fungal or bacterial diseases. Among them are the following:
- If the care is not correct, then the plant can be affected by gray mold, which damages all its parts. The fungus provokes the appearance of a gray plaque. Infection can occur from anywhere: through water, soil or air. The likelihood of infection increases with a high level of air humidity and waterlogged soil. To eliminate the problem, it is necessary to provide regular ventilation and treat the plant with special means.
- Colored, white, Ethiopian calla and other species can get sick with anthracnose, in which brown spots form on the leaves, they can crack and dry. The damaged leaves are removed, and the plant is treated with a fungicide.
- If the calla has begun to wilt, it is most likely that it has developed root rot. You need to carefully dig out the plant, and carefully examine the rhizome on which you can see dry rot.To eliminate the problem, you need to transplant the plant into a new container and new soil, reduce watering and treat the flower with a fungicide.
- The bacteria are awake and can attack your flower as well. Unfortunately, in the presence of a bacterial disease, the plant must be destroyed. There is no remedy yet.
Algorithm of the procedure for digging calla lilies
The flower must be prepared for digging up and further storage in winter:
- To do this, calla lilies stop watering 2-3 weeks before the procedure for extracting tubers from the ground.
- A very important factor in the successful digging of calla lilies is the correct timing of this procedure. Some gardeners argue that it all depends on the climate in which the plant lives. Thus, it is recommended to dig up plants living in the middle lane in early October, and residents of the southern regions can live in the ground until November.
Other growers say that the main criterion for the time to dig up calla lilies is the yellowing of their leaves. Yellowing will indicate that the flower's life cycle has come to an end and it is ready to go into hibernation.
As a rule, the appearance of yellowness on foliage falls at the end of September.
- After determining the time and preparing the tubers, you need to choose a tool for this procedure. Gardeners strongly advise using a special garden pitchfork or making large pits. This is explained by the fact that the tubers of these flowers are very fragile and delicate, babies easily fall away from them. When digging up a flower with a shovel, it is very easy to damage the tubers, but the structure of the pitchfork significantly reduces the risk of harming calla lilies.
- The dug tubers should be inspected for disease and decay. If the plant is severely affected, it should be thrown as far away from healthy flowers as possible. If the infection is small, the flowers can be saved by cleaning the affected area and treating it with brilliant green or crushed coal (activated carbon is also suitable for this procedure).
- Please note that the tubers need to be cleaned as thoroughly as possible from the ground in order to further dry them and prepare them for the next stage - winter storage.
It will also be interesting: When to cut lilies - after flowering, for the winter and whether it is necessary ✂
Necessary conditions for wintering a plant
For a correct and safe wintering, several conditions must be met. Moreover, the fulfillment of these conditions by the gardener should be mandatory.
- In winter, when storing tubers, the temperature should be in the range from +5 C to +10 C degrees.
- Conducting humidity control. Storing tubers and rhizomes in dry rooms will prevent rot and possible plant death.
- Store plants in a well and regularly ventilated area.
- Periodic sanitary examinations to help keep the planting material healthy, to detect the onset of the disease in time.
- When storing calla lilies rhizomes in a substrate or pots, it is necessary to monitor its moisture content.
- In rhizome calla lilies, care is reduced to periodic light moistening of the substrate.
- In tuberous calla lilies, to prevent premature growth, leaves and roots are removed.
- Tubers must be properly dried before storing. The safety of planting material in winter depends on this.
For successful wintering, it is advisable to sprinkle the tubers (bulbs) so that they do not come into contact with each other with one of the materials:
- peat;
- small wood chips;
- sphagnum moss;
- sand.
Description of the plant
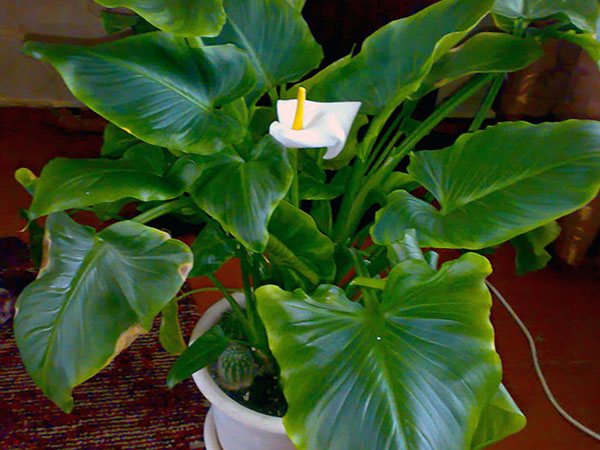
The aerial part is very beautiful. The plant has large heart-shaped leaves, painted in bright saturated colors, a shiny surface. The foliage remains decorative throughout the growing season.
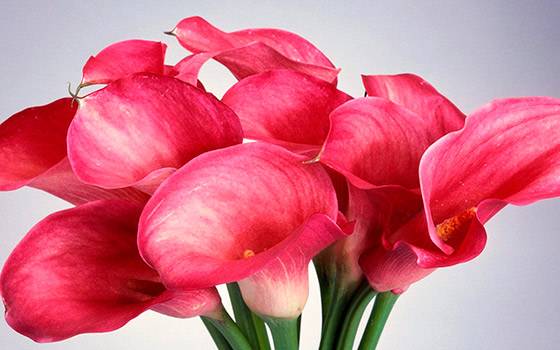
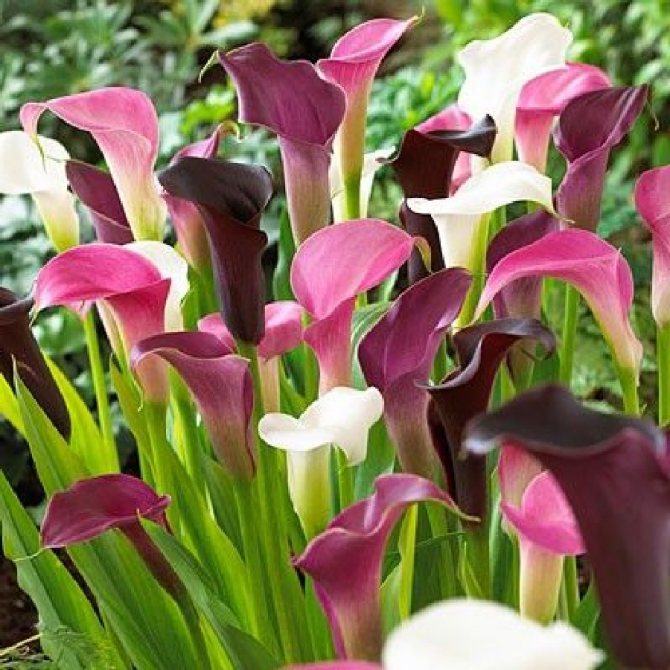
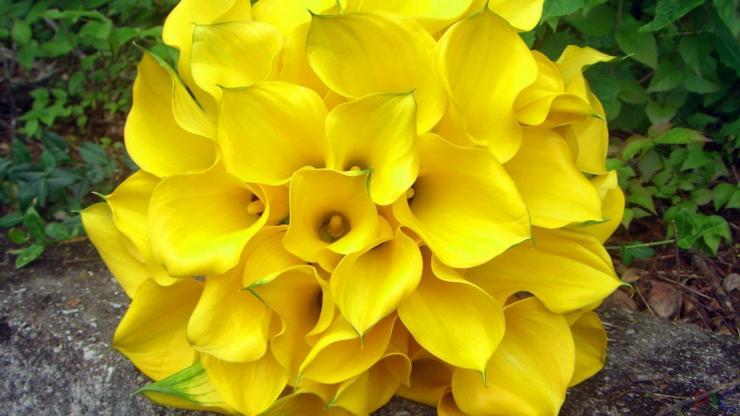
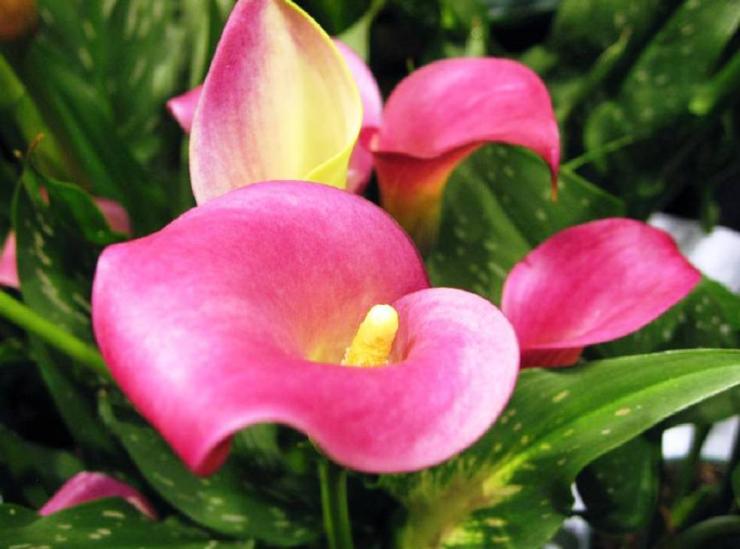
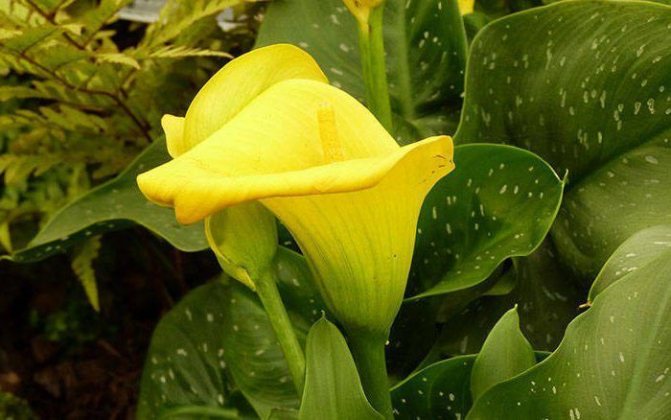
It is difficult to take your eyes off the plant during the flowering period. Its long peduncle rises above the graceful foliage. This spectacle leaves only the most positive emotions, especially today, when breeders have managed to get a lot of new colors and varieties of this unusual flower.So, now there are calla lilies not only white and red, but also yellow, two-color, orange, black, purple and other shades.
Depending on the variety, low, medium and tall plants are distinguished, with a height of 30 to 150 cm.Thanks to this spread, the plant can be planted in various corners of the garden: decorate the edge of the flower bed, plant in the background, or compose a composition of plants so that calla lilies were placed in the center.
For planting and flowering, you can place a flower anywhere, even in the shade. Moreover, it is in the shadow zones that the plant produces many peduncles, and in the sun there are few of them, but there is a lot of green mass.
In the apartment
When there are no other options, you can store calla tubers in the winter in a city apartment. For this, boxes with planting material are placed in the coolest places. The vestibule, pantry, a place near the balcony door, etc. are best suited.
To prevent the tubers from drying out and shriveling, they should be kept as far away from hot radiators and other heat sources as possible. Even if the planting material, which was in conditions of temperatures above + 20 ° C, can maintain viability, the flowering will not be as abundant as we would like. If it is also damp in a warm place, the flowers will sprout quickly.
Flowering problems
Quite often, gardeners are faced with a problem: calla does not bloom. In order for the plant to please with beautiful flowers, several rules must be observed:
- monitor the degree of burial of the bulb and rhizome;
- you should not over-apply nitrogenous fertilizers;
- faded peduncles should be removed without affecting young growth;
- you need to plant the plant in an area where there will be enough light (it is recommended to plant some species in the shade).
In order for the calla to grow and delight with its beauty, watering should be carried out correctly. Manufacturers usually indicate the degree of soil moisture and other requirements for care on the packaging.
Fertilizer
Plant feeding is carried out during growth and flowering. The plant reacts very well to feeding with superphosphate twice a month. You can also use complex fertilizers for flowering plants. During the dormant period, you should not feed the flower.
Calla lilies especially need feeding when there is a lack of lighting.
Nitrogen fertilizers should not be overused before flowering, so that the intensive growth of green foliage does not drown out the formation of buds. After the appearance of flower stalks, calla can be fertilized with urea. During flowering, organic feeding with eggshell infusion is recommended.
It is useful to alternate root dressing with spraying on the leaf. In this case, it is important to ensure that drops do not fall on the flowers.
Problems
Sometimes it is not possible to achieve flowering of a plant for a long time. There may be several reasons for this. The most common is the absence of a dormant period. It should be remembered that for the beginning of flowering, the plant must rest for at least 2 months.
Calla lilies may not bloom due to lack of feeding. On the contrary, abundant fertilizing with nitrogen fertilizers leads to blackening of the edge of the leaf plates.
Low light is another common cause of a lack of flowers. A plant that begins to bloom may stop blooming if the humidity is very low.
But even at high humidity, if the air temperature is above 27 ° C, the leaves and peduncles of the plant can begin to dry out and wither.
Requirements for the conditions of detention
Let's get acquainted with the most important nuances of keeping calla lilies.
Lighting
Calla makes high demands on the level of illumination. Perhaps this is the most important point when choosing a place to place a flower at home.
Sunlight should be abundant but indirect. Calla is good to keep in partial shade under low light conditions. In summer, it is better to place the plant by the window, but do not forget to protect the delicate flower from direct sunlight.
In winter, calla lilies are acutely aware of the lack of sun.And even during the dormant period, the plants should be sufficiently illuminated - otherwise, a delay in development, flowering, and other negative consequences is possible.
In general, for normal development and growth, calla lilies must be lit for at least 12 hours a day in summer and 8 hours in winter. If your climate and the location of the apartment cannot provide such conditions, you will have to illuminate the calla lilies in an additional artificial way.
Temperature regime
Calla lilies naturally grow in warm climates, so they cannot stand low temperatures. The optimum year-round temperature is + 15-25 degrees: + 22-25 in summer, + 15-18 in winter.
White calla lilies love cooler temperatures - during the growing season they should be kept at + 18-20 degrees, in winter - at + 10-12 degrees. The transition from summer to winter temperatures should be gradual, without sudden jumps.
Sharp temperature changes should not be allowed, since such shake-ups are detrimental to the plant. In the easiest case, calla lilies will stop blooming. Too much heat is also unacceptable, especially in combination with dry air: such a microclimate can lead to damage to calla lilies by pests.
It is permissible to grow a flower on the balcony only in summer; in winter, it is imperative to transfer the plant to a heated room.
Air humidity
This parameter should be high - dry air for calla lilies is not suitable. The ideal moisture level for a plant is 70-80%.
And if in the summer it is possible to provide the flower with normal living conditions, then when winter comes, working batteries often dry the air in the apartment. To avoid problems, spray the air around the plant with a spray bottle. You can also put the pot on a pallet with expanded clay pebbles moistened with water. Use the same measures in summer if the weather is dry.
Wake up calla lilies with the arrival of spring
In order to complete wintering, the best time for the middle zone will be the beginning of April, for the southern regions - the beginning of March. Calla root tubers are taken out, carefully examined, treated with a solution of manganese or any fungicide for fungal diseases. If the “kids” were not separated from the calla lilies in winter, you can separate them now.
"Children" are not cut off from the mother plant, but broken off. The place of separation must be disinfected, treated with brilliant green, sprinkled with ash.
In order for these beautiful plants to painlessly endure the period of winter dormancy, they must be properly dug up, dried and stored in a dry and cool place.
Calla is a member of the aroid family native to South Africa. It is distinguished by long flowering until autumn and light agricultural technology. Even novice growers can easily cope with its cultivation.
The bright and colorful calla lilies will surely decorate any garden. Their tubers are planted in early May, and after a month you can see the first flowers.
Interesting! What we call the calla flower is actually the cover leaf of the inflorescence ear.
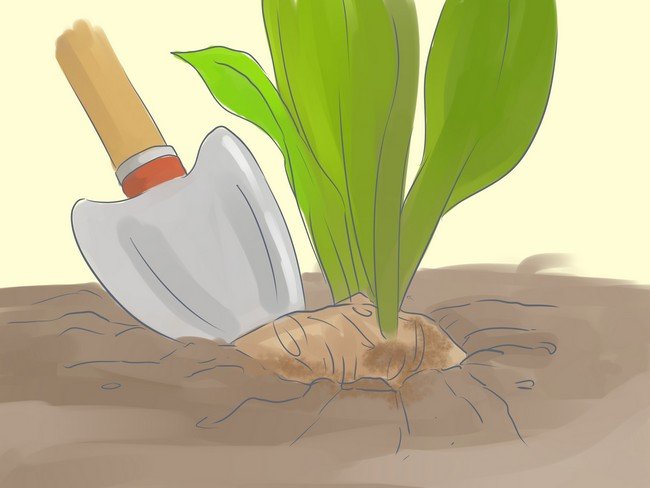
It is best to choose a place for these flowers that is open and sunny with loose, fertile soil. In nature, these flowers grow along the banks of rivers and reservoirs, so they need regular and abundant watering in the garden. Calla tubers are planted to a depth of 5-10 cm and immediately afterwards are watered abundantly. After planting, they do not emerge until they have built up a root system. Sometimes this process can take a long time.
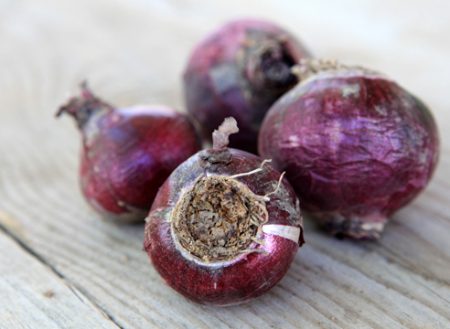
These flowers are not able to overwinter in our climate, so in the fall, with the arrival of the first frosts, they have to be dug up and then the question arises of how to store the calla lilies correctly in winter so that next summer they can again please with their flowering.
They begin to dig up the tubers of garden calla lilies from the end of September, when there is a threat of frost. At this time, they are already completing their biological cycle, their foliage begins to turn yellow.
After digging up, the calla lilies are laid out for further drying for 10 days, while all leaves and roots must be left on the plants.
After this time, the tubers are carefully cleaned of the remnants of the earth, it is very important not to damage the young nodules and children.
Attention! You should not separate the babies now, during winter storage they will ripen and in the spring they will easily separate from the mother plant.
After completing the cleaning of the tubers from the soil, you can begin to remove dry leaves and root residues. It is very important to cut off the roots, if you leave them, then the plants can soon begin to grow.
Now the peeled tubers must be dried for 2 weeks at a temperature of about 25 °. Only then can they be placed for further storage.
How to grow calla lilies as a container crop?
For planting calla lilies, a pot with a diameter of 30-40 cm is used. A drainage from expanded clay or sand is placed on the bottom of the container, and a permeable nutrient mixture is poured on top. The tubers are planted to a depth of 3-5 cm (depending on their size) and watered abundantly. The pot is placed in a well-lit room with an air temperature of 13-18 ° C.
After the germination of the first leaves, the calla is transferred to a warmer place (with a daytime temperature of 22-25 ° C and a night temperature of at least 8 ° C). There should be a lot of light here too.
It is recommended to feed calla lilies every 14 days with a complex fertilizer for flowering plants. Then, after 1.5 months from the date of planting, it will delight you with the first blossoming flowers.
Digging and storing tubers in winter
Many novice florists are interested in how to store calla lilies at home in winter in order to preserve their vitality. Tropicana is very sensitive to frost, therefore, with the onset of autumn, it is necessary to prepare the roots for wintering outside the ground.
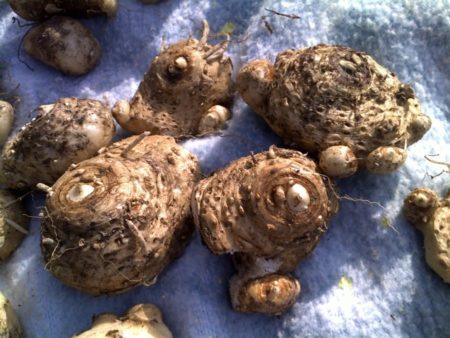
Depending on the climate, they begin to dig up the bulbs from September to October. The procedure is carried out very carefully, trying not to damage the roots, having removed the tubers, they are freed from the earthy coma and washed with water.
For two weeks, the rhizome is stored along with the stem and herbs in a cool room, where the air temperature ranges from +5 to +10 degrees. After the foliage is completely dry, you can cut it off and put the tubers in a box with sawdust or in separate paper envelopes. In this form, they can lie all winter. The best room for such purposes would be a basement, balcony or cellar.
Types and varieties
In total, there are 8 plant species in the whole genus. Only three are cultivated and used for breeding: Elliot, Remanna and Ethiopian. If you have already met this flower, then it was a variety belonging to one of these species.
Elliot
Elliott, or tuberous feces, is the species with the longest flowering period. But, in order for it to color in full force, it is necessary to strictly observe some general conditions for growing and care. And the most important thing for this is partial shade, nutritious moderately acidic soil and timely watering. Blooming in the shade will be bad - ideally, it is either partial shade during the whole daylight hours, or in the second half of it.
Tuberous root, hence the second name - develops slowly.
Location preferences and cares are very similar to hydrangea preferences - so they get along well together. A small, but convenient feature - you do not need to cut the buds after flowering, they themselves fold into neat green pods, and look like ordinary buds. This does not spoil their appearance in any way.
The bushes grow up to 50cm, the inflorescences are green-yellow outside, and completely turn yellow deep into the flower. The most popular varieties: black-eyed beauty, yellow corner, vermeer.
Remann
Another tuberous species. The bushes reach 70cm in height and bloom with red-pink and lilac-burgundy flowers - mostly pink or various shades of pink.The leaves are tall, narrow - they are thrown off before the earthly hibernation, when the plant, like a bear, retires until spring.
The most popular varieties are evening, chameleon and Indian summer.
Ethiopian
Ethiopian, or arum is the most evergreen perennials in the garden with a developed tuberous root system. The leaves are large, glossy, sometimes spotty (not to be confused with fungal diseases) with translucent specks. The size of the leaf plates is about 20cm wide and 50cm long. A thick petiole runs from the base to the very top in the center of the plate.
Mature shrubs reach 80cm and bloom in pink, white, yellow and cream shades. All varieties, without exception, lose their color after pollination and turn green.
The most popular varieties are the green goddess, Nicolai, Schone Zweibruckerin and pearls.
Methods for storing plants after digging up at home
There are several ways to store calla tubers until spring. An important point - before laying for the winter, all roots are cut off, otherwise the flower can grow.
Content in the basement
The tubers are placed in the basement. Successful storage depends on the correct temperature regime maintained, it ranges from +5 C to +10 C degrees. In no case should the temperature increase, this will lead to a premature, early onset of germination of the bulbs.
See also
Description of varieties of terry petunia, planting, cultivation and careRead
High humidity is detrimental to the planting material, so storage should be "dry". The basement itself must be ventilated, with a constant supply of fresh air. Otherwise, the bulbs will simply spray.

Accommodation for the winter on the loggia
This storage method is suitable for gardeners who grow calla lilies in a pot culture. In the fall, watering is gradually reduced, and after the first frost and the death of the leaves, the pots are transferred to a glazed balcony or loggia. Calla lilies stay there until spring. It is important to control the temperature regime - in severe frosts, it is advisable to additionally cover the pots. And vice versa - it is desirable that there is no heating on the balcony, otherwise the calla lilies will grow.
Drying calla lilies
Having dug up calla tubers that you have grown with your own hands, you will most likely be surprised at their striking difference from the planting material that you purchased before planting in your own garden. Now they are strong, large and beautiful specimens. Before you put the root tubers to dry, you need to make a thorough inspection of them.
It is advisable to discard tubers with signs of rotting. If it is a particularly valuable variety, and the damage is minor, you need to clean the damaged tissue to a healthy base. This is best done with a teaspoon or a sharp garden tool.
The damaged and cleaned tuber tissue must be disinfected with a solution of ordinary brilliant green or sprinkled with crushed coal. You can use activated carbon for this purpose.
The discarded material must be disposed of, but under no circumstances put into the compost heap. Doing so can help spread the disease to other plants. For drying root tubers at home, low cardboard or wooden boxes are best suited. You can use plastic fruit boxes lined with cardboard or old newspapers.
Conditions for high-quality drying of calla lilies:
- dark and cool place;
- good air circulation;
- lack of sunlight;
- temperature is not higher than 15-20⁰С.
The best premises can be a garage, a ventilated dry cellar or basement, a shed. It is better to arrange boxes with calla lilies rhizomes in one row. After a few days, it is necessary to completely remove the dry leaves, and after another week and the roots, which by this time will be removed very easily. When the roots are not removed, the plant may not start growing in time, without fully completing the rest period.
It is not necessary to separate the “babies” from the mother plant during this period. They have not yet fenced off from it with a special film - there is a great danger of causing injury to the plant. Separation of "children" is rational to carry out in winter. Then they mature and can serve as a full-fledged planting material. If this happens, the place of damage is dried and again disinfected with brilliant green or coal. The drying period can take from two to three weeks, depending on the humidity of the ambient air.
So what do you need to prepare for wintering? First of all, suitable containers. The best option for this would be thick paper bags or cardboard boxes with ventilation holes made. In the case of storing a large collection of various varieties, they must be signed in order not to make mistakes in the selection of colors in the spring when composing a composition from calla lilies. The best material for this would be dense foil - the material does not rot and does not deteriorate.
The name of the variety can be written on foil by extruding the letters with a regular pen or knitting needle. The tag is attached to the bag or to the side of the box.
The main condition for proper storage is the isolation of root tubers from each other, air circulation between them. In order to isolate the tubers from each other, a substrate is poured into a bag or into a box between the tubers, which can be used as:
- sawdust;
- vermiculite;
- shavings.
If a sick specimen gets into such a storage at home, then the insulation will reliably protect other tubers from rot.
Although high humidity is not welcome, shriveled and too dry tubers should be sprayed with water from a spray bottle to prevent them from drying out.
The optimum temperature for storing calla root tubers is 5-7⁰С. The ideal storage conditions are a fairly dry room that has good ventilation. If this is a basement, then the harvested crop should not be stored in it. During storage, fruits and vegetables release moisture and ethylene gas. These factors provoke too early awakening of tubers, as well as their rotting. If it is impossible to allocate a separate room, then you need to try to at least equip a separate compartment with an exhaust or supply ventilation in the basement.
The absence of lighting is desirable, so as not to provoke the plants to start the growing season too early. The rest period takes from two months or more. This is how much time the plant needs to fully recover. All this time, you need to closely monitor their health, periodically examining the tubers.
Do I need to dig up garden calla lilies for the winter
These flowers, despite their southern origin, are not overly capricious even when grown in more northern climates. But it is recommended to dig up tubers for the winter - a small minus, not to mention severe frosts, can easily destroy the plant. Plus, for the flowering of tuberous calla lilies, a mandatory period of "cool dormancy" is needed, this also applies to many indoor varieties.
In the southern regions, some gardeners leave the rhizomes and tubers to winter in the ground, covering it well with mulch. But this technique usually does not bring anything positive. It's like playing roulette. In recent years, winters are unpredictable even in the south. It is safer, and even more effective, to harvest calla lilies tubers for the winter. Moreover, this agricultural technique allows you to examine the bulbs after digging, in time to identify the onset of diseases. The very same cleaning of plants from the garden takes place in several stages.
What calla lilies look like
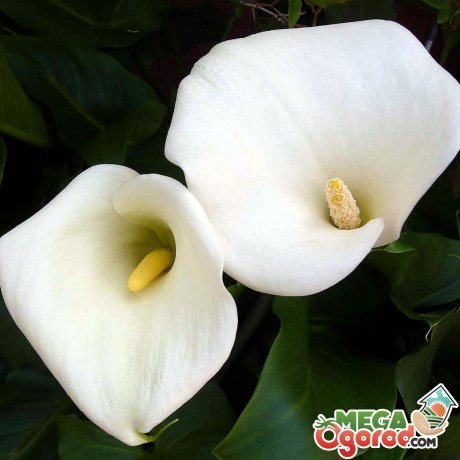
Calla lilies have a thick root system, which often comes to the surface of the soil. The leaves of the flower are distinguished by an oval-heart-shaped shape with a pointed tip and a single arrangement. Leaves of deep green color, glossy and fleshy, 7-15 cm long and 6-13 cm wide.
Some varieties are distinguished by white blotches on a green background.
A thick, upright stem is crowned with a candle-shaped ear formed by very small bright yellow or orange flowers.The candle is wrapped in a peduncle, like a blanket, which has the shape of a funnel. In natural calla lilies, this veil is painted white on the inside, and slightly greenish on the outside. Hybrid varieties have stipules of various bright and pastel colors.
In nature, the flowering of the plant lasts from May to August and at this moment they are very decorative. This is exactly the effect that flower growers want to achieve by planting calla lilies at home. But the flowers are quite capricious in nature and do not always fulfill the wishes of the owner.
Trim / Support / Garter
During the growth and flowering of the plant, yellowed and drying leaves can sometimes be removed. At the beginning of the dormant period, when all the leaves of the plant are dry, they should be cut off.
As such, pruning does not apply to calla lilies. Only dried leaves are cut off. The procedure is carried out during the dormant period, when the plant does not bloom.
In most cases, the plant does not need support and a garter. However, if the calla has reached an impressive size or is very elongated, you can neatly tie it to the support. This will prevent the pot from tipping over and injury to the flower.
Features of the
Calla for long and abundant flowering should rest 2 months a year. The rest of the time falls on its growth and flowering. The dormant period for plants occurs at different times, especially when kept in an apartment.
To organize a dormant period for the plant, after the end of flowering, you need to water it less often, and then almost stop watering. The leaves of the plant turn yellow and dry up, it goes into a state of dormancy. Some flower growers do not stop watering and feeding after flowering. So it is possible to achieve a second flowering in the season, but after that a dormant period for the plant is already necessary.
Callas usually have rest periods in July and August or January and February.
Their dry leaves are cut off, and the pot is removed to a colder and darker place. After the end of the rest, they are transplanted into a new land. Now it is important to wake up the plant correctly so that it begins to grow intensively and blooms soon.
Experienced flower growers recommend waiting for the plant to wake up by itself, and immediately after transplanting it is good to water it with acidified lemon juice. For 0.5 liters of warm water, you need a few drops of lemon juice. As a rule, new leaves appear after 1-2 weeks.
The choice of planting material
A high-quality, healthy tuber is the key to the normal development of the plant. Therefore, the choice of planting material must be approached very responsibly. The tuber should not be soft and show signs of disease or mechanical damage.
The size of the tubers plays an equally important role. The larger they are, the faster flowering will begin, and the more inflorescences there will be. The number of inflorescences in a plant with a large tuber can exceed 20 pcs.
Before planting in the soil, the tubers are washed in a weak solution of potassium permanganate, after which they are rinsed with clean water and dried.
Infectious diseases of calla lilies, methods of dealing with them
As a result of improper care or poor-quality planting material, poor soil, calla lilies are exposed to infectious diseases. They quickly make themselves felt: the color of the plant fades, the calla leaves curl or turn yellow, dry out, the stems become brittle.
To avoid the death of the plant, it is necessary to calculate the cause of this condition and take the necessary measures in time.
Anthracnose
Anthracnose is a fungal disease of calla lilies.
Such an ailment among these beauties is quite common.
Calla lily anthracnose has the following manifestations:
- depressed brown spots appear on the leaves;
- over time, the spots become larger in size, a red edging appears at their edges, and white mold in the center;
- leaves crack and dry;
- stems weaken;
- flowers fade and curl.
The reasons for this damage are:
- increased air temperature;
- excessive humidity in the air and soil.
Control methods:
- remove damaged leaves from plants and soil;
- reduce watering;
- move the plant away from batteries;
- treatment with fungicides ("Fundazol", "Fitosporin-M").
Powdery mildew
Powdery mildew develops due to the defeat of calla lilies by fungi.
With such a disease, a white bloom appears on the leaves of the plant, which very quickly increases in volume and over time covers all the leaves of the flower. Externally, the plaque looks like grains of flour that abundantly cover the surface of the calla lily. Over time, the affected parts turn black and disappear.
Control methods:
- removal of damaged leaves (if there are not very many of them);
- fungicide treatment;
- moderate watering.
Gray rot
Calla gray rot is caused by the fungus Botrits cinera.
Unlike anthracnose, gray rot can affect all parts of the plant: leaves, stems, flowers. Diseased leaves are covered with a gray bloom, and gray-green spots appear on the flowers. Over time, the blooming part acquires a brown hue and becomes covered with a gray veil.
Causes of the disease:
- high air humidity;
- excessive watering;
- planting in contaminated soil;
- infected planting material.
Control methods:
- remove all infected leaves;
- moderate saturated watering;
- treat the plant and soil with fungicides ("Rovral", "Fundazol").
Root rot
Calla root rot is provoked by a fungus of the genus Fitovtor.
Signs of calla lily disease:
- leaves and flowers dry out;
- the plant weakens quickly;
- gray mold can be seen on the soil;
- the roots are rotting.
Causes of the disease:
- high air temperature;
- high air humidity;
- excessive watering;
- excessive fertilization;
Control methods:
- transplant into dry soil and water very sparingly at first;
- move the plant to a cool, well-ventilated area;
- review feeding practices;
- treat with fungicides ("Ridomir", "Profit-gold").
Bacterial rot
Calla lily rot is caused by bacteria of the genus Ervinia.
With a disease, the root of the plant and the base of the leaves darken, and over time they rot. The surface of the leaves becomes yellow. The plant does not dry out, but it rots.
Causes of the disease:
- high temperature and humidity;
- excessive watering;
- excessive nitrogen fertilization.
Eradication of bacteria – it's a very difficult matter.
It is necessary to moderate watering, treat the plant with fungicides and transplant it into healthy soil.
Landing
Planting outdoors is not the hardest part of the whole care package. This has to be done with all plants, without exception. But it is no longer so habitual to take "kids" for the winter at home. And if you have not had a lot of time to tinker with seedlings, then now you have every chance to catch up.
Planting in spring
Before spring sowing (carried out in mid-May), it is recommended to dig up the area and make a complex top dressing. Soil with low acidity can be watered with citric acid or vinegar dissolved in water.
The planting material is checked for integrity - rotten places are cut out to healthy tissues and processed with ordinary brilliant green. After that, it is soaked for half an hour in a solution of potassium permanganate.
The tuber is buried to a depth of about 5-10 cm at a distance of 30 cm from each other.
Planting in autumn
It is not carried out in the fall, since the plant does not survive the winter.
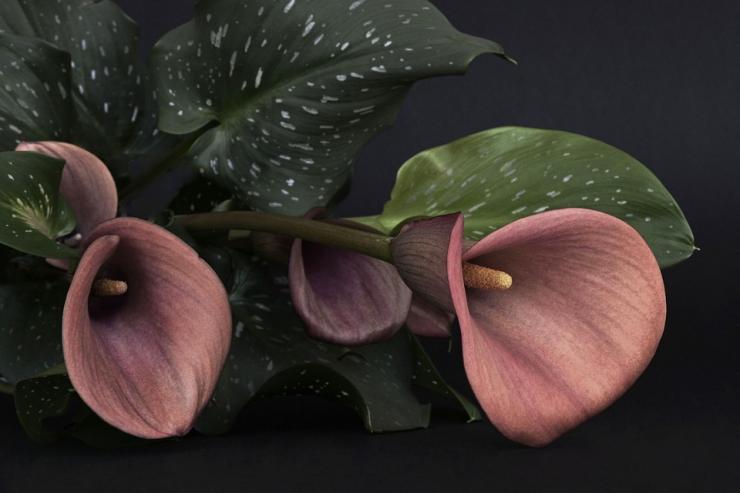
How to choose a seat
Growing conditions. The place for young animals should be open and at the same time slightly darkened, protected from direct sunlight. The greenery will suffer completely in the sun, and flowering will suffer completely in the shade - it will not be long and inconspicuous. Lands next to an alpine slide or an artificial reservoir are well suited. But at the same time, make sure that the soil has good drainage properties - running water is perceived normally, but stagnant water begins to bloom and becomes a medium for the development of pathogenic fungi and bacteria. In its natural environment, calla prefers silty soils - usually you will not find such in the garden.Therefore, a simple mixture of peat, sand and soil is suitable - increased acidity is desirable.
For tall species, wind protection will not hurt. Compliance with the conditions is well suited for decorating gazebos, hammocks, flower beds. Also, some varieties can be used as carpet - just a couple of seasons and the bushes will quietly grow over the entire area allocated for them.
Also, all varieties are quietly grown at home. And even if you do not plan to grow them at home, then wintering the plants is best at home.
The choice of material for planting
Flowers cultivation. Calla reproduces in three main ways:
Seeds - germination rate is very low, therefore it is best suited for growing seedlings. There are no special conditions when choosing seeds - a simple quality check is sufficient.
Tubers - it is recommended to transplant at least once every 4 years, wintering is also often carried out by transferring tubers to the house. If you decide to buy tubers, or take from friends, choose fresh (not dried out and wrinkled) by sight without any signs of decay and wounds. When purchasing a tuber closer to autumn, take care of its storage in winter in advance.
Dividing the bush is a relatively simple way to cultivate the variety you like without losing its features and is only suitable for varieties with rhizomes.
Important! When buying tubers, choose only those that are grown in our climate - others may die.
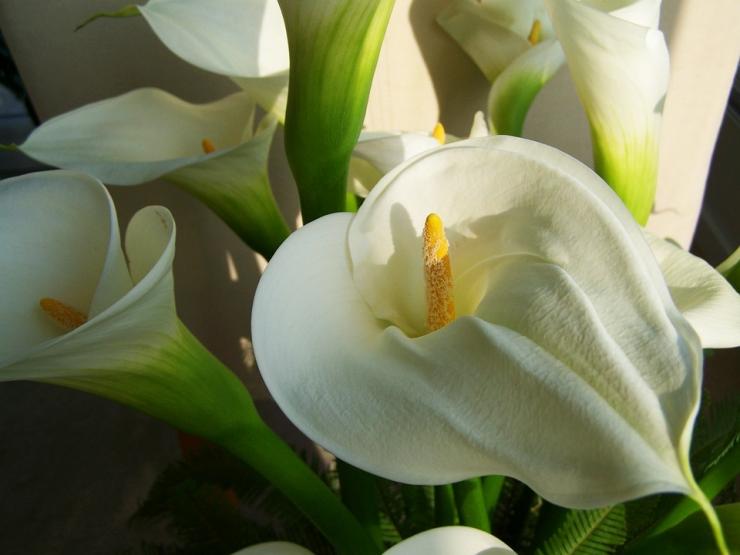
Planting tubers
Calla lilies landing. There is nothing difficult in tuber cultivation. The main thing is to choose a good place in advance and prepare the ground. The holes are made deep - about 10 cm, and the distance between them is kept about 30-40 cm. It is not necessary to somehow loosen and tamp the soil - just place the root bulb in the hole and sprinkle it.
It will not be superfluous to pre-distill the plant with peas at home. This is done in March. So the flower will ripen faster and start flowering.
The primer is suitable for universal use.
Watering must be carried out so that the earth does not dry out, but does not sink in water either. Otherwise, the bulb may start to rot.
Before planting, about 8 days of hardening are spent in the garden. They put a flower next to an open window, first for 20 minutes, then for 30 and so on, gradually increasing the hardening duration.
You can start transplanting to the garden as early as June.
Planting by dividing the bush
Dividing the bush, or dividing the rhizome:
- The procedure for preparing seedlings by this method is carried out mainly in April.
- The root is neatly divided into segments so as to preserve some part of the land not to it, so it will be protected from drying out.
- The shoots are placed in a pot with a capacity of about 3-4 liters.
- If the division occurs in the fall, then during the winter period of hibernation, storage is carried out at a temperature of +12 to +15 degrees.
- Spring seedlings are stored at temperatures from +20 to +22 degrees Celsius.
- Watering is not done immediately, but after a week has passed from the moment of disembarkation. But, from this moment on, it is necessary to ensure that the soil does not dry out. As always, for irrigation, it is most convenient to use a water spray - it will allow you to accurately regulate soil moisture.
- Towards the beginning of the season, you will already have strong shoots that can be planted in open ground. Since each plant is grown individually, there is no need to dive.
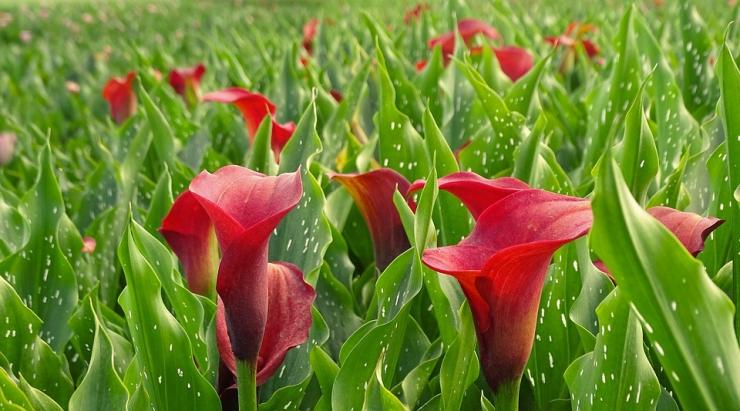
Planting seeds
Seed propagation by gardeners is discouraged, and is used mainly by breeders. This is due to the fact that, although the seeds can be immediately planted in open ground, most of them die and do not germinate, even if all conditions are met ideally.
Calla lilies garden planting seedlings:
Preliminary preparation. The seeds are placed in a solution of a growth biostimulator for 6 hours.
We take a piece of fabric, textile and moisturize well. Seeds are laid out on this piece and covered with another piece of cloth, just as well moistened.
The storage area should be warm and dry.
Storage in textiles lasts about a week, do not forget to periodically moisturize the textiles and do not let them dry out.
The sprouts are now ready to be transplanted into pots and flower beds. Planting in open ground is made based on the recommendations for a particular variety (they must be indicated by the manufacturer on the package).
Distillation
Forcing is a set of measures to accelerate the growth and development of a plant. It is often used for breeding tropical and exotic plants in a harsher and colder climate.
For forcing calla lilies, a container with a width of at least 25 cm in diameter and a depth of at least 10 cm is required. The container is filled with a universal mixture with an acidity of about 6-6ph. At seven, it is recommended to add peat, sawdust and, if possible, sphagnum moss.
The tuber for forcing must be at least 6 cm in diameter, it is planted at a depth of about 5 cm and the entire container is spilled with a fungicide solution.
The whole thing is stored in the winter at a temperature of about 14 degrees above zero, and closer to summer at a temperature of +22 +25.
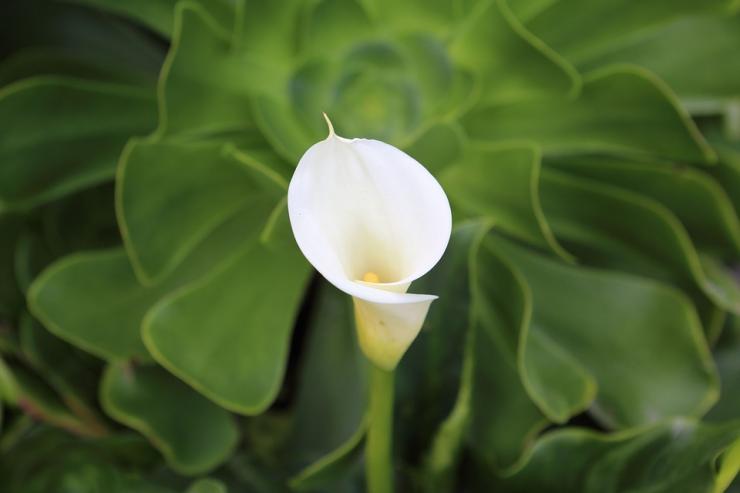
Varieties and types
Street calla lilies may differ from their relatives in the type of root system and flower color. In the first case, the plant is divided into rhizome and tuberous. According to the shade of the flower, the division occurs into two groups:
- White type.
- Colored type.
The first type of plant originated from an Ethiopian species of impressive size (up to 150 cm) with huge leaves with large, white flowers.
The color type originated from the pink-red variety Remaney and yellow Eliotte, it is distinguished by its compact size (up to 50 cm) and bright colors of the bedspreads.
Each variety and type of plant is good in its own way and requires the attention of a grower, especially for watering and soil selection when growing in the garden. There are many rules for caring for a flower and how many times a week to water it.
How to deal with calla pests
As with any living plant, calla lilies can be attacked by pests. They suck out all the useful substances from the plant, poison it with their waste products, as a result, the plant dies. Timely measures taken to combat the misfortune will save your beauty.
Spider mite
The mites feed on the top layer of the plant's leaves.
When calla lilies are affected by a spider mite, its leaves turn gray, and a thin cobweb can be seen between them. Small black spots form on the underside of the leaves. The buds most often do not bloom, dry out and disappear.
Reasons for the appearance of a spider mite:
- very dry air;
- heat;
- insufficient watering.
Control methods:
- air humidification;
- placing in a cooler place;
- wiping the leaves with a solution of soap or "Neoron", "Fufan".
Thrips
They feed on plant sap.
When calla lilies are affected by this pest, the leaves turn pale and dry out, curl, and white spots may also appear on them. To get rid of pests, you need to humidify the air, cut off the affected leaves and treat the plant with insecticides.
Aphid
Aphids are small insects (black, green, white, or gray) that feed on plant sap.
They poison calla with waste products. Usually pests are located on the lower parts of the leaves. Clear signs of aphid damage are yellowing of foliage, rapid wilting of flowers. Existing buds do not bloom, but dry out. Over time, the top of the leaves becomes covered with a sticky bloom.
Control methods:
- stop fertilizing with nitrogen for a while;
- treat the plant with potash oil (20 grams per liter of boiled warm water) or special preparations ("Decis", "Aktara").
Failure to follow the rules of caring for calla lilies leads to their defeat by a variety of infections and bacteria. Timely measures taken to combat diseases and pests will help the plant return to life and delight you with beautiful flowering.
Summary of rules and tips
The family to which the callas belong is called aroids. Plants are divided into 2 groups.The first group has Ethiopian calla roots, large white flowers and an underground part in the form of a rhizome. The second group is varieties with a colored bedspread. They descended from calla lilies Eliotta and Remani with an underground part in the form of a tuber.
Some growers, having bought a tuberous calla for the house, think that they will be able to properly grow a plant that will live for a very long time. But this is not so, because her biorhythm is disrupted. She is able to bloom from December to autumn (at a favorable time for her in South Africa), but will not be able to live long during our spring and summer.
But in fact it turns out that this flower is completely unpretentious. You just need to take into account his biorhythm and special preferences. For its successful growth, you need very little, namely, to follow some rules and tips in the right way.
Rule # 1. The right choice of tuber
It should be large, soft and slightly wrinkled. The larger the tuber, the faster it will bloom profusely.
Rule # 2. Proper storage before waking up
In no case should you rush to plant it. It is necessary to awaken the root not only in the right way, but also in good lighting, so that the above-ground part is formed correctly.
Rule # 3. Correct fit
The pot should be small, no more than a liter in volume. First, you need to lower only half of the tuber into the ground. Further, for several days, water every day (preferably even several times a day), spray the tuber. Later, after the first leaves appear, you need to sprinkle the tuber 1 cm more and continue to water. The soil can be from a mixture of humus, peat, leafy earth and sand in a ratio of 1: 1: 1: 0.5. Callas prefer slightly acidic soil, so you can periodically water the soil with diluted vinegar (2 tablespoons of 9% vinegar per 5 liters of water).
Council number 1. You need to monitor the plant during its flowering period.
You need to cut the flower only when the cover leaf turns green. This will prevent seeds from forming. And in addition, the growth of the tuber will be stimulated, which is the reason for the abundant flowering. By the way, real calla flowers have a smell similar to vanilla.
Council number 2. Do not forget to remove calla lilies during cold weather
Before the real frosts begin, you need to dig up the plant, rinse its tubers and put it in a dry and dark place. No need to cut roots and leaves! Then the tubers will take all possible nutrients from them. After a week and a half, the leaves themselves will begin to fall off. And only then can the roots be cut. Before picking up the tubers from the dacha, you must remember to sprinkle them with charcoal (chopped). This will help dry and disinfect the tuber. It is advisable to store them in a cool place. This can be a refrigerator, cellar or balcony. The temperature should be no higher than 5 degrees. Otherwise, the tubers will sprout. Calla requires a mandatory period of rest, otherwise it will not bloom. This plant loves partial shade. The ideal place is where the sun gets in before lunch and shade forms in the afternoon. From time to time, its leaves need to be sprayed with a sprayer to maintain the moisture level. Calla loves moisture, but this does not mean that it can be planted in water. It will simply rot in it.
And the last little advice: you need to feed it once every two weeks with something for "flowering plants".
In the summer, calla flowers wonderfully in a pot. If desired, it can be used as a decoration (to decorate a gazebo or veranda). And so that it blooms profusely and does not rot, it is important to adhere to these simple rules.
Calla lilies and other indoor flowers can be ordered in the Catalog View photos of the collection of indoor plants
Description
Looking for a large, spreading flower? Calla, or Calla, is a great choice! The plant belongs to the Aroid family, but to a greater extent this applies to the South African genus Zantedeskiy, which is also called Richardia or Ethiopian calla lily.
A distinctive property and advantage of this species is that it is equally easy to grow, both at home and in the garden. Calla lilies growing, transplanting and wintering are such that you will grow it both there and there. However, there is nothing wrong with this, the flower has a wonderful delicate aroma and spectacular greenery, which will decorate any area or room!
Richard is primarily a tropical plant - in its natural environment it prefers lands along the banks of rivers and other bodies of water, the soil is silty, heavy, but with a high sand content and good drainage properties - this is one of the most important conditions for care. On the one hand, constant humidity and shade are preferable, but the terrain is not needed swampy with running water, and not stagnant. Stagnant water can cause roots to rot and increase the risk of disease.
Apart from varietal differences, outwardly it is a large bushy plant with wide wavy leaves from which stems of peduncles grow, which end in large funnel-shaped flowers. In height, an adult bush reaches from 30cm to 150cm, and even the most dwarf representatives need a relatively large area for growth.