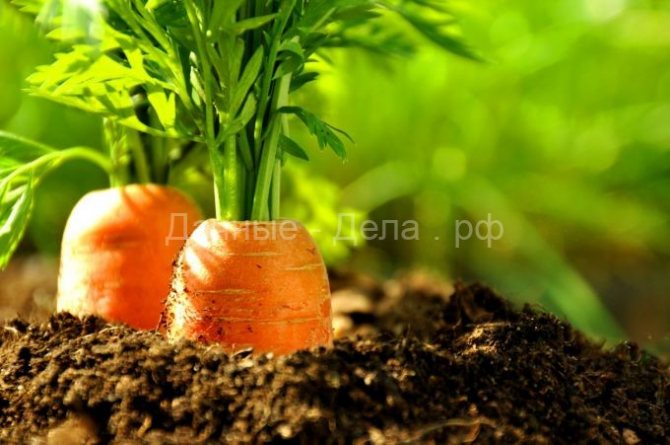
Carrots and their healing properties
Of course, we have known about the healing properties of carrots since childhood. It is she who is strongly recommended to us to improve vision, to improve lung function and many other preventive measures. Carrots contain a set of vitamins and substances necessary for a person - carotene, iron, potassium, phosphorus, magnesium, zinc, iodine, chromium, as well as vitamins of group B, C, E, PP and K.
truly, the owner of such incredible useful properties can rightfully be called the queen of the beds. This is the most accessible source of beta-carotene necessary for the retina, which is converted in the human body into vitamin A. It is possible to list the magical properties of carrots for a long time, but in this article I would like to acquaint the reader with the basics of proper cultivation of this priceless culture.
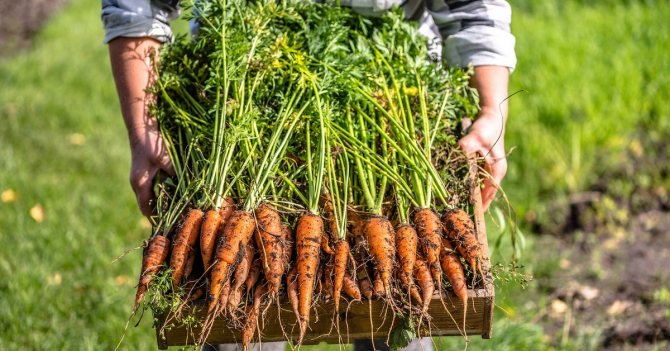
In addition to healing properties, carrots have another excellent property - they are stored for a long time, providing a person with the necessary vitamins and minerals during the cold season, when there is no fresh fruit. When stored properly, carrots remain fresh for many months. This is a valuable quality that is possible not only due to the natural qualities of this root crop, but also due to proper cultivation.
The best varieties of carrots
The choice of carrots on the shelves of modern stores can confuse a novice gardener. In order not to panic and collect a dozen bright bags at random, you need to understand why you are growing carrots. Different varieties are suitable for different purposes.
For bunch sale and fresh consumption in summer: Bureau, Vesta F1, Victoria F1, Concerto F1, Laguna F1, Lydia F1, Mars, Napoli F1, Nelly F1, Orange Muscat, Buchkovaya, Royal Chanson, Royal Chantenay, Yaroslavna.
For salads: Bolero F1, Napoli F1, Red Cor, Chantenay 5.
For processing: Boltex F1, Veronica F1, Vita Longa, Dolianka, Cardinal, Chinese beauty, Autumn Queen, Crown F1, Kuroda F1, Malika, Improved Nantes, Natalia F1, Princess F1, Romance F1, Samson, Forto, Holiday F1.
For winter storage: Anastasia F1, Gribovchanin F1, Canada F1, Cascade F1, Queen of Autumn, Moscow Winter, Nantes, Romance F1, Typhoon, Flacque, Flaccoro, Chantenay 2461, Elegance F1.
Universal varieties: Angara, Major F1, Red Giant.
- What are carrots - all about varieties and their use in cooking
Classification of carrot varieties depending on the purpose.
Soil pre-treatment
• the ground should be free of solid particles and undecomposed organic debris;
• the soil should have normal acidity;
• sand is added to heavy clay soils, as well as black earth for loosening (1 kg / sq.
• organic matter, manure and peat are added to poor sandy soil.
When grown on black soil, a large amount of fatty acids appears in the root crop, the presence of which reduces the storage period of the vegetable. In viscous soil, the fruit does not develop correctly, its underground part has an irregular shape. Clay soils that do not contain sand dry out quickly. Carrots sown in such soils will be lethargic and shallow.
• in the shade of trees;
• after planting sunflower or tobacco;
• in dry soils of any composition;
• on beds with a sharp slope;
• in areas where wheatgrass grows, as this weed dries up the soil.
Regardless of the availability of nutrients in the soil, a good harvest of carrots can only be obtained with proper site preparation.
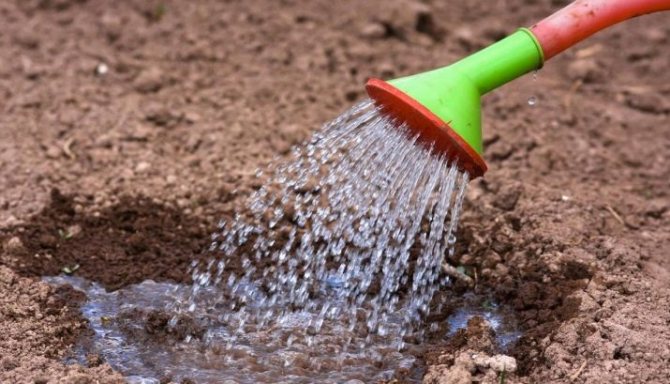
First you need to check the soil for moisture permeability. To do this, 8 liters of water are poured onto a square with dimensions of 50 * 70 centimeters. If the liquid leaked within an hour and gray spots appeared on the surface of the site, then such soil contains a lot of salts. It is unsuitable for growing crops. If no spots appear and you can roll a ball out of the ground, you should start preparatory work - the soil is suitable.
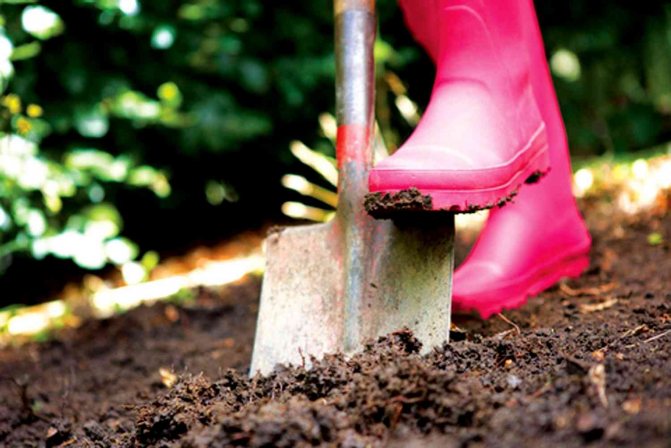
The main difficulties arise when preparing heavy soil with solid particles. The result of the work carried out should be a well-loosened soil. The bed is dug up twice (on the bayonet of the shovel within 30 centimeters, then 15-20 centimeters).
If, when re-digging, many stones or rhizomes of weeds are found in the ground, then the site is considered unsuitable for growing carrots. If the earth has acquired a loose structure, it crumbles well, then crushed peat is added to its composition to improve aeration. After this, abundant watering of the garden is carried out. With the arrival of spring, the earth is once again dug up and leveled with a rake.
The quality of the land can be determined by last year's potato crop. If the vegetables were small and there were few of them, the soil needs to rest. Carrots feel good after cucumbers. In this case, 1.5 kilograms of organic matter is introduced for each square meter of usable area.
Also, the culture feels good after eating beetroot. Here, 5 kilograms of peat and 500 grams of manure are introduced into the soil per m2. If small and nondescript cabbage grew on the same site last year, it is necessary to add both organic matter and minerals to the ground.
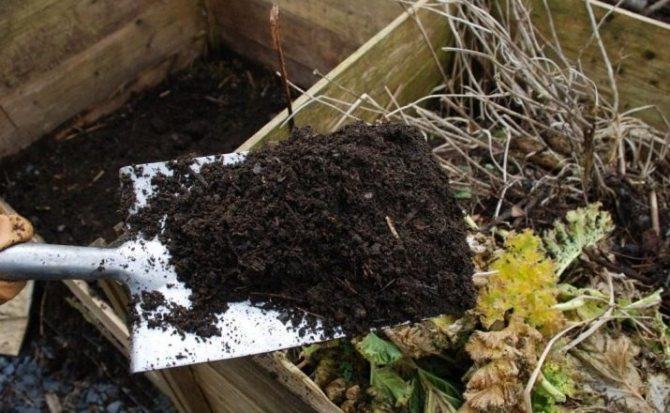
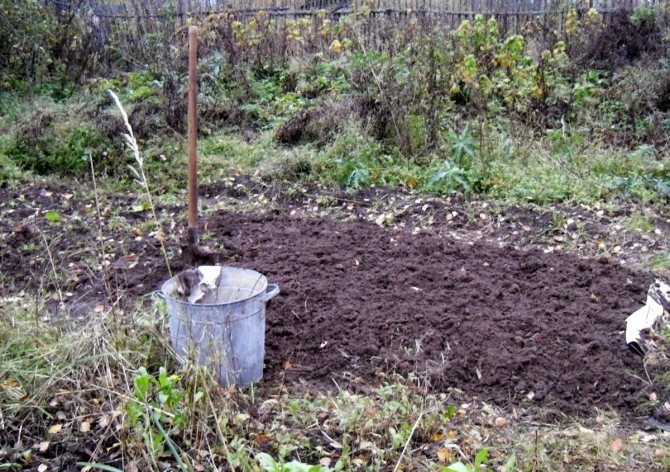
With the arrival of spring, the site is rid of weed remains. The earth is allowed to rest for 2 weeks. Next, the bed is divided into small sections measuring 3 * 5 meters. Then the first digging is carried out, thoroughly crushing large clods with a shovel, and compost is introduced into the soil. After that, the site is filled with water. When the liquid is absorbed and the top layer dries, the soil is additionally loosened with a rake and the remnants of weed rhizomes are removed.
When the soil is ready, you can start sowing the carrots. Culture seeds are placed in furrows up to 3 centimeters deep and covered with loose soil. To accelerate germination, the garden bed is watered with warm water and covered with plastic wrap. After emergence, this primitive shelter must be removed.
Loose and soft soil is necessary for carrots. In solid soil, the growth of root crops will be difficult and as a result, squat, uncomfortable root crops of a small mass will be obtained.
The best soil for carrots is loam or even sandy soil. It should contain humus (5% is enough), it should pass moisture and air well. The soil is dug to the depth of one shovel bayonet. The choice of the autumn period as the beginning of work is not accidental - over the winter and the subsequent thaw, the soil will sag well and acquire the necessary consistency. All other work is carried out in early spring, a month or one and a half before disembarkation.
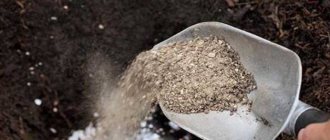
If the carrot bed is located on medium-weight soil, it must be dug up with sawdust or peat mixture. The concentration of peat should be approximately 3-5 kg per 1 sq. m of soil. Acidic soil requires liming. In this case, fluff lime is used in the amount of 1 glass per 1 sq. m. If it is not possible to get lime, you can use chalk or dolomite flour.
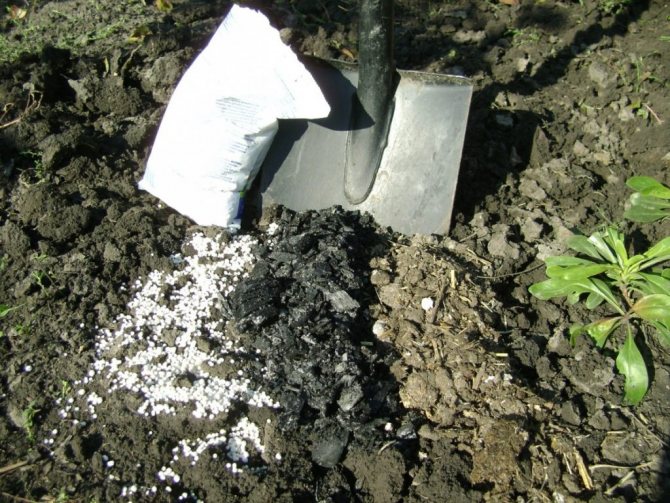
If we are dealing with poor soil, it is necessary to apply mineral fertilizers under the carrots in early spring.Depending on the fertility of the soil, their number can range from 50 to 100 g per 1 sq. M. After fertilization, the soil is loosened with a rake or flat cutter. The important point is that you cannot dig up the soil immediately before planting the seeds. It is also forbidden to use manure when fertilizing carrots - only compost or humus should be used.
A bed for carrots on different types of soil requires different additives. For example, peatlands need to add the following components per square meter:
- river sand - about 6 kg;
- compost - about 5 kg;
- mineral fertilizers (10-25 g of superphosphate and nitrate).
Alumina is enriched with a bucket of peat, 3-5 kg of river sand and 4-6 kg of humus. Mineral fertilizers for alumina: 15-20 g of nitrophos and superphosphate. Loams are enriched similarly to alumina, but river sand is not added to them. Sandstones require the introduction (per 1 sq. M.) Of 10-20 kg of turf or peat, 5 kg of humus or compost.
Carrots do not like chlorine fertilizers. From them, the roots begin to branch and bend. The same picture occurs with excessive abuse of nitrogenous fertilizers, therefore, the use of dressings should be in strict accordance with the recommended norms.
This vegetable is planted not by scattering, but in even rows, which should be reflected in the design of the garden bed. Usually use two- or three-row beds about a meter wide of any length. Such a bed for carrots will always allow you to access any plant on it. The use of more than three rows in a garden bed is undesirable, since the distance between rows is recommended at least 20 cm.

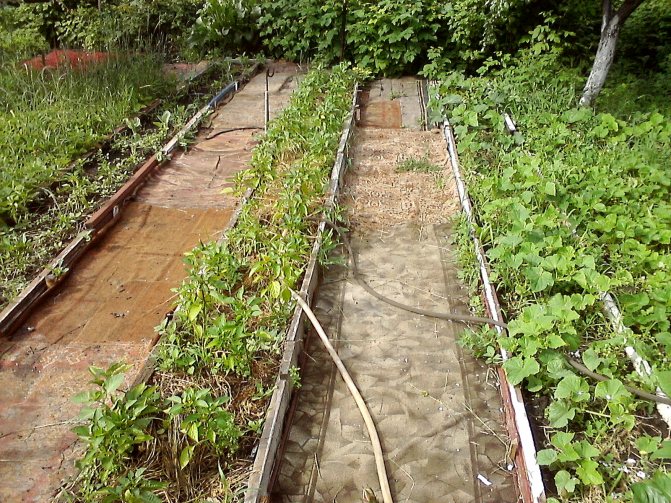
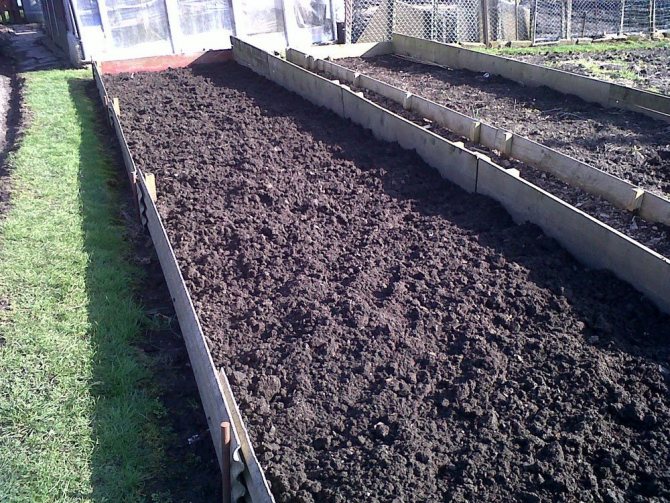
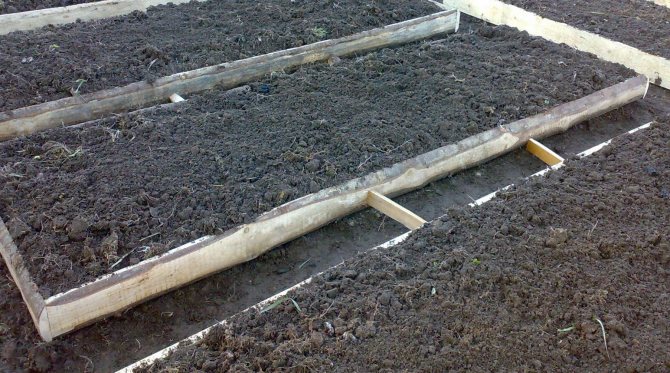
If the groundwater level is no more than half a meter, in order to avoid diseases of root crops, it is necessary to make high beds. Their height can vary from 20 to 35 cm. In this case, the sides of the beds must be strengthened, for example, with wood or any other available material.
The bright orange vegetable prefers light soil. Gardeners often add sand to make it more airy and oxygenated. If the site has clay and heavy soil, you need to add a bucket for every square meter. To increase fertility and friability, compost can be added in the same amount along with river sand.
Excess sand, on the other hand, interferes with the retention of moisture, necessary for carrots, and nutrients. Therefore, it is useful to add a bucket of rotted compost or 3-4 kg of leaf humus. Wood sawdust is also used, but they must be well rotted so as not to acidify the soil.
Acidity
You can not plant a culture in acidic soil, because of this, the roots are hairy and clumsy. Lime or chalk can be added to the acidic area. They are scattered over the surface for subsequent digging to a depth corresponding to the bayonet of the shovel. Carrots love a pH of 6-6.5, that is, neutral or slightly acidic soil.
With an acidity of up to 6, 300 g of lime or chalk are added for each square meter.
Some plants are able to extract all nutrients from the soil, so carrots should not be planted after them. These include fennel, parsley, parsnips, caraway seeds, beans, carrots themselves.
Tomatoes, zucchini, potatoes, cucumbers, onions and garlic are considered good predecessors. If the last two plants are left next to the carrot beds, the root crop will be protected from pests.
The basis of an excellent harvest is the correct preparation of the soil for planting carrots in spring and autumn. Preparation activities include digging the earth and fertilizing it. To understand exactly what your soil needs, you need to distinguish between its type. All your further actions will depend on this.
The first stage of preparing land for carrots begins in the fall, after harvesting.During this period, the earth is dug up and fertilized, depending on the type - deep digging with a full bayonet of a shovel with the addition of sawdust and ventilated peat. The amount of sawdust and peat depends on the severity of your soil, but on average, three kilograms of the above mixture is used per square meter.

And if the soil has increased acidity, then in the fall, during digging, lime or chalk is added at the rate of one glass per one square meter. During the winter, all these additives will be absorbed and will work as efficiently as possible. Spring rains and melting snow will evenly distribute and absorb the necessary elements.
Chernozem is enough for two tablespoons of sperphosphates. Organic fertilizers can be applied in the spring when it is time to re-cultivate the soil before planting.
As already mentioned, the soil is cultivated twice a year - in the fall, after harvest, and in the spring before planting. In the fall, the soil is dug up thoroughly to the entire depth of the shovel bayonet in order to saturate it with oxygen and prepare it for wintering. Deep digging is also necessary in order for the cold winter temperatures to destroy pathogenic bacteria from the soil surface.
In the spring, it is enough to loosen and level the soil.
It is very important to choose the site itself, because carrots love the sun and do not like excessive moisture. The best place is a flat area that is well accessible to the sun's rays. If you plant carrots in lowlands where moisture accumulates, the tubers will grow small and deformed.
Secrets of experienced gardeners
To properly prepare the soil, build a garden bed and eventually grow an excellent harvest of carrots, advice from experienced gardeners who have been cultivating this culture for several years and have managed to achieve certain success in this field will help. Let's consider the most interesting recommendations in more detail:
- If you grow carrots after cucumbers, for each square meter of the garden you will need to add at least one and a half kilograms of cow dung and 5 kilograms of chopped corn leaves. When growing carrots on chernozem, you will need to add potato husks and river sand to the designated one - 1 kilogram per square meter of planting;
- It is important to track and remember how previous crops grew in the selected area. So, for example, if cabbage grew there before the carrots, and the harvest did not please, the likelihood that a similar story will happen to carrots is quite high. Abundant feeding with mineral and organic fertilizers will help to correct the situation;
- If the tomatoes grown earlier on the plot for carrots turned black during the growth process, it makes no sense to plant carrot seeds. It is better to sow the area with parsley or beets;
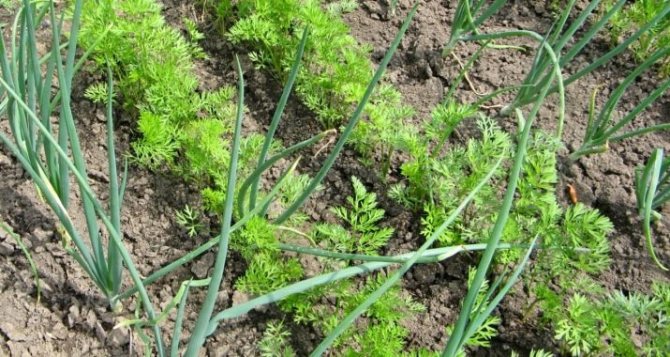
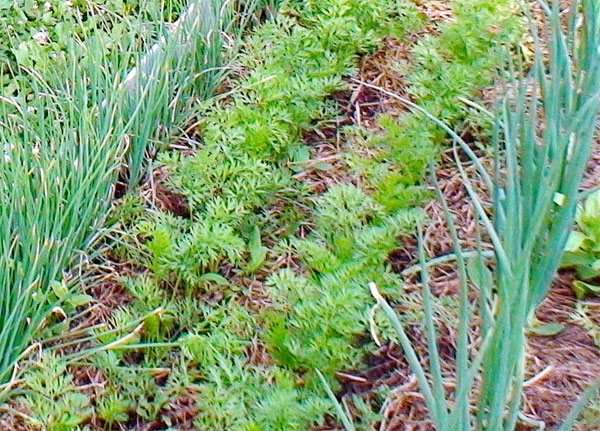
- To get rid of the carrot fly, it will be helpful to plant the carrots as early as possible and in the same bed with the onions. This move will be beneficial for both cultures;
- For even distribution of seeds, it is more effective to mix not with sand, but with a cloister. If you add a certain amount of mineral fertilizers to the latter, the benefits (and, accordingly, germination) will be much higher. It is most convenient to place such a mixture in the grooves using a pastry syringe;
- Too moist soil will contribute to the occurrence of carrot diseases. Therefore, stagnant water on the site should be avoided by all means;
- If the farm has a sufficiently large amount of compost and physical strength, it is possible to prepare beds for carrots in a fundamentally different way: a trench is dug at least 30 centimeters deep, filled with compost mixed with river fine sand, and seeds are poured into this fertilized soil.
Despite the fact that carrots are an integral part of the daily diet of a large number of our compatriots, growing it yourself is not as easy as it might seem at first glance.But if you prepare the bed properly, avoid mistakes when sowing seeds and provide the culture with proper care, a decent harvest will not be long in coming.
Potatoes are usually sold commercially grown using mineral fertilizers and pesticides. Real gardeners will never buy such a product, but will try and grow excellent carrots in their own garden. If you follow these recommendations exactly, there should be no problems with the cultivation of the culture.
Where to plant carrots
It is difficult to indicate the exact date suitable for planting carrots before winter, since everything depends on the weather conditions. The optimal period is the second half of November. The main condition is a stable air temperature from 3 ° C to -5 ° C for two weeks. At the slightest warming, seedlings will quickly appear, and then, unable to withstand the winter cold, they will die.
Seeds are sown in the prepared area. They need to be sprinkled with a layer of warm and dry soil, and on top, spread peat or humus with a layer of up to 3 cm. All together, lightly compact with a shovel, but you do not need to tamp it hard.
The seedlings do not require special care. It is enough to cover the beds with needles, and if snow falls, form not too high snowdrifts.
Ridges for spring sowing of carrots should be prepared in the fall. This root crop does not have many requirements, but it is worth observing all of them, since the wrong place will lead to a decrease in the yield and taste of carrots.
Carrots are one of those vegetables that should be in direct sunlight all day long. Therefore, under the ridges it is worth assigning the most illuminated place on the site. In addition, it prefers loose neutral soils, and on heavy or acidic soils, it becomes covered with a "beard" and deforms.
Carrots cannot be planted in one place for 2 years in a row. In addition, it is not recommended to grow it after parsley, dill, celery and parsnips. But cucumbers, tomatoes, potatoes, onions, garlic or cabbage will be excellent precursors for this crop.
After you have decided on the planting site, you need to take care of the quality of the land for carrots. This is done in September and consists of several stages:
- removal of weeds and plant debris from previous plantings;
- digging the ridge;
- introduction of organic baking powder (peat, sand, humus);
- deoxidation of the soil, if necessary, using dolomite flour, hydrated lime (fluff) or ash.
Carrots do not tolerate fresh manure, they become bitter from it, with a thick skin and build up mainly tops, and not root crops.
Features of the


The preparation of territories for spring sowing actually begins in the fall. It is then that a site is selected, beds are formed and some fertilizers are applied. There is a point of view that feeding immediately before planting will negatively affect the condition of the carrots. In addition, soil cultivation takes place in the autumn months.
All pebbles are removed, and if possible, the soil is also sieved. It should be remembered that if, during the growth process, the carrot stumbles upon some kind of obstacle, then its bifurcation and damage to the neat shape will begin. Therefore, everything must be done to prevent such a situation.
The beds are fertilized with organic fertilizers a year before planting carrots. As a rule, humus and wood ash play their role. In the fall, the conformity of the carrots to the predecessors that lived in this garden last year is also checked. Where this root crop can or cannot be planted is determined by the crop rotation table.
Finally, in the fall, acidic soil is enriched if necessary. For this, dolomite flour is used, 30 g of which is enough to process 1 sq. m of land.In the spring, after such treatment, it will need to be disinfected with a solution of copper sulfate and dug up again.
Soil types
Carrots, although an unpretentious plant, love loose loamy and sandy soil. This soil gives the carrots the sweet and juicy flavor that we all appreciate so much. The soil should not be acidic, the ideal acidity (pH) is 5.6-7.
The best composition is achieved by adding missing elements. First you need to determine the type of soil, for this we recall a simple rule: we take a handful of earth and soak it. Next, we are trying to mold a ball from the resulting gruel. If the mass crumbles in the hands, then such soil is considered sandy. Sandy loam soil does not roll into a ball, but it can be rolled in the palms to the state of a cord. Clay soil with this method of determination becomes very plastic and amenable to "sculpting". The loam also turns into a ball, but no more.
When the type of soil is determined, it becomes clear what needs to be done next. If your site consists of fertile chernozem, you do not need to do any other fertilizer besides the usual fertilizers. Peat soil will require sand, clayey - sand with peat.
Culture care
Most destructive for carrot seedlings is the proximity of weeds and the crust formed on the ground. Both that, and another, can pretty much spoil your crop even before the first leaves of carrots appear above the ground. To avoid this, weed and loosen the garden bed if you see it overgrown with grass or hard. By the way, you often need to loosen carrots, because beautiful, even root crops can only be obtained in light soil.
Watering
Without watering, carrots become lethargic and bitter, and it negatively relates to both constant under-moisture and periodic droughts. However, she will also not be happy with the appearance of the "swamp" - this culture prefers stability and moderation.
So that your carrots do not dry out right in the garden and do not crack from the abundance of moisture, make it a rule to water it every 5-7 days to a depth corresponding to the length of the root crop. While the carrots are young and thin, it is enough to soak the soil 5-7 cm, but the adult carrots need to be watered so that 30 cm from the soil surface is moistened.
Fertilizing carrots
On normal soil, it is enough to feed carrots twice a season - the first time 3 weeks after germination, the second - a month after the first. For normal growth of the root crop, any of the following dressings are suitable:
- 1 tbsp nitrofocks for 10 liters of water;
- 2 glasses of wood ash per 10 liters of water;
- 20 g of potassium nitrate, 15 g of urea and 15 g of double superphosphate per 10 liters of water.
In order for the carrots to grow large, the distance between the root crops must be constantly monitored, preventing the plantings from thickening. The first thinning of carrots is carried out in the phase of the appearance of the first pair of true leaves, leaving 3 cm between shoots.
Ridge of carrots before thinning
In order not to damage the remaining root crops during thinning, it must be carried out after abundant watering and loosening the earth.
The second time the carrot is thinned out, when it develops 2 pairs of full leaves. Then the distance between the plants is about 6 cm.
Carrots, although unpretentious, require attention. First, it grows slowly, and the weeds grow quickly, so weeding is a constant necessity. Secondly, the very process of planting seeds is an uncontrolled amount of seeds in the furrows. In this case, after the seeds sprout and grow 10-15 centimeters, the bed should be thinned out. For roots to be large and developed, they need room to grow. A dense planting without thinning will give frail, unsuitable for food roots.

Watering should be done as appropriate. If the summer is rainy, then rather you need to make sure that the crop does not rot - you need to drain the site on time. During a drought, it is necessary not to allow the land to dry out; after all, the carrots should be juicy and well-nourished.Long, regular carrots grow in undried soil, and gnarled and short roots are a sign of improper soil preparation or poor site selection.
What should be the predecessors
Whichever type of carrot you choose, the soil addictions of this vegetable always remain unchanged.
- A site for growing root crops should be chosen on an open flat place with a good level of illumination.
- Soils should be light, moisture and air permeable, such as sandy loam or loam.
- It is important for carrots and the content of humus in the garden soil, which is responsible for soil fertility. Its concentration must be at least 4%.
- It is necessary that the soil on the site for planting root crops was slightly acidic (pH = 5.5-6) or neutral (pH = 7). Strongly acidic or alkaline reactions lead to the occurrence of diseases and a deterioration in such characteristics as shelf life.
- The correct precursors for carrots are nightshades and legumes, as well as greens or cabbage.
- Soil moisture should be moderate, and the bed itself should be located in places with deep groundwater.
There are factors that negatively affect the quality and quantity of the crop.
- In areas located in lowlands and with close groundwater, root crops are affected by various pathogenic microorganisms, which leads to crop rot and loss of keeping quality.
- It is strongly not recommended to use fresh manure as fertilizer.
- You cannot plant the root crop again in the same place as in the last season. It must take at least four years before re-planting.
- Do not plant carrots in areas with poor sunlight. In such places, the yield will be lower by a quarter, and the roots themselves will grow small and with a low content of nutrients.
- Too heavy soil adversely affects the yield and the shape of the fruits. On clay and poorly processed soils, carrots become branched and deformed, and their taste deteriorates.
The best predecessors are considered to be onions, cucumbers, potatoes, under which manure was applied.
After their cultivation, a lot of decomposed organic matter remains, which are readily available for carrot seedlings. In addition, the soil after these plants is usually weed-free. This is important because weeds in the initial period overtake carrots in growth and oppress them.
DETAILS: Soil acidity for cucumbers: what should be
In areas poor in nutrients, rotted manure and wood ash are introduced before digging. On fertile soils - only a small amount of mineral fertilizers.
Diseases and pests of carrots
Most often, carrots are damaged by the carrot fly, which is attracted by the aromatic tops of this culture. Prevention of the invasion is the correct cultivation, non-thickened planting, the absence of stagnation of moisture in the soil. If this did not help, and the leaves of the carrots began to curl, which is the first sign of the appearance of a pest, you need to treat the plantings with Inta-Vir or Actellik according to the instructions.
Of the diseases of carrots, the most common are various types of rot: phomosis, sclerotinosis, alternaria, botrytosis and bacteriosis. Prevention of these diseases is a careful observance of crop rotation and cleaning of plant residues from the ridges, but the treatment for each disease is different.
- Dangerous diseases and pests of carrots
The bright sunny carrot has so many enemies! Just admire.
Garden bed preparation
Carrots grow slowly and, as already mentioned, are afraid of excess moisture. If the earth has the ability to accumulate water, then organize the beds-ridges - raise the soil by 25-35 centimeters. If the ground dries well, then it is enough just to make grooves with a distance of 20-25 centimeters from each other. Before planting, the land is leveled and loosened a couple of days before planting, then watered.
After that, the bed is again covered with foil.This is necessary to conserve heat and moisture, if everything is done correctly, then with this method, seedlings appear already on the sixth day after planting. As soon as the first green shoots appear, the protective film is removed.

In Russia, carrots are traditionally planted at the end of April, when the likelihood of night frosts is minimal.
- from 20 to 25 April, early varieties of carrots;
- mid-season varieties until May 5.
For the southern regions, other dates are mid-March and mid-June for the second disembarkation.
When preparing a bed for carrots in the fall, one of two methods of digging is used. The first one is that the earthen lump can be left intact, not broken, in order to preserve the maximum number of beneficial bacteria and favorable microflora in the lower and upper layers in the ground. The second involves breaking the lumps completely and turning the layers over. However, the latter method contributes to the freezing of the soil, therefore it is not used if early frosts began in the fall.

Organic fertilizers are not applied to the garden. The depth of the prepared hole should be at least 15 cm so that moisture does not stagnate in it. This place should no longer be touched for the next 1.5 months before planting. In October, when the soil settles and compresses slightly, harrowing with a rake will be required to loosen it.
The next step is making seed grooves. Their depth should be at least 5-6 cm.If the soil is clayey and heavy, it is enough to leave 1 cm each. Between the grooves, a distance of 15 to 20 cm is observed.The site for planting is almost ready, it is left alone for 3-4 weeks, covering from the rains with a film.
Water permeability is one of the most important soil properties. It depends on the composition, its structure and the frequency of moisture. In the garden, you can check this indicator in a simple way. A metal cylinder with a diameter of 50-60 cm is pressed to a depth of 5-10 cm. Another cylinder is cut around it, but with a large diameter - 90-95 cm. The soil is well compacted at the walls of the frames, and a scale for measuring the water level and thermometers are mounted inside each.
Measurements must be made at a temperature of 10 ° C and a water pressure of 5 cm. The optimal indicator of water resistance is from 100 to 500 mm of a water column. A mark of more than 1000 is considered a complete failure, and less than 30 mm of water column is considered unsatisfactory. Water permeability is measured within 5-6 hours.
The formation of a bed should begin by determining its size. The optimal width is 0.7-1.2 meters. If the width is made smaller, then you will have to arrange too many beds - you will not be able to get a large harvest from one. If the bed is wider, then there will be problems with watering, removing weeds. The length can be almost any - it is limited only by the size of the site and your wishes.
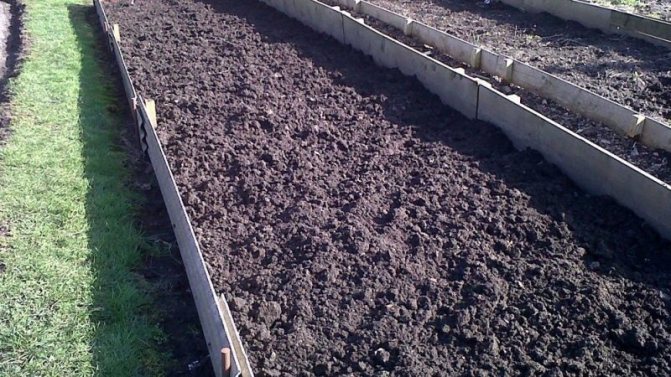
It is advisable to arrange a small embankment along the edges of the garden bed or even install slats. The desired height is 10-12 centimeters. This will conserve water by ensuring good watering even after a little rain.
But if the site is located in a lowland, another question arises - how to get rid of excess water. To do this, the bed is specially raised - a formwork is installed from a board with a height of 20-30, which is filled with earth. Thanks to this, excess moisture will quickly leave the garden.
Worst of all, if the garden has to be broken up on swampy soil - any root crops here begin to rot quickly. We have to remove part of the land from the garden to get a foundation pit about 25-35 centimeters deep. Thick and durable construction polyethylene is laid on the bottom and walls. Only after this does the soil return to its place. This will protect it from groundwater approaching the surface and get a rich harvest.
Currently, narrow beds, or, as they are also called, Mittlider beds, are gaining more and more popularity.Their main feature is the presence of high sides made of wooden planks, as well as the isolation of the soil in the beds from the surrounding soil. Such beds have a number of advantages: they are convenient to handle, they are not afraid of high groundwater levels and they do not allow various pests from the surrounding soil to get to the growing site. In addition, such a design protects crops from winds and does not allow weeds to get to them.
The Mittlider's bed is arranged as follows: an area 40-50 cm wide is marked out, having an arbitrary length. Along the perimeter, the bed is equipped with bumpers with a height of 20 to 40 cm. The width of the sides is taken at least 4 cm - this ensures the strength of the structure, since it should not allow the soil mixture in it to creep. It will not be superfluous to treat the beds with a composition against mold and mildew. A film is placed on the bottom of the resulting structure.
Traditionally, it consists of perlite and meadow mixture, however, you can use simpler methods: mix in equal proportions the soil from the site with peat mixture or compost. The beds are filled with soil in such a way that it does not reach the edge of the sides of 5-10 cm.The distance between narrow beds is chosen about 1 m.
A bed for carrots according to the Meatlider method requires the following planting scheme: in the middle of the bed, a strip of a mixture of nitrogen and potassium fertilizers is poured (about 50-60 g of the mixture per 1 meter). Seeds are sown on the sides of the fertilizer strip in such a way that the distance to it is at least 10 cm, while the distance to the sides of the planting rows should not be less than 5-7 cm.
How to land
Usually the width of the beds is made from 90 to 100 cm, and the height is from 15 to 20 cm.
Anyone who has grown onions at least once will also cope with planting carrots without problems. In addition, it is not difficult to make a bed for carrots. The most important thing to do is calculate the correct size and prepare the ground for the carrots well in advance.
Usually, the width of the beds is made from 90 to 100 cm, and the height is from 15 to 20 cm. If the groundwater is located close to the planting site, it is strongly recommended to increase the height of the bed to 35 centimeters (to its lower border). The length can be completely arbitrary, it all depends on the wishes and needs of the gardener, as well as the size of the site. You will definitely need to make a wooden side, which will prevent water from flowing down and blurring the beds during watering.
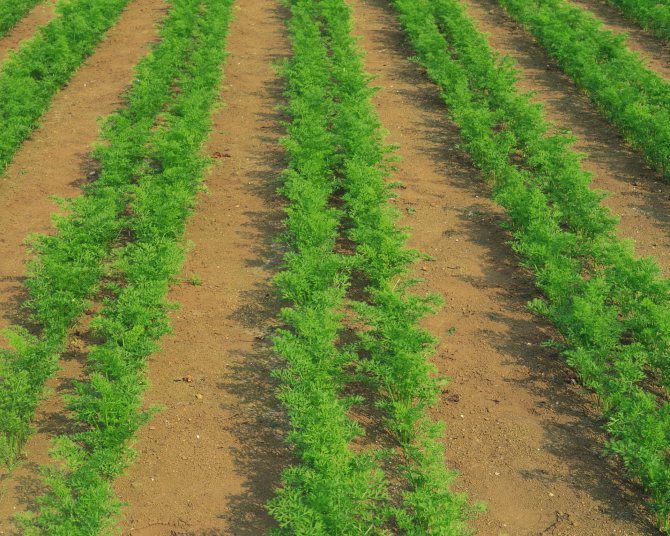
To place the seeds, it is necessary to form special grooves, the depth of which will not exceed three centimeters. It is imperative to observe a gap of 20 centimeters between them. As for the distance between roots, it can vary from two to four centimeters.
Important! The seed groove should never be too shallow or too deep. In the first case, there is a high probability that the seeds will be carried away by a gust of wind, and in the second - that they simply will not be able to break through to the surface through the thickness of the earth.
Ideally, the seeds should be sown in such a way that later they do not have to engage in thinning. This is quite difficult to achieve, but you should still try. Indeed, otherwise, the smell of tops when pulling the root crop out of the ground will inevitably attract the attention of such a harmful insect as the carrot fly.
Immediately before sowing carrot seeds, each groove must be thoroughly moistened. Since the planting material for carrots is very light, it is often mixed with sand for convenience. In those places where the seeds are too thick, experts recommend scattering the contents of the groove with a brush.
After the planting of the seeds is completed, the groove is sprinkled with mulch:
- humus;
- biohumus;
- compost;
- coconut substrate.
After the sprouts have hatched through the mulch, it must be removed, and the seedlings must be watered.
Important! Until seedlings appear, it is not recommended to water the sowing site in order to avoid seed erosion.
Carrots grow rather slowly, in addition, as already mentioned, they do not like excess moisture. If you organize bed-ridges, raising the site for planting by 30-35 centimeters, the problem can be solved. If the soil dries well, simple grooves are sufficient.
Before planting, the seeds should be soaked, and after planting and abundant watering, cover with plastic wrap. This step is necessary in order to preserve the warmth and moisture necessary for seed germination in the soil. If all manipulations are performed correctly, the first shoots will appear in less than a week. It is very important not to forget to remove the film after the very first shoots appear.
Landing in narrow beds
In recent years, the method of planting carrots in narrow beds, also known as the Jacob Mittlider method, has been in great demand among gardeners. Such beds have a significant difference from standard options. They are distinguished by inflated side bumpers and relatively wide aisles. The task of narrow and high beds is to protect the sown carrots from weeds and winds in the most reliable way. In addition, purely visually, such a bed looks just perfect.
To equip a narrow bed you will need:
- two containers that will be used for mixing fertilizers;
- narrow rake (no more than 30 centimeters wide in the area of the working part);
- wooden pegs;
- hoe;
- shovel;
- wooden boards for the manufacture of sides.
The algorithm of actions in this case will be approximately as follows:
- Mark the beds and mark their borders with pegs. The optimal width of the bed will be no more than 45-50 centimeters, the length can be any (usually gardeners choose in the range from 3 to 9 meters);
- Make wide enough (about 1 meter) passages between the beds;
- Pin wooden boards around the perimeter. The height of the resulting sides should be 10 centimeters, and the width - 5 centimeters;
- Cover the paths between the beds with gravel or thoroughly compact in such a way as to eliminate the likelihood of weed growth and the appearance of moles.
Important! It will be best to place a narrow bed in the direction from the east to the west. This will enable the carrots to receive the required amount of sunlight in a constant mode.
The competent use of narrow beds allows you to get a much larger yield (about twice) than using standard planting methods.
Storing carrots
In order for the carrots to lie all winter, you need not only to choose a suitable variety, but also to properly organize the collection and storage of the crop. A month before harvesting, root crops stop watering, and a dry, warm day is chosen for the process itself.
If the autumn is dry, the carrots can be in the ground until the very cold weather, but in rainy weather it is better to remove it as soon as possible so that it does not rot.
Root crops are carefully dug in with a pitchfork, dried in the shade, shaken off the ground and cut off their tops, leaving just a couple of millimeters. A storage facility with a stable temperature of 0-2 ° C and high humidity is suitable for carrots.
The collected roots are placed in layers in boxes, sprinkled with sand or sawdust so that they do not touch, or stored in bags. Remember that at the slightest increase in temperature, carrots will begin to germinate, so periodically inspect your stocks and remove those fruits that can no longer be stored.
- How to store beets and carrots correctly?
We will tell you how to keep carrots and beets at home.
What secrets of growing sweet and large carrots do you have?
The perfect shelter for the winter
Garden strawberries, in the presence of abundant snow cover, tolerate frosts well, however, cold winters with little snow can destroy the plants. To avoid such an outcome, do not forget to insulate the strawberry beds in the fall after a stable sub-zero temperature has been established. Previously, you should not do this, small frosts will be beneficial.
The list of materials that can be used for shelter is quite extensive, but each has its own advantages and disadvantages:
- Leaves, hay, straw are the most accessible materials, but they are caked, in the spring they are rather difficult to separate from the plants, the bushes under them can grow out, and mice often hibernate in the straw, damaging the strawberry plantings.
- Pine needles, spruce branches are the best choice for shelter, it has good air permeability, which excludes damping out, but at the same time retains heat well.
- Agrofibre - protects crops well from freezing, but it must be pulled over pre-installed arcs (the so-called air-dry shelter) so that the material does not come into contact with the plants, otherwise they will freeze even more than in the open air.
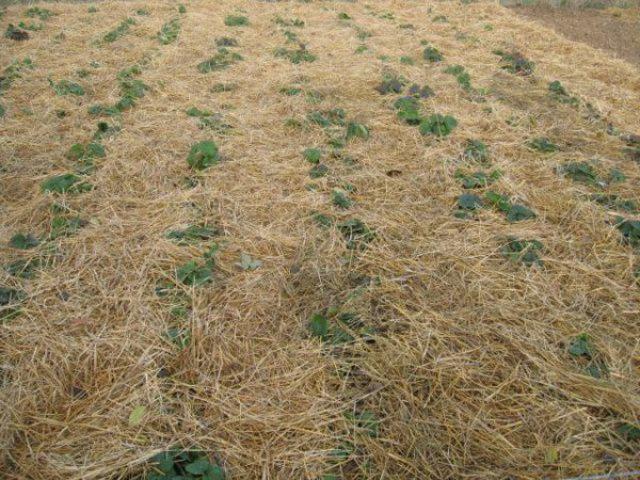

Shelter strawberries for the winter with straw
In regions with little snowy winters, pay attention not only to plants, but also aisles, mulch them with leaves, straw, grass, and so on. This will help protect the surface of the strawberry root system, because the soil will dry out less, freeze and crack.
The secret of tasty and healthy carrots in your hands
So, in order to keep a stock of tasty and healthy carrots in your basement in winter, you must adhere to simple rules for preparing the soil for planting in autumn and spring, and also properly care for the future gorgeous harvest:
- prepare the soil twice a year - in the fall, carefully dig up the soil, applying the necessary fertilizers, depending on the composition of the soil. In spring, loosen and fertilize before planting.
- prepare the seeds by soaking them with water a day before planting.
- plant the seeds correctly, avoiding excessive moisture in the beds or cold.
- thin out the seedlings, keep a sufficient distance between the growing root crops.
- water or dry the area where the carrot grows in time. Remember, she loves warmth and sun!
We hope these tips will help you grow an excellent harvest of tasty and, most importantly, very healthy carrots that will supply you with vitamins and minerals throughout the winter!

