Why prepare tubers for planting
Indeed, why? After all, it is enough to put the tuber in the ground, and then the natural reaction of the seed will follow and the sprouts will break through to the light, but this will happen much later than with prepared potatoes.
- The preparatory stage starts biological processes in the tubers, due to which sprouts are formed on the seed material and the root system is born. Seedlings from such planting material will be friendly, even, strong and early.
- Also, during the preparation period, the gardener will have the opportunity to identify and reject tubers with putrefactive phenomena, with thin sprouts that will not give good shoots.
The prepared seed material will provide 100% germination, because even in a seemingly good tuber, the eyes may not wake up due to a violation of storage conditions or some kind of disease. This will save the gardener from the appearance of bald spots in the area with potatoes.

Combination of methods
Early shoots
Many vegetable growers combine germination methods, choosing the most effective ones, based on many years of experience, adding new technology to the process.
The use of several methods in turn allows you to grow early potatoes and get a quickly tasty product.
Knowing the weather conditions in your area, it is better to start work 40 days before the landing time.
For this:
- keep the seeds for a month in a bright, warm room according to the rules of germination with the help of light, until strong shoots appear
- vegetables are immediately transferred to a moist substance using the instructions for the moisturized method
- monitor the temperature in the room, constantly adjust it, until the formation of roots around the appendix
- sprinkle on the contents of the nutrient boxes
- transfer boxes to a cool building or lower the temperature in the same building to harden the seeds and prevent overgrowth of processes
They combine the methods of preparing the seed potato fund in special cases, when the owner noticed in time that the quality of vegetables had decreased due to early germination and their etiolation.
You should not destroy such formations, it is better to use the pinching method, move it to a bright room and finish with a humid environment.
Any method is good in its own way, the owner chooses the most acceptable for him, but the work will not be wasted - the seeds prepared on time are able to repay with a high yield.
How and when to plant potatoes correctly - on video:
When the preparatory work on the planting material begins
It takes about 30 days to complete the full preparation of potato tubers. Depending on the time of planting on the site, the time for extracting the tubers from the cellar is calculated. For the Moscow region and central Russia - this is the 1st decade of April, for Siberia and the Urals - about the 15-20th of April, for the southern regions - the month of March.
For those who did not manage to get the seed material from the cellar in time, there are "express methods" that will help to some extent prepare the tubers for planting in open ground.
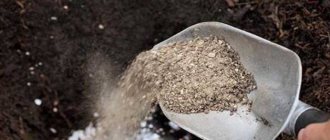
Ash treatment
Ash treatment is another way to prepare tubers before planting.Ash contributes to the accumulation of starch in potatoes, so many gardeners and summer residents fertilize the plot with it. Some of them moisten the seeds and pump them in this fertilizer. With this method you can get good shoots and increase the yield.
It is impossible and not necessary to use all of the listed methods of preparing potato seeds for planting, in most cases a few of them are enough. Pre-planting work must correspond to the specific conditions of the individual site. How to prepare potatoes for planting, the gardener must decide and try for himself. Only then will the homestead please the owner with a good harvest of potatoes.
Different ways to prepare potatoes for planting
Every gardener already has his own proven method of preparing potatoes for planting, and most often this is germination... In addition, tubers can be wither and warm up... But first things first.
Seed germination options.
- Dry germination in the light.
- Wet germination in the dark.
- Combined germination.
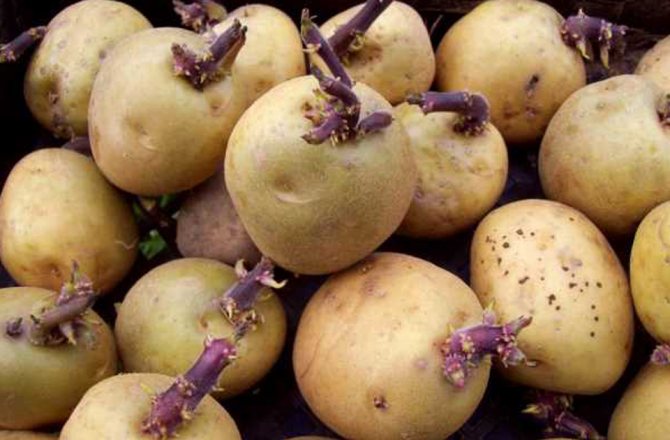
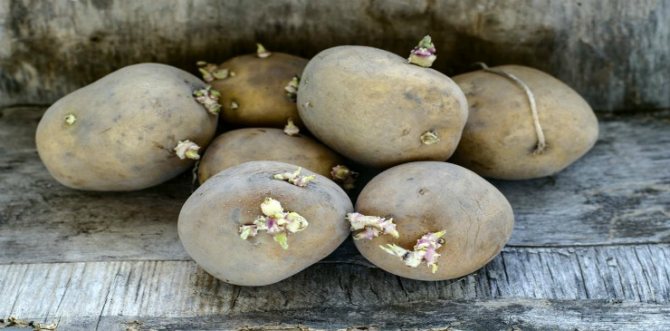
Dry germination in the light
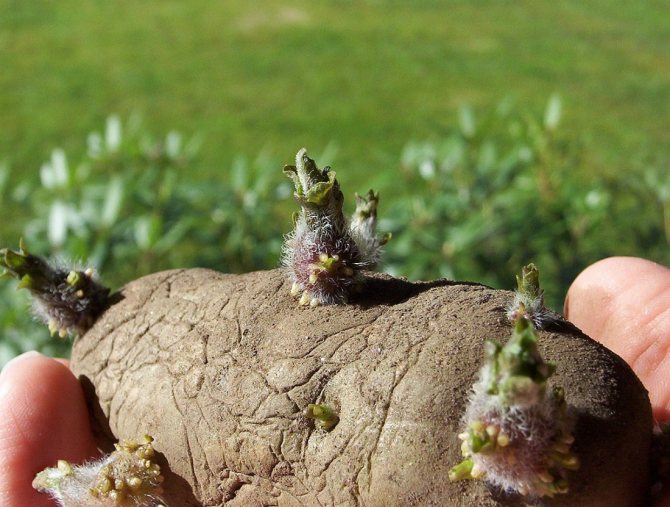
For germination of tubers in the light, it is necessary to provide seed material with 2 important conditions: the presence of diffused light and compliance with the temperature regime. The role of light plays a very important role.
- Under its influence, strong shoots are formed with signs of the formation of roots and leaves.
- In the light, solanine is formed in the tubers, as a result of which they turn green. This is a poison and such root crops cannot be eaten, but for planting material it is very useful. Firstly, the tubers are not damaged by rodents (they also read about the dangers of solanine), and secondly, green potatoes acquire resistance to diseases.
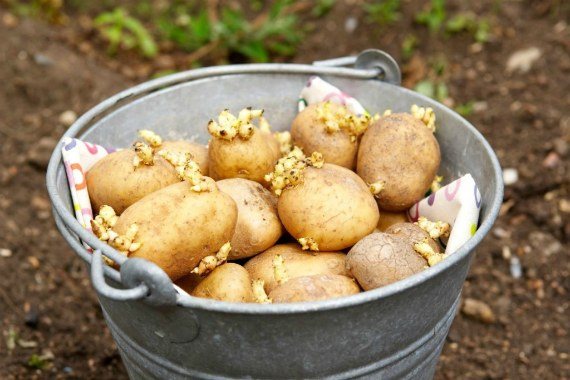
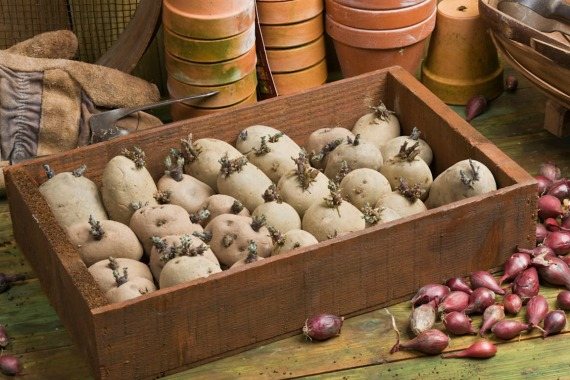
The planting material is laid out in 1-2 layers on a flat surface, it can be a window sill, a table or just a floor. If there is not enough space, then you can arrange the tubers in wooden and plastic trellis boxes and place them one on top of the other. With this option, the boxes will have to be constantly interchanged in order to ensure uniform illumination.
In the first 10-14 days, the planting material is kept at a temperature of 18-20 ° C, this will contribute to the awakening of the sleeping eyes. Then the temperature indicator is reduced to 10-14⁰С - so the sprouts will be stocky, strong and will give even and strong shoots in the future.
On a note. The average duration of the germination period of tubers in the light is 30 days.
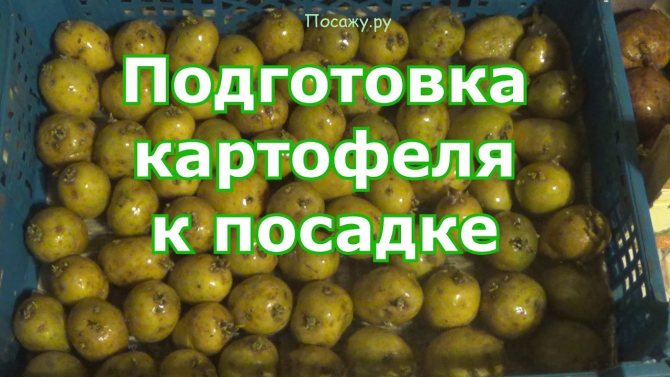
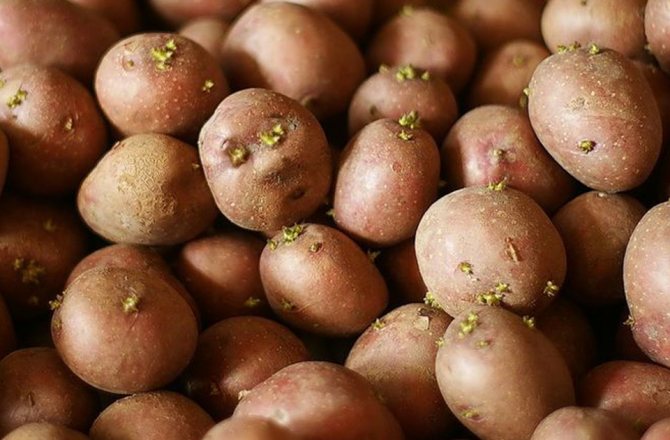
Wet germination in the dark
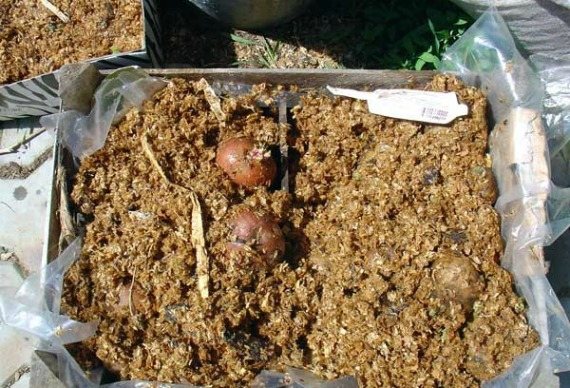
Tubers, as in the previous case, are placed in baskets or boxes and sprinkled with moist humus, peat, sawdust. The container is placed in a dark room with a temperature of 12-15⁰С. This option implies constant control over the moisture level of the substrate and its timely moistening.
Benefits of wet germination are as follows:
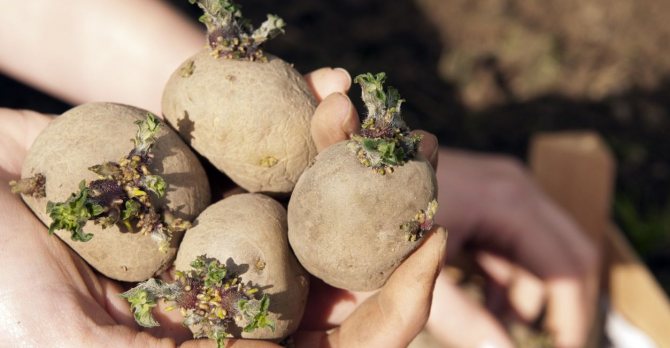
- The tuber forms not only strong shoots, but also develops the root system.
- The planting material loses less moisture, and, consequently, nutrients.
- Germination time is reduced to 15-20 days.
Disadvantage This method can be considered a factor such as the impossibility of planting sprouted tubers at the scheduled time (the weather has deteriorated sharply, or torrential rains have charged). This can lead to interlacing of the root system and upper shoots. It is necessary to immediately reduce the temperature of the content in order to inhibit the development and growth of the shoots.
Combined germination
It is not uncommon for gardeners to combine the above two methods to get the most out of their seed potatoes.
The first three weeks of pre-planting treatment, the tubers are kept in the light, observing all the necessary conditions. Then the tubers are placed in a suitable container and sprinkled with wet sawdust (humus, peat) and harvested until roots form at the base of the sprouts.
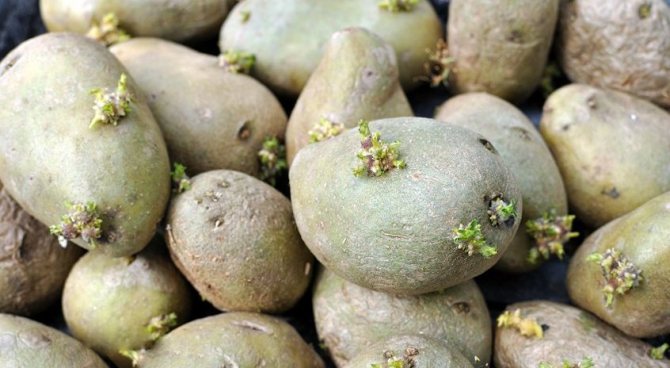
Wilting

It will take 1-2 weeks to wither seed potatoes, and this method is used when, for some reason, it was not possible to extract the tubers from the cellar on time. The planting material is laid out in one layer in a warm room with a temperature of 16 ° C and above.
The presence of light is not a prerequisite, but its effect has a beneficial effect on the health of the seed and increases resistance to diseases.
Tubers in the heat lose some of the moisture (as they say, withers), but at the same time enzymes are formed that accelerate the awakening of the eyes and the appearance of sprouts.
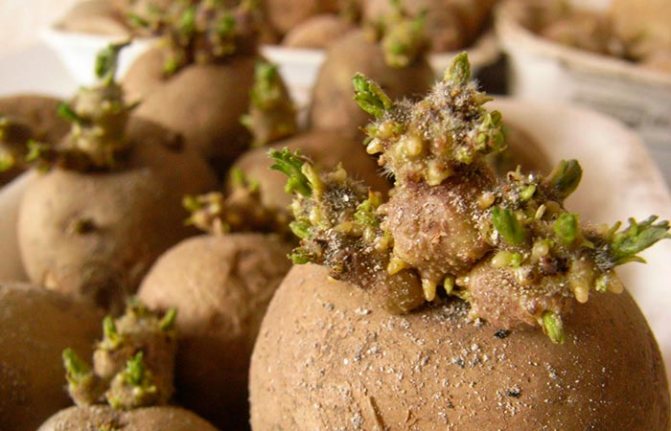
Warming up
In a situation where there is very little time left before planting, and the seed potatoes have just been taken out of the vegetable pit or cellar, they resort to the heating method. If you plant cold tubers in the ground, then the seedlings will have to wait for a long time.
To help the tubers wake up the dormant sprout rudiments, it is placed in a warm place, but this is done gradually. First, for 1-2 days they are kept at a temperature of 10-15⁰С, and only then they increase the indicators to 20-25⁰С.


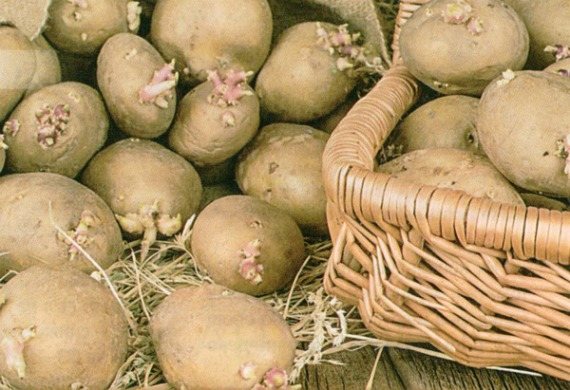
Sorting and selection of tubers before germination
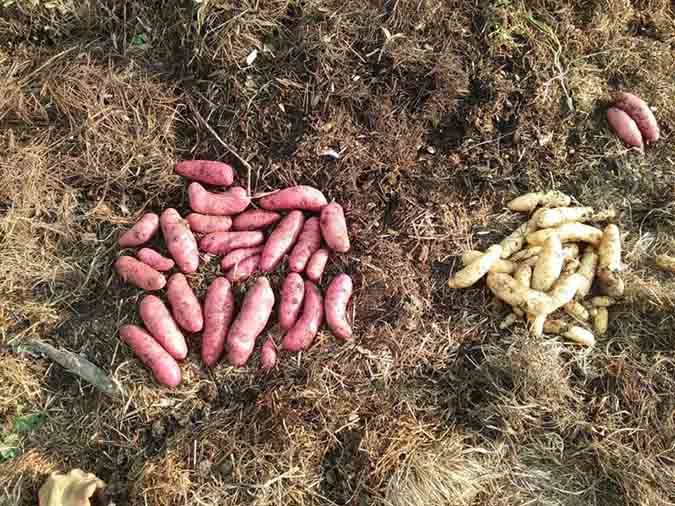
If you select tubers for seeds from the previous year's harvest, then it is better to do this in the fall immediately after harvesting the potatoes. Then it is better to sort the tubers by size.
You can purchase seeds from specialized stores. These seed tubers must be certified, i.e. not infested with any diseases or pests.
Checked and certified potato tubers still need to be sorted out again to ensure the quality and prepare them for planting in the ground. There should be no putrefactive spots or damage on the tubers.
Signs of illness:
- spots;
- protruding areas;
- cracks;
- various growths.
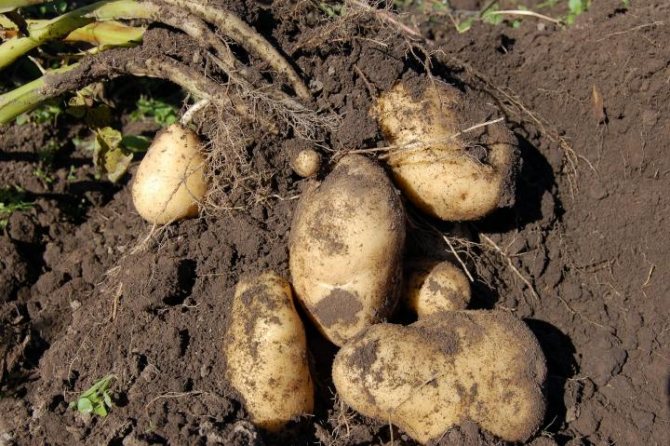
Not suitable for seeds and tubers that are irregular in shape. Such roots are considered degenerate. Wrinkled potatoes are formed if they were stored incorrectly, without observing the desired temperature or low humidity.
Signs of damage for rejection:
- there is a nematode infection of the ground part of the plant;
- the tuber has a strange and unpleasant odor;
- noticed a scab on the tubers.
The breakage of sprouts on tubers can also lead to a decrease in yield. Potatoes damaged by sharp objects are suitable for planting. You just need to treat the cuts with a fungicide solution.
The potatoes are also sorted by size.
Three groups can be conventionally distinguished:
- large tubers (more than 80 gr.);
- medium tubers (50 to 80 gr.);
- small tubers (30-50 gr.).
Medium tubers are used as planting material. By eye, they should be no larger than an average chicken egg. Large tubers are also suitable for planting. They need to be cut into slices, while at least a couple of eyes remain on any of them.
If the breeding material is generally of good quality, some small and large potatoes can be added. However, they should be planted separately, as bushes can grow irregularly, and more viable bushes will interfere with the development of others.
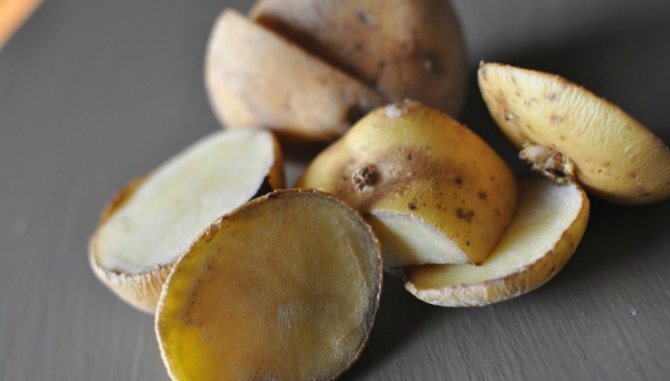
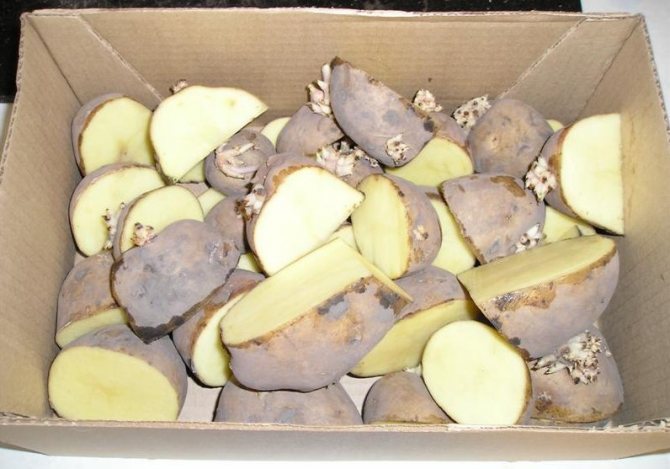
Large potatoes, if they are of excellent quality, can be cut up to increase the amount of seed.
This must be done correctly:
- Divide the tuber so that each piece has strong healthy sprouts with eyes.
- Eyes should be on each part of the potato. Two eyes are enough on one piece, no more, because several stems will grow from each. If there are many of them, they will compete for space in the sun and nutrients, which will not allow a strong bush to develop.
- Having cut the tuber, you need to process the cuts with ash and let it dry for a day.
Photo gallery
Potato diseases.
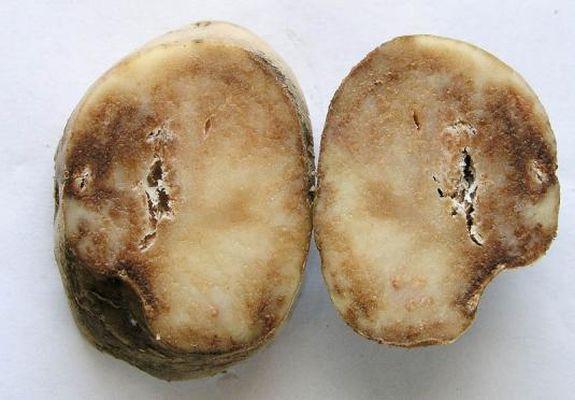
Late blight
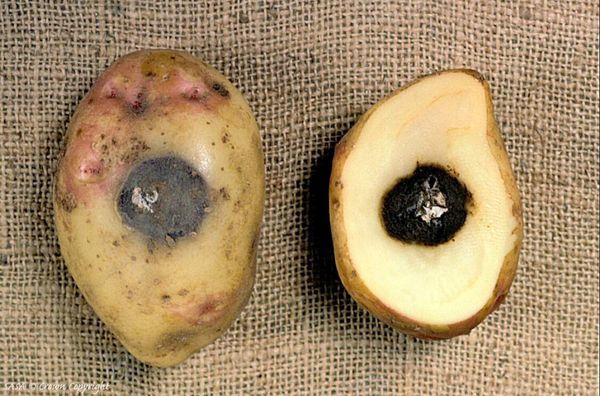
Fungus
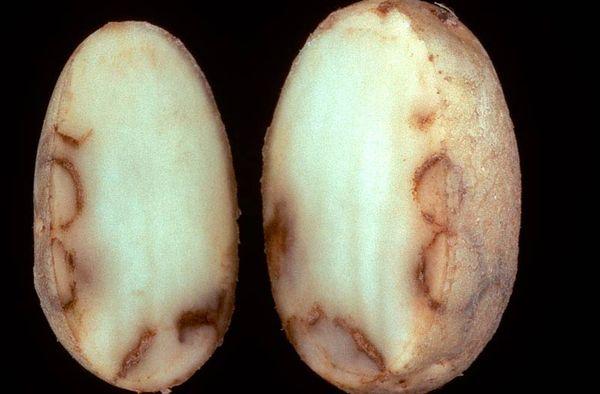
Necrosis
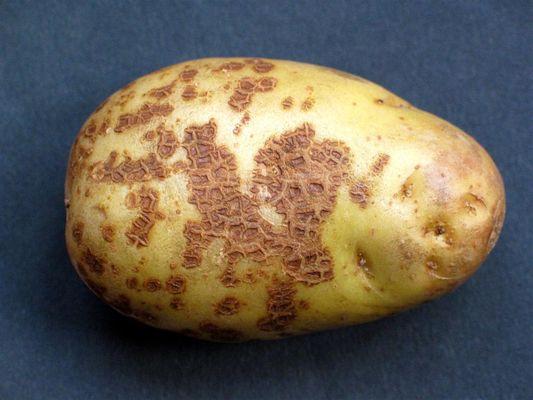
Scab
How to select good potato tubers for planting
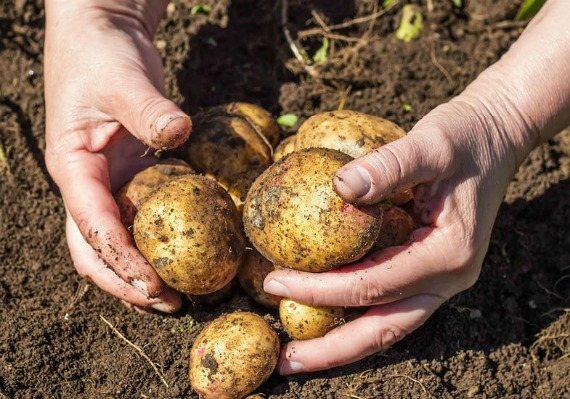
Of course, before proceeding with a particular procedure for preparing seed potatoes, it is necessary to sort the tubers in order to choose worthy specimens for planting.
Typically, seed potatoes are taken immediately after harvest and, if possible, greened. In the spring, they are additionally examined for damage and the formation of putrefaction.
The optimal size is considered to be tubers the size of a chicken egg, by weight it is approximately 60 g. But it is allowed to plant tubers of a smaller size, 40-60 g, and larger ones, over 100 g. It is recommended to plant small planting material on a separate bed so that the seedlings are even, which facilitates the care and processing of plants.
Large potatoes are cut in half, along the root crop, so that each half has at least 2-3 eyes. Potatoes are cut a day before planting, the cuts are treated with wood ash and left in the air to dry slightly. These measures are aimed at preventing the entry of pathogenic microbes into the seed, which can lead to disease of the seedlings or their death. This is especially true in rainy weather.
On a note. The cut tuber is planted with the cut side to the soil.
Fertilizing the soil before planting
In practice, it has been noticed that in order to get tasty, boiled, crumbly potatoes, you need the soil to be light, sandy and not too "greasy". Fertilize it with humus, and it is best to introduce it into the soil not before planting potatoes, but under the previous crop. And when planting, pour a handful of wood ash or bone meal into the hole. Many gardeners claim that fishmeal also gives very good results. Use this advice if you can.
If the soil in your garden is clayey, then lime will make it easier, but I advise you to add it also under the culture preceding the potato. Peat together with manure will also make lighter clay soil.
How and how to process potato tubers before planting
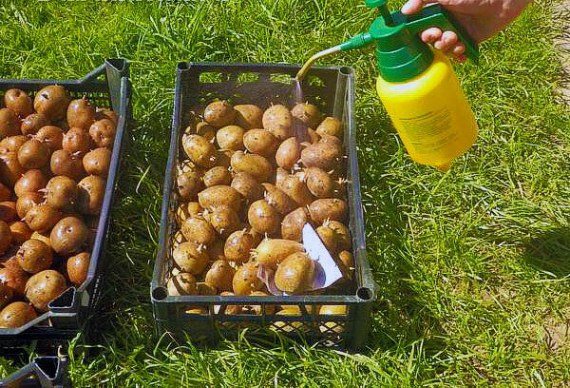
The final and very important stage of pre-planting potato processing is its protection from diseases and pests. The event is held shortly before the start of work (2-3 hours) or a day before it.
In most cases, this depends on the workload of the gardener, but it is undesirable to neglect the procedure, since young potato stems are unable to withstand the fallen misfortune, and it often happens that shoots appear along with the Colorado potato beetle on young leaves.
Treatment of seed potatoes against the Colorado potato beetle and wireworm
The Colorado potato beetle and wireworm are the main pests of potatoes that can cause irreparable damage to the quality of the crop or even leave the summer resident without it.
Industrial insecticides are used against these pests, such as Taboo and Prestige, with strict adherence to the standards from the attached instructions. When working, it is necessary to observe safety measures and use rubber gloves and a respirator.
Such insecticides are able to protect potato tubers from wireworms throughout the growing season. As for the Colorado potato beetle, the first treatment is enough for 1 month of development and growth of potato shoots. During this time, the seedlings will get stronger, but when new pests appear, re-processing of the green mass will be required.
A super way to protect potatoes from wireworm, bear and Colorado potato beetle - video
Disease protection
You can resist the onset of the disease on potatoes with the help Fitosporin. This biological agent will protect the tubers from rot and scab after it is planted, and the aboveground part from phytophthora and powdery mildew.
The processing of tubers can be carried out immediately after the selection of seed material, this will stimulate the early emergence of sprouts, or directly on the day of planting, 1-2 hours before it.
All information for use is indicated in detail on the packaging with the drug.
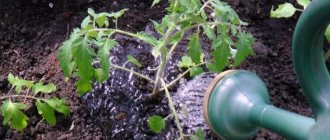
To stimulate growth
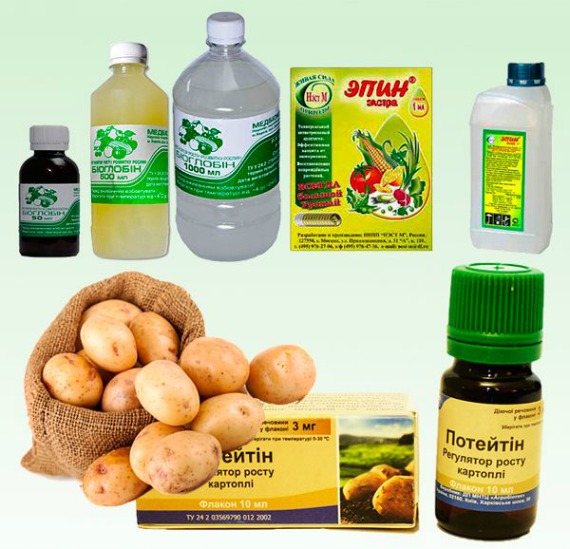
Under the influence of certain natural factors, the seed material awakens to development. But external conditions do not always meet the necessary requirements, and in this case it is quite appropriate to use growth stimulants, the action of which is aimed at activating life processes.
Epin increases stress resistance and plant immunity to environmental influences and accelerates growth processes, as a result of which seedlings are friendly and early.
The working solution is prepared from 1 ml of the product and 250 ml of water. The resulting composition is treated with potato tubers and allowed to dry, after which they are planted.
After the emergence of mass shoots, the treatment is repeated along the leaf, consuming 1 ampoule (1 ml) for 5 liters of water.
Zircon resists fungal and bacterial invasion and helps the plant to easily cope with fusarium, scab, late blight. If 20 drops of the drug are dissolved in 1 liter of water, then this solution should be enough to process about 100 tubers.
For further use on the sheet, the concentration is reduced and 13 drops are consumed per bucket of water.
Potato predecessors
Today, every gardener is familiar with the basic provisions of crop rotation: it is highly discouraged to cultivate vegetable and berry crops in the same place every year. Plants grown on the same plot of land lead to depletion of the soil, the growth of pests in it and the development of pathogens of those diseases that are characteristic of this particular plant.
If you follow the rules of crop rotation for a particular crop, then you can guarantee an increase in yield with a minimum use of mineral fertilizers, only at the expense of organic matter.
Crop rotation rules for potatoes mean planning: before and after which crops to plant potatoes.
Only compliance with these rules reduces the indicators for the site:
- Pest infestation (Colorado potato beetle, nematode, wireworm);
- Diseases (late blight, black scab, cancer).
The best predecessors of potatoes: legumes, green manures, cucumbers, pumpkin, zucchini, squash, onions, garlic.
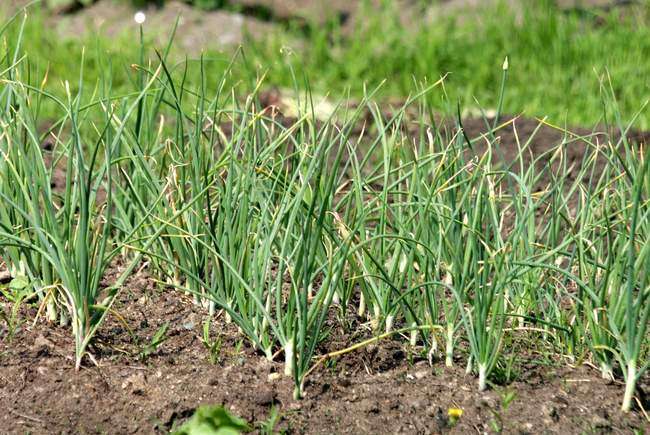
Onions are one of the best precursors to potatoes
Worst predecessors of potatoes: tomato, pepper, eggplant, sunflower, cabbage.
Recommended: Before planting potatoes, to saturate the soil with phosphorus and nitrogen, which potatoes VERY need, plant green manure-legumes: peas, lupines, vetch. This should be done immediately after the snow melts, so that useful mulch has formed by the time the potatoes are planted.
Recommended: After harvesting potatoes, sow green manure - oats, which is a crop with excellent protection against fungus and a natural disinfectant. Mow oats to the first frost, dig up the area to a shallow depth. By spring, the organic matter left over from oats will become an excellent natural fertilizer.
Processing potatoes in spring with folk remedies
Gardeners who do not want to use chemistry on their plots can resort to folk methods of protecting tubers and shoots from unfavorable external factors, diseases and pests.
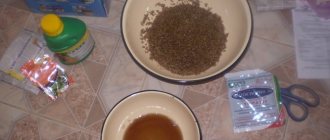
Fertilizer Blend for Seed Potatoes
This procedure is carried out before germination of tubers.
Structure:
- 10 liters of hot (about 80⁰C) water;
- 1 gram of potassium permanganate;
- 5 grams of copper sulfate;
- 10 grams of boric acid;
- 40 grams of urea;
- 60 grams of superphosphate.
All components are mixed in an enamel bowl and cooled to room temperature. Then the seed potatoes intended for germination are immersed in the solution.
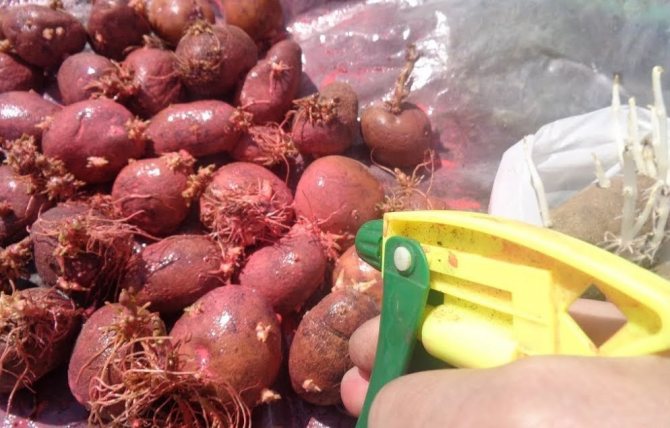
Processing tubers with potassium permanganate
Sprouted potatoes are placed in a container and poured with potassium permanganate solution for half an hour.The working composition is prepared from 10 liters of water and 10 g of the product.
To enhance the effect, wet tubers are rolled in ash and dried.
Processing potatoes with wood ash
This method, in addition to the disinfecting effect, saturates the potato tubers with potassium.
- The working solution is prepared from 1 kg of ash and a bucket (10 l) of water.
- Seed material, laid in a net or basket, is dipped in an ash solution and then dried.
- Dusting the holes (2 tablespoons) before planting potatoes will help reduce labor costs.
Disinfection with copper sulfate
You will need:
- 10 liters of water;
- 1 matchbox of copper sulfate;
- 1 g of potassium permanganate.
The solution is prepared in a glass or enamel bowl, where the tubers are dipped for 1-2 minutes. If there is no suitable container of appropriate size, you can spray by spreading the seed on a plastic wrap.
After a day or two, you can carry out the treatment with growth stimulants, which were mentioned above.
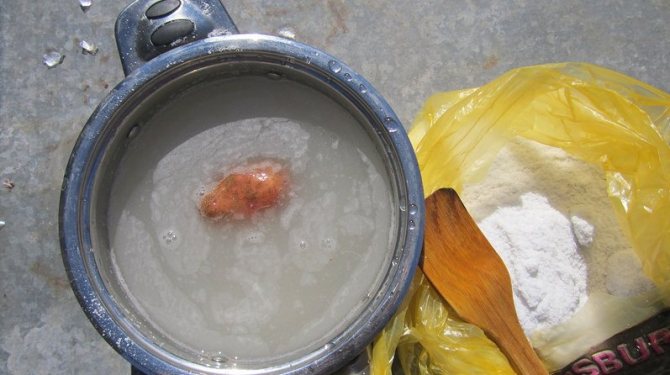
Placing vegetables in a moist substance
Germination in wet sawdust
With less energy consumption, vegetables are prepared for planting using a moisturizing method.
For this, the composition of sawdust with peat is suitable.
Seed vegetables are pre-packed in a container with a bottom covered with polyethylene.
This film does not have to be solid, liquid will be removed through the slots, but not all.
The purpose of the method is, first of all, to create a moist environment, in which potatoes will be located.
For the composition, substances are used:
- peat
- humus
- chaff
- sawdust
They create the necessary conditions for good germination, they include:
- normal heating of the room within the temperature range of 12 degrees. up to 25 deg.
- sufficient air circulation
- permissible ambient humidity
A decrease in the set temperature regime within a small range and for a short time will not become harmful to the seeds.
You can choose any suitable container for storing vegetables for the preparatory time, often vegetable growers simply carry out heaps on the floor surface. The floor is pre-heated and covered with loose material to a height of 4 cm.
It is necessary to moisten the selected components with copper sulfate diluted in a liter of water from 2 g. Seeds are evenly placed on the pad with a centimeter distance between them. Again, sprinkle the prepared wet mixture to a height of 3 cm, perform this sequence until the container is completely filled. The top should also be dusted.
When distributing seeds on the floor, do not make more than three layers of potato. This layering is always wet, but not wet.
Such conditions are created by periodically spraying the structure with a mixture consisting of:
- diluted superphosphate in the amount of 60 g
- potassium salts - 30 g
- water - 10 l
Frequently asked Questions
It would seem, what could be easier than planting potatoes? I threw the tuber into the hole, sprinkled it with earth and wait for the sprouts. In fact, everything turns out to be much more complicated: either the tubers did not wake up, then the sprouts became unnecessarily long and all these features raise a lot of questions.
If the potatoes have not sprouted, can they be planted
Why do you sprout potatoes? First of all, to determine the viability of the tuber and get an early harvest.
When planting non-germinated, and even unheated planting material, it will take at least 2-3 weeks for the emergence of seedlings. During this time, weeds will come into force, and weeding will be complicated by the fact that there is a high probability of damage to potato seedlings.
Of course, if for some reason you did not have enough seed, then you can plant unprepared potatoes. In this case, it will pass all the necessary stages in the ground: it will warm up, come out of dormancy, sprout, and only then the shoots will break through into the light.This delays the ripening of the crop and does not give a 100% guarantee of germination of unsprouted potatoes.
But in any case, the last word is for the gardener. It is up to him to decide whether he will prepare the seed for planting in order to increase the amount of the crop or free himself from labor costs and collect how much it will grow.
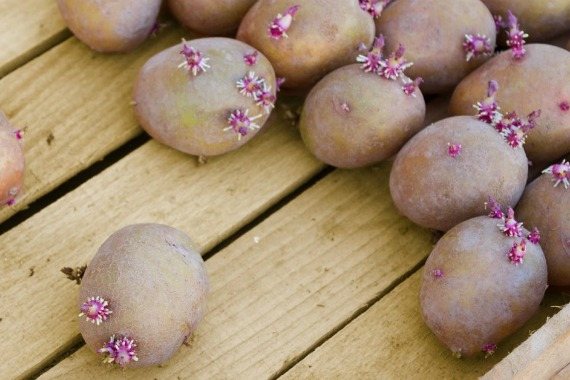
What to do if potato tubers sprouted ahead of time
If seed potatoes began to germinate in storage ahead of time, it is necessary to lower the temperature of the content to + 1-2⁰С.
Some gardeners advise breaking off the thin white sprouts that appear on potatoes in the dark. By the time it is time to get the tubers out of the cellar and prepare the seeds for planting, sprouts will begin to appear on them again.
However, it should be remembered that the potato has already used up some of the nutrients for the formation of the first shoots and this will affect the amount of the future harvest.
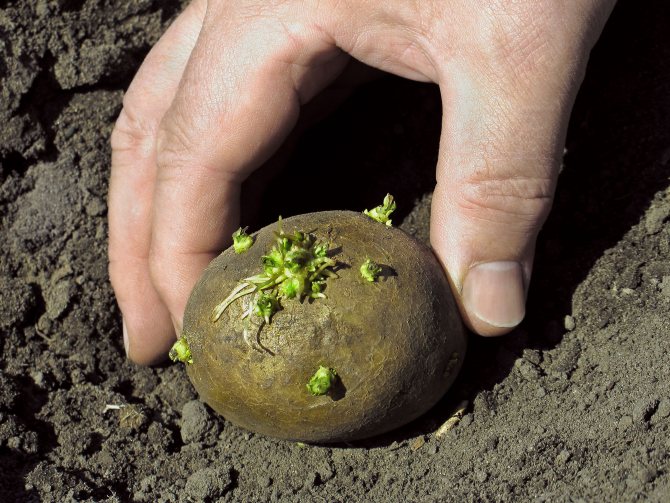
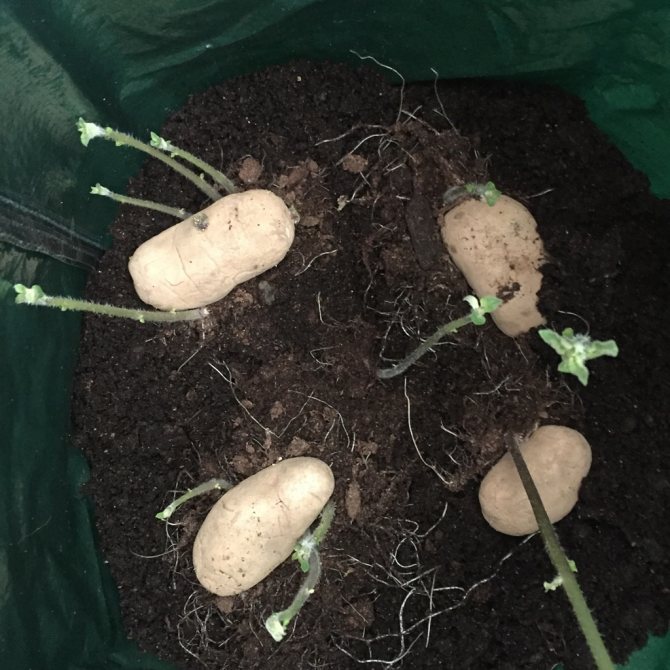
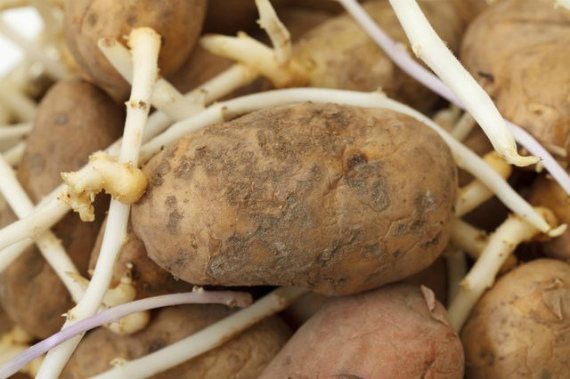
Is it possible to plant potatoes with long white shoots
Yes, you can. A little patience and careful handling of the seed will help the gardener use seemingly unusable seed.
For planting, dig a hole wider than usual. Long shoots are carefully wrapped around the tuber, placed in a hole and sprinkled with earth. The yield from planting such potatoes will be no lower.
How to increase seed material
We already know that the optimal size for a potato is a tuber the size of a hen's egg. But what if last year's harvest was a success and, in fact, all tubers are large?
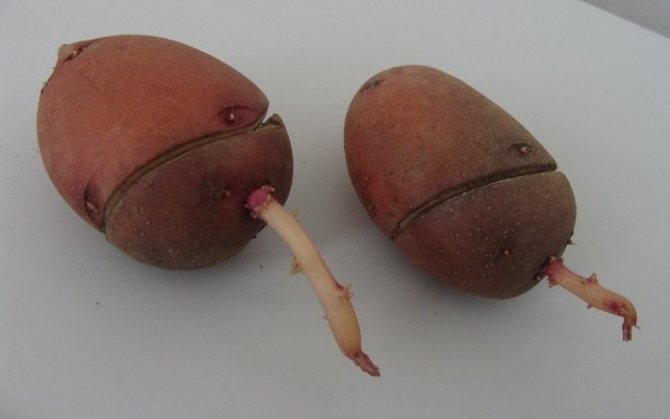
Tuber division
A fairly common method of increasing planting material is dividing the tuber into 2-3 parts. In this case, it is necessary to cut the potato lengthwise and make sure that there are at least 2-3 eyes on each slice.
The work is carried out one day before the scheduled landing. I process the sections with ash to exclude infection. After each potato, the cutting tool is dipped in a strong manganese solution.
The seed material prepared in this way is left in the air so that the surface of the slices is slightly windy, which will also serve as protection against infection. This is especially true in wet weather.
Planting material from sprouts
Growing potatoes from sprouts is a tuberless technology, which in most cases is used to breed elite and expensive varieties. Its essence is as follows.
- Preparation for receiving seedlings begins one and a half months before planting in open ground.
- The best tubers are laid out in boxes, on the bottom of which wet sawdust or peat are poured, in 1-2 layers, each of which is again sprinkled with a wet substrate.
- Germination is carried out in warmth and in diffused light with regular moisture.
- When the sprouts reach 5-10 cm in size and a small lobe of roots is formed, you can start planting on the site.
- The soil should be fertile and warm.
- The sprouts are separated from the potato by gentle twisting.
- On the bed, grooves are cut with row spacing of 60 cm and seedlings are planted, observing an interval of 20 cm.
Potatoes grown from sprouts require careful maintenance as they are does not have a mother tuber to feed it. Therefore, the plantings are regularly watered, fed, loosened and hilled up the soil, fought against weeds and harmful insects.
Soil preparation
All experienced gardeners are engaged in soil preparation before planting potatoes. Presowing work is carried out in the fall and begins with the selection of a site. It should be sunny, protected from drafts.
Further, the following activities are carried out:
- The soil is dug to the depth of the fertile layer, the podzol is not affected.
- Up to 8 kg of organic matter, up to 45 g of superphosphate and up to
20 g of potassium sulfate. These fertilizers are well absorbed by the soil and practically are not washed out of it.
In the spring, the site is loosened with harrows or rakes.When the soil is dry enough, it should be dug up or plowed, but not as deep as in the fall. At the same time, 20 g of ammonium nitrate is applied to 1 m² of the garden.
The author Kharevich Yuri Antonovich in his writings says that it is possible to prepare the soil for planting crops in the spring, but then the yield from each hundred square meters will be 20-35 kg less.
If the winter was with little snow and the soil did not settle down, then there is no need to dig up the plot in the spring. It will be enough to fence the soil and apply mineral fertilizers. Seeds are planted when the soil warms up to 7-9 ° C.
Preparation of sandy areas
Sandy loam and sandy areas are dug up in the spring with the simultaneous application of such fertilizers per 1 m²:
- up to 10 kg of humus;
- about 30 g of ammonium nitrate;
- 40-45 g of superphosphate granules;
- 20-25 g of potassium sulfate.
Author Alexander Ustyuzhanin recommends that the area suffering from excess moisture be drained using deep canals along its perimeter. If the groundwater is too close, canals are arranged in the middle of the site.
Cultivation of peat areas
Peat-boggy soils should be cultivated: groundwater should be diverted using drainage or drainage ditches into a settling tank. After that, peat must be sanding: for each m², add 10 kg of sand, mineral fertilizers (20 g of ammonium nitrate, 40 g of superphosphate and up to 30 g of potassium sulfate) and a bucket of humus.
Gardeners recommend abandoning the cultivation of crops on peat-bog soils. Potatoes grown on peat have the worst taste and contain little starch.