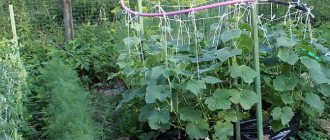
What is it?
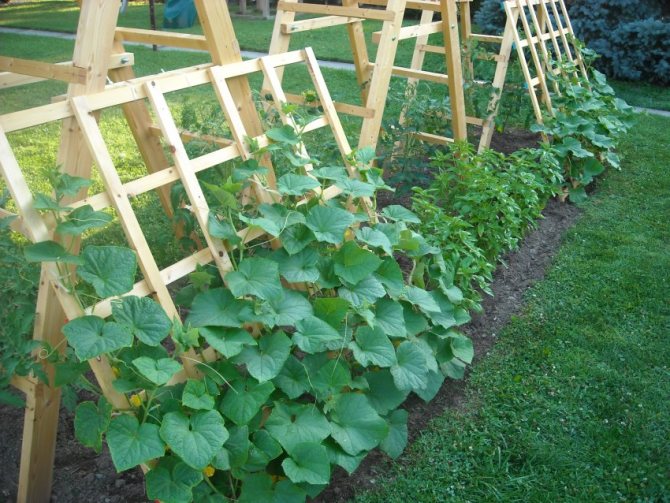
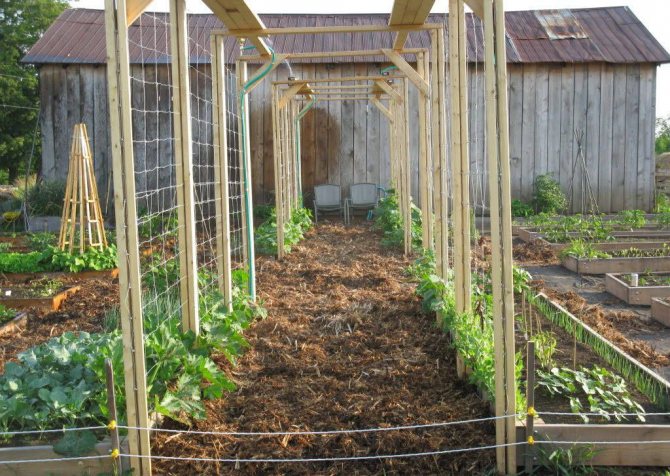
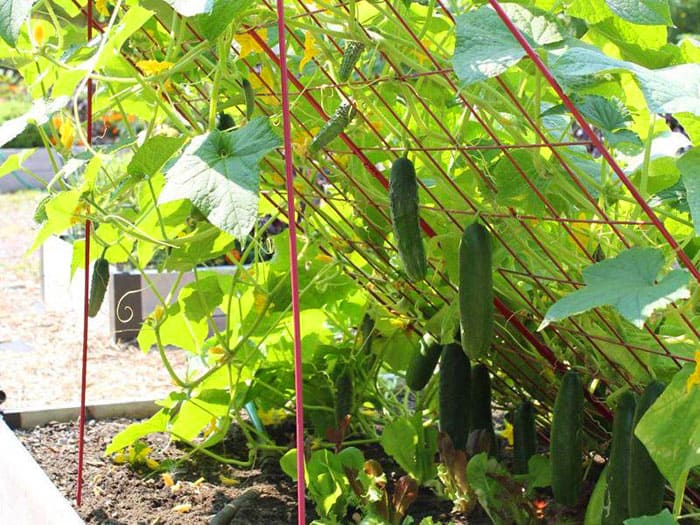
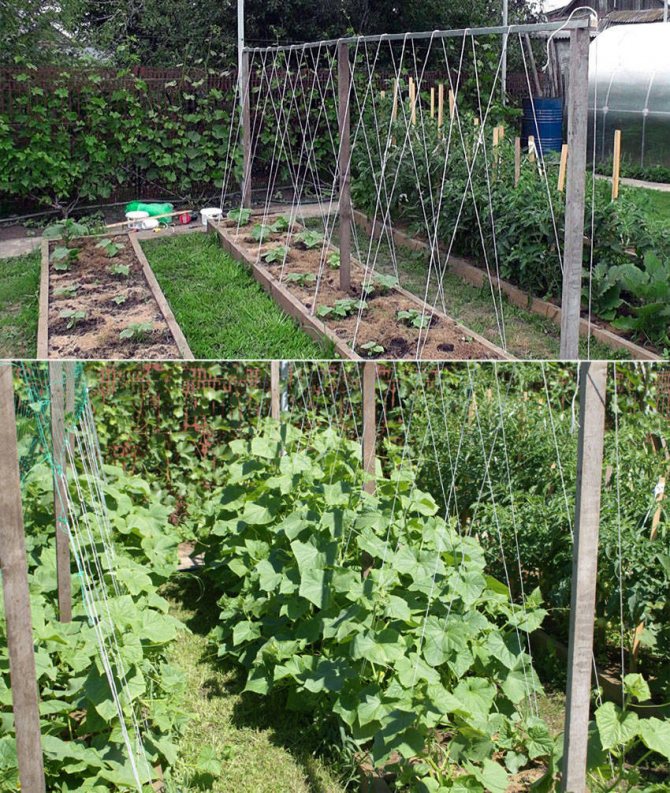
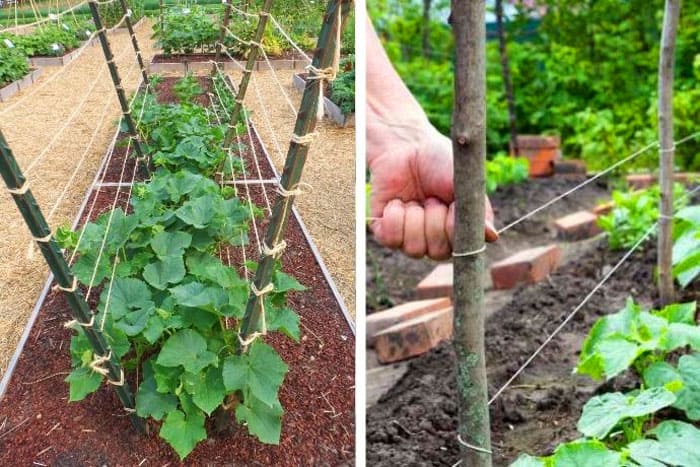
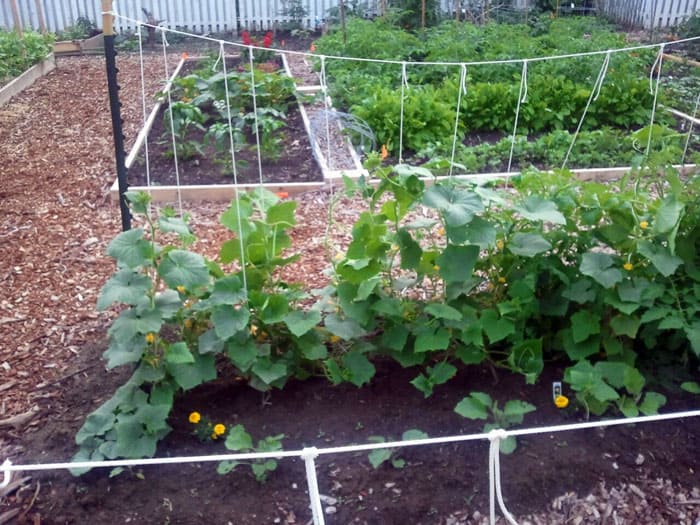
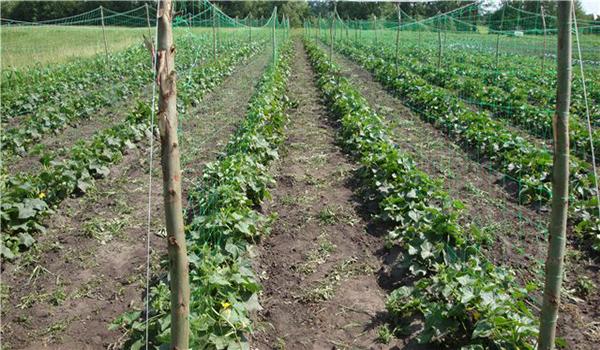
A trellis is a structure erected with metal pillars, a mesh stretched between them, and steel wire. In the process of development, the cucumber vine climbs over the mesh cells, evenly spreading over the entire area. In general terms, the construction looks like this:
- Metal pipes are driven along the bed (can be replaced with wooden pegs).
- In order for the structure to be stable, the pipes are immersed in the ground for at least half a meter. This must be taken into account when determining their total length.
- The height of the structure is determined depending on the selected grade.
- With a large number of beds, the distance between them should not be less than 1.5 meters.
Note! Cucumbers need abundant watering. When growing a large crop, it is advisable to build an automatic irrigation system. This will save you time and effort.
In the absence of a large budget, the construction of trellises is possible with the help of improvised means. The main thing is to observe the general proportions.
How to properly position on the site
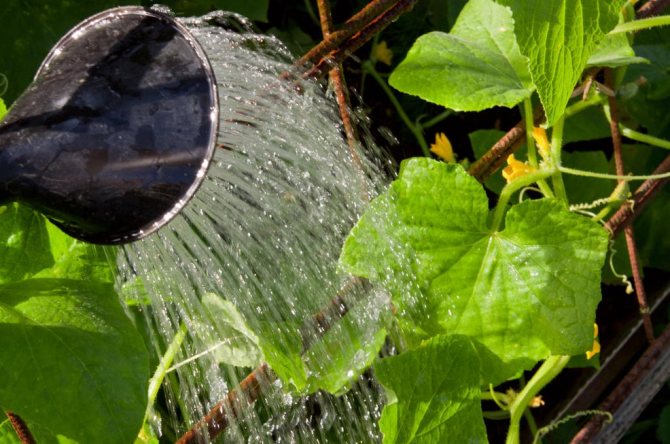
Cucumbers are a moisture-loving culture, so it is advisable to place the beds near a water source. A universal option is to install a drip irrigation system. At the same time, water will be economically consumed, each bush will receive full watering and the liquid will not get on the leaves and stems.
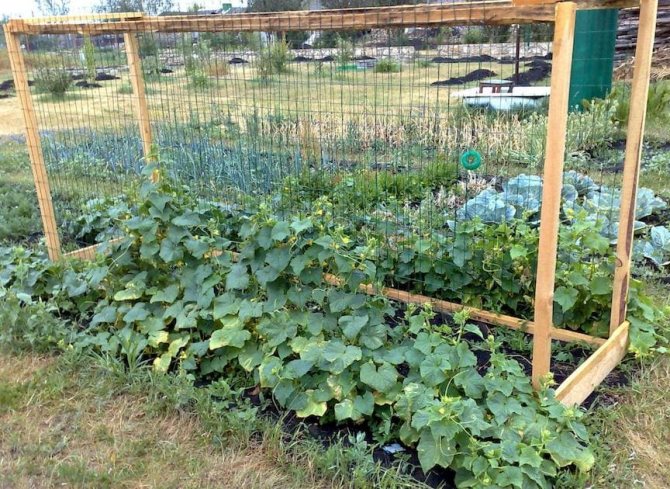
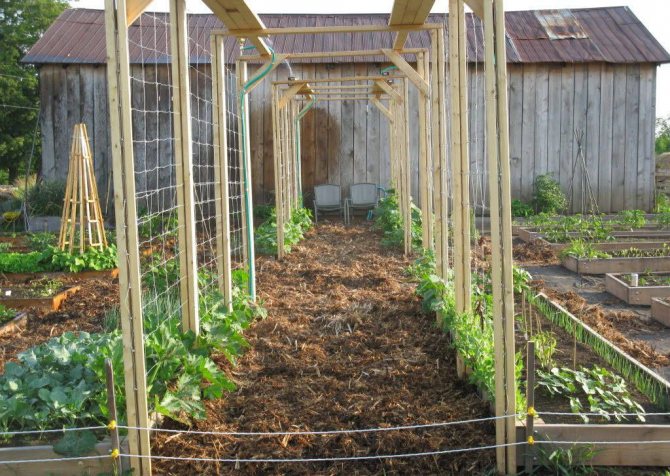
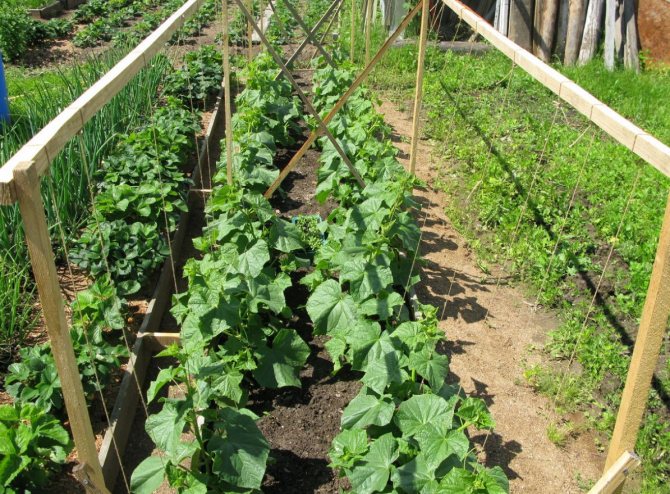
In order for the plants to be illuminated evenly and to receive the same portions of illumination, the tapestry canvases are placed in the east-west direction. For comfortable maintenance of plants, the distance between the beds should be 0.8-0.9 m.If the bushes are planted in two rows, then the distance between the rows should be 0.15-0.2 m.
When growing any vegetables, it is important to follow the rules of crop rotation. It is not recommended to plant cucumbers in one place for more than two seasons in a row. Therefore, it is advisable to install simple structures that will be easy to assemble / disassemble and move to another place.
Advantages and disadvantages of the method
Growing cucumbers on a trellis in the open field, you get the following benefits:
- the fruits do not come into contact with the ground, therefore, they do not deteriorate and are not covered with dirt;
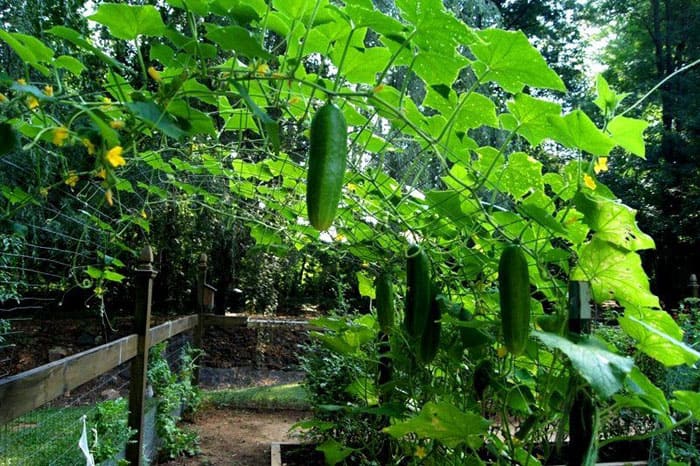
- the development of cucumber vines occurs in a natural way for this culture;
- the crop is easier to care for and more convenient to harvest;
- due to the vertical arrangement of the lashes, pollination is more efficient;
- the green mass does not block the cucumbers from the sun, and they are well ventilated, the wind blows them. This promotes accelerated growth;
- the beds look aesthetically pleasing;
- the surrounding space is saved.
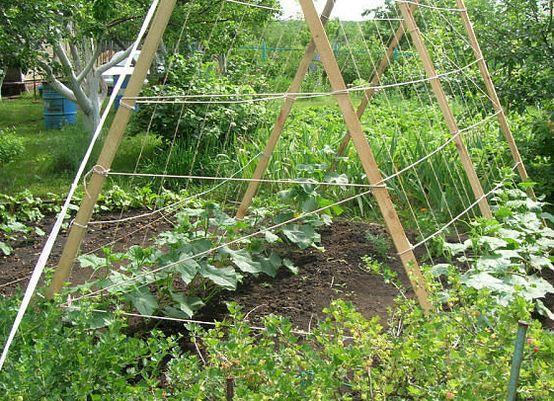

The disadvantages include:
- the construction of a trellis is a laborious process;
- you will have to spend money on a good, reliable design.
The first drawback is eliminated by purchasing tapestries in a specialized store. However, in this case, you will have to spend a lot, which not everyone can afford.
Possible mistakes
The full development of plants can be hindered by the wrong choice of a site for a cucumber garden. Planting plants in the shade or in an area unprotected from the wind greatly reduces the chances of a good harvest.
Another mistake is planting cucumbers in the same area for several years in a row.If the rules of crop rotation are not followed, pests and pathogens characteristic of pumpkin plants accumulate in the soil. Therefore, when replanting, the risk of contamination of the vegetable increases.
For the installation of trellises on unprotected beds, you should not use a metal mesh. It gets very hot when exposed to sunlight. Because of this, burns are possible on the stems. A trellis made of wooden planks or synthetic materials is safer for plants.
The installation of a trellis in the garden takes a lot of time and requires financial investments. But with a similar method of growing cucumbers, harvesting and caring for plants is greatly facilitated. Therefore, many vegetable growers use it successfully.
What varieties of cucumbers are grown on trellises
Almost all varieties of cucumbers are allowed to grow on trellises, but some of them respond better to this growing method than others:
- Focus;
- Regal F1;
- Asterix F1;
- Opera F1;
- varieties with moderate branching;
- varieties with abundant branching;
- cucumbers that ripen quickly in the garden.
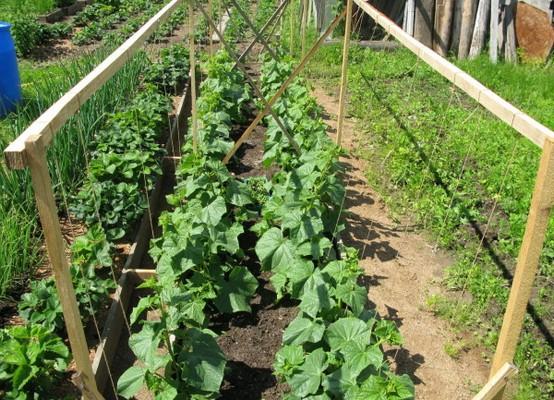

What are the advantages of tapestries?
Recently, many gardeners tend to grow vegetables and berry crops on trellises. For cucumbers, this method is perfect, and here's why:
There is only one drawback of this method - the time-consuming construction of the structure. However, there are also modern systems that are simply mounted and just as easily removed for the winter.
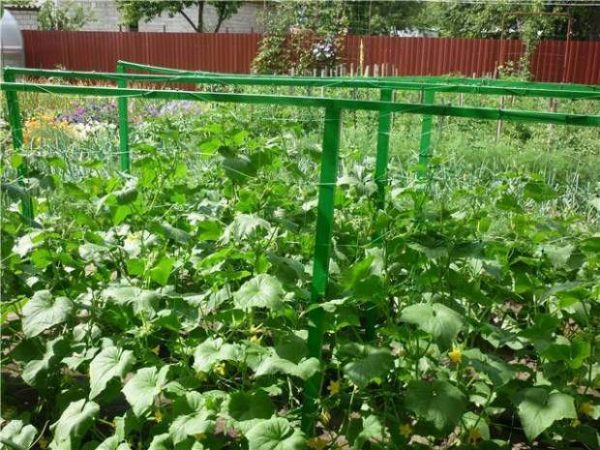

Cucumbers with abundant herbs and many fruits grow on the trellises
Trellis prices
trellis
Principles of the arrangement of trellises
Structures are located on the site according to certain rules that help to achieve a good harvest with maximum convenience. For example:
- the optimal place for the construction is the south side of the garden area, where there are no drafts;
- the installation site must be flat or with a slight slope;
- the soil is chosen fertile or it is fed in advance with organic fertilizer in order to achieve a good harvest.
Cucumbers are planted in the garden next to the trellis. The distance between plants should be between 15 cm for common varieties and 25 cm for crops with lush greenery.
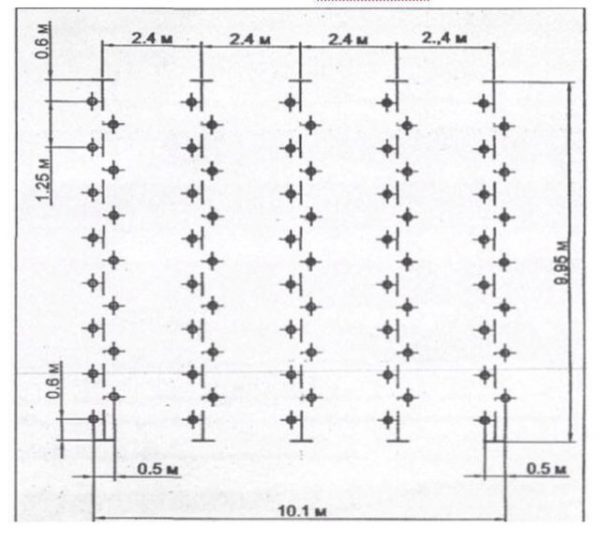

Layout of cucumber bushes
Types of trellises
Today, there are many ways to build trellises, among which gardeners are especially fond of the following types, for their simplicity and reliability:
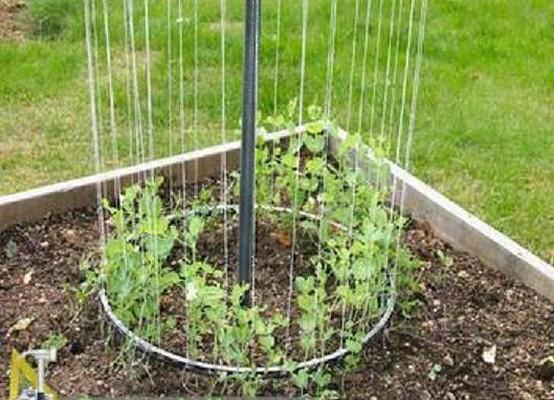
- a trellis in the shape of a circle;
- construction in the shape of the letter P;
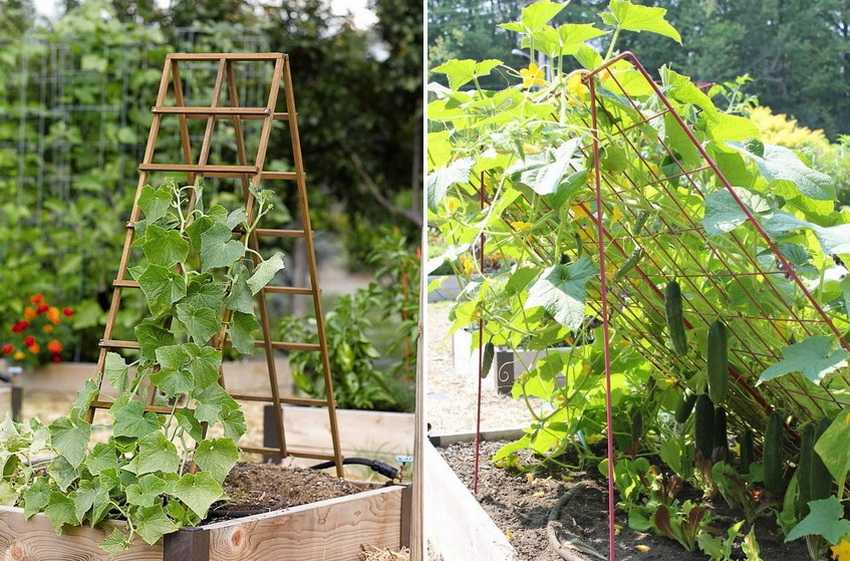
- frame assembled from wooden slats;
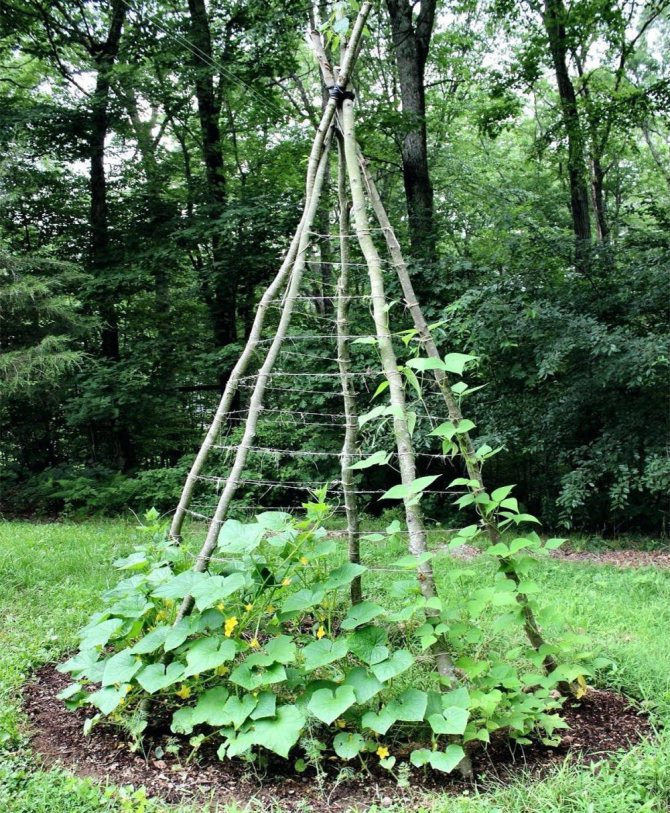
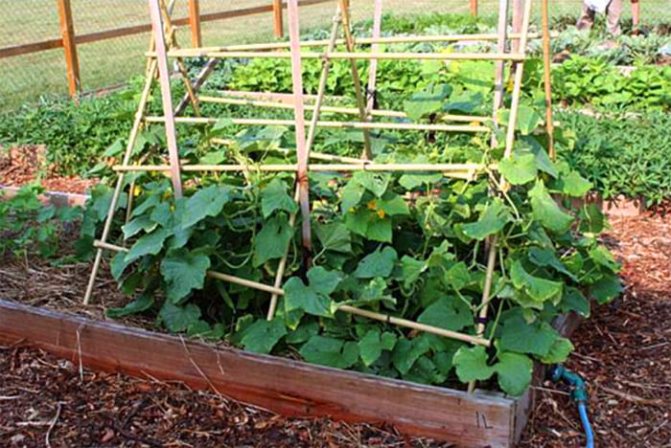
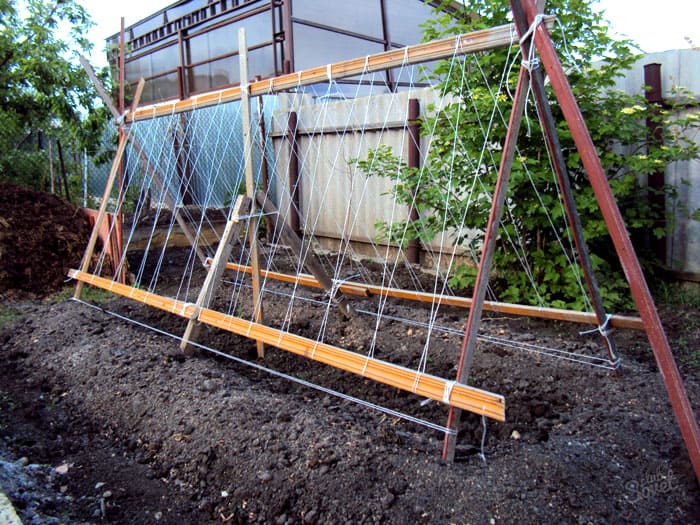
- construction in the form of a hut.
Let's take a closer look at each view. In the form of a circle:
- two old bicycle wheels are mounted on a metal or wooden post;
- one wheel is fixed 10-15 centimeters from the ground, the second - at the top of the pillar;
- threads are pulled between the wheels, which are attached to the spokes or rim;
- such a tapestry takes up little space and has an unusual, bright appearance.
See also
Scheme of pinching cucumbers, how to properly carry out the procedure for beginners
To read

In the shape of the letter P:
- we take two pillars about 2.5 meters high. Dimensions may vary depending on the variety of cucumbers to be grown;
- we dig them into the ground at a distance of 3 meters from each other;
- the pillars are connected to each other by a vertical crossbar, through which the twine threads will be thrown;
- the ends of the thread are attached on both sides of the trellis;
- the spacing between the threads is 20 centimeters.
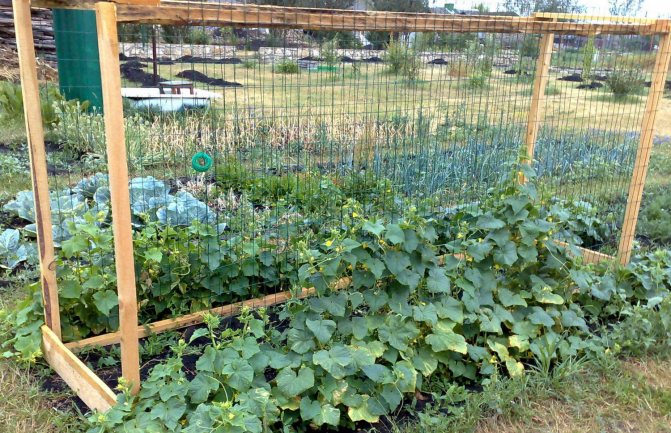
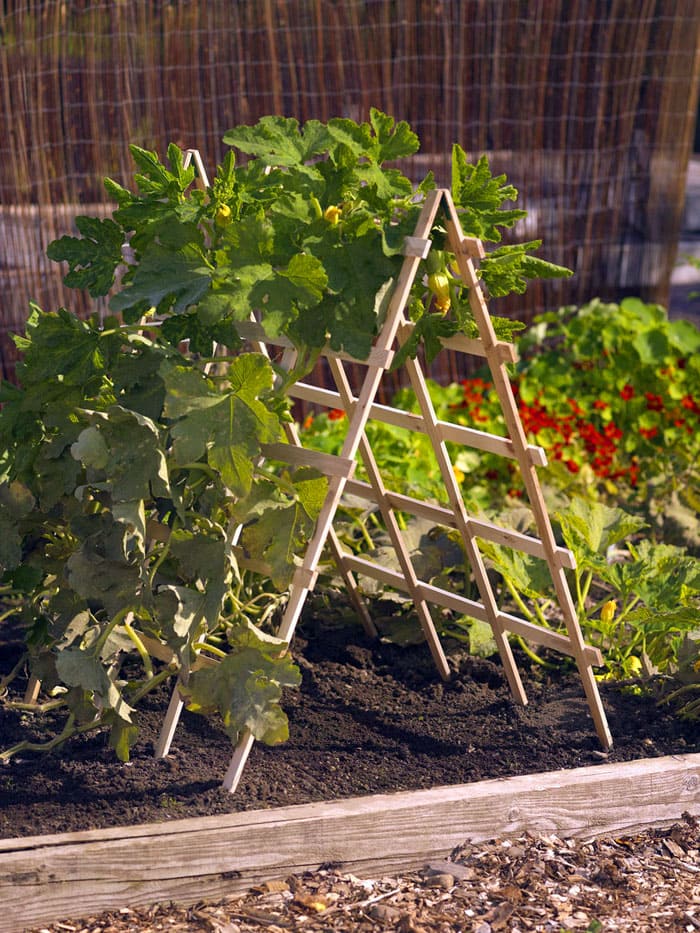
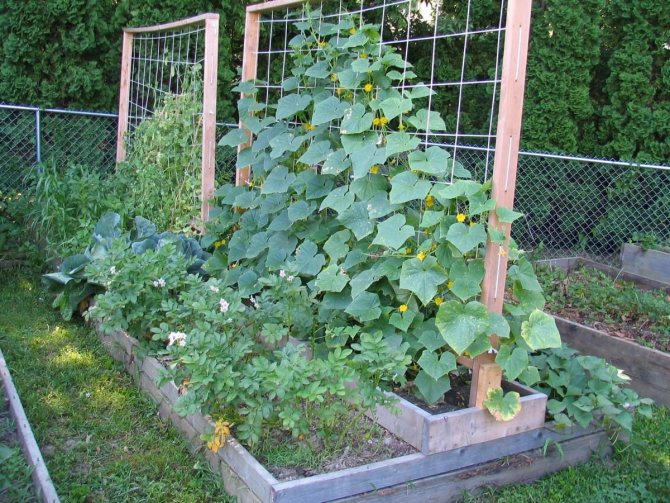
From wooden slats:
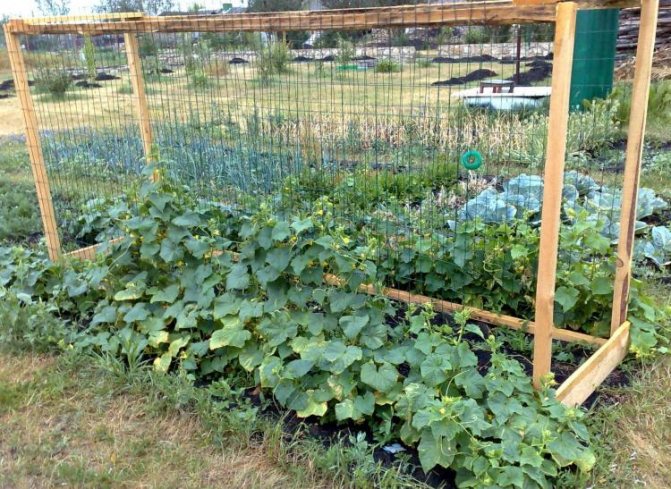
- we install a standard U-shaped structure on the beds;
- we take wooden slats and connect them together in such a way that a lattice is obtained, the cells of which are 15 by 15 centimeters in size;
- we attach the lattice to the support.

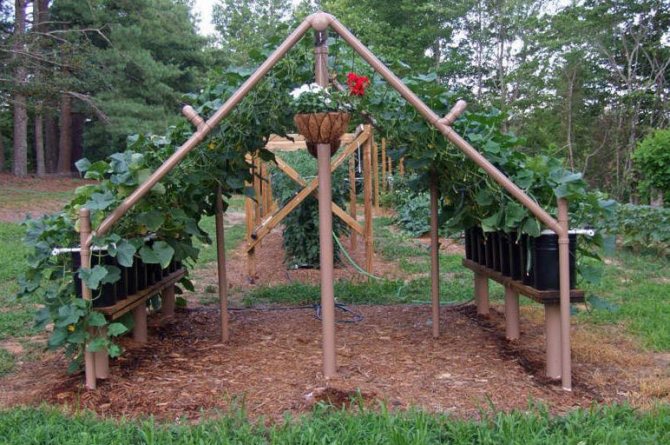
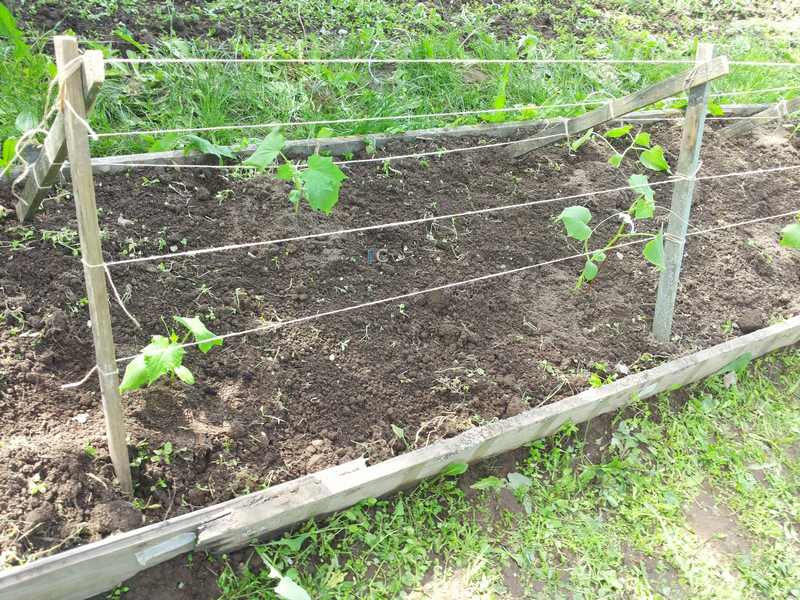
Trellis in the form of a hut:
- wooden or metal pegs are stuck on the sides of the bed, so that they create the shape of a hut;
- the lower part goes deep into the ground by 40 centimeters;
- at the top of the slats are connected to each other;
- after the slats are installed along the entire length of the bed, a horizontal strip is laid on top, serving as an element fixing the trellis.
If you do not have the time or funds to build such structures, build a trellis from scrap materials. Perhaps it will turn out to be less convenient, but it will fulfill its role 100%.
Note! The supports located at the edges of the beds are fixed on the ground more thoroughly than the intermediate pillars.
This is necessary due to the fact that the main load falls on them and, if they are not fixed securely, the structure will collapse, and the crop will be lost.

Harvesting
Fruiting of cucumbers begins on the 40th day after germination of seedlings. From this point on, you can start harvesting. The timing of picking fruit depends on the purpose. Pickles or gherkins are used for canning. In the first case, the collection is performed on 2-3 days, when the size of the fruits reaches 3-5 cm. Gherkins 5-9 cm long are picked on 4-5 days. For food, greens are used no more than 14 cm long. Fruits reach this size in 8-12 days.
The harvest is removed every other day. At the same time, for canning, you can collect fruits daily. At the same time, damaged fruits and overgrowths are removed so that they do not weaken the plant. It is best to harvest in the morning or evening.
After the end of fruiting, the cucumber vine is removed from the trellis. Plant residues are sent to the compost pit if they show no symptoms of disease. Otherwise, they are destroyed. The trellis is disassembled, removing the remnants of the plant at the same time and folded in the back room for storage.
The area where there was a cucumber bed is dug up, while removing roots and plant debris. Then the ground is leveled with a rake. At the same time, you can prepare for planting plants in this place for the next year. To do this, fertilize the soil and mulch with manure.
Principles of planting cucumbers for trellis cultivation
Growing cucumbers on a trellis is done in one of two ways:
- in the open field;
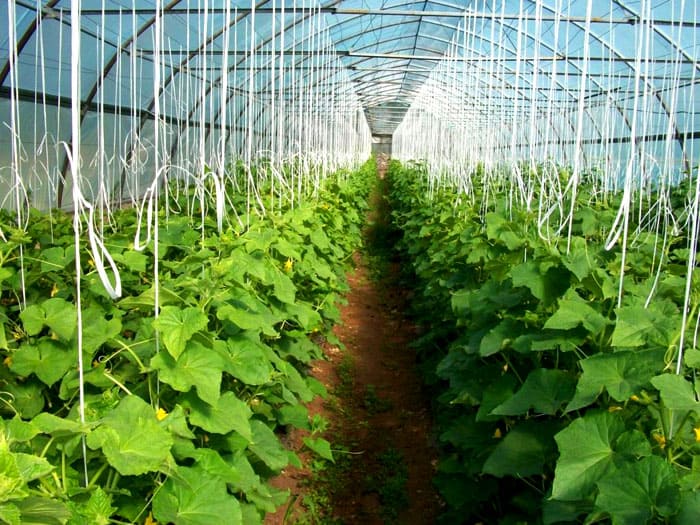
- in a polycarbonate greenhouse.
Both methods have common growing conditions:
- the soil in which the cucumbers grow must have a low or neutral acidity;
- the land should be loose and fertile.
This is where the similarity of the methods ends, and we will consider the differences in each of them separately.

In the open field
Cultivation of cucumbers in the open field, on a trellis, is carried out in the following way:
- cucumber seedlings are grown at home, according to the standard scheme;
- as soon as the sprouts reach the size of 15-20 centimeters and at least 3 leaves are formed on them, they are transferred to open ground;
- it is necessary to plan the transplant in such a way as to avoid night frosts. The best time for this is the end of spring.
In the greenhouse
When growing cucumbers on a trellis in a greenhouse, keep in mind the following nuances:
- seeds selected for sowing are heated to a temperature of 50 o for several hours;
- heated seeds are soaked in a weak solution of potassium permanganate for a quarter of an hour;
- the seeds prepared in this way are planted in the soil with a temperature of at least 15 o;
- the distance between the seeds should not be less than 20 centimeters;
- developing seedlings need abundant watering. It is advisable to irrigate the beds at least once every 4 days, pouring about 5 liters of water per 1 square meter.
See also
Planting, growing and caring for cucumbers in a greenhouse in the Krasnodar Territory
To read
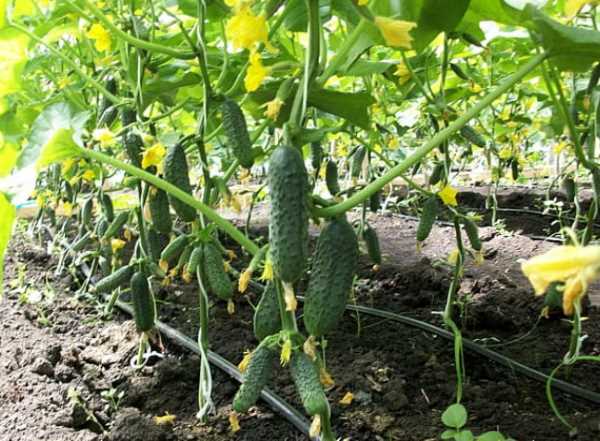

To accelerate growth, the seedlings are covered with a film, which is removed after at least 4-5 leaves have formed on the sprouts.
Preparatory stage
Cucumbers are a very demanding crop that needs special conditions, careful care, adherence to the watering and feeding regime.
Therefore, trellis cultivation of cucumbers begins long before sowing seeds into the soil.
Conditions for growing crops in the open field
Planting cucumbers requires a draft-free, sunny, open area with maximum light during the day.

Moreover, the further north the region is, the more preferable it is to plant cucumbers on the southern slope so that the sun illuminates and warms up demanding vegetable plantings as much as possible.
And in the southern regions with a sultry scorching sun for cucumber beds, it is necessary to choose flat areas that are not in a southern orientation so that the greens do not burn out.
It is impossible to divert lowlands and hollows under cucumbers: in such places, cold layers of air usually stagnate, from which delicate cucumber bushes can suffer.
To protect against drafts, which have a very detrimental effect on yields, cucumbers are planted under the protection of walls of buildings, dense high plantings (ornamental trees and shrubs, corn or sunflowers in several rows).
An important factor for choosing a site for cucumbers is the proximity of groundwater. Places with excessive stagnation of moisture should be avoided, or high beds with a good drainage layer should be made.
Cucumber precursors
Compliance with crop rotation is a guarantee of the health of horticultural crops. Therefore, when planning a sowing scheme for the upcoming season, it is important to consider what to plant after which.
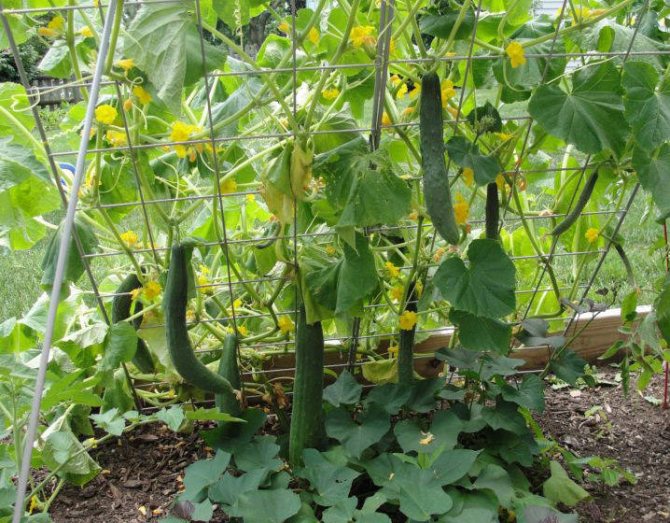

Where legumes, root vegetables, green crops, tomatoes, onions or garlic, eggplants or potatoes were grown last year, cucumber trellis can be installed.
And in the next two years, cucumbers will not grow in this place, like all representatives of this family: melons with watermelons, pumpkins with zucchini and squash.
Melons, which include cucumbers, should not be planted after melons, since close "relatives" have the same diseases, and they "suck out" the soil, leaving the "relatives" no useful and nutritious substances.
Fertilization and soil preparation rules
Experienced gardeners begin to prepare the soil in the fall, after harvest, while preparing the site for winter.
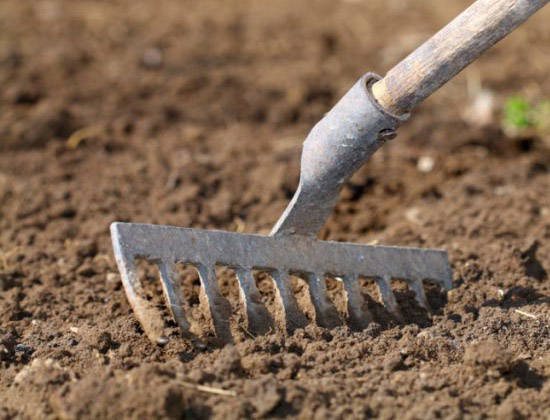

The beds on which the most preferred predecessors for cucumbers grew must be carefully and deeply dug, freeing weeds from the roots, saturating the earth with oxygen.
Since cucumbers love light soil, sand and rotted sawdust are added to the soil.
To enrich the land for digging, at least 5 kg of humus or compost are introduced per square meter of area, flavored with ash, a small amount (1 tbsp) of superphosphate, an addition from dolomite flour will not be superfluous.
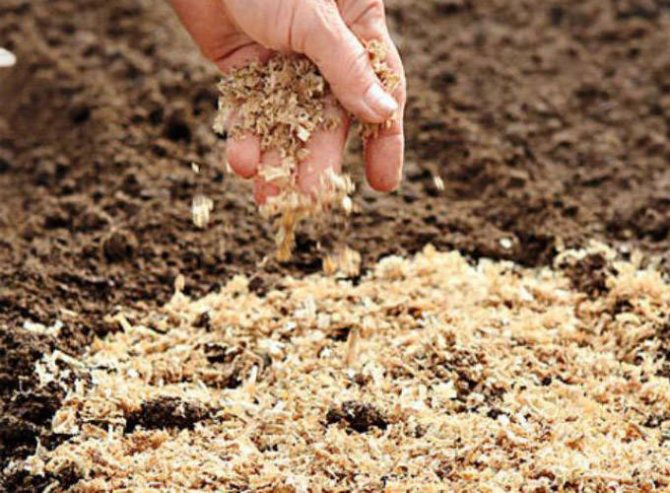

Thus, the first fertilizer for cucumbers must be applied to the soil before winter.
"Blue" spraying with Bordeaux liquid before winter and hot spring spilling of soil with potassium permanganate is a powerful prevention of many bacterial diseases.
In the spring, when preparing the beds, manure or chicken droppings must be added to the holes, slightly mixing them with the ground.
Distribution of land and preparation of rows
Cucumbers for trellis cultivation in unprotected soil are planted in pre-prepared beds. If the planting takes place in one line in the center of the bed, then the width of such beds is about 0.8 m, and the distance between them is about half a meter.
Seeds or seedlings of cucumbers are planted every 20 cm.For such a scheme of planting cucumbers, any type of trellis is suitable, but the "frame" and single-plane will be more convenient.
If the cucumbers are planted in two lines, then the width of the beds increases from one meter to two, and for row spacing, even in this case, half a meter is enough, and between the bushes in such a scheme is already at least 25 cm.
For such plantings, many people choose trellises in the form of a hut, although the choice of a support structure depends on many factors, so there can be no categorical recommendations in this matter.
Rows for planting cucumbers are divided into three varieties:
- The comb is the traditional option. A minimum of special preliminary preparation, maximum convenience in weeding and loosening.
The disadvantages of such rows include soil erosion during heavy rains and watering;
- Cucumber tunnel. This option is possible in deep groundwater conditions.
A trench is dug at the site of the bed, thus drowning the level of the bed below the level of the path. The mulch layer forms the final bed depth.
Pros: it is very convenient to water, since the water does not spill, does not erode the soil. A convenient option for cucumber drip irrigation.
To protect from cold weather, it is easy to cover the bed in the trench with a film or hide the plantings under a shelter on an arched frame.
Minus - additional preparatory work;
- High beds. The soil in such beds warms up faster and is protected from hypothermia in the spring. It is convenient to attach the trellis to the sides of the garden bed - the support for the cucumbers holds much more reliably than in the ground, which can be washed away by water in heavy rains.
Seed preparation for sowing
The assurances of seed sellers that the germination of cucumbers lasts up to 8 years are not without reason: indeed, cucumber seeds can hatch in 5-6 years.
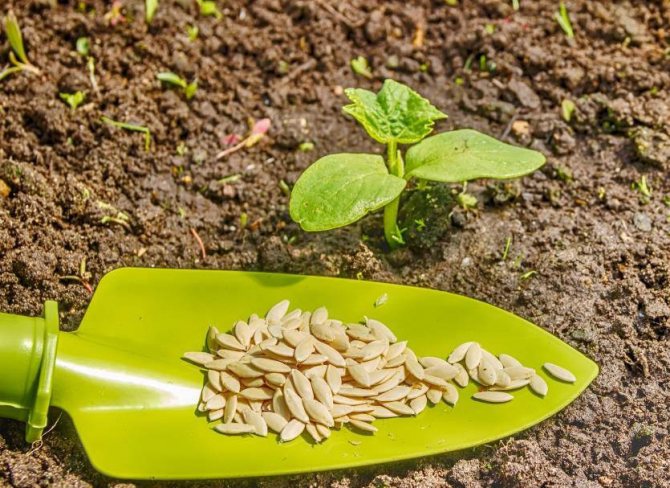

But the highest percentage of quality seeds is among those that are not less than a year old, but not more than three years old.
Therefore, gardeners who collect their own planting material can independently track which seeds are already ready for planting, and which ones still need to lie down.
But most summer residents have to rely on the conscientiousness of manufacturers and sellers of seed material.
You can buy seeds that have already undergone special preparation before sowing, pelleted, plasma: they visually differ from ordinary ones in their bright appearance.
The seed is enclosed in a shell of a useful composition that protects and nourishes the future plant in the first phase of life. Such seeds are simply planted in the ground without preliminary soaking and other procedures.
Gardeners, whose main principle is "if you want to do well, do it yourself", carry out pre-sowing seed treatment with traditional means:
- Checking seeds for germination - soak the seeds for half an hour in slightly salted water or a weak solution of potassium permanganate.
After half an hour, pacifiers unable to germinate will float to the surface.
They must be collected and discarded.
All others are suitable for planting;
- Etching against bacterial diseases - soak for an hour or two in a solution of "Fitosporin-M" or another fungicide, according to the recipe to increase resistance to diseases of fungal and bacterial origin;
- Stratification - hardening is a very useful procedure that awakens the embryo, increases immunity, protects against many diseases, which ultimately affects the yield.
Place the seeds in damp gauze or other cloth, put them in an open or sealed container in the refrigerator for a couple of days.
It is important to ensure that the fabric does not dry out. After stratification, the seeds are treated with stimulants or planted immediately;
- Soaking in growth stimulants - to increase immunity, stimulate activity, the seeds are soaked for 12 hours or more (strictly according to the instructions for each drug) in stimulants such as "Epin", "Humat Potassium", "Zircon", the name of which is for all gardeners on hearing.
Or you can use natural growth stimulants that are found in every home: aloe juice and honey.
To obtain high-quality aloe juice, the leaves of the plant must be kept in the refrigerator for two weeks, then squeeze out the juice and dilute the resulting amount with water in a 1: 1 ratio.
The seeds are soaked in this solution for 6 hours. Honey stimulant is obtained by diluting a teaspoon of honey in a glass of water. Soaking time is the same - 6 hours;
- The older the cucumber seeds (from 6 years old), the more useful it is to bubble before planting: an oxygen compressor for the aquarium, a diffuser and a container of water - all that is needed for this simple but useful procedure.
The seeds are wrapped in cheesecloth and dipped in water. A diffuser is placed under the gauze bag.
This position must be fixed, turned on the compressor and left for a day.
Seeds treated with oxygen must be sown immediately: they hatch and sprout rather quickly.
Forming cucumbers on a trellis
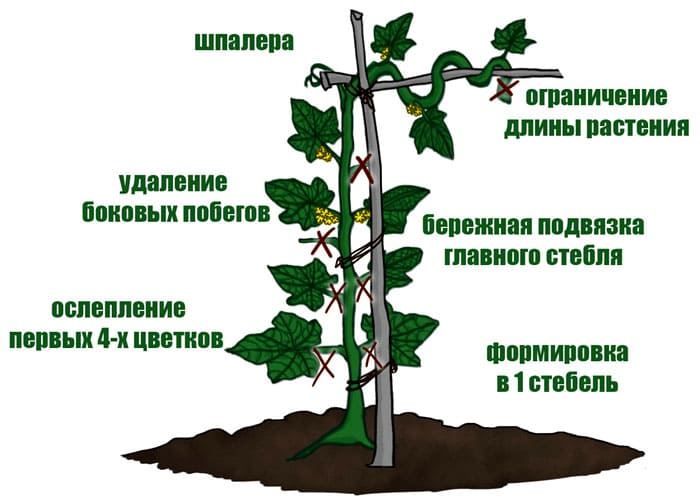
Erecting trellises on the site, and planting cucumbers is only half the battle. To achieve maximum results, the gardener needs to control the growth of the vine, directing it in the right direction. The formation process consists of two stages:
- pinching the vine;
- garter.
If you do not skip them and perform them in the correct sequence, a bountiful harvest awaits you.

Topping
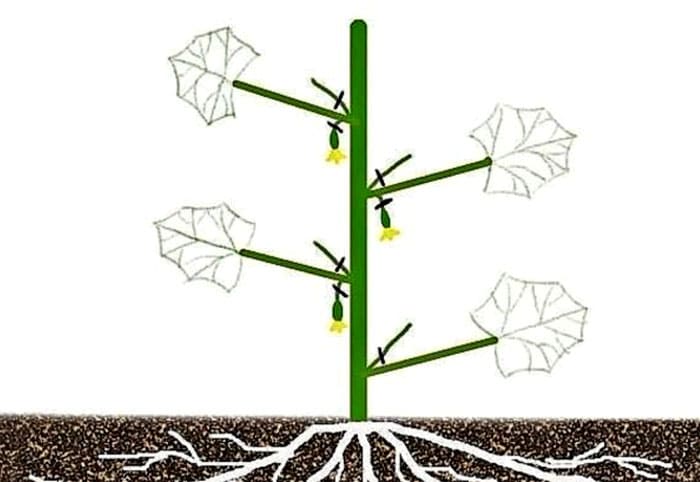
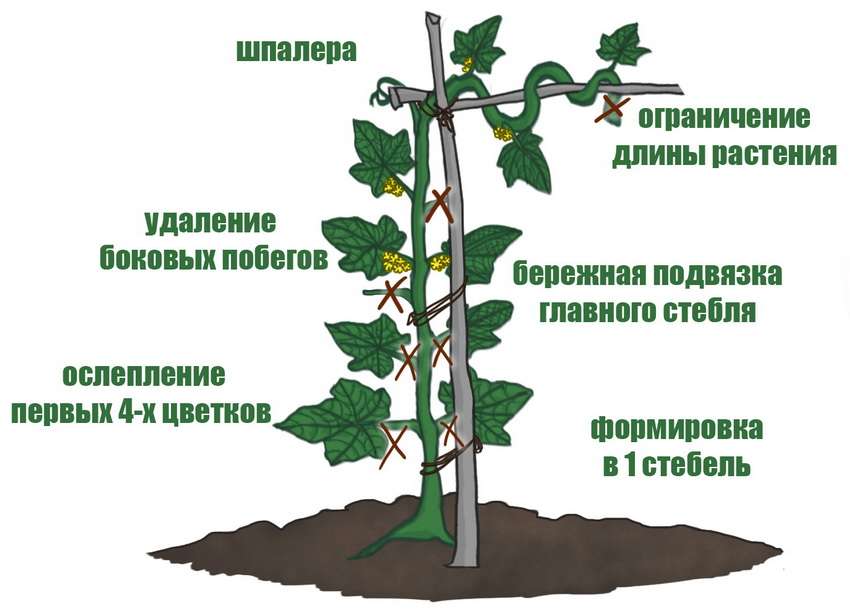
The procedure is carried out in the summer, and its meaning is to remove unnecessary side shoots, which take away strength from the main vine, spending them on the formation of unnecessary green mass. Pinching technology:
- in the summer, 5 leaves are removed on the vine, located in its lower part;
- cucumbers formed next to the first 3 leaves are also removed;
- this approach will speed up the growth of the main lash, since the first fruits take a lot of strength from the plant;
- after 7 branches, all lateral processes are left in place, but pinched into 2 leaves;
- in total, no more than 4 leaves should remain on the side shoot;
- 2 times a week, each stem is wrapped around a thread or lath;
- you do not need to pinch the tops, it is enough to carefully wrap them around the thread without damage.
Note! Cucumber whiskers do not affect the growth of the vine. They are removed solely for the convenience of formation.
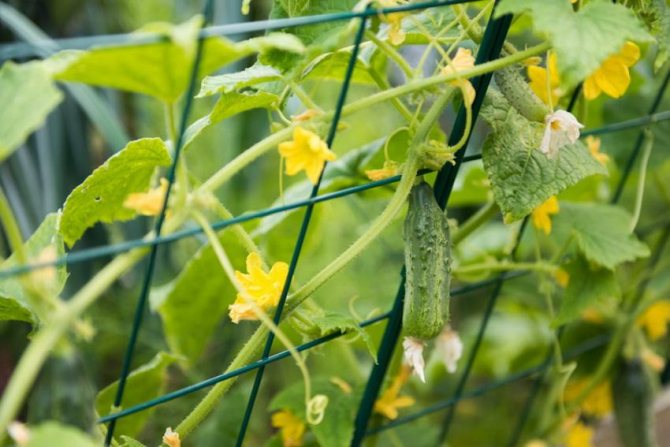

It is advisable to pinch the shoots with sharp objects so as not to unnecessarily injure the plant, but, in extreme cases, this can be done with your hand.
Garter
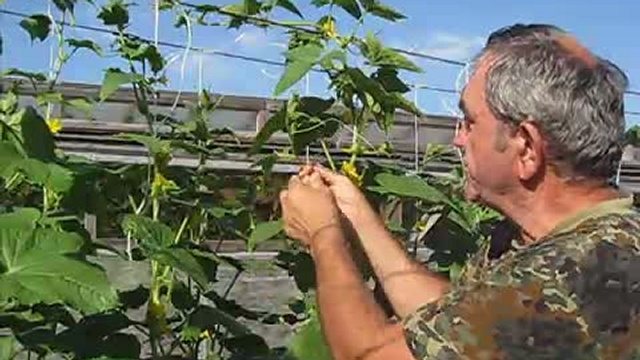
The stems are tied with flexible, soft threads to avoid damaging the vine. One end of the rope is fixed on the stand, the other on the top of the plant. Then, once every 4 days, the rope is pulled in proportion to the development of the central vine. If you tie cucumbers on a trellis in the open field according to this scheme, you will get a large harvest in the fall.
Tying a cucumber lash to a trellis
Without a garter, cucumbers are not able to let go of long shoots, so it is unlikely that it will be possible to grow a good harvest without it. Scourges quickly thicken, and then rot and dry out. The fruits quickly lose their presentation.
There are several ways to tie a cucumber to a trellis.
Vertical garter
Synthetic twine is most often used to tie a cucumber lash to the top of the trellis. The twine can be replaced with another material at hand, the main thing is that it meets the following requirements:
- did not absorb moisture;
- was sufficiently strong and elastic;
- did not injure the stem.
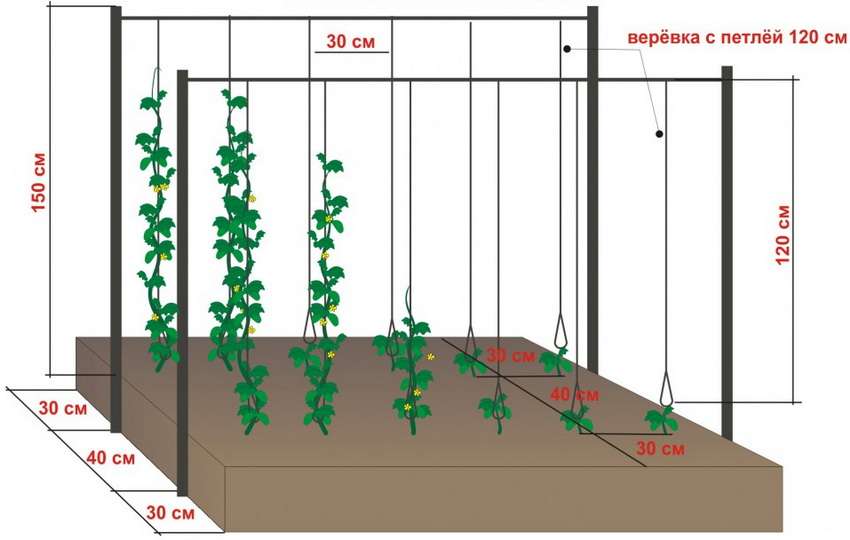
This procedure should be started after the stem has grown by about 30 cm. Usually at this time 4-5 leaves are formed on the shoot. The bush is tied under the bottom sheet. The harness is best tied to the trellis using a sliding knot, as it allows you to adjust the length of the twine as the lash grows.

Vertical garter
Note! The timing of the garter plays an important role in fruiting. There is no point in premature, and if you delay with this procedure, you can easily damage the plant.
Horizontal garter
This garter differs from the vertical method in that a strong twine or rope is stretched between the two extreme supports in several rows. The distance between the rows is about 25 cm. The lash is first tied to the lowest row, and then as it grows to the higher rows.
Garter net for cucumbers
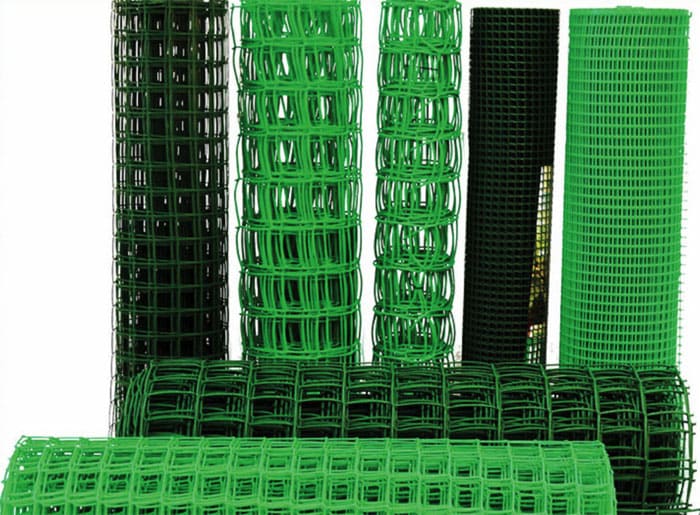
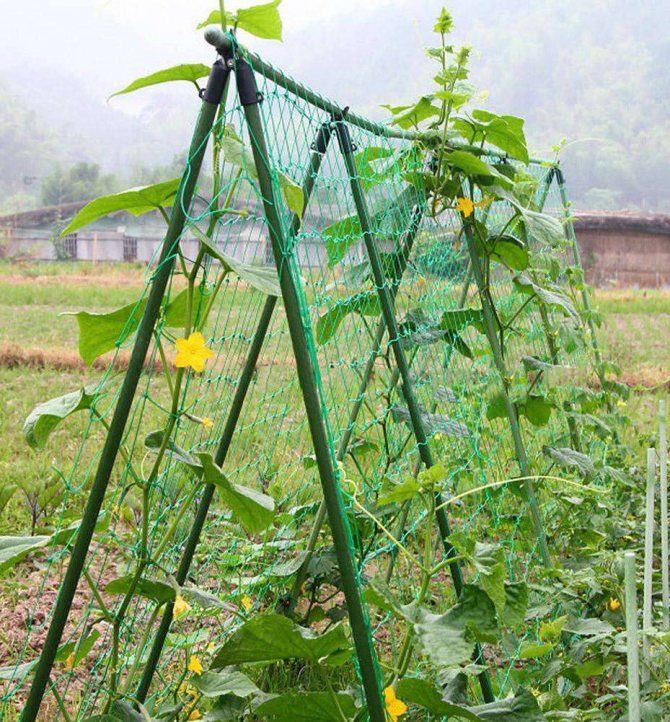
For the trellis, you can use nets specially made for spreading plants. They successfully replace both vertical and horizontal garters and allow the lash to be freely woven into the mesh of the mesh. The use of a grid gives a great boost to the gardener's imagination. It can be simply pulled between two supports, placed on the garden bed in the form of a rectangle or triangle, or placed on the site in some other way.
Care features
They look after cucumbers like this:
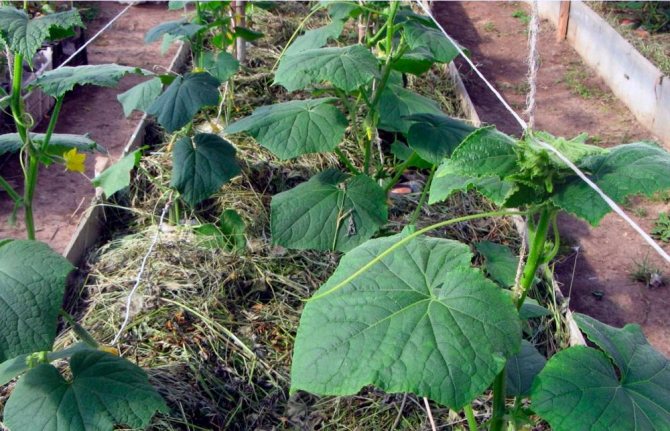
- watered abundantly throughout the season. It is advisable to irrigate the soil every 3 days, pouring water as close to the base of the stem as possible. Do not pour water on the leaves, otherwise they will "burn";
- fertilize the soil. Fertilizing the bushes with mineral and organic fertilizers, for example, manure, will allow you to achieve an impressive result;
- mulch the soil around the stem;
- do not forget about pruning, removing excess green mass in the form of leaves and side shoots, especially in the upper part.

How to install a grid for cucumbers: photo designs
Now it's time to talk about how to make a tapestry for cucumbers with your own hands. In particular, let's talk about installation. The technique of applying the mesh for the cucumber support is very simple:
- First, lay the material on the soil, folding it in several layers. This procedure must be done so that the cells can completely match.
- Seedlings or seeds must be planted in the hole of the cells. With the help of a net, it is necessary to plant the bed evenly. It won't give you much of a hassle.
- Along the edges of the site, it is necessary to install columns on which the material should be fixed, this should be done as the plant sprouts grow.
- At the moment the first shoots appear, it is necessary to raise the canvas and fix it in a horizontal position above the bed. There is no need to tie the plants: the cucumbers begin to cling to the supports with the help of their antennae.
- The canvas should be lifted to a vertical position and fixed at the required level on the columns as the plant grows. We advise you to use plastic cable ties for fixing.
- After the cucumbers have grown to fruiting time, they will be securely attached to the support.

Do-it-yourself cucumber trellis in the greenhouse: options for tying plants
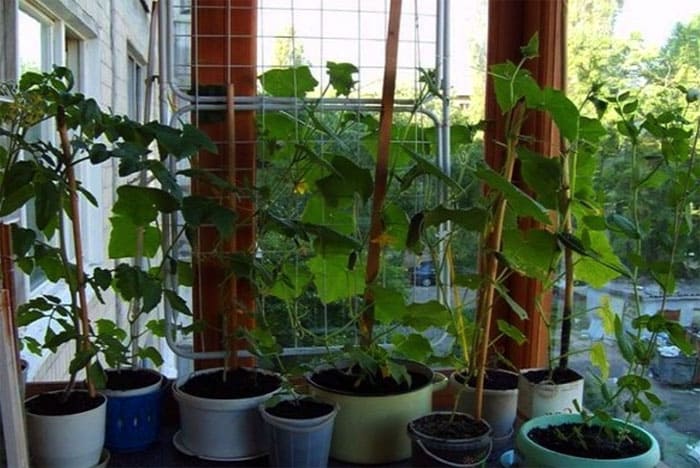
It is imperative to garter cucumbers in a greenhouse. Despite the fact that a large number of gardeners are confident that the plant is perfectly protected by the greenhouse material. For the garter, you will need trellis for the cucumbers that grow in the greenhouse. It is quite possible to make them with your own hands.
The garter gives the cucumber bushes more sun. This is very important in greenhouse growing conditions. In addition, with the help of antennae, cucumbers begin to cling to each other and form the so-called glomeruli. Mold begins to grow in these tangles, and the bush simply rots. You can avoid this by separating the plants. The garter will help the side branches of the bushes curl better. Female flowers will be placed on them. This arrangement will help to significantly increase the yield of the bushes.
For a garter in a greenhouse, the same methods are suitable as for plants growing in an open space: vertical, horizontal, or using a net.
The formation of plant bushes with a combined method is also quite effective.
A method for dazzling cucumbers.
Many experienced growers are confident that the crop should not grow uncontrollably in width and height. For these purposes, the main stem should be tied to a vertical trellis, and then remove all lateral tendrils and shoots that are located above 50 cm from the ground. Thanks to this procedure, cucumbers will direct all their strength to tying fruits on the main stem. The bush itself will hurt less. and besides, it will not block nearby sprouts. And the plant should be tied up under the second leaf.

Method for polycarbonate greenhouses.
A garter is used to a vertical support, which has a height of about two meters. This structure is fixed on the side to the metal frame of the greenhouse.
In order to make the support, you can take some unnecessary fabric. It should be cut into strips 3-4 cm wide.
In the event that the strips are not very long, then you can easily correct this defect by sewing on separate parts or simply tying them. This support will not be durable. And for the place of the fabric, you can take thin twigs. Cucumber bushes can cling to them superbly. But you will need to clean the knots from the support. Only the stem should be left.

V-shaped garter.
This method will help split the bush in two. From above, you need to lower 2 twine and tie up the bushes at the base. Next, you should direct the main and another large lateral shoot along the lowered twine.
This method will prevent overgrowing of the culture base. Thanks to this, they will be less sick and will be able to get the right amount of sun.
Ways to create a trellis for cucumbers with your own hands: support options
There are many options for self-manufacturing support structures that are used to grow cucumbers on a support in the soil or in a greenhouse.
Before you start installing the trellis yourself, you must first determine the appearance of the structure. Currently, you can make the following supports for your cucumbers (photographs can clearly demonstrate this). They might look like:
- curbstone,
- tent,
- square shape,
- mesh or rectangular shape.
You should also choose the material from which the trellis will be made. You can make a support using:
- natural wood,
- metal tubes,
- metal mesh.
Do-it-yourself metal trellis for cucumbers: photo of supports.
To make a trellis from metal, you will need some materials and tools. You should prepare them in advance:
- 2 metal tubes or columns. Their length should be 2 meters.
- 1 tube of metal, which is required for the crossbar. Its length should be equal to the length of the cucumber beds.
- roulette.
- metal stakes. Their number will depend on the size of the beds.
- twine or twine.
- knife.
- electrodes.
- a hammer.
- shovel.
- steel wire.
- electric welding.
Making a metal trellis for growing cucumbers will consist of several main stages:
- First, you should dig 2 columns into the ground along the edge of the cucumber beds. The depth of the pillar digging in should be approximately 40-45cm. This value will enable you to guarantee the stability and reliability of the support. Many vegetable growers advise hitting the post a couple of times with a hammer in order to more reliably drive it into the ground. Then you need to fill the hole with soil and tamp it well around it.
- Secondly, you need to attach the crossbar using electric welding for these purposes.
- After that, a pair of stakes should be driven in at a distance of 17-20 cm on both sides of the bed.
- Next, you need to pull the twine or twine - they will become an excellent support. The sprouts of bushes will curl along it. To the very first peg, you need to tie the end of a skein of rope.
- Then you should pull the twine in a vertical position up to the crossbar, and wrap it around, lower it vertically down.Tie to a peg on the other side of the garden.
- This procedure should be repeated until you have tied all the hammered in pegs. As a result, you will have a cucumber milking tapestry that will have the shape of the letter L.
A self-made metal trellis will have a big disadvantage: It will rust. Of course, you can fix this if you cover the stakes in several layers with an anti-corrosion agent or a high-quality primer.
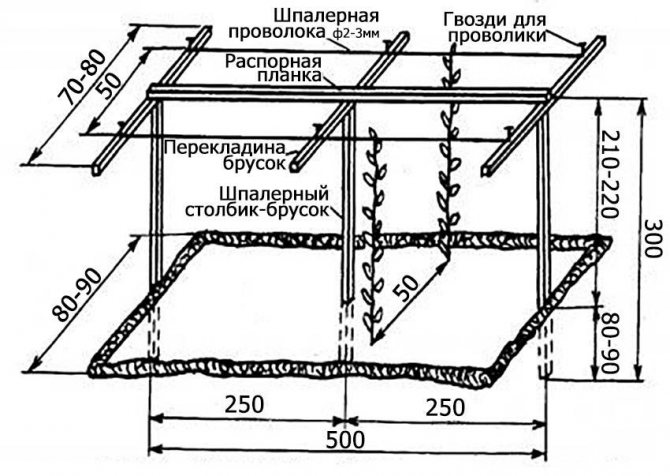
In addition to all this, the disadvantages of this type of support include the inability to disassemble the structure at the end of the season. To transfer it, you will need to dig the columns and supports into the ground again.
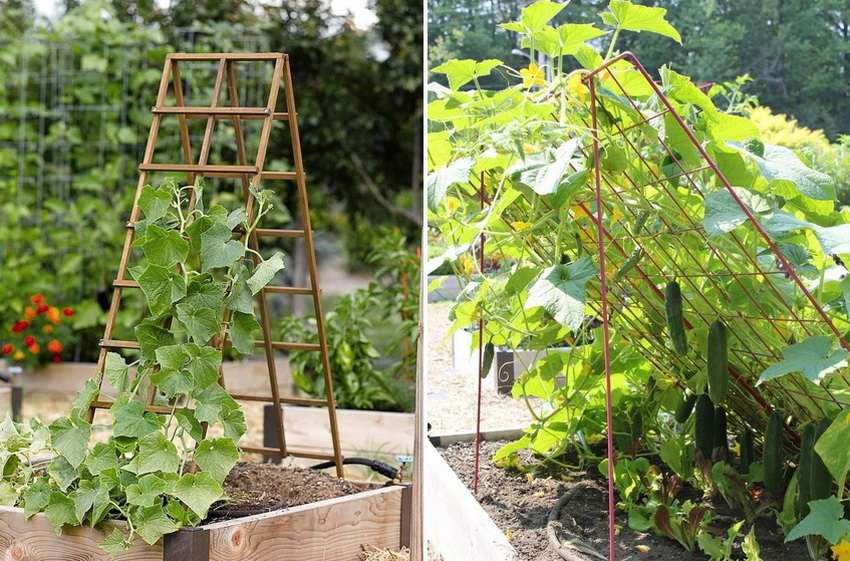

Trellis for growing cucumbers: wooden support.
A do-it-yourself cucumber trellis is an incredibly useful structure. Making a structure out of wood is an easier method and can be great for beginner growers who want to grow cucumbers using a trellis. To make this support, you will need:
- plank in size 5m.
- 3 bars. their length should be 2.7m.
- steel wire.
- twine.
- 3 wooden beams. Their length should be 0.8m.
- nails.
- hammer.
- shovel.
To make a wood trellis yourself, you need to do the following work:
- First, you should prepare the area where the wood trellis will be installed.
- Then you will need to dig 3 holes. their depth should be 80cm at a distance of approximately 2.5m from each other.
- Bars of wood should be inserted into the dug holes and deeply buried in the soil.
- Then, in the upper part of each block, a crossbar should be nailed with nails so that the structure can resemble the letter T. You should get 3 such trellises. They must be placed on the garden bed one after another.
- The next stage of work: all 3 structures must be connected in the middle. To do this, you need a spacer long bar and nails.
- Use nails to tighten the wire.
Cut the twine into equal lengths. their length should be approximately 250-270cm. Tie one end of the string to the wire, and tie the cucumber stalks with the other.
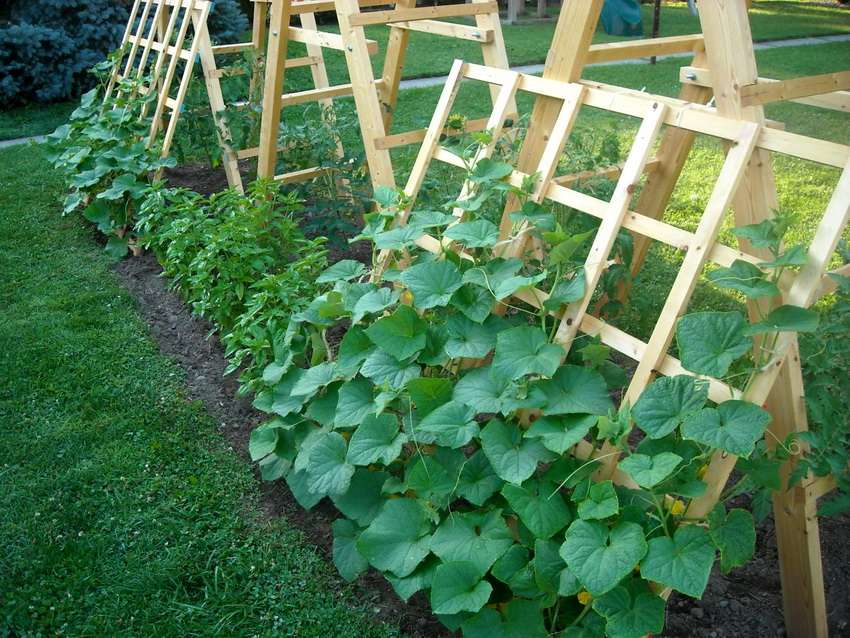

Summing up
The technology of growing vegetable plants using trellises is quite convenient and very effective. Bushes, fixed and placed in an upright position, will take up less space in your garden and will rarely break.
If you translate the word tapestry from French, then it means support or shoulder. At first, these supports were used only for decorative purposes for flowering plants. Over time, tapestries began to be used in agriculture. Do-it-yourself trellis photos for cucumbers, peas, tomatoes and various other crops you can easily find on the Internet.
See also the video:
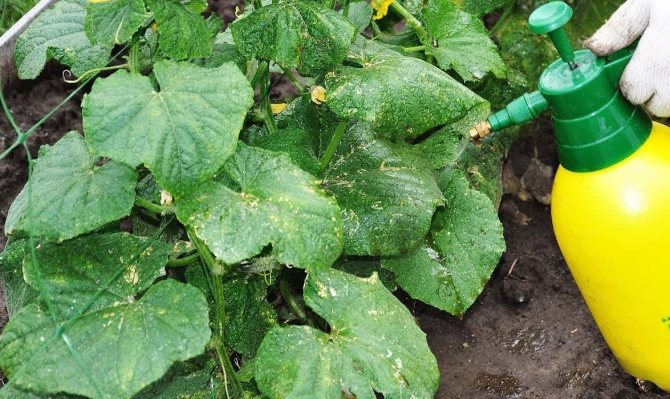
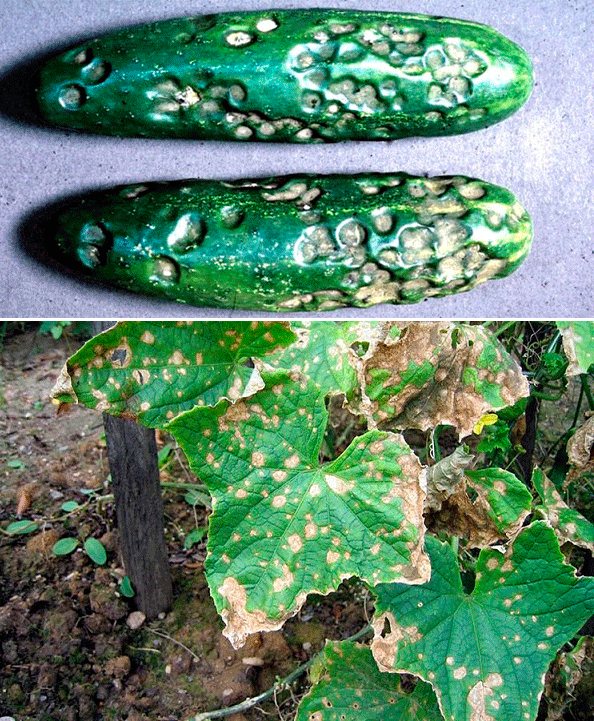
Diseases and pests
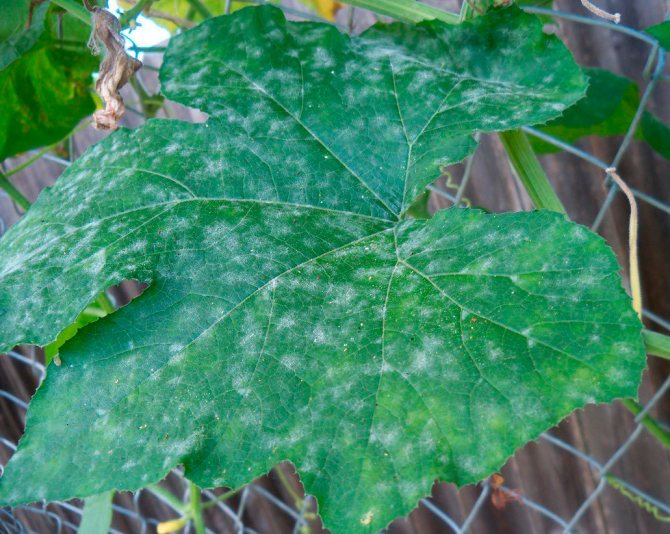
| Powdery mildew Symptoms:
How to fight:
|
| Peronosporosis Symptoms:
How to fight:
|
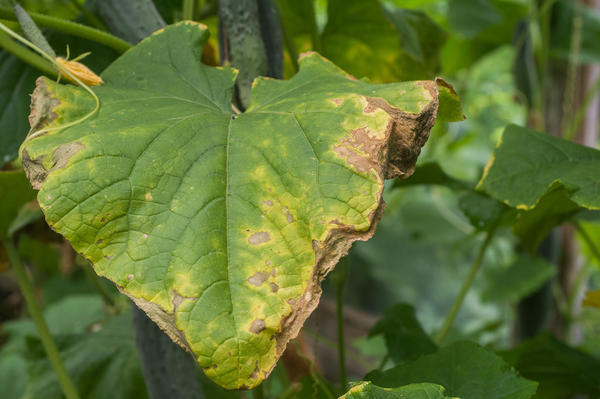
| Anthracnose Symptoms:
How to fight:
|
Reviews of gardeners
Natalia Klin
In my opinion, it is very convenient to grow cucumbers on a grid. Coarse mesh, made of nylon threads, has been serving for 15 years. Cucumbers do not need to be tied up - they cling to themselves, are always well ventilated (hence there are fewer diseases), it is convenient to collect and they are always dry and clean.
mishan
That year, cucumbers were planted on a trellis, the harvest was simply enormous. In this we want to take a plastic grate, I think the result will also be excellent.

