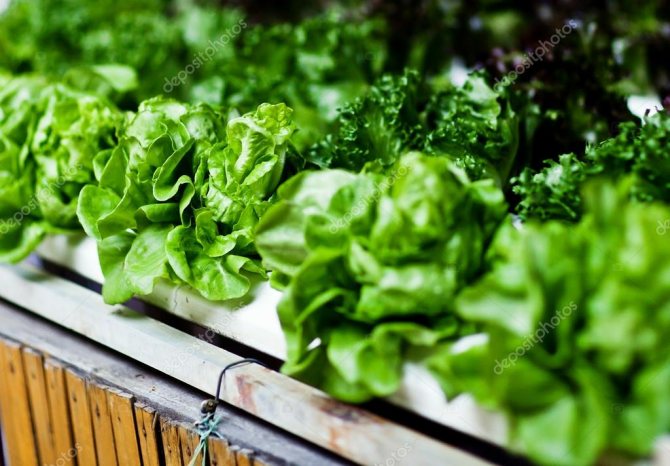
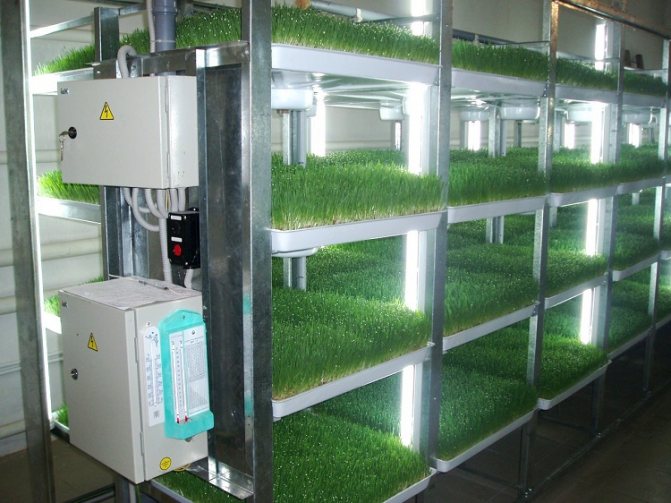
It is difficult to imagine a modern table without fresh greenery. Dill, parsley, celery, basil and other cultures not only decorate our everyday meals, but are also a reliable supplier of vitamins for us. But how to make sure that we have greens all year round, after all, it is no secret that in winter prices for it are sky-high and not everyone can afford to buy it regularly?
It turns out that everything is simple. There is a modern reliable technology for year-round production of these products at home without soil. This is hydroponics. So what is hidden behind such a concept, what is the essence of this method? Let's figure it out.
Hydroponics principles
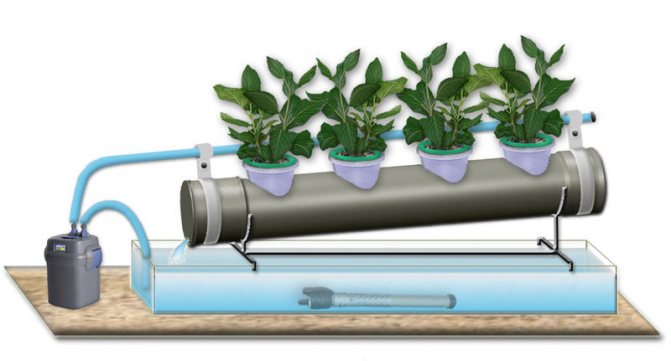
The hydroponic plant for growing greenery is based on a special medium that can absorb air and moisture. In it, the root system of greenery and plants can develop unhindered. The role of such an environment can be performed by:
- Expanded clay.
- Coconut shell shavings.
- Gravel.
- Hay.
The main task of the nutrient substrate is to deliver oxygen and nutrients to the plant roots.
Under normal conditions, plants actively develop their root system in order to efficiently extract sufficient moisture and nutrients from the surrounding soil. When using equipment for hydroponics, this does not happen, since all the nutrients necessary for the life and development of the plant come from a specially prepared solution.
When operating hydroponic systems, it is very important to follow the rules for preparing nutrient solutions. The slightest deviation in technology can lead to disruptions in the processes of plant development or even their death. The fact is that hydroponic systems do not allow plants to independently regulate their intake of nutrients from the environment. The quantity and quality of useful microelements is completely controlled by humans.
Types of cabbage: characteristics and growing rules
Nutrient solution for greens
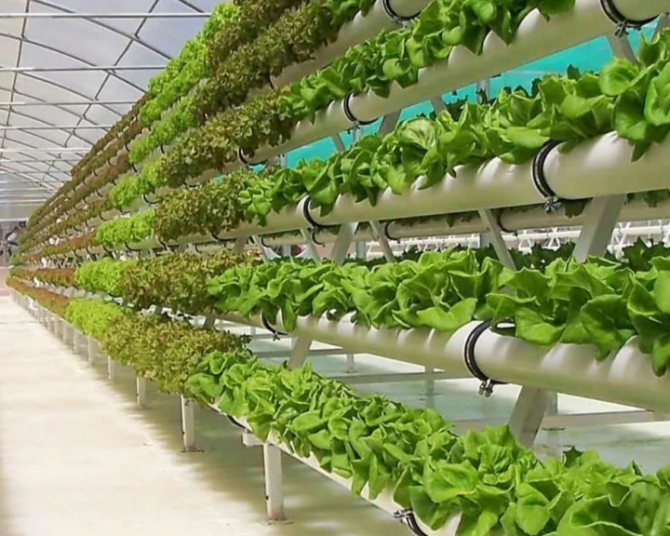
The progressive method of growing plants without soil in specially designed installations with the supply of the optimal amount of nutrients was invented a long time ago. However, it has gained widespread use and popularity only in the past few years.
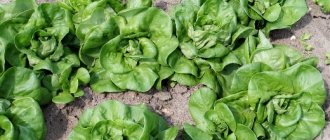
The hydroponics method makes it possible to grow many types of greenery, among which the most popular in our region are:
green onions; parsley; basil; dill; mint; cilantro; melissa, etc.
Also, in a landless plant, lavender, watercress and many other spicy annuals are excellently cultivated.
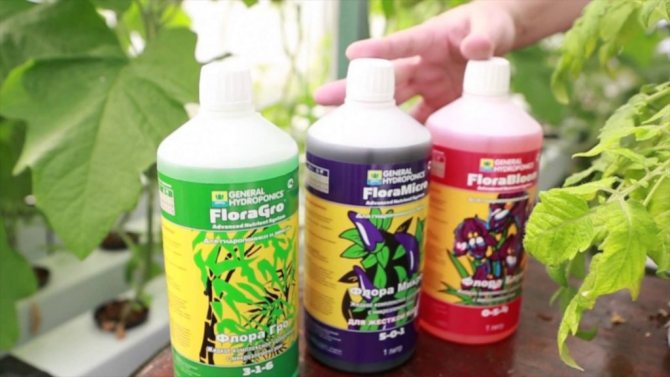
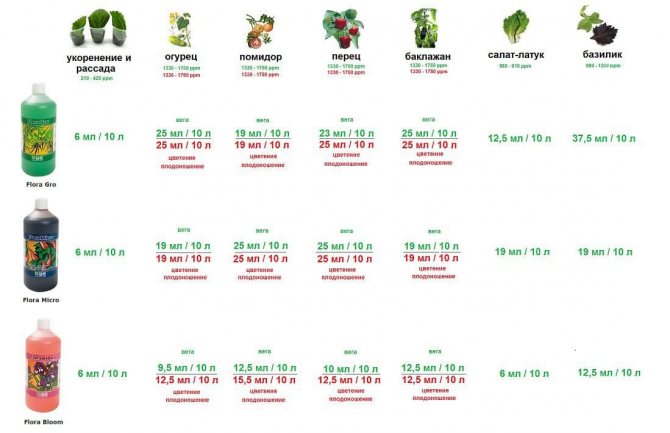
The modern mineral fertilizer market offers a wide selection of ready-made concentrates designed specifically for growing in hydroponics. They are not difficult to use - it is enough to dilute the nutritious concentrated liquid with water in a clearly prescribed proportion, and you will receive the optimal set of nutrients for your green culture.
Spicy garden greens are very easy to grow on a windowsill or in a small greenhouse using ready-made or homemade hydroponic plants.If you do not want to suffer with the correct dosage of components, which requires weighing to the nearest hundredths and tenths of a gram, take ready-made fertilizers.
They come in different forms of release. Powdered and liquid complex preparations can fully cover the needs of green crops in calcium nitrate and other vital elements. They have a number of advantages:
- instantly saturate the water base with minerals;
- have a balanced composition, excluding underfeeding or overfeeding of plants;
- strengthen the protective properties of grown green crops and activate the growth of the root system;
- stabilize the level of water hardness and remove excess salts from it.
During the operation of hydroponic equipment, it is necessary to constantly monitor the volume of liquid in the system and the concentration of nutrients in it.
The latter are regulated by a conductivity indicator (TDS / EC). A normal solution is characterized by instrument readings in the range of 1.5 - 3.0 mS. Depending on the type of plant, the nutrient solution needs a complete replacement every few months.
Gallery: hydroponics for vegetables (25 photos)

Mechanism advantages
Hydroponic plants have several advantages before the traditional cultivation of vegetables and herbs in the soil:
- Perfectly matched nutrient solution formulations ensure optimal plant development.
- Economical water consumption during irrigation.
- There is no need to worry about pests and diseases.
- Saving space, because do-it-yourself hydroponics can be easily assembled at home.
- The absence of harmful substances in the final product, since the nutrient substrate is not able to accumulate excess fertilizers and metals. That is, hydroponic plants can rightfully be called environmentally friendly.
- Leaving time is significantly reduced, since there is no need to weed the seedlings and loosen the soil around them.
Installation instructions
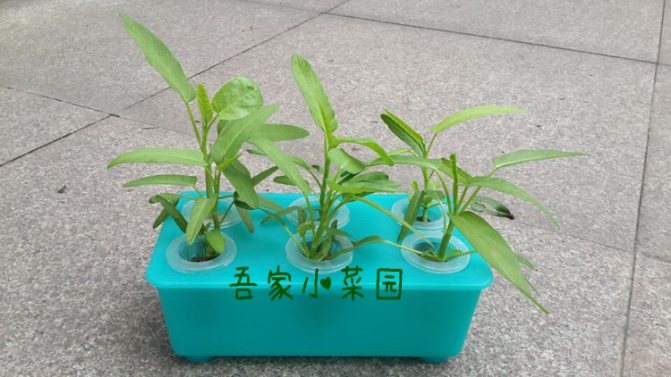
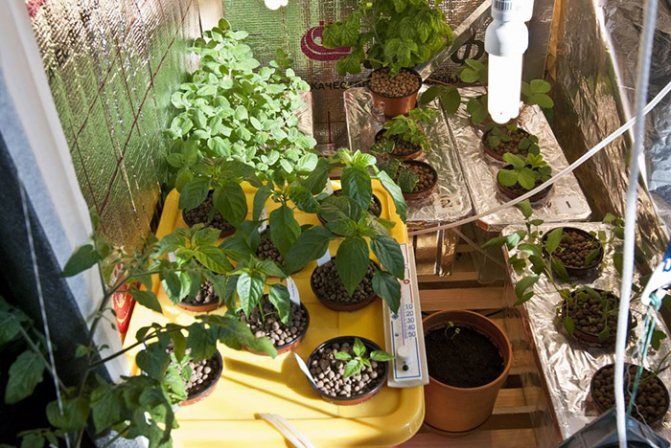
The simplest DIY hydroponic system is made in a few hours. If everything is done correctly, plants can be grown without problems in an apartment or in a private house. The installation procedure is as follows:
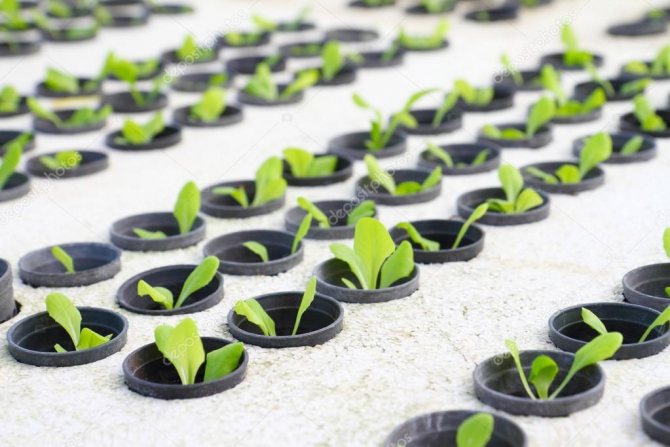
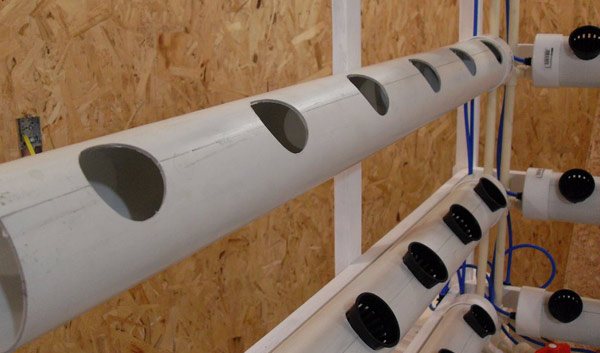
- The first step is to cut holes in the lid of a large tank for plant pots. The diameter of the hole should allow the pot to sink to the upper edge into the cavity of the tank, it should not fall through. The step between the grooves is selected taking into account the characteristics of the plants. Lettuce and greens need 10 cm, berries and cucumbers - about 15 cm.
- Holes are made in the side of the lid for connecting the pump and hoses, and the bottom of the tank is covered with clean stones.
- The tank is filled with liquid to about 2/3 of the height, after which the hoses are inserted into the tank, the pump is connected. This is done to check the correct installation and quality of the equipment.
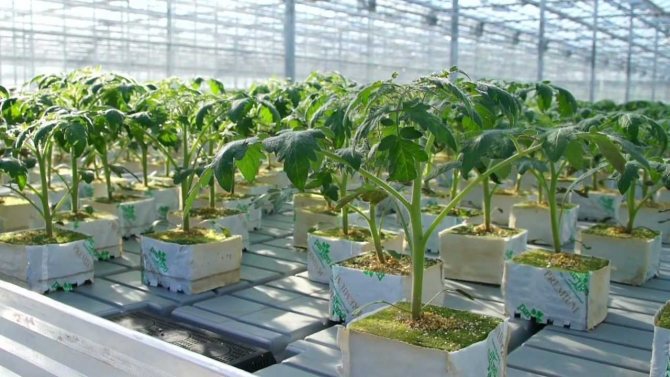
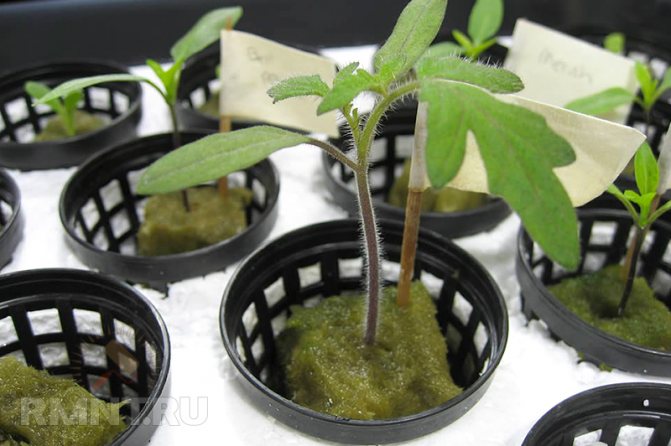
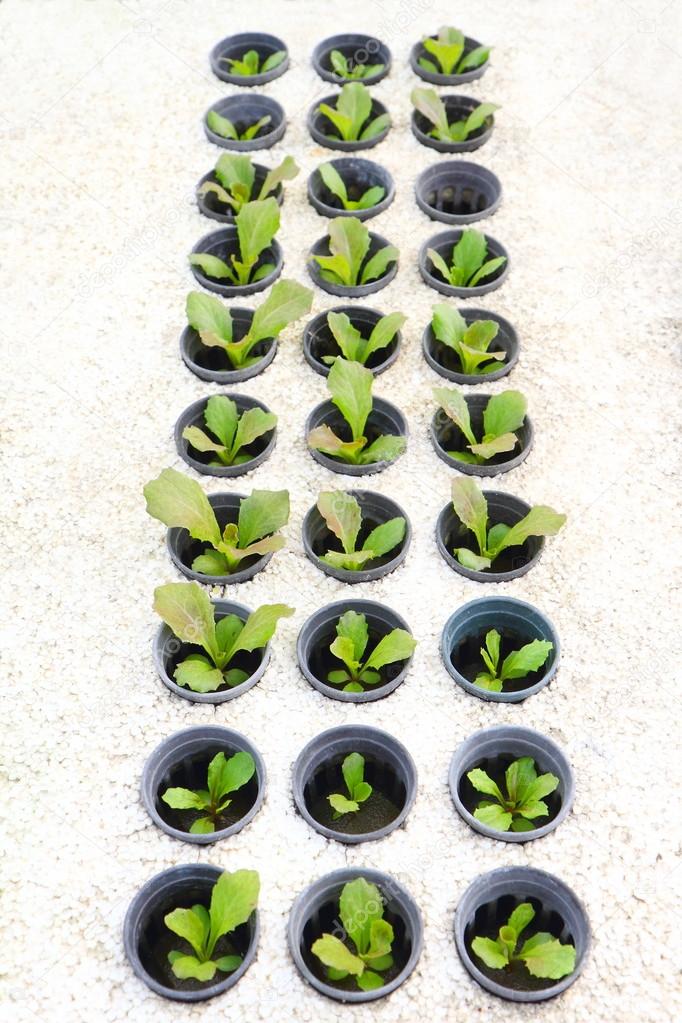
- The pots are filled with substrate. More often, mineral wool soaked in water is used, sometimes expanded clay is taken. The prepared material is placed in the holes made. If necessary, water is added to the tank, the bottoms of the pots should be immersed in the liquid. Then the tank is closed, seeds are placed in the pots or seedlings are transplanted.
- After the seeds sprout, nutrients are added to the liquid (in accordance with the instructions). After planting the seedlings, do-it-yourself fertilizers for hydroponics are applied. The substrate is added after the arrangement of the seedlings.
The liquid in the tank evaporates, so you always need to monitor its level - top up if necessary. It is recommended to use the compressor for at least four hours per day, the best option is daylight hours. For convenience, an electric timer can be connected to the compressor, which turns on the unit at a specified time.
Varieties of substrate and hydroponic systems
As you know, a substrate is needed for the normal functioning of hydroponic installations. Today, in home hydroponic farms, most often the following types of substrate are used:
- Organic substrate. It is represented by peat or moss. When using such a filler, the technology changes its name from hydroponics to chemoponics.
- Inorganic substrate. This filler is represented by expanded clay, crushed stone and sand mixture. The technology with such a substrate is called aggregatoponic.
- Ion exchange substrate. We are talking about the use of ion exchange resin in hydroponic substrates. In this case, the technology is called ionoponics.
- Ordinary air filled with fine droplets of nutrient solution. This is aeroponics.
There are a lot of varieties of hydroponic plants. Their complete description will take a very long time. Therefore, it makes sense to pay attention only to the most popular types of installations.
- Wick installations. In them, the nutrient solution is supplied to the roots of plants by means of capillaries made in the form of wicks. Their upper end is located at the base of the plant, and the lower one is immersed in containers with a solution. These are the simplest installations in terms of design, but due to the low speed of fluid movement through the wicks, they are used only for growing indoor plants. It will not work to grow greens and vegetables on a wick installation.
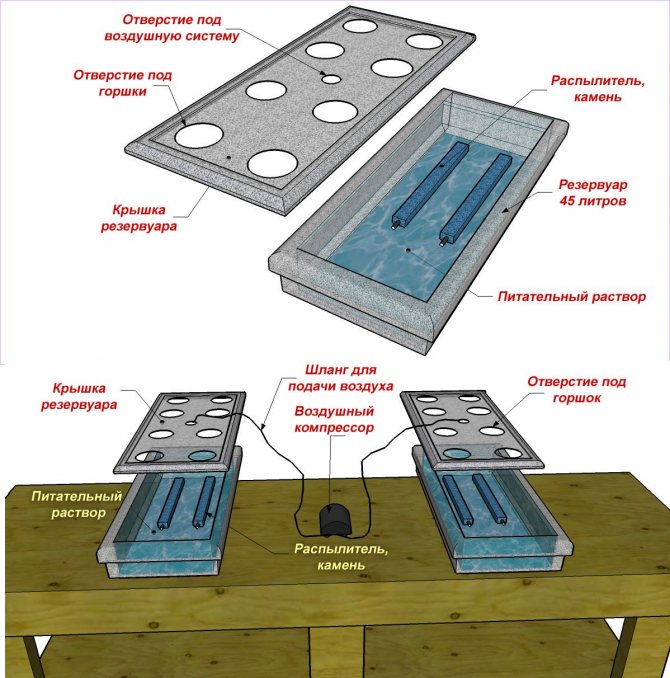
- Floating platforms. These are installations of low productivity, which are most often used for growing moisture-loving indoor flowers. The peculiarity of such systems is that there is a layer of nutrient solution at the base of the structure. The latter, under the influence of air pumps, turns into water dust and rises to the roots of plants.
- Flooded systems. They are two connected containers. One contains a substrate with a plant, the other contains a nutrient solution. From time to time the level of the solution in the lower tank rises and floods the substrate. After leveling the liquid level, the excess nutrient solution flows freely into the lower reservoir. The flooding process is controlled by special devices and occurs at regular intervals. This hydroponic system allows you to grow the most real gardens and greenhouses.
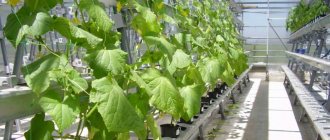
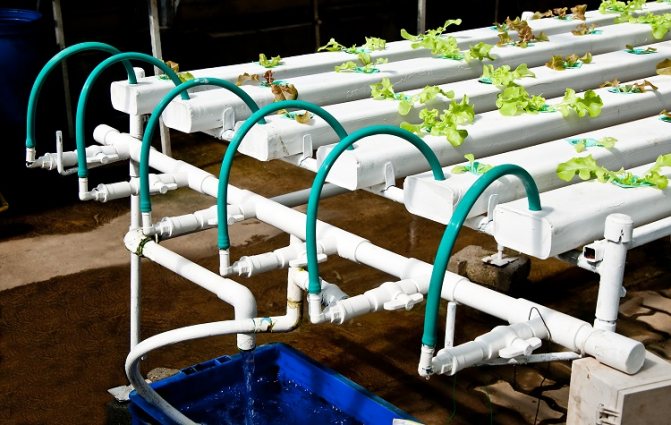
- Drip irrigation systems. This is the most common hydroponic option. They are used both at home and on an industrial scale. The drip system involves planting plants in containers containing a solid substrate. Tubes are fed to the plant roots, through which a nutrient solution is supplied in the form of drops in a strict dosage. Due to this, it is possible to avoid the competition of plants for nutrients and to minimize the consumption of resources. Drip irrigation systems allow you to grow strawberries, herbs and vegetables at home.
Rational arrangement of beds in a greenhouse 3x6
Aeroponics should be mentioned separately. With this method of growing greens and vegetables, their roots do not fit into the substrate. They are located in a dark container, where fine particles of the nutrient medium get into with the help of an ultrasonic nebulizer. Aeroponics can also be used at home, but making such a hydroponic system with your own hands is not easy at all, and the cost of the components is quite high.

Plant tie-in and control
In order for the plantations to feel good, it is necessary to foresee the possibility of their garter in advance. After a while, the plants will grow so much that without a tie, the installed systems can turn over. Without a garter, plantings can begin to get confused, which negatively affects their growth.
Tying should be done using normal twine and planting clamps. All the necessary items can be found at any gardening store.
The water level in the tank should be checked daily.You will need to monitor the acid-base balance and the level of fertilizer for hydroponics in solutions. From time to time it is necessary to check whether the pump is working correctly.
Regularly you need to monitor the condition of the plants. Their development should be monitored, cut and tied up, if necessary. If pests and signs of various diseases are found, it is necessary to remove the affected plants so that they do not infect neighbors.
The hydroponic method provides that the plantings will fight disease. However, pests are dangerous for them. If they are found, you will need to take immediate steps to eliminate them.
DIY home hydroponic plant
While creating DIY hydroponics you can go in two ways:
- Purchase system blocks in a store and assemble them into a single system at home.
- Collect all elements of the system at home from available tools.
You can do without going to the store only when creating the simplest wick installation, which is suitable for growing indoor plants. For greens, vegetables, and even more so strawberries, you will have to make a more complex system, and here you need a compressor for hydroponics.
Before assembling hydroponics with your own hands, you need to prepare the following components:
- 15 liter bucket with lid.
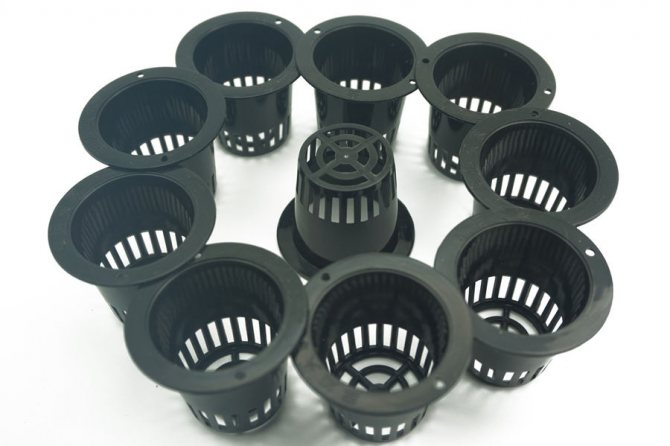
- Flower pots. In terms of total volume, they should not exceed half the volume of the bucket.
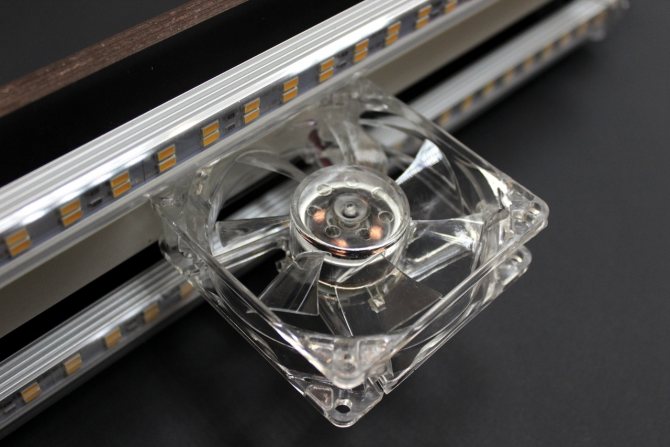
- Compressor for hydroponics. This can be a regular aquarium pump. It is desirable that the pump be silent, because the system will be at home.
- Several plastic pipes of various diameters.
- Expanded clay as the most affordable substrate. It should be enough to fill the volume of the prepared pots. It is advisable to choose expanded clay of large fractions.
- Timer for the pump.
- Timer for backlight.
Growing eggplants in a polycarbonate greenhouse
The main condition for growing strawberries, herbs and vegetables at home is the timely supply of air and solution. Best to handle it flood system... It will provide an even supply of nutrient solution and air. A timer will be responsible for periodic flooding. When activated, it will start the pump, and it will pump the nutrient medium into the substrate. After turning off the pump, excess liquid will drain into the main container - a bucket.
The direct assembly of the setup begins by cutting holes for the hydroponic pots in the lid of the bucket. 2 holes are cut in the bottoms of the pots. Through them, the nutrient solution will enter and be removed. Tubes are connected to the holes. One connects the pot to the pump, and the other avoids overflow.
It remains to fill the pots with a substrate, plant seedlings in it and fill the main container with a nutrient solution. You can then set the compressor timer to 15 minutes per hour. This mode is sufficient so that after flooding, the remaining solution leaves the substrate until the next start of the pump.
For more efficient plant development you can connect an ultraviolet illumination through a timer.

How to best add plantings
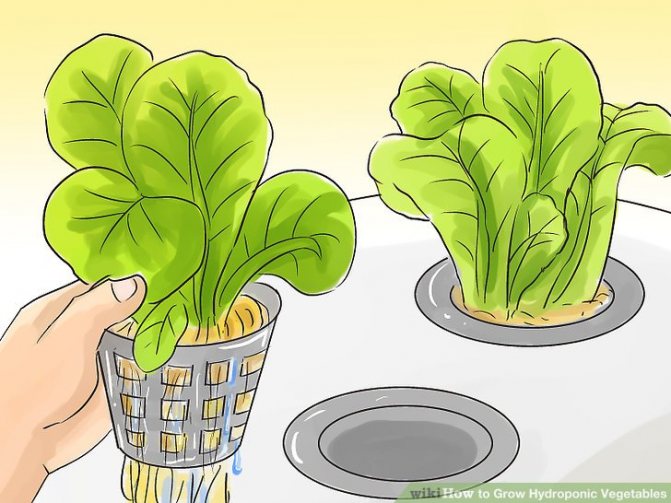
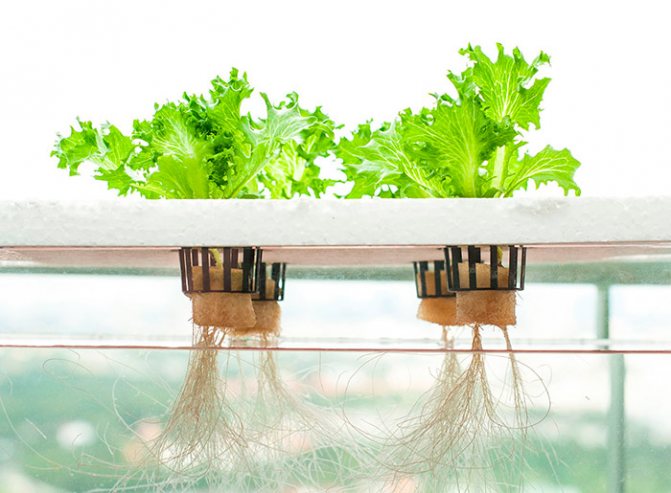
Speaking about how to grow hydroponics, you should know that the simplest option for arranging such a garden is to plant sprouted seedlings. These can be purchased at a specialist gardening store. It is necessary to ensure that the sprouts are healthy and of high quality.
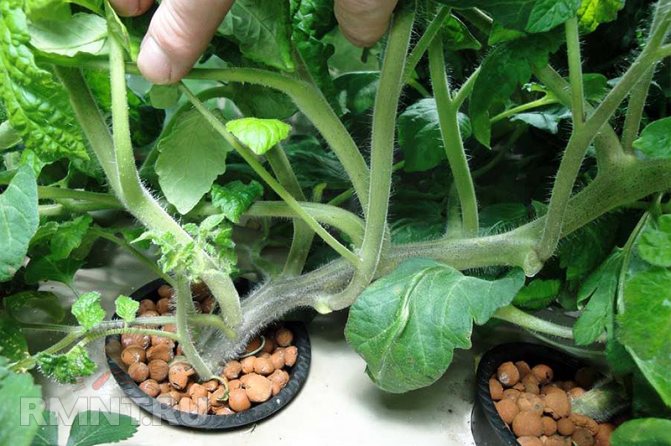
You will need to carefully free the root of the seedling from the existing soil, and then place the sprout in the pot. You need to try to stretch as many roots of the seedling as possible through the pre-prepared grooves in the bottom of the pot.
In order for the sprout to take a stable position in the pot, the container can be filled with expanded clay. This material is lightweight and will not cause significant damage to the roots of the plant.
Fertilizer selection
Another important condition for successful plant growth is an adequate supply of nutrients. At home, this condition can be realized only with the help of fertilizers for hydroponics.
Fertilizers are of 2 types:
- Organic. This type of fertilizer is made from organic ingredients. In fact, they are an imitation of the processes taking place in nature. Such fertilizers have a very mild effect on plant roots.
- Mineral. They are made from inorganic substances. They are highly soluble in water and are best suited for creating a nutrient medium.
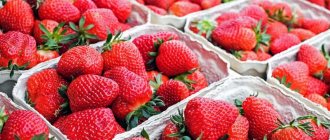
Ways of growing strawberries, features of berry care
Fertilizers for hydroponics can be purchased at specialty stores or made by hand.
When choosing finished products We recommend paying attention to the following fertilizers:
- Greenworld Spezialdunger Hydrokultur. This German-made product is excellent for growing herbs and strawberries. It makes the leaves and fruits richer, juicier and denser.
- Guanokalong Extract 1 lt. This versatile fertilizer is made from bat droppings. Its peculiarity is the presence in the composition of elements that control the assimilation of nutrients by the plant.
- FloraDuo Bloom. A French fertilizer that is best used during flowering and fruiting. It is great for growing fast growing crops.
Hydroponics is a technology available to everyone that allows you to get fresh greens and vegetables at home all year round. The cost of the hydroponic system and fertilizers is minimal, and 1 square meter of area is enough to accommodate the simplest hydroponic installation. It is the perfect solution for urban dwellers looking for fresh vegetables and herbs on the table.
Useful tips for growing greens using a soilless method
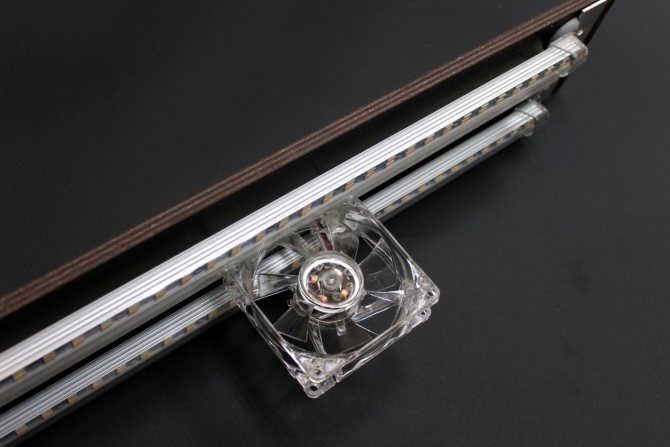
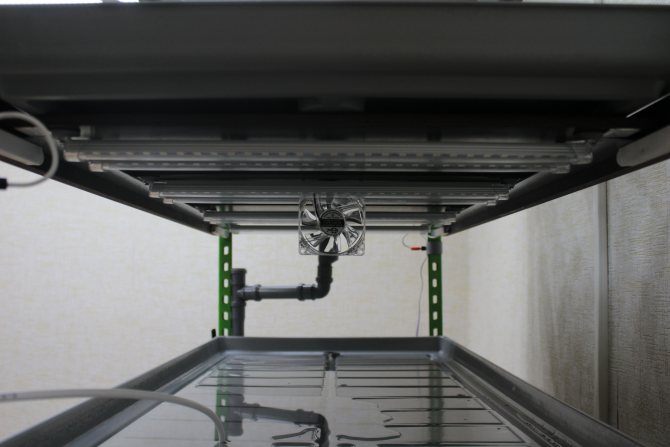
Cultivating fresh herbs with this method is not difficult at all, but how much joy and benefits it brings! It is very important that the plants in hydroponics receive a lot of light. Therefore, you need to purchase bright lamps and install them next to the seedlings. The backlight is usually used 12-14 hours a day.
This should not be done when hydroponing onions, parsley and dill. They can do without additional lighting.
In this case, the roots of crops are very vulnerable to oxygen starvation. Therefore, it would be nice to use aquarium spray stones in the tank of the installation.
Existing technologies in home and garden conditions
The most popular are the following:
- In containers.
- In barrels.
- In bottles.
- Indoors.
- Japanese technology.
- In boxes.
- According to the mitlider.
Let's consider their features in detail.
In containers
Do not grow vegetables in containers, the roots of which are too deep. Plants in this case will slowly ripen and require fertile soil. These include celery, parsnips, beets, carrots.
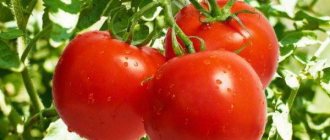
However, there are some exceptions to this rule. Tomatoes and potatoes give great results when you plant them in containers. It is important to root them properly so that the plants begin to grow and develop.
Low-growing varieties do well. They do not require the use of large containers. In addition, if the weather is bad outside, you can easily hide the plants in the greenhouse, and then return them back. There are decorative varieties of vegetables, the fruits of which are not only tasty, but also very beautiful.
Among the green crops in containers, you can plant spinach, lettuce, herbs, Swiss chard. Basil, curly parsley, dill, coriander are considered to be very diverse.
It is easy to grow different types of plants in one container. You can combine peppers, basil, tomatoes, coriander. But do not plant plants of the Solanaceous family together. For example, tomatoes and eggplants will only oppress each other. But this cannot be said about beans, which are characterized by a variety of stalks.
As containers you can use:
- wooden boxes;
- barrels;
- buckets;
- pots;
- pots made of plastic and clay;
- flowerpots.
They should match your garden in style and color. After all, their purpose is not only to conveniently grow, but also to decorate the site.
Plants must be of the same size as the containers. Large vegetables that need to be fed frequently are best planted in higher containers.
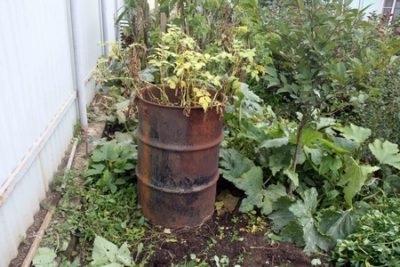
In barrels
This method is a real find for people who have a small piece of land. From one barrel, you can get a crop, like from a 3-meter garden.
This way you can grow your own:
- zucchini;
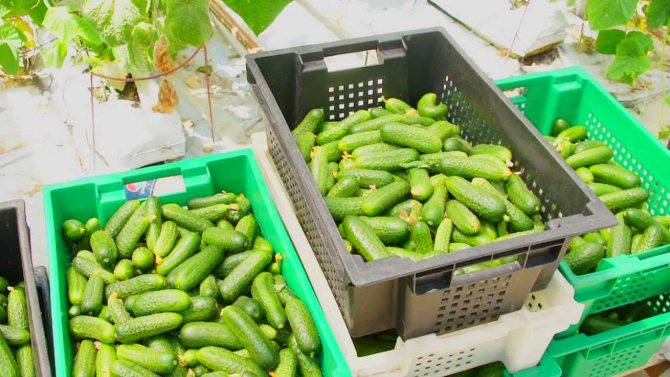
- cucumbers;
- potatoes;
- tomatoes;
- greens.
To provide for a family of 5, you can take several large barrels. Old products can now be purchased at an affordable price. The best solution would be to place them on the sunny side.
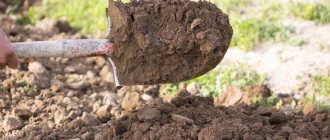
Preparation for planting can be carried out in the fall or spring.
- Holes are made at the bottom to prevent stagnation of water and air.
- First you need to lay a nutritious soil.
- After that, plant residues are put, such as mowed grass, vegetable cleaning, weeds. All organic waste can be thrown into the barrel. The decomposition of such components will make the crop as fertile as possible.
- After that, the barrel can be filled with earth.
- Add some earthworms to loosen the ground.
When the crop is harvested, do not throw out the old soil. It will turn into humus, with which it will be possible to grow vegetables next year.
You can put up to 10 seeds in one barrel. To speed up the sprouting process, the product can be covered with foil. Caring for vegetables is very simple:
- Watering is carried out once every 4 days.
- Weeding is carried out as needed.
- When the sprouts are large, you can lay a 5 cm layer of mulch.
- If you provide abundant soil nutrition, the stems will grow more mass and the harvest will be more abundant. Do not allow the soil to dry out, as this is very dangerous for potatoes, cucumbers and tomatoes.
We are watching an interesting video on how to grow potatoes in a barrel:
In bottles
Not everyone uses such a creative approach. And the reason for this can be different factors. Planting cucumbers in bottles is a very convenient and effective option for many growers.
Throughout their existence, plastic bottles have been used for various purposes. This container is very convenient and free. Planting vegetables in it allows you to grow them even on the balcony.
Seedlings produced in bottles can be planted in open ground or in the country. This is a kind of mini greenhouse that will promote the growth of vegetables throughout the season. Plants are often planted in the ground along with the bottle. If you prefer early varieties, then crispy vegetables will delight you already in June.
The rim of the bottle has many advantages:
- Protection from the bear.
- Saving water when watering.
- Getting rid of weeds from seedlings.
- If the planting is carried out in a greenhouse, the plant will not only be healthy, but also strong. An important condition that cannot be ignored is loose and porous soil that allows air to pass through well.
We are watching an interesting video "Growing cucumbers in a bottle":
Indoors
This method was tested back in the 80s of the last century. It was very appropriate, as it allowed to save water costs for watering vegetables. Now it can be used to grow eggplant, pepper, cabbage, lettuce, spinach, and watermelon. Besides vegetables, it is possible to grow berries and ornamental plants.
The indoor microclimate plays an important role. Fertilizers should be of high quality, nutrition is complete and regular, and temperature and humidity are optimal.
All closed structures are classified into greenhouses, tunnels, greenhouses. If you find the most convenient way for yourself, you can grow in early spring:
- a tomato;
- cucumber;
- onion;
- carrot;
- potatoes and other crops.
A heated facility has many advantages as it will yield crops all year round and is suitable for Samara and other regions of Russia.
Japanese way
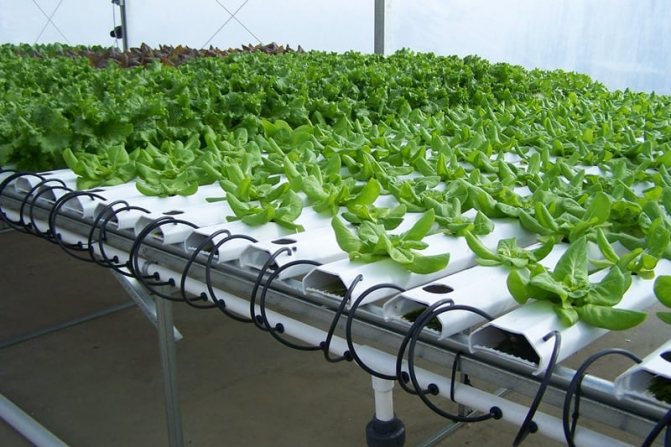
In Japan, the method of growing crops on a floating platform is very popular. It is a farm where vegetables are ripened all year round. After the seeds germinate, the plants are automatically transplanted by the machine into special holes on the rafts. Further maturation takes place in the DFT system.
At first, they are located tightly to each other, and then the rows begin to cut through. The seeds grow in small nurseries while the roots are dipped in a special solution. Everything happens automatically, except for harvesting - it is done manually.
For the plant transplant to be successful, you need to realize that the roots of the seedlings have gone deep into the raft. Another interesting point is growing spinach. In Japan, it is customary to use separate trays for this crop.
In boxes and in the garden according to the Meatlider method
The Meatlider method is not only convenient, but also reliable. The area of the garden for planting should be 1.5 acres. The technology provides for the availability of water for lighting and irrigation. Vegetables grown in this way are often of high quality, can be stored for a long time and do not contain nitrates. Every gardener will be able to create a well-groomed, perfect garden.
Reference! The method involves digging the beds without using other sites. Loosening of the soil is not necessary due to the small amount of weeds.
Growing vegetables can be carried out not only in a narrow bed, but also in a box. The soil should be artificial, including sawdust and sand. The boxes can be placed both in the greenhouse and in the apartment. An excellent solution would be to plant tomatoes, cabbage and greens.
The narrow beds are 50 cm wide, and the distance between them varies by 90 cm. There are no weeds between the rows, and the vegetables ripen on time. Garden-grown vegetables often get their nourishment from the roots. They don't oppress each other.
It is important not only to feed the planted crops, but also to provide them with the necessary microelements. In narrow beds, they receive a full range of vitamins, while the nitrate content is reduced to nothing. They self-purify, removing all toxic components due to the active process of photosynthesis.
We are watching an interesting video about the Mittlider method:
Hydroponics: what it is and the necessary equipment
The hydroponic method consists of replacing the soil with an artificial substrate. It can be sand, gravel, mossy environment. It can be used in greenhouses. By means of this method, good plant nutrition is ensured, as well as an excellent concentration of individual elements. Crops that grow hydroponically do not need additional disinfection and fertilization.
The hydroponic method, despite its many advantages, also has some disadvantages. The mechanism for supplying solutions is rather complicated, therefore, a gardener who does not understand this issue is simply obliged to seek help from technical personnel.
The creation of a hydroponic plant begins by making holes in the lid of the bucket for the flower.They are responsible for accessing the nutrient solution. In the first, the pump is fixed, and in the second, the tube. They are needed in order to saturate plants with nutrients in moderation.
After the hydroponic system is assembled, it will be possible to test it. The solution should flow in and out of the pot fairly easily. The bucket is often filled with a solution, and the pot is filled with expanded clay and seedlings are planted in it.
On the balcony of the house
The plantation on the balcony requires some effort and free time, and its organization itself is carried out in several stages:
- Sowing seeds and preparing the land.
- Caring for them.
- Transplanting.
- Caring for her.
The process of getting vegetables is the need to sow seeds. Sowing should start in December or January. To speed up germination, you can treat them with potassium permanganate. It will promote active growth.
Soil preparation also plays an important role. It should consist of peat, turf, humus, sawdust. All components must be taken in different proportions. It is important that the plants get enough sun.
In an apartment on a windowsill in winter and summer
To achieve success in this business, it will not be superfluous to follow the rules for growing vegetables:
- Selection of seed material. It is better to give preference to early maturing varieties.
- Providing proper conditions. Vegetable beds work especially well on the southeast or south windowsill.
- Watering mode. Use only settled water at room temperature.
- Additional functions. Every day, plants need to be turned towards the light so that they receive all the vitamins they need.
- Artificial lighting. In winter, it is mono to put a fluorescent lamp, which will provide good lighting for the beds.
In greenhouses all year round
The most profitable would be the cultivation of such crops:
- Tomatoes and bell peppers. They don't require much attention, but do need stimulants and hydroponics. Cucumbers. They grow very quickly. Only 2 months pass from the moment of sowing. They are stored for a long time, but they require a lot of space.
- Chinese cabbage and radish. These species require special care. If the growing process goes right, a continuous flow can be achieved.
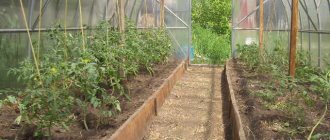
In a polycarbonate device
When growing plants in a greenhouse made of polycarbonate, do not forget about some rules. In one hole, you need to place the root, and in the other, lay the stem. Tall crops are planted in one row in the middle of the garden bed. Top dressing is carried out once a season. Potassium sulfate or liquid mullein is suitable for this.
Winter growth
In a greenhouse that is used all year round, you need to calculate the planting of vegetables for growing in the winter. Vegetables planted for the winter will no longer bear fruit with the onset of spring.
Important! Constantly enrich the soil between plantings. Loosen all rows and spread a small amount of compost. A prerequisite will be compliance with such requirements for plants - maintaining the temperature and humidity. Drip irrigation is a very good idea.
Garter and control
The possibility of tying plants is taken into account in advance. Without a garter, a grown culture can get confused, which negatively affects growth, or even completely turn the system upside down. The tie is carried out using twines and planting clamps. The water level in the tank is checked daily. You also need to monitor the acid-base balance and the level of fertilizers in solutions. The correct operation of the pump is periodically checked.
Regular monitoring of the development of plants is carried out, which are pruned or tied up if necessary. If pests are found that may nevertheless appear, measures are taken against them. Affected plants are removed so that they do not infect neighbors.