"Sharing our experience" A hassle-free vegetable garden for the elderly
0
826
Article rating
Find out how, with a great desire and the right approach, to turn a garden into a storehouse of vitamins. How to make it a place for pleasant work and relaxation. A hassle-free vegetable garden for the elderly - the correct organization of work.
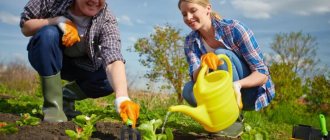
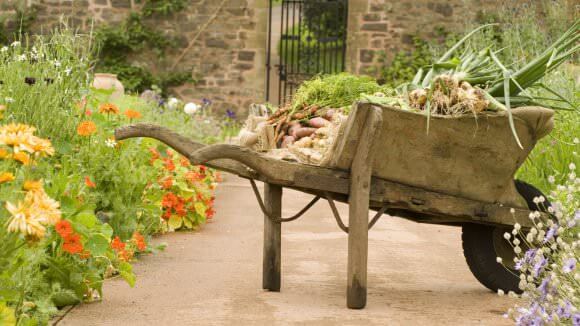
While we are young and energetic, the garden and work on it are not a burden. But time is ticking. The squares are large, but little use. We do not have time to process everything. Digging, watering, agricultural technology, fertilization takes a lot of effort. What to do? As well as harvest good harvests and rest, rejoicing every day, and the works of their hands. A garden without hassle for the elderly should justify itself and bring pleasure.
A hassle-free vegetable garden for seniors
Why is the vegetable garden more and more troublesome? First of all, you need to reconsider your attitude to the land and work on it. Follow the rule "Less is more."
What is the point of planting the entire plot with hundreds of tomato seedlings, large areas with vines of cucumbers? Maybe make a paradise out of a huge vegetable garden. So that flowers, fruit trees, berry fields bloom there. Also build a small reservoir. Everything should be pleasing, raging, fragrant.
The ideal option for a new vegetable garden is to think over a completely different layout of the site, on which everything would grow at the same time, as if overflowing from one to another.
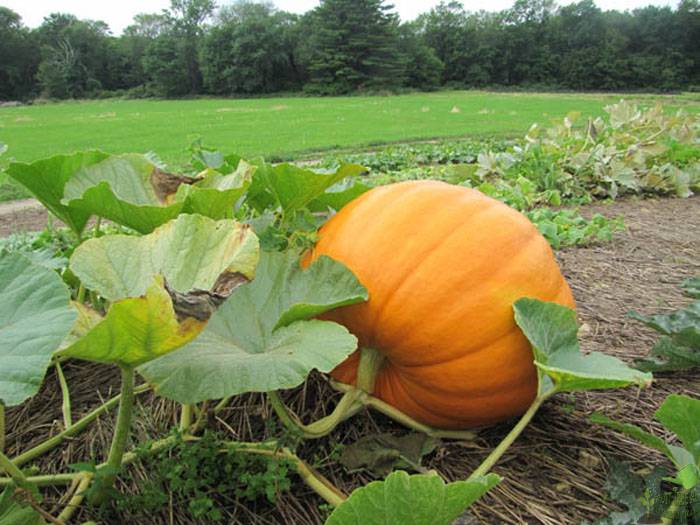
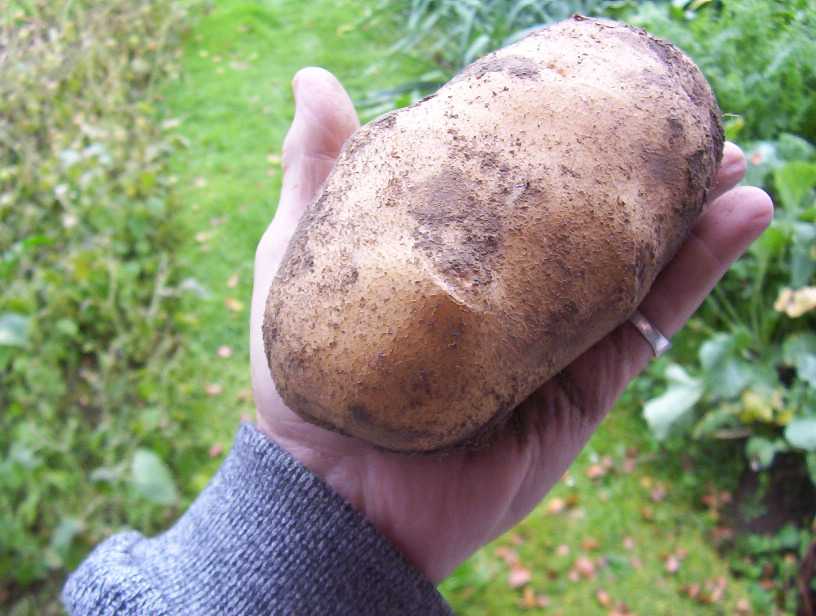
Features of growing potatoes
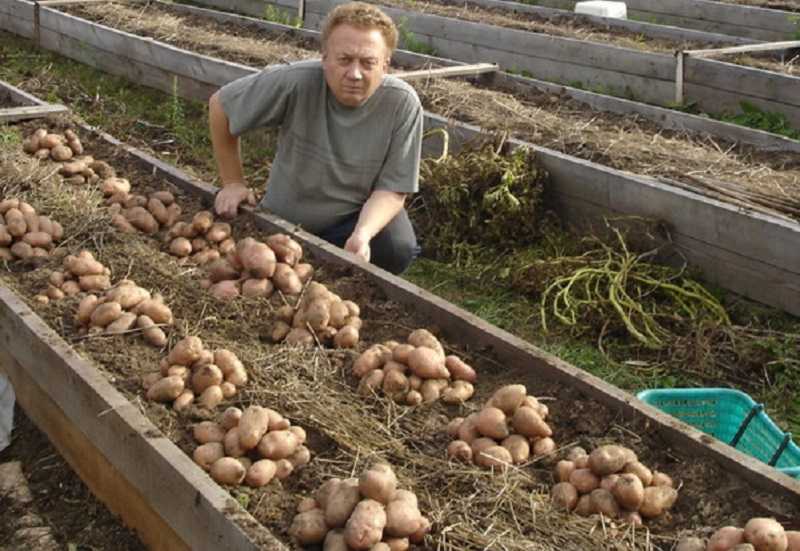
Kizima pays much attention to the second food product after bread - potatoes. This is how the gardener Kizima talks about a garden without hassle for potatoes:
First, you need to prepare the tubers, that is, wash, pour hot water (+45 ° C) until they cool, add a solution of potassium permanganate to disinfect the planting material. After 15 minutes, remove the tubers, wash and wipe.- Expose tubers to light for greening for 2-3 weeks. As a result, corned beef poison will accumulate under the skin of the potato, which repels pests.
- Then remove the tubers in a dark and warm place for germination. It will take another half month.
The preparatory process should be completed before the cherry blossoms or a little earlier. On the advice of Galina Kizima, potatoes should be planted during this period:
- Choose a seat for landing. In no case should the virgin soil be dug.
- Spread the sprouted tubers directly on the untouched ground. Row spacings are recommended to be 40-50 cm wide, and leave a distance of 25 cm between the potatoes. Also, 20-25 cm should be left from each row to the edge of the garden.
- The optimal size of the planting material is 50-60 grams (chicken egg).
- It is advisable to plant different varieties in different beds. The ripening period for them may be different.
Description of popular varieties of cucumbers for open ground
For planting potatoes, you need to choose a sunny place, otherwise you can get a crop of tops, and not potatoes.
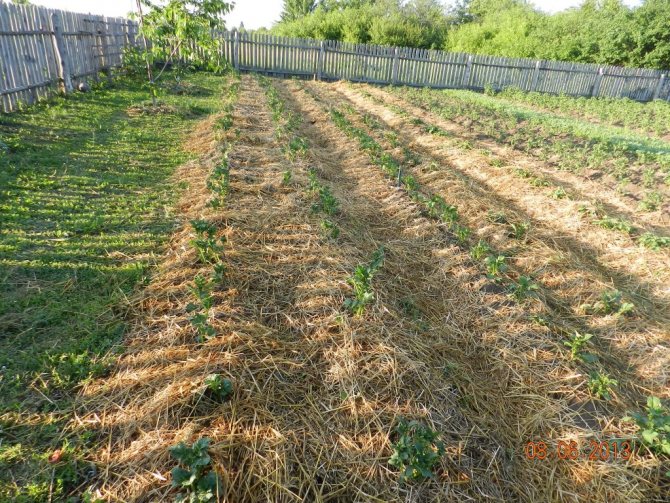
At the time of spring frosts, the rows of plantings should be covered with dry hygroscopic material. Meadow hay, dry leaves or the top dry compost layer work well for this. From above, everything is covered and strengthened with non-woven fabric or old bags. When warm days come, the upper canvas must be removed and gradually put on the beds everything that has been mowed or weeded out by this time.In short, you need to fill up the plantings with what is usually used for compost. It is these materials that should be earthed up. You just need to make sure that the tubers are not exposed. The result is:
- Fertilizers are not needed during planting. Bushes get them from compost.
- There is no need to water the beds. They get enough moisture from the same waste.
- Perennial weeds under planting will die over the summer without receiving sunlight.
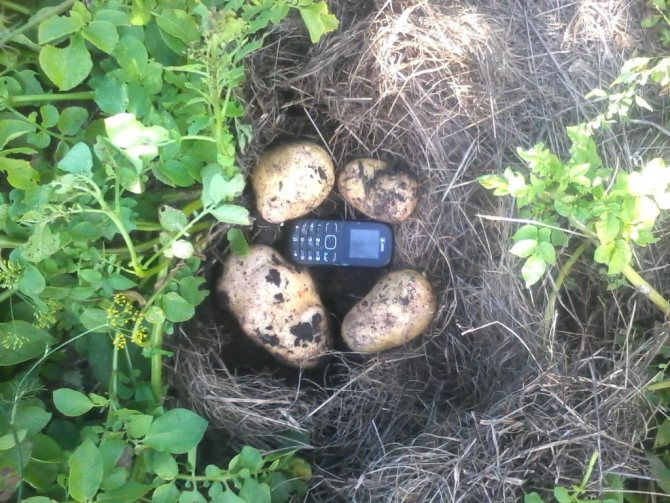
To increase the yield of potatoes, it is recommended to cut off the tops of the tops with flowers. So the plant will be able to give mass to tubers, and not tops. You only need to leave a few flowers to know when the potatoes are ripe. As soon as the flowers begin to wilt, the first crop can be taken. To do this, you just need to move the compost layer and get the right amount of tubers. The rest continue to grow and mature.
After harvesting, the tops should also be laid out in the sun to destroy the corned beef, and then used as compost. After harvesting, the compost heap is left in place until spring and is used as rotted compost.
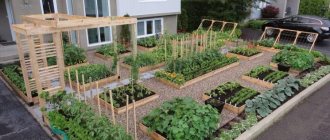
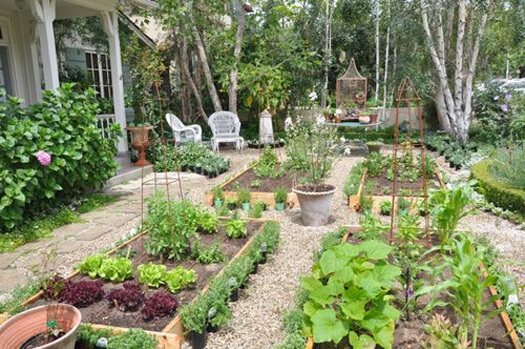
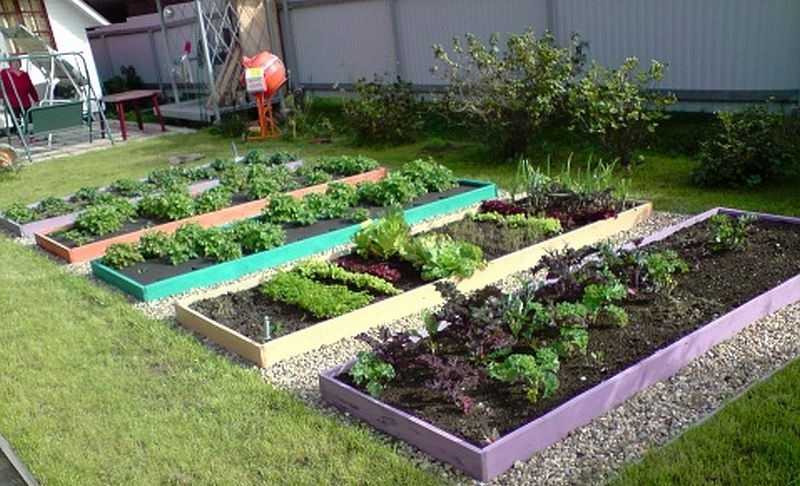
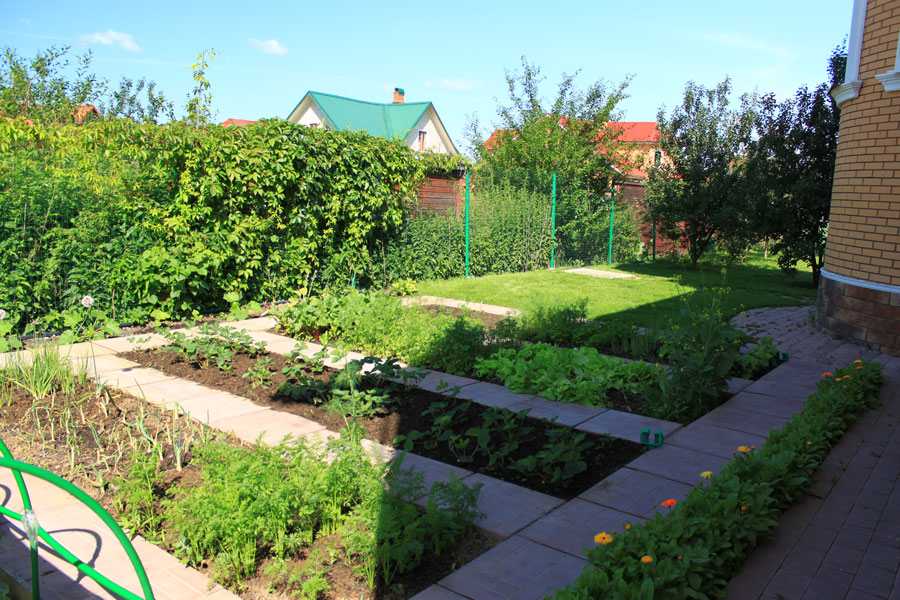
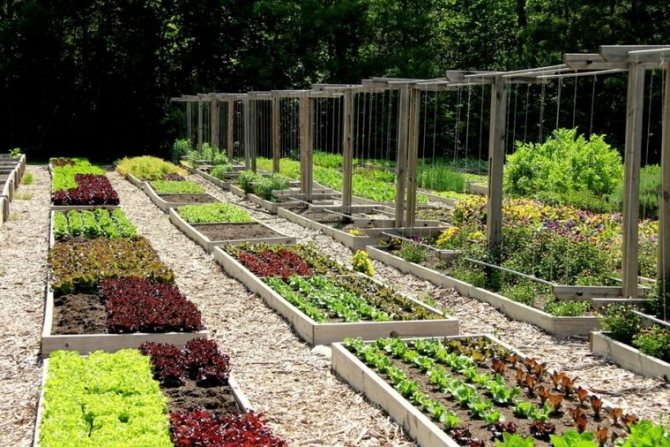
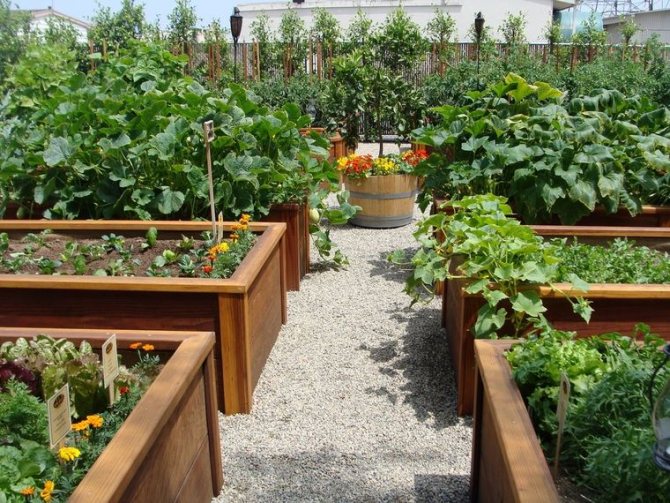
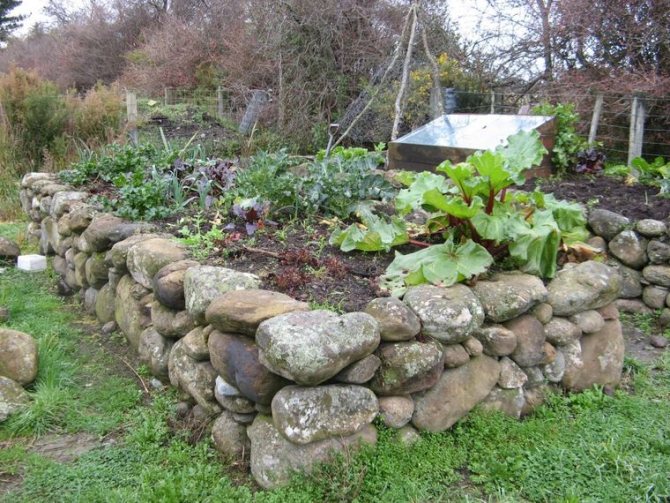
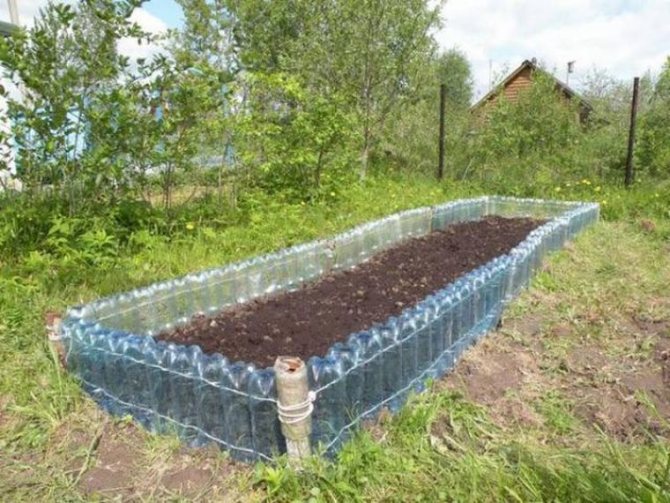
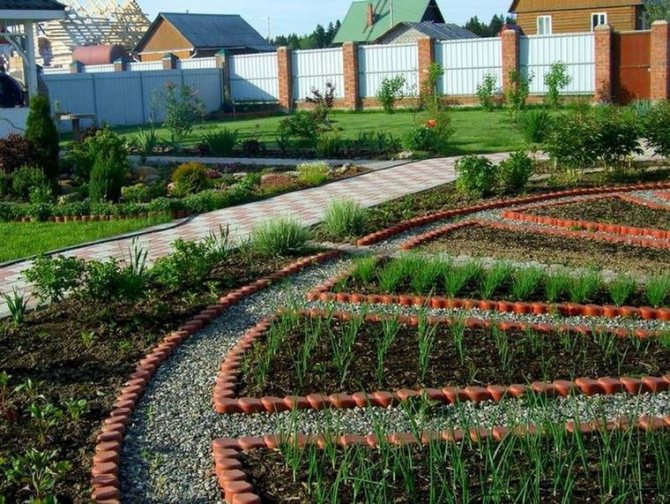
The vegetable garden is smart beds
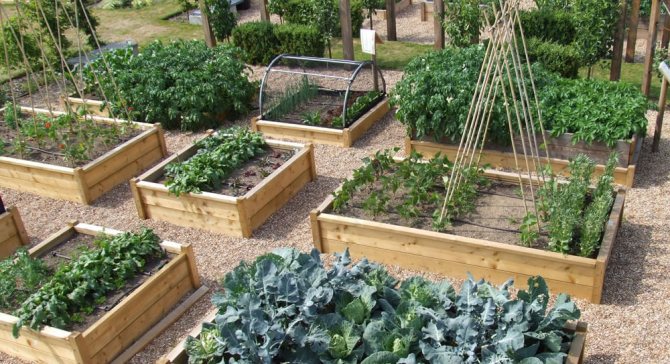
Make smart beds. This is helped by the curbs with which they are surrounded. Moreover, they can be built from improvised means. And the ridges are not in the form of the usual rectangles, but in different shapes. At first, it will seem absurd, but in summer it is beautiful.
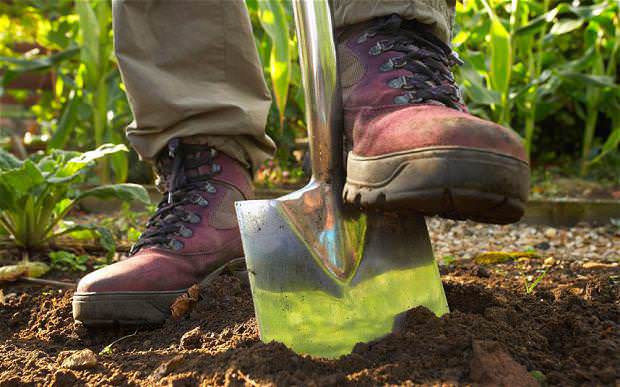
The land in the beds does not need to be dug up every year. It is better to use a flat cutter, which greatly facilitates work. But do not forget the shovel.
These are also convenient boxes in which you can put grass and waste. An excellent solution is their reconstruction of the transfer to a temporary greenhouse, installing arcs and covering with a film. In fenced land plots, moisture retains better, fertilizers, and the earth is not washed out. The advantages of smart beds have long been appreciated, and now every gardener seeks to improve his plots.
Along the edges, be sure to plant a row or two of black shaves or other flowers that are useful for vegetable crops.


Principle # 1: DO NOT dig!
Let's first figure out why digging is harmful? There are at least 5 reasons why you shouldn't do this.
The first reason consists in the following: we are accustomed to consider the earth as something like inanimate matter.
But the soil is a very complex living organism, densely populated with microorganisms and lower animal organisms, for example, such as earthworms. And between them there are established laws of the community.
In the upper soil layer, at a depth of about 5-20 cm, micro-fungi and bacteria live, which need oxygen for life. In the lower layer, at a depth of about 20-40 cm, bacteria live, for which oxygen is harmful. They need carbon dioxide.
When digging to the depth of a shovel bayonet, turning the layer over, we change the layers in places. And each type of microorganism finds itself in an unfavorable environment for itself. Most of them die in this case.
The soil, devoid of microorganisms, becomes dead and loses fertility. After all, this very fertility of the soil is created and maintained by microorganisms and earthworms inhabiting the earth.
The soil will remain dead until its population is restored on every floor. In addition, the soil, losing its inhabitants, loses its structure along with them, and therefore collapses. This soil is washed away by the rains and carried away by the winds.
The second reason, on which one should not dig and plow with overturning the layer of earth, is as follows: when digging the soil, we break all the microchannels through which moisture and air penetrate into the arable layer. As a result, neither moisture nor air gets into the zone of the sucking roots, and then the normal nutrition of the plants is disturbed.
Usually, such soil turns into a viscous substance, like plasticine, during rains, and after drying it turns into real reinforced concrete.The roots literally suffocate, the plant weakens. What a harvest there.
How are these microchannels formed in the soil? The fact is that the root system of plants is huge. It not only goes deep (sometimes up to 5 meters), but also widely branches in all directions. And each of these roots is covered with hundreds of thousands of sucking hairs. As a result, every inch of the earth is literally riddled with these hairs. When the aerial part of the plant dies off, soil microorganisms begin to eat the remnants of the roots. As a result, microscopic channels are formed through which moisture penetrates into the soil. The soil absorbs moisture, and air rushes through the formed voids-channels into the earth.
In addition, there are passages that worms make in the soil. And they also serve as channels for water and air, only larger. Through all these passages, the roots of the next generation of plants easily penetrate deep into the soil.
We are strongly advised to do the autumn digging of the soil. But by doing so, we completely disrupt the system of water and air exchange, replacing it with several large slots. In the spring, with repeated digging, we finally destroy the channels created by roots and bacteria. With this double cultivation, the entire complex soil system is destroyed, and the soil itself is compacted. Sometimes (in dry weather) so much that it literally has to be hammered.
Third reason, on which one should not dig and plow, is very simple: during the autumn digging, we bring all the seeds of weeds from the surface into the soil, where they remain until spring. And with repeated digging in the spring, we bring back overwintered weed seeds to the surface, which immediately begin to germinate.
Fourth reason, on which the soil should not be dug, is this: usually after digging, we leave the surface of the soil "bare", and this leads to drying out and destruction of its uppermost layer. In addition, weeds are now beginning to occupy an open place under the sun.
The soil must not be left bare. It should not be dug up, but covered from above with any mulching material.
The easiest way to do this is how nature has invented a long time ago. It covers the ground with organic debris. In autumn - fallen leaves and aerial parts of dead annuals. In spring - young green shoots.
Why is she doing this? In autumn, to return the organic matter consumed by plants to the soil and protect the superficial root system from frost. In spring, to cover the surface from direct sunlight, to protect the top layer from drying out and destruction.
Fifth reason is as follows: when digging, the upper, most fertile part of the soil, containing humus, turns out to be scattered throughout the entire thickness of the dug layer. The humus seems to be washed out or smeared out. And since there is not much of it in poor soils, the fertility of the upper layer almost completely disappears. Over time, humus "floats" into the upper layer. But when will that happen! Humus should be protected and appreciated, and not destroyed by digging.
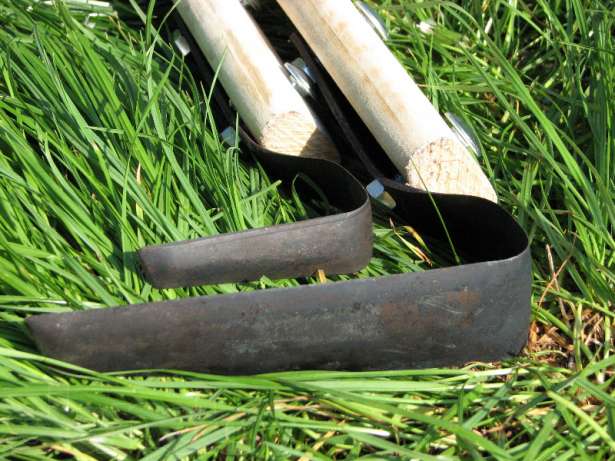
So what do you do with the soil if you can't dig it? And it can and should be loosened. Use a Fokine flat cutter instead of a shovel. It has a pointed end, which should be used to make grooves. First along, then across, deepening it into the soil about 5 cm.Then, use the flat part of the tool to lightly dig up the top layer. Use a rake if necessary.
By the way, the rake can also be used to loosen the topsoil. A hand-held cultivator is best suited for such shallow cultivation. In addition to the wheels that loosen the soil, it also has a cutting plate.
This work can be done with both a sharpened hoe and a weeder "Strizh", and other devices. There are quite a few of them now on sale.
The only requirement for such tools is that they must be very well sharpened. And don't believe in self-sharpening. The tool must be sharpened before each use, then the work will go easily and quickly. And make sure that the tools do not sink into the soil below 5 cm, and that the layers are not mixed. You can also dig with an ordinary shovel, but only superficially.
Don't worry about the roots. They will find their way into deeper layers, penetrating the microchannels left over from the root system of previous plants.
So, you need not dig, but loosen!
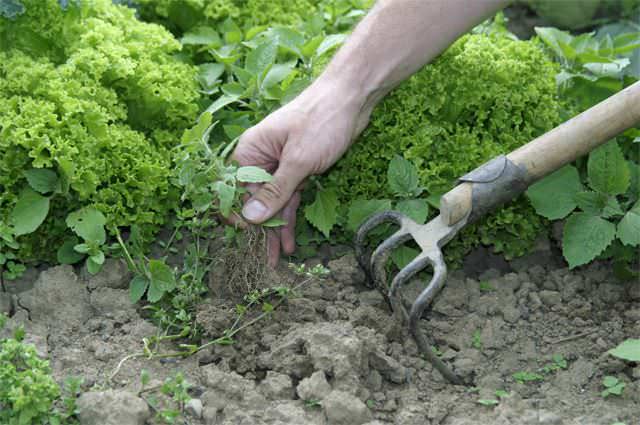
Weeds are friends of the garden
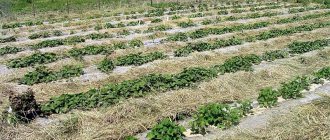
Use weeds to create compost pits and make nutritious infusions from them. Do not forget that while they are not blooming, this is a good mulch with which you can plant seedlings of vegetables and berries. A wonderful material for planting potatoes under the straw when you need to report the grass. Therefore, after weeding, leave it in place or place it on potato rows. A grass blanket will save you from frost, keep moisture and give its own.

Principle # 2: DO NOT weed!
How can this be? Everything will grow!
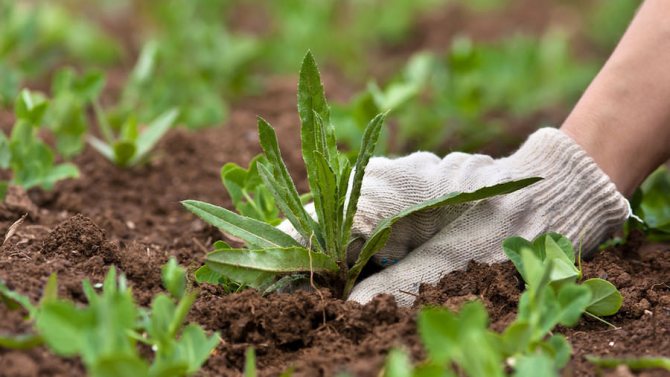
Do not weed - does not mean at all that you do not need to deal with weeds. It is imperative to fight with them, otherwise these native children of nature will simply displace our cultivated plants from the site.
So what can be done? And you need to cut perennial weeds at the root! And most importantly, this must be done systematically. It is necessary to cut the weeds at the age when it is easiest to do it, that is, when they are no more than 5-15 cm high.
You can use the already familiar Fokin flat cutter, or the Swift weeder, or any other device. And shave the weeds off the face of the earth. The best result is a slight deepening of 2-3 cm into the soil.
You simply cut the weeds and immediately leave them in the soil.
What does it do?
- Firstly, weeds are suppressed. During the growing season, no plant can do without an aerial part for a long time. Roots that do not receive their share of the chlorophyll in green leaves are doomed to die. Of course, new stems will immediately come out of the buds on the roots. And you - again at the root. Do not let them grow higher than 5-10 cm, otherwise the roots will have time to "wake up". So, having made 3-4 cuts per season, you practically get rid of weeds.
Cut weeds should not be composted. Leave them in place. Why? Yes, because you mulch the soil with them, and its top layer does not dry out and does not collapse.
- Secondly, this layer of weeds, gradually rotting, restores fertility to the soil.
- Thirdly, you get rid of the extra work of carrying weeds into the compost.
- Fourth, you get an even distribution of the compost that has rotted over the past year over the area.
- Fifth, the roots of the weeds, left without the aerial part, will die. Rotting, they will give additional nutrition to the roots of cultivated plantings. That is, you will additionally enrich the soil with humus exactly as it happens in nature.
You can, of course, not cut, but simply mow the weeds. But again, it's important to do this systematically, without letting them grow too tall.
Why shouldn't we weed after all? After all, if you weed systematically, then there will be no weeds either?
The difference is that by cutting the growth point underground, or by mowing the aboveground part, you induce re-growth of the same stem. One. And as soon as you dig up or pull up the weed, then on all the scraps of the root system remaining in the soil, the buds of renewal will immediately wake up. And this will provoke the growth of a whole horde of weeds instead of one.
Oh well. We have learned how to deal with perennial rhizome weeds. But what about weed seeds in vegetable beds? Is there really no way to do without weeding?
But no. It turns out that they can be strongly squeezed in the beds.In any case, it is quite possible to do without the tedious many hours of weeding. For this, we just need to grow weeds in the beds in advance. Yes Yes!
- In early spring, before the last snow melts, scatter ash or peat over the beds to slightly darken the remaining snow. Then cover the beds with stubs of old film, lay them on top of the poles so that the wind does not lift the film up or carry it away.
- Under the layer of film, the blackened snow in the beds will quickly melt, the surface layer of the soil will warm up, and weeds will quickly grow out of it. This will happen in about 10-12 days. If after two weeks you visit your site and see that the weeds have sprouted, remove the film, loosen the topsoil and leave the beds open for a day. Young shoots of weeds will die. At this time, the shoots of weeds are still too weak, therefore they die from only one loosening.
- After you loosen the first shoots of weeds, wait a day and again cover the beds with foil. Leave the beds under the plastic for another 1-2 weeks.
- Arriving at the site for the second time, you will again see the shoots of weeds under the film. These are the seeds that sprout from deeper layers of soil. Repeat the same operation again.
- After a day, you can sow cultivated seeds in the beds, freed from weeds. At the same time, you must understand that such a bed is not dug up before sowing! Otherwise, you will bring the weed seeds back to the surface from the lower layers. And they will ascend safely.
The labor of preliminary cultivation of weeds in the garden is small and not at all difficult. You just need to do it on time.
So, weeding is the worst and most ineffective way to control weeds.
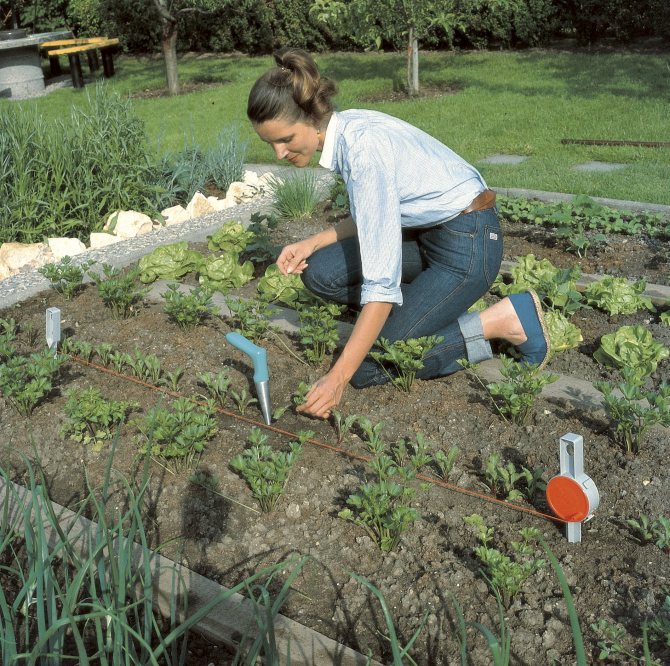
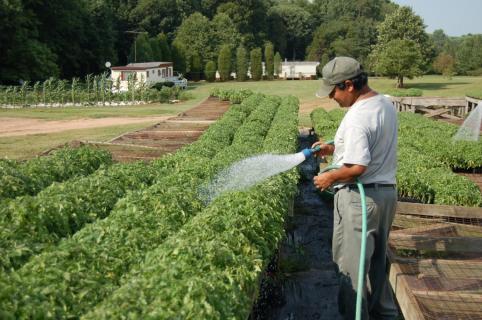
Water wisely
Automatic watering can be done, but it is quite expensive and requires certain skills in performing assembly and commissioning work. Not all elderly people (especially women) will be able to learn the rules of handling automatic irrigation systems. What can you advise in such cases?
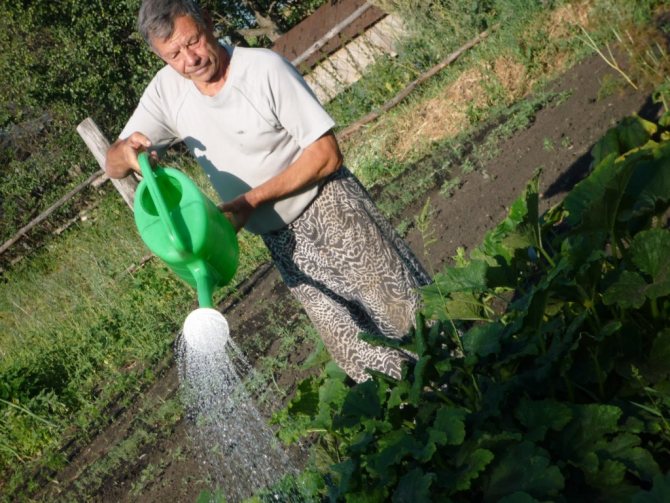
Correct organization of watering
Think about why the earth is watered. That's right, in order to be wet. Why does it dry out? Due to evaporation by plants and capillaries in the soil. If nothing can be done about the evaporation of plants, then the drying out of the soil due to the capillaries can be significantly reduced. This means that you will have to water the garden much less often.
Under natural conditions, the earth is protected from drying out in a simple and very effective way - a plant carpet. The shade from the plants themselves and from their remains prevents the sun's rays from reaching the ground, which reduces the amount of evaporated moisture by several orders of magnitude.
Planting your plants correctly will allow you to water less.
Read also: Apparatus for peeling pine nuts
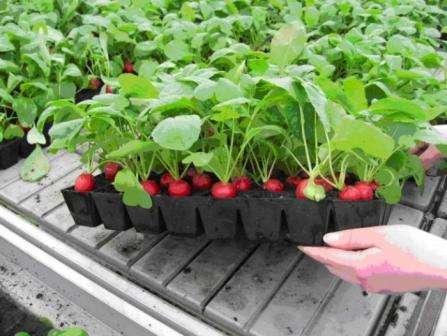
To facilitate work in the city, you do not need to reinvent the wheel, you should only adopt the experience of nature. It is not necessary to make the spacing very large, this will allow the tops or green stems to completely shade the ground. For example, a 4 × 4 cm area is enough for radishes, 5 × 5 cm for carrots, 20 × 20 cm for cucumbers, 35 × 35 cm for tomatoes. times less moisture than from the soil surface. And for the normal development of the root system, free areas of small size are quite enough. For plants that require more nutrients, additional feed can be used. It is much easier than weed control and watering.
You can combine watering and feeding
The second way is mulching. You can use plastic films (the worst option), non-woven materials that let rain water (the average option in terms of efficiency) or natural mulch made from woodworking industry waste. The last option is the most acceptable, we recommend using only it.If there is a desire to use modern non-woven materials and completely cover the soil together with cultivated plants, then it must be borne in mind that the temperature under such materials is 6–10 ° C lower than that of open ground. Such a difference can adversely affect the growing season of thermophilic plants.

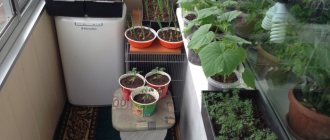
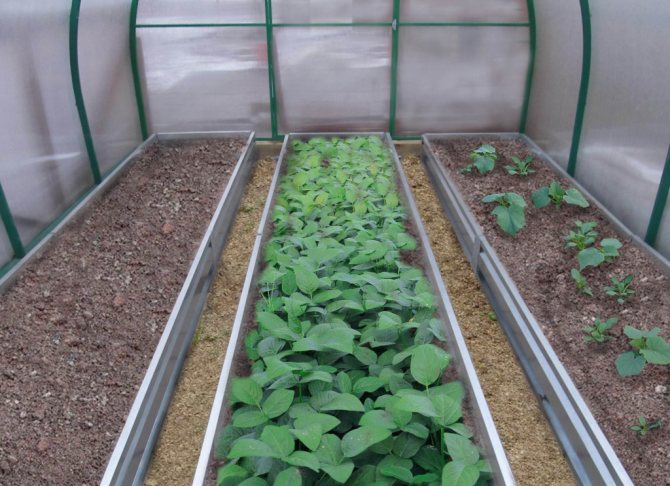
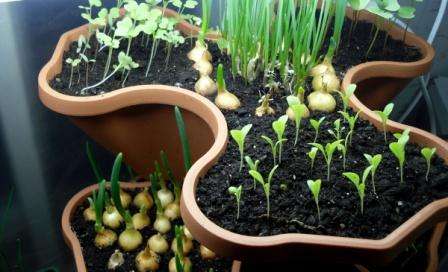
What can be grown at home on a windowsill?
First of all, greens can be grown at home. It is always appropriate when preparing food and serving ready meals on the table. In addition to greens, some types of vegetables can be grown, such as tomatoes, cucumbers and peppers. Lemons, tangerines, kiwi, etc. can grow at home. Some amateurs plant wild plants on their windowsills, i.e. plants that usually grow in the wild, but have beneficial properties for which they are kept in an apartment. This can be mint, lemon balm, and many other herbs.
If you do not know what to grow in your country house or windowsill, then read a book or watch the full video course "Garden without hassle for the elderly" from Galina Kizima. The helpful tips are sure to inspire you!
How to equip your home garden without hassle?
First of all, you need to decide which plants will be planted in the garden. Based on this, it is necessary to find a suitable land for these plants and a place in the room. Land can be helped to choose in a flower shop, but lighting is more difficult. There are plants that need bright lighting, there are those that cannot stand direct sunlight, and all this must be taken into account when creating a vegetable garden in the house. It is good, if possible, to make a vegetable garden on shelves with artificial lighting.
After the place of the garden in the house is determined, it is necessary to start arranging it. What will be used as beds? Some plants need a lot of space for the root system, some don't. Some plants can be planted next to each other, and some die because of this. In addition, it is advisable to make pallets under the beds, where excess water could drain after watering. It is equally important to remember about drainage, it is necessary so that water does not stagnate in the soil.