Growing vegetables according to Meatlider is a well-known vegetable growing technique that allows you to get a large harvest. Every gardener can make do-it-yourself beds in Mitlider. The technology is clear and easy to implement. For implementation, you do not need any special skills or abilities. Even a novice gardener without experience can productively use such a management system. To master the Meatlider method (vegetable growing in small areas), the main thing that is required is to strictly adhere to the recommendations for arranging a garden and acquire patience. If you do everything according to the rules, then the result will please.
Why are Meatlider beds attractive?
- The area of cultivated land is significantly reduced, because only the beds are cultivated, and the aisles are never dug.
- Productivity in narrow beds increases significantly due to intensive nutrition.
- The opportunity to get a high yield in the first year.
- Ease of planting maintenance - wide aisles.
The Mittlider method consists in the fact that by applying a mixture of mineral fertilizers and planting according to a certain pattern, plants receive adequate nutrition, develop more actively and become resistant to adverse weather factors, pests and diseases.


What difficulties may arise and how to avoid them
When growing potatoes using narrow bed technology there are some difficulties associated with violation of the basic rules of the method.
Wrong watering regime
In the absence of daily watering, the nutrients included in the composition of fertilizers do not dissolve and do not penetrate deep into the soil. As a result, they accumulate on the surface, having a detrimental effect on plants. In addition, a crust forms on the surface of the earth, which prevents air from entering.
Lack or excess of fertilizers
When feeding bushes, you should use mixtures No. 1 and No. 2, developed by Mittlider himself., and strictly follow the recommended dosage of fertilization. Otherwise, a good result is not guaranteed.
Poor mixing of fertilizers
When applying fertilizers, it is necessary to carefully dig up the soil.so that the nutrients are evenly distributed for the harmonious growth of the bushes along the entire length of the ridge.
Uneven beds
If the bed is located on a slope, water and nutrients will only collect on one side of it, resulting in an uneven growth rate. Therefore, it is necessary to level the surface set aside for the beds as much as possible.
Other
When making formula at home, you must use elements strictly according to a certain composition in order to prevent an overabundance of them. That is why it is not recommended to use complex mineral fertilizers as a component.
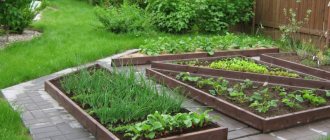
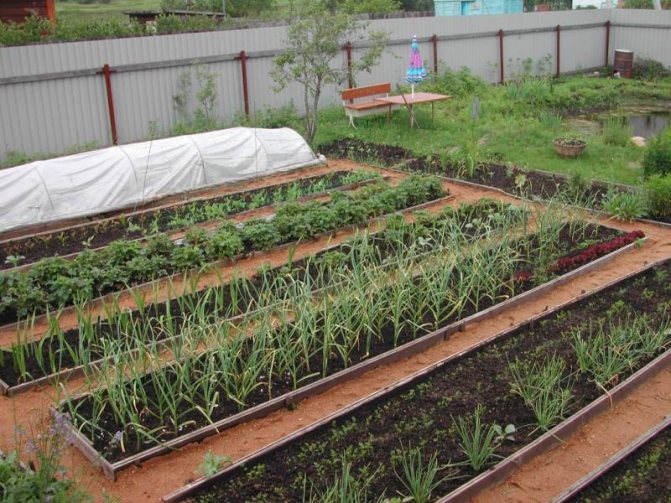
Planning the beds
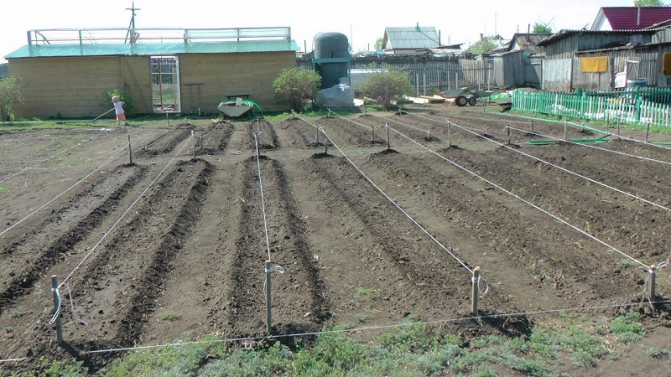
The plot is planned to be perfectly flat. We carefully dig it up, choosing all the rhizomes of perennial weeds, which will subsequently save time on weeding. It is better to do this with a garden pitchfork, so as not to cut the rhizomes. Then we begin to form the ridges.
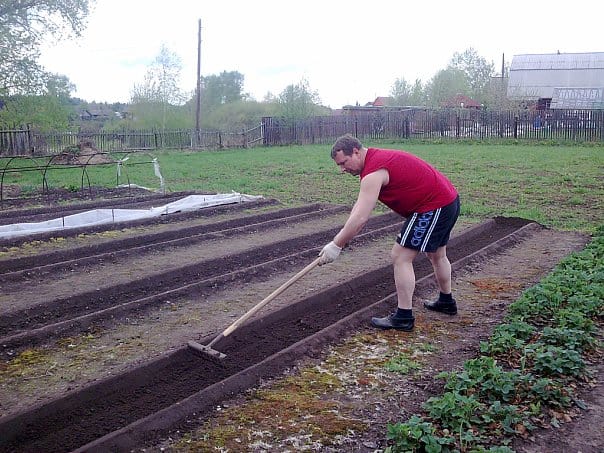
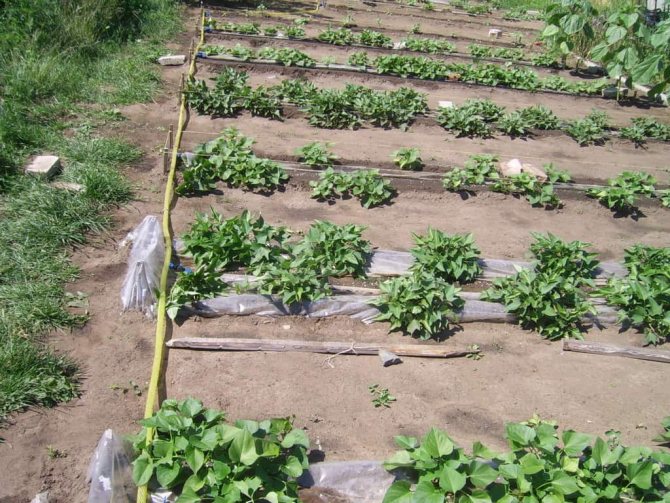
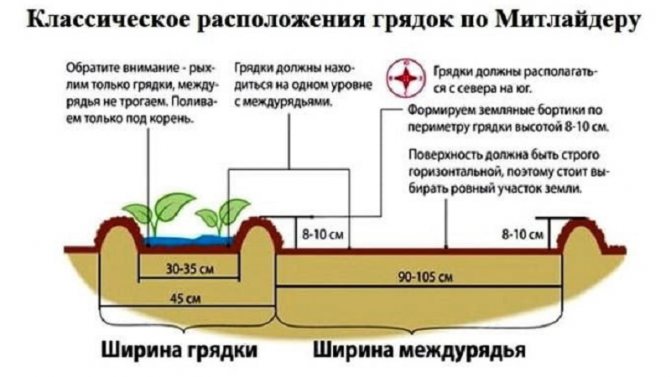
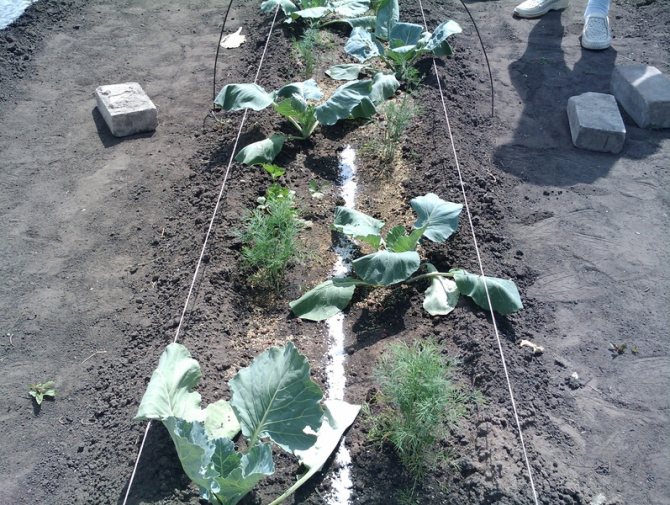
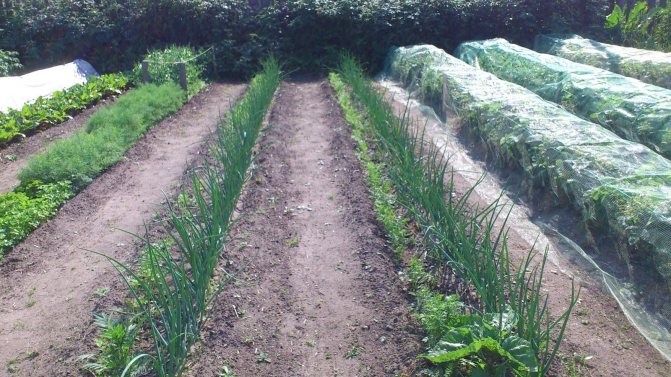
A bed is a strip of land 45 cm wide, limited from the sides and ends by earthen rollers 8-10 cm high. The rollers retain water and fertilizers, allow them to be saved and delivered to their intended destination.
The length of the ridge can be any. The inside of the ridge should be flush with the surface of the walkways and be perfectly leveled. It is advisable to check the horizontality of the ridge with a building level, since this is of great importance when irrigating for an even distribution of water and fertilizers. We arrange the ridge on the day of planting.
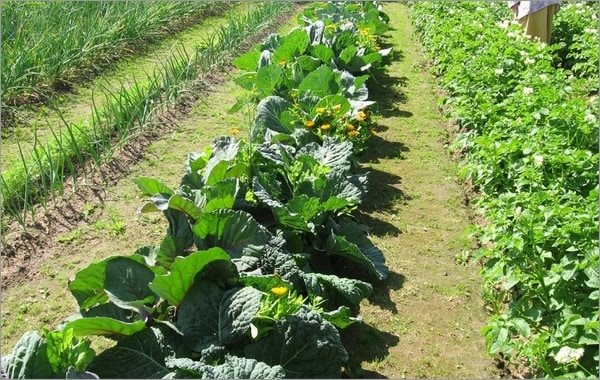
We form the row spacing with a width of 90-105 cm.
Do not allow narrowing of the row spacings, because they work on the illumination of plants, and, accordingly, their photosynthesis improves.
You can find recommendations for narrowing the row spacing to 70 cm. But such aisles are suitable only for low-growing plants - onions, garlic, herbs.
And if the crop rotation is observed, this will turn out to be inconvenient, because the aisles are formed permanent. With constant use of row spacings, the soil on them becomes compacted and becomes unattractive for moles, since moles love loose soil. On wide aisles, it is convenient to use a weeder, cut plants remain right there and dry.
Polycarbonate
Polycarbonate greenhouse construction technology:
- The base of the future structure is laid on top of the foundation. Bars with a section of 10x10 cm are used as a base. Bars are laid along the entire perimeter of the structure and fixed to each other with self-tapping screws;
REFERENCE: After laying the base, be sure to check whether the rectangle is correct. Then stakes are driven in along the entire area of the base, the connection with the bars is carried out with self-tapping screws.
- Collect the side walls according to the intended dimensions. Self-tapping screws are also used to connect the walls;
- Build the ends. The distance between the posts is 70 cm. The walls are mounted using a bar with a section of 75x50 cm;
- Collect the doorway. Hinges are installed on the doorway;
- Install windows. In this design, the window frame should have an angle of inclination similar to the slope of the roof slope, equal to 30º. The best option for construction is two windows.
The final stage is the construction of the roof. For the construction of the roof, use:
- Five beams, the length of which is 1.9 meters;
- Five bars, 32.7 cm long. They will serve as a support. The corners of the bars must be cut;
- Five triangular wedges with equal sides 50 cm.They are made of 70 cm thick plywood.
Using materials, a five-rafter structure is assembled. The distance from the extreme point to the other is 240 cm. Then fasten the wedges with nails. Installation of finished structures on top of the walls is carried out. First, the side elements, then the rest, with the same distance. Fix the installed structures with self-tapping screws. At the very top, under the roof, a bar with a section of 75x50 mm is installed, window frames are attached to it. Above, the installation of an auxiliary board is required. Several short bars are fixed under the windows between the rafters.
ATTENTION: All wooden parts of the structure in contact with moist soil are coated with linseed oil. The finished frame is covered with polycarbonate.
During the installation of a polycarbonate coating, it is necessary to follow some rules:
- It is necessary to pre-drill holes for self-tapping screws. The holes should be 2-3 mm wider than the diameter of the screws;
- Avoid pressing the polycarbonate sheets too tightly to the frame;
- The polycarbonate coating is installed on the side with UV protection. Due to the protective membrane, the coating has a bluish tint.
The choice of a greenhouse structure according to Meathlider will be an excellent option on a personal plot. Thanks to the design features, it has a positive effect on the development of plants and guarantees a large harvest at the end of the summer season.
Greenhouse according to Meatlider. From design to production:
The Meatlider method is a popular vegetable growing method in our country.Thanks to him, you can get a good harvest without much effort.
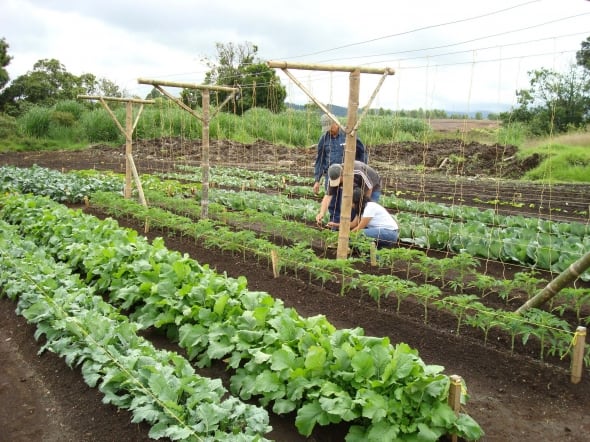
Agriculture has firmly entered our life through dachas and vegetable gardens. You always want to grow something of your own, but far from always the harvest comes out plentiful, and the plants often get sick and suffer from various pests. Then the Meatlider scheme comes to the rescue, which solves almost all the problems of gardeners. You can learn how the Meatlider method works and how to apply it by reviewing the implementation of the method.
Sowing plants
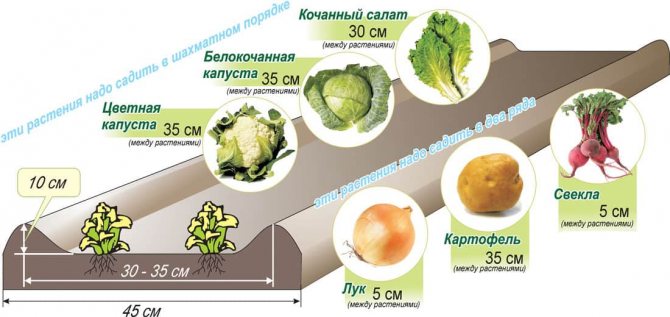
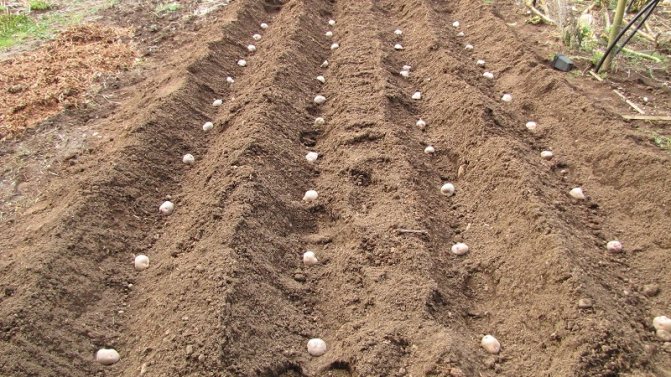
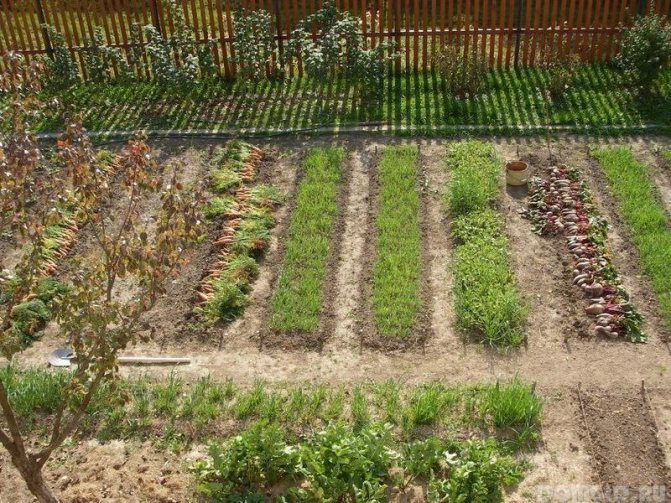
Plant seeds and seedlings on the beds are sown along the rollers:
- In 2 rows - beets, carrots, garlic, onions (sets, leeks, nigella);
- In 2 rows in a checkerboard pattern - seedlings of cabbage, head lettuce;
- In 1 row along one of the rollers - seedlings of tomatoes, cucumbers, zucchini, squash, pumpkin.
The middle of the ridge is left free. Fertilizer mixtures will be applied here and watering will be carried out.
Cucumbers in boxes
This technology is perfect for trouble-free growing of cucumbers. The main thing is to provide the bushes with enough light and water.
Long narrow boxes are usually used to grow this crop, but it is allowed to plant them in narrow ridges. Boxes are usually used when the soil of the plot is not suitable for traditional cultivation. The soil for the boxes is prepared separately. It is a mixture of sand and sawdust.
If the summer resident has a mitlider greenhouse, then the cucumbers are best grown there. In this case, the length of one bed should not exceed 9 m, and the width should not exceed 45 cm.
The main secret of growing cucumbers according to the mitlider technology is balanced crop fertilization. The top dressing should contain all the trace elements necessary for the rapid growth of plants and fruits. A special calculator will help to correctly calculate the ratio of all feeding elements. It can also be used to create mineral mixtures for fertilizing other crops.
Watering and feeding plants
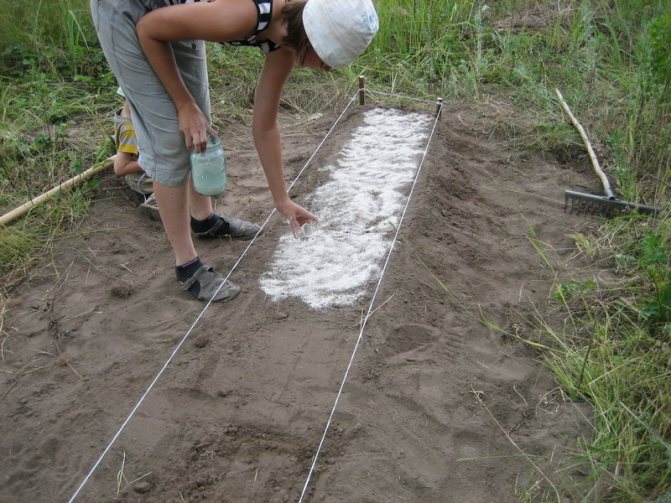
Plants are fed with mixtures of mineral fertilizers.
Mixture No. 1 (pre-sowing)
Consists of 5 kg of dolomite flour and 40 g of boric acid (borax). It is introduced for digging 1 time per season at a dose of 100 g per linear meter of the ridge on light and 200 g on heavy (clay, loam, peat) soils.
Drip irrigation beds
Mix No. 2
Comprises:
- nitrofocks 6kg
- urea 1 kg
- potassium sulfate 1 kg
- magnesium sulfate 1 kg
- 15 g boric acid
- 15 g of molybdic acid or 20 g of ammonium sodium molybdate.
This mixture is used when digging at a dose of 50 g per running meter of the ridge together with mixture No. 1 and for mandatory dressing during the summer.
For top dressing, mixture No. 2 is used at a dose of 25-40 g per linear meter of the ridge (25 g in unfavorable weather, with partial shading of the plantings). The mixture is applied in a dry, narrow strip in the center of the garden bed, then watered until completely dissolved. Watering can be done at any time of the day, not just in the evening. Water is supplied over the soil surface.
With this method of watering and feeding, plant roots are located in the upper soil level, where they quickly find water and nutrition, therefore, loosening of plants prohibited
.
Mix No. 2 is applied 1 time in 7 days in dry, warm weather and 1 time in 10 days in cold, cloudy weather. Top dressing begins 3 days after plant transplantation and continues after 7 days. When planting with seeds, fertilizing begins after the emergence of friendly shoots.
When organizing the Meatlider method, questions arise about the application of organic fertilizers.
The author's method does not imply the introduction of organic matter either as a dressing for the soil, or as a top dressing. But Dr. Mittlider himself noted that organic matter, when decomposed, gives humus and carbon dioxide, which is so necessary for growing plants.
Having carefully studied all the requirements for organizing the beds in the Meatlider with our own hands, we can realistically assess our capabilities.After all, this method presupposes strict adherence to the entire technological chain, from working with the soil and ending with painstaking work with plants. There are no trifles in this system, all elements in it are equally important, the whole system is aimed at the harvest.
It is not necessary to arrange the whole garden according to the Meatlider, you can arrange 1-2 ridges for experience. Follow all the technology, rejoice yourself and surprise your neighbors with an excellent harvest.
Method advantages
The method is based on the doctor's personal half-century experience. The arrangement of a garden according to Mitlider has its advantages:
- Vegetable crops can be grown in the beds at least twice a season.
- It is convenient to care for the plantings.
Vegetable crops ripen at the same time.- High yield of vegetables even in small areas.
- Fertilizers are applied at the root, in the groove between the beds, so they do not spread over the surface and are well absorbed by the plantings.
Meatlider has calculated the exact proportions of the required micronutrientsc, determined the optimal irrigation regime and provided plants with abundant light for photosynthesis.
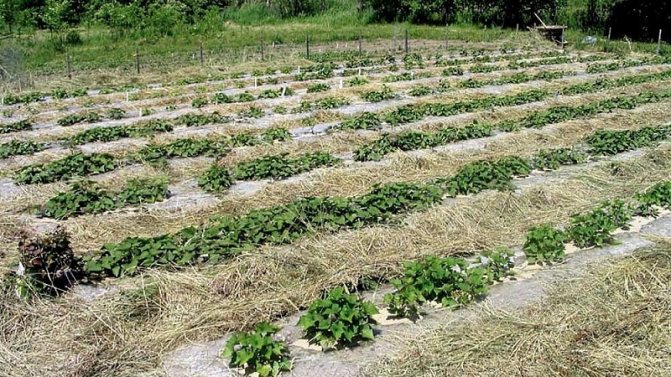
Strawberries in a special soil mixture
This culture is considered one of the most popular among summer residents. It can be found in most vegetable gardens. The popularity of this berry is due to its pleasant aroma and excellent taste. Some gardeners allot the entire garden to this crop.
When growing strawberries using the Meatlider method, narrow ridges are created in the garden. As a rule, they are made in the open field, but if weather conditions do not allow, then strawberry ridges can be created in a greenhouse. The length and width of the beds are classic: 9 m and 45 cm, respectively. The distance between the ends of the beds should be at least 105 cm.The width of the side aisles is 90 cm.
Strawberry beds can be arranged in long and narrow boxes. But this method is considered uneconomical, since it does not give special advantages in terms of yield, but it requires large financial costs.
Meatlider's strawberry cultivation technology provides for the creation of a special mixture for the formation of the topsoil in the beds. It is prepared quite simply: 1 part of sawdust is mixed with 2 parts of sand. The thickness of the layer of this mixture on the garden bed is usually 5 - 7 cm.
The easiest way to create a fertilizer flow chart is to use a calculator.
Particular attention should be paid to watering the strawberries. This crop should be watered in the root zone and thereby protect the leaves of the plant from sunburn.