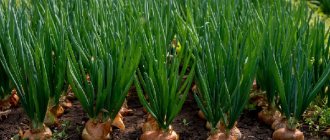
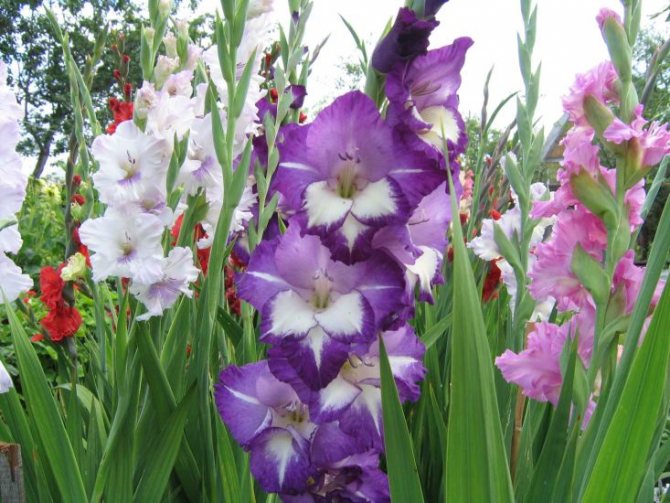
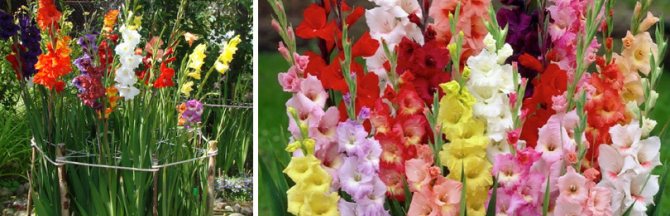
Gladiolus, also known as skewer, is one of the most common flowering plants in the gardens of Russian agronomists. And this is not surprising, because during flowering an incredible colorful picture is formed.
Due to the demand today, there are more than 5000 varieties of the species. The life span of most perennials does not exceed 10 years, the plants are unpretentious in care, but they have their own characteristics. So, for novice flower lovers, it is still better to figure out how to care for gladioli correctly.
Why gladioli grow crooked and fall
These flowers always tend to grow vertically, but due to their length, the stem often tilts to the side and grows further curved. Such a flower will not look beautiful either in a cut or in a flower bed, so it is worthwhile to study in advance all the possible causes of this phenomenon and take appropriate measures to prevent undesirable consequences.
Did you know? Many legends are associated with the appearance of gladiolus flowers, but according to the most common one, they were the swords of two gladiator friends Teresa and Sevt, who refused to fight each other to please the emperor and were executed together on his orders.
In most cases, there are two main reasons for the curvature of gladioli. Too shallow planting of bulbs, to a depth of no more than 5-7 cm from the ground surface... The top layer of the substrate dries out quickly, which is why the plants experience a lack of moisture every day and tend to the ground in the evening. At night, their moisture increases, but each time the stems are less and less flattened, and remain crooked.
It is quite difficult to maintain constant moisture levels when growing flowers in the country, since most summer residents come to the site only for the weekend. In such a situation, the only possible way out of the situation would be to comply with all the requirements for planting a flower culture, with the bulb deepening at least 12-15 cm deep into the soil.

The second reason for curved peduncles in gladioli is a lack of calcium in the soil or an excess of nitrogenous components.... In each of these cases, plant tissues become very loose over time, so the stem can no longer support the peduncle in a normal position and bends under its weight. To remedy the situation at the initial stages of the appearance of the problem, it is worth adding calcium nitrate and potassium phosphate to the soil, performing top dressing according to the attached instructions.
In addition, do not forget that gladioli are tall flowers in themselves, with not very thick stems, therefore in the absence of support in the neighborhood, they can break simply due to the weight of the apical part, which is quite logical.
We advise you to read: folk remedies based on gladiolus.
Description and characteristics of the plant
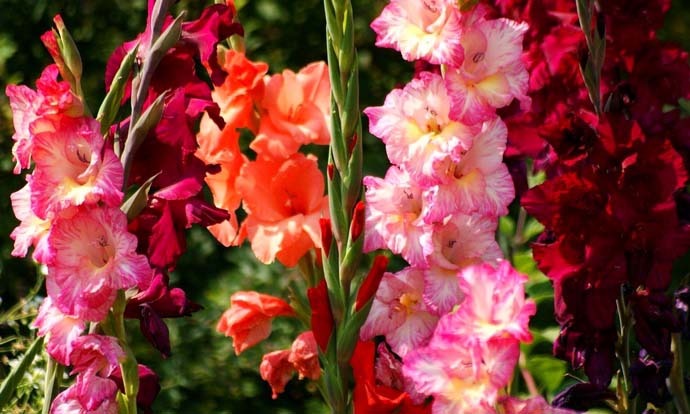
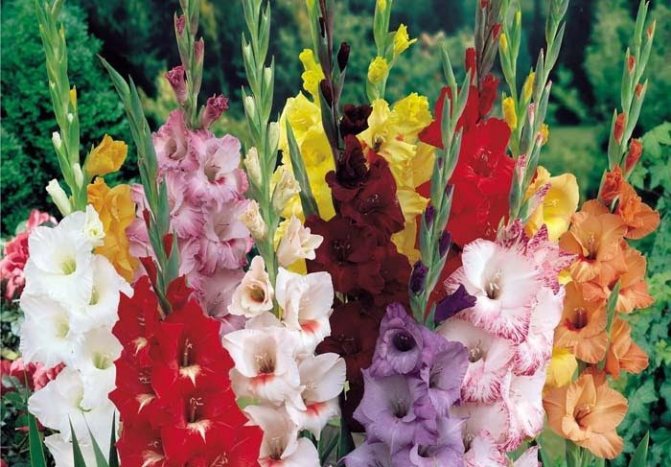
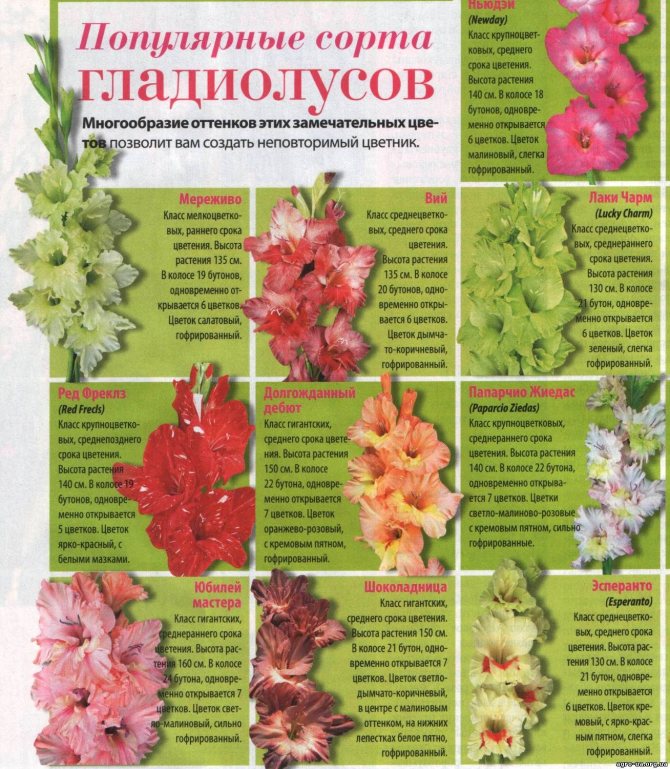
Gladiolus is the common name for flowers in the Iris family, which includes over 250 plant varieties. In Russia, mainly hybrid varieties are grown, obtained by crossing European and African. Due to the wide variety of flowers, it makes sense to consider the characteristics of certain types of gladioli that are in demand among gardeners:
- Moscow White stone. The length of the gladiolus grows up to 150 centimeters.White flowers on a straight stem reach 14 centimeters in diameter. No more than 8 buds bloom on one trunk at a time. This variety begins to bloom in July.
- Krasava. An early variety of gladioli. The first yellow flowers bloom in early June. Krasava has a long stem. Up to 24 buds are formed on one trunk.
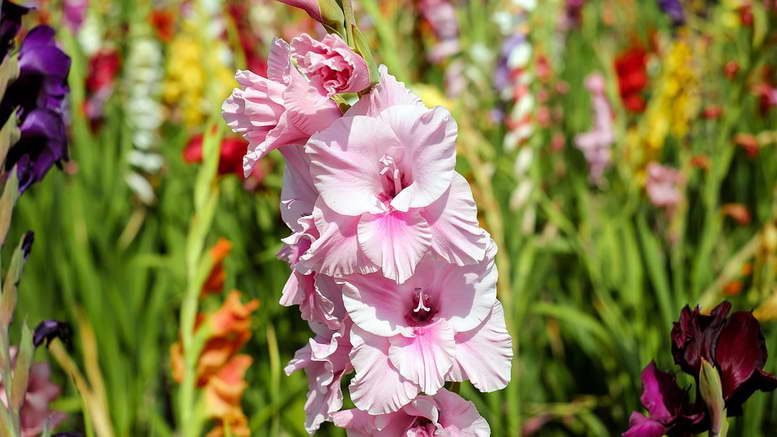
- Priscilla. On the gladioli of this variety, flowers bloom white-pink with a crimson edging. The barrel length does not exceed 100 centimeters.
- Amber Baltic. 160 cm gladiolus with large flowers (up to 15 cm in diameter) light red. Up to 23 buds bloom on one trunk.
- Grand Duchess Elizabeth. A non-standard variety of gladioli, characterized by a small stem (up to 70 centimeters) and abundant flowering (up to 22 buds). The flowers are distinguished by a combination of orange and pink hues.
Despite the different flowering times, gladioli are planted in early spring. For each of the varieties, there are the same requirements for the place of growth and care. In addition to the above, breeders have also bred varieties of gladioli, distinguished by compact flowers. But due to the fact that the plant grows straight up and is characterized by a small crown, each variety can be grown in a flower bed of any size.
Diseases and pests
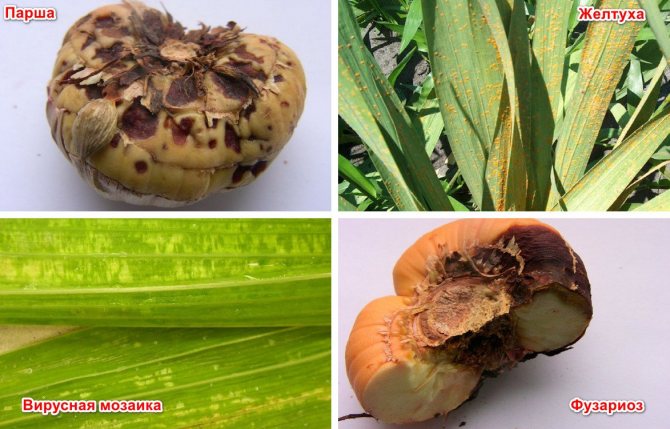
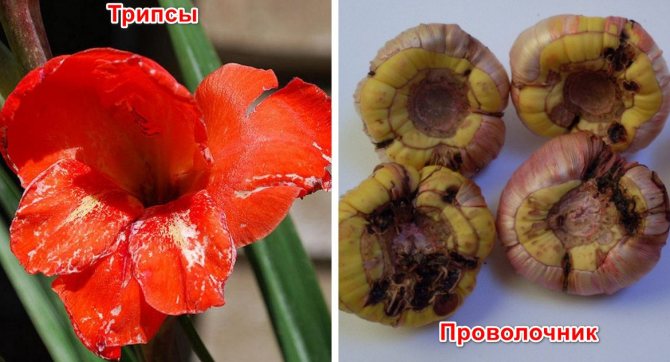
Like other flower crops, gladioli are susceptible to attacks by pests and diseases, some of which can cause curvature of stems and inflorescences. First of all, we are talking about bacterial scab, fusarium, gladiolus cancer, jaundice and viral mosaic, due to which the flower quickly weakens and its stem part becomes not as elastic as before. This is especially noticeable with severe damage to scab and jaundice, although root cancer is no less dangerous for the decorative effect of the culture.
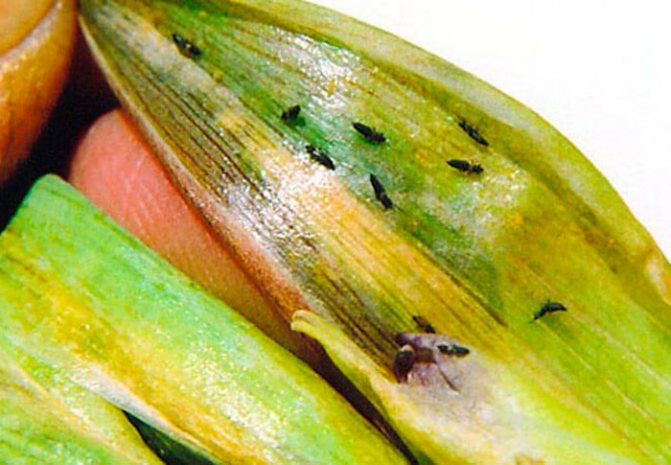
As for pests, the most relevant in this case include thrips and wirewormsthat damage different parts of the plant and make it unstable. By the way, the latter is the causative agent of many fungal diseases, so the harm from it is double.
Prevention and control measures for each problem have some common features for different groups:
- the affected areas of flowers should be immediately cut off and destroyed;
- spray the rest of the plant with a fungicidal or insecticidal composition (depending on the type of pest or disease);
- further control the mode of moistening, feeding and crop rotation of flower plantations (you should not plant flowers after nightshade crops, especially tomatoes and potatoes).
Without fail, the tubers are processed after digging for the winter, and the aboveground part of the flowers can be sprayed even when the first signs of an illness appear.
Important! With fusarium, bacterial scab and cancer, it is better to completely dig a sick gladiolus out of the ground and destroy it, and treat its planting site with a suitable fungicide, carefully distributing it throughout the entire soil thickness in the hole.

Cleaning and storage of bulbs
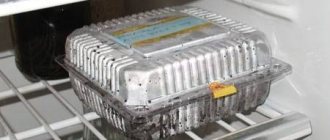
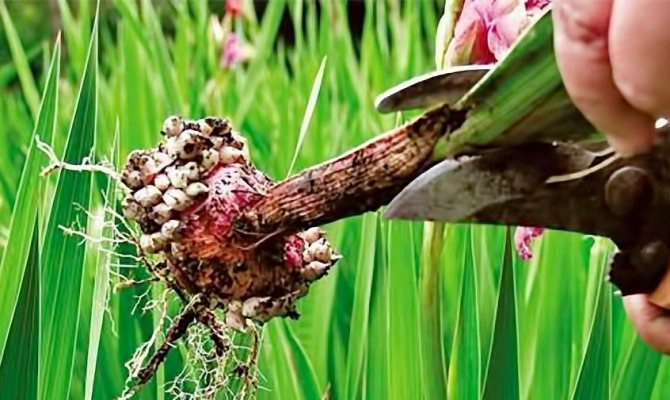
With the beginning of the first serious drops in air temperature, the bushes of gladioli are dug up and dried. The bulbs are separated from the stems and small children with pruning shears. Corms are stored in linen bags or cardboard boxes at a temperature of + 6-8 degrees and a humidity of about 70%.
A good place for them is the vegetable section of the refrigerator or the cellar.
So, in this article, we examined the features of planting gladioli in the spring in open ground, when to plant gladioli according to the lunar calendar and depending on the region. Bright flower beds to you!
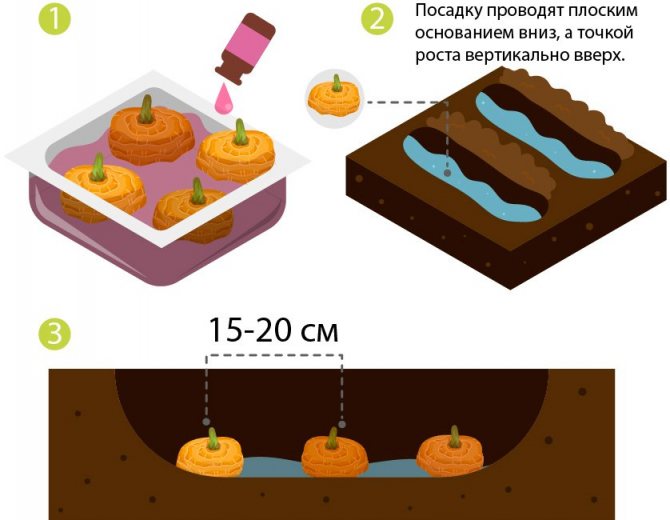
How to plant gladioli so that they do not fall and are even
The correct development of gladioli in the garden largely depends on the fulfillment of the general requirements for their planting. For instance, before performing the procedure, it is necessary to add nitrophoska to the moistened substrate, embedding fertilizer in the ground 3-4 cm below the bottom of the corm (1-2 g of fertilizer should be consumed per hole).
The second thing you should pay special attention to is the planting depth of the bulbs. In most cases, this indicator depends on the size of the planting material itself, and on average, with a diameter of 4-5 cm, gladioli need to be deepened by 10-12 cm, increasing these values to 15 cm on sandy and loose chernozem soils or decreasing to 7-9 cm on knocked down clay substrates.
Adult bulbs must be planted separately from small ones, otherwise they will not allow them to grow and develop normally.... The largest specimens are even placed on separate beds, far from the main group. With their help, you can create another full-fledged flower garden on the other side of the site.
The right landing site will be just as important.... In the shade or on swampy soils, there is no reason to hope for the high decorative effect of gladioli, therefore, so that the stems do not bend and the flower stalks bloom well, it is better to give preference only to well-ventilated and sufficiently illuminated places, with deep groundwater.
Did you know? The decorative qualities of gladioli began to be massively appreciated by flower growers only at the beginning of the 19th century, right after the Englishman W. Herbert first crossed several South American varieties of these flowers and received a new beautiful flower.
GROWING A GLADIOLUS BEGINS WITH A LANDING
Corms of gladioli are most often planted after May 10, choosing the sunniest place for this. They are placed in a flower bed with a height of at least 20 cm so that rainwater does not stand around them. For digging, without skimping, they bring in compost, sand (one bucket per square meter), potash-phosphorus fertilizers and oven ash.
Plants do not like acidic and heavy soils. The best for them will be neutral or slightly acidic (pH 6.8 - 7). It will not be at all difficult to grow gladioli on such.
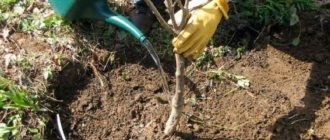
Every three years, gladioli are transplanted to a new place, otherwise pathogens will quickly accumulate in the ground. Before planting, the corms are treated with a solution of potassium permanganate or "Fitosporin M" for five hours.
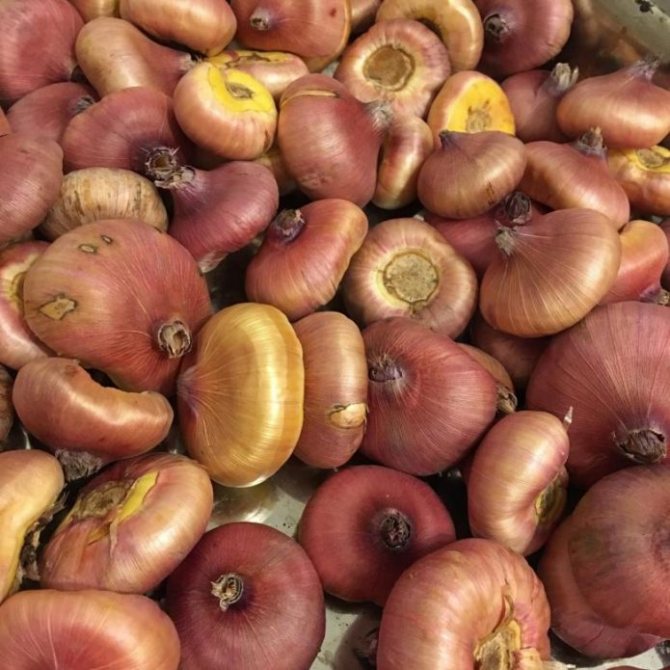
The planting material is sorted by size: large corms - separately, small - separately. Otherwise, adult bulbs will take food from young ones. It is better to allocate a separate flower bed for each.
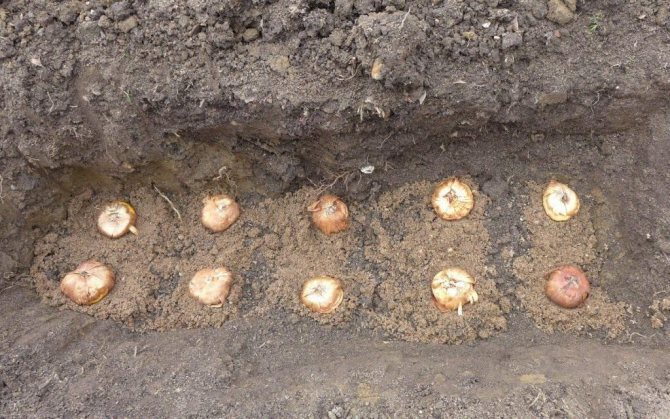
Corms are planted at a distance of 16 centimeters from each other.
The depth of the planting hole should correspond to three diameters of the bulb plus 2 centimeters, since sand is laid on the bottom of the hole in such a layer as drainage. Corms are laid out on it, covered with earth and watered well.
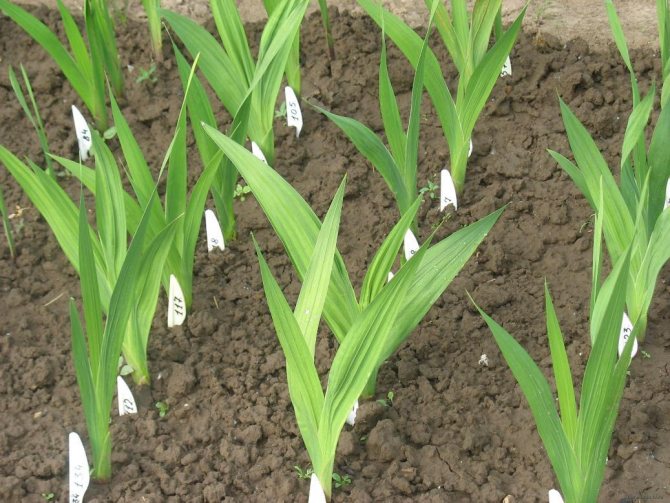
When the first shoots appear, they are again sprinkled with fertile soil so that they have more adventitious roots. This will ensure the growth of large leaves and the establishment of a powerful inflorescence with a large number of buds.


Do I need to tie up gladioli
Given the external characteristics of these flowers and their long stem, the question of a garter of gladioli will always be relevant, especially if the grower rarely appears on the site and only manages to plant the plants without providing them with further full care. If you do not fix the flowers at first, then after a month it will be too late to do it., since they will begin to fall to the side or completely fall to the ground, continuing to grow in a horizontal position.
To preserve the high decorativeness of gladioli for the entire time of their flowering, it is better to tie up the plants while the sprouts are still relatively short and are located strictly vertically, but how exactly to tie the plants to a support (stick) installed next to it can be determined based on the number of flowers and the peculiarities of their location in the garden.
IRRIGATION AND FERTILIZERS WILL HELP TO GROW GLADIOLES
Gladiolus is a powerful flower, so it needs a lot of nutrients to grow and develop quickly. But any feeding without enough water can damage the roots of the plant due to the too high concentration of salts in the soil solution. Therefore, watering is of great importance.
In the heat, they are watered twice a week, two watering cans per square meter of the flower bed. It is best to do this in the evening so that the moisture does not evaporate quickly. After each watering, the ground around the gladioli is carefully loosened with a small hoe or hands so that a soil crust does not form.
Fertilizing for gladioli is applied in liquid form so that nutrients are better absorbed. In addition to nitrogen, plants really need phosphorus and potassium. Therefore, as fertilizers they take (per 1 square meter): 35 grams of potassium nitrate and 50 grams of superphosphate.
Phosphate fertilizer is poorly soluble in water. Therefore, a water extract is made from it. A kilogram of superphosphate is poured into a bucket of boiling water, covered with a lid and insisted for two hours. A liter of such a solution is equal to 100 g of dry fertilizer.
The first feeding is carried out in the second half of June during the formation of numerous inflorescences. In early July, this top dressing is repeated, and after 2 weeks the plants are also given a solution of liquid mullein (2 shovels of manure per bucket of water).
The same top dressing is done in early and mid-August.
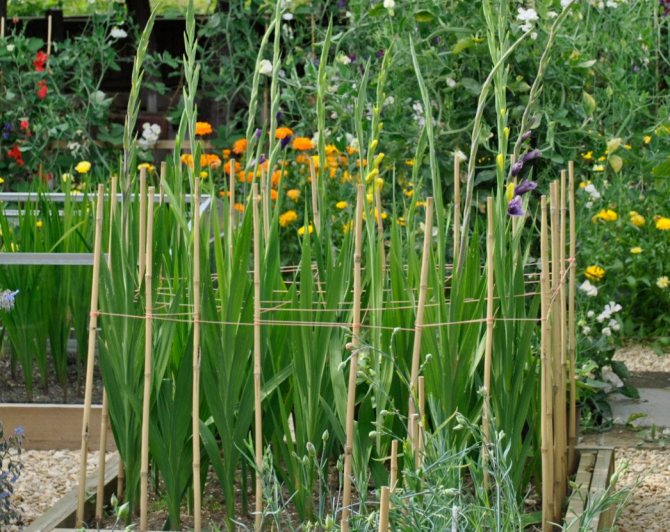
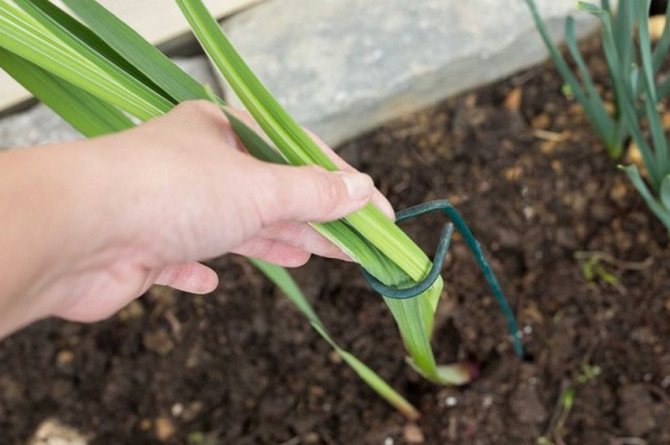
How to tie gladioli
There are just as many ways to tie gladioli as your imagination and materials at hand will be enough to implement your plan. In fact, so that the branches do not begin to bend and bend, and adult flowers do not become completely crooked, you can simply drive a small support stake next to each plant and tie the stem to it with soft ropes.
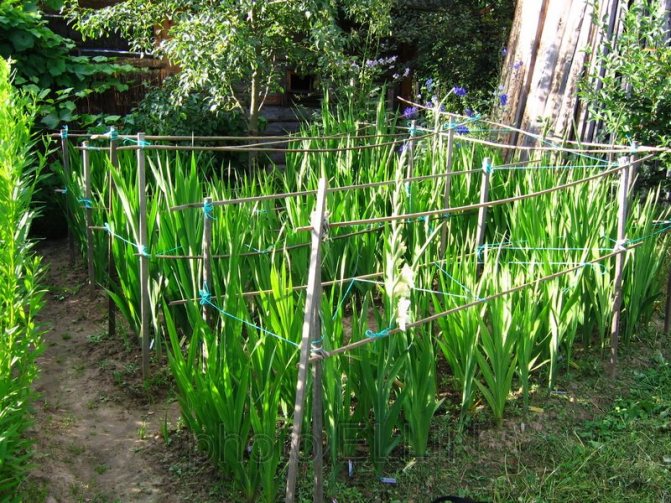
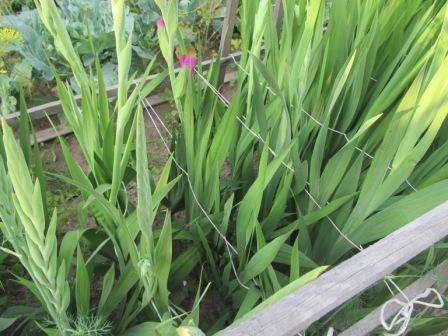
When placing flowers in a row, it is often practiced to install a group protective structure, which can be done using a dense mesh or a rope stretched between two stakes.... Such a structure is installed in the spring, digging it in the open ground by 8-10 cm (it is necessary to achieve high stability of the structure). Caught between two parallel twines or next to a coarse mesh, the flowers will be supported by them and will not become crooked, with inflorescence defects, and even in windy weather they will not change their position.
Important! When tying flowers to supports, try not to damage their stems with a rope, otherwise there is a possibility of damage to plants by pests and diseases.
Care of gladioli after disembarkation in open ground
In order for the gladiolus to have a beautiful, even stem, the flowers in the arrow were presentable, it is necessary to make efforts for the next 2 months after planting in order to get the most positive result at the exit.
How to water
Gladiolus after planting should be watered every other day so that the peduncle is fully formed. This will require 8-10 liters of water per 1m². If dry weather is established, watering should be carried out at least 1 time a day in the evenings.
After that, it is advisable to loosen the earth in order to accumulate moisture inside and prevent it from quickly evaporating. In the case of the opposite, that is, when rainy weather is established, watering is either stopped completely, or limited to 2 times a week. In this case, the water must be well settled. It is not worth pouring it directly under the bulbs, as this contributes to their decay. It is necessary to pour in the aisle, then the soil near the roots is moistened. Gladiolus leaves tolerate spraying well.
Feeding gladioli
- When the sprouts reach 10 centimeters in length, it is necessary to fertilize the soil around the plant with humus. This is done in order to protect the soil from overheating and reduce the amount of moisture evaporated.
- During the formation of the first 3 leaves, fertilizing with fertilizers is necessary, which include mineral nitrogen.These fertilizers include urea and ammonium sulfate. It is introduced at the rate of 2 tablespoons per 1m² in order to form the green mass of the plant.
- Then they are fed twice with a mixture of complex potassium-phosphorus fertilizer: the first stage falls on the period of appearance of 5-6 leaves, the second - at the time of laying the buds. During potassium-phosphorus feeding, you can add a few peas of urea.
Four times during the entire growing season, organic fertilizers can also be applied under the plants during irrigation.
It is better to use bird droppings for tincture (animal manure should be excluded) at the rate of 1 bucket of droppings for 2 buckets of water. Organic fertilizer is infused for a decade, then it is diluted in a ratio of 1 to 10, where 1 share falls on the infusion and 10 - on water. The quality of the flower depends on the regularity of feeding. Usually fertilizers are applied after watering, which is repeated after fertilization.
Simple disease prevention
For gladioli cultivated on sandy loam, it is good to carry out foliar feeding, the essence of which is to spray the leaves with a special solution. For 1 liter of water, take 0.15 g of potassium permanganate or 0.15 g of boric acid or 0.2 g of Bordeaux mixture. This solution is used as a prophylactic agent against diseases and harmful insects.
Processing is carried out at least 3 times during the entire growing season: the first - during planting, the next - during the appearance of the arrow and during the formation of buds. If you add soap to the solution and process the gladiolus leaves on both sides, then this will be a very useful procedure for him in the fight against spider mites.
Loosening the soil and weeding
The roots of absolutely all plants, including gladioli, love oxygen. Loosening will help to provide access. To avoid the appearance of a crust on the soil surface, loosening should be carried out after watering. If you do not weed the flower bed, then the weeds will take nutrients from the soil, which will negatively affect the quality of the gladiolus flower. Therefore, weeding is simply necessary once a decade.
How to tie gladioli
The garter is necessary for those varieties of gladioli that reach more than 1.5 meters in length. To provide the stem with support, which over time begins to bend, you can attach a peg to each free-standing flower. Many gardeners use a different method: they stretch a wire along a row of gladioli and carefully tie each flower to it. At the same time, the stems are spud to give them even more stability.
How to cut a flower correctly
In order not to damage the plant, the bulb of which will remain in the ground for some time, and to ensure that the stem is cut worthy of a bouquet, the following rules must be observed: leave a part of the stem with 4 leaves above the ground so that the bulb does not deteriorate. You can cut a flower only when the bottom 3 flowers are completely dissolved. Ideal varieties of gladioli are those whose ability to dissolve up to 10 buds at once is the norm. Cutting flowers is best done in the evening or early morning. The remaining peduncle stem is hidden deeper into the leaves.
Is it possible to align gladioli when they are already crooked
Initially, planting gladioli correctly and preventing them from curving in the future is much easier than trying to align already crooked flower stems, which in most cases it is no longer possible for adult flowers... Of course, while the "carrion" has not yet completely laid down on the ground, gardeners are trying to fix the stems to the supporting structure and hope for their further vertical growth.
But it is best to take into account the initial direction of young shoots when planting bulbs: if the green aboveground part already "looks" to the side, then the planting material should be deepened into the ground at an angle, thereby leveling the position of the shoot during its further growth. If you can give it the right direction, then it will turn out to grow a flower of the correct and neat shape, not disfigured under its own weight.
In fact, the process of growing beautiful and even gladioli is not as difficult as it seems to many, and if you follow the simple recommendations for planting and regular plant care, in some cases a garter may not be needed.
Is it possible to transplant gladioli during growth
It is possible to transplant gladioli during growth, but this idea is not the most successful. The likelihood that the plants will take root is not so high, moreover, you will have to try very hard for this. If the grower wants to transfer the plants in the growth phase to the greenhouse due to unfavorable climatic conditions, then it is more expedient to install arcs on the rows and cover them with agrofibre.
When to dig up gladioli
An autumn digging of gladioli is required. As a rule, it is carried out in the second or third decade of September, after 35-40 days after flowering. The bulbs, ready for digging, are covered with thick integumentary scales. It is necessary to dig the plant in dry weather. Start with the early varieties first, and then gradually get to the later ones. The latter need to dig up children and small bulbs.
Perennial rudbeckia: planting and care
Important! If the tubers are affected by black or brown spotting, then it is recommended to dig them out earlier than the prescribed period. Otherwise, the likelihood that the plant will be infected with secondary infections increases significantly.
Shortly before digging, you can mow the stems or trim them with pruning shears. The root system should also be pruned.
Pruning gladiolus
Next, the earth should be shaken off, and the children should be carefully separated. Corms should be placed in boxes with a mesh bottom. All varieties must be kept separate from each other.
Before storage, they must be disinfected by immersing them for half an hour in a weak solution of manganese or Fundazol. After that, you need to thoroughly rinse the tubers under running water and lay them in one row on a flat surface for drying. As a rule, it takes 3-5 days to dry, then they are transferred to containers where paper lies at the bottom. The optimum temperature regime for storing planting material is + 25-30 degrees.
Attention! The bulbs must be turned over from time to time.
After a month, the tubers can be peeled and sorted. Dirty scales are removed from their surface.
What to do with the kids? First of all, they are sorted by grade and size. A large baby is one that has reached 0.8 cm in diameter, an average one - approximately 0.6 cm. Then the children are placed in paper bags and stored at a temperature not higher than +6 degrees. Store at temperatures above is strongly discouraged, otherwise germination may be lost. In the apartment, children can be stored in the refrigerator, in the section dedicated to storing fruits and vegetables.
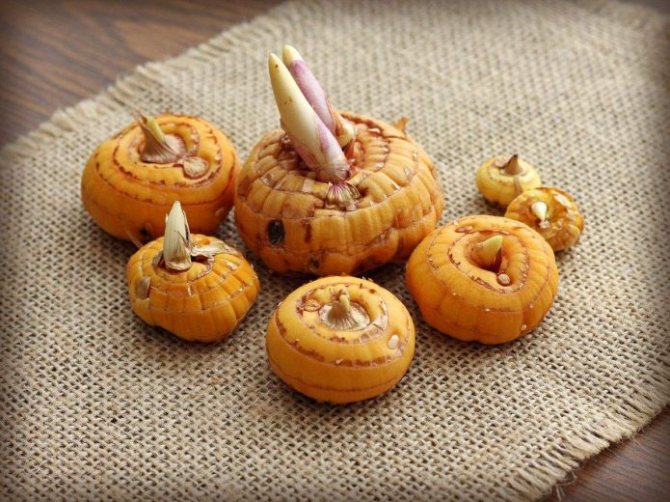
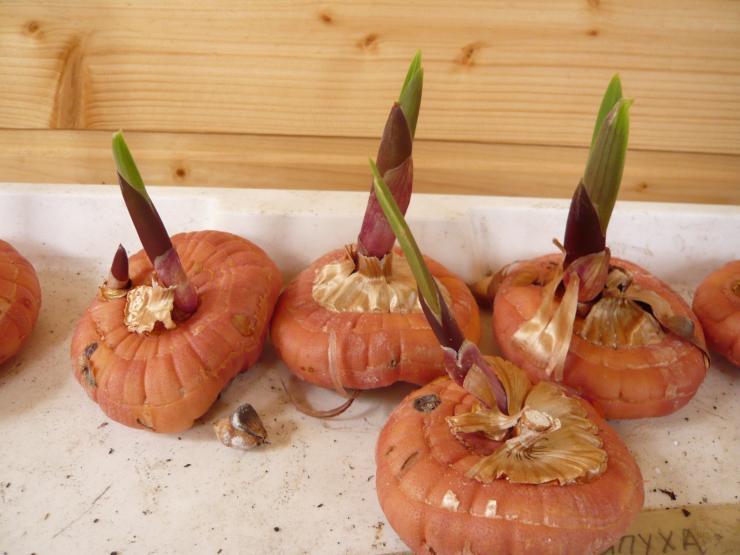
Preparation of planting material for gladioli
Two to three weeks before planting, the corms are cleaned of scales. They do this carefully, as under them there may be young seedlings that are easy to break off. If the baby's shell is cleaned, then lightly press on it with two fingers, and then remove the scales with a fingernail. It is imperative to clean it, since parasitic microorganisms and thrips nest in the scales. In addition, it is easier to detect signs of disease on peeled corms and disinfect planting material in time.
The baby is cleaned on the eve of planting so that it does not dry out. If the baby under the shell is sick, dry, with black dots, it is thrown away. To prevent diseases from spreading, all planting waste is burned.
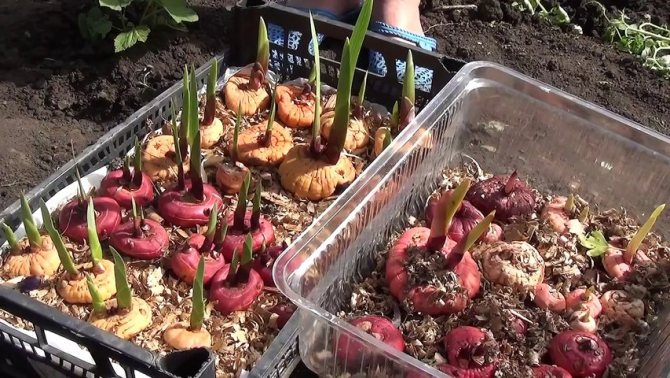
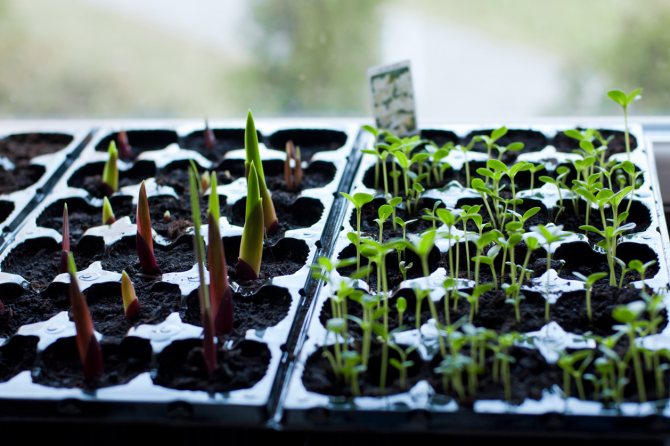
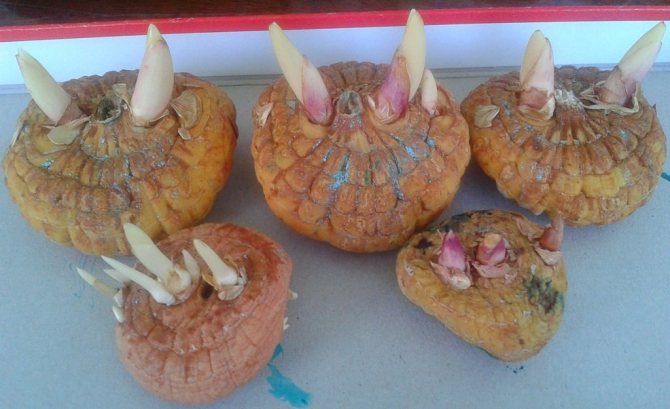
Peeled corms are laid out sprouts upwards on vernalization, like potatoes.This activity promotes better flowering and less susceptibility to diseases at the beginning of growth.
Planting material purchased in a store or on the market is treated against diseases and pests. It is better not to use chemicals for this in the garden. Soak the corms and the baby well in an infusion of garlic (250-300 g per 10 liters of water) for 2 hours.
Garlic acts on both pathogens and plant pests. It is passed through a meat grinder, pour 10 liters of water. The planting material is immersed in the resulting infusion not only before planting, but also after digging. In the spring, a solution of a lower concentration is prepared (300 g per 10 l), in the fall - a larger one (500 g per 10 l). For digging processing, the concentration can be further increased by taking up to 1 kg of garlic per 10 liters of water.
If there is no garlic, the planting material is treated with a solution of potassium permanganate - from pathogens, karbofos - from pests. In the spring, in a solution of potassium permanganate (1 g of potassium permanganate per 10 l of water), then in a solution of karbofos (30 g per 10 l of water) the corms and the baby are kept for 30 minutes. In the fall, take a stronger solution of potassium permanganate (5-10 g of potassium permanganate per 10 liters of water) and incubate for 30-60 minutes.
A solution of karbofos is the same concentration as in spring, and the material is kept in it for the same time. After disinfection, before planting, the material can be treated with growth stimulants and trace elements for faster root development. Usually one of the following drugs is used, based on 10 liters of water:
- heteroauxin - one tablet;
- sodium gummate - 1 g;
- succinic acid - 2 g.
The planting material is kept in a growth stimulator solution for 10-12 hours.
Solutions of microelements for processing planting material can be of different composition. For soaking corms before planting, it is better to use the recommendations of A. N. Gromov (Table 1). The processing time of the material in the recommended composition is 12-14 hours.
Table 1. Doses of micronutrient fertilizers for the treatment of corms
| Microfertilizer | Dose per 10 l of water, g |
| Boric acid | 3 |
| Potassium permanganate (potassium permanganate) | 2 |
| Copper sulfate (copper sulfate) | 3 |
| Cobalt Nitrate (Cobalt Nitrate) | 0,8-1,0 |
| Ammonium molybdate | 1,0-1,5 |
| Zinc sulfate (zinc sulfate) | 0,5-0,7 |
Tab. 2. Doses of micronutrient fertilizers for the treatment of tubers
| Microfertilizers | Dose per 10 liters of water |
| Potassium permanganate | 5 g |
| Copper sulphate | 4 g |
| Cobalt nitrate | 1 g |
Table 2 shows the doses of micronutrients recommended by T.G. Tamberg for preparing a solution for soaking tubers before planting. Processing time is 4 hours.
The author prefers to soak the corms and the baby before planting in a combined solution of ammonium molybdate (2 g) and copper sulfate (5 g) per 10 liters of water for 2 hours, then immediately plants.
Care
Now, knowing how to plant gladioli correctly, you need to worry about caring for flowers.
It is known that flowers react very strongly to a lack of moisture in the soil. Therefore, water should be frequent and abundant. With a lack of moisture, flowers develop more slowly and later begin to bloom. During the flowering period, a lot of moisture is required.
Weeding and destruction of weeds should be carried out constantly. In the early stages of plant development, weeding is considered the most urgent.
Loosening the soil after watering helps provide it with oxygen. At the same time, the evaporation of moisture from the soil increases, which will have a bad effect on the development of flowers. To solve both problems, the soil is mulched with sawdust or peat. Mulch prevents rapid evaporation of moisture and the formation of a crust after watering.
Tying flowers
For additional wind resistance, you can use individual supports or stretch nets if the flowers grow in rows.