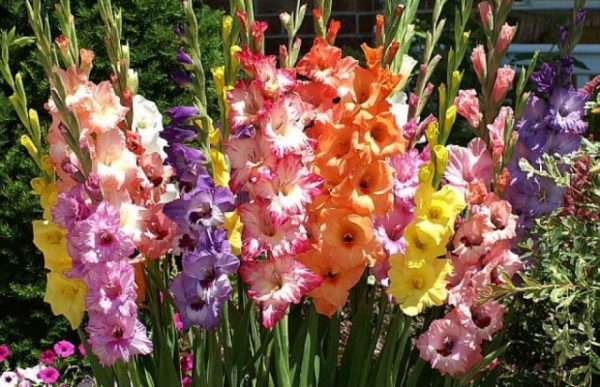
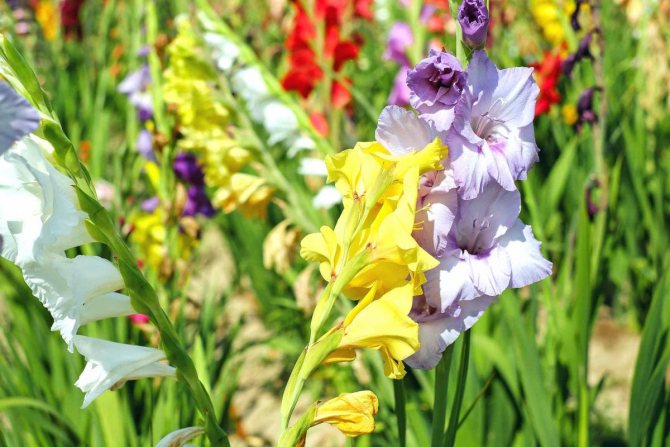
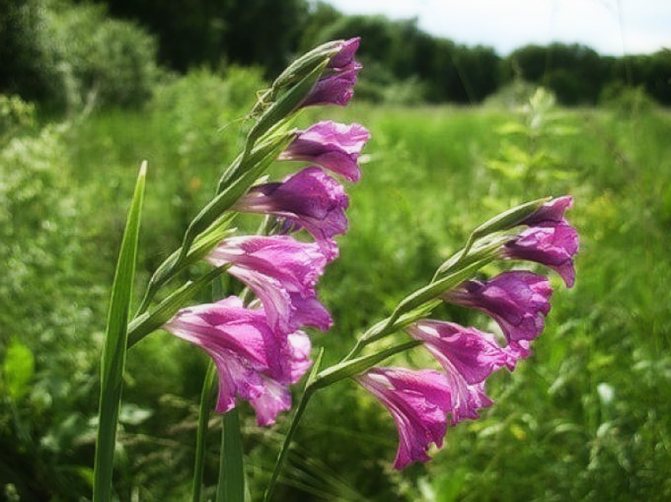
Gladioli are a plant that can be propagated with tubers, corms and, of course, with seeds. Vegetative propagation is considered an adaptation of a plant, which gladioli have for further existence when seed reproduction is in question.
This can happen due to unsuitable conditions for the development of the plant, when the seeds may not ripen. Thus, vegetative reproduction can be observed only in varietal gladioli, wild species most often reproduce by seed. But the very predisposition to the possibility of vegetative reproduction was inherited by gladiolus from its wild ancestor.
This propagation method is important for maintaining the morphologically important characteristics of the variety. In addition, vegetative reproduction of gladioli is efficient and fast, which is especially important in breeding new species of gladioli. Considering the question of how to propagate gladioli, it is worth first of all to consider the features of the methods.
Reproduction of gladioli by children (tubers)
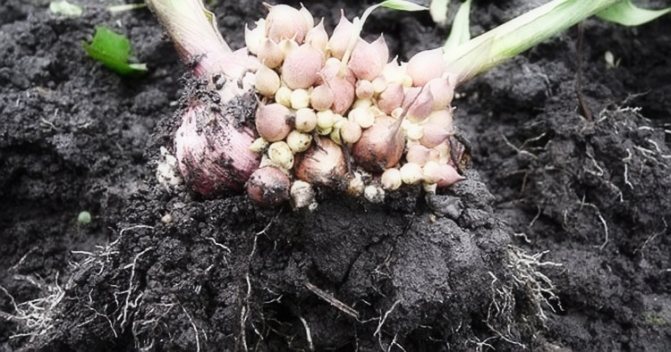
The most reliable, but at the same time, the simplest way to propagate a flower you like is to collect tubers from it. Garden gladioli of any variety form them in sufficient quantity after the end of the flowering period.
What it is?
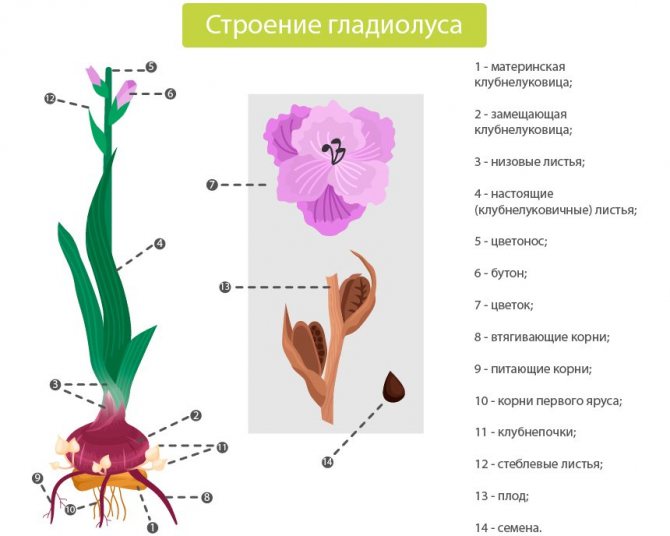
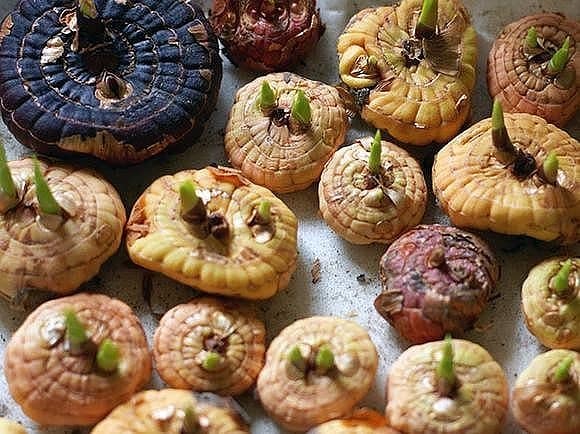
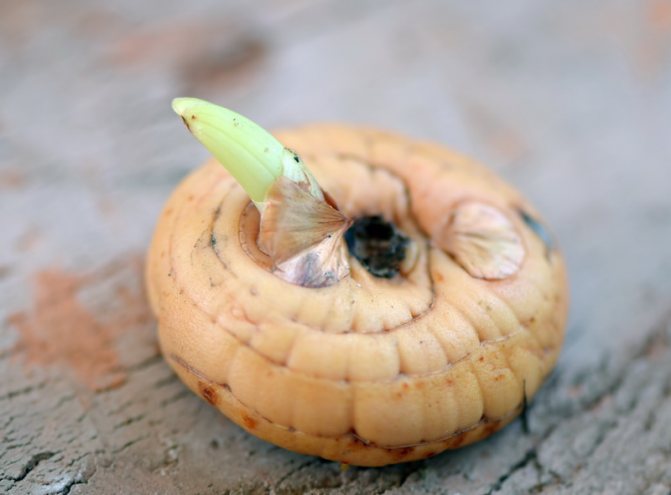
Corms form the basis of bulbous plant species, it is with them that the growth and development of the future flower begins. Depending on the variety, a different number of babies are formed on the mother bulb.
Sometimes you have to resort to stimulating this process, cutting off the peduncle just before the end of flowering.
Reproduction of gladioli by tubers allows you to quickly breed your favorite variety, as well as rejuvenate your own plantings.


How to work with seeds?
Over time, gladiolus bulbs lose their properties:
- become flat;
- give fewer children for reproduction;
- they throw out weak peduncles in small quantities.
In this case, some gardeners resort to seed propagation of gladioli. This technique is considered risky, costly and unjustified, but it still takes place. When growing bulbs from seeds, all the varietal properties of the mother plant are often lost, the cross-pollination that occurred during the flowering period is strongly affected. The result of such processes is unpredictable.
Most often, the method of growing gladioli from seeds is used by professional breeders for their scientific works and breeding new varieties.
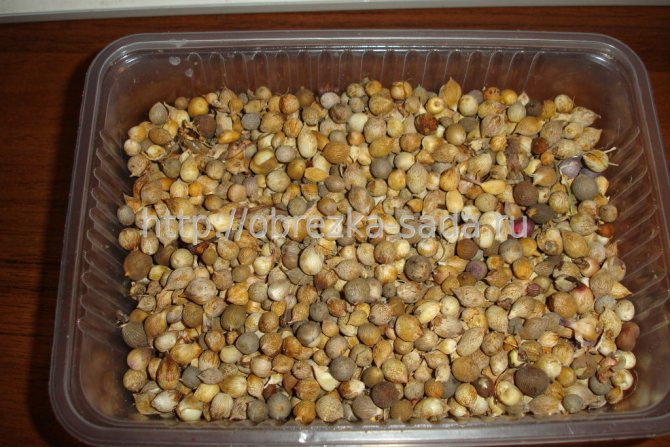
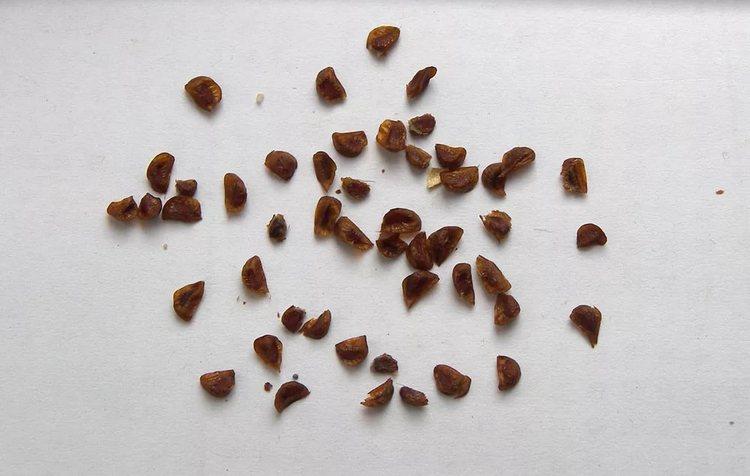
In gladioli, after pollination, the formation of seed pods occurs, in which the seeds then ripen. According to their external characteristics, they resemble small flat plates, the size of which is 2 mm. After ripening, the seeds acquire a brown color. A barely noticeable embryo of the future gladiolus is visible under the shell. Up to 200 seeds are formed in each seed box. After ripening and collecting, they are successfully stored in room conditions, however, the storage place should not be allowed to be too dry. In this case, germination is greatly impaired.
In March-February, the harvested seed is planted in containers or boxes. During this period, flowers need to provide a sufficient level of illumination using fluorescent lamps.If this is not possible, the sowing dates should be postponed to the end of March.
Before sowing, the seeds are soaked in a growth promoter for several hours. The containers and soil mixture are prepared in advance. The ideal option would be to mix in equal proportions:
- sod soil;
- humus;
- river sand.
Florists also use a ready-made commercial mixture, but in this case, calcined sand should be added to it. Seeds of gladioli are germinated and then sown in boxes or pots. Subsequently, they only need regular moisture and gentle loosening of the soil.
With the onset of warm weather, boxes with young shoots of gladioli gradually begin to be taken out into the street and hardened. Initially, they are left in the fresh air for a couple of hours, and then this time is gradually increased. To prevent the sprouts from getting sunburn, they are covered from direct rays.
After the threat of night frosts has passed, gladioli can be planted in open ground. Although some florists leave them in boxes for the whole summer, while carrying out standard care procedures. As a rule, in the first year of life, a flower grown from a seed does not bloom. All his strength goes to the formation and development of a strong and healthy bulb.
In autumn, gladioli planted from seeds are dug out, small bulbs are separated from the stem and prepared for storage. The timing of harvesting flowers depends on the climatic conditions, but most often it is done in September. The next year, the collected bulbs are planted on the site in grooves. They may well already bloom, although professionals recommend cutting the peduncle so that the plant has enough strength to further form the bulb. Care for gladioli grown from seeds is no different from that which is carried out when growing them from bulbs or children.
Growing gladioli with seeds is usually preferred by professionals. For amateur gardeners, this planting process can be too time-consuming and laborious. If you figure out how to properly reproduce gladioli by seeds, you can not only grow plants annually, but also develop new hybrid varieties of these beautiful majestic flowers.
Before growing gladioli from children or seeds, you should study as much of the available information on this issue as possible. Not only books will help, but also the live experience of professional gardeners. The collected information will be especially useful if you want to create a new variety yourself. After collecting seeds for gladioli, planting should be successful. When choosing planting material, one must take into account that hybrid varieties in most cases do not acquire seeds.
When the desire to get your own personal variety is great, growing gladioli from seeds can become extremely interesting, despite the laboriousness and scrupulousness. The first step is independent artificial pollination of gladiolus flowers. This is a complex process that requires sufficient time. Hastily, without understanding, it is not worth producing it, since you can ruin the mother plants. Pollination is usually carried out in order to bring out a new early flowering plant or flowers of an unusual shape and color.
Winter storage
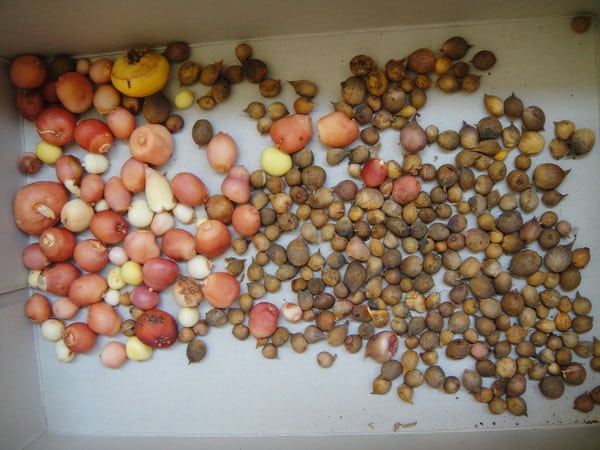
It is recommended to dry the small onions thoroughly before storing them. The drying process takes several weeks (usually 2-3). After that, the planting material is sorted again and sent to the storage only for healthy children. If small foci of decay are found, then they are cut out with a sharp knife, filled with brilliant green and left for further drying.
Wooden boxes for vegetables are suitable for drying, in which children of gladioli are stored for 1-1.5 months at room temperature, covered with a newspaper that will absorb the released moisture. After drying, the onions are wrapped in dry, clean newspaper and sent for storage in a cool room or in the lower section of the refrigerator. Subject to the necessary conditions and maintaining the temperature regime, the children of gladioli retain their qualities for 2-3 years.

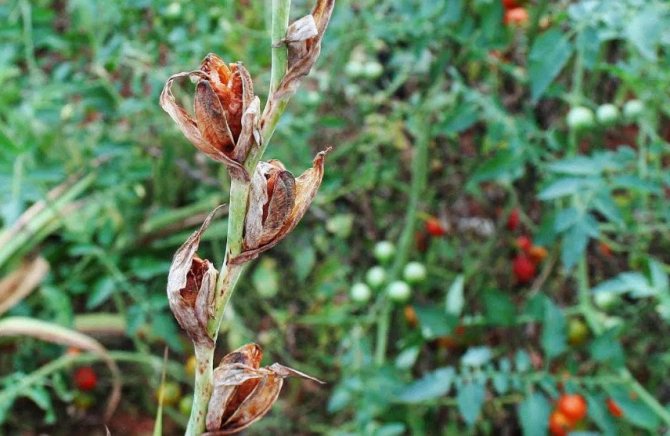
Description of gladiolus seeds
Gladiolus fruits look like a membranous box... Its upper part is slightly cracked. There will always be winged seeds inside the capsule. On average, their number reaches 250. The seed material of the gladiolus flower has no physiological rest. Therefore, they can be planted immediately after harvest. As a result, they will begin to sprout in a few weeks.
Important! It is necessary to store gladiolus seeds in a room with a fairly high level of humidity. In a dry environment, seed may lose its germination capacity.
Most gardeners, even experienced ones, cannot answer the question of what gladiolus seeds might look like. Everyone knows the description of the flower bulb, but certain difficulties arise with the appearance of the seed material.
The main characteristics of seeds include:
- shape - flat;
- Brown color;
- size - about 2 mm.
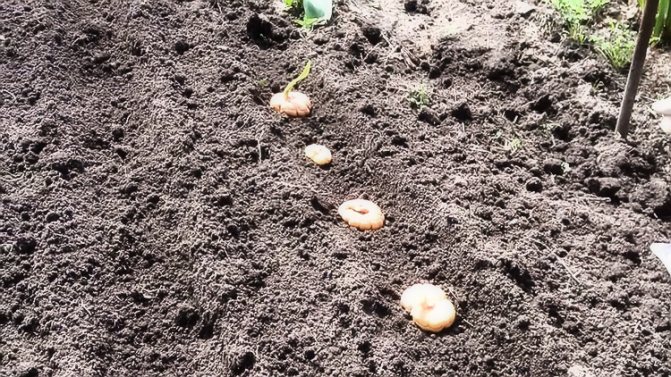
Growing seedlings from gladiolus babies
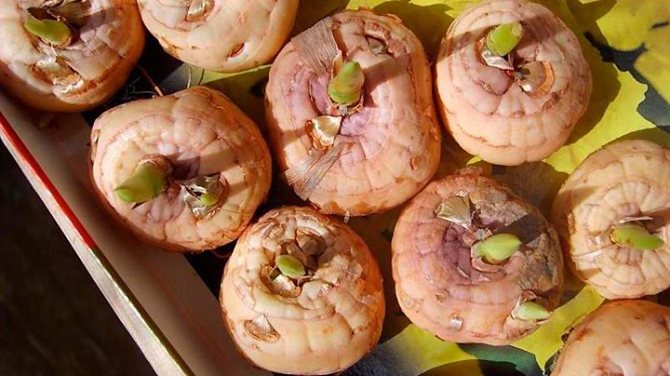
Preparing children for planting involves certain activities. The collected planting material is taken from the storage, cleaned of dry husks, if necessary, soaked for a day in warm water. This stimulates the rhizomes to start growing. After that, the children are planted in prepared soil, poured into a flower pot or box, and wait for their germination. Further, the plantings are moistened and left for a week in a warm, well-lit room, waiting for the sprouts to appear.
See also
Description and characteristics of varieties and types of hyacinths, growing rulesRead
How to pollinate
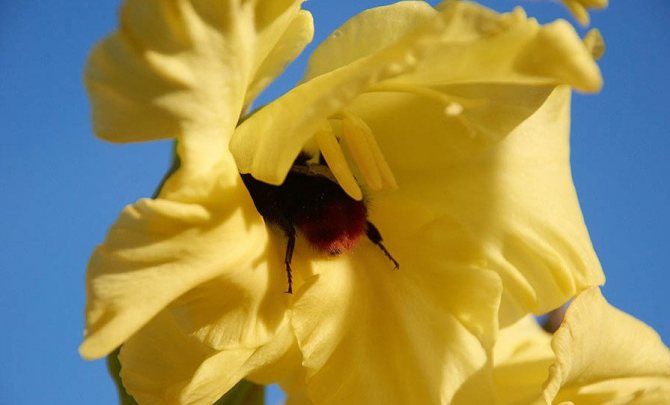
In their natural environment, these flowers do not pollinate by themselves. The pollen of flowers ripens later than the pistil opens. Gladiolus is pollinated by bees or by gusts of wind. However, here it is difficult to control which flower the mother plant will cross with. Therefore, those who have chosen seed reproduction of gladioli must learn to pollinate flowers on their own in order to be able to breed plants with given external features.
Artificial pollination is carried out as follows:
- Anthers are carefully separated from the paternal blossoming flowers.
- The cut parts of the flowers are carefully laid out on plain paper and left to ripen.
- After a rash of pollen, which will indicate ripening, it is carefully collected.
- Anthers are cut from mother plants. The mother flowers are covered with gauze bags and the pistil is waiting for the opening.
- On the stigma of the pistil, the pollen collected from the paternal flowers is applied with a small brush, after which a gauze bag is again put on the flower.
- Pollinated plants are tagged with parental flower data.
Do not despair if the procedure does not work out the first time. Due to its laboriousness, it is better to methodically carry out pollination until the ideal result is achieved. More than 2-3 flowers on one peduncle should not be pollinated, it is better to remove the extra ones... The pouches are removed when the seed pods appear on the flowers.
Ready-made gladiolus seeds look like small thin plates with an embryo in the center and a total size of no more than 0.02 cm in diameter. Usually in a seed box there are up to 180-200 pieces of them.They must be stored indoors; in a too dry or humid environment, the harvested planting material can quickly lose germination.
Planting and caring for children of gladioli in the beds
After the bulbs are planted in the soil, they are irrigated, and the land around is mulched. Throughout the growing season, young gladioli are watered, loosened the soil, and fed. As soon as foliage begins to form, a complex mineral fertilizer with a nitrogen content is applied. After a couple of weeks, the plants are fed with preparations containing iron and manganese. The emerging peduncles from young plants must be cut off.
Pollination rules
It seems that everything is simple - having collected the seeds of gladioli, you need to learn how to plant them. But it is important not to forget about the correct pollination. You need to decide in advance on the number of plants for pollination. Their flowers are covered with gauze. This is to prevent bees from pollination. When the pollen is formed, it is transferred to other flowers.
On average, a maximum of 5 plants are needed to obtain pollen using this method. This procedure is necessary for all those who want to learn how to grow gladioli from seeds at home. There is no other way to get seeds, flowers that have undergone self-pollination cannot form seeds. Growing gladioli from seeds at home is not a difficult procedure, but painstaking.
Dividing the bulb
More experienced florists and summer residents risk propagating gladioli by dividing the bulb. This will require certain skills and a stock of theoretical knowledge, otherwise the experiment will fail.
Features of the method
When dividing the maternal gladiolus bulb into several parts, you can get not only a larger amount of planting material, but also stimulate the formation of children. For manipulations, material is taken from the second or third year of life without signs of any diseases or pests.
How to exercise correctly?
Before you start cutting the onions, prepare tools and fixtures. The knife is sharpened well, burned on fire. The head is cut vertically. The number of pieces obtained depends on the size of the original bulb.
Each piece should contain not only a part of the bottom for the formation of new roots, but also living buds.
The cut sites must be disinfected and processed. Wood ash and brilliant green are used for such purposes. After that, the pieces of the onion are left to dry for a while, and then planted in the prepared nutrient soil. In the fall, ready-made, formed corms are dug up. Already next year they will give a large number of children, which are later used for reproduction and renewal of planting material. It is necessary to care for the cuttings planted in open ground in the same way as for an adult plant.
Plant the slices of the bulbs, preferably upside down. Ground shoots with this method develop more slowly, flowering often does not occur, but the formation of children is stimulated.

Preparing for landings
There are 3 ways to grow the future beauty and pride of the garden:
- Seedlings on the windowsill
- Landing in open ground
- Seed or dividing the bulb
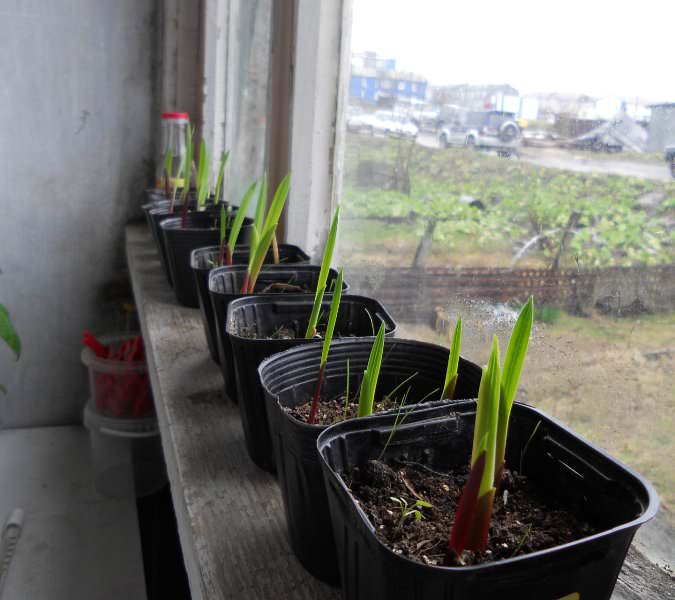
Seedling
Adequate lighting is required at all times. If there are already seedlings of other crops on the windowsills, then the children may not have enough light, and then the sprout will be weak and pitiful.
The second difficulty is that it is not advisable to grow gladiolus for seedlings in common boxes. When transplanting into the ground, you will have to separate the roots, and this, in turn, will weaken the plant, and it will take longer to take root and hurt.
Planting in separate cups is quite troublesome - the bulbs require constant moistening of the earth, and in a small container the soil dries out quickly.
Landing in open ground
This option is best suited for the propagation and development of the garden skewer!
Adult bulbs and young overwintered children are planted when the soil warms up to + 10 * and the threat of frost has passed. Approximately mid-April to mid-May. For planting the bulbs must be prepared!
10-15 days before instillation, it is recommended to clean them of scales. For what?
- This will speed up the germination of the shoot by about 7-10 days.
- It will allow you to reject bulbous babies that have not survived the winter.
- Freed from the shell, tubers will be able to assimilate nutrients in full.
- If pests have hidden under the crust, then we will not give them a chance to get to the planting beds!
Selected bulbs should arrange a daily bath in a solution of potassium permanganate: 2g per 10 liters. warm water.
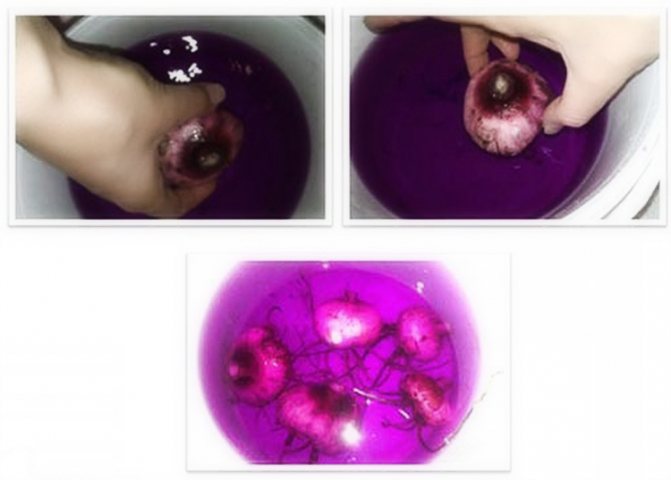
By the time of planting, the children should have 2-3 root tubercles - the key to a healthy and powerful plant. The more of these bumps, the better.
After bathing, the tubers should be placed on a damp cloth or rough cloth soaked in a manganese solution. Cover the top with the same material. Our task is to get roots by the time of planting, and not "tops". Such a "house" must be constantly wet!
When planting in open ground, we will process our bulbs again. This time - karbofos.
It would be good to spill the earthen grooves with an aqueous solution of chicken manure.
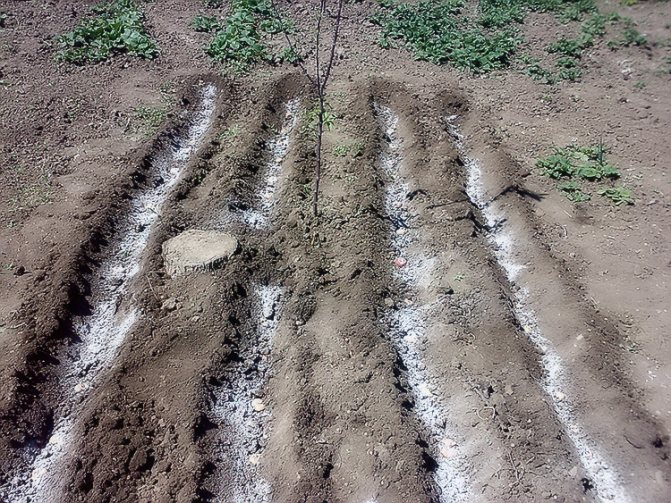
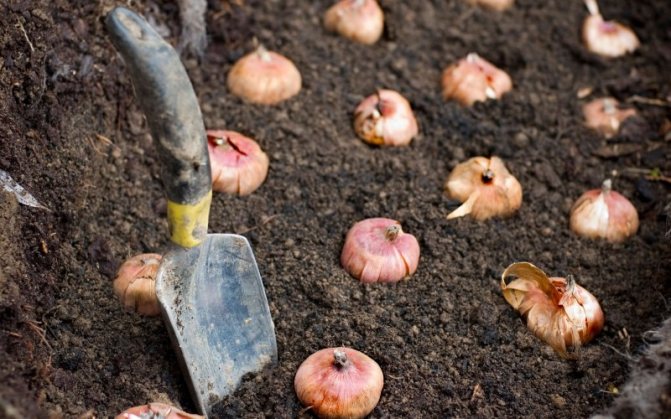
Children should be planted in the soil, which has been properly prepared since autumn, according to the scheme:
- the distance between tubercles is at least 7 cm;
- planting depth - 3-5 cm (large ones can be planted deeper - up to 7 cm);
- the distance between the rows is at least 20 cm.
After planting, the soil is mulched with 2-3 cm of humus.
It remains to cover the planting with non-woven material or greenhouse film, in order to obtain friendly shoots and to protect against suddenly returned frosts.
The first feeding is 30 days after the appearance of the first leaves.