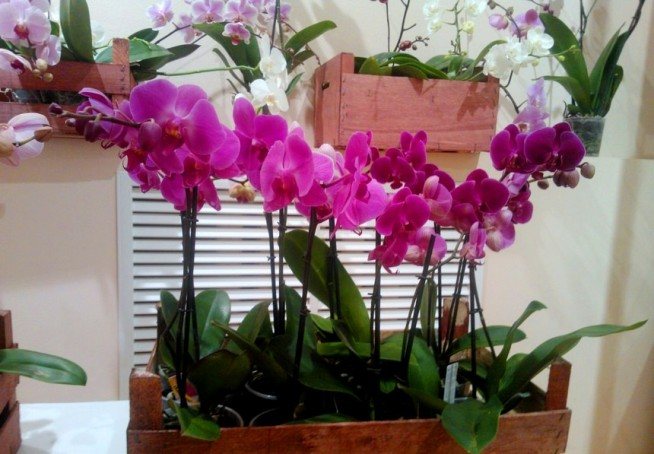
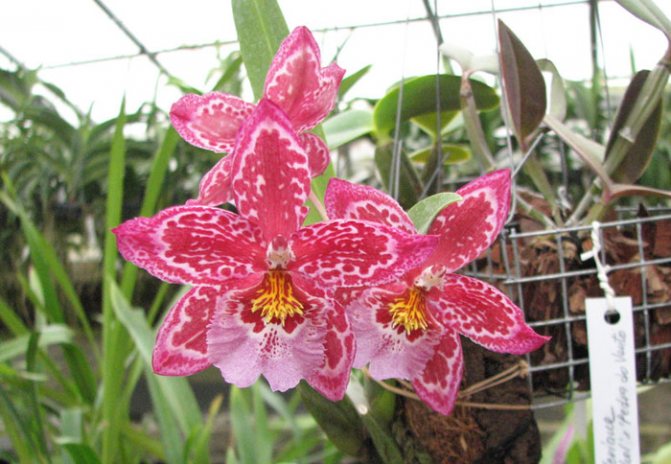
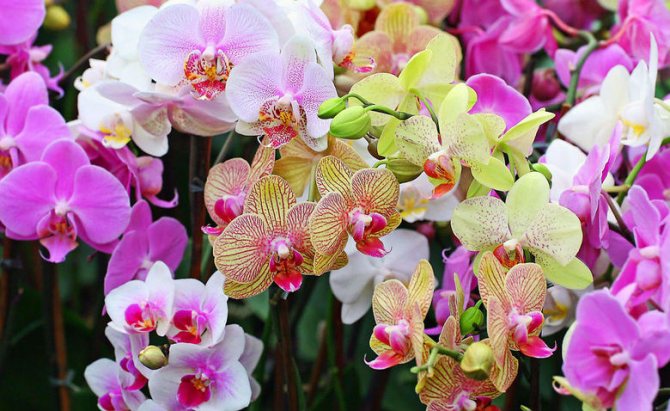
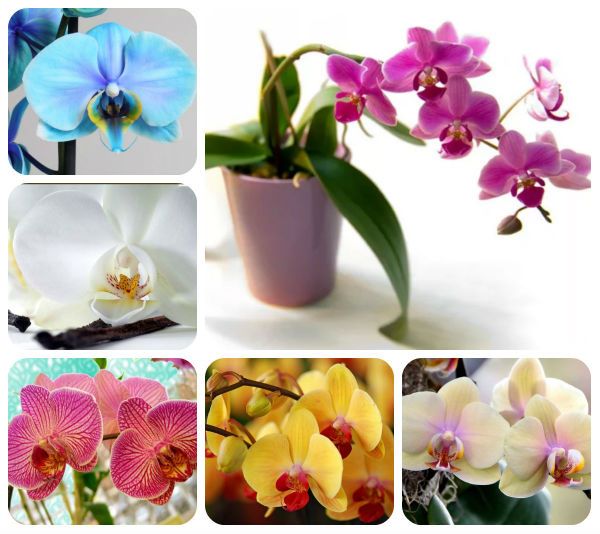
That is why flowers use various techniques to attract insects:
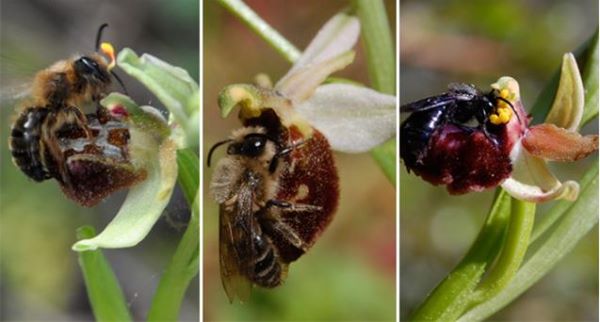
- Imitation of females of some insects. The male arrived, while he figured out that this was a successful model of the female, he gathered dust particles (pollinium). Realizing that he was mistaken, he flew to another. Everything is like in the life of people;
- Can also display nectar-bearing flowers (shape, color and texture);
- Even the nectar itself will be shown with a peculiar pattern;
- The special scent attracts insects. So much for the purpose of perfume. Important. To be attracted;
- Certain types of orchids even shoot them when insects approach. Life compels.
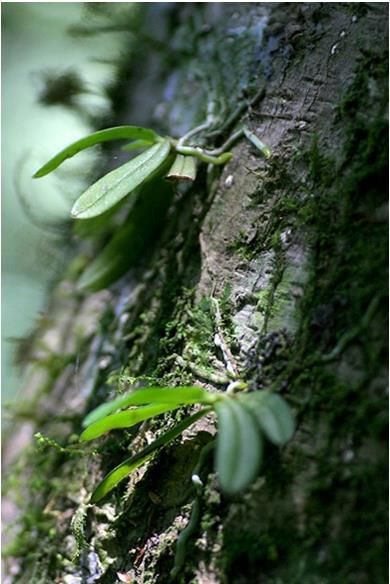
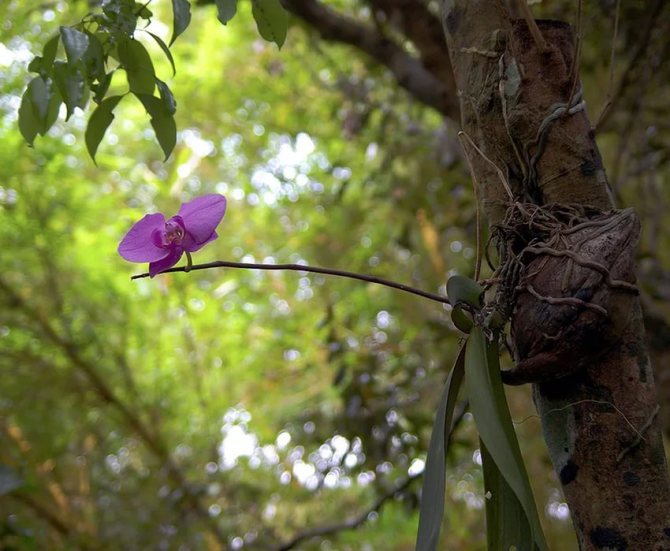
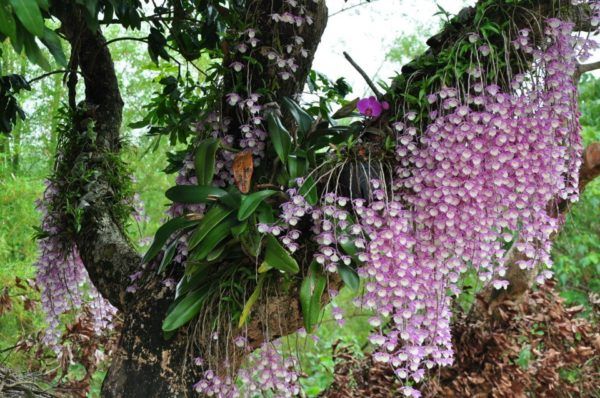
And also many orchids reproduce by air layers and side shoots. And so for millennia. Some species survive. And many are no longer there. And civilized humanity helps in this. At the beginning of their popularity, orchid miners drove more than one species to extinction. And experts and enthusiasts bring out new ones.
In this article we will tell you about different ways of growing orchids (from a flower, from a tuber, from an arrow).
Care features
- During the period of active growth - in late winter and spring - orchids need good lighting and regular watering.
- During intensive development - in summer - orchids need careful watering and feeding. To supply the plant with the necessary nutrients during the growing season, there are special fertilizers.
- At the end of summer, pseudobulbs begin to ripen and flowers are laid. At this time, the temperature should be reduced to 4-6 ° C and watering should be reduced.
- In autumn and winter, orchids move into the dormant and flowering stage (how to care for an orchid in the autumn-winter period?). Many species bloom at the beginning of the dormant period or during dormancy. In winter, care involves an increase in lighting and a decrease in watering.
We talked more about the secrets and intricacies of caring for orchids at home here.
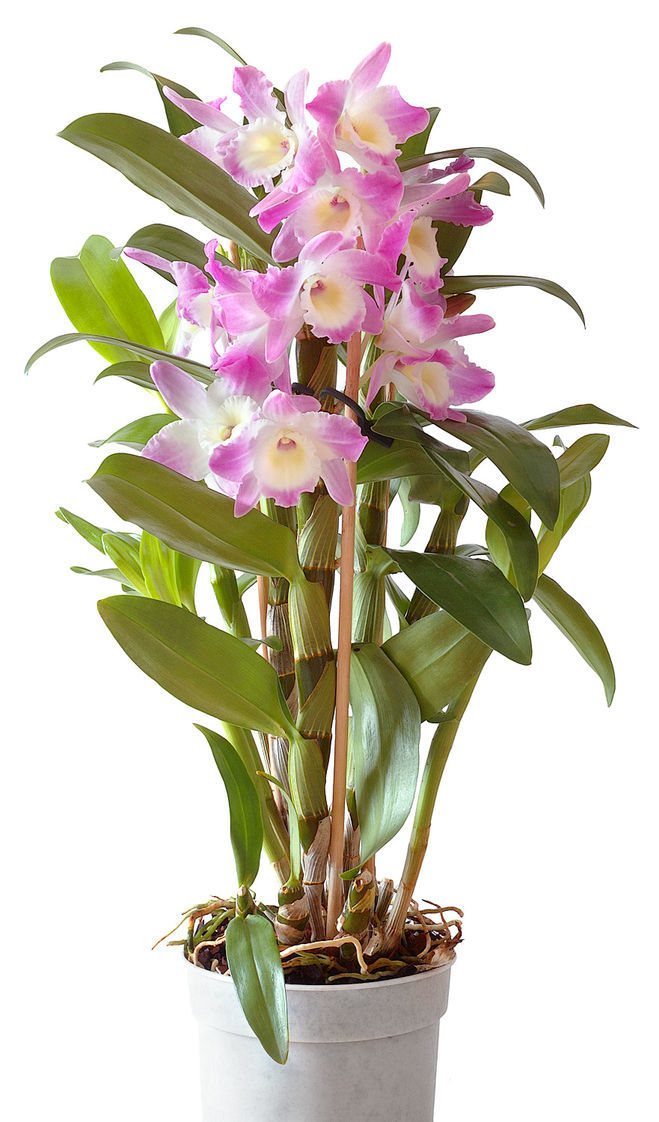
Dendrobiums
These orchids are also quite common on the shelves of shops and shopping centers. Like the rest of the orchids that we talked about, these are artificially bred hybrids based on 2 wild natural species - the cold-loving Dendrobium nobile and the thermophilic Dendrobium phalaenopsis.
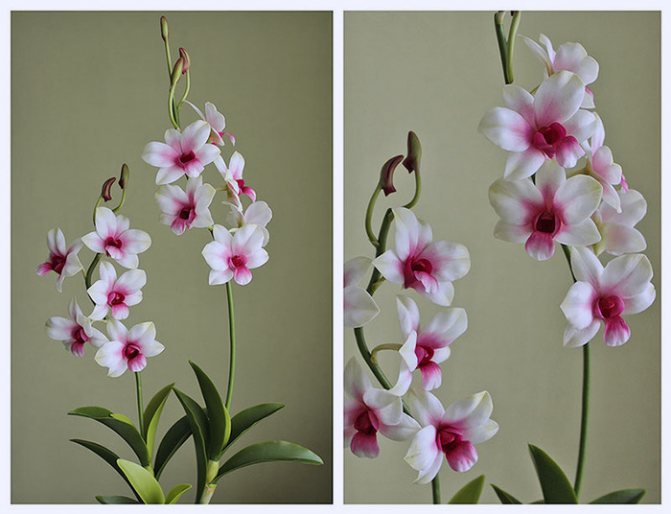
Hybrids Dendrobium Nobile
differ in that their flowers bloom along the entire length of the "stems" -pseudobulbs. These plants love bright light and coolness.
Hybrids Dendrobium phalaenopsis
more thermophilic. They are distinguished from the previous species by the arrangement of flowers on a peduncle (flower shoot), which grows from the top of the "stem" -pseudobulb.
Both types of dendrobiums need regular watering and partial drying of the substrate between waterings. Dendrobium phalaenopsis blooms more often and easier. Many dendrobium nobile hybrids require a temporary drop in temperature for flowering.
How is the plant grown on an industrial scale?

Orchids grown in greenhouses and greenhouses in Thailand and Holland are mainly sold on the Russian market. (You can find out more about what to do after buying an orchid and how to care for it at home here). Recently, cultivation of orchids in the greenhouse has become common practice.It takes about a year from the moment of planting a plant to its appearance on the shelves. Growing orchids is possible in several ways:
- vegetative (by dividing parts);
- "Kids" (bulbs);
- family (from seeds);
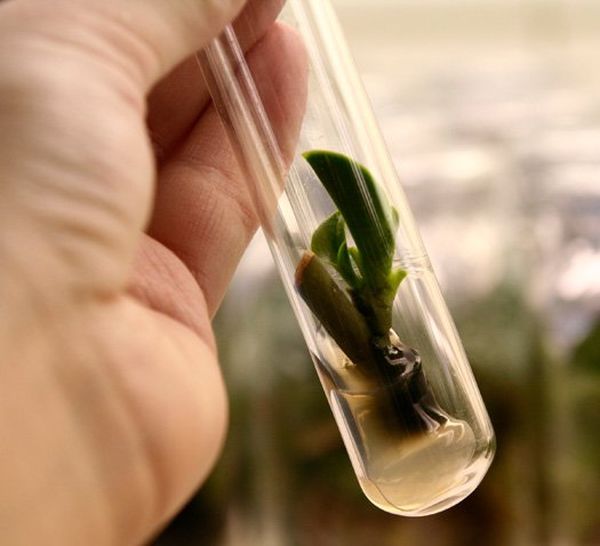
- generative (due to tissue division in the laboratory).
The process of plant growth begins from the "baby" stage:
- The babies are placed in trays in which they grow for 30 weeks under the supervision of greenhouse workers.
- Then they are manually transplanted into a transparent pot, in which they will grow directly in the greenhouse.
- A label is placed on the pot with information about the plant (type, color) and sent to the greenhouse, where they will be grown for 10 weeks.
- The orchids are then transferred to the workshop and placed in a special plastic pot, in which they are kept for 16 weeks.
- After this period, they are placed in a larger pot and are in it until the growth of the peduncle (3-4 weeks).
- At the last stage, orchids are placed in a special "cold" part of the greenhouse, with a temperature of 19 ° C.
The general rule of thumb for growing orchids is: a good ventilation system, providing the air with the correct temperature and humidity; sufficient lighting to increase the efficiency of the photosynthesis process; providing quality soil and fertilizers.
The best and most unusual ways to plant orchids
Before planting, the selected pots and pots are washed in running water, poured over with boiling water for disinfection, or treated with a soda solution. Before transplanting, the orchid is not watered for several days. So, the plant tolerates this procedure more easily. The planting method is chosen based on the characteristics of a particular plant and its water requirements.
Phalaenopsis and the Vendian tribe
These plants are epiphytes. Therefore, it is best to plant them in a large transparent pot with many drainage holes. In such a container, the root system will receive a lot of air and will be able to participate in photosynthesis. Drainage from pebbles, pumice or other suitable material is placed at the bottom of the container. Styrofoam is placed in the center. It is needed to prevent waterlogging in this area.
Then the pot is filled with a substrate with a lump size of 2 to 3 cm. The particles are positioned so that small voids are formed between them. They create good conditions for air exchange. The plant itself is positioned so that only its roots are in the substrate. The base of the Phalaenopsis or Tribe Vandov shrub should rise slightly above the surface.
Moisture-loving species
These types of orchids include oncidiums, miltonia, masdevallia, bulbophillums. They prefer to grow in a humid environment. But at the same time they do not tolerate stagnant water. Therefore, soil and drainage are especially carefully selected for them. To grow such plants and achieve flowering, the drainage layer must be no less than the amount of substrate.
For this, the container is half filled with large pebbles. Place a piece of foam in the center. Then the substrate is poured with a layer of 2 to 10 cm. The plant is placed so that it is buried to the base. Pieces of moss are laid out along the edge of the container.

Sympodial species
For these species, a non-standard planting method is used due to the special structure of their root system. In sympoidal orchids, the root system grows in a horizontal plane, forming the shoots of young plants. Therefore, when planting such plants, a lot of open space is created.
A basket or a low bowl will work instead of a pot. Large pebbles are placed on the bottom of the container. Pieces of cork, large particles of bark, pine cones are used as drainage. An adult plant is placed not in the center, but at the edge of the container. Then there will be enough space for the development of small orchids.
On the block
This method of cultivation is most consistent with the habitat of epiphytes in nature.Orchids are usually grown on blocks in greenhouses and greenhouses, where it is easy to maintain high humidity. Accommodation on a block is not very convenient in an ordinary apartment. Such an orchid needs to be sprayed every day, and in hot weather, such procedures are carried out several times a day.
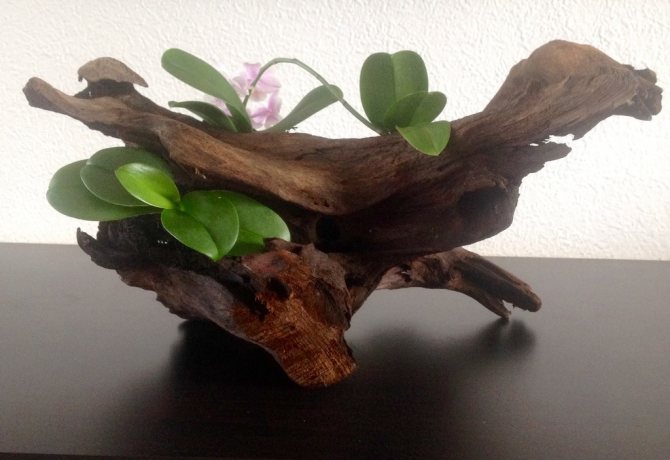
A large piece of bark is chosen as a block. An epiphyte is placed on it and fixed with brackets or improvised means. The fasteners are removed when the roots grow together with the block.
Important!
When planting on a block, sphagnum is placed under the roots, but the moss cannot be placed under the outlet. Otherwise, the plant will rot.
Is it possible to plant several orchids in one pot
In the rainforest, orchids grow in a wide variety of conditions, including in groups. Therefore, there are no obstacles to placing several epiphytes in one container. The only condition is the creation of favorable conditions for the development of each plant. As a result of such a group planting, you can create a beautiful decorative composition that adorns any interior.
This method of planting saves space on the windowsill. Plants need fewer containers and growing medium. They support each other, and caring for them is easier. This method of planting requires a more responsible attitude towards the plants. In the event of a mistake, pest or fungal infection, all orchids living in the same container will suffer.


What should be the conditions for domestic species?
- Temperature... Orchids differ in their thermophilicity. Domestic species prefer an average temperature: in summer - 18-23 ° С, in winter 15-18 ° С.
- Humidity... For irrigation, settled (soft) water is used, which is several degrees warmer than the room temperature. Watering is preferable to moderate - from one to three times a week during the growth period, so that the roots do not start to rot. Water should not stagnate in the soil. Air humidity should not exceed 70%, if it is insufficient, the plant must be sprayed from a spray bottle.
- Lighting... Orchid is a light-loving plant. In summer, it feels great on a slightly shaded windowsill - to avoid getting burned, a special opaque film is used (you can find out where it is better to put orchids in an apartment here). To intensify the cultivation in winter, orchids are supplemented with artificial lighting lamps.
Important: With a lack of light, the leaves are brightened and stretched.
Read more about the rules and conditions for keeping an orchid in this material.

Planting process
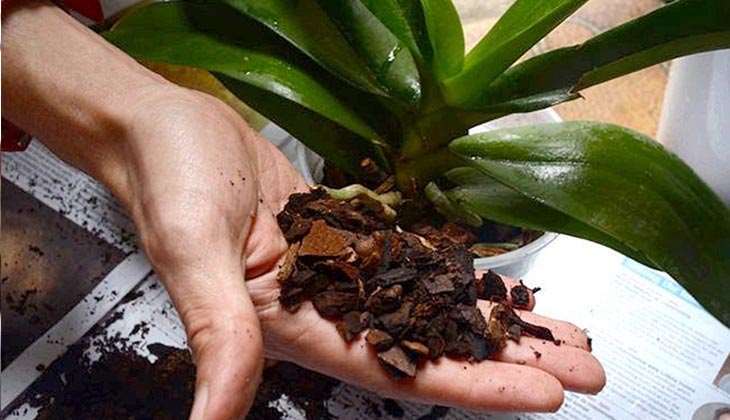
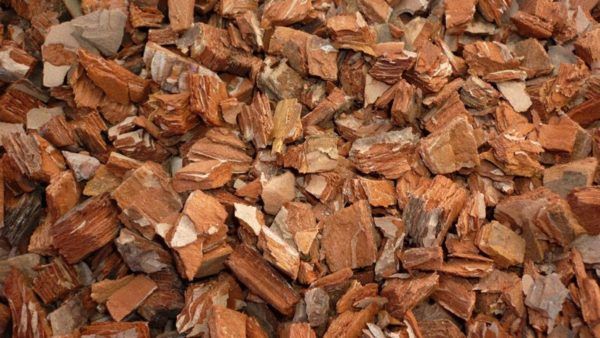
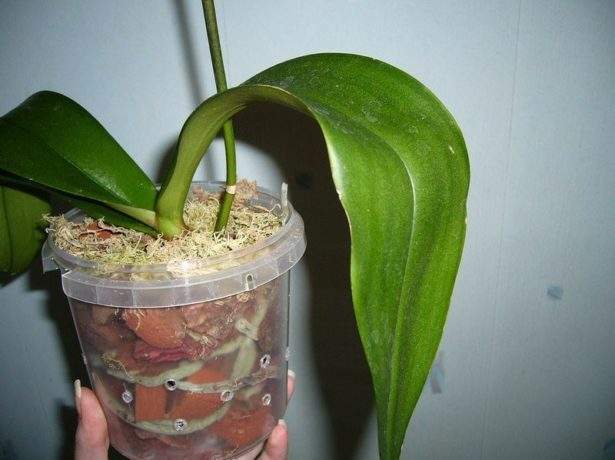
The treated parts are planted in separate small containers with a special substrate. Regular soil will not work, you need a complex balanced substrate for growing orchids. In normal soil, the plant will not grow and develop. The soil for orchids has a level of acidity suitable for exotics, balanced in the presence of minerals and trace elements necessary for growth and development.
The soil must contain: chopped pine bark, peat and coconut fiber. The soil should not be crushed, it should be moisture permeable and allow air to enter. Don't forget about the drainage layer as well. The container for planting must be chosen transparent and with holes for drains.
After planting, experienced florists recommend sprinkling the seedling several times, otherwise it will not give the first real strong roots and leaves. After the appearance of those, no additional actions are needed, it is only important to provide proper care and optimal conditions for development.
Step-by-step instructions for beginners on how to grow a flower correctly
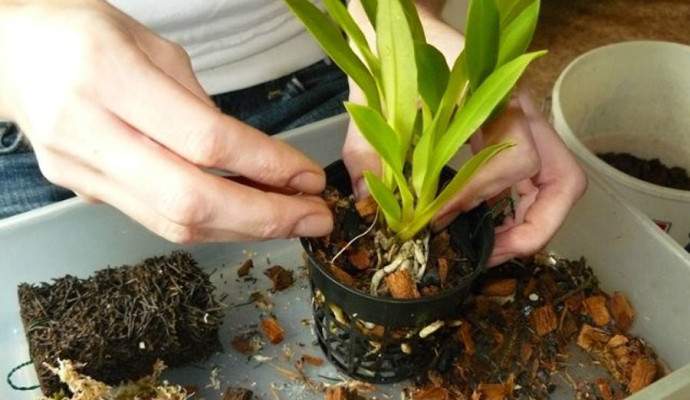
Preparation of soil and containers
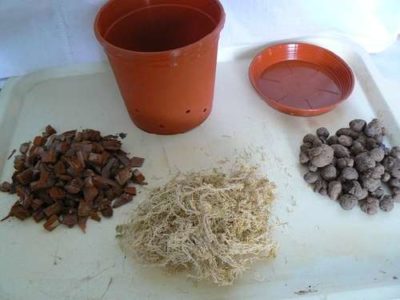
A plastic (preferably transparent) or ceramic porous pot with sufficient space for the root system, equipped with holes for water drainage, is suitable as a container. The bottom of the pot is lined with a drainage layer (small pebbles, tile chips).
The soil substrate should consist of components that do not retain moisture: moss, pieces of tree bark, coal, cork, granular clay. Garden soil is not added to the soil.
Technology
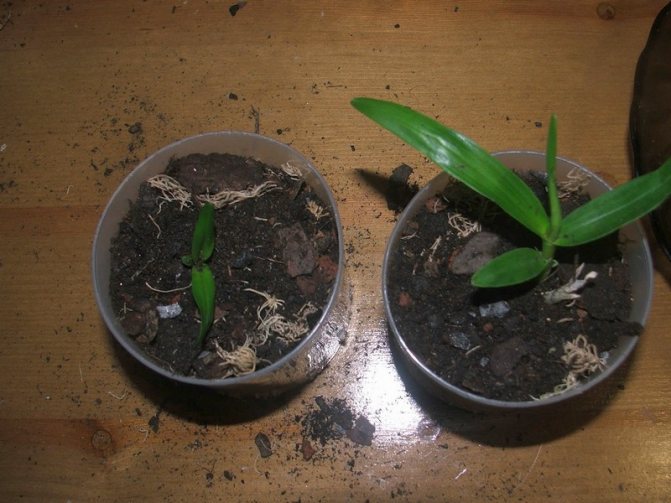
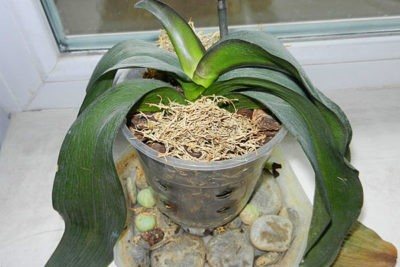
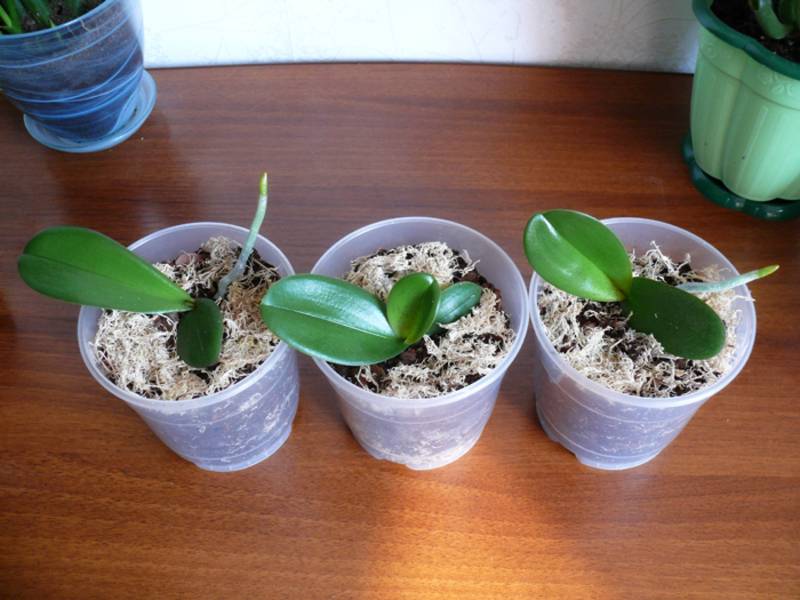
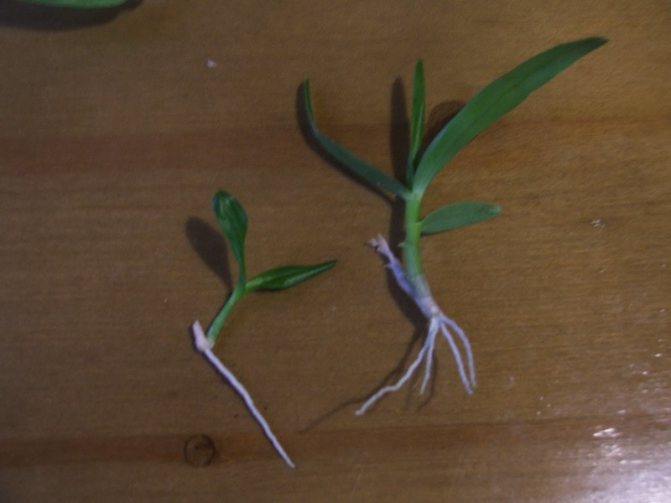
- From the root (or by dividing the bush)... How to grow a plant from a root? The division is usually combined with a planned transplant of an adult bush. The plant is completely removed from the pot, the roots are cleared of soil. The main (large) bulb is determined, which is divided with a sharp knife so that at least 4 pseudobulbs remain on each of the parts. The sections are processed with charcoal and dried. Each plot is planted in a separate pot. At first, instead of watering, spraying is carried out.
- Bulb orchid... How to grow it from store-bought bulbs? All small pseudo-bulbs are cut off with a knife; the cuts are powdered with charcoal and the bulbs are placed in the moss.
- From the cutting... With a sterile knife, a shoot (10-15 cm) with two or more air roots is cut off from the plant. Sections are treated with fungicide and charcoal. The cuttings are laid horizontally in a plastic container filled with moss. When roots appear, the segments are planted in pots. The procedure is carried out in the spring.
- From baby... The baby appears on the stem at high humidity and temperature (over 28 ° C). The baby is separated when its leaves reach a size of 3 cm, and is wrapped in moss. As soon as a 5 cm root sprouts from the base of the baby, it is placed in a pot with soil. It usually takes a baby about six months to grow its own roots. You can stimulate the appearance of children with the help of a hormonal drug - cytokinin paste.
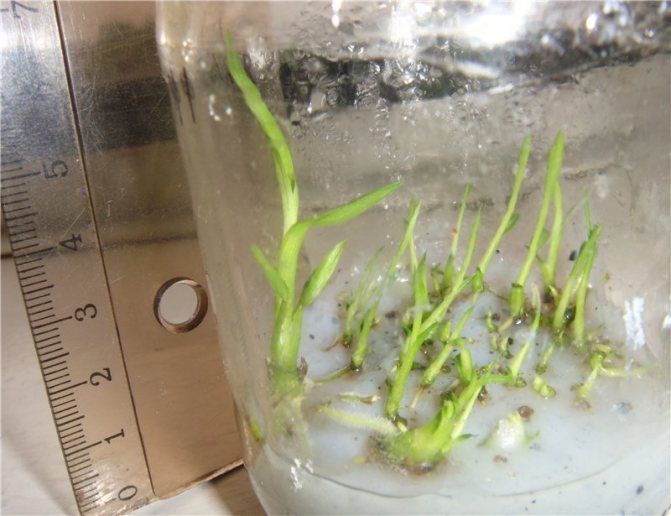
- From seed... The most time consuming and rare way to grow an orchid. The seeds ripen within 8 months, then germinate in a sterile flask lined with moss or filled with an agar-agar base. If the seed has sprouted (it takes from 3 months to a year), the seedlings are planted on a mixture of pine bark and moss, on which they can wait for transplanting into a pot for about a year.
Next steps
The first step is to take care of ensuring the required length of daylight hours. For orchids, this is about 10-12 hours daily. The best option is diffused lighting so that a sufficient amount of light falls on the plant, but direct sunlight does not burn the tender young growth.
Temperature drops and drafts must be completely excluded. Temperature readings must be maintained between 22-24 ° C. If the room is cool, then take care of an impromptu small greenhouse. With hydration, the main thing is not to overdo it. Although the flower appeared in the tropics, it is extremely sensitive to waterlogging. It is recommended to replace watering with spraying. The water should be clean, filtered, slightly warm.
Drought is also unfavorable, so it is better to focus on the condition of the soil. If the top layer is dry, you can water it. If you are afraid to overflow, place a tray under the pot and pour into it. In this case, the orchid itself will take the required amount of moisture. It is better to consult a specialist about feeding. Young plants cannot be fed, they take everything they need from the substrate. But in the future, top dressing will definitely be needed.
Growing an orchid from the root will take a lot of time, but it will help you not only save money, but also feel like an experienced florist.
Difficulties and difficulties
With a lack of moisture and light, buds or leaves may fall off.- With excessive watering, the leaves become sluggish.
- If the temperature of the content is exceeded, the leaves will ripple.
- If the orchid does not bloom, it is necessary to arrange "heat stress" for it - to increase the difference between day and night temperatures by 8-10 degrees.
- When the roots are peeking out of the pot, this means that the plant does not have enough space and needs to be transplanted into a larger container.
How to get and prepare a root
The roots of the orchid are quite fragile, so you need to empty them out of the pot very carefully, along with the soil clod. After the rhizome, shake slightly so as to free the roots from the substrate.
To divide the rhizome, you need to use a sharp knife or pruner, the tool must be disinfected.
There should be a few pseudobulbs on each cut piece, otherwise the new bush will take too long to grow. Sections should be immediately treated with chopped charcoal or cinnamon to avoid disease or pests affecting the plant. After processing, parts of the rhizome are ready for planting.

Diseases and pests
When grown at home, orchids are attacked by pests and can even get sick.... Consider what is harmful to the health of flowers:
- scale insect (dark spots and mucus appear on the leaves);
- worm (leaves turn yellow and fall off);
- whitefly (the plant is dehydrated).
- powdery mildew (flowers are covered with a white bloom);
- anthracnose (characterized by the appearance of brown spots);
- rot.
We recommend watching a video about pests and diseases of orchids:
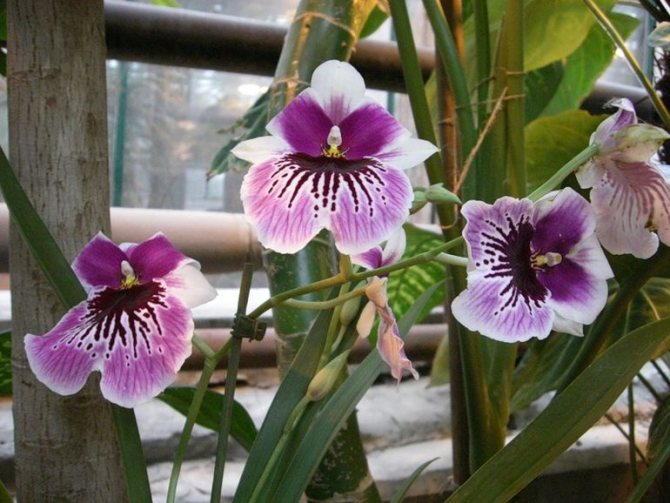
Cymbidium
These are very beautiful orchids that need cool maintenance to stimulate flowering. Almost all cymbidium hybrids are rather large plants that take up a lot of space. Regular watering, bright lighting and frequent feeding combined with cool conditions will ensure that these magnificent orchids will grow and bloom regularly.
Secrets
- To maintain proper humidity, a special watering technology is recommended: a pot with a flower is placed in a container filled with water, when the soil is saturated (after 3-5 minutes), the container is listened to and placed on a grate to drain excess water through the drainage holes.
- The orchid needs to be planted at an average depth, since at a low planting, the buds begin to rot, and at a high planting, the plant is unstable in the pot. In both cases, growth retardation occurs.
- It is better to replant an orchid in a state of new growth, when it has faded and rested a little. It is necessary to remove all damaged and soft areas and treat the sections with charcoal. After transplanting, it is not recommended to water the plant for a week (after 3 days, you can start spraying).
- You can put a clove of garlic in the pot to scare off flower gnats.
- Orchid roots take part in photosynthesis, so a transparent pot would be the best planting container.
- Growing should start with disease-resistant and standard-care species.
- Top dressing is applied during the months of active development along with watering.
Anchoring the orchid
The orchid is unstable immediately after planting. Therefore, at first it is fixed with special brackets or old nylon tights. To do this, they are cut in long strips and the plant is fixed so that it does not move. When rooting occurs and the growth of the orchid begins, the fasteners are removed.
Also, bamboo sticks and soft wire are used to hold the epiphyte in one place. Sticks are stuck into the soil vertically around the orchid. A wire is passed between them. As a result, the orchid should stand firmly in one place.
Possible problems and ways to solve them
- Long absence of children... If a healthy plant does not have babies for a long period, you should review the surrounding conditions and provide proper care, or, on the contrary, try to create a stressful situation.
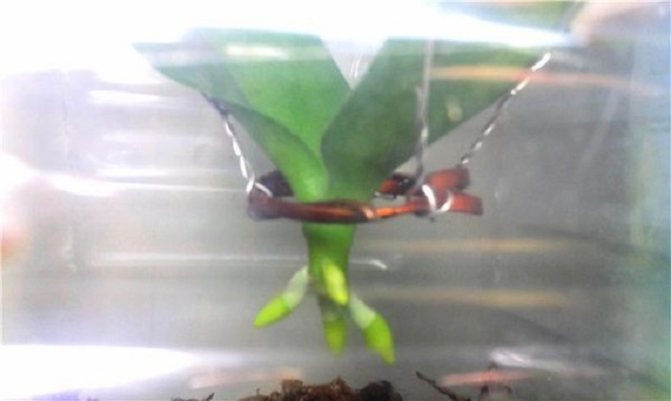
A young shoot does not release roots for a long time... The shoot does not always give roots. For their appearance, the following activities are carried out:- take sphagnum moss, strong thread and cling film;
- moss is soaked in water for 30 minutes to swell;
- a nest is formed from moss, which is attached with a thread to the peduncle with the baby;
- wrap the nest with cling film to achieve a greenhouse effect.
- Children appear on a sick orchid... With such a problem, first of all, the peduncle is cut off and placed in water with activated carbon. After the flower stalks wither, young plants are transplanted onto moss.
Some experienced flower growers do not recommend growing roots with special methods, but advise to wait for their natural appearance.
When do you need a transplant?
Phalaenopsis transplant process is not so time consuming. Consider the cases in which you need to transplant an orchid:
- If the roots have grown so much that the orchid has already begun to crawl out of the pot.
- When the substrate needs updating (every three years). Or, for example, the soil is of poor quality, as a result of which pests or diseases appeared in it.
- If the roots are shriveled, pale, or rotten.
- When the kids have grown and the orchid needs to be divided.
After purchase, provided that the plant is planted in a high-quality substrate, replanting the orchid is not required. But if it was sold in a package, an unsuitable pot, or the container is too small for it, then the phalaenopsis must be moved to a new container with nutrient soil.
Can a blooming orchid be transplanted? Yes, but as a last resort. In this case, it is better to shorten the peduncles after the fourth or fifth bud. Orchids that have flower stalks with buds can be transplanted, but always with a part of the old substrate.
The best time to transplant is after flowering ends.
In pots made of natural materials
The cultivation of exotic pets in containers made of natural and not only material is not excluded. A special are popular baskets of:
- Wood;
- Bamboo;
- And even steel;
- Steel mesh;
- Or plastic.
Bamboo - the most successful material in structure... The smooth surface, unlike other wooden materials, does not allow roots to grow into the pores.
Do not differ in decorative appearance and aesthetics steel mesh baskets or plastic. But they are the ones that are practical when growing orchid crops.
Pros and cons, landing features
Dignity:
- Aesthetics and beautiful appearance;
- Environmental friendliness;
- Convenience when creating drainage.
Of the shortcomings, it is worth noting quite quick fragility natural material.
Convenience in the formation of the components of the substrate allows you to conscientiously organize drainage and other components. If there are large holes, should be covered with sphagnum moss in order to avoid the precipitation of small fractions of soil.
These baskets look beautiful in limbo... The transplanting process itself is not much different from standard methods.
Fancy growing containers
Basket
Growing on a block suits and not every florist likes... In second place in terms of proximity to natural is the cultivation of orchids in baskets. At the same time, the material can be very diverse.
Planks, pieces, strips of wood, plastic or thin metal gather on the line like a pot "crown". It is not difficult to make such a basket on your own for a creative person.
In it, not only orchid development will be complete, but also an aesthetic look can be successfully entered into the interior of the room. Drainage is also laid, bark with a small amount of charcoal. If necessary, large holes are filled with moss.
Advice! Each specific type of orchid requires a special planting method, substrate, capacity.
Aquarium
Aquarium - the same mini greenhouse. Stability of humidity, temperature. Not every type of orchid is suitable for growing in these conditions. Those growing in the tropics or jungle will grow well in conditions:
- High humidity;
- And constant temperature.
Requires constant ventilation to dry the root part.
Wooden containers
Less suitable for the cultivation of orchids.Orchid roots "stick" to the porous surface, which is unsafe when transplanting.
DIY pot
With imagination, creativity and skillful hands, you can make a flower container yourself... And exactly for the desired interior and conditions. Experienced orchid growers believe that orchids develop better in such a pot.
Advice! A pot made of bamboo strips with the required number and size of holes is the optimal "home" for exotic and interior design.
Plant adaptation after planting
Adaptation and rooting on average lasts 2-4 weeks, depending on the conditions of keeping and the habit of the plant itself.
Orchid can be sprayed with stimulants and placed in a humid environment - mini greenhouse. In extreme cases, you can simply cover it with a plastic bag, creating a greenhouse effect around the leaves, which in turn will reduce moisture evaporation and the overall load on the plant.
It all depends on what kind we are talking about. In general, it is necessary to ensure bright diffused lighting for 12-14 hours a day, optimal temperature and its drops, as well as proper watering. However, these are only general recommendations and each type of orchid should be approached individually, trying to achieve conditions that are most similar to natural ones.
The care for different types of orchids will also vary.
Major mistakes
The main mistake is the wrong size of the pot. Too much - it is more likely that the roots will start to rot, in too small - the plant will dry out faster. The substrate, correct in moisture capacity, also plays a role. All these little things need to be considered.
We process the roots
Before planting an orchid in a pot, you need to carefully examine the roots. They may look healthy on the outside, but be empty on the inside, so you need to feel each suspicious root with your fingers and determine its condition. Healthy roots feel firm and pliable, while diseased roots may smell soft. All rotten, dry and empty roots must be carefully trimmed, capturing 5 mm of healthy tissue, and then treated with charcoal powder to prevent the development of infection.
What kind of orchid appeared in your home?
If a flower suddenly appeared in your home, and you are an inexperienced florist, first you need to decide on what species does it belong to this instance.
The first step is to determine the type of plant in order to determine the composition of the substrate it needs. Therefore, if it is not possible on your own to determine which type the acquired plant belongs to, you need to ask the seller about it or refer to the relevant forums on the Internet (or in the comments on our website), where they will help you determine the type of orchid purchased.
First you need to decide what type your orchid belongs to.
This is important, since epiphytic plants are planted in clean bark, terrestrial and lithophytic ones in soil intended for growing orchid plants. There besides the bark there is:
- Sphagnum moss;
- Peat;
- And some charcoal.
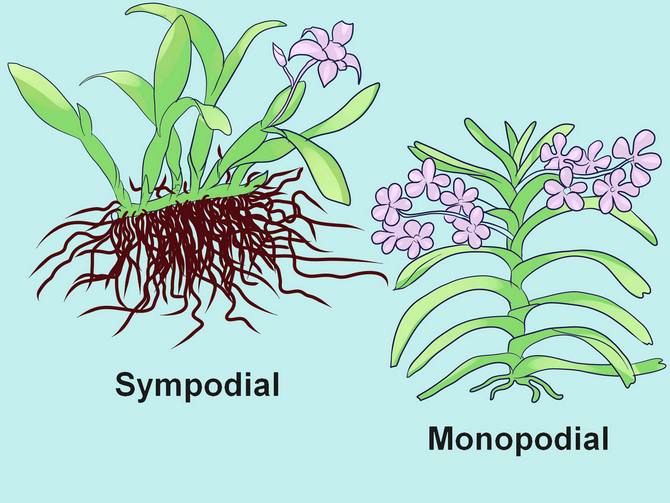
Growth type
It's possible determine by the structure of the bush:
- If a plant grows with one trunk and its leaf plates are arranged in pairs and grow one above the other, then this is a monopodial orchid;
- If the flower grows like a raspberry with a branch ending in a young baby bush, then it is a sympodial type of orchid.
How to look after further
After planting, the planted baby needs special care. If executed correctly, the process will quickly take root and form a strong flower. The first time the plant is watered for 2 or 3 days. The next time, water is added only when the soil has completely dried, but no later than after 5-7 days.
When it became clear that the shoot has taken root in a new place and started to grow, its care is carried out according to the standard scheme, which is prescribed for all varieties of orchids.It is important to organize the correct water and temperature conditions for the plant, as well as adjust the humidity in the room.
As you can see, getting a new flower from a baby is quite simple. The main thing is to follow the prescribed breeding instructions exactly. If you did everything correctly, that in 3-4 years the new plant will form its first peduncle.
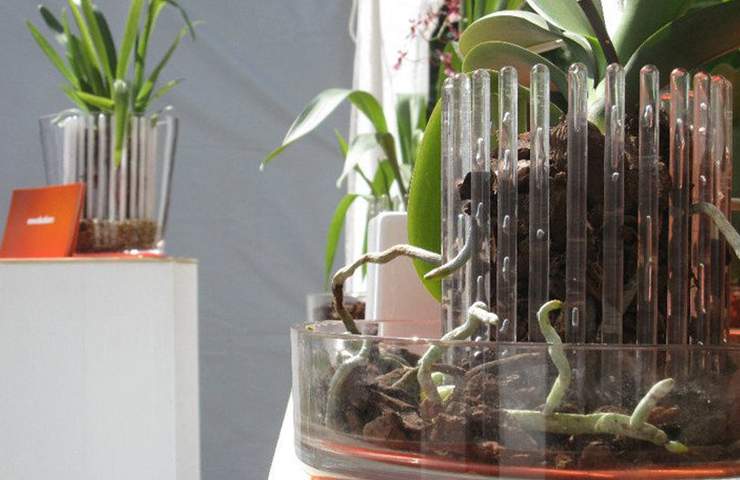
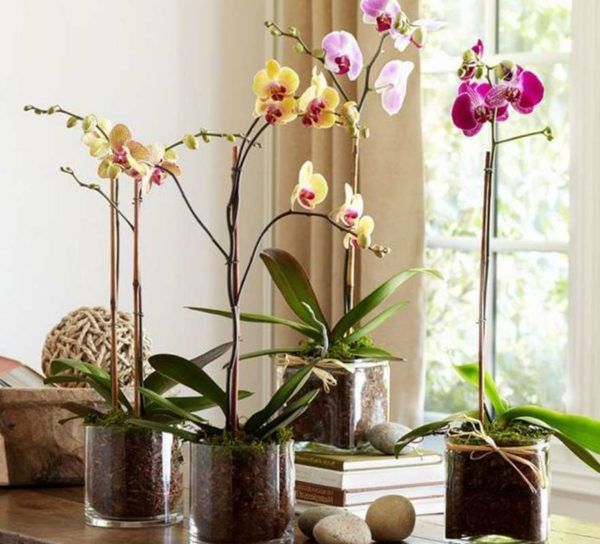
Glass container
How do you plant in glass pots? Whatever they say and write about glass containers for orchid crops, experienced orchidists do not recommend using them various species for growing epiphytes.
If in another material it is possible to ensure air circulation inside the vessel, then in glass it is impossible without special skill and tool. The slightest inaccurate watering will lead to rotting of the root system and subsequent death.
Which orchids are planted in glass vessels? Can be grown in glass with careful and careful watering, some types of orchids:
- Wanda;
- Phalaenopsis;
- And Ascocenda.
Advantages and disadvantages
Positive moments not so much:
- Aesthetics;
- Transparency.
There are plenty of cons:
- Lack of breathability;
- Organization of special drainage;
- Strict control of watering and maintenance.
Features of the
How to plant an orchid in a glass vase? When planting orchids in a glass "house", special attention should be paid to selection of bark fraction with the expectation of providing the largest number of air sinuses.
To transplant an orchid into a glass pot, you need to select high-quality bark.
A prerequisite is the availability of drainage with good water absorption capacity. Peat-containing components are also excluded from the substrate.
Reproduction
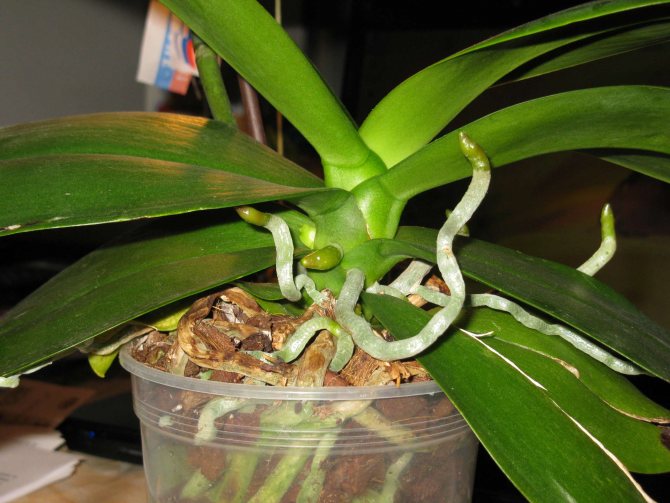
If a baby has appeared on the plant, first of all you need to know that it is separated only when the roots on the baby reach 5 cm in length. This usually takes up to six months. First, the vegetative part will grow, and then the baby grows its root system.
But sometimes this does not happen, and then the child needs help so that she gets her roots. There are various ways to do this. One of them is when tie up sphagnum moss at the bottom of the kids, in such a way that there is a distance of about 5 mm between it and the bottom of the baby. In this case, the moss is moistened every two days to achieve the moisture necessary for root growth.
Comments (4)
Valeria
21.12.2018 at 01:40 |
I doubt that such a beautiful orchid, as in the photographs here, will bloom right on my windowsill, but for some reason I have no doubt that it will safely rise and grow.Reply
Julia Expert Plodogorod
24.12.2018 at 22:51 |
Hello Valeria! If you are a beginner florist, or have not grown orchids before, then it is better to purchase a plant at a flower shop. And when you get comfortable with leaving, you can safely reproduce in a way suitable for the selected species. But, even in this case, you need to carefully consider the choice of a flower at the time of purchase, since some of them may be weak or affected by various diseases.
First of all, it is better not to buy this southern plant in late autumn or winter, when the outside temperature is below freezing. There is a great risk that the orchid will start to hurt after such a walk. Be sure to check with the seller for the name of the selected instance, as care may vary. If there is an opportunity to buy a plant in a nursery, then this will be a more acceptable option, since the care for them there is better and the conditions are close to natural.
Many florists choose a plant with flowers already, and this, of course, has its advantages. For example, you can see exactly what kind of buds will be in the future. But, flowering greatly weakens the orchid, and one cannot know in advance how long it has stood on the counter. In addition, very often flowers in stores are sprayed with color stimulants.If this was really done, then this will have a bad effect on the plant, since it has already spent a significant part of its vitality on forced flowering. If you still decide on a flowering specimen, see that there is the maximum number of closed buds.
Examine the substrate in which the orchid grows: it should not contain moisture. Better to choose with dry filling. This will make it easier for the new pet to move and acclimatize in the new building.
It is very important to examine the roots. Choose a flower in a transparent pot. The roots should be tight and elastic, as well as not sticking. Color from light to dark green. You cannot buy with black or gray roots. The leaves should be smooth and free from damage.
Reply
Ira
12.03.2019 at 01:32 |
My girlfriend bought an orchid in the spring and gave it to me, it did not take root with me. I gave it back to my friend, and she immediately bloomed, I don't even know what was the matter and what she lacked in my house.
Reply
Julia Expert Plodogorod
12.03.2019 at 21:46 |
Hello Ira! Please describe in what conditions you kept the orchid, so that it is easier to understand what the problem is and help fix it.
There are several common mistakes that inhibit the life of a flower. The first is the wrong pot. The fact is that the roots of this flower photosynthesize in the same way as the leaves. Therefore, the pot must be transparent and colorless.
Transparent plastic containers that have some kind of shade will interfere with the normal passage of this process. In addition, there should be a large number of holes in the pot around the entire perimeter and at the bottom. You can make them yourself using a hot knitting needle, or you can buy a pot specifically for an orchid.
If the container does not have the required number of holes, then condensation can be seen on its walls. Without airing, the roots will rot and begin to hurt.
Further, orchids, like many houseplants, do not like dry air. Do not place it over radiators during the heating season. Or, you need to cover the heat source with something. Regular spraying from a spray bottle is required. The water should be lukewarm.
These exotic beauties will not bloom even in poor lighting conditions. But, on hot summer days, diffused light is required, otherwise the plant will get burned.
The lack of flowering can be observed due to a lack of nutrients. Orchids need to be fed regularly. For young flowers that are only building up their vegetative mass and in the period after the end of flowering, you can use Mr. Color - universal.
To stimulate flowering and help the plant during the period of opening the buds and directly flowering, you can use the Mister Color - Orchid.
These flowers respond well to foliar feeding. This is especially true if the root system is damaged by a disease. You can apply Dr. Foley starter. This product is suitable for the period of foliage growth.
When the plant is in bloom it is best to use Dr. Foley - an orchid. Do not make a more concentrated solution than indicated on the package. This will only provoke burns on the organs of the plant.
Reply
Potential risks
The process of an orchid from an adult plant, in fact, differs only in size. Therefore, the risks and rules for its transplant are the same, as for an adult... The best prevention is to keep the plant in favorable conditions. During landing try to be neat with roots - they are quite fragile in orchids and can be easily broken.
Damage by a pest is possible if the plant is weakened, and the neighboring ones are already infected. It is necessary to maintain plant hygiene and not place them too close to each other. In case of an attack of paranoia orchids can be sprayed with Actara.

Orchid pests.
Formation of shoots on orchids
The baby, separated immediately after the appearance, will die. The scion must be formed for subsequent planting on the parent specimen. This process takes about six months, and sometimes even longer. Children who have acquired roots with a length of at least five centimeters and several leaves are considered ready for separation.
No outside assistance is recommended. Winding sphagnum, attaching foam and using stimulants can speed up the formation of a baby, but do not guarantee the success of vegetative reproduction. Lack of natural development can cause subsequent generations to grow up weak.
Specimens grown from a shoot formed without human intervention, on the contrary, are perfectly adapted to the conditions of home keeping, often even surpassing the parent plant. The main thing, given that the orchid spends all its energy on the offspring, is to provide correct and timely care, which consists in watering and fertilizing. During this period, you can irrigate the orchid with a hot shower from all sides.
Baby without roots: ways to build up the root system
Ideally, babies do not separate from the mother plant until they have roots. If, for some reason, it happened otherwise, it is impossible to plant the offspring in the ground. First you have to help him to give roots.
There are various tricks to help achieve root growth in an orchid baby. The most effective are the following:
| Way | Description |
| Greenhouse room |
|
| Foam rafts |
|
The greenhouse method is used in practice much more often. At the same time, the methods of attaching a baby or filling a glass may be different:
“I just hang the kids over a glass of water on bamboo skewers placed on a grate. I put a pebble in the bottom of the glass for balance, and I don't add any moss there. I cover the top with a cut off five-liter bottle. Roots appear very quickly ”(Zhanna, Kislovodsk).
When the baby grows roots, it is planted in the substrate in the usual way.
In order for the child to grow roots faster, the greenhouse must be very well lit. To put it in the sun, at the same time, in no case is it - so the offspring "cooked". Lighting should be provided by special phytolamps.
Substrate, soil
When transplanting, it is not recommended to completely change the entire substrate so that the orchid does not get sick... With a complete replacement of the soil mixture, there is a sharp change in the microchemical composition to which the roots of the flower are accustomed, so it is better to leave a small part of the old soil (if, of course, it is not diseased) and add fresh bark.
A high-quality substrate does not smell like mold, is breathable, moisture-absorbing and consists mainly of bark.
The peat-containing substrate is not suitable for orchids. The roots in it can easily rot. Moss, which is often added to the soil mixture, is also superfluous, as it retains moisture for a long time. It needs to be added a little on top and replaced with a new one three times a year.
Moss should be placed on the surface of the substrate
You can prepare the substrate yourself. For this:
- Take Pine Bark Pieces (you can buy it). A prerequisite: it must be resin-free and wood-free.
- Use a knife to remove unsightly and rotten areas from the bark. The size of the pieces should be 1–1.5 cm. Cut large pieces with pruning shears.
- Boil the bark for 2-3 minutes (stirring). Then drain the water, add fresh and boil again.
- Drain and dry the bark in the oven at low temperature (do not burn!) Or on parchment. If you apply the bark straight away, you do not need to dry it completely.
- Add birch charcoal to the bark (you can also buy it). Proportion 4: 1.
Do not use polystyrene and cork recommended by some, these are completely superfluous elements! If you want to "dilute" the substrate, then it is better to use expanded clay.
Even if you plant phalaenopsis in bark alone, it will be better than in many commercial substrates that are too overloaded with peat, moss and all sorts of small fractions. Purchased substrates of this kind are more suitable for growing milkweed. From ready-made soils, the mixture "Seramis" made in Germany has proven itself very well.
Bloom
Peduncle begins to develop from the leaf axils or a dormant bud located on a peduncle. At the same time, at the very beginning, the growing bud of the peduncle has a pointed end, and the future baby has a rounded blunt end.
It is better not to feed a blooming orchid.
If the grower doubts at the very beginning, then after 10 days it will be possible to say for sure what is developing: a peduncle or a baby.
Securing the flower after planting
After planting, it is advisable to firmly fix the flower to ensure complete rooting. For this, flower metal holders are purchased in a specialized garden center. This support is stuck into the ground like a frame, and the flower is placed inside.
Due to this, the flower is well fixed, and is no longer subject to various vibrations that negatively affect rooting. In the absence of such a support, three wooden pegs are placed on the sides of the pot, and the plant is tied to them until it takes root and grows.
Expert advice on choosing a container for transplanting grown orchid babies
For transplanting children with a well-grown root system, you can use not only standard plastic pots or baskets.
“Now on sale you can find so-called 'crowns' for orchids, reminiscent of a round fence. In terms of decorativeness, they are better than ordinary perforated pots, and the aeration of the roots when planting in the crown remains at a high level. But I do not recommend using various colored pots made of thick transparent colored plastic. They look beautiful, but the orchids in them easily suffocate and suffocate. " A. Davydovskaya, owner of the greenhouse, candidate of biological sciences
Preparing the soil for planting the baby
There are many soil recipes for planting orchid babies. Florists experiment with different materials, mixing them in different proportions. And yet, most orchid lovers prefer the classics - pine bark and sphagnum moss.
The combination of bark and moss gives the substrate the properties necessary for the rooting of children. The bark makes it friable, leaving many cavities for air. Moss serves for moisture retention and does not allow the soil to quickly turn into a "crack". The main thing is to choose the right proportions of these components. This is done based on where the baby was cut from:
| Place of formation of the baby | The percentage of pine bark in the substrate | The percentage of moss in the substrate |
| Peduncle | 70% | 30% |
| Stem | 50% | 50% |
| Pseudobulb | 50% | 50% |
This approach takes into account how the roots of the children are accustomed to the air and how much the offspring has learned to "feed" on its own.
It is better to buy bark in the store, and not bring it from the forest.Different manufacturers of orchid substrates offer pine bark of a more or less coarse fraction. For children, you need a small one.
The components of the substrate are poured in the required quantities into a large bowl, filled with clean water without chlorine and discarded in a colander. If desired, add 2 drops of Radix per liter to the water.
Tip # 1. Instead of the classic recipe from bark and moss for planting children, you can take the innovative material "ZeoFlora for Orchids". It represents small stones of natural yellowish zeolite. Its advantage is that it absorbs water and keeps it for a long time, giving the orchid "in portions". The looseness and air permeability of the substrate does not suffer.

The substrate is moistened just before planting. It is not recommended to plant children in dry soil.
Separating the baby from the mother orchid
It is carried out exclusively for children who have fully formed both roots and leaves. The procedure is carried out as follows:
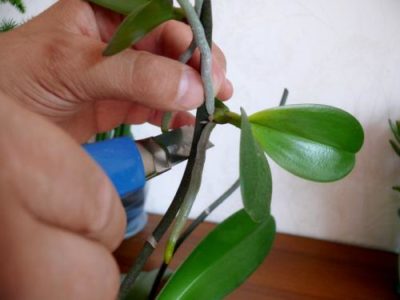
- Pruning a scion. A miniature "plant" is cut with scissors or a sharp blade. The instrument must be disinfected first. Otherwise, there is a risk of introducing infection to both the adult specimen and the appendix. You need to cut off the baby with a small part of the peduncle. You should leave at least one centimeter, but you can take a little more. Similarly, pruning is carried out from the leaf axil.
- Scion preparation. The separated planting material is left for half an hour to dry. Places of cuts both on orchids and on the process must be treated with activated crushed carbon. If not, it is permissible to use a seasoning such as cinnamon.
It is recommended to carry out these works exclusively with gloves. No stage in the preparation of the scion should be neglected. Otherwise, the planting material will be spoiled, and the mother plant may get sick and die. The latter concerns the implementation of a cut with a raw tool.