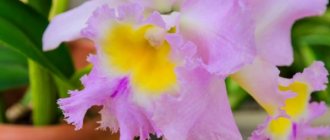
Growing phalaenopsis at home - a very simple task. Only the transplantation and, in a sense, the reproduction of the orchid can be distinguished as an exception to this rule. Choosing what is needed for transplanting (pot, substrate), you are laying a kind of foundation for the future building.
Improper planting or transplanting can disrupt the health of the plant, and further cultivation can provoke its death. This article will focus on how when and how to transplant phalaenopsis correctly, you can also see a video with a photo step by step about this process.
Why you need to transplant orchids - the main reasons
The recommended schedule for transplanting phalaenopsis into a new container or other substrate is every 2-3 years. This is due to the stress the plant experiences during this process.
Any orchid variety needs a timely transplant.
The overdue need for a new pot or soil is due to the following factors:
- depletion of the soil;
- violation of the balance of mineral substances in the substrate;
- change in the level of acidity;
- loss of breathability;
- soil compaction does not allow the root system to develop optimally and even causes root rot;
- a transplant after 3 years is needed if the bark was the main component in the substrate. If it was sphagnum moss, then the soil should be replaced 2 years after planting.
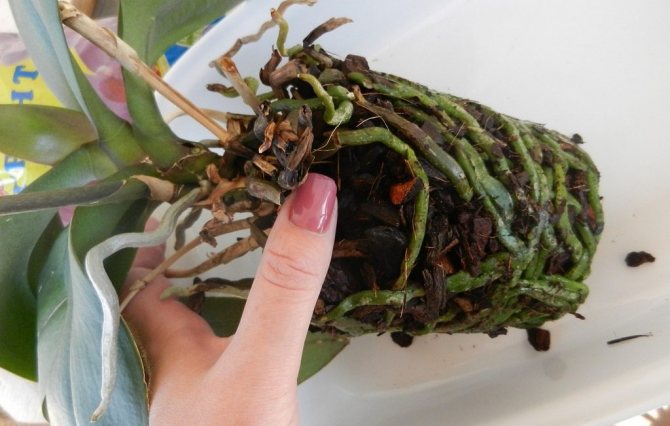
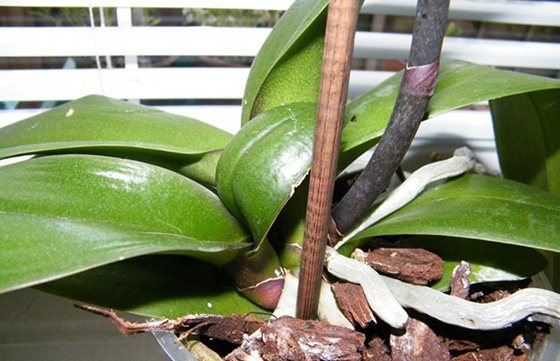
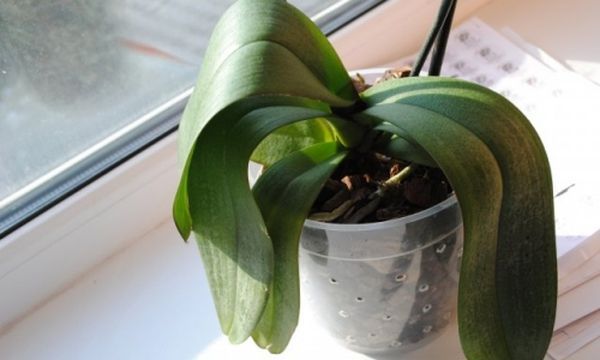
A cramped pot, from which roots stick out in all directions, needs to be changed to a more spacious one
If the pot has become cramped, the roots will push the soil out of the container, which will undoubtedly affect the health of the flower.
Possible mistakes
You can transplant the flower correctly according to the step-by-step instructions, but it will not take root in a new place and will fade more and more every day. This is due to the fact that during the land work, the gardener made one of a number of mistakes:
- The soil is incorrectly selected. The soil must contain the necessary organic and mineral substances to ensure good growth of the flower.
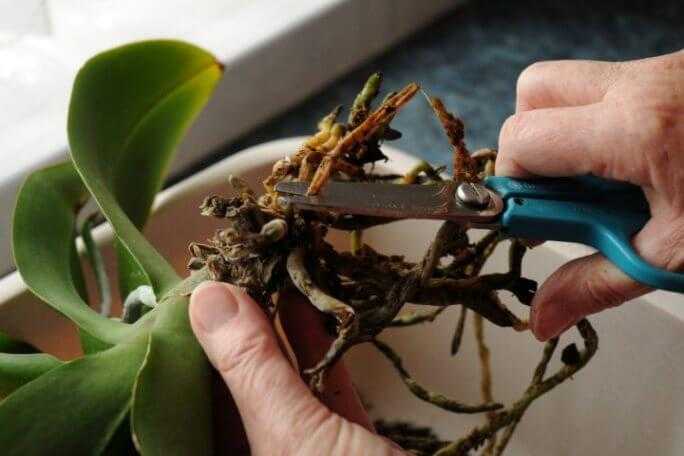
- Damage to the root system. Many gardeners do not know if the roots of an orchid can be pruned. Only damaged or dry processes need to be trimmed.
- Incorrectly selected pot. It must necessarily be created from a transparent material, since the roots are also involved in the process of photosynthesis.
- Wrong pot size. When choosing a capacity, you should focus on the power of the root system.
Orchid is a capricious plant that requires careful maintenance. Every 3 years it needs to be replanted, otherwise, there will be little space in the pot, the roots will begin to die off, and the pot itself will fade. But, this must be done in accordance with the step-by-step instructions and all the rules so as not to damage the plant culture.

Is it possible to transplant a blooming orchid
An emergency transplant during flowering can be done for a number of reasons: an army of pests has appeared on neighboring plants, you have noticed signs of rotting or other diseases. The orchid is also transplanted after purchase, even during flowering, if it is obvious that the flower does not feel well in this soil. We will explain below how to do this.
Sometimes you have to make a choice: a long plant life with delayed flowering or short days in bloom and the death of an orchid. If you want to see your plant healthy and pleasing to the eye for years to come, then don't ask if the plant can be transplanted during flowering. It is better to cut off the peduncle and transplant the beauty.
Transplant features
After the purchase
Transplant the plant after purchase only needed if it dies... Otherwise, if the substrate is good, then no need to transplant.
If the crust has collapsed, then transplanted under the following conditions:
- after flowering;
- after the acclimatization of the plant in your apartment (about 2 weeks).
Read more about the post-purchase transplant in this article.
In the spring
The best time for a transplant is considered spring, when daylight hours increase (late February-early March). The transplant technology is standard.
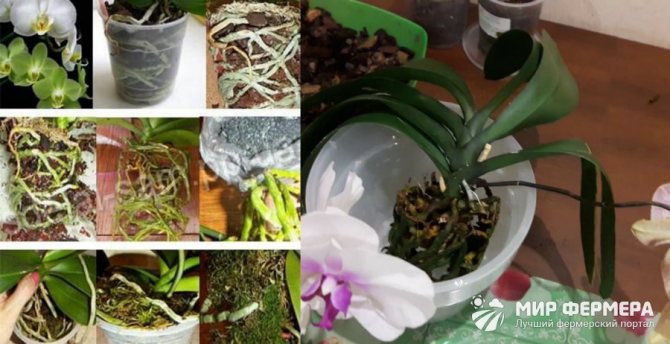
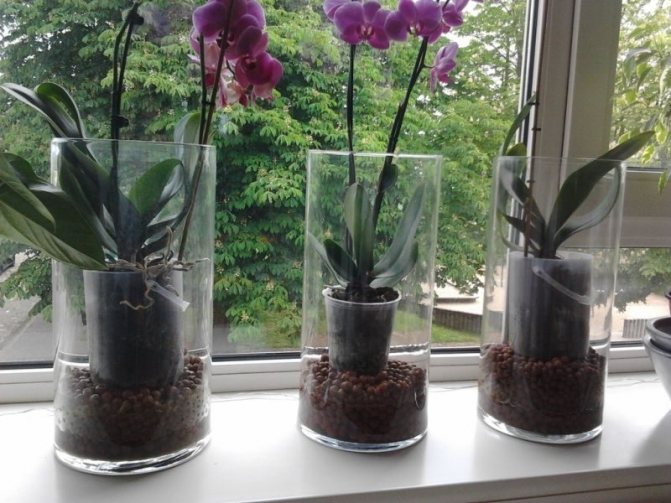
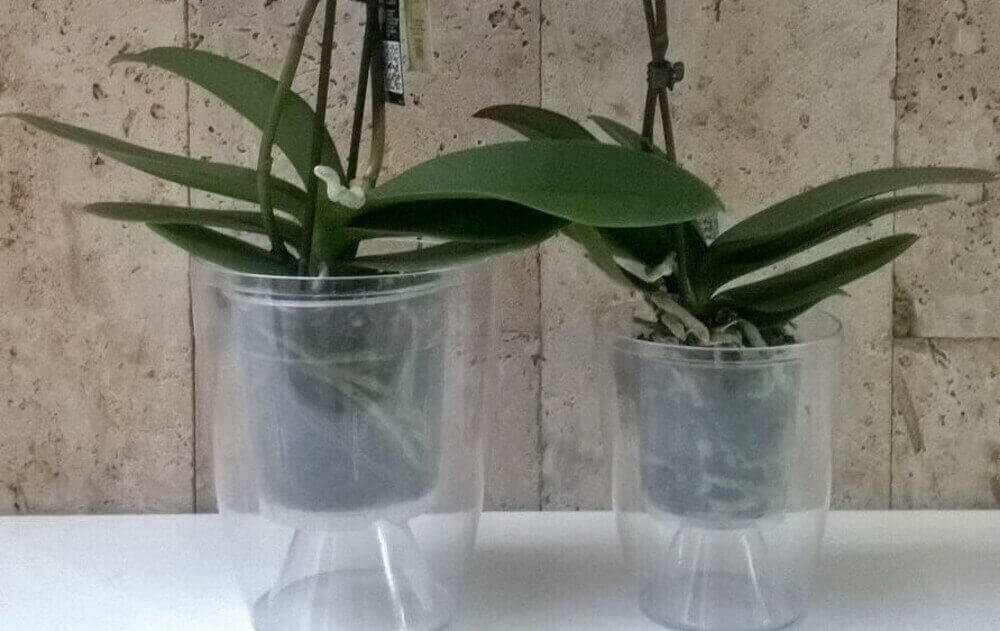
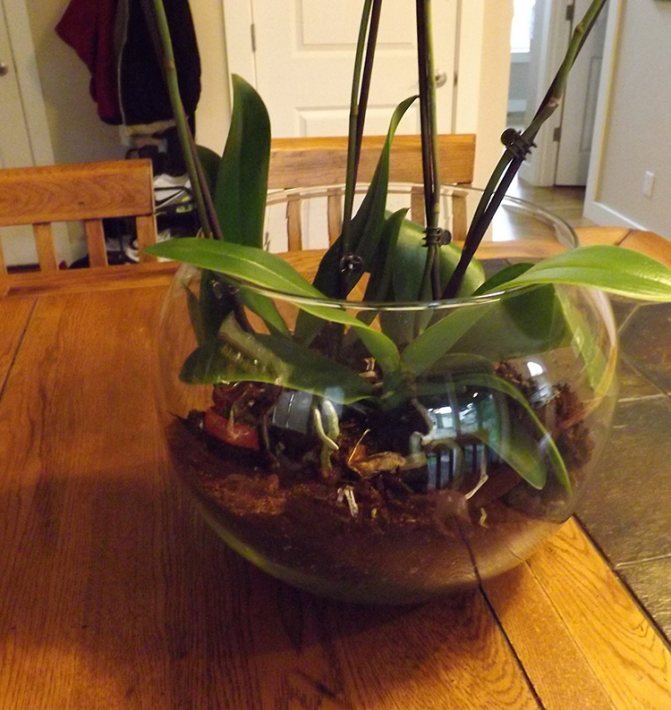
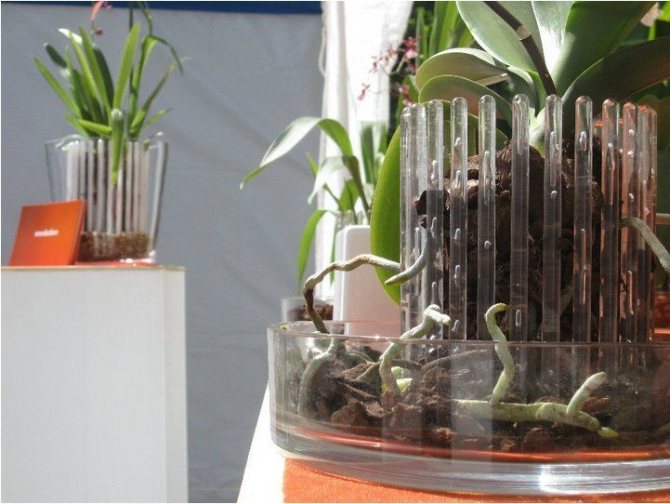
Into a glass vase
Quite an unusual way of planting and cultivating orchids. The positive side of which is that the plant can hardly be watered... In the sense that with the correct selection and placement of the substrate components, moisture from the bottom of the vase gradually rises up and goes to the roots. Under such conditions, the root system can reach relatively large sizes and resemble a beard.
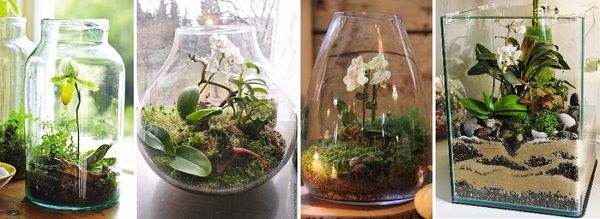
Orchids in glass vases.
It should be understood that this method requires some experience and knowledge, the volume of which is worthy of a separate article and will not fit into a small paragraph.
Old orchid
Old plants are transplanted in the same way as young or adults.... The only caveat is that you need to be more careful with a particularly large plant than with small, young ones.
Older, well-groomed orchids usually have a lush beard of roots that can be easily damaged. You need to be careful with them. Otherwise, the transplant technology is identical to specimens of a different age.
Read more about transplanting an old orchid in this article.
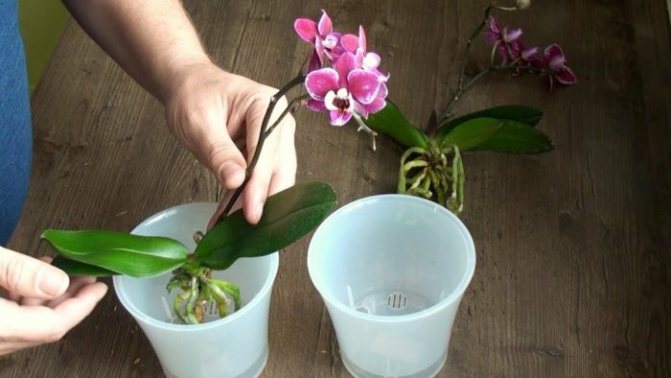
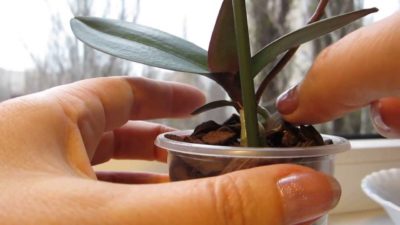
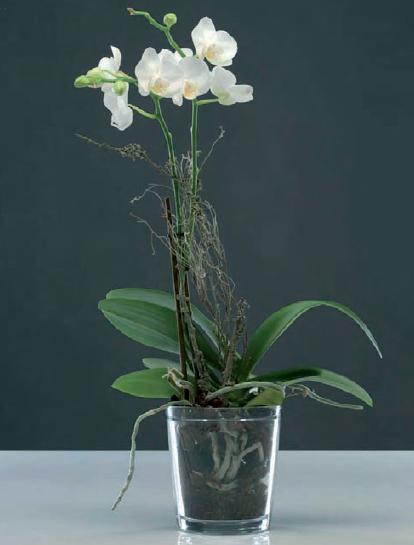
What kind of pot is needed for an orchid - capacity requirements
The pot for orchids is always chosen transparent. This condition is necessary in order to monitor the development of roots and monitor the condition of the soil. If desired, a transparent container is placed in a pots that are pleasing to the eye. We recommend choosing a more spacious pot. It will be enough if the new container is a few centimeters wider than the old one.
Before making a transplant, a new container is disinfected, and then only a layer of drainage is laid out
When can the procedure be carried out and when not?
It is recommended to transplant phalaenopsis only after flowering. Intervention in the root system of the plant at this time can lead to a violation of its flowering, the discharge of buds, and possibly the death of the flower.
Phalaenopsis is not recommended to be replanted after purchase if it is in good quality soil (read here how to care for phalaenopsis after purchase in a store). Better to transplant the plant one year after purchase... An exception is made if, after purchase:
- Phalaenopsis loses balance and cannot be upright due to large foliage or poorly selected capacity;
- there is a small amount of substrate in the pot, which is why the plant dangles in it;
- the roots of the plant are in poor condition. In this case, the diseased parts of the plant are cut off, treated with activated carbon and planted in new soil.
Season

The best time to transplant a plant is spring, around March-April... At the end of April, after the resting phase, active growth of the roots and leaves of phalaenopsis begins, therefore it is recommended to have time to transplant the plant before this time.
It should be borne in mind that if the flowering of phalaenopsis happened in the spring, it is better not to transplant it, so as not to harm it by interfering with the root system. It is better to start the transplant after the end of flowering.
Emergency move to a new pot
It is carried out in the following cases:
- Complete soil decomposition... This is evidenced by its ability to retain moisture for a week or more.
- Root system disease... The roots of the plant turn black and dry out, the leaves fall off or look sickly.
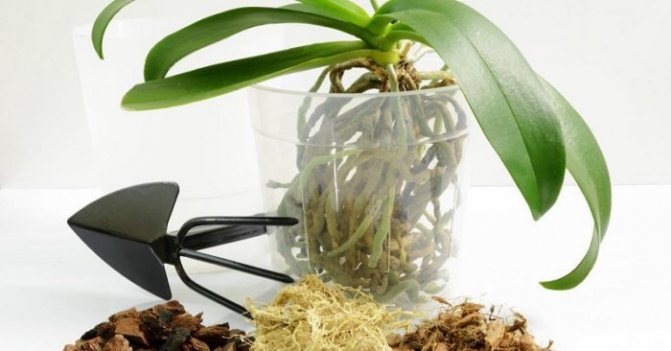
How to choose a substrate, and what kind of soil is needed for orchids
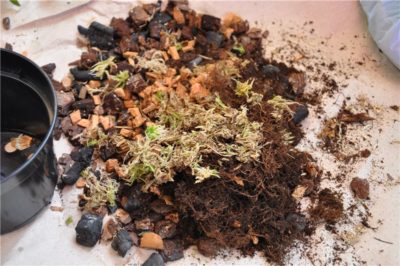
The beautiful orchid needs a loose substrate. It is preferable to purchase a ready-made mixture in a store. If you undertake to prepare the soil yourself, then take expanded clay for drainage, sphagnum moss or crushed conifer bark and charcoal.

The substrate should not only provide the flower with nutrition and oxygen, but also help to fix the plant in the pot.
After a couple of years, you will notice that the coal and bark have turned to dust, the soil has become dense and settled - it's time to transplant. So that you appreciate the benefits of breathable soil, we offer an introductory video on how to transplant an orchid at home:
Briefly about the flower
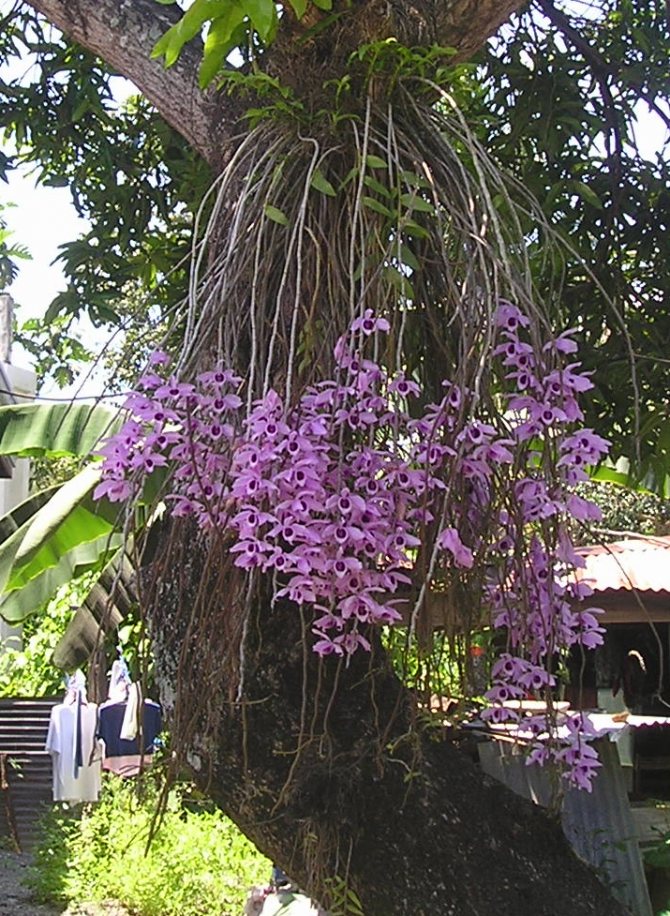
Phalaenopsis is a perennial herb belonging to the Orchid family... It is an epiphyte and grows on tree branches or snags, without parasitizing them. Phalaenopsis prefers a humid tropical climate, so it can be found in the forests of Australia, the Philippines and Southeast Asia.
It grows only upward and can reach a height of 50 cm. Large, colored phalaenopsis flowers outwardly resemble the wings of butterflies, which is the reason for the name - Phalaenopsis (moth-like, nocturnal butterfly).
When you need to transplant an orchid immediately
If you notice that the soil has become dense, all large components are more like dust, the orchid has become a refuge for aphids, thrips, scale insects and other "lovely" guests, then it is not long before the complete death of the plant. Sometimes you can notice rotting of the roots, or the green mass of leaves has become much larger than the size of the pot, which means that you urgently need to transplant the orchid, and we will tell you how to do it right at home.
If your orchid has just arrived from the store and looks healthy, no transplant is required. But when your ward looks unimportant after the purchase, it is better to start replanting her immediately.
How to get rid of midges in indoor flowers using simple methods. In a special publication of our portal, we will tell you in detail how to get rid of pests in indoor flowers. You will learn the reasons for their appearance, the types of midges and their signs and measures to prevent the appearance of midges.

Transplant instructions
Transplanting an orchid after flowering is a complex process. You can cope with it if you know the timing and frequency, the rule for choosing a substrate and a pot, follow the methods and technology of the process. Then it will be possible to prevent the occurrence of stress in the plant, thereby protecting it.
Timing and frequency
A common question among new gardeners is whether to transplant an orchid after purchase. If the plant looks healthy, is actively growing, then it is recommended to do this not earlier than after 2-3 years. It is better to do this at the end of February. The further frequency of movement of the flower is also 2-3 years.
Attention!
Many gardeners do not know if an orchid can be transplanted in the fall. During this period, she actively blooms, so it is better not to disturb her. Moving to a new location is possible only when absolutely necessary.
Substrate
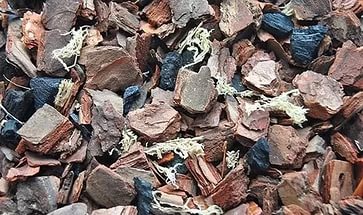
Substrate - a substance necessary for the full fixation of a plant in a new place, maintaining an optimal level of moisture in the root system. There are several types of this component in shops for gardeners; for flowers, one based on pine and pine bark is suitable.
You can prepare pine bark for creating a substrate yourself, but it should be borne in mind that there is a minimum amount of resin and surface contamination on it. Before adding to the soil, you need to thoroughly rinse it, dry it, bake it in the oven, cut it into cubes.
Pot
When choosing a new pot for transplanting phalaenopsis at home, you should study its condition. If the flower is healthy, then the dishes should be 1-2 sizes larger than the one in which it was previously. In it, the root system will straighten out, the plant will grow comfortably far away. But, if most of the roots have rotted and they need to be cut off first, then you can plant a flower in the same pot after processing or pick up a container of the same size.
As for the material and color, it is best that this flower grows in a transparent container. Therefore, both a plastic container and a glass vase are equally suitable for this purpose. There should be several small holes at the bottom of the container through which excess water will come out and air will penetrate, providing ventilation of the soil.
Methods and technology
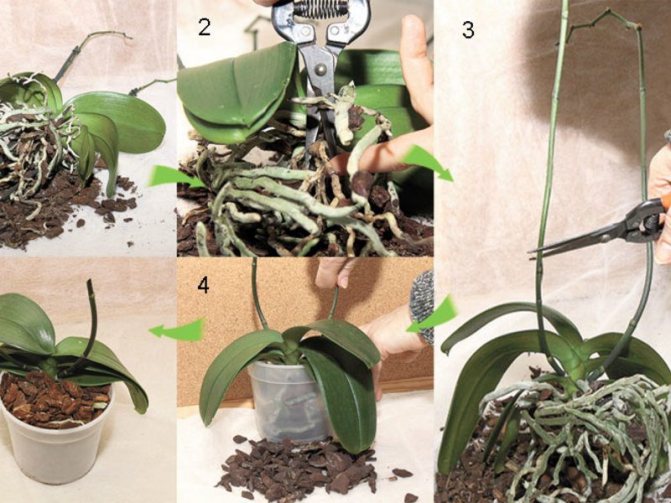
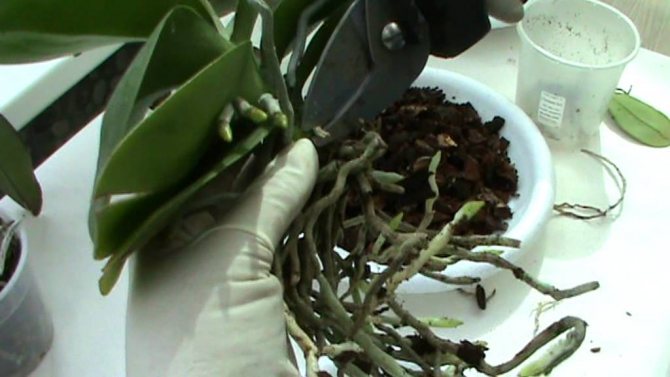
Transplanting the Phalaenopsis orchid must be done very carefully, given that this flower has a fragile root system, you can damage it with a sharp movement. When transplanting, you must follow the step-by-step instructions:
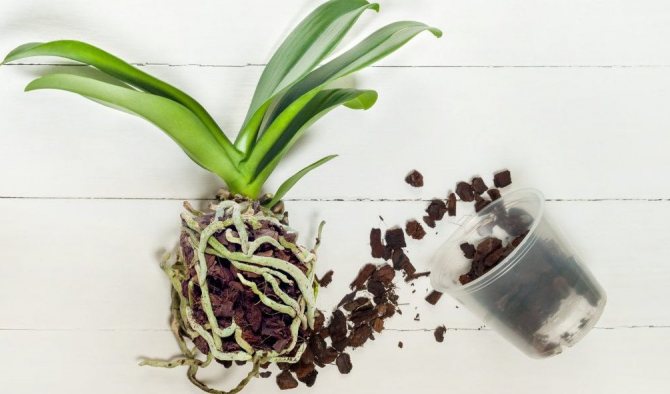
- The plant should be watered before transplanting into a pot. The roots will become saturated with liquid, from which they will become flexible and elastic, it will become more difficult to damage them. Rotten shoots, on the other hand, will become easier to detach from the common root system.
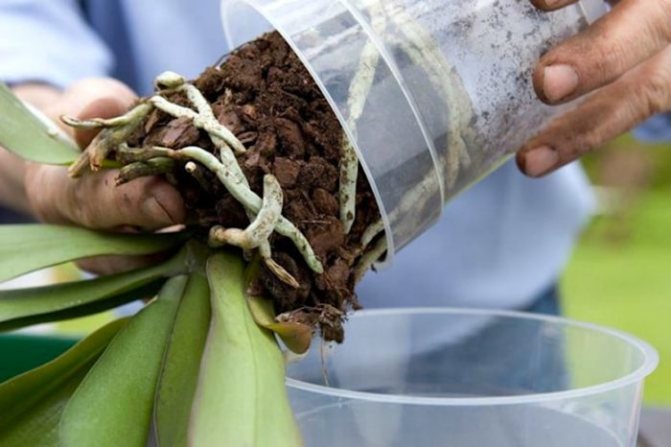
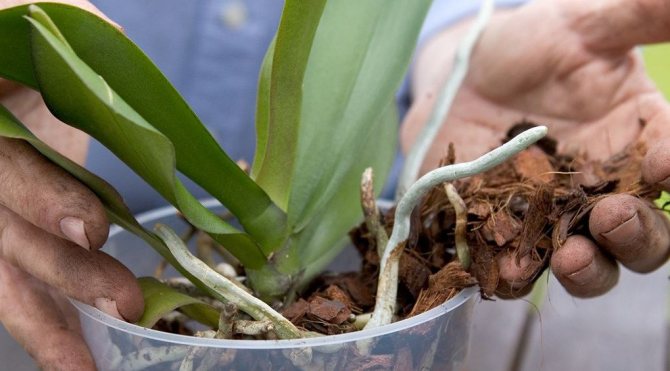
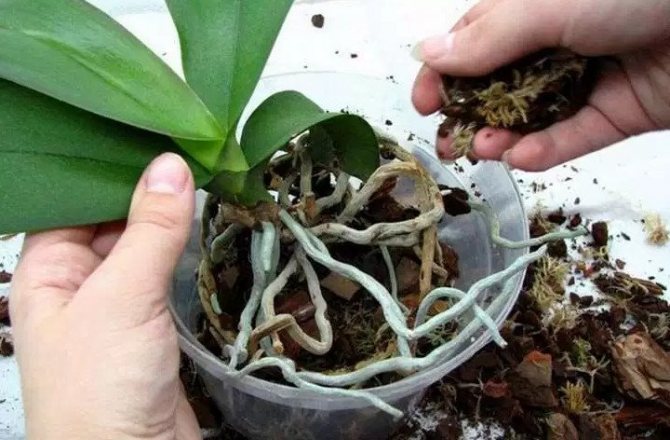
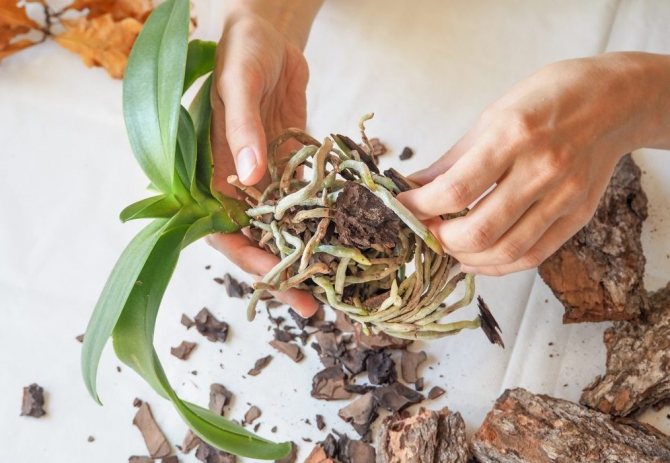
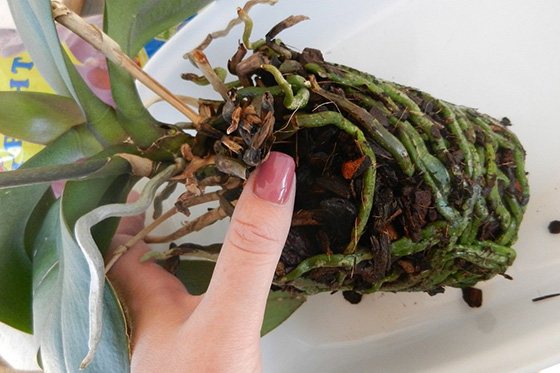
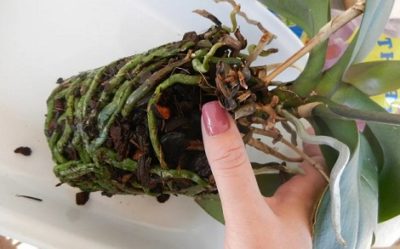
- After watering the orchid during transplanting, gently knead the contents of the pot with your fingers, trying to properly stir the old substrate. Only then can the plant be carefully removed from the container.
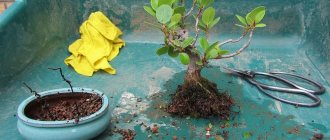
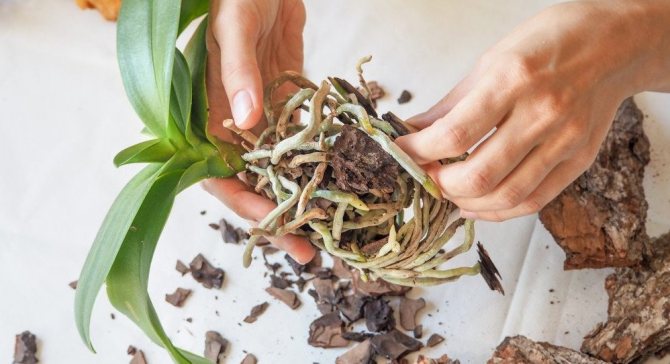
- The roots must be freed from excess soil and old bark. Then you should slightly moisten them under running cool water.
- All rotten, damaged or dried out plant elements must be cut off. Places of cuts on the root system must be sprinkled with plenty of charcoal.
- The plant should be transferred to a newspaper or dense cloth. The root should be completely dry. This can take 6 to 8 hours. Only then can it be transplanted.
- The flower should be placed in a pot with fresh soil. The roots must be carefully spread. If voids have formed, then you need to fill them with substrates.
The orchid is transplanted. If some aerial roots did not fit into the pot and remained on the surface, then there is nothing wrong with that. This will not affect the full growth of the plant in any way. Next, you need to do watering after transplanting. It is better to carry out the process of supplying water through a shower or watering can.
Attention!
Large plants are difficult to transplant so that they are firmly entrenched in a new pot. To increase stability, it is recommended to place a small stone on the bottom of the container.
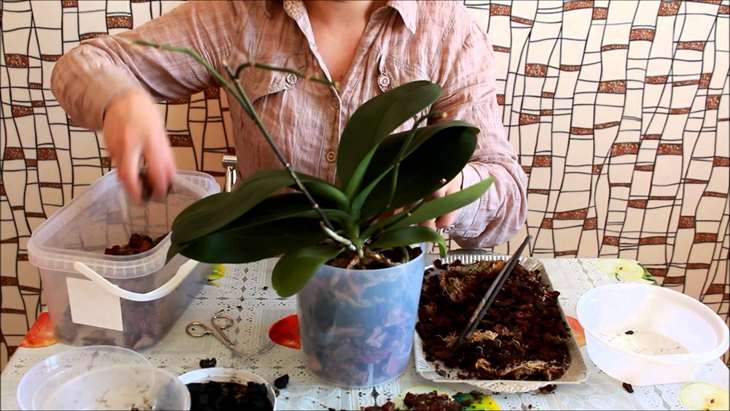
Preparing for an orchid transplant
The more responsible the transplant is, the more successful the process itself will be. Before getting down to business, prepare everything you need: disinfected scissors or a sharp knife for cutting off a faded peduncle, a new transparent pot, fresh loose substrate, an activated carbon tablet.
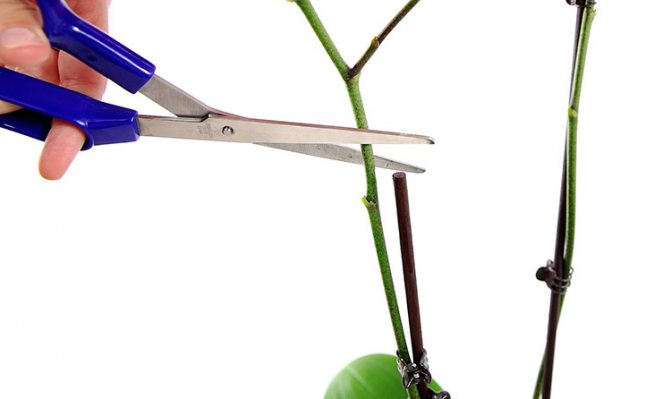
If the orchid has just finished pleasing you with its flowering, then the peduncle needs to be cut off. After that, you can proceed to the very process of transplanting the plant.
Nuances depending on flowering
For phalaenopsis, there are uniform transplant rules. However, the development phase of the plant should be considered:
- A flowering phalaenopsis transplant is carried out only in emergency cases, when a flower is ill or damaged by pests. If nothing threatens the plant, it is recommended to postpone the transplant.
- When transplanting a non-flowering phalaenopsis, it is necessary to remove damaged leaves and roots, if any. Then leave the plant in a weak solution of potassium permanganate for 5 minutes. The same solution is used to treat the soil prepared for planting phalaenopsis. After that, the plant is washed with warm water and treated with Fitoverm.
- Transplanting faded phalaenopsis is carried out in the same way as transplanting a non-flowering one. Also, to reduce the load on the plant, you need to remove the peduncle.
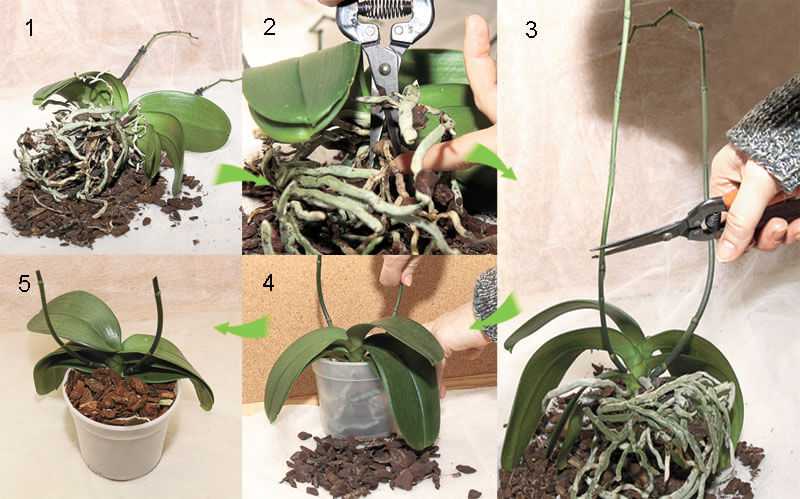
How to transplant an orchid at home step by step
To make the process of transplanting an orchid at home easy, we propose to study all the key points step by step.

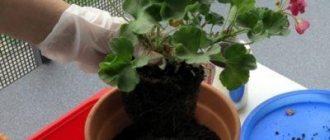
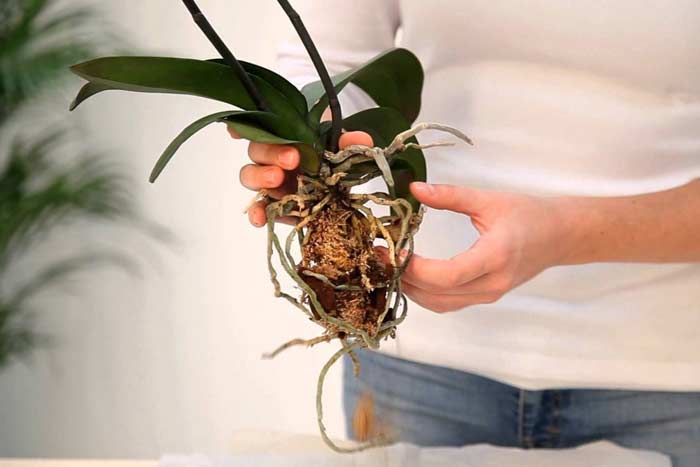
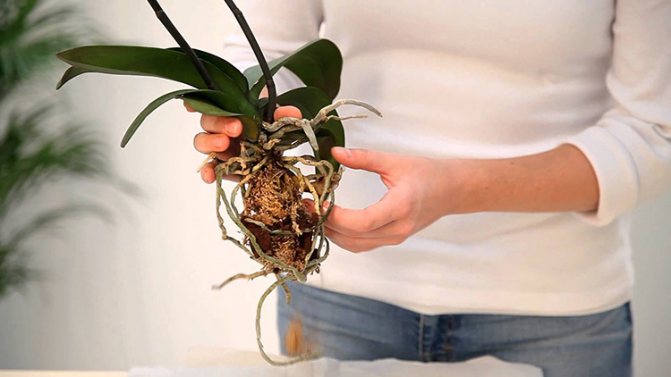
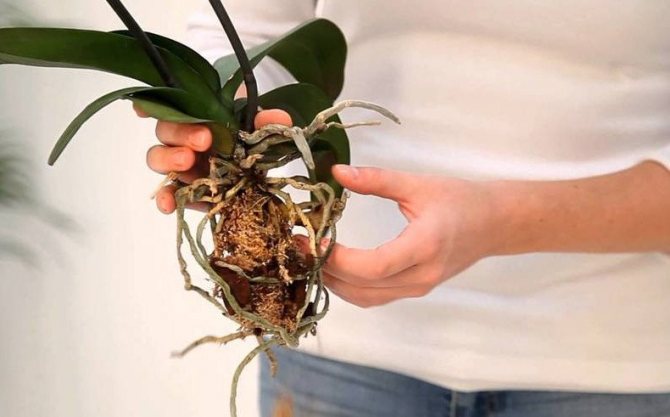
We remove the flower from the previous pot. The more careful the better. The root system must remain intact
TIP!
(click to find out)
TIP!
For trouble-free extraction, it is recommended to wrinkle the pot with your hands.
If the soil or pot is too dense, and the plant does not give in, then it is better to sacrifice capacity than a flower and cut it with scissors. Since the process can be messy, we recommend spreading out a large newspaper or heading to the bathroom.
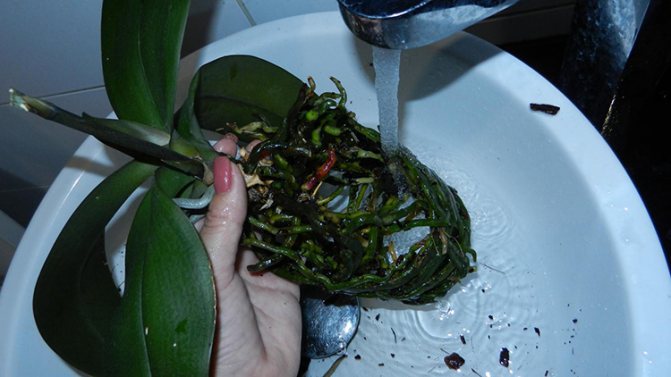
It is generally preferable to remove the plant from the pot under running water, so the roots can be painlessly removed, and immediately inspect for pests or rot
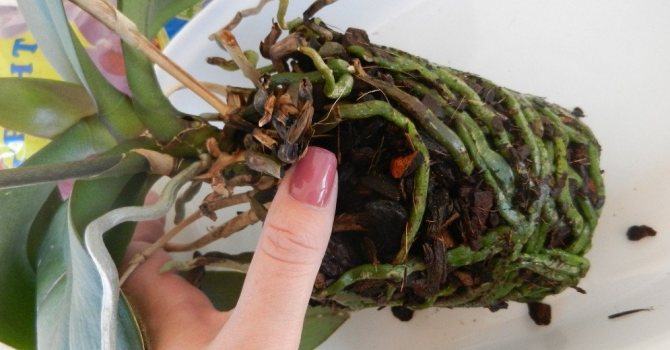
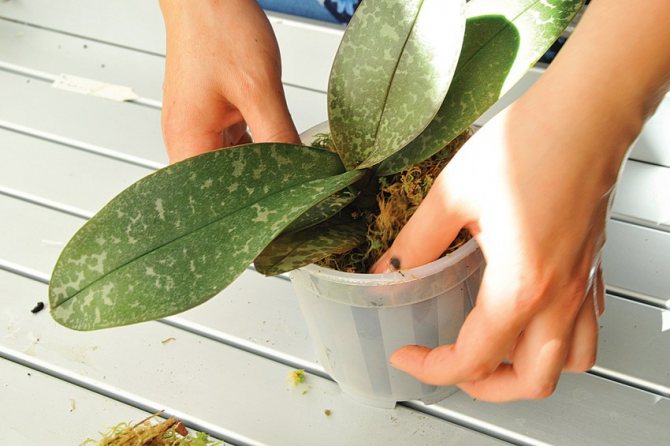
Now we will tell you how to properly plant an orchid in a pot. Expanded clay is spread into a new container and sprinkled with a little substrate. Then you need to carefully plant the orchid, spreading the roots evenly. Hold the plant by the root collar. The remaining space is filled with substrate, the pot is tapped and the plant is watered.
IMPORTANT! (click to find out)
IMPORTANT! The upper aerial roots cannot be pushed into the pot by force, leave them on the surface of the soil.
During the examination of the roots during transplantation, rotting processes or parasites can be detected. The diseased parts of the roots are cut off and thrown away, the cuts are treated with Kornevin and sprinkled with charcoal. They also do with dried roots. If you notice pests, then the plant must be placed in a container with warm clean water for 2-3 hours, and then treated with a suitable insecticide.
Planting in a new soil after washing the roots is carried out only after the root system is completely dry
The lower yellowed leaves of the plant are also removed.

Now you know how to painlessly transplant an orchid into another pot.
The reasons
Plant root system disease - can be identified by such signs as: yellowing of the leaves, dark color of the roots, their drying and the appearance of black spots on them. It occurs most often due to improper plant care (excessive watering, low air temperature).- Depletion of the plant substrate - over time, the soil tends to cake and form dense lumps, as a result of which it prevents air from reaching the roots and causes oxygen starvation of the plant. This can be seen by a change in the consistency and color of the soil, as well as the decay of the substrate.
- Overgrowth of plant roots - leads to enveloping of the entire space and clogging of the drainage holes with roots. As a result, the soil becomes waterlogged, since water does not seep through clogged drainage holes.
- Pest infestation - most often the plant affects the mealybug. If spraying does not help get rid of the pests, a flower transplant is necessary.
Orchid care after transplant
The period after the transplant is called the recovery period for a reason. Any major intervention in the life of a plant creates stress for it.So, a few rules about what to do after transplant:
- the pot is placed in a shaded place, closer to the east window;
- the air temperature is maintained within + 21 ° С;
- watering after transplantation is done after 5 days;
- leaves can be sprayed daily with warm water;
- after a month, they begin to apply fertilizers.
Simple care techniques will allow this beautiful flower to quickly gain strength.
Further care
Transplanted orchid put in a shaded place for 10-14 days, protecting it from excessive light and overheating.
All the most necessary information about caring for a transplanted orchid can be found here.
In the absence of flowering
Not blooming is normal, since replanting is very stressful for the plant. Be prepared for the plant to "come to life" and recover for some time.
The period when orchids bloom after transplanting is very dependent on proper care and the creation of optimal conditions for them.
For more information on why the orchid does not bloom after transplanting, read this article.
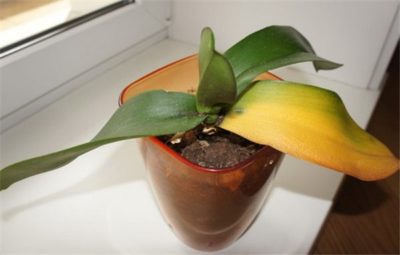
What if the orchid wilts after transplanting?
This can be observed if more than half of the roots are rotten or if the plant is in bright sun... Since the root system has gone through light damage, it does not fully fulfill its functions, from which more moisture evaporates from the leaves in the heat and sun than comes through the roots.
You don't need to panic rearrange the plant in partial shade, spray it, increase the humidity around... You can cover it with a plastic bag or put it in a greenhouse. Otherwise, a slight loss of leaf turgor or pseudobulb is not critical for the plant.
Most often, orchids wither due to root problems or excess lighting.
This article will tell you more about the causes of wilting.
Watering
After compacting the substrate with water from the shower the orchid is not watered for a while (a week and a half)... It is better to replace watering by spraying the plant with settled water in the morning.
You can get more information about watering after purchase here.
What problems can arise after a transplant
Let's consider the possible problems that may appear after transplantation.
- If the leaves look lethargic, then you are greedy with watering: the substrate should not completely dry out. Another reason may be direct sunlight. Try shading the plant for a week.
- The plant does not bloom for a long time: if the engraftment process is delayed, start feeding earlier.
The more attentively and accurately the transplant process goes, the less chances of problems after it.
Transplant methods
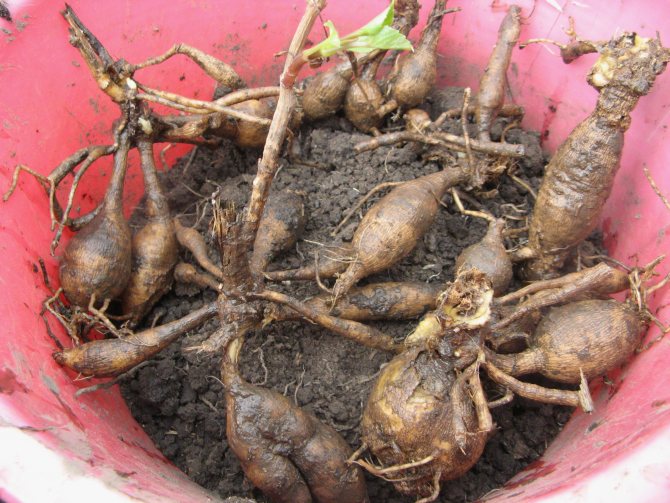
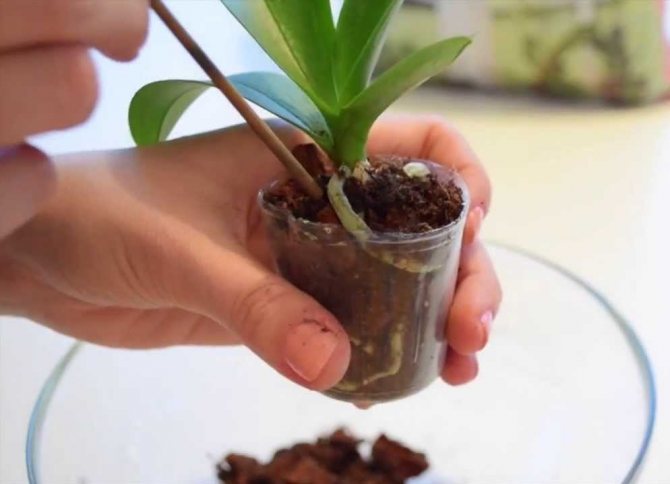
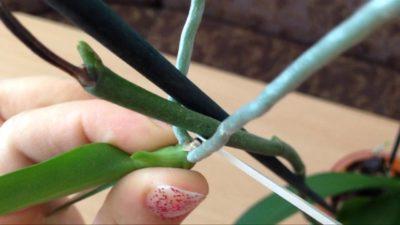
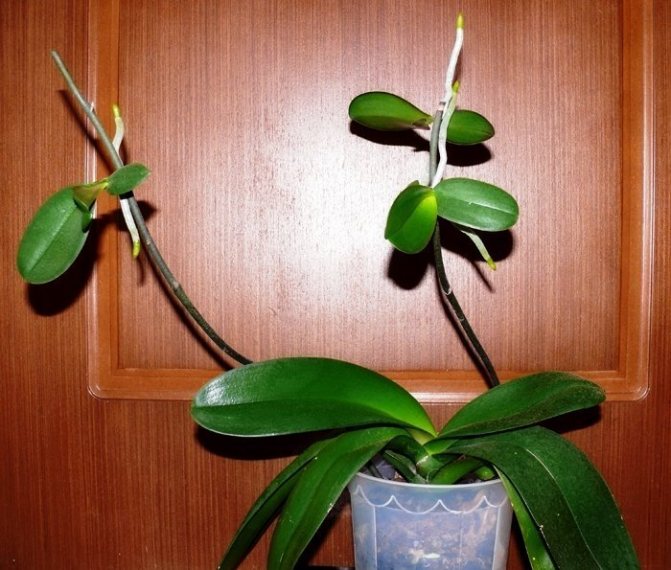
One of the ways to transplant phalaenopsis is to separate the baby, that is, the young process of the plant.
The baby is separated when its roots reach a length of 5 cm.
To separate the baby you need:
carefully cut off the baby from the mother plant;- half an hour after separating the baby, sprinkle the slices with charcoal powder;
- put a small amount of expanded clay on the bottom of a plastic pot and place the baby in the center, straightening its roots;
- pour the bark of the fine fraction into the pot, put a layer of wet sphagnum on top;
- after 2-3 days, the baby can be watered.
Another way is grafting... To do this, the faded stem or lateral shoot must be separated from the plant, which must necessarily have at least two axillary buds. These cuttings are first grown on a damp substrate in a small greenhouse and then transplanted into soil.
What needs to be prepared for a flower relocation
It is best to replant the plant in the spring: it is at this time of the year that the dormant period begins for orchids. If a newly acquired flower needs to be relocated, then it is better to wait until it fades. You cannot transplant an orchid during the flowering period.
The destruction of the lump of the substrate is always stress for the flower.Sometimes it is better to replant the plant with the remnants of the old soil, filling the empty space of the pot with fresh substrate.
The root ball must be cleaned of the substrate very carefully.
To successfully complete the resettlement procedure, you will need the following tools and materials:
- a new transparent pot of a slightly larger diameter, previously disinfected with boiling water or a solution of potassium permanganate;
- a sharp garden knife or pruner;
- prepared substrate (disinfected and dried);
- expanded clay or fine gravel for drainage;
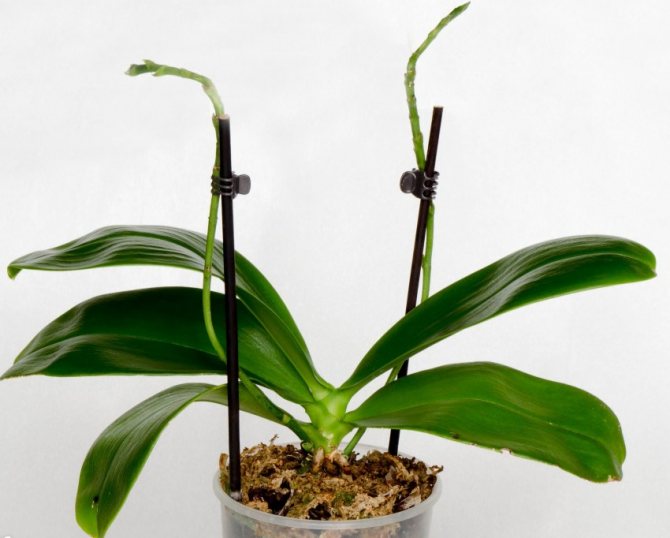
- special sticks made of natural materials (bamboo, pine chips) for fixing peduncles;
- activated carbon for root cutting;
- insecticide solution for treating roots affected by parasites.
Pot selection
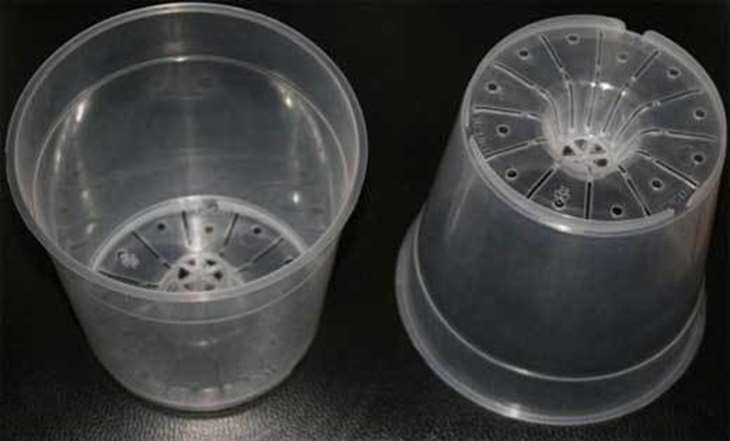
In nature, the roots of orchids receive enough light, it needs it for normal growth and development. Therefore, in indoor conditions, the pot must provide lighting. You need to plant an orchid in a container that will allow enough light to pass through. In addition, its bottom should contain a large number of drainage holes so that water does not stagnate in the substrate. There are special clear plastic pots on the market that meet these requirements.

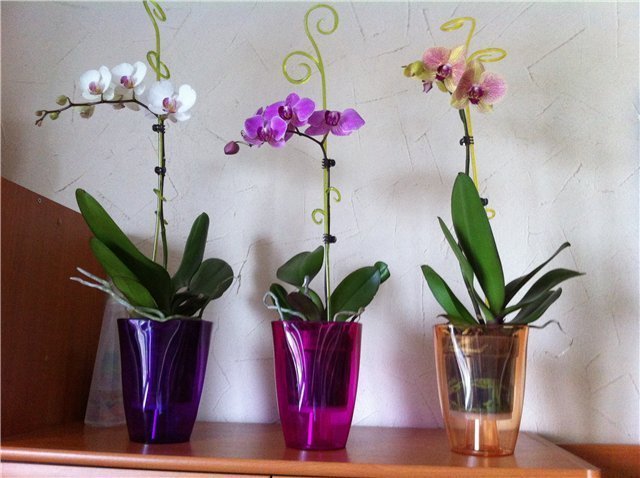
The orchid pot should be transparent or translucent and contain many holes
Gained popularity and special flowerpots for ordinary containers for orchids. They act as a second pot of a more aesthetic design and at the same time serve to collect excess moisture from the substrate.
Such stands look aesthetically pleasing in interiors of various styles.
Recently, a modern solution has appeared to provide the root system with light and an influx of fresh air and remove excess moisture. These are pots, made in the form of a frequent fence, which surrounds the substrate and the root system of the flower. This solution brings the conditions of keeping the plant as close to natural conditions as possible.
Such a pot brings the conditions of keeping the orchid closer to natural
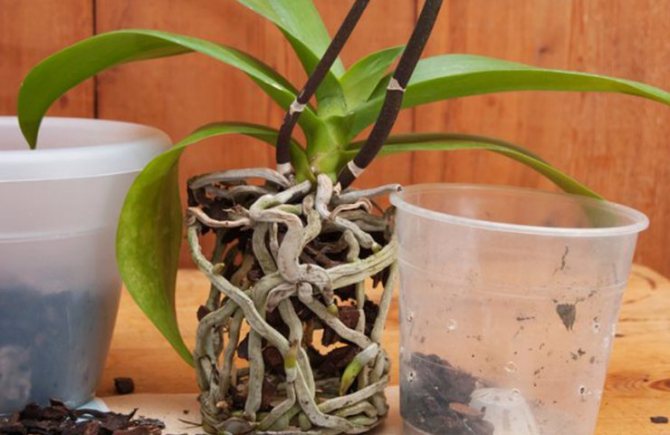
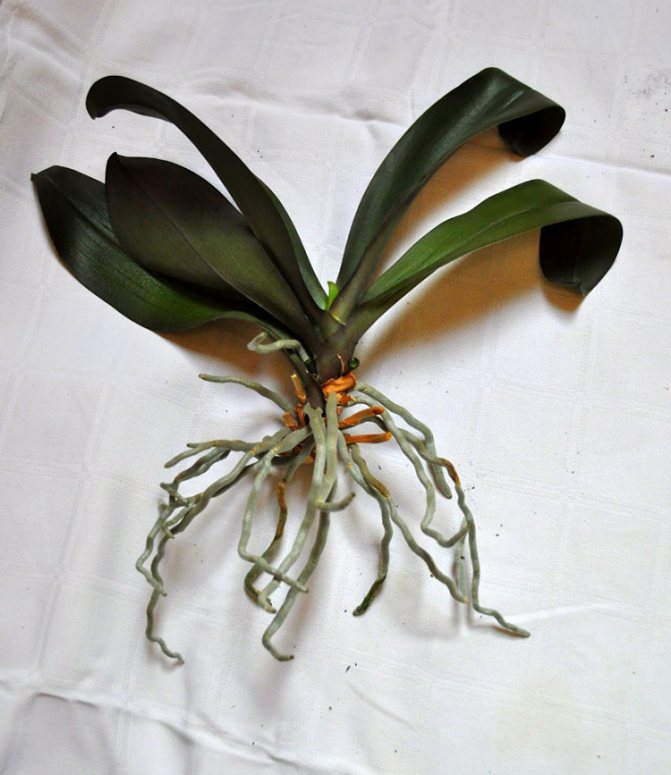
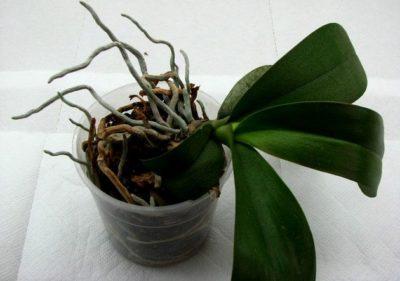
The size of the pot should exceed the volume of the ball of the root system of the plant by only 1–2 cm. Orchids love tightness. Excessive substrate will lead to excess moisture accumulation, which is fraught with the formation of mold and fungal diseases, as well as an increased risk of activating decay processes. Sometimes the orchid will release individual roots outside the pot, this is normal.
Several roots outside the pot are normal for an orchid
Substrate preparation
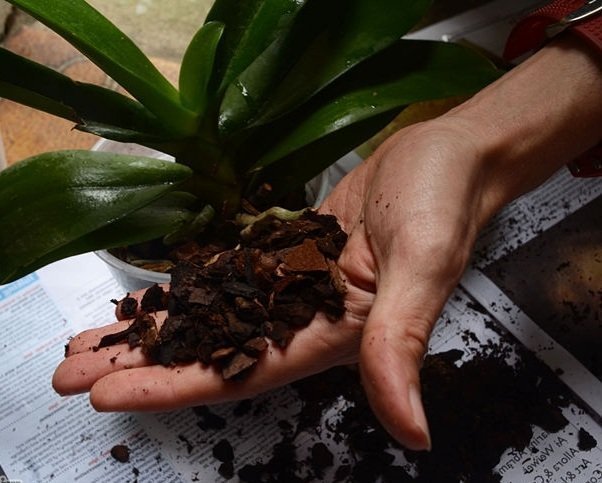
Ordinary soil will not work as a soil for these plants. The root system of orchids requires ventilation and freedom in space. Therefore, the pot is filled with rather large particles of bark, chips, twigs.
Pine bark, charcoal and moss substrate ideal for orchids
Ready-made substrate can be purchased at the store. However, cooking it yourself is not difficult. It consists of the following components:
- bark (pine or larch), crushed to a size of 1–1.5 cm;
- particles of charcoal;
- expanded clay;
- sphagnum moss;
- small twigs (optional).
Before use, the bark must be boiled in a large container for 5 minutes and left to cool completely. After that, it is dried at room temperature. This process takes about a day.
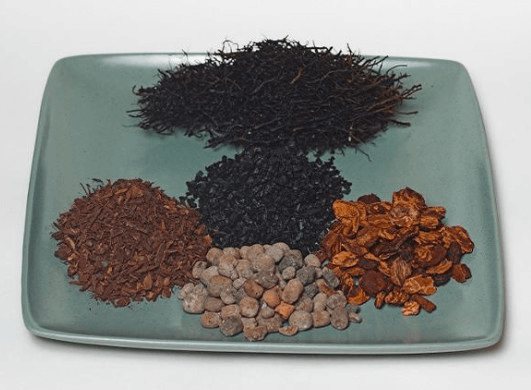
Chips, pieces of bark, expanded clay, charcoal, small branches - everything you need for the substrate
Important! If the old substrate is not infected with pathogens or parasites, it is recommended to add a small amount of it to the new one. This will help to preserve the biochemical composition of the soil familiar to the flower.
When do you need a transplant
If the flower is disturbed for no reason, then it will take a very long time for its rehabilitation. That is why the question arises: when is it necessary to transplant this plant.
There are two main reasons why you need to do this:
- The orchid has already outgrown its pot - this happens if the roots have completely filled all the space in the pot and at the same time displaced all the soil. The plant can only be transplanted at the end of the flowering period, and the pot is used a few centimeters more.
- Phalaenopsis roots are damaged - this happens as a result of improper care and the transplant must be done immediately. If the orchid received insufficient watering, then the roots begin to dry out and die as a result. However, an excess of moisture can adversely affect the root system. This type of orchid belongs to the aerial representatives of this flower, therefore it tolerates a moisture deficit better than stagnation, and root decay, which occurs as a result of an excess of moisture, leads to the development of diseases in phalaenopsis.
Important! For orchids, having aerial roots sticking out of the pot is considered normal and not a symptom for transplanting.
In addition, sometimes the flower needs to be replaced with a more nutritious soil:
- If the soil loses its properties or salt appears on it, then the orchid needs a new substrate. Replacement must be done at least every few years.
- A change of soil is needed if the flower is affected by various pests.
If one of these cases has been identified, then an immediate transplant is required.
Appendix transplant
If your flower dies and it can no longer be saved, but a shoot has appeared on it, you can get a new copy from it. The offspring are cut at the point of contact with the mother bush. Places of cuts are treated with carbon powder. Then they give it to dry for several hours and plant it in a nutritious and moist substrate of sphagnum moss and coniferous bark.
A prerequisite is that there must be several leaves on the shoot, otherwise the transplantation procedure will not give a positive result. The shoot is watered abundantly from a watering can, spilling water along the edges of the walls. Care for a new instance is the same as for adult flowers.
Consequences of mistakes
Transplanting phalaenopsis during flowering can weaken the plant, discoloration, cessation of flowering and impaired growth. Such a flower will be significantly weakened and may become less resistant to disease.
Timely transplantation of phalaenopsis and the correct procedure are the key to the healthy development and life of the plant. By being careful and following all the recommendations, you can avoid possible mistakes and negative consequences for the flower.
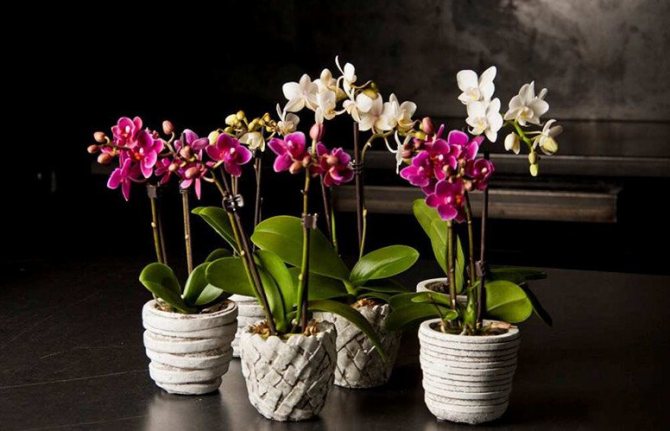
How beautiful to arrange?
An orchid is an incredibly beautiful and self-sufficient interior element that can complement a beautifully designed pot.
Both natural and artificial materials are suitable for decorating the pot., eg:
- moss;
- all kinds of wood elements;
- bright coasters for the pot;
- do-it-yourself coasters from natural materials;
- vessels made of ceramics and clay;
- brackets for hanging a flower.
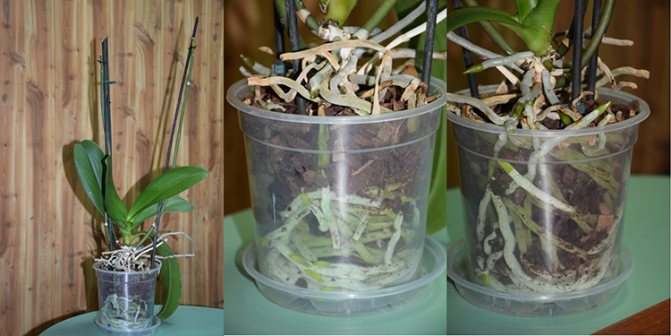
Photo
In the photo below you can see a phalaenopsis transplant:
Conditions that an orchid requires
All the usual beauties of the flower kingdom grow from soil, soil, that is, from the ground. But the indoor orchid is an original beauty. She doesn't need land. For normal growth and development, it needs tree bark.
Its wild ancestor, the Phalaenopsis orchid, grows in Southeast Asia along the shores of water bodies, on coastal rocks and tree trunks. Most of the varieties that are cultivated in Russia belong to this particular species. An orchid does not need land because it absorbs nutrients from the bark of the trees it lives on. She wraps her roots around the trunk, using the bark as a substrate. Together with the orchid, various fungi and saprophytes settle there in huge quantities. The flower feeds on the bark in symbiosis with these microorganisms.He cannot eat independently, without their participation. Therefore, the indoor orchid is cultivated on pieces of pine or larch bark with the addition of moss and peat or other additives. When transplanting into a new substrate, you need to add a little old, decomposed, which contains the symbionts necessary for the orchid.
Orchid uses tree bark instead of soil
On the trunk of the tree, the roots of the orchid are freely illuminated by the sun's rays. Root lighting is necessary for her normal development. Therefore, orchids are grown in special translucent pots.
Also, the plant needs air access to the roots. It is unacceptable that there is a dense substrate in the orchid pot. The bark particles should be large enough (on average 10–15 mm) so that air flows freely between them to the roots. The orchid is watered differently from ordinary indoor flowers. It should be immersed in warm water along with a pot so that the bark particles get wet well (usually they stand for 15 minutes), but then the water from the substrate should be drained. All this allows you to make the design of special pots.
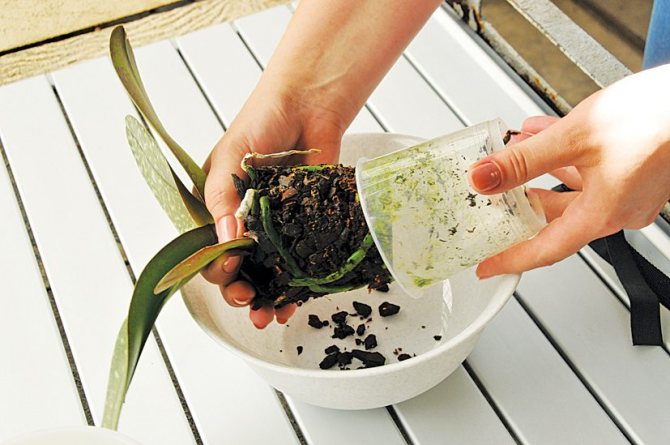
We compose the soil and choose a new pot
Before transplanting a phalaenopsis orchid, you need to prepare an appropriate substrate for it, as well as choose a pot.
Substrate
In order for the orchid to develop normally, it is important to choose the right soil for it. As you know, in nature, phalaenopsis are epiphytes, that is, they grow not in the ground, but on the bark or branches of trees. In order for home conditions to resemble natural conditions as much as possible, bark must be included in the composition of the soil. Most often, pine bark is used for these purposes.
But not all growers have the opportunity to make their own soil. Therefore, in specialized flower shops you can purchase a ready-made substrate for growing orchids. It usually includes bark, chopped into small pieces, chopped sphagnum moss, charcoal and fern roots.
Pot selection
The first thing to be guided by when purchasing a pot is the size of the plant's root system. You need to choose such a flowerpot so that the distance between the roots and the wall is no more than 2 cm.If you choose too large a capacity, the plant will actively grow leaves, and the flowering will either be very scarce, or it will not be at all.
Even plastic glasses are suitable for children or very small plants, since their root system is still quite small. The most important thing is not to forget to make drainage holes for them, as well as holes on the sides for air access.
Also, the walls of the pot must be transparent, since the process of photosynthesis takes place in the roots of orchids. If this condition is not observed, the plant will not be able to fully develop. It is also easier to see through the transparent pot that the plant needs watering.
Step-by-step transplant process
This painstaking operation requires knowledge, accuracy, skill. The growth and flowering of the plant depends on its correct implementation.
Preparatory stage
Before transplanting phalaenopsis, you need to pick up a pot, soil, and familiarize yourself with the procedure.
Pot selection
Properly sized capacity is very important for the growth of an orchid. Opt for a translucent plastic pot. The roots of the plant rush down, so a high and not too wide flowerpot with holes is needed to easily remove excess moisture.
If the holes are small, the owner will have to expand the drainage holes on his own. When choosing, start from the size of the root system - the roots should fit freely, leaving an unoccupied space 1-2 cm from the side walls.
Right choice
Capacities
What to place an orchid in, is it possible in an ordinary ceramic pot?
The ideal orchid pot is a clear container with lots of holes... Such a pot will provide free access of air and light to the roots and allow you to monitor their condition. If ceramic pots are chosen for planting orchids, then they should be covered with glaze and have a sufficient number of side holes. In addition, it will allow you to control the moisture level in the substrate.
Advice: When choosing a pot, you also need to rely on the size and volume of the root system: it should be about 2 times the size of the roots.
We recommend watching a video about choosing a pot for transplanting an orchid:
The earth
Depending on the type of orchid, there are 2 types of substrate.:
for epiphytic orchids, consisting of fern roots, oak or birch charcoal, peat moss and pine bark;- for terrestrial orchids containing coal, peat, sphagnum moss, leaf humus and bark.
Ideal soil for any type of orchid includes charcoal, bark, peat, moss, fern roots, styrofoam, and chistomouth.
We recommend watching a video about the types of soils for orchids:
Follow-up care
In order for the orchid to take root, bloom profusely and not undergo diseases, it is necessary to provide subsequent full care, which includes:
- choosing a place for a flower;
- maintaining a comfortable temperature and humidity;
- watering;
- top dressing;
- pruning.
The orchid loves light, but direct sunlight is detrimental to the plant. It is better to place the pot on the western or eastern windowsill. If the orchid will be located on the south side of the room, it is better to place it on a table next to the window. Periodically, the phalaenopsis needs to be rotated 180 degrees. If natural light is not enough, you need to use additional, for example, fluorescent lamps. The distance between the flower and the light source should be at least 30 cm.
Comfortable temperature for growing orchids is +24 degrees. Sharp temperature changes negatively affect the life processes of the plant. Air humidity should be 60%. Excessive humidity can cause root rot.
The room in which the plant is located needs regular ventilation. It is important to avoid drafts, especially in winter. Leaves should not come into contact with cold window panes.

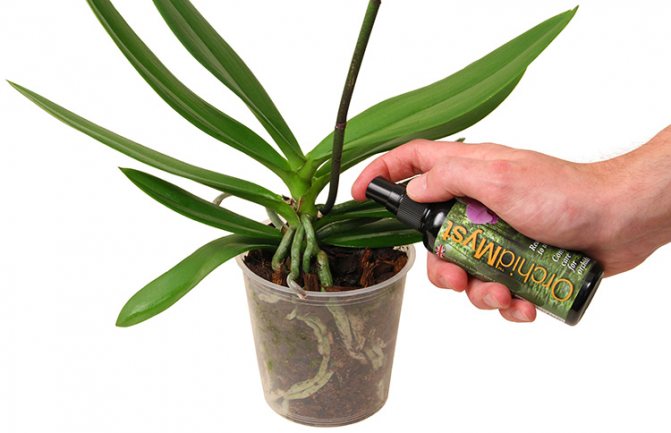
Water the orchid after the substrate is completely dry. Water for irrigation should be settled or boiled, in winter you can use melt water. Watering can be done from a watering can or by the submerged method (placing a pot with a plant in a container with water). Avoid getting water on flowers and leaves. Frequent watering harms the root system and can provoke the development of putrefactive processes, the appearance of mold and fungal diseases.
It is not recommended to spray the plant. Moisture can stagnate in flowers and at the point of growth.
Top dressing
For feeding orchids, special fertilizer complexes are used, which can be purchased at flower shops. After transplanting, fertilizer can be applied in a month. During the flowering period, the orchid is fed two to three times a month.
The lack of mineral components contributes to growth retardation and the development of diseases. Excessive amounts of chemical elements lead to rapid growth of leaves and lack of flowering.
In addition to industrial fertilizers, you can feed the orchid with folk remedies. Watering the plant with tea and coffee contributes to the acidification of the substrate, and the water after boiling the potatoes saturates with potassium.
Pruning orchids
The orchid must be pruned after flowering to remove the flower stalks. In some cases, phalaenopsis can bloom again, so pruning is carried out when the arrow is completely dry or yellowed.

You need to carry out the procedure with sharp scissors or pruning shears. It is advisable to disinfect the instrument so as not to infect the plant tissue. It is important not to damage the leaves in the process. Violation of the integrity of the flower can lead to negative consequences.After complete removal of the peduncle, the next one is formed in 2 - 3 months.
Transplanting a purchased flower
The purchased orchid is not transplanted immediately, but 2-3 weeks after purchase. First, the plant is quarantined in a room closed from other plants. During this time, you can determine its condition and check for diseases and pests. In addition, the plant needs quarantine to get used to the new habitat.
Transplant the purchased orchid from a small pot into a pots 1 cm larger.Use a regular plastic or ceramic container with drainage holes.
The very same transplant procedure is no different from the procedure for transplanting a home flower. The care for it after planting in a new substrate and pot remains identical.
Florist reviews about soils for planting orchids
When preparing for an orchid transplant, special attention should be paid to the selection of a substrate. A good soil is obtained by self-preparation. The components can be different:
| Composition option | Components |
| №1 | Pine bark and fern roots in a volume ratio of 4: 1 |
| №2 | Pine bark, charcoal and sphagnum in a volume ratio of 3: 1: 1 |
| №3 | Pine bark and sphagnum in a volume ratio of 5: 1 |
All of these components are freely available from garden centers. Ready-made soils for orchids are also on sale there, however, problems often arise with their quality:
“I have tried several types of ready-made primers: Fasco for Orchids, Garden of Miracles, Peter Peet, Ambulance and Weltorf. I was convinced with my own eyes that the peat in the composition is an absolute evil. The roots of orchids, at best, stopped growing and pupated, at worst, they began to rot from dampness. I have a lot of orchids, I don't really want to cook substrates myself. Now I stopped at the proven "Orhiata" - it never fails, an excellent line-up. For adults I take "Orchiata Power +", and for little ones - regular "Power" "(Julia, Moscow)

The German substrate "Seramis", which is a mixture of bark and clay granulate, has earned excellent reviews. However, this product is very expensive - an average of 600 rubles will have to be paid for 2.5 liters.
Possible problems
After
After transplanting an orchid, its leaves may begin to fade or turn yellow.... This may be due to too little preserved root system or improper watering. In the first case, the problem with leaves is the norm, and as soon as the orchid grows roots, it will immediately release new leaves.
If the matter is in improper watering, then it should be urgently normalized. Leaves can also deteriorate due to exposure to sunlight, so the orchid must be kept in the shade for a week after transplanting.
During the procedure
During planting, orchids can take a long time to heal roots.... This happens if the substrate was heavily flooded in the old pots - the roots get too wet and after pruning the damaged roots, the cut sites begin to rot, even after being processed. Therefore, the plant must be well dried before pruning.
Transplant timing
Experienced flower growers recommend routinely replanting the orchid every 2-3 years. The best time for the procedure is spring, so that the plant does not lose its ovaries. A sign of the need to transplant monopodial orchids, which include phalaenopsis, is the long absence of bright green root tips.
Reasons for an emergency transplant:
- decay of the root system;
- invasion of pests;
- deterioration of soil quality;
- plant diseases - a decrease in the intensity of the color of the leaves, growth arrest, exposure of roots, unstable position of the flower in the pot.
Blackening of the roots, the appearance of mold is a signal for an immediate transplant with a complete replacement of the soil.
Repotting before, after and during flowering - what's the difference?
The process of transplanting phalaenopsis itself consists of standard stages, therefore there is no difference in transplanting a flowering or faded plant.
The transshipment of blooming phalaenopsis is an emergency measure to save a flower. A plant ready to bloom or flowering may shed its buds or flowers, and further growth will slow down. Therefore, if possible, a flowering plant should not be disturbed.
A faded orchid that enters a dormant state is also not worth replanting. But if there is a need for this (decomposition of the bark, disease of the roots), then the transplant should be carried out in the same way as working with a flower that has entered the period of active growth. The only difference is peduncle pruning.
Attention! You should not cut off the green peduncle - children or new buds can form on it. A dry arrow can be completely cut off. If the peduncle is partially dry, then only the dry part should be cut off.
The importance of the procedure
Phalaenopsis can and should be transplanted. Every two or three years he needs to change the substrate and also outgrows his pot.
The main reasons for a transplant at home are:
The pot has become small... The main symptom is the filling of the inner space of the pot with roots. That is, if the roots have practically displaced the substrate in the pot, then it's time to transplant.- Root disease... This is the reason for the emergency transplant. Otherwise, there is a risk of death of the flower. The cause of the defeat (decay) of the roots is most often the improper care of the plant. The plant can either be flooded or the room temperature is too low.
Do not be guided by the fact that some of the roots that grow above the pot. This is a sign of a healthy orchid and should not be touched.
When to conduct?
The seasons and the transplant of phalaenopsis are a very important moment in caring for a plant. As a rule, it is transplanted after a dormant period, before the start of an active growing season. It's mid-spring. It is at this time that the rest period ends. The plant enters the growth phase. It is very important to have time to transplant phalaenopsis before flowering!
We wrote about when to transplant the phalaenopsis orchid here.
Force majeure situations
Reasons for an emergency transplant:
- Complete soil decomposition... A characteristic feature is that the soil retains moisture for a long time (a week or longer). If this is observed, then the substrate should be urgently replaced.
- Root system damage... Typical signs: blackening or drying of the roots, painful changes on the leaves or their dropping.
Several nuances
There are general rules for transplanting phalaenopsis. And this applies to both flowering and non-flowering plants. Three points should be dwelled on in more detail here:
- A flowering phalaenopsis transplant will always be urgent. That is, if the flower is seriously ill or affected by pests. If there are no such signs, then the transplant can be postponed.
- When transplanting a non-flowering orchid, damaged leaves and roots (if any) must be followed. And also immerse the plant in a solution of potassium permanganate for 5 minutes. The solution should be slightly pink in color. Then the orchid should be rinsed under warm running water and treated with Fitoverim. The soil should also be shed with a weak solution of potassium permanganate.
- Transplanting a faded orchid is done in the same way, but the peduncle is removed. This is done to reduce the load on the plant.
What other methods are there besides the main one?
There can be many ways, or rather, the reasons for transplanting an orchid. Here are the most basic ones:
Department of babies... This is one of the methods of propagation of the phalaenopsis orchid. In this case, the matured baby (having its own roots and leaves) is separated from the mother plant and planted in the substrate.- Cuttings... It is characterized by the fact that a stalk is formed from the plant. As a rule, this is a faded flower stem or lateral shoot. Each cutting must have axillary buds (at least two). Such cuttings are germinated in a mini-greenhouse on a wet substrate, and then planted in the ground.
- Emergency transplant... This is a transplant due to illness. Depending on the nature of the lesion, the plant is processed, pruned, disinfected, and then planted in prepared soil.
- Transplant after resuscitation... This method can be called emergency. It should be mentioned here that the effectiveness of this method is rather low, as well as the survival rate of orchids. We are talking about complete or partial loss of roots. If the roots of the orchid have disappeared (rotted), then they must be removed without fail. After which the plant is reanimated, that is, they give the opportunity to grow new roots, and therefore survive.
IMPORTANT: Resuscitation is done in several ways (in water, in air, in a greenhouse). After the young roots have grown, Phalaenopsis is planted in the ground.
If you spend it at the wrong time?
If phalaenopsis is transplanted during flowering, you should expect a drop of flowers.... In addition, the orchid can weaken, as the load on it increases significantly. This can manifest itself in the cessation of flowering and growth retardation. Also, your pet may become less resistant to disease.
The conclusion is simple - the orchid requires maximum attention. For its successful cultivation, one should look for information, replenish the baggage of knowledge and be sure to apply it in practice. Something will work out, some will not. But your work will not be left without results. This means that the beautiful and delicate phalaenopsis will constantly delight you with their beauty!
Answers to user questions
Most gardeners who decide to have this amazing flower are interested in whether it is possible to transplant a blooming orchid, and whether a phalaenopsis transplant is needed immediately after purchase.
Do I need to replant after purchase
After purchasing, phalaenopsis does not need to change the soil, since the manufacturer uses all the necessary fertilizers when planting. These substances are enough for the normal growth of the flower, moreover, the soil has its own shelf life. However, only the seller knows exactly how long the orchid is in the store and when it needs to be replanted. That is why you should check this information at the flower shop.
We recommend reading about home care for mini phalaenopsis.
Most often, the transplant is done somewhere after a year from the date of purchase, since the nutritional value of the substrate that the manufacturer laid down dries up, it begins to decompose and rot. However, if, upon visual inspection, the soil lost its airiness, the acidity level changed and the salt balance was disturbed, then phalaenopsis needs an immediate transplant.
Is it possible to transplant a flowering phalaenopsis orchid
One of the common questions among novice flower growers is whether it is possible to transplant phalaenopsis during flowering. Transplanting a flowering plant is not recommended as it can be stressful. In this case, the flowers fall, and growth is inhibited. The only exception to this situation is disease or pest attacks. If the root system is damaged and there are signs of rot, then it is better to cut the peduncle so that the orchid has the strength to recover. However, this is done as carefully as possible so as not to hurt the roots.
Did you know? Phalaenopsis translated from Greek means a moth, and among the people it is often called a moth orchid.
Orchids are very delicate plants, so they must be transplanted very carefully. Phalaenopsis should be transplanted only if necessary, but not more often than once every couple of years. At the same time, the optimal time for transplanting is spring, when the flower has not yet passed into the active stage of growth, since transplanting is stress for a flowering plant.
Typical mistakes of novice florists
Many novice flower growers face a number of problems:
- Purchase the plant from a specialty store or greenhouse. Only here they maintain the temperature and humidity that are optimal for flowers in the room, conduct regular work to identify and destroy insect pests. When buying an orchid from a small flower shop or an unadapted store, there is a high risk of acquiring a diseased plant.
- A common transplant mistake is using soil that is not intended for the orchid. Buy a special substrate or prepare it yourself from the right ingredients. The soil should be free of dust and small particles.
- Select the size of the container for the flower. In a large pot, the soil remains moist for a long time, the roots can rot.
- Do not water the transplanted plant for several days. make the first feeding in a month.
- If the orchid is unstable, dangles in the pot, then you did not fix it well when adding soil. We'll have to use a support.
A huge number of problems for inexperienced flower growers that arise when caring for an orchid are due to improper transplantation. The main thing to know is that frequent relocations harm the culture. In no case should a flowering plant be transplanted.
Choose the right soil, be careful not to damage fragile roots. If you do everything right, the plant will quickly come to its senses after transplanting and will delight you with bright flowers.
Can you plant it in the ground?
The root system of an orchid is not adapted to grow in the ground. When planting a plant in garden soil, the roots begin to deteriorate quickly, and the plant dies. This is due to the lack of light and air required for photosynthetic roots to function properly. In their natural habitat, orchids attach to the trunks and branches of plants, to rocks and cracks in rocks. Therefore, the land is not suitable for planting indoor orchids.
A correctly performed transplant will provide the plant with comfortable conditions for rooting and subsequent growth.
How to transplant a scion?
To properly transplant a baby or orchid shoot, follow the simple step-by-step instructions.
- The shoot must be separated from the mother plant. To do this, the baby is cut with sharp scissors together with a 1 cm long peduncle. The cut sites must be dried and treated with activated carbon to prevent the plant from contaminating with infectious diseases.
- To transplant an orchid, you need to take a transparent pot or plastic container, having previously made a sufficient number of drainage holes in it to drain the water.
- The shoot is placed in the middle of the pot so that the root collar is at the level of the edge, and the roots are evenly distributed inside the container. Holding the orchid by the root collar, fill the pot with substrate. To ensure that the soil is evenly located inside, the pot should be tapped along the walls. It is not recommended to tamp the substrate so as not to damage the root system of the plant.

After transplanting, the soil must be sprayed with a spray bottle. You can water the plant after 2 - 3 days. During this time, the cut on the peduncle will heal, and the risk of infection in a humid environment will be minimal. Further, the process of the orchid should be watered as the soil dries out and not to allow waterlogging.
Transplanting a diseased orchid
A sick and rotten plant can be saved if the problem is diagnosed in time and the disease is not allowed to spread. If the root system begins to dry out, change color or soak, and the leaves have lost their turgor, then the plant requires an urgent transplant.
- Before proceeding with the procedure, you must carefully remove the orchid from the pot and clean the roots of the old substrate.
- Then remove the damaged roots with sharp scissors or pruning shears. All suspicious parts of the root system must be trimmed to prevent the spread of rot.
- The remnants of the root system are washed under running water and treated with a weak solution of potassium permanganate (3-4 crystals per liter of water).
- Then the roots must be dried and the cuts must be treated with activated charcoal.
- After preparing the roots, the orchid is planted in a new substrate with the bark of a coarse fraction and the soil is sprayed from a spray bottle.
- After 2 - 3 days, the orchid is watered using the submerged watering method.
In the future, watering is carried out as the soil dries. It is important not to overmoisten the plant so as not to provoke the development of putrefactive processes.
What substrate is needed for a plant
Orchid transplantation is carried out in a soil of a certain composition. The soil or substrate for the Phalaenopsis orchid should not even consist of soil in part. It is also desirable that there is no peat in it. The basis of the mixture for orchids is dry pine bark.
This material takes up more than half of the composition of the substrate. The pine bark should not be too shallow. It is desirable that its pieces are cubic in shape. Orchid soil can also include:
- Dry sphagnum moss;
- Shredded fern roots;
- Pieces of charcoal;
- Pieces of styrofoam;
- Dry pine needles.
These ingredients are taken equally and in the amount of 1/5 of the pine bark included in this substrate. It is very difficult and time-consuming to compose soil for an orchid with your own hands. It's easier to buy a ready-made substrate at a flower shop. When buying, you need to pay attention to the composition of the soil.
Planting a plant in a new pot
The process of planting an orchid prepared in this way into a new container takes several steps.
- A drainage layer of 2–2.5 cm (expanded clay or crushed stone) is poured into the disinfected pot.
- A little new substrate is added on top of the drain.
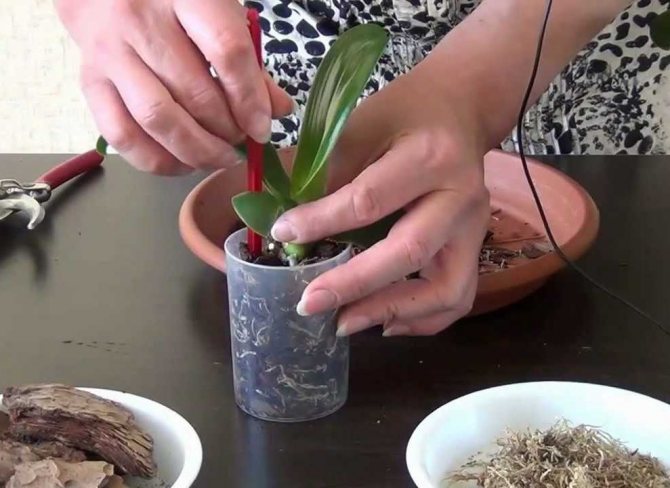
- An orchid is placed in a pot, its roots are distributed evenly throughout the volume of the container. The base of the plant should be 1-1.5 cm below the edge of the pot.
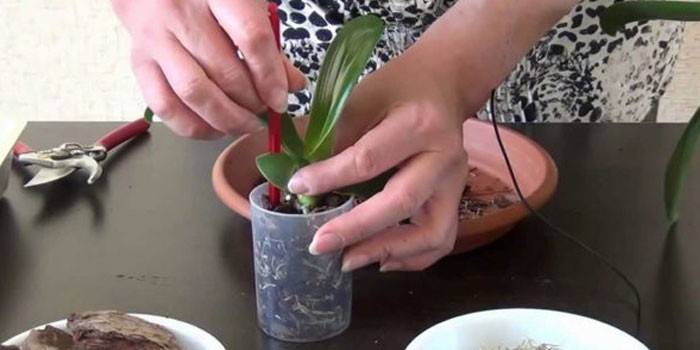
- The support for the peduncle must be installed at this stage, before the substrate falls asleep, so that later you do not accidentally injure the roots. It should be located very close to the base of the flower.
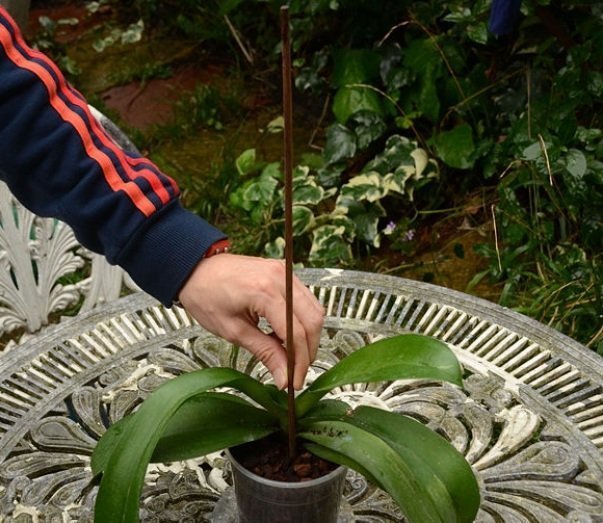
The support is installed before the new substrate is filled
- The substrate should be added a little, gently shaking the pot so that the bark particles fill the space between the roots.
The substrate is filled up tightly, but not compacted
It is important that the orchid is fixed with the substrate from all sides and not toppled to one side. It is advisable to leave some roots on the surface in order to improve the process of photosynthesis.
Video: orchid transplant
Flower rejuvenation
Older plants can be successfully rejuvenated. If the trunk is elongated, since the leaves naturally die off from below for a long time, Phalaenopsis rejuvenation procedure can be performed:
- Cut off the top so that under it there are air layers and the beginnings of new roots. Treat the area with activated carbon.
- Prepare the substrate or bark.
- Place large pieces of bark on the bottom of the pot.
- Put a piece of polystyrene under the cut site - this technique prevents moisture from entering the cut area and rotting.
- Place the orchid and sprinkle with fine bark on the sides for stability. The bark should cover the area where the root buds are located so that they begin to grow faster.
The rest of the plant with roots can also be cleaned and left in the substrate. Soon a new rosette of leaves will grow out of it.

How to plant an orchid with a shoot
Such a need arises when paired leaves with root rudiments (children) appear on the peduncle.
New plants formed on the peduncle are ready for separation
When jigging the offshoot, the following rules should be followed:
- Before cutting them from the mother plant, you need to let them grow.
- When the roots are 3–4 cm long, the baby can be detached. To do this, you need to cut the peduncle of the mother plant a centimeter on each side of the process.

The baby is taken from the mother plant along with part of the peduncle
- Treat the cut sites with activated carbon powder.
- Soak the baby in warm water for 15 minutes.
- Pre-disinfect the substrate.
- Further, the planting process takes place in the same way as for adult plants, see the instructions above.
No more than one shoot should be planted in one pot.
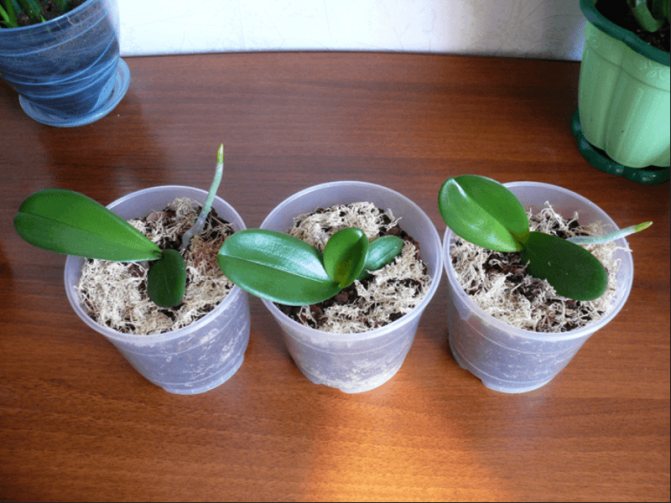
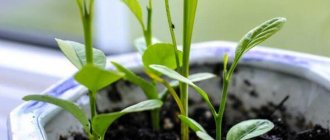
Separated young orchid plants will soon delight the owner with flowering