Plants »Flowers
0
873
Article rating
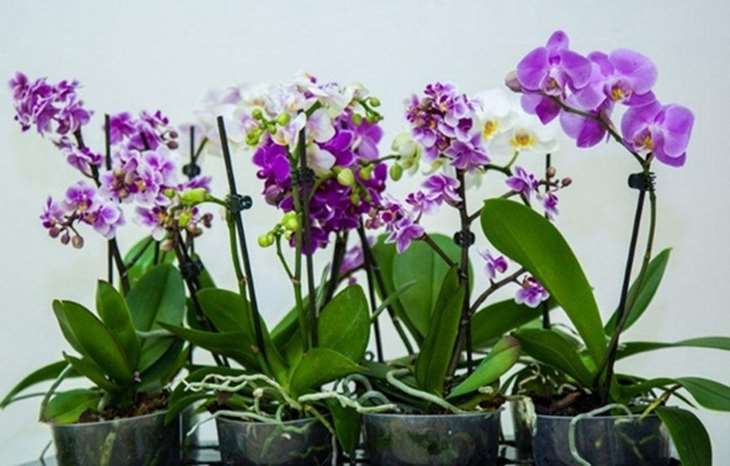
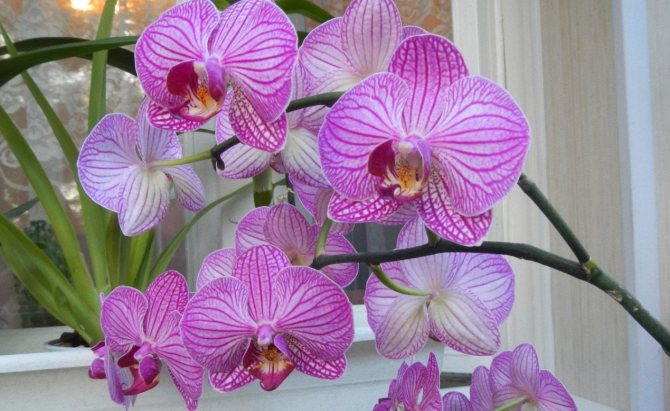
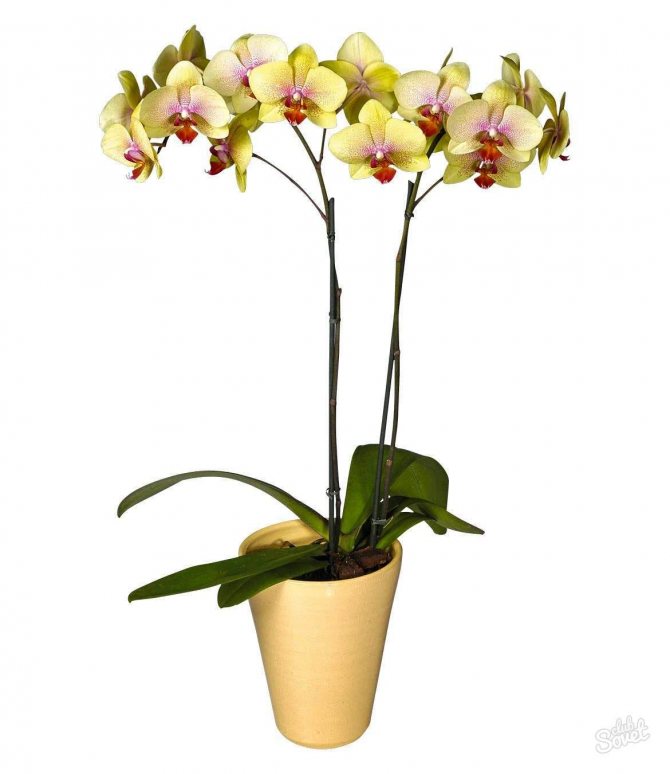
The orchid is considered the most beautiful indoor flower, but at the same time it is very moody. Planting an orchid has many subtleties and nuances, so you should carefully study the recommendations and tips.
Orchid planting rules at home
Orchid transplant
Conditions
Let's find out how to plant an orchid at home. It is possible to plant (transplant) an orchid, but only in those cases when there is really a need for it.
Orchid transplant is done only as a last resort.
The optimal condition for starting the procedure spring is consideredwhen the plant enters a stage of active growth after a dormant period. Or there is an urgent need for a transplant due to emergency reasons.
The reasons
When growing orchid growers, beginner growers sometimes make gross mistakes, replanting an orchid at their own discretion for no good reason. It must be understood that any change in the natural residence of the plant makes him stress... In orchids, the stressful state is felt especially and can lead them to a state of "stupor" for a long time.
Important! It is better not to disturb the orchid without good reason.
The reasons for seating are:
- Planned;
- And emergency.
Planned reasons provide for changing the substrate due to its compaction or decomposition every 2-3 years, depending on the quality of the soil components.
Emergency:
- Rapid decomposition of soil;
- The appearance of harmful insects in the substrate;
- Decay of roots;
- Small capacity.
Most amateur flower growers, especially novice orchid growers, are dealing with hybrid forms, adapted for growing at home.
The breeding work carried out by specialists in this field allows hybrids to bloom for quite a long time, sometimes reaching six months, and as such they do not have a certain stage of dormancy.
Therefore, there is no definite answer to the optimal time for planting a plant. Florists have to take into account physiological periods that do not exert significant stress on the plant during transplantation. These are the stages:
- After flowering;
- Or in the spring after a state of dormancy during the beginning of active growth.
Step-by-step instruction
Tool, inventory, substrate
Orchid planting should follow the instructions. Correctness of the transplant procedure depends on:
- Knowledge;
- Tool;
- And the correct substrate components.
Instruments and the necessary inventory:
- Capacity (basin) for cleaning and processing the root part;
- A new flower pot that matches the full development and size of the orchid species;
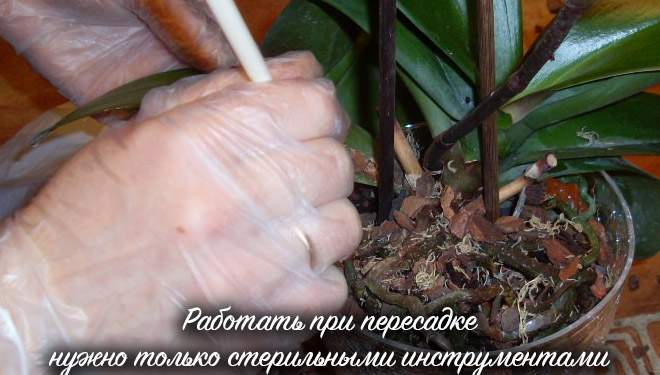
All instruments must be disinfected before use. - Sterilized, sharp instrument: Knife;
- Secateurs;
- Scissors.
- Perlite;
- Activated carbon;
- Soft;
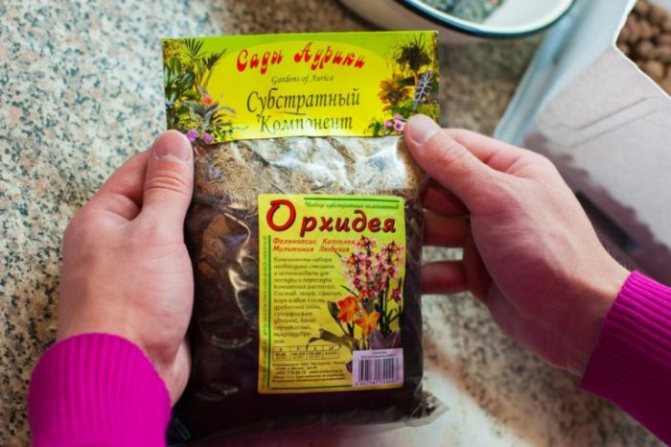
Soil mixture can be purchased ready-made, but not always it is of high quality and with the right set of components for a certain type of orchid. Before purchasing, you should familiarize yourself with the composition and reviews.
Recommendation! Experienced orchid growers advise you to prepare the substrate yourself. The percentage of quality components for 2-3 years will protect the plant from diseases and allow it to fully develop, grow and delight the owner with lush flowering.
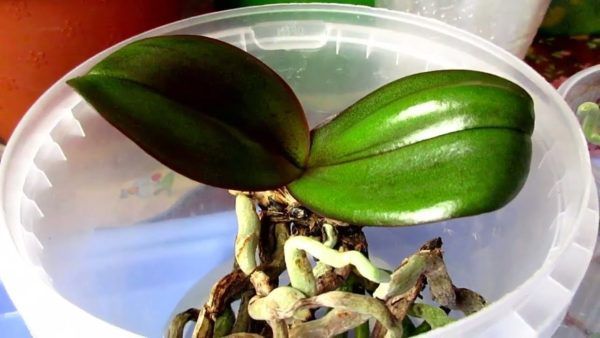
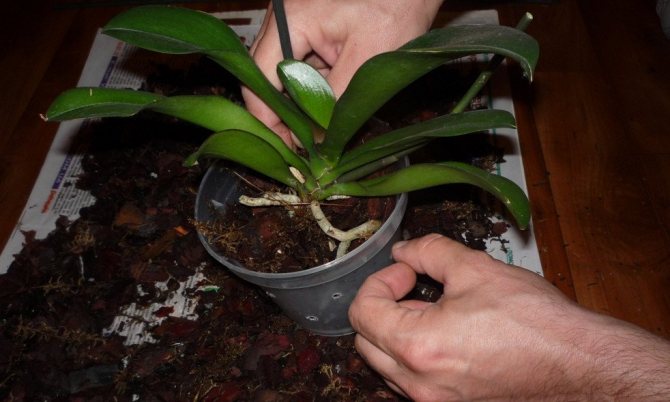
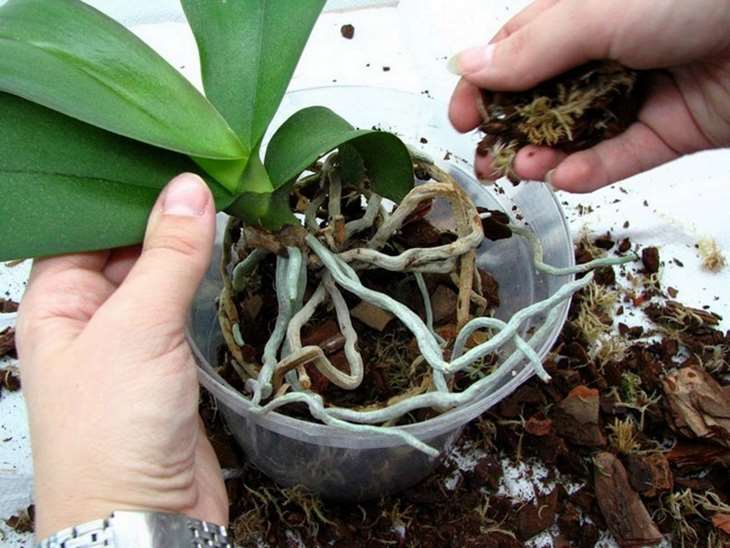
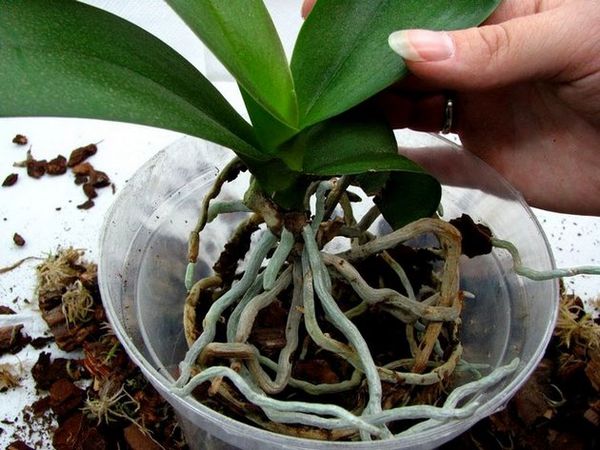
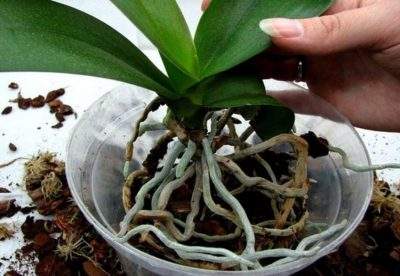
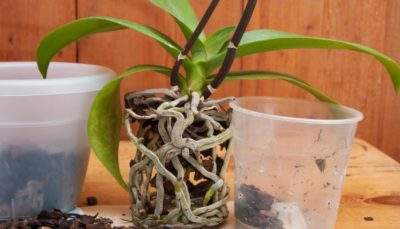
Extracting a plant from an old container, cleaning and diagnosing the root system
As you know, in many respects the vital activity of cultures depends on the moon. therefore it is recommended to stick to the lunar calendarindicating favorable days for transplantation.
The procedure for preparing for transport to a new container looks like from certain step-by-step instructions, broken down into stages.
First stage:
- Extraction. If the structure of the pot allows, then it must be carefully pressed on all sides so that the roots are detached from the walls. Otherwise, it needs to be cut or broken. Place the extracted plant in a spacious basin with warm water;
- Cleaning. Leave in water for 1-1.5 hours to separate the substrate from the roots. Rotate or wiggle the root portion periodically. You can not tear off pieces of bark from the roots. Then rinse under running, warm water and leave to dry completely;
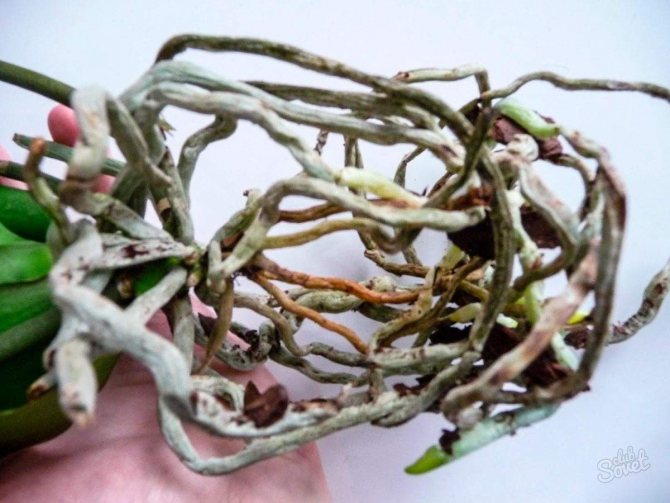
- Diagnostics. After drying, carefully examine the root system, root collar and stem for foci of decay and drying out. Healthy roots are firm and light green in color.
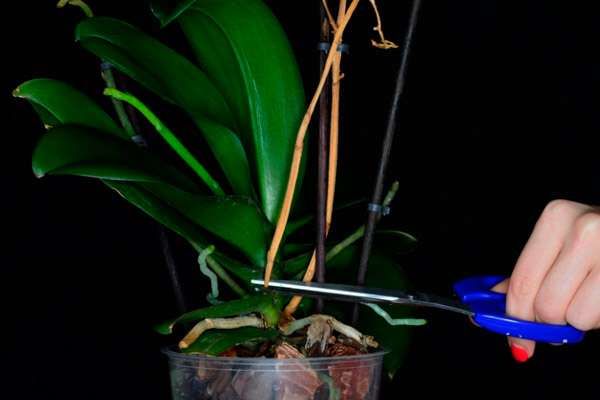
Necessary pruning, processing, drying of roots
Second phase:
- Pruning. Cut off dried and affected roots with a sharp disinfected tool. Pruning is carried out in a healthy area 2-3 cm above the damage. Leaves are also trimmed: Dry;
- Yellowed;
- And damaged.
Places of cuts in the orchid are processed.
Placement in a new container
Before planting a treated and well-dried orchid it is necessary to prepare the substrate... Bark needs:
- Steam in boiling water;
- Or ignite in the oven;
- And be sure to cool.
Stir the substrate components in proportions corresponding to the given species and growing conditions. It is also recommended to disinfect the new container.
Put a 1.5-2 cm layer of drainage from inert materials on the bottom of the pot. Dip the root of the plant into a container and gently distribute the root system throughout the volume. Then proceed to filling with the substrate.
It is not recommended to distribute it too tightly, but you should not leave large gaps either, otherwise the plant will be in an unstable position. The main duty of the soil is create resistance to the orchid and only then be a source of additional power.
Important! In this case, the rosette or bark collar is not deepened, but is located on the surface of the substrate.
With a well-dried root part after processing the first watering can be done immediatelywithout overflowing the plant. With improper drying, watering is done after 1-2 days.


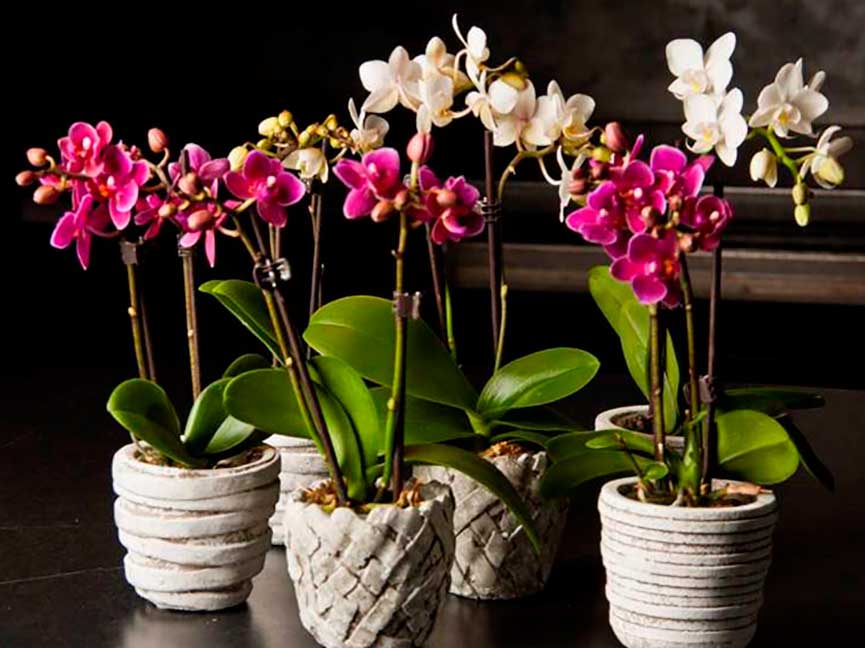
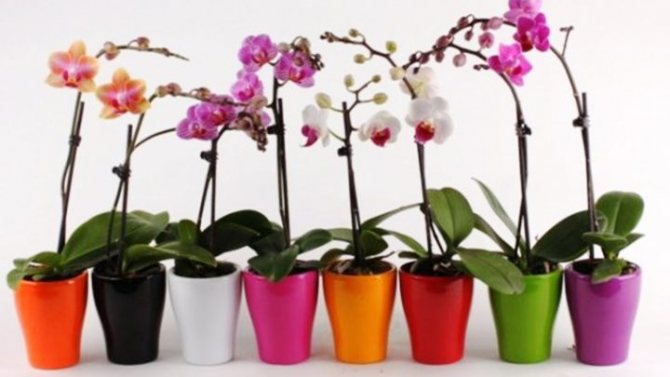
How to choose a pot?
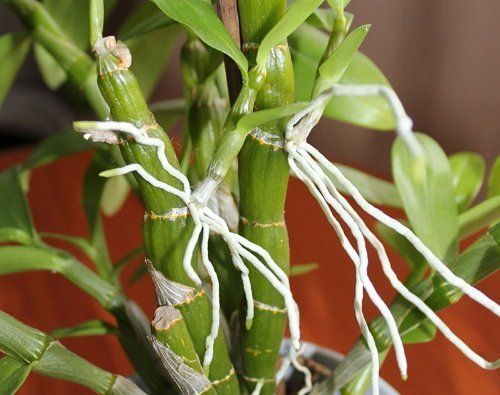
The most common flowers in home greenhouses are epiphytic orchids. The main feature of such plants is the presence of an aerial root system.She participates in photosynthesis on a par with foliage and is in dire need of oxygen, light and moisture.
The presence of such features makes the choice of a container for planting an orchid one of the most important tasks of a plant breeder:
- Clay and ceramic pots. Unsuitable container for the normal existence of epiphytes. Deaf walls of such dishes do not allow light and air to pass through. Because of what the root system is not able to fully function. The roots grow on the uneven walls of the clay pot. A poorly drying substrate can cause root rot.
- Glass vases. Not the best option for orchids, despite its aesthetic appeal. They have poor ventilation of the substrate and limited access of oxygen to the roots. In addition, the glass walls of the pot are capable of refracting sunlight so that the root system will receive a serious burn.
- Wicker baskets. They are able to provide the required air circulation, but the root system will not receive enough light in them.
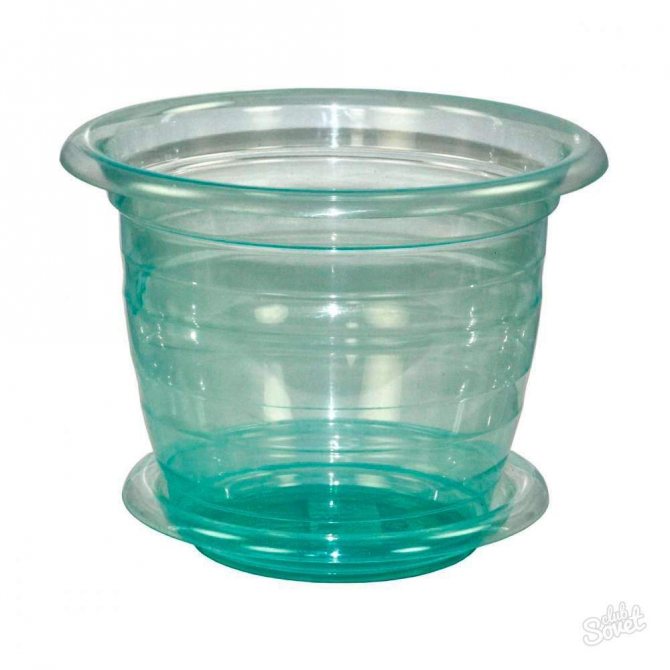
- Plastic pots. An ideal container for epiphytes, but only if there are the required number of holes on the walls and bottom of such a pot. Perforated clear plastic planters provide just the right amount of light and air. Through the walls of such a container, you can monitor the state of the root system.
Important! The pot for planting an orchid in diameter should be a couple of centimeters larger than the root system.
There is a technique for growing epiphytic orchids on blocks, which are pieces of bark or tree cuts. This method allows you to create conditions close to natural. The main disadvantage is serious drops in humidity. Since it is impossible to maintain the required level of moisture in the air within the apartment.
How to plant children at home?
Planting an orchid is an essential part of flower propagation. A baby is a small plant that forms on a mother specimen. Experienced professionals - orchid growers call babies cakes. They can form:
- On peduncles;
- In the leaf sinuses;
- From dormant buds on the trunk;
- And even on the roots.
That is, in any part of the mother plant, depending on the development and species. In some parts more often, and in others very rarely. The place of appearance of children directly depends on the type of growth of orchids, which are subdivided into monopodial and sympodial types.
Branch
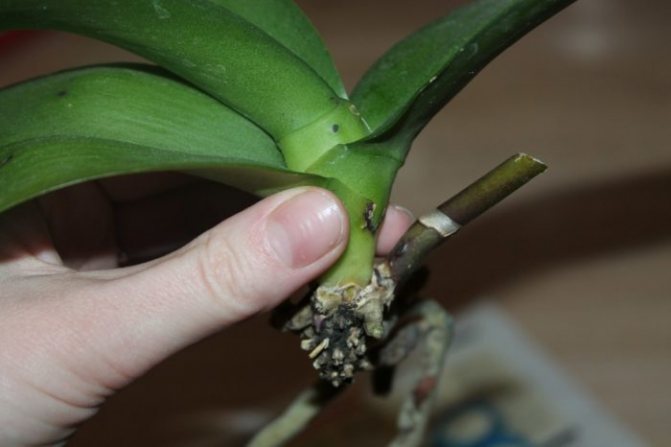
Can I plant an orchid at home? An important condition for the separation of the baby is the presence of at least 3-4 leaves and roots from 3 to 5 cm in length. It is the formation of roots that signals the ability of the formed young plant to an independent life, since the roots can extract their own food from the air and soil.
Branch is carried out with a sharp disinfected instrument, while leaving 1 cm in all directions, if the formation occurred on the peduncle. When formed, part of the root is left on the root part, and when a leaf appears in the axil, part of it can be left if it does not interfere. If it gets in the way and there is a risk of root damage, then it should be removed.
Planting in a self-contained container
Where and when to plant an orchid? Before planting the baby in the ground, you need to prepare it. For this places of cuts:
- Treated with an antiseptic (crushed activated carbon or cinnamon);
- And they dry well.
Then experienced orchidists recommend lowering it for 15-20 minutes. in water with a growth stimulator introduced into it for faster and more successful root formation.
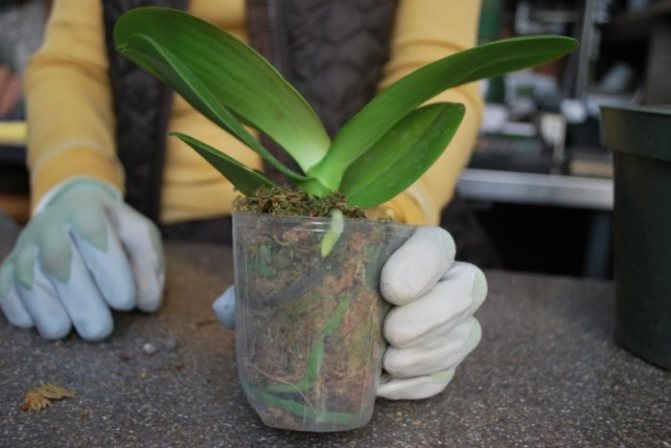
For planting in the ground, you can use any small transparent (preferably plastic) container with a drainage hole at the bottom... A small layer of drainage from inert materials is stirred at the bottom to prevent decay of the roots.
Orchids can be planted in any glass container.
A baby is planted in a prepared, finer fraction than for an adult plant. At the same time, the soil is not rammed so as not to damage the delicate young roots. For complete and even soil subsidence, it is necessary to lightly knock on the walls of the container.
To create the moisture required at first a greenhouse is being built... To do this, you can use:
- Plastic bag;
- Plastic bottle;
- Or just a glass jar.
Watering is carried out only for 3 days. To maintain humidity many use sphagnum mossspraying it periodically.
In greenhouse conditions, a newly planted baby is recommended grow throughout the year and only then after transplanting, take care of it like an adult plant.
Common mistakes made by florists
Inexperienced flower growers, when planting orchids, can make a number of mistakes. For example, not everyone knows that certain types of orchids require a specific method of propagation. For Dendrobiums and Epidendraums, the best method is exclusively cuttings. At the same time, it is important not to be mistaken in the time of their seating - from the beginning of March to the end of April.
In the video, the florist shows and talks about a simple way to plant orchids at home.
Some growers make mistakes related to the developmental phase of orchids. Plants cannot be planted until they finish blooming and acquire new formed leaves. This period is considered less traumatic for this type of event: orchids quickly adapt to a new "place of residence", and the survival time is significantly reduced.
Features of cuttings
Reproduction of orchids more laborious by cuttingsa method that takes a lot of time, but with a successful coincidence of circumstances and the correctness of the process, it is effective. This method is especially suitable for monopoidal, rapidly growing orchid species such as Wanda, Dendrobium and others. But sympodial orchids can also be propagated by cuttings.
Important! The orchid should completely bloom.
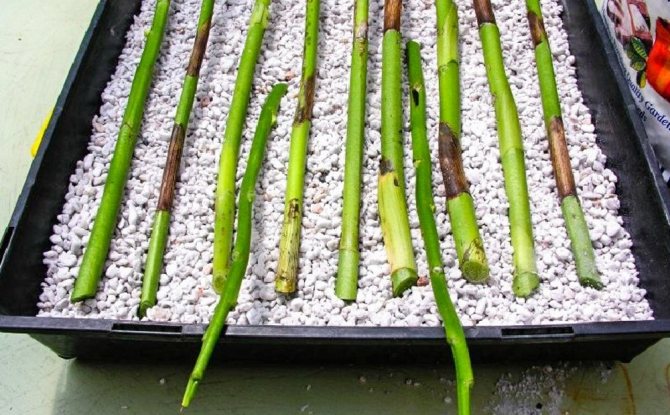
Lateral shoots are cut into cuttings, 6-10 cm long, so that each one has at least 2 - 3 sleeping buds... The cut sites are treated with activated carbon and allowed to dry for up to 5 hours.
Then the prepared cuttings are laid horizontally on a nutritious substrate (moistened sphagnum moss) and remain in this position in greenhouse conditions. before root formation.
After the formation of at least 5 roots of sufficient size, the cutting can be planted in the substrate in an upright position.
When grafting a faded peduncle, the procedure is the same, except that the cuttings are cut in lengths from 10 to 15 cm.
Special attention when rooting cuttings should be given:
- Soil moisture;
- Temperature (23-25 ° C);
- And good lighting without direct sunlight.
Soil preparation
The unusual root system of most plants in the orchid family needs special soil. The main requirements for it are:
- breathability;
- moisture absorption;
- the ability to hold the flower upright.
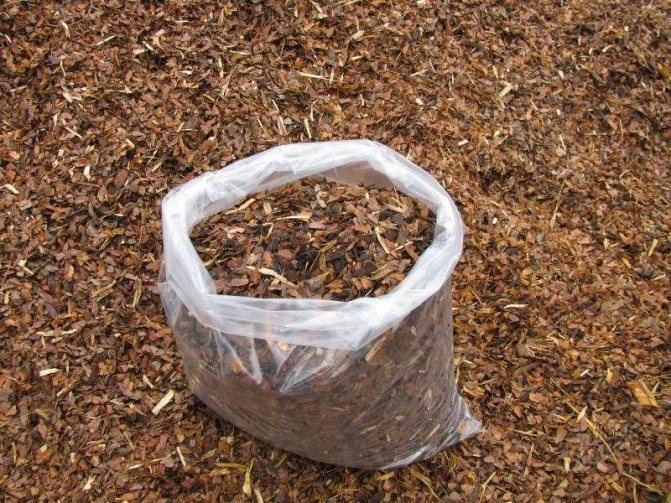
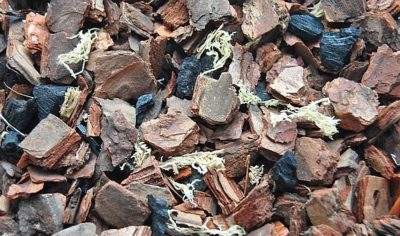
Traditionally, the basis of the substrate is made up of fragments of tree bark in the form of small, medium or large squares. Sometimes it is replaced with particles of coconut shells. Ready-made substrate for planting orchids can be purchased in special stores or made yourself. Its composition looks something like this:
- bark cut from a lying tree and cut with pruning shears into medium-sized squares;
- charcoal or activated carbon;
- coconut fiber;
- sphagnum moss;
- expanded clay or pumice.
Attention! The purchased substrate does not need processing.
If necessary, you can add spruce cones, fern roots, humus, peat.To prevent unwanted insects and microorganisms from getting into the homemade substrate, it should be sterilized first. A suitable acidity is important for the substrate. Ideally, it should be between 5.5 and 5.6 pH. Exceeding the norm will lead to the plant ceasing to absorb iron and its leaves will begin to turn yellow and die off.
Is it possible to plant a flower in ordinary soil?
When planting epiphytes, ordinary soil cannot be used as a substrate. Due to the high density of such soil, air circulation in it is minimal. The light transmission of the earth is also zero. Such conditions of detention are destructive for the root system of epiphytes, and therefore for the plants themselves. However, for terrestrial orchids that have a common root system, land will be a perfectly suitable option.
Using expanded clay as drainage
Any potted flower needs drainage to control moisture levels. Orchid plants are no exception. Expanded clay has always been considered the best option for this. It has its advantages, such as environmental friendliness and hygroscopicity, and disadvantages:
- possible increase in the acidity of the substrate;
- gradual destruction of drainage;
- absorption of not only excess, but also necessary water for the flower.
Expanded clay can also be replaced with other materials. Pebbles, pumice, crushed stone, gravel, ceramic shards, polystyrene or broken brick do an excellent job with this function.
Hydrogel application
This is a polymer that comes in the form of colored balls or grains. Its functionality is to absorb large amounts of water and gradually release it to the roots of the plant. Despite its visual appeal, the hydrogel has many disadvantages:
- does not allow oxygen to penetrate to the root system;
- after a while, mold forms on the balls;
- not subject to any treatment for the purpose of disinfection.
Temporary placement of a flower in a hydrogel is allowed, for example, to decorate a gift. If you leave the plant in such conditions for a long time, it will certainly die. Therefore, when receiving or buying an orchid placed in multi-colored balls, it should be transplanted into a more suitable substrate as soon as possible.

Dividing the bush
This method of reproduction or seating is characteristic mainly for sympoidal species:
- Dendrobiums;
- Cymbidiums;
- Miltonius;
- Cattley;
- Odontoglossums;
- Oncidiums.
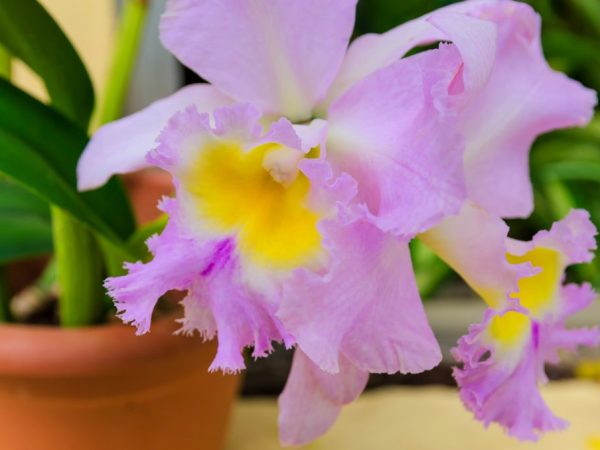
Not all orchids reproduce by dividing the bushes.
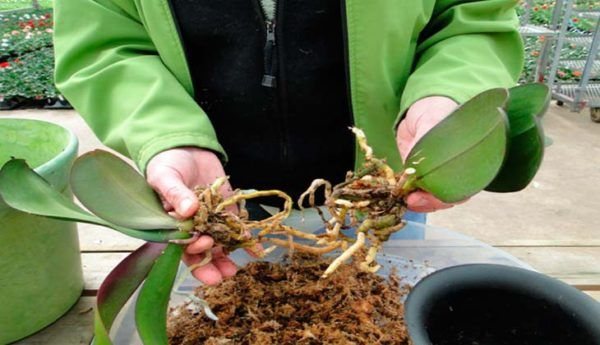
You can see in the photo how to plant orchids by dividing the bushes. This is due to the fact that the sympoidal types have more than one point of growth, which allows them to propagate by dividing the rhizome (bush).
Technology
The plant is removed from the container, soaked for half an hour and cleaned of old soil. Then, with a sharp disinfected tool, the rhizome is divided in such a way that on each part there were at least 3 pseudobulbs left... The cut sites are processed, dried and planted in new "apartments" with a new substrate.
What to do after landing?
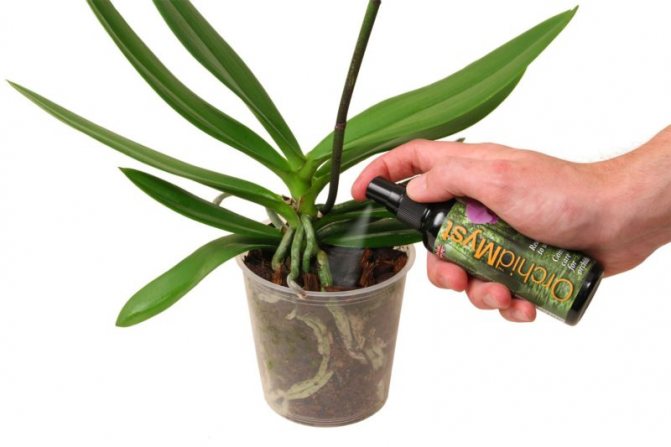
After completing planting, it is necessary to create the flower as comfortable as possible. In addition to observing the optimal regime of humidity, lighting and temperature, each plant needs balanced watering, timely feeding, prevention of diseases and getting rid of pests.
Fixing in a pot
In cases where the root system of the orchid after transplantation has become smaller than the leaf mass, and the plant does not hold well in the pot, it is necessary to fix it. This can be done in several ways:
- put a metal frame over the flower;
- wrap wire or fishing line around the neck, fix its ends at the edges of the pot;
- install bamboo sticks around the perimeter of the planter, stretch a soft lace in a circle between them.
Watering
After transplanting, the flower pot should be placed for a while in a container with clean soft water so that the substrate is fully saturated with moisture.After this procedure, it is recommended to start watering the plant no earlier than two weeks later.
Top dressing
The first feeding of a newly planted plant is carried out only after 21 days. It is necessary to wait for the plant to fully adapt to new living conditions. Most of the fertilization is required during the period of active growth and flowering.
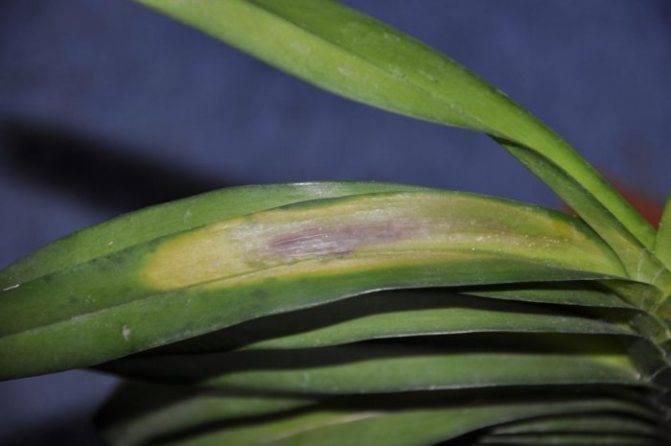
Diseases and pests
The following types usually become the most dangerous for orchids:
- scale insect is a small pest, whose mucus has a destructive effect on leaf tissue. Dark spots on the leaf plates are considered a sign of its appearance;
- mealybug - leaves fall from the influence of this parasite;
- whiteflies - insect larvae suck juices from foliage.
In addition to pests, flowers are susceptible to various diseases. Dampness leads to anthracosis, which turns into rotting spots on the sheets. Powdery mildew appears from the elevated temperature, provoking the drying out of the foci of the leaf plate. There are effective remedies for all diseases and pests, the main thing is to identify the problem in time.
5 / 5 ( 1 vote)
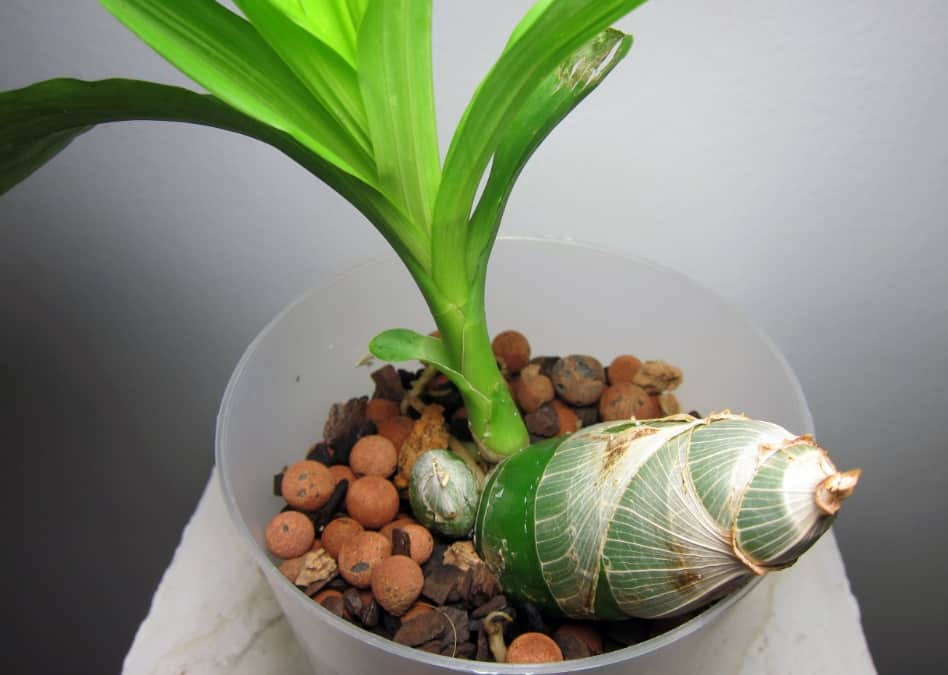
Bulb seating
This method is used in most cases, when the orchid gets cramped in the pot... And during the period of the planned transplant, they are seated with bulbs.
The process consists in the correct execution of actions:
- Removing a plant from a pot;
- Cleaning the root part from the substrate;
- Cutting bulbs with roots with a sharp tool;
- Treatment of cut points with activated carbon and drying;
- Landing in a new container with prepared soil.
Recommendation! Planting is carried out in dry soil, with daily spraying.
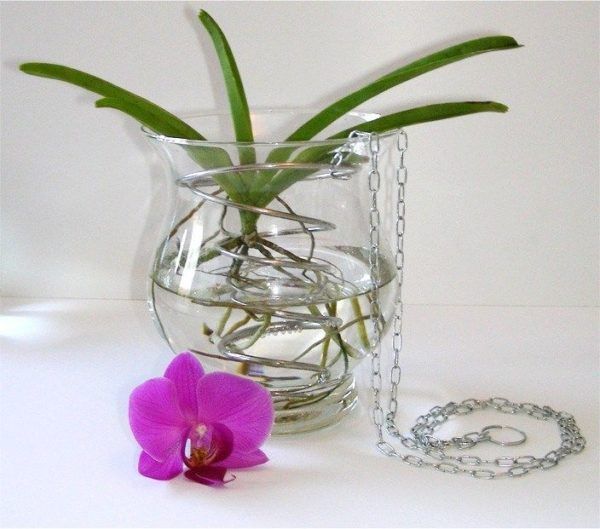
Growing in a closed system
A closed system does not mean placing a plant in a hermetically sealed container. It is only about planting a flower in a glass pot. Only the roots are covered, and the rest of the plant is outside. Planting a flower in a glass pot is carried out in the same way as in a plastic container. Differences are in the irrigation and feeding system.
There are two ways to moisten a flower: fill the vessel with water up to the neck of the flower, and leave for 15 minutes. Then remove the liquid while holding the substrate. Or pour water in a thin stream along the edge of the flowerpot to the upper border of the drainage.
Important! The fertilizer dosage for a closed system is significantly lower than for a classic pot.
Pros of a closed system:
- saving time on watering;
- ease of care;
- increased chances of recovery in diseased plants;
- more intensive growth and development of flowers.

Cons of a closed system:
- decay of roots with mistakes in care;
- dying off of the lower level of foliage;
- the formation of mucus on the walls of the flowerpot;
- the appearance of midges.
Growing in a closed system is well suited for flowers in need of resuscitation. Such conditions of keeping are comfortable for young shoots and adult plants that have lost their roots.
Features for some species
Cymbidium
This terrestrial epiphyte is planted every 3 or 4 years. The reproduction procedure, planting is carried out immediately after flowering. One of the important conditions for reproduction is the presence of at least 6 pseudobulbs at Cymbidium. The plant is divided into sectors 3-4 pseudobulbs with leaves and roots, dead roots are removed and planted in a new container with prepared soil mixture.
Cambria
Cambria, like many orchids, has a negative attitude towards transplants... A planned transplant is performed every 2-3 years, depending on the condition of the substrate.
Reproduction is carried out by bulbs... In this case, the bulbs are carefully separated from each other, taking care not to damage the roots. If the roots are damaged, then they must be treated with crushed activated carbon or cinnamon.
For good stability and rooting they should:
- Fasten to the support stick;
- And do not water for a week.
Cattleya
The procedure for transplanting and breeding is based on the same principles as for other species. when dividing a bush... It is better to carry out such a procedure during the period of a planned transplant once every 2-3 years, during the period of the beginning of active root growth:
- The plant is removed from the container;
- Soaked;
- Cleans up;
- And processed;
- Then the rhizome is divided so that each part has at least 3 bulbs;
- And after processing and drying, it is planted in a container prepared in advance.
Wanda
If in nature Wandas can reproduce not only vegetatively, but also by seeds, then at home seed reproduction is impossible... The transplant is carried out in the same way as most orchids, every 2-4 years.
The most effective method for seating Wanda the separation of children is considered or, as they say, basal rosettes, from the mother plant. Of course, it is best to perform this procedure during a planned transplant:
- The baby is separated from the “mother” with a sharp disinfected instrument;
- Cutting points are processed with crushed activated carbon or cinnamon (ground);
- Children are placed in small containers with a substrate of bark, charcoal and sphagnum moss;
- A support is installed for the vertical position of the children in the container and a greenhouse effect is created (mini greenhouse);
- Airing, condensate removal is carried out daily;
- Periodically, as necessary, the mulching layer of moss is sprayed;
- According to the regrowth of roots and the resistance of young plants, the greenhouse is removed.
Dendrobium
Reproduction of Dendrobium even in a natural, natural environment does not cause difficulties. therefore there are many ways of its reproduction... Under natural conditions, it is able to multiply from broken small fragments, if it lands on a fertile place.
Home is best plant it in vegetative ways.
Children
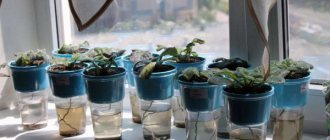
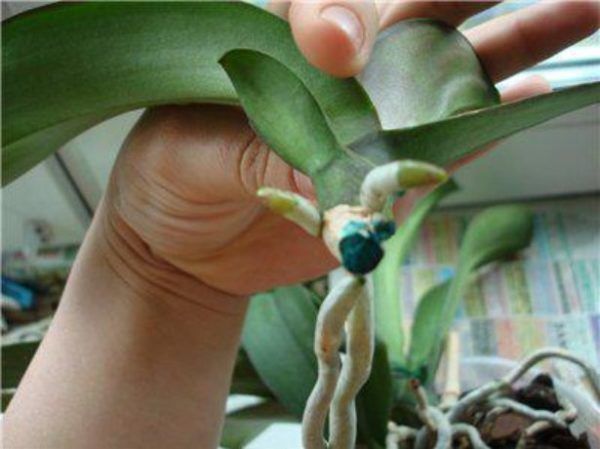
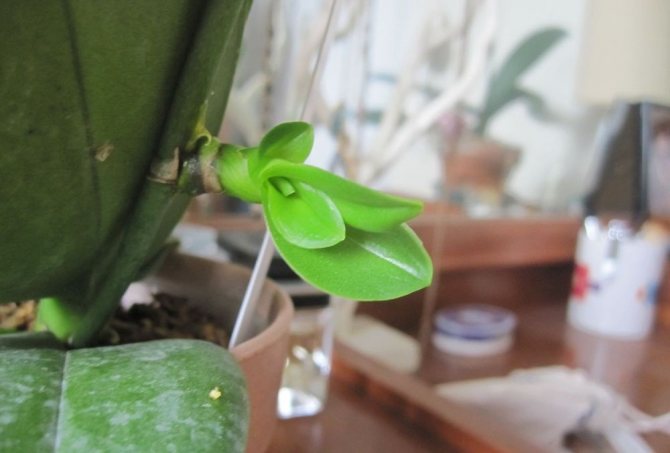
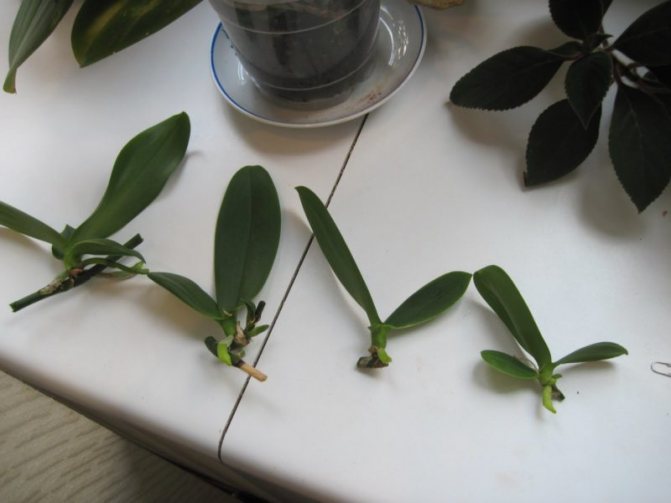
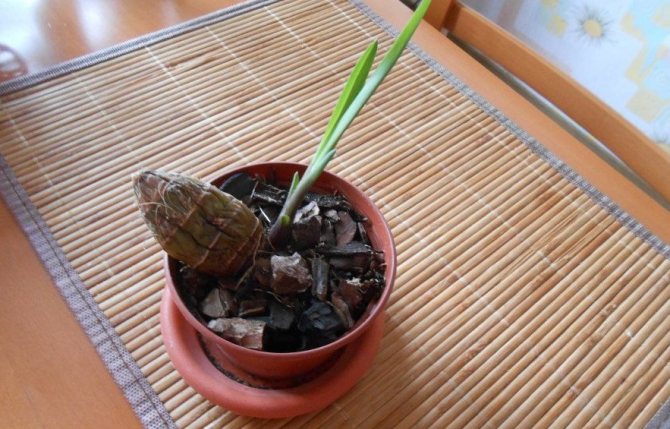
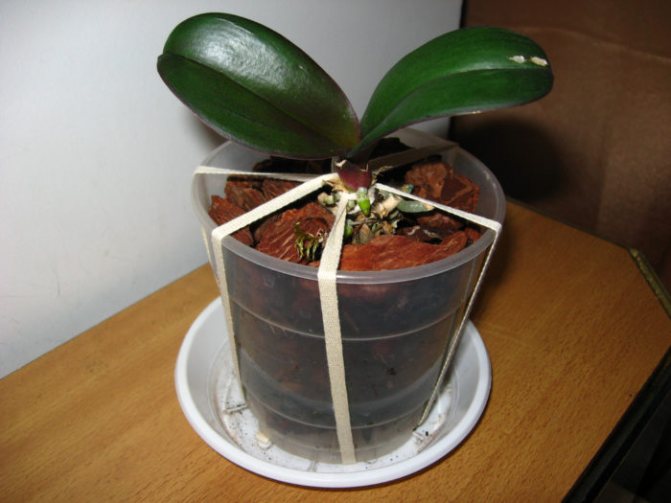
A baby that looks very much like a small copy of an adult plant, emerges from the kidney, formed at the very base of the stem. This serves as a signal for offspring. It is believed that after several such cycles of breeding offspring, the mother plant begins to die off. You can see the baby in the photo, we will tell you step by step when to separate her from her mother.
Baby on the dendrobium.
As soon as roots appear on the baby, 3-5 cm in size, it can be separated with a piece of the trunk and placed in a substrate, then creating a small mini-greenhouse.
Advice! Experienced flower growers recommend planting sphagnum moss simply in moss.
By dividing the bush
An adult, sufficiently overgrown Dendrobium orchid can be divided, while receiving several copies... Moreover, such specimens will be adult plants.
The division process is reduced to:
- Removing the main bush;
- Cleansing and processing of the root part.
Plots are made in such a way that on each there were at least 2 stalks and young sprouts. Do not forget to process the cut sites to avoid infection.
Cuttings
Really plant this type of orchid stem fragmentshaving several internodes. These fragments should be placed on wet sphagnum or sand. Having created a greenhouse effect, good lighting, temperature, wait for the appearance of children.
Then the children are seated in a permanent place of growth. Many growers use the grafting method for transplanting.
How to plant phalaenopsis correctly?
These orchids are monopodial species. This means that they grow exclusively vertically and have one point of growth. Therefore, after choosing the right pot and preparing the correct substrate, the plant is completely cultivated and prepared for planting. All that remains is to place it in the pot strictly in the center.
However, such a simple matter has its own nuances:
- drainage is placed on the bottom of the planter;
- the plant is placed vertically in the pot, the roots are evenly distributed inside the container;
- the gradual filling of the flowerpot with pieces of the substrate begins without compaction;
- after filling the container, sphagnum is placed on top.
Feature! There is no need to manually place the roots between the substrate particles, over time they will take a comfortable position themselves.
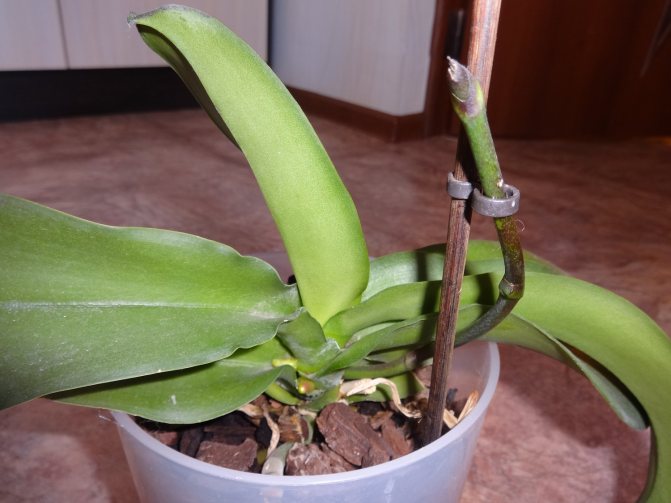
If the orchid has a long peduncle, then it must be maintained. For this purpose, sticks made from natural materials are used.
How to plant a flower without roots?
If for some reason it turned out that the orchid was left without roots, then you should immediately start rooting it. Otherwise, she will inevitably die. In order for the orchid to be able to regrow the roots, you can resort to various methods:
- In water. The flower is placed in liquid, with the addition of activated carbon and a special rooting agent that stimulates the formation of connective tissues.
- Above the water. Clean liquid is poured into the container. The orchid is placed so that about two centimeters remain between it and the surface of the water.
- In moss. The plastic bottle is cut in the middle, but not completely, but so that the top folds back. Wet sphagnum moss is placed on the bottom of the bottle. Above it, about five centimeters, a flower is placed. The top is closed and the greenhouse is placed in a warm and bright place.
While the orchid is growing its root system, the foliage also needs support. To restore the normal state of the leaves, they should be wiped with a solution of succinic acid. As soon as the roots grow at least 5 cm, the orchid can be planted in the substrate.
Where to buy planting material?
Can I buy from websites? At the moment, the Internet is replete with a variety of online stores that offer to buy not only seeds, but also plant seedlings.
China
On Chinese sites, you can order seeds, bulbs, cuttings and seedlings orchids, with free shipping. In some cities there are specialty shops for Chinese goods, where you can find this plant.
If someone you know is going to China on vacation, then you can order plant seedlings. An orchid will tolerate transportation well if it has at least a minimum of light.
Vietnam
If you want to grow an orchid from Vietnam, you can order bulbs in a specialized online store... It is worth warning right away that you need to order 30 percent more than you plan to grow plants, since some specimens may dry out during delivery.
Vietnamese, bulbous orchids are much larger than those that we are used to seeing on the shelves of flower shops. They are extraordinarily beautiful and spectacular.
Thailand
In Thailand, the cultivation of orchids from seeds is put on stream... In numerous stores, you can see on the shelves a huge number of cones with a nutritional composition in which Thai orchids are already ready for planting.
But it is impossible to order such containers by mail, since they will die during delivery without light. If you only ask someone to bring them in hand luggage.
As for seeds, bulbs or cuttings, you can order them on a special resource. True, no one will give you a guarantee that the exact variety of plant that you liked will come.
Other places
The algorithm of actions does not differ from the above. You can buy an orchid in the online store.
Do not discount specialized orchid nurseries, which can be found in any exotic species, while already rooted.
There are many benefits to this purchase, as experienced sellers will give you detailed instructions on how to grow the plant and provide it with proper care.
Preparing the substrate
The potting mix for orchids should be as close to natural habitat as possible. In nature, most of these plants live in tropical forests, attaching to the bark of trees with their aerial roots, therefore, bark and moist moss must necessarily be part of the substrate. In flower shops you can buy a "special" mixture, but experienced growers consider such a substrate too small and prefer to prepare it on their own.
In principle, the same substrate composition is suitable for all orchids, the only difference is in the proportion and size of the fragments. For epiphytes, large and medium fractions are used, for moisture-loving orchids - small ones. At home, you can prepare a substrate from the following materials:
- bark of trees (preferably pine) - the basis of the substrate;
- fragments of ordinary spruce cones;
- pieces of charcoal;
- high-moor peat;
- moss.
The number of components depends on what moisture capacity the substrate needs to be obtained. For a very moisture-absorbing mixture, bark and peat are used in a 1: 1 ratio. To obtain a substrate with an average moisture content, you should increase the amount of bark in relation to peat and add charcoal. As drainage, which should occupy at least 1/3 of the substrate, materials that do not absorb moisture should be used: expanded clay, pieces of crushed stone or foam.
Step by step instructions
Prepare materials and tools. You will need:
- Orchid pot.
- A suitable basin for work.
- Pine bark substrate.
- Drainage - expanded clay, ceramic shards, pieces of red brick.
- Alcohol disinfected pruning shears or sharp scissors.
- Antiseptic - powder of crushed charcoal, you can take activated.
- Sphagnum moss (if you don't find it, you can do without it)
- Stick for pushing the substrate between the roots
- Peduncle holder
- The drug Fitosporin for the prevention of rot.
- If necessary - insecticides (Fitoverm is allowed in room conditions)
Prepare a solution of Fitosporin to soak an orchid. Dilute 1/5 teaspoon of the preparation in a little warm water, then dilute to two liters. You can add a drop of Epin to the solution, which stimulates the immune system.
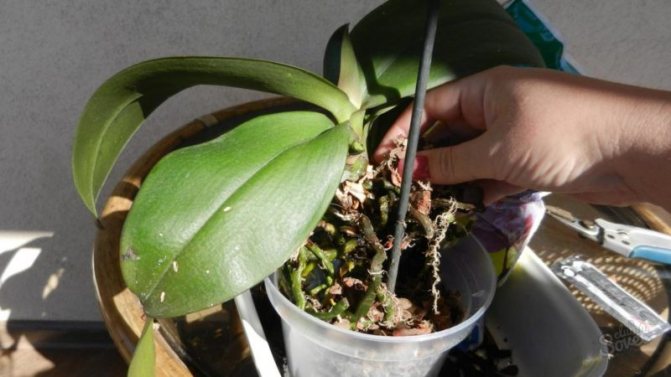
Gently lift the plant out of the container by the base of the stem. If the roots are strongly entangled in the pot, it is better to cut it with scissors.
Shake off the old substrate from the roots. If it is difficult to remove, rinse it off the roots under running warm water.
Mix a little good substrate from the old pot with a new one - it contains the microflora familiar to the plant. If pests are noticed, the soil must be washed in an insecticidal solution.
Caution! Phalaenopsis roots are very fragile and easy to break.
Examine the roots, leaves, and stem carefully. We remove all blackened, rotten, shriveled roots to a healthy green part.
Remove diseased and withering leaves. To do this, cut the leaf along the central vein and remove the halves from the stem. Cut off dried leaves and peduncles.
Immerse Phalaenopsis roots in the prepared Fitosporin solution for 30-40 minutes.
Dry the plant lightly and dust all cuts with charcoal powder.
Lay drainage at the bottom of the pot with a layer of 3-5 centimeters. It protects the roots from getting wet and prevents the pot from tipping over, making the bottom heavier.
Apply a small layer of substrate. Set the plant by placing the stem in the center of the pot. Place a support for the peduncles next to it.
Gradually fill the pot with the substrate. Put large pieces of bark down, and on top - smaller ones. Gently push the bark between the roots, filling in the gaps. Do not compact the soil, you may damage the roots!
When the pot is full of bark, place a layer of damp sphagnum moss on top. The moss will protect the bark and young roots from drying out quickly.
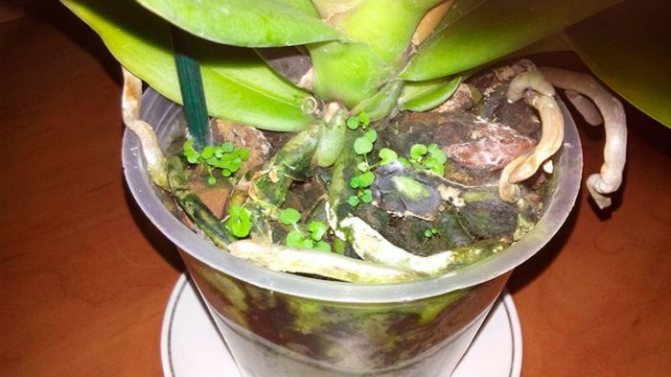
Most often, at home, phalaenopsis reproduces vegetatively. The plant has only one point of growth, but you can slightly "tweak" the nature.
Sitting "babies" is the most common way of reproduction of phalaenopsis. The offspring is separated from the mother plant 1.5–2 months after flowering. The procedure most often takes place in the spring. Growth buds are formed in the axils of the leaves or on the peduncles of orchids at the age of two years, with at least 4 healthy leaves. Sometimes they form on faded peduncles no older than one and a half years.
The appearance of "babies" can be stimulated in several ways:
- The difference between the daytime (28–30 ° C) and night (18–20 ° C) temperature of the content. At the same time, high air humidity (70% or more) and daylight hours with a duration of at least 12 hours are guaranteed.
- "Sunbathing". The orchid is left in direct sunlight for an hour a day in early spring. When a slight purple “tan” appears on the leaves, it’s not scary, but if it changes color to ink purple, and there are still no “babies”, stop the procedure.
- Artificial "drought". The plant is not watered for 12-14 days, protecting the orchid from direct sunlight. Moistening of the substrate is resumed 2-3 days after the roots acquire a silvery-gray hue. Thus, the flower is made to believe that his death has come, in the face of which the instinct of procreation is activated in him.
- Use of fertilizers with a high nitrogen content. The method is rather risky. Orchids do not like this macronutrient too much, so there is a real risk of ruining the mother specimen. Even if he gives a "baby", he will definitely not have to wait for his flowering this year.
As for when exactly it is necessary to separate the "baby" from the mother plant, there is no consensus among flower growers. Most believe that you need to wait for at least one root to appear. Others are of the opinion that this greatly depletes the "parent", so they cut off the "offspring" when the first pair of leaves appears.
- Separate the baby from the mother plant. Process the sections. Dry in the open air for 24 hours.
- Fill transparent cups with a mixture of finely chopped sphagnum moss with pine bark and fern rhizomes (1: 3: 1). The more uniform the soil is, the better. In containers, you need to make 3-4 drainage holes.
- Moisten the substrate. Plant young orchids in the ground and place the containers in a home mini-greenhouse, florarium or homemade greenhouse. Maintain a constant temperature of 23–25 ° C and bright, diffused light.
- As it dries, moisten the substrate with a solution of a root formation stimulator - Kornevin, Heteroauxin, Zircon, Epin (3-5 ml per liter of water). Air the plantings daily for 5-7 minutes.
- If the bottom pair of leaves turns yellow, this is normal. You cannot cut them off - the forming roots receive nutrition from them. When the time comes, they dry up and fall off on their own.
- Wait until the roots are 4–5 cm long, then transplant the phalaenopsis into adult soil. The procedure is not quick, it usually takes about a year.
Alternative way:
- Pour water warmed to a temperature slightly above room temperature into a glass. You can add a tablet of succinic acid to it.
- In the morning, place the cut and dried "baby" so that the bottom is located at a distance of 1-2 mm from the water. You can, for example, take a piece of styrofoam, cut a hole of the appropriate diameter and put it on a glass.
- After 6 hours, remove the "baby" from the water. Dry it outdoors the rest of the time.
- Continue manipulating daily until roots appear. The water should be fresh every day. Then proceed as described above.
Stages and methods of planting
Before planting orchids in the ground, you need to sterilize the container. This can be done with hydrogen peroxide or baking soda. Then washed with hot water.
Further, the landing is divided into several stages:
The first stage of planting is the preparatory stage.It involves the preparation of tools and antiseptics.
- a knife or scissors, possibly a secateurs (must be sterilized).
- well crushed charcoal or a bactericidal preparation.
The next step is to remove the orchid from the old substrate and remove its components from the roots. To safely remove the old container, it is best to wrinkle it in your hands so that the soil falls away from the walls.
Important! If the soil does not lag behind the walls, then the container is cut.
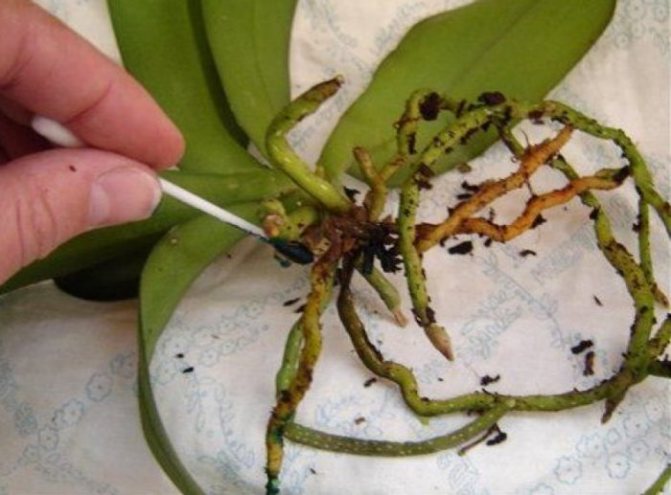
After cleaning the roots, a visual check of their health is carried out. If clearly rotten areas are found, then they must be cut off immediately, and the sections must be rubbed with charcoal or treated with a bactericidal preparation. The next step is a touch test. Healthy roots are resilient, while rotting ones are soft and oozing fluid when pressed.
The orchid is left for 1.5 - 2 hours so that the leaves and roots dry out. And also, so that there is a primary adaptation to cuts and injuries.
Some of the ways to plant a flower in the ground will be presented below.
The first way

Oncidiums and Miltonias, for example, belong to orchids that love water, but are very sensitive to stagnation in the ground. For such species, a high drainage system is made, which fills half of the capacity. A piece of polystyrene, that is, polystyrene, is placed in the middle of the drain. The height of the substrate itself is about 10-12 centimeters.
Preparatory stage
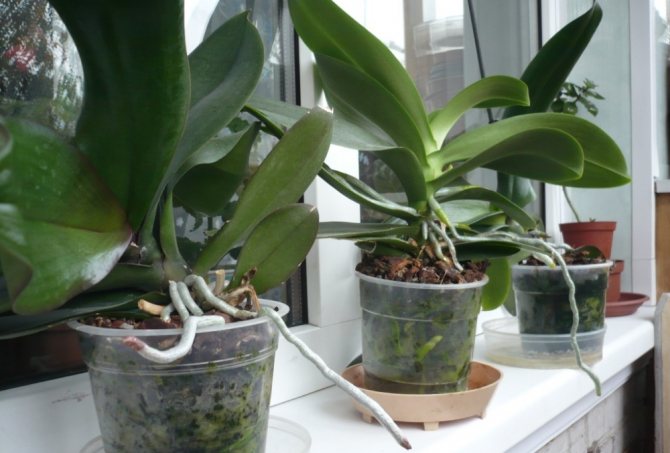
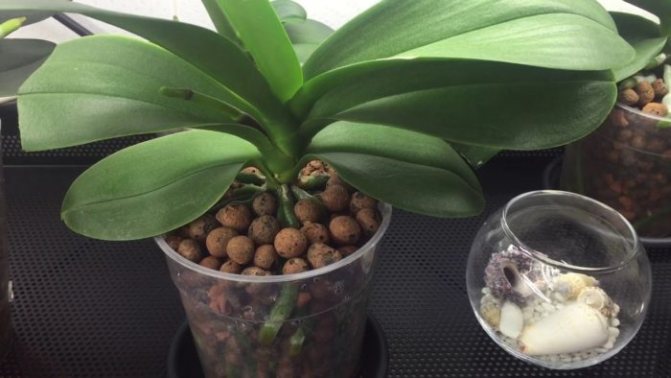
Having decided to decorate your home with a collection of orchids, it is recommended to start with 1 flower. At this stage, you need to observe his reaction to the environment, leaving. After 2-3 weeks after purchase, the seedling adapts to the new conditions and can be transplanted into a permanent container. To do this, you should pick up a pot 2-3 cm wider than the previous one. It is recommended to use transparent pots that do not interfere with the sunshine of the root system. Choose pots that have holes for excess moisture to escape. If there are none, you must prepare them yourself.
Orchid refers to epiphytic plants that form in their natural environment on other crops. At home, its disembarkation is carried out in two ways:
- Ernst Ernst: “I threw Malakhov to hell after the broadcast about“ sore joints ”! He dared ...
>>
- using natural blocks;
- into substrates.
To decide how to properly plant an orchid of a particular variety, you need to study its characteristics. The first type is optimal for greenhouses, the second type for an apartment. In the first case, the bark of pine, oak or tree fern is used. You need to place the flower on a piece of moss and thread it to a block of wood. The disadvantage of this method is the rapid drying of the root system. For the development of a culture grown in this way, it is necessary to maintain a high air humidity.
For growing orchids, the use of soil is unacceptable. You should purchase or prepare your own substrate. To obtain a standard mixture, you need to combine crushed pine bark and peat in the ratio required for a particular type of flower. For moisture-loving crops, this figure corresponds to 1: 1, for plants that do not require frequent watering, it is 7: 1.
To prepare a substrate with moss, boil the pine bark and then leave it to dry. After a few days, this manipulation should be repeated, which is necessary to eliminate bacteria. The disinfected material is crushed into 2 cm particles and mixed with crushed dry moss.
To obtain a sod substrate, the following components should be disinfected with boiling water or a solution of potassium permanganate: fern root, moss, sod and leafy soil. The processed and dried ingredients are mixed in equal proportions.
What soil to transplant?
Every novice florist asks the question - in what soil to plant Phalaenopsis?
Phalaenopsis Substrate can be purchased at the store.The main component of purchased substrates is pine bark.
Other components can be added to it: sphagnum moss, charcoal, fern roots.
The main thing to be guided by when choosing a soil is its looseness and good ventilation. The components must be coarse and not cakey. Fine-grained soil is unsuitable for Phalaenopsis orchids. It is better to purchase pure pine bark.
Another option is to prepare the soil yourself. For this:
- Collect pine bark from fallen trees (don't touch live pine trees!)
- Rinse the bark well in water.
- Use a pruning shears to chop up into 1.5 - 3 cm pieces.
- Boil the bark for a few minutes to remove resin residues, pests and pathogenic fungi.
- After boiling, rinse the bark again with boiling water or boil again.
- Lay out on trays to dry.
On a note! The orchid can be transplanted into an incompletely dried substrate.
Seating errors
Some growers, when carrying out the flower propagation procedure, make various mistakes that lead to disease or death of plants:
- unfavorable time for transplanting: in winter during "hibernation" or in summer heat, during flowering or the formation of new leaves;
- a breeding method was chosen that is unacceptable for this type of orchid;
- an unformed sprout was chosen, without aerial rhizomes (when propagating by side shoots), a weak cutting or with an undeveloped root system in a young plant (when multiplying by division from the mother bush);
- damaged or diseased roots were not removed during seedlings;
- the sections were not disinfected with antiseptics (charcoal or activated carbon), as a result, the flower began to hurt and died;
- improper care of the separated sprout, excessive or rare watering.
Optimal conditions
After planting, the orchid is kept for 3-4 days without watering - this makes it easier for the plant to endure stress. The flower is protected from direct rays of the sun. A comfortable temperature for a plant at this time is considered to be 20-23 ° C.
The bush needs provide good lighting... West and east windows work best.
On the southern windows, the bright rays of the sun have a negative effect on the orchid - they can cause burns or pigmentation.
By the state of the plant, you can understand: is it comfortable in the chosen place, or you need to make adjustments.
A plant under poor lighting loses its juicy color. The leaves become narrow, faded, twisted. They turn and stretch towards the light. When it is impossible to provide the flower with good lighting, phytolamp illumination can be used.
Helpful hints:
- It is important to provide the orchid with a comfortable atmosphere, to prevent drafts and cold air.
- In winter, it is recommended to remove the flower from the window sill deep into the room; from contact with cold glass, its leaves can freeze.
- Dry air from heating devices can affect the flower destructively, provoke the appearance of parasites. It is necessary to create optimal humidity and spray the orchid more often.
Exotic orchid: transplant or not
Before thinking about how to plant an orchid, you should remember that for any flower, be it an ordinary geranium or an exotic prickly pear, any manipulations can be quite traumatic stress, after which a long recovery and rest are required. For overseas orchids, transplantation most often ends with a suspension of root growth, a kind of conservation, when the plant seems to freeze, in anticipation of further events. However, contrary to fears, in most cases the flower "comes to its senses" and continues to grow, as if nothing had happened.
Important
Precisely because orchids experience severe stress when transplanting into another pot, you should always be extremely careful, and most importantly, manipulate it no more often than once in two, or even better, in three years. If the orchid had to be planted not according to the planned schedule, then it is better to postpone the event to spring, when it is in the phase of its most active growth.
Features and reasons
Like any other plant, an orchid is transplanted into another container for a reason, you need to have good reasons for this.Even a beginner can figure out when it is time to perform all the necessary actions and how to do it.
- As it grows, the plant can gradually deplete the soil in which it grows. Since it does not have the possibility of natural restoration, it is possible to cope with the problem only by replacing the soil with another one, more saturated with nutrients, vitamins, minerals and other substances.
- Regular abundant watering of orchids does not lead to anything good, since the rhizome can rot and then the situation can only be saved by an emergency transplant with cleaning the damaged processes.
- The soil, which is dominated by sphagnum moss, should be changed once a year, and the one with more coniferous bark can be left for three to four years.
- From cramped pots, the roots of flowers can begin to look outward, displace the soil, then you cannot do without transplanting into a large container.
In the latter case, the roots begin to intertwine, completely displace all the soil from the pot, which negatively affects the development and growth of the flower as a whole. In order to control this process and plant the orchid correctly, it is better to choose a transparent pot, where it will be clearly visible what is happening inside.
Emergency measures
It is also worth talking not about planned transplants, but about emergency cases when there is no other way out. After all, it is better to expose the flower to stress, but to save it, than to leave it to its own devices.
- If the soil in the pots has completely decomposed and turned into dust and dust, then it's time to start replacing it, otherwise the plant will die.
- When the roots began to rot and this is already noticeable with the naked eye.
- As a result of the activity of parasites, the root system of the flower is damaged.
If such uninvited guests, such as tips, nematodes or scale insects, are brought in, then you need to act quickly so that the "infection" does not spread to your other green pets. Many novice botanists are interested in whether it is worth disturbing a plant that has just been brought from the store and whether it is necessary to immediately plant it in a new pot. Since it is most often accepted to buy a plant in bloom, it is not worth replanting it immediately, but it is better to leave it until the time when it enters the phase of active growth.
When and why to seat?
In the annual development cycle of orchid growers there are two periods that are optimal for seating:
- the period of active growth that completes the dormant period is usually spring, but in some species this stage occurs at other times of the year;
- period after flowering - the calendar time of the year depends on the specific type of orchid.
There is only one reason for seating - the volume of the pot is small for all children and bulbs. Neglect of this factor is fraught, at best, with disruption of nutrition and development of exotic, and at worst, it can lead to the complete death of an indoor flower.
Difficulties and problems
Most often, difficulties arise when planting orchid seeds., since they need to be grown strictly under sterile conditions and in a nutrient composition, which is rather difficult to prepare on your own.
Problems that may arise when landing in other ways:
- Bulb, planted in the moss does not wake up - it is possible that the planting material has rotted from waterlogging. You can check this by cutting off a little of the protective layer. The smell should be fresh, similar to cucumber.
- Kids... The root system does not develop well in children. The reason may be dry air - it is enough to spray the plant several times a day.
- Seeds do not germinate in the nutrient composition. in this case, there may be several reasons: the seeds are not viable, the composition is not prepared correctly, the sterility is not observed.
We process the roots
Before planting an orchid in a pot, you need to carefully examine the roots. They may look healthy outwardly, but be empty on the inside, so each suspicious root must be felt with your fingers and determine its condition.Healthy roots feel firm and pliable, while diseased roots may smell soft. All rotten, dry and empty roots must be carefully trimmed, capturing 5 mm of healthy tissue, and then treated with charcoal powder to prevent the development of infection.
How often to replant?
Florists agree that Phalaenopsis needs to be transplanted at least every 2-3 years. During this time, the following happens:
- The substrate partially decomposes, loses air permeability, becomes overgrown with moss and is saturated with salts.
- The central part of the root system dies off from waterlogging, poor aeration, and excess salts. Roots twine around the walls of the pot, sprout from the drainage holes.
- The stem grows from above, becomes bare, often hangs sideways from the pot - this is a biological feature of growth. The green mass outweighs, the pot may tip over.
- Young roots growing from the stem suffer from drying out, especially in winter.
All these signs mean that the time has come for the transplant. Prepare an orchid pot. Phalaenopsis is buried in it to the level of the lower leaves. The part of the stem that has died from below can be broken off.
Transplanting a plant into a permanent container
The procedure is carried out in early spring or autumn between the flowering phase and the active formation of the root system. Before planting an orchid, you should prepare a pot and fill it with substrate. It is necessary to lay out drainage on the bottom - expanded clay or sand. Materials collected independently are subject to sanitization by washing with boiling water or a solution of potassium permanganate. After that, the container is 1/4 filled with the substrate.
To gently remove the plant from the temporary container, water it abundantly beforehand. The root system must be cleaned of old soil and rinsed with water. After that, it is carefully examined for the presence of rotten and wilted areas, which are carefully removed with disinfected scissors. Similarly, yellowed leaves and hollow bulbs should be removed. Immerse the treated root system in warm water for 10 minutes, after which it is pollinated with crushed coal, straightened and left to dry.
To plant an orchid in a pot, you need to keep it in weight, gradually fill it with a substrate. It should not be tamped so as not to deform the fragile root system. After that, a support is inserted into the pot to support the stem. The first watering is carried out 5 days after planting.
Care

It should be noted that no specific care after transplant is required, but it is worth doing the following:
- Organize shading for 10 days, especially the upper part.
- Watering is carried out immediately after transplanting with boiled and cooled water to which potassium, magnesium and nitrogen are added.
- Re-watering is carried out after 2 weeks.
- You need to feed the plant every 21 days.
Proper watering of the orchid is to lower the pot with the plant in water for 15-20 minutes, this time will be quite enough for the plant to receive a sufficient amount of moisture. Then take the pots out of the water and place them in their usual place.