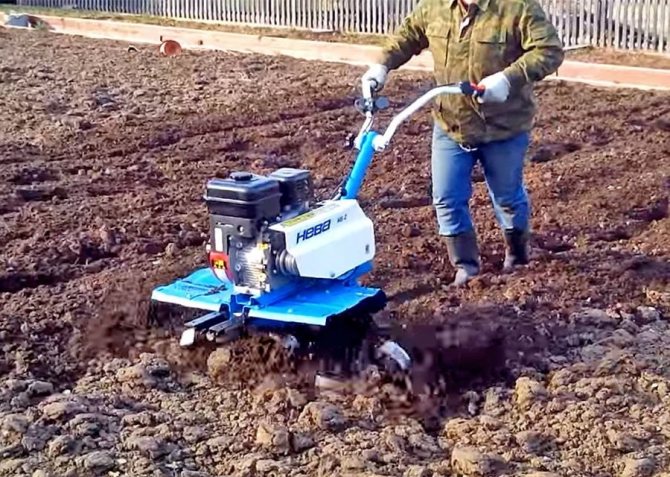
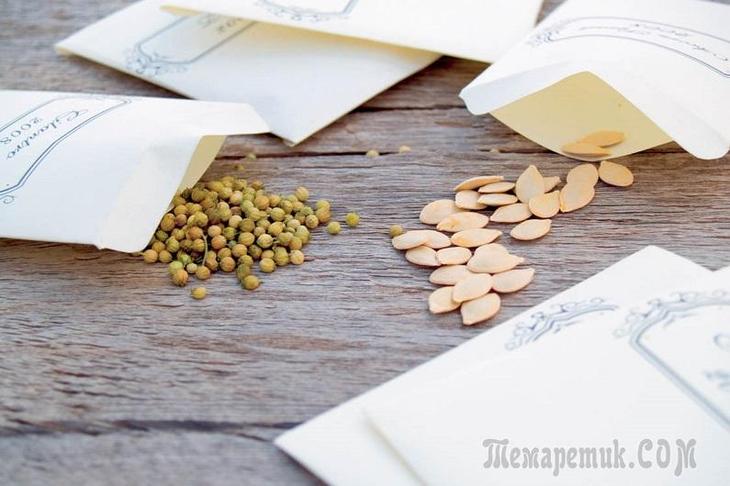
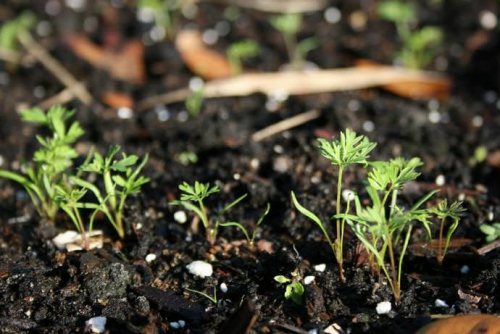
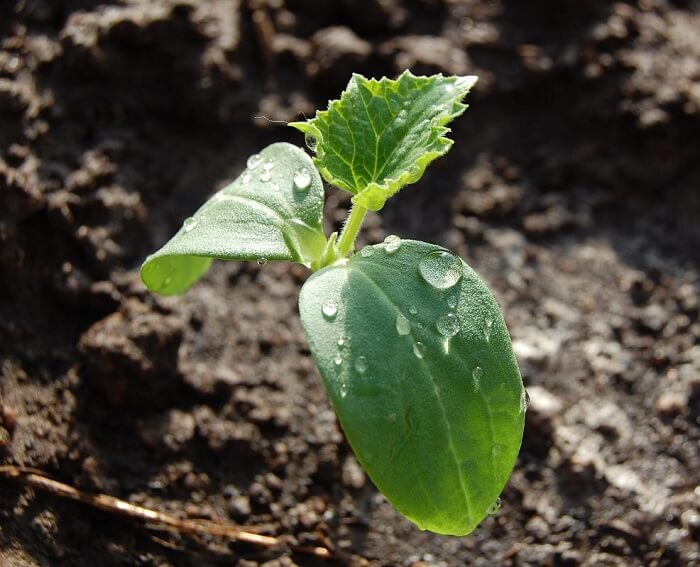
Before purchasing seeds for garden plants such as cucumbers and tomatoes, you should determine which ones will grow well in your climatic conditions. After all, a good preparation of seeds of cucumbers and tomatoes will not guarantee a rich harvest if the planting material is intended for cultivation in the southern regions. If your site is in the middle lane, seeds should be taken early or mid-season. Pay attention to their characteristics such as the height of the plant bush. The scheme of planting seedlings and tomato seeds often depends on this.
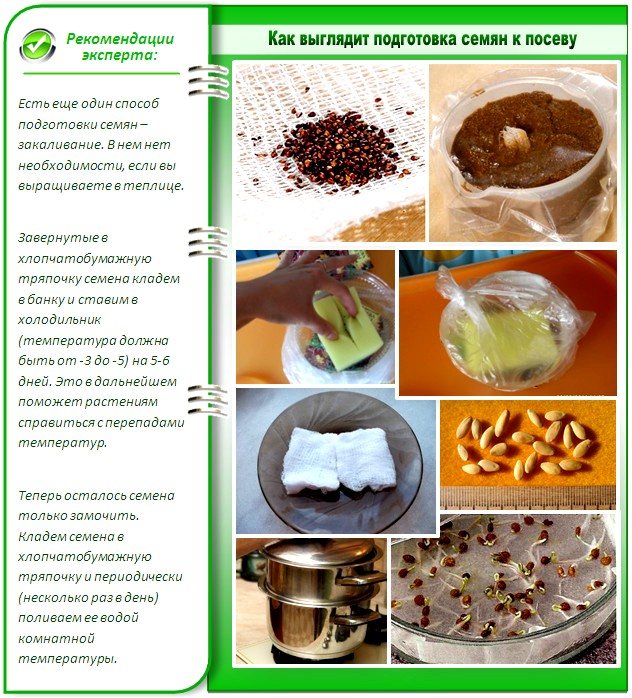
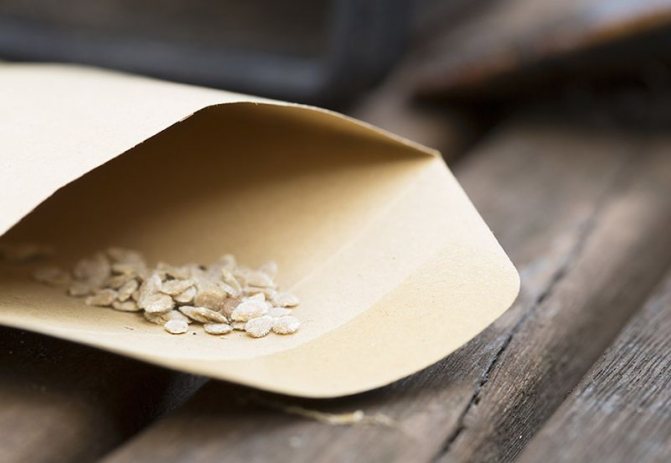
Before planting in the ground, the planting material must undergo calibration, disinfection, bubbling and soaking. Some seeds need natural stratification to make the seedlings stronger and more resilient to the specific environment.
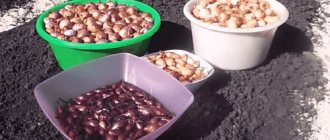
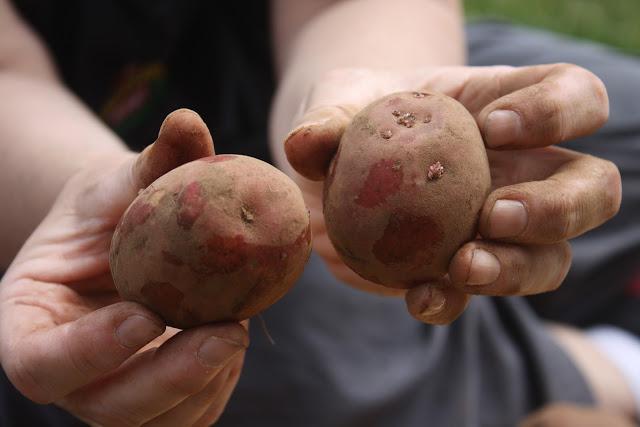
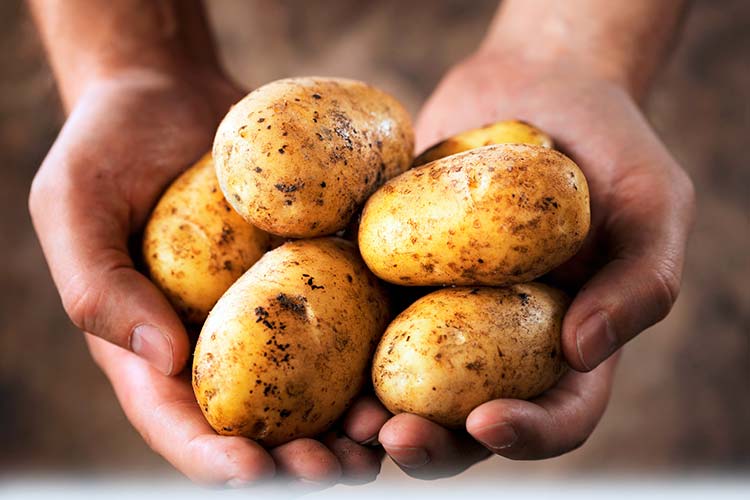
Preparing potato seeds for planting: selection of tubers by their appearance
First you need to select the planting material. The recommended weight of potatoes allowed for use varies from 30 to 100 grams. Experts immediately exclude tubers that look unhealthy or have an irregular shape. When conducting the selection yourself, you should pay attention to the following characteristics of the material that make it unsuitable for planting:
- the ground part of the plant was affected by a nematode; - an unpleasant and unnatural smell emanates from the tuber; - scab settled on the tubers.
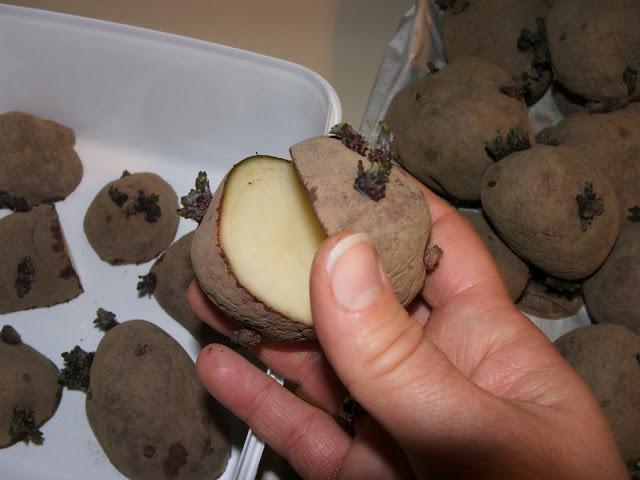
It is worth paying attention to the fact that potatoes damaged by sharp objects, but not affected by diseases, are quite suitable for planting. Cuts are usually treated with a fungicide solution. As a result, there should be at least 85% of high-quality planting material.
Choosing seeds for sale - avoiding the very first mistakes!
The biggest mistake novice greenhouse owners make is to quickly buy up the seeds and plant them. Yes, of course, all these tomatoes and cucumbers on the covers - you will lick your fingers, but not all of them are intended for growing indoors, and even, quite possibly, not for your region. Sellers take what "goes well" and, believe me, half of them do not understand the rudiments. The only thing that they will more or less reliably tell you is whether the bushes will turn out to be short or tall. In all other respects, it is a lottery. And also keep in mind that the packs of seeds in the open are the same ones that got wet yesterday while the saleswoman covered them. Such "preparation" is fraught with an extremely frail harvest.
But the most important factor in the choice is the manufacturer. Read the reviews, chat with friends, avid gardeners and always take the company that has proven itself well. On the Russian markets these are the brands Gavrish, Ilinichny, Russkiy Ogorod, Poisk and SeDeka. Please note that the packaging contains contact information and GOST. And immediately look at the expiration date - it should be stamped, not typed.
Now it remains only to decide on the variety. It is already easier here: for central Russia, take vegetables with an early and medium ripening period - they will hurt less, which is especially true for tomatoes.If you have not found those varieties about which you have heard plenty of positive reviews, order better through the online store.
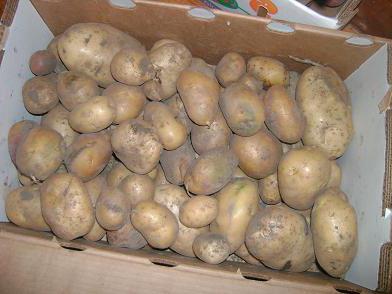
The need for sorting
For planting, usually an average group of sorted tubers is used. For next year's harvest, you can use a small portion of small and large potatoes. Experienced gardeners do not recommend mixing pre-sorted tubers. The reason is that the bushes will grow unevenly, and stronger and stronger plants will overwhelm the neighboring ones.
Separation of tubers must be done in order to eliminate difficulties with the subsequent care of the plantings. Using this method eliminates uneven seedlings. The plants will be similar in size and will develop in the same way.
Calibration - selecting the best
These procedures are necessary in order to immediately select all the best and viable for sowing. Here's what you need to do:
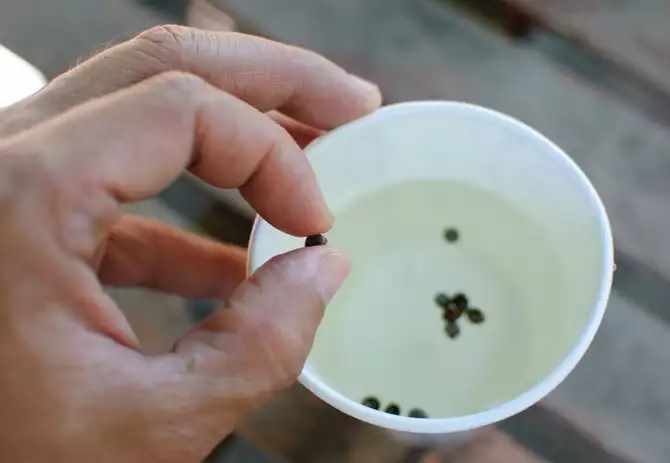
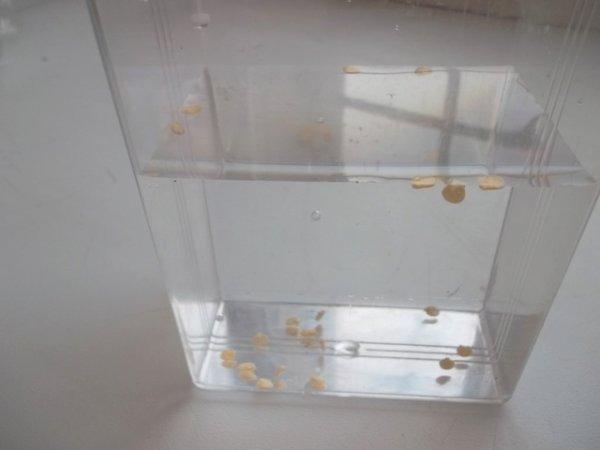
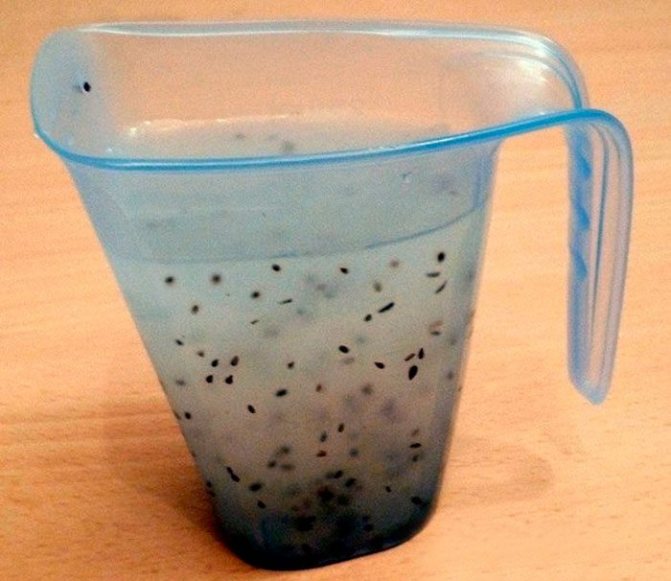
1. Pour the seeds into 3-5% saline solution (50 grams per 1 liter of water). 2. Stir everything for three minutes. 3. We collect garbage from the surface of the water, and the seeds that surfaced are the smallest and empty ones, while the viable ones always go to the bottom. 4. Wash and dry well selected in this way.
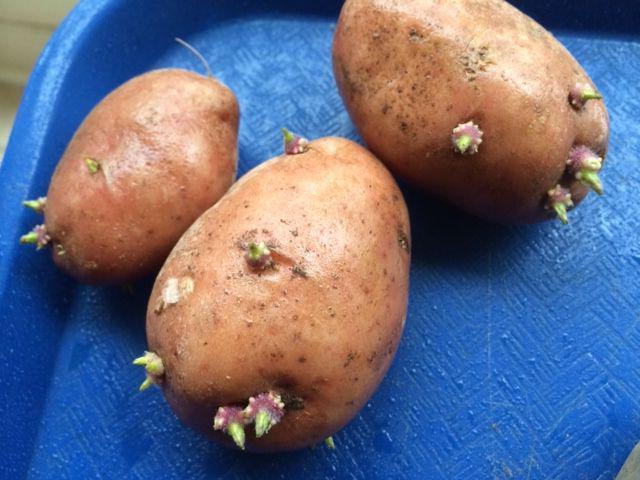
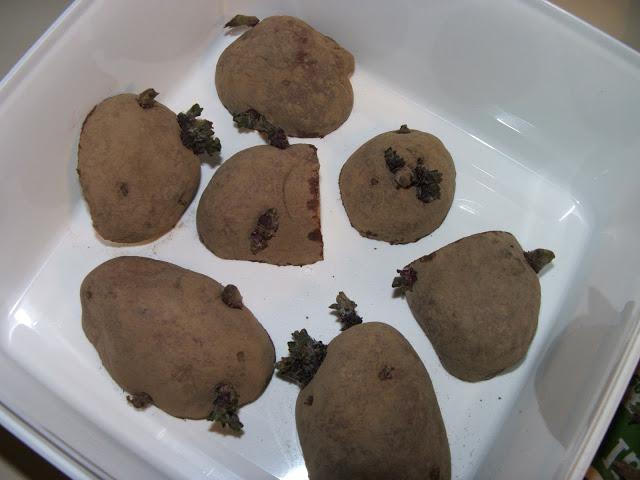
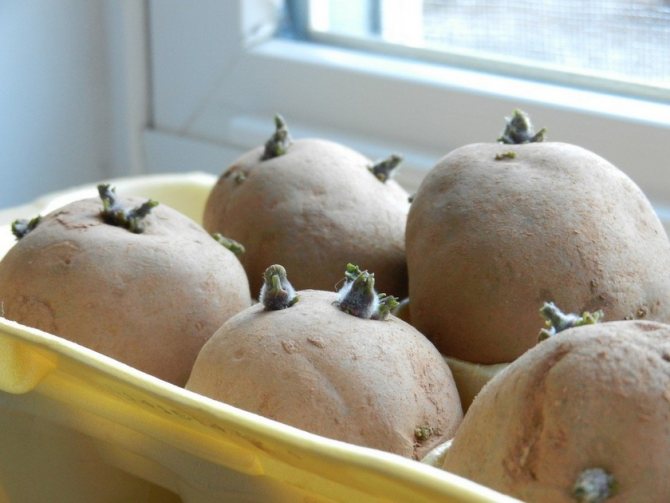
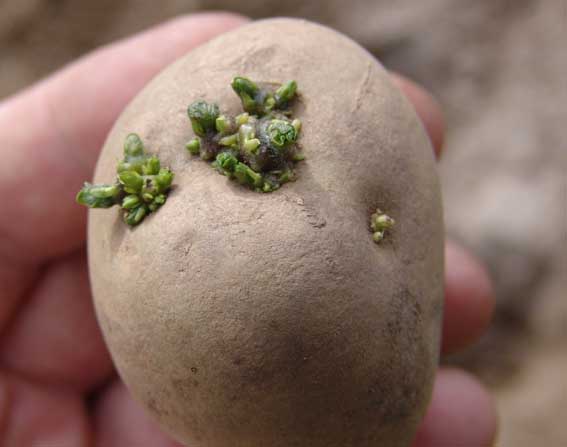
Greening tubers
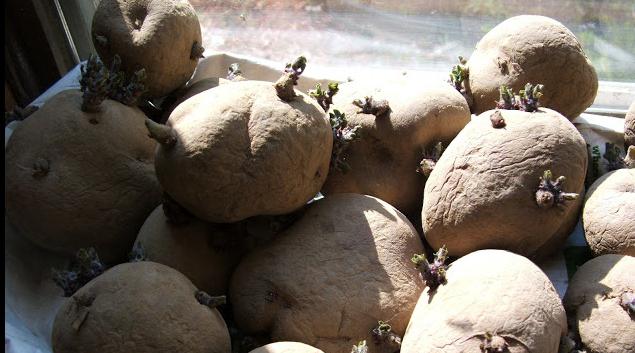
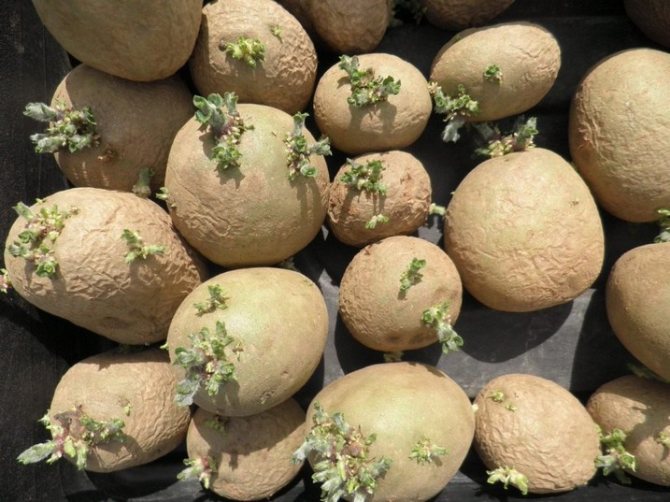
After dividing the planting material into three large groups, the preparation of potato seeds for planting can begin. Only tubers with sprouts are suitable for planting, so they need to be landscaped. Potatoes are placed in a cool room with a stable heating regime. The recommended air temperature should not be lower than 10 degrees Celsius. But at the same time, you need to make sure that the thermometer does not show values above 12 degrees. The landscaping area should be well ventilated or ventilated.
The main condition for successful landscaping is the availability of sufficient amount of light. Only by observing this rule, you can achieve the color of the tubers necessary for planting. In the light, the potatoes turn green. It takes at least 30 days to complete the process. Tubers that have changed their color are no longer suitable for human consumption, but are optimal for planting. Planting material requires periodic monitoring. It is necessary to turn the tubers regularly so that the potatoes are of a uniform green color.

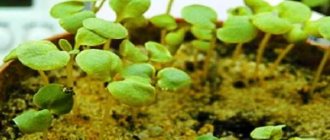
How to properly prepare seeds for sowing seedlings: warming up
To get high-quality seedlings, you can apply several methods of preparing tomato seeds for sowing. Each gardener chooses the best method for himself.
Be sure to follow the specified sequence of actions!
Sorting
The initial stage of preparing seeds for planting is sorting. Planting material must be of good quality, be sure to cull according to the following principle:
- Choose large and heavy seeds - they will grow stronger and healthier seedlings.
- In the prepared saline solution (proportions: a teaspoon to a glass of water), lower the selected planting material for fifteen minutes.
- Discard the floating seeds that are not suitable for sowing.
- Rinse the grains settled on the bottom in clean water and dry.
Warming up
For better preservation, seed material is kept in a cool room, so it should be warmed up long before sowing.
A month before planting seeds in the ground, they are brought into a warm room. They can be kept near heating devices for several days. This will increase the heating and revitalize the tomato seeds.
Pathogens of some tomato diseases that can infect seedlings may be present on the seed coat, therefore, additional disinfection is necessary.
The seeds are placed in a bright pink solution of potassium permanganate, where they are disinfected within half an hour. Then they should be rinsed and dried.
In addition to potassium permanganate, you can use Fitosporin or other similar drugs, which are diluted according to the instructions.
After the pickling process, mature tomato plants will be less susceptible to disease.
The procedure is carried out one day before disembarkation, not earlier. Stimulants can be purchased at a specialty store, or you can make your own. Maintain the temperature at least 20ºC.
Juice is squeezed out of potatoes or aloe and slightly diluted with water. The seeds are placed in one of these nutrient solutions for one day.
Ash solution for enrichment with microelements: 1 tsp. stir in a glass of hot water and insist for 24 hours. Then the seeds are kept in it for 4-5 hours.
Industrial preparations: Zircon, Epin (1 cap per 1 tbsp.) For 16-18 hours.
Treatment with stimulants is carried out only after disinfection!
After stimulation, the planting material is not washed, but only dried. This procedure contributes to the rapid and simultaneous germination of seedlings.
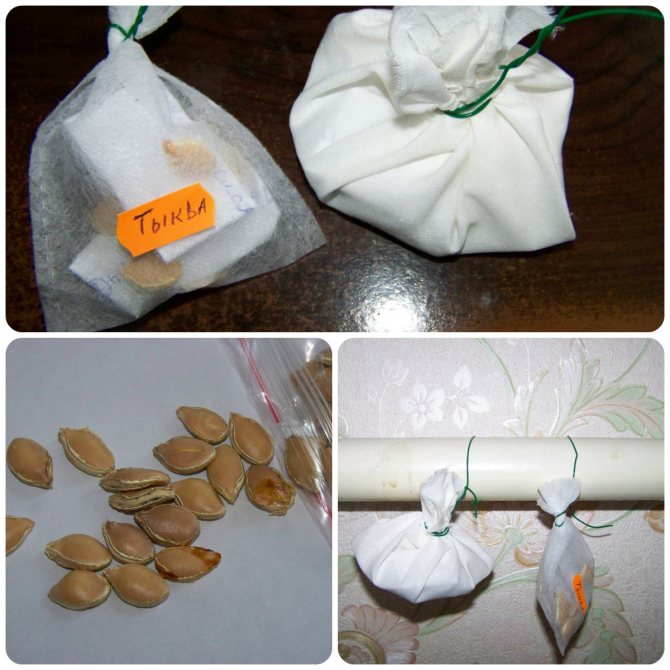
Soak
For this process, the seeds are placed in a thin, lightweight cloth and moistened with room temperature water. There should be a small amount of liquid so that it only slightly covers the fabric with the planting material.
Seeds should be soaked for no more than twelve hours. This procedure allows the seeds to be saturated with the necessary moisture. Swollen tomato grains will sprout earlier.
It is important not to overdo it at the preparatory stage - after all, the eyes run up from the abundance of means and methods. Below we will give a couple of simple preparation schemes (sequence of actions - the processes themselves are described above).
We offer you to familiarize yourself with: Where and how snails winter in nature and at home
The first, the simplest
- Processing with a solution of potassium permanganate for 20-30 minutes.
- Germination in a damp cloth for 3-5 days.
Second, with stimulants
Suitable for old seeds or those with no known shelf life.
- Disinfection for 20 minutes in a solution of potassium permanganate, rinse with water.
- BAS: 18 hours in a solution of Epin or Zircon.
- Germination of tomato seeds, planting.
We select a container for sowing. Here, too, you need to take into account several nuances. Firstly, it should not be taken too deep, otherwise the soil, in which there are few roots, will acidify and may get sick. Also in such a container there should be drain holes - with a diameter of a pencil. Smaller ones will clog the soil. You can also use special seed cassettes.
Another common mistake is to buy the cheapest soil, or even take it from the greenhouse. Such soil quickly cakes and forms a dense crust through which the seed cannot grow. This is not to mention the mass of pathogens. Therefore, do not save at this stage - it is better to purchase a coconut substrate, which is loose, has a large structure and is saturated with air. The roots of the seedling develop perfectly in it.
You will be surprised, but saturating the soil with useful substances is also a mistake! It must be "poor" enough, otherwise it will be difficult for plants to germinate. Future sprouts need a different diet than adults - just like newborns do not eat borscht. For example, the famous Dr. Mittlider seed soil is made up of a part of sand and three parts of sawdust: it turns out to be quite poor in chemical composition, the soil is loose, breathable and moisture-consuming, and without any random weed sprouts.
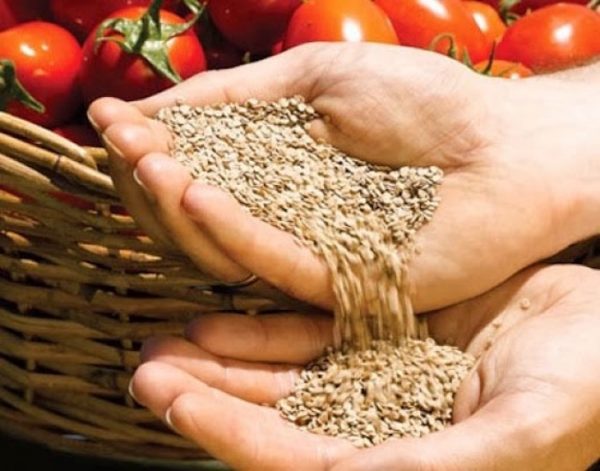
If you already have experience in planting and growing greenhouse plants, you know that the more germination and germination energy they have, the more amicable and stronger their seedlings will be. That is why it is so important to purchase quality planting material.
In many vegetable crops, diseases are transmitted through planting material. Therefore, before preparing the seeds for sowing for seedlings, they must be thoroughly disinfected.
To increase the resistance of cabbage seedlings against fungal diseases, the seeds are heated for 20 minutes in water at a temperature of 50 ° C, followed by cooling (for 3 minutes in cold water) and drying. This method of preparing seed for sowing for seedlings is used for carrot, beet and black onion seeds.
To destroy viral and fungal infections on the surface of seeds of cucumber, tomato, zucchini, squash, they are kept for 20 minutes in a 1% solution of potassium permanganate (1 g per 100 g of water), followed by washing and drying. For this purpose, the seeds can be disinfected in 20% hydrochloric acid for 30 minutes, followed by rinsing with water.
To prepare the seeds for planting seedlings in the way that correct agricultural technology suggests, some gardeners treat the seed with a 0.1% solution of potassium permanganate with the addition of boric acid (0.02 g per 100 g) and copper sulfate (0.01 g per 100 d), increasing the disease resistance of tomatoes. This method of disinfection can also be considered as treatment with physiologically active substances.
Another effective method of how to properly prepare seeds for sowing seedlings is warming up.
Seeds of cucumber, watermelon, melon, pumpkin are heated in the sun, in a thermostat, under an incandescent lamp. This applies especially to annual seeds. Two- and three-year-old seeds from these crops tend to yield higher yields than annual seeds.
Warming up the seeds increases the yield by 20-30%. In a thermostat, the seeds are heated for 3 hours, first at 25-20 ° C, then the temperature is brought to 50-60 ° C. In the room, pumpkin seeds are hung in bags near the batteries 1.5-2 months before sowing.
In Central Asia, where the most delicious watermelons and melons are grown, the peasants wear the best seeds all winter near their bodies at the waist.
Seed hardening is carried out to increase the resistance of plants to low temperatures. But this is a very delicate matter and can lead to a decrease in germination. It is not recommended to harden seeds of early cabbage, as this can cause flowering. The best way to harden tomato seeds for early planting is to place the seeds in a snow pile or on ice at a temperature of 0 to -3 ° C for 3 days. This is done after 5% of the seeds have hatched.
Pelleting seeds - increasing their size by introducing nutrients into the shell, possibly growth substances, fungicides - makes sense only when using precision seed drills. For gardeners, it is impractical to use such seeds, since in a number of cases this can delay the emergence of seedlings.
Vernalization
Choosing a container for landscaping
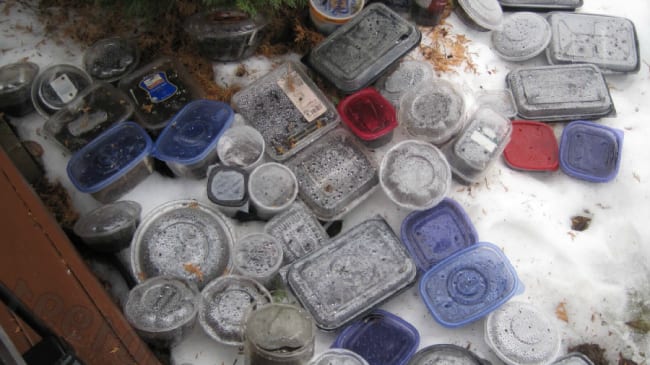
Transparent plastic containers can be used as storage containers. Many gardeners have adapted to planting tubers in cake boxes or ordinary polyethylene bags. According to the observations of specialists, this significantly reduces the time required for the preparation of planting material. It is recommended to make several small holes in plastic bags, fill the free volume with tubers by two-thirds and tie the ends of the bag. Then you need to intercept the package in the middle and hang it out in a cool room. It is also important to ensure that sufficient light is available.
Preparing potato seeds for planting by landscaping is sometimes called light vernalization. But there are several other methods that are used depending on the conditions and personal preferences of the gardener.
Why is it important to cook seeds
There are several reasons why you should pay close attention to carefully preparing your tomato seeds before you start growing your seedlings.
- Not all seeds are suitable for sowing, and without preliminary preparation it will not be possible to weed out unsuitable ones.
- Seeds that have been stored for a winter or a few, especially if they are collected from their site, may contain pathogens of fungal and other infectious diseases that pose a mortal danger to seedlings.
- If you help the seed to germinate as soon as possible, to awaken its vitality, the seedlings will be stronger and will be able to withstand even errors in care or climatic disasters.
- Everything works for the harvest - soil, temperature, moisture and sun, top dressing, absence of diseases, care, but the very first, important event for a successful start is preparatory work with seeds, which must be completed before the sowing season.
Seed preparation
Table. Step-by-step instructions for preparing tomato seeds.
| Stage | Description |
| Calibration | Parse seeds by size into small, medium and large. If there is enough seed, only the last two categories can be sown. |
| Saline solution | Seeds are soaked in it to test their germination. |
| Heat treatment | An important stage that will protect plants from fungal and other diseases and sudden climatic changes. |
| Disinfection | It is necessary to protect the seedlings from the destructive black leg and the defeat of late blight. |
| Bubbling | Reduces the inhibitory properties of essential oils found in seeds, which slow down their germination. |
| Hardening | The goal is to develop resistance to temperature changes, frosts, drought in future seedlings from the moment of emergence. |
| Pelleting | Perhaps the most important stage of preparation, aimed at stimulating growth processes. |
Stimulating the timing of germination
The method is used in cases where the gardener is very late with the processing time of the planting material. In such cases, the preparation of the potatoes for planting in the spring and germination may be slightly accelerated. To do this, you must first prepare a special solution consisting of a mixture of ash, trace elements and copper sulfate (or another stimulant for plant growth). The proportions must be observed when mixing the ingredients. A quarter of a teaspoon of copper sulfate is required per liter of water, and very little trace elements are added - at the tip of a knife. Each gardener determines the amount of ash in the composition independently.
Potatoes are sprayed with the prepared solution every other day. It is allowed to reduce the number of procedures and irrigate the planting material once every 3 days. Some gardeners completely immerse the tubers in the composition. This is a good prevention of diseases, in particular fungus. It is important not to overdo it, experts do not recommend keeping the potato in the solution for more than two minutes.
Culling non-viable specimens
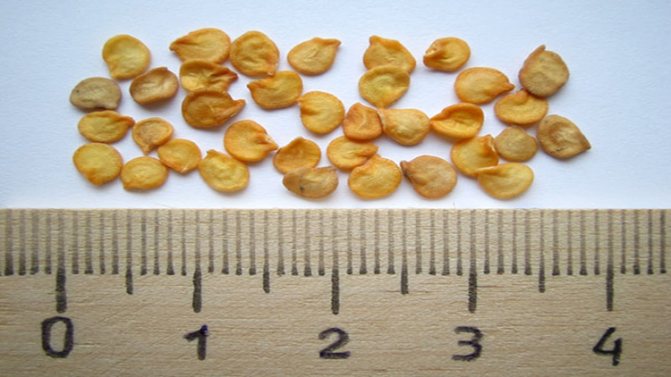
Practice shows that not all seeds can germinatesome of them lack embryos. Before planting, it is worth checking their ability to sprout. In addition, it is worth rejecting too small specimens.
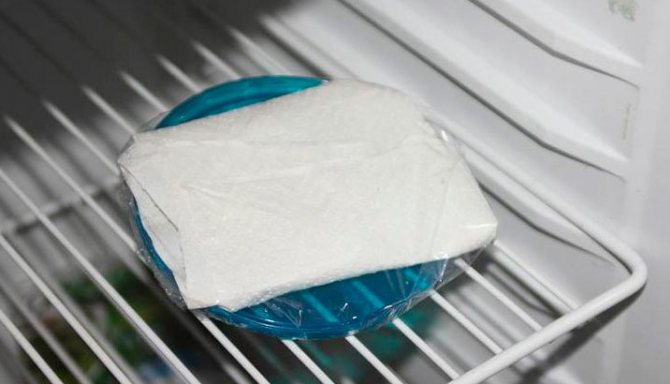
The germination test of self-collected seeds is carried out two weeks before sowing. To do this, select 10 pieces and wrap them in gauze bags. Dip them in warm water for a day, then put them in a container in a warm place.
REFERENCE! Tomato seeds can be stored for up to 5 years, pepper seeds - 2-3 years... Store them in dry paper bags or a tightly closed jar in a cool, dry place.
Check the result in a week. Your task is to find out how many seeds you have selected have sprouted. If at least 5 germinated from each batch, feel free to use the batch for sowing.
IMPORTANT! If you buy seeds from a store, you just need to keep track of their expiration date. As a rule, fresh purchased ones germinate 90-100%.
Further culling immediately before planting is carried out by immersion in salted water.In a glass of water, it is necessary to dilute a teaspoon of salt and dip the seeds into the solution. Viable specimens will sink to the bottom... Throw out all the floating ones - nothing will grow out of them. Then rinse in clean water and dry.
Drying tubers by the express method
Preparing potatoes for planting in spring in this way is carried out in cases where there are no necessary conditions for germination of planting material, and the time is also limited. It is recommended to wither the tubers at an air temperature of 14 to 16 degrees. Potatoes are placed in a thin layer on a flat horizontal surface and left for 10 days. The room must be dry.
It is convenient that when such preparation of potato tubers for planting is used, it is not necessary to provide light access to the room. The method is very easy to use and the effect is quite high. It can be used at an abnormally early early spring, since the planting material will be ready by mid-April.
Poultry house planting and care in the open field
The poultry garden, or ornithogalum, on the contrary, is planted in open ground with both seeds and bulbs. It belongs to cold-resistant plants, so you can safely grow it in the Russian climate.
Before planting, you need to find a sunlit or slightly shaded place. The poultry farmer does not like too acidic and moist soils. Take care of soil drainage when planting a plant.
If you are going to plant bulbs in the poultry house, you need to place them in the ground at a distance of about 15 cm from each other to a depth of six centimeters.
Seeds should be planted in early spring two centimeters deep. In this case, it is better to stratify the seeds of the poultry farm three months before planting in the ground. It should be noted that the poultry farm will bloom when planted with seeds only after five years.

Wet method
When preparing potato tubers for planting using the wet method, the potatoes are germinated not in the light, but in a wet filler. As a basis for the substrate, they usually use sawdust or sand moistened with water (gardeners in northern latitudes take ordinary peat for this). The germination rate increases significantly: 15 days are enough for the preparation of planting material. Tubers can be laid not earlier than April.
According to some gardeners, using this method of germination, the tubers retain more nutrients and are able to produce healthier seedlings. The disadvantages include the low resistance of such potatoes to diseases and pests.
How to avoid mistakes when growing peppers
The reasons for slow growth, poor development, death of seedlings are often associated with wrong actions. The most common errors are:
- Absence or incorrect preparation of seeds for planting.
- Using an unsuitable soil mixture for pepper or planting seedlings in depleted areas.
- Planting too early - it contributes to the overgrowth of seedlings, such bushes adapt worse after transplantation.
- Late planting - accompanied by a delay in plant growth.

Pepper seedlings - Lack of light - provokes stretching of the stems and weakening of the bushes.
- Failure to comply with the temperature regime - leads to a slowdown or stop the growth of pepper.
- Mechanical damage to the root system during picking - negatively affects the growth rate and development of seedlings.
- Improperly organized watering and feeding - significantly affect the quantity and quality of the crop.
The most dangerous mistake gardeners make is neglecting pests and diseases. At first glance, innocent insects can cause enormous harm to the plant, and one bush infected with a fungal infection can infect an entire pepper bed and other closely growing crops.
You may be interested in:
How to plant peppers for seedlings in diapers: the advantages of the method Growing peppers is a simple process that is extremely enjoyable. It all starts with choosing a variety, then ... Read more ...
Warming up the planting material
Preparing potato seeds before planting by heating the tubers is the fastest way to get sprout. It is used in cases where the potatoes have not sprouted for unknown reasons, and there is no longer time to use other methods. The planting material is kept in a room with a high air temperature. Values can reach 35-40 degrees Celsius. With this method, seedlings appear and the buds are intensively awakened. The tubers are ready for planting after 4 days.
Rules for sowing pepper seeds and growing seedlings
Growing pepper seedlings is a rather lengthy and laborious process. An inexperienced gardener needs to follow existing guidelines so that the seedlings grow large and strong.
Seeds are planted to a depth of 2-3 cm. Wet seeds are placed in pre-moistened soil, and dry ones in dried soil, followed by moistening from a spray bottle. The container with seeds on top is tightly covered with polyethylene, glass or a transparent plastic lid. Germination is carried out under high temperature conditions. When the sprouts grow a little, the film is removed.
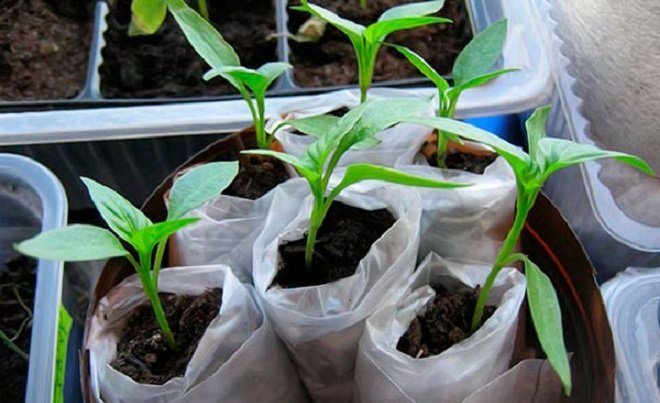
As soon as the peppers throw out 3-4 full-fledged leaves, they are dived in separate containers, with a volume of 0.5 to 0.7 liters.
Seedling care provides for compliance with 3 modes:
- lighting;
- glaze;
- feeding.
Pepper is considered a light-loving plant. He needs to provide daylight hours with a duration of at least 12 hours. The light should be diffused, as direct sunlight can harm young plants, especially if the containers are located on the south side. If the bushes begin to pull out the stems, this indicates insufficient lighting. In this case, the gardener should install additional lighting for the seedlings.
This can be done using both special phytolamps and conventional fluorescent light sources.
You need to water the seedlings on demand: the soil is moistened as its top layer dries. In addition to watering, peppers should also be sprayed 2-3 times a day from a spray bottle. Such a measure will allow maintaining the increased level of air humidity necessary for plants.
It is permissible to introduce additional food from the 2nd week after picking the seedlings. The need for fertilization depends on the quality of the soil: if the soil is selected correctly, the gardener can do without additional feeding. Peppers growing in poor soil require fertilization with nitrogen-containing mixtures.
Important!
When choosing a fertilizer, you should pay attention to its composition. A mixture suitable for peppers should be chlorine-free.
Using solutions
Tuber germination can be accelerated by spraying the planting material with compounds that stimulate their growth. The procedures are recommended to be carried out no more often than once every 5-6 days. You need to use different solutions, some of them are presented in the following list:
1) Nitrophoska. Recommended concentration: one teaspoon for three liters of liquid. 2) Fertilizer "Effecton". One spoon of the composition is diluted in three liters of water. 3) Urea. For a three-liter jar of water, one small spoon is enough. When using solutions, it is important not to exceed the concentration of the substance in the water and to follow the seed processing schedule.
What is bubbling for?
This term means the saturation of seeds with oxygen. To complete this process, you will need additional equipment, namely: an aquarium compressor and a tall jar. Place the seeds in a container and fill them with water. Place the tip of the compressor hose on the bottom of the can and turn on the device. The water in the container must be stirred periodically.
Sparging is necessary for faster and more unhindered germination of seeds. This oxygenation method promotes the rapid destruction of the shell, which interferes with germination.
Sparging at home can be carried out not only with plain water, but also using a solution of potassium salts. The procedure time for different cultures is also different.
Peas bubbled for about six hours. Radish, lettuce, tomatoes and strawberries - 12 hours. Carrots, onions and spinach need a long sparging process, which can take a day. And pepper and watermelon are left in a container with air bubbles for 36 hours. Preparation of seeds for cucumbers, melon, celery and parsley involves bubbling for 18 hours.
Division of tubers into shares
To save planting material, as well as when introducing a new variety, experts recommend cutting the tubers into shares. Such preparation of potato seeds for planting (cutting) requires compliance with several general rules:
- Only sprouted tubers are cut. The planting material is kept for about three days (until a protective crust is formed). - The weight of each slice must be at least 25 grams. - There should be more than two shoots on the surface of the skin of the lobe. - Store cut tubers in a heated room at an air temperature of 18 to 25 degrees and a humidity of 94% to 96%. - There must be enough light on the potatoes. - Cutting is carried out with stainless steel knives. After each cut, the blade is disinfected in 0.1% manganese solution or 0.5% salicylic acid solution.
Planting anthurium
The anthurium flower is interesting for its unusual shape, so it is often chosen for decorating a house and even a garden plot. It is grown from leaves, by dividing a bush, by cuttings or from seeds. In the latter case, you can get more than a dozen plants.
If you have an anthurium fruit, the seeds must be removed from the pulp, which must be kneaded first. Then they are washed and treated in a solution of potassium permanganate 1%.
The material for planting anthurium is not dried. It is immediately placed on the ground with perlite and sphagnum moss. Anthurium seeds are pressed into the soil and covered with a transparent lid, placed in a warm environment. Seedlings will appear in two weeks, after which they are dived into larger containers.

Disease prevention
When potatoes are prepared for planting under and without film, different solutions are used to protect the planting material during germination. The most popular among gardeners is the treatment of potatoes with diluted potassium permanganate or copper sulfate. This method prevents late blight infection of tubers. For copper sulfate, the permissible concentration is no more than one teaspoon per three liters of liquid. Manganese is diluted in water until a saturated purple color of the solution is achieved. Potatoes are dipped into the composition for a couple of minutes, and then laid out and allowed to dry.
Diluted copper sulfate or manganese is also recommended for spraying tubers and young bushes. This significantly increases the plant's resistance to pathogens of major diseases and effectively repels pests.
Seed soaking
Soaking the seeds has also proven itself, it also allows you to accelerate the emergence of seedlings. Different plants need different soaking times:
- peas, beans, legumes - at least 4 hours;
- cabbage, zucchini, pumpkins, cucumbers - up to 12 hours;
- beets, bell peppers, tomatoes, eggplants - 24 hours;
- dill, parsley, carrots - 48 hours.
In this case, biological growth stimulants can be used, but their effect should not last longer than two hours. After that, the seeds must be transferred to plain water at room temperature. After soaking, the seeds are laid out on a flat surface in a thin layer and dried.
Stratification
Hardening plant seeds
The seeds of perennial plants must be placed in a cold environment, resulting in a dormant period for the embryos. This process is called stratification. For the procedure, cold sand or soil is used, into which the seeds are buried, and then they are removed in a cool place for a period of two weeks to six months.
Treatment with chemically and biologically active substances
Microorganisms play an important role in creating soil fertility. Microorganisms are involved in many processes, such as organic decomposition. Microbial cenosis on plant roots is strictly specific. Microorganisms help the plant to feed, sometimes they carry out a protective function. Some microorganisms are capable of breaking down harmful substances - phosphates. The formation of humus is entirely due to the activity of microorganisms.
Before sowing, the preparations "EM-1", "Oksizin", "Baikal-1", containing microorganisms that maintain soil fertility, are introduced into the soil. Phytocide preparations or pesticides are introduced to combat plant pests.
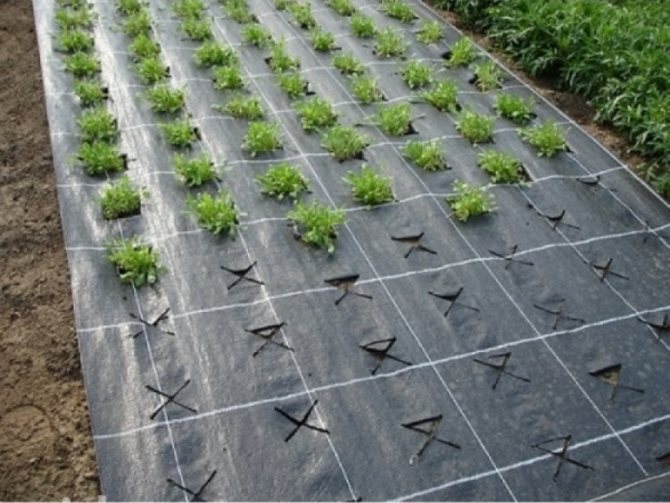
Preparing the soil for planting cucumbers
Cucumbers are plants that are quite demanding on environmental conditions. They can be grown both outdoors and in a greenhouse. They need special conditions. The main ones are:
- High illumination.
- High air humidity (up to 80%).
- Medium-high temperatures (about 25 ° C).
- The pH of the soil is 6-7.5. Acidic soils must be limed before planting cucumbers.
- Irrigation with warm water (not lower than 18 C).
Tilling the soil before planting cucumbers requires a special approach, since this vegetable crop is quite capricious.
- If the soil is acidic, liming is imperative.
- Carry out mechanical loosening of the soil.
- Apply 10-15 kilograms of organic fertilizers per m2.
- Apply mineral fertilizers (about 10 grams of nitrogen, potassium, phosphorus).
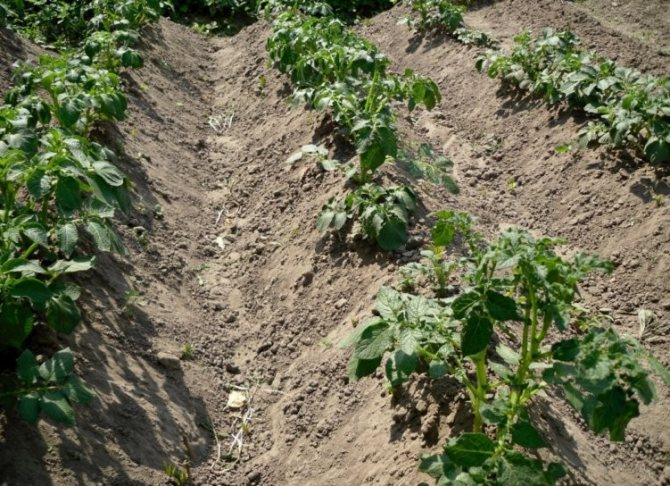
- Form beds 80x60 centimeters in size with a soil layer of at least 45 centimeters in thickness.
Preparing the soil in the greenhouse before planting
Preparing the soil in a greenhouse follows the three steps described above. Fertilizers rich in magnesium, molybdenum, manganese, nitrogen, calcium, potassium, sodium, boron are introduced. For example, siderates. Siderata are plants that easily form a shoot, grown on arable land. These plants are subsequently "plowed" into the soil, become sources of organic matter and habitat for soil microorganisms. The most commonly used siderates:
- representatives of the legume family (clover, sweet clover, vetch and others);
- representatives of the Cruciferous family (shepherd's purse, rapeseed, and others);
- representatives of the Cereal family (Sudanese grass, granary and others).
They should be sown in spring (from March to April) and in autumn (after harvest), and plowed up 1-2 weeks before planting crops. It is also important to moisten and warm up the soil in early spring, since in greenhouses it usually dries up very much, therefore it is a good heat insulator. For this, it is recommended to warm up the ridges simultaneously from three sides after the soil has been loosened. Small furrows can be made to increase the contact area of warm air with the soil. After that, the soil is moistened with an EM solution and watered.
The main stages of preparation
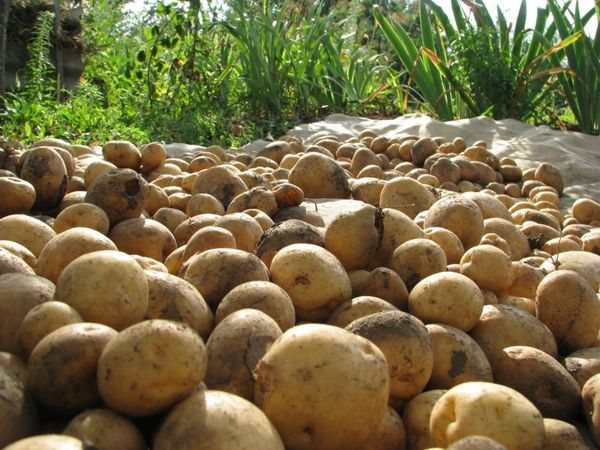
Anyone who believes that the pre-planting preparation of tubers is carried out only in the spring, immediately before planting in open ground, is largely mistaken. Experienced gardeners begin this preparation even before laying the tubers for winter storage.
Pre-planting preparation includes several important stages:
- landscaping;
- calibration;
- germination;
- disinfection;
- growth stimulation.
This is not to say that all of them are strictly mandatory, but each of them is capable of giving a yield increase of 5-15%.
Read also: The best varieties of low-growing tomatoes for open ground
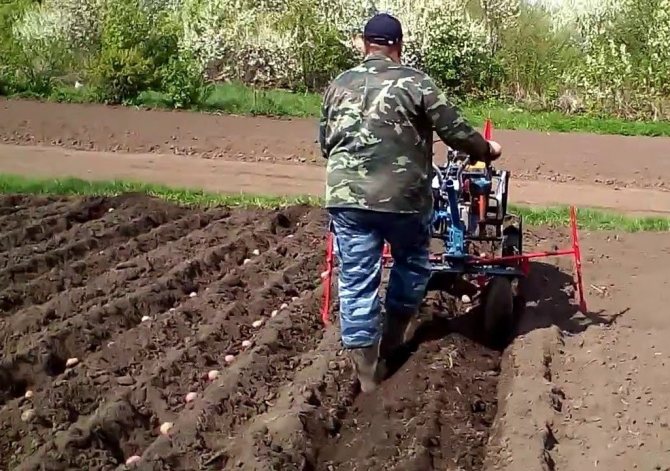
Planting potato tubers
Preparation of tubers for planting should be started in autumn, almost immediately after harvesting. When sorting potatoes, the seeds intended for future planting are selected, rejecting deformed and damaged tubers.
Then the selected seed tubers are placed in one layer under a canopy or tree crown, and kept there for 10-15 days, regularly, every 3-4 days, turning them over. It is not worth placing tubers in direct sunlight: the hot sun can harm them, and diffused daylight is quite enough for landscaping.
Under its influence, the tubers change their color, become dull green. The culprit for these changes is solanine, a poison that is dangerous even for humans in large doses. It is clear that green tubers are not allowed to be eaten or fed to animals, but this procedure will destroy most of the harmful fungi and bacteria on the peel. And small rodents do not like green tubers.
This procedure, to which many gardeners are dismissive, allows not only to plant healthy seed.
It has long been noticed that when planting with green tubers, seedlings appear earlier, come out of the ground more amicably, which contributes to an increase in yield. Therefore, if landscaping was not carried out in the fall, it is better to take care and choose a method of sprouting potatoes, in which it could simultaneously plant greenery.
Calibration of tubers
It is also an important step to get uniform planting of potatoes. Tubers weighing from 40 to 80 grams are usually left on the seeds. It is clear that 80 grams of tuber will have more seedlings than 40 grams.
If you plant them alternately, then in some areas of the garden there will be more sprouts than in others. To avoid this, the tubers are sized according to their size. Usually they are divided into two types: large (weighing from 60 to 80 grams), and small (weighing from 40 to 60 grams.) For greater uniformity, I divide them into 3 types: small (40-55 grams), medium (55- 70 g) and large (70-80 g).
Calibration can be carried out both in the fall, before laying the tubers for storage, and in the spring. It is more convenient for me to do this in the spring - there is almost no work in the garden, moreover, over the winter, rot that has not been noticed in autumn appears on some tubers, and it is clearly noticeable in the spring.
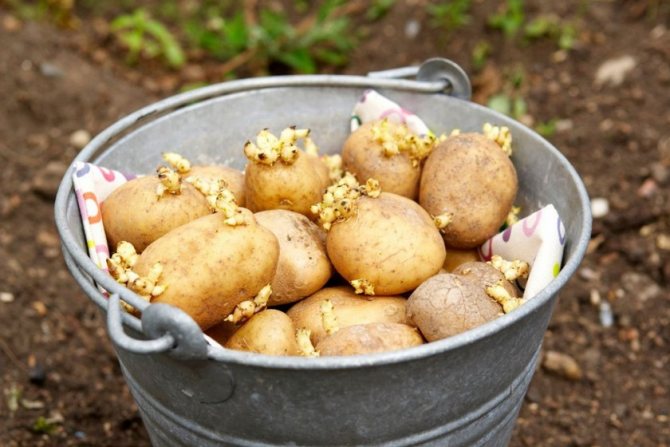
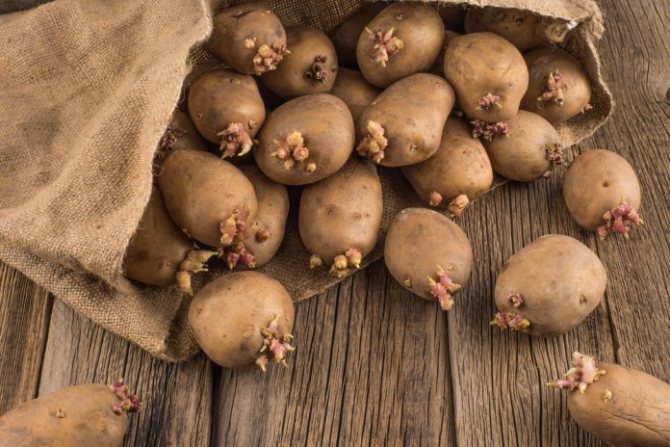
Sprouting tubers
Germination has been considered the most effective way to prepare potato tubers for planting for many years. It allows not only to significantly accelerate the emergence of potato seedlings, but also to improve their vigor. As a result, you can get an earlier and more generous harvest.
There are two ways to germinate:
Dry germination is more usual for us, but also longer in time. Depending on the room temperature, it can last from 20 to 40 days. Tubers can be germinated in this way both on pallets, arranged in one row, and in small nets or transparent plastic bags.
The main condition for the successful germination of tubers is compliance with the temperature regime. In the first 10 days after laying potatoes for germination, the room temperature should be maintained at 18-20 °, then, until the end of the germination procedure, it should be maintained in the range from 10 to 14 °.
Also, with dry germination, it is advisable to provide a sufficient amount of light in the room, especially if the tubers were not greened beforehand in the fall. In this case, this stage of pre-planting will be performed automatically.
When germinating in pallets (in small boxes or directly on the floor), the tubers are laid out in one row, turning them periodically every 3-4 days so that they evenly warm up and turn green. When using nets for germination, tubers are placed in them in 10-15 pieces, and hung on the wall so that they do not get direct sunlight. Periodically, the nets are turned so that the potatoes are evenly illuminated.
The same is done when sprouting tubers in plastic bags. This method allows you to speed up germination by 1.5-2 weeks. But this method also has its own peculiarity - in plastic bags, it is imperative to make 5-6 small holes for oxygen access.
With wet germination, the tubers are placed in a substrate of sawdust, peat or humus, keeping it moist all the time. Tubers are germinated in a wet way in a dark room, at a temperature of 12-15 °.
The advantage of the wet method is that the tubers, being in a humid environment, completely retain liquid and substances useful for future sprouts. At the end of wet germination, the tubers form not only sprouts, but also numerous branched roots, so the planted tubers take root faster and begin to grow.
If you need to plant trees at the same time and acquire a developed root system, combine dry and wet methods. First, the tubers are germinated in a dry way for 20-25 days, greening them, and then for a week and a half they are visited in a wet substrate, rooting the sprouts that have appeared on the tubers.
Wilting and warming tubers
If you need to germinate potato tubers in the shortest possible lines, wilting is used. To do this, the tubers are laid out in one layer in boxes or on the floor in a room with a temperature of 16-20 ° C, and kept in this temperature regime until sprouts appear on them. This usually takes 7 to 20 days, depending on the temperature maintained.
With this method of germination, tubers lose from ¼ to ½ of their liquid, but they gain significantly in time. In addition, this method additionally allows the tubers to be greened, if not only a warm, but also a bright room is used for drying.
If the time for the pre-planting preparation of tubers is sorely lacking, then heating is used. This method allows you to prepare potatoes for planting in just 3 days.
For this, potato tubers raised from a cold cellar or basement are placed in a room with a temperature of 12-15 ° for 4-6 hours, and then it rises to 20-22 °. You can raise the temperature in the room and higher - up to 25 °, but in this case, the taste of the tubers of the new crop may deteriorate. So it's not worth the risk.
Warming up has one important nuance. The raised tubers are dormant, and a sudden change in temperature can adversely affect future yield. Therefore, the room temperature should not be raised immediately, but gradually - by 1-2 ° every 2 hours. If this condition is met, heating will take place quickly and efficiently.
Disinfection of tubers
An important preparatory stage that allows potato tubers to get rid of harmful fungi and bacteria remaining on their surface. Most often, disinfection is carried out after germination, 2-3 days before planting tubers, although options for disinfecting tubers are also possible before germination.
For disinfection, seed potatoes are treated with special solutions. These can be aqueous solutions:
- potassium permanganate (1 g per 10 l);
- boric acid (50 g per 10 l);
- copper sulfate (10 g per 10 l);
- zinc sulfate (10 g per 10 l);
- a solution of 40% formalin (30 g per 10 l).
Read also: 25 best varieties of cucumbers for pickling in the open field: description with names
It is enough to hold the seed potato tubers in such a solution for 25-30 minutes to thoroughly disinfect it. The only exception is formalin solution, in which the tubers must be kept for no more than 10-15 minutes. Then the disinfected tubers are dried and sent for germination.
Now there are many special potato dressing agents on the market, which not only effectively kill fungi and bacteria, but also protect tubers and young shoots from pests: Colorado potato beetle, wireworms, etc.The most famous of them: Prestige, Matador, Commander, Fungazil, Vitax, Masterpiece.
Potatoes in such solutions can not only be soaked, but also sprinkled with sprouted tubers just before planting. But in both cases, when working with dressing agents, you need to take precautions.
For those who completely refuse to process their potatoes with chemistry, water extracts of some plants, for example, onions, garlic, bird cherry or radish, can be used to disinfect it. The only difference is that the tubers will have to be kept in such solutions from 8 to 12 hours.
Growth stimulation
To accelerate the development and growth of young plants and, as a result, to increase yields, special growth stimulants are used. The most popular of these stimulants among gardeners is Poteytin; Epin and Bioglobin are also used for this.
The treatment of tubers with these preparations before planting allows to increase the "stress resistance" of potato plantings against the vagaries of the weather (cold snap, up to short-term frosts down to minus 5 °, or prolonged drought).
Also, processing contributes to an earlier (5-6 days) emergence of seedlings, faster and more luxuriant growth of bushes, and even, to a certain extent, an increase in field resistance against pests and diseases. Treatment of tubers with growth stimulants contributes to an increase in yield by 15-25%.
But, in my opinion, this is the most controversial stage in the pre-planting preparation of tubers. In theory, treating tubers with growth stimulants should accelerate the development of young plants and increase yields. But, if you consistently complete all the stages of pre-planting preparation, and in the fall harvest potatoes from 4-5 centners per hundred square meters, then it is impossible to say unequivocally what increase was given by the treatment with growth stimulants.
For the experiment, I planted both Poteitin-treated and unprocessed potatoes in one area. For the purity of the experiment, I took one variety - Slavyanka, and planted it in a mix, alternating 2 rows of stimulant-treated and unprocessed potatoes.
All other preparatory stages of tubers were performed in the same way. In the fall, I did not notice much difference in yield between treated stimulants and untreated rows of potatoes.
But he did not give up the treatment of tubers with stimulants, acting on the principle: "you cannot spoil porridge with butter." The year in which I conducted the experiment turned out to be favorable for potatoes in itself - no frost, moderately warm and rainy. Perhaps, under unfavorable conditions, the difference in yield would be more noticeable.
The overwhelming part of the regions of Russia, as well as practically the entire territory of Ukraine and Belarus, are located in the zone of risky farming. In practice, this means that without much trouble, acting on the principle: the main thing is to plant in the ground, and there - as God willing, it is impossible to get high yields of potatoes.
Therefore, the correct and timely implementation of all stages of the pre-planting preparation of potato tubers, although not a panacea for all ills, will be a reliable foundation for obtaining consistently high yields.
Pelleting
This concept refers to the preparation of seeds for planting by enveloping them with a special substance. For pelleting, a mixture of neutralized peat, potash and nitrogen fertilizers is taken. Mullein, polyacrylamide, as well as boric acid, trace elements, growth vitamins and other nutrients are added to the dry composition.
Dragee seeds
Preparing seeds for sowing by pelleting has many advantages:
- The protective film keeps the seeds in place during the winter. Germination after pelleting increases up to 25%.
- Convenient form for sowing. The smooth shell makes it easier to sow small seeds or grains of an uncomfortable shape, such as beets or carrots.
- Protection against fungus, bacteria and other parasites.
- Enrichment with vitamins and microelements, increasing the immunity of the future plant.
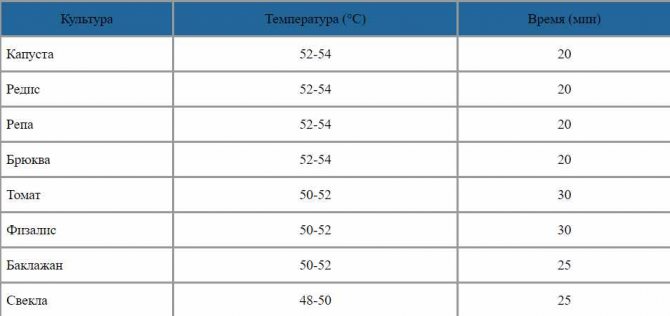
Hot water treatment
For good germination, heat treatment of seeds is carried out before sowing. First, they are placed in a cotton bag or cotton pad with gauze folded several times and placed in a thermos filled with hot water (temperature 50-54 degrees), not boiling water.
Hot water for seed treatment
For each crop, a certain temperature regime and processing time are suitable:
- cabbage, radishes, turnips and rutabagas are processed for 20 minutes at 52-54 degrees;
- tomato and physalis at 50-52 degrees for 30 minutes;
- eggplants at 50-52 degrees and beets at 48-50 degrees are kept for 25 minutes.
Additional processing and soaking of potato tubers in fertilizers to stimulate its growth
In addition to dressing in various kinds of growth stimulants, fungicides and insecticides, potato tubers can be processed in mineral fertilizers. Such treatment will increase the immunity of the root crop, and also serve as a kind of activator of its growth, for a start, improving its germination.
For example, one of such complex fertilizers is Solution... To prepare a working solution, you will need 1 teaspoon with the top of the preparation and 3 liters of water. Spray the tubers every 10 days before planting.
Much easier to apply ammonium nitrate and superphosphate. To prepare the solution, you will need 200 grams of each fertilizer per 5 liters of water. In this case, potato tubers are processed right on the day of planting. Potatoes are placed in the solution for 60 minutes and then dried and planted.
In search of the most delicious: we choose the best potatoes for planting or to buy on the table, which potatoes are tastier when fried and boiled, a detailed description of the varieties

The simplest and most economical, but no less effective means for pre-sowing treatment of potato tubers is wood ash... The solution is prepared as follows: about 1 kilogram of ash is taken and dissolved in 10 liters of water, and then the tubers are dipped into it right before planting. It turns out a kind of dusting. Thus, this potash fertilizer contributes to a more active emergence of seedlings.
Planting potatoes under film
A more modern version of the previous method, designed for early potato varieties, which has some advantages and disadvantages. In this case, the previously loosened and fertilized soil is covered with a black film, in which then in a checkerboard pattern at a distance of 35-40 cm.A sharp knife is made crosswise cuts and the sprouted tubers are placed there.
The photo shows clearly both the planting places for the tubers, and the result of planting in the form of a young tops.
Harvest the following way: first, the tops are cut and removed, then the film is removed and the tubers of the new crop are harvested.
Compulsory fertilization of the soil before covering with a film can consist, for example, of the following components:
- potassium chloride (30 g),
- copper sulfate (1 g),
- superphosphate (60 g),
- water (10 l.).
The difficulties of the method lie in the inconvenience of watering and the need for timely harvesting, otherwise the potatoes may simply rot. In addition, if it is possible to build a low frame for the film, it is better to raise it slightly above the ground.
First selection
Before you start preparing boxes with soil for sowing tomatoes for seedlings, you need to take the seeds through all the preparatory stages. It will take at least two weeks, so do not rush to take out the container and mix the fertile soil, first go for the seeds.
Advice. If tomato seeds are harvested from their own varieties in their own garden, the task is simplified. They only need to be taken out of storage and you can proceed to the first stage of processing. But if you purchase seed material, you need to approach its selection and purchase with maximum responsibility.
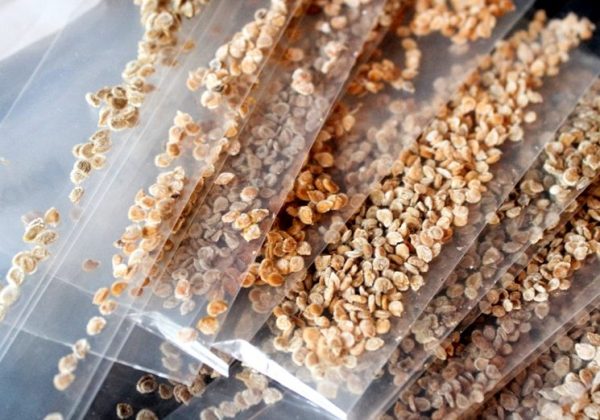
Buying tomato seeds
Seed selection - step by step instructions
The importance of the choice of seed is difficult to overestimate, it depends on its initial quality how high the yield will be, and whether the tomatoes will be suitable for the purposes for which they were grown.
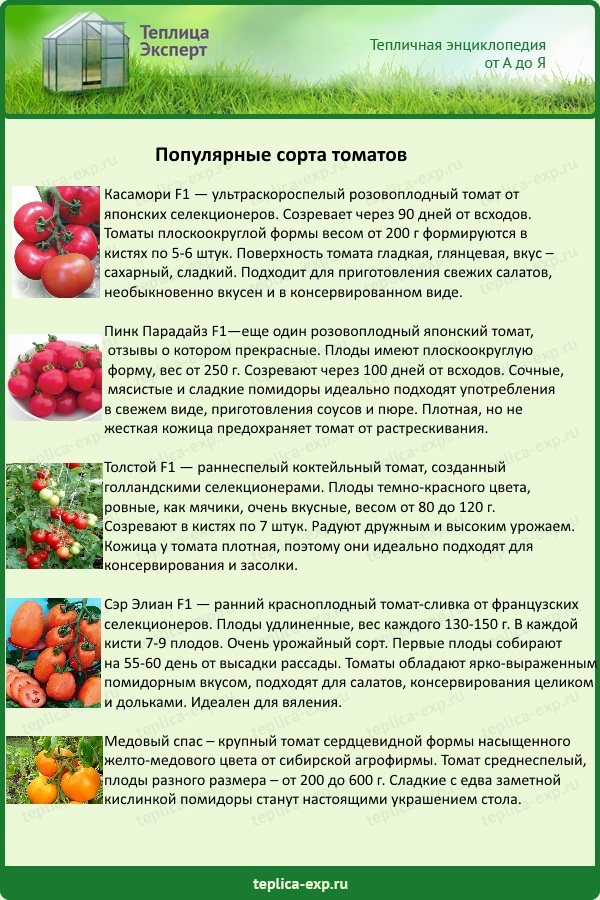
Popular varieties of tomatoes
Variety selection:
- Selection of varieties, taking into account the growing zone according to its climatic indicators.
- Purchase of seeds with the expiration date indicated on the package and complete data on the manufacturer, characteristics of the variety and growing conditions.
- Purpose of the variety - plants are suitable for cultivation in open ground or in a greenhouse. Determination and indeterminacy.
- Ripening dates - early, mid-season, late. Keeping quality, transportability and method of use may depend on this.
- Terms of use of fruits - for canning, fresh use, for juice production, universal, for long-term storage or processing.
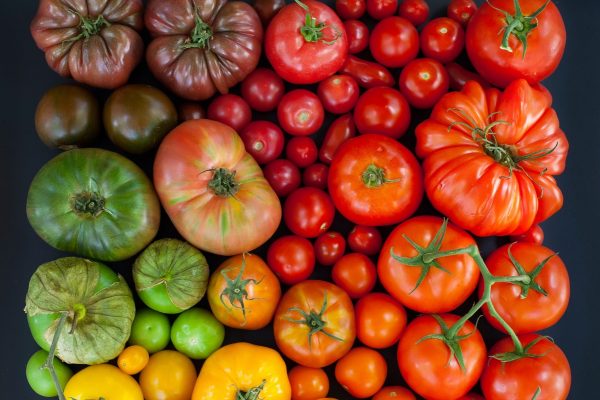
Large selection of tomato varieties
By the way. After observing all the steps and selection criteria, when you have the cherished bags with the long-awaited seed material in your hands, you can start preparing, but first you need an initial selection.
Not all seeds are worthy of becoming direct participants in the sowing campaign. From purchased or home material, you need to select only symmetrical seeds and calibrate them. You can find out more about growing tomato seedlings at home in our article.
Prices for seeds of tomatoes of different varieties
tomato seeds
Features of soil types
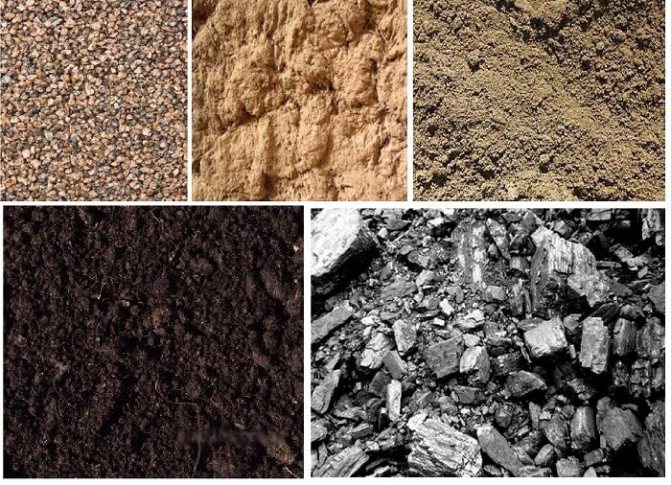
First, you need to understand what type of soil should be cultivated:
- Clay soil is hard, with strong moisture, such soil becomes viscous, easily deformed, but breaks with difficulty. Some varieties of roses, irises, raspberries, figs, apples, cherries, hawthorns, many legumes and nightshades grow on such soils.
- Loamy soil in a dry state is ground into powder, upon detailed examination of which, grains of sand and dust particles are found. It becomes easily deformable when moistened. On such soils, in the conditions of the development of modern agricultural science, any crops grow, but the highest yield is given by plants of the legume, cruciferous and solanaceous families.
- Dry sandy loam soil is ground into a homogeneous powder between the fingers. On examination, you can distinguish sand. Wet is difficult to deform. Suitable for growing various root crops, legumes and crucifers.
- Sandy soil in a dry state is a coarse powder. Does not deform when moistened. Allows to grow some nightshades and root vegetables.
- Crushed, or cartilaginous soil contains clay, sandy, crushed stone and cartilaginous particles. Suitable for growing conifers.