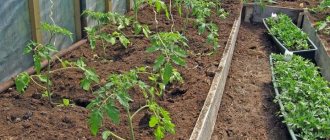
The temperature in the greenhouse on average should be from +16 to 25 degrees, and at night it should drop by no more than 5-8 degrees. Below the norm, the temperature will slow down the growth rate of plants, and a higher temperature is unfavorable - after all, it stimulates the growth of green mass, which will immediately affect the yield of plants and the quality of the fruits themselves in the greenhouse. It would seem that let it be hot in the greenhouse - both palms and thermophilic tomatoes will feel great. However, in practice, everything is different. Literally 1-2 extra degrees of heat - more than half of the plants begin to wither. Why?
How to control these differences
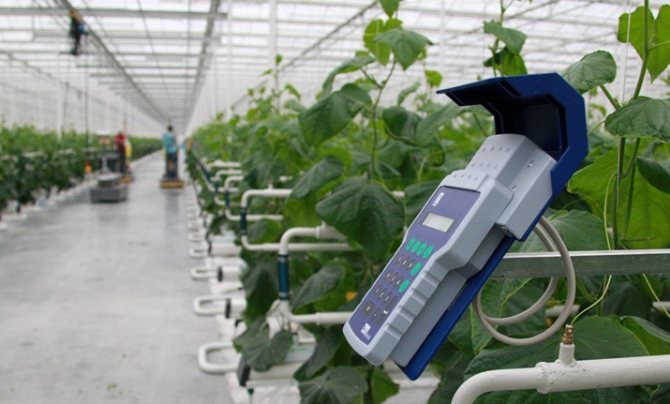
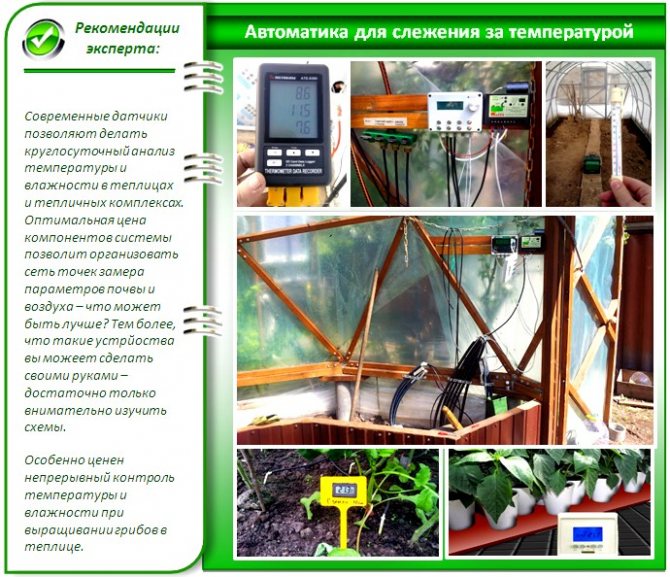
Automatic temperature control
Visually observing all the necessary parameters inside the greenhouse is a difficult, time-consuming and responsible business.
This fact often leads gardeners to the need to automate these processes. The purchase of a regulator eliminates the need for hourly control and measurement of all parameters. This is not the cheapest way, but it pays off.
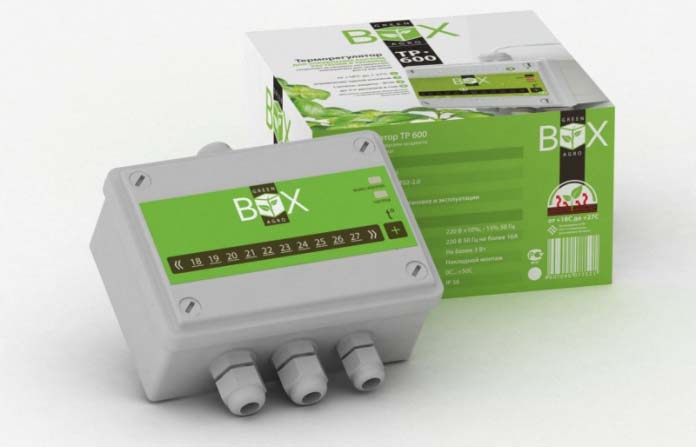
Today the market offers three types of thermostats:
- mechanical
- electronic
- sensory
The most economical option is a mechanical thermostat, which allows you to set and adjust the temperature yourself. A conventional thermostat works in it.
The electronic regulator controls the temperature more accurately and is equipped with a display for convenience.
The sensor regulator is the most reliable system that creates the required ground and air temperature day and night.
The choice of the type of regulator depends on several factors.
Choosing the optimal thermoregulation option
When choosing, the most important are:
- power of the selected thermostat
- installation principles
- type of adjustment
- functional features
- device appearance
Particular attention should be paid to the power of the device. It must exceed the calculated power of heating the soil
For very large greenhouses, it is possible to install several thermostats, dividing the entire greenhouse into zones. Installation of such systems can be hidden, hinged.
If large investments in the greenhouse are not expected, then a simple regulator can be made independently.
Automatic thermostat on your own
A simple regulator can be made to easily warm the soil in spring. There are no expensive parts in it.
Such devices have features:
- susceptibility to autogeneration
- lack of great accuracy
The role of the sensor is usually performed by a thermistor.
Thermostats help solve the problem of heating in cold weather. The summer months raise the question of greenhouse ventilation.
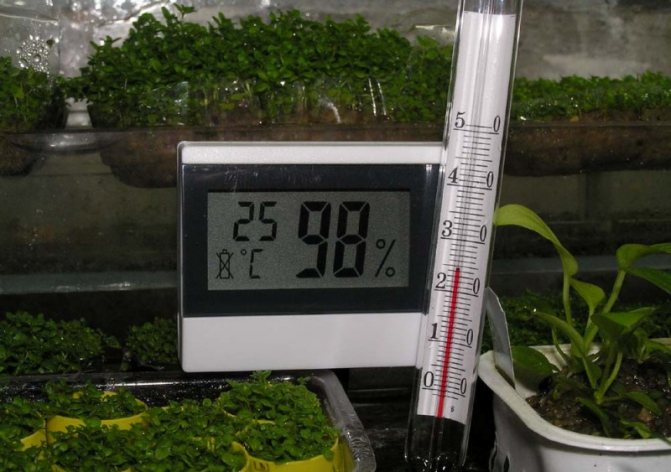
Temperature and humidity control in summer
For such control, two devices are required:
- psychrometer
- thermometer
An alcohol thermometer is required. It is better to hang it at the level of the growth of green plants. If the greenhouse is large, divided into zones, then several thermometers must be purchased.
The psychrometer measures the humidity in the greenhouse. The most convenient in practice are digital psychrometers.
These devices allow you to control the microclimate in the greenhouse.To maintain an optimal climate, it is necessary to provide ventilation in the greenhouse.
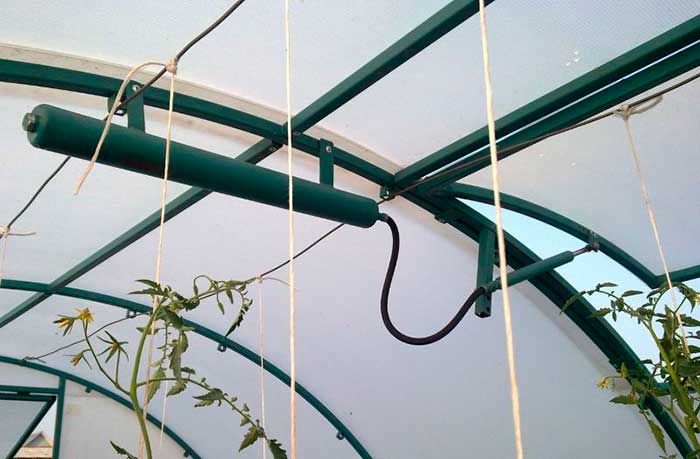
Automatic greenhouse ventilation
The presence of doors, vents, windows in the greenhouse allows natural ventilation. To automate such processes, they use:
- electrical mechanisms
- mechanical devices
The mechanics are more clever. Its work is based on the expansion of bodies with increasing temperature.
Thus, a wide field opens up for gardeners to improve, control microclimatic conditions in their greenhouse economy.

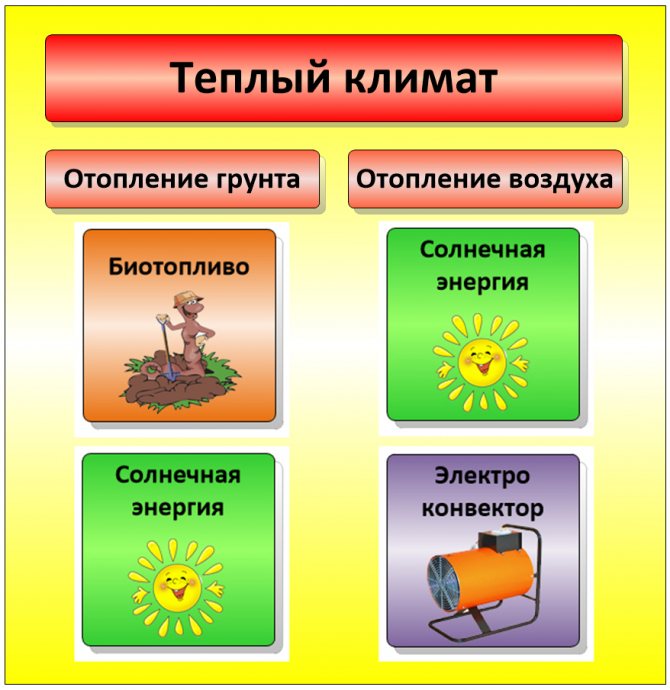
Electric heating
Heating the greenhouse using electricity is available to every gardener.
Infrared lamps
Electric heating can be realized in several ways:
Advantages of electric heating:
- availability of electricity;
- ease of installation and operation;
- low price of heating devices;
- rapid heating of air and soil;
- high level of automation.
Disadvantages:
- high price of electricity;
- it is not always possible to connect devices of the required power.
A special heating cable is laid inside the heated ridges and is used to heat the soil and protect it from freezing in the northern regions. The cable laying diagram is shown in the figure.
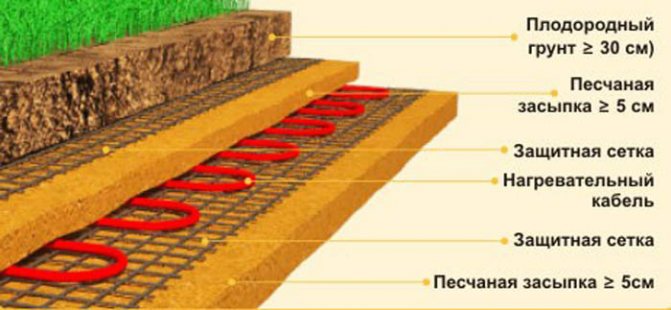
Heating the soil with a heating cable
Convectors or radiators are placed along the main walls - the devices create protection from cold air currents. It is better not to install them in the immediate vicinity of polycarbonate - during operation, the body of the convectors heats up, so the material can melt.
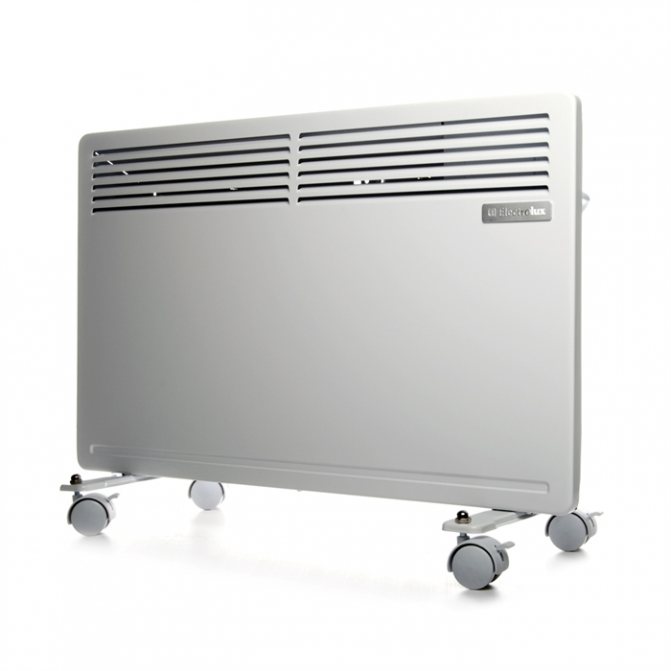
Electric convector
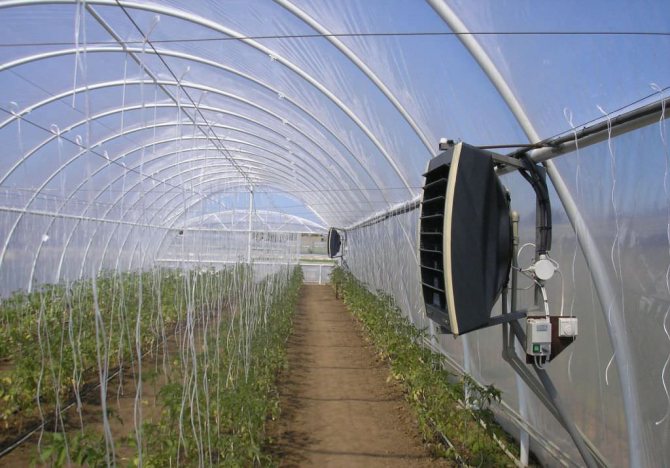
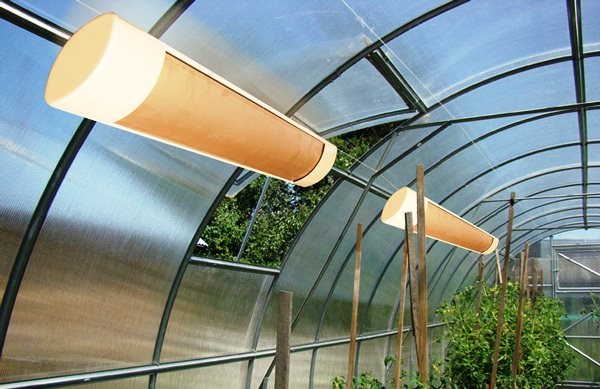
Infrared heaters do not heat the air, but the surfaces on which the rays fall. As a result, the soil and the plants themselves, paths, ridge fences, equipment and irrigation systems are heated. Heaters are mounted on brackets or hangers to the greenhouse frame. The radiation spectrum of infrared heaters is close to that of the sun and is beneficial for plants.
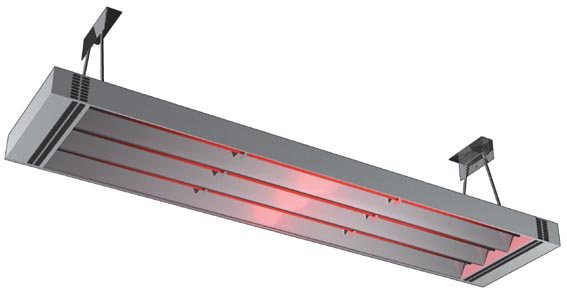
Infrared heater
Electric boilers for heating greenhouses are quite convenient, but they require the installation of a water circuit, which increases the cost of installation. Moreover, their efficiency does not exceed that of other types of electrical heating.
Note! Despite the large list of advantages, due to the high price of electricity, electric heating is more often used as a backup source of heating.
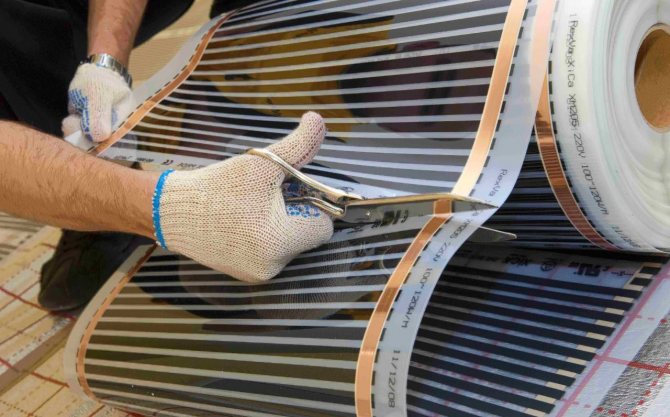
Another option is a film heater
Film IR heaters in the greenhouse
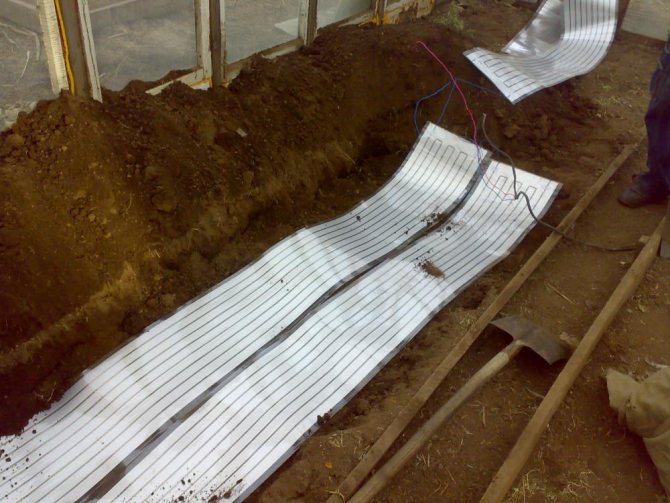
Infrared film can be used for "lower" heating of the greenhouse soil or cover plants from above in very cold periods.
Prices for infrared underfloor heating
infrared warm floors
Care features
In winter, you need to maintain an average daily temperature of 18 to 22 degrees. Overheating has a bad effect on tomatoes, eggplants and bell peppers, and a cold snap can have a detrimental effect on radishes and cucumbers. On frosty days, greenhouses are not ventilated, when the outside temperature rises, the vents must be opened 1-2 times a day.
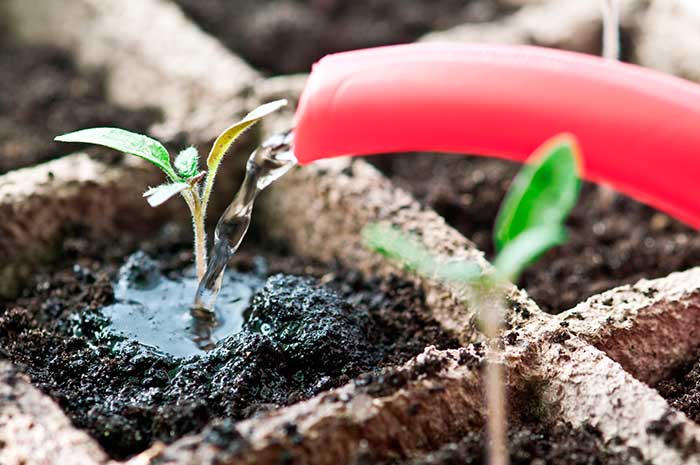
Vegetables in the greenhouse are watered 2-3 times a week, when the soil dries up a little. It is advisable to use water at the same temperature as the air in the greenhouse. Cold water can cause shock and slow plant development.
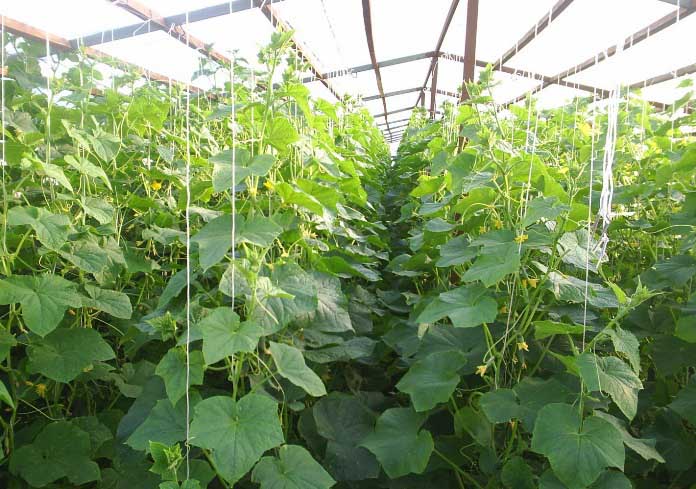
As the plant grows, it is necessary to tie up the stems. Cucumbers need special supports to be mounted on the roof of the greenhouse. With their help, the stems of plants can be directed in the right direction, which is especially convenient for rack cultivation.
When fruit begins to form, it is recommended to remove the lower leaves on the stems. Excessive green mass interferes with fruit development. In addition, this technique will improve air exchange and access to sunlight, plants will not be affected by pests and fungi.
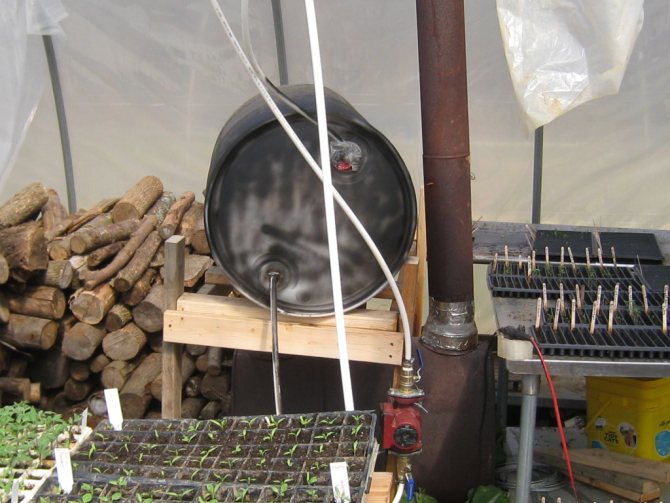
It is important to maintain a plant-friendly atmosphere in the greenhouse. The humidity level will help increase watering of heating pipes and floor with water, as well as placing open tanks indoors.
For the successful ripening of tomatoes in the greenhouse, you can put tanks with an aqueous solution of mullein. Barrels of hot water also increase humidity well, besides, they additionally heat the room.
With conveyor cultivation, harvesting takes place all year round. In early summer and late autumn, preventive treatment of premises with partial replacement of soil and thorough washing of all surfaces is recommended. After airing and fertilizing, a new stage of planting begins.
The success of growing vegetables in a greenhouse in winter depends on the region. The most profitable option is to use greenhouses in temperate and climates. Regions with short summers and long frosty winters will require high heating costs.
In such an area, it is more advisable to extend the summer period until the end of October and practice early planting in heated soil. Using correctly selected varieties of vegetable crops, you can achieve a good harvest.
Simple innovations in the design of greenhouses for growing vegetables all year round, in the video below:
In a small dacha or a large local area there is always a place for a greenhouse, which can be used almost all year round, including the greenhouse off-season, to grow fresh herbs for the dining table.
In winter, in heated greenhouses in cold regions and unheated in the south, you can grow dill, parsley, salads, celery, and onions. Greens and onions, as a rule, belong to early ripening vegetable crops with a short growing season, which allows you to harvest several crops during the autumn-winter season and constantly have greens on the table.
Greenhouse grown in winter. Lee a reich
How to adjust the temperature inside the greenhouse
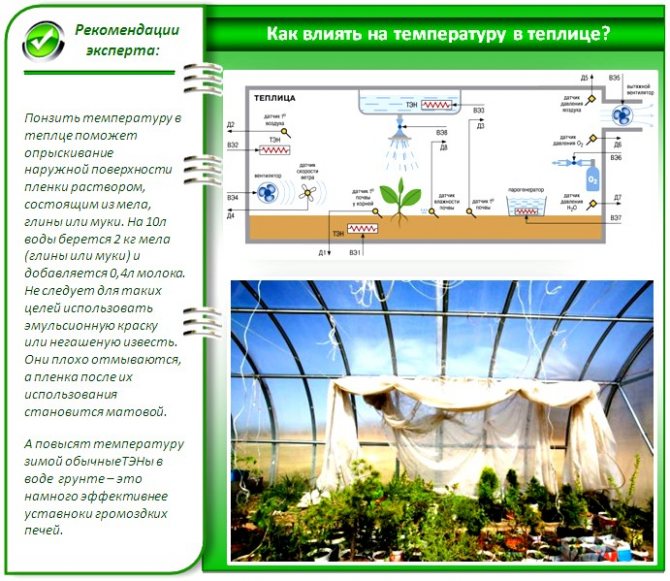
You can change the temperature inside the greenhouse using one of the methods presented. To raise the temperature a few degrees:
- organizing an additional film cover for the greenhouse will reduce heat loss, creating an air gap;
- cover the soil with dark covering material - polyethylene, spunbond, peat;
- sheathe the walls with foam film around the entire perimeter of the greenhouse;
- shelter of plantings inside the greenhouse. To do this, install a frame over the beds, which is covered with a perforated film on top, providing both ventilation and heat preservation. In the daytime, especially on sunny days, such a shelter should be opened or removed altogether so that the air does not overheat.
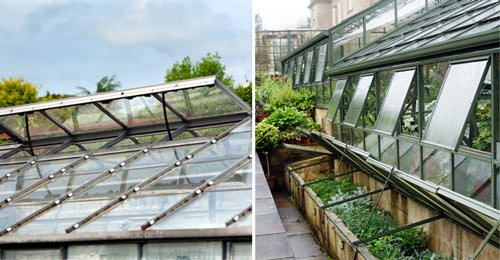
You can regulate the temperature in the greenhouse using the vents
To lower the temperature:
- arrangement of vents in the upper part of the greenhouse or on the roof;
- watering in the morning
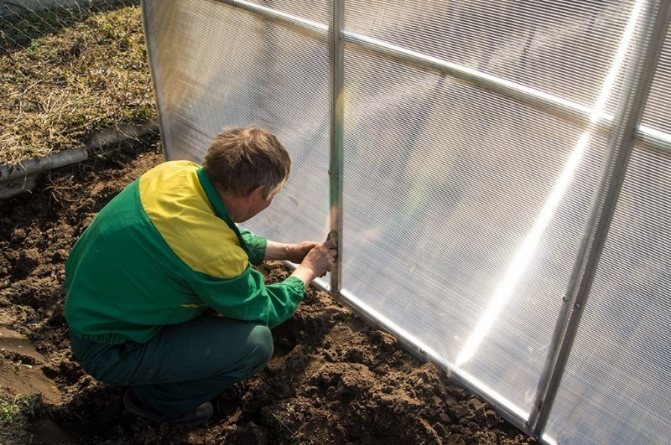
- processing of film greenhouses with a chalk solution consisting of 5 liters of water, 1 kg of chalk and 200 g of milk. The prepared solution should be sprayed onto the greenhouse from above. The dried white layer will reflect the sun's rays, preventing the indoor temperature from rising. If necessary, the chalk layer can be easily washed off without leaving any marks on the film.
Compliance with the temperature rules when cultivating seedlings in a greenhouse, taking into account the individual characteristics of the plant, is the key to its healthy development and a good harvest in the future.
Simple winter greenhouse without special heating
Over the years, I tested different greenhouses and came to the conclusion that they all have one, but a significant drawback - they require a large amount of fuel to heat them.
I have been using a winter greenhouse without special heating for several years now. I grow many types of crops and even subtropical and tropical plants in it.
It was necessary to figure out how to get rid of these costs.I "shoveled" a mountain of literature, including old textbooks on gardening, and came across an interesting fact. It turns out that in ancient times, greenhouses were made partially deepened into the ground. This provided significant fuel savings.
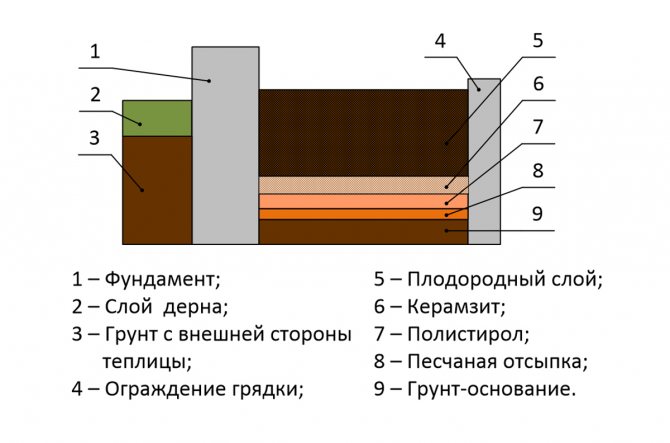
Taking into account the principle of "deepening", he built his own greenhouse, which does not need to be heated (see figure). The warmth comes from the ground and partly from the sun's rays. True, there is an indispensable condition: the depth must correspond to at least twice the value of the soil freezing index in a given area. Otherwise, you will not achieve the desired thermal regime.
I dug a "hole" along the length from north to south, poured all the soil onto the western side. Actually, the length of the greenhouse can be any (I have it -10 meters). The side walls are well whitewashed with lime - this is both disinfection and an improvement in the light regime.
The overlap was made of bars and poles at a distance of 40 to 60 centimeters. The thickness of the bars and the distance between them were determined in such a way that they would hold the snow load. I chose a thicker film for the upper floor and secured it with strips nailed to the bars. On the inside, I attached another layer of film. When severe frosts begin, somewhere at the end of December, I stretch the third film layer. I cling to the bars at the top, and fix the lower ends below the level of soil freezing.
Under these conditions, the unfrozen soil of the lower and side layers gives off its warmth to the greenhouse. I do not remove snow in severe frosts, only in some places I clean it off, make "windows". In early spring I completely remove the "fur coat".
This is how my greenhouse works, in which I do not use a single gram of fuel. Even in the most severe frosts, when it is minus 32 degrees outside, in the "winter house" under three layers of film the temperature does not drop below 0 degrees.
This is how I grow orange, tangerine, mimosa, roses, pomegranate, persimmon, tea, medlar, lavender and much more. In spring and autumn, onions, parsley, and seedlings of garden crops grow well there. True, some "delicate" and delicate plants have to pay a little more attention, to create a favorable light and humidity regime for them. But this is, as they say, trifles.
N. Tymush, Vinnytsia region
Back to the table of contents - Construction


Temperature control methods
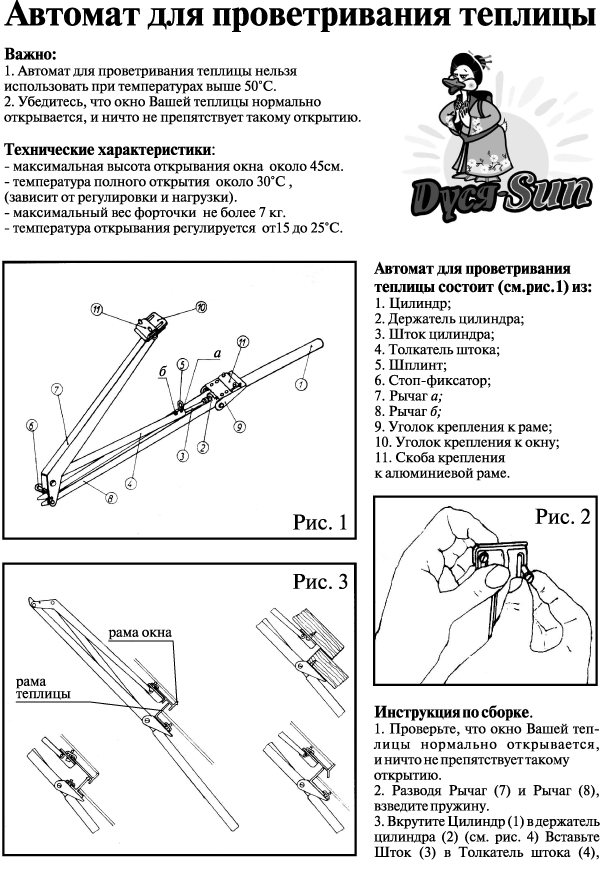
The device and instructions for assembling the machine for ventilating the greenhouse "Dusya-San".
What temperature should be maintained in greenhouses? It is problematic to achieve certain indicators manually. In order to maintain the optimal temperature constantly, automation is indispensable. During the transition from night to daytime temperatures, sharp changes should not be allowed; in many conditions, it is recommended to increase / decrease the level at a time by 3-4 ° C. For this, a variety of methods are used.
In order for the temperature level in the greenhouse to be increased by a couple of degrees, the following actions must be taken:
- at night, special shelters made of films are used, they cover plantings. The layers of material are fastened with fasteners in such a way that a so-called air cushion is obtained, which will completely isolate the landings from the air from the room. It is with the help of this method that the temperature can be increased by 2-3 ° C;
- films in the form of a temporary shelter may be small, therefore the side walls of the greenhouse can be processed using a special foam film;
- you can mount an additional low greenhouse, the frame of which will be made of wire or vine rods. The greenhouse cover is made of solid or perforated film with a layer thickness of up to 0.5 mm. For such a greenhouse, it is important to ensure constant ventilation, but in sunny weather it should be removed, since the temperature rise can be significant, and this will lead to the death of plantings. Airing is also necessary so that condensation does not form under the greenhouse, which is also harmful to plants;
- the soil can be mulched with spunbond or a thin layer of film, but the color of these materials should be black, not transparent. Such mulching is used only for low plantings, but the difference in temperature level is small, somewhere up to 1-2 ° C;
- the temperature level should not rise too much, especially on days when the sun is bright. If you do not follow this rule, then burns will appear on the leaves, the fruits will become lethargic.
What winter greenhouses are built from, methods of heating and lighting, what is worth growing in winter
Today it is not a problem to enjoy vegetable salad in the middle of winter: in stores all year round there is a rich assortment of vegetable products. But, besides the fact that the price for it is not the most affordable, and the taste leaves much to be desired, the benefits are also minimal, but it is quite possible to "enrich" the body with various chemistry. Therefore, despite the abundance of shops, winter greenhouses, which make it possible to grow environmentally friendly and tasty vegetables or greens for your family, have not lost their relevance. However, in comparison with summer greenhouses, winter ones are more difficult both in terms of construction, and in terms of operation of the structure, and more demanding on materials. The members of our portal are mainly engaged in seasonal greenhouses, but there is also experience in the construction and use of year-round greenhouses.
- Constructional features of winter greenhouses.
- Arrangement of winter greenhouses.
- What is worth growing in winter.
Selection of vegetables
In the winter greenhouse, you can grow any crop, from popular tomatoes to cabbage lettuce and herbs. Among the most popular and fruitful vegetables:
- cucumbers;
- tomatoes;
- radish;
- head salad;
- eggplant;
- Bell pepper;
- various varieties of cabbage;
- zucchini.
It should be borne in mind that crops have different requirements for humidity and temperature, so they need to be placed in separate greenhouses. For example, tomatoes and bell peppers require moderate humidity (no more than 60%) and frequent ventilation. Such a regime is destructive for cucumbers, which need a humid and hot atmosphere.
In the cold season, the greenhouse effect with high humidity is easier to maintain.
Therefore, many novice gardeners focus on popular and productive crops that need just this mode: cucumbers and radishes.
When choosing varieties, you should give preference to hybrids cultivated specifically for indoor use. These plants have a shortened growing season and do not require insect pollination. Most greenhouse varieties have good yields and pest resistance.
Growing greens in a greenhouse in winter
In the coldest and darkest time of the year, the body needs energy more than ever. Of course, you can go to the supermarket for green vitamins, but why not try to grow much tastier and healthier fresh greens yourself? It's not difficult at all!
The growing season is short (a guarantee of several harvests at once in the autumn-winter season), and the greens are quite resistant to temperature extremes (you don't even need round-the-clock heating in the greenhouse).
Basically, greens in greenhouses are grown not on the main area, but on shelves, saving space. With a competent approach to the process, you will not only provide your household with vitamins, but you will also be able to make money on the sale of early greens.
Early Greens for Sale - Learning to Grow Greens grown for sale should be vibrant, healthy, and inexpensive. You will be glad to know that this is possible and will take a minimum of time.
Most often, in a greenhouse in winter they cultivate:
Bow on feather
For forcing onions on a feather, species are used with a very short dormant period or without it at all (they are ready to form a new harvest immediately after harvesting) - multi-tiered, batun, shnitt, slime.
Onions are suitable for an ordinary soil mixture of peat and garden soil, fed with nitrogen fertilizer.The bulbs are cut by the shoulders and soaked for 15 minutes in heated water, after which they are immediately planted in prepared boxes with soil close to each other and watered abundantly.
For the first week, it is desirable to maintain the temperature in the range of 10-15 ° C, then the daily rate is raised to 18-20 ° C. Watering is carried out as the soil dries up. Onions will drive out feathers in natural light, but they will turn out brighter and denser when illuminated with phytolamps.
Feathers are cut as needed - under good conditions, you will take off the first crop in 25-30 days.
Salad
Another unpretentious plant for a winter greenhouse is lettuce. Without much effort on your part (moderate watering, minimal lighting, temperature about 15 ° C), you can harvest its crop every three weeks. Watercress is the most suitable for this kind of cultivation.
Rhubarb, chicory salad, Swiss chard and asparagus will also delight you with fresh greens in winter. At the same time, they do not even need a lot of light - containers with rhizomes sprinkled with moist earth can be kept in the lowest, dimly lit areas of the greenhouse. The crop is harvested by cutting off the peripheral large leaves and leaving the young to grow.
Dill
Dill is also a fairly cold and shade-resistant crop, undemanding to the soil and suitable for winter cultivation in a greenhouse. It is more rational to use early-ripening varieties for forcing (Aurora, Redoubt, Gribovsky, Grenadier, Dalny, etc.), and sowing already germinated seeds into prepared grooves about 2 cm deep.
Dill can be planted on its own or as a sealant for onions or lettuce. For him, a loose, well-moistened soil is desirable, a temperature of at least 15 ° C and a complete absence of drafts are important. Before germination, moisten the soil daily from a sprayer, and then water the seedlings every 5-7 days when the top layer of the soil dries out. If you see excessive thickening of the area, carefully thin out the plantings.
You can get the first harvest of dill in a month or two after sowing the seeds. After a particularly plentiful cut, you can feed the remaining bushes with a solution of ammonium nitrate (10 g per 10 liters of water).
Parsley
This is the most capricious of all winter greenhouse inhabitants, requiring good lighting and a certain thermal regime. Of the two possible ways to grow parsley (from root crops or from seeds), we advise you to choose seed - this way there will be less worries.
Like dill, parsley in a greenhouse should be grown from prepared, hardened and germinated seeds - this way you will shorten the pre-emergence period, which may otherwise drag on for a month and a half.
Parsley seeds are sown in grooves about 2 cm deep and lightly sprinkled with soil. After that, the sown area is well moistened with a spray bottle.
During the growth process, parsley needs a temperature in the range of 12-18 ° C (at higher values, the leaves will turn yellow and wither en masse). Also, do not allow waterlogging - watering is carried out only after the topsoil dries up.
Dense seedlings should be thinned out, before the rows close - regularly loosen and remove weeds.
As soon as the plants have reached a height of 10-15 cm, the first harvest can be taken. As in the previous case, if you removed too much greens, it is worth feeding the remaining hemp with a urea solution (a tablespoon per 10 liters of water).
Water heating
The most reliable way to create the required microclimate in polycarbonate winter greenhouses.
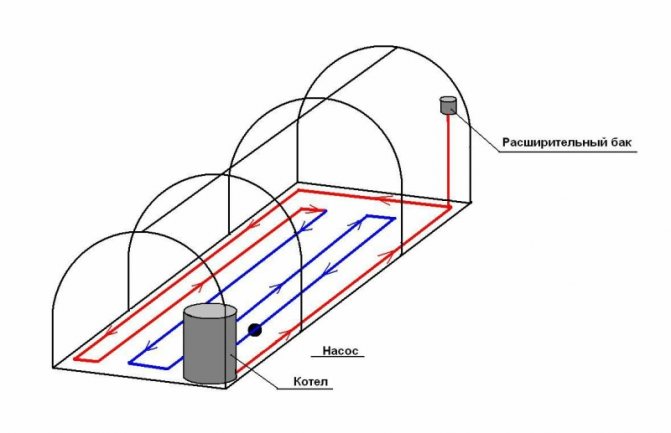
Greenhouse water heating arrangement scheme
Water heating is a whole complex of equipment:
- boiler;
- heating circuit from pipes, registers or radiators;
- expansion tank;
- circulation pump in the case of using forced circulation;
- security group.
Installation of such a system is not cheap, so it is usually installed in large greenhouses used to grow vegetables, berries or flowers for sale. If the greenhouse is attached to a house heated by a boiler, it can be connected to the home heating network. A freestanding building is usually connected to a separate boiler.
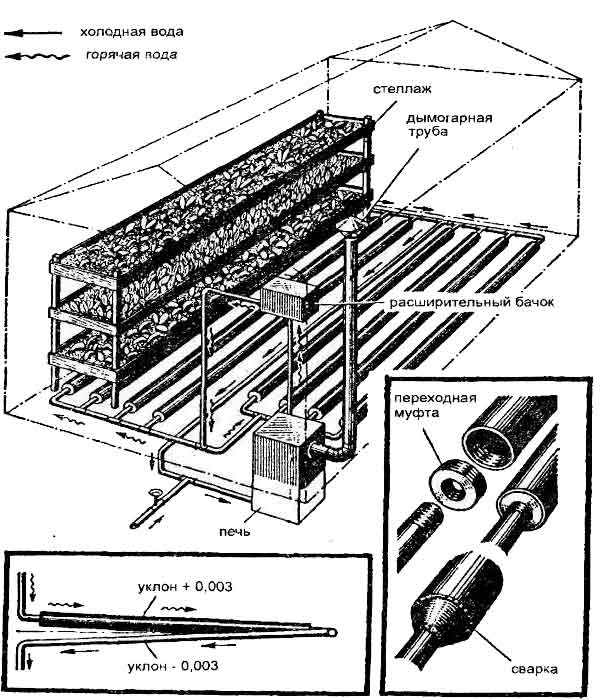
Greenhouse heating scheme using water heating
Different boilers can be used for hot water heating of greenhouses:
- gas;
- diesel;
- solid fuel;
- electric.
All of them have their own advantages and disadvantages, they are described in table 1.
Table 1. Comparison of different types of boilers for heating greenhouses.
| Boiler type | Advantages | disadvantages |
| Gas | Low fuel cost. High efficiency. Safety. High level of automation. Compact boiler dimensions. Possibility of using a coaxial chimney. | Gas connection required. Most boilers are volatile. Quite high cost of boilers. |
| Diesel | Communication independence. Safety. High level of automation. High efficiency. | High fuel costs. It is necessary to equip a diesel fuel tank. |
| Solid fuel | Communication independence. Availability and low price of fuel. Low cost of boilers. Energy independence. | Automation is only possible when using pellets. The efficiency depends on the fuel. A chimney device is required. |
| Electric | Safety. High level of automation. High efficiency. No chimney needed. | The high cost of electricity. Volatility. Efficiency decreases over time due to scale. |
The choice of the type of boiler is performed depending on resources and personal preferences. At the same time, the installation of the heating system is not much different, the only difference is that gas, diesel and electric boilers are often equipped with a built-in circulation pump and a safety group, therefore, when installing them, the connection of these elements is not required.
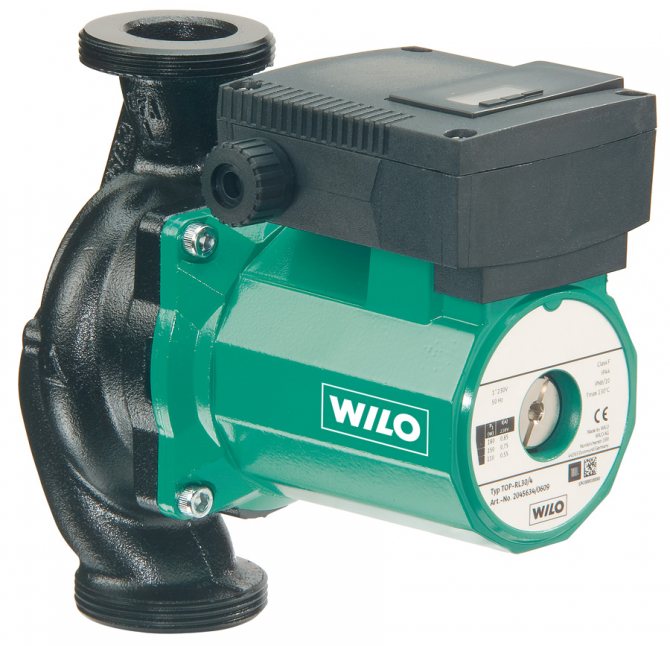
Circulation pump for heating
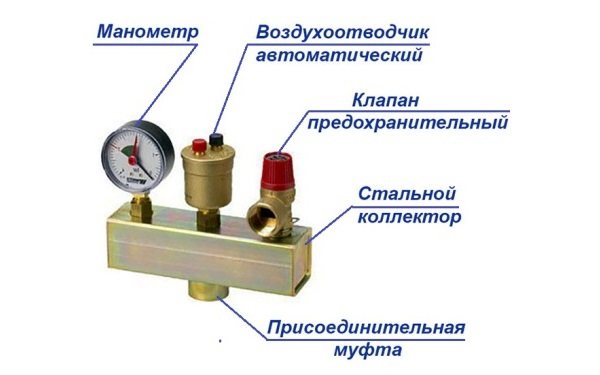
The main devices included in the heating safety group
Step-by-step instructions for installing a water heating system are given in table 2.
Table 2. Installation of hot water heating in the greenhouse.
| Stages, illustrations | Description of actions |
| Greenhouse volume calculation | To calculate the required boiler power, you need to know the volume of the heated room. To calculate the volume of the greenhouse, you need to multiply its geometric dimensions: length, width and height. Dimensions are in meters, the result is in cubic meters. Example: greenhouse with dimensions L = 6 m; W = 3 m; H = 2.5 m. Volume V = 6 3 2.5 = 45 m3 |
| Calculation of boiler power | The power of the boiler is calculated according to the above formula, starting from the volume of the greenhouse. The specific power required for heating 1 m3 is taken equal to 50 W. The result is obtained in kW - it is in these units that the passport power of most boilers is indicated. Example: P = 45 50/1000 = 2.25 W. The result is rounded up to the nearest nominal value, for example, 4 kW. |
| Radiator calculation | Radiators, depending on the design, have different thermal power. This indicator is usually indicated in the passport per 1 section for prefabricated models and for the entire radiator for soldered ones. Indicated in watts. The number of radiators is calculated based on the power of the boiler, taking into account losses - for this, a factor of 1.5 is introduced into the formula. The power of the radiator section is assumed to be 170 W. Example: n = 4 1000 / (1.5 170) = 15.7 sections. The result is rounded up to a larger whole number and distributed over the required number of radiators. |
| Pouring the foundation | The foundation for floor boilers is made of reinforced concrete 10-15 cm thick. For this, soil from an area of about 1 m2 is removed to a depth of 15 cm and a 5 cm layer of sand is covered. The sand is poured with water and tamped. A wooden formwork with a height of 10-15 cm is installed, collecting the boards with nails or self-tapping screws. A reinforcing mesh is laid inside, concrete is kneaded and poured into the formwork.Dried within 1-2 weeks. |
| Boiler installation | The boiler, depending on its type and method of fastening, is installed on a previously prepared foundation or hung on a main wall. When installing, it is important to align it with the hydraulic level - misalignment can lead to the formation of air pockets in the heat exchanger. Volatile boilers are connected to the mains. An expansion tank and, if necessary, a heat accumulator are connected. If necessary, a DHW system is connected to the boiler. |
| Chimney installation | The type of chimney depends on the type of boiler. For gas and diesel, a coaxial chimney is used, it is brought out through the wall. The coaxial chimney has a fresh air duct inside, so additional ventilation is not required. For solid fuel boilers, a stainless steel sandwich chimney is usually used. It is connected to the boiler flue pipe and out through the roof or wall. The pipe must be fixed. A spark arrester is installed on the top of the pipe - if sparks hit the polycarbonate, it can melt. |
| Installation of the water circuit | The water circuit is connected to the boiler according to the diagram shown. A safety group is mounted at the outlet of the boiler. The circulation pump is placed at the boiler inlet on the return pipe. A bypass with a balancing valve is inserted between the direct and return pipes. A coarse filter is installed in front of the three-way valve on the return pipe. |
| Installation of radiators | The radiators are connected to the pipes, shut-off valves and Mayevsky taps are installed on them to bleed air. If the radiators are equipped with balancing valves, the latter are fully opened. Mayevsky's cranes are being tightened. Plugs are installed on free inputs. |
| Boiler pressure testing | Pressure testing is carried out with air from the compressor. The crimping pressure is usually indicated in the certificates for the boiler and radiators. A pressure test is supplied to the system. The joints and joints are sequentially lubricated with soap foam and checked for leaks, which can be detected by the resulting bubbles. If air leaks are found, the assemblies are reassembled and sealed. |
Hand pumps for pressure testing the heating system
After pressure testing, the boiler is ready to be filled with water and started up. The first start-up is carried out in accordance with the instructions of the technical passport for the boiler - depending on the model, they are different.
Do-it-yourself drip irrigation from polypropylene pipes
In this article you will find detailed step-by-step instructions on how to make do-it-yourself drip irrigation from PP pipes! We also recommend reading an article on how to make polycarbonate beds in a greenhouse.
Circulation pump prices
circulation pump
Video - Water heating of the greenhouse. Part 1
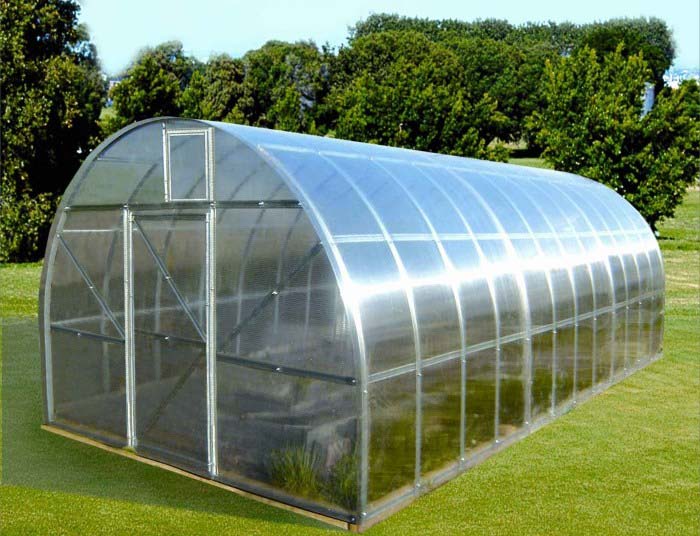
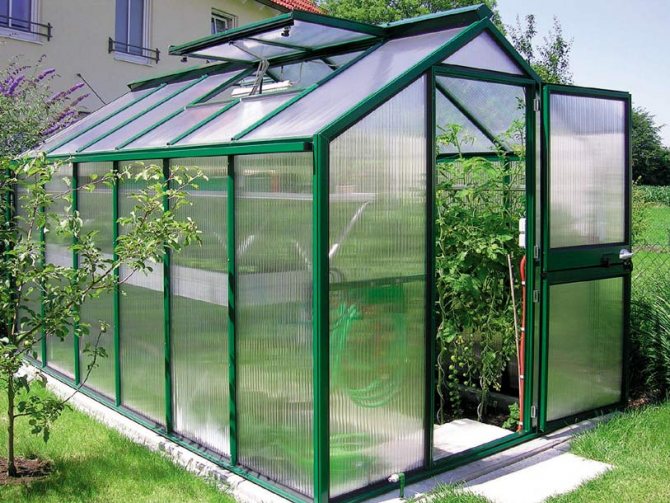
What should be a winter greenhouse
Winter greenhouses are permanent structures built on foundations that can withstand both wind and snow loads. These can be both stand-alone buildings and annexes with one blank wall. For example, to the utility block, if the orientation of the structure allows.
Foundation
The foundation of the greenhouse can be tape or from separate blocks; columnar and slab bases are less common. UWB under free-standing greenhouses is usually not done, but if this is a winter garden within a capital house, then such a foundation is fully justified. In terms of cost, a slight expansion of the building spot against the general background is uncritical, and the heating circuit laid down when the slab is poured will simplify the further arrangement of the greenhouse.
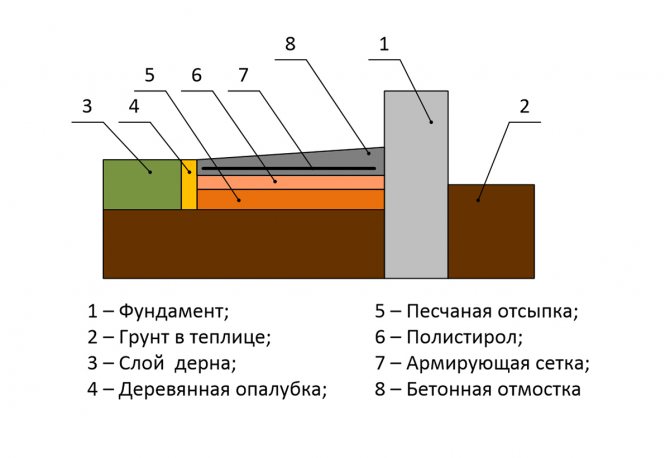
To prevent the outflow of far from free heat through the base of the greenhouse, extruded polystyrene foam can be used in the construction of the foundation. The most effective is complex insulation - of both the foundation tape and the soil under the greenhouse, in the place of future beds.The use of insulation is especially important if soil heating is planned, EPPS will prevent unnecessary consumption of thermal energy for heating the lower, unused soil layers. You can also use insulation to protect the north side.
The road is a spoon for dinner, and a green cucumber - for the new year. This addition to the Russian proverb is not controversial. No amount of conservation can replace vegetables grown in our own greenhouse.
However, just the desire to create a "vegetable island" on the site is not enough. Heating the greenhouse in winter is a major stumbling block for beginners.
Which heating method is easy to implement and not too expensive? What technical innovations do greenhouse owners use to grow seedlings, vegetables and flowers? What are their pros and cons? We will give answers to all these questions in our review.
Tightness
Store greenhouses are quite airtight, but it is better to pay attention to this and double-check the joints, windows, doors, front parts, etc. Even if all is well, then these places should be additionally insulated with a sealant or tape.
The edges of the structure should be sprinkled with earth so that cold air does not get into the cracks and does not freeze the root part of the plants. If you do not take care of the tightness, then overnight you can lose up to 50% of the heat. There shouldn't even be small gaps.
Tips for using a cold greenhouse in autumn and winter
With the onset of winter cold
the main crop growing season is also ending, since winter weather in most of the world does not at all contribute to the growth and development of most plants. However, the use of a greenhouse structure allows you to significantly extend the growing season without fear of temperature and weather conditions.
The greenhouse makes it possible
produce various crops all year round. An important point in "winter" greenhouse cultivation is the presence or absence of active heating in the greenhouse during the winter period. A heated greenhouse in terms of temperature will, which is logical, very different from an unheated one. This will determine not only what crops you can grow most fruitfully, but also how you will need to use the greenhouse structure in cold weather and how to care for it.
Unheated, or, as it is also called, cold greenhouse
Is a greenhouse without artificial heat sources. In winter, a moderate "autumn" temperature is established in such a greenhouse in the region of about 15 degrees Celsius - the temperature level largely depends on the number of sunny days, since the sun will be the only source of heat, and there may not be very many such days in December-January. But due to the fact that the walls of the polycarbonate greenhouse will still retain heat, the microclimate inside the greenhouse will still be warmer than the temperature outside, even at night.
Therefore, the conditions of an unheated winter greenhouse
not suitable for growing all types of horticultural crops. Cold greenhouse crops include all winter crops, as well as crops such as cabbage, garlic, radish, carrot or parsley. That is, despite the cold outside, you have quite a few options.
One of the main advantages
growing in a cold greenhouse is a high quality crop. As you know, growing at low temperatures makes the fruits strong, large, and more pleasant to the taste. For example, citrus fruits like lemon and orange are much more juicy and healthier when they grow at lower temperatures.
Planting a particular crop in winter
, by the spring you will have cobs that have grown stronger from the cold weather in February, which will begin to develop rapidly by the arrival of heat - this is another undoubted plus of "cold" cultivation.
Finally, a purely economic benefit
from owning a cold greenhouse is that no heating is needed for its full functioning. You do not have to spend money on energy resources (electricity and heating), which today is a fairly relevant advantage. You may even not install any heating systems in the greenhouse at all and still use your greenhouse all year round. In summer your greenhouse structure will be used as “normal” and in winter it will function as a “cold” greenhouse.
An emergency way - we would have to stand the night ...
The main threat to both seedlings and mature fruits is represented by early autumn and late spring frosts. In the fight against this enemy, the people's ingenuity has developed a whole range of country inventions and devices: from heated bricks to thermal relays.
One of the most effective ways to stabilize the temperature in anticipation of frost is to increase the air humidity to the maximum. Just put a lot of flat dishes with water in the greenhouse overnight. The moisture will fall on the walls as condensation. Polycarbonate will be covered with a layer of drops - from large to microscopic. The water film will act as another layer of insulation - and the crop will be saved. But the above is more likely not a systematic regulation, but an emergency measure to stabilize the temperature.
Growing on straw
If there is wheat straw that has not been treated with herbicides, it can be used as substrate and biofuel. The compressed straw in the form of bales is placed in the furrows to a depth of 20 cm.
15 days before planting, the straw is watered with hot water (40 ... 60 ° C) in three doses: on the first day - 4–5 liters; on the second - 3-4 liters; on the third - 2-3 liters for each bale. Then they are scattered over the surface of each bale:
- on the first day, double superphosphate (200 g);
- on the second - ammonium nitrate (330 g), potassium sulfate (80 g), magnesium sulfate (40 g);
- on the third day - 240 g of fluff lime.
Fertilizers are washed with irrigation water inside the bales.
3 days after the fertilizer has been washed in, the straw heats up and the temperature inside the bales reaches + 35 ... 45 ° C. After the temperature of the straw has dropped to + 30 ° C, you can plant cucumber or tomato seedlings in it.
When growing plants on pressed straw, it is necessary to increase the rates and timing of watering, preventing the substrate from drying out.
Straw bales are a good substrate for plants, they have a good balance between solid, liquid and gaseous phases and a favorable thermal regime for the root system of plants is maintained for a long time.
The need for straw can be determined based on the dimensions of the bales: 40 × 50 × 90 cm, the weight of one bale is 20-25 kg.
- Useful articles
- Garden
- Gardener
- Greenhouse heating: microclimate control
Garden themes
Garden themes
New in the rubric
Weed-free vegetable garden: from dream to reality Late blight: causes and methods of combating brown rot If cucumbers turn yellow: diagnosis and solution of problems Yacon is a valuable plant: growing and care How to remove carrots correctly
2012-2019 Useful magazine Good-Tips.PRO (+18)
We build a temperature controller ourselves
But it is not necessary to purchase temperature control devices with electronic filling, such a device can be built by anyone, even those who are far from knowledge of electrical engineering.
Physics to help
Today we will build a device that uses a simple law of physics - as it heats up, matter expands.
And so, how to lower the temperature in the greenhouse using a homemade, simple device?
Materials - all from the farm
It is quite easy to make it at home. We will need:
- Three liter jar 1 pc.
- Liter jar 1 pc.
- Copper tube 5 - 6 mm in diameter.
- Metal lid for cans (for seaming) 1 pc.
- Plastic lid for jars 1 pc.
- Rubber hose (dropper hose works well).The main condition is that the hose should fit snugly over the tube, be flexible and not pinched.
Minimum tool
From the tool we need:
- Soldering iron.
- Roll-up for cans.
- A hammer.
- Pliers.
- Thermometer.
Stage one - we make a thermosyphon
You can get to work.
- Roll up a 3 liter jar with a metal lid.
- Drill a hole in the center of the cover so that the copper tube fits snugly into the hole.
- Insert the tube into the lid so that it does not reach the bottom of the can by 3 - 5 mm.
- While holding the tube in this position, solder it to the cap. The connection must be tight.
We calibrate the device
Our thermosyphon is ready. Before performing a complete installation of the entire device, it is necessary to check our siphon and obtain accurate data on its operation.
This is done as follows:
- Pour a liter of water into a three-liter jar through the tube.
Our advice - realizing the complexity of pouring water through a pipe with a diameter of 5 - 6 mm, we advise you to do the following. Pour a liter of water into a container. Put the hose on the tube and turn the can upside down.
Suck the air out of the can through the hose, pinch the hose and lower the end of it into the collected water. Release the clamp. The water will flow into the jar.
After performing this action several times, you will pump the required amount of water into the jar. Thus, in the future, water is added to the device.
- Place the jar in a bucket and pour water into it to such a level that the water does not reach the jar lid by 50 - 70 mm.
- Put a hose on the copper tube, and lower the other end into a liter jar.
- Put the bucket on fire and heat the water, while monitoring its temperature with a thermometer.
- When the water in the bucket starts to heat up, the air and water in the can will heat up.
- The created pressure will begin to push water out of a three-liter can, it will begin to flow through a hose into a liter can.
- When the temperature reaches 25 ° C, turn off the fire and measure the amount of water that entered the liter container, this volume will be approximately 400 ml.
Principle of operation
You can collect our device. The principle of its operation has already become clear.
- When the temperature inside the greenhouse begins to rise, the water from the three-liter jar will begin to flow into the liter, which in turn acts as a counterweight.
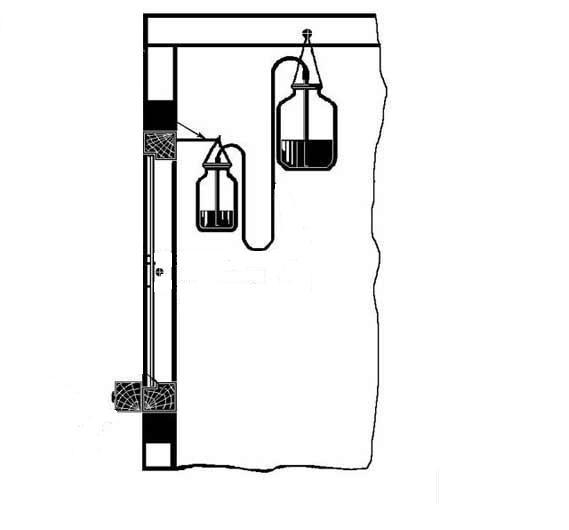
Water regulator. The window is closed.
Thus, increasing the mass of a liter can opens the window and ventilates the greenhouse. The higher the temperature, the more water flows in and, therefore, the window opens more and more.
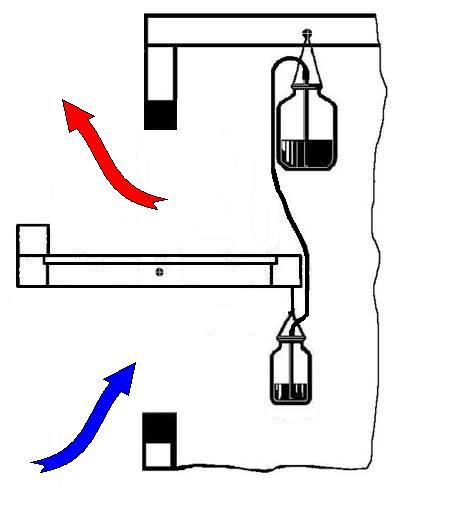
Water regulator. The window is open.
When the air temperature in the greenhouse begins to drop, a vacuum is created in a three-liter jar and water from a liter jar is sucked back. Thus, the mass of a liter can becomes less, and the window begins to close.
Assembly and installation
As you can see, the temperature controller for the greenhouse turned out to be quite simple, but nevertheless very effective.
- A liter can is hung from the window.
- A plastic cover is put on it, in which a hole is made and a hose is inserted there. The end of the hose does not reach the bottom by 3 - 5 mm.
- 200 ml of water is poured into a liter jar.
Weight adjustment
The only thing to do is choose the right counterweight for the frame.
Everything is done empirically.
- The weight of a liter can and the water poured into it should not open the window.
- But when water from a large can begins to flow into a small one, the window should open.
It is important - the cavity of a liter can must freely connect with atmospheric air. If the hose fits snugly in the plastic cap, punch a hole next to it in the cap.
This system does not require any special control. The only thing that needs to be done is to add water to a three-liter jar, the volume of which is reduced by evaporation.
Tomatoes, eggplants, cucumbers, strawberries - we solve the temperature issue
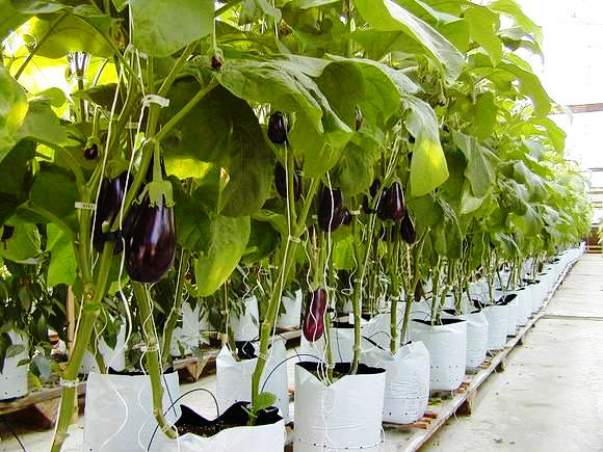
Eggplant in a greenhouse.
This unit is adjusted for tomatoes, but it can be adjusted to your desired temperature.
For example, the temperature for cucumbers in a greenhouse is different from that of a tomato (see How to Grow Cucumbers and Tomatoes in a Greenhouse). During the germination period, the optimum temperature is 25 - 28 ° C.
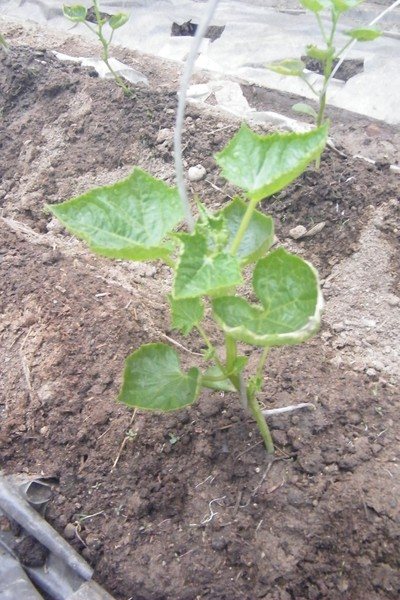
Cucumber shoots.
With further cultivation, it is very important to ventilate the greenhouse on sunny days, while the temperature is 28-30 ° C, and on cloudy days it should fluctuate around 20-22 ° C.
This device will successfully cope with this task.
- If you need the temperature in your greenhouse not to exceed 20 ° C, adjust the device for this temperature regime. You probably already understand how to do this.
- Make the counterweights removable and specify the temperature range for each, then you just need to change the counterweights, and the temperature in the greenhouse will be adjusted strictly according to the specified parameters.
Our tip is to mark the cans with a water level mark, so it will be easy for you to determine when the device needs to be refilled.
Windows open with one drive.
With ingenuity and leverage, you can make multiple windows open at the same time with this device.
Today we talked about how to build a temperature controller in a greenhouse on our own in just a few hours. At the same time, we did not need to get expensive and rare materials, we just used what is always available in any farm.
The temperature is regulated by the air
Many gardeners use such devices with success.

Air regulator circuit.
There is a device that works according to this principle, but it uses air instead of water.
The device and principle of operation of the air regulator
It is arranged as follows.
- Instead of a three-liter can, a metal container is used there, preferably an aluminum one. The container is sealed.
- Due to the increase in temperature, the volume of air in the container increases and air begins to flow through the hose into the rubber chamber. You can successfully use a soccer ball camera.
- The camera expands and pushes a lever that opens the window.
As you can see, the system is closed, sealed and does not communicate with the atmosphere.
- After the air temperature in the greenhouse drops, so does the air pressure in the device.
- The rubber bladder deflates, the lever moves backward and the window closes.
Advantages and disadvantages
The advantage of this system is that it does not require control over the water level and works independently for a very long time.
Among the disadvantages, one can single out the fact that good tightness is required. Otherwise, the device simply will not work, and it is quite difficult to visually determine the leak.
Temperature and yield direct link
At the very beginning of our article, we want to immediately say that the yield of plants is influenced not only by the air temperature in the greenhouse, but also by the temperature of the soil (see Land in the greenhouse: soil selection and care).
At the same time, it is important to understand that various plants grow well and bear fruit strictly at a certain temperature.
Different plants, different temperatures
A bountiful harvest.
Many probably faced such a question that in a certain year some plants gave a rich harvest compared to other plants growing nearby.
It's all about the temperature, for some it was the most optimal, while for others it was either too high or too low.
Greenhouse - temperature advantage
But if it is not possible to adjust the temperature for individual plants in the open field, then the greenhouse is a closed space in which you can successfully regulate the temperature regime.
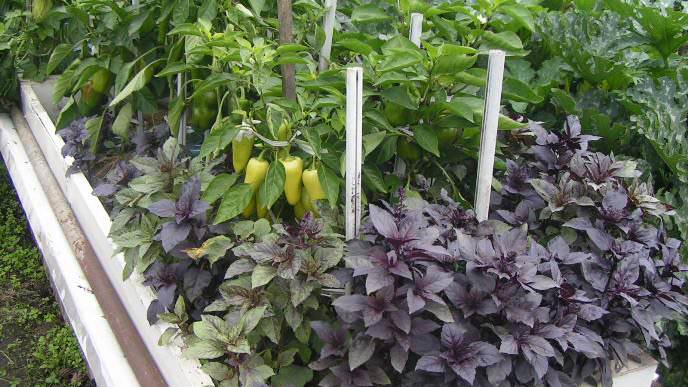
Correct plant placement is an important task
This is why it is so important to plant your greenhouse plants correctly.If your greenhouse is large, there will be a significant difference in temperature in different corners of it.
This can be successfully used by planting heat-loving plants in warmer places, and in cooler ones, plants for which this temperature is optimal. For more information on how to grow different crops together, you can read: Peppers and Eggplants in the Same Greenhouse and Growing Cucumbers and Tomatoes in the Same Greenhouse).
As in the open field, in the greenhouse there is a temperature difference between day and night.
This difference is very important. Too large fluctuations can adversely affect plants and lead to their diseases, and in some cases to death.
Our reference is that the limit of night and day regime should not exceed 4 - 8 ° С.
What's good for the greenery is bad for the fruit
Lots of greenery, few fruits.
Depending on the type of plant, the daytime air temperature in the greenhouse should be 16 - 25 ° C. Temperature directly affects growth, for example, a temperature rise of 10 ° C will increase the growth of greenery.
Do not rejoice, the roots and fruits develop much worse at the same time.
Lots of fruits with a minimum of greenery.
An increase to 40 ° C leads to a depression and possible death of the entire plant.
We talked about the air temperature.
Air is important - soil is equally important
Thermometer in the greenhouse.
The temperature regime of the soil is also important and should be within the range of 14 - 25 ° C, everything also depends on the type of plant.
- If the temperature regime of the soil drops and reaches 10 ° C, the plant will begin to experience phosphorus starvation.
- Too high a temperature, exceeding 25 ° C, leads to difficulty in the absorption of moisture by the roots.
- With the correct temperature conditions, the root system of plants develops and functions correctly, which cannot affect the well-being of the entire plant.
Temperature issue
Realizing that the temperature regime in the greenhouse is extremely important and the yield depends on it, many will wonder how to control the temperature and observe the most optimal regime in the greenhouse?
Automatic regulation - solving the temperature issue
Electronic device.
As is clear from the above, the visual observance of all parameters is a very difficult and responsible task.
- Therefore, the best option would be to equip the greenhouse with automation.
- Automatic temperature control in the greenhouse will relieve you of the worries of hourly monitoring and measurement of air and soil temperature parameters in different parts of the greenhouse.
Sometimes the temperature begins to rise above the required rate, and you are not at this time.
How to lower the temperature in the greenhouse to the required parameters?
Automation comes to the rescue. Currently, there are a wide variety of electronic devices on the market, which we have already covered earlier (see Thermostat for the greenhouse).
Temperature for greenhouse tomatoes
The optimal indicators are + 20 + 22 ° С, if the day is bright and sunny, and + 19 + 20 ° С, if the day is cloudy. Night temperature - + 16 + 17 ° С. A similar regime is suitable before the beginning of the fruiting period of tomatoes. When it begins, the temperature maximum can reach + 26 + 32 ° C, but if it is hotter, then even the highest quality flowering will be of little use. Under such conditions, many necessary processes, for example, photosynthesis, are slowed down, and pollen grains do not germinate.
During the flowering period, temperature indicators should not be allowed to fall below + 14 + 16 ° С, since the tomato will stop blooming.
At a certain period of time, a greenhouse tomato can go into rapid growth, and this process must be stopped by stabilizing the temperature at + 25 + 26 ° С. If you do not do this, the bush may simply build up a vegetative mass, from which you will definitely not get the expected yield.
After the first fruits are removed from the bush, the temperature regime is lowered to + 16 + 17 ° C in order to stabilize the growth of the fruits and their ripening.
Growing parsley in a greenhouse
Preparing parsley seeds
Parsley has a very long pre-emergence period, which, depending on the variety and growing conditions, is about 45 days. To shorten the pre-emergence period, it is better to sow parsley with germinated seeds. To do this, before sowing, the seeds are kept for 5 days in a moist two-layer gauze.
Sprouted seeds are transferred to a room with a temperature of + 1 ° C for 10 days. When sowing, such seeds germinate on days 15-17 and form an aboveground mass 3 times faster than with conventional sowing.
Sowing parsley
Divide the prepared substrate into furrows every 10 cm, 2 cm deep. Evenly after 4-5 cm, place the seeds in the furrows and cover them with soil, smoothing them with your hand.
After sowing, we moisten the soil through a sprayer so as not to wash the seeds out of the substrate. The air temperature is maintained within +12 .. + 18 ° С not higher. At + 20 ° C, parsley leaves wither from overheating.
Optimal conditions for greenhouse cucumbers
Even before the first shoots appear, containers with crops are kept warm for several days - + 25 + 28 ° C. When the first greens break through to the surface, the cover is removed, and the crops are set in a well-lit place where the temperature is kept within + 20 + 22 ° С. If we talk about nighttime indicators, then in the first 3-5 days after the emergence of cucumber shoots, they should be + 16 + 17 ° С, in order to prevent unnecessary stem growth and stretching of seedlings, then they are kept within + 19 + 20 ° С.
Do not allow sudden temperature changes. This, as well as a sharp cold snap in the greenhouse, can lead to diseases, oppression, plant death or simply loss of yield.