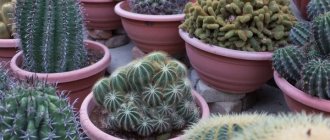
What is bee wax?
Bee wax
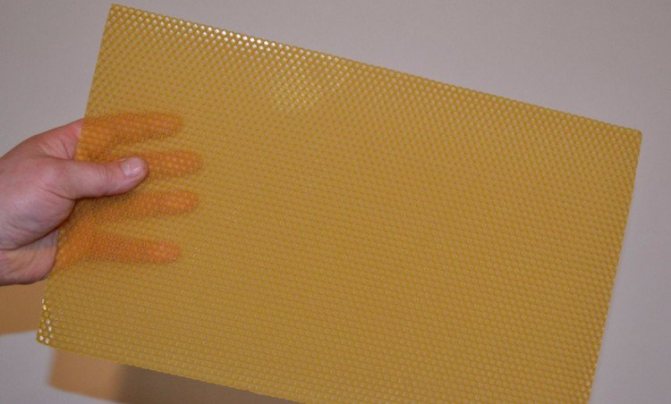
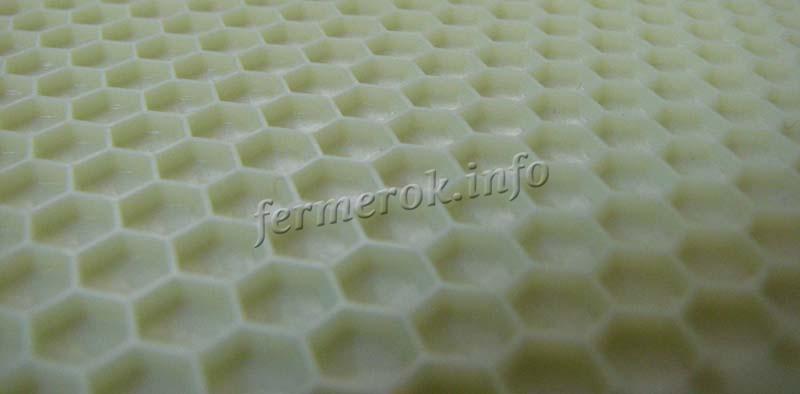
Foundation is wax leaves that are inserted into frames. They have hexagonal grade imprints on both sides. When using foundation, it is much easier for bees to work, because they simply build their storehouses for honey or brood brood on top of these six-sided impressions. If there is no foundation in the frame, then insects have to spend a lot of time and effort to build new honeycombs from scratch, as in nature.
Important!
If there is a waxed blank - the basis for the honeycomb, the bees get the job done much faster.


What is it for?
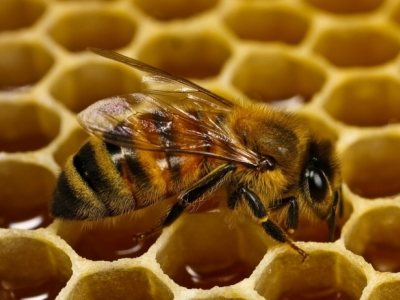
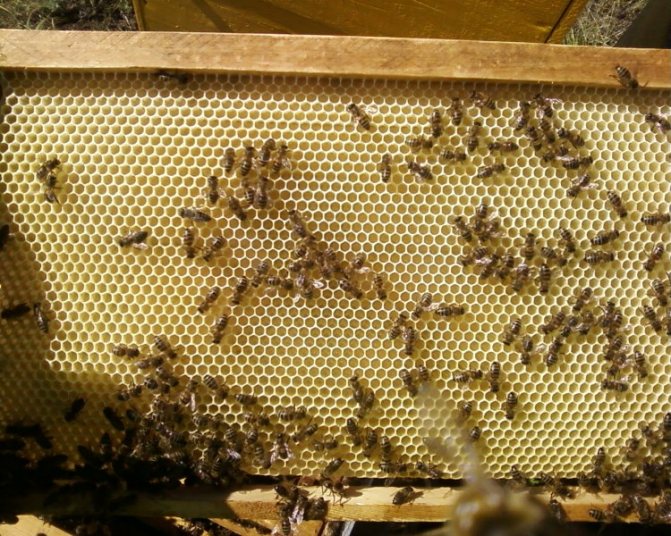
Natural foundation - honeycomb, which is used by bees to accumulate a layer of honey. Moreover, hardworking bees independently build such cells for the future brood, drones and queens.
If the natural purpose of the honeycomb is clear, then it is worth telling a little about their role in beekeeping, because they not only provide a comfortable life for bees, but also greatly simplify the work of the beekeeper.
So, foundation for bees performs following functions:
- expands the bee's nest;
- promotes decent performance of bees;
- guarantees the normal formation of a bee swarm in the spring.
Did you know? One bee can build about four thousand cells per day.
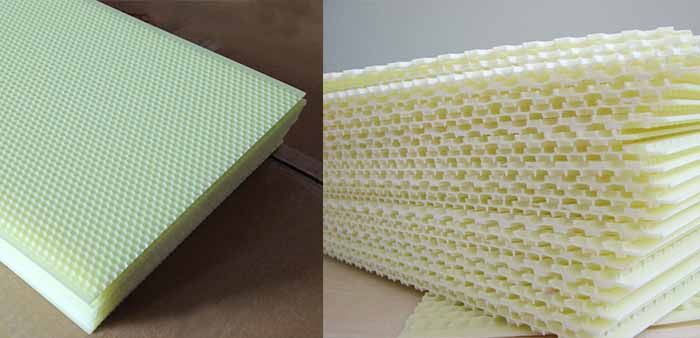
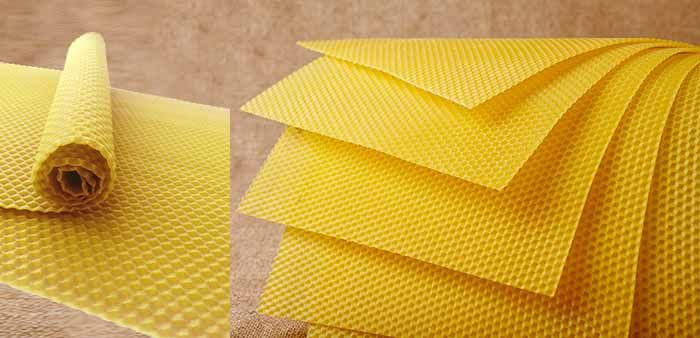
Types of foundation
Check out these articles as well
- Peach variety Golden Jubilee
- Pepper and tomato lecho
- Chicken brood (Kvochka)
- Plastic cellar for summer cottages
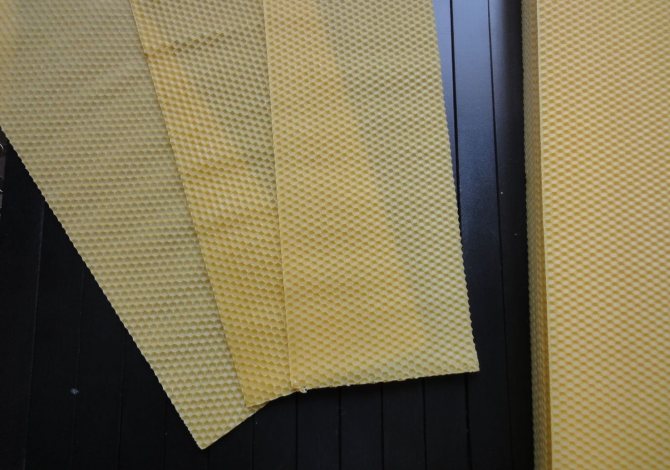
There are three types of foundation used in modern beekeeping.
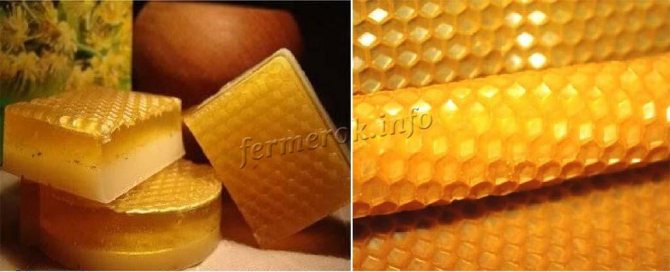
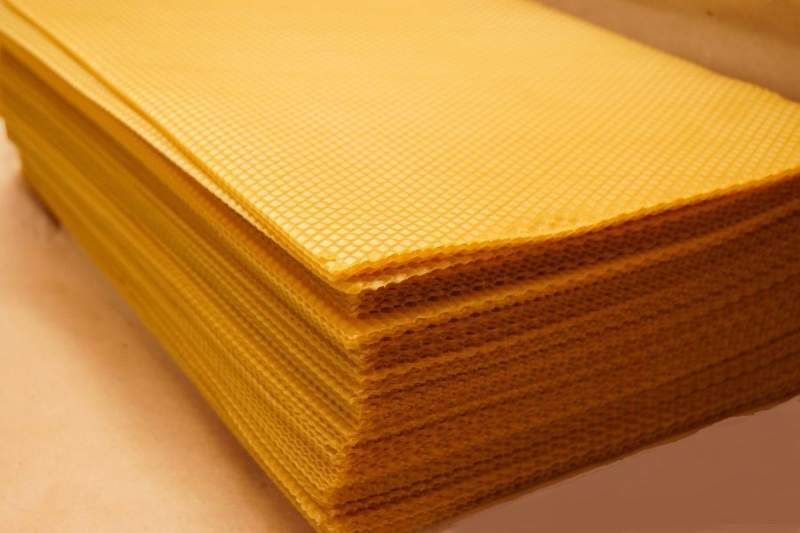
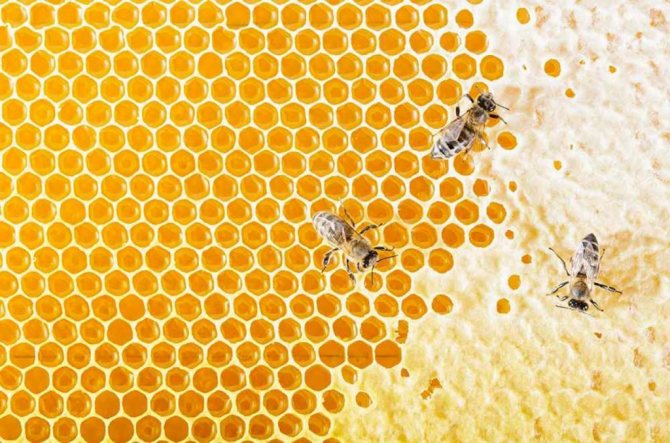
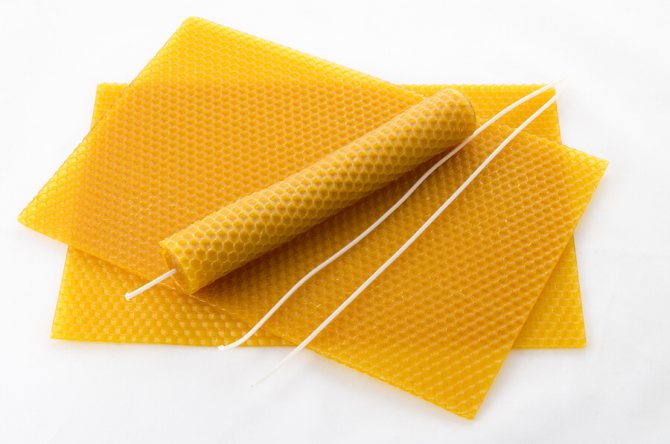
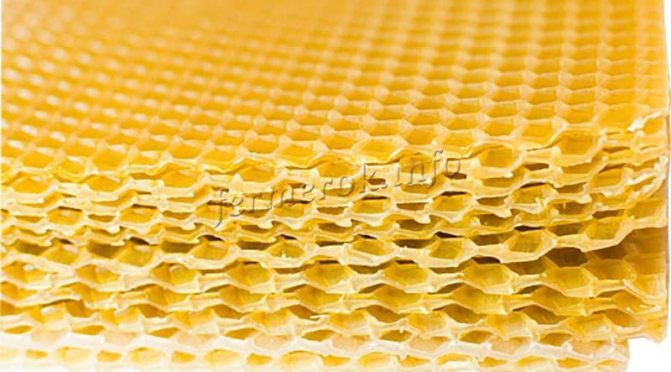
Photo of natural foundation
- Natural wax is made from pure wax without artificial impurities. This type is considered the most preferred by bees, but not always available to the beekeeper.
- Semi-artificial bee wax is made from wax with various impurities, such as paraffin. Such a mixture makes the finished sheets not very durable, but cheap, so they are often purchased by beekeepers, wanting to save money.
- Artificial foundation is made from plastic or paraffin wax. There is usually no wax there, at least when you buy it. It is applied immediately before use - placing it in the frame.
The latter two are usually tinted yellow or bright yellow for a natural look.
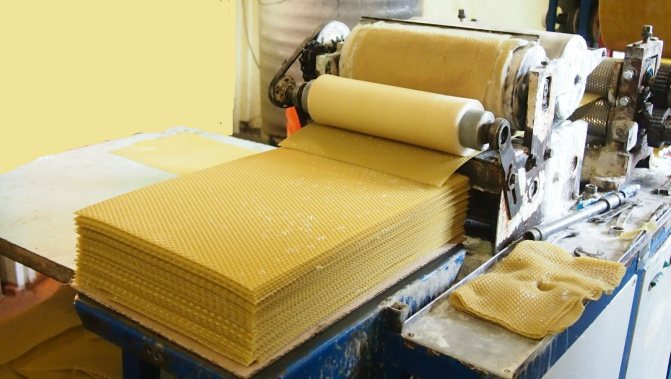

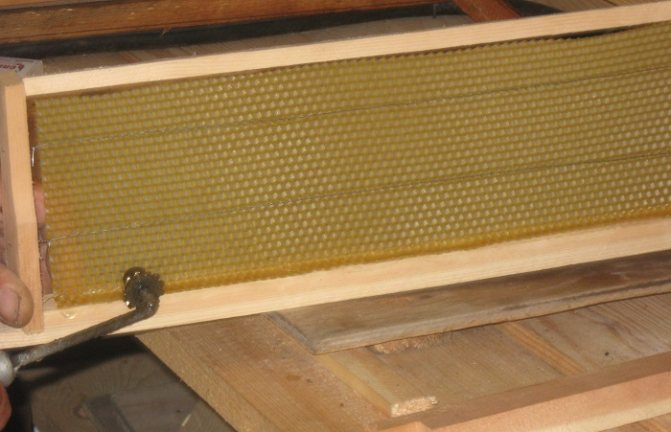
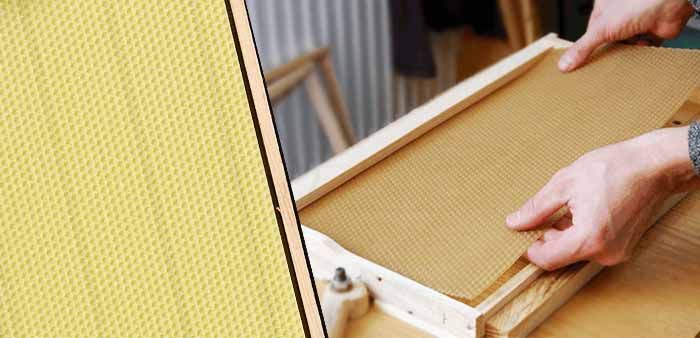
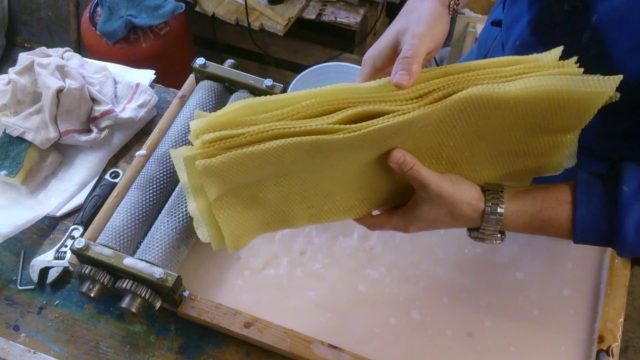
Step-by-step production of foundation sheets
- First of all, the master must cleanse the wax from mechanical impurities by boiling the wax in an enamel container several times.
- After cleansing, it is necessary that the wateriness of the mass is no more than 2%, all excess must be removed. This can be done by simmering the water from the wax over low heat on the stove. In the future, how much water is in the mass will determine the class of "honeycomb" for bees.
- After the wax is prepared, the master will melt it in a steam bath, in two containers at the same time.
- It is required to put the template in warm water for a little warm-up.
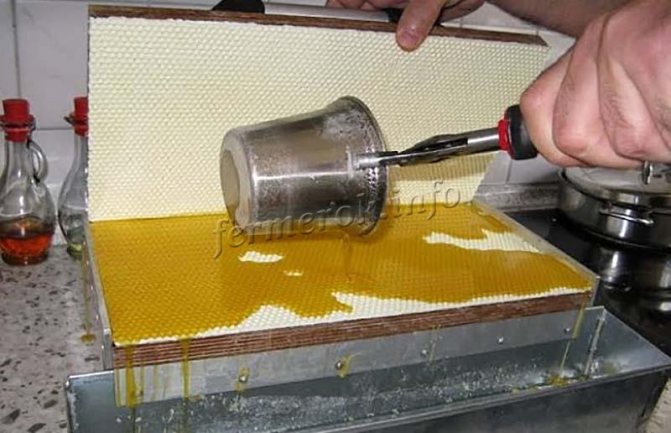
- After the molten wax has been processed, the master proceeds to the stage of pressing the sheet for bees. To do this, fill the bath of the unit with warm water and place the lower and upper press plates in it separately, heating them for 45-60 minutes.
- After that, the lower part of the master must remove the sheet. Such an event will allow excess liquid to drain, throw it over the bath.
- Knead the prepared foundation sheet, the quality and class of the finished result will directly depend on this.
- Remove the wax sheet of the foundation from the bath and put it on the lower die, remove the fixing pins from the guide mechanism.
- After that, the master can remove the jack and remove the upper part of the matrix.
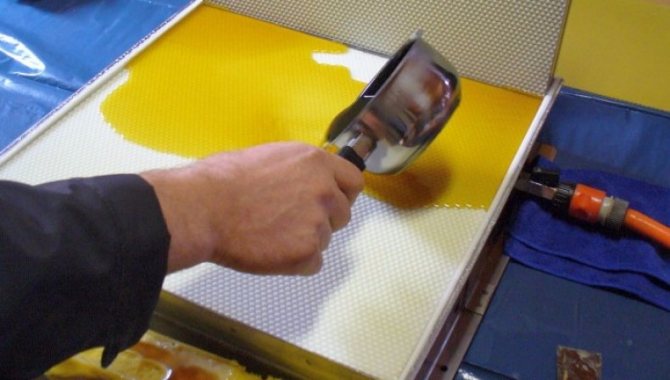
- The finished result must be substituted by the stove and the wax sheet under running cold water. So, the sheet will fully solidify and when it is moved, it will not crack and chip, and as a result there will be a durable material and a high quality class.
- After that, the master can already dry the sheet. Drying of the leaf must be carried out in its natural environment.
Pros and cons of a fake product
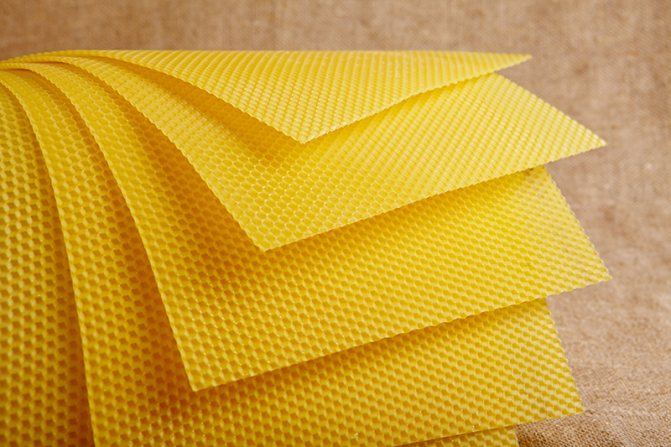
Artificial foundation
There is a heated debate about the benefits of unnatural waxes. It's hard to say how safe or dangerous they are, but there are opinions that are hard to argue with. Let's start with the benefits:
- long service life - up to 10 years;
- simplification of work, reduction of cash expenditures;
- such bee foundation does not deform when used;
- it is not expensive - it is quite affordable material.
In addition, it is much easier to store plastic foundation, it usually does not break, does not bend, so it is always ready to use. But those beekeepers who have already used it in their household, managed to highlight some of the shortcomings.
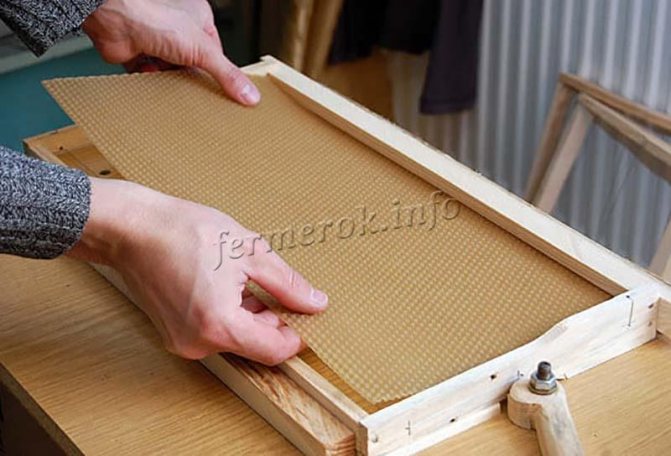
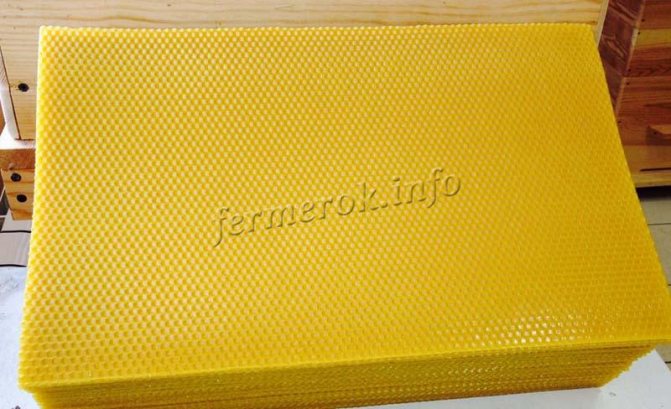
Photo of unnatural foundation
- The presence of dyes, which are used to color the sheets, can negatively affect the health of the bees.
- Sheets must be treated from time to time for diseases and pests.
- If the sheet is damaged, it cannot be repaired.
- Before use, be sure to apply a thin layer of wax on both sides.
- Plastic is an artificial material, there is no exact information about how it affects the quality of honey or how it is generally perceived by bees.


Why do bees gnaw on foundation?
This happens because the wire is covered with oil or other grease. Insects simply gnaw this fat off the strings.
Sometimes insects gnaw at the reinforcing layer. This happens if reinforced foundation is used. Usually, a thin wire is laid inside during its production.
To stop the workers from gnawing the wire, degrease it with alcohol or regular moonshine
It is advisable to use such devices if the distillation of nectar is carried out in honey extractors at high speeds. This prevents honeycomb from breaking. The home reinforced foundation is also of excellent quality and differs little from the factory one. In addition, homemade foundation is much cheaper than factory foundation. But experience is required to produce quality sheets.
How is foundation made?
We recommend reading our other articles
- Goose breed Large gray
- White spots on eggplant seedlings
- Planting spring garlic
- Ratunda pepper variety
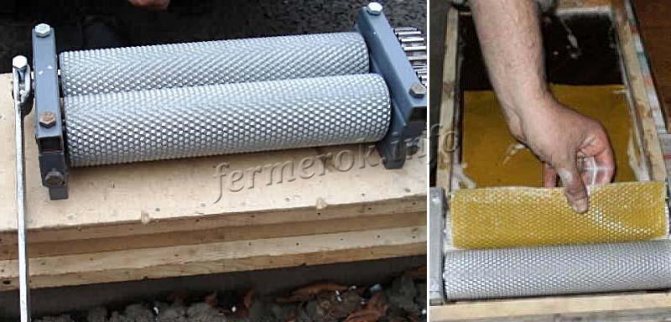
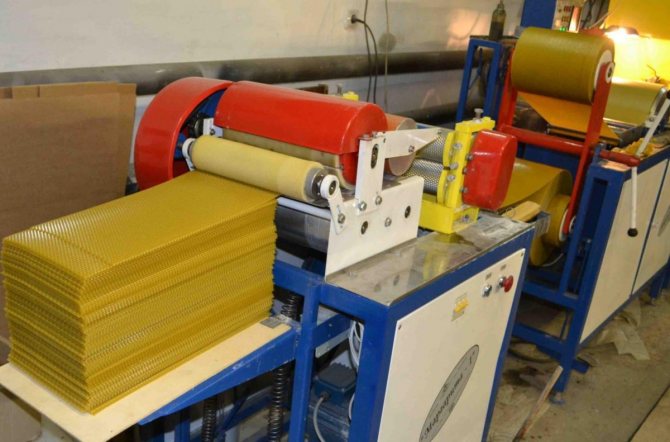
Mechanical method
Depending on what type of foundation is produced, the production technology may differ.
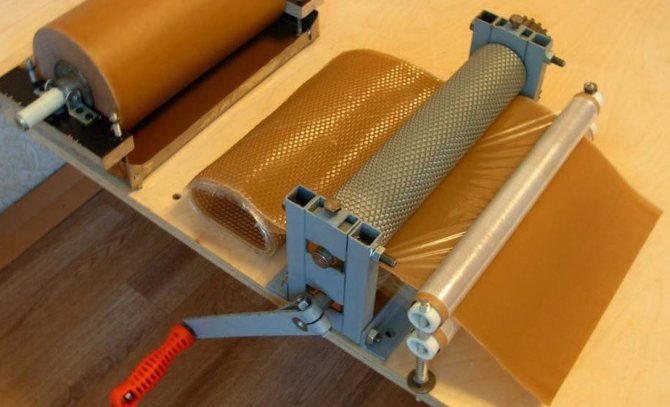
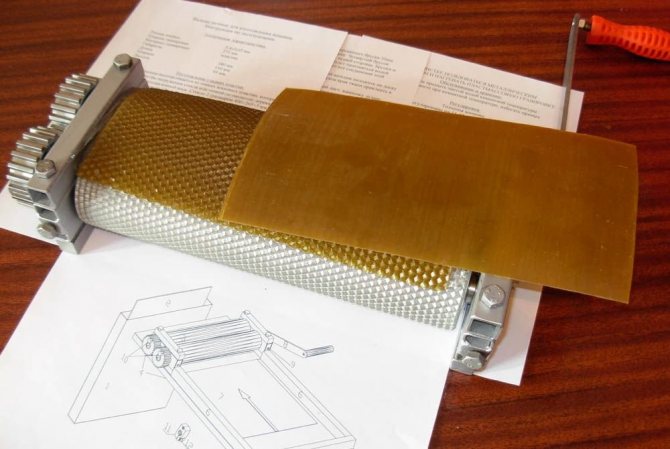
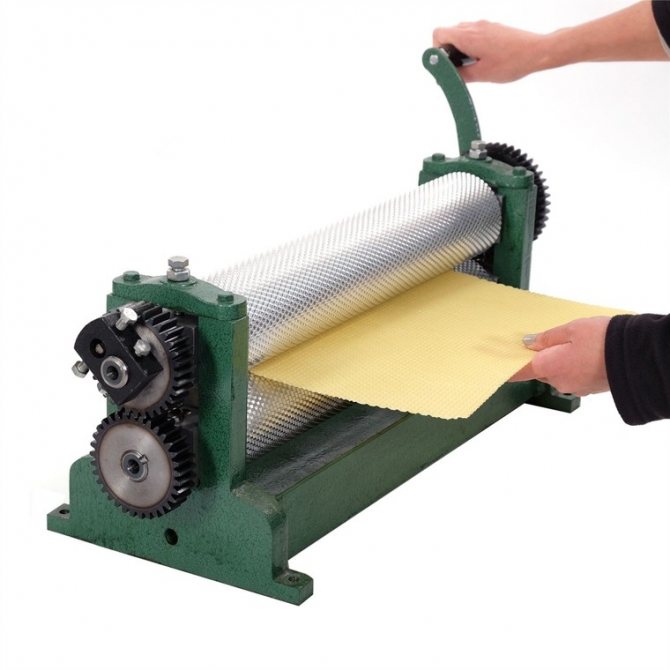
- For the production of natural waxes, a mechanical method is usually used. For this, manual or automatic rolls with a mesh pattern are used, through which the heated, softened wax is passed. The second option is a press, consisting of two plates, on which a pattern of hexagonal cells is applied. The softened wax is put into the press and thus the foundation is obtained.
Important!
In large apiaries, automatic rollers are usually used, and not small ones, you can do with a press.
- Artificial and semi-artificial waxes are produced in factories. They are usually not made by hand, since they use wax with impurities for production, or they do without wax at all. Ready-made waxes can be purchased in stores or on request.


Conclusions on the methods of making foundation
In conclusion, I will tell you what advantages this method has from the technical and economic side.On the first hand, we have a way in which the quality of foundation is brought to a high degree of perfection; the foundation is homogeneous, strong and graceful in appearance. As an example of rolled foundation, the sample sheets that I supplied with the rollers can be used. Nothing like that can be done by dipping. The ease of rotation of both rollers is also not the last plus.
From the economic and economic side, this method provides an opportunity to develop the production of foundation intensively and more conveniently. A foundation can be made from the last pound of wax as well as from a large batch. Two people rotating the rolls alternately can pull up to 190 kg through the engraved rolls in 10 hours. pure (chopped) foundation, while dipped sheets are more than 125 kg. almost impossible. Thanks to the uniform, precisely matched thickness of the wax sheets, scrap and scrap is kept to a minimum. Despite the 2 rollers, the amount of soap consumed does not increase compared to the first method.
How to make natural foundation with your own hands?
DIY foundation
To make natural foundation, you need to purchase a wax press. Such a device is purchased once and completely pays for itself, because without it it will be difficult to make natural foundation, and a purchased one will not be cheap!
Important!
There are many types of press on sale, you need to acquire the type that is suitable for the frames in the apiary (dedan or rue), otherwise the finished waxes may not fit into the frames.
To make the foundation, you need to heat the required amount of wax to 90 degrees. Then cool for 3-5 minutes, so that it thickens a little. Now an even layer of wax is poured into the press and from there the finished bee wax is taken out in a couple of minutes.
As you can see, the method is very simple and does not require much effort, but only a good press, wax and compliance with the temperature regime, as well as the cooling time.

Can artificial foundation be made?
Artificial foundation
It is believed that making an artificial foundation with your own hands is very difficult. This is partly true. In this case, several specific auxiliary gizmos will be required:
- 600 ml of silicone;
- duct tape or tape;
- 40 g of catalyst;
- natural or artificial foundation;
- putty knife.
To start work, a factory foundation is placed on a hard surface. The surface must be absolutely flat, smooth and firm so that it does not run or wobble. Now, with the help of adhesive tape, a side is made (we glue it to the factory mold) so that the silicone does not spread. The catalyst is mixed with silicone and poured into a mold. Then you need to wait until it hardens. Now the silicone foundation is separated from the factory mold with a spatula. Here is a completely accessible method.
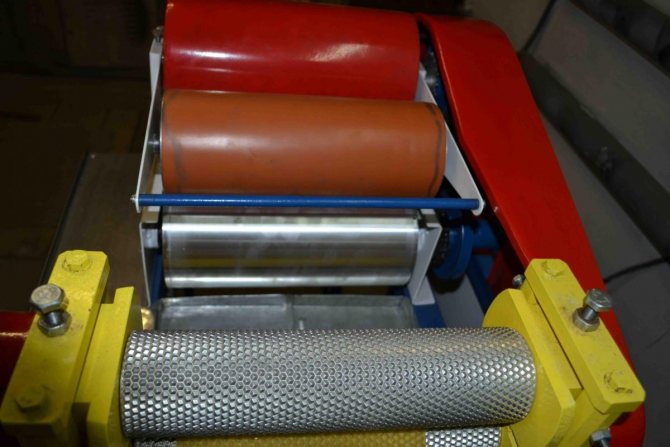
Reasons for Roller Failure
In conclusion, I will say a few words why the rollers can deteriorate. For three reasons:
- When the bearings are not lubricated and the soap that has got into them when working from the rollers is not allowed to dry out, without lubrication, the axles can stick in the bearings and generally wear out soon.
- When there is no thorough cleanliness during work, various foreign objects can get into the rollers on the sheets: sand, pebbles, wood, carnations - all this crushes the cones and makes prints on them. Rubbish and all sorts of foreign objects falling on wax sheets between the rollers are the greatest evil; from them the rollers most often deteriorate — engraving.
- When you want to get a thin honey foundation on the nesting rollers, the lower roller is pressed strongly against the upper roller, which is why the cones in the rollers can also wrinkle.
The most serious sin is when foreign objects are passed through the rollers: paper, canvas, etc. You should never, under any circumstances, do this.
Read more articles
Share link:
- Tweet
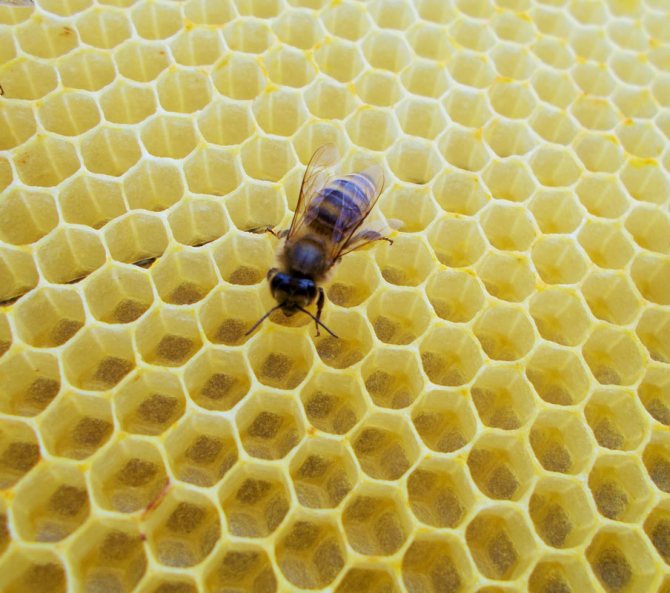
How do you get the bees to pull the foundation?
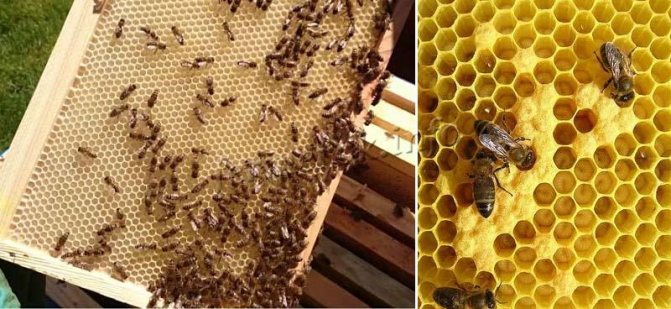
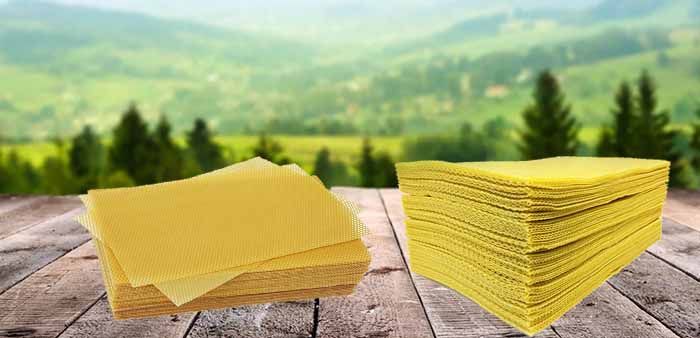
Photo foundation and bees
One of the most important conditions for rebuilding foundation is the presence of a bribe in nature and bringing in fresh pollen. Feeding with syrup does not solve this problem. If there is no bribe, neither the strength of the family, nor the place where the foundation is substituted have no role, the bees will not rebuild the foundation.
Another secret of beekeepers - if the bee colony is not very strong 5-6 frames of the brood, then the foundation is placed along the edges of the brood. If the bee colony has 8 or more frames with brood, then the foundation can be placed in the center of the brood part of the nest. Too abrupt expansion of the nest is dangerous and can provoke brood diseases in case of recurrent cold weather. For this reason, it is advisable to substitute one frame at a time.
How exactly is it used in beekeeping
Beginners understand what foundation is in beekeeping, but do not know how and when to install it. Everyone does it differently, but there are a number of general rules and tips:
- it is possible to substitute the foundation into the hive only if there is honey collection (trees or fields bloom within a radius of 5 km from the place where the apiary is installed) or when feeding with syrup, candy or other hearty food;
- the family must have a fertile queen, otherwise the bees will flood the foundation with honey, but the queen needs to sow it.
Fact: Many people practice beekeeping without foundation. From the point of view of science, this is not logical and not natural, but the choice remains with the beekeeper.
Storage of foundation
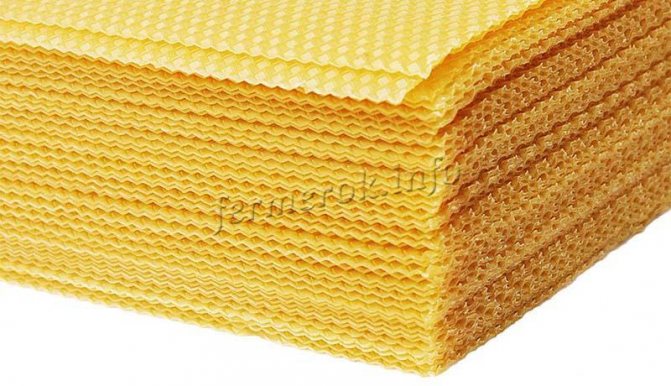
Photos of foundation
The way in which the foundation is stored depends on whether it is natural or not. An artificial product is the easiest to store - no special conditions are needed for this. Sheets are stacked in any convenient room and stored as needed. Since they are not natural, pests and rodents are unlikely to be interested in them.
Natural bee wax should be stored at above-zero temperatures. If you store it in a room where it is about -5 degrees Celsius in the spring, when it is taken out, it will most likely just crumble. Usually it is folded in a stack of 5-7 pieces, wrapped in wrapping paper or any other. Then they put it in boxes and determine where it will lie until it is needed.
It is impossible to say for sure which type of foundation is better - natural, semi-artificial or artificial. Every novice beekeeper should try out all types in order to understand their advantages and disadvantages. Then he will be able to choose for work exactly the foundation that will be more convenient, practical and reliable.
Setting up the rolls for rolling the foundation.
The rollers are sent by me perfectly set and checked for the tasks that I assign to my rollers, with the attachment of a test sheet and a manual. But the beekeeper often has to install the rollers himself, which can be squeezed from work or out of curiosity upset by the beekeeper himself. The whole procedure for the complete installation of disassembled rollers requires so much knowledge and experience that I will not even talk about it, but will only limit myself to those cases that may appear in the practice of a beekeeper.
Ability to "read" foundation
Every incorrectness in the installation is primarily reflected in the foundation; so we will learn to read the wrong installation on the foundation. The foundation is viewed into the light and, moreover, in the position in which it comes out from under the rollers. To prevent any mistakes, you need to look for an imprinted inscription on the foundation (the customer's name is engraved on the rollers). If they accidentally confused which side the sheet was going, then, looking at the inscription, we will immediately find the lost.
The sheet of foundation is taken by hand so that you can read it. The side facing itself, that is, the side that was near the front rack (where the gears), will be called the front edge of the canvas; the opposite, that is, which is near the back pillar, is the back edge of the foundation linen. Having carefully examined the foundation into the light, we can distinguish between the lower cells, corresponding to the cones of the lower ridge, and the upper ones, of the upper ridge.It is necessary to be firmly able to distinguish the lower cells from the upper ones. With practice, you can see this difference at a glance. This difference is as follows; the bottom of the cell has three faces, two vertical and one horizontal; in the cells of the lower roller, the horizontal edge is at the bottom, and in the cells of the upper roller, it is at the top. This difference can be seen in the devil. 1, where the right cell belongs to the lower roller (the lower side of the foundation linen). This is the rule for our drums.
Other constructors may have the other way around, or even (like Kamenev) there are two horizontal faces and one vertical one. Perfectly made and carefully installed rollers should give a foundation in which all the walls of the cells should be the same color when viewed to light, that is, of the same thickness. As a rule, this is almost unattainable for manual work, and the foundation is dazzling, that is, here and there we see thicker walls. If in the arrangement of these thickenings we notice some correctness, legitimacy, for example, all the left walls of the cells are thicker, then the rollers are installed incorrectly.
Installing the rollers
Now let's start installing the rollers. The simplest case that can be encountered in the practice of a beekeeper is shown in the devil. 2. On the foundation, we see that along the entire length of the canvas, the left walls of the cells of the lower roller are thicker. This means that the rollers are so located between themselves that the distance between the left edge of the cell of the lower cone and the right upper one is greater than between the right edge of the lower cone and the left upper one.
This is clearly seen from the devil. 3. In this figure, a vertical section through the rollers and a gear section are connected to the roller axis through the plane of the screws, which are shown in perspective. The second incision is superimposed on the first. For clarity, part of the gear has been removed so that the relative position of the roller tapers can be seen. Everything is approximately doubled. Looking at this drawing, we see that, indeed, when the rollers are arranged in this way, the left edges of the cells will be thicker. (Let's agree that when we talk about the parts of the cell, it is exclusively the bottom one). Therefore, the foundation depicted in the devil. 2, corresponds to the position of the rollers shown in fig. 3.
Working with screws
Now it is easy to figure out that if we turn the upper roller in the direction indicated by the arrows so that the ab axis is aligned with the a'b 'axis, then this drawback will be eliminated, and all the walls will be of the same thickness. For such rotations, screws A and B are used, which are placed in special slots c and d, visible in Fig., Cut in the axis of the roller. In this case, we will proceed as follows: we release the right screw B completely freely, and press the left screw A lightly (up to 10 degrees) and fix it with the right one, pressing with a key so that the screw sits firmly in its place. It is clear that by pressing the left screw A, the roller will turn in the desired direction. It must be remembered that during the installation of the rollers, the lower lifting screws, which regulate the thickness of the foundation, must be loosened, and the foundation is passed through thicker. Otherwise it is easy to crush the cones.
With an inexperienced hand, screw A can be transferred (or from some other reason) and the opposite drawback will turn out - the right side will be thicker. The foundation will then have the form shown in the devil. 4. In section, this foundation is shown in the devil. 3 below. To fix it, they do it back - loosen the left screw, press the right screw and fix the left one.

The next can be the wrong depicted in the devil. five.
Here we see that quite often the edge of the canvas is correct, that is, all the walls are of the same thickness. At the rear edge, the right walls are thicker, and in the middle of the canvas, all the gradual transitions from one to another. This is eliminated by the side screws on the C-pillar. These screws move the rear end of the roller to the right and left. The devil serves to clarify. 6.
It shows a vertical section through the rear ends of the rollers with a part of the rack visible behind them.Dotted lines indicate parts that are hidden from direct view: the bearings are covered with rollers, and the screws C and D are covered by a stand. Considering this drawing, we see that if we move the upper roller slightly to the left in the direction indicated by the arrow, then the cones of the upper roller will exactly fall into the grooves of the lower one. To do this, we release the left screw C, push the right D degrees to 20 (depending on the degree of inaccuracy) and fix the left one. From the drawing it can be seen that from this the upper bearing with the axis of the roller will move to the left.
Again, the opposite drawback (Fig. 7) can be from excessive zeal when we press the screw D. Here they do the opposite: release the first screw D, press C, and fix D. again.
The situation is much more complicated when the foundation has the form depicted in the devil. 8 and 9. These figures correspond to cases where the rear edge is correct and the front has one wall thicker. Apparently there is nothing easier to fix this defect with side screws on the A-pillar. In fact, it is very, very difficult and, it is better to never touch the front side screws, making sure that they do not loosen and the front bearing does not slack. To install, I proceed as follows. Suppose that we have a foundation, where the right walls are thicker at the front edge, that is, damn. 8. Then we are cogs on the upper gear, comparing this case to the one depicted in the devil. 4, install the rollers and only make sure that the leading edge is correct. When this is achieved, the trailing edge will be as shown in the drawing. 7, which is eliminated by the side rear screws.
The case of devil. 9 is eliminated in the same way: I press the left gear screw, and the rear end of the roller is retracted to the left.
The latter cases are very rare (of course, I'm not talking about installing new or disassembled drums). Actually, these cases exhaust all those that can occur in the practice of beekeepers. As an exercise, I will also suggest a very gross and rare disorder of the rollers (Fig. 10 and 11).
Let's take the 10th. To correct this installation flaw, first set the rear edge with the rear side screws and bring the case to hell. 9. To do this, we will move the rear end of the roller to the left. Then we press the left screw of the gear and again feed the rear end of the roller to the left. You cannot do this in two steps, because you can easily crush the cones, since you will have to feed the end of the roller to the left a lot. When this is done gradually with intermediate rolling of the foundation, the danger is eliminated. Drawing 11, I will not explain - it is similar to the 10th, and those who wish will decide it themselves. These are all the theoretical rules that should be known to those who have our rollers and upset them. I will tell you a few more practical mandatory requirements.
From experience
It is necessary to carefully read the foundation and figure out what and where to submit, for which it is necessary to thoroughly understand drawings 3 and 6, and in every difficult case, although in the most primitive way, imagine the cuts through the rollers and start from them. This is not a phrase - I personally. Despite my rather great experience, when installing the rollers of other systems, I sometimes get confused and have to reconstruct either in my head or on paper the cut corresponding to this case, and then only unravel it.
The second golden rule is that the more difficult the case is, the stricter the rule of lifting screws must be observed, so that only the rollers do not touch each other, but so that there is still a reserve of free space. The third and most important rule of thumb is not to worry, but to ponder every move; if you feel that the cold horror of annoyance begins to creep into your soul, you better drop it, because if the rollers do not die, then in any case they will be badly dented and the matter will only get worse.