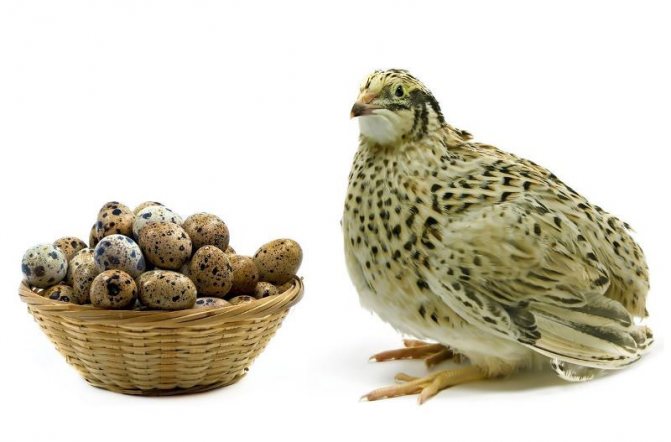
In modern poultry farming, one cannot do without such a type of bird as quail. Why are quails so popular, you ask. It's simple, the cost of quail eggs on the market is quite low, the period for hatching chicks by means of an incubator is short, and the meat is tender and tasty, and it can not be sold cheaply. To simplify the correct observance of all conditions, you can draw up a table of incubation of quail eggs.
Of course, quails are not the easiest birds to grow and breed, but if you choose the right approach, then a beginner will cope.
What do you need to know for incubating quail eggs? The most important aspects are mode, temperature, time and incubation table. Let's consider everything in order.
Choosing a bird breeding machine
At home, quails do not incubate offspring, so poultry farmers should purchase a special incubator. Initially, you should figure out which models are suitable for producing offspring.
Incubator Option
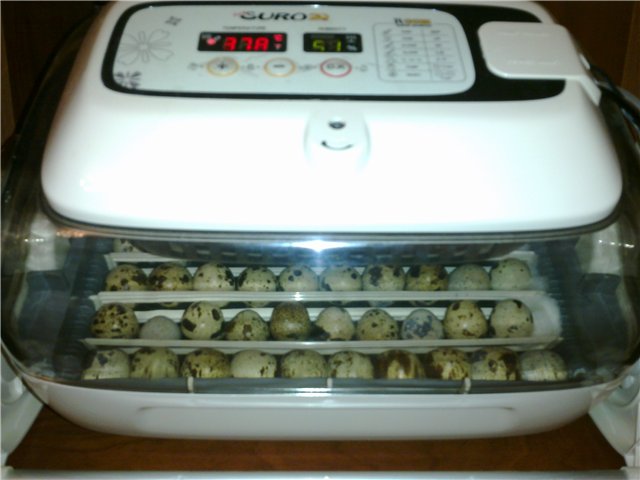
Some poultry farmers recommend buying an incubator "Nasedka" for home use. Incandescent lamps are located under the tray, which heat the device inside. The temperature is set within 25-400C and is maintained with a thermostat. The device has removable trays in which the eggs are turned over automatically. This function is turned off a couple of days before the magnifier.
The brood hen can be used to keep hatched chicks until they are two weeks old. For these purposes, the tray is replaced by a box. A special mode of rearing young stock is established.
Incubator "Nestka"
Apparatus without automatic coup will be cheaper. When purchasing, it is necessary to look so that the device contains:
- pallets;
- special heating elements;
- temperature regulators;
- humidifiers.
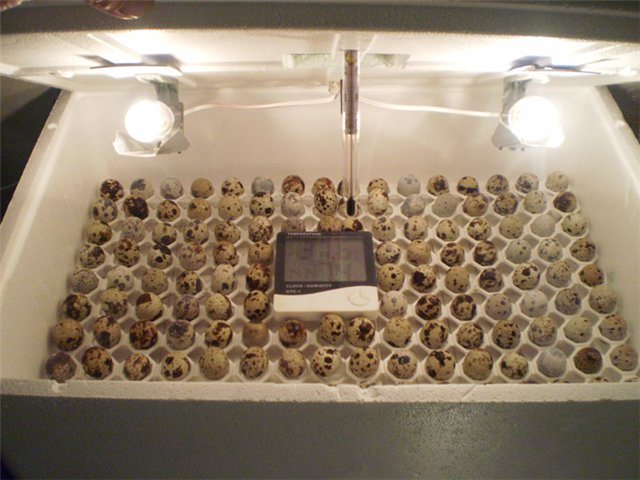
In most incubators, humidity is maintained in the following way: water is poured into trays, which evaporates and humidifies the air inside. The devices are ventilated by opening special holes in the lid of the incubator or in its bottom.
Maintaining humidity in the incubator
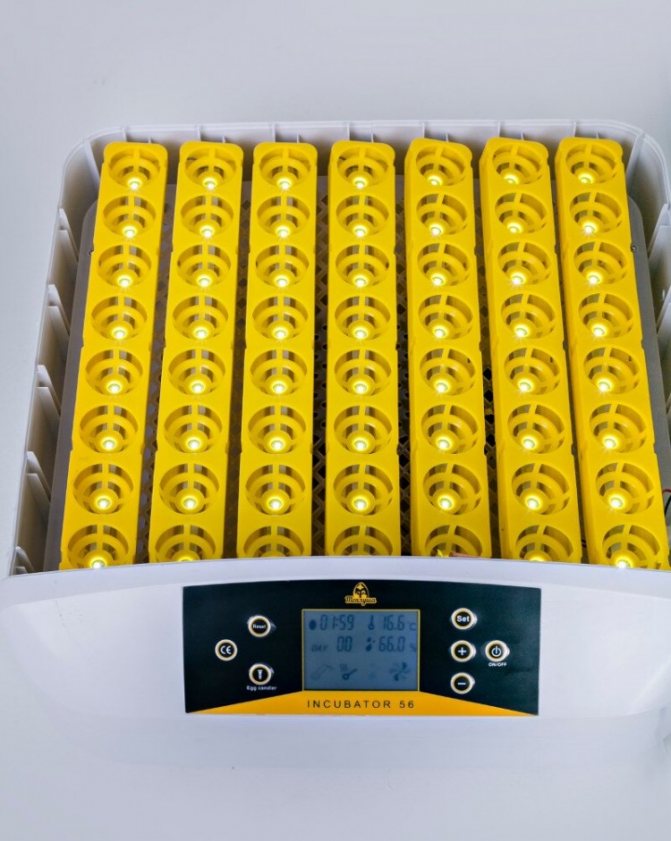
Conventional household incubators can hold more than 200 eggs. For breeding quails at home, this amount is quite enough. But in large farms, they prefer to use industrial equipment.
Egg incubators prices
Egg incubators


Useful Tips
A few additional tips for incubating quail eggs will help newbies get consistently positive results.
- You should not open the incubator lid often to "just see how you are doing." Even in a few seconds, the humidity inside decreases.
- Additional evaporation of calcium when moistened makes the shell harder. Therefore, it is better to use soft or boiled water for moisturizing.
- It is necessary to take out newly hatched chicks no more than once every 3-4 hours. Toddlers need to dry out for their feathers to dry properly.It is useful to then sprinkle warm water from a spray bottle on the sides of the incubator to restore moisture inside.
- At home, the least demanding incubation conditions are Japanese, Estonian and other egg-bearing breeds. Broiler Texas quails are more capricious and require strict adherence to all parameters from the table at the beginning of the article.
- It is very convenient to create reminders on your phone or computer that will not allow you to miss key moments: 10 and 15 days.
Preparation for the artificial incubation process
To obtain healthy full-fledged offspring and ensure the maximum percentage of hatchability, it is advisable to understand:
- with the regime of keeping adults;
- the peculiarities of feeding the broodstock;
- the age of the parents;
- the sex ratio in the herd.
The hatchability percentage of quail eggs depends on many factors.
It is recommended to adhere to such proportions: for each male there should be 3-4 quails. If there are more females, then the percentage of unfertilized eggs will increase. Too many males only increase feed consumption.
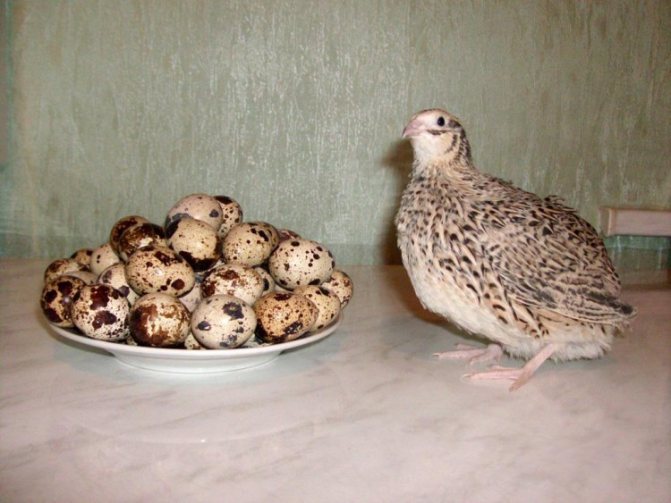
The optimal age of females is considered to be 2-10 months: during this period, the maximum number of fertilized eggs is observed. It is believed that under optimal conditions, up to 85% of eggs from females not older than 10 months of age will be fertilized. Eggs are not taken from older females, they are used for food.
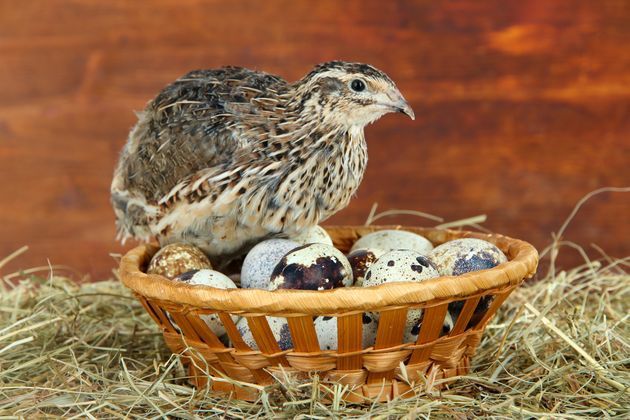
The optimal age of the quail is 2-10 months
To obtain offspring, it is important to monitor the nutrition of the bird. It is allowed to use only high-quality feed, which contains sufficient fats, carbohydrates, nutrients, proteins: protein should be about 25%. The female eats up to 30 g of feed per day. During the laying period, it is necessary to add crushed shells to the diet.
Learn! There must be grain in the feed, otherwise there is a risk that the birds will stop rushing.
You can include in the quail diet:
- livestock products (starter cultures, egg white, cottage cheese);
- vegetable products (cabbage, beets, carrots, potatoes);
- sources of minerals (yeast, shells, chalk).
Be sure to add herbs, herbal flour.

Quails should have greens in their diet.
Only with adequate nutrition will the females lay eggs, from which healthy offspring can hatch. The quality of feed affects:
- the nutritional composition of the egg;
- embryo development;
- the vitality of the offspring that has appeared.
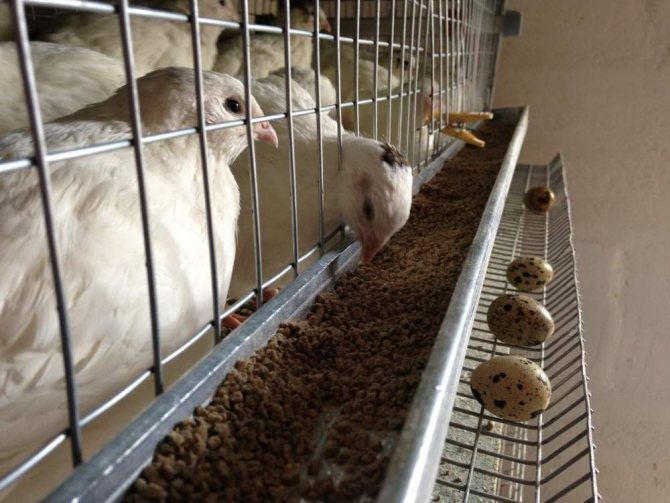
For good egg production, you will have to monitor the temperature regime. In the cages where quails live should be from 12 to 250C. When the temperature rises, birds begin to throw off their feathers, and in the cold they may even die.
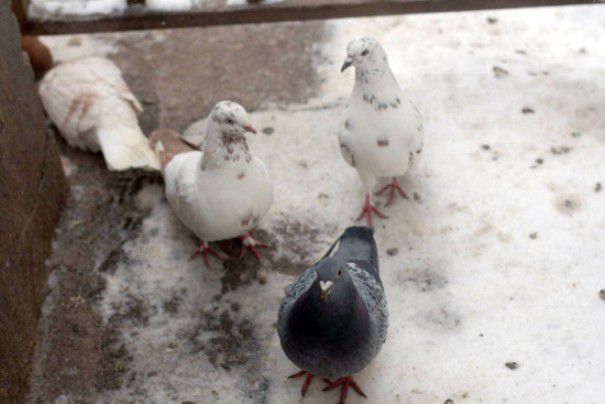
Quail health directly affects the quality of eggs
Compliance with the conditions of home incubation is the key to a high percentage of hatchability of young animals. Quail care is an important step in preparing for offspring. But it is possible to ensure the hatching of the maximum number of chicks with the correct selection, storage and preparation of the eggs for the planned artificial incubation.

Incubation periods
Let's dwell on them in more detail. The incubation mode of quail eggs depends on the time period for the development of the chick.
The optimal indicators taking into account the time factor are shown in the following table:
| Period, days | Humidity | Temperature | Turns, pcs | Airing |
| 01.02.18 | 65 | 38 | 2 | Not |
| 01.03.15 | 50 | 37,5 | 5 to 7 | Yes |
| 16-17 | 80-90 | 37 | — | not |
If you want to get a healthy brood, then compliance with these requirements is imperative.
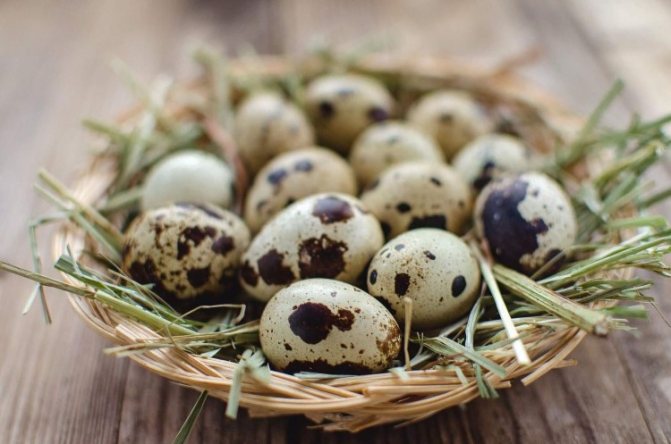
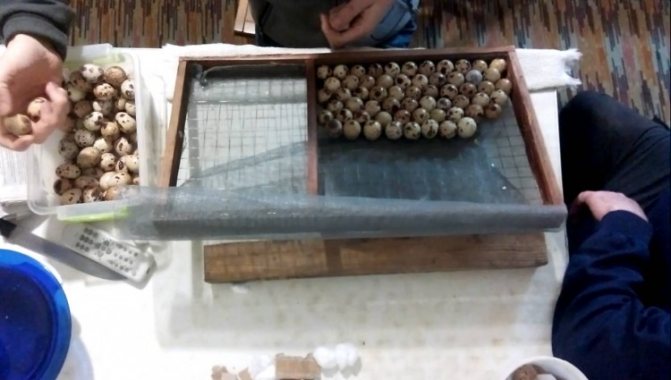
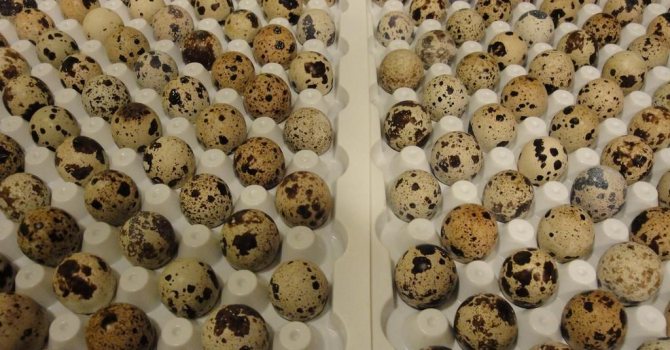
Selection and preparation of raw materials for incubation
Having dealt with the rules for keeping and feeding quails, you should find out what you need to pay attention to when selecting incubation raw materials.
Select copies that meet the requirements indicated in the table.
| Parameter | Value |
| Weight | 9-12 g (from quails of egg breeds), 12-16 g (from representatives of the meat breed "Pharaoh") |
| Shell | Smooth, no flaws: no cracks, build-ups, notches, dents |
| The form | Correct, oval |
| Surface | Matt |
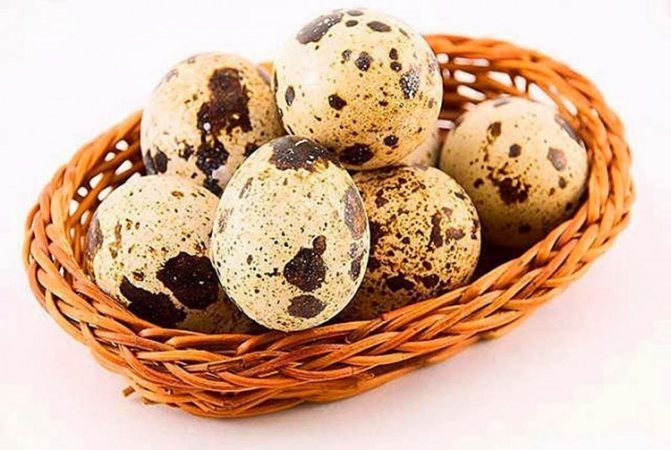
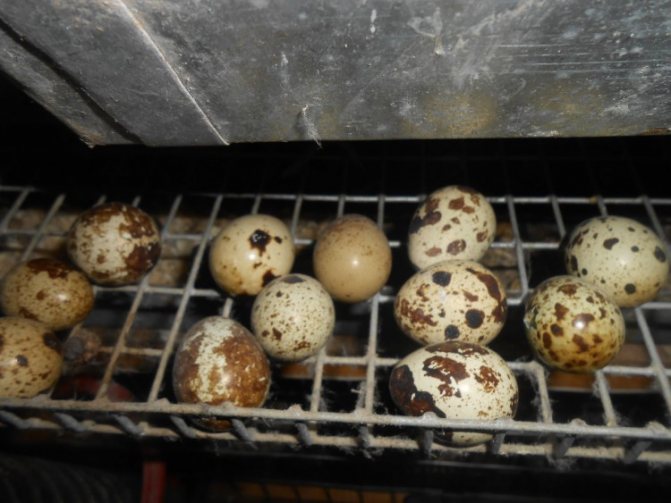
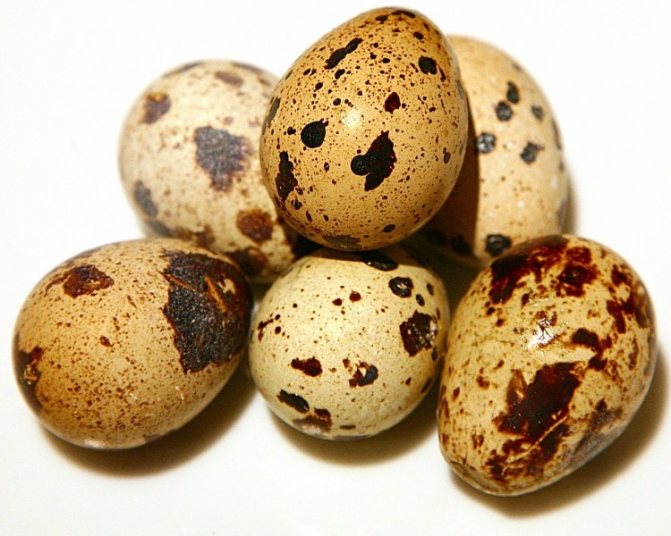
Important! Experienced poultry farmers recommend not taking too small and large testicles. Preference should be given to specimens with an average level of pigmentation: pale and variegated specimens are discarded.
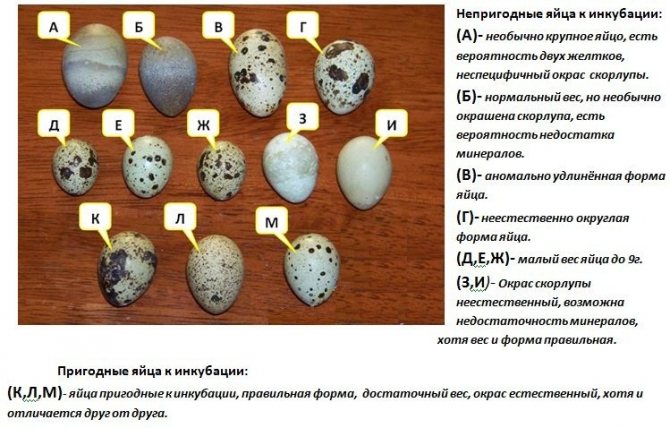
Which eggs are suitable for incubation
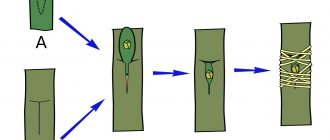
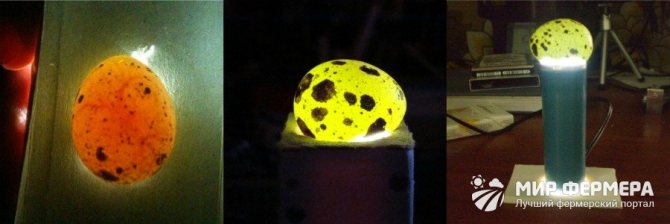
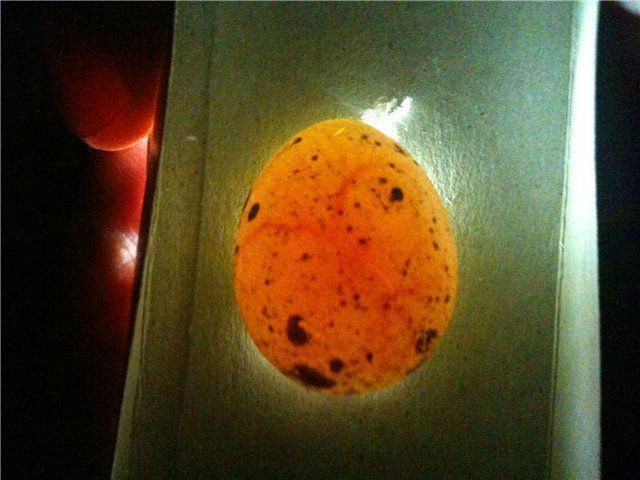
You can get the best hatchability by first examining all testicles with an ovoscope. The poultry farmer should figure out how to choose quail eggs.
Preliminary ovoscopy
Translucent eggs are a must. With the help of an ovoscope, you can immediately cull those specimens from which there is no chance of getting chicks. Defective raw materials in conditions of heat and high humidity can quickly deteriorate and cause contamination of other eggs with pathogenic microbes.
Preliminary ovoscopy
Ovoscope prices
Ovoscope
In the absence of a professional ovoscope, it can be replaced with an ordinary bright flashlight. When translucent, check:
- number of yolks: two-yolk specimens are discarded;
- the location of the yolk: it should be in the middle, a little closer to the blunt edge, in appearance on the ovoscope it resembles a fuzzy darkening;
- the presence of impurities, such as blood;
- the integrity of the shell: in case of cracks, chips, the raw material is rejected;
- purity of protein and yolk: dark spots underneath the shell are a sign of mold infestation;
- location of the air chamber: it is at the blunt end.
In the absence of an ovoscope, you can use a regular flashlight
If the yolk is located near the side wall or mixed with protein, then it makes no sense to lay such an egg in the incubator. Many incubation materials are visible through immediately after demolition. But experienced poultry farmers advise to carry out ovoscopy immediately before laying, because during storage, some specimens may become unusable.
Storage of hatching eggs
Only those eggs that were laid before 7 days ago are suitable for breeding. Some experts say that the maximum allowable shelf life is 10 days. The temperature in the room where the future quails are located is maintained at the level of 10–150C, the humidity reaches 75%. Turn them over regularly during storage. It is recommended to store eggs in an upright position so that the blunt edge is turned up.
You need to store eggs with a blunt edge up.
Keeping eggs at room temperature is not recommended. This significantly reduces their shelf life. Also, specimens stored in a refrigerator are not suitable for incubation.
You can increase the shelf life if, immediately after laying and collecting, you put the eggs in honeycomb boxes and pack them hermetically in a plastic film. In a vacuum, even at temperatures up to 180C, provided that the humidity is at 60%, eggs will be stored for up to 2 weeks.

Proper storage of hatching eggs is a guarantee of large offspring
It is possible to increase the percentage of hatchability of chicks from raw materials that are planned to be stored for a long time with the help of periodic warming up. The eggs are heated for 30-120 minutes several times, then they are returned to the room where they are stored. It was experimentally found that periodic warming up can increase hatchability up to 75% (of the number of fertilized specimens). In the absence of warming up, hatchability is reduced to 30%.
Important! In the room where the quail eggs will be stored, it is advisable to curtain the windows. Direct sunlight should not be allowed on them.
Having selected and prepared the raw materials, you can begin the process of reproducing offspring.
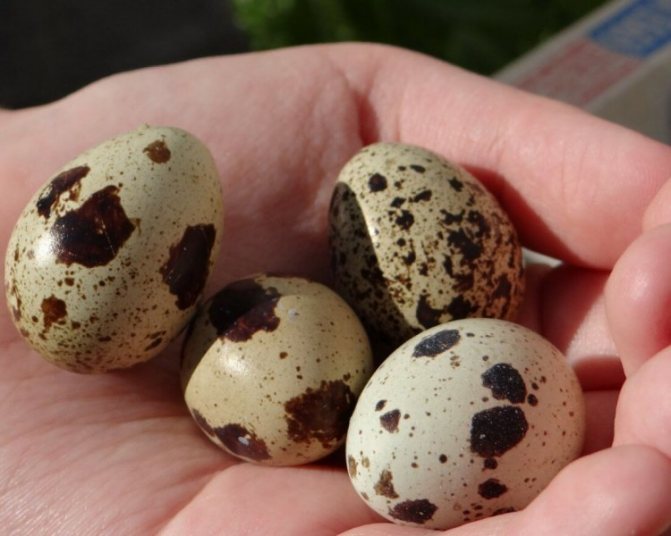
Choosing eggs
When choosing quail eggs for incubation, it is necessary to take into account a number of nuances:
- weight for breeding birds - 10-15 g;
- weight for growing chicks for meat - 8-13 g;
- shape index (the ratio of the smaller diameter to the larger one, expressed as a percentage) 65-70%;
- absence of shell defects (notches, outgrowths, irregularities);
- matte coating.
After that, the eggs must be examined through an ovoscope or "through". This will allow you to identify such disadvantages:
- blood inclusions;
- mixed yolk and white;
- wrong location;
- the size of the air chamber.
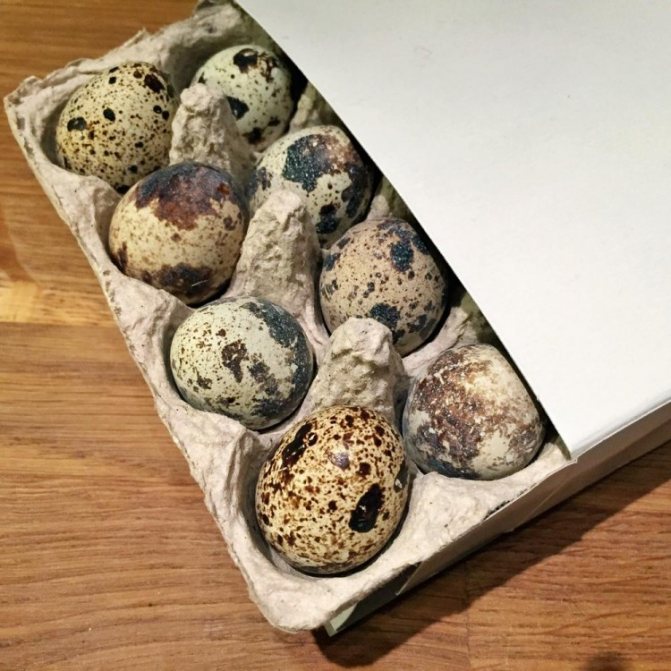
Eggs must be placed in the incubator that meet the following criteria:
- Correct oval shape.
- Weight. It is determined taking into account the quail breed. If these are eggs of meat breeds, then the weight is 16 g, and layers - 11-14 g.
- Egg surface. It should be perfect, no plaques or streaks.
Post from Marisha (@ maxa311987) Dec 25, 2020 at 2:10 PST
Incubator laying: starting the quail breeding procedure
Experts advise to select clean eggs for incubation without visible contamination. If some of them are contaminated with droppings, then it is cleaned during disinfection. Make a weak solution of manganese or bleach. Wipe contaminated areas with a dampened cloth.
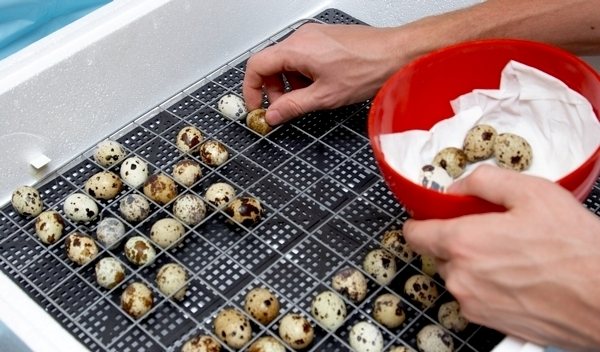
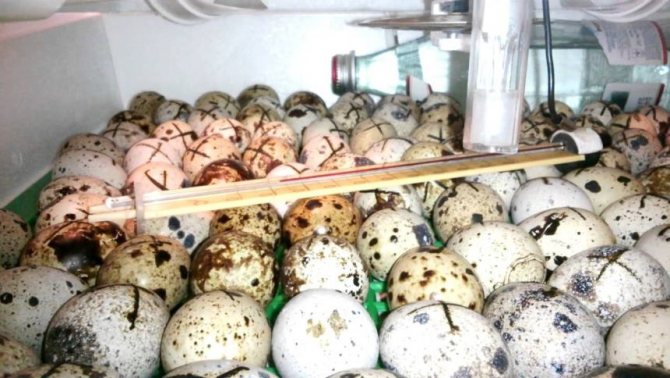
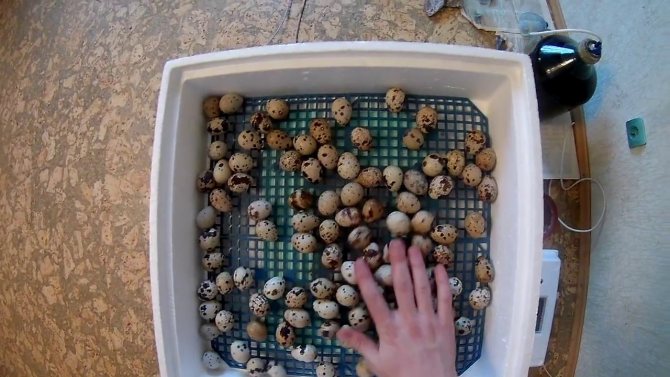
Laying eggs in an incubator
But it's not just the eggs that should be peeled. Before laying, the incubator is thoroughly washed and disinfected. This is necessary to reduce the likelihood of infection in future chicks. For cleaning, you can use special disinfectants: "Ecocid", "Brovadez-plus" and others. You can also kill germs using a household ultraviolet emitter: the device is processed for 5-8 minutes from a distance of about 40 cm.
Eggs and incubator are thoroughly disinfected before laying
Depending on the incubator model, eggs can be laid:
- horizontally;
- vertically.
In the first case, they are laid on their side and turned over by rotating them 180 °. On the sides of the mark for control of the coup can be omitted. The poultry farmer can simply scroll several of them with his palm at once. But many, by analogy with chicken eggs, mark them.
In the second case, they are placed in special trays so that the sharp end is directed downward. But the testicles are not placed strictly vertically, the farmer is exposed at an angle of 45o. This position is considered optimal for the development of embryos. Turn them by tilting them 45o.
Eggs are laid in the incubator either horizontally or at an angle of 45 degrees
Before laying, the incubator is pre-heated: the temperature is set at 380C and the apparatus is allowed to work for at least 3 hours. Eggs are also brought from a cold room to a warm one.
Experts advise, after laying the incubation raw materials, to maintain the temperature at 38.20C for 2 hours. This will quickly warm up the eggs and start the embryo formation process. Standard operating values are established after 2 hours.
Some simply lay the incubation material and only then turn on the apparatus. You can watch the beginning of the incubation process in the video.
Video - Laying quail eggs in an incubator
Reasons for failed incubation
Sometimes the incubation of quail eggs fails. The reasons may vary. For example, improper nutrition of layers. A lack of vitamin can lead to the appearance of an unviable embryo, which does not have enough strength to even break through the shell, which means that a small conclusion will turn out as a result. Therefore, only purchase eggs for incubation from reputable vendors.
Very often, incorrect incubation can lead to the death of embryos at the final stage. That is, the embryo will suffocate, since at the last stage it is extremely susceptible to an excess of carbon dioxide and a lack of oxygen. It is possible to establish that the embryo died during viewing on an ovoscope.The embryo will be deployed in the egg with its head towards the sharp end. This is often due to overheating of the testicles or too little cooling. From time to time, such young growth is still born, but ahead of time, while very weak. As a result, at the final incubation time, you need to carefully monitor the temperature, and when a squeak is heard, quail in the testicles immediately transfer them to the hatcher or reduce the temperature.
Very often, the cause of the death of embryos can be a non-systematic or incorrect turning of eggs. In this case, the protein is not fully utilized, and the embryo is incorrectly formed and dies. Very often, this is the reason for the death of chicks immediately after their birth.
In any case, if the incubation of quail eggs is unsuccessful, you need to thoroughly understand it. To do this, the unhatched testicles must be opened and the dead embryos analyzed. This will allow you to avoid mistakes in the future, and therefore increase the hatchability of healthy chicks.
Breeding chicks in an incubator
To obtain offspring, it is necessary to select high-quality incubation raw materials and put them in an incubator. But the troubles of poultry farmers do not end there. Over the next 17 days, they will need to constantly monitor temperature, humidity, provide air access and turn future quails.
Quail chick development
Incubation modes by period
The required incubation modes depending on the period of embryo development are shown in the table.
| Time period, day | Recommended humidity,% | Temperature indicators, ˚С | Number of coups per day | The need for ventilation |
| 1-2 | 55-70 | 37,8 | 1-3 | Not |
| 3-15 | 45-55 | 37,5 | 3-8 | Yes |
| 16-17 | Up to 90 | 37,2 | Not | Yes |
These indicators must be adhered to in order to get a full-fledged healthy brood of chicks.
Features of the incubation procedure
They begin to turn eggs as early as 1 day. This will minimize the likelihood of the embryo drying out to the shell. From day 3, compulsory ventilation and spraying is added. If the incubator does not have an automatic egg turning function, then it is not necessary to organize additional ventilation. Eggs will be cooled during manual flipping.
when manually turning eggs, you do not need to ventilate the incubator
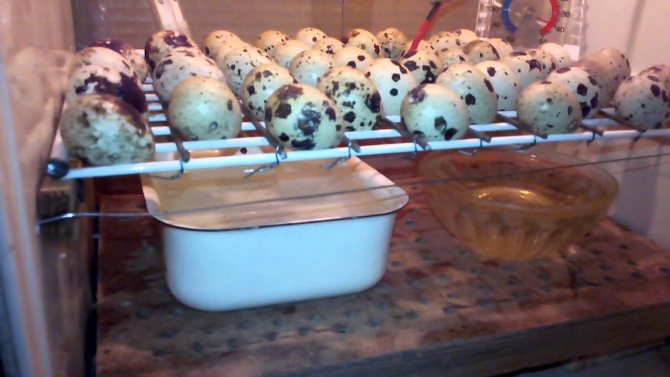
In addition to airing, from 3 days on, the incubation raw materials are sprayed with warm water. It is not necessary to water them, it is enough to moisten the shell a little. The procedure is repeated 2 times a day. This helps to soften the shell: it will be easier for the chicks to hatch.
Please note! Experts do not recommend starting spraying immediately after opening the lid. Wait a couple of minutes for the eggs to cool slightly.
In units where the rotation of the incubated raw material is carried out automatically, periodic ventilation is a mandatory procedure. First, the lid is removed for 3 minutes, over time, the procedure is lengthened to 10 minutes.
Egg incubation is a responsible process
Maintaining optimal temperature indicators, monitoring humidity, ensuring the flow of fresh air is necessary for the full development of the quail embryo.
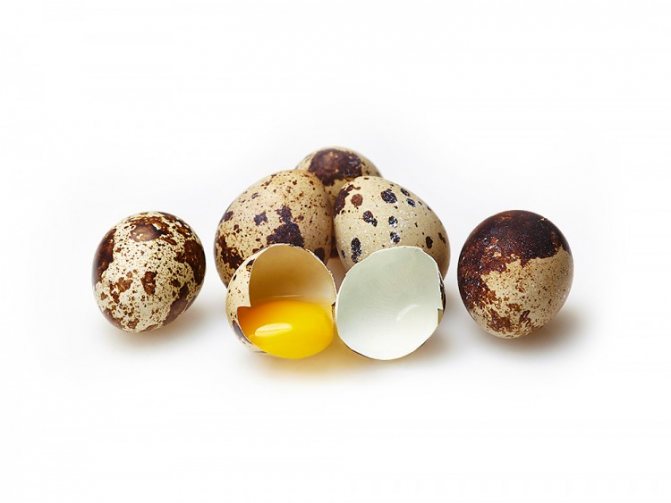
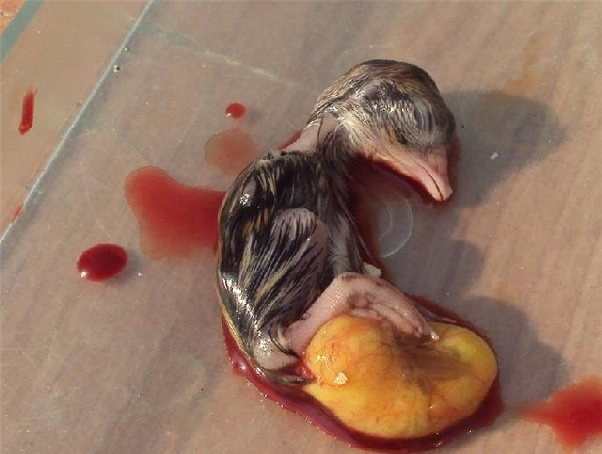
Embryo development
Quail embryos are less sensitive to temperature extremes compared to other types of chicks. For their development, it is necessary to maintain optimal temperature values in the first 5 days. Therefore, many of them are taken out even in homemade incubators.
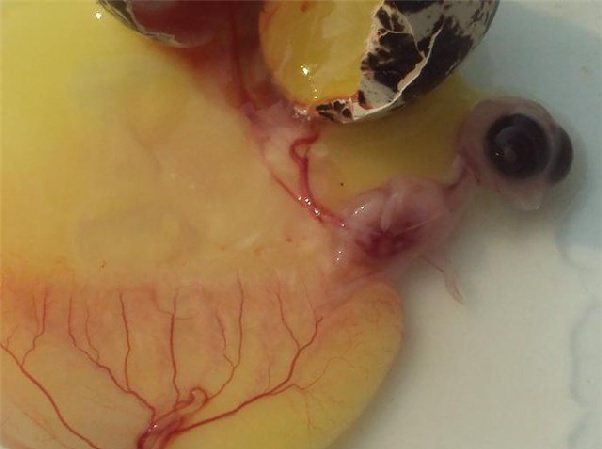
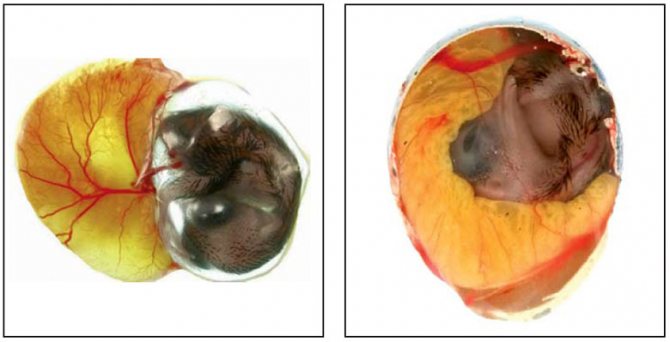
Broken egg with embryo
It is necessary to closely monitor the temperature on the 7th day of incubation. The embryos begin to generate heat on their own, and the temperature inside the device can rise significantly.
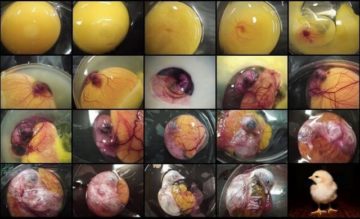
You can control the development of the embryo using an ovoscope. The procedure is carried out weekly.
- At the end of the first week, during ovoscopy, the yolk is visualized, a developed capillary system is visible.In the absence of blood vessels, a dark center and a light edging, they speak of the death of the embryo.
- By the end of the second week, the capillary network occupies the entire inner surface under the shell. The embryo is visible as a dark spot that occupies about 25% of the inner surface.
- On the 16th day, the final rejection is carried out. If there is no embryo under the shell, it died in the first days of development, then such testicles will be visible on the ovoscope, their contents are greenish. If everything is in order with the embryo, then the contents will be dark, only the air chamber located at the blunt end is visible.
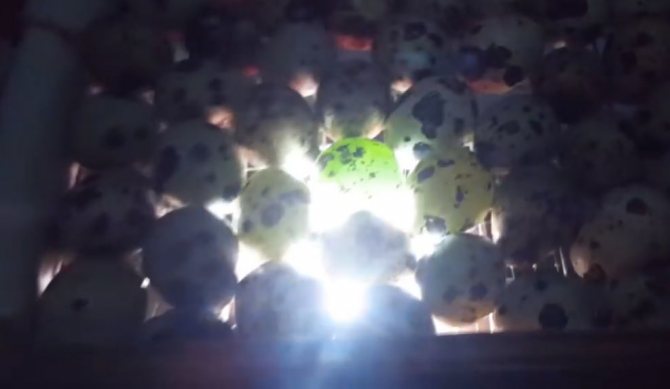
A green tint during ovoscopy indicates an infertile egg.
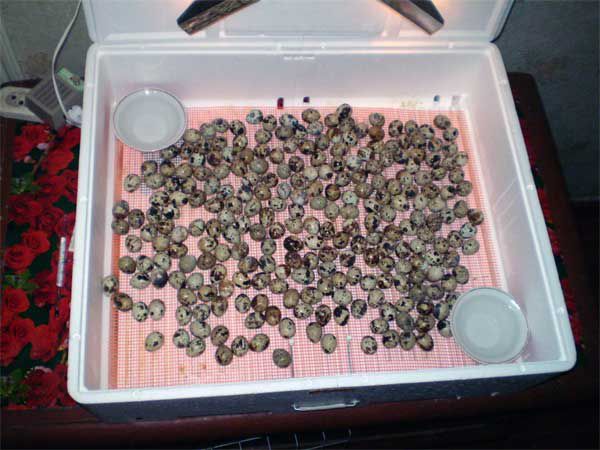
The discarded eggs are disposed of, the rest of the specimens are returned to the incubator and wait for the quail to hatch.
Stages of development of quail embryos
| Day of incubation | Development |
| 1-2 | The yolk is loosened, the embryonic disc is visualized, islands of the circulatory system appear |
| 3 | The development of the circulatory system begins, the rudiments of the eyes appear |
| 4 | Eyes are visible, the body of the diaper begins to form |
| 5-6 | The rudiments of the beak, paws, wings appear, the outlines of a chick appear in the embryo, it rises on top of the yolk, an intestinal tube is formed, the liver, kidneys are laid, the heart is differentiated |
| 7 | The process of formation of a cannon begins, paws, wings, beak are clearly distinguishable |
| 8-16 | The embryo continues to develop actively, becomes overgrown with fluff, the yolk is drawn in and the amount of protein decreases |
| 17 | The yolk is completely retracted, the embryo is formed |
Depending on the temperature set in the chamber, the hatching process begins on the 16-18th day.
Video - Ovoscopy of a quail egg during incubation
Egg development by day
The time intervals after which there is a need to change the surrounding conditions are subdivided into periods of embryonic development:
- First phase. its duration is seven days;
- the temperature is maintained at 37.8 degrees;
- humidity not more than 55%;
- Coup - 4 times a day;
- no cooling.
- temperature - 37.8 degrees;
- duration from 15th to 17th day;
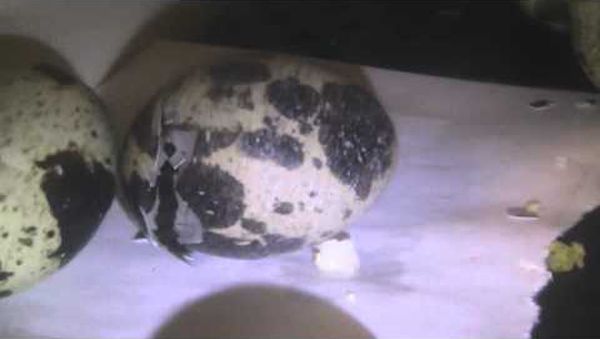
Hatching procedure for chicks
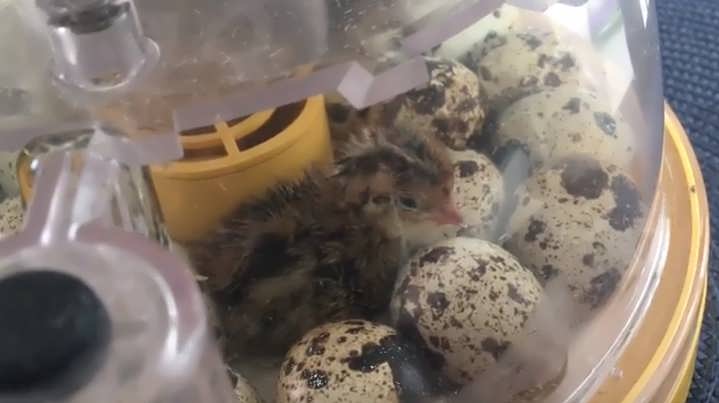
Experienced poultry farmers say that if the correct incubation regime is observed, the quails appear almost simultaneously. The hatching procedure takes up to 7 hours.
Important! It is not recommended to immediately get the chicks that appear. They are given the opportunity to dry completely for 12-15 hours. The quail is taken out in a warm room for 18 days.

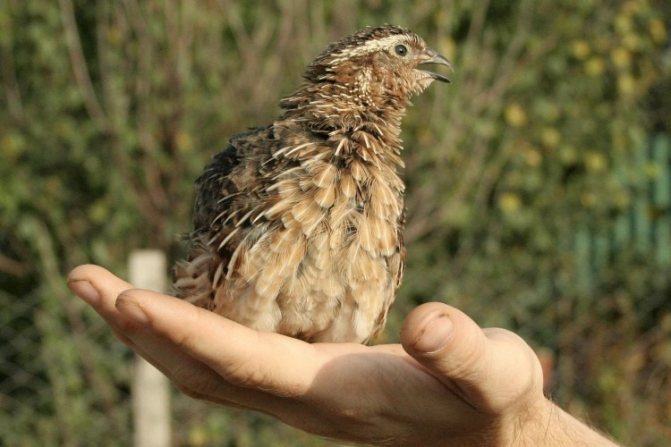
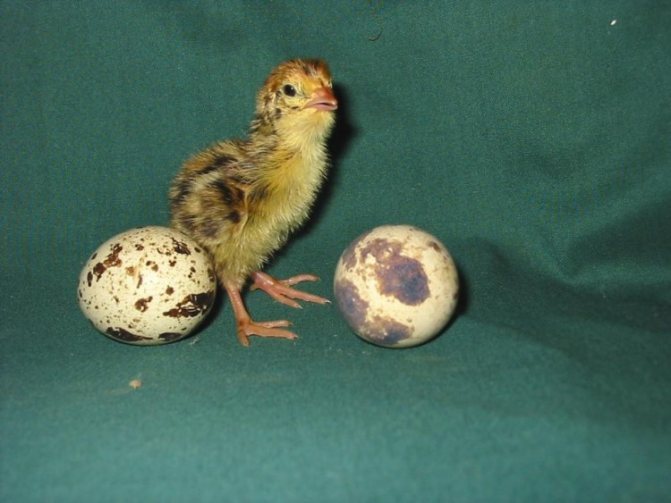
Quail hatching
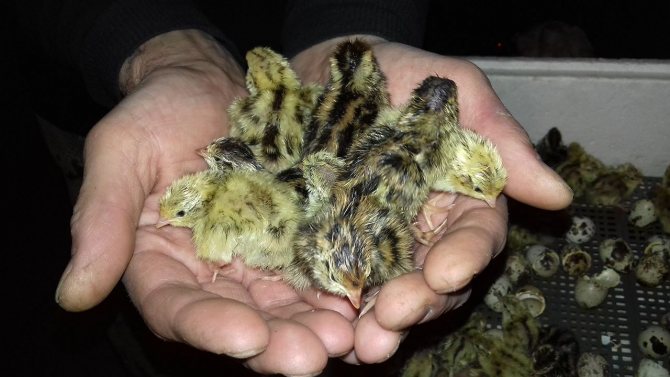
The weight of newborns is about 8 grams. The number of females and males is usually the same. True, some individuals can hatch 1-2 days later. Experts attribute this to the quality of the laid eggs. There is no point in waiting any longer. With a hatch of more than 80%, it is a sign of successful incubation. In other cases, the poultry farmer is advised to find out why the hatchability of the quail was poor.
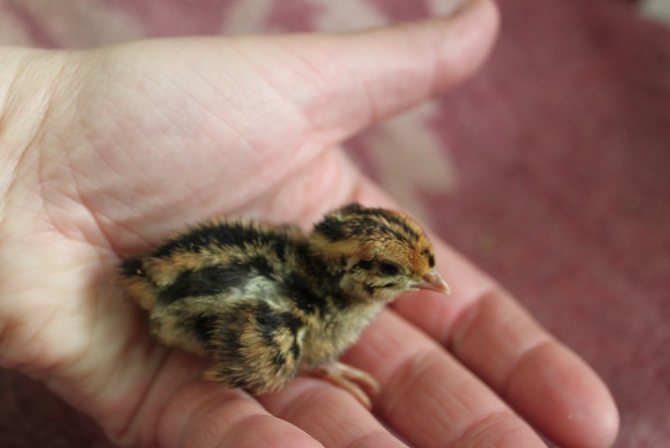
The weight of newborns is about 8 g.
Reasons for failed incubation
Lack of control over temperature and humidity is the main reason for poor hatchability of quail chicks. In the first days of incubation, metabolic processes are actively underway under the shell. It is possible to minimize the likelihood of a shortage of liquid by maintaining a normal level of humidity inside the unit.
- If the air inside the device is dry, then the shell under the shell may dry out, its density will increase. Because of this, the chick may not be able to get through the shell during hatching.
- Excessive moisture also interferes with pecking. The embryo membranes contain an excess amount of moisture, and the chick cannot break through them. In addition, high humidity contributes to the development of bacterial infections and mold lesions.
In order for the chick to break through the shell, the air humidity must be optimal.
But these are not the only reasons why there are problems with breeding. The main reasons for incubation failure include the following.
- Wrong quail diet... If the birds do not receive all the necessary substances with their nutrition, then their chicks will be weak, many are born with defects and die during the first two months of life.
- Lack of ventilation... Fresh air in the incubator chamber is required. The practically formed chicks receive oxygen through the shell. In the absence of oxygen inside the unit, embryos may die.
- Violation of the egg overturning regime. If you forget about the eggs, do not turn them over, then the embryo can dry out to the shell and die. Also, the lack of coups is the reason that the chick does not fully utilize the protein. Because of this, it develops unevenly, and after pecking it can die immediately.
- Failures in the process of gas exchange... If the inner chamber overheats, gas exchange under the shell may be disturbed. In this case, the embryo is positioned incorrectly: its head is directed towards the sharp end, not blunt.
- Long-term transportation of incubation raw materials... If you shake while riding, there is a possibility of damage to the internal structure of the testicles.

Reasons for unsuccessful incubation and their manifestation
Many reasons can lead to the death of an embryo.
Knowing the possible reasons for unsuccessful incubation, poultry farmers have the opportunity to prevent their occurrence. For these purposes, they need to choose a suitable incubator, familiarize themselves with the features of selecting eggs for incubation and the procedure for hatching them. Particular attention is paid to caring for the hatched offspring in the first week.
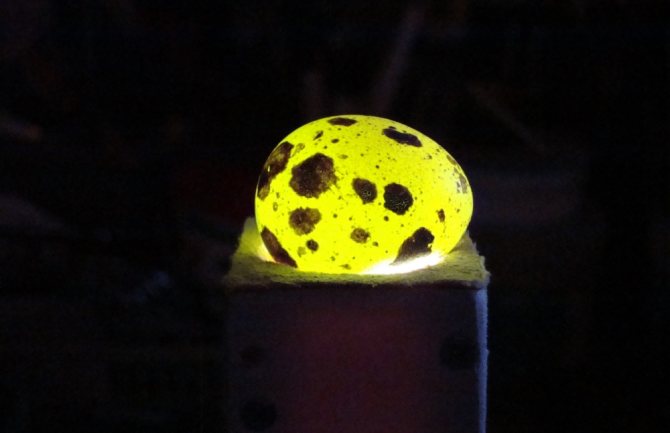
Ovoscopy of eggs
Quail eggs are poorly translucent on the ovoscope due to the dark color of the shell. So you won't be able to see the details:
- On days 6-7, ovoscopy is performed in order to remove unfertilized eggs. They completely transmit light, and their color is bright-light. Those in whom life has originated have education below. It looks like a small lump.
- At the end of the first week, check to see if all the embryos are alive. If, when viewed through an ovoscope, it is found that a light border passes along the border of the dark spot, then this indicates that the embryo has died.
- In the second week, you need to look for the vascular system. When the egg is translucent, a network of capillaries is visible on it. It will take up 1/4 of the entire egg volume. If it is less, then this indicates that it is absent, the embryo has stopped its development.
- On days 15-16, ovoscopy is performed. When viewing an egg, it should be dark, that is, the chick has already fully developed and occupied the entire space.
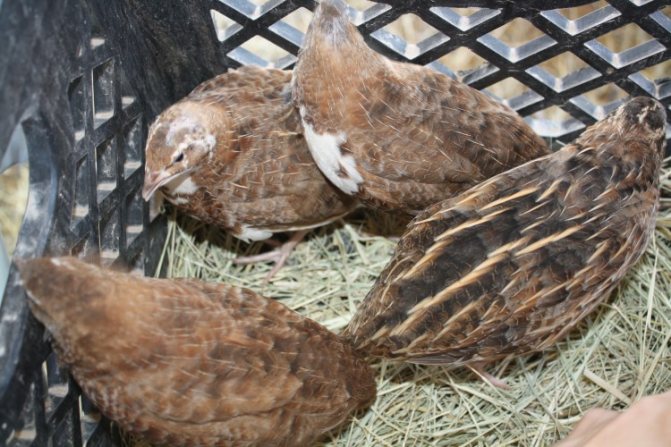
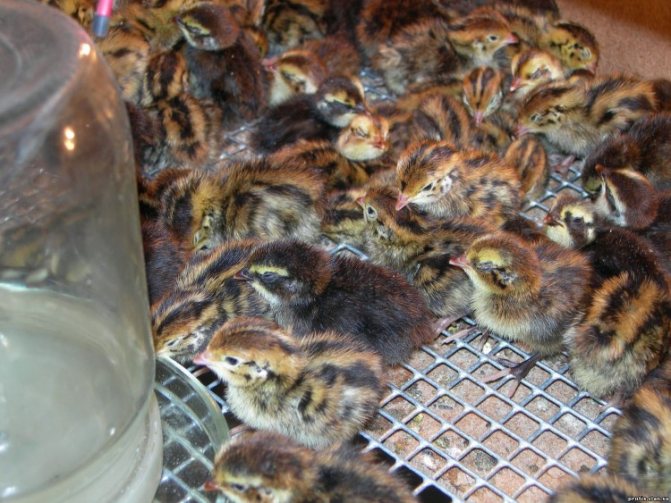
Care of hatched quails
After drying, the chicks become mobile, they run quickly and constantly try to hide somewhere. They should be quickly moved from the setter trays to the boxes. After that, rejection is carried out. Chicks are removed from which:
- the toes on the paws are bent, folded into a "fist";
- the upper or lower part of the beak is shortened;
- twisted joints;
- paralysis: in such chicks, the whole body is clamped, the head can be thrown up.
Quail chicks
Leaving such quails is impractical. They only increase the density of birds in their cages and consume food. Such individuals are more susceptible to infectious diseases, most of them die before reaching two months of age.
The depth of the feeder for newly hatched chicks should be up to 2 cm. It is covered with a soft cloth. This is necessary so that the quails do not damage their beaks.When feeding, consider the following features.
- In the first week, hard-boiled testicles are the basis of the chicks' diet. They are rubbed together with the shell. 1 egg is enough for 3 chicks.
- From the second day, cottage cheese is added to the diet.
- For 3 days, the chicks are given a little greenery.
- From day 4, the amount of egg feed is reduced by adding cottage cheese.
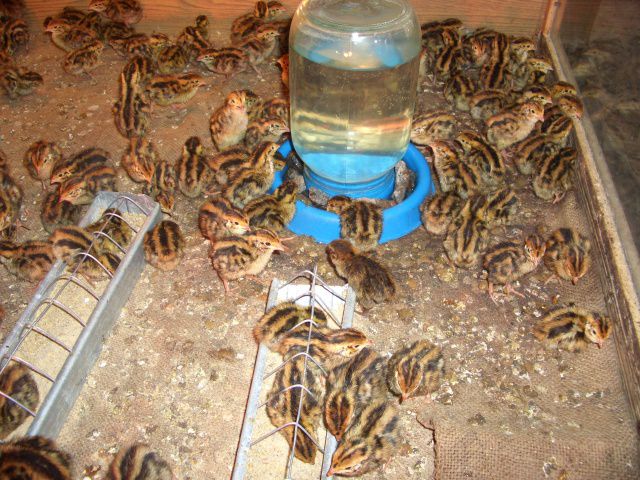
Quail feeders and drinkers should be easily accessible
On the first day, poultry farmers need to help the little ones find food by tapping on the feeder. The quails will come running to the noise. In the first days, the crumbs are fed up to 5 times a day. 1-2 hours after feeding, the troughs are cleaned.
Drinking bowls are made small, otherwise there is a risk of drowning. Water can be poured into regular plastic can lids. The hatched chicks are watered with a weak solution of potassium permanganate (the pink tint should be barely noticeable).
From day 4, the bottom of the boxes is covered with burlap or a similar cloth. By the seventh day, newspapers or corrugated paper can be laid on the floor. The litter is changed daily.