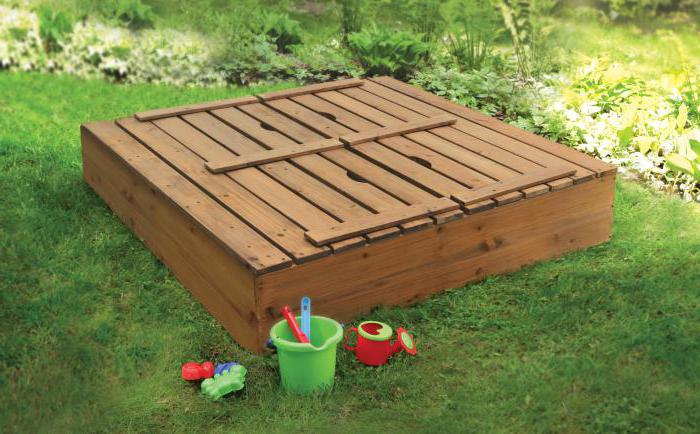
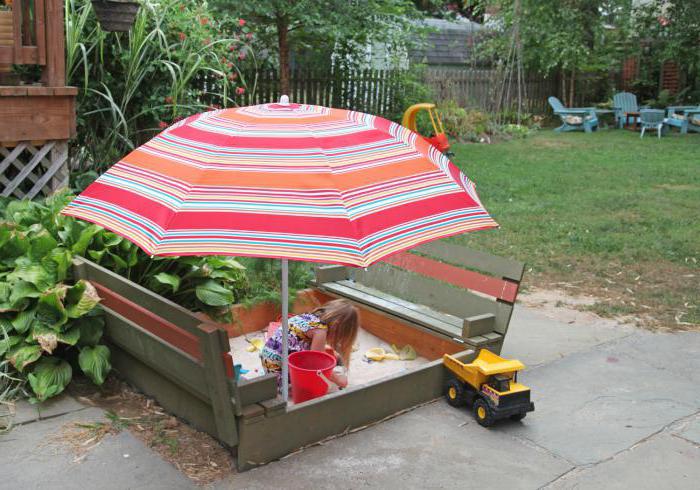
If you decide to make a sandbox with a lid with your own hands, you can equip a playground for games, where cats and other animals wanting to use the territory as a toilet have no place. However, the lid will not block rainwater from entering, which will keep the sand from drying out. The last aspect can be considered important for the reason that only raw sand allows children to create figures.
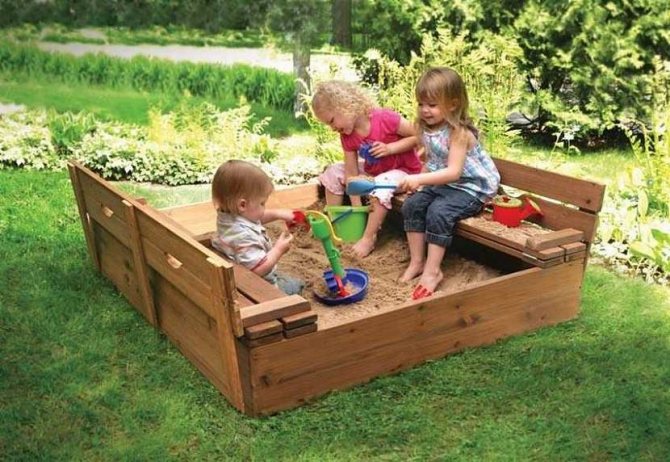
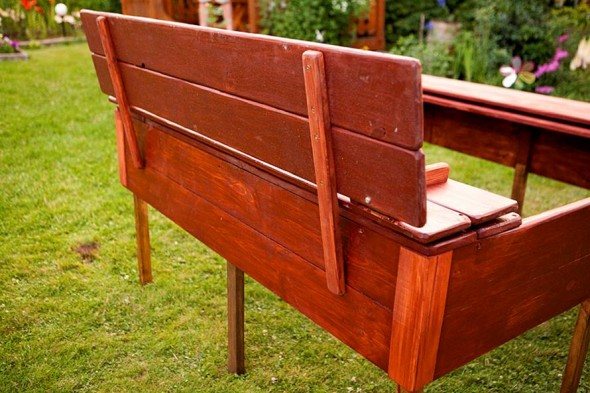
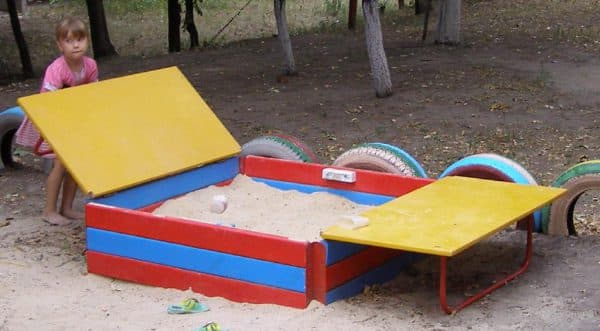
Dry sand under the influence of wind can rise into the air and begin to pose a danger to human health, because small particles of material can enter the lungs. The described construction will have an open one. This also keeps the sand moist. The cover of this design plays another important role - for the duration of the games, it can be transformed into comfortable benches with backs, where parents can comfortably sit, watching the baby play.
Site preparation
Before you start making a sandbox with a lid and a bench with your own hands, you must prepare a platform for it. For this, the perimeter of the structure with a canopy or fungus is marked. Then the soil should be removed, deepening by 30 cm. It is important to take care of the presence of a drainage layer in the form of a cushion of coarse gravel and sand. The layer of material is well compacted, which ensures the absorption of moisture into the soil and will contribute to accelerated drying of the sand after rain.
When doing a do-it-yourself sandbox with a lid, it is recommended to consider the photos. They help you decide which design is best to choose. It must have a base, which can be different materials, for example:
- plywood;
- polyethylene;
- paving slabs.
The first pair of options is not very successful, because the film almost does not allow moisture to pass through, and plywood deteriorates quite quickly when exposed to water. You can use this approach when there is a need to save money.
Drainage holes should be formed. The optimal base is made of geotextile, which will ensure the passage of moisture. Before making a wooden sandbox with a lid with your own hands, it is recommended to consider the photo. Perhaps they will allow you to understand how to avoid mistakes. For example, some experts even advise to abandon the last stage - creating the foundation. But, as practice shows, in this case, the sand becomes polluted rather quickly and mixes with the soil. A kind of barrier from rodents and insects, according to home craftsmen, is simply necessary.
Preparation of materials
If you decide to make a sandbox with a lid with your own hands, then you need to take care of the availability of appropriate materials and tools. The base will be wood, which is resistant to insects, decay and atmospheric precipitation. At the same time, the material should not exude toxic fumes, like plastic boxes that are presented for sale.
Experts do not recommend using chipboard and material treated with preservatives under the influence of pressure for construction. The sheets in this case contain formaldehyde and other chemicals that serve to protect the wood from insects and rot, but are harmful to health.If you make a sandbox from such materials, then the design will be harmful for the baby.
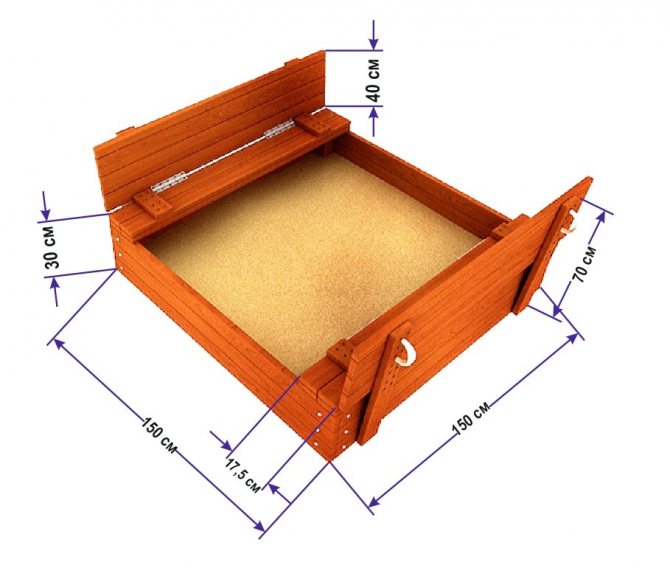
When preparing materials, you must take care of the availability of boards, as well as bars. The first should be 8, their length will be 120 cm, while in the cross section of the workpiece should be 2.5 x 15 cm. 12 boards with the same length will have a cross section of 2.5 x 10 cm.These workpieces will go to the top cover ... Therefore, you should try to choose flat boards that are well trimmed. After all, some of them will go to the backs and seats.
Before you start making a sandbox with a lid with your own hands, you must take care of the presence of 20-cm bars, the cross-section of which will be 2.5 x 7.5 cm. These elements will go to fasten the seat planks. The surface of the bars must be well processed, otherwise you will have to deal with drifts. The four 45 cm bars should be 2.5 x 7.5 cm. They will be used to hold the back and seat planks together. The 28 cm bars should have a cross section of 5 x 10 cm.
To strengthen the corners, you can use square bars with a side of 10 cm.If you decide to make a sandbox with a lid with your own hands, then you also need to take care of the availability of accessories, as well as fasteners. You should purchase a package of self-tapping screws, the length of which will be 30 mm. They will be used for fastening wooden elements. You need to take care of the presence of 40-mm metal non-separable loops, their number should be equal to 8 or 12.
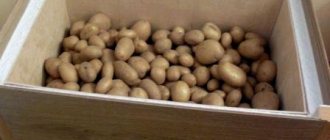
What's the best sand?
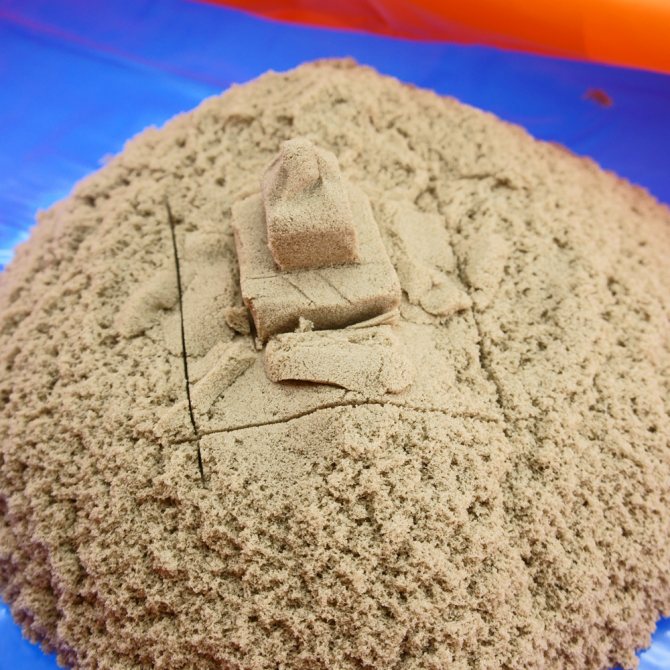
The most suitable and safe for children is river sand. It contains a minimum amount of harmful impurities to health. Although the quartz analog is also acceptable for use in a children's sandbox. One of the important rules: no matter what material you choose to fill, it must be sieved without fail.
There is a special sand mixture with a high clay content on the market. This solution is convenient for sculpting figures and other similar activities. In addition, substances are added to it, the smell of which drives away both cats and dogs from the building.
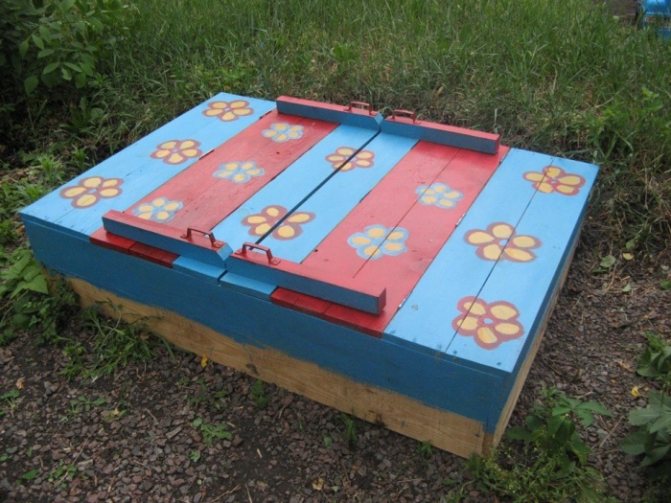
To give more aesthetics, you can use harmless paints and varnishes and make a real masterpiece. A do-it-yourself children's sandbox is being built quickly enough, you just have to show your imagination and spend some free time!
Instrument preparation
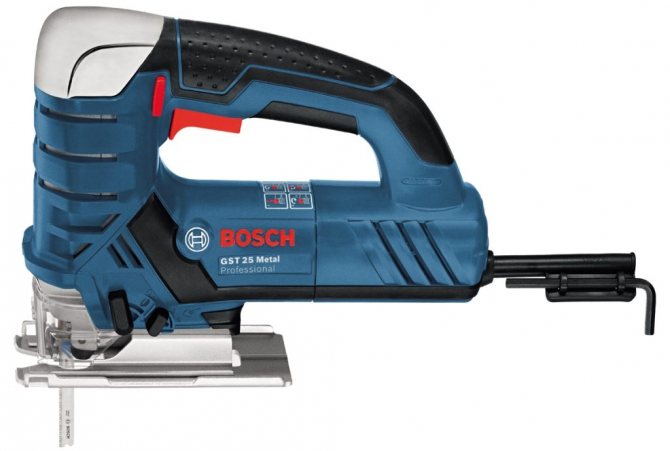
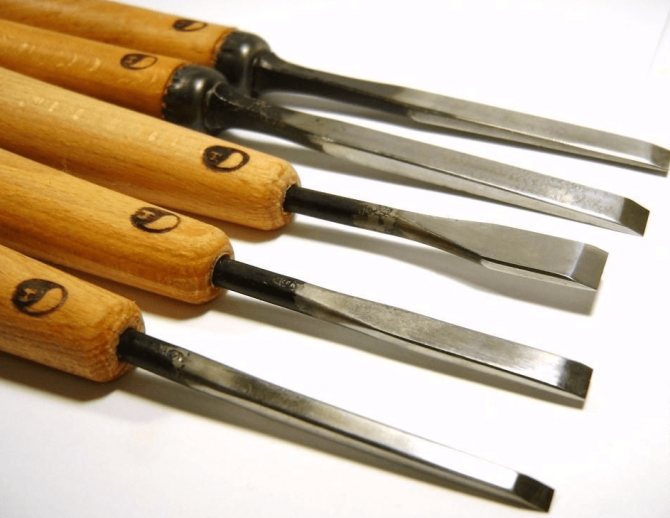
Some DIYers already have some of the tools listed below in stock. Otherwise, they can be purchased, borrowed or rented. To build a sandbox, you will need:
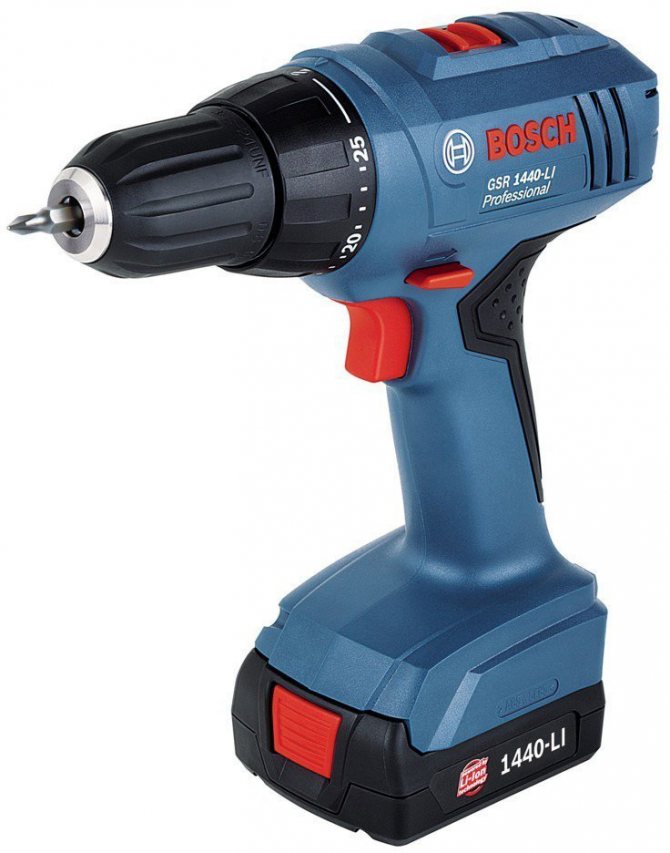
- cordless drill;
- drill for boards;
- a circular saw;
- construction stapler;
- pencil;
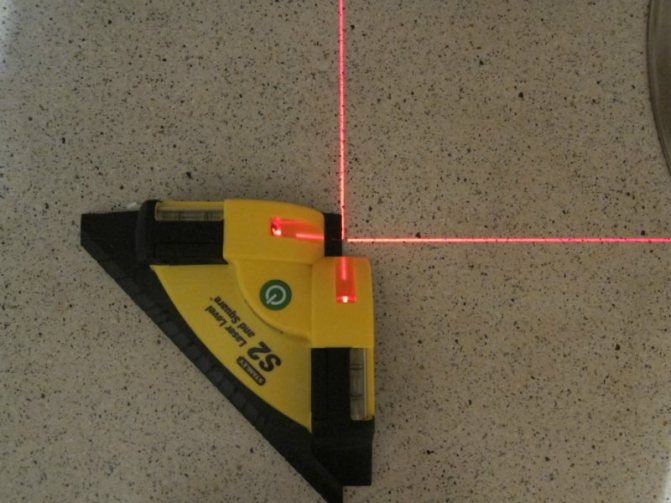
- square.
The drill must have the function of a screwdriver. In order to avoid splitting the wood, you will need a 3 mm drill bit, with which you can make pilot holes in the boards. The construction stapler is useful for fixing material that prevents weed growth. But the square is needed to mark right angles and draw lines.
Construction technology
Before you start building a sandbox with a lid and a bench with your own hands, you need to complete the drawings. They will allow you to determine the size. It is necessary to start work with blanks of bars and boards of the required length. They are cut, while the cutting width of the circular saw should be 3 mm. Although this value is insignificant, it must be taken into account in order to minimize inaccuracies and errors.
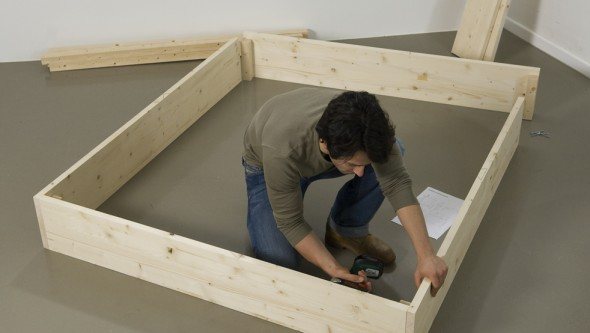
Once all the wooden elements are prepared, you can start assembling them. The rails are drilled before installing the screws. The construction of the box should be started by assembling a square base.For this, 120-cm boards are used, which are fixed in the corners with bars, with a section of 5 x 10 cm.Their height should be 28 cm.
Use a square to make sure all corners are straight. Performing a sandbox with a lid and a bench with your own hands, it is necessary to fix boards around the perimeter of the square, the cross-section of which is 2.5 x 15 cm.A pair of screws are screwed into each end of the board. The operation is repeated with the second row of boards, which will encircle the bars of the rack. You should end up with a solid construction.
If the measurements are correct, then the box should not turn out to be square, its sides will be equal to 120 and 125 cm, because the boards of the short side will overlap the ends of the blanks on the long side. Once the box is finished, you can fix the material that will exclude the growth of weeds. It is not worth pulling it too tight, you should provide slack, otherwise the substrate may tear (the weight of the sand and uneven soil will lead to this).

Manufacturing instruction
When a suitable place for the sandbox is found, and all the tools and materials are prepared, you can proceed directly to the manufacture of the structure itself. Conventionally, this process can be divided into several stages.
Foundation construction
To equip the sandbox, you need to prepare the base
Initially, it is important to determine the size of the future sandbox. Then it is desirable to apply them on the drawing and on the terrain itself. The latter must first be cleaned of vegetation and debris. For marking, you can use 4 pegs driven into the ground, and a cord stretched between them.
When setting the pegs, it is important to consider an additional 25 cm on each side for digging the ground. You also need to designate the center of the future structure.
Now is the time to start removing the top layer of earth up to 30 cm thick and digging a hole in the center up to 80 cm deep. It will serve as the basis for a drainage system, thanks to which sedimentary moisture can be absorbed into the soil. To do this, a metal pipe with holes is lowered into the dug hole, which is covered with a mesh on top to avoid the ingress of grains of sand.
In the absence of such a pipe, large crushed stone can be used. It is filled up to a depth of 15 cm and compacted. A "pillow" of sand with a height of 5 - 6 cm is poured on top, on which the base itself can be laid directly. In addition to agrofibre, it can be:
- dense polyethylene film;
- geotextile;
- paving slabs;
- plywood sheet with holes made for perforation.
Such bedding materials prevent the sand from mixing with the ground. They also block the way for rodents and insects in the sandbox.
Housing
Having prepared the boards for the sandbox, you can start building the frame
For the construction of the sides, it is necessary to dig in the bars in the corners to a depth of 15–20 cm. And then nail the prepared boards to them. The process of their procurement also has its own characteristics. Like bars, they must be:
- sanded to eliminate the appearance of splinters in children;
- treated with linseed oil, bitumen or any other antiseptic at least 2-3 times in order to avoid wood decay.
Based on the fact that the minimum height of the sides is 25 cm, you need to nail 2 boards on each side. This means that you need 8 boards of the required length to make the hull. With the help of a hacksaw, grooves are cut into them and the boards are inserted into each other, forming two squares. The lower one is placed in the prepared recess. Upper - is installed on it. And the structure itself is fixed by using small bars in the corners.
Nails and screws, with the help of which the wood will be fixed, must be completely buried in it, eliminating the risk of injury to the kids during the game. For greater strength, they can be putty.
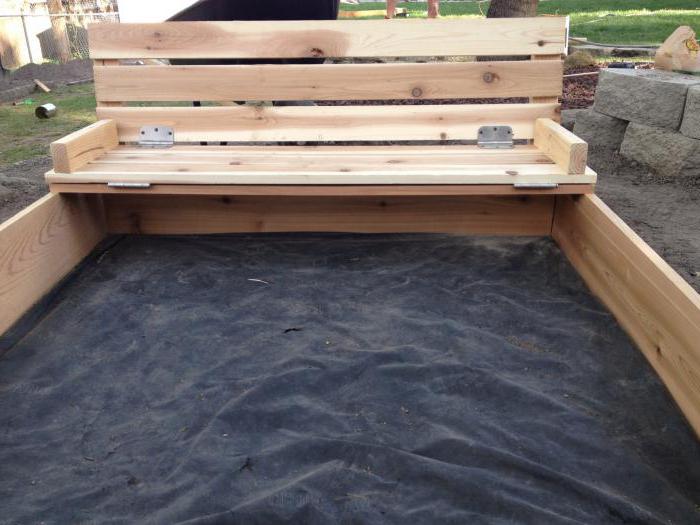
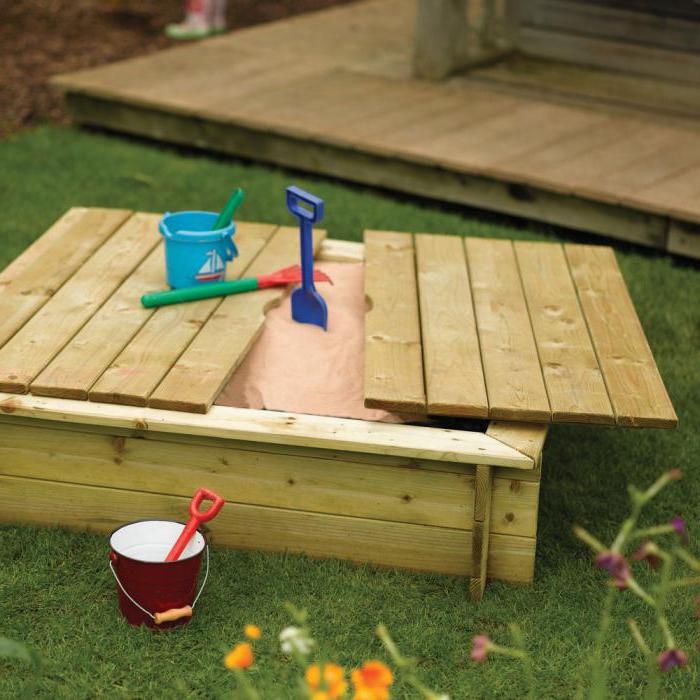
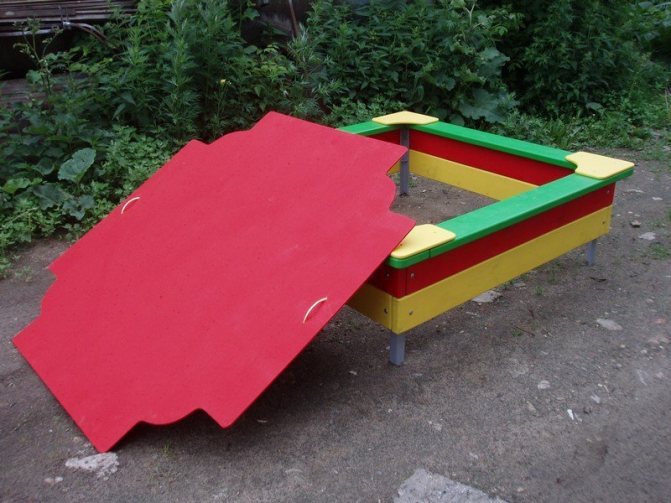
Cap
Children will surely appreciate the sandbox with a table top
There are several options for constructing a roof.
- A cover of the desired size is cut out of a chipboard sheet, which can be placed in the grooves previously made in the sides.
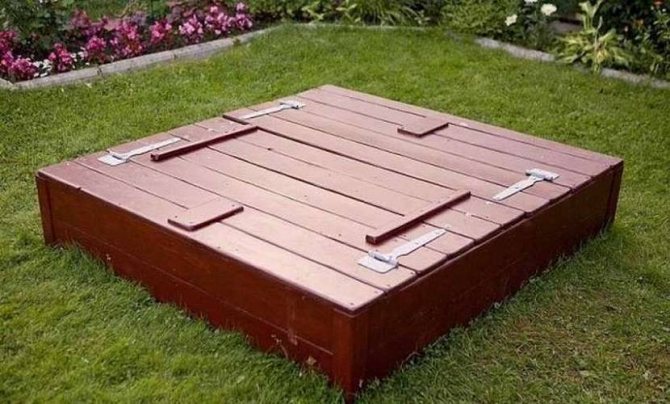
- A board with a thickness of 20 mm is taken. and is attached to the side walls of the structure using hinge hinges.When closed, it will ensure the safety of the sand. And in the open - it will serve as a bench, shelf or table. Additionally, it can be equipped with handles for ease of use.
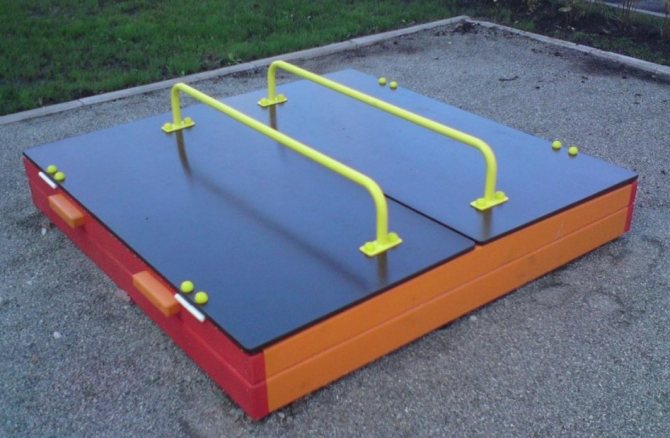
Options in the photo
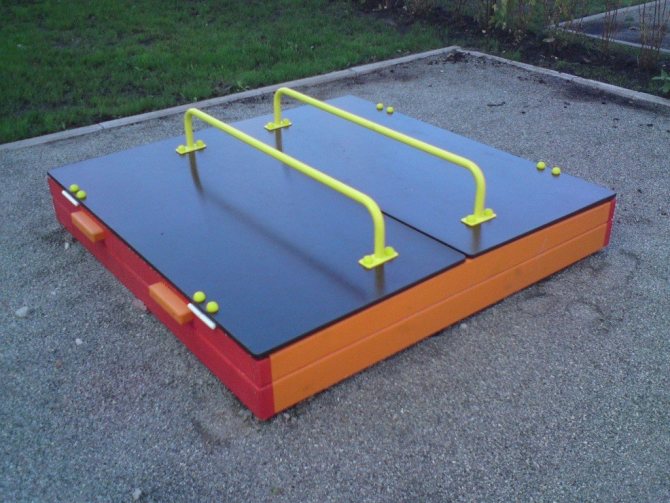
Sandbox with lid
Sandbox with lid

Sandbox with lid
Sandbox with lid
Cover making
Before you start making a sandbox with a lid and a bench with your own hands, it is recommended to consider a photo of such structures. They will help you understand how to avoid mistakes. The next stage of the technology involves the manufacture of a lid. For this, the boards are sorted by surface quality. The workpieces should have a cross section of 2.5 x 10 cm. Roughly cut products are located closer to the edge, while smooth ones should be placed closer to the center.
Each board is laid with the smooth side down. Half of the lid will consist of 6 planks. The last pair of products is fixed with self-tapping screws to a square box. Pilot holes must be drilled with a 3mm drill. Do not tighten the self-tapping screws too much, otherwise the wood may become cracked. In the process, a centimeter gap is left between the boards.
How to make a sandbox with a lid with your own hands
In order to create a children's structure on your own, it is optimal to choose a tree. For a sandbox with a lid, the assembly instruction requires you to first draw a diagram, indicate all dimensions, connection nodes. The whole DIY assembly process consists of several steps:
- When the drawing of a sandbox with a bench cover is ready, materials are purchased. You will need an edged board 25 mm thick. For legs sinking into the ground, a bar is used.
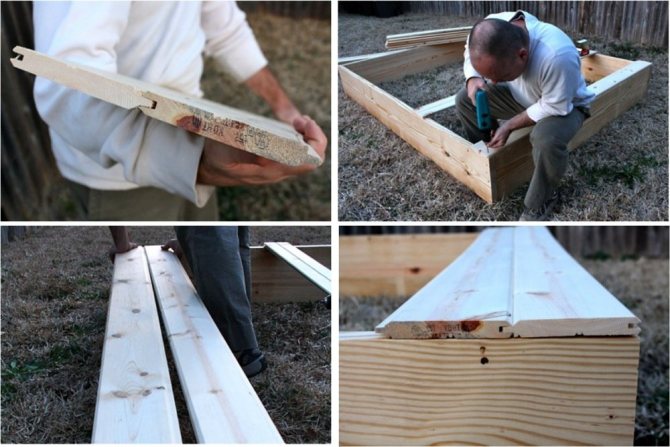
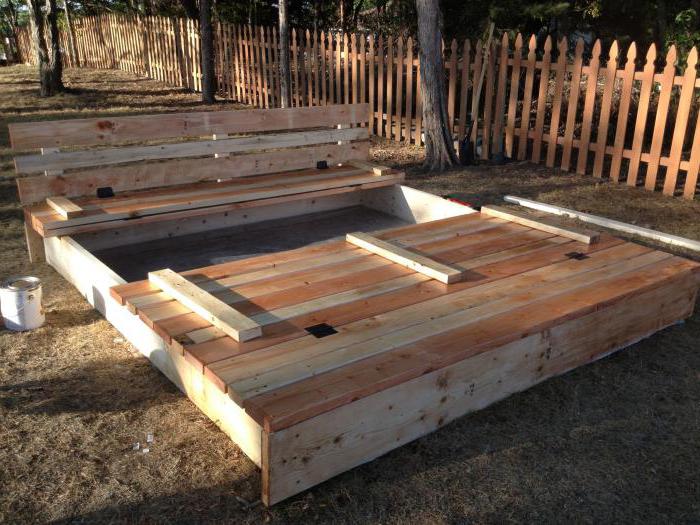
- Boards are usually sold in lengths of 6 m. For economical consumption of material, they are cut into 4 pieces of 1.5 m each. The length is just enough to create a box measuring 1.5x1.5 m and the same cover. For legs from a bar, saw off 4 blanks 25 cm long.All details are carefully polished. The workpieces are impregnated with a protective composition against fungus, and they are allowed to dry. Before assembly, the parts are checked again for burrs.
- A box is assembled from boards and timber. First, they knock down the sides with their own hands. Each of them consists of two planks. The connection is carried out with self-tapping screws. The boards are immediately fixed at the edges to the timber. As a result, you should get a square box with protruding pointed legs.
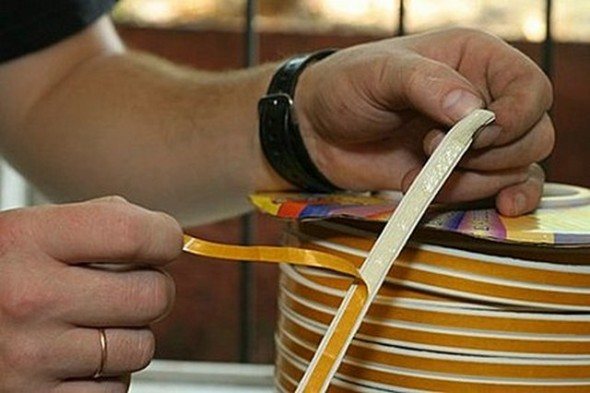
- During the assembly of the box with your own hands, a self-adhesive rubber seal is laid between the ends of the boards, which is used when sealing windows and doors. The tape will reliably close all the cracks, prevent sand spilling through them.
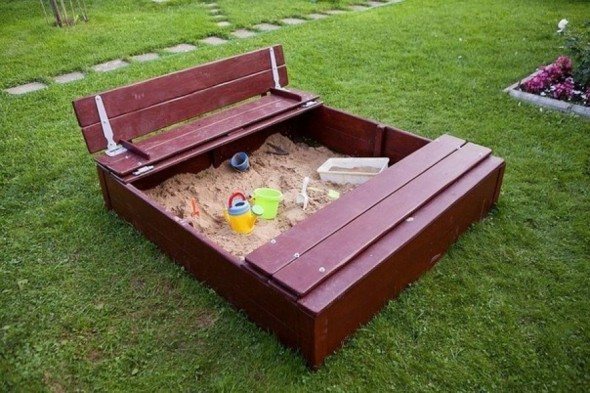
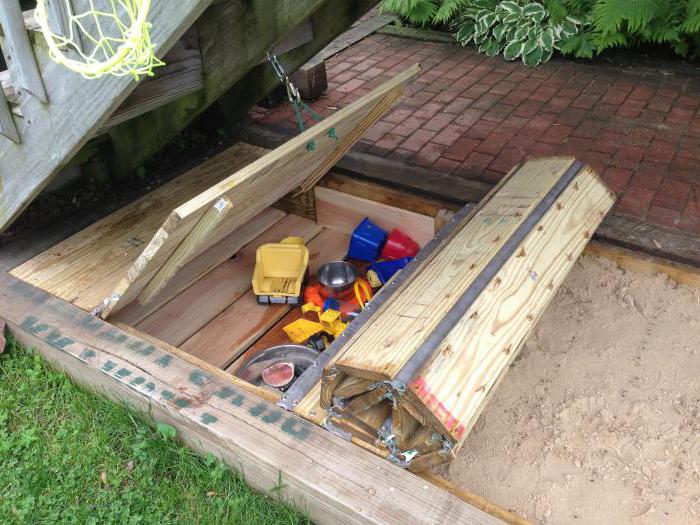
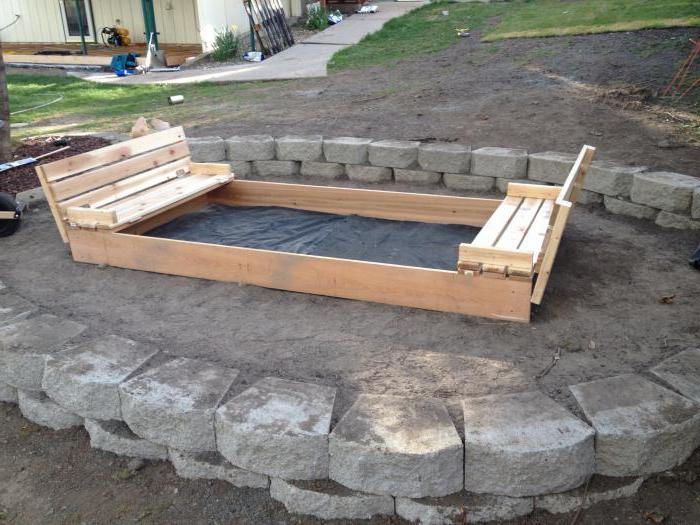
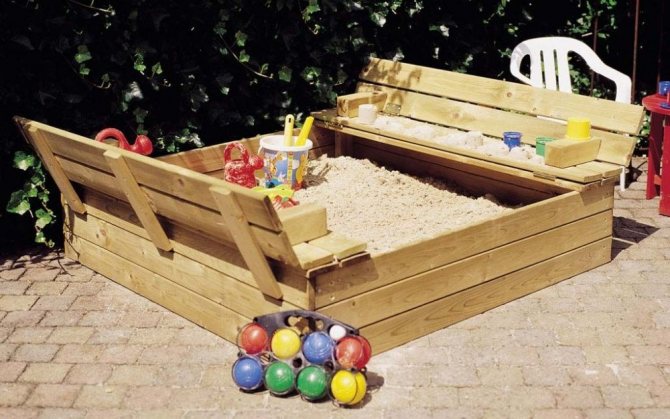
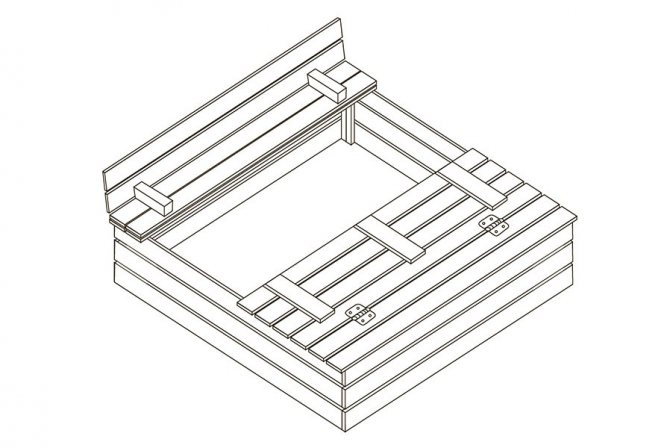
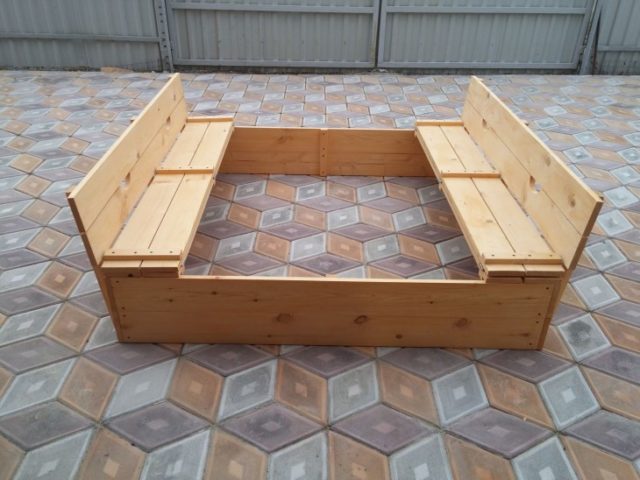
- The next step is the manufacture of the lid. The shield is not the best option. It is optimal to stay on the transformer. Here, too, there is a choice. The unfolded lid can be converted into two benches or a bench and a table. The first option is most often popular.
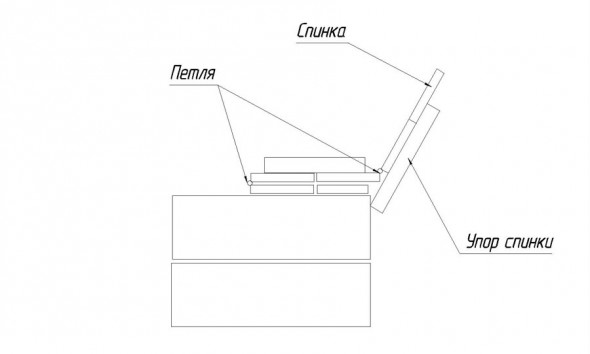
- To create a folding bench, you need 6 boards. They are connected in pairs. The first pair is rigidly fixed to the side of the box with self-tapping screws. The second and third pair are attached with loops. Of the two rails, limiters are installed, which provide the backrest of the bench. The principle of creating a structure is shown in the diagram.
- The second bench on the opposite side of the box is created according to a similar principle. You will need 12 boards in total. Their width must be calculated so that when folded, the benches become a full-fledged cover that completely covers the sandbox.
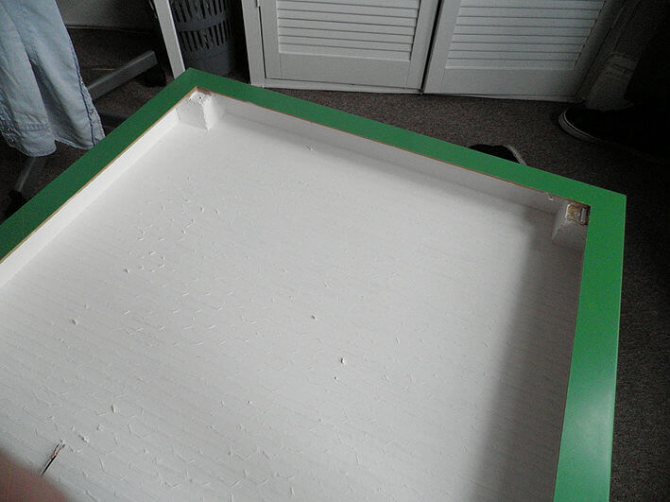
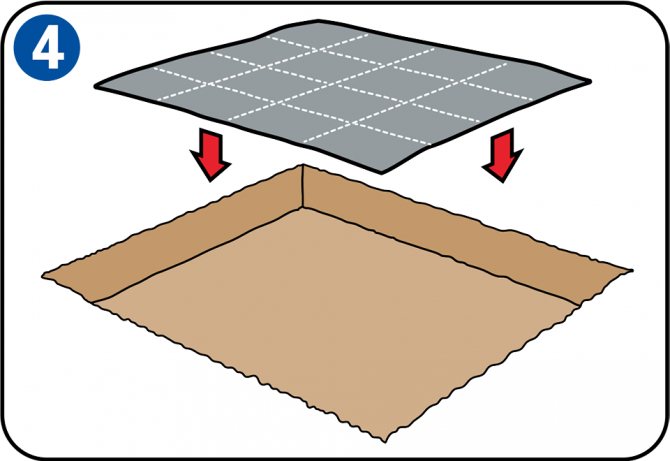
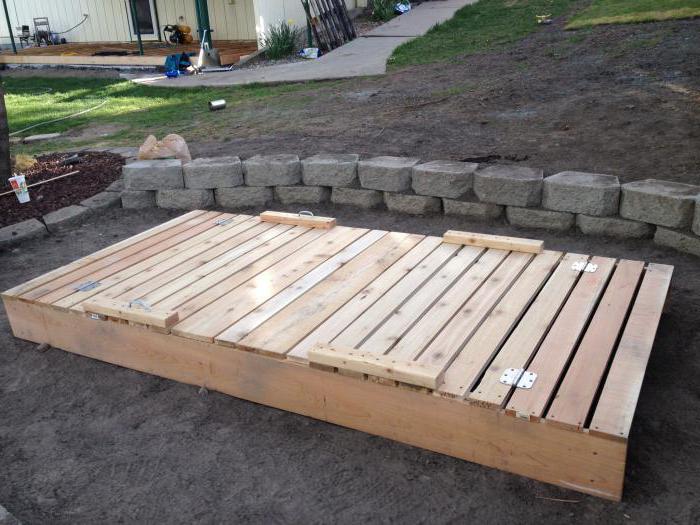
- The bottom is an important structural element. Without it, the kid will get to the ground. After the rain, earthworms will crawl into the sand, and grass will begin to sprout. The bottom is usually made of geotextile or dense agrofibre. The canvas is shot with staples to the ends of the lower part of the box.
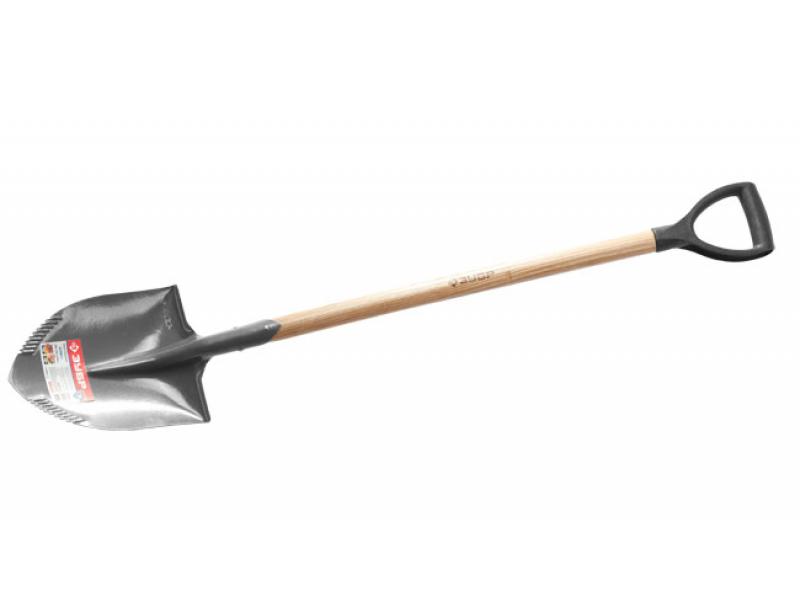
When the structure is ready, it is placed on a leveled area. A place for holes is marked under the legs. The pits are shallow, they can be dug with a shovel or drilled with a drill.The legs of the sandbox are treated with bitumen, immersed in holes, tamped with sand.
An example of creating a sandbox is shown in the video:
Seat making
If you decide to make a sandbox with a lid and a bench with your own hands, you are invited to consider a photo of such products. They are presented in the article and will allow you to determine the design features. The next step is to tackle the seat. For this, the underside of the boards is well sanded with sandpaper. With metal hinges, the seat must be fixed to the box as tightly as possible. The blanks are connected to each other by three bars, the thickness and width of which are 2.5 and 7.5 cm, respectively. These bars will prevent the backrest from tipping forward.
The assembled seat is placed on boards fixed to the box. A pencil is placed between them. With the latter, you can provide clearance for the hinge. The hinges are secured with self-tapping screws and the seat is raised and lowered several times to ensure everything is working properly.
To fix the seat, you can use three hinges, which are evenly spaced along the length of the board. The last pair of boards will act as a back. It will be fixed with hinges. They are attached opposite the first set. In this case, one back board should be used. The sixth board is installed and fixed in the next step. To do this, you should use 45-cm bars, the cross-section of which is 2.5 x 7.5 cm. They will perform a double role - to prevent overturning, structures back and fasten the boards together in the back.
The end of each bar should be aligned with the edge of the last plank. The second end will cover the second board by 4 cm.If you are making a sandbox made of wood with a lid with your own hands, then it is important to make sure that the bars are perpendicular to the lid boards, while all the gaps must be aligned. The bars are fixed with self-tapping screws, but only to the sixth or fifth board.
How to avoid mistakes
As soon as the work was completed, and the child began to play in the new sandbox, you can understand that this design has one drawback. It is expressed in the fact that the load on the screws will be increased due to the fact that the child will grab the upper part of the back to help himself when he rises from the sand. In this case, the screws holding the backrest hinges to the seat will be under stress.
Even if you use a longer fastener to fasten the hinges and screw it in without disturbing the surface of the board, which cannot be called an easy task, the hinges will still break out over time. The solution to this problem can be the implementation of small wooden latches, which will have a rotating structure. These elements must rigidly hold the backrest upright.
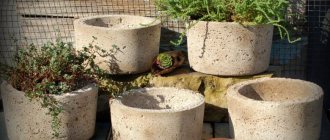
Stone sandbox
Natural stones of different sizes and colors are perfect as a manufacturing material for a sandbox.
To make a sandbox from stones you will need:
- Dig a small pit no more than 60 centimeters deep.
- Install the largest stones along the contour of the pit, the surface of which should rise above the ground. Then everything is covered with soil and compacted well.
- The second row is laid on the inside and connected to large stones using cement mortar. The height of the masonry in the second row should correspond to the first row.
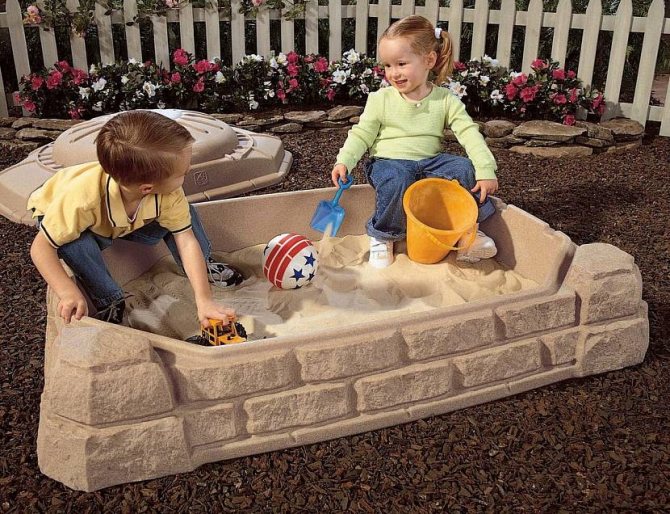
Portable sandbox stylized as a stone
- Allow the solution to dry well.
- Using a garden sprayer, spray the structure with sealant to protect the masonry from cracking.
- After a week, fill the sandbox with sand.
The advantages of such a sandbox are that its shape can be whatever, and as a fence, you can use not only stones, but also bricks, paving slabs and other building materials.
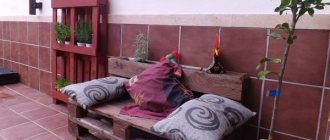
Making a sandbox from pallets
Quite often, home craftsmen today make sandboxes with a flight cover with their own hands. You too can follow their example. The advantage of this technology is that the product is almost ready, it will only need to be partially disassembled, and then reassembled, but in a slightly different design.
So, a sandbox can be made of several pallets. The pallets are disassembled in such a way that in the end it is possible to obtain two rows of boards, which will be located horizontally. They are connected in the form of a rectangle with metal corners or wooden bars. In order for the sandbox not to move, which is especially important when it is small, you can install pegs around the perimeter, they are driven into the ground.
Benches can also be made of pallets, they will have backs. Fastening is carried out using the same technology, which was discussed above, however, the pallets must first be prepared by disassembling and sawing the boards in the right places. At the final stage, the product is sanded and painted with paint for external work.
Preparation for manufacturing: drawings, dimensions, diagrams
When planning a sandbox on a site, first of all choose a place to install. Pay attention to the following points:
- The sandbox should be clearly visible from different points of the yard so that the child is supervised and can see you.
- Do not be located near a pool, pond, beds, which will often be watered;
- Choose a small elevation so that rainwater does not stagnate in the sandbox;
- The sandbox should be located partially in the shade - it can be either the shade from trees, a fence, or set up umbrellas or fungi. It is not recommended to simply install under a tree, as falling branches, leaves will clog the sand. Caterpillars and beetles falling from trees can scare your baby.
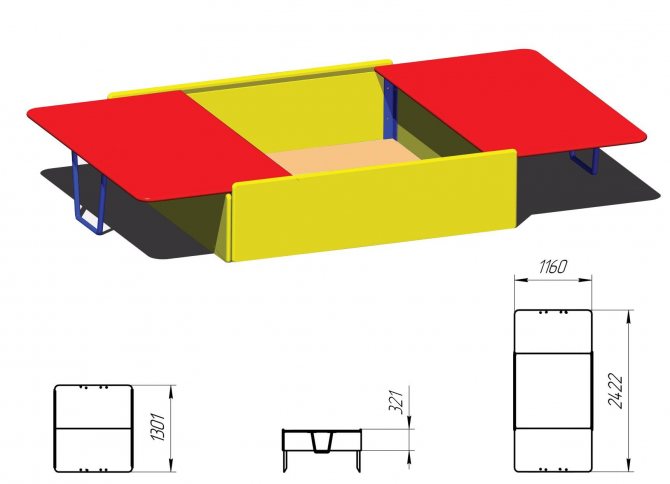
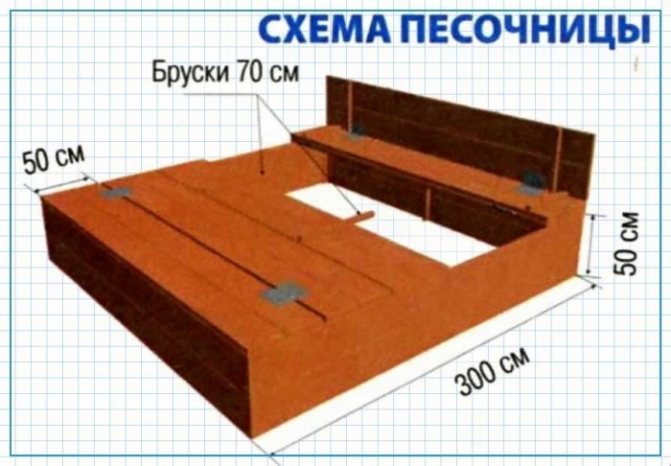
The next step is the choice of size and design. One child is bored to play, and guests with children may come. Choose a size so that multiple toddlers can easily fit in the sandbox. Most often, a sandbox is made square with a side size of 1.2-3.0 m, a height of 25-30 cm, but you can choose a different size based on the available material. Therefore, below we give a diagram without specifying the dimensions.
Sandbox scheme with a transformer lid
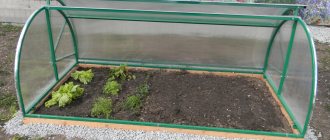
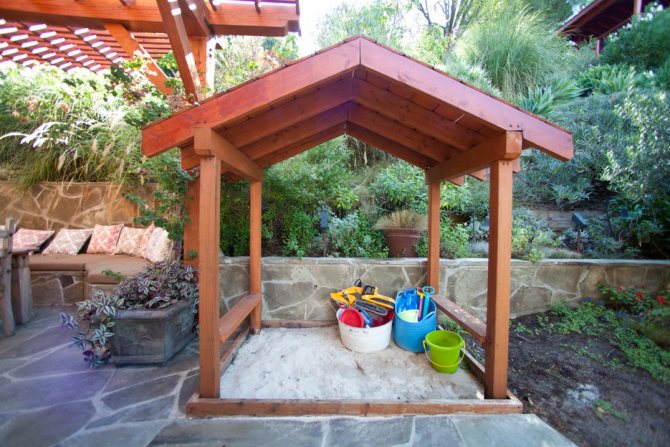
Canopy making
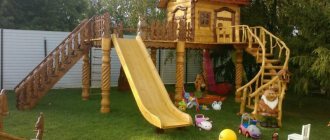
A sandbox with a lid and a canopy, which you can make with your own hands, will become not only a favorite place for a child, but also a safe area for your child. After all, the sun will not bake a head - a child and will always remain in the shade. Sheds have different shapes, but most often home craftsmen stop at the fungus option. A small table can be formed around it, which will serve as a place to store toys.
First you need to prepare a pit where the support will be installed. The stability of the canopy can be ensured by a foot dug in by 1 m.Before you build a sandbox with a lid with your own hands, you should think about having a canopy. The support for it is made of a square bar with a side of 10 cm.
The wood should be treated with an antiseptic, which will exclude damage to the material by insects and rot. To make a hat, triangles should be formed from the boards. The inside of the part is fixed to the support, while the outside should be sheathed with a thin board or plywood. The material is fastened with nails, the next part is nailed in such a way that the heads of the nails are hidden on the previous board of the fungus.
For effective protection from the sun, the size of the cap of the fungus must be equal to the parameters of the sandbox. As soon as the leg and cap are connected, the fungus can be installed in the prepared hole. If you are faced with the question of how to build a sandbox with a lid with your own hands, then you must definitely supplement it with a canopy.
It is important to take care of wedging the legs to fix the structure. For this, the support is covered with loam and stones. A more durable mount can be made for the fungus; for this, a sand pillow is poured onto the bottom of the pit. The leg is deepened 0.7 m and filled with cement mortar. If you plan to do this, then you must do this even before the installation of the sandbox box.
Making a sandbox with a lid with your own hands quite often involves the installation of a fungus. Once all the elements have been connected and installed, you can proceed to the design of the structure. What kind of decorative ornament to use depends on the creative abilities of the parents. However, the finishing material should be safe, and the kids should like the idea of decorating a sandbox.

Specialist recommendations
To fill a sandbox made of wood, it is better to use river sand, which is well polished and almost does not contain foreign impurities. If you buy it in a shopping center, then it will need to be pre-sieved. Sometimes a children's sandbox with a do-it-yourself lid, a photo of which is presented in the article, is filled with special mixtures that contain specific fragrances and clay. This filler is great for sculpting figures and repels insects.
You can additionally protect the place for games by adding a polyethylene cape to the structure. This will protect the sand from rain and reduce washout, as well as prevent debris from entering in windy conditions. A removable cover can be made of tarpaulin. A wooden lid will look more attractive. However, which option to choose is up to you.
Types of sandboxes with a lid by material of manufacture
Wood and plastic are common materials. The first option is relevant for self-assembled structures. A shop sandbox for a summer cottage with a lid is usually made of plastic.
Previously, metal structures were popular in the post-Soviet space. Sandboxes in the form of a square box or boat were installed in playgrounds. Metal is a tough material, but not resistant to corrosion. When the sides of the box begin to rot, holes with sharp edges of steel appear. A child playing in the sand can be seriously injured. For this reason, metal structures are a thing of the past. Nowadays they are rarely seen in the courtyards.
Wooden sandbox with lid
Wood is considered a classic material if it is decided to assemble the sandbox with your own hands. The advantage is the ease of processing. Usually, an edged board is used for work, less often plywood, OSB boards. In a simple design, the structure is a square box. You need to work a little, and from the boards it will turn out to assemble a hex or octagon. If the lid is made not as a transformer, but as a shield, then boards are nailed flat on the ends of the sides. They are replacing benches for seating children.
The scheme of a sandbox with your own hands with a bench cover, products in the shape of a ship, a house or other figure is more complicated. Here, first you need to create a layout of the structure itself, think over all the complex nodes, calculate the dimensions.
Important! Wood is an environmentally friendly material. Even when heated in the sun, parents may not worry that the cover or enclosure will release harmful substances.
Plastic children's sandbox with lid
In order not to bother with work, modern young parents buy ready-made plastic sandboxes. They usually come with a lid. The factory design is more attractive to children. First, with a lid, the plastic children's sandbox is colorful. Babies love bright colors. Secondly, the product is often not made in the classic square shape, but is a copy of an animal or fairytale hero.
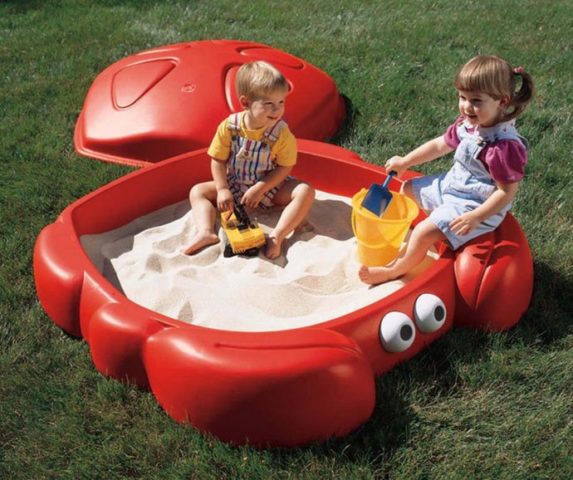
In terms of safety of use, plastic also wins over wood.The rounded edges will not seriously injure your child if accidentally dropped on board. Plastic is resistant to decay, it can stay outside in the rain all summer. There is no chance that the child will pick up a splinter. In a tree, this problem often occurs, even if all structural elements are well polished.
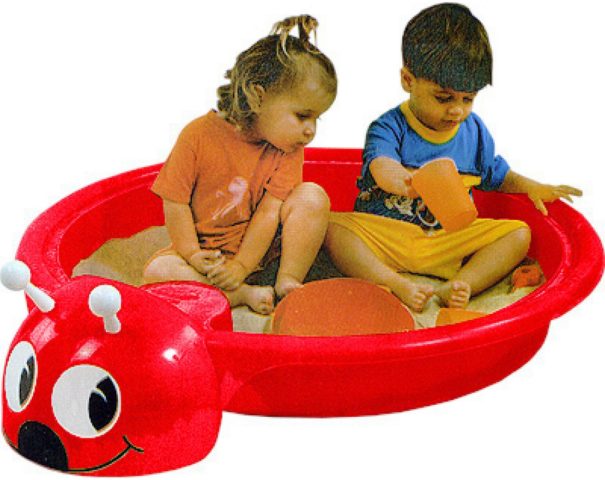
Factory products attract children with design. That only there is a sandbox ladybug with a lid, a turtle, a crab, a machine. There are playgrounds in the form of a yacht, house or other shape. In addition to the sand compartment with a lid, there are stairs, benches, tables, chests for storing toys. Usually large playgrounds with a cover are collapsible. For the winter, they are laid out and brought into the barn.
In self-production with a lid, plastic sandboxes for summer cottages are made from PET bottles, window sills. They make a canopy made of polycarbonate with their own hands. The design is primitive, but safe and cheap.
Giving preference to plastic, one must take into account that high-quality sandboxes are expensive. Cheap baby products with a cap can be dangerous. Plastic heats up in the sun and releases a lot of toxic substances. If the allowable rate is exceeded, the child will be poisoned.