A cool room will be very useful on the territory of a country house site, in which it will be possible to store various fruits, pickles and, in general, any food products. In this case, the question arises of how to make a cellar with your own hands, spending a minimum of money.
It is important to understand that only by following the step-by-step instructions for making a cellar will it be possible to create not only durable, but at the same time reliable storage.
Choosing a place for construction
Before choosing a suitable place, it is necessary to carry out geological surveys. With their help, you can find out the type and composition of the soil, ground level, the likelihood of flooding the territory, the nature of the terrain. Based on these parameters, the degree of deepening of the storehouse, the need for strengthening the walls is determined. Recessed structures can be placed under a bathhouse, a shed, a garage, while saving additional space in a summer cottage, a personal plot.
If it is planned to place the cellar separately from the main structures, then it is better for it to choose the most elevated place on its territory. This will ensure dryness inside, the absence of dampness, respectively, and foreign odors. It is desirable that trees grow around that will protect it with their crown from the sun's rays in the summer. The size of the structure is chosen based on the needs of the family, the number of its members. On average, 1.5 - 2 m² will be enough for one person.
It is not recommended to place a vegetable store near buildings at a distance of less than 0.5 m, to prevent shrinkage of the foundation, destruction of walls.
Construction of a deeply buried cellar
Arrangement of a place for storing supplies should be carried out in the summer in dry weather. The deeply recessed version is ideal for providing a suitable indoor climate. It is equipped on any part of the dacha, in a barn, under a canopy, in a garage. If it is decided to build it in an open area, a special cellar should be provided. A small room will protect the basement from flooding, direct sunlight. To achieve the best result and quickly carry out work, all actions should be performed in a strict sequence according to a previously outlined scheme.


Materials and tools for construction
The equipment of a deeply buried cellar can be carried out using various compounds and mixtures. An underground room must meet all quality standards in order to perform its functions as long as possible. The following materials will be used during construction:
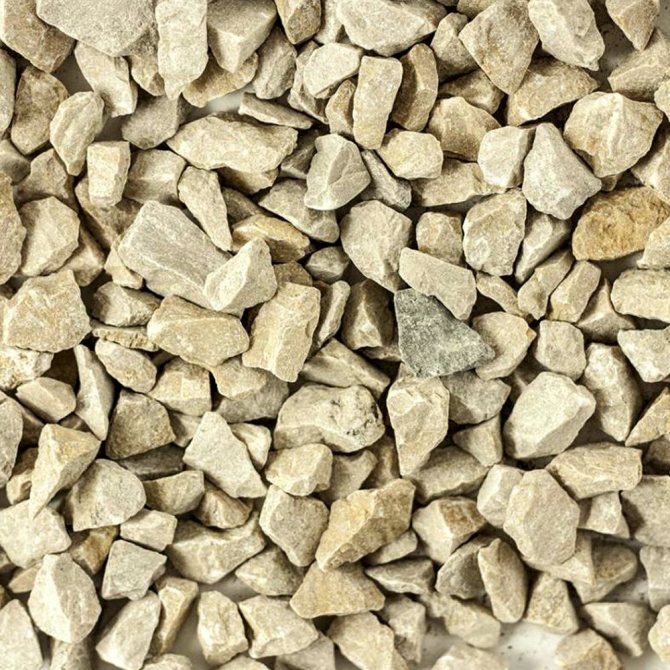
- Gravel, crushed stone;
- Clay solution;
- River sand;
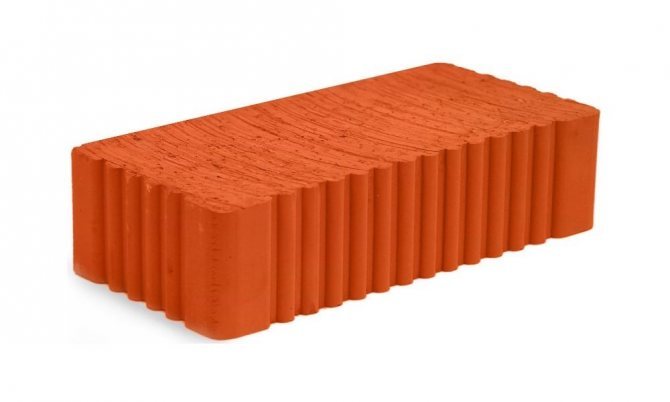
- Brick, cement mortar;
- Roofing material for waterproofing;
- Resinous products;
- Metal grilles;
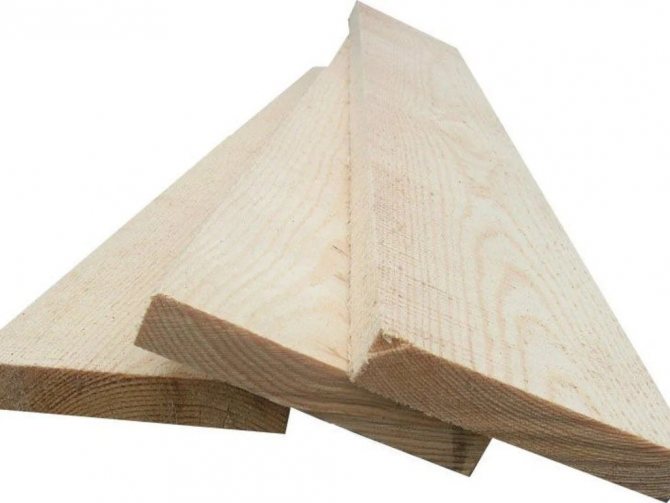
- Frame boards.
To equip a home basement, you will need a concrete mixer, a shovel, a hand rammer, a hammer, a screwdriver, a grinder, a hacksaw, a set of brushes, nails and screws.


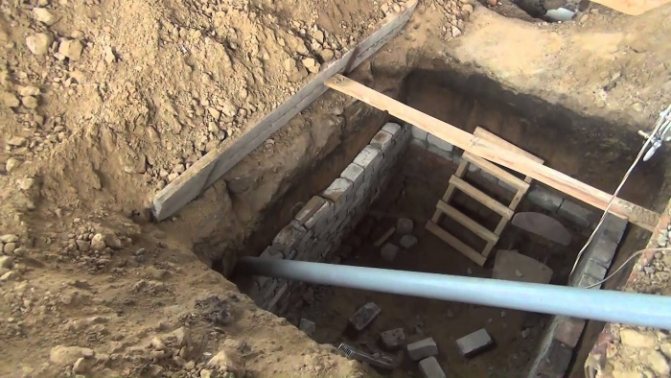
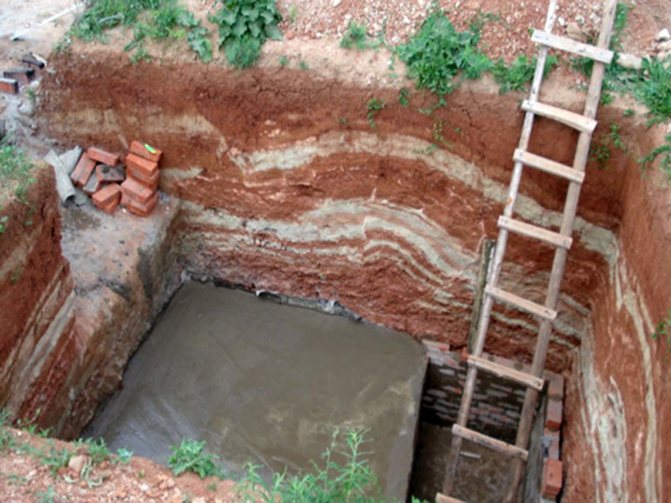
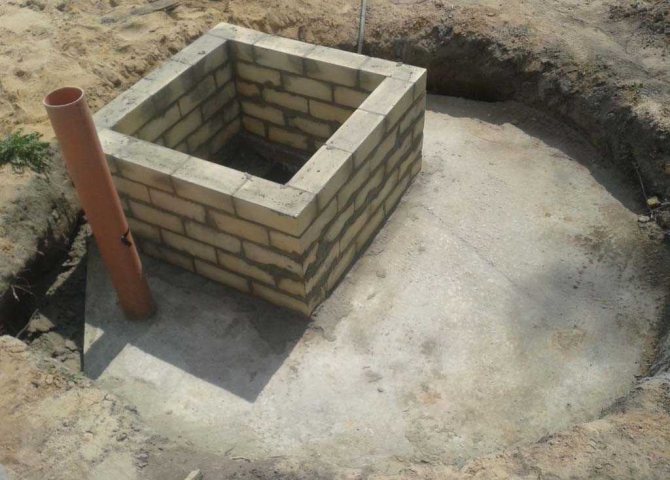
Pit preparation
The deepening in the ground must be at least 2.5 meters. When digging a pit, it is important to take into account the thickness and material of the floor, the height of the crushed stone cushion. Its thickness will be 20-30 cm. Each owner chooses the volume of the pit individually, depending on the planned harvest, the number of family members.A few centimeters are added to the given figure for the decoration of the walls, the device of the clay castle.
It is better to dig a hole for the cellar by hand, since the uneven edges left after the excavator will contribute to the destruction of the waterproofing. In the process of digging in the corners, the supports from the channel are immediately hammered, and the floor beams will be laid on them in the future. After the end of the work, the pit is left for several days, covered with polyethylene. During this time, it is possible to determine the suitability of the pit for the future storage. If the groundwater has barely penetrated, such places are covered with clay. Heavy flooding makes further construction impossible.
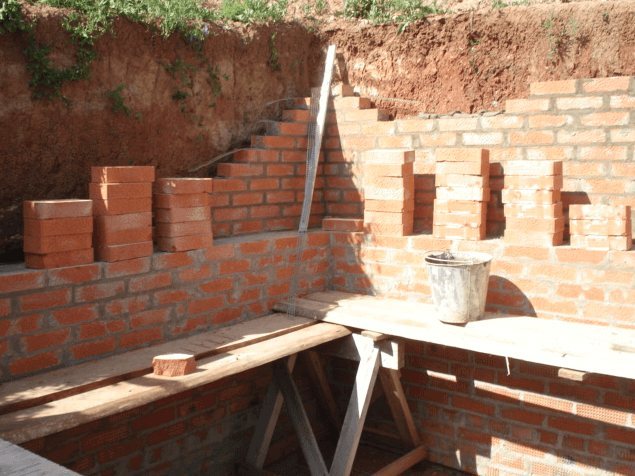
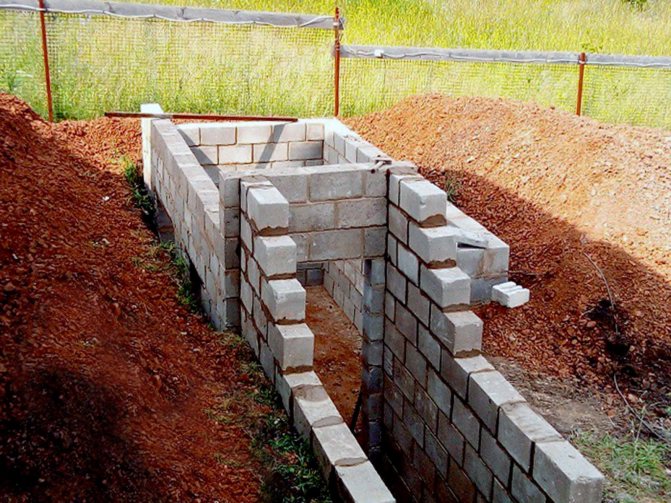
Construction of walls
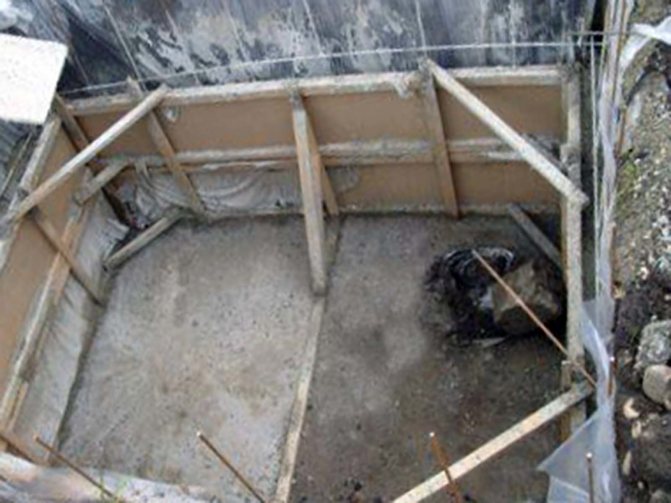
There are various materials for making walls. The simplest option is boards, but they will quickly rot, so we will not even consider such a project. It is best to make the walls out of brick or concrete. You can also bury the finished metal container, but in this case, no special instructions are required. Therefore, we will consider the option with brick and concrete. Before the erection of the walls, a reinforcing frame 10 cm wide is laid. For this, reinforcement rods with a thickness of 10 mm are needed. They are installed vertically around the entire perimeter and tied together with a knitting wire.
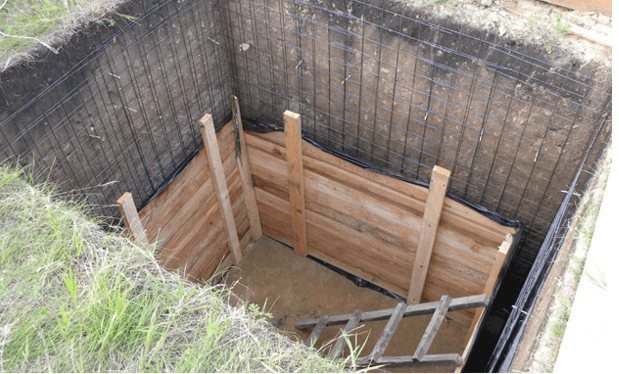
Installed fittings and formwork for grouting.
After installing the reinforcement, the wooden formwork is assembled along all the walls. When it is ready, they begin to fill it with a solution. The concrete should be kneaded as needed so that it does not have time to harden. One portion should be enough for 1 - 2 hours of work. In the process of pouring, concrete should be shaken with a construction vibrator. This will eliminate the trouble with the formation of voids inside the monolith. The cast formwork should be left for 2 - 3 weeks. Only during this period will the concrete completely harden.
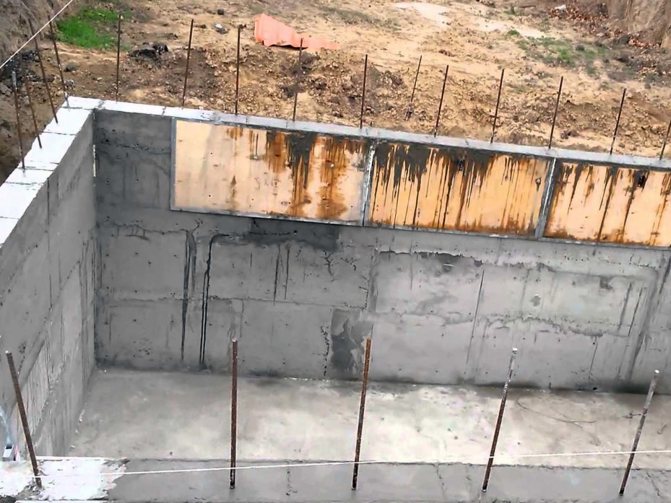
If we start to make the walls of bricks, then for the masonry mortar we use M200 cement. The best option for a cellar is walls made of 2 layers of solid bricks. If the soil is dense enough, and the groundwater is deep, then you can get by with just one layer. Whether concrete or brick requires waterproofing devices. To do this, use its coating form. All walls are coated with waterproofing mastic in 2 - 3 layers, after which roll waterproofing material is glued.
From the outside, the walls are covered with soft clay. This allows you to create high-quality protection against moisture and condensation. A layer of clay is made more than 10 cm, after which all the voids are covered with soil. The inner surface of the walls is whitewashed with lime. This is a cheap material that, in addition to the coloring effect, also has antiseptic properties. Lime is a good protection against fungus, germs and mold.
Installed fittings and formwork for grouting.
Features of the construction of a horse cellar
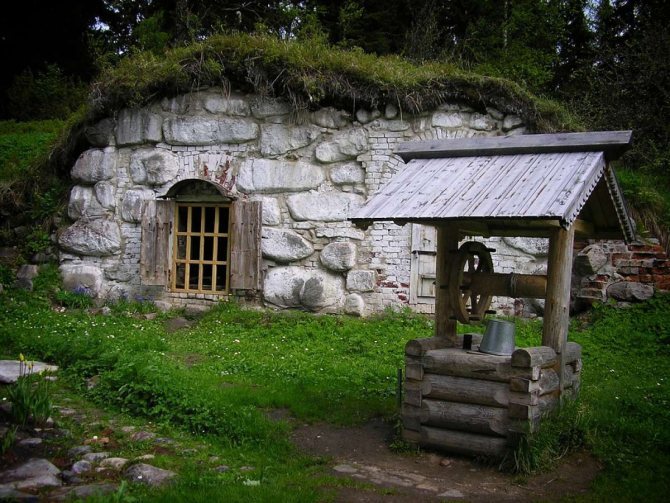
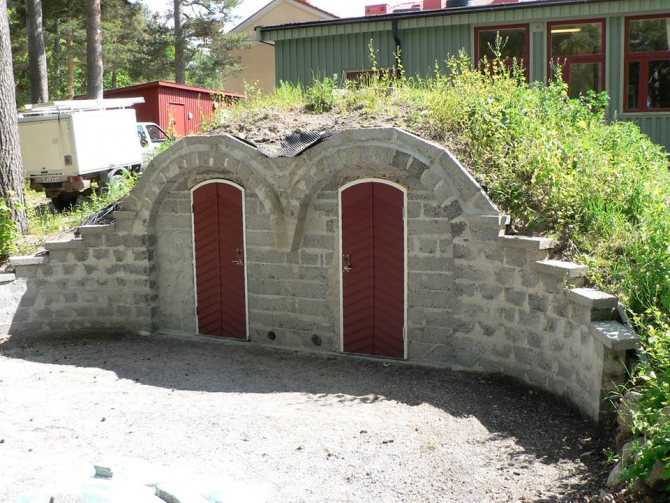
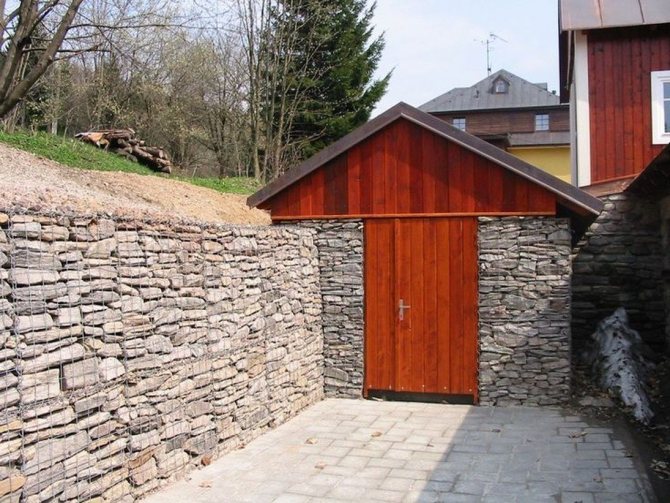
Above ground garden storage can be built on any site, not an exception - places with a high level of groundwater. The building can become a real decoration of the yard if it is beautifully decorated from the street. There are several options for riding storage. They are divided according to their location relative to the soil level.
Storages can stand alone or be attached to one of the walls of a house, a barn, or any other building. You can choose any option, there are no special differences between ground structures. It all depends on the capabilities and skill level of the owner of the site. When drawing up a project, it is necessary to take into account the design features and advantages of any type of structure.
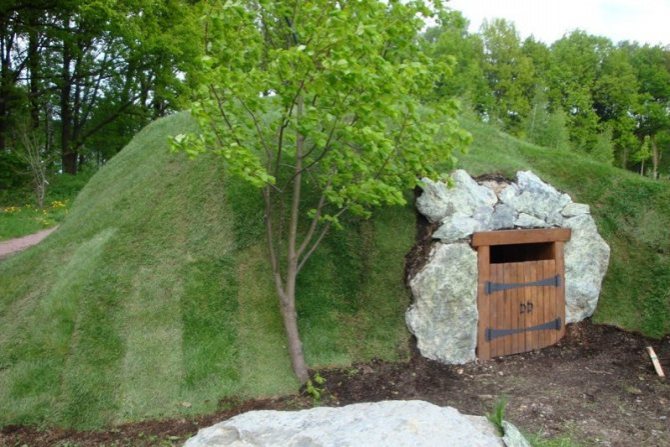
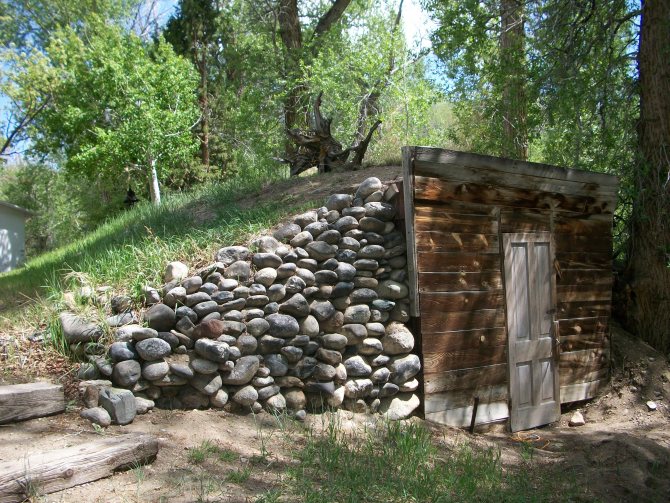
Embankment construction
The construction of the cellar is not difficult. For construction, you will need logs, boards, any wood material.The raw materials do not have to be new, you can use elements from disassembled sheds, a summer shower, or the remains of any tree. Building materials must be prepared - coated with bitumen. This can significantly extend their service life.
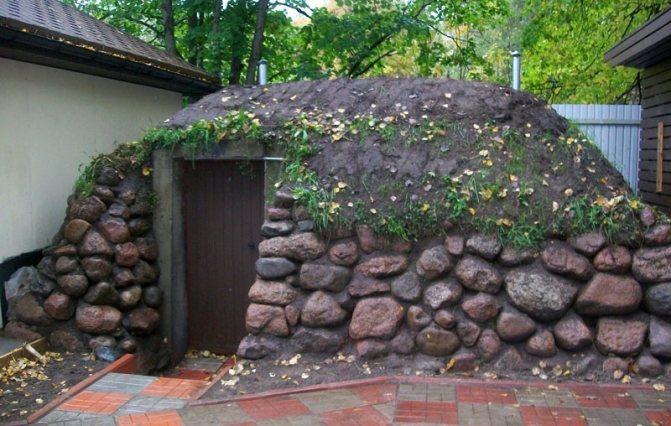
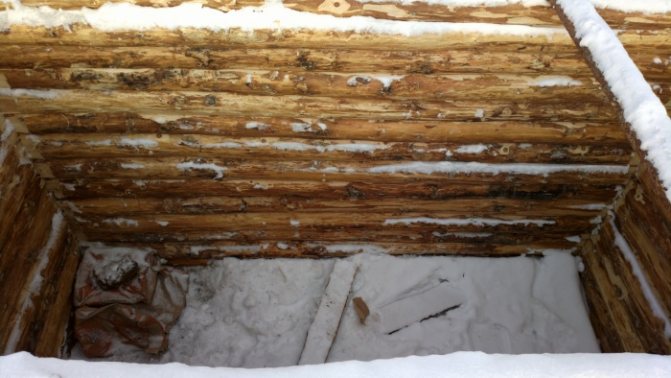
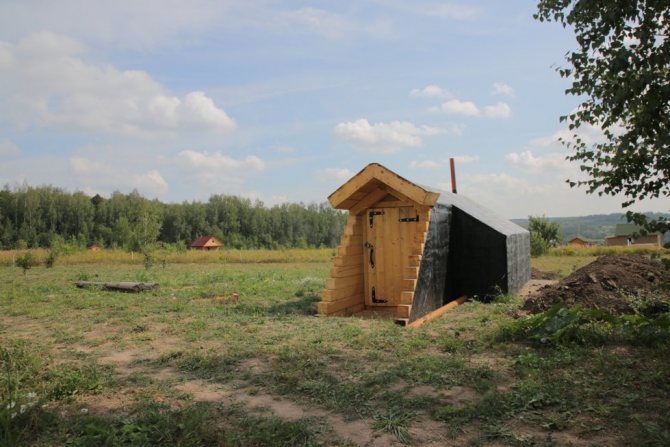
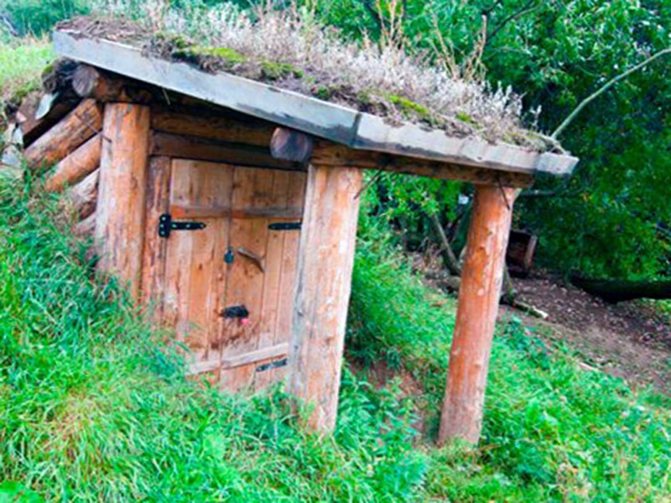
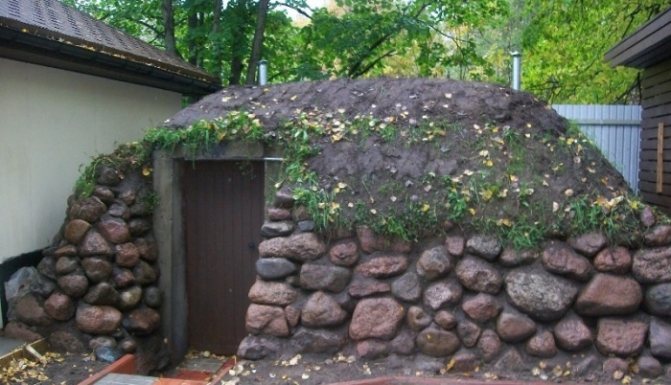
Massive logs are dug in along the perimeter of the future cellar and tie their ends at the top. The structure is covered with boards and roofing felt. A peat mixture is used as an embankment. It is poured onto the roof and tamped well. This will allow you to better retain heat. If desired, the soil can be sown with any low vegetation. On one side, a door is made, insulated with polyethylene, foam.
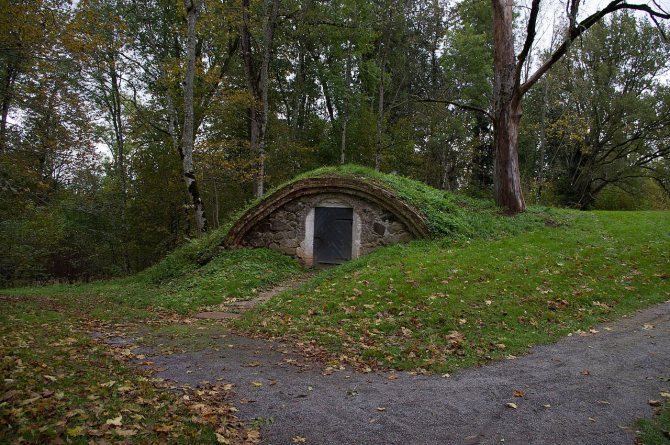
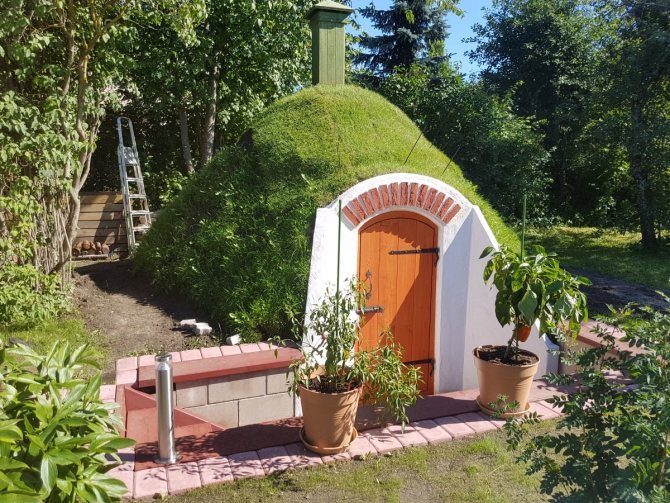
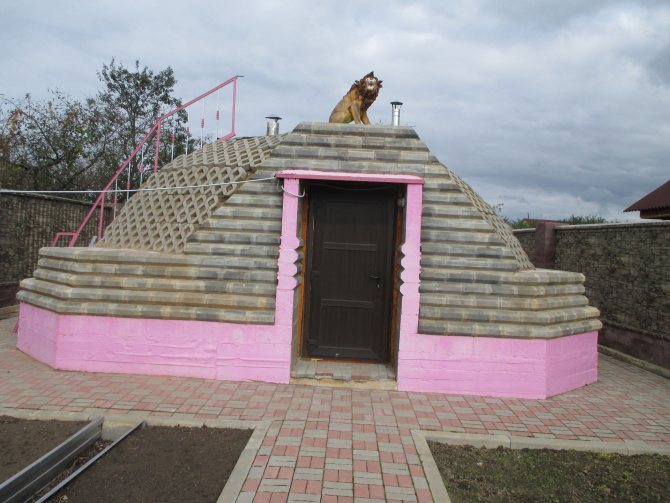
Externally, the bulk cellar resembles a triangular prism. This design is perfect for storing vegetables, preserving and other preparations for the winter. The edges of the roof must be hanging down. This will ensure a good drainage of water, and snow will play the role of natural insulation in winter.
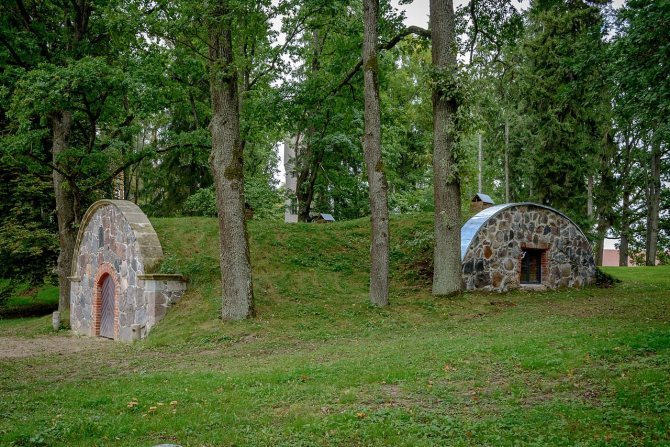
Construction without embankment
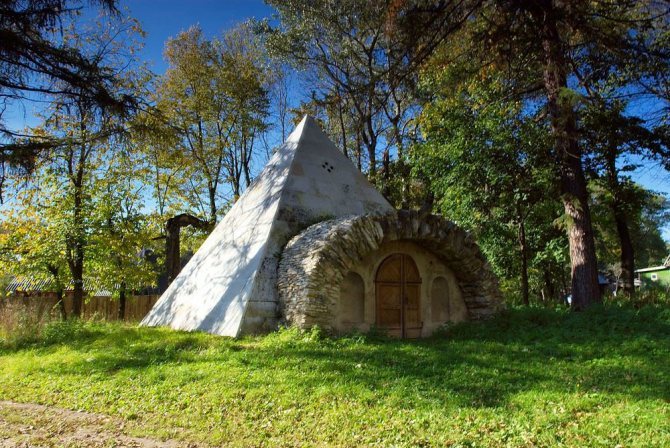
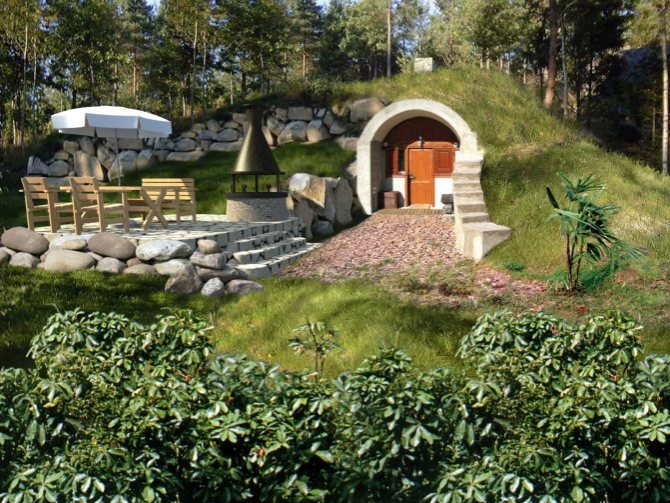
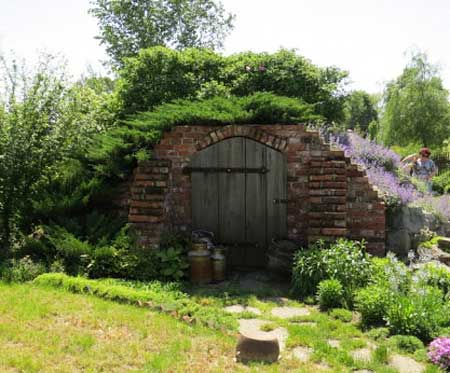
Mini-cellars, long loved by gardeners, perform not only their direct functions, but can also be an original decoration of the site. A storage without embankment can be built on a small area, thanks to the above-ground type of construction, any flooding by groundwater is excluded.
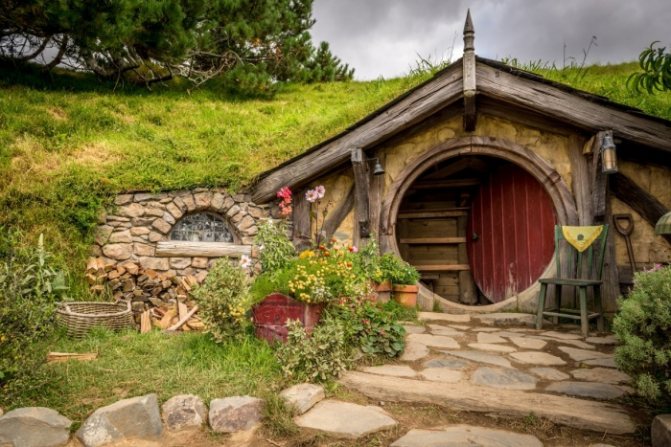
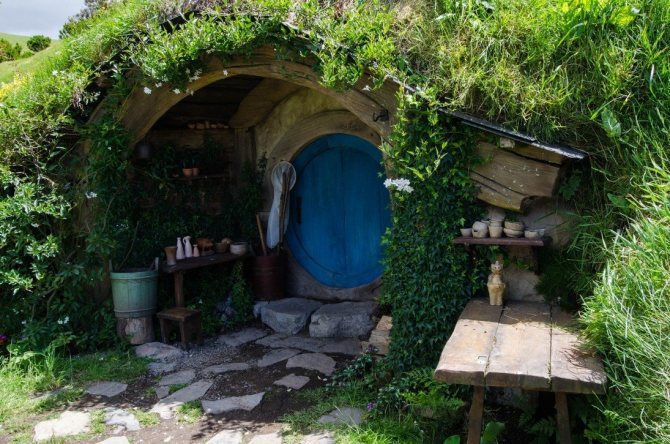
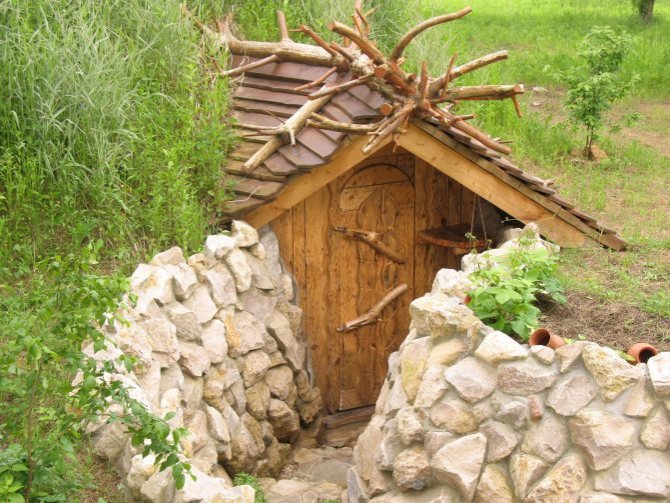
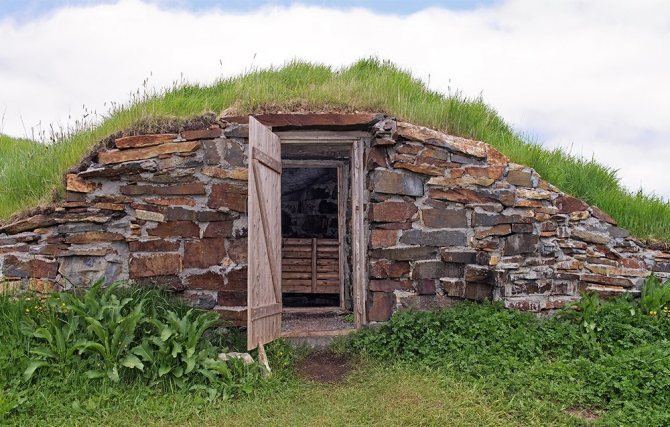
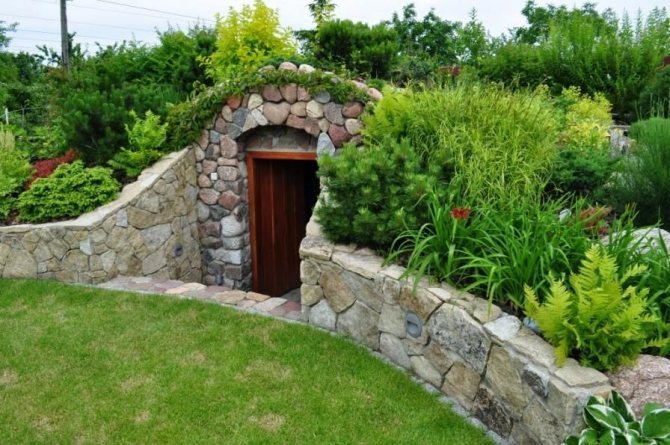
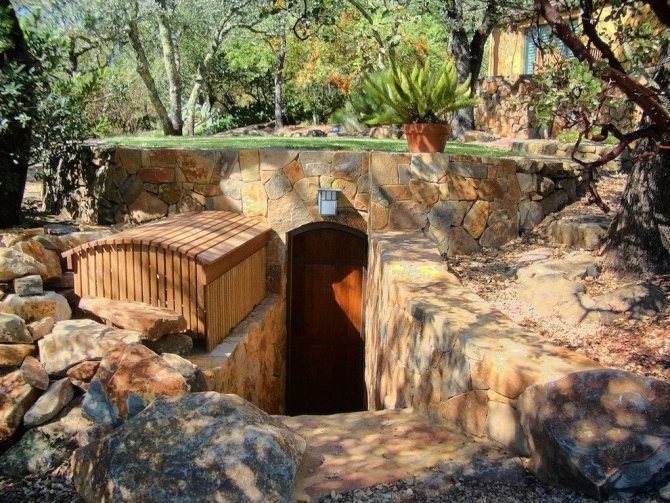
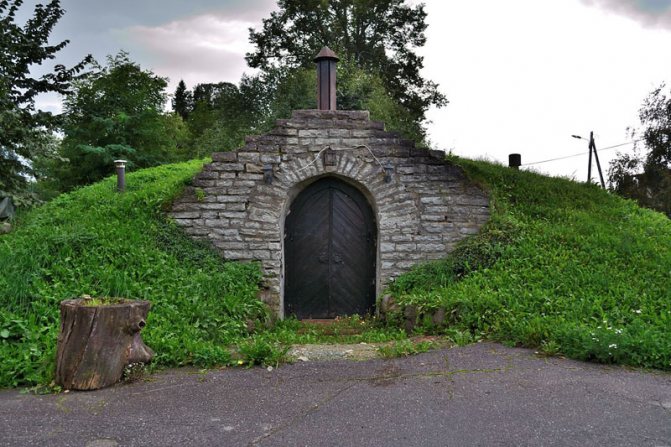
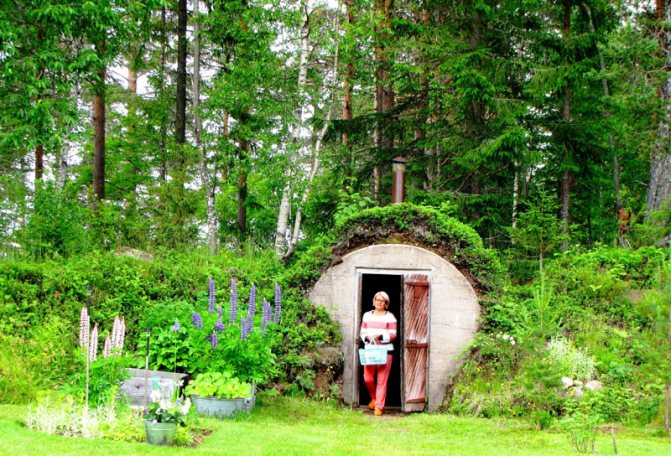
The design and size of the cellar can be any, the main thing is that there is enough space to store the entire food supply. When drawing up a project, one should take into account the volume of the harvest, the number of family members. The structure can be made of the usual type - an insulated box with double walls or a room with ventilation and interior decoration. For external, internal arrangement, any original idea is suitable, for example, in the Hobbiton style.
Construction of an above-ground cellar without embankment begins with site preparation. The top layer of soil, about 20 cm, is removed, the area is leveled and tamped. Then a expanded clay drainage cushion is laid out. This will increase the waterproofing performance. If there are a lot of rodents near the country house, the device is supplemented with eroded clay. Bricks are placed in this mixture with a minimum gap and masonry is made at least 15 cm high from the ground.
The ceiling and walls are made of solid planks. To create an ideal microclimate, lay in several rows with a gasket made of heat-insulating material. The structure must necessarily have ventilation. The roof is made gable, single-pitched from slate or roofing material.
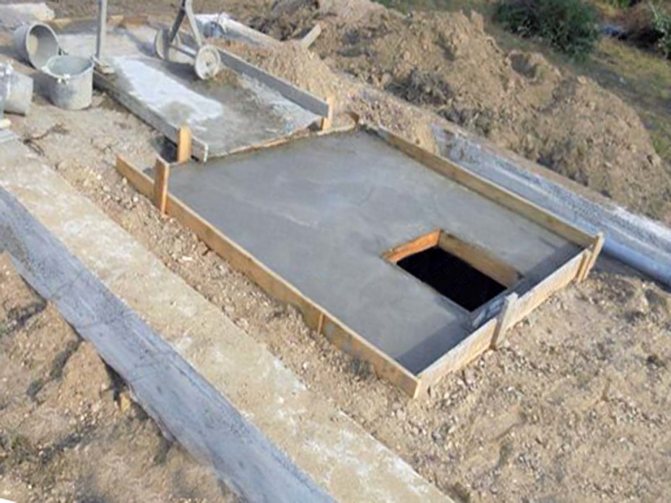
Basement of the cellar
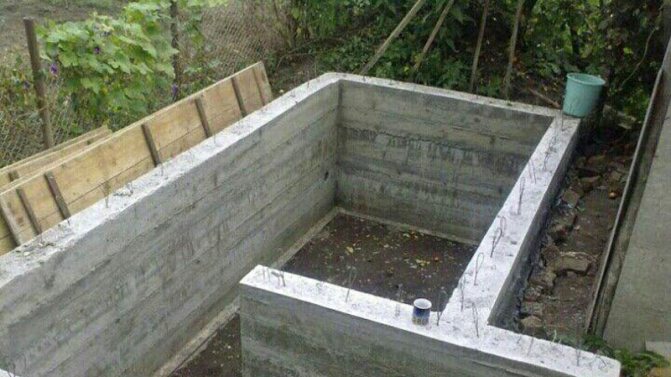
First of all, it is necessary to make a sand cushion in the pit, onto which a monolithic foundation slab will be poured. Previously, during the construction of cellars, no concrete base was made, because it was believed that the room should have constant contact with the soil in order to naturally maintain the necessary temperature and humidity conditions.
Today, experts recommend making a reliable foundation, because in many regions there is a high probability of seasonal flooding. In this case, the concrete base will play the role of a powerful waterproofing layer that prevents moisture from penetrating into the room.
The foundation is done as follows:
- To begin with, in order not to sacrifice the size of the cellar, the storage floor deepens a little (by about 50 cm).
- Further, a sand layer with a thickness of about 10-15 cm is laid. This layer must be properly tamped.
- Gravel is poured onto the sand (it is best to take fine gravel). It also needs to be carefully tamped with your own hands or with the help of special equipment, giving the base more reliability.
- Sand is again poured onto the gravel layer and, again, rammed.
- Then it is necessary to lay a waterproofing layer, which will prevent the penetration of moisture into the room, not only during seasonal flooding, but also throughout the year.
- The final layer is cement mortar. In this case, it is possible to reinforce the base, but this event is not mandatory, because in a small cellar the floor will not experience serious stress.
It is possible to leave the base unpaved only if the area has a low groundwater level and an arid climate.


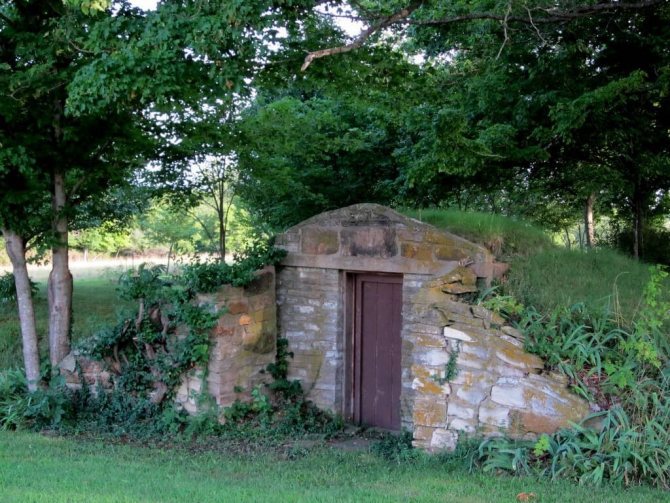
What is typical for an earthen basement
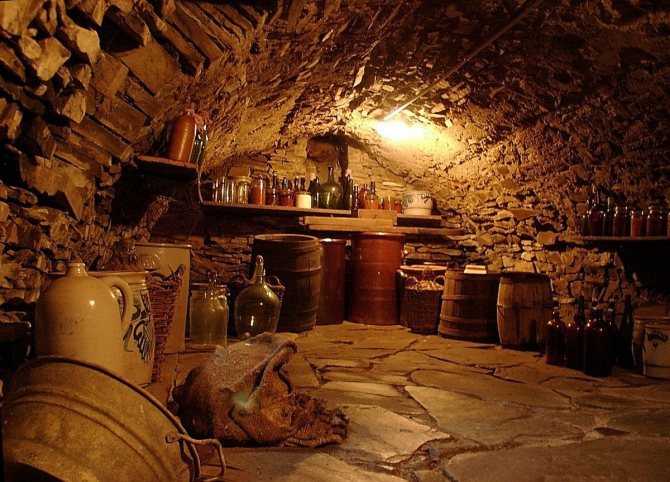
Today, many designs for basements are known: there are cellars, above-ground basements, storage sheds and glaciers. It can be both complex architectural structures, and the most primitive structures from scrap materials.
One of the simplest structures is an earthen cellar. Such a design is not suitable for all areas - the construction of an earthen cellar with your own hands is possible only under the following conditions:
- There is a low level of groundwater at the site - it is measured in spring, when there is the most natural precipitation. For the construction of an earthen cellar, the depth of the groundwater must be at least 200 cm.If the water passes a little higher, you can go in two ways: reduce the height of the cellar ceilings or make a dump of gravel and sand to raise the basement floor.
- In winter, the soil on the site does not freeze too deeply, otherwise it will be difficult to maintain a positive temperature inside the earthen cellar (and it should correspond to 2-4 degrees of heat).
- The soil must be dry and firm. Loose soils are quite difficult to keep, you will have to additionally strengthen the walls and ceiling, there is a high probability of penetration into the earthen basement through the porous soil of groundwater.
- The place for the cellar should be on a hill, the ground there should be dry and level.
- If the site is located in an open area, strong winds can cause excessive cooling and destruction of the earthen cellar. To prevent this, it is recommended to plant powerful shrubs around the perimeter of the building.
Attention! Trees near the earthen basement are not planted, since their powerful root system can damage the walls of the building.
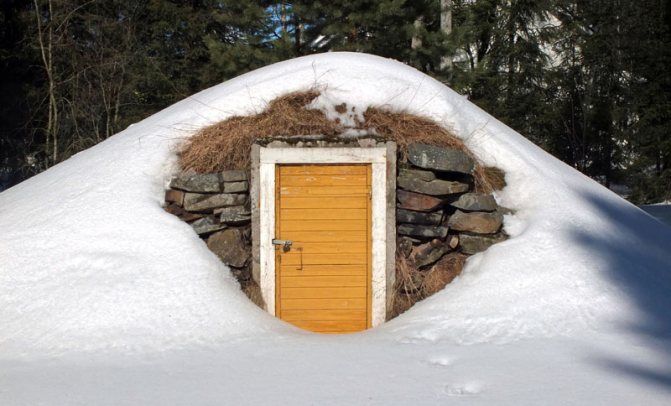
It is believed that it is in the earthen cellar that the optimal microclimate is maintained, suitable for storing root crops such as potatoes, carrots, beets, turnips. The natural moisture of the earth will not allow the vegetables to dry out and wrinkle - in the spring the harvest will remain as appetizing and healthy.
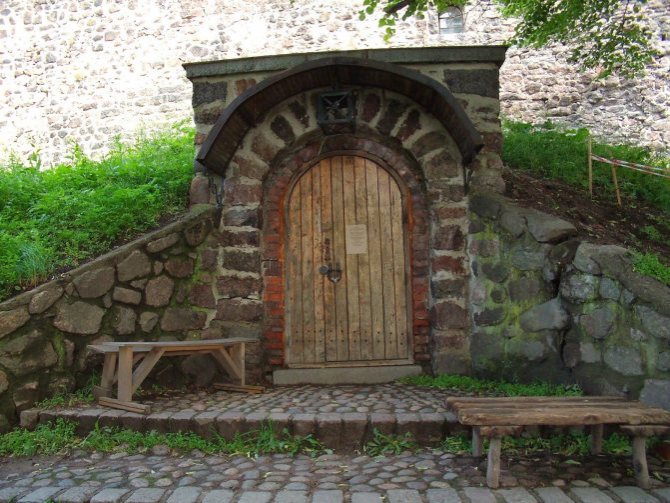
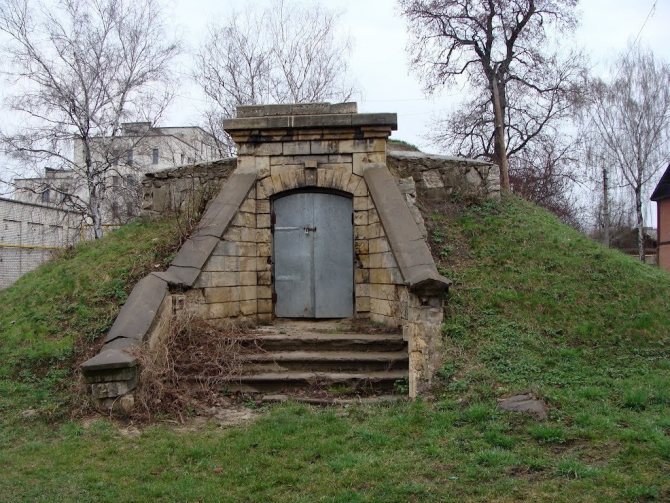
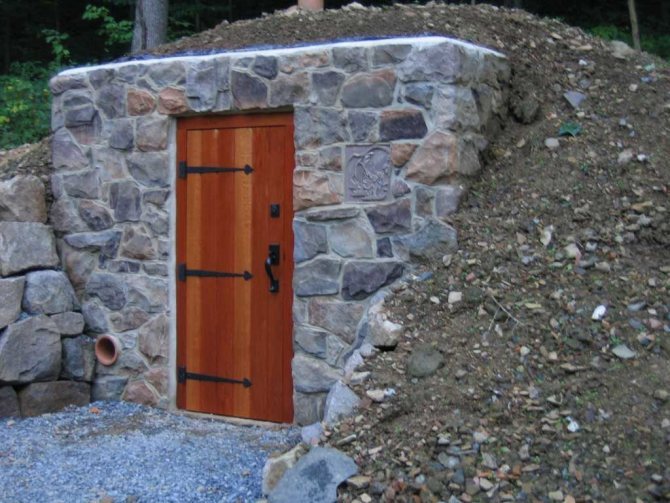
Semi-recessed cellar
The building does not completely go underground, its main part rises above the ground, which makes it possible to build a full-fledged storage facility. This arrangement reduces the time and labor costs for the construction of the cellar. You will need to dig a shallow pit; minimal thermal insulation will be enough. It will come out cheaper and more efficient than any basement, semi-basement option. The storage is convenient to use, it is easy to get into it by wide steps. For the construction of such a cellar, the following materials will be required:
- Brick;
- Cement for screeds, steps;
- Masonry mortar, plaster mass;
- Pine boards;
- Pieces of stone of irregular shape.
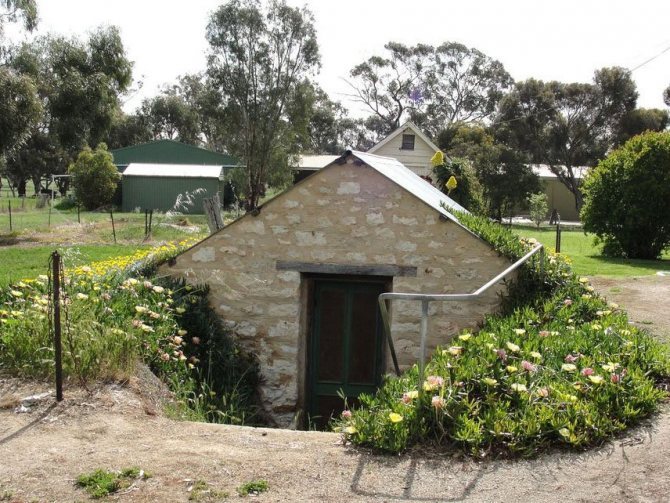
It is necessary to work strictly according to a previously drawn up project, performing step by step the planned actions. First, a pit is dug, about 1 meter. Then a brick, concrete base is laid, the walls are raised to the desired level, usually not higher than 2 meters. The bottom and walls are laid out with waterproofing materials (roofing material, clay, bitumen). The roof is made of slab, covered with roofing material and sprinkled with soil. A great idea for interior decoration is to use an arched ceiling.


How to build a cellar
The first part of construction
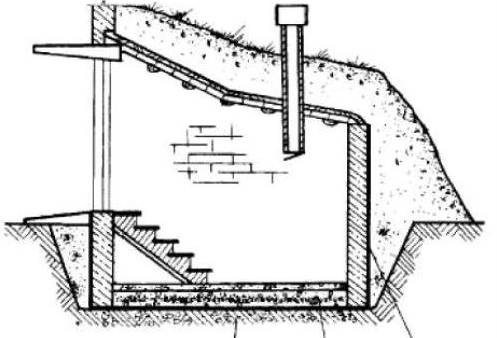
Now let's find out how you can build a cellar in the country with your own hands step by step. Self-made, not buried construction site is quite original. Since it has one vertical front side of the wall and three more inclined ones.
In this design, the walls of the cellar will be necessarily double. There should be a special gap of 60 cm between them.These voids must be insulated with high quality. You can use different materials for this:
- slabs of asbestos shavings;
- sawdust;
- fibreboard;
- Styrofoam;
- mineral wool.
Just before using sawdust, they need to be treated with a special anti-rotting agent. Take into account the GWL, because excess water that is close can lead to the destruction of the building.
First you need to make strapping (external and internal). Then we move on to the vertical posts, as well as the device of the front wall vestibule ceiling, temporary technological posts.
After that, it is necessary to install the ceiling beams, as well as the inclined spacers of the outer and inner walls. The frame should be sheathed from the inner walls.
Interior decoration of the earthen basement
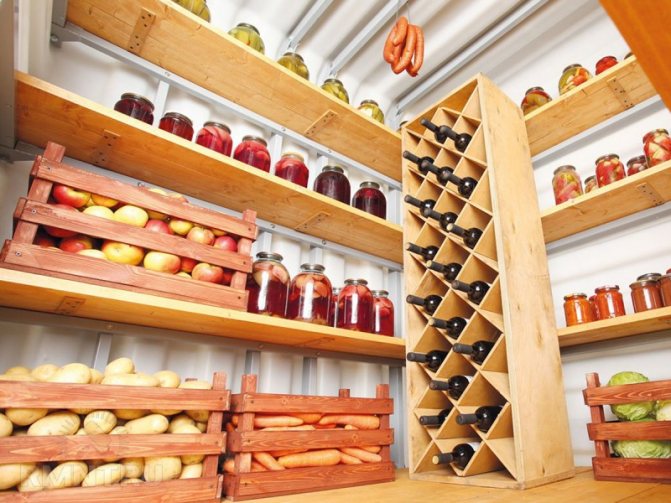
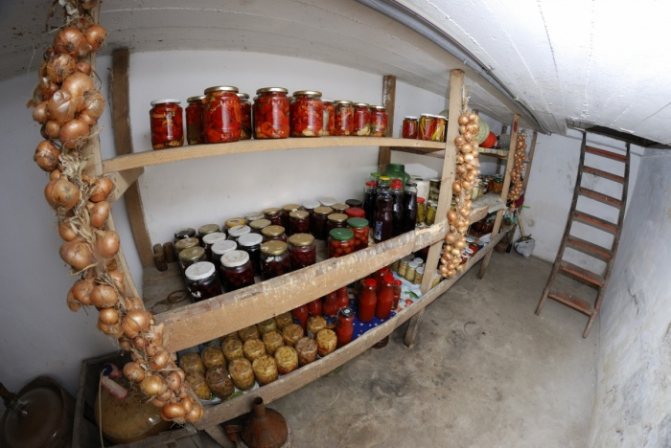
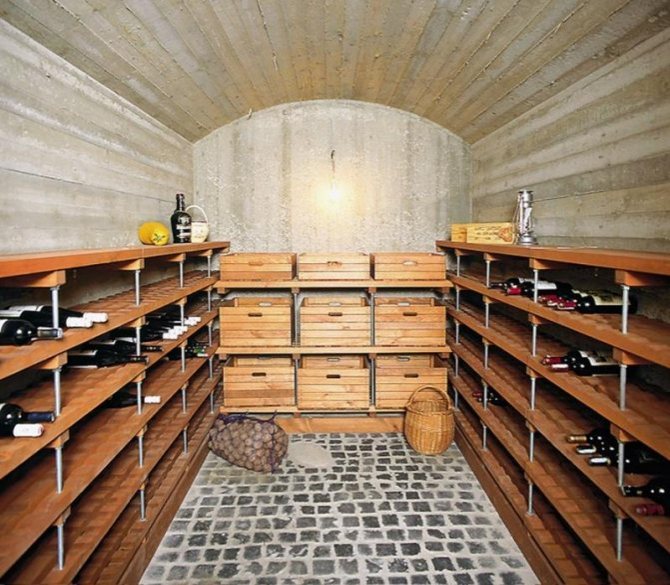
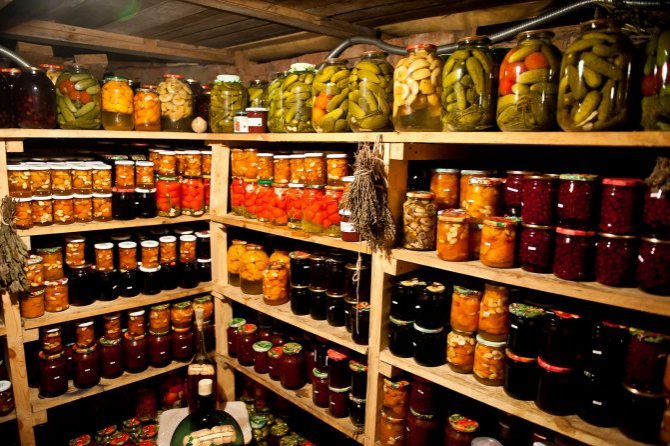
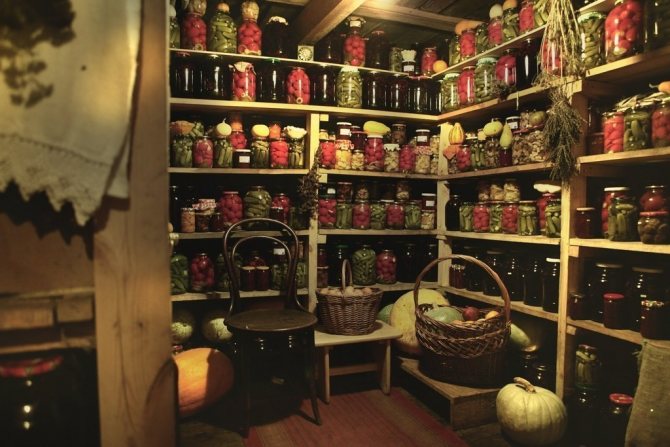
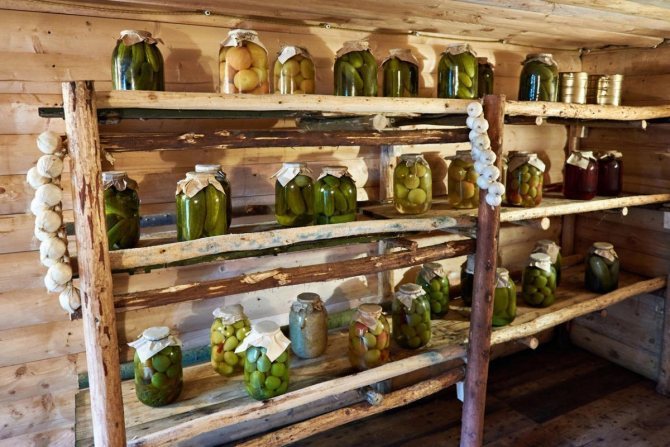
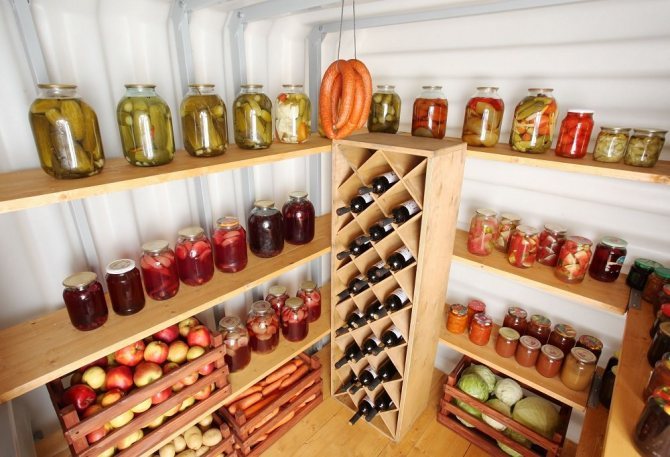
Inside the earthen basement, everything can be arranged at the request of the owner himself, because someone stores jars and potatoes there, and for someone such a cellar can become a storehouse for wine, for example.
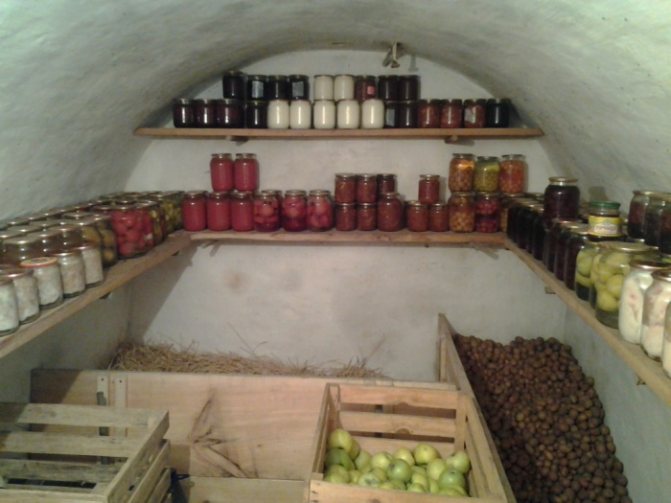
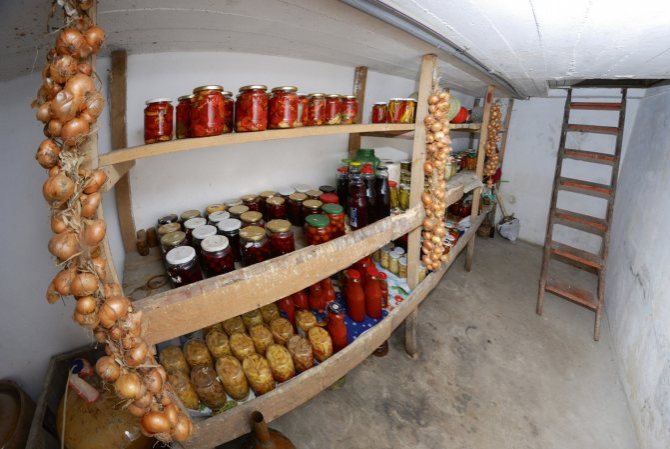
Usually, the space of the earthen cellar is divided into two identical zones: bins are placed on the right - wooden boxes or compartments for root crops or apples, and racks are made on the right. The shelves of the shelves should be at a distance of 50-60 cm from each other - this size depends on the height of the cans with conservation.
Shelves can be either metal or wood. In the first case, they must be protected from corrosion by regularly painting, and in the second, the wood must be treated with antiseptics or coated with oil enamel.
The staircase is an indispensable attribute of the basement. It must be strong and safe, treated in a timely manner against corrosion or decay.
The construction of an earthen basement is completed by wiring and connecting electrical wiring. Do not forget about the microclimate of the cellar and safety standards: lamps with low voltage are installed in such rooms.
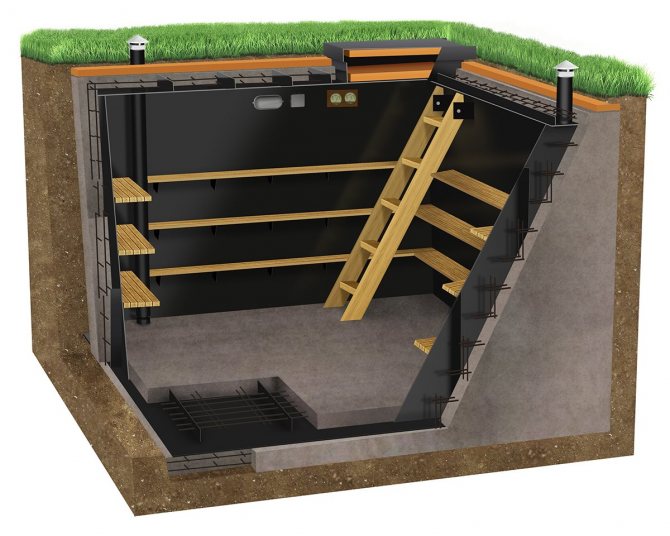
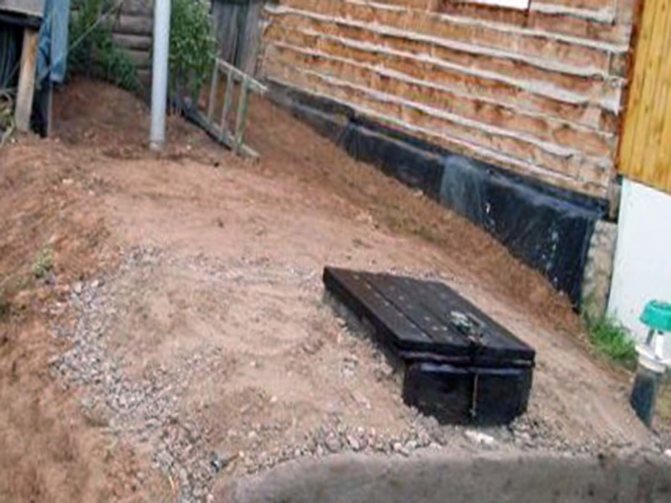
Cellar made of concrete rings
This method of construction is simple and less expensive than previous options. It has advantages and disadvantages. Strong well rings are a durable material that is resistant to damage and the effects of groundwater, but they are heavy, so you cannot do without the use of lifting equipment. The structure can be erected without a foundation, with minimal waterproofing. It is enough to coat the joints of the material with mastic. Rings require careful handling during installation. At the slightest distortion, strong concrete will crack.
Concrete parts can be round, square. This makes it possible to place them in a vertical, horizontal position, to optimally organize the internal arrangement. Before purchasing materials for a summer cottage, it is necessary to clearly understand its purpose, evaluate the possibility of delivering a heavy load to the installation site, and calculate the required number of elements.
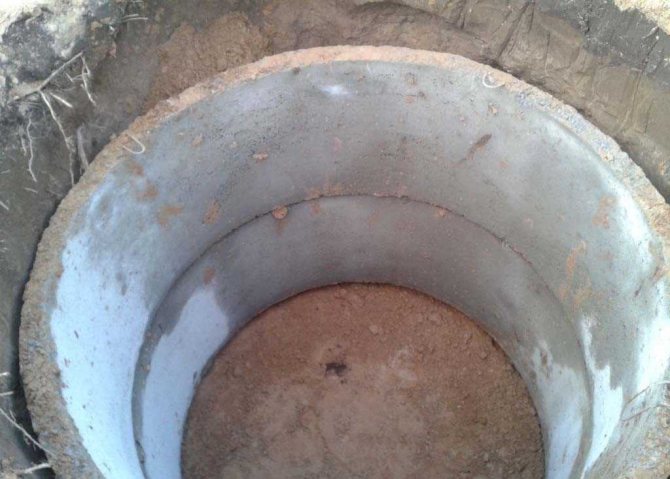
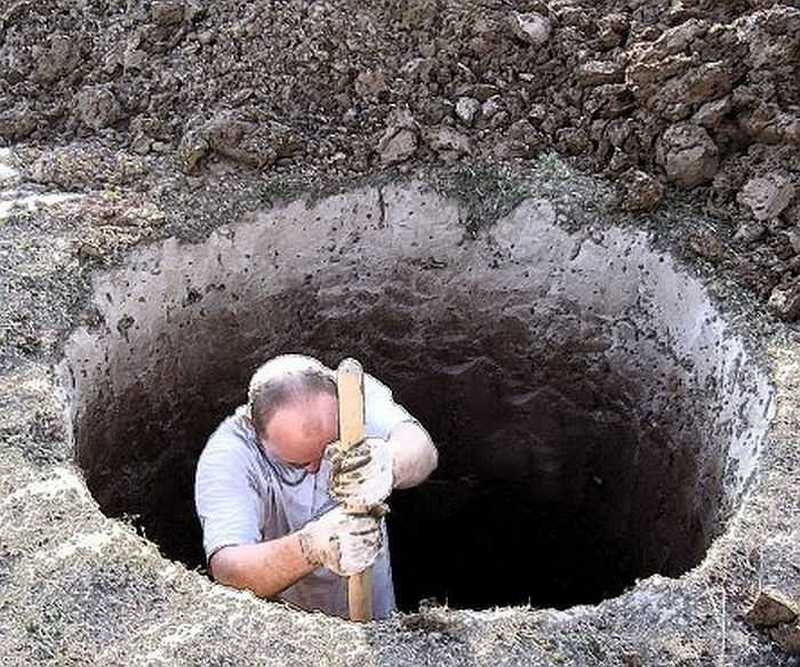
Having passed the preparatory measures, you can start building. On the territory of private plots, vertical cellars are mainly erected from rings. They start with earthworks: they dig a hole 2.5 meters deep, install the ring, coat the joint with cement mortar, lower the next ring and tightly connect the spike and groove.
Now, for the convenience of descent and finishing work, a metal staircase is installed. The roof can be used purchased or made with your own hands from a metal sheet and thermal insulation materials. For better air circulation, double natural ventilation is done - pipes are installed at different heights.
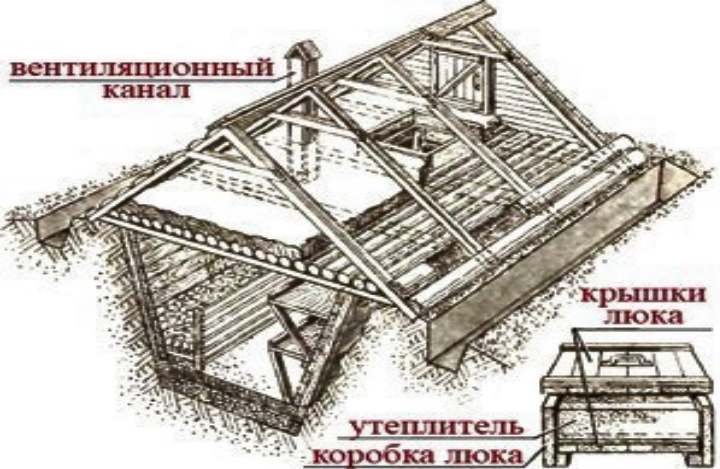
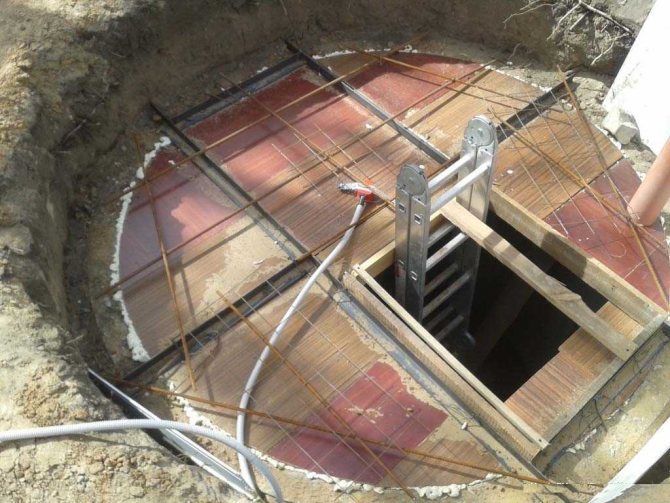
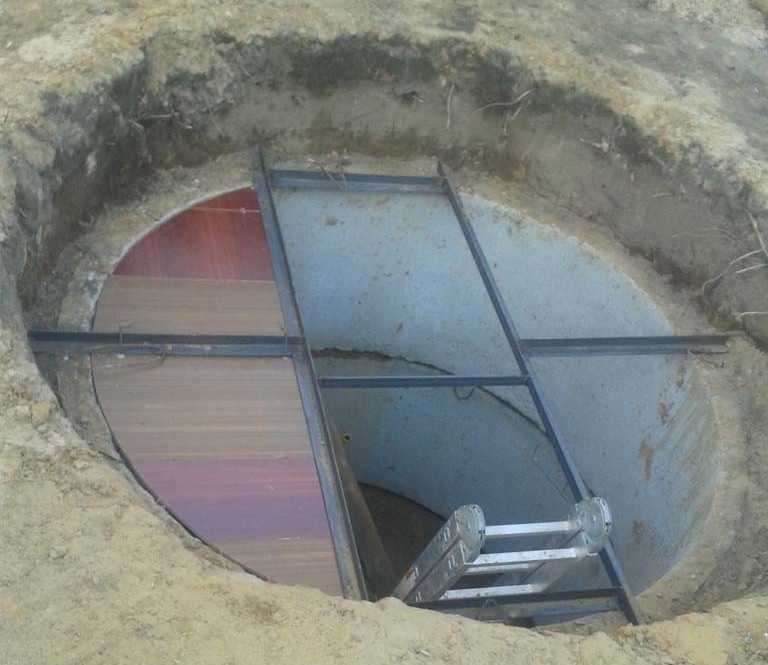
Ceiling and ventilation
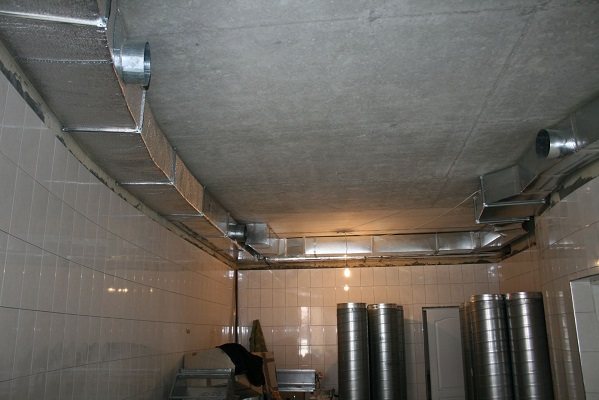
After you build the walls, you can start to overlap. Cellars can be covered with reinforced concrete slabs, a monolith and a brick vault can be made. In the first case, the installation is carried out using a crane, in the second it will be necessary to make the formwork on the racks.
It is made of plywood, which is laid on beams, which, in turn, are held by other beams perpendicular to the upper ones on telescopic racks. If you don’t have them, it doesn’t matter: their role is perfectly fulfilled by sub-commodities in the form of logs. The main thing is that the racks are located at least every 1.2 m.
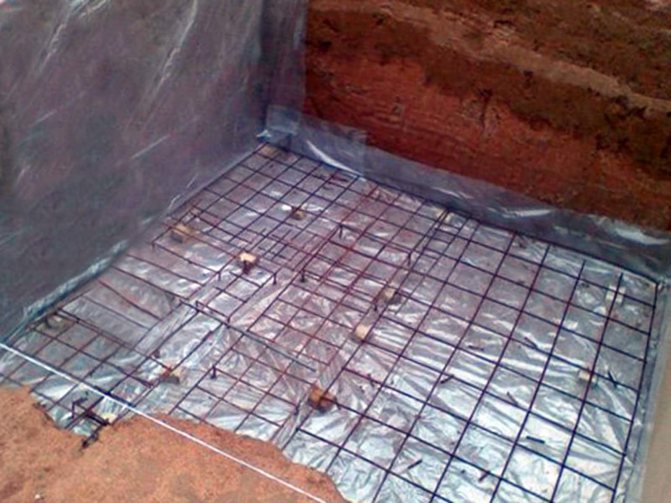
After installing the formwork the reinforcement cage is knitted, in this case, the cross-section of the reinforcement (corrugation) must be at least 8 mm, and if the spans are large, then the cross-section must be large. The overlap height is usually 20-22 cm, but both on reinforcement and on concrete, you can save money if you put a profiled sheet down instead of formwork. It should go on the walls by at least 10 cm. The profile of such a sheet will provide the rigidity we need.
When installing the overlap, one must not forget about the two ventilation holes. One of them will serve for the supply of fresh air, and the other for removal. Into the holes pipes are laid, one of which should start at the ceiling, and the other at the floor. The difference in pressure at different heights will provide us with proper natural ventilation.
The importance of ventilation
For proper storage of food, you will need to set the optimum humidity in the cellar room. It ranges from 70 to 95%, while it is important to exclude condensation.
The second reason for the need for a ventilation device is ensuring the release of gasesthat can stand out if some food does go bad.
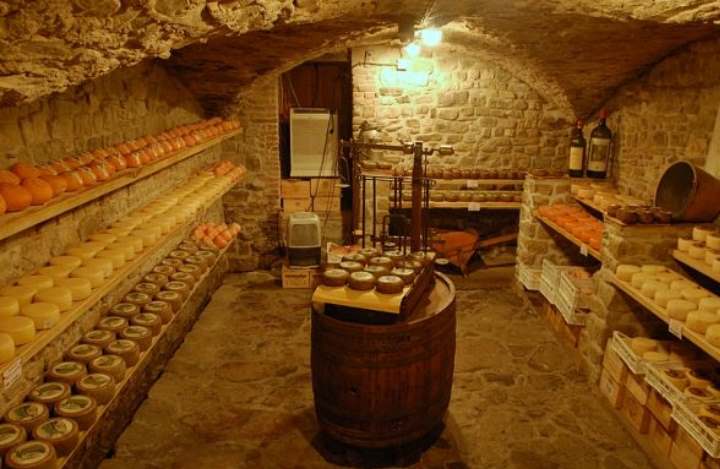
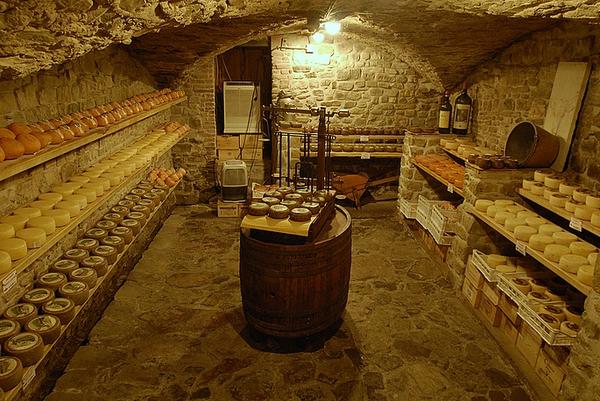
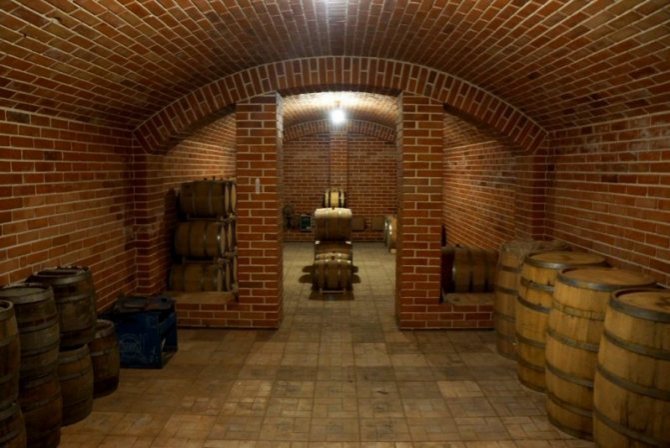
Brick vault
This type of overlap is performed on a semicircular formwork, which should be securely fastened before erecting the actual vault.
The vault is being built from the edges to the middle, the number of rows must be odd (in the middle - the castle row). Spoon and butt rows are laid alternately. The thickness of the seam at the bottom of the arch should be about half a centimeter, all seams are carefully filled with mortar.
You can read more about the construction of vaults on the net, this work is quite painstaking and requires qualifications. If you have no time to acquire this qualification, then follow the instructions that can be found on the net.
Waterproofing and wall insulation
Walls made of stone materials must be plastered with cement mortar before insulation. After the plaster has set, you can proceed to waterproofing the walls.
They are thoroughly coated with bituminous mastic, after which pasted over with waterproofing using a propane burner. It is best to make two layers of waterproofing. Waterproofing concrete walls is carried out in the same way.
Together with the walls the top of the floor is also insulated... The thickness of the insulation depends on the weather conditions in your area and the required storage temperature. And let's talk about this in more detail.
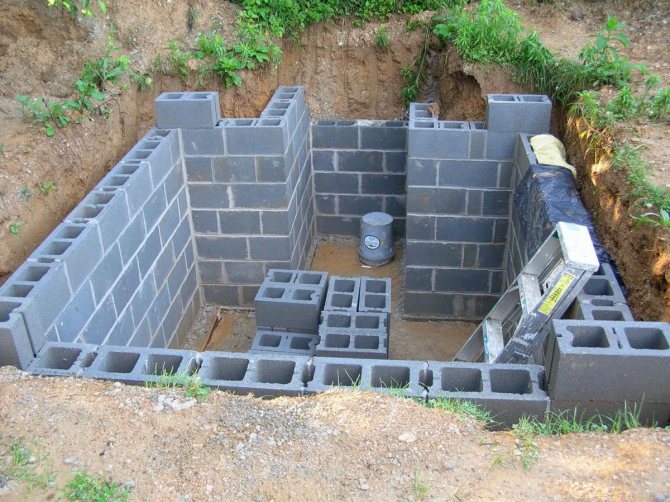
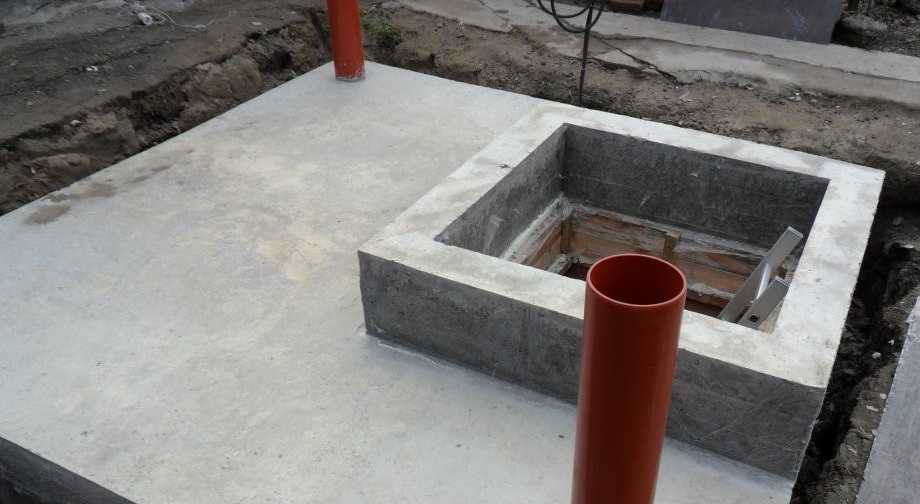
DIY concrete cellar
The main advantage of a concrete cellar over structures made of other materials is the strength and durability of the finished structure. In addition, the construction technology of such a storage facility is much simpler than, for example, brick buildings (Figure 8).
As in the case of other types of basements, for the construction of a concrete storage, it is necessary to dig a pit and only after that it will be possible to start pouring concrete to form the walls.
Material for construction
It doesn't take a lot of materials to build a concrete cellar on your own. Firstly, you need to buy a ready-made concrete mixture or purchase components for making it yourself. Traditionally, a mixture of sand and cement M-200 is used for this purpose.
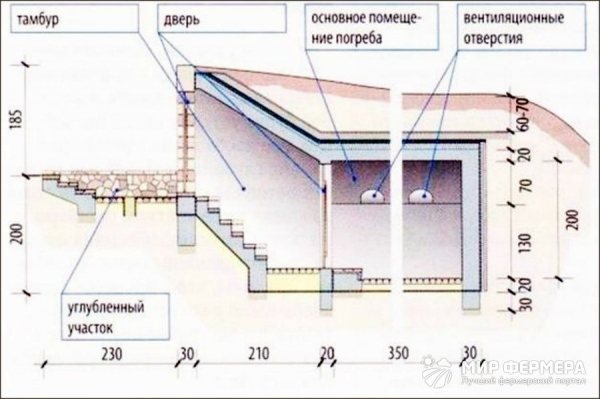
Figure 8. Drawing of a concrete underground storage
You will also need boards for the construction of formwork, which will serve as a frame for the concrete pavement, as well as reinforcement for strengthening the finished structure. In addition, prepare a trough and shovels for solution preparation.
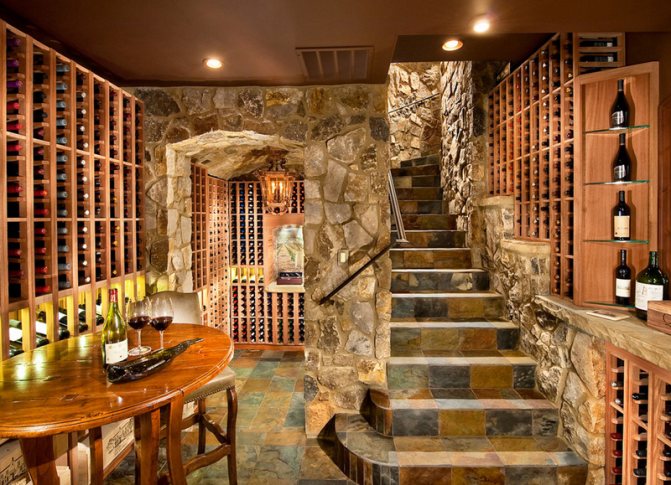
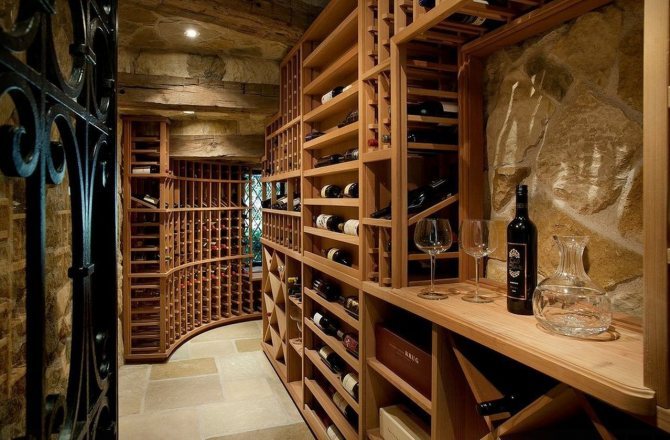
Features of the construction of a wine cellar
The construction of a wine storage cellar practically does not differ from a standard vegetable store. First, a suitable place is selected, with the condition that it must be sufficiently dry inside. To place a structure under the house, it must be designed before it is built, while it is forbidden to place a storage under the kitchen, sauna, bathhouse.
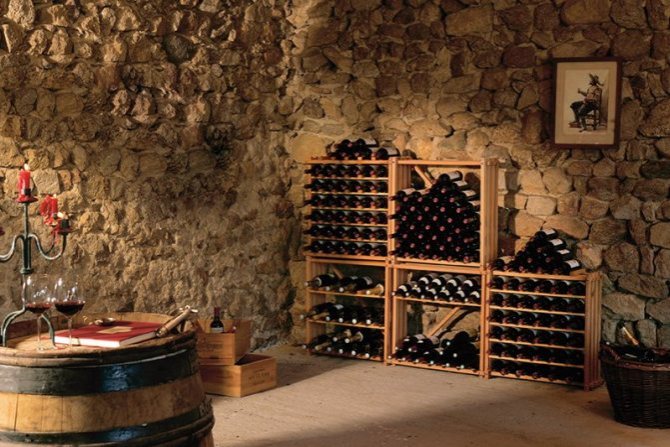
When choosing building materials, it is necessary to pay attention to the absence of a specific smell, and they should also be treated with antiseptics, covered with moisture protective agents. For the construction of walls, you can use concrete, brick, foam block. The interior decoration of partitions is carried out exclusively from natural wood, stone, including artificial, decorative tiles, bricks. The flooring is hardwood, ceramic tiles, natural stone, gravel or sand.
An important point is the internal arrangement. Only low-power artificial light sources are used to illuminate the wine structure. To maintain the microclimate, temperatures within 12-14 ° C, special thermal doors are installed, both internal and entrance. Thermal insulation and vapor barrier deserve special attention, there should be no cracks in the room, they are treated with antiseptics and sealed. For thermal insulation, sheathing with a porous structure is used. Do not forget about high-quality ventilation, on which the absence of foreign odors depends.

Additional building ideas
A neighbor made a storage facility out of concrete rings with a diameter of two meters. They have a standard bottom and lid. I dug a hole, filled the preparation with lean concrete, glued the waterproofing layer in two layers. A manipulator arrived, lowered the bottom, two rings and a lid into the pit. The neighbor pasted over the rings with waterproofing, lifted and glued what was sticking out from under the bottom. And covered everything with soil. Along the perimeter of the racks, half a meter deep to the ceiling made. An eerie breakthrough of everything crawls inside. The cellar is dry. The whole construction took four days. I will also do in the summer, only two of them. One will be a summer glacier.
Relanium
Video: construction of a cellar with a high ground level
The third year has gone, as my relatives installed a double-walled fiberglass cellar with insulation between the walls. They had no problems with using and installing it. The main thing is that such a cellar should be properly anchored with a reinforced concrete slab. And it is very important that everything is good, especially if the cellar is under the house like mine.
Matvey Ave.
Video: installation of a plastic cellar
In our basement, a cellar with clay walls stood for 20 years. It would have stood still, but the floors in the cellar were wooden and required regular repairs. And I will not fill the floors in the cellar, there seems to be no water. Still, a breathable cellar floor, I think, is good. Nature itself regulates all processes. Of course, if the water comes in, then you can concrete floors with good waterproofing.
karbo
A properly built cellar will keep the required temperature in any weather and will serve its owner for decades.
Ready-made structures for cellars
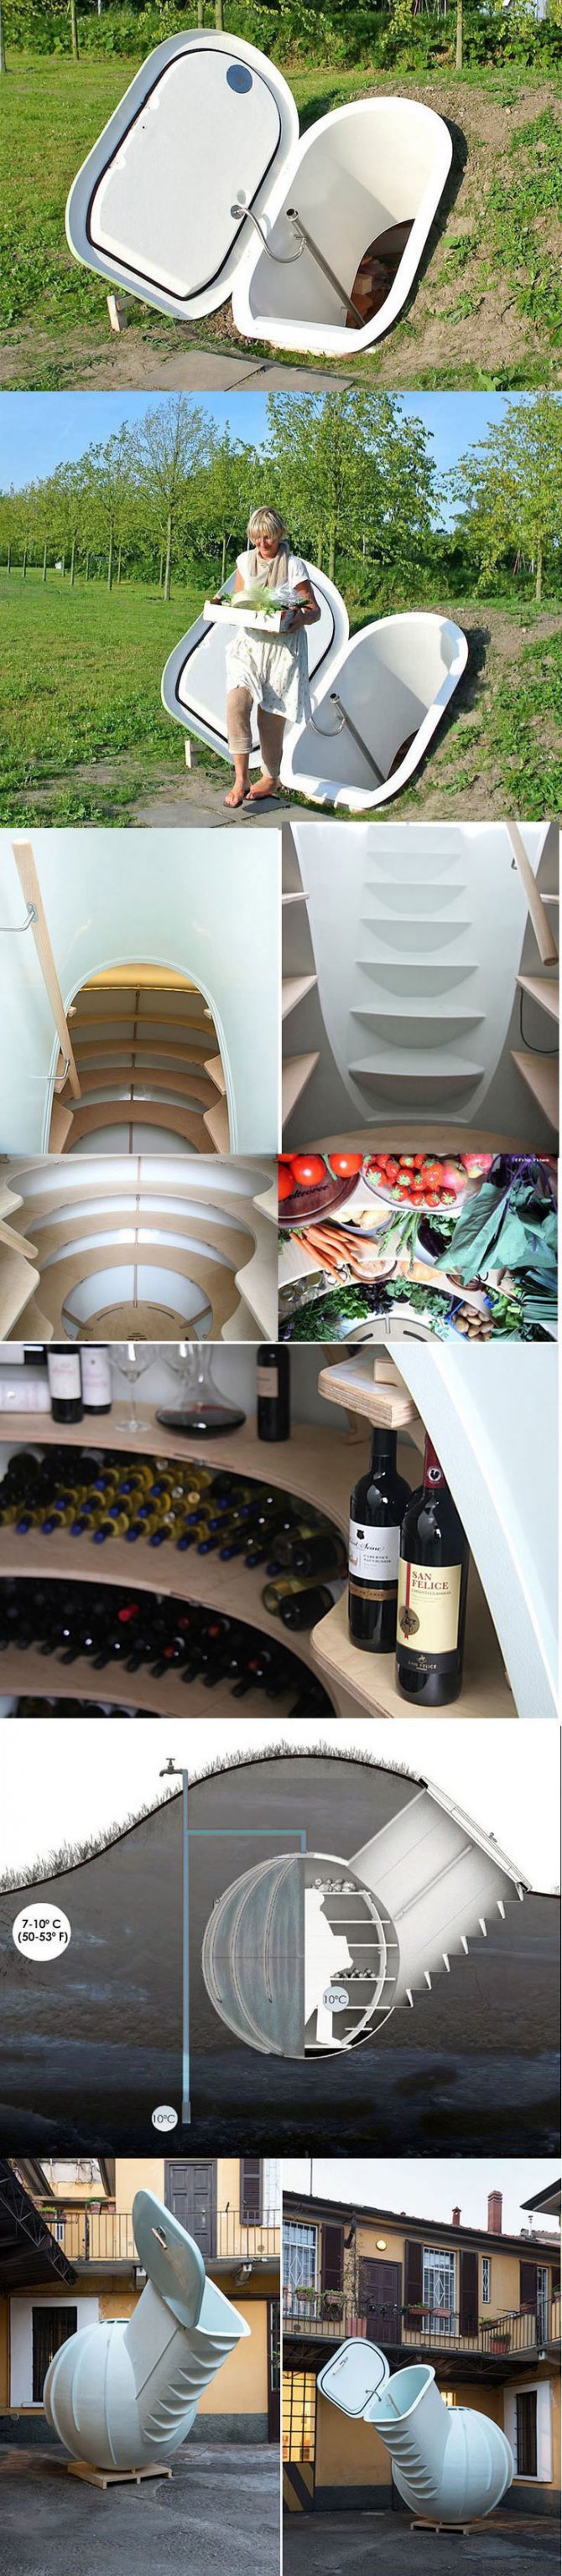
In the absence of experience, tools, time and effort to build a storage facility, you can use ready-made models. For many summer residents, gardeners, this option becomes optimal. There are different types of such structures, which differ in the material of manufacture:
- Metallic. The product is a sealed metal casing with a minimum number of seams. The surface is covered with a protective anti-corrosion layer. The structure can be installed without fear of rising groundwater, heavy rains, it will provide high-quality waterproofing.
- Plastic. The material is not subject to corrosion, unlike metal, it does not rust, it is lightweight, which makes it easier to install. They are characterized by a long service life of more than 50 years.
Products differ in shape:
- Spherical. They are presented in the form of a round or oval capsule with a staircase inward. A characteristic shape for plastic options.
- Rectangular, square. The design has the parameters of a standard cellar.
- Cylindrical. They look like a regular barrel. Made of high quality plastic.
Stairs
The simplest, but very inconvenient option is a ladder, welded from pipes or knocked down from wood. It is advisable to provide a stationary staircase made of iron, concrete or metal in the project, it is both more convenient and safer to use it:
- the minimum width is 30-40 cm, but it is better about 50-60 cm, it will be convenient to climb along it

A beautiful cellar will delight your guests for a long time
- if it is planned to lower heavy, bulky goods into the cellar, which must be carried together, then the width of the stairs should be at least 80 cm
- the maximum allowable slope is 75 degrees, but such a staircase will be within the power of a young and energetic person. To make the ladder comfortable, but at the same time not take up much space, a slope of 45 degrees will be optimal - it is quite easy to climb it (the span is not very long) even with a load in your hands
- step height - 15 - 20 cm, width - 25-30 cm
You can purchase a ready-made cellar in the form of a capsule, which you just have to hide in the ground
What should be the floors in the cellar
Even if you choose a bulk cellar with your own hands, and not a classic cellar, in any case, you will have to take care of the floors in the storage.
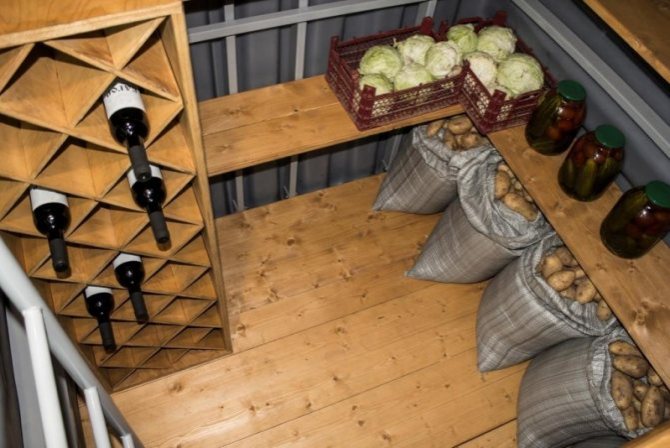
Concrete floors are predominantly chosen, since they perfectly resist groundwater, as well as various pests, which are always found in a large number in a country house.
We make the roof of the cellar at the summer cottage
Choosing the roof structure. Either we cover it with beams and a non-edged board, as a base, or we cover it with a slab of concrete - what load will be applied. For example, a concrete slab can be covered with a good layer of earth, which means that there will be almost no temperature changes.
If desired, to further improve the temperature regime (to reduce the differences), a slab of concrete is covered with roofing material, and then filled with filler (crushed stone, slag, expanded clay) in the form of a mushroom - higher in the center, and goes down to the edges. We fill all this with a concrete solution three centimeters thick and lay waterproofing from roofing material and bitumen.
How to care for a cellar
To keep any structure clean and in good condition, it requires periodic maintenance. The vegetable store is no exception. With timely maintenance of the structure, the products will not deteriorate or acquire a foreign smell. This can be done by adhering to certain rules:
- Once every 1-2 years, as well as in case of detection of fungus or mold, the room must be disinfected. To do this, all the contents, up to the removable shelves, are taken out into the street, washed and dried. Walls, floor and ceiling are cleaned, whitewashed with fresh lime.
- Once a year, at the beginning of summer, the cellar must be cleaned, periodically thoroughly ventilated.
- Occasionally, the vegetable store should be checked for gas contamination. To do this, you need to light a match in the room, if it does not burn, then it is ventilated.
- In case of heavy rains, it is recommended to close the ventilation so that moisture does not get inside through the pipes.
- If mouse, rat tracks are found, traps should be set, and the exit from the holes should be sealed with cement mortar. The use of poisons is not recommended.
The need to equip a ventilation system
In order to prevent dampness in the basement, it is very important to provide ventilation in it. Despite the fact that all waterproofing measures were taken, there is almost always an excess of moisture in the cellar. Among other things, you must not forget that the vegetables and fruits themselves, stored in the basement, release moisture.
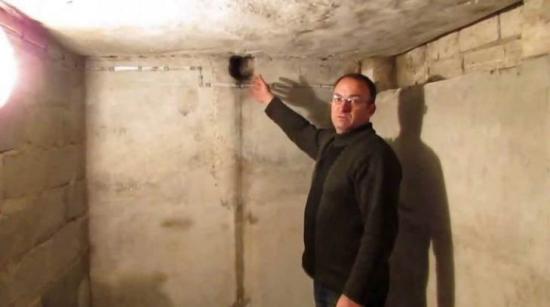
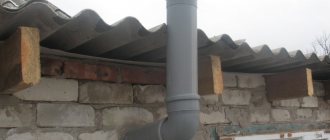
The built-in ventilation system is quite simple. It can consist of two pipes.On one of them, fresh air will enter the room, on the other - to leave it. The pipes must be placed on opposite walls of the storage room. For this, any pipes are suitable, both specially designed for this, and ordinary sewer pipes made of polyurethane. The lower part of the chimney should be located under the ceiling of the basement or cellar, and the upper part should be led out to the roof of the house.
The supply pipe should not reach the floor of the room by 20-30 centimeters, but go out into any hole. To increase traction in inclement weather, you can install a deflector to increase traction. In addition, in order to avoid clogging of ventilation, it is better to install filters in the pipes that will prevent debris, insects and rodents from getting inside the cellar. When arranging ordinary household cellars and basements, such ventilation is quite sufficient. For large vegetable stores, it is recommended to install special devices that will forcibly expel stagnant air.