

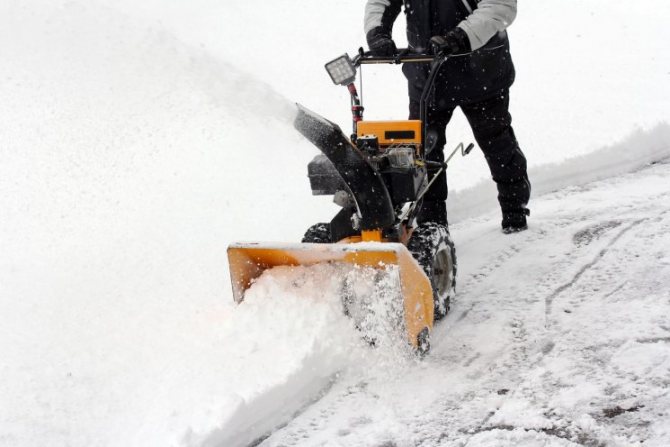
Nowadays, there are practically no devices for the house that could not be made with your own hands. Today we will talk about a snow blower, this machine will allow you to remove snow in your yard. And most importantly, a snow blower can be easily made with your own hands from existing mechanisms.
Long gone are the days when the snow blower was replaced by shovels, they are not so convenient to use. With the help of an electronic tool, you can easily make the very mechanism that will greatly simplify the cleaning process.
Types of snow removal equipment for the home with your own hands
Snow removal machines use mechanical snow removal in a designated area. This device should not only collect snow, but also throw it to the place of its collection. Such equipment can be powered by either an internal combustion engine or an electric drive. Equipment serving these purposes can be divided into self-propelled and manual. Self-propelled equipment can use a tracked or wheeled chassis.
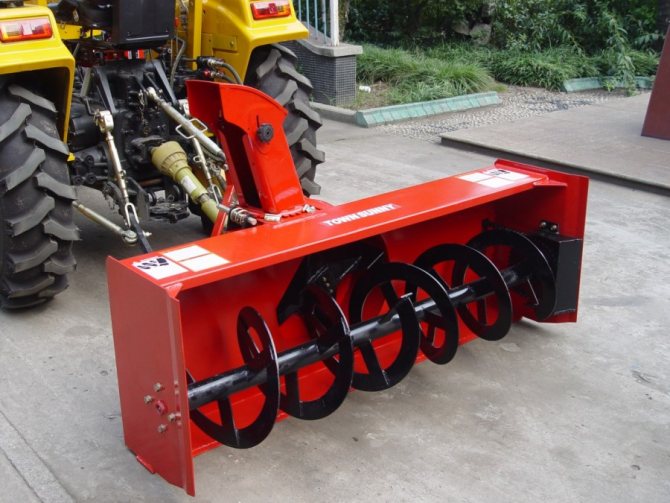
To assemble a snow blower, it is permissible to use a saw-mounted internal combustion engine or an electric power unit. In many country farms, walk-behind tractors are used, which, with some ingenuity, can be used as a basis for a snow blower.
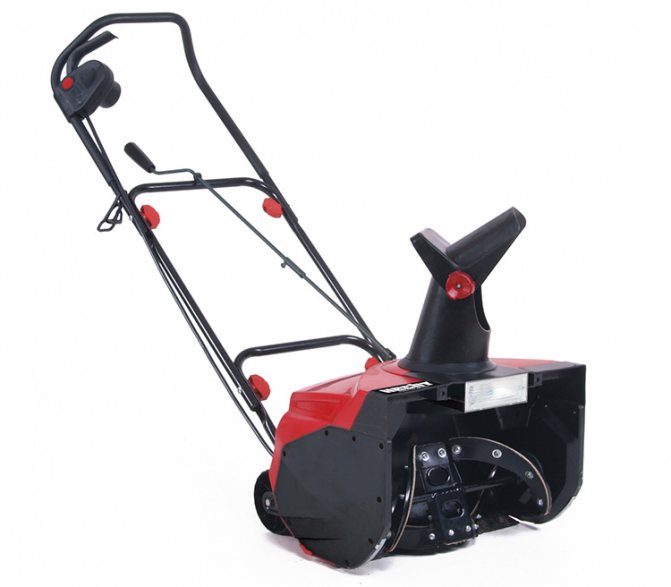
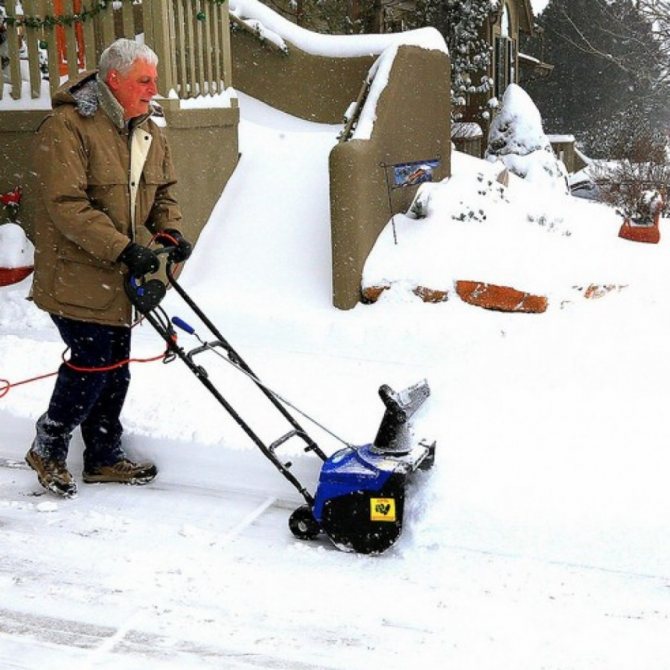
Electric machines clean a small area like a porch, walkways or garage entrance. But it is not always advisable to use it for cleaning large areas. In addition to this, it can be said that work efficiency will be reduced if ice or large accumulations of snow are noted on the existing area. Electrical appliances are small in size and easy to operate and maintain. But its operation is associated with the mandatory observance of electrical safety rules. In particular, a wire must be used that is suitable for low temperatures. In addition, special fittings must be used.
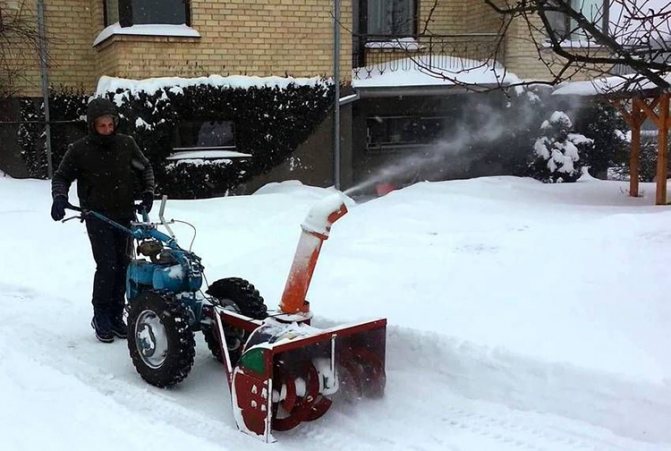
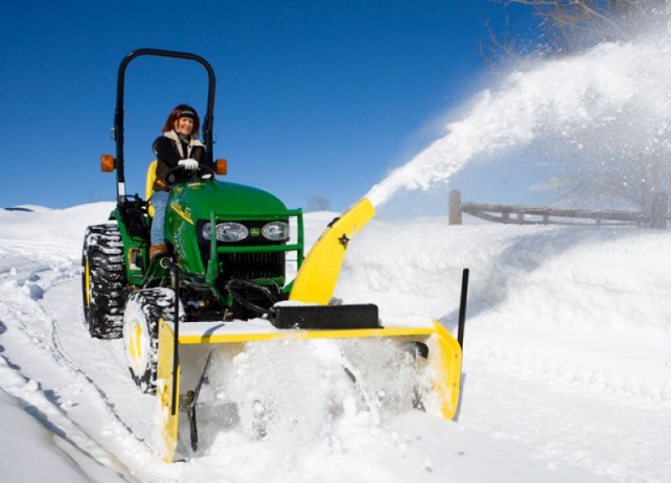
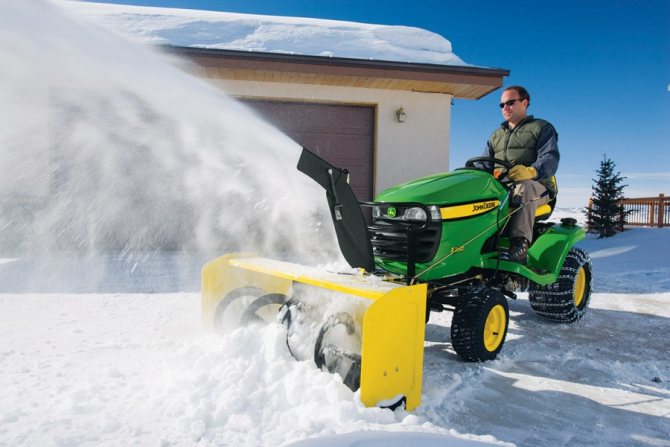
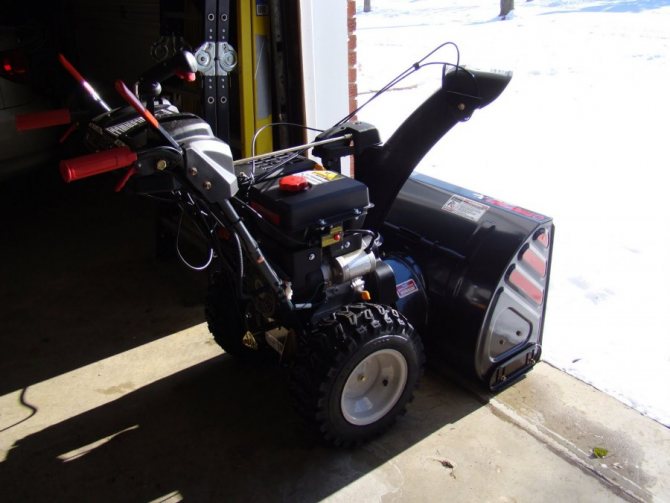
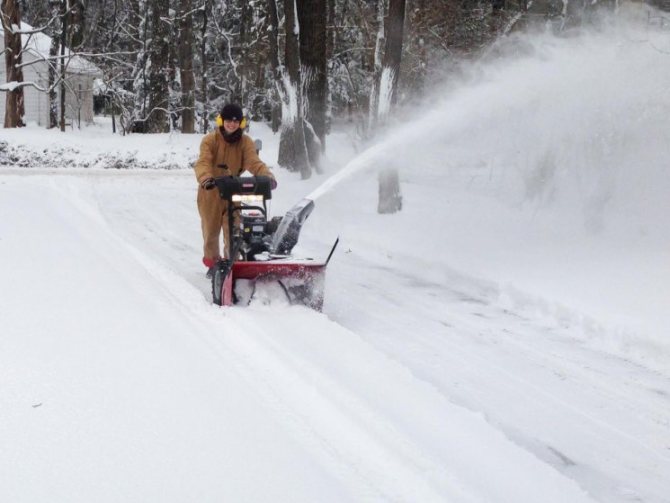
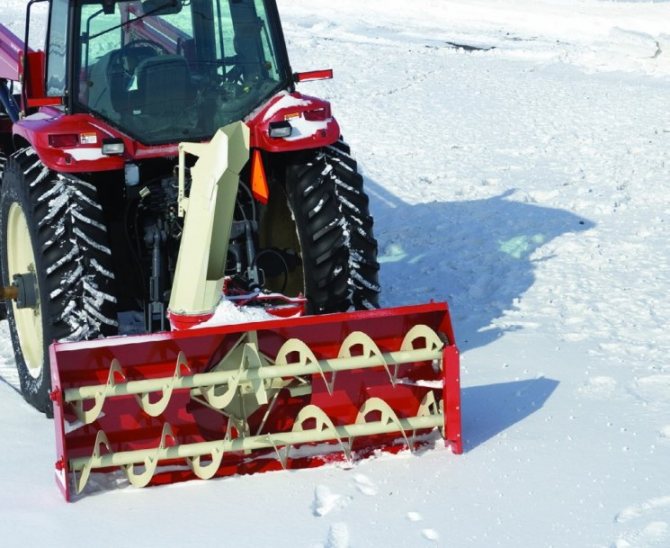
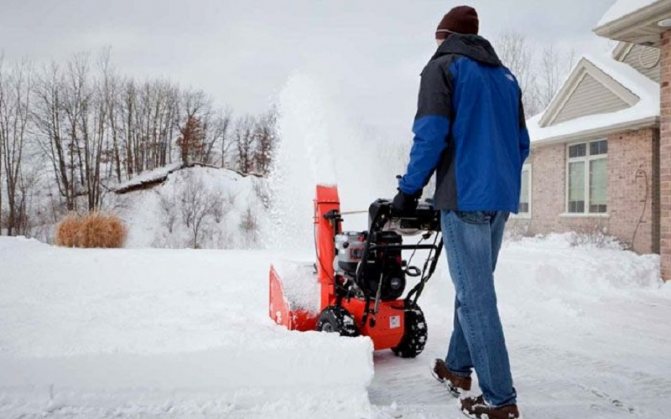
For work in large areas, it is advisable to use self-propelled devices with gasoline engines. They have good maneuverability and are capable of throwing snow far from the place of work. But, at the same time, the technique of such a plan has serious dimensions, but it does not require the application of large muscular efforts to control it.
Before deciding on the manufacture of a snow blower, it is necessary to consider the following - non-self-propelled devices are designed to remove freshly fallen snow, and they show high efficiency in cleaning garden paths, sidewalks and flat roofs. Yes, no doubt, these devices are distinguished by excellent handling, but when a dense layer of snow appears, it falls and the cars lose all their advantages.
Tips for operating a walk-behind tractor in winter
Considering that the walk-behind tractor is still more designed for operation in the warm season, it is advisable to keep the equipment warm when operating in winter.This will allow you not to waste time warming up the engine, but immediately start clearing the snow.
It would also be a good idea to change the grade of gear oil used. Low temperatures cause oils to thicken. Therefore, it is recommended to switch to more liquid brands or immediately purchase synthetic oils designed specifically for extreme conditions.
Recent Entries
9 traditions and customs of the Old New Year that everyone should know about 5 budget meals for the Old New Year 5 beautiful plants that our children and grandchildren will no longer see
How to choose the most suitable walk-behind tractor model:
Auger snow blower
A snow blower becomes especially in demand when, after the snow falls, the owner of the house faces the problem of clearing an area of a certain size with his own hands. Serial, factory-made snow blowers are not very cheap and therefore many owners of a country house are trying to assemble it with their own hands.
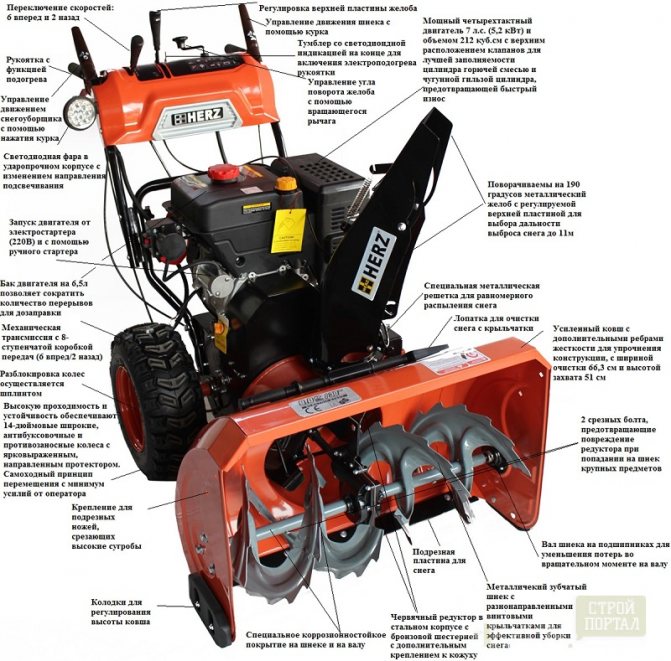
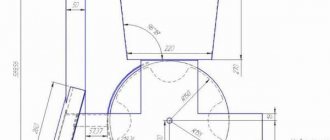
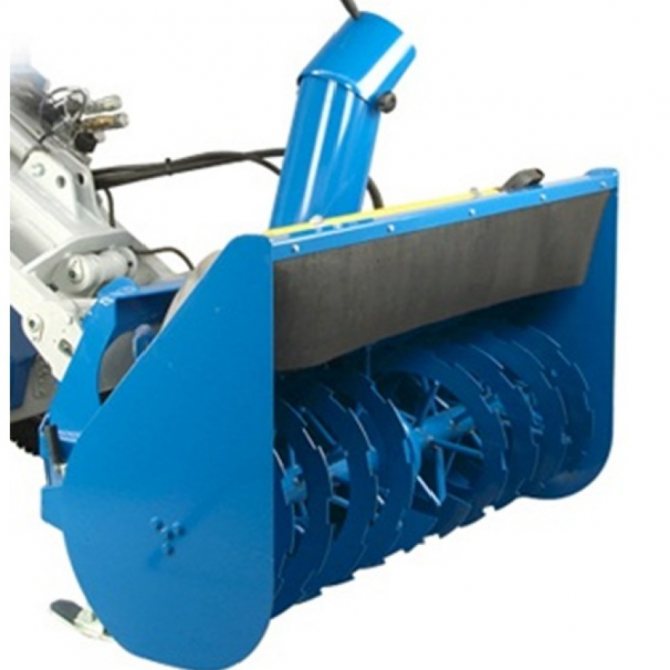
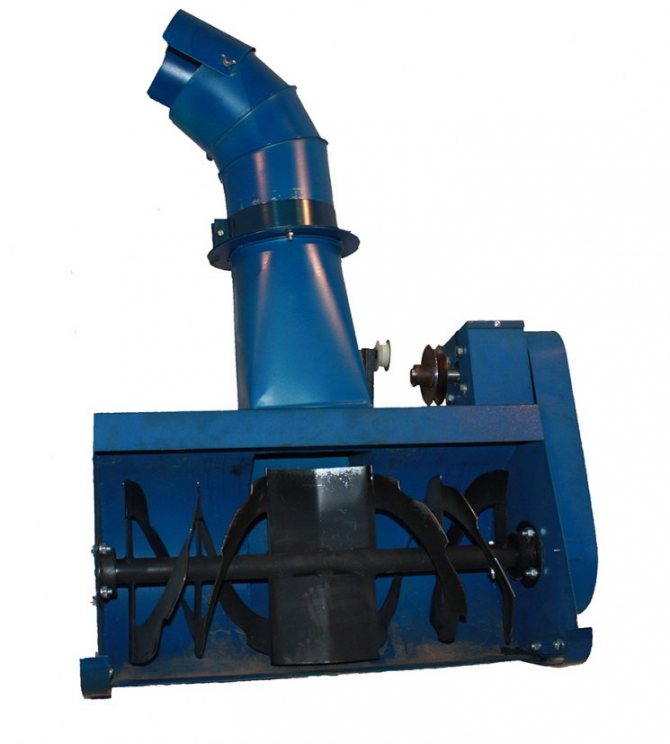
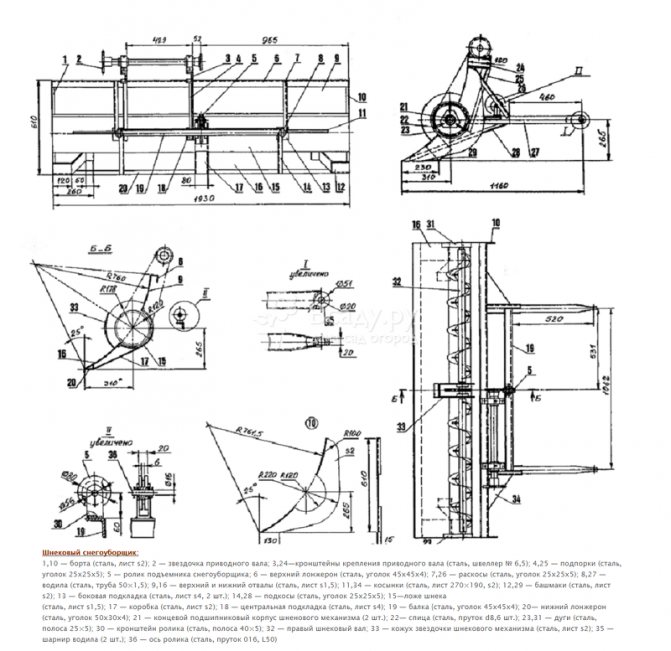
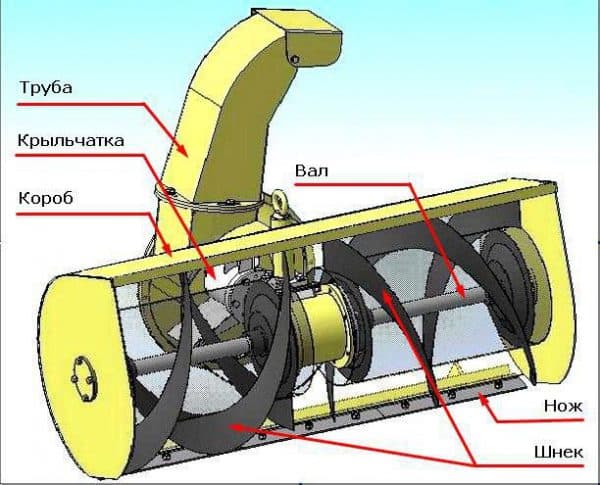
The structure of the auger snowblower
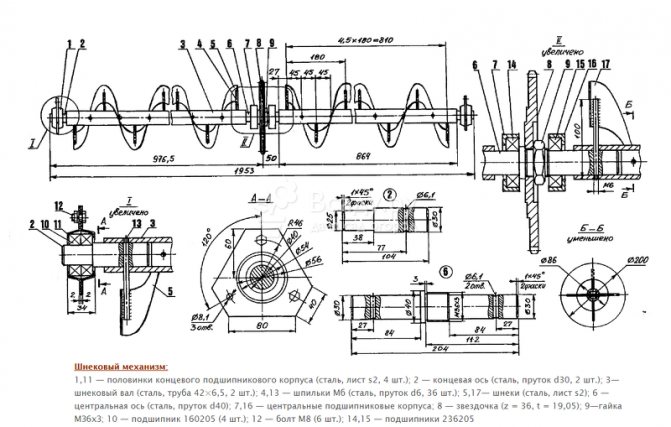
Drawing of the auger mechanism
Most often, the auger is the working body of the snow blower. This is probably the most difficult part. For its manufacture, it is necessary to have at least competently executed drawings. Errors are guaranteed to lead to the fact that the auger will beat during rotation, and as a result, the machine will be thrown from side to side. Such an impact will sooner or later lead to the fact that a self-made snow blower will fail.
Auger devices are divided into two types - one- and two-stage. In the first devices, a screw is used as a working body, and secondly, both the screw and the rotor are used.


Features of a complete set
In the manufacture of a rotary snow blower, screw elements can be neglected. Of course, this will slightly reduce the power of the final unit, but will greatly simplify the manufacturing process of the desired snow blower.
In this case, only the rotary mechanism will perform the function of capturing and crushing the snow. For the case, you will need regular aluminum or thin steel.
A self-made snow blower can have a rather different device. But in any case, there should be two main parts: collecting snow and throwing it into the right place. Gasoline or electric motors are mainly used as a drive. When choosing the design of the future snowblower, it is necessary to take into account how large the area will have to be cleaned. The simplest models are not productive enough and do not always cope with the clearing of strong ice, snowdrifts.
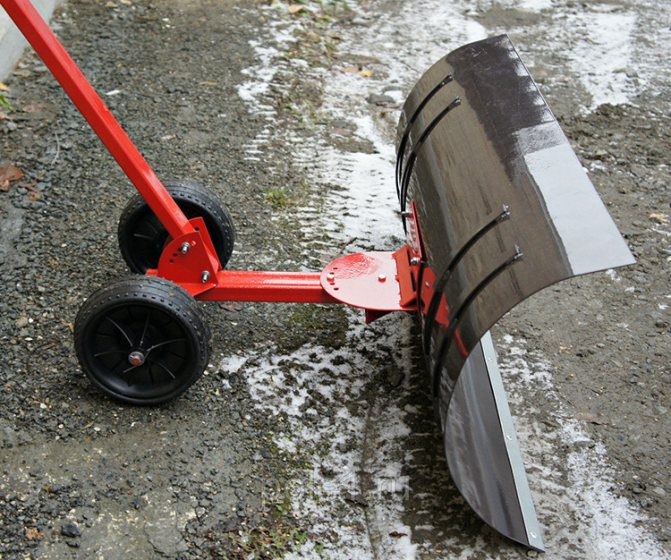
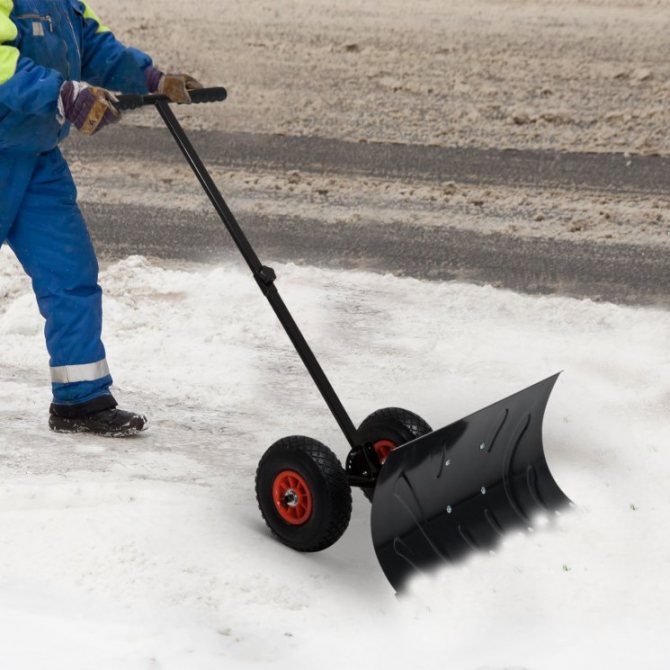
Despite the significant severity of such structures, there is no need for physical effort to move them. Non-self-propelled snow blowers are most often used to clean up garden paths, sidewalks and flat roofs.
The maneuverability of non-self-propelled vehicles is quite high. But when it is necessary to remove a dense, thoroughly compacted layer, or when there is a lot of snow, or when it is wet, cleaning becomes very difficult. Moreover, the maneuverability of the apparatus also decreases. To compensate to some extent for this moment, it is required to use the lightest possible parts. If preference is given to gasoline models, this is not so important.
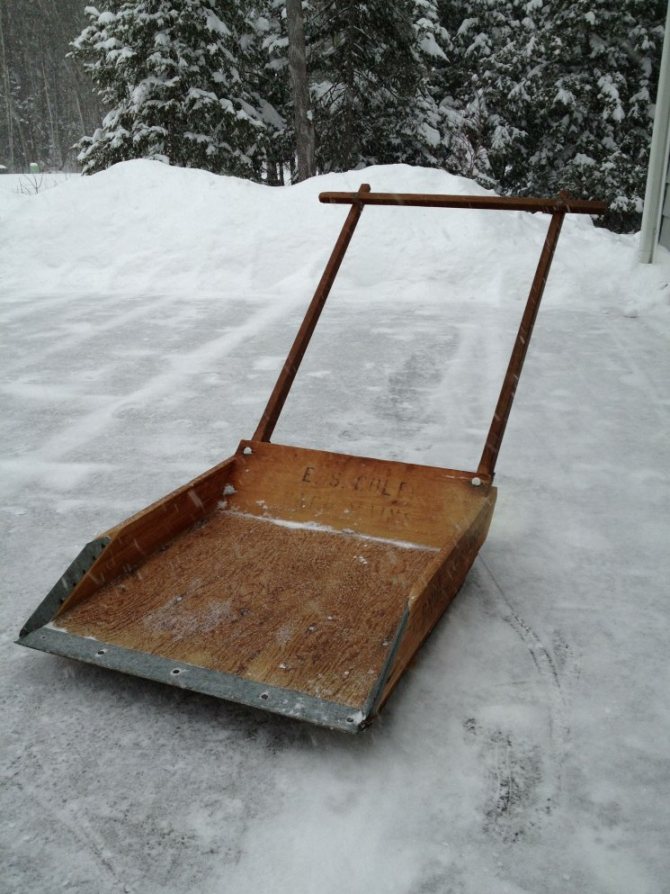
How does a single stage auger machine work
A single-stage (auger) snow blower works as follows. Rotating, the auger collects snow, crushes it and throws it aside. The auger edge has two versions - smooth and serrated. Smooth effectively works in removing fresh snow, and toothed successfully copes with icing.Auger machines are much lighter than auger rotor ones. In fact, it is a mobile shovel powered by an internal combustion engine or an electric motor. These machines move with the help of muscular strength.

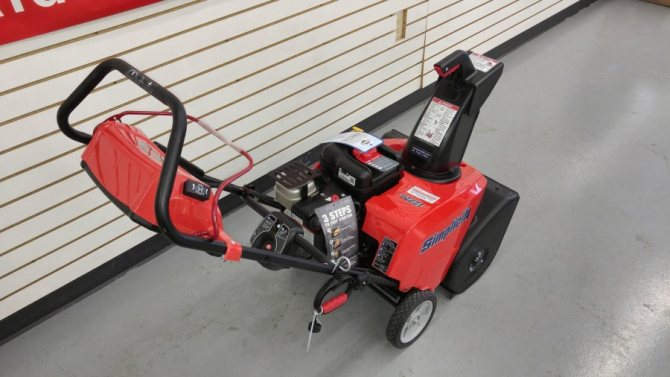
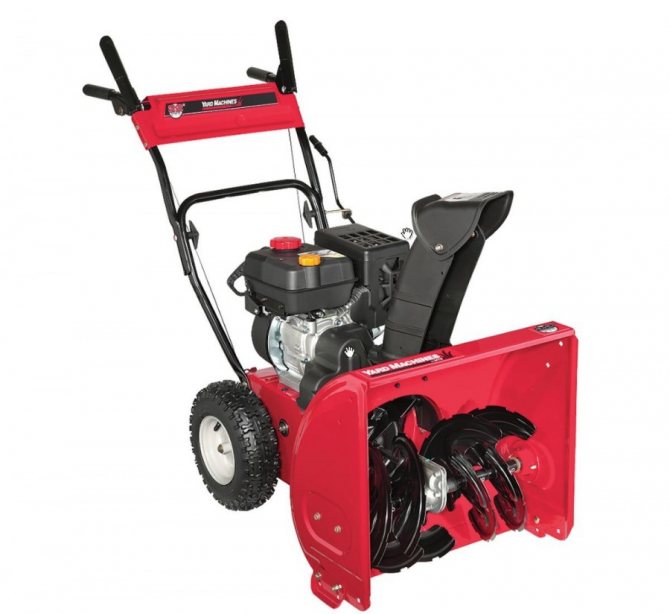
Single stage snow blower
Choice
According to their design, gasoline snow blowers can be of several types:
- screw type;
- rotary;
- mixed type.
Rotary is the best option for homemade
For making at home, a rotary snow blower is considered the best option. There are several reasons for this:
Working principle of a two-stage machine
A two-stage (auger-rotor) snow blower works as follows - the auger rakes in the snow, and the rotor throws it out through a special chute. The augers in these snow blowers can be smooth or serrated. It is permissible to make them from metal or from other materials, for example, reinforced rubber. This equipment can be both self-propelled and manual. The rotor impeller can have from three to six blades. For their manufacture, polymers or metal are used.
Two-stage snow blower
The above schemes of a snow blower are not very technical, and it is quite possible to make them with your own hands.
Benefits of electrical models
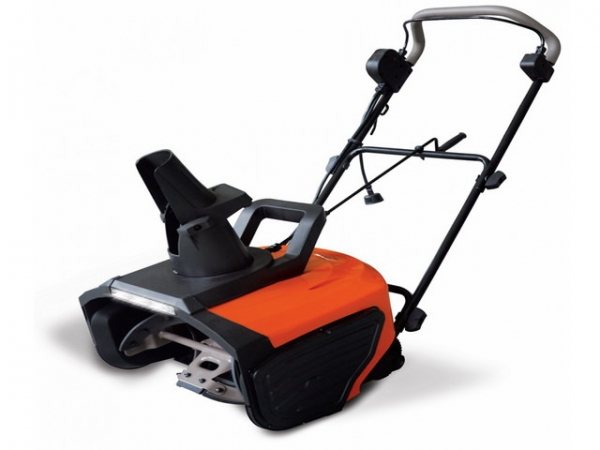
Benefits of a snow blower
- Electric snow blowers are more affordable than gasoline-powered counterparts.
- They are much more compact and lighter, which makes them easier to move and store during the snowless period of the year. There is an opportunity to load it into the luggage compartment of the car, bring it with you to the dacha, and a hidden socket in the fence will allow you to connect to the network and clear the approach to the house.
- There is no need to purchase gasoline and oil, which significantly saves money. And the cost of electricity is an order of magnitude lower than hydrocarbon fuel. The absence of a specific smell makes storage available not only in a free-standing room, but also in a pantry.
- Not too high noise level of the operating unit.
- Maneuverability of management, easy to move even in narrow areas.
- Lack of exhaust gases during operation.
- The presence of a headlight allows snow removal at night.
Do-it-yourself snow blower where to start
Before you start assembling a snow blower, you need to understand what problems it will have to solve. Based on the tasks set, it is necessary to choose the type of power unit - internal combustion engine or electric.
The choice is based primarily on the amount of work that the snow blower has to solve. When it comes to cleaning paths, sidewalks, etc. It is advisable to use an electric motor. In the event that snow is to be removed from a large area, then it is advisable to think about using a gasoline engine.
After the future owner of a homemade snow blower decides on the type of power plant, he will have another question - to do the installation from scratch or use, for example, a walk-behind tractor.
Assembly diagram of auger snow blower
You need to understand that using a ready-made walk-behind tractor, solving the problem will be significantly simplified. Indeed, in this case, it will be enough to design and make with your own hands only attachments for the walk-behind tractor. It consists of a box, auger and a mechanism that will transfer rotation from the power plant to the auger and rotor. I must say that the task of making a snow blower with your own hands is within the power of a person with minimal technical knowledge and locksmith skills.
Instructions
It should be noted right away that to make a homemade snow blower, you will have to work a little on a lathe, adjusting the metal parts you have to the desired size.
If you do not have it, then you can go with the drawings to the nearest turning shop, where they will make the necessary parts for you for very reasonable money.
Now you can start making a snow blower. This process can be roughly divided into several stages:
- Screw manufacturing.
- Manufacturing of a rotary mechanism.
- Installing the casing (bucket).
- Manufacturing of the body frame.
Screw manufacturing
The basis of any auger is a metal shaft, on which the elements gripping the snow are located. For the shaft, you can use a regular metal pipe with two trunnions at the ends. For gripping elements, 8 steel half-discs are suitable.
Screw manufacturing
Their thickness must be at least 2 mm. Screw elements are made of them, which are then welded to the metal shaft.
As a material for rotating elements, you can use a conveyor belt with a thickness of 1 cm. We will need about 2 meters of such material. Four rings are cut from this tape, the diameter of which must be at least 28 cm.
In order for the desired auger to rotate, you need to use closed-type bearings No. 205 so that the snow does not fall into them.
For the manufacture of the rotor, a metal sheet with a thickness of no more than 3 mm (2.5 mm is possible) is used. We also need an electric jigsaw with a metal cutting attachment, as well as an ordinary compass. If you do not have a jigsaw, then you can use a grinder, with an appropriate attachment for metal.
We take a sheet on which, using a compass, we draw a circle of the required diameter (in this case, this diameter will be about 3-3.2 cm). Next, we cut out this circle with a grinder. Everything must be done extremely carefully, because the performance of the future snow blower will depend on your efforts.
It is important to understand that homemade counterparts are unlikely to be factory accurate, so you should use more powerful bearings that can withstand the rotor runout.
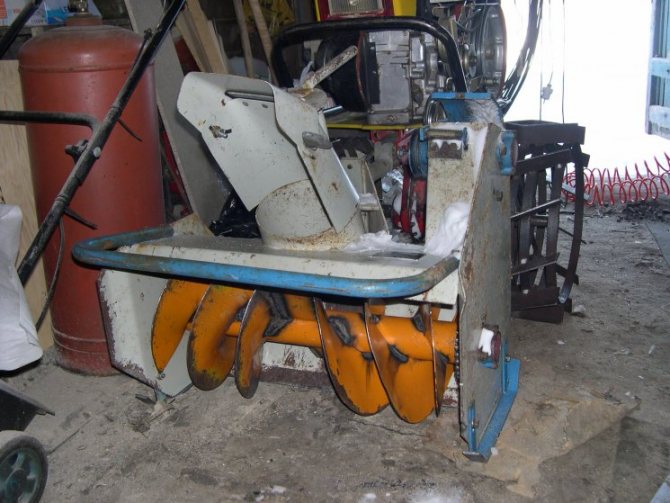
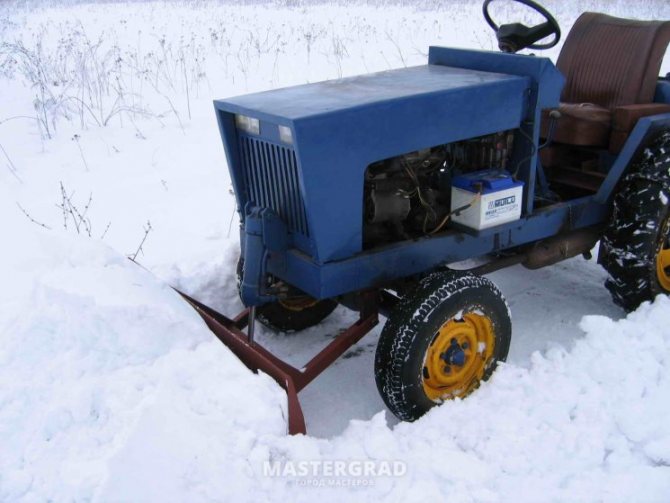
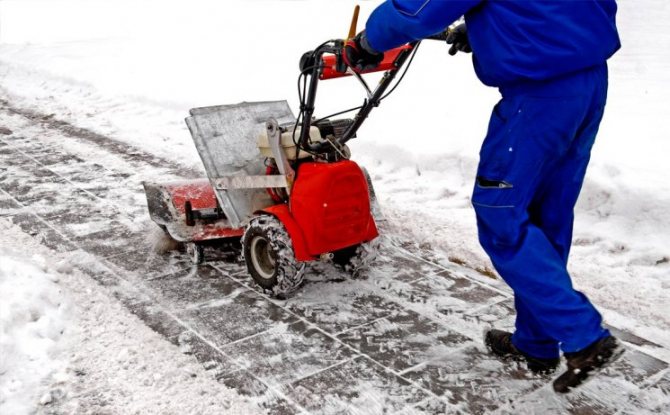
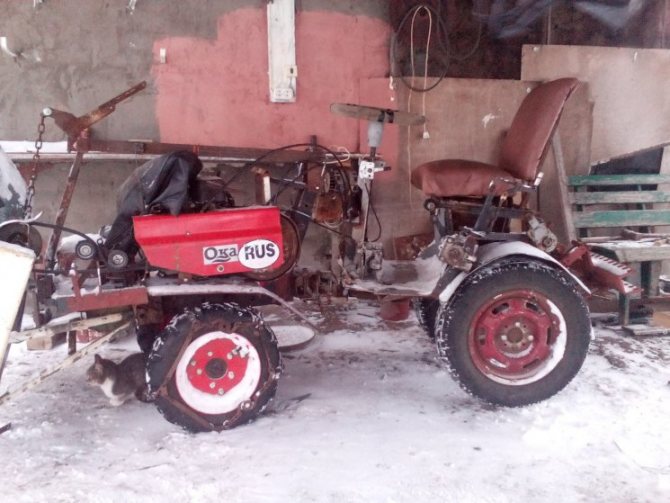
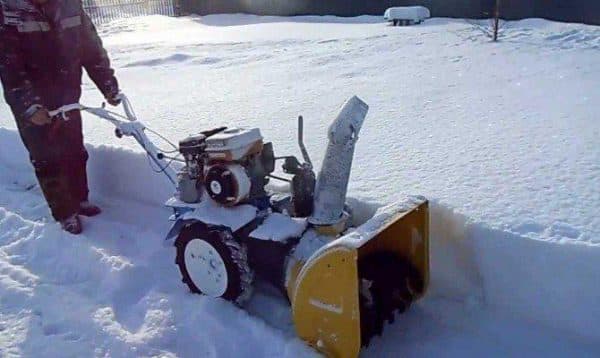
Installing the engine or using a walk-behind tractor

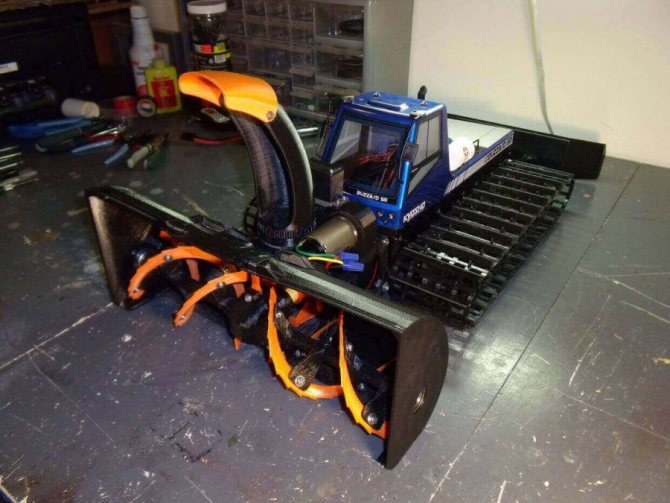
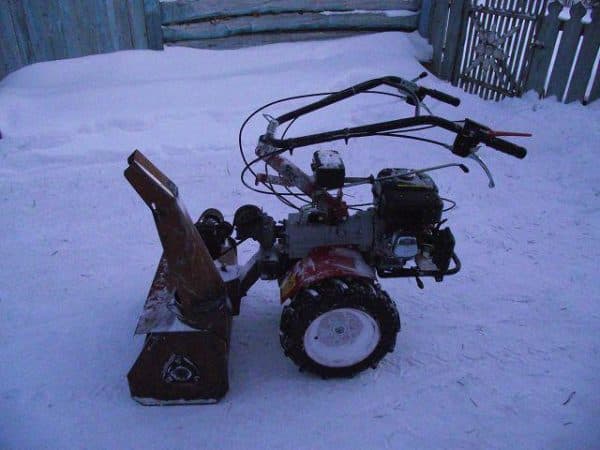
Snow blower from a walk-behind tractor
If a decision is made to make a snow blower with your own hands on the basis of a walk-behind tractor, then the question of the type of gasoline engine disappears. If the future owner decided to build a snow blower from the very beginning, then it makes sense to install an engine dismantled from an old walk-behind tractor or lawn mower. For efficient operation of the snow blower, a power of 6.5 l / s is sufficient. To facilitate repair and maintenance of the engine, it is advisable to install it on a removable platform.
In order to reduce the overall and weight characteristics and increase the reliability of the snow blower, it is advisable to use a manual start to start the engine. This is due to the fact that the installation of electrical strapping (battery, wires, generator, etc.) will lead to an increase in the mass of the device and, accordingly, maneuverability.
The installation of an electric motor, on the one hand, will facilitate the snow blower, on the other, it will introduce restrictions on the radius of its operation. It will be limited by the length of the power cord. In addition, a waterproof motor must be installed on the snow blower.
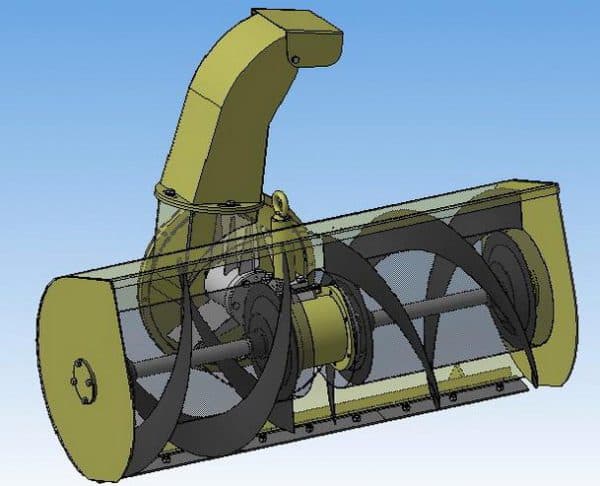
Snowplow device and diagram
Before you start designing a machine, you need to prepare calculations and drawings. Preparation will be easier to carry out if a clear idea of the visual image, the principle of the unit and its functioning appears in the head.
How does a snow blower with auger attachment work:

Scheme 1
The front of the cleaner consists of a huge bucket with a funnel that collects large amounts of snow. Inside there are two conveyor screws - this is an auger (see here how to make it yourself), which move the accumulated mass into the pump. Each screw is made up of blades that rotate around the screw.
As soon as the engine is running, the blades begin to rotate. Each spin cuts sharp notches into the snow, then a second sharp blade replaces it.
Rotating conveyors and screws perform the following main functions:
- crushing snow;
- add it to the pump.
The conveyors have a trick - they are located at an angle to the pump, which allows you to bring snow to the pump. With the help of a fast rotation of the screw, the snow mass is pulled out at a high speed and carried by the air pressure over a long distance.
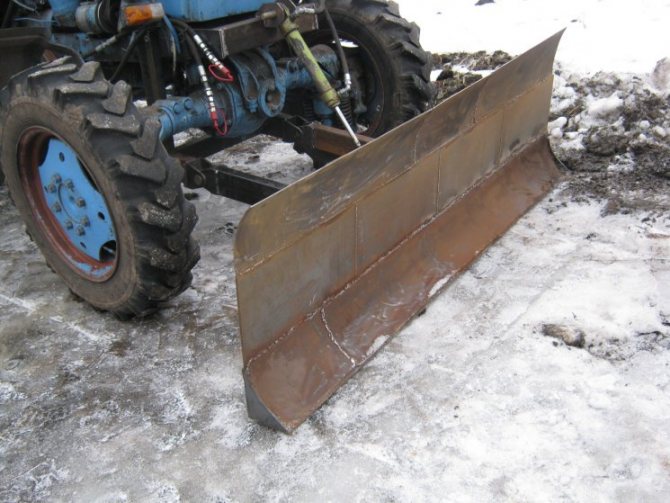
A scoring plate is attached to the bottom of the "shovel".
If an air-cooled electric motor is included in the structure of the universal apparatus, then the air intake must be protected from accidental contact of the electrical part with wet snow.
Scheme 2
Simulation preparation scheme:
- Buy, or use the available, walk-behind tractor engine. For example, Honda brands (requirements: 6.5 liters per second; auto transmission; gear ratio);
- Prepare a plastic pipe, mainly sewer, with a diameter equal to 16 cm;
- Roofing iron is needed;
- Plywood (10 mm thick) is useful;
- Half-inch pipe;
- Steel corner;
- Take the pipe ѕ inch;
- The steel plate should be 120 * 270mm;
- Hole drilling jig;
- Rear wheel axle.
- Check sleeve bearings against pipe size. If the pipe is wider than the inner ring, then it can be turned on the machine.
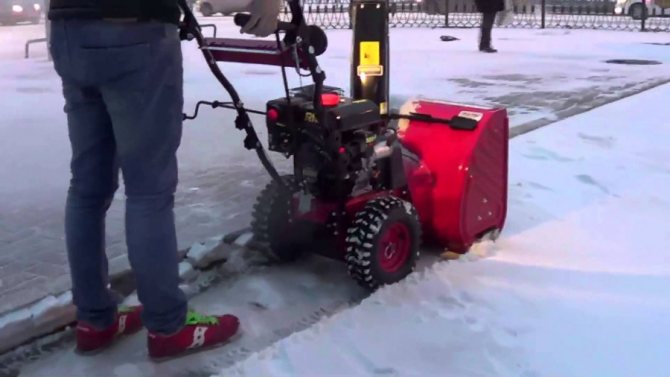
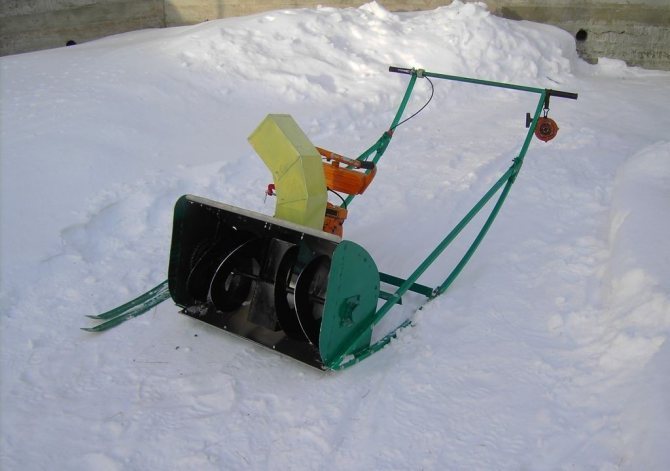
The total width of the home-made machine is approximately 65 cm (working width is 50 cm), which is convenient for storage.
The compact size of the snow blower allows for increased maneuverability and clearing snow from even the narrowest paths.
More complete information on the following videos:
How to make a snow blower from a walk-behind tractor
A do-it-yourself snow blower can be assembled when the following material and tools are assembled:
- welding machine;
- angle grinder;
- electric drill;
- a set of locksmith tools;
- sheet metal for the manufacture of an intake casing;
- metal for the manufacture of auger.
- metal corner 50 × 50;
- ball bearings;
- plywood;
- pipes for the manufacture of the control handle and the auger shaft.
The collected material is enough to make a frame and auger for a snow blower with your own hands. Cut metal rings from pre-prepared iron. Having cut the ring, bend the remaining halves into a spiral segment.
Then the segments must be welded into a single piece. The resulting spiral is welded to vertical struts radially installed on the screw shaft in advance. In order to make the auger, you might consider hiring a professional welder. In the process of manufacturing this unit, you must always remember that even a small mistake can lead to unstable operation of this unit.
Bearings are put on the ends of the pipe. This way the auger is ready.
Necessary materials
To make a homemade snow blower yourself, you need not only basic knowledge in welding and turning, but also some tools, which are quite difficult to do without.
Here is a list of what we need:
- Wrenches of various diameters.
- Bolts and nuts (it is better to collect all available ones to make it easier to navigate in the future).
- Electric drill.
- Bulgarian.
- Screwdrivers of all types and sizes that are available.
- Pliers, vices and pliers.
- Normal hammer and file.
- Various chains.
- Welding machine.
Metal pipe for gutter
With regards to materials, we need a metal profile pipe with a cross section of 20 by 40 mm.A profile corner with the same parameters is also suitable for the frame base.
DIY snow blower making auger and frame
For the manufacture of the frame, steel corners of 50 × 50 mm are used. A platform for installing the engine will be installed on it.
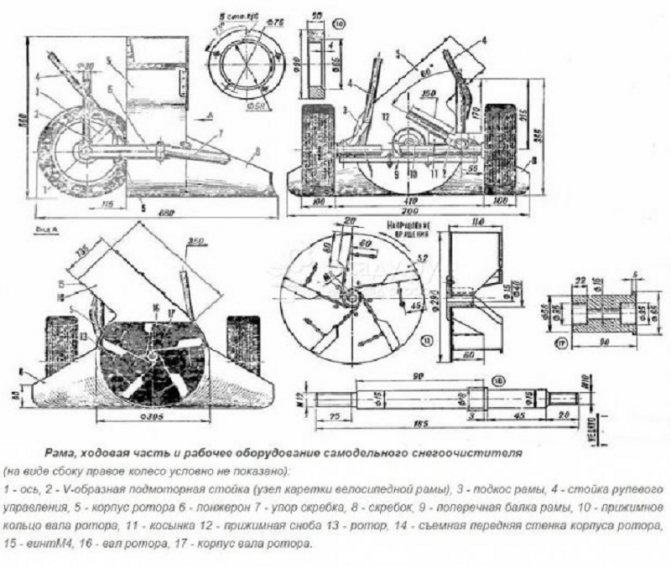
Snow blower frame and chassis diagram
Holes must be made on the platform to install the power unit. They can be done either with a drill or with a gas cutter.
It is desirable to make the pulleys for the transmission of torque from an aluminum alloy.
The metal from which the body will be assembled, where the auger will be installed, must also be protected from corrosion. Therefore, it makes sense to use galvanized material.
In order for the frame to work longer, it must be coated with a primer. This may be a material called GF21 or XB0278. It is best to paint on top of it. This solution will protect the frame from mechanical damage and corrosion.