What are homemade incubators
Before you figure out how to make an incubator, it is worth considering the variety of home models. Any auxiliary materials, as well as already inoperative mechanisms, are used for manufacturing.
DIY incubator
It's important to know. The main selection criterion is that the materials must meet sanitary requirements in order for the chicks to grow strong and healthy.
The most popular are the following models:
- re-equipment of an old refrigerator into an incubator;
- carton boxes;
- foam sheets;
- wooden boards (plywood).
Any poultry farmer can safely choose another other material or give preference to those already listed. An important role is played by the size of the "artificial brood hen", they are calculated from the number of eggs that are planned to be laid.
Materials for a homemade incubator

DIY incubators photo
Read here - Do-it-yourself drip irrigation - options for how you can make watering and what to use for this, see the photo!
What you need to know about sizing
Do-it-yourself tedder rake
It is necessary to calculate in advance the size of the home-made device, the parameters depend on the volumes on which the farm is oriented and the number of eggs that will be laid one-time. The second factor plays a decisive role.
An incubator with an average dimensions of 450 × 300 (in length and width) can accommodate approximately the following amount of incubation material:
- goose eggs - 40 pieces;
- turkey (duck) - 55 pieces;
- chicken - 70 pieces;
- quail - 200 pieces.
The dimensions will also be influenced by the option of the heating system, the location of the lamps and the materials that will be used for manufacturing.
The size of the incubator depends on the number of eggs that will be laid at a time
Types of devices and device rules
When making an incubator for eggs with your own hands, you need insulating walls. Of course, the most difficult part is the automatic flip mechanism. But the main classification of home-made devices is based on the type of body material.
For these purposes, you can use the following things:
- The chamber of an inoperative refrigerator.
- Cardboard box.
- Foam sheets.
- Plywood or wood.
In addition, incubators can be with or without automatic egg-turning, and also have one or more tiers. However, homemade designs can have any technology and the number of tiers. It all depends on the skill of the manufacturer.
What should be an incubator
Starting to mount the incubator with your own hands, you need to remember the end result in order to get an apparatus in which all the nuances will be observed, allowing the chicks to hatch relatively healthy in due time.
DIY snow blower
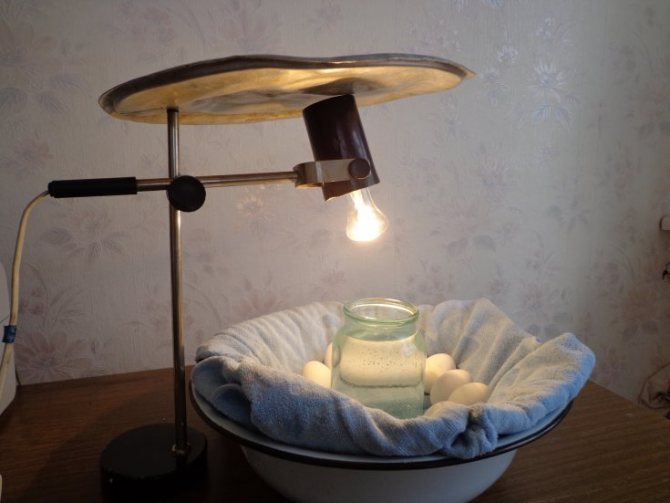
An "artificial brood hen" is set up in such a way that all the conditions that a live hen creates for its chicks are in the hatcher. The most important role here is played by humidity indicators and temperature conditions. When designing, it is worth considering the convenience of human use, because the farmer must control the entire process from start to finish.
Note to the poultry farmer. To breed the most popular breeds of domestic birds, a temperature of +37 to + 39 ° C is required.
On the first day of the incubation period, the material should warm up as much as possible (there are indicators for each species of bird). By the time the chicks are born, the indicator is reduced to a minimum. The exception is quail, the entire period in the incubator must be kept at a temperature of + 37.5 ° C.
On the first day of the incubation period, the material should warm up as much as possible
Do not allow overheating or low temperatures in the machine. Overheating leads to the fact that the internal organs of the young are deformed and deformities appear. At low values, the livestock simply will not be born.
Moisture readings will vary depending on the phase of development of the embryo:
- bookmark - pecking - 50-60%;
- pecking - withdrawal - 80%;
- selection of chicks - 55 - 60%.
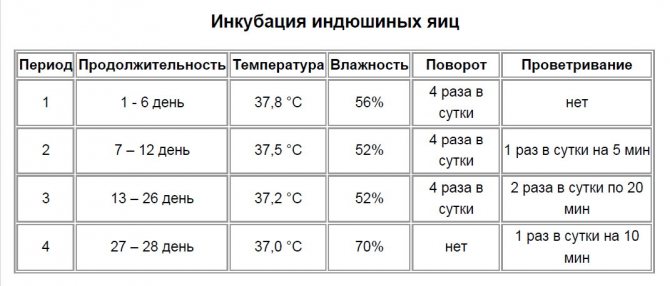
Incubation of eggs in different species occurs at different temperature indicators, you can get acquainted with the data in the table below.
| Bookmark | Temperature regime at the beginning of incubation | Temperature regime at the end of incubation |
| Chickens | 38 — 39 | 37.6 |
| Ducks | 37.8 | 37.1 |
| Geese | 38.4 | 37.4 |
| Turkey | 37.6 | 37.1 |
| Quail | 37.5 | 37.5 |
What is it needed for?
Many novice poultry farmers are not sure if they need an automated incubator and don't know what it is for. This device is indispensable as it turns chicken eggs on its own. This greatly simplifies the process of incubating the testicles, because a person does not need to turn them over by hand.
It is imperative to turn the testicles over, as this contributes to the correct development of the young fetus. If this is not done, the chick will grow up sick and soon die. Professional biologists say that they should be turned over at least three times a day.
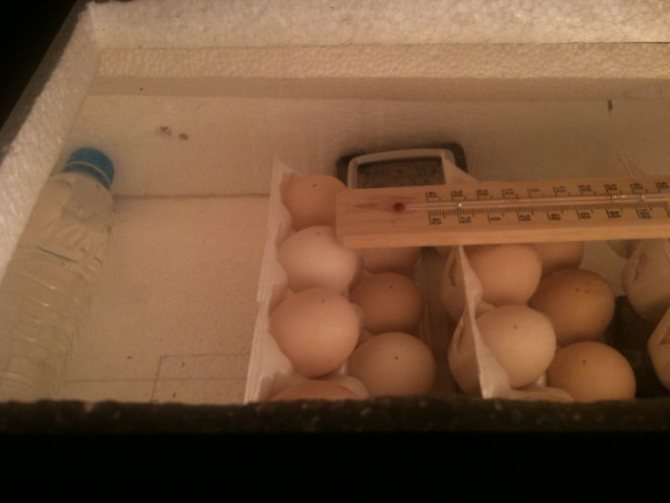
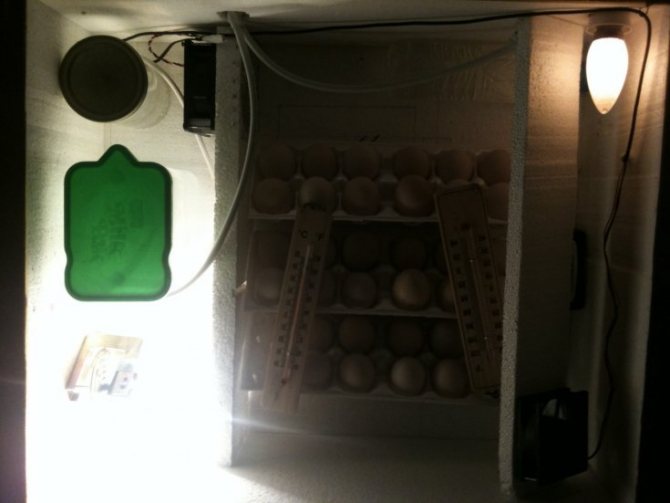
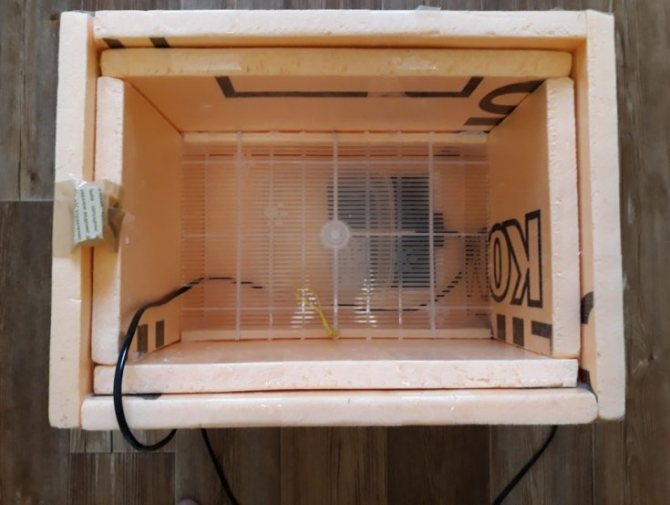
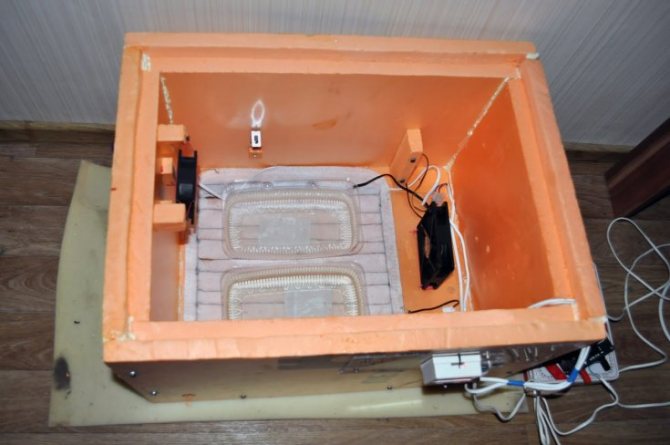
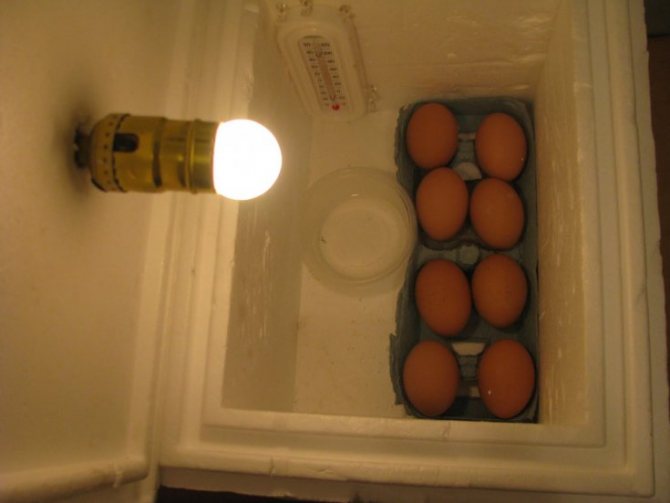
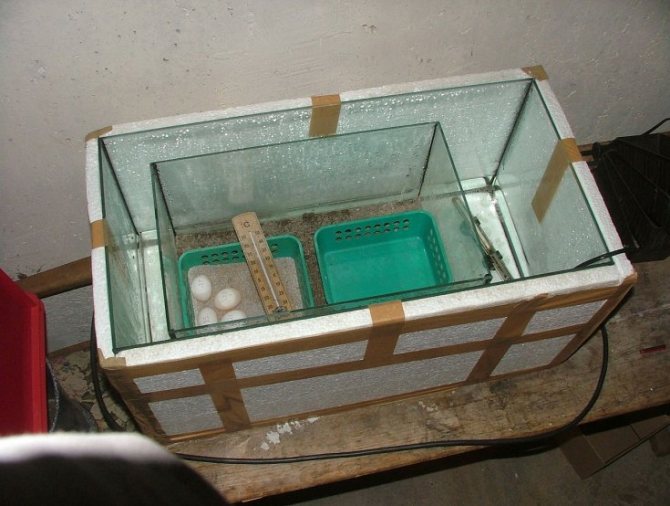
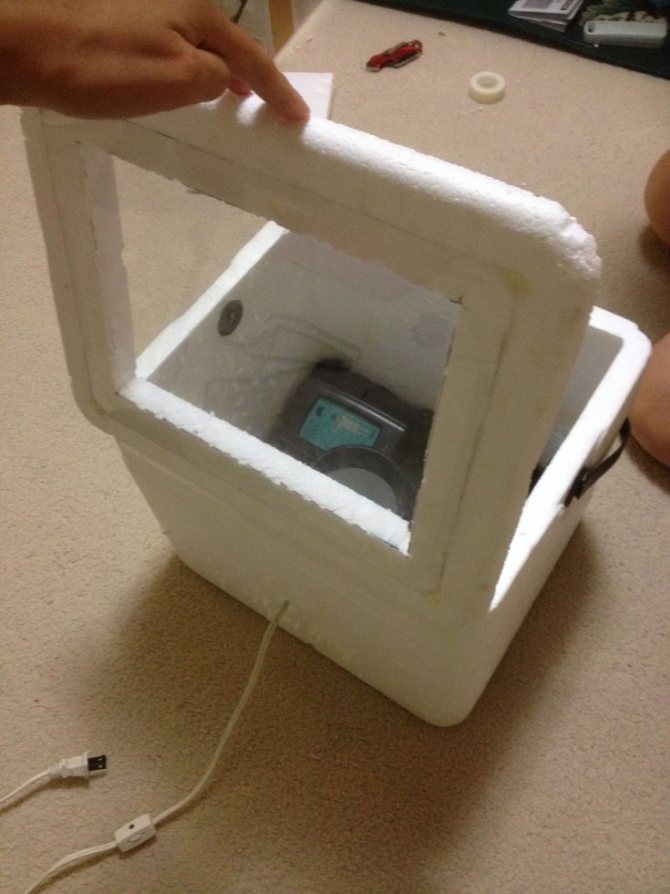
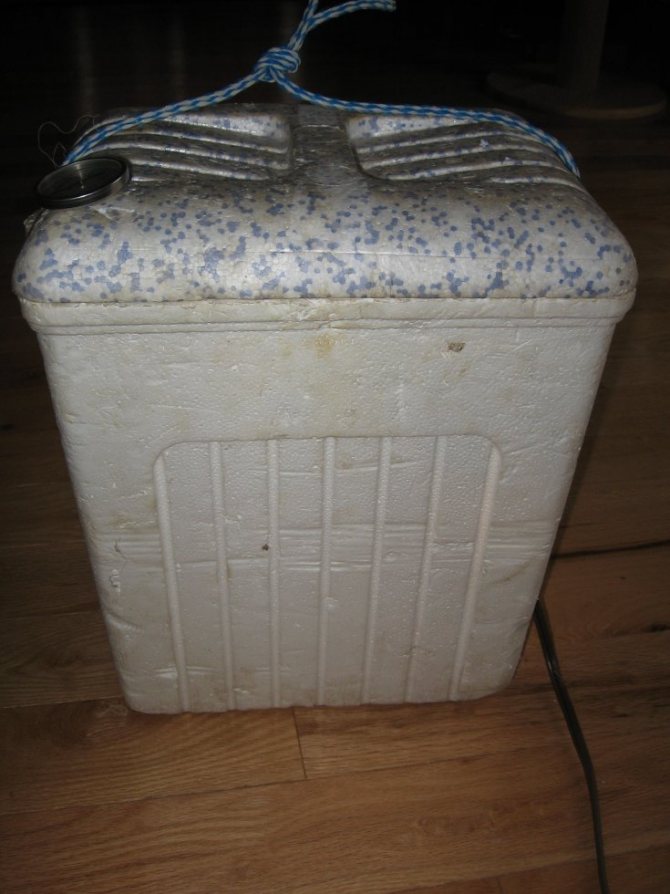
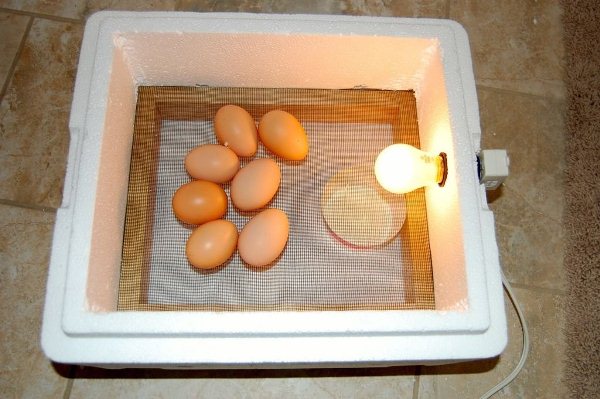
Styrofoam incubator
DIY beehive
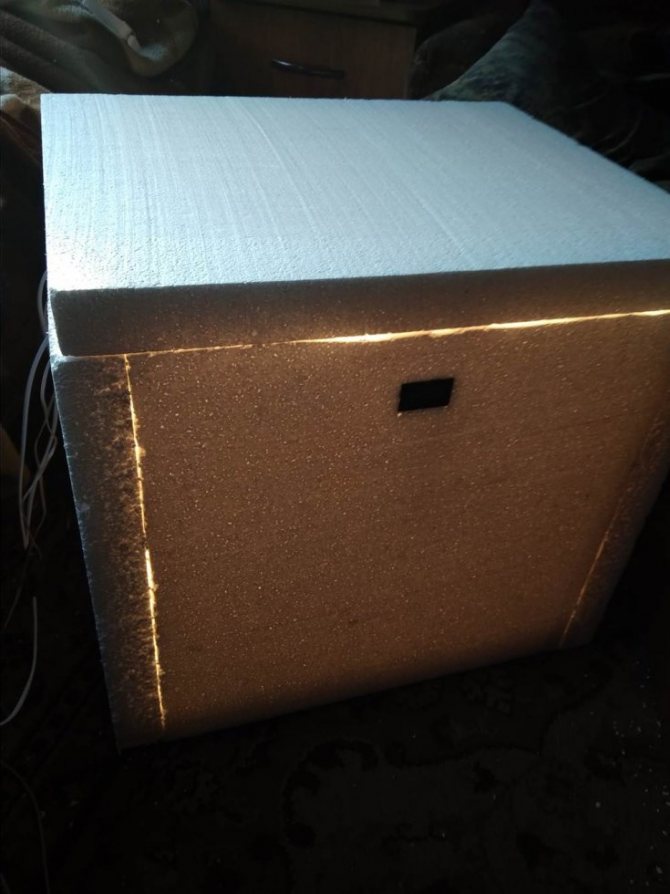
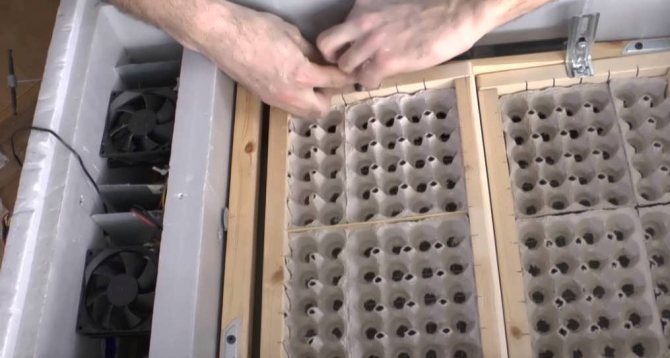
The foam has very good thermal insulation, and therefore it is this material that poultry farmers choose for installing an incubator. It is necessary to cut out parts that are suitable in size from the sheets; it will be easy to connect them with adhesive tape to obtain a cube-shaped structure. The walls reliably keep the heat necessary for the successful development of chicks.
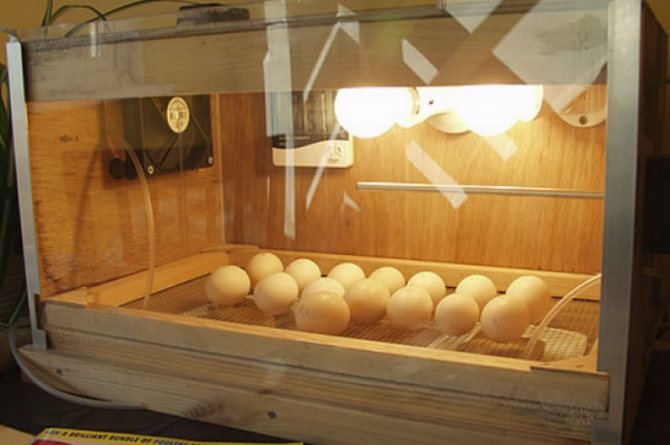
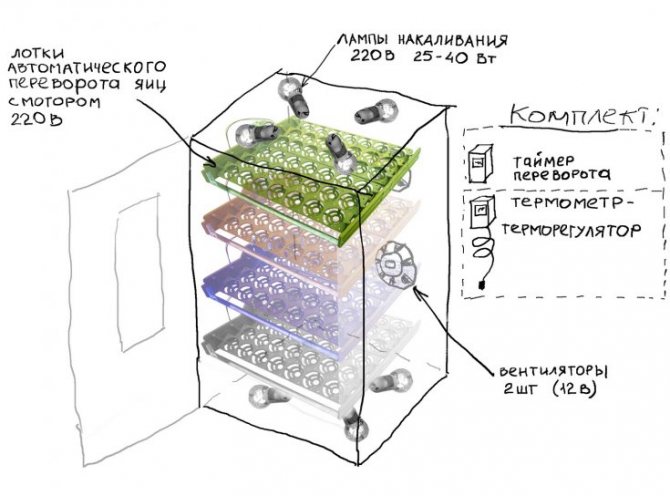
As an additional heating system, 20 W lamps are used. The heating elements are fixed on the inside of the lid so that there is a distance of at least 15 cm between them and the incubation material.
Styrofoam incubator
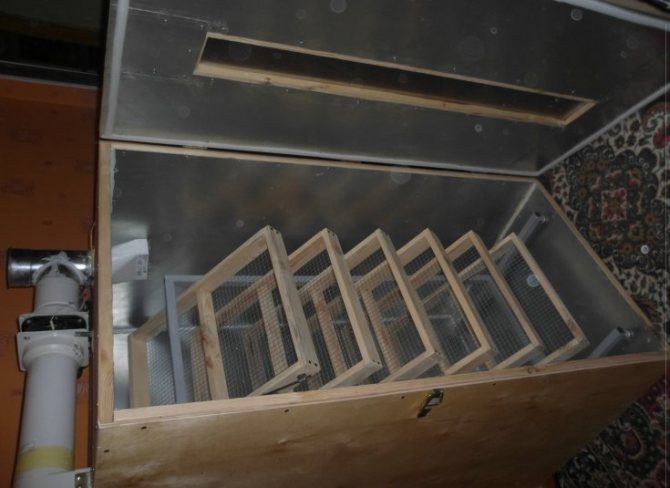
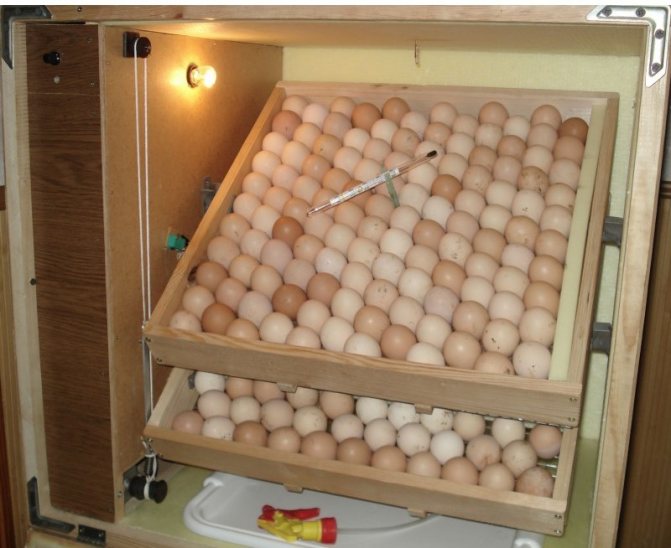
To make hatcher trays in a homemade incubator, you can take wooden planks or purchase a ready-made structure in a specialized store. The trays are installed in the central part of the machine so that the same distance to heating lamps and bowls of water is maintained. The latter are set to maintain the desired moisture percentage.
It is important not to forget about observing the required distance between the walls and trays for hatching chicks. This is necessary to ensure air exchange. There is an egg incubator with automatic turning, but in this model the function will be carried out manually.
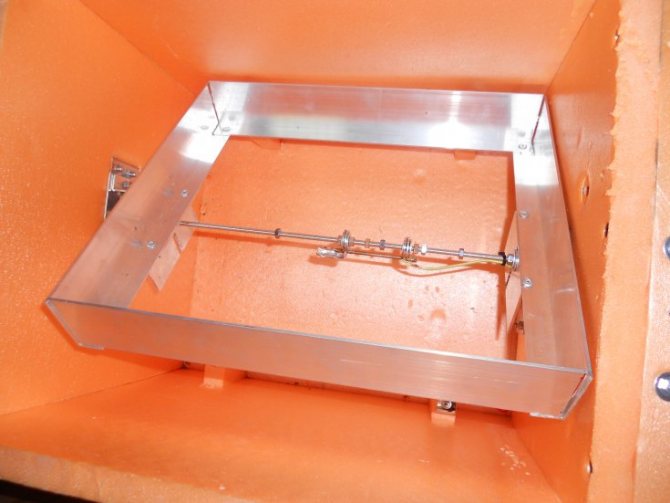
Advice! To facilitate the work, you need to pass a rod through the top of the box and attach a tray and a handle to it, which will be brought to the surface.
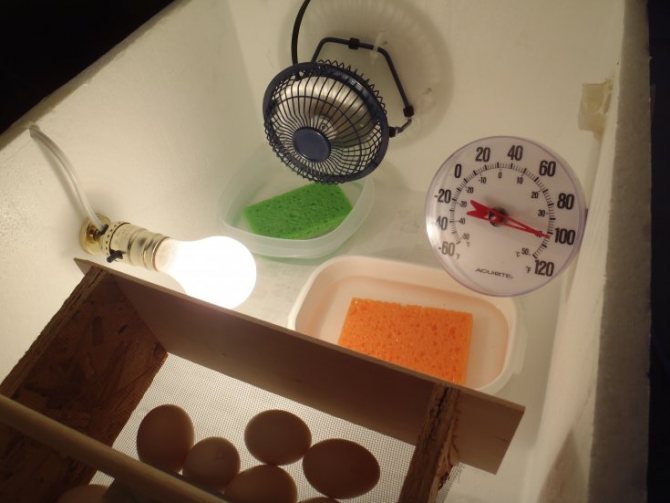
To keep temperature readings under control, the thermometer must be fixed so that the scale can be seen without opening the incubator. To maintain humidity and ventilation, several holes must be made in the top and bottom of the box.
Preparation for work
First of all, you need to calculate the required area. A medium-sized tray (450 * 350 mm) holds the following number of eggs:
- goose - 40;
- turkey or duck - 55;
- chicken - 70;
- for quails - 200.
Most often, an incubator is made for chicken eggs. For them there is a separate table for tray sizes:
| Eggs | Tray dimensions |
| 45 | 45x25x28 |
| 70 | 55x55x28 |
| 100 | 60x60x28 |
Cells for chicken eggs should have a depth of 60-80 mm and a radius of 22 mm.
Of course, these are approximate figures. The exact number depends on how dense the eggs will be and how big they will be. Therefore, when drawing an incubator diagram with your own hands, you need to take into account the approximate number of eggs, and not the exact one. However, in most cases, when making an incubator, you have to use the materials that are at hand.
In addition, there are several more requirements for the camera:
- The case must be dry and clean. The surface must not be covered with dyes, grease or mold.
- It is necessary to assemble the camera in such a way that in the future it does not leak out heat. For this, a sealant is used.
- Calculate in advance the free space for the water bath so that the required humidity is maintained in the chamber.
- You will need to make several holes in the case so that there is air ventilation.
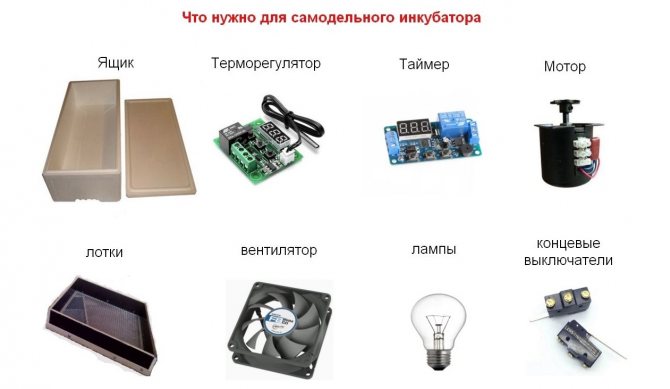
To create a homemade incubator with your own hands, you will need the following components:
- materials for the camera: refrigerator, sheets of cardboard, plywood, foam;
- egg trays;
- incandescent lamps with a power of 25-40 watts. A small apparatus will need 2-3 pieces, and a refrigerator will need 4-6;
- thermometer;
- fan;
- hygrometer;
- for automatic turning of eggs, you will need a thermostat, a timer for an overturn, a motor gearbox, bearings with clamps;
- installation tools: pliers, saw, knife, electrical tape, jigsaw;
- sealant.
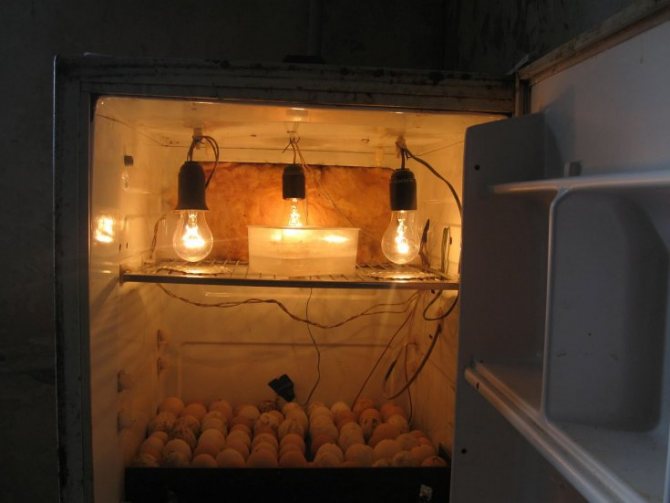
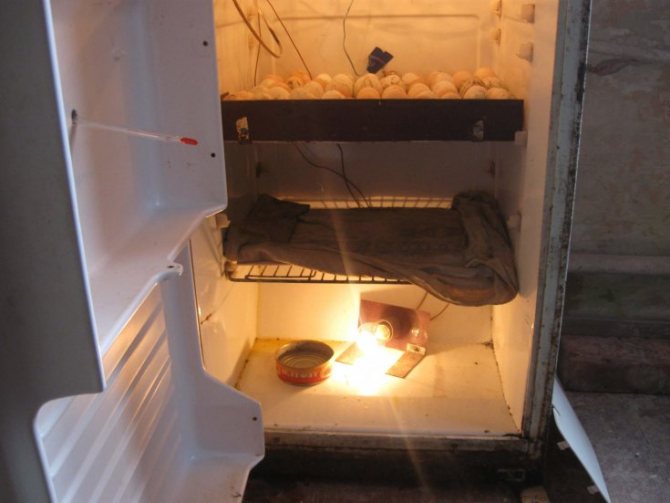
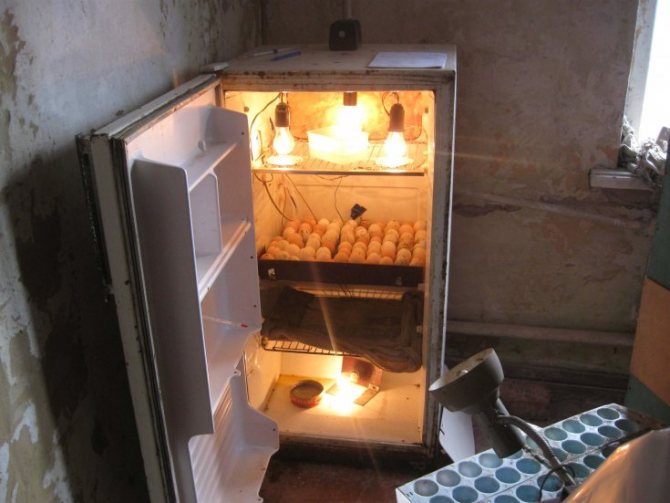
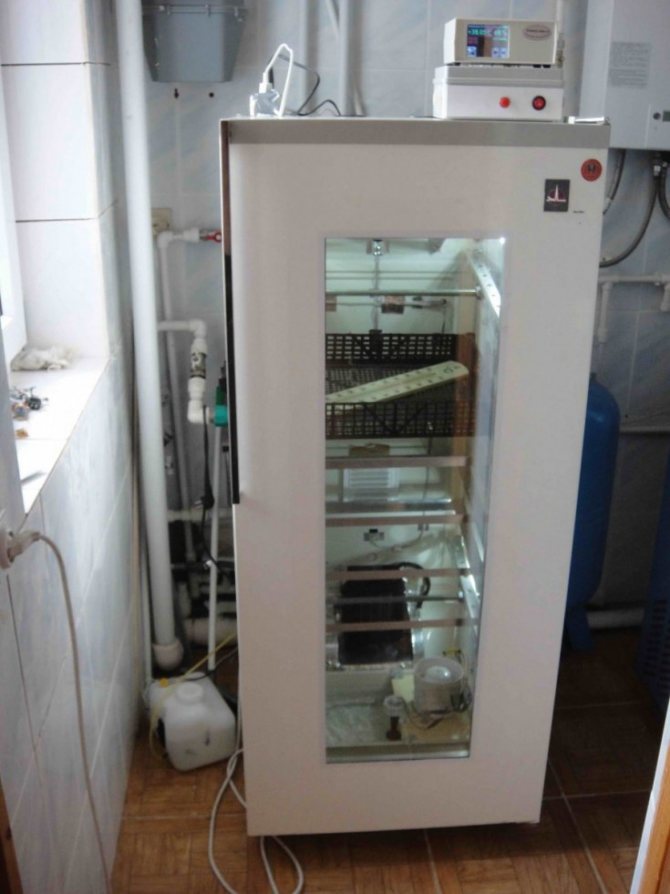
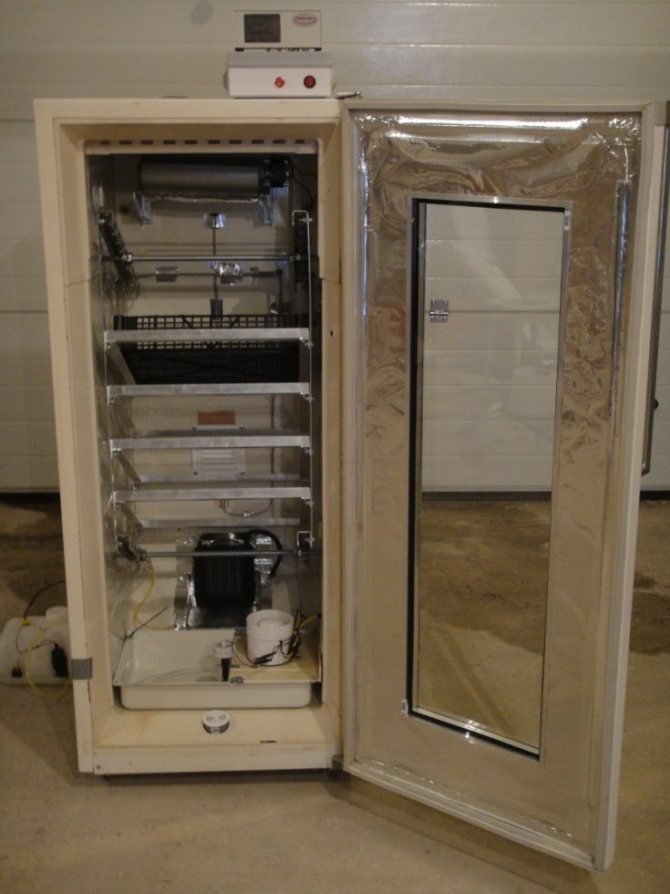
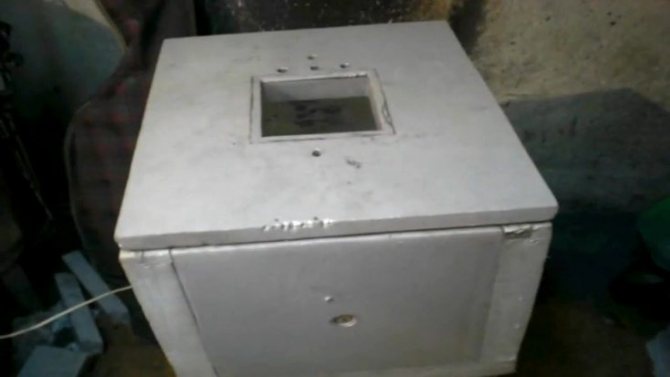
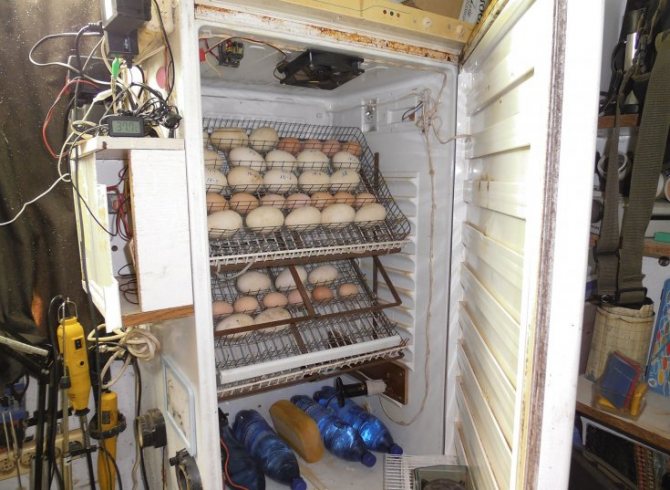
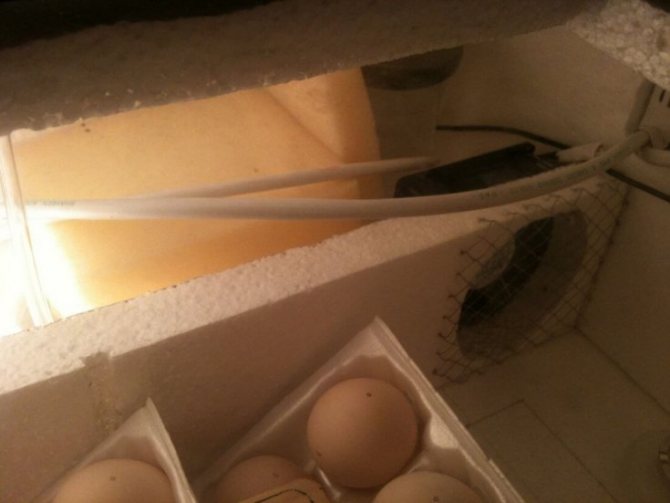
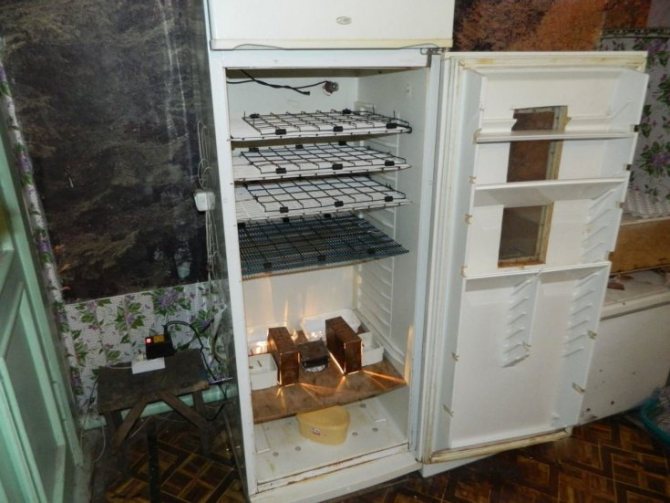
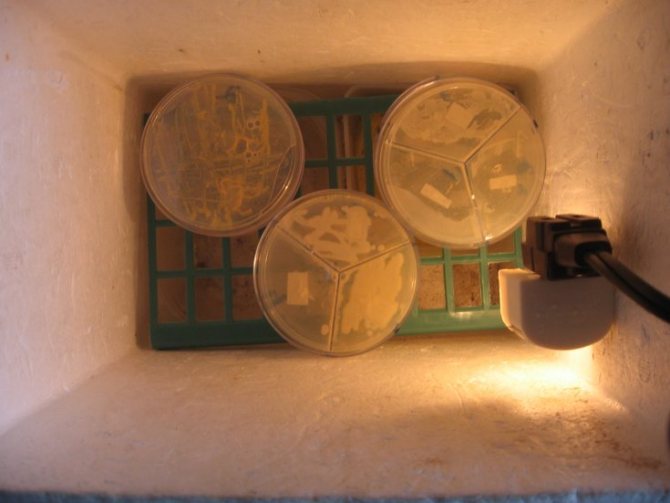
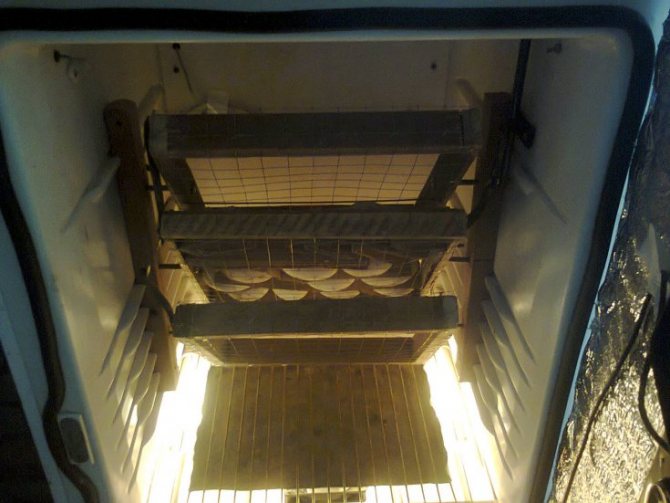
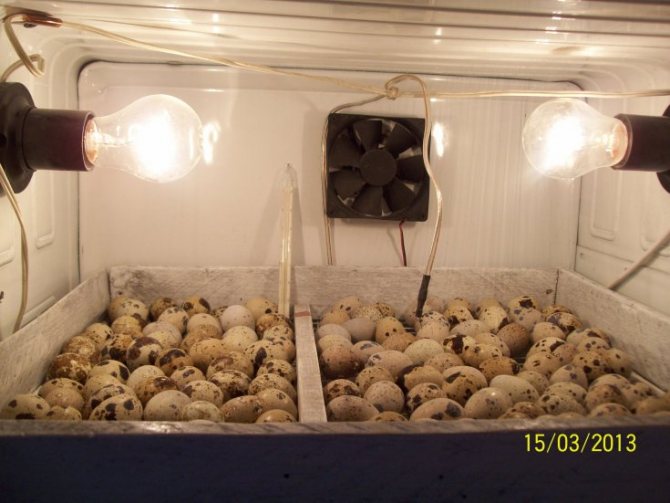
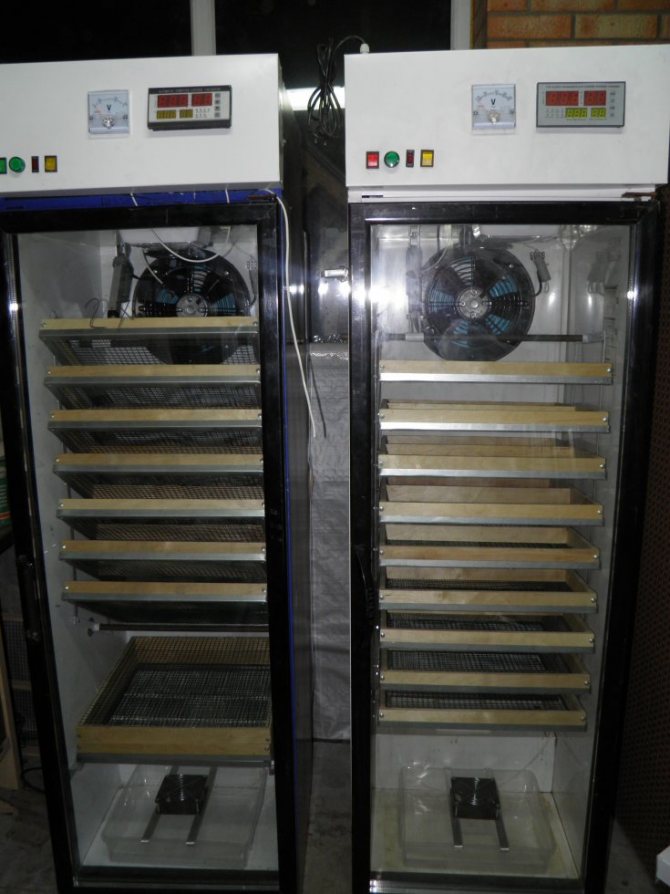
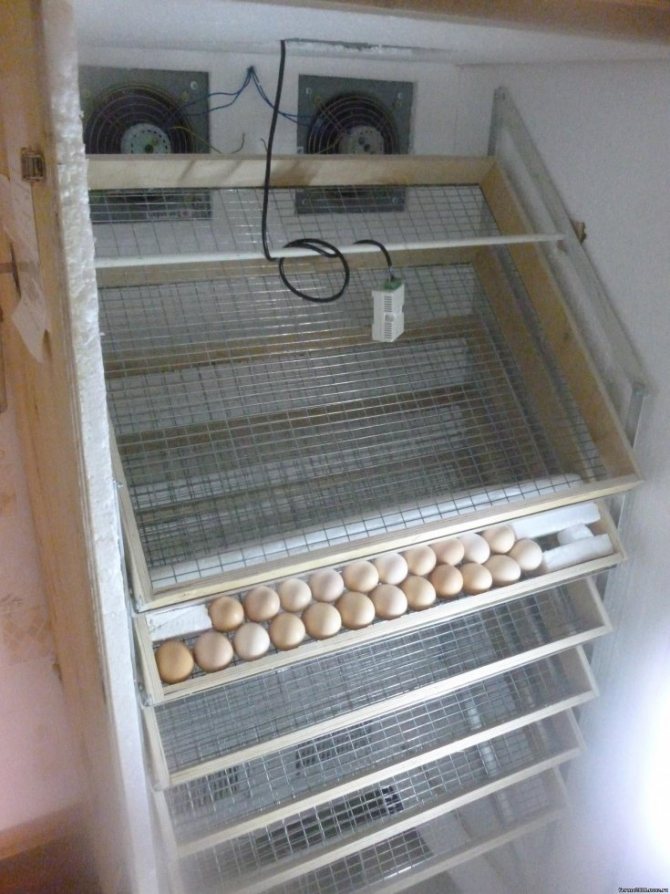
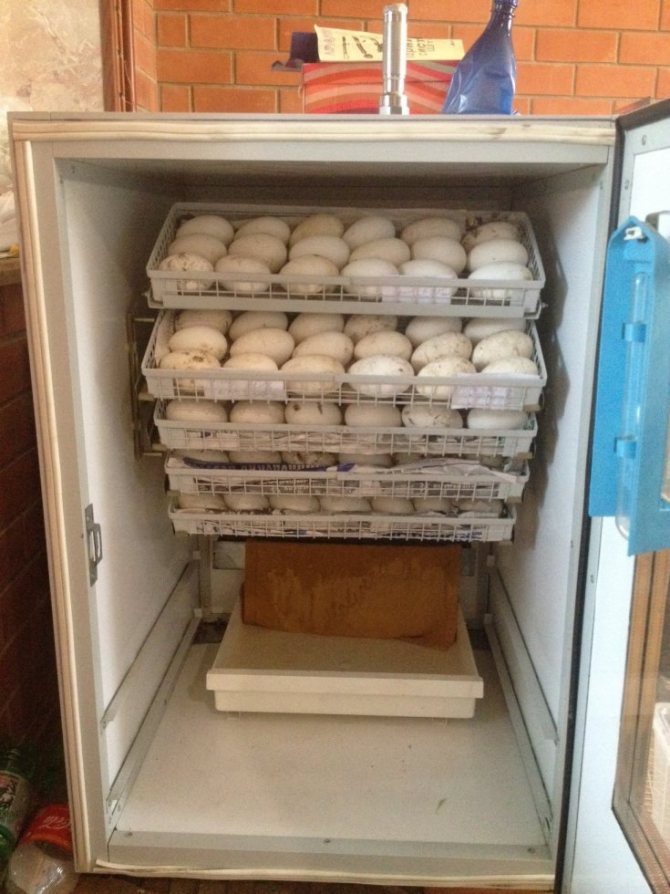
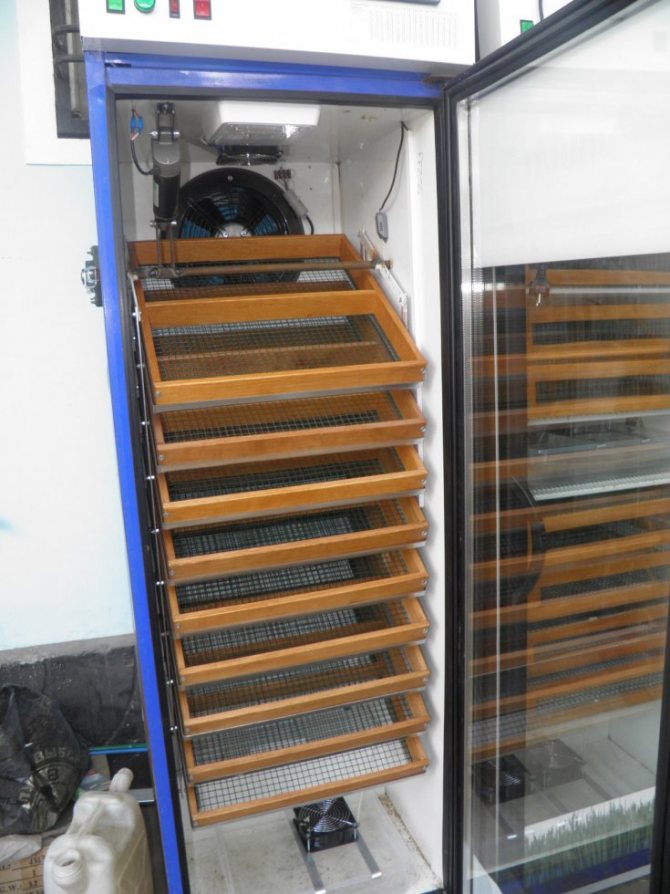
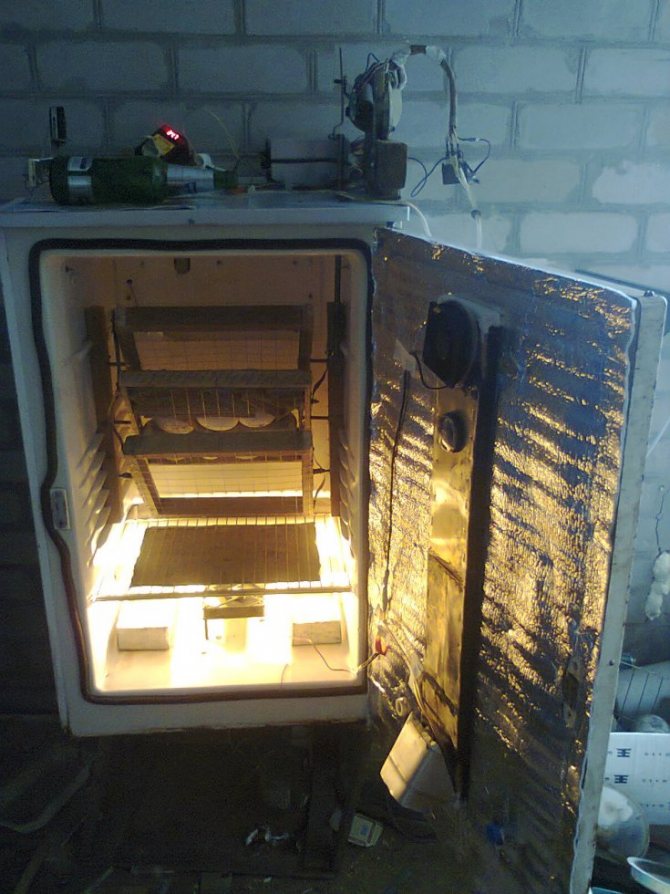
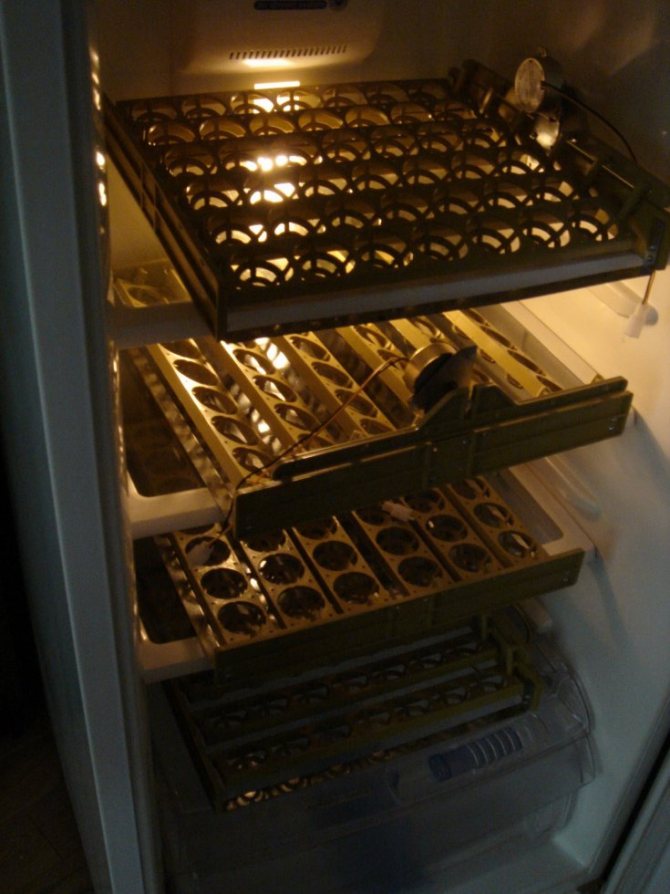
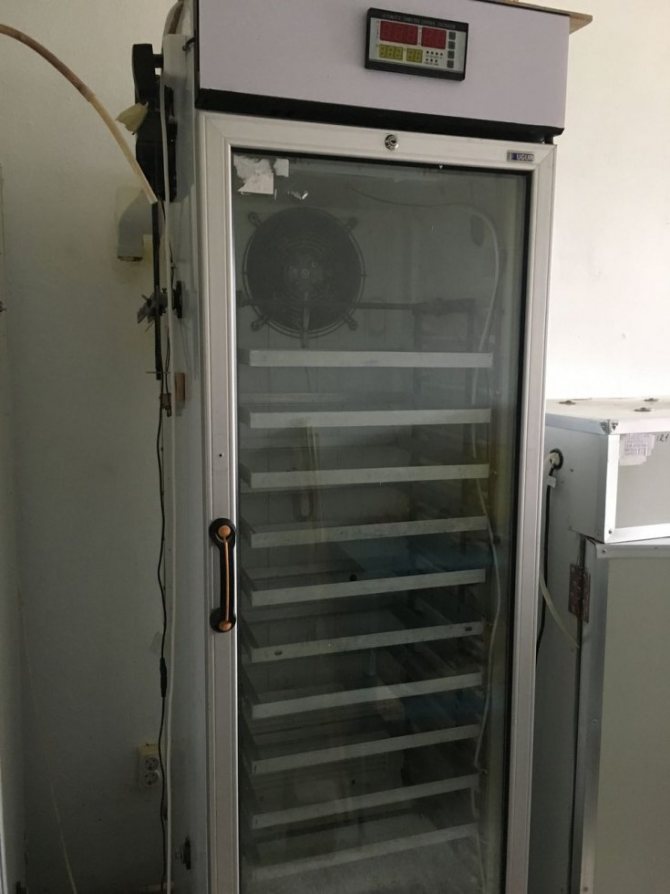
How to turn an old refrigerator into an incubator
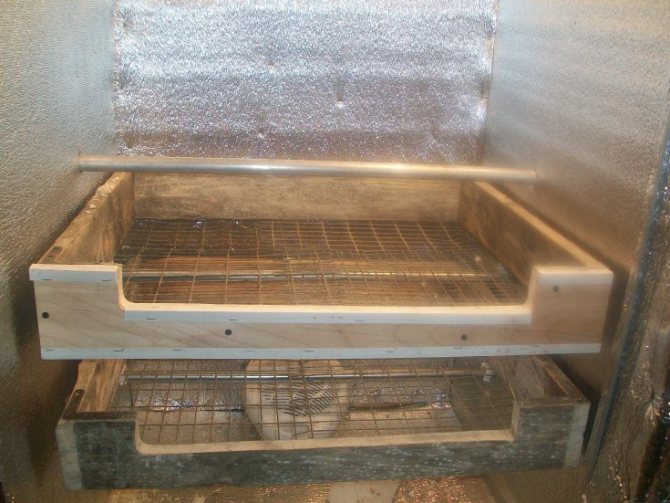
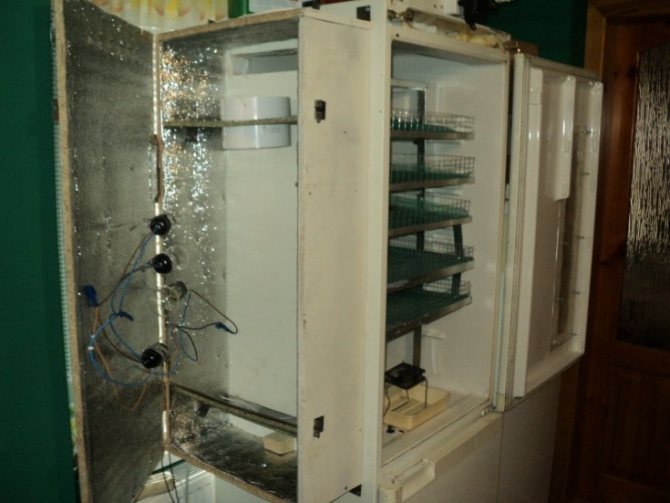
You should not hastily get rid of a broken refrigerator, it can be given a second life, but already as an "artificial brood hen". The creators of such a familiar household appliance made sure that the set temperature was maintained inside thanks to the heat-insulating walls.
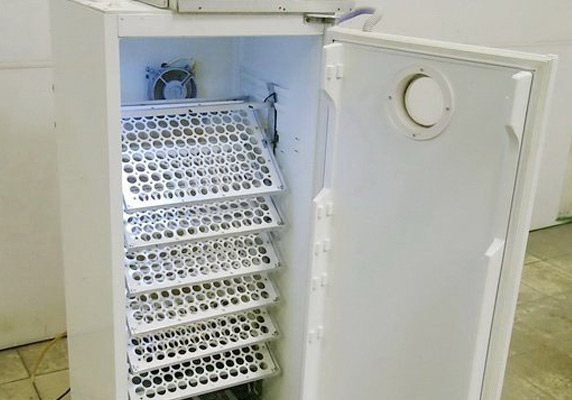
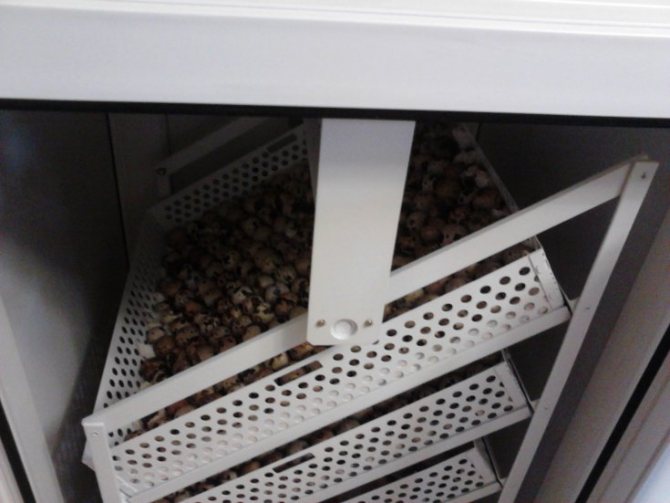
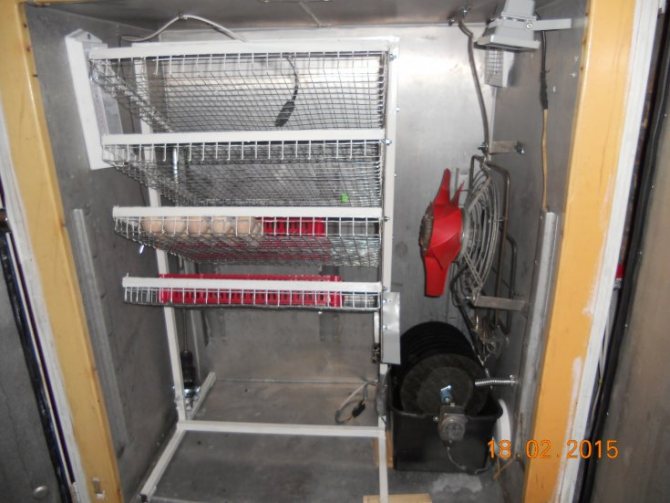
Incubator from an old refrigerator
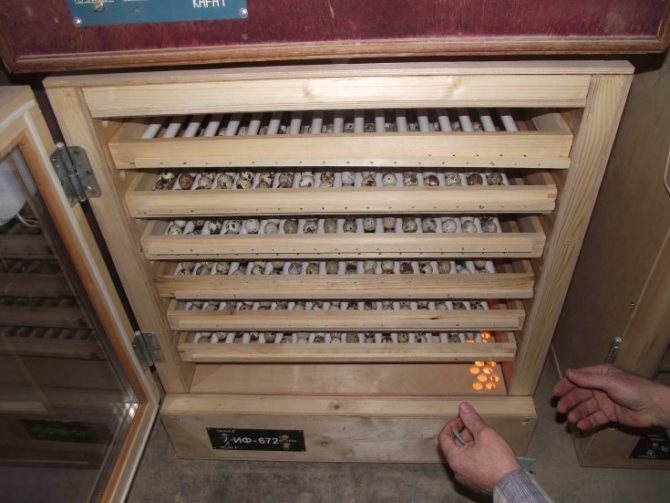
Shelves with shelving can be easily converted into egg trays. The material will be laid evenly if you use the fastening grooves located along the inner walls. At the bottom, containers with water are installed, which will help maintain humidity. A description of everything that should be in the incubator is presented below.
Ventilation system
Each factory model, as well as in incubators from a refrigerator, made by hand, must have ventilation. The condition of the air inside the machine, as well as temperature and humidity, depend on this important system. Thanks to all these complexes, an ideal microclimate will be created, suitable for breeding chicks.
The best option is called an air speed of 5 m / s, which will be provided by a running fan. The bottom and top of the case will have to drill holes for the circulation of air masses.
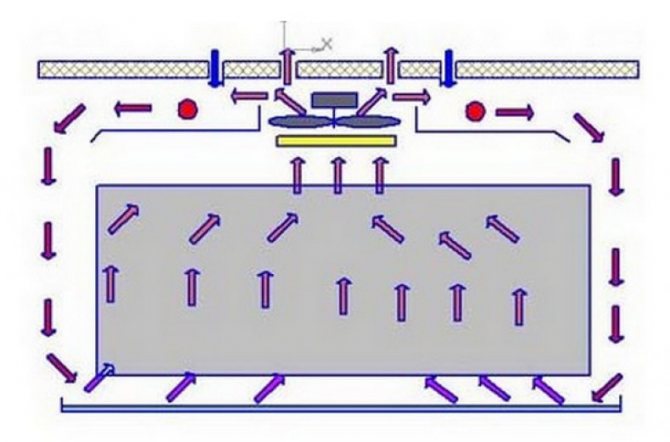
Incubator ventilation diagram
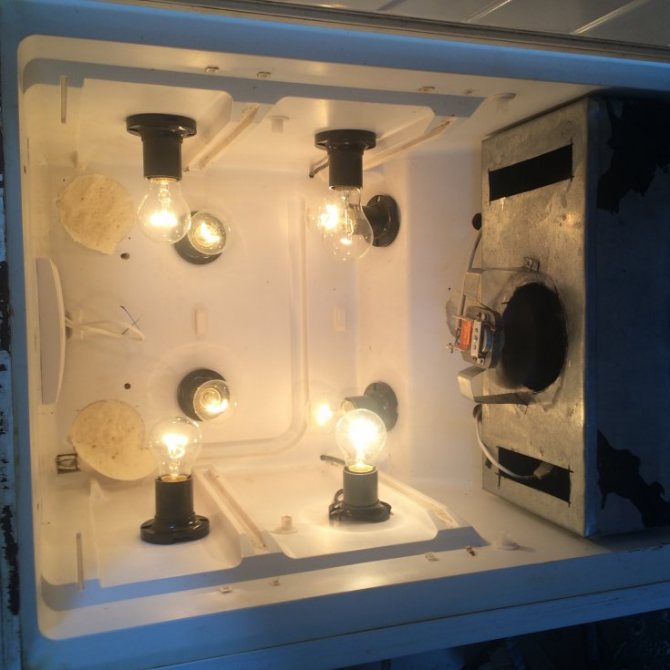
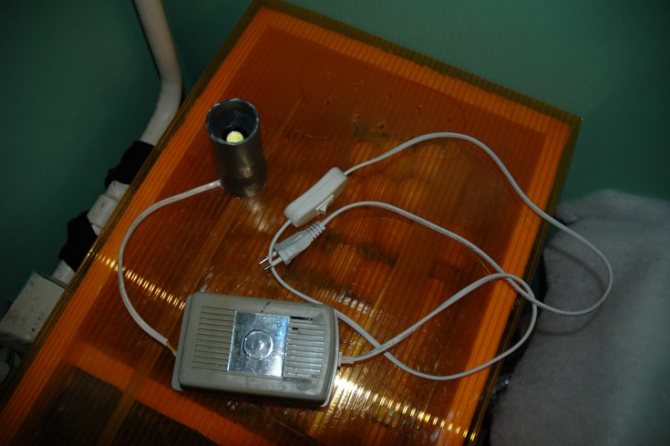
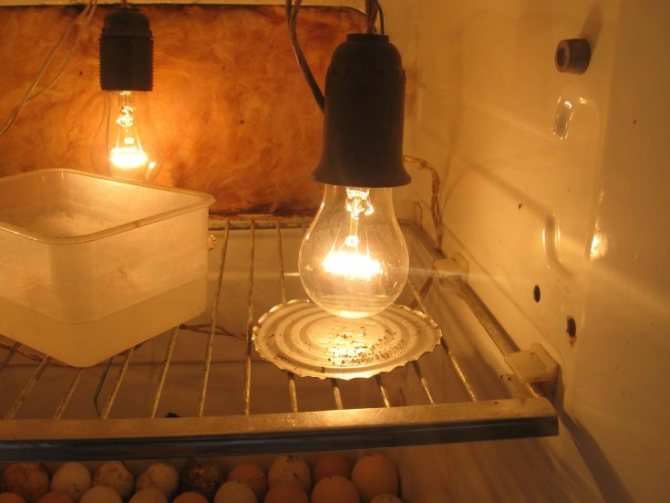
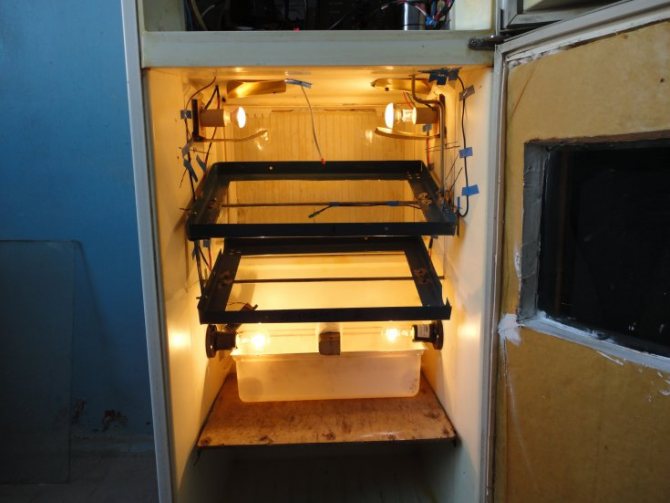
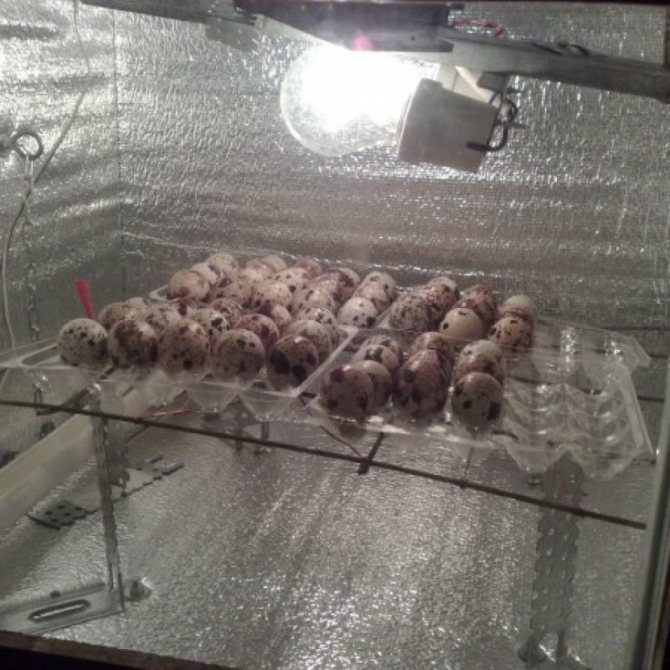
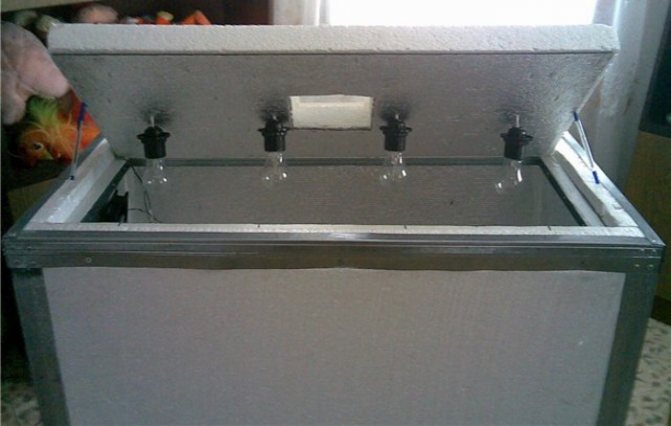
Heating system
The simplest heating system consists of ordinary light bulbs. They are evenly distributed below and above the structure (of course, inside). There is only one requirement for the lower lamps: they should not interfere with water containers that act as humidifiers.
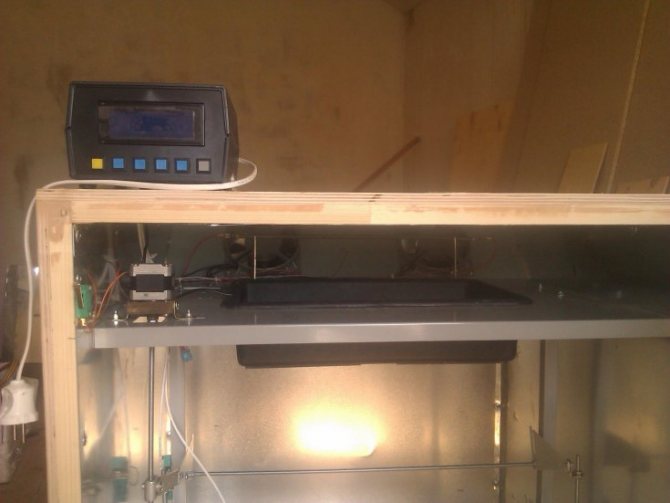
The incubator thermostat will help maintain a suitable temperature. It is customary to use three types at once
- bimetallic plates;
- mercury thermometers equipped with electrodes;
- barometric sensors.
One is responsible for closing the electrical circuit as soon as the required temperature is established. Thanks to the second, heating stops. The third closes the circuit if overpressure occurs. To control the indicator, it is most convenient to use temperature sensors.
Heating circuit
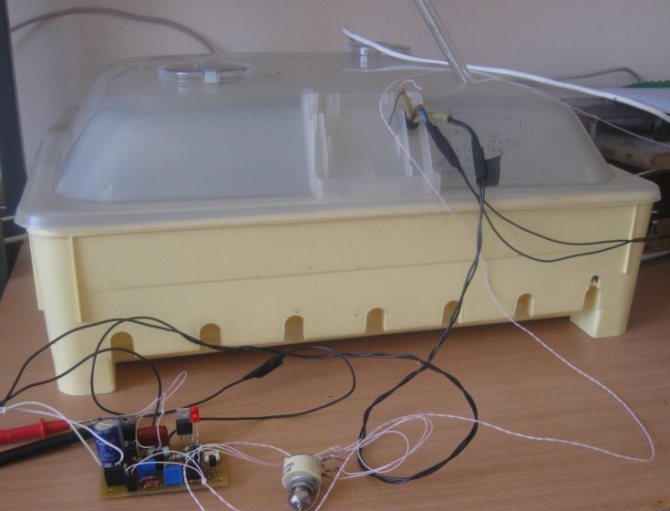
How to perform an egg flip
In a do-it-yourself egg incubator, just like in standard models, turning the eggs is imperative. The process can be either manual or automatic, the second is more convenient.
The mechanism works in a very simple way. Thanks to the actions of the electric motor, a motor impulse enters through the rod, which moves the trays. You can make an egg incubator with automatic egg turning by yourself:
- A gearbox is installed below.
- The assembled wooden frame will hold the trays fixed in such a way that they tilt 60 degrees towards the hatchery door and the same amount in the opposite direction towards the wall.
- It is important not to forget to firmly fasten the gearbox.
- An electric motor is connected to a rod, one end of which is connected to an egg tray.
Primary requirements
Before you start assembling, you need to be well aware of what the final result should be. To clearly understand it, you need to know the requirements that apply to the incubator. One of the most important is the presence of a constant temperature inside the incubator. In this case, not only the egg itself should be heated, but also the air around it. Indicators should be maintained within a range of 37.3 degrees to 38.6. Attention is paid not only to temperature, but also to the humidity that should be inside. The period that precedes the bite should be 40%. If hatching is concerned, then the percentage increases to 80. Just before hatching takes place, the humidity will need to be slightly reduced.
Note! To successfully complete the process of raising chickens inside the incubator, you should not use eggs that have already lasted ten days.
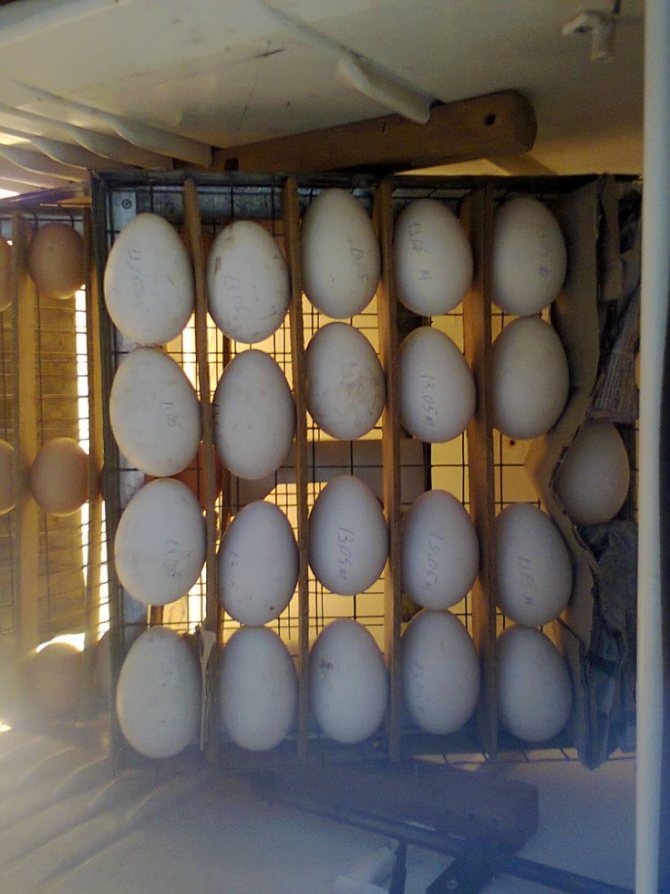
The egg holders in the incubator should be made in such a way as to keep them upright. In this case, the shape of the cells should be such that the sharp end is directed downward. The shelves should be sloped throughout the entire incubation period. The incubator should have easy access to the eggs. This is necessary in order to turn the eggs three times a day. If desired, such a mechanism can be implemented in an automatic mode. Before the brood itself, he must be motionless. The incubator must be provided with good ventilation, which will avoid overheating and excess humidity.
Advice! The cells must be versatile because eggs are not always the same size. It is possible to envisage the option of breeding quails, for which eggs will require stands with a smaller diameter.
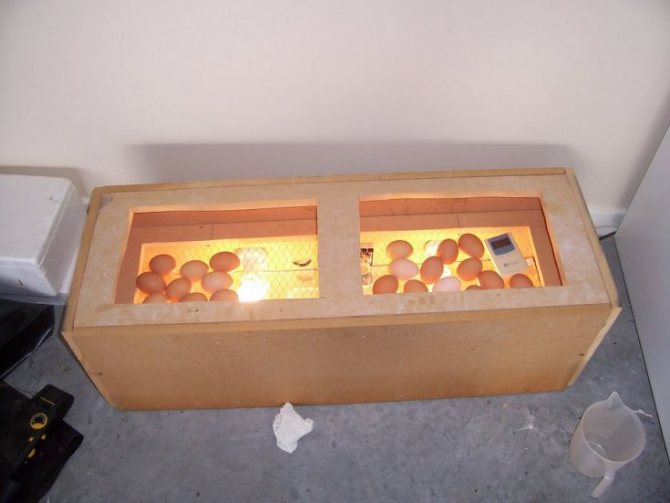
Incubator from a cardboard box. Assembly instructions
Such a do-it-yourself incubator model, created at home, is the least costly financially, and you will have to devote only a few hours to working on the model. The design has one minus - fragility due to the fragility of the main material.
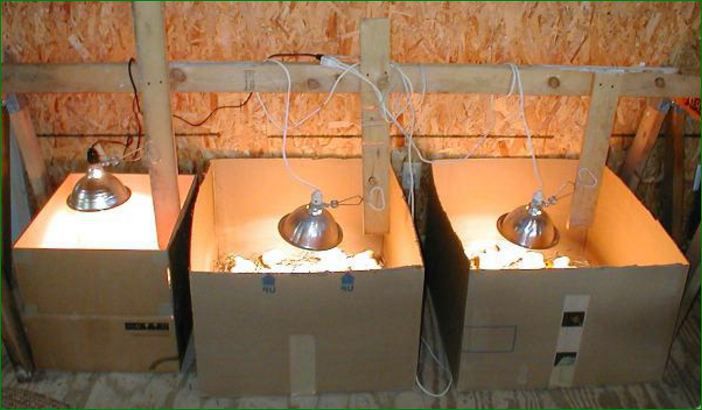
Incubator from a cardboard box
- You need to find an unnecessary box of the same size as the incubator is planned. The inner walls are pasted over with felt or several layers of paper.
- Holes are made through which the electrical wiring will go. On the inside, 25W bulbs are attached, between them and the egg trays there should be no less than 15 cm.To prevent heat loss, all unnecessary slots (wiring passages) must be plugged with cotton wool or left as ventilation, but it is important not to forget to monitor the temperature.
- Installation of wooden trays, assembly of rails (for installing trays), door manufacturing.
- The thermometer will help determine the temperature in the incubator. To maintain the desired level of humidity, containers with water are placed at the bottom of the box. It is recommended to make a small viewing window in the upper wall to control all processes taking place in the incubator.
Good to know. It is better to place a cardboard incubator on wooden blocks rather than on a flat surface. A slight elevation will allow natural air circulation.
Making an incubator for personal use is not as difficult as it sounds. A homemade car will be a great help on a home farm. Difficulties with the acquisition of the necessary materials should not arise, and their cost will be a pleasant surprise for any breeder of poultry.