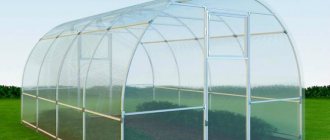
It is a known fact that the eggs of chickens that live in the wild, and not in the cramped walls of poultry farms, are much tastier and healthier. Recently, an increasing number of people have been striving to have these representatives of birds.
The greatest difficulties for the owners arise when organizing the process of feeding chickens, since it involves significant labor costs and financial costs. Because of the choice of feeders must be approached responsibly.
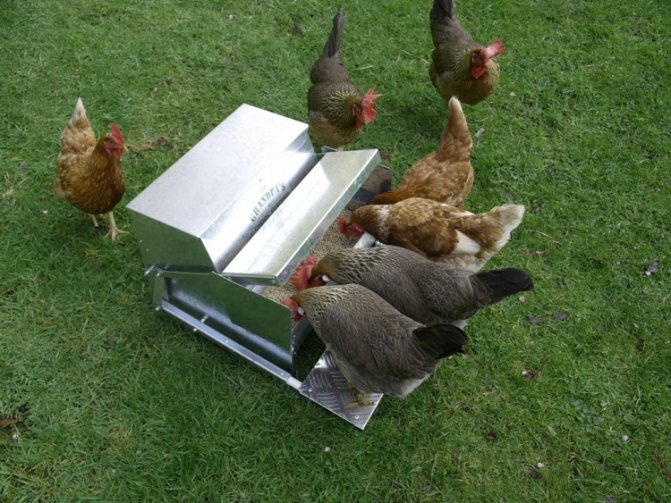
But you can save a significant amount if you independently form a receiving point for bird feed. A do-it-yourself chicken feeder is an opportunity to create a useful device that will come in handy in everyday life. You will receive not only material benefits, but also moral satisfaction when chickens peck grain from these feeders.


Features of the chicken feeder
First of all, you should familiarize yourself with the basic principles of designing a chicken feeder:

- The device should prevent spoilage of the feed, thereby optimizing its consumption. To do this, the feeder is equipped with elements such as grates, spinners and sides, which prevent the bird from getting inside and contaminating the feed with droppings or scattering it.
- Consideration should be given to the possibility of sanitization. The feeder should be kept as relatively clean as possible by regularly cleaning and washing it. Accordingly, the material and construction must be such that this can be easily done. In this regard, it is advisable to make the feeder light and mobile, but in moderation so that the chickens do not overturn it.
The sizes are selected so that each individual has access to food. If the feeder is made in the form of a tray, then its length should be laid at the rate of 10 - 15 cm per bird. For young animals, this parameter is halved.
If the feeder is round, then it will be enough to lay 2.5 cm for each chicken.With limited access, the weak individuals will be constantly pushed aside by the stronger ones.


Primary requirements
There are a number of requirements that are met when creating them:
Strength. The creation of feeders should be based on materials that retain their shape and are resistant to mechanical stress.
Ease of use. The device should clean easily. It is necessary that it is easy to fill the feeder with food, and it is convenient for poultry to eat from it.
Stability. Under no circumstances should the feed collection point change its location after direct contact with poultry.
Rationality. It is necessary to manufacture the device in such a way that it would be impossible for droppings or debris to enter it.
There are other requirements for the feeder, which are imposed on them, depending on the characteristics of keeping poultry.
Necessary materials
A variety of materials can be used to make a feeder. But when choosing, you need to pay attention to the combination of material and the type of feed for which the feeder is used. The chicken diet can be divided into three groups:
- Dry food: this group includes compound feed and grain. Dry mineral additives are also served - shells, chalk, pebbles. For all this, the feeder can be made of wood.
- Mushrooms: this type of food is wet and it will be problematic to clean it from a wooden feeder. Metal and plastic products with a smooth and waterproof surface are much more suitable.
- Grass: for such a feed, the feeder does not need to have solid walls, therefore it is most often made from a net. The mesh can be made from thin wire yourself.
Consider the design and manufacturing process of a wooden feeder. It will require the following materials:
- thick plywood;
- hinges with an opening angle of 90 degrees;
- self-tapping screws.
Types of structures
Feeders for chickens from sewer pipes can be of diverse designs. Types of devices:
- Vertical - the body is placed perpendicular to the floor covering.
- Horizontal - the main part of the device is placed along the wall of the chicken coop parallel to the ground.
- Bunker - allows you to regulate the feed for poultry.
Sometimes the hopper feeder, according to the principle of placement and manufacture, is combined with a vertical or horizontal type. The choice is made taking into account the number of poultry, the design of the premises or pasture, and personal preferences.
Manufacturing procedure
From a plywood sheet with a jigsaw, you need to cut rectangular parts of the following sizes:
- 29x17 cm (bottom);
- 29x40 cm, 2 pcs. (blanks for sidewalls);
- 28x29 cm (frontal wall);
- 70x29 cm (ibid.);
- 29x26 cm (cover);
- 40x29 cm (back wall);
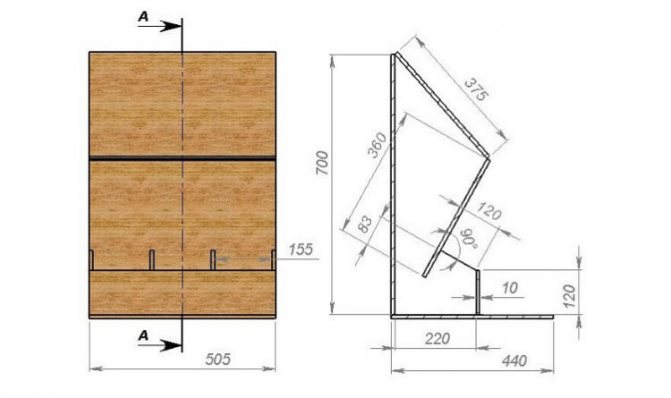
The proposed feeder is made according to the following scheme:
- In rectangles with a size of 40x29 cm, which serve as blanks for the side walls, you need to make cuts at an angle of 15 degrees. As a result, you should get details that look like slightly beveled letters "L", in which the length of the upper edge is 24 cm, and the lower one - 29 cm.
- In all details, holes should be drilled for screws, not forgetting to make recesses for countersunk heads with a drill of a larger diameter.
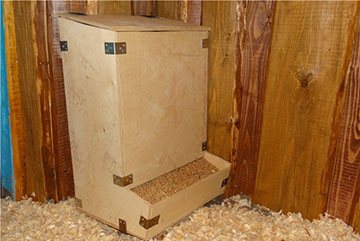
- Now you need to assemble the feeder. It will be a box with a drawer pulled out from below. The front wall is formed in two parts: the narrow one is fixed on the "pulled out drawer", the larger one covers everything else. The lid is hinged at the top.
- All edges, protrusions and burrs must be sanded so that birds cannot be injured by them.
- The collected feeder must be treated with a biocide. It cannot be varnished or painted.
To make the parts fit as tightly as possible, before screwing in the self-tapping screw, press them with a clamp or other clamp.
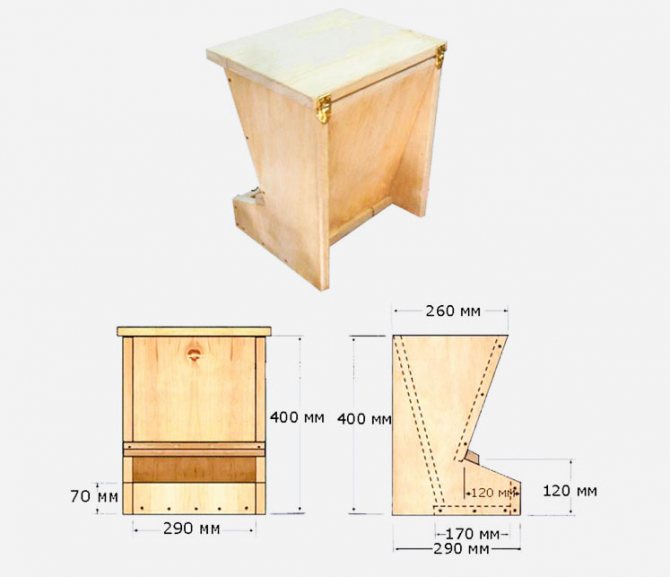
Diagram of a wooden feeder
The trough is ready and you can fill it with dry food. The main supply will be inaccessible to the bird, but a small part will be visible in the "pull-out drawer", which acts as a feeding tray. As food is consumed from the tray, it will gradually spill out from the main part of the pan. This part is called a bunker, and feeders operating on this principle are called bunkers.
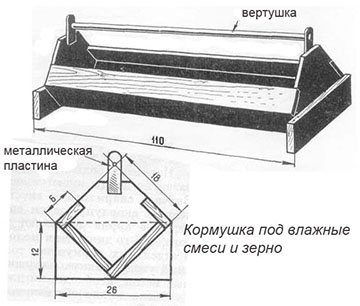
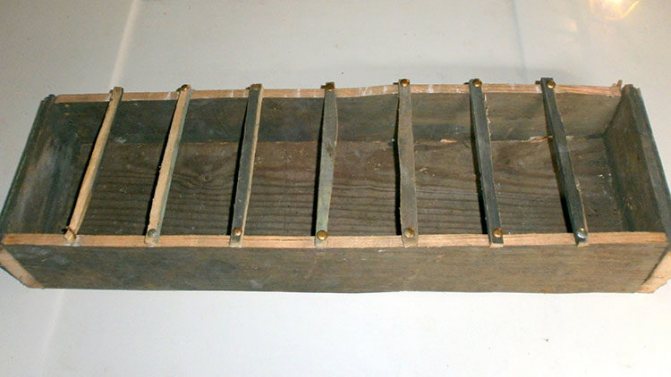
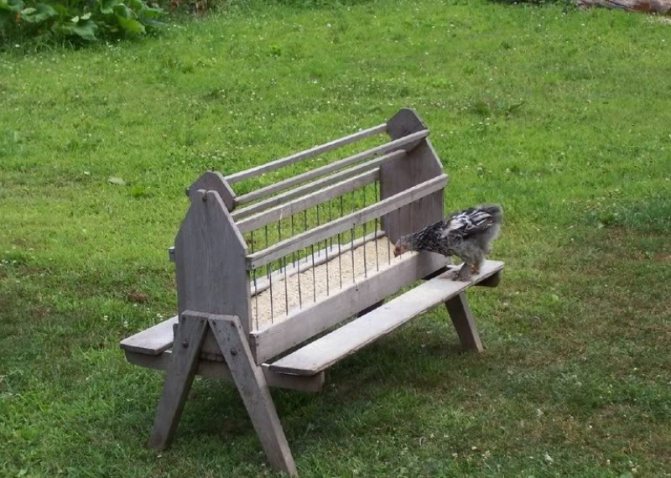
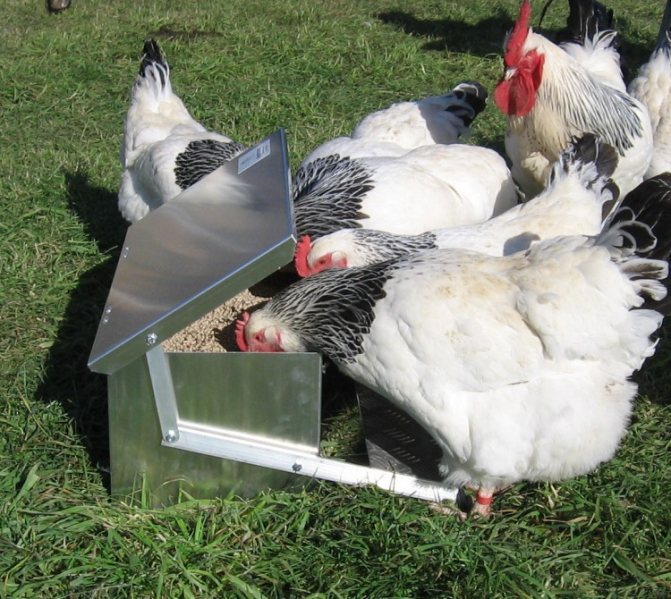
Another version of a wooden feeder turned out to be quite in demand, for which such details need to be cut out of plywood or boards:
- a rectangle with dimensions of 100x15 cm (this will be the bottom);
- two rectangles measuring 100x8 cm (front and back walls);
- two details in the form of a "house": a rectangle measuring 15x8 cm, to which a triangle is attached;
- rail with a section of 2x3 cm and a length of 100 cm.
Bunker trough drawing
Details "houses" are the side walls. A rail is attached between the tops of their "roofs" so that the feeder looks like a toolbox. Only the rail in its upper part is not so much a handle as a barrier for chickens: thanks to it, they will not be able to get into the feeder.
Please note that it is easy to overturn such a feeder, so it is advisable to cut the bottom out of a thick board.
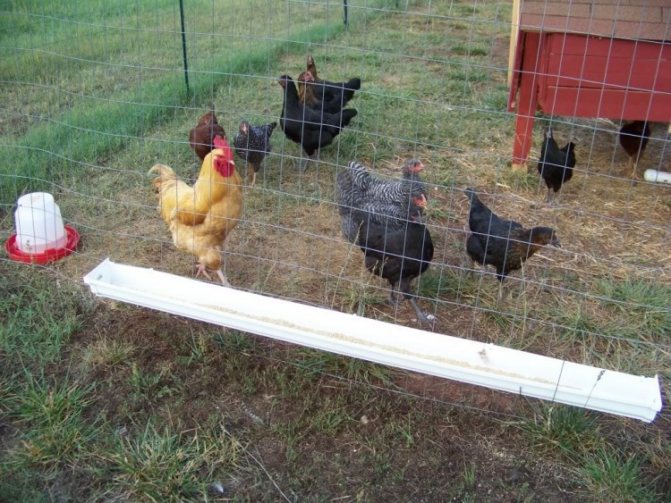
Metal mesh is also an effective barrier. The size of the cell is selected so that the bird can freely push its head into it and get to the feed.
In conditions of a lack of space, a two-story feeder will be very appropriate. First, a frame is assembled from the bars, then sheathed with sheet material, for example, the same plywood. The lower floor is made 25 cm high and 26 cm wide. The length is chosen in accordance with the number of chickens. The second floor is made in the form of a trough with sides 10 cm high.
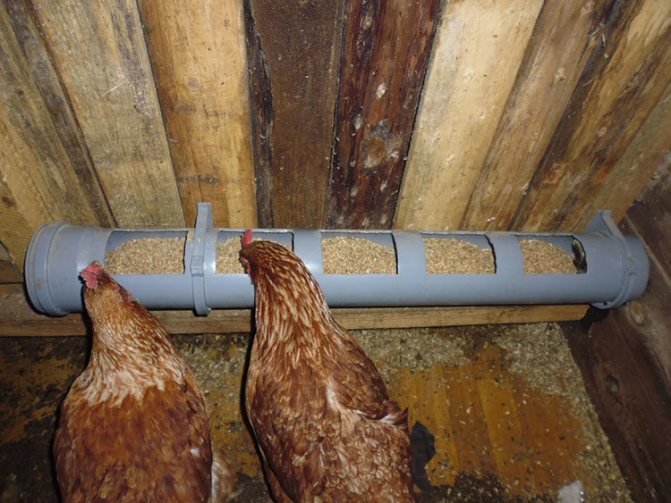
Another bunker feeding system
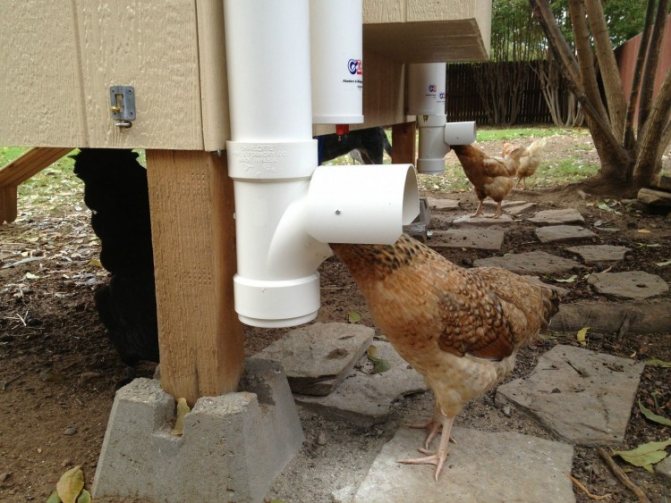
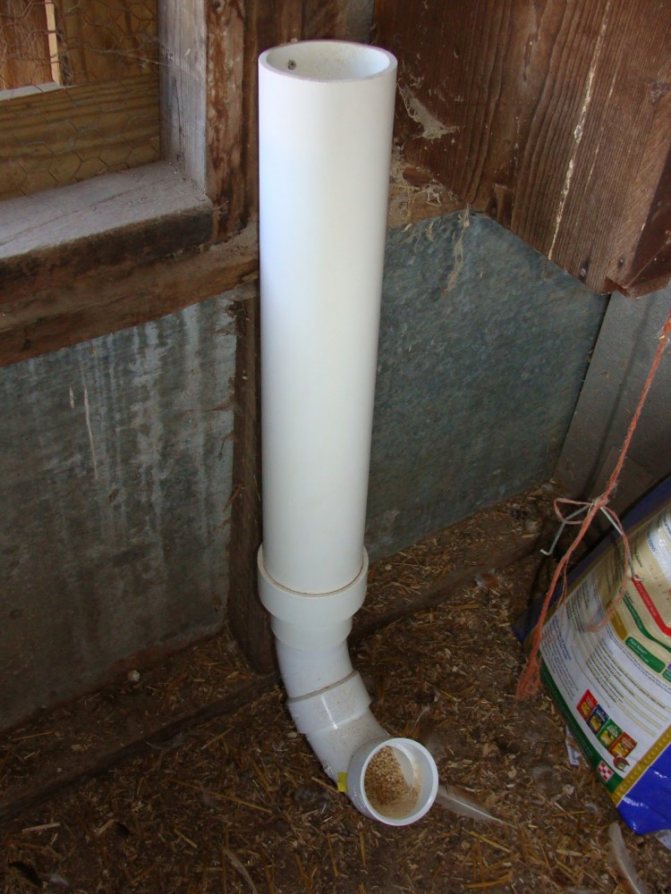
This version of the chick tube feeder is perfect for chicks that are already a little older. To make it, you need to take 2 polypropylene pipes: the first - 10 x 200, and the second - 30 x 32; plywood sheet 30 x 30, at least 1 cm wide, 5 liter plastic bottle.
The 200mm pipe should be attached to the plywood. In a cylinder with a smaller diameter, a vertical incision of 10 cm should be made. After that, stepping back 10 cm from the edge, a horizontal incision should be made. Now the narrow pipe needs to be inserted into the wide one. Then you need to cut off the bottom of the bottle and plant it with its neck on a thin profile.
To prevent birds from turning over the feeder, it should be hung on the wall. The amount of grain in the trough is enough to feed 30 broilers for more than 24 hours. This design is good not only because you do not have to constantly run to fill up the food, but also because the birds can be disciplined. Over time, having got used to the fact that there is always enough feed, they will stop crowding the whole flock around the trough.
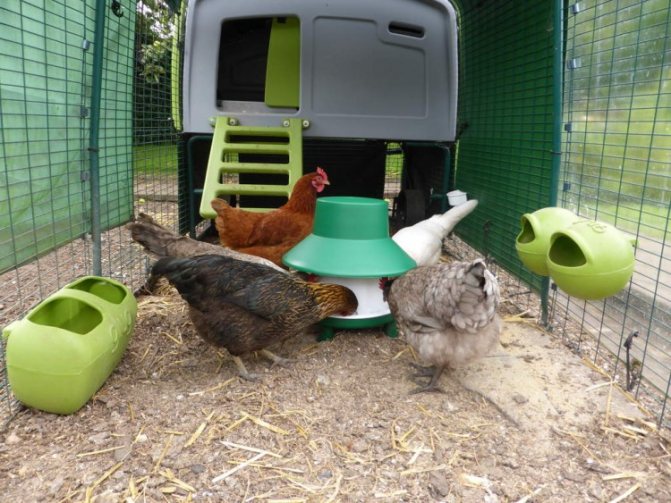
Photo - DIY homemade chicken feeders
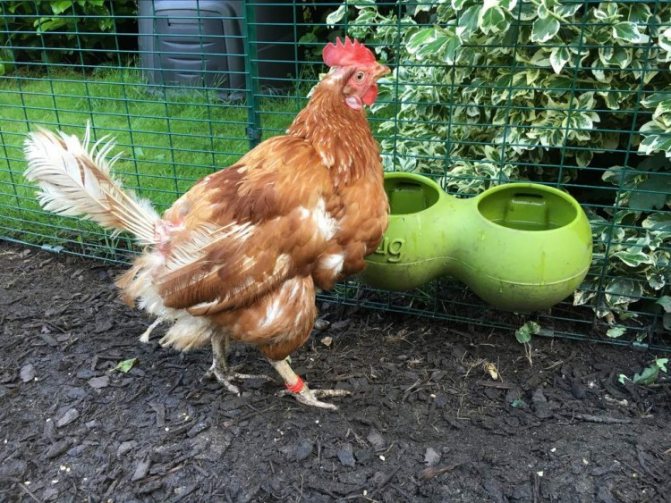
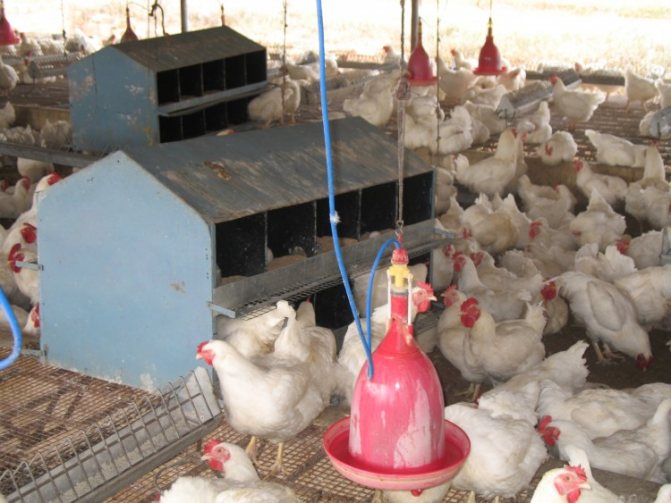
Simple poultry feeder
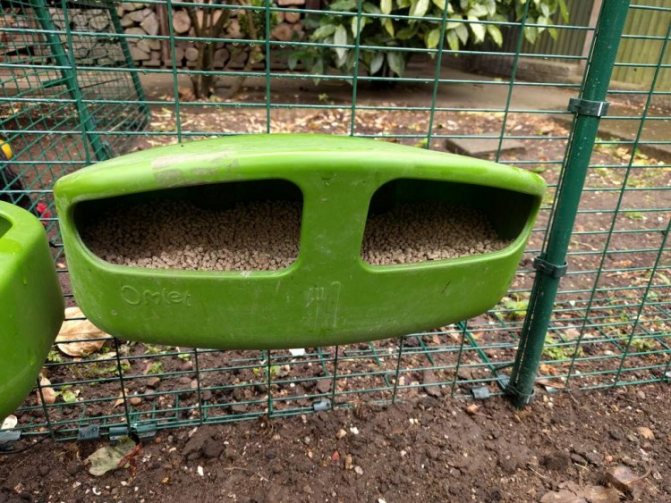
Plastic feeder
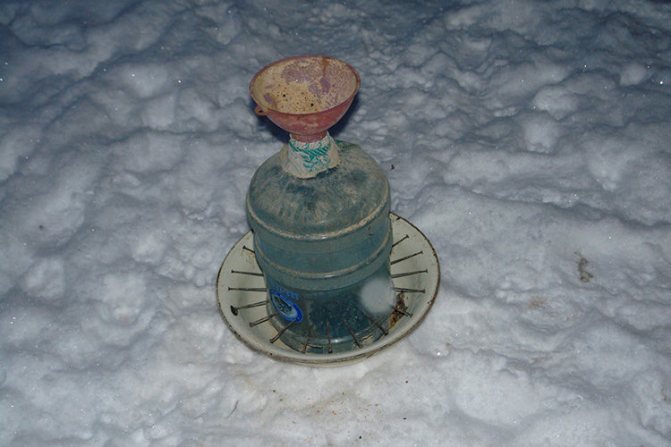
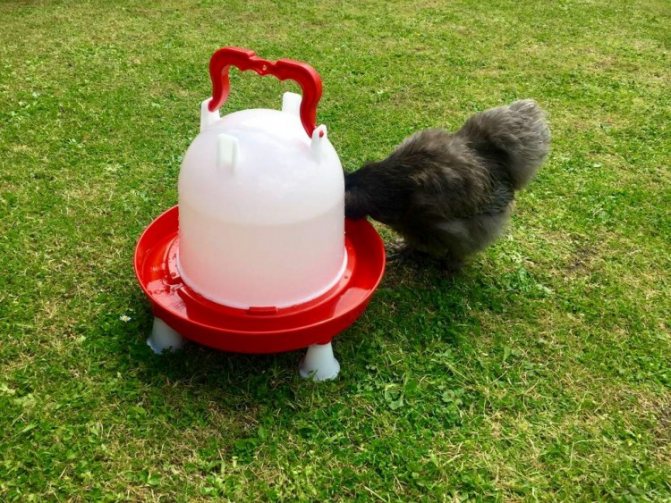
Bottle feeder

Where to begin?
In order to make a feeder with cutouts or holes, you will need the following PVC parts and accessories:
- 2 PVC pipes. 60 cm and 80-150 cm with a diameter of 110-150 mm.
- Knee. Accessory connecting pipes at right angles.
- 2 plugs along the pipe diameter.
- Instruments.
For a tee feeder, you should purchase:
3 PVC pipes 10, 20, 80-150 cm with a diameter of 110-150 mm.- 2 plugs.
- Tee with an angle of 45 degrees for pipes d = 110 mm. The tee can be double-ended. Then more chickens can peck at the same time.
- Accessories for fixing the pipe to the wall.
Fewer materials required for vertical hopper feeder:
- 1 pipe up to 150 cm long.
- 1 corner 45 degrees.
- 1 corner 90 degrees.
- Plug.
Tools you need
- Grinder or hacksaw for metal for sawing pipes.
- Electric drill with a drill for wood and a crown with a diameter of 70 mm.
- Electric jigsaw.
- File.
- Marker, pencil, long ruler.
Material prices
- PVC pipe D = 110 mm - 160 rubles / m.
- Tee D = 11 mm - 245 rubles.
- Plug-55 rubles.
- Knee-50 rubles.
- Clamps for fastening to the wall for 40-50 rubles.
Original feeders
The following types of feeders, some of which are made from scrap materials, will surely please the reader:
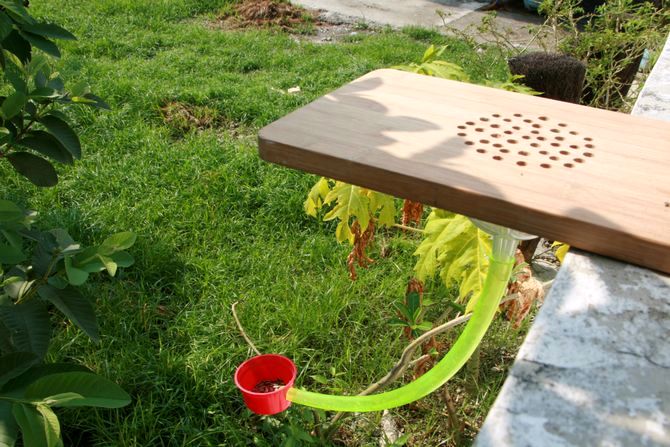
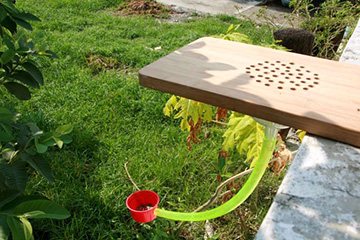
Feeder on the basis of a cutting board
For the manufacture of this device you will need:
- cutting board;
- plastic cup;
- funnel (it is better if it is also plastic);
- hose with transparent walls;
- silicone sealant.
You need to act in the following sequence:
- The wide part of the watering can is attached to the cutting board and outlined with a pencil.
- Using a drill, many holes are drilled in a random order within the drawn circle.
- Further, with the help of a sealant, the watering can is glued to the board in exactly the position in which it was held when tracing the wide part. Both items need to be held together for a while until the sealant sets.
- A hole is drilled in the cup at the bottom with such a diameter that a hose can be threaded into it, but the latter fits tightly enough.
- Now you can start assembling the feeder. One end of the hose is put on the spout of the watering can and fixed on it with a clamp; the second is inserted into the cup through a hole made in it. If the hose in the cup does not hold very tightly, you need to use a sealant as a seal.
The feeder is ready. Through the tube, the grain poured into the watering can will enter the cup.
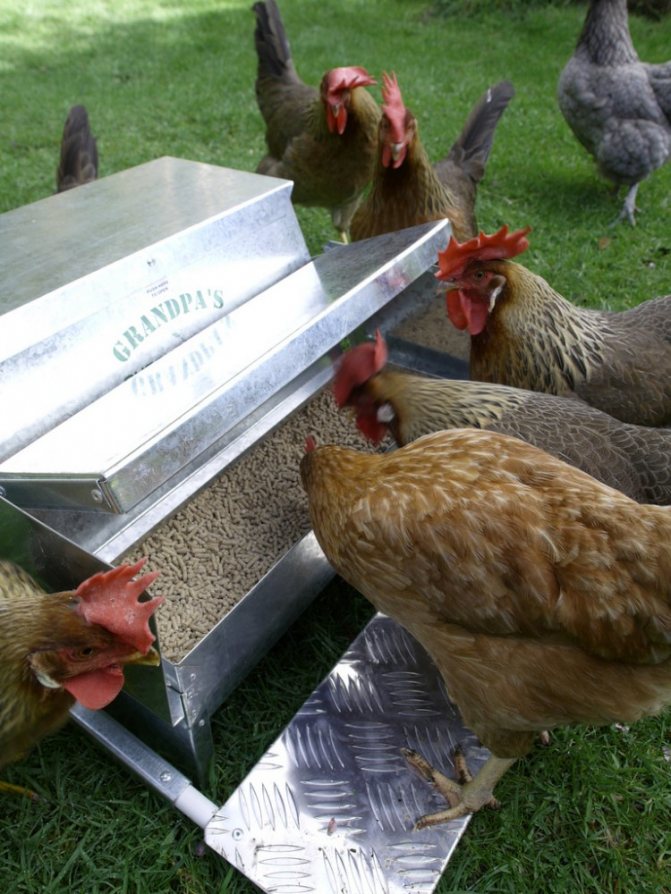
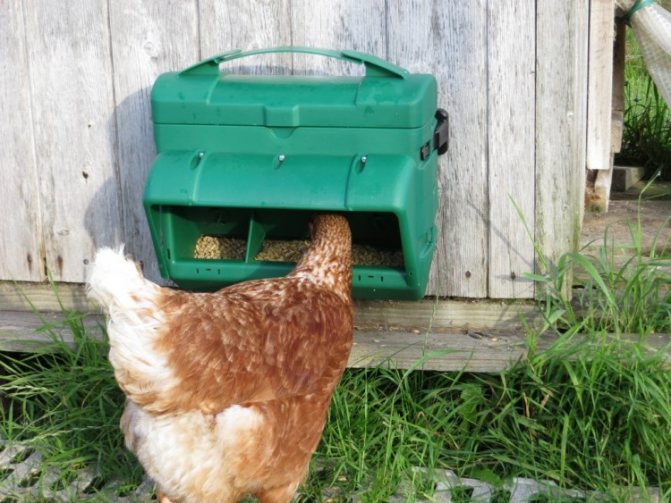
Feeders for feeding dry feed for poultry are conventional, and they are automatic. The good thing about the automatic chicken feeder is that it saves feed and keeps it safe.
For instructions on how to make a bird feeder with your own hands, see here.
You will find options for pig feeders with photos at the link.
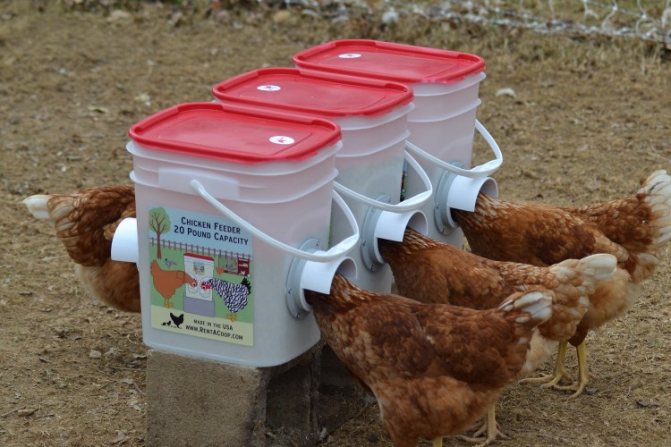
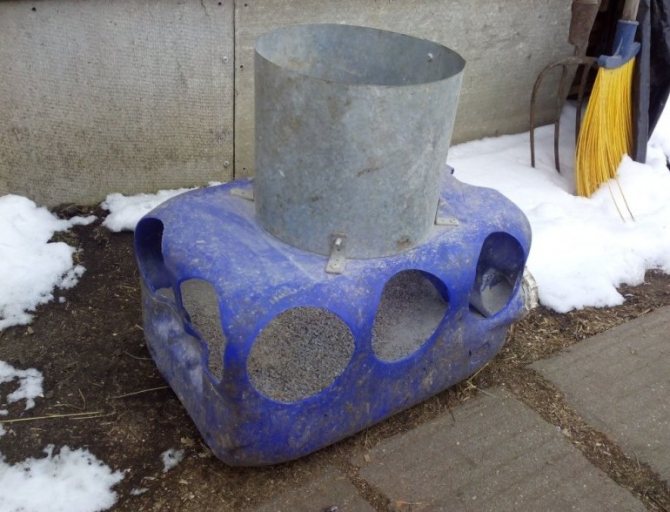
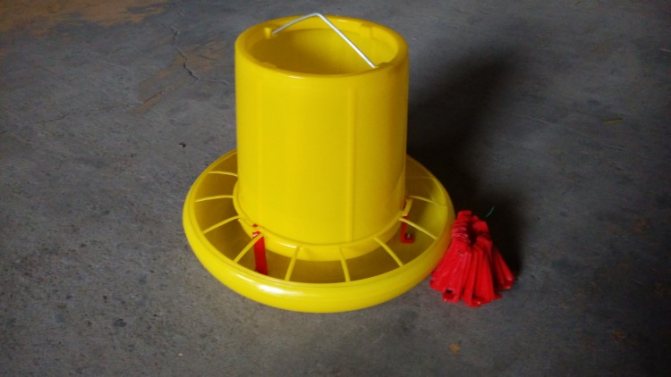
Bunker bucket feeder
Any capacity can act as a feeder hopper. You can make such a feeder very cheaply from a plastic bucket in which some kind of building mixture was packed. In addition to it, you should prepare the bottom from the same, but larger bucket, or a sectional bowl for pets, or a plastic seedling bowl. This part of the trough should have a diameter 10-15 cm larger than the bucket.
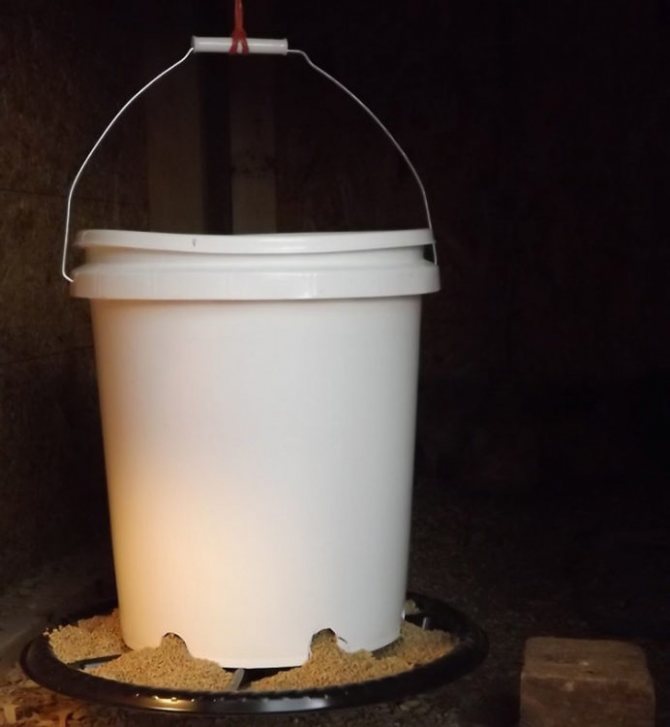
Plastic bucket feeder
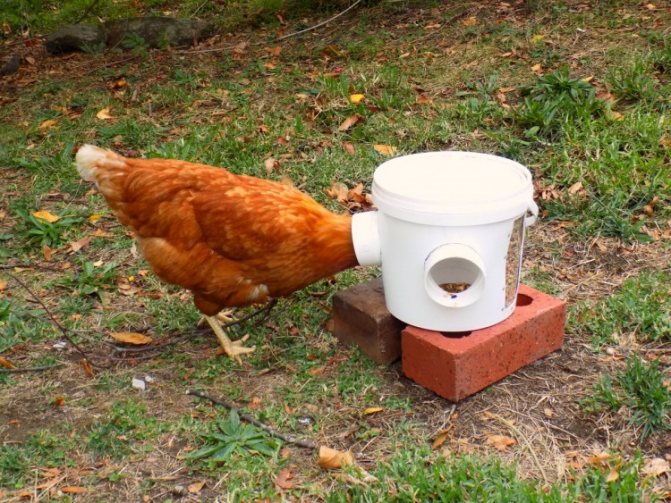
Manufacturing technology is extremely simple:
- Holes are cut in the side wall of the bucket at the very bottom.
- Next, the bucket is installed in the center of the bowl or dish and screwed to it with a bolt and nut.
It remains to pour food into the bucket and close it with a lid. Some of the food will spill out into the bowl through the holes, and while the birds are eating it, it will spill out over and over again.
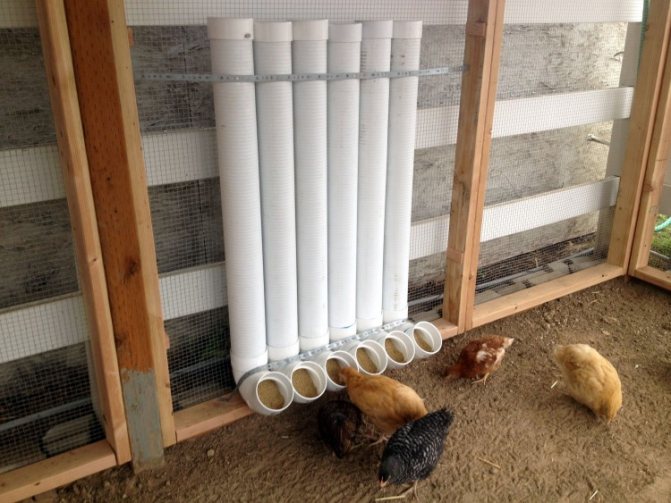
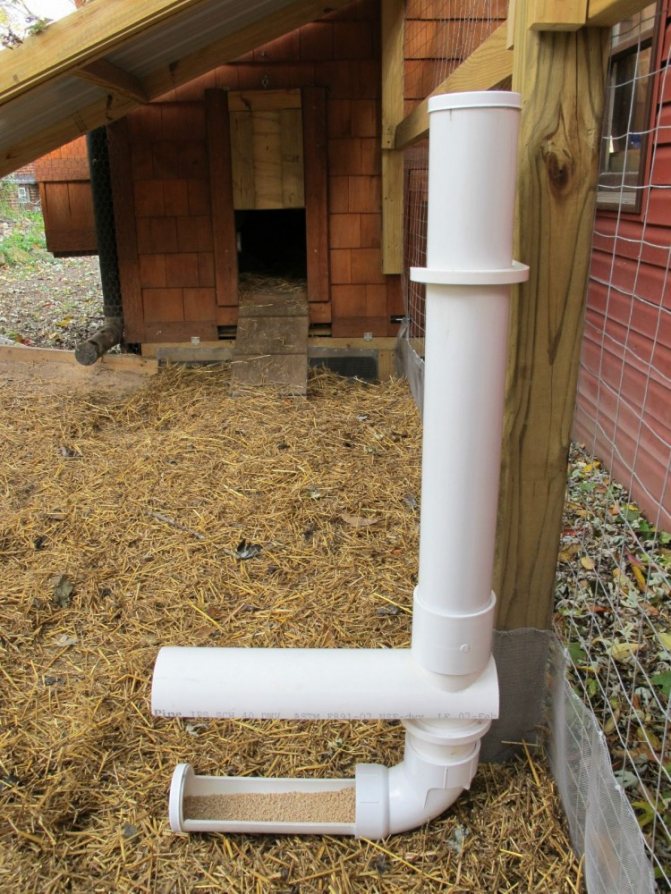
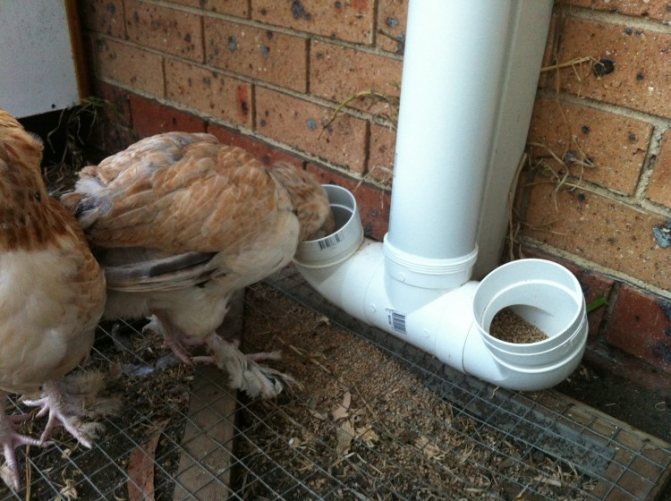
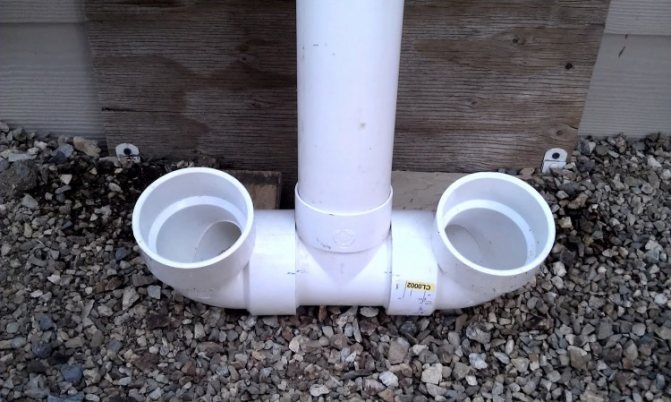
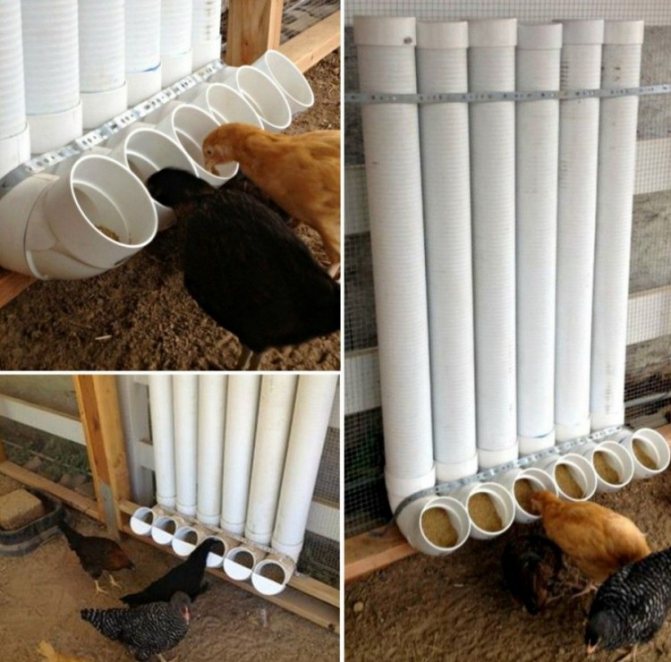
PVC pipe feeder
A very affordable material is plastic parts for assembling sewers. Here's what you need to prepare:
- pipe with a diameter of 150 mm;
- a couple of stubs for her;
- tee.
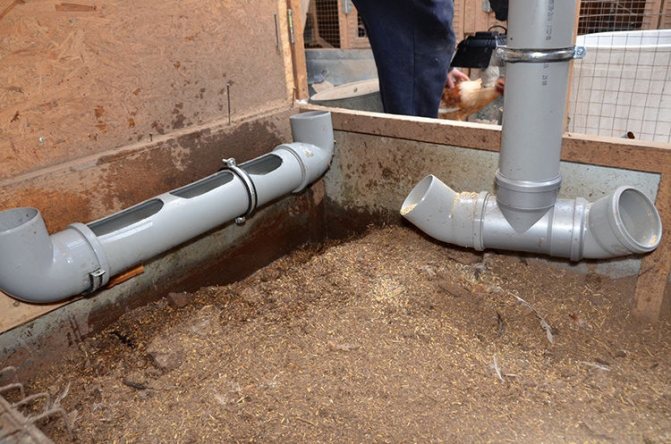
DIY chicken feeders from plastic pipes
Make a feeder like this:
- A) Three fragments are cut from the pipe: two 10 and 20 cm long, the third one of arbitrary length (this will be a bunker).
- A long piece of pipe, acting as a bunker, is inserted into the tee on one side, and on the other - a piece 20 cm long. The free ends of these pieces are closed with plugs.
- A 10 cm length is connected to the branch of the tee.
The structure is filled with grain or other dry food, after which it is installed with its long part up. And they fix it. A short section connected to the branch of the tee will act as a tray. It can also be closed with a plug at night.
Are there many squirrels in your area? Build a squirrel feeder and these little animals will delight you in cold weather.
Read about the peculiarities of making silicone molds for paving slabs in this article.
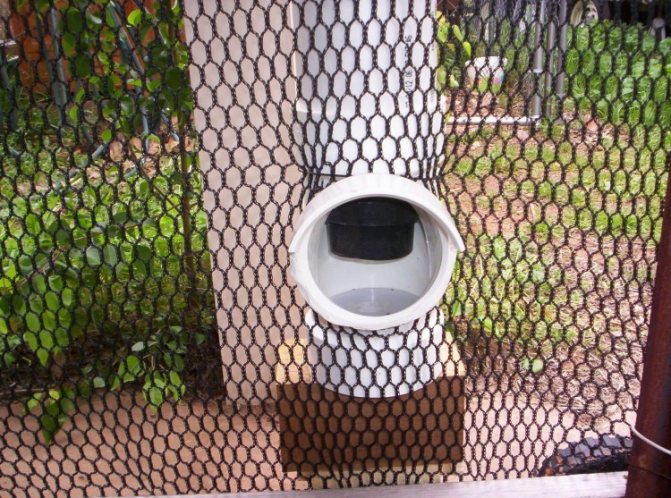
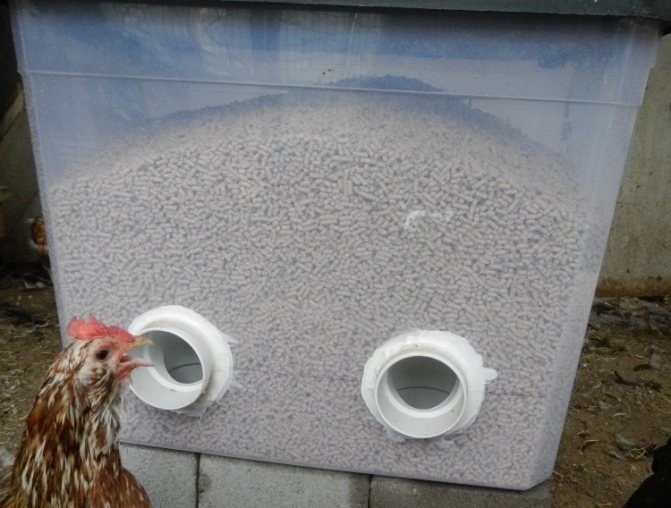
Hopper feeder made of 5 liter plastic bottles
This container, used for packaging purified water, is quite popular today. To make a feeder, you will need two copies. Here's what to do with them:
- From one bottle, you need to cut off the upper tapering part, so that a semblance of a glass with smooth walls remains.
- In one of the side walls of this "glass" a window is cut out, wide enough for a chicken to stick its head into it.
- The edges of the window must be pasted over with fabric tape or adhesive tape so that they, being sharp and tough enough, cannot injure the bird.
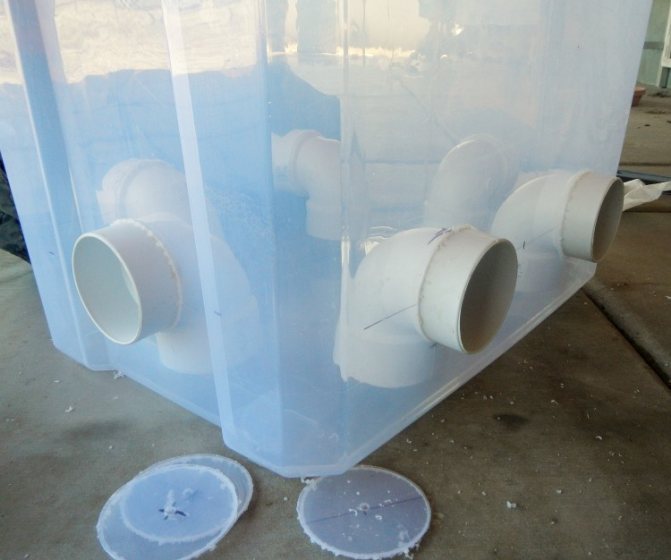
- From the second bottle you need to cut off the bottom.
- Several holes need to be made at the lid itself in the wall of the 2nd bottle.
- Let's start assembling. The second bottle, that is, the one that we have deprived of the bottom, is turned upside down and inserted into the first bottle, which looks like a glass. In this case, the cap of the 2nd bottle should touch the bottom of the 1st.
The feeder is ready. Now you need to pour the grain into the inverted 2nd bottle and cover it with some kind of lid. This feeder works in the same way as all other bunker type.
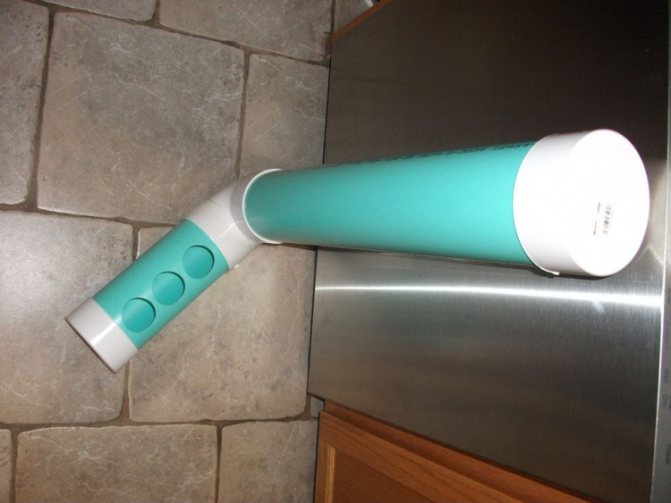
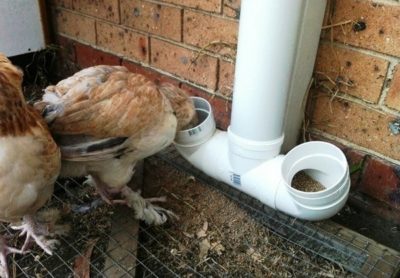
Vertical feeding system
To make such a feeder, you will need:
- one meter cut of eco-plastic with a diameter of 110 mm;
- oblique tee;
- two plugs.
The cut of eco-plastic should be divided into 3 parts: 70 x 20 x 10. A plug should be put on the 20 cm cut - this will be the base of the trough. Next, knee up, you need to put on a tee.A ten-centimeter cut must be inserted into the tee, and the largest piece of pipe into it.
That's the whole system, now all that remains is to fix the device on the pole with a wire. A second plug is needed to cover the trough, thus protecting the feed from contamination. The feed in this design is enough to feed about 15-20 broilers or 30 layers per day.
Are there any disadvantages?
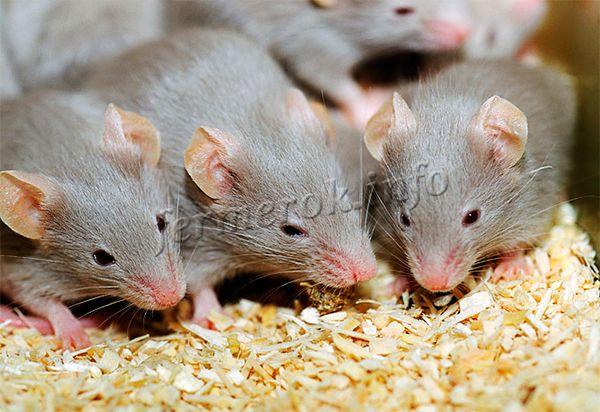
The constant presence of food in the chicken coop can attract rodents.
The main problem with the hopper feeder is the unlimited supply of feed. On the one hand, this makes life easier for the breeder, but on the other hand, it can lead to obesity of the bird. This is what breeders are afraid of, and it is for this reason that they rarely purchase a bunker structure for adults. Indeed, a bird can overeat, especially if it is prone to obesity, so it is necessary to purchase such a feeder either for chickens or for breeds that are not prone to overeating.
It is also important to note that if the chicken coop is damp, all feed can rot and rot right in the hopper. Such food is very harmful, so you need to wash such a dish regularly, check it for a smell inside and put it only in dry rooms.
Another problem associated with the regular presence of food in the chicken coop is mice and rats. They will enjoy unlimited access to food as much as chickens, so it is necessary to poison the rodents from time to time.