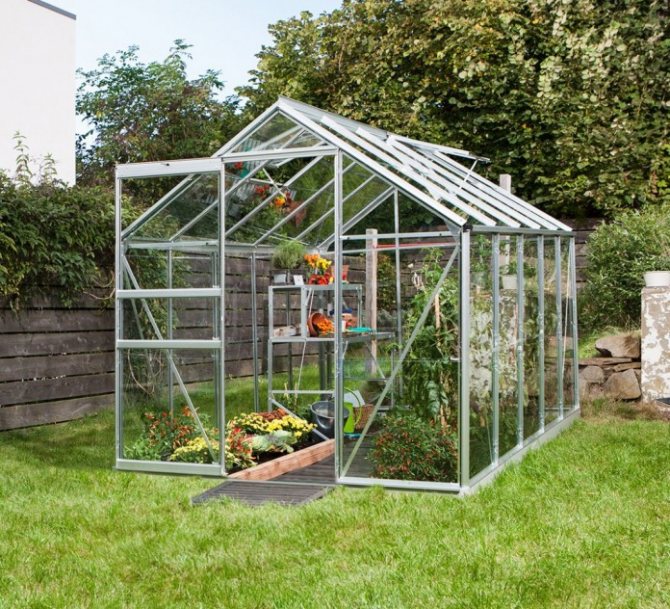
All preparatory operations of the greenhouse and greenhouse for the new planting season should begin after harvest, in the fall. However, intensive preparation begins in early spring, in March or April, depending on the region. The main spring stages include cleaning the greenhouse and preparing the soil for planting vegetables or ornamental plants. Soil preparation is the most important point, since not only a successful harvest depends on its composition, but also the composition of the grown fruits. The ideal soil composition is selected by trial and error and requires more than one season of experimentation. The optimal solution is the golden mean, since an overabundance of various fertilizers can cause intoxication, and as a result of plant death, or the accumulation of negative substances. After sowing seedlings, care and due attention should also be done.
Assessment of the condition of the greenhouse
And the announcement is not in vain that it says "... with the beginning of the thaw." As soon as the opportunity arises (conditions allow), you should drive to the site. It is much easier for the owners of houses who have erected a greenhouse on the territory in this regard. But its inspection must be done in advance. It is not a fact that after wintering, it does not need at least a little repair.
Such foresight is never superfluous. According to the well-known law, it is imperative that something cannot be found (purchased) immediately, so the time reserve will always come in handy. Probably, there is no need to explain that gardeners who use the greenhouse in the winter as a storeroom will have to unload it first.
If the greenhouse has minimal automation, literally everything needs to be checked. Moreover, not only make sure that water is flowing from the tap, but also see if the pressure is the same as it should be. What if there is a small defect on the track in the form of a crack in the pipe? It's the same with tension. How do light bulbs shine? The author once faced the fact when a new neighbor connected a powerful "welder" to the line, and the phase imbalance not only led to the lamps blinking, but also the drip irrigation of the greenhouse stopped working. The problem was resolved "amicably", but it is better to clarify all such nuances ahead of time, before the start of planting.
How to get rid of late blight?
Many gardeners are seriously concerned about the question: how to treat the greenhouse from late blight in the spring?
Phytophthora - a nightmare of any gardener. This is a fungus that infects all nightshade crops - tomatoes, potatoes, eggplants, peppers. Phytophthora is capable of destroying any plant from roots to fruits.
The fruits of a plant affected by late blight can not be eaten, and the plant itself must be immediately pulled out and burned to prevent the disease from spreading to healthy bushes. However, such methods often do not bring results: once appeared, late blight can destroy half of the crop.
Important! Prevention of phytophthora should be started in the fall. After harvesting, all plant residues must be carefully removed and burned outside the garden.
If an outbreak of late blight occurs in the greenhouse, you need to treat the soil with a special preparation - "Fitosporin". Before the next planting of plants, the treatment should be carried out at least 3 times.
Wet cleaning
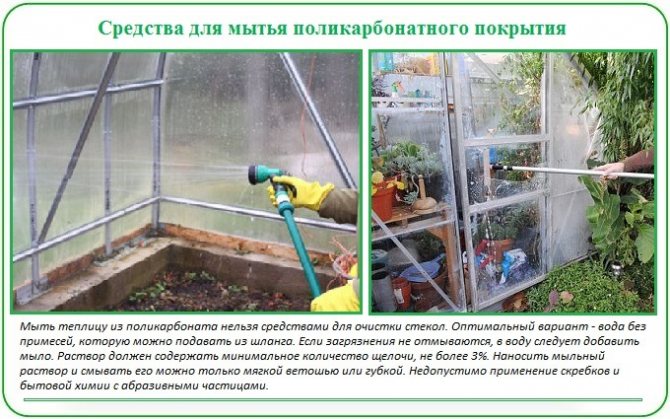
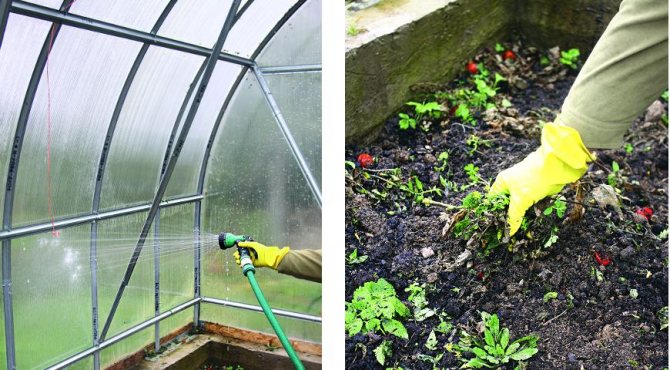
Next, you need to clean the soil in the greenhouse from plant residues that accidentally remained after the autumn harvest. Next, you should wash the greenhouse. You can start this in April, when it is already warm enough. It is easy to remove dirt from film and glass with a soap solution. For processing cellular polycarbonate, you can use a light pink solution of potassium permanganate (it is more convenient to wash with a sponge).
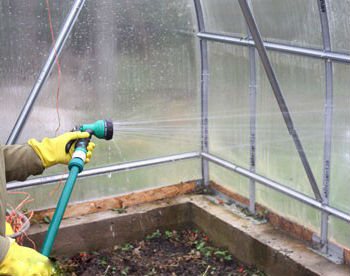
That's putting it mildly. It is necessary to wash everything as thoroughly as possible, especially in the places of window openings. If the greenhouse is made of polycarbonate, the problem is solved quickly using a hose. In the case of frame structures with windows, it is necessary to clean not only the glasses themselves, but also the places where they adjoin the frame. It is there that various microorganisms accumulate, which definitely should not be in this specific structure.
But what kind of means to use is decided on the spot, depending on the materials of the greenhouse and containers. But washing with just water is a waste of time. In extreme cases, for lack of the best - soapy water, but increased alkalinity. Therefore, you will need laundry soap, not toilet soap.
A set of simple soil preparation measures
The very process of soil preparation in a greenhouse is a series of specific activities:
- loosening the soil cover;
- warming up the greenhouse soil;
- sowing with green manure (if necessary);
- fertilizing the beds with organic compounds, compost, peat, humus 14 days before the main planting;
- the introduction of a complex of mineral fertilizers into the soil, provided that they were not introduced into the soil in the autumn period;
- measures to rid the soil of excessive acidity by adding dolomite, lime, chalk to it;
- digging the beds with deep loosening and subsequent leveling;
- spilling the soil with biological solutions.
Preparing the greenhouse for spring: treatment before planting from pests and diseases
You can disinfect the soil immediately after washing the greenhouse. There are two ways to treat soil against diseases and pests: chemical and biological.
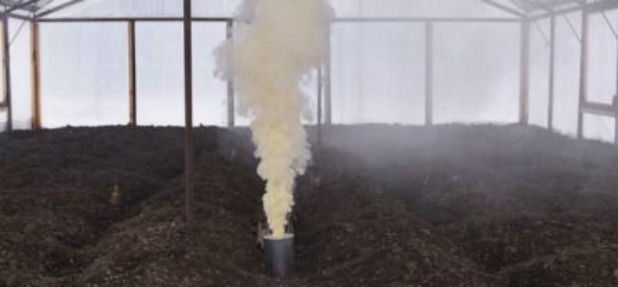
Chemical processing method. For the disinfection of wooden greenhouses and greenhouses made of plastic pipes, a sulfur checker is most often used. How to carry out processing with its help? It is better to install the checker not in the ground, but on some non-combustible material. Next, you need to set fire to the wick and leave the greenhouse, tightly closing the door and transoms. When the checker burns out, let the smoke stay in the greenhouse for a couple of hours, and then open it and leave it to ventilate for a few days.
Greenhouses made of metal profiles are best treated with a solution of slaked lime (dissolve 3 kg of slaked lime and 500 g of copper sulfate in 10 liters of water). And if you nevertheless decide to use a sulfur checker, pre-paint the frame or grease it with grease, otherwise the surface will quickly rust.
Biological processing method. Dilute Fitosporin, Phytocide, Stubble Biodestructor or any other preparation of your choice for disinfecting the soil according to the instructions on the package, and spray it on the ground and walls of the greenhouse.
After all the procedures carried out, it remains only to dig up the ground and form beds in the greenhouse. You can immediately apply fertilizers to them: compost, manure or humus. The soil in the greenhouse should be fertile, because the future harvest depends on this.
For more information on fertilizers that need to be applied to the soil in spring, read our article.
So that the ground in the greenhouse warms up faster, in the spring you can put covering material on the beds or cover them with black film. By the way, some summer residents leave it for the whole season, making cross-shaped cuts in the film and planting seedlings in the holes. Black color promotes better soil warming and more active development of greenhouse crops.
You can also increase the fertility of the soil, as well as improve its structure with the help of green manure, for example, mustard or oats.They must be sown about 3-4 weeks before the main planting of crops. By the time when it will be necessary to transplant seedlings into the greenhouse, the siderates will have time to grow up a little. The soil is dug up with them. The benefits of such an agrotechnical technique are colossal.
Have you already prepared your greenhouse for the "move" of vegetables? If not, then hurry up. In summer cottage affairs, every little thing is important, otherwise you can not even dream of high yields.
Share this important information with your friends on social networks!
The presence of a greenhouse at the summer cottage allows you to get an early harvest of vegetables and herbs. For the harvest to be really early and healthy, it is necessary to timely and correctly prepare the greenhouse for the new season.
Preparing the greenhouse for spring includes several important activities, which we conditionally divided into two groups:
- what they did not manage to do in the fall;
- what is best to do in the spring.
The activities of the first group are recommended to be carried out in the fall immediately after the release of the greenhouse. This is the right thing to do, but very often summer residents do not have time for the greenhouse, and it hibernates along with plant residues.
Let's start with activities that are desirable in the fall, but due to circumstances can be done in the spring. Conscientious and zealous summer residents who do everything according to the rules can skip this point.
To begin with, we take out plant residues, inventory and garbage from the greenhouse. If temporary trellises from twine or slats were arranged, then everything should be disassembled and taken out too.
All greenhouse waste must be incinerated. Greenhouse cleaning and preparation should be started before nighttime temperatures are positive.
The sooner the greenhouse is ready, the faster the soil will warm up in it.
Next, we remove the top layer of soil about 10 cm thick and take it outside the greenhouse. It is in this layer that the bulk of the infection and wintering phases of pests are concentrated.
The frame and cover of the greenhouse (film, glass or polycarbonate) need to be thoroughly rinsed with water under pressure from a hose from dirt and debris.
We suggest you familiarize yourself with: What to plant in the greenhouse with cucumbers
It is also recommended to apply basic fertilizers and humus in the fall. However, this can be done in the spring in parallel with other soil preparation operations.
Now let's move on to the events that are recommended to be held in the spring.
All work can be broken down into the following stages:
- cleaning the cover and perimeter around the greenhouse from snow (carried out in March to accelerate the warming up of the soil in the greenhouse);
- inspection and repair of the structure and coating (if you miss small cracks, then a draft can destroy all young shoots);
- disinfection of the greenhouse and soil;
- soil preparation for sowing and planting;
If you have a polycarbonate greenhouse, then in no case use a shovel or wooden stick to remove snow.
Use a plastic broom to avoid damaging the coating.
The first two stages are understandable even for novice gardeners, but the last ones require more detailed consideration.
The greenhouse is a separate agro-ecosystem in which it is very important to maintain favorable phytosanitary conditions.
Disinfection of the greenhouse in spring is carried out in order to destroy the spores of such dangerous diseases as late blight, gray rot, powdery mildew, black leg and others.
If in open ground conditions crop rotation can be used to reduce the spread of the disease, then in a protected one there is a rapid accumulation of the infectious principle.
Sulfur checkers are used at the rate of 50 g per 1 m3, but if a spider mite was noticed last year, then the rate is increased by 3 times.The effectiveness of fumigation depends on the length of time the caustic smoke has been in contact with the inner surface of the greenhouse and the surface of the soil.
Before processing, it is necessary to close up all the cracks and think over the insulation of the door. You can open the greenhouse for ventilation only after 3 - 5 days. You should also take into account the temperature minimum, which for sulfur preparations is in the region of 10 - 15 ºC.
The joints formed during combustion cause corrosion of all metal surfaces, therefore, the frame needs to be coated with paint.
If all points of the instructions are followed, then sulfur checkers will protect not only from fungal spores, but also from bacteria, slugs and ticks.
At the same time, smoke can penetrate everywhere and there are no "missing areas" for it.
Spraying is carried out with a 10% solution of bleach or a solution of copper sulfate with slaked lime (1: 6).
On a 10-liter bucket of water, take 0.5 kg of copper sulfate, add lime and insist for several hours.
The finished solution is used to wash the inner surface of the coating, the frame and the soil of the greenhouse.
You can combine fumigation and spraying by treating wooden parts and soil with a solution of copper sulfate, and then fumigating with sulfur bombs.
Such treatment of the greenhouse from pests and diseases may be required with a high number of pests and severe disease infestation in the past year.
When working with chemicals in a closed, unventilated room, it is necessary to remember about personal protective equipment (respirator, gloves, goggles and a dressing gown) and safety measures.
Biological treatment of greenhouse soil is becoming more and more popular today.
In gardening stores, you can purchase a specialized biological product (Fitosporin, Planriz, Baikal EM-1, etc.), prepare a working solution and pour soil abundantly with it.
This method is inferior in efficiency, but allows you to get a truly environmentally friendly harvest.
If you use biological products for prophylaxis, without waiting for the onset of symptoms of diseases, then the effect will be higher. With the help of biological products, it is possible not only to restrain the reproduction of pathogenic microorganisms, but also to increase soil fertility.
Disinfection of a greenhouse is a rather laborious activity that requires careful preparation and adherence to instructions, but this step should not be neglected.
Spraying fruit-bearing tomatoes and cucumbers many times against massively spread pests and pathogens is much more costly and harmful than treating a greenhouse in the spring before planting.
In greenhouse conditions, the soil is under increased stress.
Firstly, due to intensive use (it is difficult to find a greenhouse where there are empty areas) and high yield from 1 m2, and, secondly, due to the lack of environmental impact (precipitation, wind, animals, sharp temperature fluctuations ). As a result, the soil is severely depleted and needs to be replaced or enriched. You cannot start a new season on old soil.
During the winter, the soil in the greenhouse dries out a lot, in order to eliminate this problem, it is enough to sow green manure in the beds in the middle of autumn, which will cover the ground and reduce evaporation.
In addition, green manures enrich the soil with nutrients, cleanse it of pathogens and serve as an excellent fertilizer in the spring.
But these recommendations will come in handy for the future, and now we have dry frozen soil that needs to be reanimated.
Soil preparation in a greenhouse includes the following work:
- loosening the soil in the beds;
- digging small trenches in the beds for better contact with warm air (after watering, the trenches are filled up and the beds are leveled);
- spilling with warm water until saturation (you cannot use snow for moistening, since it will only delay the heating process);
- introduction of organic matter (humus, compost, river silt, peat);
- the introduction of phosphorus-potassium fertilizers (if not applied in the fall);
- the introduction of dolomite flour, chalk or lime to neutralize the soil solution (the annual use of mineral fertilizers leads to acidification of the soil);
- deep digging and loosening;
- early sowing of green manure before planting seedlings;
- spillage with a complex of beneficial microorganisms;
- covering with black agrofibre for better heating of the soil (if green manure is not sown).
The soil prepared in this way will ripen faster and "wake up" for sowing greenery and planting seedlings.
The commencement of soil preparation works depends on the conditions of the region.
Visual inspection of the external and internal parts of the greenhouse and repairs
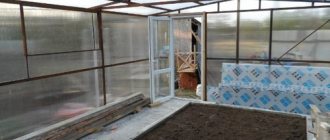
The preparation of the greenhouse for the new season should begin already at the end of February or the beginning of March: if possible, you should come to the dacha and inspect the greenhouse for any damage it could have received during the winter. To do this, you will first need to remove the snow both from the structure itself and lying next to it. If you notice that the tightness of the structure is broken, then you should definitely repair all the holes. After all, the main goal of a greenhouse is to preserve heat and humidity.
Advice! Experienced summer residents and gardeners advise on an ongoing basis to periodically clean the greenhouse from snow throughout the winter period.
Video: snow removal from a polycarbonate greenhouse
Disinfection
A clean, washed greenhouse must be additionally treated. The choice of funds depends on local conditions, the most common (and known to the gardener) pests, personal experience, and expert recommendations. The author's business is to offer a small overview of the drugs, and which ones to use, at the discretion of the owner.
Will be effective against spider mites, fungi, various parasites that feed on young plant growth.
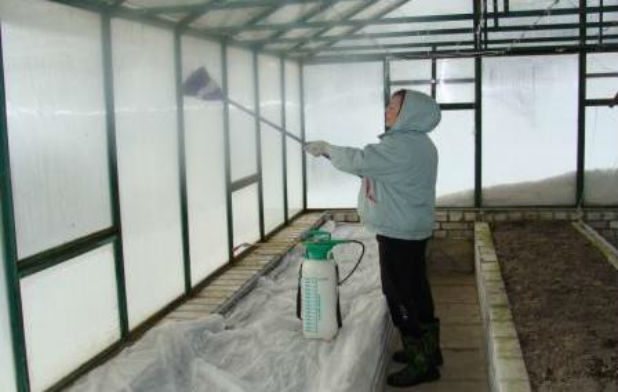

There are special sulfur checkers on sale. The gas formed during their combustion will penetrate everywhere, so this method of disinfection should always be practiced, together with others. The process technology is simple. It is necessary to seal the greenhouse as much as possible, light the checker, close the door and wait about 3-4 days. During this time, the smoke will do its job. All that remains is to ventilate the room.
Do not forget about garden tools. It must first be brought into the greenhouse so that it undergoes such a treatment. The only limitation in application is the material of the building frame. If it is made of metal, then such a procedure is carried out less intensively, since sulfuric gas is quite aggressive. But for plastic or wood, this is not critical.
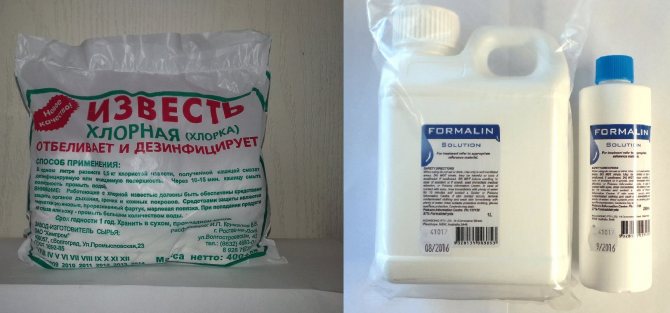
Lime (chloric)
Protects against root-knot nematode, black leg, keel, white rot, late blight.
Carbation
In terms of effectiveness, it is in many ways similar to the above-described tool. In addition, it prevents plant wilting, soil pathogens.
Copper sulfate
One of the most (and widely known) drugs. From scab, rust, late blight, powdery mildew (its pathogens), rot, curliness and much more.
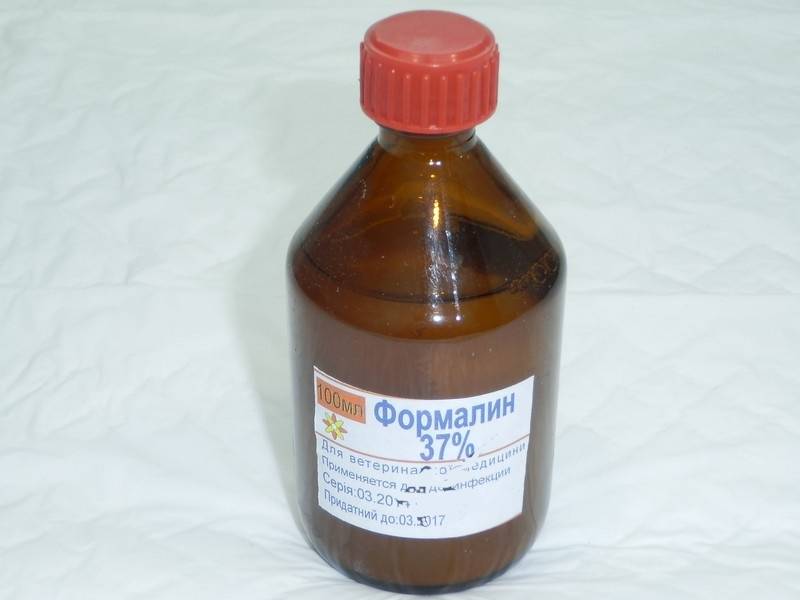
Formalin solution
Various spores, rot, larvae - all this will be destroyed by this remedy.
We suggest you familiarize yourself with: How to grow watermelons in a polycarbonate greenhouse
There are also compositions on sale that are positioned as universal. The author does not quite agree with this, but from personal experience dares to recommend "Acrobat MC", "Baylon", "Fitolavin-300". You don't need to invent anything - the application procedure is detailed in the attached instructions. Checked - they work!
Selection of materials for the foundation, frame and cover of the greenhouse
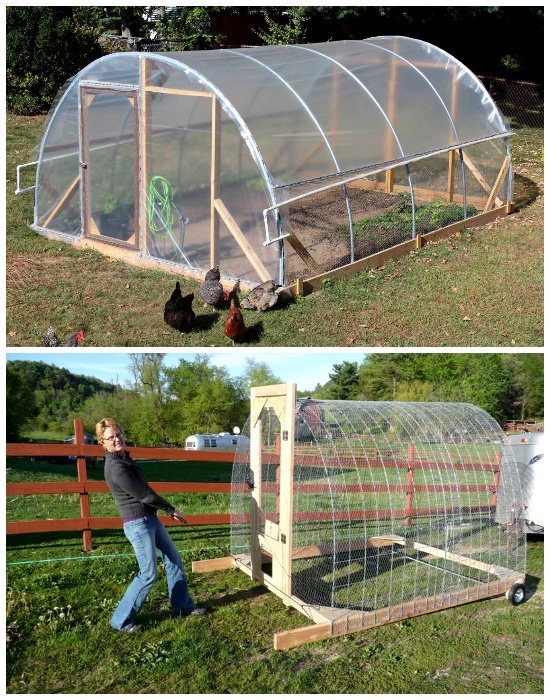

Lightweight mobile greenhouse instructions are ideal for growing vegetables in the spring and fall.
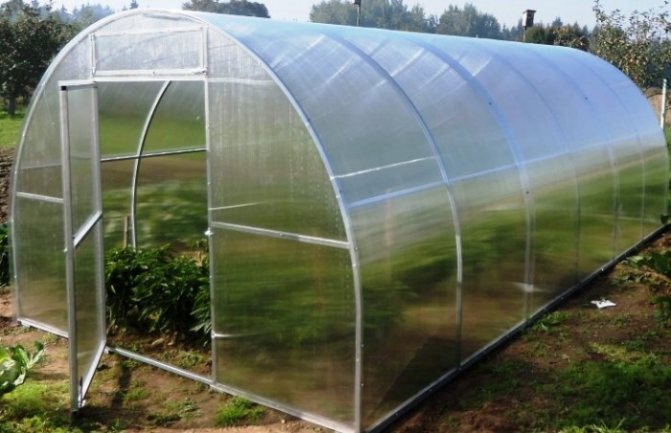
For greenhouse use from April to September, it is better install a lightweight structure with inexpensive covering material. They are mobile and easy to use, because there is no need to make a foundation for them, but as a base from a wooden beam or planed edged board, logs are created, on which the frame and the translucent canvas are directly attached. In this case, the frame can be made of aluminum, steel or plastic pipes, as well as wooden frames.
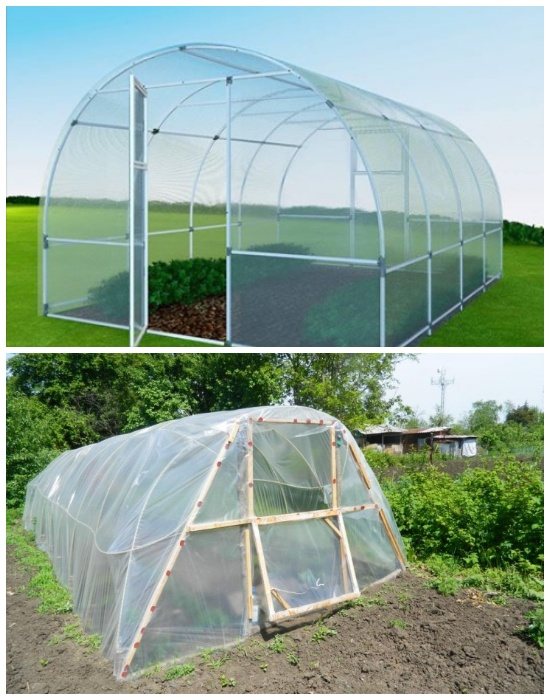

Options for creating greenhouses with a frame made of pipes and fittings.
If you use pipes as a frame, then they can simply be deepened into the ground and secured with pegs.Ordinary polyethylene film or polycarbonate sheets can serve as a translucent covering material; glass is not used on portable structures. The main thing is not to forget about the organization of the top and side ventilation, because any greenhouse lets in a lot of sunlight, and it is very hot in it during the day.
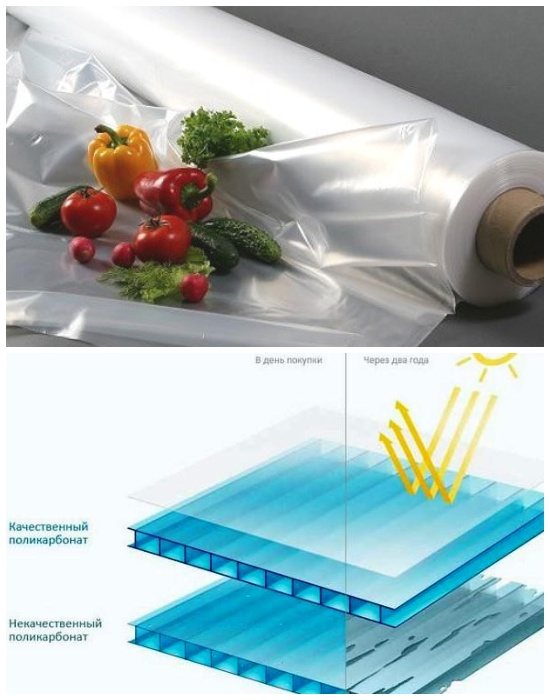

Plastic sheeting and polycarbonate are ideal translucent covering materials for most greenhouse designs.
As a rule, such mobile greenhouses are disassembled in the fall, cleaned and stored until the next season, because their lightweight design will not withstand strong gusts of wind, heavy frost and snow cover.
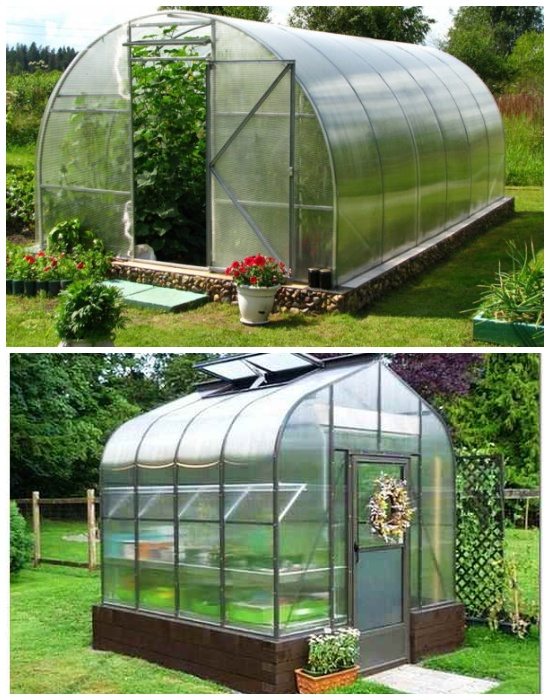

Stationary greenhouses are built on a foundation or on a plinth.
For greenhouse use year-round, set stationary structures, for which you will need a foundation, and in some cases even a plinth. Therefore, it is better to build a greenhouse in the fall, because it will take a lot of time to create a foundation, because its construction requires a certain amount of time for the material to shrink. Also, when creating it, it is necessary to provide for a drain, in order to avoid locking the foundation.
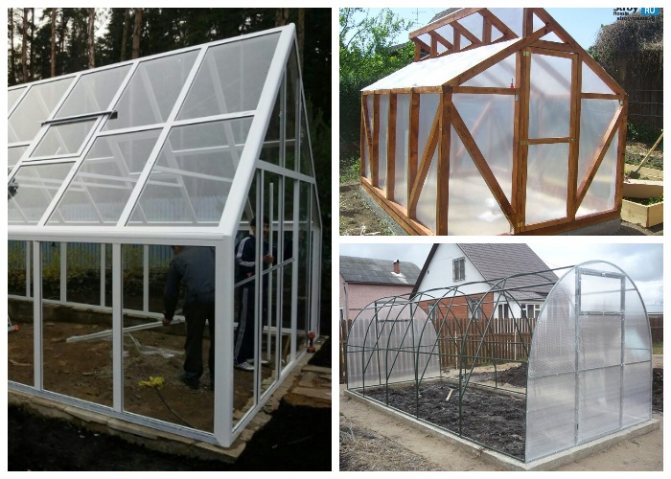

The frame can be made of profiles, pipes or timber.
As the main frame material, you can use metal pipes, a profile, a wooden beam or ready-made frames, and glass, acrylic, polycarbonate or plastic film can become a translucent filling. The frame should include vertical and horizontal posts (in some cases, even rafters), special connecting elements that must ensure the abutment of all parts of the structure to each other.
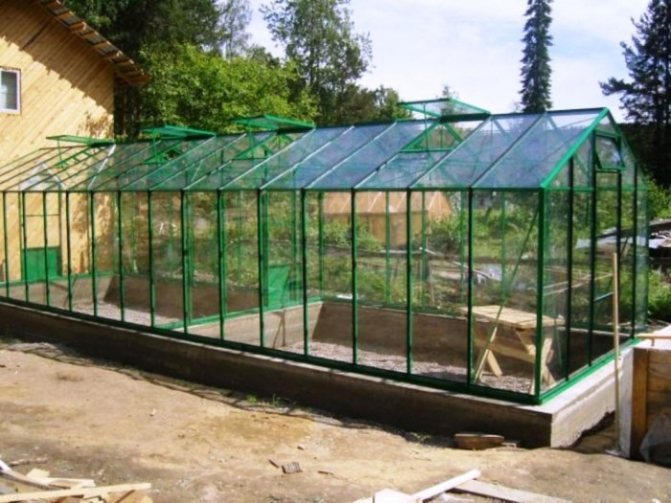

The greenhouse must be equipped with a sufficient number of windows. | ...
It is also necessary to provide for the upper and side windows, which should be easily opened and fixed in the desired position, as well as doors (if the area is large, then two, preferably from the end sides).
Fertilization
If the soil is not replaced, then the top layer still needs to be removed. It is to a depth of about 50 mm that the entire "infection" - larvae, bacteria and the like, penetrates. Instead of the harvested soil, humus is poured. But first it should be loosened, since during the winter the soil is precisely compacted.
In principle, the greenhouse is fully prepared for planting.
Perhaps the author missed some nuances. But the main points are noted, and everything else will be suggested by your own ingenuity, the experience of neighbors and special literature. You just need not to be lazy, but to regularly replenish your knowledge on the peculiarities of growing crops in a greenhouse and new products that appear on the market. For example, drugs.
The final stage of preparation
Fertilizers for potatoes when planting in a hole in spring
Before planting tomatoes in the greenhouse, you need to make sure that the soil there is already warm enough, loose and fertile, and also has good water permeability. If necessary, add the necessary components, dig up and cover. The required size of the beds is selected individually, but often the proportions are as follows: height - 35 cm, width - 70 cm, distance between planting sites - 55 cm.A week before the tomato is planted on the garden bed, the final stage of preparatory work should be carried out. For this, the land is treated with Fitosporin or another similar agent.
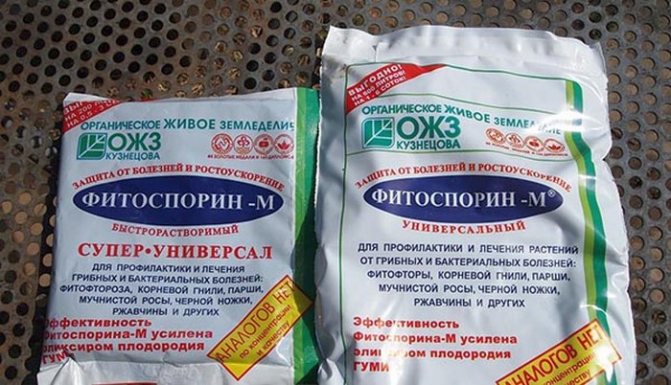

Fitosporin
Greens in the greenhouse in spring: sowing
As soon as the climate in the greenhouse has returned to normal, and this is a plus temperature day and night, you need to prepare the soil for seedlings. Preparing the soil for sowing begins with the formation of beds and loosening the soil, removing plant residues, roots and stones.Before planting seedlings, you need to determine the acidity of the soil, which is determined by several methods, including both free and the purchase of a special device.
Methods:
- Put a little earth on a spoon and pour vinegar, if the reaction is similar to extinguishing soda in vinegar (it boils), then the acidity is normal. If nothing happens to the soil, then the soil is acidic.
- Three black currant leaves are placed in a glass and poured with boiling water, filtered and a spoonful of soil is placed in the solution, if the solution turns red, then the soil is very acidic, if it turns pink, it is of medium acidity, turns green, then neutral, and if blue, then alkaline.
- A special device is an acid meter. In stores, both conventional acid meters and those with a combination of various functions are on sale (measuring soil acidity, measuring soil moisture, measuring the level of illumination).
Soil preparation is carried out depending on the type of planted plants. For tomato seedlings, dig up the soil, sprinkle with sawdust, cover with lime and manure on top. Next, the "sandwich" obtained on the soil is poured with a fresh layer of earth and sprinkled with a hall. The ash fraction corresponds to flour, boil water at a temperature of 60 ° C, water the soil and cover it with foil, after two weeks you can plant tomato seedlings.
A month before planting cucumbers, the soil is dug up and beds are formed with a height of 30 cm to 50 cm and a width of 80 cm to 100 cm. The formed beds are fertilized with a solution of potassium sulfate, tree resin and urea. After that, the beds are dug up and watered with a solution of bird droppings and covered with a film. After a week, you can sow cucumbers.
How to prepare the ground for planting tomatoes
Usually, gardeners are engaged in preparatory work in the fall, but in the spring there is also the possibility of improving the structure of the greenhouse soil and the formation of beds.
So that you can work with the soil, you need to try to defrost it as soon as possible after winter. To do this, spill it with hot water and cover with a black film. After a week, you can start working.
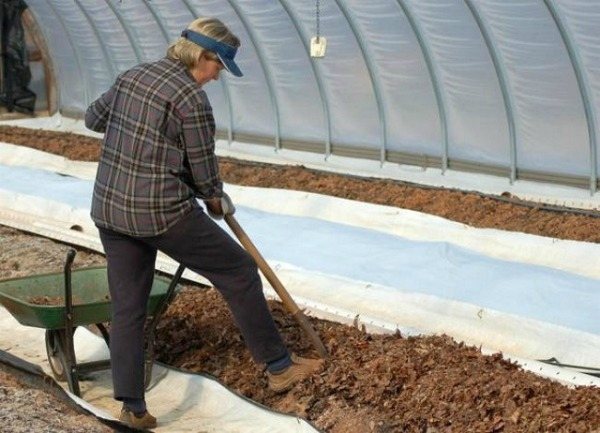

- From last year's beds, the top layer of soil about 40 cm thick is removed, finely chopped branches are laid.
- Then the first layer is leveled with sawdust.
- Next, you can lay a layer of humus or matured compost.
- The topmost layer is represented by fertile soil, which can be obtained by applying fertilizers and loosening components to the previously removed soil. Here you need to add sand (or vermiculite), quite a bit of high-moor peat, humus and mineral fertilizers.
- It is recommended to immediately check the acidity of the resulting composition. Tomatoes grow well with soil acidity of about 6.5 pH.
- The resulting substrate is scattered on the beds and with a rake they form their flat surface.
- Ashes can be immediately scattered over the surface of the beds or applied directly into the hole when planting seedlings.
For those who have just installed a greenhouse and do not know how best to form beds for tomatoes in it, their optimal sizes will be interesting.
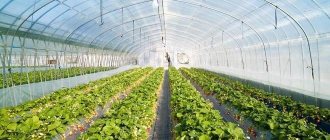
The beds are placed along the long walls of the structure. Their number and dimensions directly depend on the width of the greenhouse.
- For example, in tunnel-type greenhouses (with a width of 2.5), 1 bed 100 cm wide is placed on the sides, leaving a passage of 0.5 m in the center.In this case, tomatoes are grown in 2 rows on each bed.
- If the width of the greenhouse is larger, for example, 3 m, you can arrange 1 bed 45 cm wide at the edges (for planting seedlings in 1 row), and in the middle of the greenhouse form a bed 100 cm wide (double-sided planting). Thus, there will be paths of 55 cm between the beds.
Useful Tips
- If possible, the soil in the landing tanks should be replaced. And be sure to check the acidity level, even if the land was bought in a specialized store. You may have to add something to the soil.
- The early spring sefederation (a separate topic; worth paying attention!), As well as compliance with the rules of crop rotation (if the land is used last year), contributes to an increase in yield.
- Some types of microbes can be eliminated by adding manure or compost. But planting on such plots will have to be postponed.
- "Improvement" of the soil can be done by a sharp change in temperature - pour boiling water or vice versa, throw snow.

Good luck at your own dacha!
Preparing the soil
In order to further prepare the greenhouse, I advise you to initially plant fast-growing plants, the so-called siderates, in it. Greenhouse greenhouse crops are a proven way to create fertile soil. Among these plants I single out peas, vetch, mustard, phacelia.
After they germinate, I plow them into the soil. Green manure helps to maintain soil moisture, relieve it of toxins, saturate it with nitrogen and humus. However, the landing must be calculated. After they have sprouted and embedded in the ground, up to 5 cm in depth, it is necessary to have a time reserve of up to two weeks, before planting the main cultivated greenhouse plants.
Siderites, as a rule, are sown either in the fall of last year or in mid-March. I advise you to check the lunar dates.
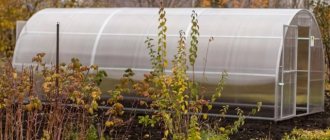
Preparing a polycarbonate greenhouse for planting in spring
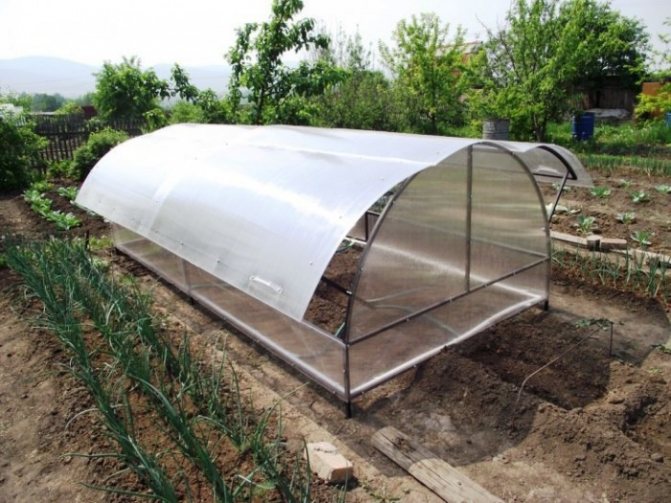
After wintering, a covering material made of polycarbonate may have deflections, deformed and cracked channels, darkened areas that need to be replaced. The main element in a polycarbonate greenhouse is the transparency of the roof. If in some places darkened areas are found, then this indicates damage to the air channels in the polycarbonate, in this place it may burst over time.
To disinfect and wash polycarbonate, you need to prepare a soapy or vinegar solution. In order to make a vinegar solution, you need clean warm water and vinegar in the ratio of a bucket of water to 100 grams of vinegar. Next, apply the solution to the walls and ceiling of the greenhouse with a plentifully moistened rag. This work should be done with rubber gloves to avoid skin burns with vinegar solution.
And for a different climate, sometimes the only way out is a good greenhouse. But the very first landings are usually planned when the snow has not yet melted there.
And it's not easy to start the usual work in it - you need to prepare a polycarbonate greenhouse for planting in the spring, and it depends on it how healthy, strong and pleasing your harvest will be. And we will help you figure out all the intricacies!
The first step in deciding how to prepare your greenhouse for planting in the spring is to start with simple cleaning. Throw away old twines and garters, and wash irrigation hoses and water barrels well.
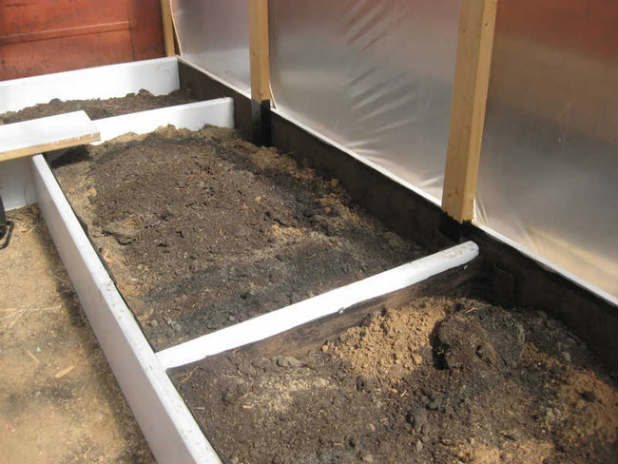

All vegetation that remained for the winter will need to be removed completely.
This will not be a good fertilizer - on the contrary, pathogens on such organic matter most of all like to winter, which is dangerous for future seedlings.
You need to wash the greenhouse correctly:
- Wash the film and glass with ordinary soapy water.
- Clean PVC and metal frame elements with hot water and vinegar.
- Cellular polycarbonate will best clean and disinfect a weak, barely pink solution of potassium permanganate.
After washing, open all the vents and doors, and dry the greenhouse well.
Let's start with the fact that in any greenhouse soil there are pathogenic microorganisms and pests, and it will not be possible to completely clear the ground of them.
So, all these living creatures also have their own cycle of activity, and just in the spring their "awakening from sleep" falls.
You don't want the newly planted seedlings to be eaten, do you? Therefore, at this time of the year, an important procedure is carried out - disinfection, unless you did this in the fall.
Before chemical treatment, it is necessary to carry out mechanical treatment: remove the moss from the base of the greenhouse and other places, and "cure" all these surfaces with a 5% solution of ferrous sulfate.
This is the only way you can eliminate all spores. If you did not remove plant residues in the fall, do it now, and be sure to disinfect it then. Take the discarded tops off the site, because
usually all pathogens remain in it.
Take the issue of disinfection seriously: fungal spores are able to maintain their vital activity even in severe frosts.
We advise you to use a sulphurous gas, which forms a gas that permeates everywhere during combustion. It cleans well even those places that cannot be reached with any brush, which is especially valuable for a greenhouse.
We suggest that you familiarize yourself with: Protection of asters from disease
And all insects, the malicious spider mite, mold and even slugs are afraid of sulfur. During disinfection, wear rubber gloves and a mask on your face, and close all the cracks in the structure itself.
Keep it in smoke for 3-5 days, then open and ventilate thoroughly.
It is possible to carry out disinfection with a sulfur checker already at a temperature of 14-16 ° C. All gardening tools, shovels and watering cans should be kept indoors during processing.
Do not use a sulfur stick if your greenhouse is on a metal frame. The gas that will be released reduces the service life of such structures, but such processing is absolutely safe for wood.
The second option for safe disinfection is spraying with a bleach solution. They need to process both the soil and the entire structure from the inside, even ropes and drip irrigation tapes. By the way, lime cleans even heavily contaminated soil.
To do this, prepare a solution of bleach, stirring 400 g in 10 liters of water, leave to infuse for a day (so that later its splashes do not cause burns), and brush all the wooden parts with a brush. Pour the solution into the cracks especially generously - everything is microscopic there and hides. Then take the liquid for spraying the soil into the spray bottle, and coat the wooden parts of the greenhouse with sediment.
Modern biological products are even safer, although less effective. Their main purpose is to destroy pathogens and increase soil fertility.
It is not necessary to air the greenhouse especially after biological products, and the seedlings can already be planted in just a few days.
However, if in the previous season you suffered from diseases and pests, then be sure to update the topsoil.
But disinfection is undesirable, because the chemicals used can adversely affect the entire crop.
If it so happened that you did not do all this in the fall, then try to disinfect everything as early as possible, so that there is a certain period of time before planting seedlings.
That is why it is better to disinfect indoor ground in the fall, and in the spring - only to wash the structure from accumulated dust.
So, first of all, after winter, we begin repair work. We check the integrity of the greenhouse, replace the broken areas, and, if necessary, level the walls and arches after the snow.
It is important not only to inspect the greenhouse, but to check its strength: all connections, all supports and guides. If you find deformed, rotten, or corroded parts, be sure to replace them.
In the spring, they replace the soil with a new one, and, if desired, arrange the so-called warm beds.
Most harmful bacteria accumulate in the upper layer of the earth. Therefore, it is better to completely remove the top 5-7 cm, in such a simple way, making the soil healthier by 90%.
And instead of the removed layer, sprinkle humus and mineral fertilizers.
And yes, do not throw away the top layer - it will be quite healthy outdoors, especially in flower beds or beds with a different crop.
Here is one of the best recipes: take four parts of loamy soil, three parts of manure or humus, and three parts of peat. Another: six parts of loamy soil and four parts of humus.
These are universal recipes, but for each individual vegetable there is also one that is most suitable.
- After preparing the beds, be sure to check the acidity of the soil. For tomatoes, the soil should be pH neutral, which can be achieved by mixing 60% peat, 20% sand and 20% compost. And put sawdust or straw at the bottom of the bed to additionally warm the tomato roots that are sensitive to the cold.
- For cucumbers and vegetables that are close on demand, prepare the following soil: 6 parts of peat, 2 parts of humus and 2 parts of woody soil. If desired, make a bedding of rotted sawdust here too.
- For berries, make the soil on lightweight soil: 6 parts of turf and 2 parts of sawdust.
What matters is exactly where you get the land from. It is desirable that this is not a nearby state farm or vegetable garden, where a priori there are already pathogenic disputes. Only fresh peat can be called absolutely sterile, but its reuse is no longer safe.
When replacing soil, be guided by what problems you faced in the past season. After all, there are also regions in Russia where there are almost no contaminated soils - pests have simply not been brought there yet.
And therefore, if the degree of spread of pathogenic microorganisms and insects was low before, and there was no phytophthora, then you can remove only 10 cm of the surface layer. Otherwise, change everything.
But believe me, this process is quite laborious.
After you form the beds from the new soil, add to each of them a glass of ash and any mineral fertilizer.
By the way, you can not throw away the soil that you pulled out of the greenhouse - just disinfect it: put it in a pile, pouring it in layers with dry bleach.
And so leave it for three years. Recipe: 250 g of lime per 1 m2 in a 20 cm layer.
This soil can then be used if it has never had blackleg or phytophthora pathogens in it. You can also plant in it something that does not get sick from these misfortunes.
And finally, the finishing touch is fertilization.
If you correctly alternate the cultivation of vegetable crops every year, then the soil can not be changed, it is enough just to disinfect.
When storing peat, alternate its layers with manure and lime.
And apply to the greenhouse soil with the following calculation: 20-25 kg per 1 m2, if the soil is light, and up to 15 kg if heavy.
The spring sun heats up the air quickly, but the soil takes much longer.
But for sowing seeds or planting seedlings, the earth temperature is needed at least 10-15 ° C - do you really have to wait for April? Not at all - there are a lot of tricks on how to warm up the beds faster, and as a result get the desired harvest much earlier.
So, watering with hot water not only warms up the earth well, but also activates many beneficial microorganisms and bacteria.
It is better to do it twice, then the earth temperature quickly reaches 15 ° C. And if your greenhouse also has electricity, install a floor fan.
So you get rid of cold air, which, as you know, always accumulates from below.
In addition, any black covering material will help to warm up the soil.
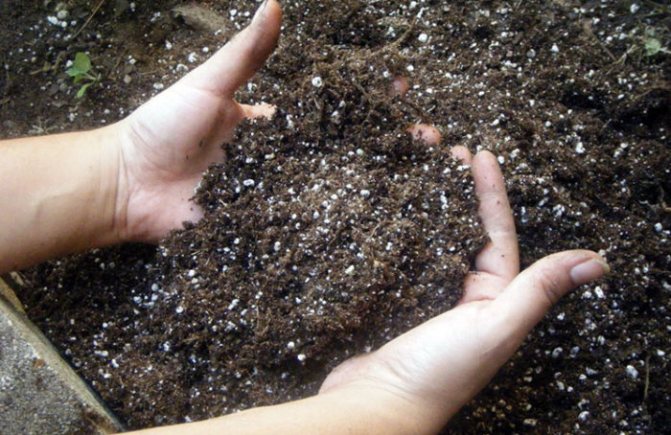
Aim for the prepared soil to be loose, porous and oxygenated.
That is why at this stage we add compost to the greenhouse soil.
These are food waste rotted in a year or two and products that need to be put in a separate box on the site.
Tags: spring, cook, planting, greenhouse
About
«Previous post
Repairs
The frame of the greenhouse also requires attention in the spring. So the crate of the greenhouse, made on a wooden base, must be checked for strength. Elements that are loosened to strengthen. Determine the presence of rotten wood that needs to be replaced.
If the structure is metal, then it must be examined for the establishment of rust. When corrosion has significantly damaged the metal, replace these elements. Supports that bent under weight, including under the pressure of snow, must be strengthened, having previously unbent and returning the structural elements to their original state.
Greenhouse canvases (coatings) should be inspected. The presence of cracks, breaks, even small ones, is unacceptable. They can serve as places of accumulation of bacteria, harmful mycelium, which will subsequently cause the death of seedlings, young plants.
If the walls of the greenhouse are film and have breaks, you can temporarily patch them up with duct tape. But it is better to re-cover.Greenhouses with glass sheets in the presence of cracks, broken areas must be replaced. If the greenhouse is equipped with polycarbonate panels, then the darkened fragments require replacement.
Experts advise that temporarily damaged glass areas can be replaced with polycarbonate.
After the greenhouse coating has passed the inspection, problem points have been eliminated on it, it must be thoroughly rinsed from the outside and from the inside with water to remove accumulated dirt. This procedure will lead to better penetration of sunlight into the greenhouse. And she herself will take on a neat look.
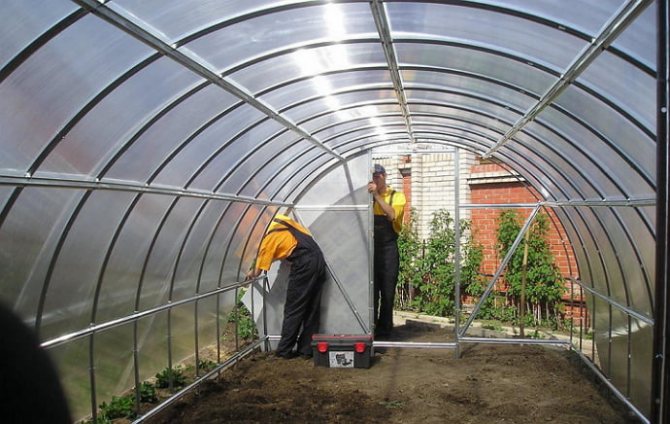

Security measures
Copper sulphate is classified as a low-hazard substance (toxicity class 4). However, when working with it, direct contact with powder or liquid should be avoided. Therefore, during disinfection, the following rules should be followed:
- Stir copper sulfate only with a wooden stick, without contacting your hands with the liquid.
- Avoid splashing, contact with the eyes.
- Keep out of the reach of children and pets to avoid swallowing the solution.
- It is advisable to wear glasses during processing.
- Do not eat or drink.
If the drops get on the skin, no burns will occur. In this case, it will be enough to wash it with running water and soap. In rare cases, liquid may enter the eyes. Then it is necessary to rinse them with a not too strong jet of water (under pressure).
If by mistake someone drinks a liquid with copper sulfate, it is necessary to immediately induce a gag reflex, and also take laxatives (Phthalazol, Picosulfate, Bisacodyl, Castor oil) and diuretics (Hypothiazide, Furosemide, Trigrim, Indapamide).
Attention! If extraneous sensations in the eyes (itching, stinging) or in the abdomen (heaviness, nausea, weakness) do not disappear within an hour, it is necessary to call emergency help.
Improving the fertile potential of the soil
In addition to medical procedures, the preparation of the greenhouse in the spring also cannot do without the preparation of proper soil mixtures - a high-quality basis for the future harvest. Indeed, in order to promote the normal growth and development of plants, the earth needs proper care, as well as a sufficient amount of minerals. In this section, we will try to understand the features of greenhouse soils and their preparation.
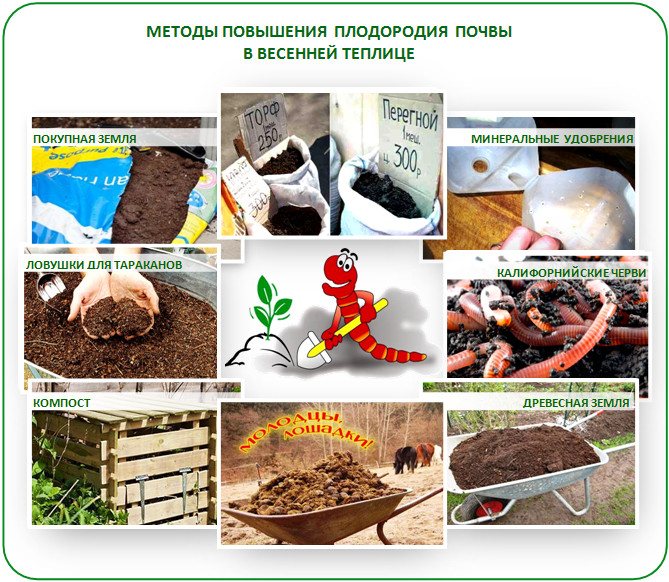

Well-made soil significantly increases yields
Features of an ideal greenhouse soil
Let's make a reservation right away that the soil for greenhouses, which would be suitable for absolutely all plants grown in them, simply does not exist in nature. The choice of greenhouse soil mixture depends on many factors:
- the requirements of the grown crop;
- season and presence of additional heating;
- climatic features of the region;
- availability of the necessary ingredients.
To ensure normal productivity, the soil in the greenhouse must meet the following requirements:
- the ability to provide normal heat and air exchange;
- high-quality saturation with water during irrigation, as well as the ability to transmit it when growing non-moisture-loving plants;
- absorption of the necessary microelements in cases of fertilization.
The best in terms of their physical characteristics are soil mixtures in which the ratio of liquid, solid and gaseous fractions is 1: 1: 1.
Greenhouse soil: components and their properties
Among the possible components of greenhouse soil, the following elements are found: turf, sand, peat, clay, as well as coniferous bark, straw, sawdust and fallen leaves, green manure and fully prepared composts. In addition, organic agents in the form of pus, humus and poultry droppings are added to the soil mixture, as well as a full set of necessary mineral macro- and microelements.
Each of them has its own special purpose in creating an optimal soil for growing plants. So, sand serves as a baking powder and insulation, and clay retains moisture well. Sawdust, foliage, straw, etc.maintain the required volumetric mass, improve the water regime and emit carbon dioxide, and the bark serves as an antiseptic. The introduction of these compounds perfectly replenishes the soil with organic matter.
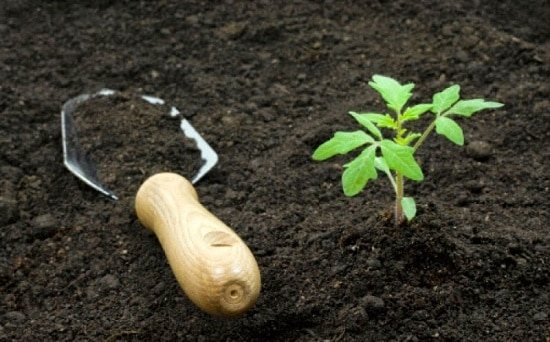

Plants need a nutrient medium
Another supplier of organic fertilizers for soil mixtures is manure. In addition, it perfectly maintains the structure of the soil, and also saturates the plants with a full set of micro and macro elements. Peat eliminates excess life-giving components, releases carbon dioxide and adds organic matter. Lime materials optimize acidity and improve soil structure.
The more ingredients are used to create a mixture, the more the possibilities for proper nutrition, formation and development of plants are improved. In addition, qualitatively complementing each other, the elements of multicomponent soils also mutually neutralize negative manifestations.
So, in the case of applying fertilizers in excess of the norm, their surplus will be absorbed by sawdust, bark or peat. In turn, poultry droppings will enrich them with nitrogen, and the sand will resist oxidation.
DIY soil components
In fact, the preparation of the greenhouse in the spring for harvesting begins with the preparation of components for the greenhouse soil. And already their combination is produced depending on where and what vegetables are planned to be grown. Let us consider here the features of the preparation of the main components for the manufacture of soil mixtures: turf, humus and compost.
Sod land is harvested in late spring or early summer in areas where perennial cereals and legumes grow. Manure, lime and mineral fertilizers are scattered on freshly plowed soil crushed by a harrow, after which they are raked and stacked in stacks up to 2m high. Throughout the summer, it is watered several times with liquid manure and shoveled with the help of improvised mechanisms.
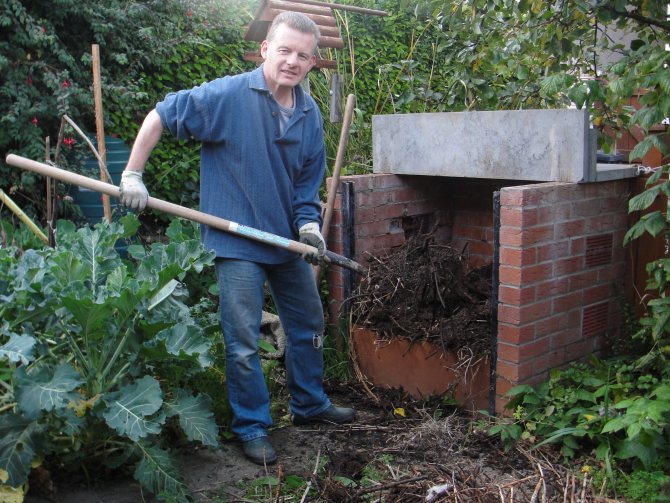

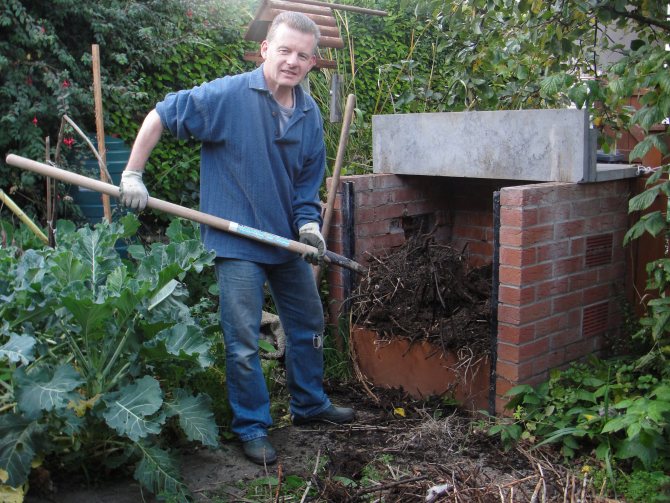

Harvesting humus
An excellent biofuel for greenhouses, humus, is nothing more than completely rotted manure.
To prepare this component of the soil mixture, it is necessary to take the manure that has already been used in the greenhouse and lay it out in stacks. The finished heaps are sprinkled with peat and systematically watered with slurry. In order to avoid drying out, the stacks must be interchanged from time to time.
Compost is another great fertilizer for preparing the soil in spring in a greenhouse. It can be harvested almost all year round, because the basis of this tool is made up of almost any plant residues: mowed grass and weeds, fallen leaves and kitchen waste, rotten vegetables or fruits, manure, peat and others. Each of the organic layers is covered with fertile soil and watered from time to time.
Conditions for natural maturation
The maturation of the compost lasts from 6 to 12 months. The readiness of the fertilizer can be determined by its color (it becomes uniform and dark) and, most importantly, its smell and substance. Mature compost has a rather pleasant aroma of freshly plowed soil or forest floor. To avoid drying out, compost containers are placed in the shade, and sometimes covered with foil. In winter, in order to protect from freezing, they are thoroughly covered with snow.
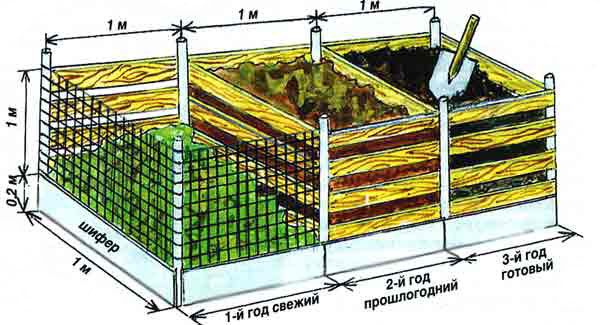

Composting
Important to remember:
- Regular ventilation speeds up the composting process.
- It is extremely undesirable to harvest sod in areas with swampy terrain - you will get a soil mixture with very high acidity.
- Dry peat chips, due to the impossibility of high-quality wetting with water, are not used in the manufacture of greenhouse soils.
- Soil, which contains insects, pests or pathogens of various diseases, is not suitable for preparing greenhouse mixtures.
How to quickly and conveniently wash a greenhouse
In spring, not only the soil needs to be processed, but also the frame parts of the greenhouse and materials used as covering.Through them, light from the street enters the greenhouse, without which the plants cannot survive.
In the absence of serious diseases in the crops grown indoors, you can only do wet cleaning (do not use any additional methods) with a soap solution.
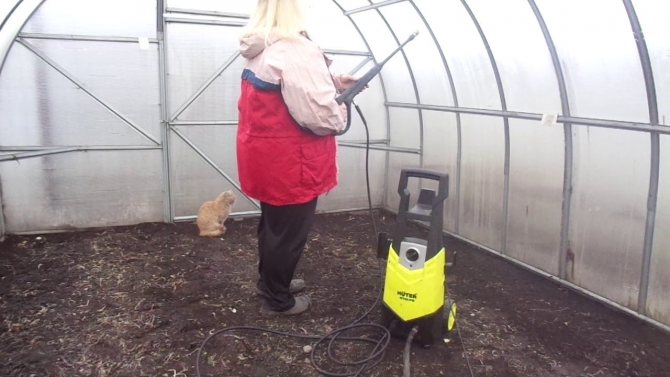

How to quickly and conveniently wash a greenhouse in spring
The use of disinfecting drugs is recommended exclusively against those ailments or pests that have appeared in the past year.
As for the coatings, racks and frame, wet cleaning is done here, and the following tools are additionally used:
- soft tissue;
- sponges;
- brushes;
- not very aggressive detergents.
Helpful advice. Before wet cleaning in a polycarbonate greenhouse, it is necessary to inspect the material for chips, cracks and other defects.
If nothing of the kind was found, then the structure should be washed with warm soapy water and wiped with a soft cloth. In the event of mechanical damage, it is recommended to replace the coatings with new ones.

