

During the planning and registration of a land plot, many people have an idea to make a reservoir, which will become a stylish decoration, and will help solve the problem of irrigation in emergency situations. In it you can breed fish and amphibians, plant moisture-loving plants along the banks, build a waterfall or fountain. But first you need to understand the intricacies of the design and construction of the pit.
First stage. Determining the type of pond
First, you should find out what purpose will be pursued by the construction of a pond on the site. From this point of view, water bodies can be conditionally divided into four large groups.
Table # 1. Functionality classification of artificial reservoirs
| Group name | Short description |
| They are an element of the landscape composition and are intended, first of all, to decorate a particular area of the garden. Active rest is not provided near such reservoirs. |
| They are deeper and are often decorated with fountains, bridges, sometimes they are equipped with lighting. Such ponds are built near a house or a gazebo, benches with awnings are placed next to it. Therefore, it is quite obvious that such reservoirs are the heart of the recreation area for residents of the house. |
| This option is suitable not only for avid fishermen, but also for families with children - the latter will enjoy watching bright fish while relaxing in nature. |
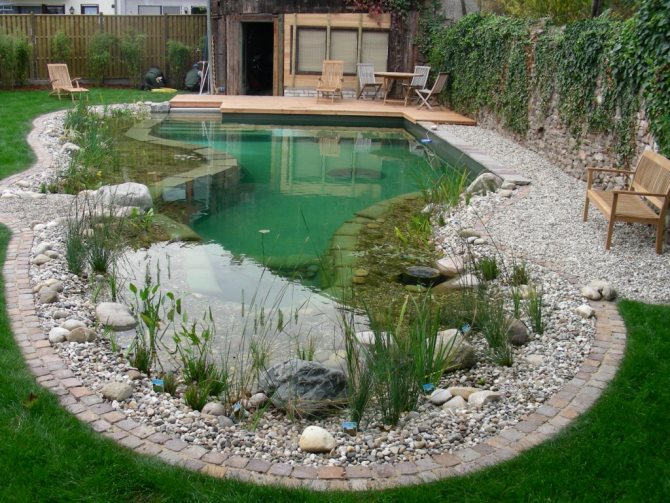
| They also belong to artificial summer cottages and not only perform an aesthetic function, but also provide an opportunity to freshen up or even swim (it all depends on the size). |
Then, based on the goal and our capabilities, we proceed to the choice of style, location, size and shape.
Caring for decorative structures
To care for a homemade pond, you should follow a number of simple rules:
- In the summer, clean the surface of the water from filamentous algae, and remove weeds from the slopes of the pond.
- In dry summers it is necessary to add water to the reservoir.
- In the fall, clear the pond of fallen leaves and pull some dense cloth or mesh on top of it to protect it from debris.
- In the spring, it is necessary to clean the bottom and walls of the reservoir from dirt and remove dried plants around the artificial waterfall.

There are many different types of artificial reservoirs with waterfalls. The choice of which one to build on his site should be made by the owner, based on his capabilities and skills.
Second phase. Determining the style
An artificial pond can be made in one of two possible options, and each of them also has a great variety of modifications.
Table 2. Artificial reservoir styles
| Name | Short description |
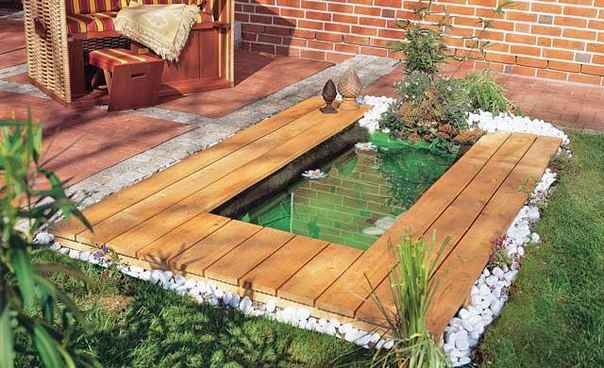
| This name exactly reflects the essence - these are designs that differ in clearly defined outlines. The geometry of the pond, which is correct in terms of geometry, is suitable for those areas that are decorated in the style of minimalism, high-tech, modern or classic. But, which is characteristic, the shape can be not only rectangular, but also square, round, oval, broken. |
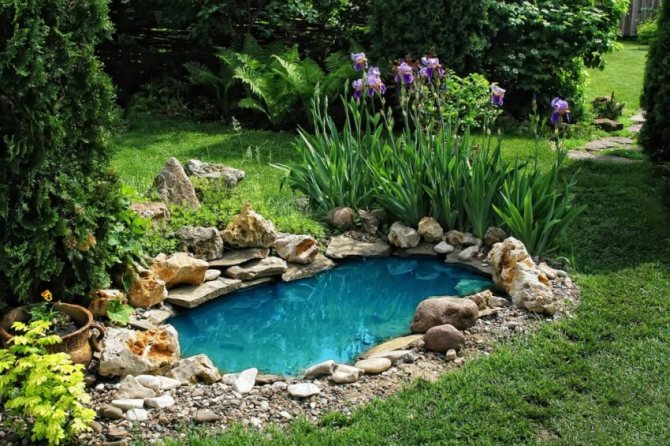
| They are more popular, because they are characterized by naturalness and irregular outlines of the banks, which means they seem to bring a person closer to nature.The shape of the reservoir here depends only on personal preference, but the more complex it is, the more difficult it will be to lay the film (more on this later). |
The relief of the site also plays an important role in choosing a style. So, if the surface is sufficiently flat, then the shape of the pond can be any. If there are irregularities and drops on the site, then they need to be given special attention, but they make it possible to additionally equip a cascade or a waterfall. In addition, against the backdrop of all this, an artificial slide, for example, will look great.
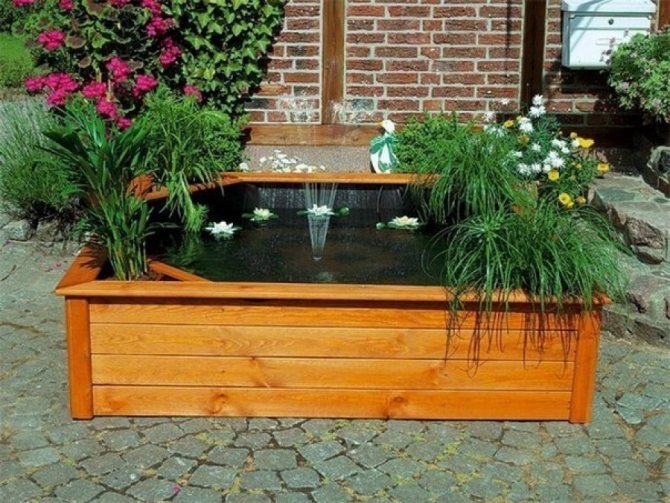
Also, the reservoir can be raised somewhat above the ground. In this case, the construction technology will differ only in the arrangement of the foundation, which will prevent possible distortions of the bowl.
The walls of the reservoir rise above the ground
When creating such a reservoir, earthwork is minimized, and it will be much easier to care for it.
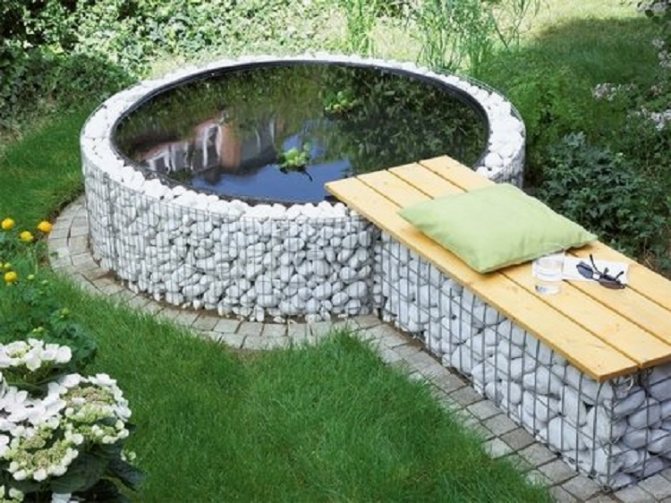
In the photo, a variant of a reservoir with walls made of gabions
Note! If the reservoir is to be built with a fountain, then preference should be given to a high construction.
Stage three. Choosing a place
To begin with, we place the reservoir in the most convenient place so that you can admire your creation from anywhere on the site. That is why, when choosing, we take into account several important factors.
- Land area. Not only the size of the pond, but also its shape directly depends on it.
- Illumination... It is preferable to place an artificial reservoir in a shaded place, in which the exposure to direct rays of the sun does not exceed five to six hours a day, otherwise part of the water may simply evaporate. Moreover, in the sunlight, biological activity can develop, which is unlikely to be able to decorate the pond. Therefore, having chosen a specific place on the site, we observe the solar regime for several days.
- Relief... The shape of the pond depends on it, and it also simplifies the arrangement of additional elements (for example, fountains).
- Groundwater level, soil composition. These indicators affect not only the depth of the reservoir, but also the complexity of the work and the need for additional consumables.
Note! The deeper the pond, the more illuminated it should be placed. If the reservoir is intended for fish, then we treat the location even more responsibly, since the oxygen content in highly heated water decreases.
- Expandability... We do not forget about the perspective, therefore, on the one hand, we leave free space.
- Visibility... It is advisable to arrange the reservoir so that it can be seen from home and recreation areas.
- Power supply... If a fountain or lighting is additionally equipped, then we will think over electrification in advance. It is better to lay the wires even during development, moreover, underground and in a reliable protective corrugation. There should be small access hatches at the connections.
- Reflection. The pond will look more attractive if the surface reflects the sky or beautiful buildings, and not some kind of utility structure.
- Landscaping. The vegetation near the pond is, of course, beautiful, but the leaves will pollute it and form silt. Moreover, the root systems of trees can damage the waterproofing layer.
- Compatible with general design and other objects.
We begin work in the spring - this way we will have enough time for the reservoir to "take root" on the site.
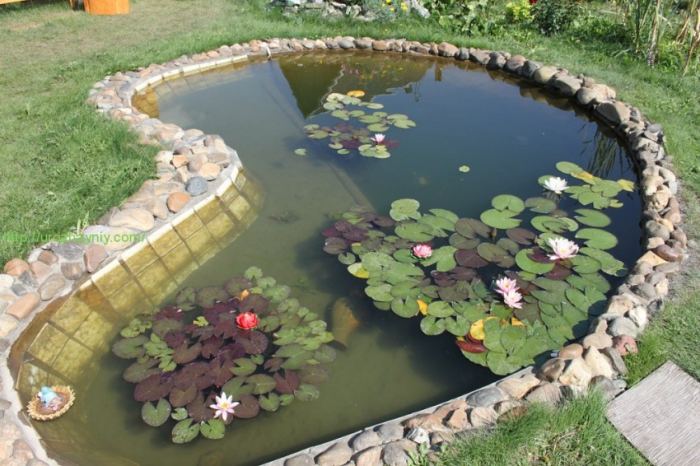
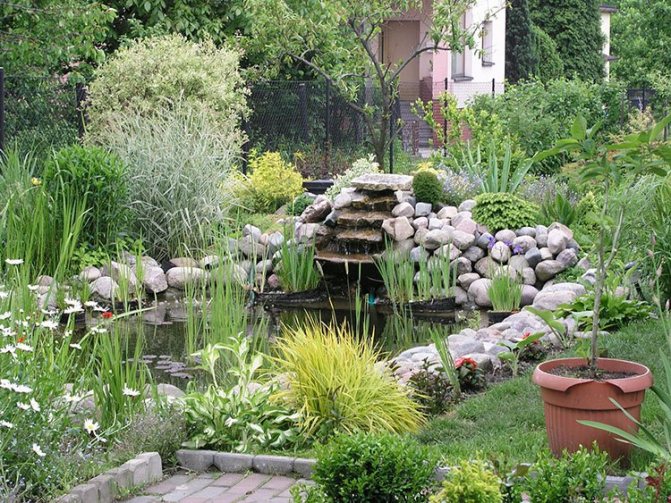
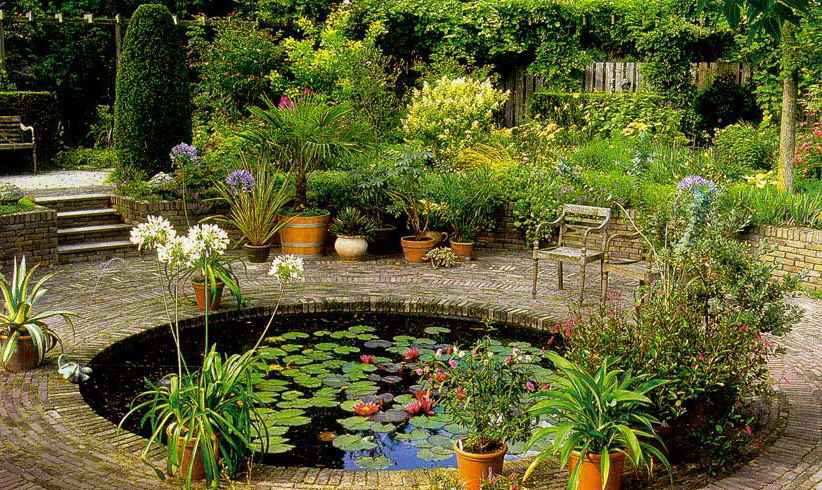
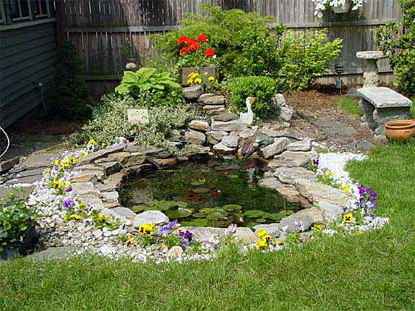
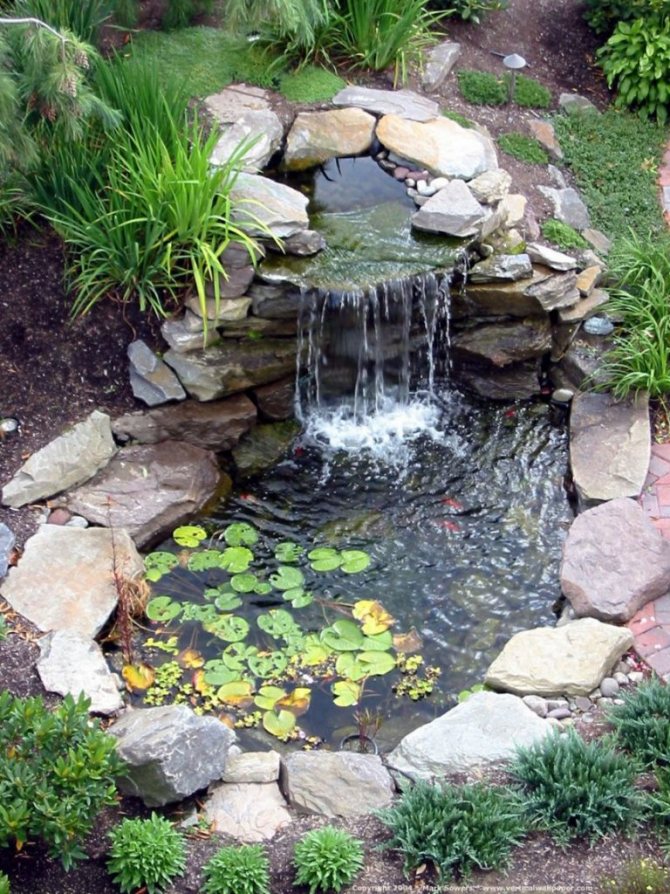
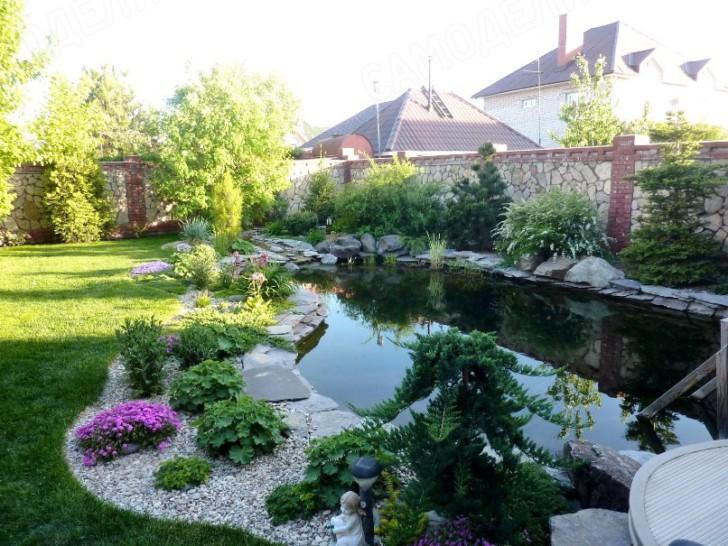
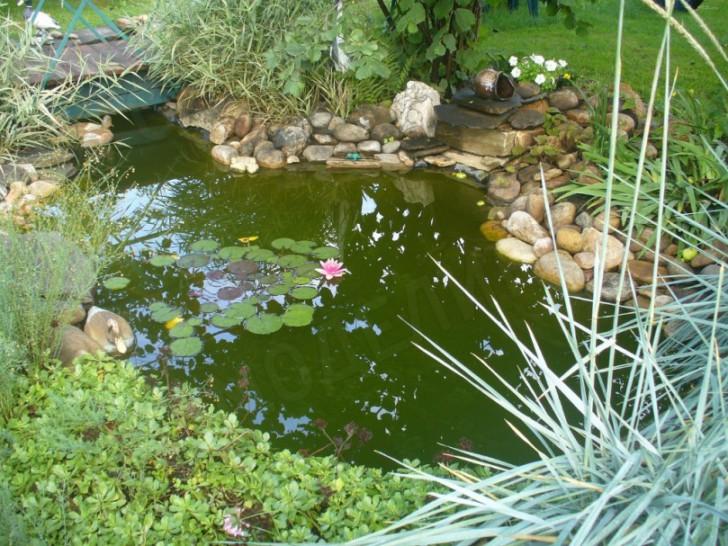
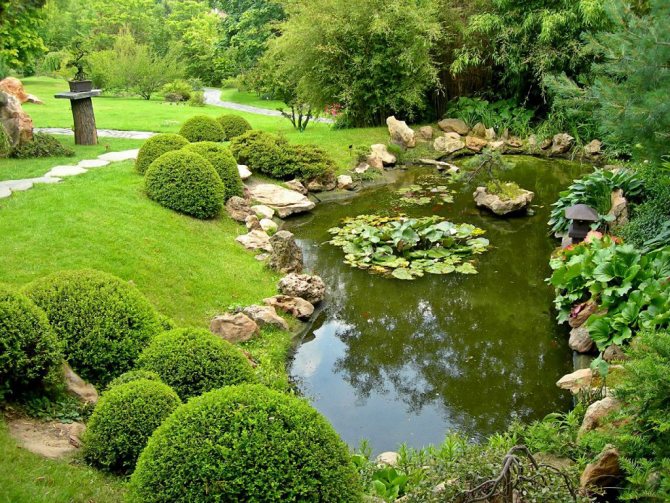
An example of a well-designed summer cottage pond
Stage four. Determine the size
It is difficult to say that a large pond will cost more than a small one, since there are many nuances here. Therefore, we will consider the key points.
1. Dimensions. They depend on the location of the reservoir. Many say that the pond should make up on average 3-10% of the total area of the site, although there can be no clear recommendations in this case.As for the length and width specifically, they depend not only on the area of the land plot, but also on our capabilities. After all, we will dig a hole under the reservoir by hand.

Large reservoir in front of the house
2. Depth. It depends on the purpose of creating a reservoir, as well as its size.
3. Difficulty of content. The larger the pond, the easier (no matter how paradoxical it may sound) to care for it.
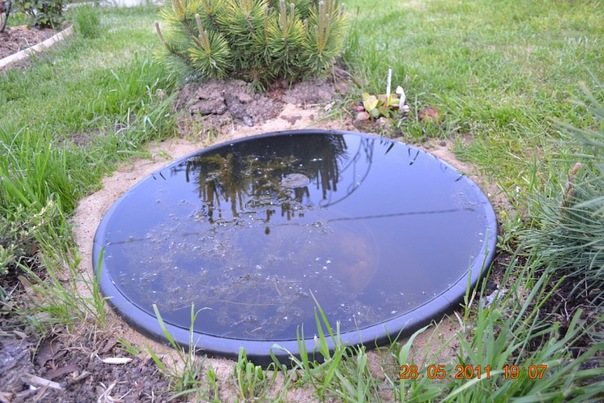
![]()
A large body of water is difficult to care for
4. Zoning. The reservoir is divided into the following zones:
- coastal (from 10 cm to 40 cm), which will serve as an entrance and for planting a plant;
- shallow (from 40 cm to 100 cm), where crops that grow deeper will be planted (for example, a winter-hardy water lily);
- deep-sea (more than 100 cm) - it is required only in those reservoirs where fish farming is planned; the area of this zone depends, first of all, on the number of fish, but on average it should be more than 20% of the total area of the reservoir.
In the photo, the workers are zoning the future pond.
5. Biological balance. In any case, living creatures will settle in the pond, which means that it is necessary to provide such conditions so that it can self-clean. No oxygenation or chlorination of water is envisaged here. It is worth remembering: no more than ½ of the entire area can be allocated for plants.
Note! The lowest point should be lowered below the soil freezing line, especially if fish breeding is planned so that they can survive the winter in non-freezing water.
How to make a small pond in the country with your own hands
How to create a small pond in the country? First you need to choose a place for the future reservoir. A correctly chosen place for the future pond will save you from all sorts of problems. A suitable pond site should look like this:
- there will be no trees on it, since the leaves are crumbling, and the roots germinate so that the bottom can be damaged;
- a large amount of the sun should fall on the surface, and for a rather long time, as this contributes to the development of plants;
- there must be additional space, because over time you can expand it, so it is better to consider this option in advance;
- the surface needs to be flat.
And, most importantly, remember that a pond cannot and should not occupy more than 3% of the summer cottage area! From various sources, we found out that feng shui experts suggest the best way to place a body of water in front of the house, so that you can admire it from the window. In order for the plants to feel good, it is necessary to make the bottom steps.
Water lilies are planted in shallow water, and fish hibernate at the lower level of the pond. Also, you should not make a hole more than 2 meters deep. The size of a small pond is about 3 square meters. A small pond is a profitable solution. It will take less materials and effort to create such a masterpiece.
By the way, a small pond will have to be cleaned much more often, since there is little room for the inhabitants to clean it.
Fifth stage. Choosing materials
The next question that needs to be dealt with is the choice of consumables. There are many options on the market today that can be used to create an artificial reservoir. Let's consider them.
Concrete pond
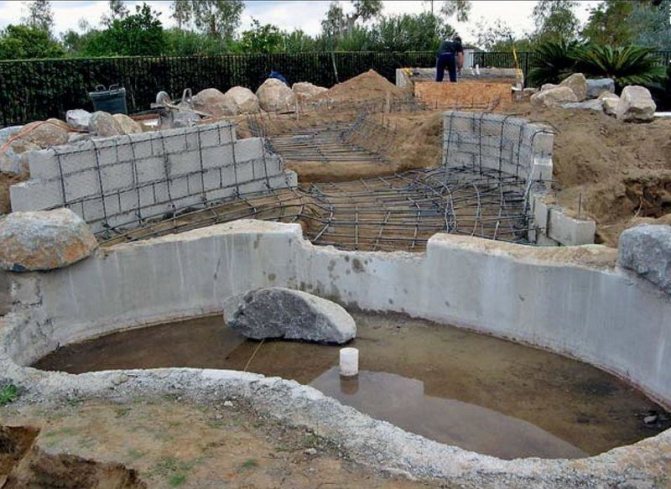
Pictured is a concrete pond
The most expensive option, which, nevertheless, allows the reservoir to be exploited for a long time. Although the concrete fill is more suitable for the arrangement of the pool.
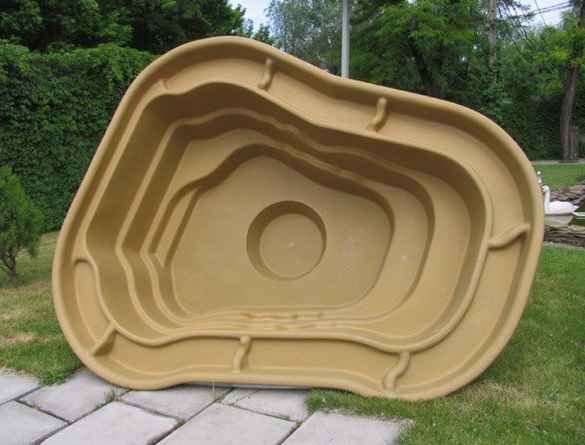
Finished plastic container
Plastic pond container
This option is more suitable. The form, made of fiberglass or PVC, allows you to build a pond in record time and use it for up to 30 years (the specific period depends on the quality of the container).
The procedure itself will consist of only four steps:
- digging a pit;
- set the form;
- fill the remaining voids with sand;
- we plant the plants, fill the reservoir with water.

Pond tank installation diagram
The disadvantages of this method are the difficulty of transportation (if the volume is large) and the need for basic knowledge of installation (otherwise the bowl may be damaged). Moreover, plastic containers are destroyed over time by UV radiation.
Note! It is preferable to use a fiberglass bowl that is reinforced with rubber - this design is more reliable and repairable.
Rubber reinforced fiberglass bowl
Polymer film
In terms of the shape of the pond, this option provides simply unlimited possibilities. The most affordable material is plastic wrap, although it will not last long.
Polyethylene film
A PVC film has a longer service life; with proper installation, it can last up to ten years.
PVC foil
Note! The film can be replaced with used advertising banners - you can buy them at very low prices.
Butyl rubber film
Perhaps the most reliable option. For ponds with rocky bottom and great depths, it is recommended to use a butyl rubber membrane (EPDM) with a service life of up to 50 years. In addition, this material is able to withstand multiple frosts.
Butyl rubber film
There are several popular ways of making a reservoir, in which scrap materials are used. Let's take a look at the most popular of these methods.
Pond from the old bath
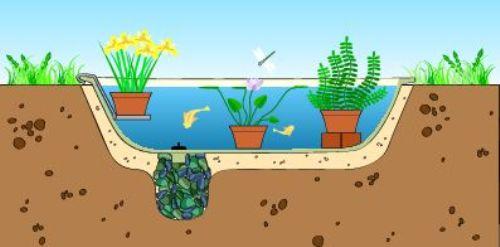
Diagram of a reservoir from an old bath
A great option, because a bathtub is a container that was originally intended to hold fluid. The bathtub can be painted in bright colors and placed in a picturesque corner of the site, or, as an option, deepened into the ground.
Tire pond
A simple way to create a mini-reservoir on the site. The manufacturing procedure is shown in the photo below.
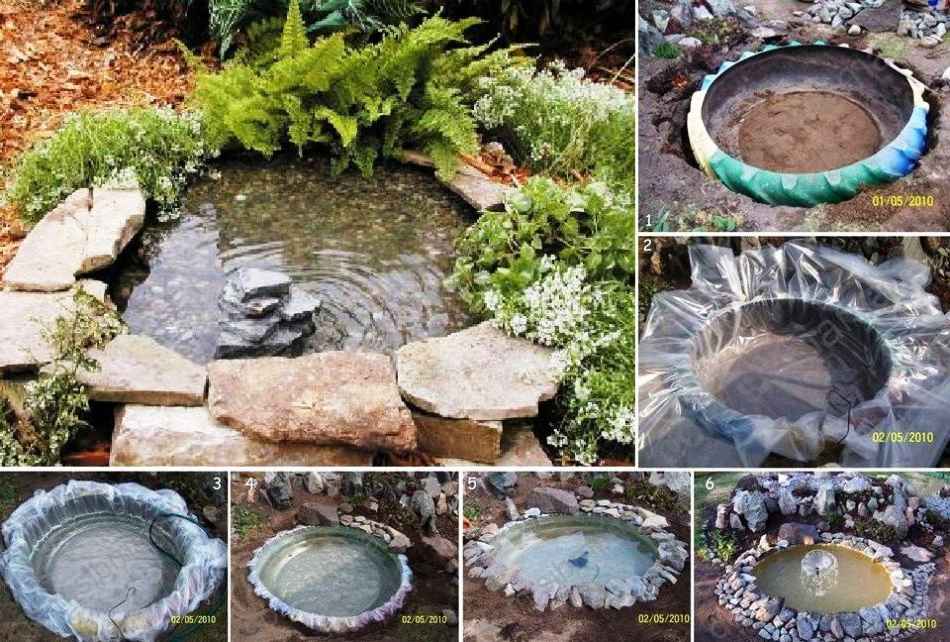
Arrangement of a reservoir from a tire
Basin pond
An even easier way. The basin is capable of holding water well, so it can be installed in the same way as a bath. With proper decoration, such a mini-pond will be an excellent decoration for the yard.
A pond from an old basin
Note! The choice of material depends not only on the aesthetic characteristics of the pond, but also on its service life. It is desirable that the selected material is environmentally friendly.
Rules for using plants for decoration
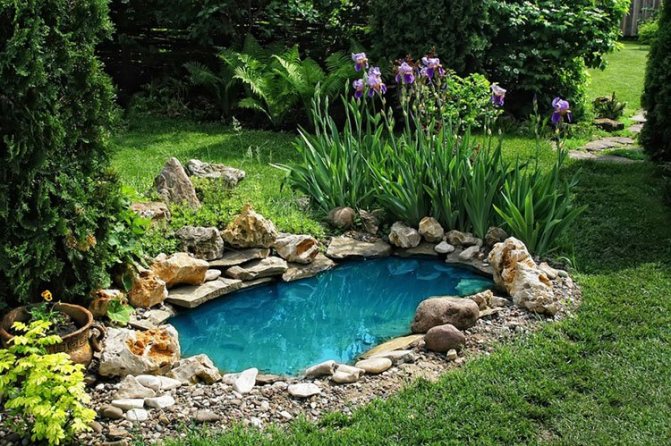
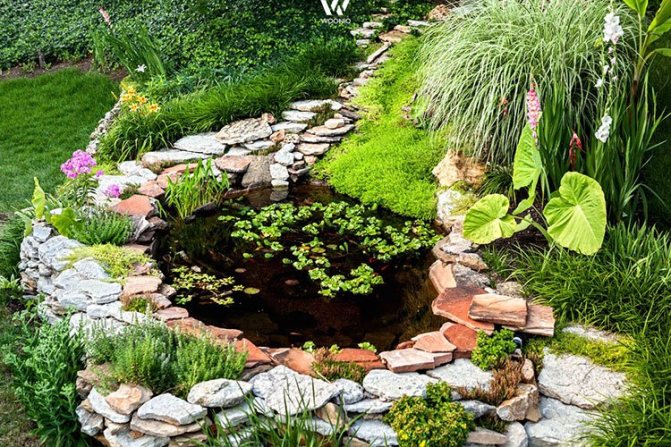
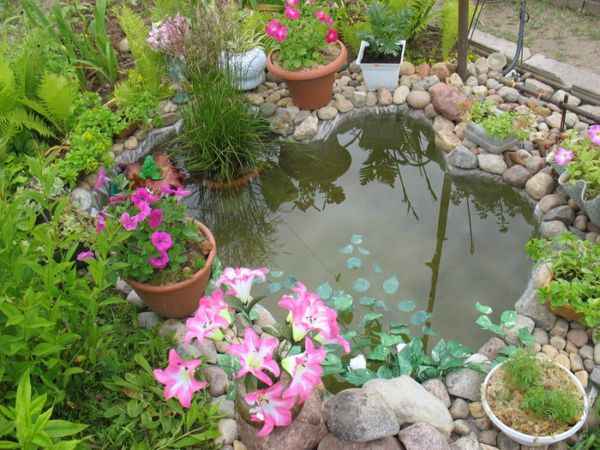
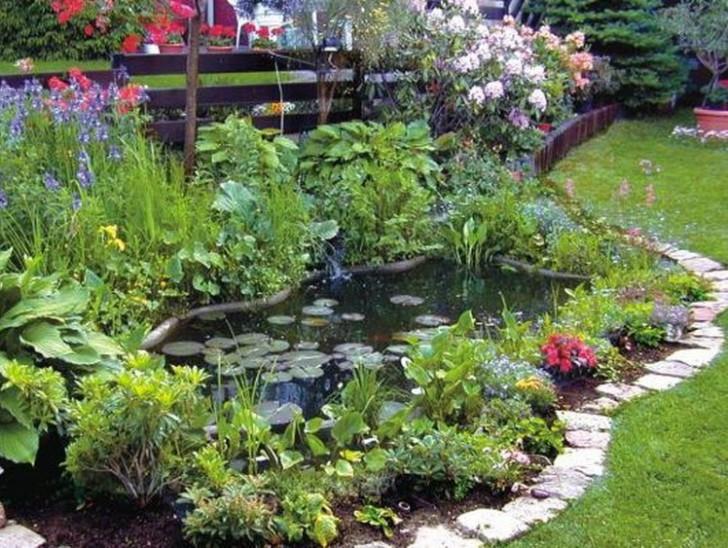
The choice of plants for a man-made reservoir is a crucial moment that affects the balance of its entire ecosystem. The owner needs knowledge about the features of the plants that he plans to plant on the coastal zone of the pond and those that will be located directly in the water. Competent selection is clearly shown in the photo of ready-made reservoirs, created by hand.
Revitalization of the reservoir
Before tackling the plantings, you should hide the film that covers the bottom and walls of the reservoir. This can be done with stones, river shell rock, and ceramic tiles. It can also be hidden with plants with large leaves - geranium is used, as well as a cuff.
The moment has come to fill the bowl with water. It is worth being prepared for the fact that after 2-3 days the initially pure and transparent liquid will become cloudy, and then after a while it will clear up again. This process is inevitable: it is due to the appearance of microorganisms in the water, which will gradually settle down in new conditions and cleanse their home. However, the water in such a reservoir will still have to be changed - according to the rules, this should be done once every six months.
In order for the ornamental pond to become a closed ecosystem, it needs a little help. You should put into the water snails, water striders that live in natural lakes.
Vegetation on the shore of the reservoir
Framing the reservoir with plants is consistent with the style of the landscape. Large bodies of water, made in a natural style, gravitate towards lush plantings.The shore of such a reservoir is decorated with a coin loosestrife, willow loosestrife, and marsh iris. Reeds and darmer look great on the banks of a large pond. In the case of a regular planting style, they are carried out so that they maintain the established symmetry of the pond.
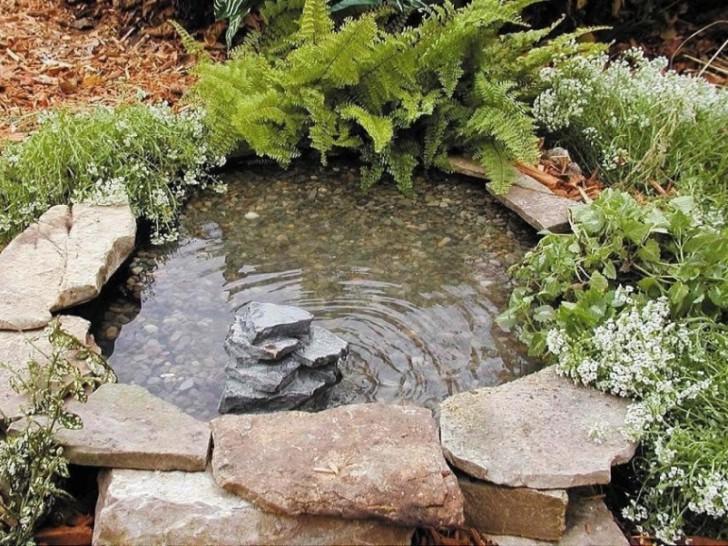
When organizing the banks, it is appropriate to use wooden flooring, stone or ceramic plates of a geometric shape. For the Japanese style, a calm contemplative atmosphere of unity with nature is important. When decorating a pond, the harmony of stone and flora is welcomed. Decorative bridges and garden accessories in Japanese motives serve as an organic addition.
Many owners strive to give their creation a spectacular appearance. Tall perennial plants are used to decorate the shores: astilba, badan, marsh iris, gunner, hosta, rogersia. The edge by the water is decorated with stones and forget-me-nots, tenacity, stonecrops are planted between them.
Plants that are planted near the pond need to be fed regularly. Most of them love white clay, which can be pre-rolled into balls, or bone meal can be used.
These plants will live in the water
The choice of aquatic plants is determined by the size of the pond. The surface of a small reservoir will be decorated with plants floating on the surface: water hyacinth, dwarf water lily, duckweed, water buttercup. In addition to their decorative qualities, small representatives of the flora have an additional function - they work as powerful installations for the production of oxygen, saturating the pond with it. When looking for aquatic life, pay attention to the reproduction rate of different species. Some aquatic greenery is capable of covering the surface of the reservoir so much over the summer that the water surface will not be visible.
To control the growth of plants, they are not planted in the ground, but in special jute planting containers, attaching the containers to the coastal stones. Heat-loving species of flora, planted in such containers, are cleaned in the cool for the winter, dipping into a basin or a bath of water. When planting plants in water, the depth of the pond must be taken into account. For garden ponds, there is a conditional division into several zones:
- Coastal area. The zone is located at a depth of 0.1 m; indicated by a swamp or wet meadow. Plakun, marsh iris and marigold are suitable for planting in it.
- Shallow water. It occupies a depth of about 10-40 cm. This depth is suitable for planting plants with tubular stems: reeds, whorled urut, calamus.
- The deep-water zone in the dacha pond begins at a depth of 40 cm. For it, types of aquatic vegetation with floating leaves are selected: elodea, nymphea, arrowhead, two-headed aponogeton.
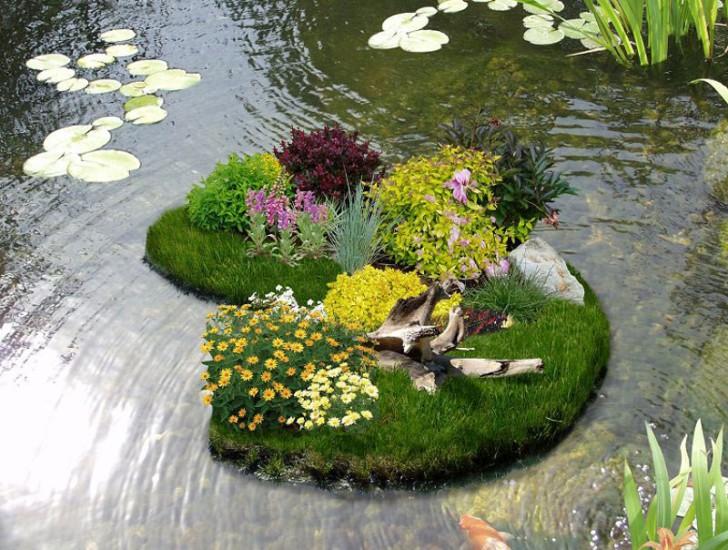
Another way to add grace to the water surface is to place an island flower bed that will float on it. Such a craft is very popular and it is really possible to do something like this with your own hands to the wave, for this you need to familiarize yourself with the material "Interesting flower beds and flower beds with your own hands, photos and original ideas for a summer residence and a garden."
Sixth stage. We prepare the equipment
To create a simple artificial reservoir, we need a level, a cart with a shovel, a cord, a hose that is used for watering, and pegs.
If the pond is more technologically advanced, then such equipment will be needed:
- cleaning filter;
- a sterilizer (it will remove algae so that the water is clear);
- pump for pumping / pumping out water;
- aerator for oxygenation (especially important for fish breeding).
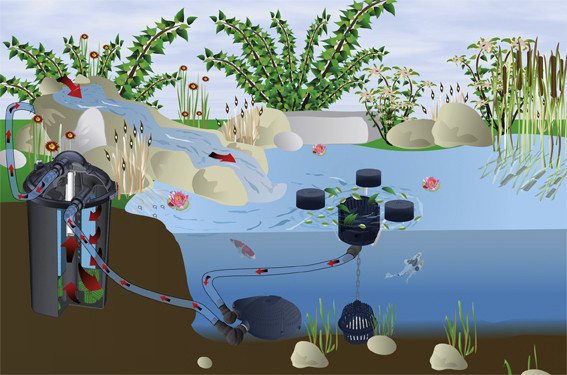
Equipment for ponds and reservoirs
Seventh stage. Create an artificial reservoir
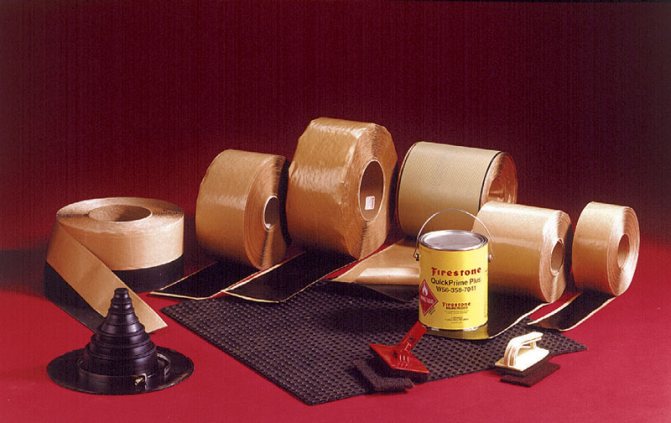
There are plenty of materials that can be used to create a reservoir, but we will focus on PVC film. The fact is that it is cheaper, it takes the desired shape better, it can be repaired, and it does not require specific knowledge or skills to work.
Step 1. First, select the color of the film. There are several possible options here.
- Black film - it will turn the bottom into a mirror (plants, clouds, etc. will be reflected).
- Creamy, blue - this way the pond will look more like a pool, and fish against a light background will be more clearly visible.
- Brown - will imitate the soil of natural reservoirs. A great option for a landscape pond.
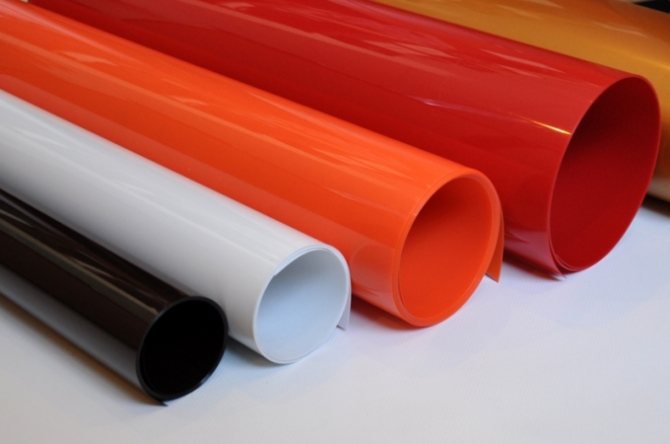
Pond films
Also, when choosing a film, we pay attention to the composition (PVC is more durable than PE) and thickness (for a pond, you will need material thicker than 0.5 mm). Moreover, the greater the depth of the reservoir, the greater the thickness of the film should be. Equally important is resistance to UV radiation and mechanical damage.
Note! If the depth of the pond exceeds 1.5 m, then we use butyl rubber. Such a film is resistant to stretching, deformation and UV, moreover, it can withstand temperatures of 40-80 ° C.
Step 2... Next, we calculate the dimensions of the film, for which we use the following formulas:
- pond width + (depth x 2) + stock (55-60 cm) = material width;
- pond length + (depth x 2) + stock (55-60 cm) = material length.
For gluing, we will use a special glue (for example, "Tagnit") or adhesive tape (Quick Seam 3).
Quick seam
Step 3. The next step is to create the schema.
Pond scheme
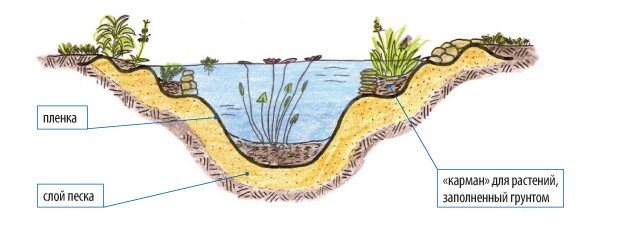
First, we draw it on paper, and then we transfer it to the ground. We indicate the size of steps or "shelves" for plants - this will avoid possible problems. For marking we use sand or a flexible garden hose (preferably a bright color).
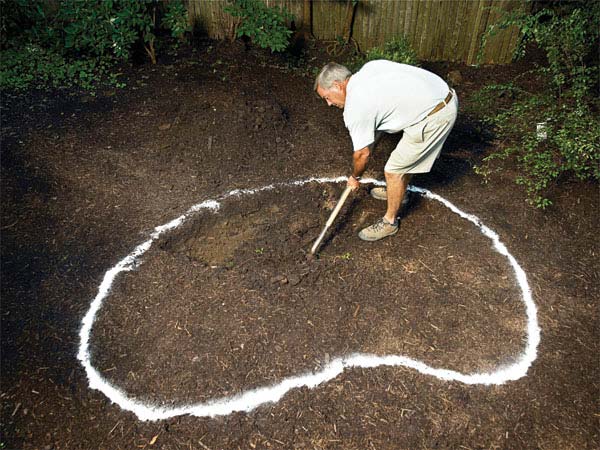
Markup
After that, we cover the marked area with a piece of light film and examine it from different angles. We make adjustments if necessary.
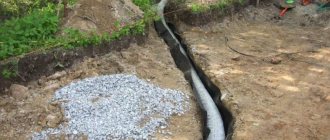
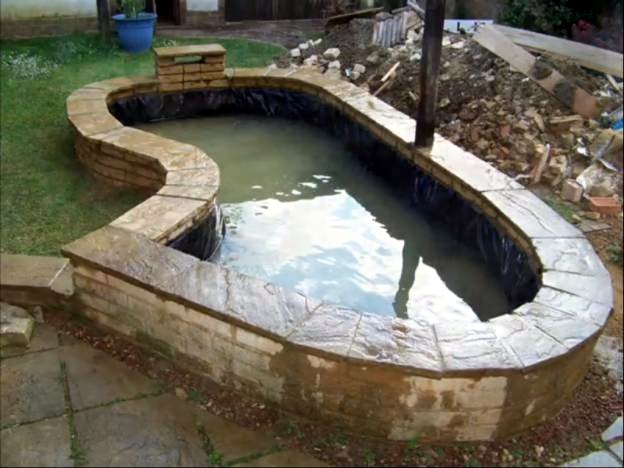
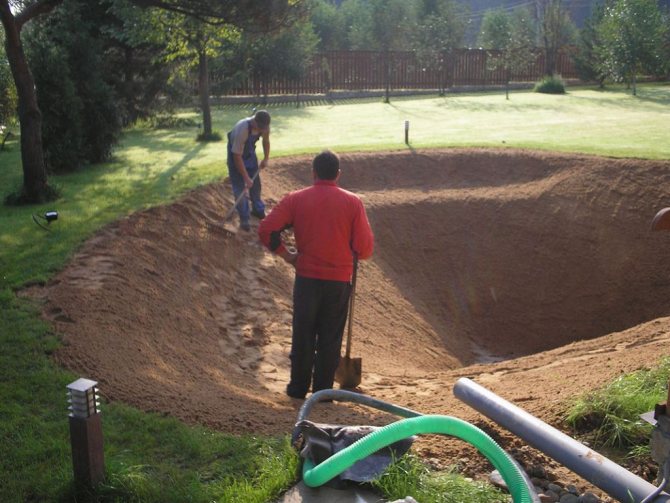
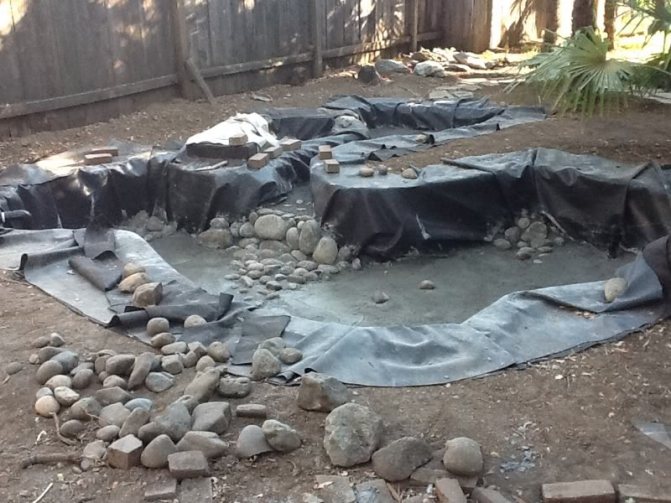
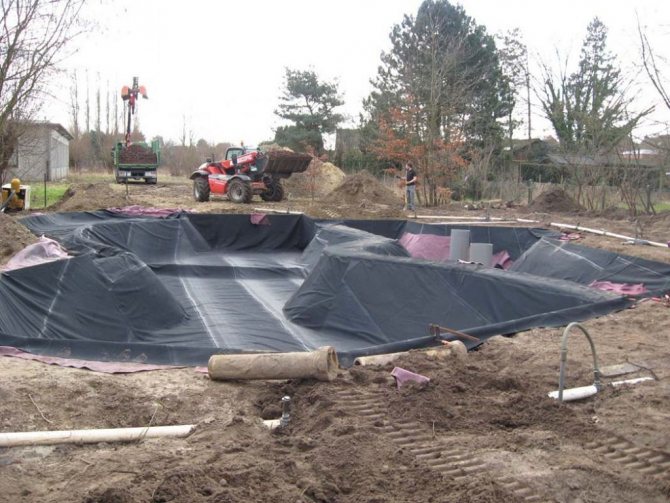
Step 4... We dig a foundation pit. To do this, we perform the following actions.
- First, remove the sod.
- Then we dig the foundation pit itself. At the same time, we move from the edges to the center, going deeper in the required places - this is more convenient. For laying out the stone and decorating, we equip a ledge with a depth of 60-70 cm.
- We remove the soil, and with it roots, stones, debris and everything that can damage the film. By the way, you can make an alpine slide from the excavated soil.

Pit under the reservoir
When carrying out earthworks, we pay attention to the fact that the shores of the future pond are located on the same line. If a waterfall is created, then we maintain the required height difference.
Note! If a large level is required, we can make it ourselves. To do this, we put the usual level on a long flat board.
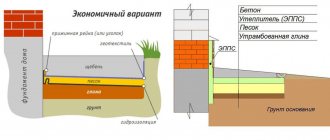
Step 5. We lay the substrate. We carefully tamp the bottom of the finished pit, after which we proceed to the waterproofing layer, which will prevent the penetration of water into the ground.
The underlay can be done in several ways:
- we cover the bottom with stones and fill it with sand (this kind of waterproofing will lose its properties after a few years);
- we lay a layer of geotextile, which we fill with sand (it will cost a lot);
- we lay PVC film (the most reliable way, so we will dwell on it).
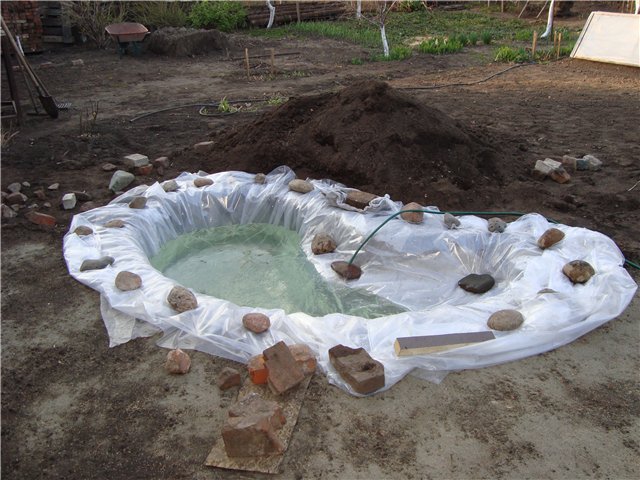
Step 6. Next, we lay the film, preferably on a sandy "pillow" (the latter will prevent damage from stones and other dangerous objects). It is advisable to do styling on a hot day - as it warms up, the film becomes more pliable.
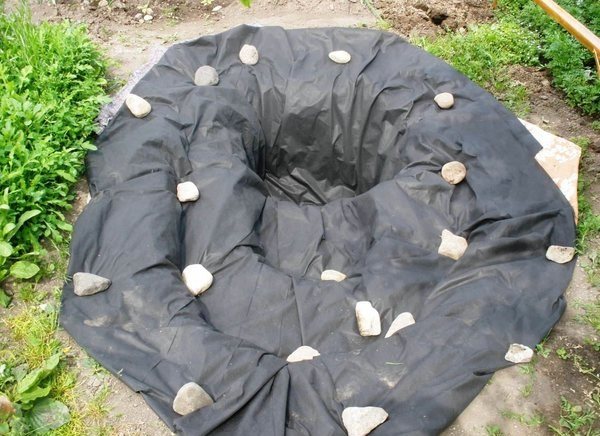
Laying the film
In this case, it may be difficult to form folds. We try to make one large fold, and not a large number of small ones, then glue it or press it down with stones. The film should be loose, loose.
To secure it, we dig an additional trench along the perimeter. We put the film there, after which we fill in the crushed stone. Next, fill the trench with large stones with a flat bottom (so that the film does not break). We lay the walls with round stones (flat ones will slide). At the end, we fill the pond with water - we serve it without pressure, directing it to the center of the pit. After two days, we cut off the excess film.
Step 7... Strengthening the shores. Their slope depends on the type of soil: if it is sandy, then the walls should be sloped, if we are talking about clay or black soil, then vertical.The optimum slope angle should be approximately 45 °.
The fortification itself depends on the type of coast.
If they are shallow, then you can use:
- geomat;
- geogrid;
- polymer geogrid.
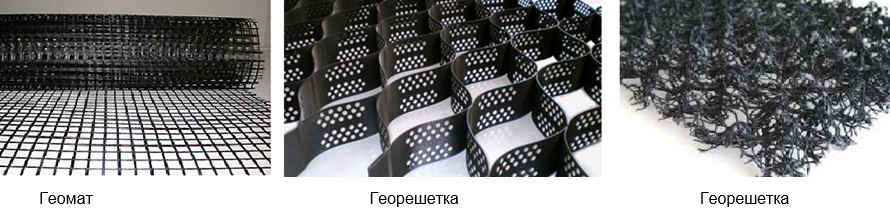
Geomats and geogrids
You can also use a regular mesh netting, clogging its cells with soil with seeds of perennial grass (for example, clover). There is another option - to strengthen the banks with shrubs or plants.
If the coast is steep, then we can use:
- piles;
- gabions;
- retaining walls.
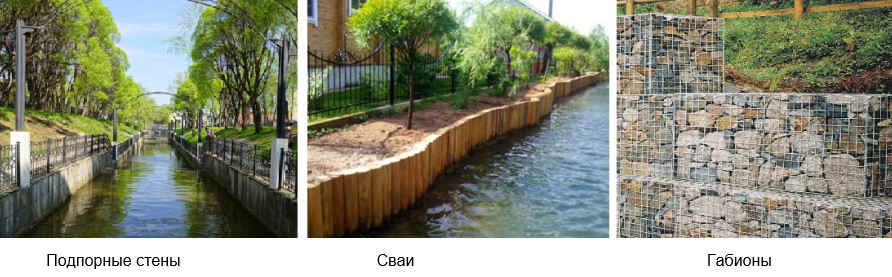
Retaining walls, piles and gabions
It can be effectively strengthened using biological methods (planting of plants). Ideally, biological enhancement methods should be combined with engineering ones.
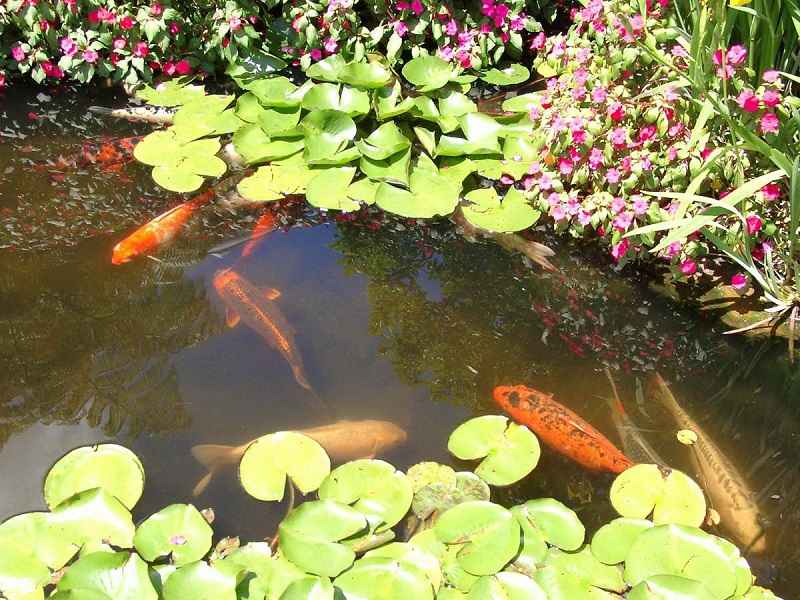
What kind of fish to buy?
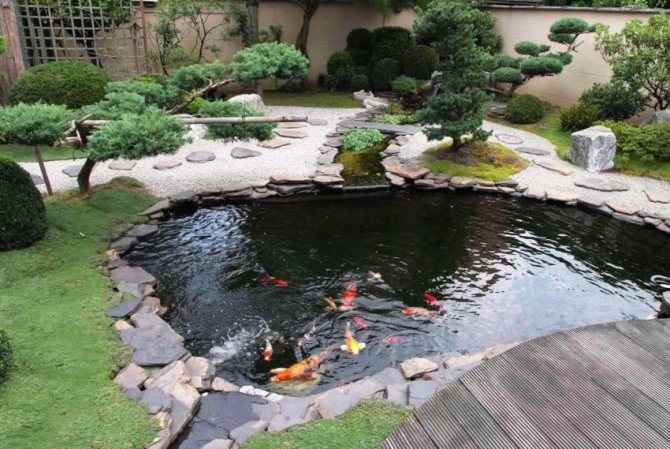
Koi carps
This is a freshwater species of fish, but in their behavior they are very similar to a dog. Koi love their host so much that they may even eat out of your hands. This type of aquatic fauna is also considered quite intelligent, bright carps recognize people and pets, distinguish smells, and may even have their own food preferences.
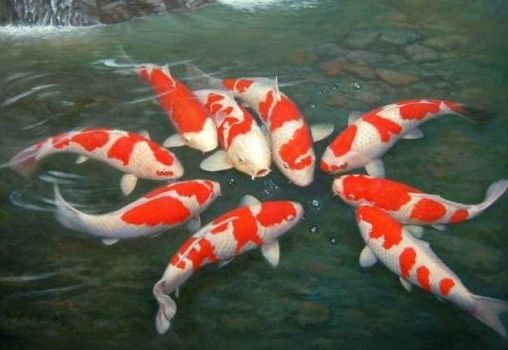
Also, one cannot fail to mention the color of such fish. There are white, yellow, blue, black and even orange varieties. The color of the fish depends on the dyes, the sun color and the composition of the water. In length, such carps grow up to 90 centimeters, and they can live in artificial conditions for 20-30 years.
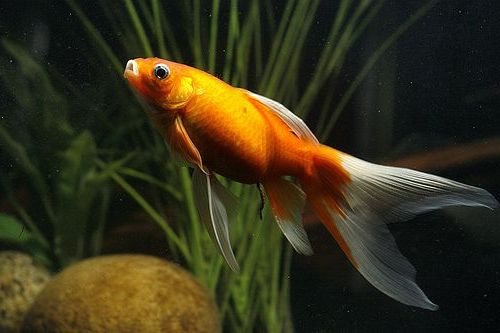
gold fish
In a pond, such a fish can grow up to 45 centimeters in length and weigh in the region of 1.5 kilograms. For feeding, you can use dry mixes, but it should be borne in mind that the daily portion of food should not exceed 3% of the weight of the fish. This bright representative of the aquatic world can live up to 35 years.
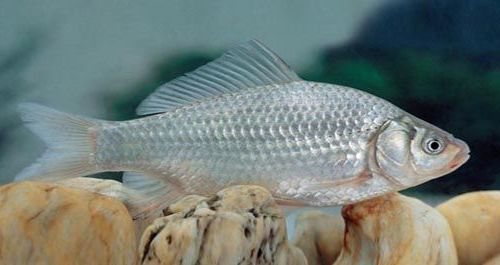
Colored crucian carp
This fish has a high body and a thick back, it also has rather large and smooth scales. The color of the crucian carp will depend on the conditions of its habitat. The body length of the golden type is from 50 centimeters, and weighs from 3 kilograms. Goldfish reaches up to 40 centimeters in length and weighs up to 2 kilograms. In order for this fish to endure the winter well, a reservoir depth of 1 meter or more is required.
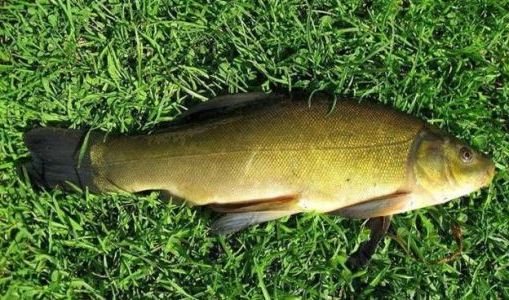
Tench
Its length is 20-40 centimeters, some individuals grow up to 70 cm, and at the same time they weigh 7.5 kilograms. This is a rather lazy fish that leads a sedentary lifestyle. Basically, laziness stays at the bottom among the plants and does not like bright colors. The main advantage is that laziness is not very picky about conditions, and lives where other fish die.
It should be borne in mind that all types of fish have their own requirements for the characteristics of the reservoir and for feeding. It is worth asking the seller of the pet store in detail about this, so that the fish can live normally in an artificial pond.
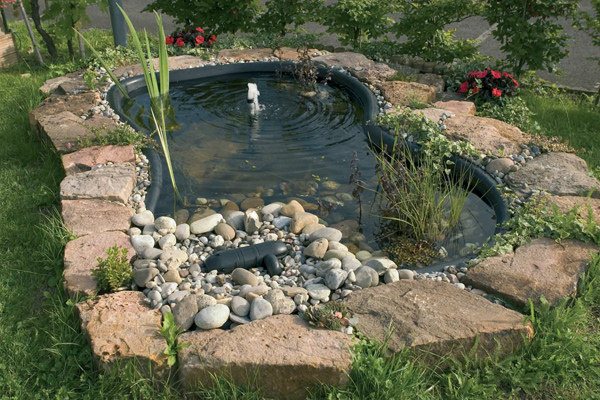
Eighth stage. We design an artificial pond
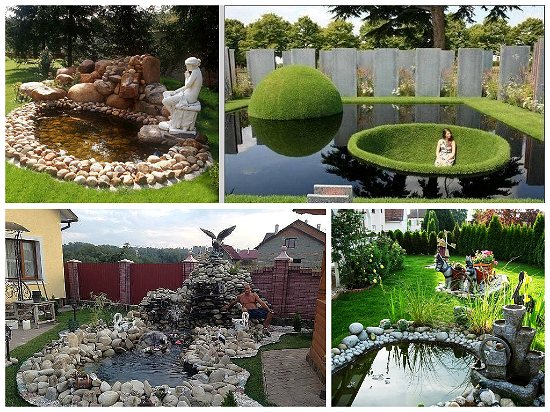
Registration of reservoirs
There are several ways to decorate a pond. To make it a full-fledged design element, we use one or more of the methods below.
- We plant plants at the bottom of the reservoir. To do this, we place them in special containers and put them on the steps. It is preferable to use local cultures for this, since they take root better.
- We equip the software, which can be used as a large decorative stone with a plant in a pot installed on it.
- We plant any plant (you can also exotic) in a bucket or barrel and put it on the shore.
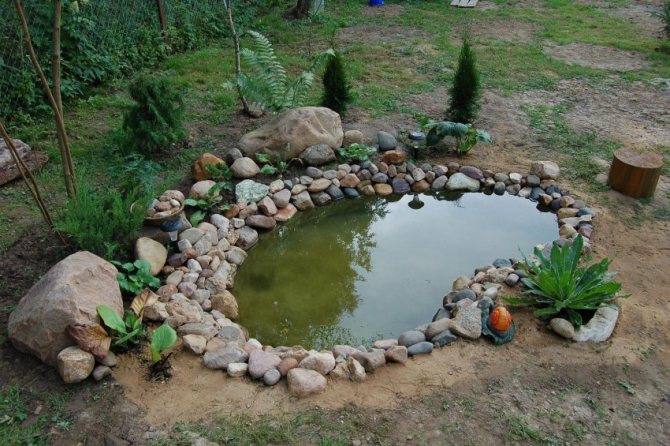
- We lay beautiful stones.
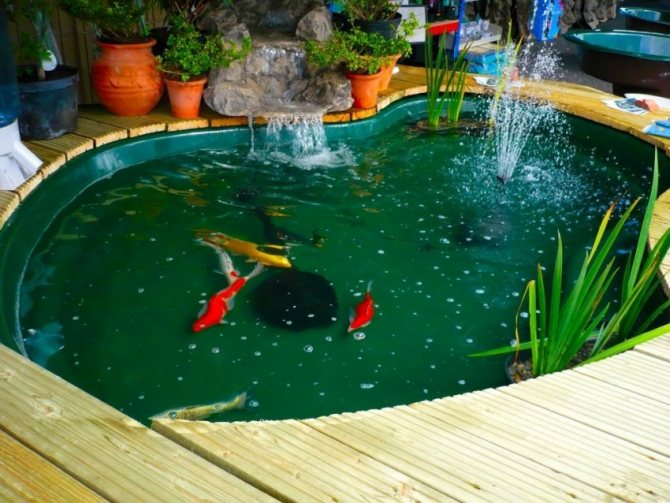
- We launch bright fish into the reservoir.
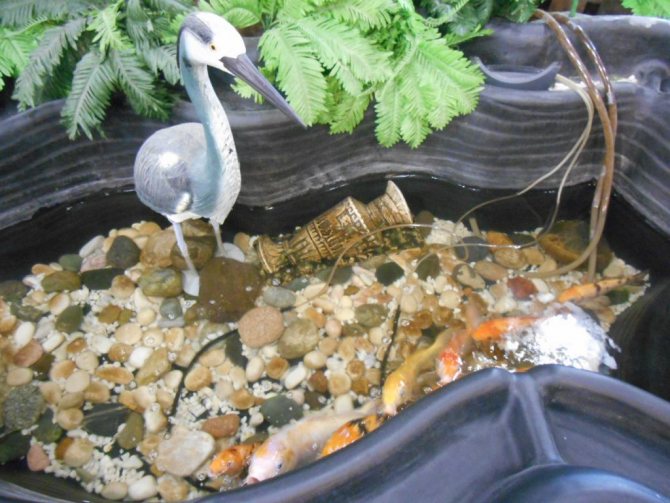
Small pond with fish - We lay out beautiful paths using brick, gravel or natural stone.
- We equip a gazebo on the shore.
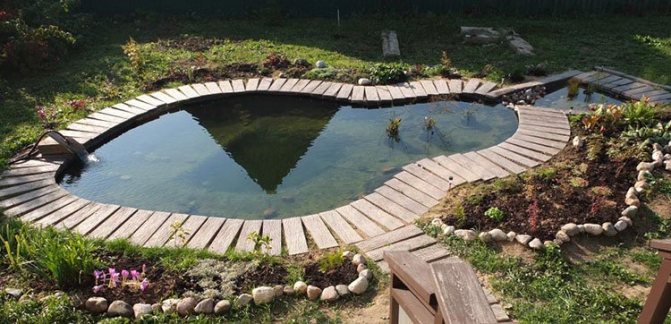
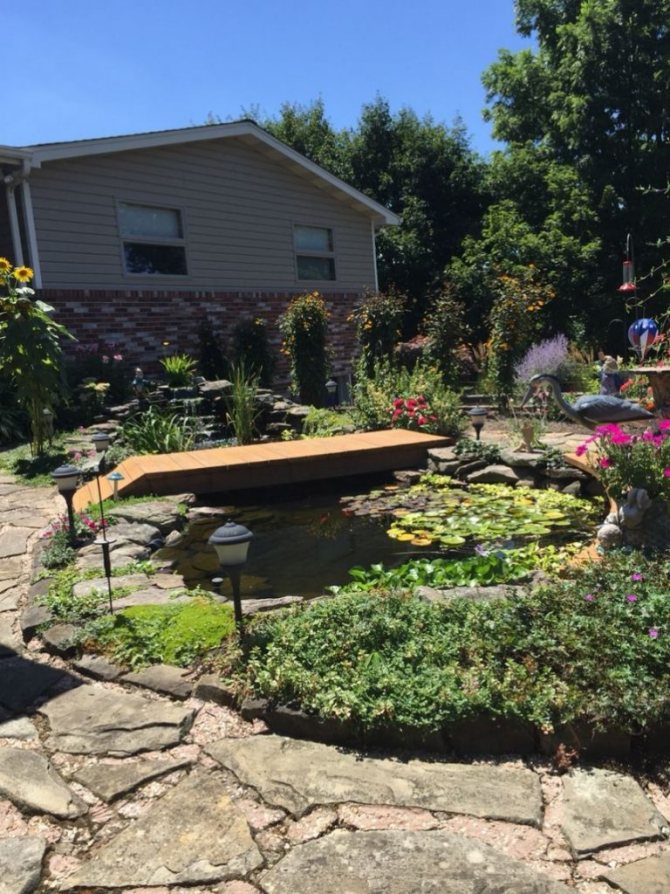
- We throw a small bridge across the pond.
- We equip the lighting of the pond.
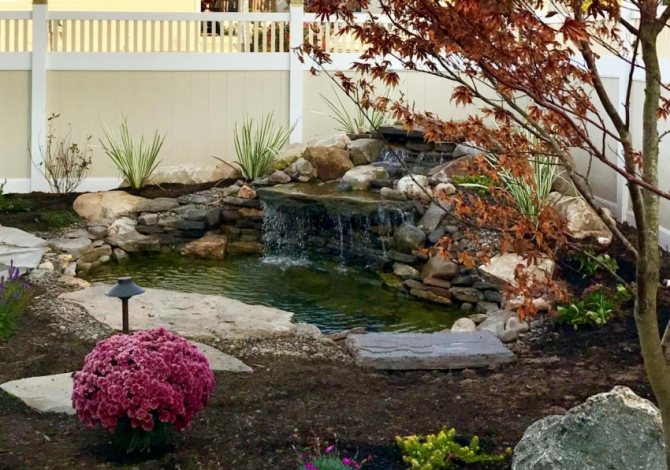
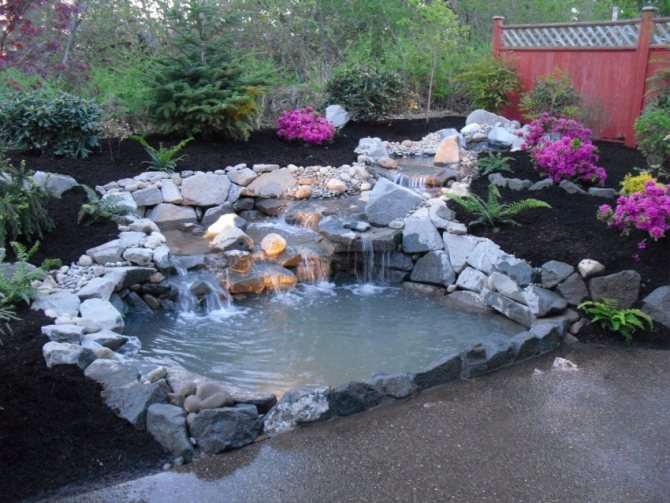
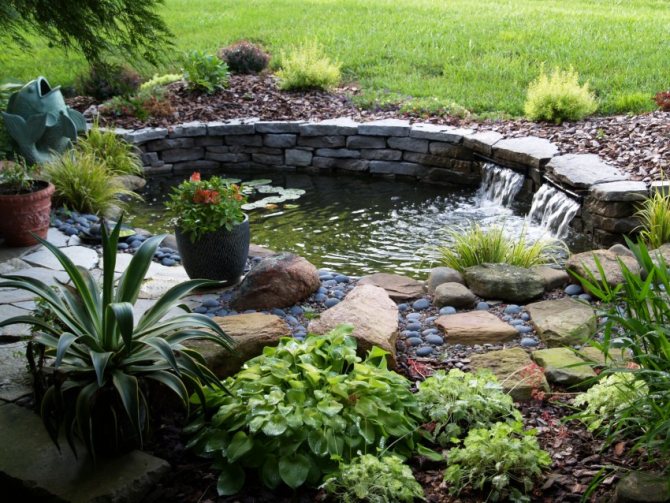
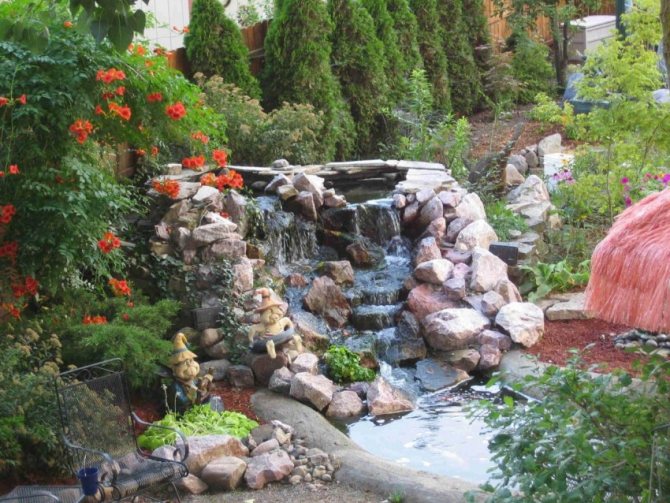
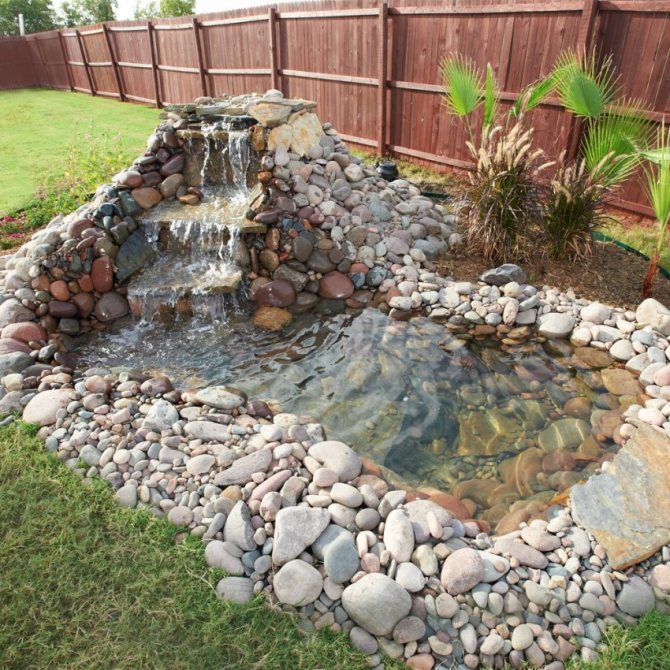
- We supplement it with a small waterfall.
- We install a beautiful stone or wooden fence.
An example of a pond with shrubs
Decorative pond with a bridge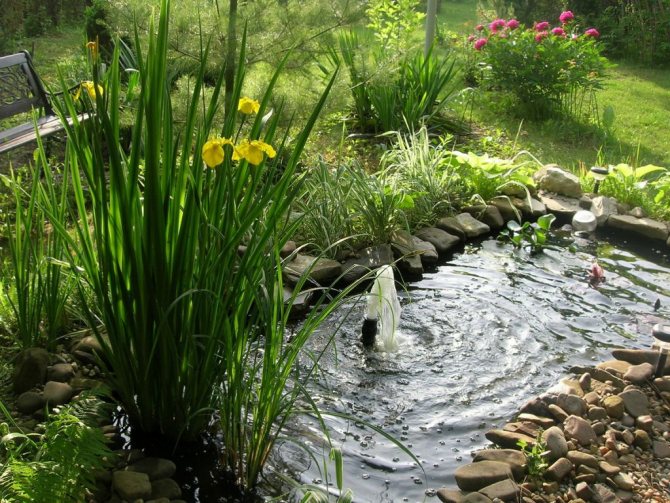
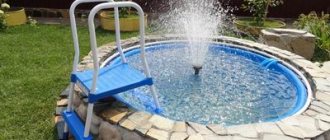
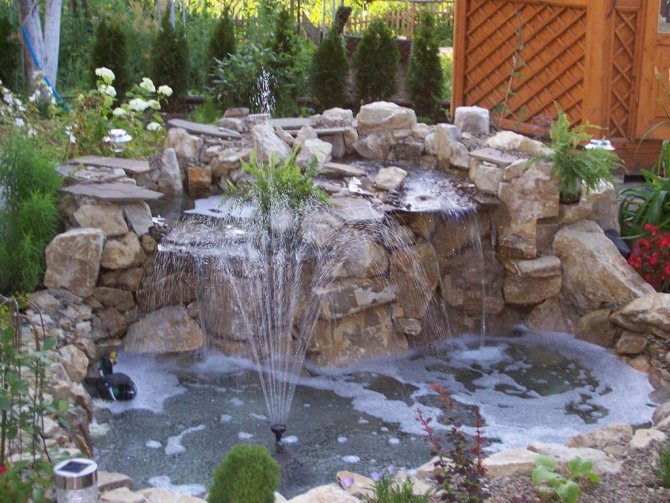
Pond with fountain